

USER MANUAL
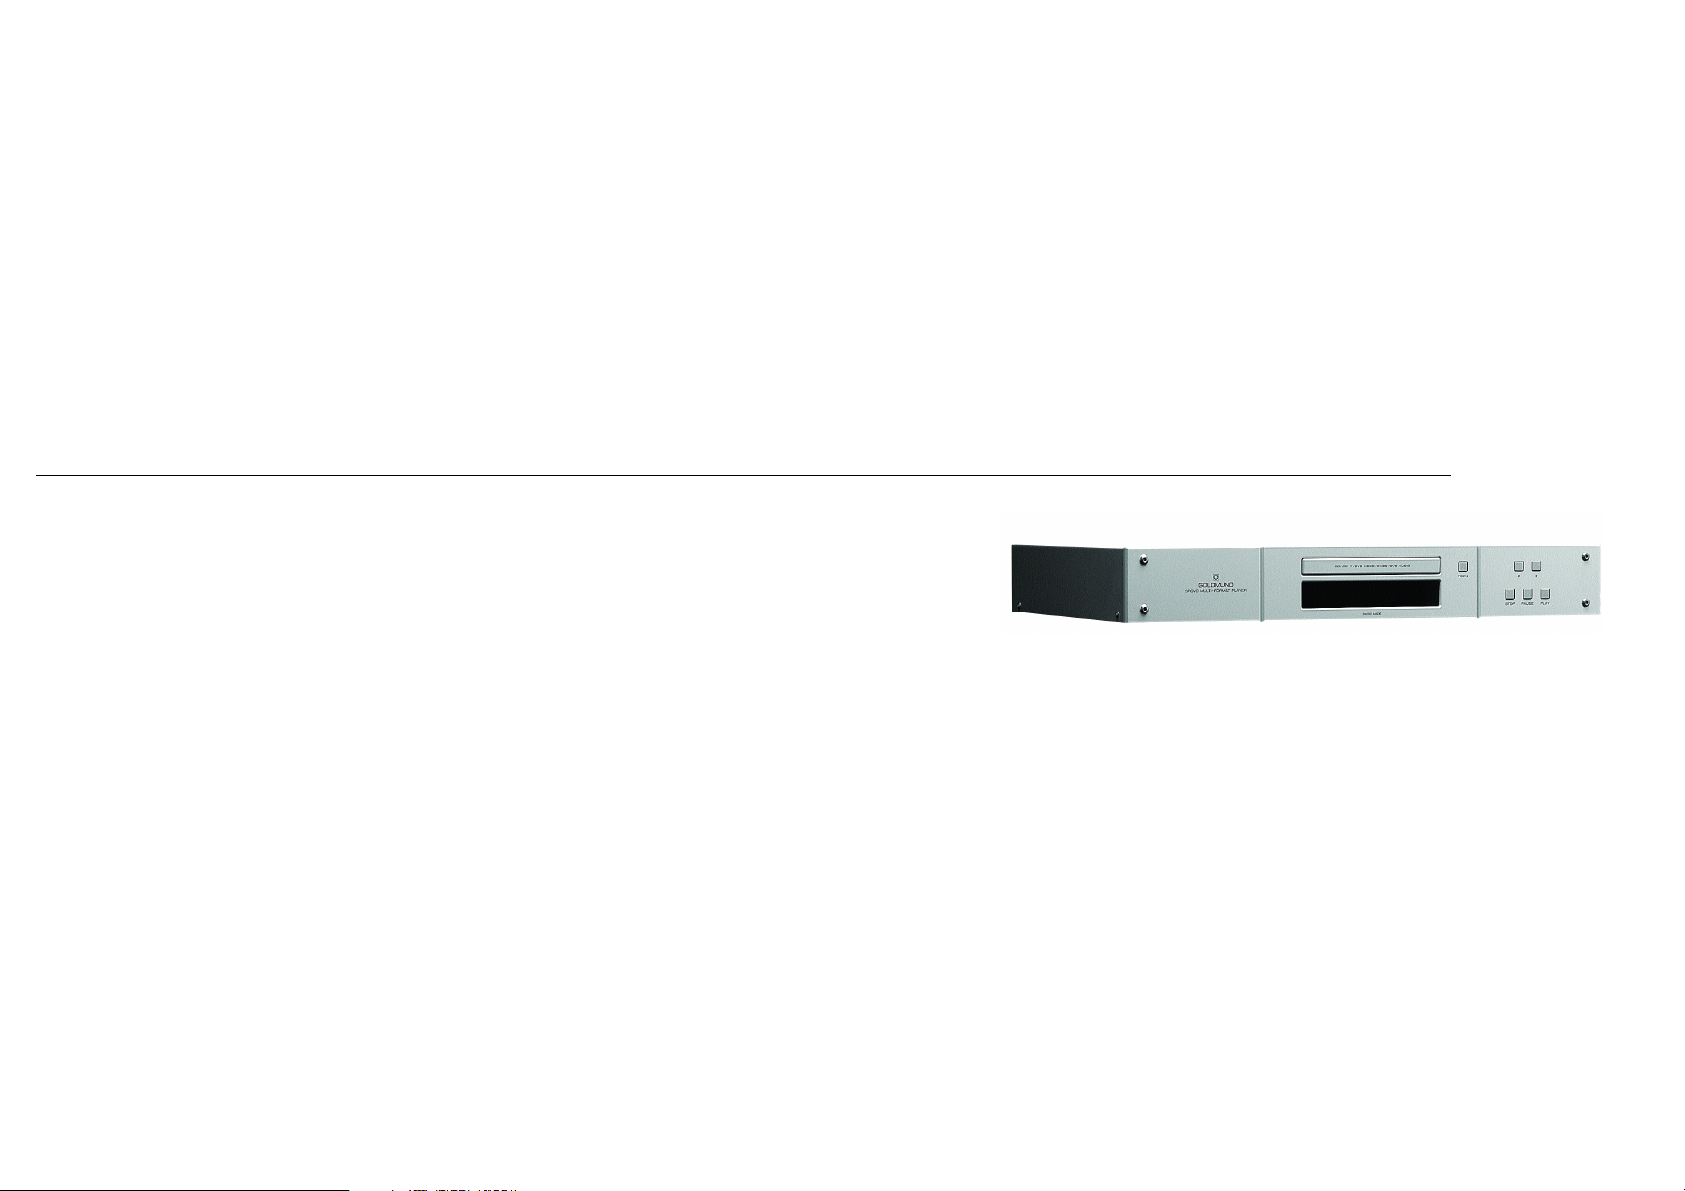
GOLDMUND SRDVD MULTIFORMAT PLAYER

Goldmund was founded in 1978 and has ever since been dedicated to the accurate reproduction of sound
and image.
At Goldmund, we strive to lead in the creation, development and manufacture of the industry's most
advanced technologies, including audio and video systems, home- networking and music distribution.
The guiding principle at Goldmund is to produce a precise sound with the least possible loss of quality
through the different stages. Goldmund will never adopt a technology before it is sufficiently developed to
satisfy the high quality standards we set. This is why Goldmund has often rejected mainstream technologies
and developed its own.
I N T R O D U C T I O N
The
GOLDMUND SRDVD Multiformat Player
Congratulations.
Thank you for purchasing the Goldmund SRDVD.
You have acquired the best DVD Player ever made for professional and domestic uses. Please take some
time to read this manual. It may provide you with useful information to make your pleasure of using to the
SRDVD even higher.
User manual - GOLDMUND SRDVD MULTIFORMAT PLAYER
This high quality DVD player possesses
new technical features which are
necessary for accurate tracking of the
today’s best DVDs and CDs.
Only careful use can provide all the
satisfaction you are expecting.
All handling must be performed according
to the following instructions to avoid
deterioration of the preamplifier.
N e v e r theless, if the instructions are
carried out in full, you will notice that the
use of the GOLDMUND SRDVD is quite
simple and convenient.
IMPORTANT
PLEASE DO NOT CONNECT ANY CABLES
OR MOVE ANY PART BEFORE READING
THE FOLLOWING INSTRUCTIONS.
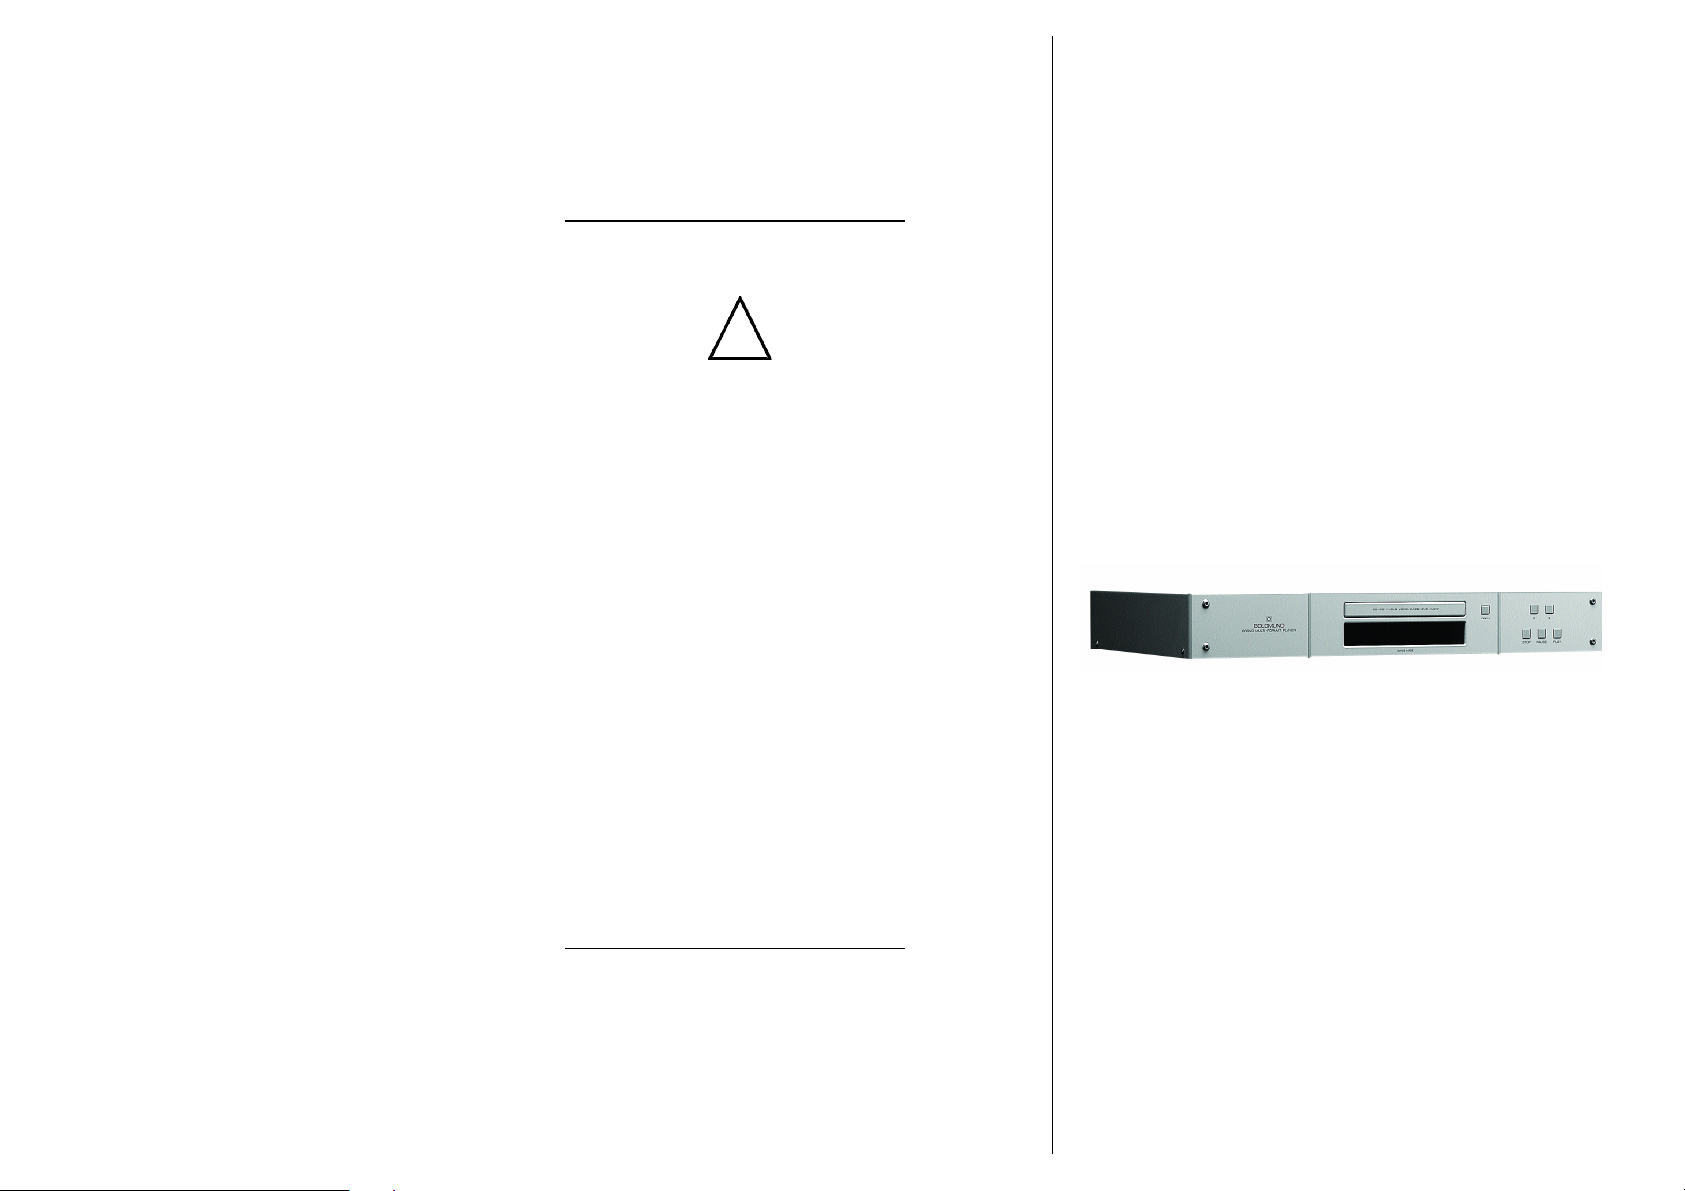
W A R N I N G
!
User manual - The GOLDMUND SRDVD MULTIFORMAT PLAYER
GOLDMUND S R D V D M u l t i f o r m a t Player

1
FE AT U RES AND COMPAT I BIL I T Y p 5
2
SET T I NG UP THE S R D V D
2.1 Unpacking p 6
2.2 Power supply voltage selection p 6
2.3 Choice of the DVD Player location p 7
2.4 Power connection p 7
2.5 Back panel cable connections p 8 - 9
Video connections
p 8
Audio connections
p 9
3
OP E R AT I NG THE S RD V D
3.1 Front panel control p 10 - 11
3.2 Remote control functions p 12
3.3 Setting the TV system p 13
3.4 Switching on p 14
3.5 First connection p 14 - 20
Using the on-screen displays
p 15
Setting-up with the Set-up navigator
p 16-17
Playing discs
p 18
Basic playback controls
p 19
Front panel controls
p 19
DVD disc menus
p 20
Video CD PBC menus
3.6 Playing Discs p 21 - 31
Using the Disc Navigator to browse the contents
p 21
Scanning discs
p 22
Playing in slow motion
p 22
Frame advance/frame reverse
p 23
Looping a section of a disc
p 23
Using repeat play
p 24
Using random play
p 25
Creating a program list
p 26-27
Editing a program list
p 27
Other functions avilable from the program menu
p 28
C O N T E N T S
User manual - The GOLDMUND SRDVD MULTIFORMAT PLAYER

Searching a disc
p 29
Switching subtitles
p 29
Switching DVD-Video audio language
p 30
Switching DVD-RW audio channel
p 30
Switching DVD-Audio audio channel
p 30
Switching CD/MP3/Video CD audio channel
p 30
Zooming the screen
p 31
Switching camera angles
p 31
Displaying disc information
p 31
3.7 The Audio settings menu p 32 - 33
Audio DRC
p 32
Virtual Surround
p 32
Channel Level
p 33
3.8 The Video settings menu p 34
Video Adjust
p 34
Creating your own presets
p 34
3.9 The Initial settings menu p 35 - 44
Using the Initial settings menu
p 35
Digital audio Out settings
p 35-36
Video Output settings
p 37
Language settings
p 38-39
Display settings
p 39
Options
p 40
Bonus Group
p 41
Auto Disc Menu
p 41
Group Playback
p 42
DVD Playback
p 42
SACD Playback
p 42
CD Playback
p 42
Speakers
p 43
Channel Level
p 44
3.10 CLEANING p 45
3.11 MAINTENANCE p 45
SCHEM A p 46-47
C O N T E N T S
User manual - The GOLDMUND SRDVD MULTIFORMAT PLAYER

F E A TU R E S & C O M PAT I B I L I T Y
Please read very carefully the following instructions. This high-precision DVD player will
provide the best tracking conditions for today's high-quality DVDs and CDs.
C O M P A T I B I L I T Y
Please note that the Goldmund SRDVD is compatible with the following formats:
q
DVD Video 12 and 8 cm size, one or two layers, single sided or two-sided.
q
VIDEO CD 12 and 8 cm size, single sided.
q
Audio CD 12 and 8 cm size, single sided.
q
CD-R/RW
q
DVD-R/RW
q
DVD – Audio
q
SACD
q
MP3 CD
A S S O C I A T E D E Q U I P M E N T
If you bought the SRDVD and you are a technician, musician, or a user who demands the
very best in sound transcription, we strongly recommend the use of one of our separate
D/A converter, the Goldmund Mimesis 20M, Mimesis 21+ or SRDA2. The built-in D/A are
not up to the same standard of quality and are provided to use in simpler systems or with
formats requiring them (multichannel DVD-Audio, SACD).
1
User manual - GOLDMUND SRDVD MULTIFORMAT PLAYER |
P 5

2
2 . 1
S E T T I N G U P T H E SR D V D
U N P A C K I N G
You will find in the packing:
q
The DVD player itself
q
The power cord
q
This user manual
q
The warranty card, to be sent back to Goldmund immediately to benefit of
the Goldmund 3 years warranty and upgrade programs.
Unpack carefully the above-mentioned parts.
Keep the whole packing for future use.
WARNING
IF YOU NEED TO RETURN THE DVD TO THE FACTORY OR TO YOUR LOCAL
REPRESENTATIVE FOR A WARRANTY REPAIR, PLEASE NOTE THAT IT MUST BE
REPACKAGED IN THE ORIGINAL PACKAGING. THIS PACKAGING HAS BEEN DESIGNED
S P EC I FI C A L L Y TO PR O T ECT YO U R SRDVD IN TRA N S I T. USE OF ALT E R N AT I V E
PACKAGING IS LIKELY TO RESULT IN DAMAGE, INVALIDATING WARRANTY COVER.
P O W E R S U P PLY VOL TA G E S E L E C TI O N
The power supply of your unit has been adjusted to operate with the AC voltage of
your area. Check on the back panel of the unit in any doubt. If you move after
purchasing the DVD player to an area using different mains voltage, do not forget to
switch the back panel selector to the new voltage of your area. The unit can operate
indifferently with 50 or 60 Hz mains.
2 . 2
P 6 |
User manual - GOLDMUND SRDVD MULTIFORMAT PLAYER

User manual - GOLDMUND SRDVD MULTIFORMAT PLAYER |
P 7
2
2 . 3
S E T T I N G U P T H E SR D V D
C H O I CE O F T H E D V D P L AY E R L O C AT I O N
To get the best result, especially in Audio, you will have to select a very rigid support for your
DVD Player.
Due to the specific quality of its Goldmund "Mechanical Grounding" construction, the Goldmund
DVD Player is less critical than other designs in placement selection. Feedback is mostly so low
that no special precaution is required. Nevertheless, position the player as far as you can of the
speakers if you want to totally avoid the air coupling between the speakers and the DVD player.
Select a position of the support where the transport is set to have the most rigid possible
connection to the floor. Solid coupling is essential, and if your support is standing on a
suspended floor, optimal result requires that you arrange the support to have at least one foot
over a supporting beam or close enough from a supporting wall.
P O W E R C O N N EC T I O N
Plug the AC power cord to the back of the SRDVD and in a wall socket.
Switch the back power switch ON.
The front display will glow on as soon as you press any key or when pressing the remote control
STANDBY/ON button, meaning the unit is now powered on.

2
2 . 5
S E T T I N G U P T H E SR D V D
B A C K PA N E L C A B L E C O N N E C T I ON S
V
IDEOCONNECTIONS
The SRDVD offers 2 different types of Video signal outputs:
q
S-Video Output connector.
q
3 x 75 Ohms RCA coaxial Component Video Output connectors.
Depending on your specific installation you may choose one of the above video outputs.
Always use high quality cables for getting the best picture. The best results will be achieved by
using high quality coaxial cable on Component Video Output connectors or high-quality S-Video
cable on the S-Video Output connector. Both may be of equivalent quality if the associated
equipment is properly tuned (especially for color and hue). On some type of projectors or
screen, the component video may be found of higher quality. On some doublers or quadruplers,
the S-Video may be providing better results. Always experiment the best selection in readjusting
the color and hue accordingly.
The SRDVD with DVI offers 4 different type of Video signal outputs:
q
S-Video Output connector.
q
3 x 75 Ohms RCA coaxial Component Video Output connectors.
q
5 x 75 Ohms BNC RGB progressive Output
q
DVI Digital Video Output
Depending on your specific installation you may choose one of the above video outputs.
If you use the Progressive Output, move the top left switch on the rear panel to analog Video.
If you use the DVI Digital Video Output, move the top left switch on the rear panel to Digital
Video.
Always use high quality cables for getting the best picture. The best results will be achieved by
using high quality coaxial cable on RGB Output connectors or top DVI cable from the Digital
Video Output. Always experiment the best selection in readjusting the color and hue accordingly.
P 8 |
User manual - GOLDMUND SRDVD MULTIFORMAT PLAYER

2
2 . 5
S E T T I N G U P T H E E I D O S 1 8
B A C K PA N E L C A B L E C O N N E C T I ON S
A
UDIOCONNECTIONS
The Goldmund SRDVD is equipped as standard with the following stereo output
standard connectors:
q
75 Ohms RCA coaxial SPDIF connector.
q
TOSLINK optical cable output.
You may use these connectors to connect your DVD to a D/A converter or digital
preamplifier.
Goldmund recommends that the greatest care is taken when selecting the cable
linking the DVD to the D/A converter or digital preamplifier. The very accurate signal
provided by the SRDVD can easily be ruined by an imperfect connection.
Use a «Goldmund LinealTM» cable from the coaxial output if you want to reach the
most accurate jitter-free connection for CD playback.
In addition, there are the following Analog Audio Outputs:
q
2 x RCA (Left/Right) coaxial stereo analog outputs.
q
6 x RCA 6 channel coaxial analog outputs
(needed for multichannel DVD-Audio and SACD connection).
User manual - GOLDMUND SRDVD MULTIFORMAT PLAYER |
P 9

3
3 . 1
O P E R A T I N G T H E S R D V D
F R ONT PA N E L C O N T R O L S
F
RONT PANEL KEYS
OPEN
Located near the disc drawer opening, this button opens the tray to load the CD or
DVD. The same button closes the tray when it is open. When loading a disc, place
discs in the disc tray with the label side facing up.
PLAY
This key is used to start or resume Playback. It also cancels the «Pause» function.
PAUSE
Key used for the pause function. When the «Pause» function is switched off by
pressing the «Start» key, the selection will start back at the exact location where it was
interrupted.
STOP
Press to stop playback. Pressing once enables playback to resume from a point
shortly before the location where it stopped. Pressing twice causes the disc to
return to the beginning of the disc if playback starts again.
>>
Press to advance to chapters/tracks.
Press and hold to perform fast-forward scanning.
<<
Press to go back to previous chapters/tracks.
Press and hold to perform reverse playback scanning.
These functions, accessibl e f rom the
k e y b oard can also be achieved by the
re mote-cont rol transmitter.
Please, see next page for all Remote
Control functions.
P 10 |
User manual - GOLDMUND SRDVD MULTIFORMAT PLAYER
3
3 . 1
O P E R A T I N G T H E SR D V D
F R ON T PA N E L C O N T R O L S |
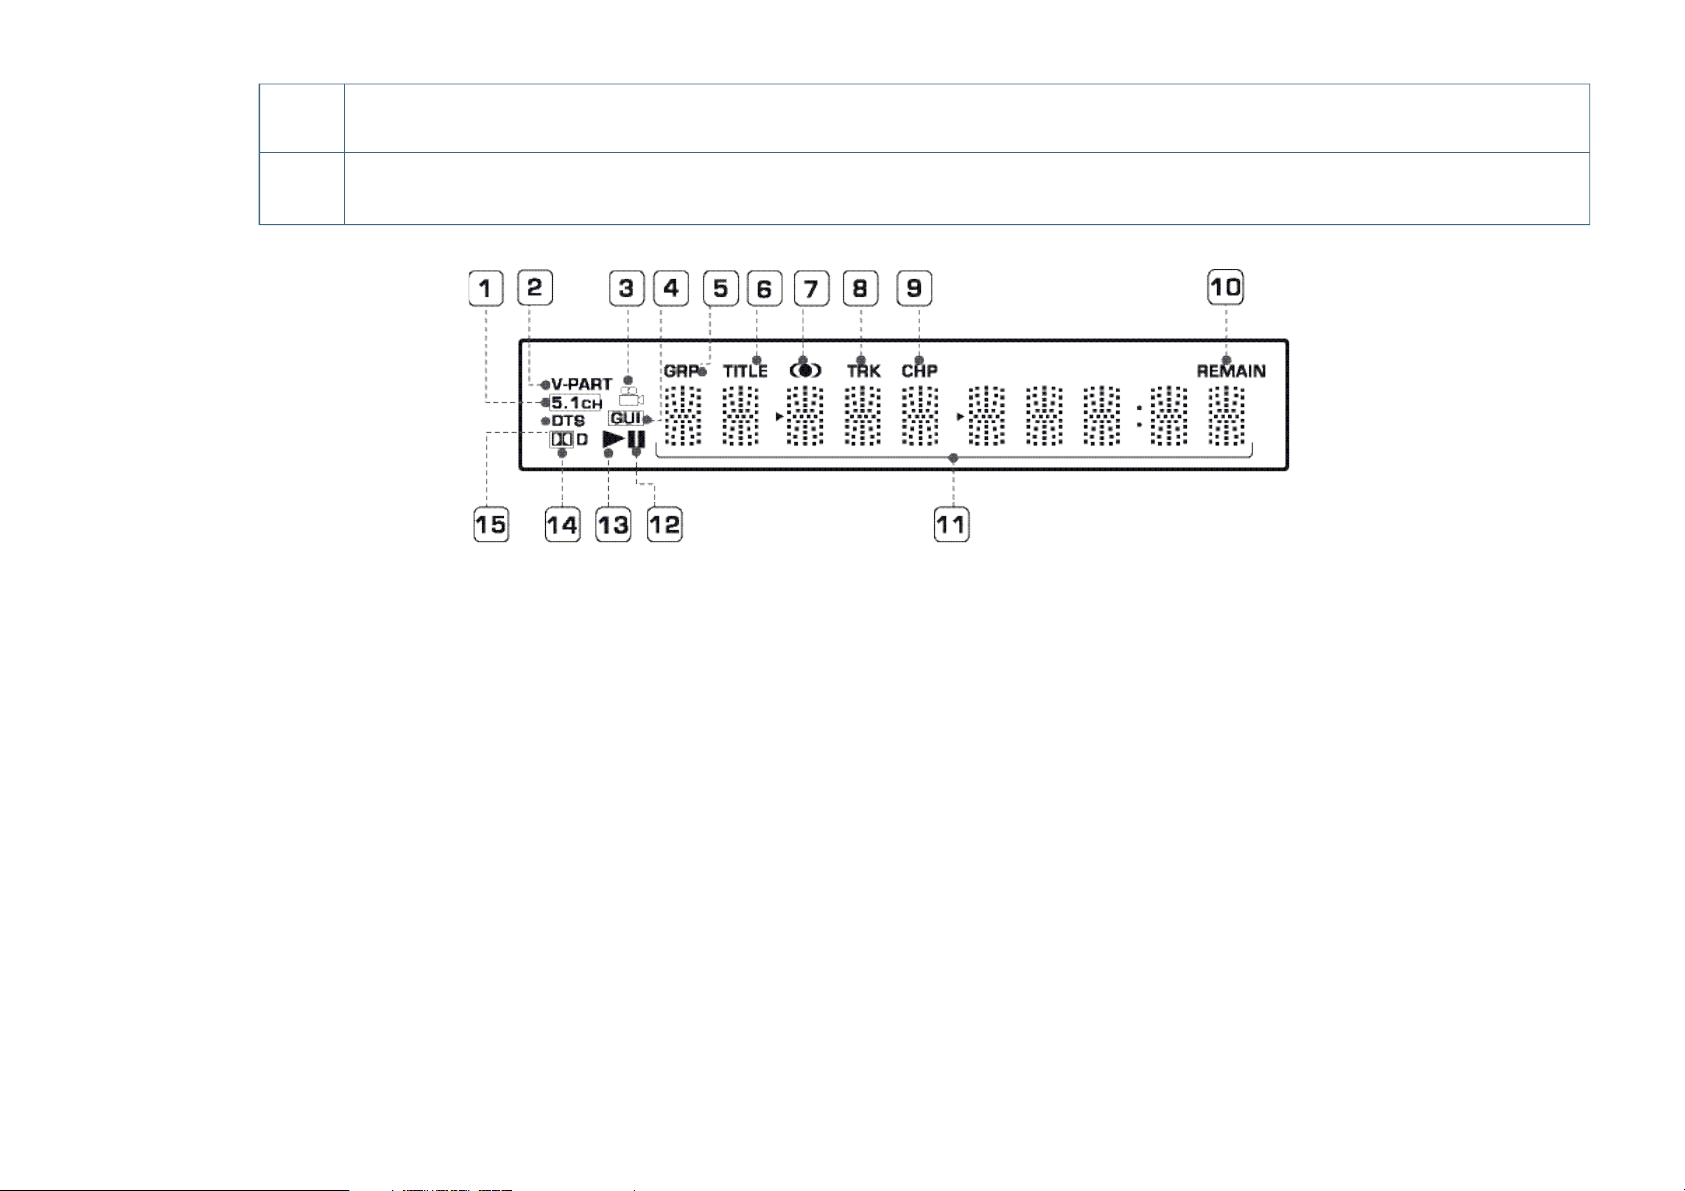
Front Panel Display
1
5.1CH
Lights when analog 5.1 channel output is selected
(see below)
2
V-PART
Lights when playing a video part of a DVD disc
3
(camera)
Lights during multi-angle scenes on a DVD disc
(see below)
4
GUI
(Graphical User Interface)
Lights when a menu is displayed on-screen
5
GRP
Indicates that the character display is showing
a DVD-Audio group number
6
TITLE
Indicates that the character display is showing
a DVD-Video title number
7
(l)
Lights when Dolby V/TruSurround is active
(see below)
8
TRK
Indicates that the character display is showing a track
number
9
CHP
Indicates that the character display is showing
a DVD chapter number
10
REMAIN
Lights when the character display is showing the time
or number of tracks/titles/chapters remaining
11
Character display
12
Pause
Lights when a disc is paused
13
Play
Lights when a disc is playing
14
DolbyDigital
Lights when a Dolby Digital soundtrack is playing
15
DTS
Lights when a DTS soundtrack is playing
User manual - GOLDMUND SRDVD MULTIFORMAT PLAYER |
P 11
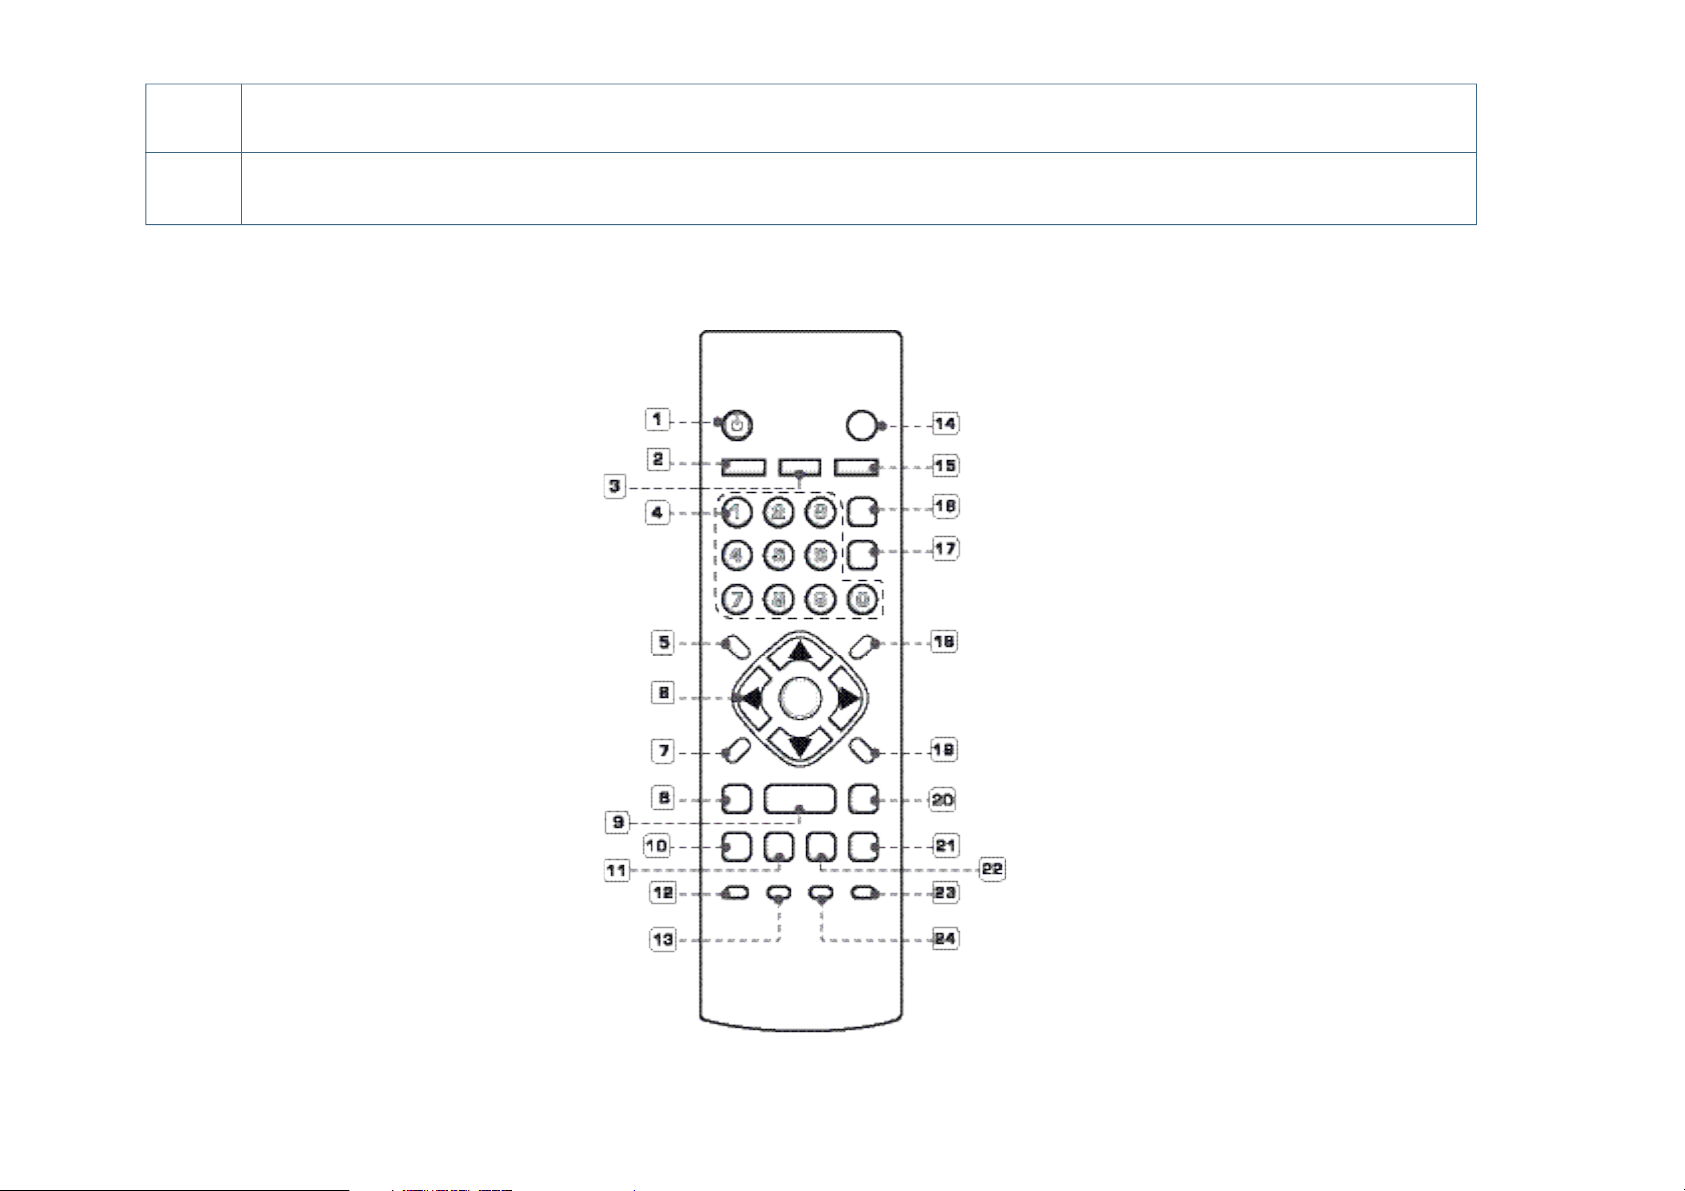
1 STANDBY/ON
Press to switch the player on or into standby
2 AUDIO
Press to select the audio channel or language
(see below)
3 SUBTITLE
Press to select a subtitle display (see below)
4 Number buttons
5 TOP MENU
Press to display the top menu of a DVD disc
6 ENTER & cursor control buttons
Use to navigate on-screen displays and menus.
Press ENTER to select an option or execute
a command
7 SETUP
Press to display (or exit) the on-screen display
8 Reverse
Use for reverse slow motion playback,
frame reverse and reverse scanning (see below)
9 Play
Press to start or resume playback.
10 Previous
Press to jump to the beginning of the current
chapter or track, then to previous chapters/tracks.
11 Pause
Press to pause playback; press again to restart.
12 PLAY MODE
Press to display the Play Mode menu (see below)
(You can also get to the Play Mode menu
by pressing SETUP and selecting Play Mode)
13 SURROUND
Press to activate/switch off Dolby V/TruSurround
14 OPEN/CLOSE
Press to open or close the disc tray
15 ANGLE
Press to change the camera angle during
DVD multi-angle scene playback (see below)
16 CLEAR
Press to clear a numeric entry
17 ENTER
Use to select menu options, etc. (works exactly
the same as the ENTER button in 6 above)
18 MENU
Press to display a DVD disc menu, or
the Disc Navigator if a DVD-RW, CD, Video CD or
MP3 disc is loaded
19 RETURN
Press to return to a previous menu screen
20 Forward
Use for forward slow motion playback,
frame advance and forward scanning (see below).
21 Next
Press to jump to the next chapter or track
22 Stop
Press to stop the disc (you can resume
playback by pressing 3 (play))
23 DISPLAY
Press to display information about the disc playing
(see below)
24 ZOOM
Press to change the zoom level (see below)
3
3 . 2
O P E R A T I N G T H E S R D V D
R EM O T E C O N TR OL F U NCTI O N S
P 12 |
User manual - GOLDMUND SRDVD MULTIFORMAT PLAYER

3
3 . 3
O P E R A T I N G T H E S R D V D
S E TTI N G T H E T V S Y S T EM
The default setting of this player is AUTO, and unless you notice that the picture is
distorted when playing some discs, you should leave it set to AUTO. If you experience
picture distortion with some discs, set the TV system to match your country or region’s
system. Doing this, however, may restrict the kinds of disc you can watch. The table
below shows what kinds of discs are compatible with each setting (AUTO, PAL and
NTSC).
1 If the player is on, press STANDBY/ON to switch it to standby.
2 Using the front panel controls, hold down “Forward” then press STANDBY/ON
to switch the TV system.
The TV system changes as follows:
AUTO => NTSC
NTSC => PAL
PAL => AUTO
The player’s display shows the new settin
g.
DISC PLAYER SETTING
Type Format NTSC PAL AUTO
DVD NTSC NTSC MOD.PAL NTSC
PAL –– PAL PAL
Video CD NTSC NTSC MOD.PAL NTSC
PAL NTSC PAL PAL
CD / no disc NTSC PAL NTSC or PAL
Watching NTSC on a PAL TV
Most models of the newly developed countdown PAL TV system detect 50 Hz(PAL)/
60 Hz (NTSC) and automatically switch vertical amplitude, resulting in a display
without vertical shrinkage. If your PAL TV does not have a V-Hold control, you may not
be able to watch NTSC discs because of picture roll. If the TV has a V-Hold control,
adjust it until the picture stops rolling. On some TVs, the picture may shrink vertically,
leaving black bands at the top and bottom of the screen. This is not a malfunction; it
is caused by the NTSC to PAL conversion.
Note: You have to switch the player into standby
(press STANDBY/ON) before each change.
User manual - GOLDMUND SRDVD MULTIFORMAT PLAYER |
P 13

3
3 . 4
O P E R A T I N G T H E S R D V D
S W I T CHI N G O N
After making sure that everything is connected properly and that the player is plugged
in, press STANDBY/ON on the remote control to switch the player on. Also, switch on
your TV and make sure that it is set to the input you connected the DVD player to.
You can also use the OPEN/CLOSE button to switch on the player and open the disc
tray at the same time.
This player features a screen saver. If the player is stopped or paused and
no button is pressed for five minutes, the screen saver starts.
F I R ST C O N N ECT I O N
When you switch on the player for the first time, you should see a welcome screen
displayed on your TV. From here you can set up the language and the kind of TV you
have, then either use the Setup Navigator to make more settings, or jump right in and
start playing some discs.
Before continuing, make sure that you’ve loaded the batteries in the remote control.
GUIDE RETURN
ENTER
1 Use the (cursor up/down) buttons to choose a language, then press ENTER.
2 Press ENTER to move on to the next screen.
3 Use the (cursor left/right) buttons to select either ‘Wide screen (16:9)’or
‘Standard size screen (4:3)’ according to the kind of TV you have, then press
ENTER.
4 Press ENTER again to finish setting up.
Select Back then press ENTER if you want to go back and change the setting you just
made.
3 . 5
 Loading...