

GOCLEVER TAB I70
USER’S MANUAL EN
INSTRUKCJA OBSŁUGI PL


Declaration of Conformity
Hereby GOCLEVER Technology declares that the product complies with the
essential requirements and other provisions of Directive 199/5/WE.
Environmental Protection
The device is subject to the WEEE Directive 2002/96/EC. The symbol next to
mean that the product must be disposed of separately and should be shipped to
the appropriate collector. This allows you to limit pollution and the impact on
human health.
Also like to inform that our company has the obligations under the Act on waste
electronic equipment, including in his collection, treatment, recovery and
recycling is supported by KARAT ELECTRO-RECYCLING Ltd. If you have any
questions or concerns you can contact Karat call 056-623-80-91.
Responsibility
GOCLEVER Technology Company nor any of its licensors shall not be liable for
any loss of data or profits, as well as for any other consequential or indirect
damages resulting from the use of equipment brand, in any case and the
maximum permitted by law. GOCLEVER Technology is not responsible for any
problems related to the malfunctioning of the operating system and applications
operating under its control.
Changes
GOCLEVER Technology reserves the right to revise this document and the
specifications of the device, without notice to you. These features and images
may vary depending on the services offered by the operator and software version
of the device.
Before using
Remember that the battery is not charged. Opening or attempt to disassemble
the outer casing of the device will void the warranty.
Google is a registered trademark, and Google Maps is a trademark of Google
Inc.. in the United States and other countries. YouTube is a trademark of Google
Inc..
GOCLEVER Technology Company is not liable for technical or editorial errors or
for omissions contained herein is not responsible for incidental or consequential
damages resulting from furnishing this material.
Information is presented in such a state in which you adopt them, and are not
covered by any warranty. Subject to change without notice. GOCLEVER
1

Technology Company reserves the right to change the contents of this document
without prior notice. The manual describes basic functions of the device.
Security
Please refer to these guidelines. Failure to comply with them may cause danger
to life or health or may be illegal. For further information, please read the entire
podręcznikiem.Urządzenie was designed to operate from battery and mains
supply with the charger. Using the device in a different way can be dangerous
and will void the warranty.
Charging Battery
The unit should be connected only to a power source in accordance with the
parameters set out in the specification. In case of doubt as to the type of power
source required, consult an authorized service provider or local power company.
If the product is powered from a battery or other sources, follow the instructions
supplied with the product.
The impact of external factors and the electromagnetic field
The device is not waterproof. Make sure that it was always dry, protect from
moisture. The device also must be protected against high and low temperatures,
dust, sand, do not expose it to shock, throw, as this may damage it or its
components.
Do not use the device in a damp and very high or low temperatures.
•
Do not leave the device in the vehicle or in places where temperatures exceed 50
•
degrees Celsius.
Do not use the equipment on board aircraft and in areas where it is not allowed to
•
use equipment that may emit an electromagnetic field for example a hospital,
petrol station, a warehouse of explosives violations of these rules may result in
fire or explosion.
Do not use the device while driving.
•
Do not use the device near strong electromagnetic sources, such as microwave
•
ovens, sound speakers, TV and radio.
Use only original manufacturer-approved accessories, or accessories that do not
•
contain metals.
Service and Repair
For repair use the authorized service and qualified staff, any attempt to repair
yourself, or by unauthorized service will void the warranty.
2

Product Name: GoClever TAB I70
CPU: InfoTMIC IMAPX210 up to 1GHz ARM11 (3D hardware)
Screen: WVGA 800x480pixels 7.0''TFT 65000 color LCD
Touch screen: Resistive touch screen
Memory: DDR2 256MB
Storage: Bulid-in flash memory 2GB, support external microSD
card up to 16GB
Battery: 1400mAh
Power adapter: DC 9V/1,5A
Ports: 2x miniUSB HOST, 1x Headphone,
1x AC power, 1x microSD Card, 1x miniHDMI 1.3
OS: Android 2.2 (SlideMe Market)
Network: WiFi 802.11b/g network
3
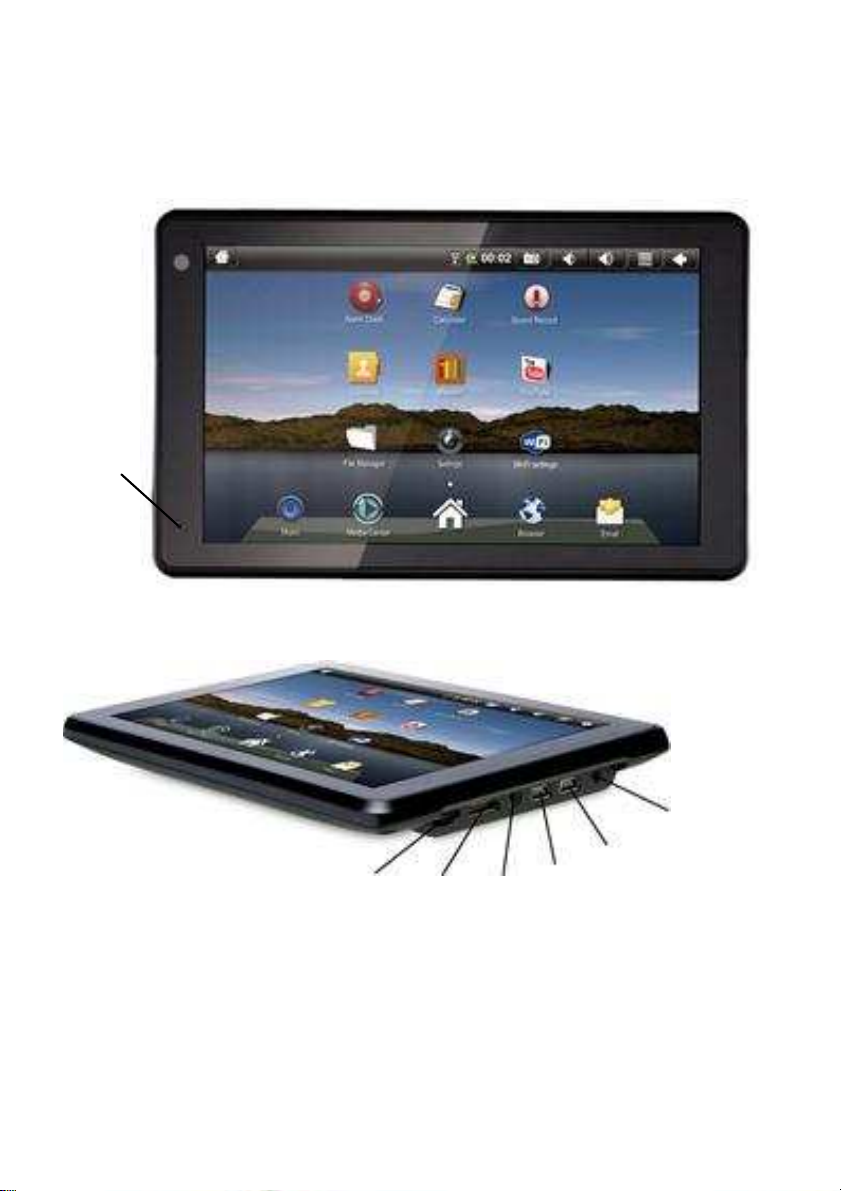
Sensor
Front View:
Light
Side Angle View:
Host USB Port
Power Jack
Host USB Port
MicroSD Card
The Host USB port is used primarily to connect USB devices such as a mouse or
keyboard.
Mini
HDMI port
4
Headphones
The Mini HDMI port is an “OUT” port designed to output HDMI.
Note: The software on your Mini Tablet is updated frequently to ensure your Mini
Tablet is always optimized. Make sure to check for updates frequently. The icons
shown may be different than the icons of the actual product.
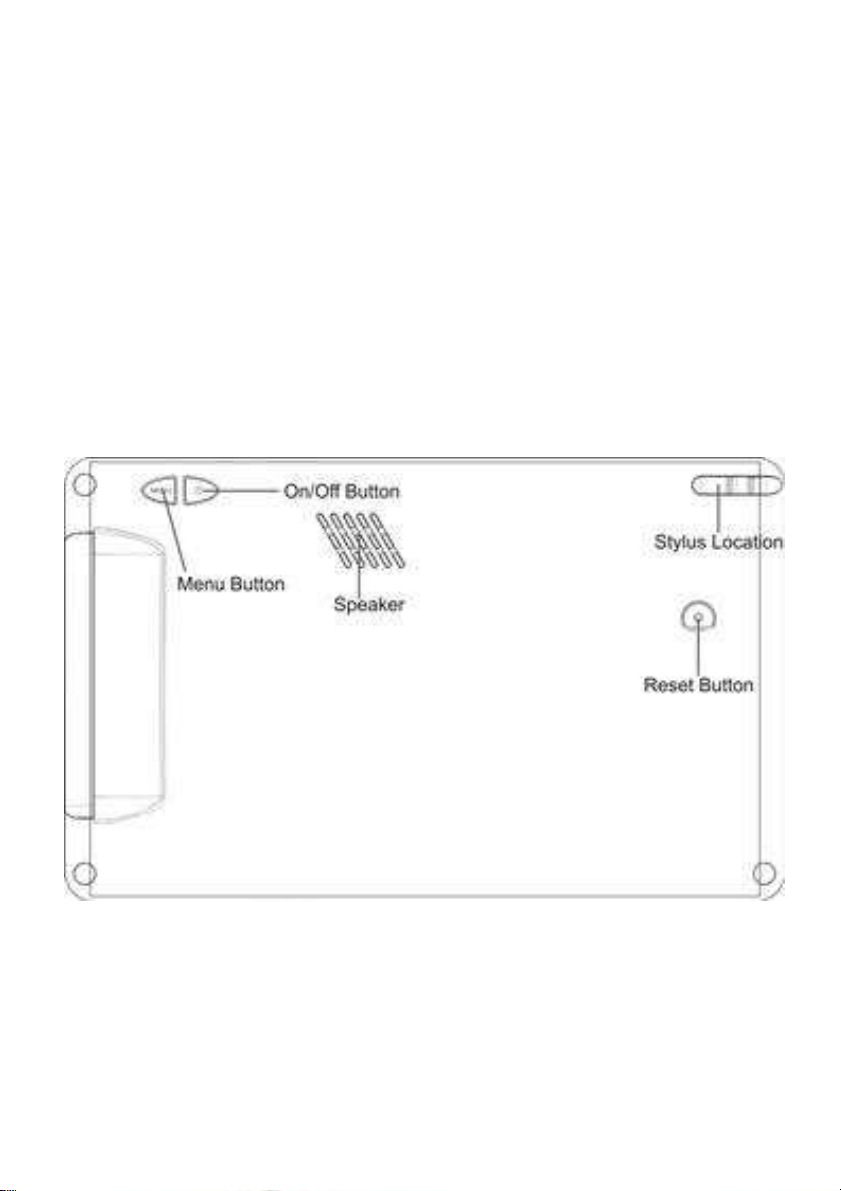
Back View:
5
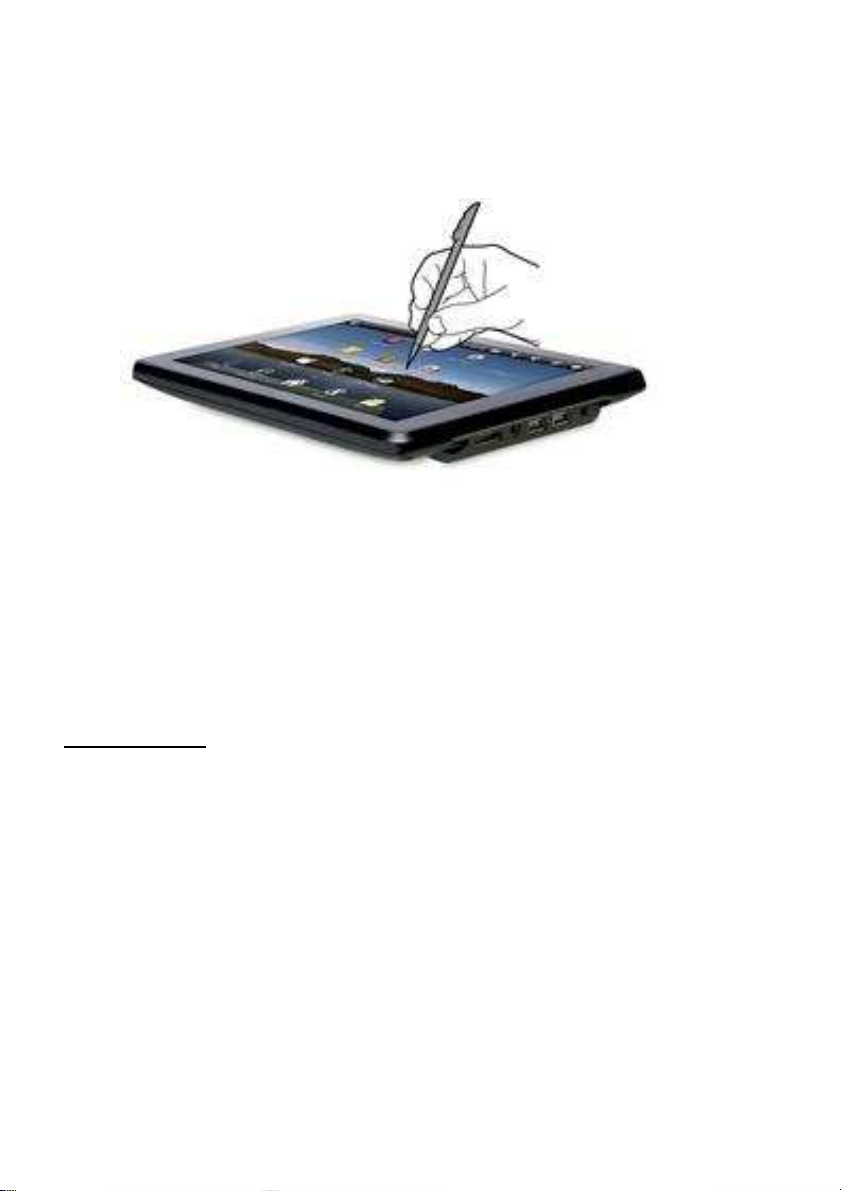
Using your Stylus:
Tap with the stylus or finger nail rather than the pad of your finger.
Note that this product has a resistive touch screen. This machine senses
pressure applied to it in specific areas and acts on this pressure. Please use a
stylus or your nail when tapping the screen for optimal usage. Note that simply
touching the screen with your finger will not produce optimal results.
Getting Started
1.Charge your Device
Plug the power adapter into an electrical outlet and connect your device to the
adapter. It is recommended that you fully charge the battery before use, for at
least six hours.
2.Turn Device On
Press the power button on the back of the device to turn on. You can use the
6

device while the battery is charging. To turn the power off, hold on to the power
button on the back of your device for about three seconds. Then tap power off
followed by OK.
3.Configure Touch Screen
Press the MENU button on the back of the product.
Tap Settings on the bottom menu.
Scroll down and tap Touch Screen Calibrate.
Use the stylus to tap the middle of the displayed crosshairs to calibrate the touch
screen.
Note: After a system reset, it may be necessary to re-calibrate your screen.
4.Insert SD Card
Inserting an SD Card is an option for importing other files, downloading
applications, and playing stored media.
Insert a Micro SD Card (up to 16GB) into the SD Cart Slot. You will hear a click
when the card is inserted properly.
Many of the features included on your device will not function properly without the
SD Card.
Please note that this product is not a computer. It is a Wireless Internet Device
7
10
1
2
4 7
9
6 8 5 3
with Android Operating system.
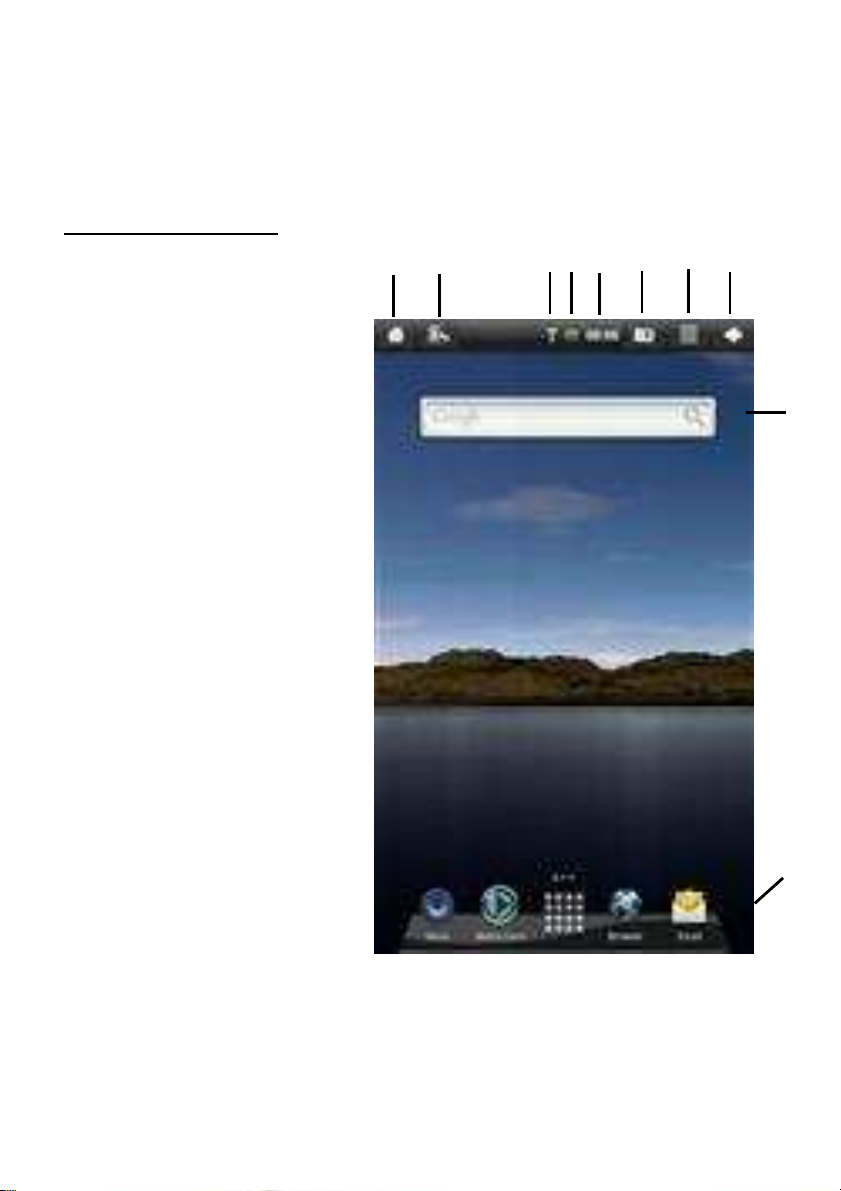
Home Screen Features
1.Return to Home Screen
2.Screen orientation (Portrait or
Landscape)
3.Wi-Fi Connection Status
4.Battery Level
5.Time Display
6.Tap to take a picture of your
screen.
7.Settings Menu
8.Tap this button to go back
one screen.
9.Tap to search the web.
10.Application Quick Launch
Bar: Frequently used
applications are displayed here. Tap the icon to access the application.
8
Set your display preferences
Landscape (default)
Portrait
To switch between Landscape and Portrait
mode, tap on the Screen Orientation icon on
the top menu bar.
9
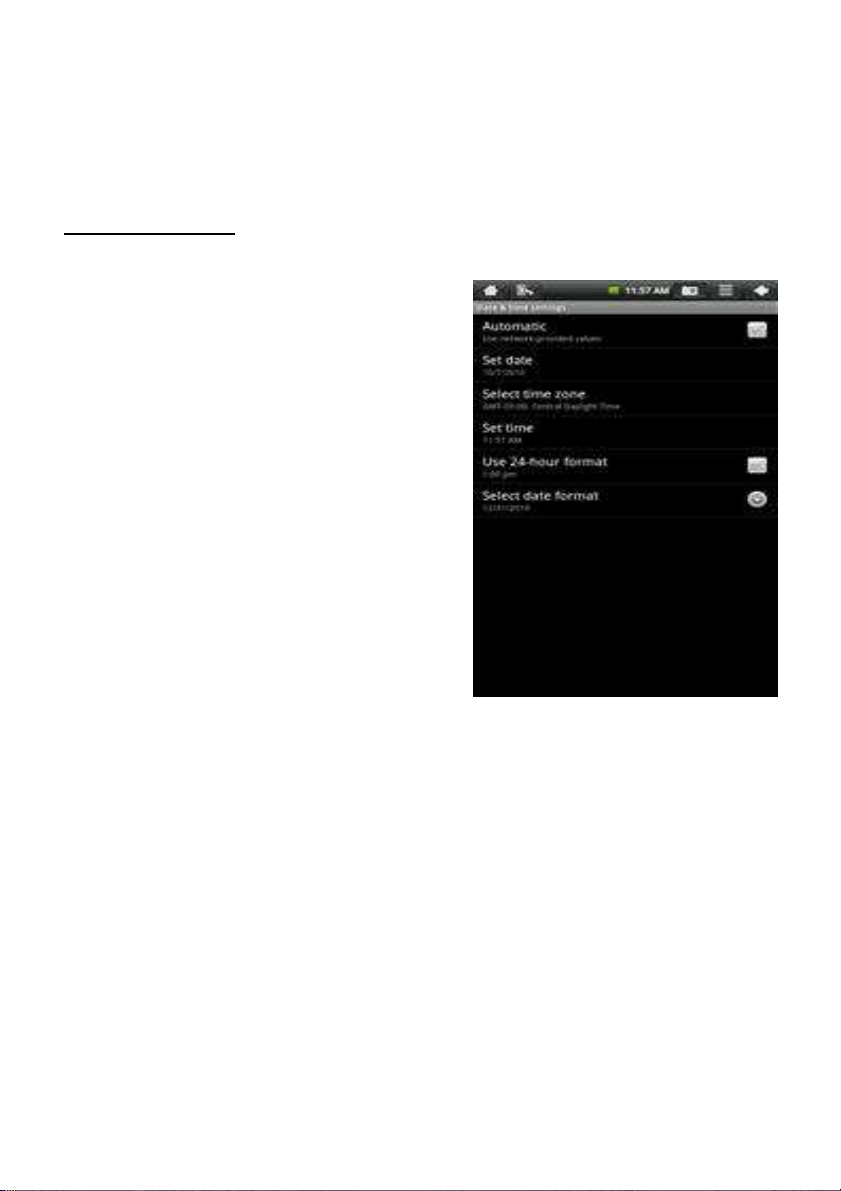
Set Date and Time
1.Tap Settings from the Home Screen
to access the device settings.
2.To set up the current date and time,
tap Date & time.
3.Tap the Automatic option to turn off
the network-provided values.
4.Tap Set date and enter the current
date.
5.Tap Set when finished.
6.Tap Set time and enter the current
time.
7.Tap Set when finished.
8.Change the way in which the date and time are displayed by tapping the Use
24-hour format and Select date format options.
10
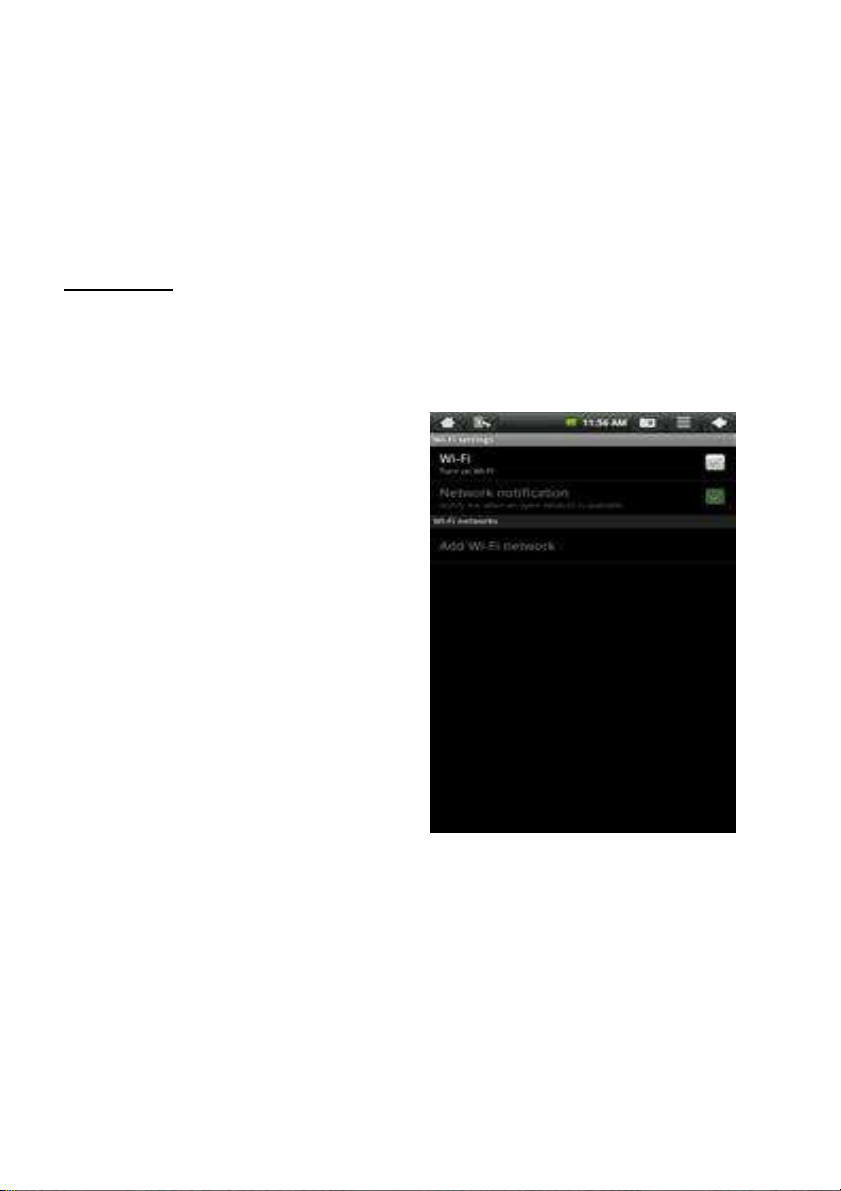
Wi-Fi Setup
1.To set up Wi-Fi, tap Wi-Fi settings on the Application Home Screen Panel.
2.Tap Turn on Wi-Fi. The device will automatically scan and list local Wi-Fi
networks that it finds. A lock image
indicates a secure network that
requires a password for access.
3.Tap the network that you would
like the device to connect to.
4.If a password is required, a
notification screen will appear to
allow you to enter the password.
Tap the Wireless password box to
access the keyboard and enter the
password. Tap Done when
finished.
5.A wireless icon will appear in the
toolbar to indicate that you are connected to the wireless network.
11
6.Tap the back arrow to exit to the Home Screen.
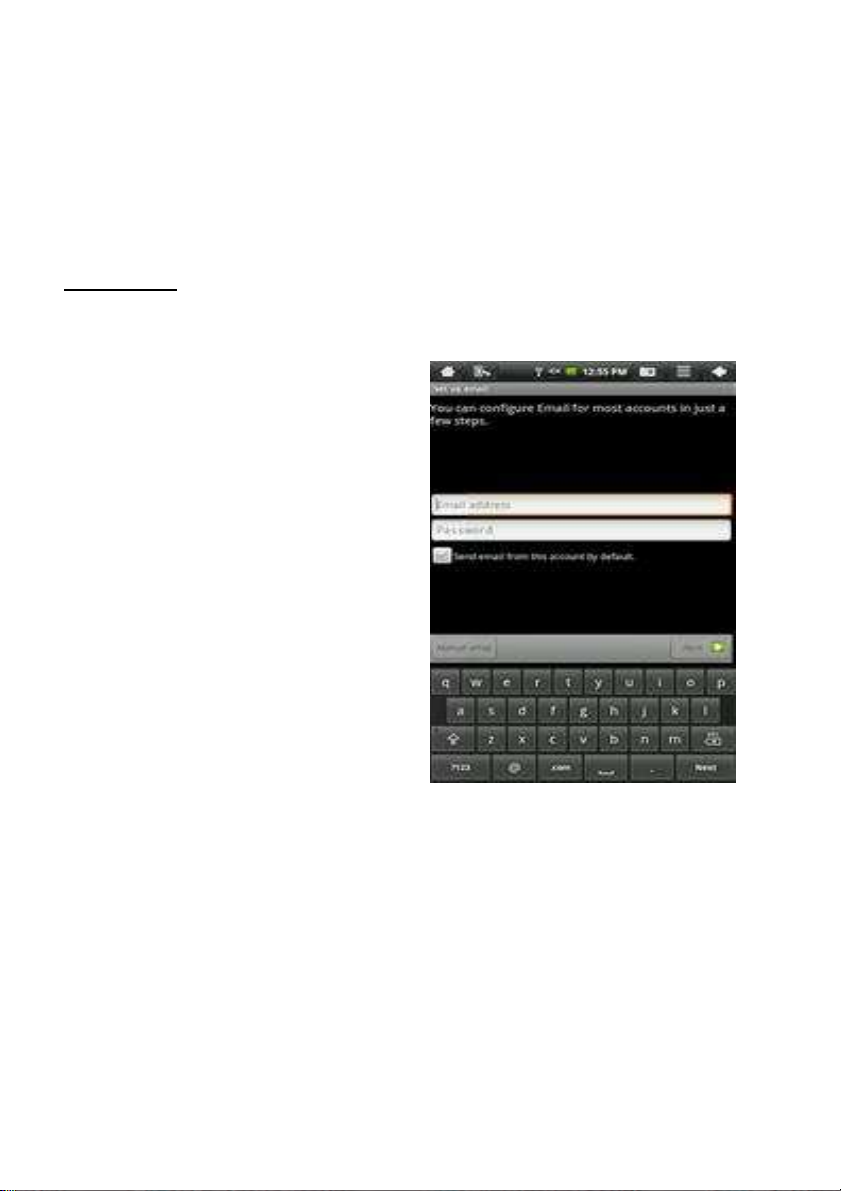
Email Setup
POP3, IMAP, and other common email accounts are supported.
1.To set up Email, tap Email on
the Application Home Screen
Panel.
2.Enter your email address and
password.
3.Tap Next.
This will be your default account
unless you add another email
address. After you have more than
one account set up, you can
select a different address as the default account.
(optional) To select the account type, or modify individual account settings, tap
Manual Setup after entering your email address and password.
12
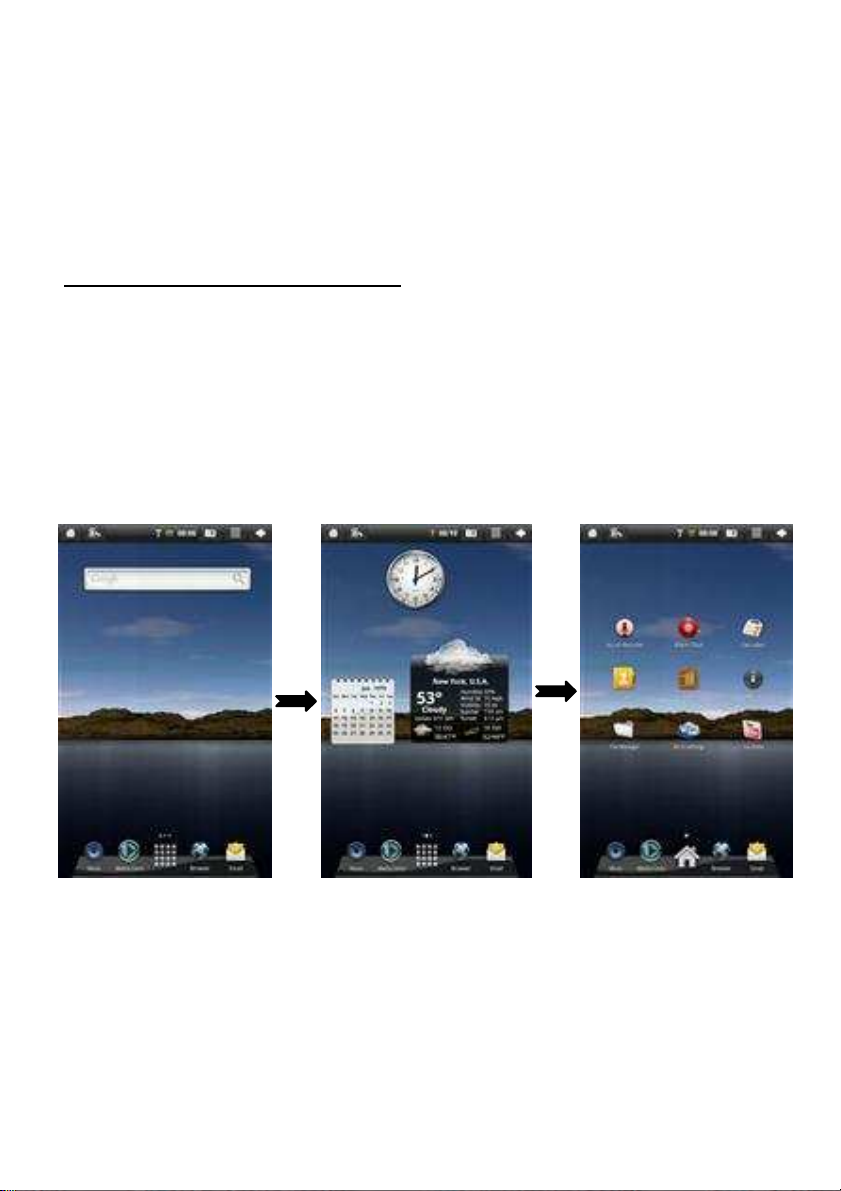
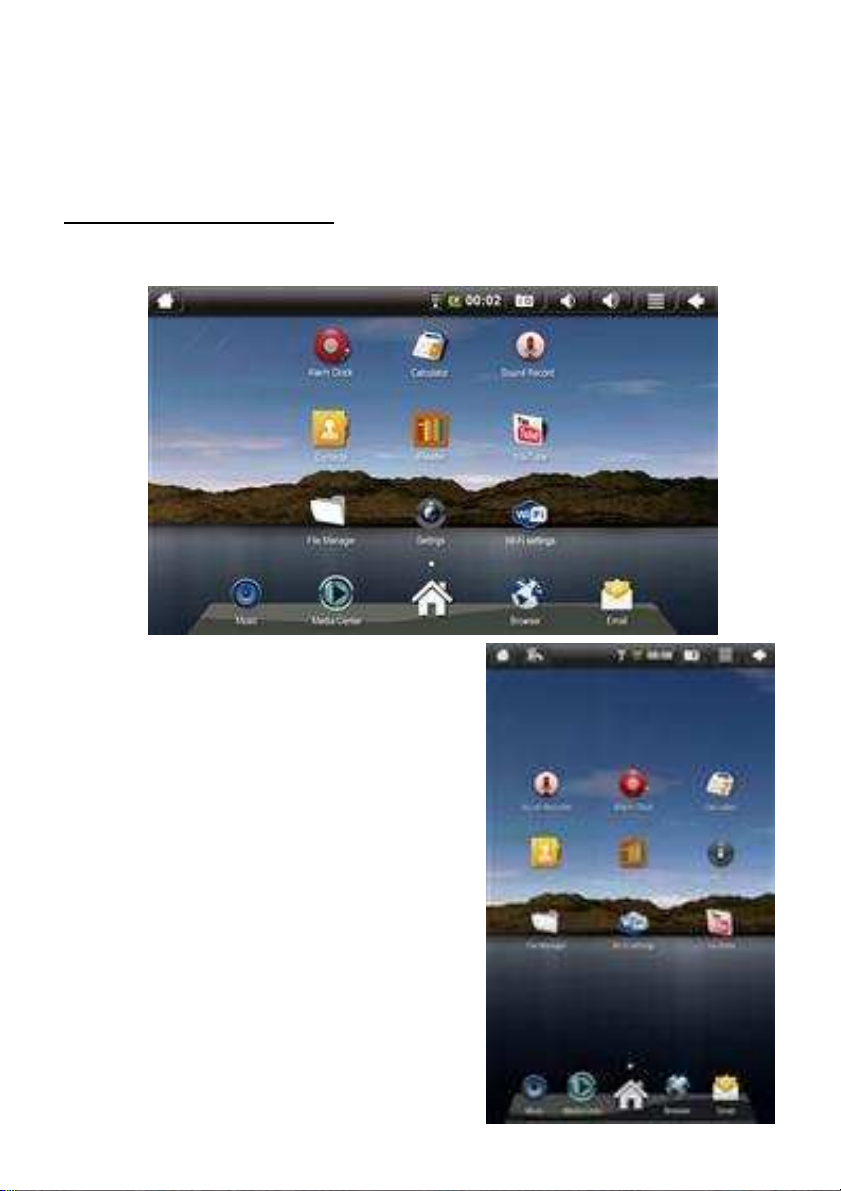
Search Panel
Widget Panel
Application Panel
Navigating the Home Screen Panels
Your device displays the Home Screen when there are no other applications or
menus open on the screen. The Home Screen allows you to organize all of your
favorite applications, widgets, and other tools for easy access.
The Home Screen is divided into three panels: the Search Panel, The Widget
Panel, and the Application Panel. Slide the stylus across the screen to the right
or left to change panels.
Use the Search Panel to quickly search the web.
The Widget Panel allows you to customize a variety of tools, or “Widgets” that run
right on the Home Screen, such as a calendar, mp3 player, and local weather
13

updates.
The Application Panel displays the Android® applications installed on the device.
Tap an application icon to launch the application on your device.
Other Settings
Animation:
You can change your screen animation from 2D (default) to 3D.
Tap on Settings Menu.
Tap Animation to change the setting.
Adding Applications
You can easily add applications to your device.
Note: A MicroSD card is required to install applications on your device.
Use the SAM 3.5 application to search for and install Android applications to your
device.
Moving Icons
To move any of the icons on your screen, touch and hold the stylus to the icon.
The icon will highlight and then increase in size and allow you to drag and drop it
anywhere on the screen, or into the trash bin.
When you have selected an icon, the trash bin will pop-up on the side of the
14

screen. Dropping an icon into the trash bin will simply remove it from view; it will
not uninstall the application from your device.
Included Widgets
Widgets
Analog Clock Displays the time with an animated analog clock.
Calendar Displays the date in a monthly calendar view.
Latitude Displays your current location in a map view. (Requires
Wi-Fi connection.)
Music Play and manage audio files (MP3, WAV, AAC, OGG).
Media Player Allows you to view photos, play videos and audio files.
Power Control Turn Wi-Fi, Account Sync, and Screen Brightness on and
off to save batter life.
Weather Forecast Displays local weather conditions. (Requires Wi-Fi
connection.)
Included Applications
Applications
File Manager Manage files stored on the SD Card or on local memory.
15

Browser Access the internet and surf the web.
Email Send and receive email using your existing email
accounts.
Media Player Allows you to view photos, play videos and audio files.
Alarm Clock Set and schedule alarms.
Settings View and change settings to personalize your device.
Contacts Create, view, and edit your personal contacts.
Calculator Perform simple mathematical equations.
YouTube View and share popular videos online.
Wi-Fi Settings View and update Wi-Fi settings and access points.
iReader Displays your digital media (Supports CHM, TXT, PDB,
Mobipocket, and EReader books.)
Sound Recorder Record voice notes or sound using on-board microphone.
16
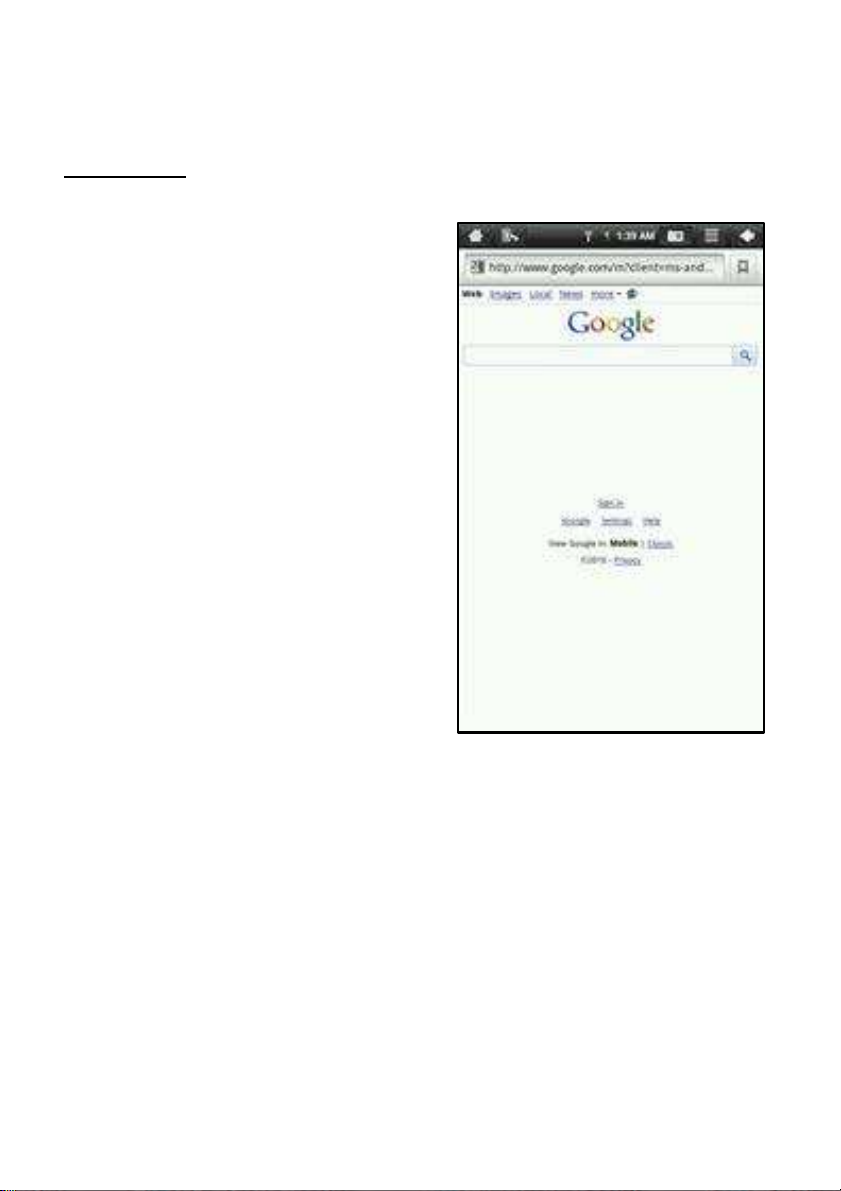
Surf the Web
Use the Browser application to surf the
web easily and securely.
1.Select Browser from the Application
Quick Launch Bar to launch the internet
browser.
2.Tap in the top entry field to enter a web
address (e.g. google.com) or tap in the
search box to search the internet. The
keypad will appear so that you can type
the web address or search term.
3.Tap Done when finished.
17
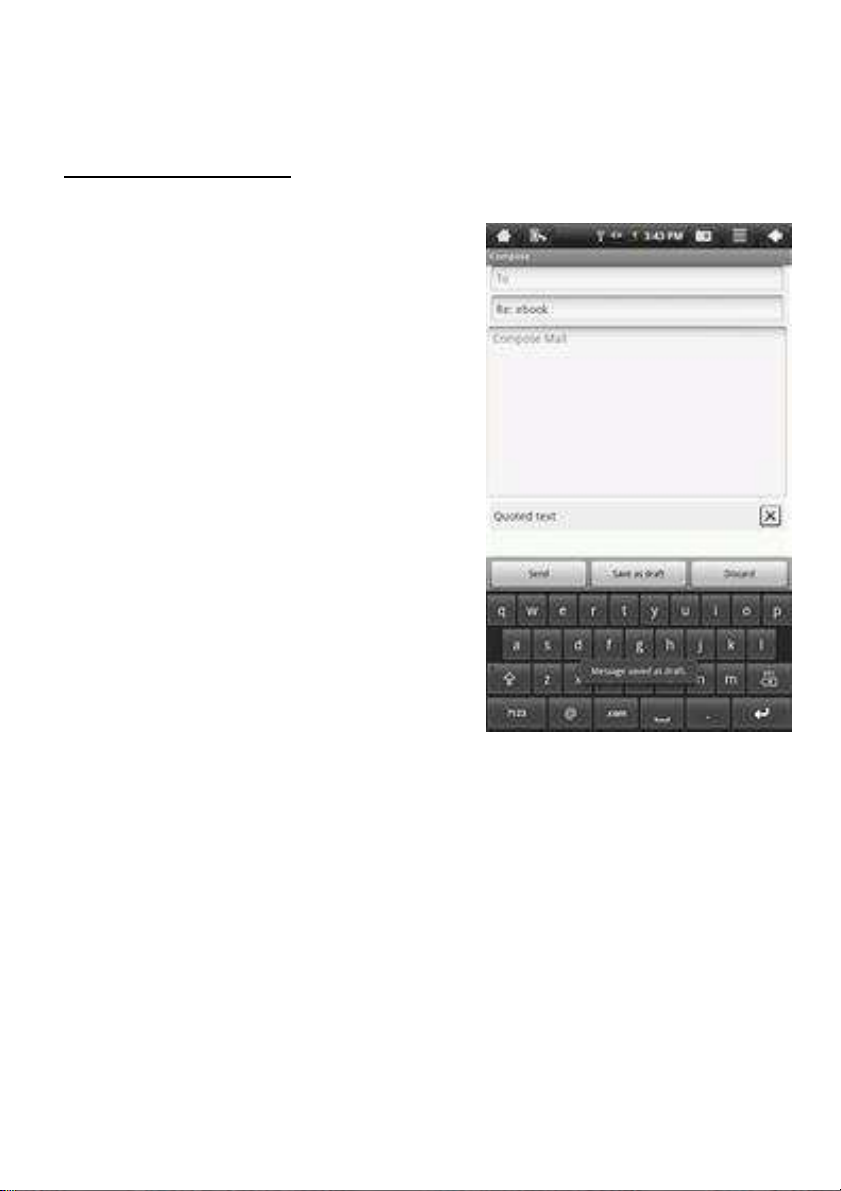
Send and Receive Email
After Email setup is complete, you can
access your current email account Inbox.
1.Tap Email on the Home Screen
Application Panel to access your Inbox.
2.Tap an email message in your Inbox to
read the message.
3.Reply to or delete the message by
tapping the buttons at the bottom of the
screen.
4.To compose a new message, tap the
Settings button while in the Inbox.
5.Tap in any of the message entry fields
to display the keypad.
6.Tap Send to send the message.
18

Deklaracja zgodności
Niniejszym GOCLEVER Technology oświadcza iż produkt jest zgodny z
zasadniczymi wymogami oraz pozostałymi postanowieniami Dyrektywy
199/5/WE.
Ochrona środowiska
Urządzenie podlega dyrektywie WEEE 2002/96/EC. Symbol obok oznacza, że
produkt musi być utylizowany oddzielnie i powinien być dostarczony do
odpowiedniego punktu zbierającego odpady. Pozwala to ograniczać
zanieczyszczenie środowiska i pozytywnie wpływa na ludzkie zdrowie.
Informujemy ponadto, iż nasza firma w zakresie obowiązków wynikających z
ustawy o zużytym sprzęcie elektronicznym, w tym w zakresie jego zbierania,
przetwarzania, odzysku i recyklingu jest obsługiwana przez KARAT ELEKTRORECYKLING Sp.z o.o. W razie jakichkolwiek pytań lub wątpliwości możecie się
Państwo kontaktować z Karat pod numerem telefonu 056-623-80-91.
Odpowiedzialność
Firma GOCLEVER Technology ani żaden z jej licencjobiorców nie ponosi
odpowiedzialności za jakąkolwiek utratę danych lub zysków, jak również za
żadne inne wtórne i pośrednie szkody powstały w wyniku użytkowania urządzeń
marki, w żadnym wypadku i maksymalnym dopuszczalnym przez prawo
zakresie. GOCLEVER Technology nie odpowiada za problemy związane z
nieprawidłowym działaniem systemu operacyjnego i aplikacji działających pod
jego kontrolą.
Zmiany
GOCLEVER Technology zastrzega sobie prawo do dokonywania zmian w
niniejszym dokumencie jak i specyfikacji urządzenia, bez konieczności
informowania o tym użytkownika. Opisane funkcje oraz obrazki mogą się różnić
w zależności od usług oferowanych przez operatora jak i wersji oprogramowania
danego urządzenia.
Przed użyciem
Pamiętaj, że akumulator nie jest naładowany. Otwarcie lub próba rozebrania
zewnętrznej obudowy urządzenia powoduje utratę gwarancji.
Google jest zastrzeżonym znakiem towarowym, a Google Maps jest znakiem
handlowym firmy Google, Inc. w Stanach Zjednoczonych i innych krajach.
YouTube jest znakiem towarowym firmy Google, Inc.
Firma GOCLEVER Technology nie ponosi odpowiedzialności za błędy
techniczne lub redakcyjne ani za pominięcia w niniejszym tekście; nie ponosi
również odpowiedzialności za szkody przypadkowe lub następcze spowodowane
korzystaniem z niniejszego materiału.
Informacje są przedstawione w takim stanie, w jakim przyjmuje je użytkownik, i
19

nie są objęte żadną gwarancją. Mogą ulec zmianie bez powiadomienia. Firma
GOCLEVER Technology zastrzega również prawo do zmiany zawartości
niniejszego dokumentu bez uprzedniego powiadomienia. W podręczniku zostały
opisane tylko podstawowe funkcje urządzenia.
Bezpieczeństwo
Należy zapoznać się z tymi wytycznymi. Niezastosowanie się do nich może
spowodować powstanie zagrożenia życia lub zdrowia albo może być niezgodne z
prawem. Aby uzyskać dalsze informacje, należy zapoznać się z całym
podręcznikiem.Urządzenie zostało stworzone do pracy przy zasilaniu
akumulatorowym jak i podłączeniu do sieci elektrycznej za pomocą ładowarki.
Korzystając z urządzenia w inny sposób może być niebezpieczne i spowoduje
utratę gwarancji.
Ładowanie
Urządzenie należy podłączać tylko do źródeł zasilania zgodnych z parametrami
określonymi w specyfikacji. W przypadku wątpliwości co do typu wymaganego
źródła zasilania należy skonsultować się z autoryzowanym punktem usługowym
lub lokalnym dostawcą energii elektrycznej. Jeśli produkt zasilany jest z
akumulatora lub innych źródeł, należy przestrzegać instrukcji dołączonej do
produktu.
Oddziaływanie czynników zewnętrznych oraz pola elektromagnetycznego
Urządzenie nie jest wodoodporne. Należy dopilnować, aby zawsze było suche,
chronić przed wilgocią. Urządzenie należy chronić również przed wysokimi oraz
niskimi temperaturami, zapyleniem, piaskiem, nie należy narażać go na wstrząsy,
rzucać nim, gdyż może to spowodować jego uszkodzenie, bądź jego elementów.
• Nie korzystać z urządzenia w pomieszczeniach wilgotnych i w bardzo wysokich
lub niskich temperaturach.
• Nie pozostawiaj urządzenia w pojazdach ani miejscach, w których temperatura
może przekroczyć 50 stopni Celsjusza.
• Nie korzystaj urządzenia na pokładzie samolotu oraz w miejscach gdzie nie jest
dozwolone korzystanie z urządzeń mogących emitować pole
elektromagnetyczne Np. szpital, stacja benzynowa, magazyn materiałów
wybuchowych; nieprzestrzeganie tych zasad może spowodować pożar lub
wybuch.
• Nie korzystaj z urządzenia podczas prowadzenia samochodu.
• Nie korzystaj z urządzenia w pobliżu źródeł silnego promieniowania
elektromagnetycznego, takich jak kuchenki mikrofalowe, głośniki, telewizory a
nawet radia.
• Stosować tylko oryginalne akcesoria zalecane przez producenta albo
akcesoria, które nie zawierają metali.
20
 Loading...