

Page 1
Page 2

CONTENTS
Owner Details .............................................................................................................3
FEATURES ...........................................................................................................................3
MT600G ADDITIONAL FEATURES ........................................................................................3
GENERAL DESCRIPTION ......................................................................................................4
REGISTRATION AND TRANSFER OF OWNERSHIP ..................................................................5
EPIRB Purchase or Transfer Advice ...............................................................................5
Transferring Ownership ...............................................................................................5
PREVENTING ACCIDENTAL ACTIVATION ..............................................................................6
INSTALLATION ....................................................................................................................6
BRACKET RELEASE AND STOWAGE .....................................................................................7
IN AN EMERGENCY .............................................................................................................8
Using the Beacon as a Last Resort ...............................................................................8
Activation ...................................................................................................................8
DEPLOYING THE EPIRB ........................................................................................................8
TURNING THE EPIRB OFF.....................................................................................................9
IN THE EVENT OF ACCIDENTAL ACTIVATION ......................................................................10
BATTERIES AND MAINTENANCE ........................................................................................10
SAFETY SEAL ....................................................................................................................11
TESTING THE EPIRB ...........................................................................................................11
Test Indicator LEDs ...................................................................................................11
General Self Test (MT600/MT600G) ...........................................................................11
MT600 Model General Self Test ................................................................................12
MT600G Model General Self Test ..............................................................................12
GENERAL SELF TEST TABLE ........................................................................................13
GPS Satellite Acquisition test (MT600G Only) .............................................................13
GPS SATELLITE ACQUISITION TEST TABLE ...................................................................15
UNACCOMPANIED TRANSPORTATION ...............................................................................15
DISPOSAL .........................................................................................................................16
ABOUT THE COSPAS-SARSAT SYSTEM ...............................................................................16
SPECIFICATIONS ...............................................................................................................17
NATIONAL AUTHORITY REGISTRATION DETAILS ................................................................18
Australia ...................................................................................................................18
New Zealand ............................................................................................................18
STANDARD COMMUNICATIONS CONTRACT WARRANTY AGAINST DEFECTS .....................19
IMPORTANT:
To ensure the MT600/MT600G is fully functional,
TEST IT AT REGULAR MONTHLY INTERVALS
or prior to an extended journey as described
on page 11 of this manual.
2 INSTRUCTION MANUAL MT600/G
Page 3

OWNER DETAILS
Name: .............................................................
Address: ...........................................................
. . . . . . . . . . . . . . . . . . . . . . . . . . . . . . . . . . . . . . . . . . . . . . . . . . . . . . . . . . . . . . . . . .
Phone: ............................................................
Beacon UIN/15-HEX ID:
Congratulations on purchasing your new Accusat™ MT600 series EPIRB.
The Accusat™ MT600/MT600G are the most advanced 406 MHz digital satellite
beacons available today. GME have developed and approved internationally, a new
family of affordable high performance 406 MHz beacons.
A CAUTIONARY NOTE: The satellite EPIRB is the most significant advance in search
and rescue technology in many years. However, it is not a substitute for a marine
radio. Mariners should not be over-reliant on any single system. Wise, safe mariners
plan carefully, ensure that shore contacts know their sail plan, carry a marine radio
and the correct range of other safety equipment and operate their craft sensibly to suit
conditions at sea.
FEATURES
• Compact , lightweight, easy-to-mount design.
• 1
21.5 MHz VHF homing beacon to assist in guiding rescuers to your
precise location.
• Zero warm-up digital technology.
• Ultra high performance solid state strobe.
• Quick and easy test facility with audio / visual indication.
COSPAS-SARSAT CLASS 2 (C/S T.001). Internationally approved, worldwide operation.
•
• Meets or exceeds the applicable requirements of:
AS/NZ 4280.1:2003 standards C/S T.001/007.
• Includes quick release mounting bracket.
• Antenna deploys automatically when the unit is removed from the bracket.
• 10 year battery life.
• 6 year warranty.
MT 600G ADDITIONAL FEATURES
• Integrated 66 channel GPS receiver with top mounted Quad helix antenna for better
than 100 metre accuracy.
MT600/G INSTRUCTION MANUAL 3
Page 4
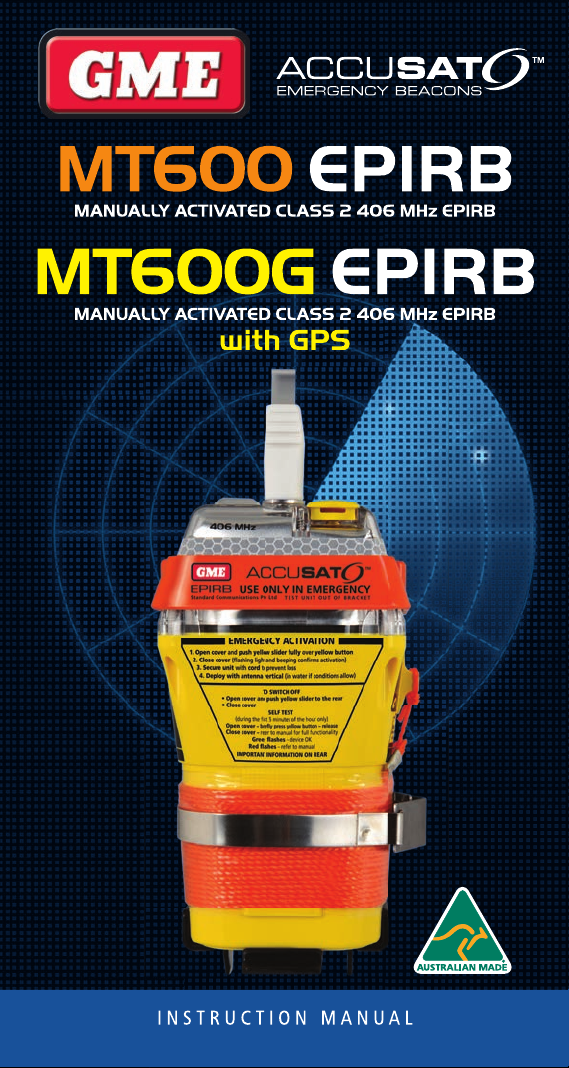
GENERAL DESCRIP TION
The Accusat™ MT600 and MT600G digital Emergency Position Indicating Radio
Beacons (EPIRBs) are designed to be used when the safety of your craft and crew is
endangered and you have no other means of communication. The EPIRB can save
your life and the lives of others on board by leading an air/sea rescue to your precise
location. In the past, extensive and lengthy searches have been carried out for missing
craft, sometimes to no avail.
Your GME EPIRB is a self contained 406 MHz radio transmitter that emits an
internationally recognised distress signal on a frequency monitored by the COSPASSARSAT satellite system. The MT600 and MT600G EPIRBs contain a unique identity
code which can be cross referenced to a database of registered 406 MHz beacons,
allowing the beacon’s owner and vessel to be immediately identified in the event of
an emergency. All models can be manually activated by the operator in an emergency
situation.
Additionally, each unit includes an ultra high performance solid state strobe and 121.5
MHz VHF homing beacon to assist in guiding rescuers to your precise location.
The MT600G model also features an integrated 66 channel GPS receiver which
automatically acquires a position and relays the latitude and longitude of the beacon
along with the personal identifier and emergency signal.
GPS Antenna
Strobe
Antenna
Switch
Cover
MT600
Test LEDs
Lanyard
MT600G
WARNING:
USE ONLY IN SITUATIONS OF GRAVE
AND IMMINENT DANGER
MISUSE MAY RESULT IN A SEVERE PENALTY
4 INSTRUCTION MANUAL MT600/G
Page 5
REGISTRATION AND TRANSFER OF OW NERSHIP
EPIRB PURCHASE OR TRANSFER ADVICE
Registration of 406 MHz satellite EPIRBs with the EPIRB registration section of the
national authority is mandatory because of the global alerting nature of the COSPASSARSAT system. The information provided for registration is used only for search and
rescue purposes. If your EPIRB is activated in an emergency, it will transmit its unique
identifying code that will give the authorities immediate access to your details when the
beacon is detected.
In Australia the preferred method of registration is online at: http://www.amsa.gov.
au/beacons. Alternatively, fill in the owner registration form upon completion of the
sale and mail, fax or email the registration form to the relevant national authority.
Registration forms are also available online and if the beacon is to enter service
immediately, complete the registration form and submit to the relevant
national authority electronically for immediate registration.
(Registration details are on page 18 of this manual).
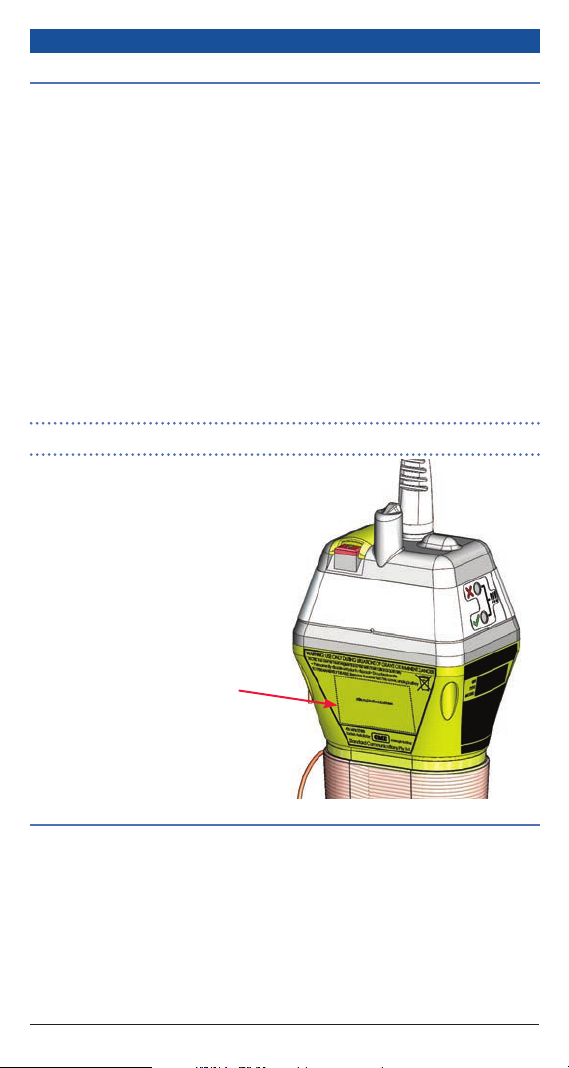
Once your EPIRB has been registered you will receive an adhesive label which must be
applied to the body of the EPIRB in the location shown below.
NOTE: Registration of your EPIRB cannot be done by GME.
Affix label here
TRANSFERRING OWNERSHIP
If the beacon is being transferred to a new owner, it is the responsibility of the current
owner to inform the national authority of the new owners name and address by email,
fax, letter or phone.
The new owner of the beacon is required to provide the national authority with the
information shown on the registration form.
This obligation transfers to all subsequent owners.
Failure to register your beacon may result in a fine and could result in
unnecessary delays in the rescue process and possible loss of life.
MT600/G INSTRUCTION MANUAL 5
Page 6

PREV ENTING A CCI D E N TAL AC TIVATION
The signal from an EPIRB is regarded by authorities as an indication of distress and is
given an appropriate response. It is the responsibility of every owner of an EPIRB to
ensure that it is not activated unintentionally or in situations that do not justify its use.
Most cases of accidental transmission are the result of poor or inappropriate storage or
failure to totally disable an old model EPIRB before disposal.
The need to treat EPIRBs responsibly cannot be too highly emphasized.
The MT600/MT600G beacon will not activate unless the ON button is being held
continuously in the ‘pressed’ state. Once the beacon has been activated, it will not
commence transmitting until approximately 50 seconds after activation, providing a
safety period of audible and visual warning. If you hear the beacon beeping while it is
being carried or stowed, you may still be able to deactivate it during this time period
without actually transmitting a distress signal. If in doubt, report the incident to your
local authorities just in case.
To minimize the possibility of accidental activation, EPIRB owners are urged to pay
careful attention to the following points:
1. Always stow the EPIRB in the mounting bracket with the switch cover closed.
The switch cover is designed specifically to prevent accidental activation.
2. Do not allow children to interfere with the EPIRB.
3. Educate others on board your vessel regarding the consequences of beacon
activation.
INSTALLATION
The MT600/MT600G can be mounted upright or horizontally against a panel or
bulkhead. When selecting a location, consider the following:
• Select a location that is readily accessible in an emergency.
• Ensure the unit is protected against the environment. Avoid locations where it will be
subject to water spray or continuous sunlight.
• Avoid mounting the EPIRB where it will be subjected to continuous direct sunlight.
This could cause the beacon’s internal temperature to exceed the maximum storage
temperature of +70°C. Long term stowage under these conditions could result in
reduced battery life, poor performance or degradation of the plastics due to excessive
UV light.
• Mount the unit in a location where it will be safe from physical damage.
• The specifications section contains the ’Compass Safe Distance’ for your particular
model EPIRB. This is the minimum distance that must be maintained between an
inactive stowed beacon and any magnetic navigational device.
• Confirm the selected location allows sufficient clearance to remove the beacon from
the bracket when required.
6 INSTRUCTION MANUAL MT600/G
Page 7

Hold the mounting bracket in place
(with the EPIRB removed) and mark the
location of the mounting holes. Screw the
bracket to the panel or bulkhead using
the stainless steel screws supplied.
NOTE: The locations of the mounting
holes for the mounting bracket are
identical to those used on the earlier
MT400 series EPIRBs.
Mounting
holes
Once the bracket is fixed in place, fit the
emergency beacon to the bracket.
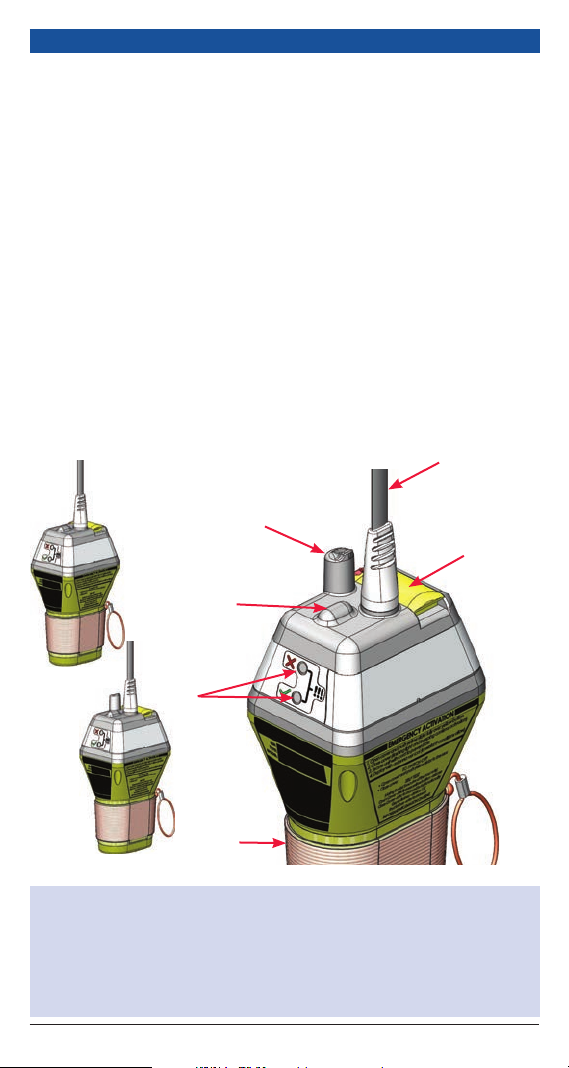
BRACKET RELEASE AND STOWAG E
To remove the EPIRB
1. Release metal strap by pulling clasp forward.
2. With one hand, press down on the tab at the base of the bracket.
3. Grasp the EPIRB with the other hand and pull it outwards and downwards.
4. The antenna will release automatically and spring to the upright position.
Mounting
holes
MT600/G INSTRUCTION MANUAL 7
Page 8

To Stow the EPIRB
1. Hold the EPIRB upright with the antenna towards the front.
2. Insert the EPIRB, antenna first, upwards into the bracket.
3. Press the tip of the antenna against the bottom of the three ridges in the antenna
slot and slide the EPIRB upwards into the orange collar of the bracket so that the
antenna folds over.
4. Push the EPIRB base firmly into the bracket until the release lever clicks upwards.
5. Connect strap.
IN AN EM ERG ENCY
The EPIRB should only be used where grave and imminent danger threatens your craft
and assistance is required.
If an emergency occurs, you should first try to use your radio to summon assistance.
If contact is made, it may not be necessary to use the beacon. Notify the ‘Emergency
Facility’ that you have a beacon and that you will turn it on upon their instructions.
USING THE BEACON AS A LAST RESORT
If dire emergency threatens life and you have been unable to make radio contact or
have lost radio contact, use the beacon. The distress signal transmitted by your beacon
identifies you as a craft in distress and will initiate an air/sea search and rescue.
ACTIVATION
1. Remove the beacon from the bracket.
2. Lift the switch cover (marked ‘LIFT’).
3. Slide the ‘ON’ slider switch fully
forward in the direction of the
arrows. The unit will initially beep
once and the strobe will flash,
then after seven seconds the
flashing strobe and beeps will
continue every 3 seconds to
indicate the beacon is operating.
4. Close the cover to secure the slider
switch in the ‘ON’ position.
5. If the beacon is an MT600G it will begin acquiring GPS satellites. When a position
is obtained, a musical chime will be heard and the green LED will flash rapidly for a
few seconds. The green LED will then flash in sync with the strobe light to confirm a
valid GPS position is being used.
6. The beacon’s first transmission will occur approximately 50 seconds after activation
(with or without a valid GPS position).
Lift switch
cover
‘ON‘ slider
DEPLOY ING T H E EPIRB
Unwind the cord and secure the EPIRB to prevent loss. When activated, the MT600/
MT600G will transmit the strongest signal to the satellites when:
8 INSTRUCTION MANUAL MT600/G
Page 9

• It is floating in water.
• It is well clear of surrounding and
overhanging objects.
• The antenna is vertical.
In extreme sea conditions, you should not float the
EPIRB free of the vessel or the life raft if there is the
possibility of loss or damage to the EPIRB. However,
it is recommended that the EPIRB should ideally be
operated clear of any cover or canopy.
By observing the following guidelines satisfactory
operation should still be achieved when operating the
EPIRB out of water.
• The EPIRB signal will not pass through metal but will pass through fibreglass, wood
or fabric with some loss when wet.
• The body of the EPIRB can be attached to metal fittings, but the antenna must be
vertical and clear of the metal. You must not attach it to the vessel using the lanyard.
• If the cabin is metallic (such as steel or aluminium), the EPIRB should be mounted
outside on a clear space with the antenna vertical and clear of surrounding objects.
WARNING: Switching a beacon on and
off interferes with the satellites’ ability to
METAL
determine your location. Once activated in
an emergency, allow the beacon to operate
without interruption until your rescue.
METAL
NOTE: Once battery capacity is depleted,
normal 406 MHz transmissions will cease
along with the strobe and audible beeps.
However, special circuitry within the EPIRB
will direct any remaining battery capacity towards extended operation of the 121.5
MHz homing transmitter and the green LED will flash every 10 seconds. If after a long
period of deployment your beacon appears to cease functioning – leave the beacon
switched on – as it is likely that the homing signal is still being transmitted.
TURNING T H E E PIRB OFF
After you have been rescued, it is important that you turn the EPIRB off as soon
as possible. If you leave the EPIRB running when it is no longer needed it may make
it difficult for the satellites to detect other beacons that may be transmitting in the area.
1. Remove beacon from the water
2. Lift the switch cover (marked ‘LIFT’)
3. Slide the yellow slider switch fully towards the ‘OFF’ position
4. Close the cover to secure the slider switch
5. Check that both the strobe light and the ‘beep’ have stopped
MT600/G INSTRUCTION MANUAL 9
Page 10

IN T HE EVENT OF ACCID E N TA L A CTIVATION
If you suspect that an EPIRB has been activated inadvertently, you MUST turn it off
and report it immediately to your National Authority‘s Rescue Co-ordination Centre to
prevent an unnecessary search.
If at sea, call your local VHF coast station or Rescue Co-ordination Centre.
In international waters contact a Maritime Rescue Co-ordination Centre or Coast Radio
Station (CRS) by any available means.
When reporting you should include the following:
1. Your EPIRB’s 15 character Unique Identifier Number (UIN) which is marked on
the unit body.
2. Date, time and duration of activation
3. Cause of activation
4. Location at time of activation
Search and Rescue authorities will not penalize an EPIRB owner or operator in cases
of genuine accidental activation.
BATTERIES AND M AINTENANCE
The MT600/MT600G is fitted with the very latest in high capacity lithium battery
technology. These batteries are able to operate within a temperature range of -20°C
to +55°C.
The full operational capability of your beacon may not be available if the batteries
fitted have exceeded their replacement date, as shown on the body of the unit. Prior
to reaching this date, make arrangements to have your EPIRB returned for service.
If the red LED lights when the TEST button is pressed and the EPIRB fails to start, the
battery voltage has been depleted.
NOTE: The replacement of batteries due to expiry or usage is not covered by the
product‘s warranty. EPIRB maintenance operations, including battery replacement,
require that the beacon be returned to a manufacturer approved service facility.
Although the MT600/MT600G is otherwise maintenance free, routinely following
these few simple steps will help ensure that your beacon will be operationally ready
if called upon.
1. Test the EPIRB at the recommended interval (refer to ‘Testing the EPIRB’ below)
2. Confirm the SAFETY SEAL has not been broken
3. Check that the batteries have not passed their replacement date
4. Inspect the MT600/MT600G and bracket for damage or deterioration
5. Keep the unit clean by wiping over with a damp cloth (warm water and mild
detergent are suitable) – then dry.
6. Verify that the unit releases correctly from the bracket and is securely retained
when returned to it.
If there is any doubt as to the EPIRB’s serviceability, immediately contact your
authorised dealer or service centre for advice.
10 INSTRUCTION MANUAL MT600/G
Page 11

NOTE: Some installations may be covered by state, national or international carriage
requirements. Such legislation may impose additional inspection and maintenance
requirements beyond those listed above. Contact the relevant authority for further
information.
SAFETY SEAL
The safety seal which covers the tab behind the ‘ON’ slider is designed to tear if the
unit is switched on. A safety seal that is not broken, serves to indicate that the beacon
has never been manually activated.
NEVER remove or break the seal unless deploying the EPIRB in an emergency.
If the beacon has been activated for any length of time, the batteries can no longer
be guaranteed to have the capacity to operate for the minimum 48 hour period and
therefore must be replaced.
TESTING T H E E PIRB
To ensure the MT600/MT600G is fully functional,
it is recommended that you test it at regular monthly
intervals or prior to an extended journey.
TEST INDICATOR LED
During the test the unit will beep. Red and green
LEDs on the side of the unit will indicate the
test status.
S
Test indicator LEDs
GENERAL SELF TEST (MT600/MT600G)
NOTE 1: The ‘General’ Self Test function does not test GPS acquisition. The ‘GPS
Satellite Acquisition Test‘ is done separately and only applies to the MT600G model.
Refer to pages 14 – 15.
NOTE 2: To minimise interference to the COSPAS/ SARSAT system, testing should be
performed during the first 5 minutes of the hour.
IMPORTANT: Do not over test. Testing consumes
a small amount of battery power. If both red and
green LEDs flash rapidly at the start of the test
cycle it means the beacon has been tested well
beyond its recommended number of periodic self
tests. If this happens you
can still continue to perform
self tests, but you should
limit testing to the
recommended monthly
intervals or just prior to an
extended journey.
MT600/G INSTRUCTION MANUAL 11
Test
indicator
LEDs
‘Test’
button
Page 12

MT600 MODEL GENERAL SELF TEST
You may test the EPIRB using the following procedure
1. Remove the EPIRB from the bracket. (Refer to page 7).
2. Keep the antenna well clear of metallic objects during testing.
3. Lift the yellow cover marked ‘LIFT’.
4. Hold the EPIRB in position so the two test indicator LEDs are clearly visible.
5. Briefly press and release the yellow TEST button (do not hold the test button longer
than 2 seconds). The EPIRB will beep once and simultaneously the strobe will flash
once indicating that the self test has commenced.
6. The EPIRB will then perform a series of 3 tests and the results of each test will be
identified with a green or red LED accompanied by a high or low beep.
A short green LED and a high beep indicates a ‘passed’ test.
A short red LED and a low beep indicates a ‘failed’ test.
7. Following the 3 tests, a test summary will be displayed.
A long green LED indicates the EPIRB has completed and passed all the tests.
A long red LED indicates the unit has failed one or more of the tests.
If the EPIRB repeatedly fails the testing process you should contact the
GME service department for advice.
8. Once testing is completed, close the switch cover and press firmly into place until
it clicks.
9. Return the EPIRB into the bracket.
MT600G MODEL GENERAL SELF TEST
You may test the EPIRB using the following procedure
1. Remove the EPIRB from the bracket. (Refer to page 7).
2. Keep the antenna well clear of metallic objects during testing.
3. Lift the yellow cover marked ‘LIFT’.
4. Hold the EPIRB in position so the two test indicator LEDs are clearly visible.
5. Briefly press and release the yellow TEST button (do not hold the test button longer
than 2 seconds). The EPIRB will beep once and simultaneously the strobe will flash
once indicating that the self test has commenced.
6. A series of green LED flashes (no beeps) at one second intervals indicates the self
test is in progress.
7. The EPIRB will then display the results of each of the 4 tests performed with a green
or red LED accompanied by a high or low beep.
A short green LED and a high beep indicates a ‘passed’ test.
A short red LED and a low beep indicates a ‘failed’ test.
8. Following the 4 tests, a test summary will be displayed.
A long green LED indicates the EPIRB has completed and passed all the tests.
A long red LED indicates the unit has failed one or more of the tests.
12 INSTRUCTION MANUAL MT600/G
Page 13

GENERAL SELF TEST TA B LE
LEDS DESCRIPTION MESSAGE
GREEN LED flashes once
per second with no beeps.
RED and GREEN LEDs flash
simultaneously with beeps.
EPIRB is undergoing a General Self
test. (MT600G only).
EPIRB is undergoing a General
Self test; however, the
EPIRB has detected that an
excessive number of self tests
have been preformed.
You should limit further self tests
to the recommended intervals in
order to conserve battery power.
3 or 4 GREEN or RED
flashes with beeps
(the number of flashes and
or
beeps are model specific).
Test results – each flash
indicates the result of a
specific test.
• A GREEN ash and a HIGH
beep indicates a test has
passed.
• A RED ash and a LOW beep
indicates a test has failed.
Long GREEN flash or long
RED flash (no beeps).
or
Test Summary
• Long GREEN ash indicates the
EPIRB has passed all tests and
is OK to use.
• Long RED ash indicates the
EPIRB has failed one or more
tests and may require servicing.
Contact GME for advice.
If the EPIRB repeatedly fails the testing process you should contact the
GME service department for advice.
9. Once testing is completed, close the switch cover and press firmly into place until
it clicks.
10. Return the EPIRB into the bracket.
GPS SATELLITE ACQUISITION TEST (MT600G ONLY)
The general self-test procedure is more than sufficient to perform a comprehensive
check of your beacon without consuming too much battery capacity. The general selftest also includes a general GPS check to ensure the GPS circuitry is functioning.
However, on occasions, and no more regularly than once per year, you may wish
to also perform a full GPS satellite acquisition check which includes the operation of
the special GPS antenna. This test consumes much more power than a standard selftest, so before you begin, choose an outside test location with good visibility of the
open sky above. A fast satellite acquisition means a shorter test and less wasted
power consumption.
MT600/G INSTRUCTION MANUAL 13
Page 14

NOTE: Once the GPS test has started, you can terminate the test at any time by briefly
pressing the ‘TEST’ button.
TO TEST THE GPS
1. Remove the EPIRB from the bracket. (Refer to page 7).
2. Ensure you are outside with good visibility of the open sky above.
3. Keep the antenna well clear of metallic objects during testing.
4. Lift the yellow cover marked ‘LIFT’.
5. Press and hold the yellow ‘Test’ button until the green LED flashes, then release
the button within 2 seconds.
6. The beacon will now attempt to acquire a GPS position. During this time the green
LED will flash at one second intervals accompanied by double beeps.
The time taken to acquire a position will vary depending on the number and location
of satellites present in your location. Under normal conditions, acquisition should take
around 30 to 40 seconds, however it is possible for it to take several minutes. Note
that distress signals are not radiated as part of this test.
a. If a GPS position is successfully acquired, the beacon will emit a 3 tone musical
‘chime’ and the green LED will flash 8 times. It will then send a brief ‘TEST’
transmission containing the GPS coordinates. The ‘TEST’ transmission is safe
and will not trigger a search.
b. If a GPS position cannot be acquired within 2 minutes, the beacon will emit 8 beeps
and the red LED will flash 8 times. This may indicate a fault with the EPIRB’s GPS
receiver system and you should contact GME service department for advice.
7. Once GPS testing is completed, close the switch cover and press firmly into place
until it clicks.
8. Return the beacon to its bracket.
IMPORTANT: DO NOT over-test. GPS testing consumes additional battery power.
To conserve the battery the EPIRB will only allow a total of 12 GPS tests during its
lifetime.
• If the available GPS test count is approaching the limit, both red and green LEDs
will give a double flash accompanied by a double beep during the GPS
acquisition period.
• If the available GPS test count expires, any further attempts to perform a GPS test
will result a single red LED flash accompanied by a low beep and the test will not
start. As long as the GPS is tested at the recommended average of once per year,
the test count should not expire during the lifetime of the beacon.
14 INSTRUCTION MANUAL MT600/G
Page 15

GPS SATELLITE ACQUISITION TEST TA B LE
(in order of appearance)
LEDS DESCRIPTION MESSAGE
GREEN LED flashes once
per second with double
beep.
or
Both RED and GREEN
LEDs double flash with
double beeps.
or
One long Red LED flash
with low beep.
8 GREEN flashes and a
musical chime.
or
8 Red flashes and 8 low
beeps.
EPIRB is undergoing a GPS test.
EPIRB is undergoing a GPS
test HOWEVER there are
less than 4 GPS tests
remaining.
You should limit further GPS
tests to the recommended
intervals.
The GPS test count has
expired. No further GPS
tests can be performed*.
GPS test PASSED.
A GPS positional fix was
acquired.
GPS test FAILED.
No GPS positional fix was
acquired. Please contact
GME for advice.
*IMPORTANT: Although in this situation the EPIRB has reached the limit of the
available number of GPS tests, the GPS circuitry will still be powered if the EPIRB is
used in an emergency. Alternatively, the EPIRB can be returned to GME for battery
replacement (not covered under warranty) and the GPS test counter will be reset.
UNACCOMPANIED TRANSP ORTATION
The MT600/MT600G EPIRB contains Lithium batteries. Some transportation or courier
companies may have special requirements for transporting devices containing Lithium
Batteries. We recommend you retain the original packaging in which you received your
EPIRB for transportation.
If returning your MT600/MT600G to your dealer or GME branch office for repair
or scheduled battery replacement, you should inform the transportation company
beforehand that your beacon contains Lithium batteries.
DO NOT send your MT600/MT600G beacon through the postal system.
MT600/G INSTRUCTION MANUAL 15
Page 16

DISPO SAL
Special precautions must be taken when finally disposing of your beacon at the end of
its useful life. Legislation may determine the specific requirements which apply to you.
In the first instance contact your National Authority for advice. See page 17.
The following information may also be helpful:
• To permanently disable the beacon, remove the 4 screws retaining the cover, open
unit, unplug battery lead, then reseal.
• Lithium batteries are generally not considered to be hazardous waste when fully
discharged. Qualified personnel may be able to slowly and safely discharge the
cells for you.
DO NOT short circuit the cells or battery. DO NOT incinerate.
AB OUT TH E COSPAS-SARSAT S YSTEM
The COSPAS-SARSAT system is a complete global search and rescue service using
geostationary and polar orbiting satellites. Many countries provide ground facilities
known as Local User Terminals (LUTs).
Polar orbiting satellites provide complete, although non-continuous, coverage of the
earth (due to the fact that these satellites can only view a portion of the earth at
any given time) and can accurately resolve an active beacon’s location. Additionally,
geostationary satellites can give an immediate alerting function in many regions of
the world.
The basic COSPAS-SARSAT concept is illustrated in the figure above.
16 INSTRUCTION MANUAL MT600/G
Page 17

SP E CIFICATIONS*
MODES OF OPERATION
Activated: UHF (406) and VHF (homer) complete with high intensity strobe and
General Self Test: Comprehensive internal diagnostics with visual and audible operator
GPS Self Test (MT600G): GPS acquisition test with visual and audible operator feedback UHF
OPERATION
Activation: Manually by operator
Bracket Type: Manual release
Duration: 48 hours minimum
Transmission Delay: 121.5 and 406 MHz distress signals commence ~
UHF: 406.040 MHz, 5 W ± 2 dB, PSK (digital)
Strobe: 20 flashes/minute at greater than 0.75 cd effective intensity
COSPAS-SARSAT: Certified to C/S T.001 (Class 2) requirements
UHF-Protocol/Data: Serial number*, Radio call sign or MMSI
(all with GPS location – MT600G only).
Repetition Period: 50 s mean, digitally generated randomization
VHF: 121.5 MHz, 25 mw. Min PERP@25°C
BATTERY
Replacement Period: Prior to expiry date marked on case
Replacement Method: Service centre, or factory only (non-user replaceable)
Chemistry: MT600/MT600G – LiSO2 (2.4 g Lithium per cell)
Configuration: MT600/MT600G – 2 ‘D’ type cells
PHYSICAL
Operating Temperature: -20°C to +55°C
Storage Temperature: -30°C to +70°C
Weight: 550 g (plus 98 g for bracket)
Compass Safe Distance: MT600/G – 0.7 m from magnetic navigational device
Dimensions: 260 mm (H) x 102 mm (W) x 83 mm (D) max (stowed in bracket)
Materials: UV stabilized plastic chassis
Performance: AS/NZS 4280.1
OTHER FEATURES
GPS (MT600G only): Internal 66 channel high performance receiver with quadrifilar helix
Retention Lanyard: Buoyant type approximately 5.5 metres long
Reflector: SOLAS retro-reflective tape encircling unit above waterline
Solid-state Strobe: High reliability solid state design exceeds IMO requirements
Antenna: Flexible self straightening stainless steel design
Bracket: Quick release mechanism (manual)
*Standard factory setting, subject to National requirements. Distributor-reprogrammable via optical data interface.
Speci fications are subject to change wi thout notice o r oblig ation .
MT600/G INSTRUCTION MANUAL 17
audible activation alert.
feedback. UHF test message (inverted synchronisation compatible
with portable beacon testers).
test message containing GPS co-ordinates.
50 seconds after activation.
antenna.
Retained by four (4) vessel fixing points.
Page 18

NATIONAL AUTH ORITY REGISTRATION DETAILS
AUSTRALIA
24 hour emergency contact
Within Australia: 1800 641 792
International: +61 2 6230 6811
Registration
Beacon Registration Section,
Australian Maritime Safety Authority
GPO Box 2181, Canberra ACT 2601.
Freecall 1 800 406 406 local only.
+61 2 6279 5766 business hours only.
Fax: 1800 406 329 local only.
Email: ausbeacon@amsa.gov.au
Online registration: www.amsa.gov.au/beacons
Local or international calls from a mobile attract connection charges.
NEW ZEALAND
24 hour emergency contact
Within NZ: 0508 472 269
International: +64 4577 8030
Registration
406 Beacons
Rescue Co-ordination Centre
New Zealand
PO Box: 30050, Lower Hutt 5040
Tel: +64 4577 8042
Fax: +64 4577 8041
Email: 406registry@maritimenz.govt.nz
Online registration: www.beacons.org.nz
18 INSTRUCTION MANUAL MT600/G
Page 19

STANDARD CO MMUNIC ATIONS
CONTRAC T WARR ANTY AG AINST DEFEC TS
This warranty against defects is given by Standard Communications Pty Ltd ACN 000
346 814 (We, us, our or GME). Our contact details are set out in clause 2.7. This
warranty statement only applies to products purchased in Australia. Please contact your
local GME distributor for products sold outside of Australia. Local distributor details at
www.gme.net.au/export.
1. Consumer guarantees
1.1 Our goods come with guarantees that cannot be excluded under the Australian
Consumer Law. You are entitled to a replacement or refund for a major failure
and for compensation for any other reasonably foreseeable loss or damage. You
are also entitled to have the goods repaired or replaced if the goods fail to be of
acceptable quality and the failure does not amount to a major failure.
1.2 To the extent we are able; we exclude all other conditions, warranties and
obligations which would otherwise be implied.
2. Warranty against defects
2. 1 This warranty is in addition to and does not limit, exclude or restrict your rights
under the Competition and Consumer Act 2010 (Australia) or any other mandatory
protection laws that may apply.
2.2 We warrant our goods to be free from defects in materials and workmanship for
the warranty period (see warranty table) from the date of original sale (or another
period we agree to in writing). Subject to our obligations under clause 1.2, we will
at our option, either repair or replace goods which we are satisfied are defective.
We warrant any replacement parts for the remainder of the period of warranty for
the goods into which they are incorporated.
2.3 To the extent permitted by law, our sole liability for breach of a condition, warranty
or other obligation implied by law is limited
(a) In the case of goods we supply, to any one of the following as we decide -
(i) The replacement of the goods or the supply of equivalent goods;
(ii) The repair of the goods;
(iii) The cost of repairing the goods or of acquiring equivalent goods;
(b) In the case of services we supply, to any one of the following as we decide
(i) The supplying of the services again;
(ii) The cost of having the services supplied again.
2.4 For repairs outside the warranty period, we warrant our repairs to be free from
defects in materials and workmanship for three months from the date of the
original repair. We agree to re-repair or replace (at our option) any materials or
workmanship which we are satisfied are defective.
2.5 We warrant that we will perform services with reasonable care and skill and agree
to investigate any complaint regarding our services made in good faith. If we are
satisfied that the complaint is justified, and as our sole liability to you under this
warranty (to the extent permitted at law), we agree to supply those services again
at no extra charge to you.
MT600/G INSTRUCTION MANUAL 19
Page 20

2.6 To make a warranty claim you must before the end of the applicable warranty
period (see warranty table), at your own cost, return the goods you allege are
defective, provide written details of the defect, and give us an original or copy of
the sales invoice or some other evidence showing details of the transaction.
2.7 Send your claim to:
Standard Communications Pty Ltd.
PO Box 96 Winston Hills, NSW 2153, Australia.
Tel: (02) 8867 6000 Fax: (02) 8867 6199
Email: servadmin@gme.net.au
2.8 If we determine that your goods are defective, we will pay for the cost of returning
the repaired or replaced goods to you, and reimburse you for your reasonable
expenses of sending your warranty claim to us.
3. What this warranty does not cover
3.1 This warranty will not apply in relation to:
(a) Goods modified or altered in any way;
(b) Defects and damage caused by use with non Standard Communications
products;
(c) Repairs performed other than by our authorised representative;
(d) Defects or damage resulting from misuse, accident, impact or neglect;
(e) Goods improperly installed or used in a manner contrary to the relevant
instruction manual; or
(f) Goods where the serial number has been removed or made illegal.
4. Warranty period
4.1 We provide the following warranty on GME and Kingray products. No repair or
replacement during the warranty period will renew or extend the warranty period
past the period from original date of purchase.
PRODUCT TYPE WARRANTY PERIOD
EPIRBs 6 years
A division of Standard Communications Pty Ltd.
Head Office: PO Box 96, Winston Hills, NSW 2153, Australia.
New Zealand: PO Box 58-446 Botany, Auckland, 2163, NZ. T: (09) 274 0955.
All other international enquiries email: export@gme.net.au
Part Number: 310545 Drawing Number: 45823-4
 Loading...