

GIGABYTE GA-G1975X, GA-G1975X-C Quick Start Manual

Table of Contents
Configuring SATA Hard Drive(s) (Controller: Intel ICH7R) ........................................................... 2
(1) Installing SATA hard drive(s) in your computer .......................................................................... 2
(2) Configuring SATA controller mode and boot sequence in BIOS Setup .................................... 3
(3) Configuring RAID set in RAID BIOS ............................................................................................. 5
(4) Making a SATA Driver Disk ........................................................................................................... 9
(5) Installing SATA controller driver during OS installation ............................................................. 11

Ác
Åé
¤¤
¤å
Configuring SATA Hard Drive(s) (Controller: Intel ICH7R)
To configure SATA hard drive(s), follow the steps below:
(1) Install SATA hard drive(s) in your system.
(2) Configure SATA controller mode and boot sequence in BIOS Setup.
(3)* Configure RAID set in RAID BIOS.
(4) Make a floppy disk containing the SATA controller driver.
(5) Install the SATA controller driver during OS installation.
Before you begin
Please prepare:
(a) Two SATA hard drives (to ensure optimal performance, it is recommended that you use two hard
drives with identical model and capacity). If you do not want to create RAID with the SATA
controller, you may prepare only one hard drive.
(b) An empty formatted floppy disk.
(c) Windows XP/2000 setup disk.
(d) Driver CD for your motherboard.
(1) Installing SATA hard drive(s) in your computer
Attach one end of the SATA signal cable to the rear of the SATA hard drive and the other end to available
SATA 3Gb/s port(s) on the motherboard. Then connect the power connector from your power supply to
the hard drive.
"*" Skip this step if you do not want to create RAID array on the SATA controller
SATA Hard Drives Configurations (Intel ICH7R) - 2 -
(2) Configuring SATA controller mode and boot sequence in BIOS Setup
You have to make sure whether the SATA controller is configured correctly in system BIOS Setup and
set BIOS boot sequence for the SATA hard drive(s).
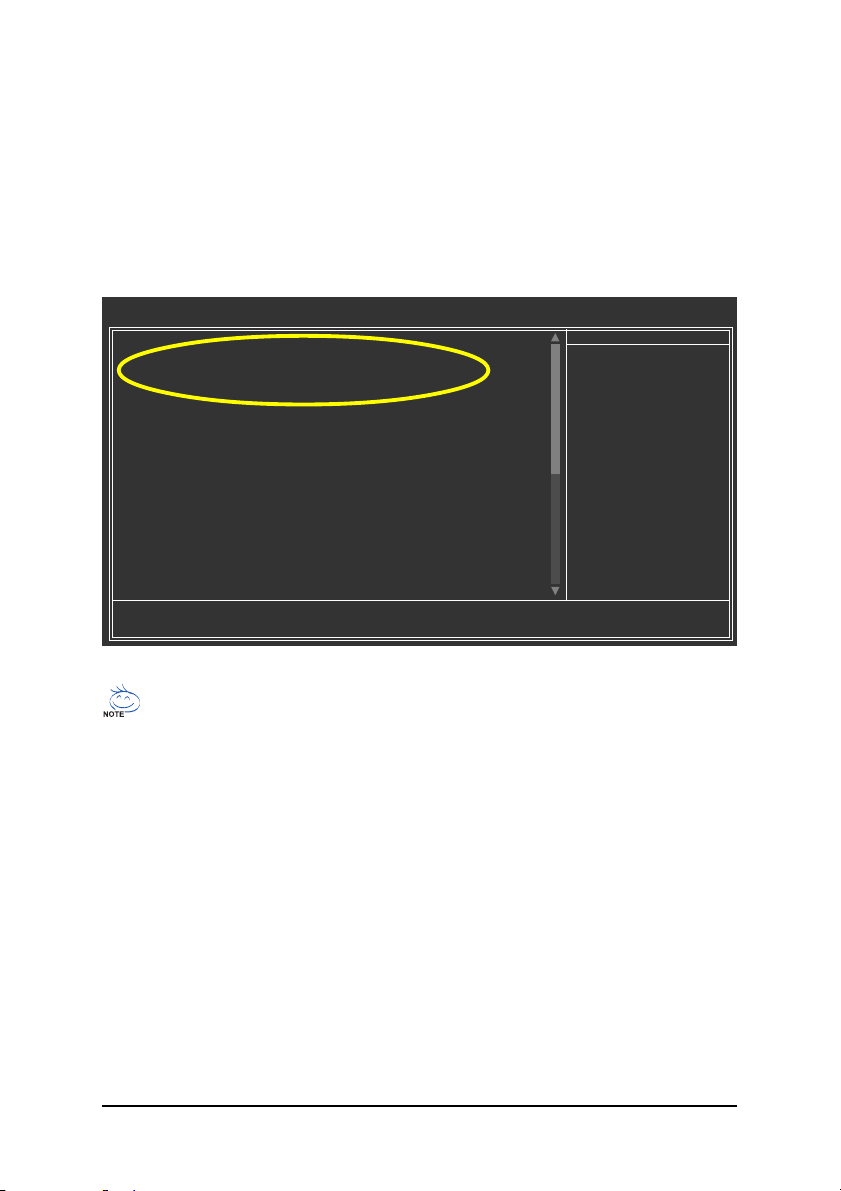
Step 1:
Turn on your computer and press Del to enter BIOS Setup during POST (Power-On Self Test). If you
want to create RAID, set SATA RAID/AHCI Mode under the Integrated Peripherals menu to RAID
(Disabled by default). Then, set On-Chip SATA Mode to Manual or Auto (default) based on your
own requirements.
CMOS Setup Utility-Copyright (C) 1984-2005 Award Software
On-Chip Primary PCI IDE [Enabled]
On-Chip Secondard PCI IDE [Enabled]
SATA RAID/AHCI Mode [RAID]
x On-Chip SATA Mode Auto
x PATA IDE Set to Ch.1 Master/Slave
SATA Port 0/2 Set to Ch.2 Master/Slave
SATA Port 1/3 Set to Ch.3 Master/Slave
USB Controller [Enabled]
USB 2.0 Controller [Enabled]
USB Keyboard Support [Disabled]
USB Mouse Support [Disabled]
Azalia Codec [Auto]
Onboard H/W 1394 [Enabled]
Onboard H/W GigaRAID [Enabled]
GigaRAID Function [RAID]
Onboard H/W LAN [Enabled]
Onboard LAN Boot ROM [Disabled]
Onboard Serial Port 1 [3F8/IRQ4]
G-Keyless Port [Enabled]
KLJI: Move Enter: Select +/-/PU/PD: Value F10: Save ESC: Exit F1: General Help
F3: Language F5: Previous Values F6: Fail-Safe Defaults F7: Optimized Defaults
Integrated Peripherals
Figure 1
Item Help
Menu Level`
The BIOS Setup menus described in this section may not show the exact settings for your
motherboard. The actual BIOS Setup menu options you will see shall depend on the motherboard
you have and the BIOS version.
SATA Hard Drives Configurations (Intel ICH7R)- 3 -
Ác
Åé
¤¤
¤å
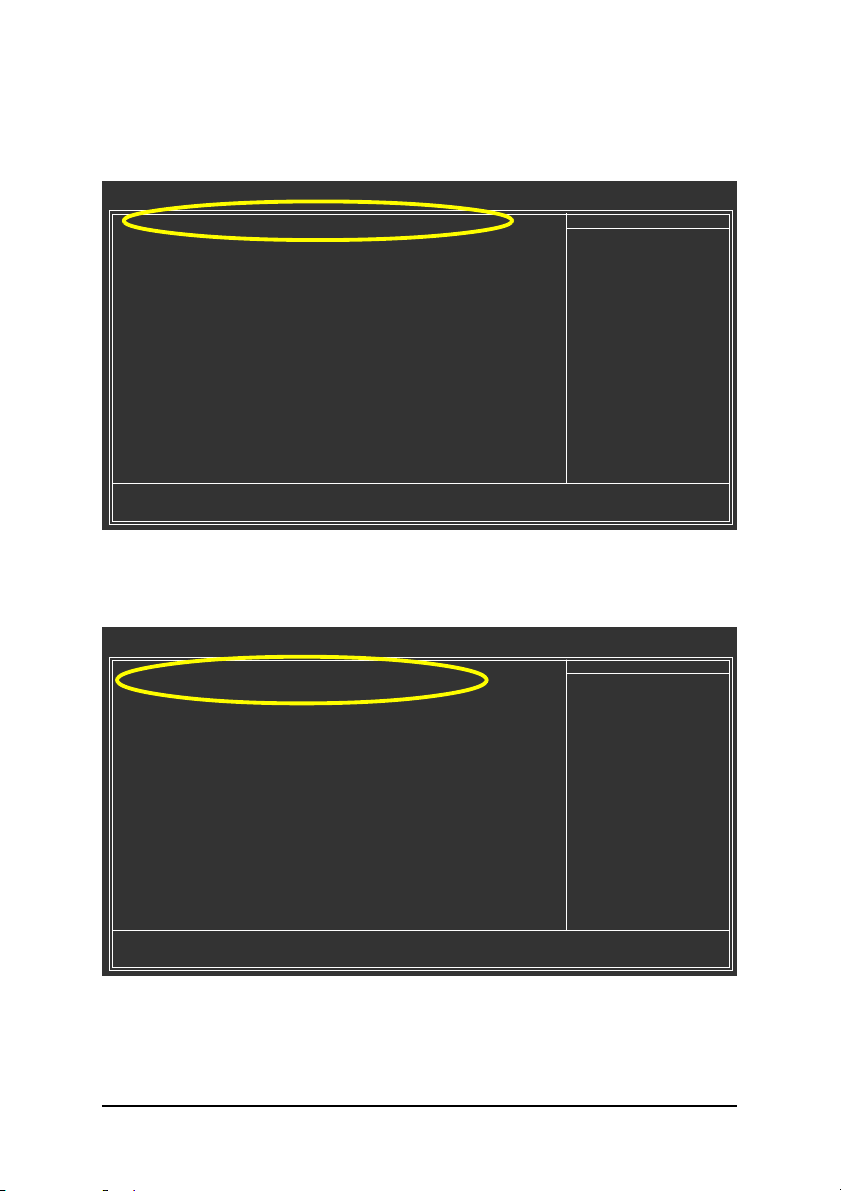
Step 2:
Later, select Hard Disk Boot Priority under the Advanced BIOS Features menu. In the Hard Disk
Boot Priority submenu, select the model of the SATA hard drive onto which you intent to install
Microsoft Windows 2000/XP (Figure 2).
CMOS Setup Utility-Copyright (C) 1984-2005 Award Software
1. SCSI-0 : Intel Volume0
2. Bootable Add-in Cards
KL: Move PU/PD/+/-: Change Priority F10: Save ESC: Exit
Hard Disk Boot Priority
Item Help
Menu Level ``
Use <K> or <L > to
select a device, then
press <+> to move it
up, or <-> to move it
down the list. Press
<ESC> to exit this
menu.
Figure 2
Step 3:
Set First Boot Device under the Advanced BIOS Features menu to CD-ROM to boot from CD-ROM
after system restarts (Figure 3).
CMOS Setup Utility-Copyright (C) 1984-2005 Award Software
` Hard Disk Boot Priority [Press Enter]
First Boot Device [CDROM]
Second Boot Device [Hard Disk]
Third Boot Device [CDROM]
Password Check [Setup]
# CPU Hyper-Threading [Enabled]
Limit CPUID Max. to 3 [Disabled]
No-Execute Memory Protect [Enabled]
CPU Enhanced Halt (C1E) [Enabled]
CPU Thermal Monitor 2(TM2) [Enabled]
CPU EIST Function
(µù)
Advanced BIOS Features
[Enabled]
Item Help
Menu Level`
Select Hard Disk Boot
Device Priority
KLJI: Move Enter: Select +/-/PU/PD: Value F10: Save ESC: Exit F1: General Help
F3: Language F5: Previous Values F6: Fail-Safe Defaults F7: Optimized Defaults
Figure 3
Step 4:
Save and exit BIOS Setup.
SATA Hard Drives Configurations (Intel ICH7R) - 4 -
 Loading...