


IT7150
User manual
Safety precautions
Safety Symbols
Make sure to follow the directions below to prevent accidents and damage to the
product.
Failure to follow the accompanying directions may lead to
serious injury or death.
1. Insert the power plug correctly until it is firmly in place.
Failing to do so, may cause fire.
2. Do not use a damaged power plug, cord or outlet, as this may cause electric
shock or fire.
3.Do not touch the power plug with wet hands, as this may cause electric
shock.
4.Do not connect more than one appliance to a single outlet, as an overheated
outlet may cause fire.
5.Do not use force to pull the power cord.
Don't place anything heavy on the power cord, as this may cause electric shock or
fire.
6.Make sure to turn the power off and disconnect the power plug from the outlet
before moving the product. Make sure to disconnect the connection cables
from other devices as well.
Moving the product without disconnecting the power cord may damage it while
moving, and may cause electric shock or fire.
Failure to follow the accompanying directions may lead to
minor personal injury or property damage.
1. Hold and pull out the plug by its body when disconnecting it from the outlet,
as pulling the plug out by the cord may cause it to be damaged.
Failing to do so, may cause fire, or the product may not turn on normally.
2. Ensure that the power plug is disconnected before cleaning the product.
Failing to do so, may cause electric shock or fire.

3. Do not let water come into contact with or enter the power adapter, as this
may cause electric shock or fire.
Do not use the product outdoors in snowy or rainy weather, or near any water.
When cleaning the floor with water, avoid any water contact with the power adapter.
4. Do not place the power adapter near a heater, as this may cause fire.
Installation
1. When installing the product on a cabinet or shelf, do not let the front end of
the product project beyond its front edge.
Failing to do so, may cause the product to fall, resulting in a product malfunction or
personal injury.
2.Do not place the power cord near a heater, as the power cord may melt,
causing electric shock or fire.
3. Do not install the product in a car or a location exposed to oil, smoke,
moisture, water, or rainwater.
Any contact of these materials with the product may cause electric shock or fire.
4.Disconnect the power plug when there is thunder or lightning.
Failing to do so, may cause electric shock or fire.
5 For PLUGGABLE EQUIPMENT, the socket-outlet shall be installed near the
equipment and shall be easily accessible
6. The equipment is to be supplied from an identified USB port complying with
the requirements of Limited Power Source
=======================================================================
IMPORTANT SAFETY INSTRUCTIONS
When using your equipment, basic safety precautions should always
be followed to reduce the risk of fire, electric shock and injury to persons,
including the following:

1. Do not use this product near water, for example, near a bath
tub, wash bowl, kitchen sink or laundry tub, in a wet basement
or near a swimming pool.
2. The socket-outlet shall be installed near the equipment and
shall be easily accessible
3. Use only the power cord and batteries indicated in this manual.
Do not dispose of batteries in a fire. They may explode. Check
with local codes for possible special disposal instructions.
SAVE THESE INSTRUCTIONS
================================================
1.Place the product down gently when installing it.
Failing to do so may cause product damage or personal injury.
2.Do not install the product in a location easily reached by children.
As the product may fall and cause personal injury.
DECLARATION OF CONFORMITY

Interference Information:
This device complies with Part 15 of the FCC Rules. Operation is subject to the
following two conditions: (1) This device may not cause harmful interference, and (2)
This device must accept any interference received, including interference that may
cause undesired operation.
Warning: Changes or modifications to this unit not expressly approved by the party
responsible for compliance could void the user's authority to operate the equipment.
NOTE: This equipment has been tested and found to comply with the limits for a Class
B digital device, pursuant to Part 15 of the FCC Rules. These limits are designed to
provide reasonable protection against harmful interference in a residential installation.
This equipment generates, uses and can radiate radio frequency energy and, if not
installed and used in accordance with the instructions, may cause harmful interference
to radio communications.
However, there is no guarantee that interference will not occur in a particular
installation. If this equipment does cause harmful interference to radio or television
reception, which can be determined by turning the equipment off and on, the user is
encouraged to try to correct the interference by one or more of the following measures:
- Reorient or relocate the receiving antenna.
- Increase the separation between the equipment and receiver.
- Connect the equipment into an outlet on a circuit different from that to which the
receiver is connected.
- Consult the dealer or an experienced radio/TV technician for help.
FCC RF Radiation Exposure Statement:
This equipment complies with FCC RF radiation exposure limits set forth for an uncontrolled
environment. This equipment should be installed and operated with a minimum distance of 20
centimeters between the radiator and your body.
Shielded cables must be used with this unit to ensure compliance with the Class B FCC limits.
Package Contents:
Please check the following items are included in the package:
Wifi Digital Picture Frame 1pcs
AC Power adaptor 1pcs
Quick start Guide 1pcs
USB Cable 1pcs
Tips
- The user manual is stored in the flash memory of Wi-Fi Digital Picture Frame.
General Controls:
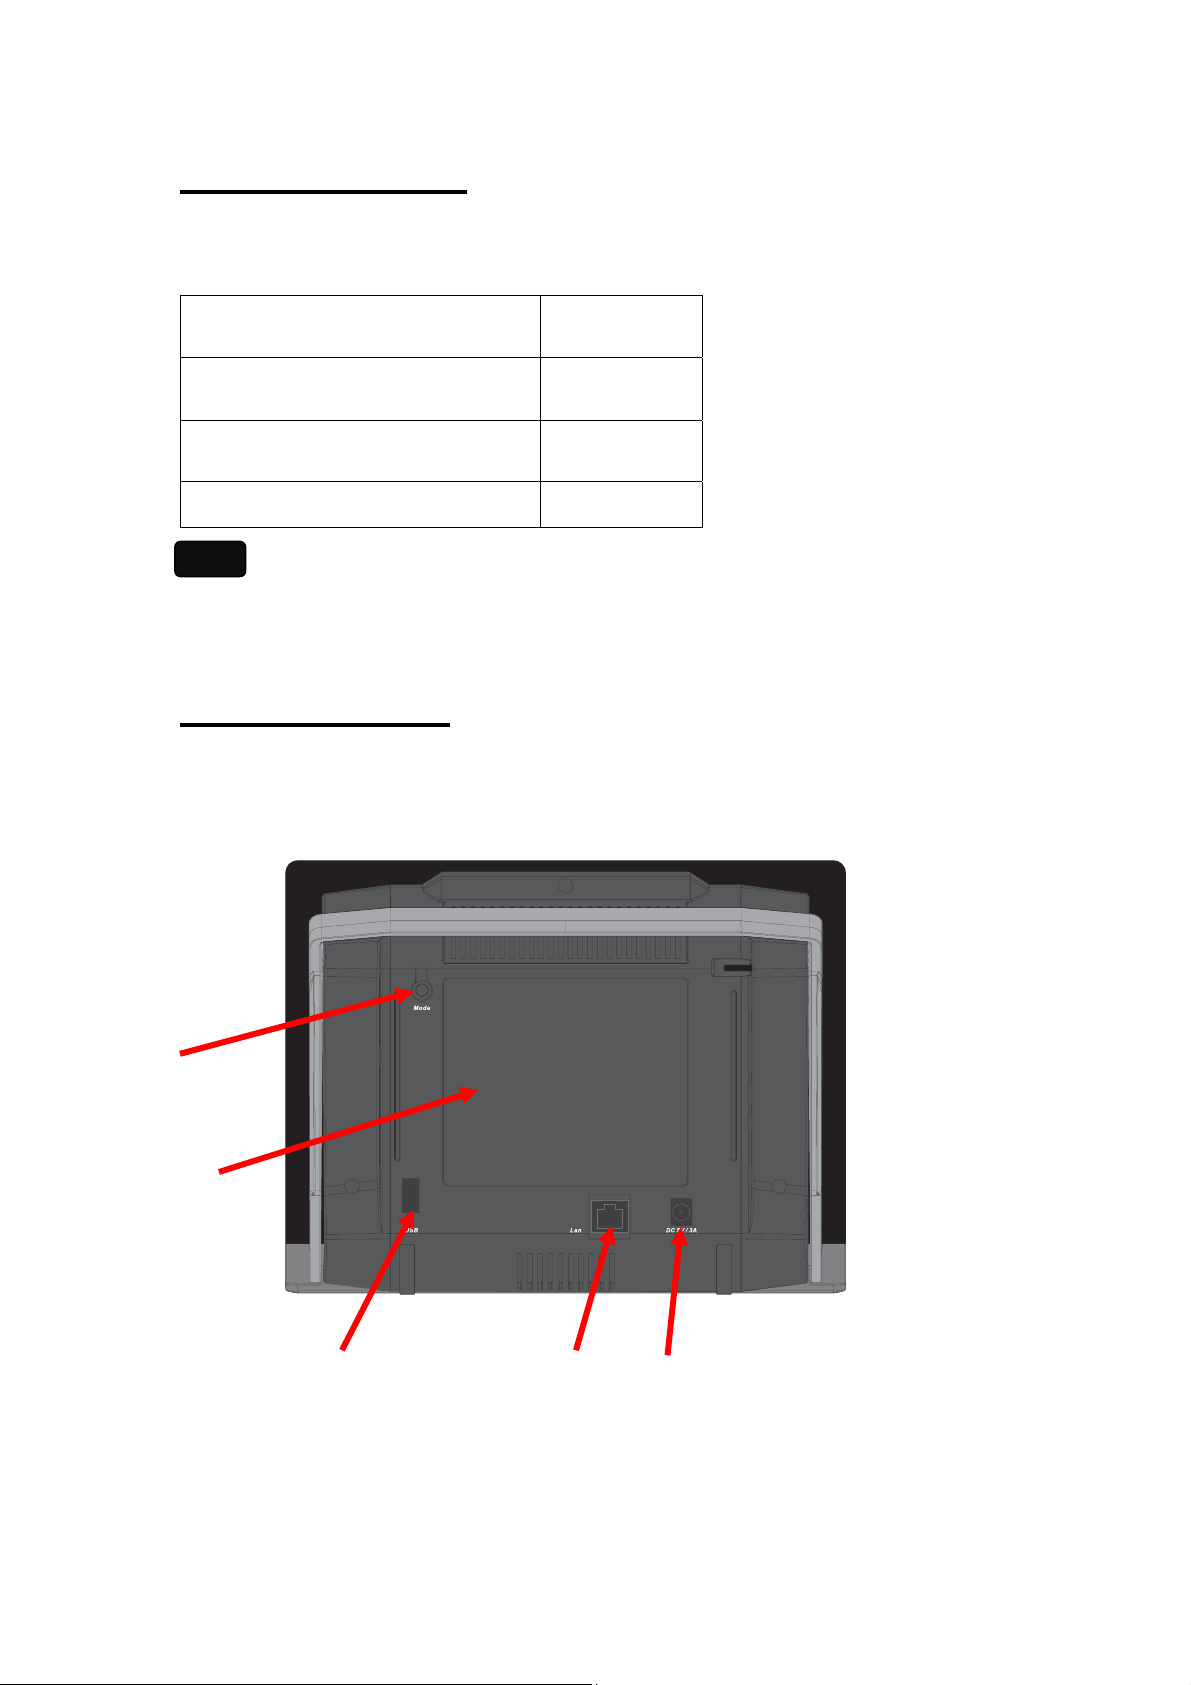
1. Back panel
4
5
1.DC Power input jack
2.LAN jack
3.USB connection jack
3
2
1

4 Mode Key
5.Battery door
Left Panel:
1
2
3
4
1. Mini USB – Connect to PC
2. Reset button – Reset unit to factory preset
3. Audio output jack – Connect to external audio output. E.g. earphones,
headphones, speakers
4. Power Switch – Control power on / off
Right Panel:

1
2
1. SD (Secure Digital) / MMC (MultiMedia card) / MS (Memory Stick) / XD
(XD-Picture card) card slot
2. CF (Compact Flash) card slot
Connecting the power and USB:
Connecting Power:
1. Connect the power adapter to the DC 5V/ 3A terminal at the back of the unit.
2. Plug the power cord for the product into a nearby outlet.
3. Slide the Power Switch to [ON] position to turn the unit on.
Connecting USB:

1. Connect an external USB-supporting device to your digital picture frame.
Tips
- The external devices connected to your Digital picture Frame are not
recognized by your PC.
- When connecting an external device to the down stream port, use the USB
cable provided with the external device.
- Some external products provide a cable that does not meet USB standards.
Hence, they may cause a malfunction.
- If an external storage device does not work normally when connected to your
digital photo frame, try to connect it to your PC. If it still does not work normally
when connected to your PC, contact a service center for that external device
or your PC.
1. Power On:
- Slide the Power Switch to [ON]. The system will power on and go to home
screen (please refer to 2. Home Screen)
Tips
- If it’s your first time to power on / power on after factory reset / power on after
pressing the reset button, you need to go through the step 1.1 to 1.3.
1.1 Calibrate the Touch Screen
- 5 points are needed to tap to calibrate the touch screen, 1 st in center and 4 points
on every corner. The next interface will not be entered until 5 points are calibrated
OK.
- After complete the calibration, user will enter to select the language screen.
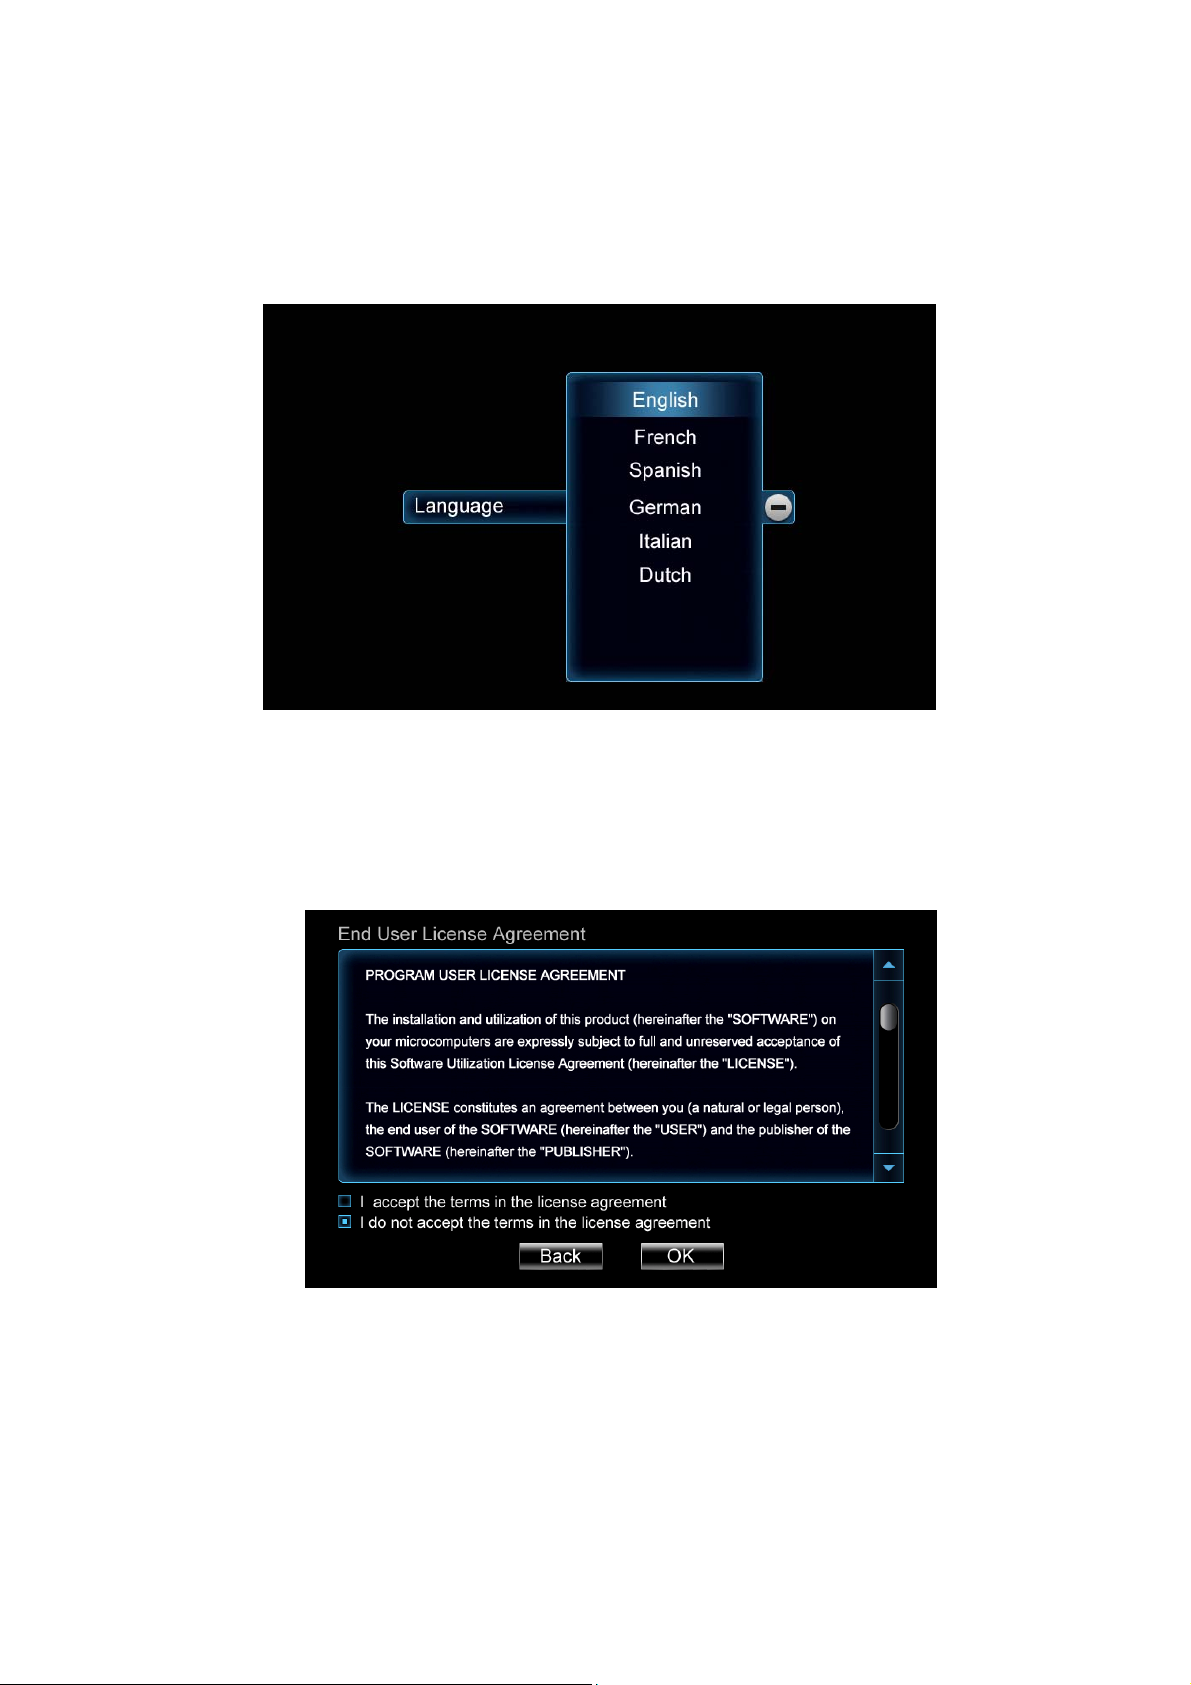
1.2 Select the Language
- Tap [+] button to select the language.
1.3 End User License Agreement (EULA)
- After select the language, user can review the Agreement.
- User can tap the check box of [I accept the terms in the license agreement]
and tap [Ok] button. Use will enter into home screen.
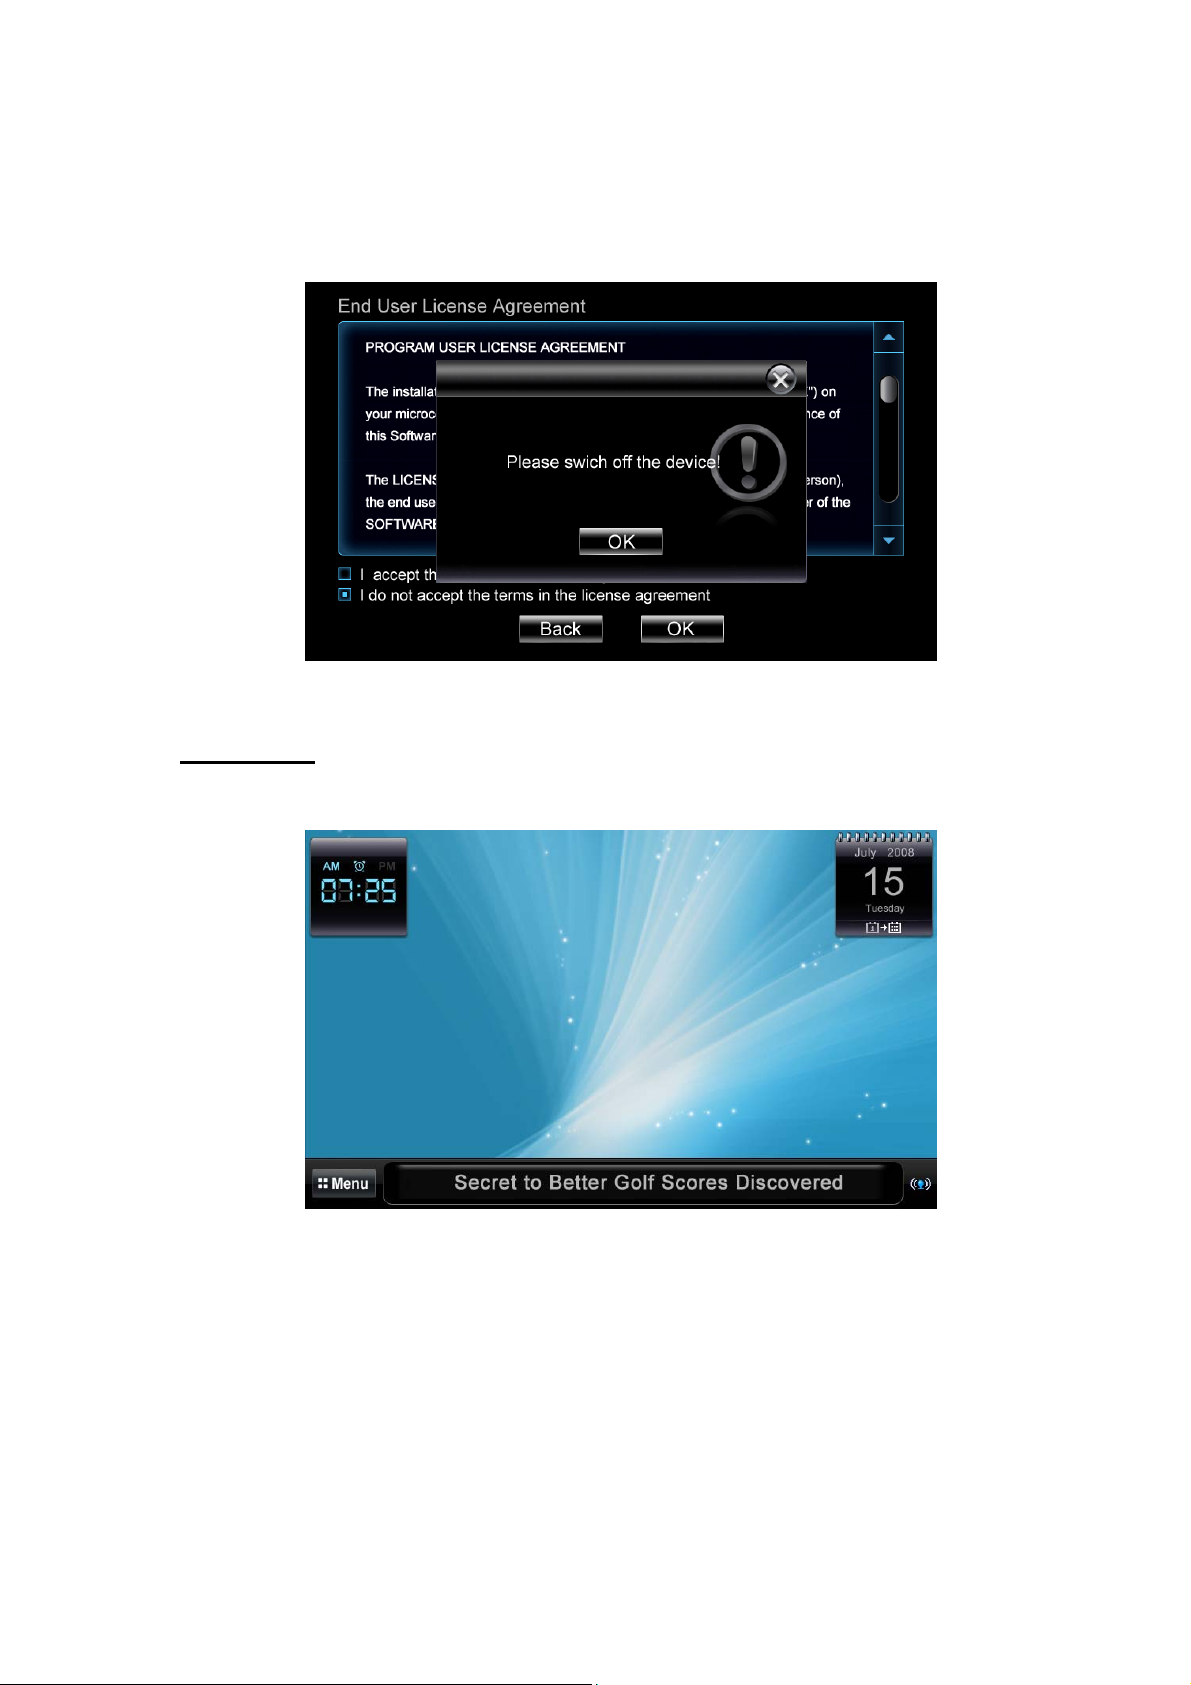
- If user can the check box of [I do not accept the terms in the license
agreement] and tap [OK] button, then a pop up will display below;
2. Home:
In Home screen, click the wall paper area, it enters to Home Settings.
Home Screen
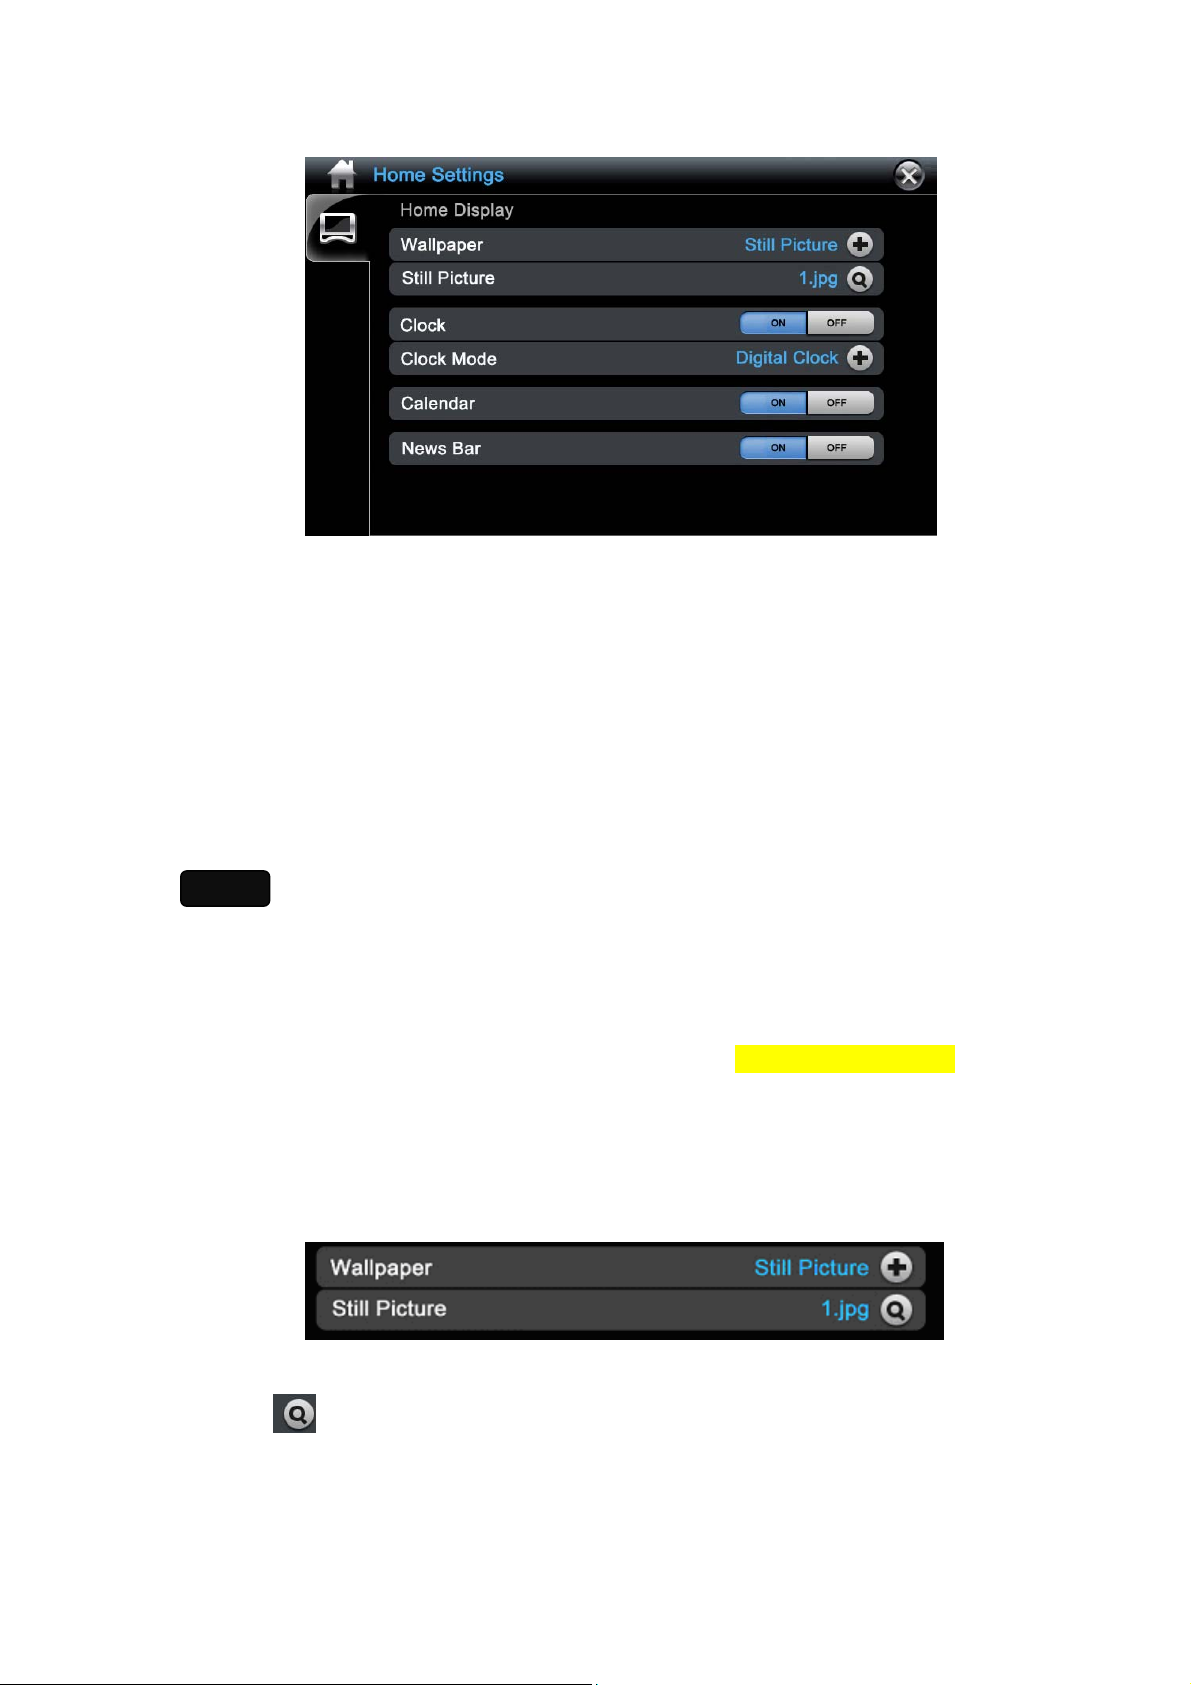
Home Settings
2.1 Home Settings Selection:
2.1.1 Wallpaper
- You can choose a still picture or slide show as wall paper in Home Screen.
- Selections: Still Picture / Slide Show
Notes
- After factory reset, the wall paper would be changed to default wall paper
- The selected still picture will be copied to internal memory. If users delete the
picture in Photo application; it would not affect wall paper setup.
- If you want to add the background music or change the other settings for slide
show in Home screen, please go to Photo Setup. (Refer to Photo Setup)
- User can select play slideshow from internal memory or card. Web or PC is
NOT allowed.
When select “Still Picture”,
Home Settings
- Click [
] Button, it goes to “Photo Browser”.
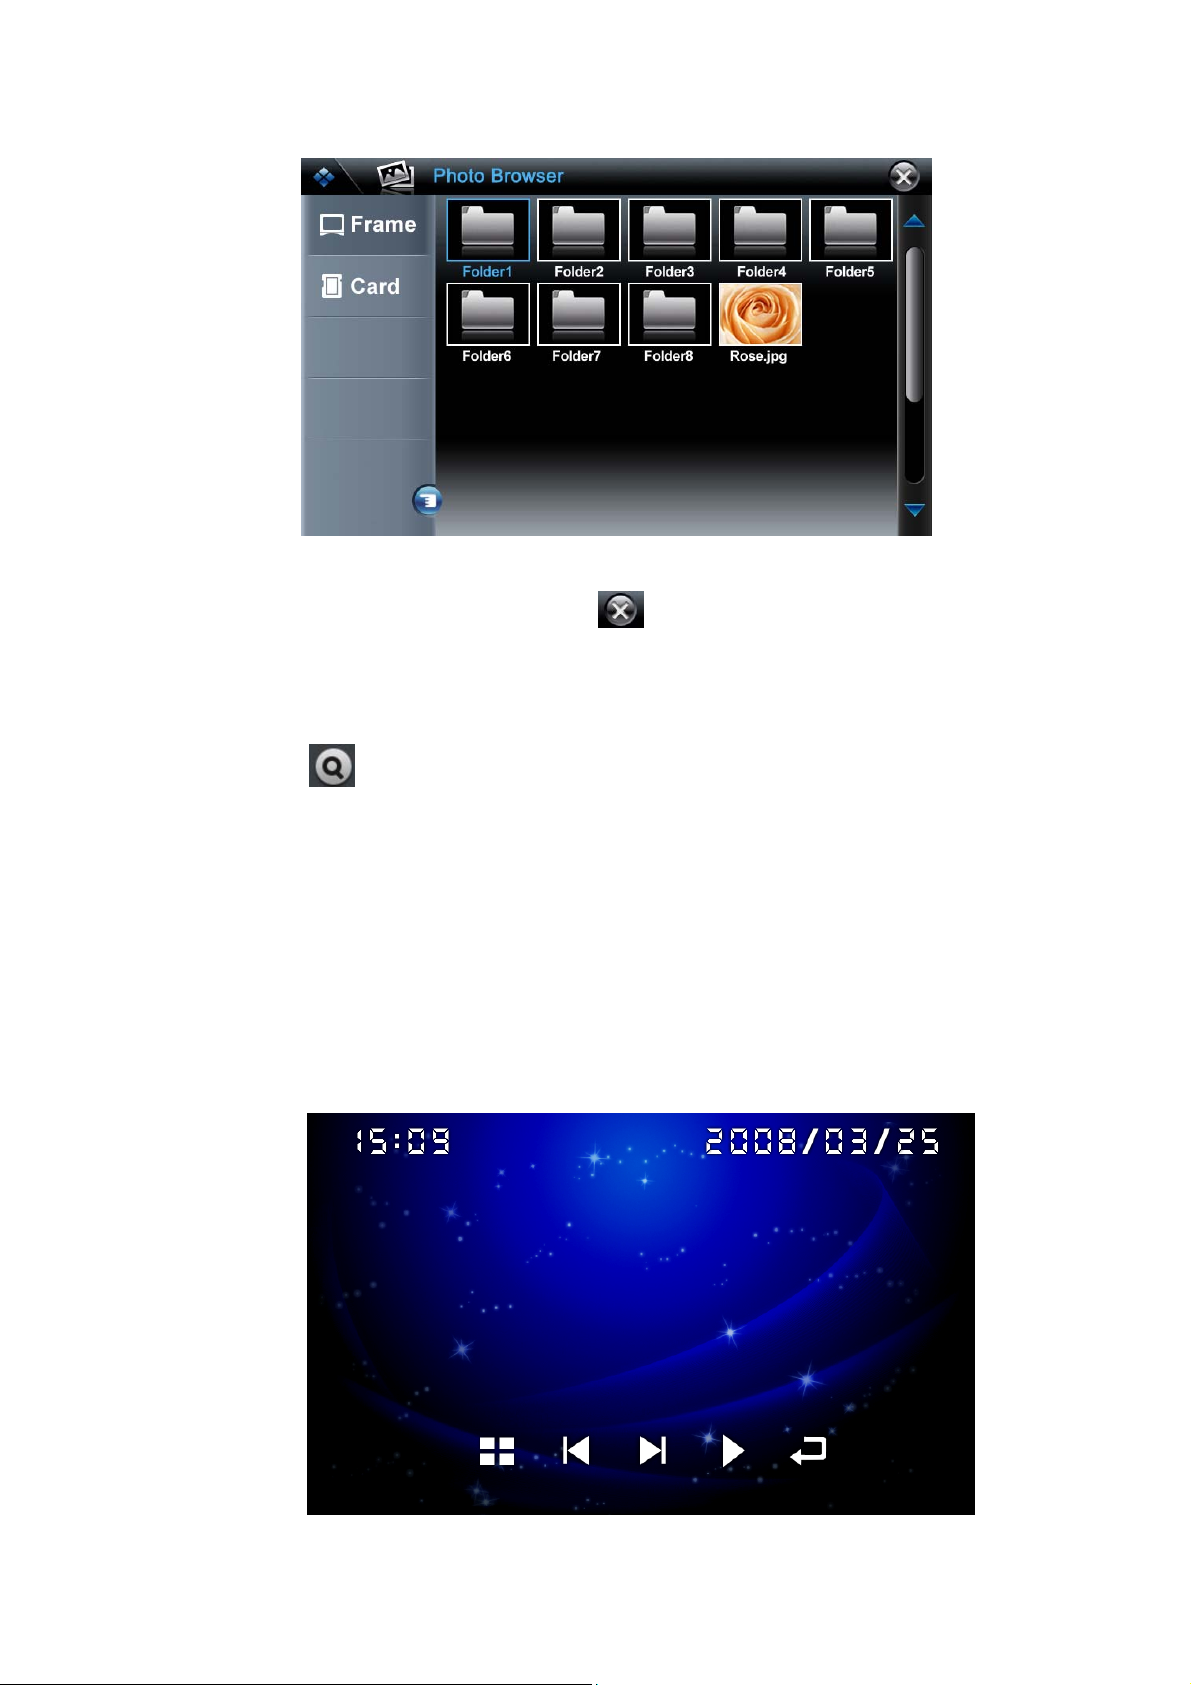
Photo Browser of Home Settings
- Users need to select a picture. Click [
paper.
] button to close and save the wall
When select “Slide Show”,
- Click [ ] icon, it goes to “Photo Browser”. Users need to select picture which is
the start of the slide show.
- When select “Slide Show”, it only displays;
o Clock [ON] / [OFF]
o Clock Mode – Disable
o Calendar [ON] / [OFF]
o News Bar – Disable
Play slide show in Home screen
- After exit Home Settings, it starts slide show playback.
- Tap the screen to open slide show control buttons.
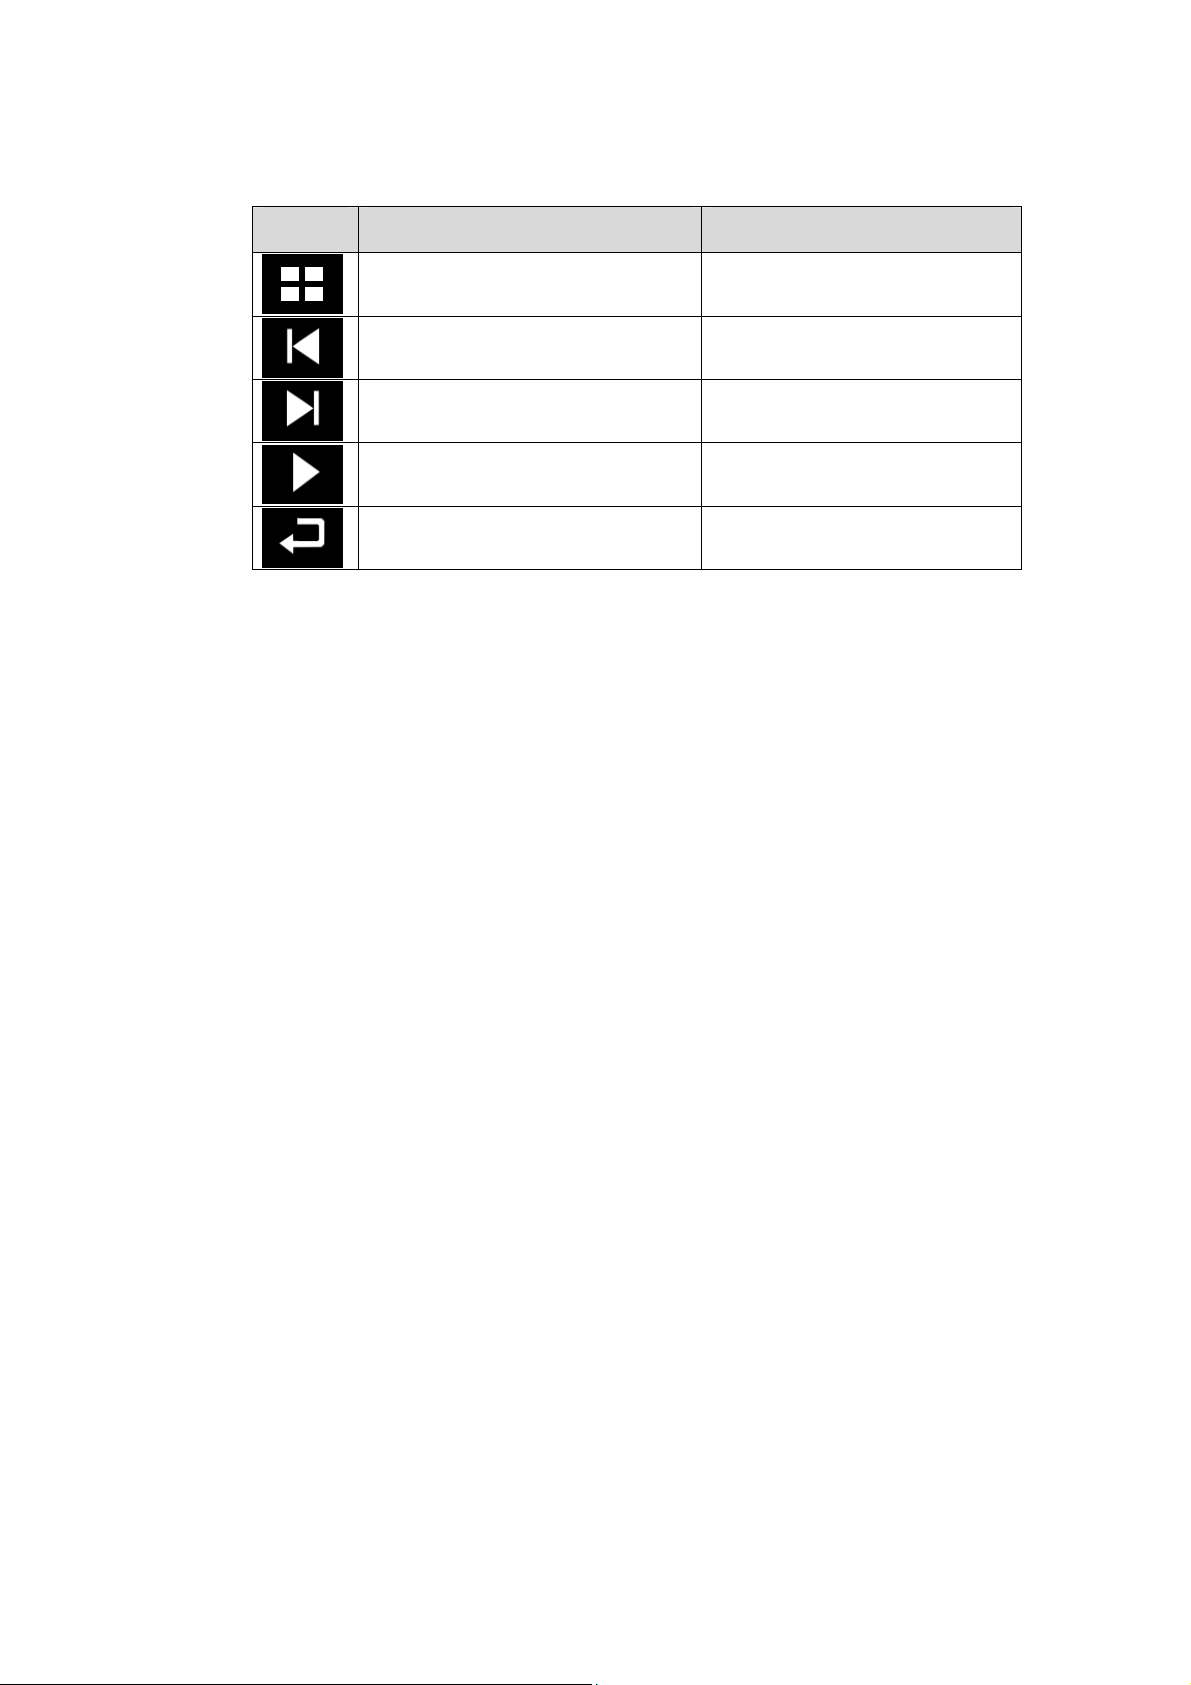
Slide Show Control Buttons
Icon Button Name Functions
Menu button
Previous button
Next button Go to next photo
Play button Start slide show playback
Back button Back to Home Settings
2.1.2 Clock
- Turn on / off the clock display in Home Screen.
- Selections: ON / OFF
2.1.3 Clock Mode
Go to Main Menu
Go back to previous photo
- Select the display clock mode in Home Screen.
- Selections: Digital Clock / Analog Clock
Clock Mode would be disabled if slide show is selected or the clock is turn off.
-
2.1.4 Calendar
- Turn on / off the calendar display in Home Screen.
- Selections: ON / OFF
- Calendar would be disabled if slide show is selected.
2.1.5 News Bar
- Turn on / off the news bar display in Home Screen.
- Selections: ON / OFF
- News bar would be disabled if slide show is selected.
-
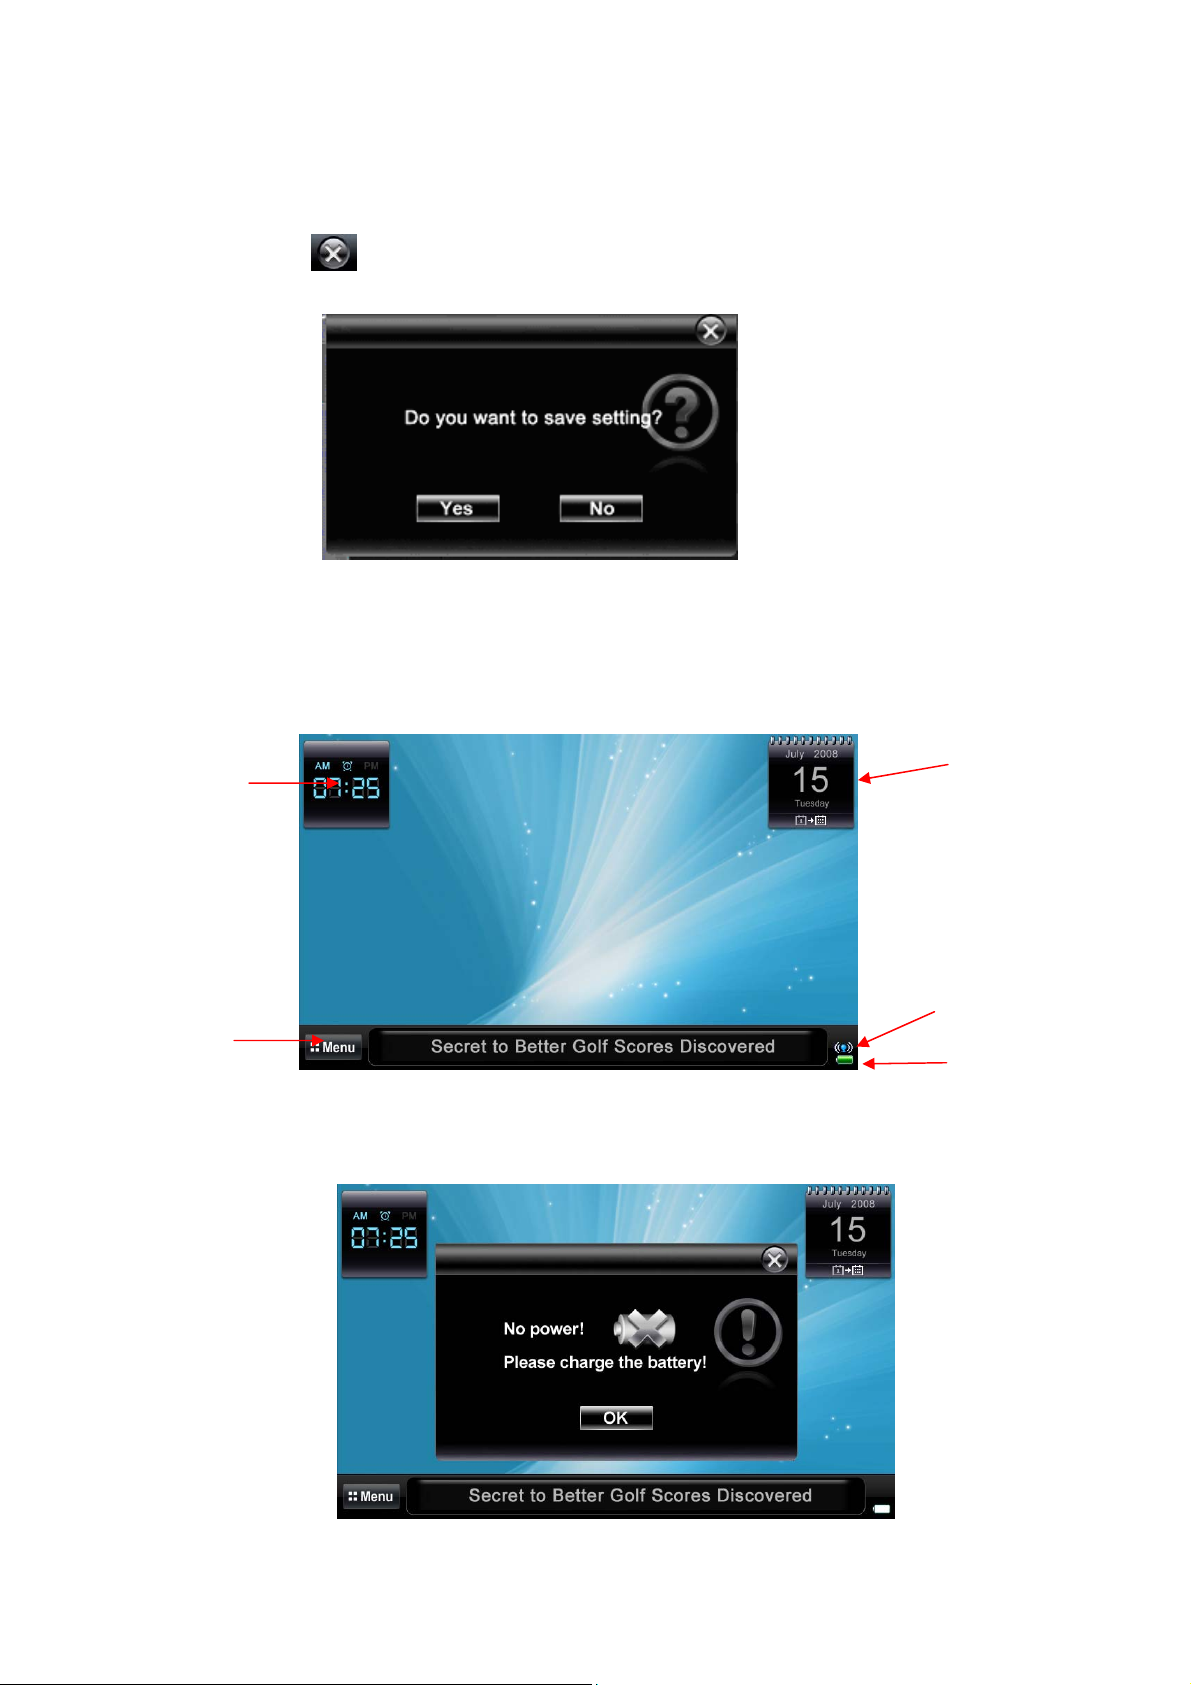
2.1.6 Exit Home Settings
- Click [ ] button in Home Settings, a pop up screen appears.
- Click [Yes] button, it saves settings and go back to HOME.
- Click [No], it would not save settings and go back to HOME.
2.2 Home Screen:
Clock
Menu
button
2.2.1 Power Icon
Calendar
Wi-Fi icon
Power icon
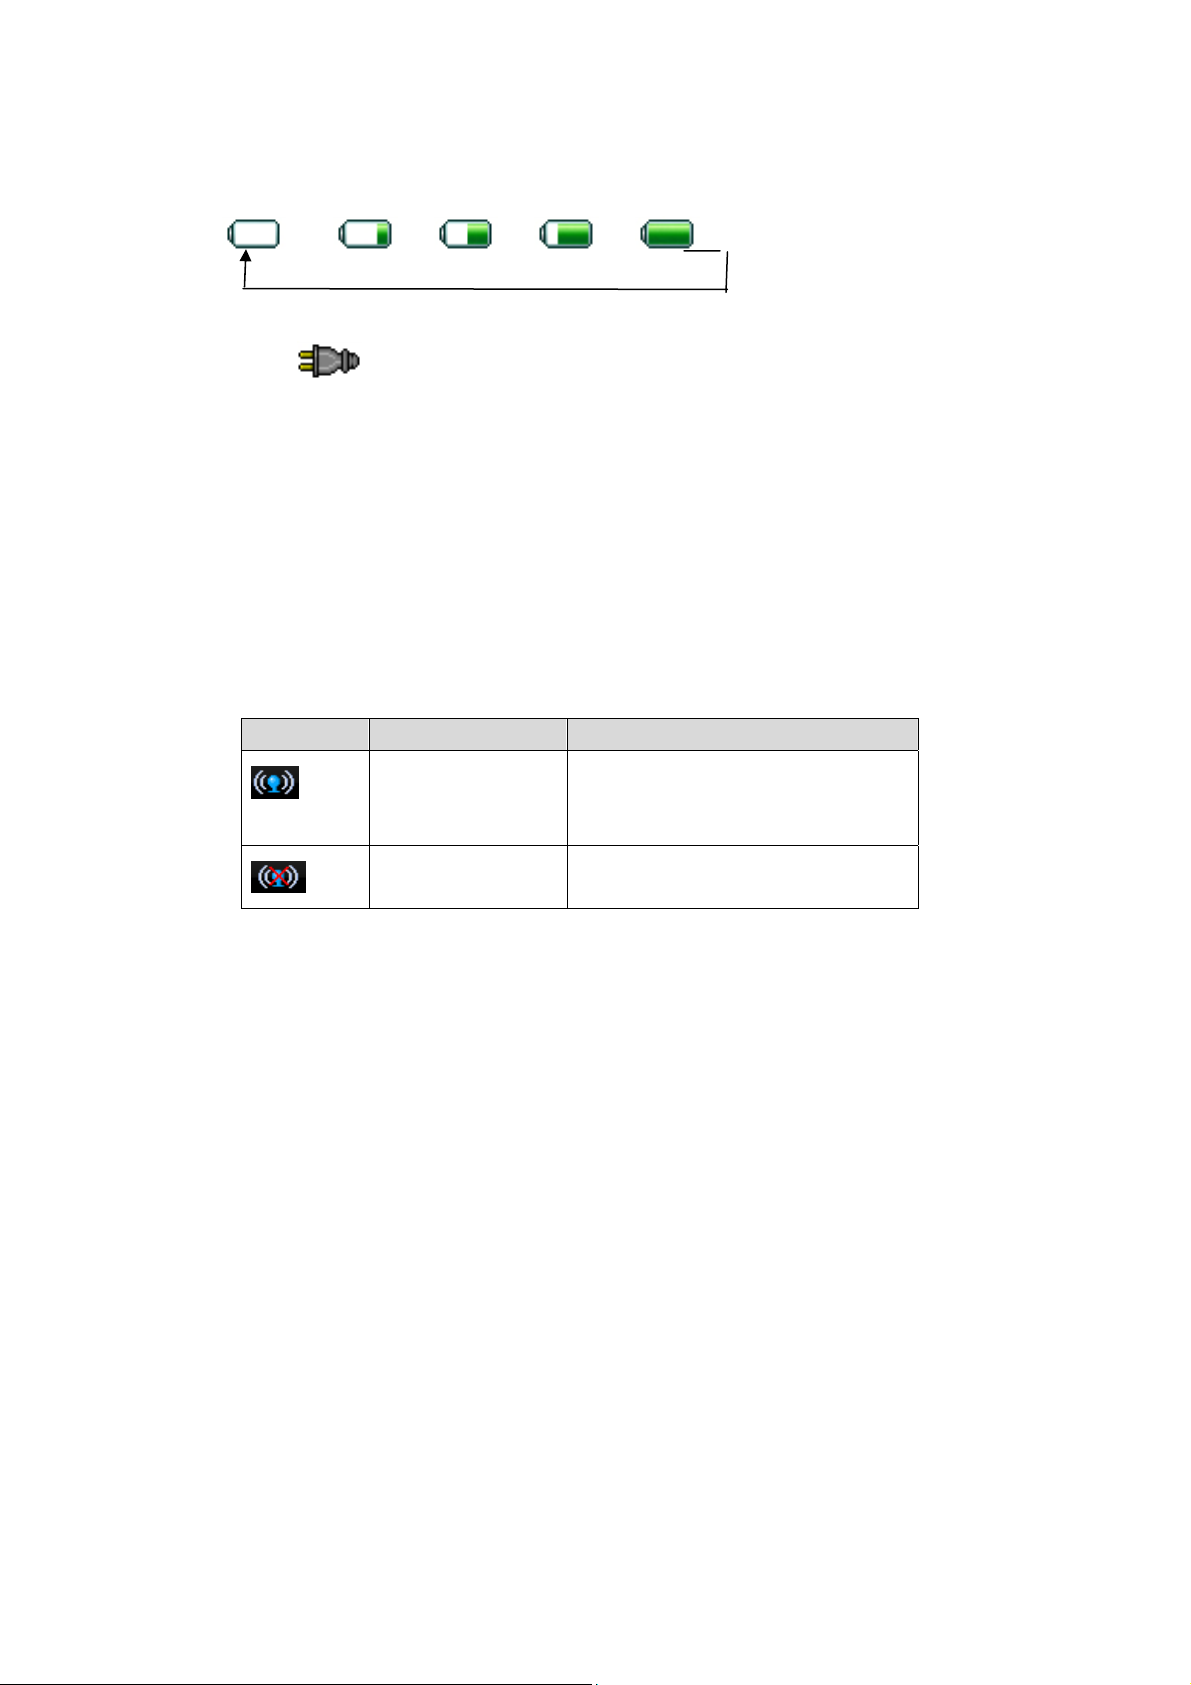
When the battery is empty, connect the Power adapter. The battery icon will flash
from empty to full repeatedly.
>>> >>> >>> >>> .
When the battery is full and the Power adapter is connected, the battery icon will
display
display the current battery status.
. When the battery is not full and the power adaptor is disconnected, it
2.2.2. Wi-Fi icon
- Display the Wi-Fi status.
Icons Icons Name Description
[Wi-Fi] icon Connect to wireless access point
[No Wi-Fi] icon Can’t connect to wireless access
successfully
point
2.2.3. New Bars
- Scroll the RSS News headline. The RSS News headline is from RSS News reader.
Refer to RSS News Setup for add / edit RSS news feed.
2.2.4. Main Menu
Tap button in Home Screen to ent er main menu. You can enter photo / News /
Media / Tools / Settings.
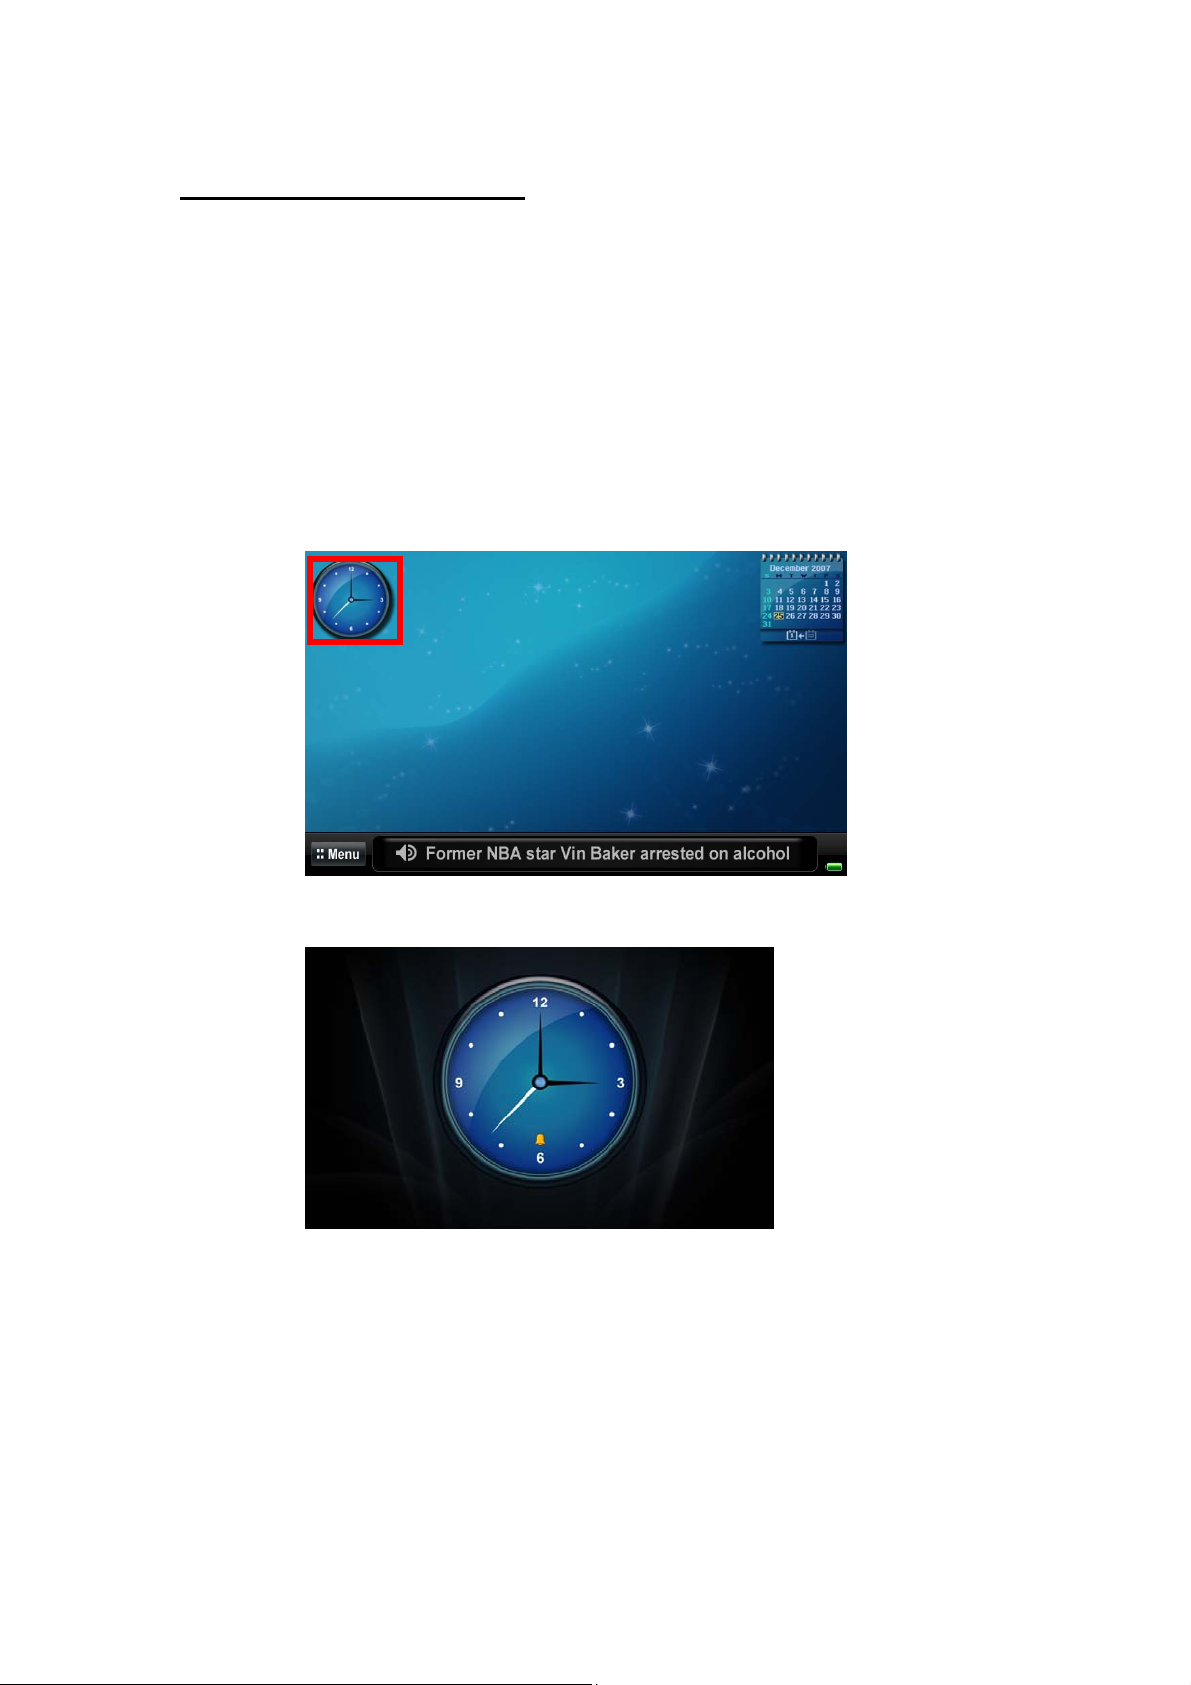
3. Clock and Calendar:
Tips
- If you want to set the time and date, please go to MENU > Settings >
Date/Time.
3.1 Add Alarm
- Tap the red area (Analogy Clock or Digital Clock) to view Clock in full screen.
- Tap the screen, two icons will be appeared.

Clock Control Buttons
Icons Icons Name Functions
Alarm button Enter to Alarm Settings
Back button Go back to previous page
Alarm icon Alarm icon is on when alarm is
active.
3.1.1. Alarm Settings Selection
Alarm settings page 1
- Tap [
] button to add alarm. Refer to Alarm Settings Page 2. User can set
the maximum four alarm entries.
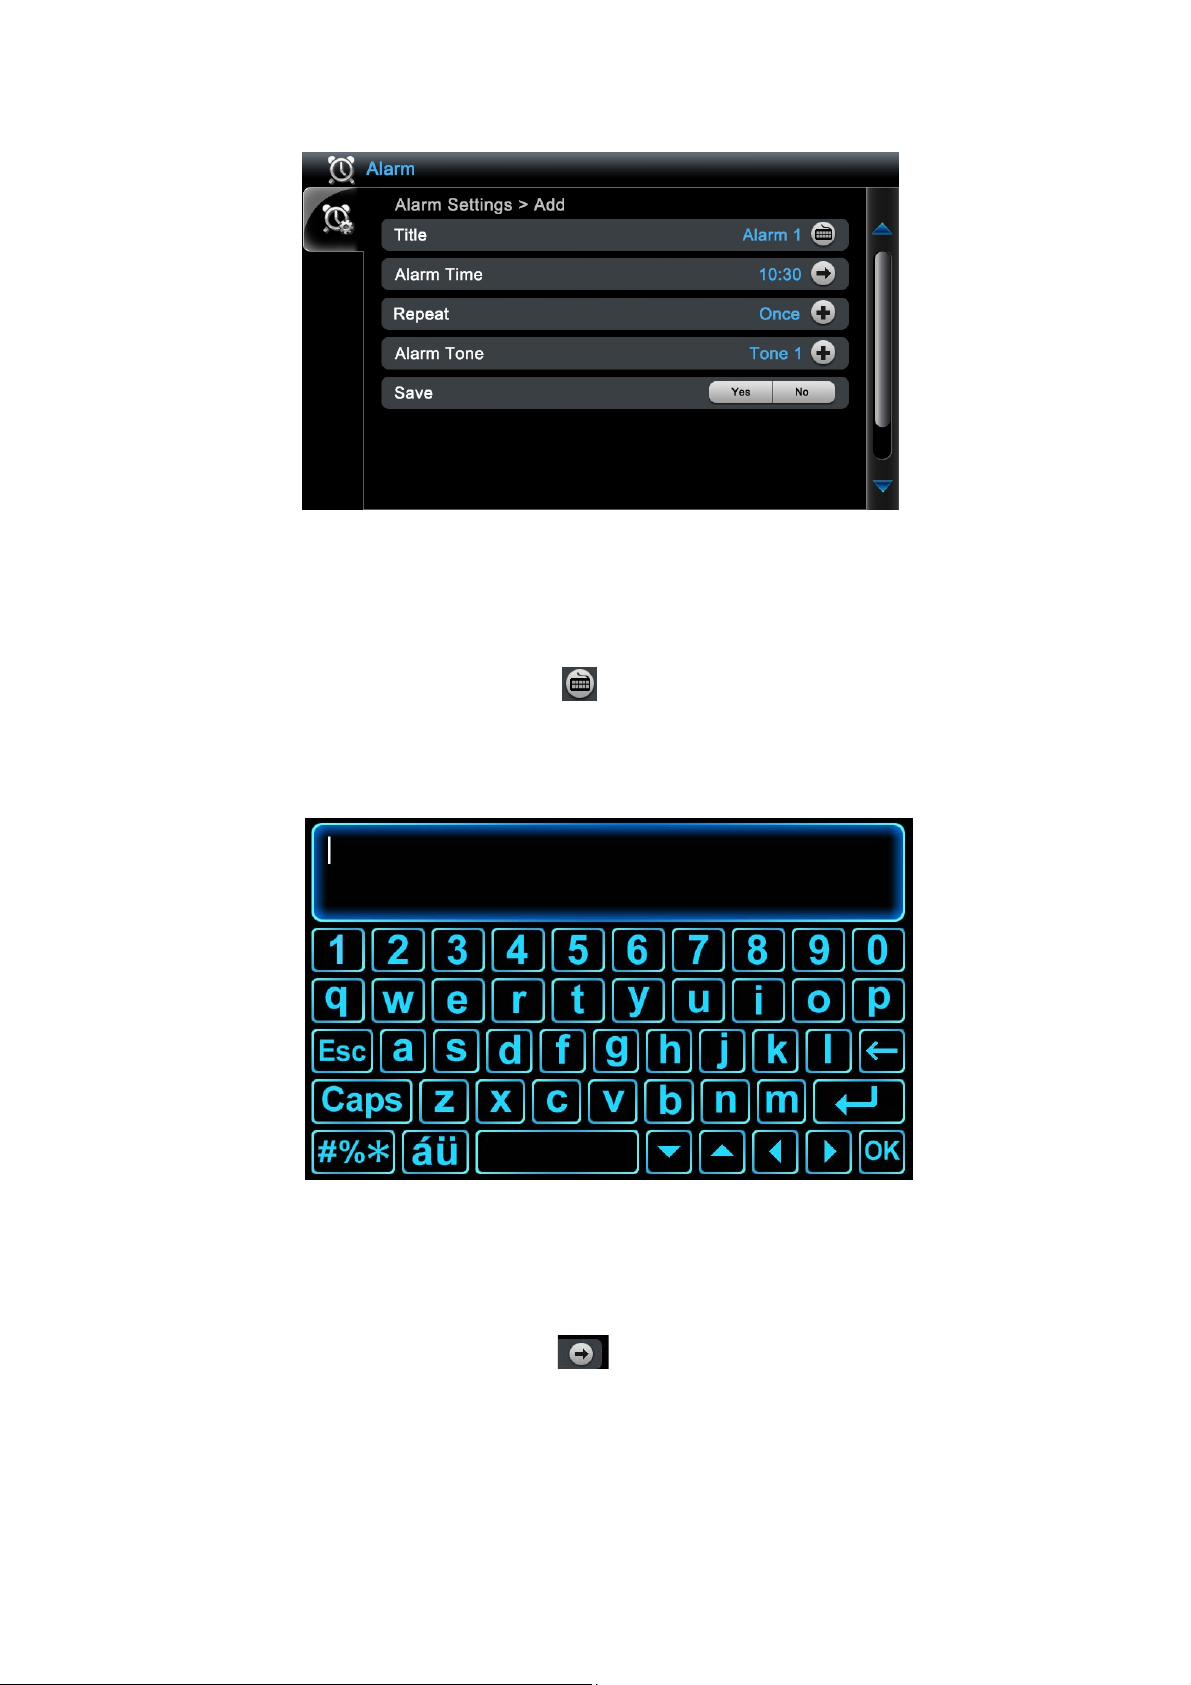
Alarm Settings Page 2
3.1.2 Alarm Title
- In Alarm Settings Page 2, tap [keyboard] button to open the keyboard.
Input the title of the alarm. Default titles are “Alarm 1”, “Alarm 2”, “Alarm 3”,
“Alarm 4”.
Keyboard
3.1.3 Alarm Time
- In Alarm Settings Page 2, tap button to set Alarm Time. Refer to Alarm
Settings Page 3.
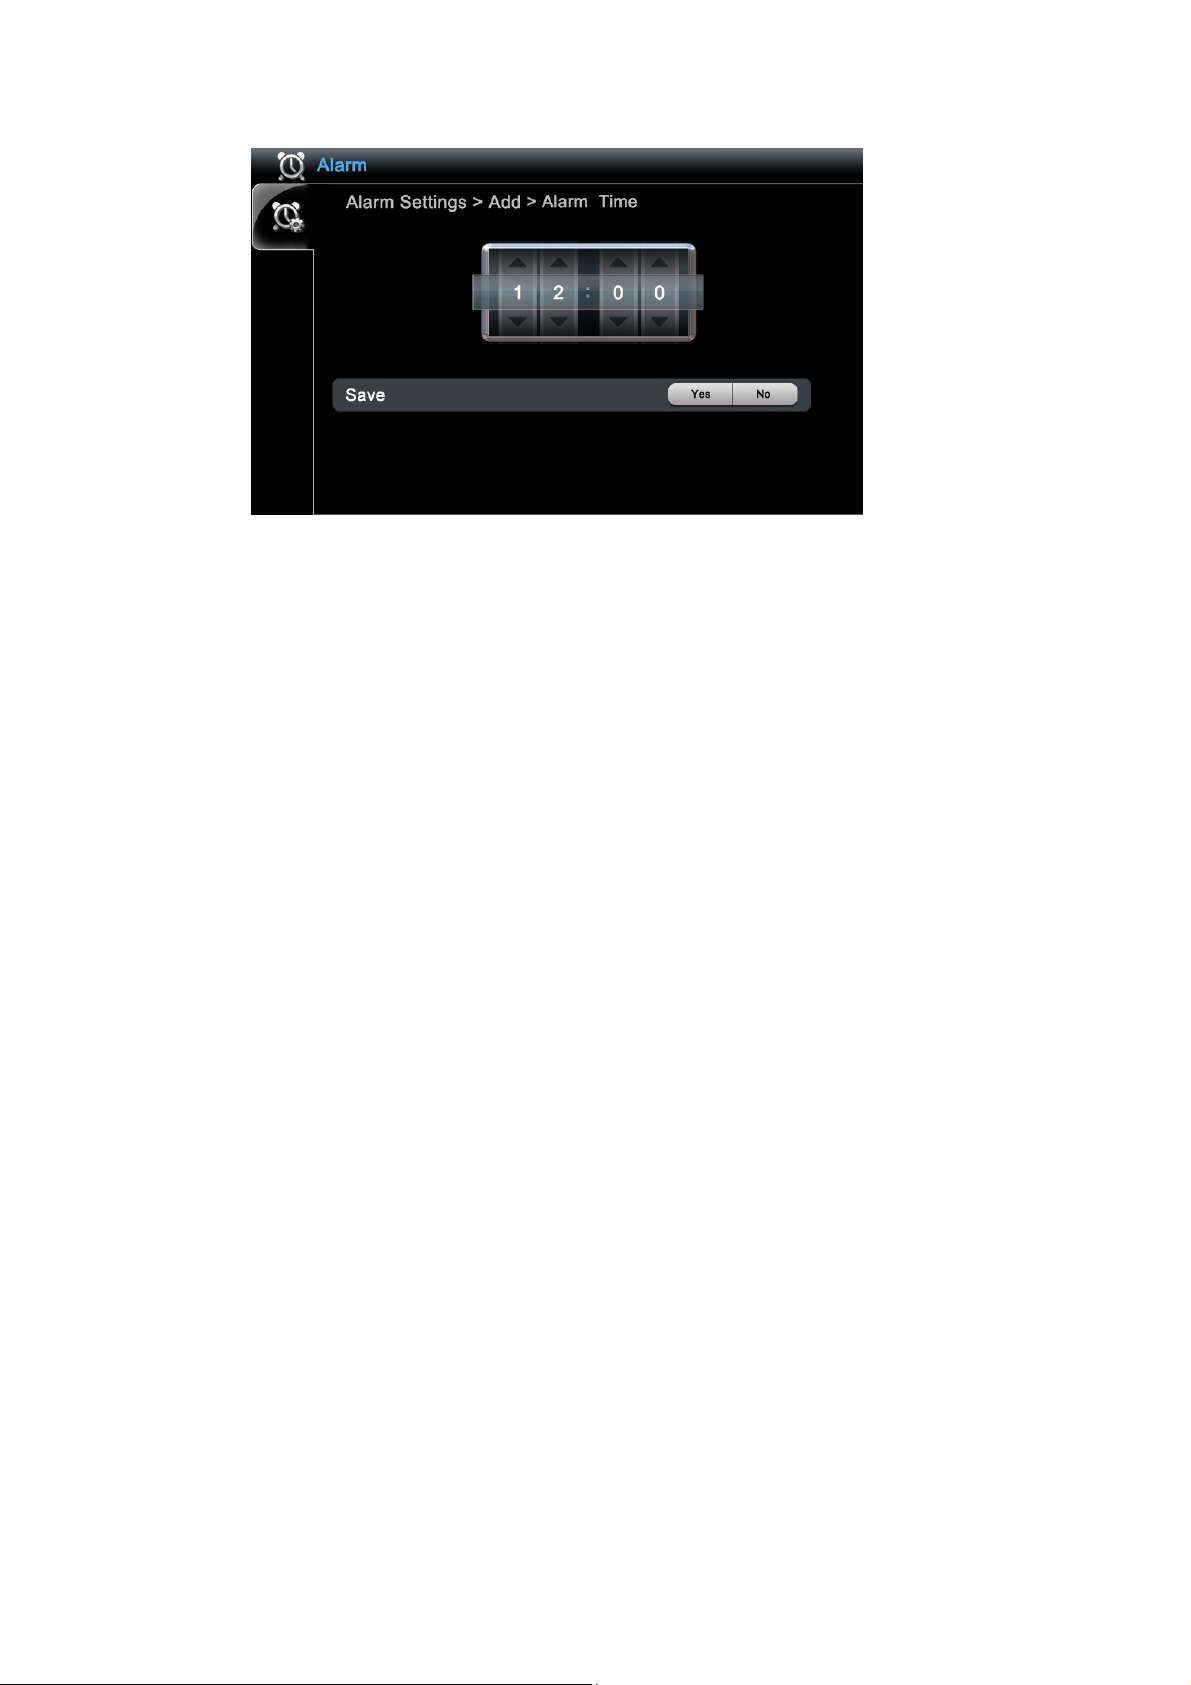
Alarm Settings Page 3
- User can adjust the time just by tapping the up or down arrow button.
- Tap [Yes] button to save settings and return to Alarm Settings > Add page.
- Or tap [No] to return to previous page without save.
3.1.4 Repeat
- User can select the desired alarm repeat mode.
- Selections: Once / Everyday / Week day.
3.1.5 Alarm Tone
- User can select the desired alarm tone.
- Selections: Tone 1 to Tone 5.
3.1.6 Alarm ON / OFF
- User can turn on / off the alarm.
- Selections: ON / OFF

3.1.7 Save Alarm
Alarm Settings Page 2
- Tap “Yes” to save your input or “No” to back to previous page without save.
- If users select “Yes” to save, the new created alarm entry will be shown in Alarm
settings page 1
Alarm settings page 1
- User can tap [Edit] button to your alarm settings.
- User can tap [Delete] button to delete the whole alarm entry.
3.2 Alarm Control
- When the Alarm time is reached, the alarm sounds is on. At same time, the Alarm
Control Buttons are shown.
Edit button
Delete button
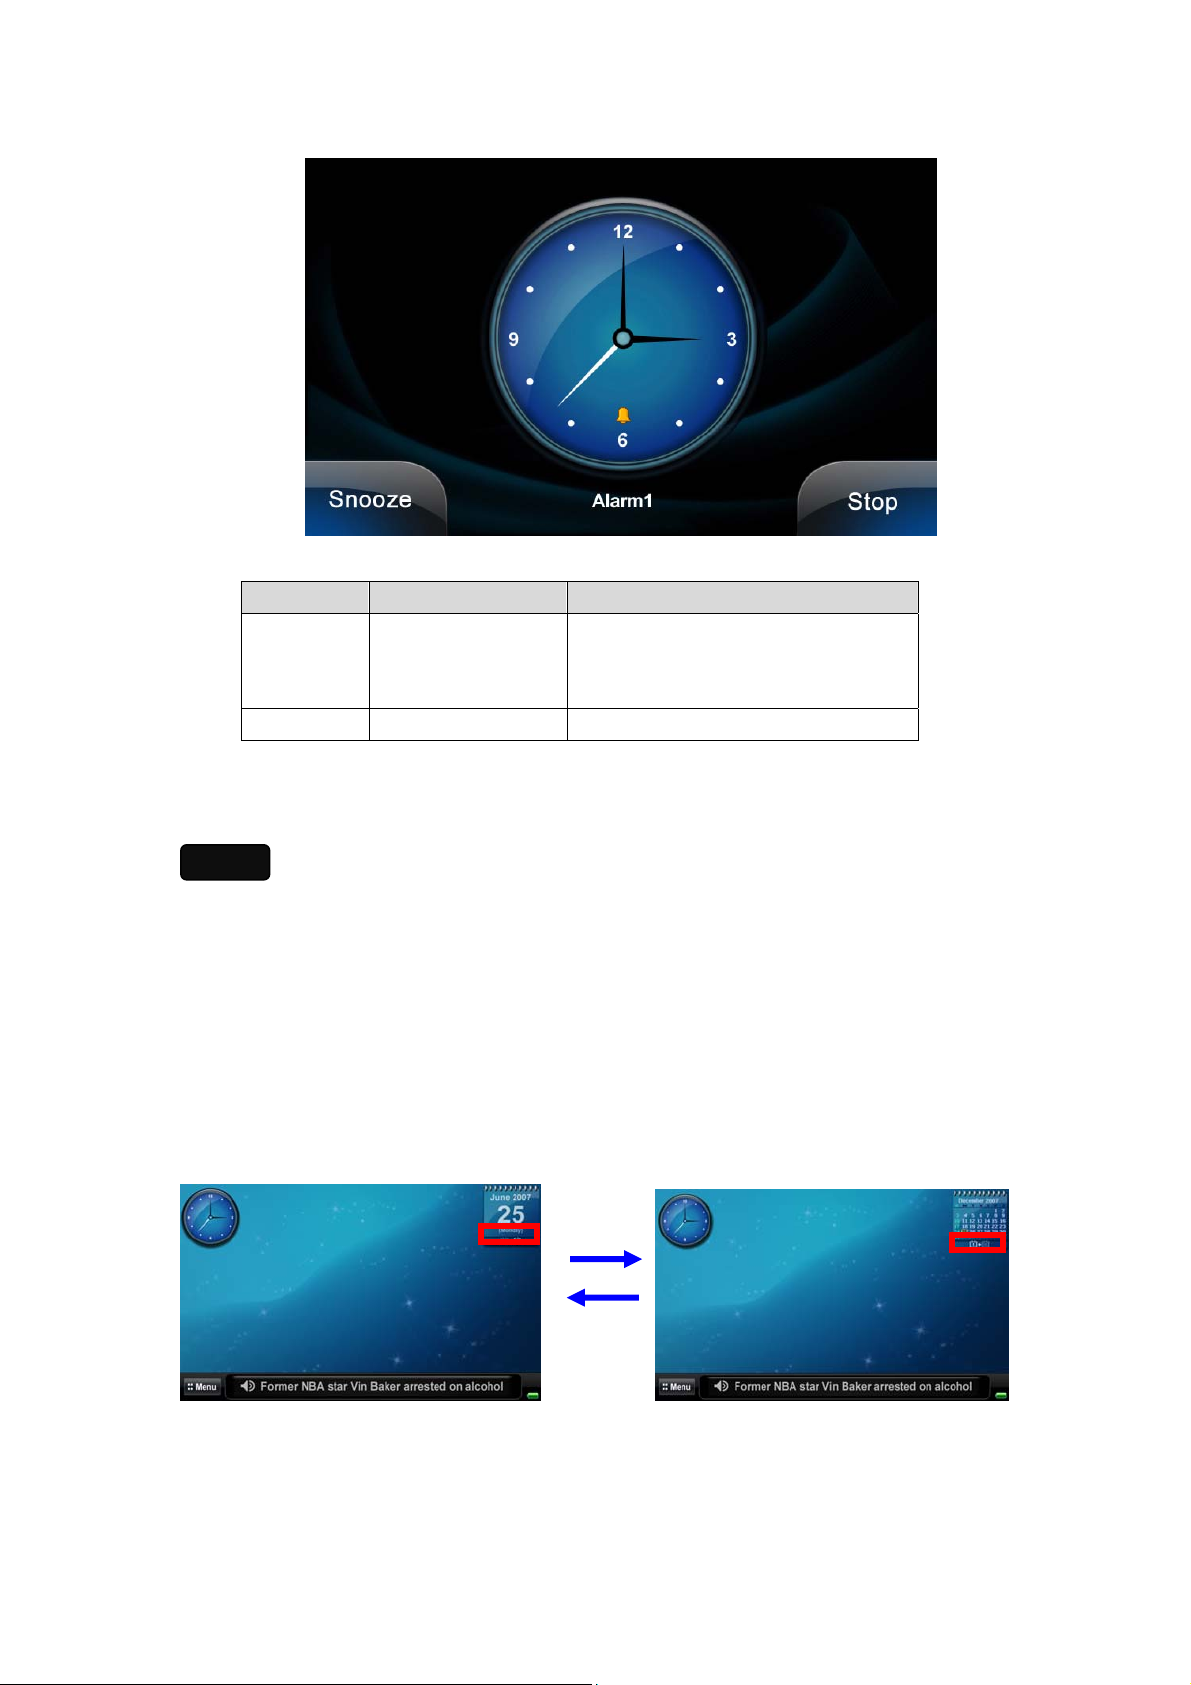
Alarm Control Buttons
Button Button Name Functions
Snooze Snooze button Snooze the alarm. The alarm
sound stops and then turns on
again after 5 minutes.
Stop Stop button Stop the alarm.
Tips
- If users don’t tap Snooze button, it will beep the alarm tone for 5 minutes and it will
stop. After 5 minutes, it will beep again.
- The alarm will repeat this sequence in 40 minutes. Afterward, it will turn off
automatically.
3.3 Calendar
- In Home screen, user can tap the red area to switch between Date Display or
Month Display.
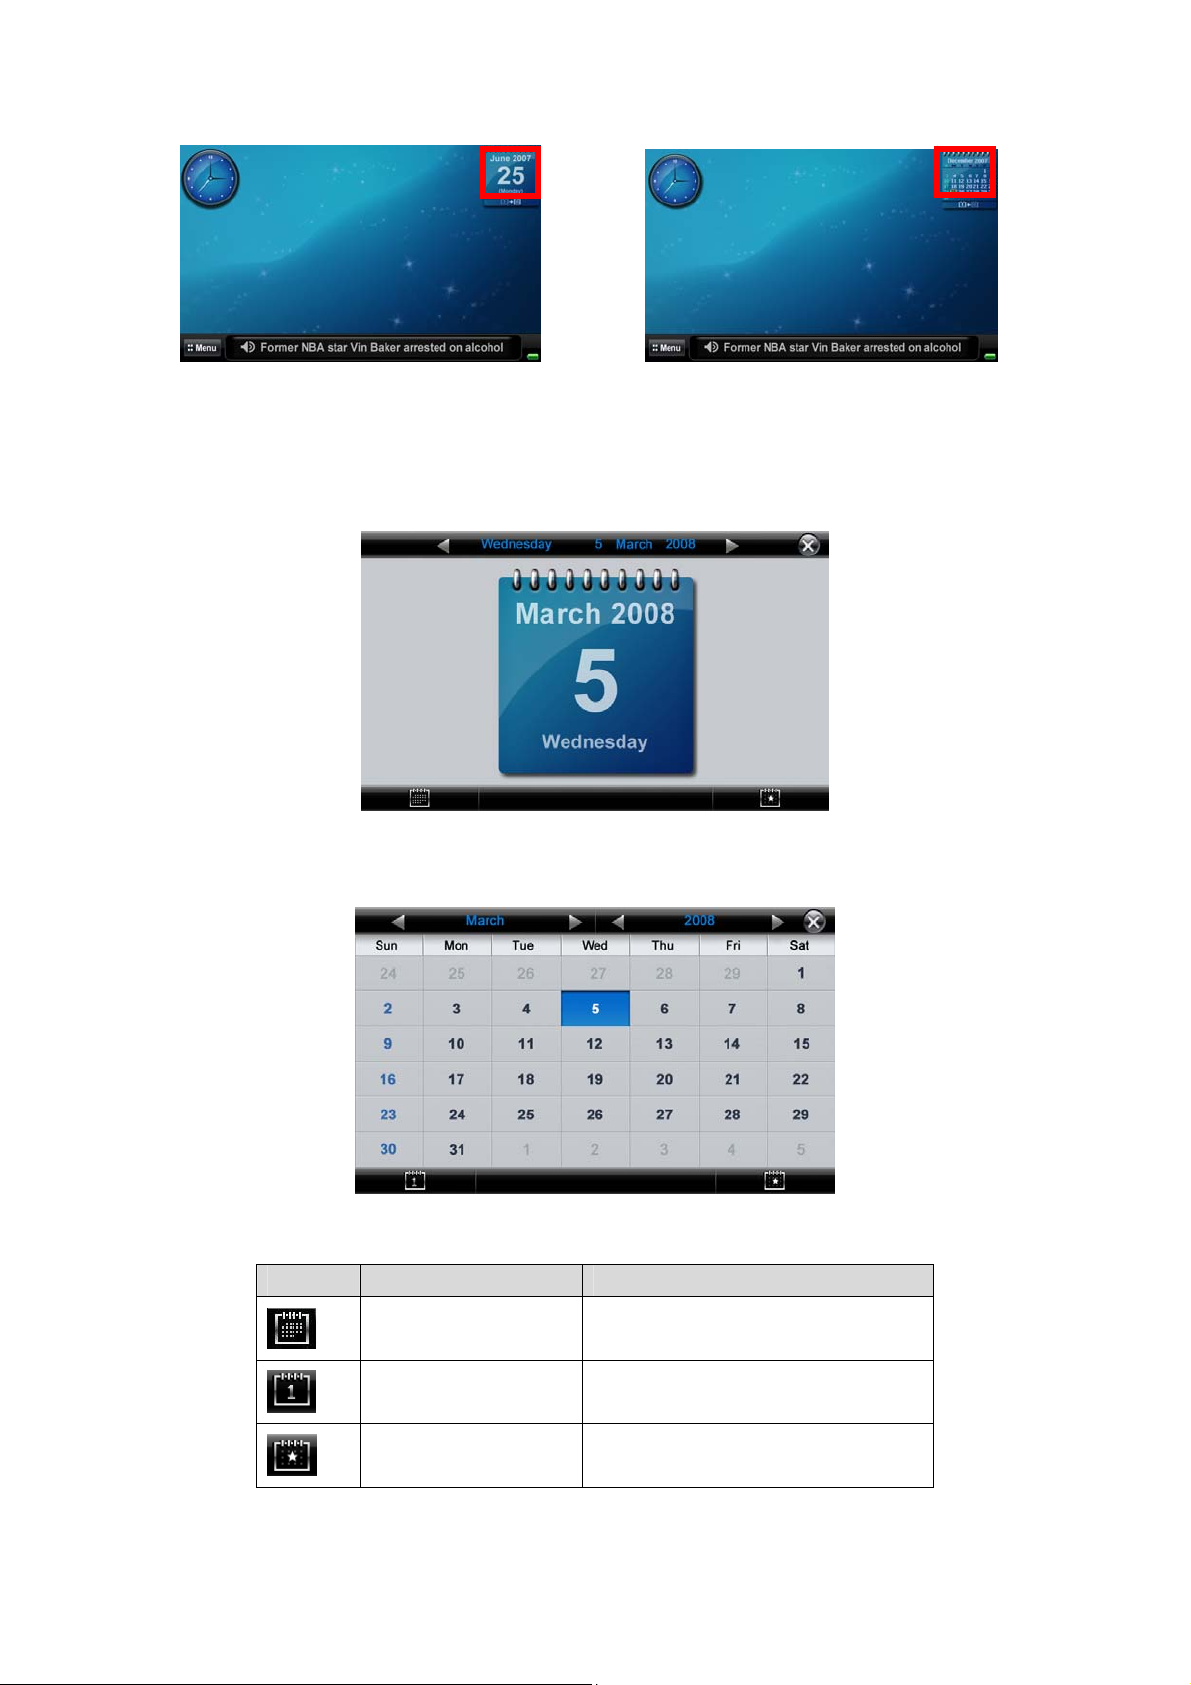
- Tap the red area to view the Calendar in full screen.
3.2.1 Day Display / Month Display
Calendar: Day Display
Calendar: Month Display
Button Button Name Functions
Month Button Change to month display
Day Button Change to day display
Today Button Jump to Today display
Next Button Go to next month or next year
Previous Button Go to previous month or previous
year
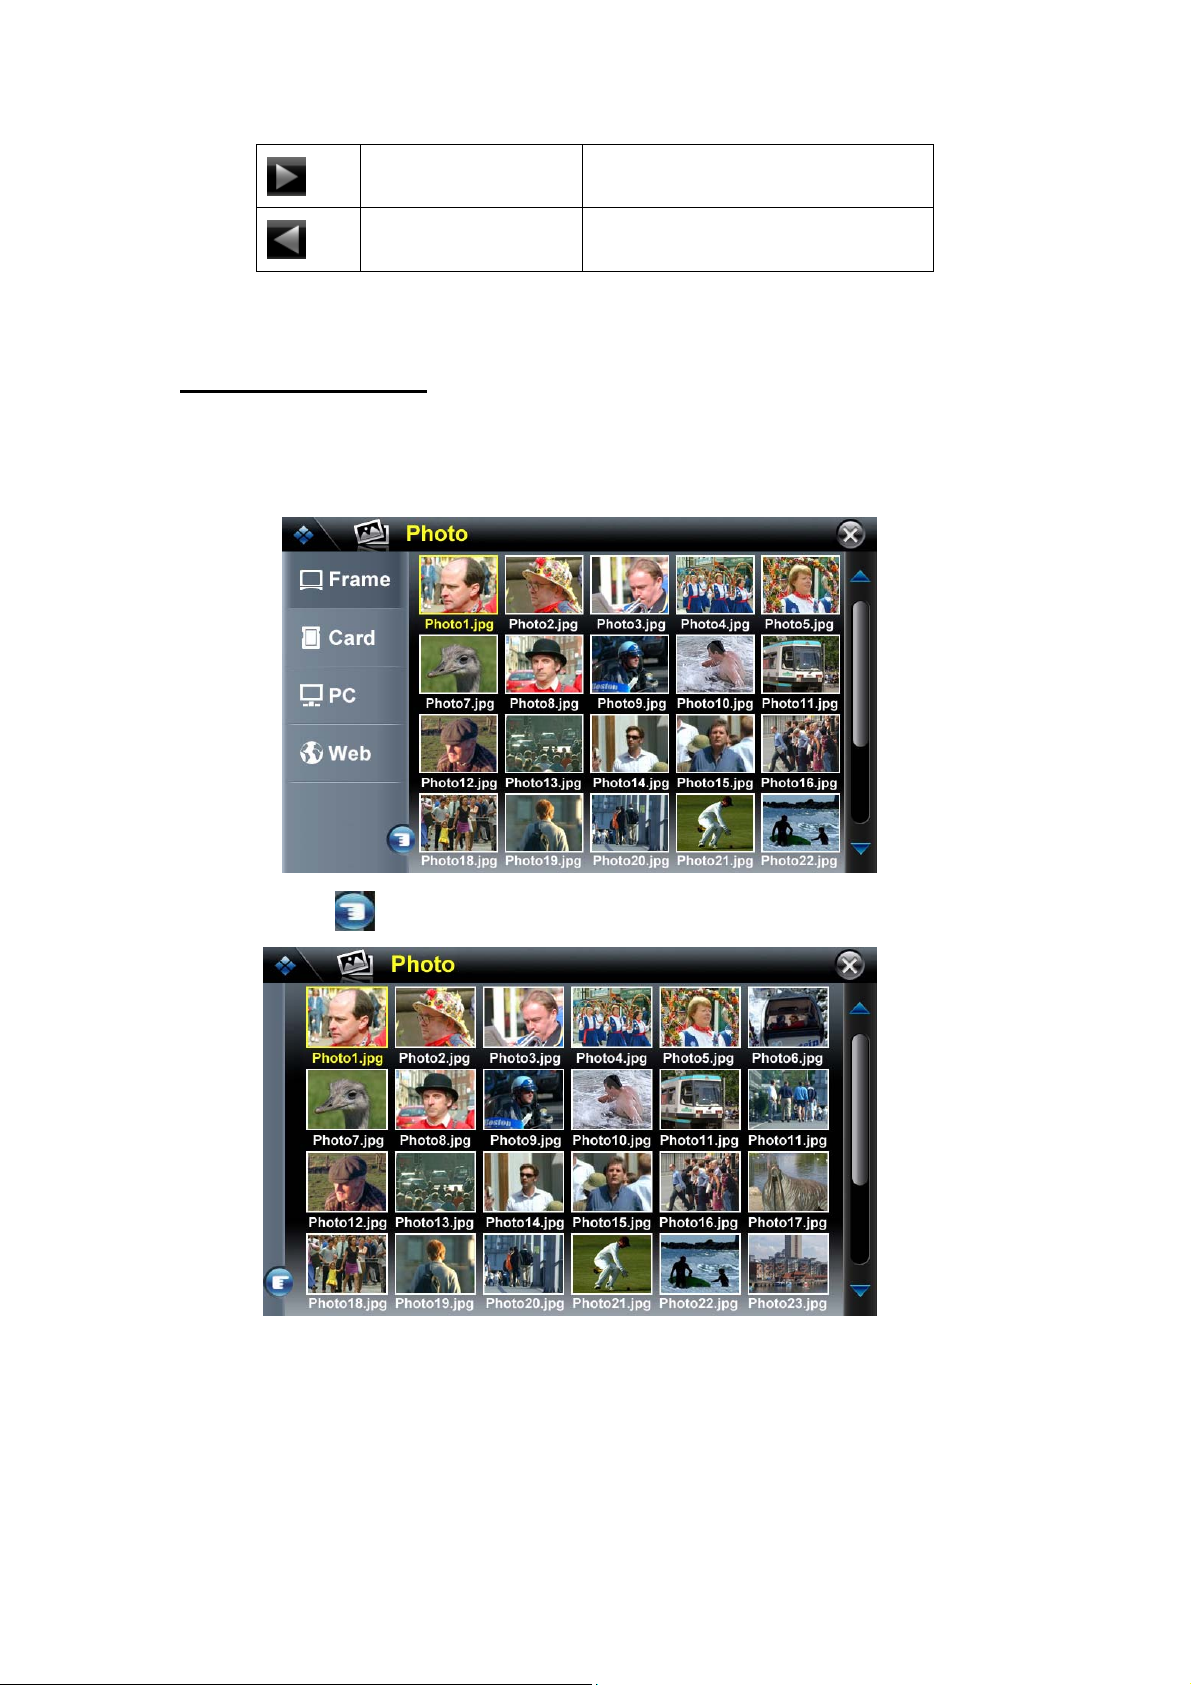
4. Photo Player
Double tap Photo icon in main menu to enter into photo player. User can view
pictures in Frame, Disk, PC and Web.
Tap the icon, it will show as follows:
4.1 Frame
Select a photo and double tap, the full screen will show the photos in the frame.
Tap the screen anywhere, a tool bar will be popped up and the photos will stop slide
show mode.
 Loading...