

Page 1
INSTRUCTION MANUAL
GLDM25
25M LASER DISTANCE MEASURER
Page 2

2
Read the following safety instructions before attempting to operate this product.
Keep these instructions in a safe place for future reference.
SAVE ALL WARNINGS AND INSTRUCTIONS FOR FUTURE REFERENCE.
WARNING: Read and understand
all instructions.
› Use the laser measurer only with the
specied batteries.
› Store the laser measurer out of reach of
children and other untrained persons.
Lasers are dangerous in the hands of
untrained users.
› Due to the electromagnetic radiation
interference to other equipment and
devices please do not use the laser
distance measurer in an airplane or
around medical equipment.
› Do not use in a ammable, explosive
environment.
› Discarded batteries or devices shall
not be processed with household
garbage. Please follow related laws
and regulations.
› Tool service must be performed only
by qualied repair personnel. Repairs,
service or maintenance performed by
unqualied personnel will void the
warranty. Only approved and
authorised service technicians can
carry out warranty repairs.
› Do not use optical tools such as a
telescope or transit to view the laser
beam. Serious eye injury could result.
› Do not place the laser in a position
which may cause anyone to intentionally
or unintentionally stare into the laser
beam. Serious eye injury could result.
› Do not position the laser near a
reective surface which may reect
the laser beam toward anyone’s eyes.
Serious eye injury could result.
› Do not use optical tools to view the
laser beam.
› Do not remove or deface warning
labels.
SAFETY
!
WARNING: DO NOT DISASSEMBLE THE
LASER MEASURER. There are no user
serviceable parts inside. Disassembling
the laser will void all warranties on the
product. Do not modify the product in
any way. Modifying the tool may result in
hazardous laser radiation exposure.
CAUTION: Class 2 Laser Product
› Never look into the laser beam
directly and intentionally.
› Do not use optical tools to view the
laser beam.
› Do not let children come in contact
with the laser measurer.
!
Page 3

3
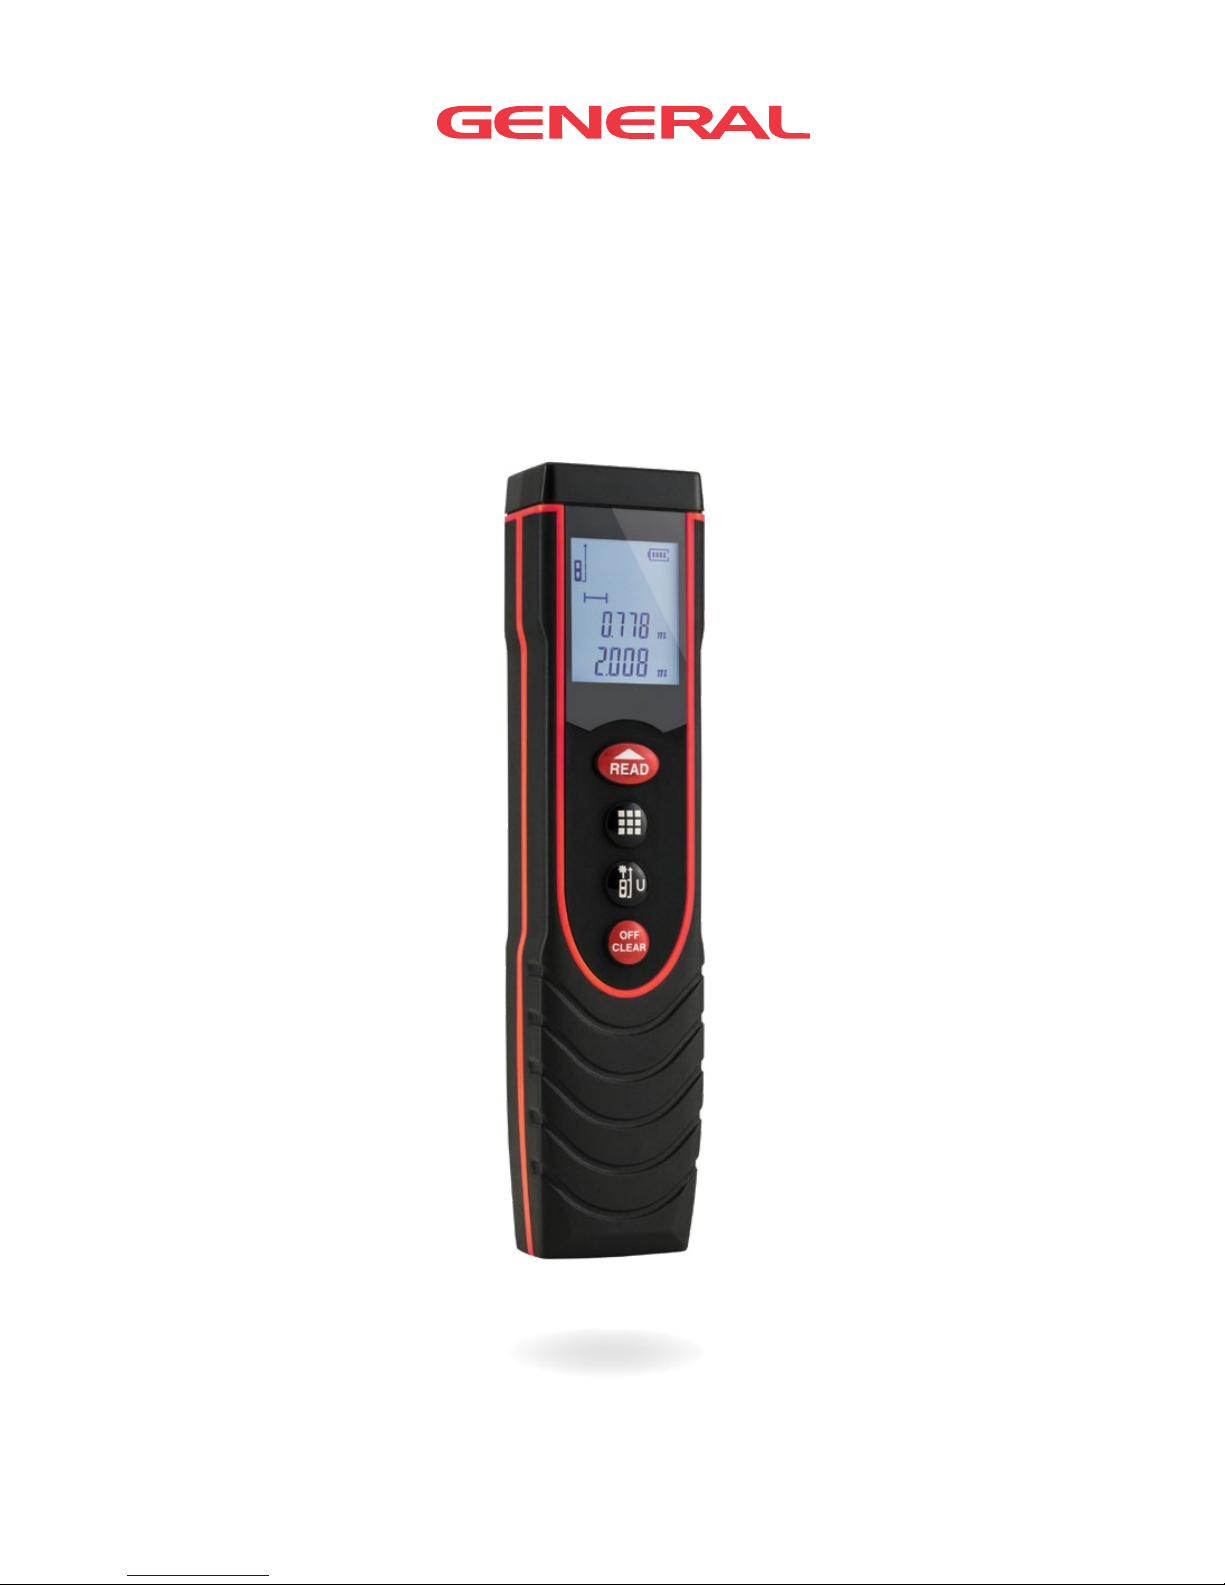
ITEM CHECKLIST
General GLDM25 Carry pouch
Alkaline batteries
Please ensure the following items are included with your laser distance
measurer. If anything is missing please contact your retailer.
Page 4
4
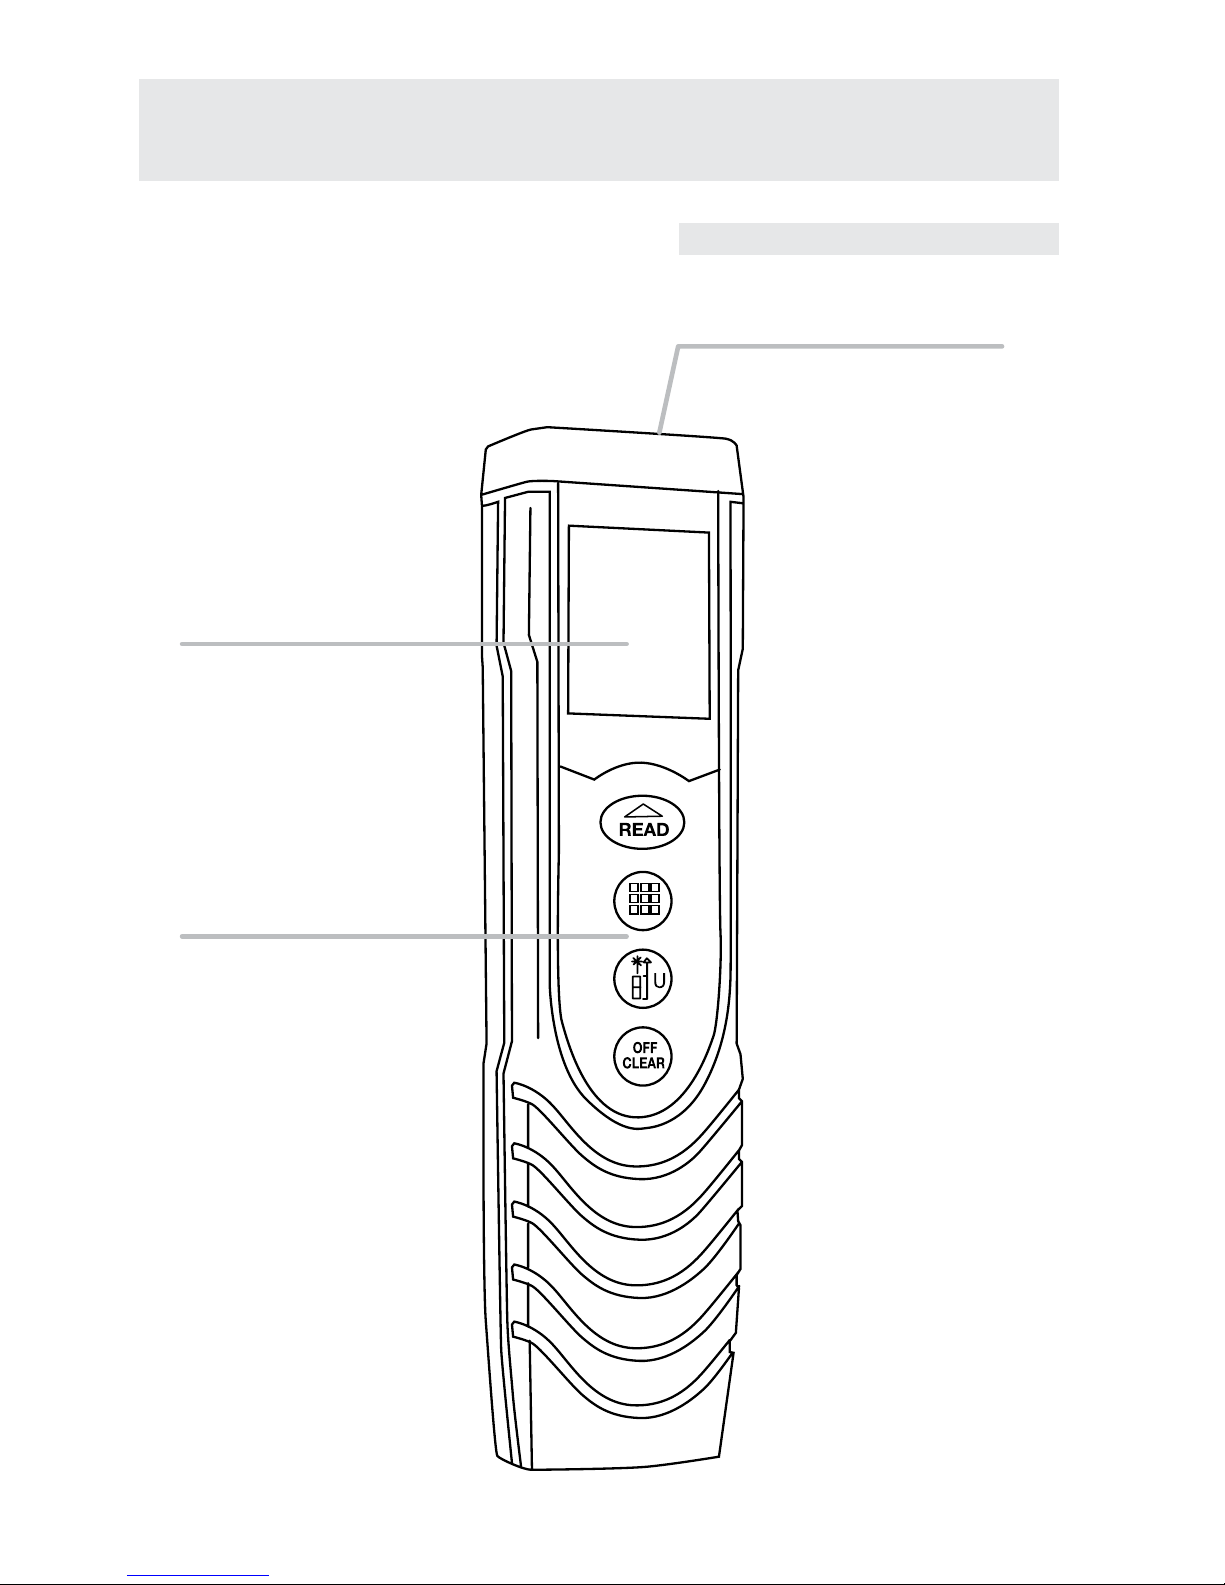
LCD screen
Laser emitter
Control panel
PRODUCT OVERVIEW
LASER MEASURER FRONT
Page 5
5
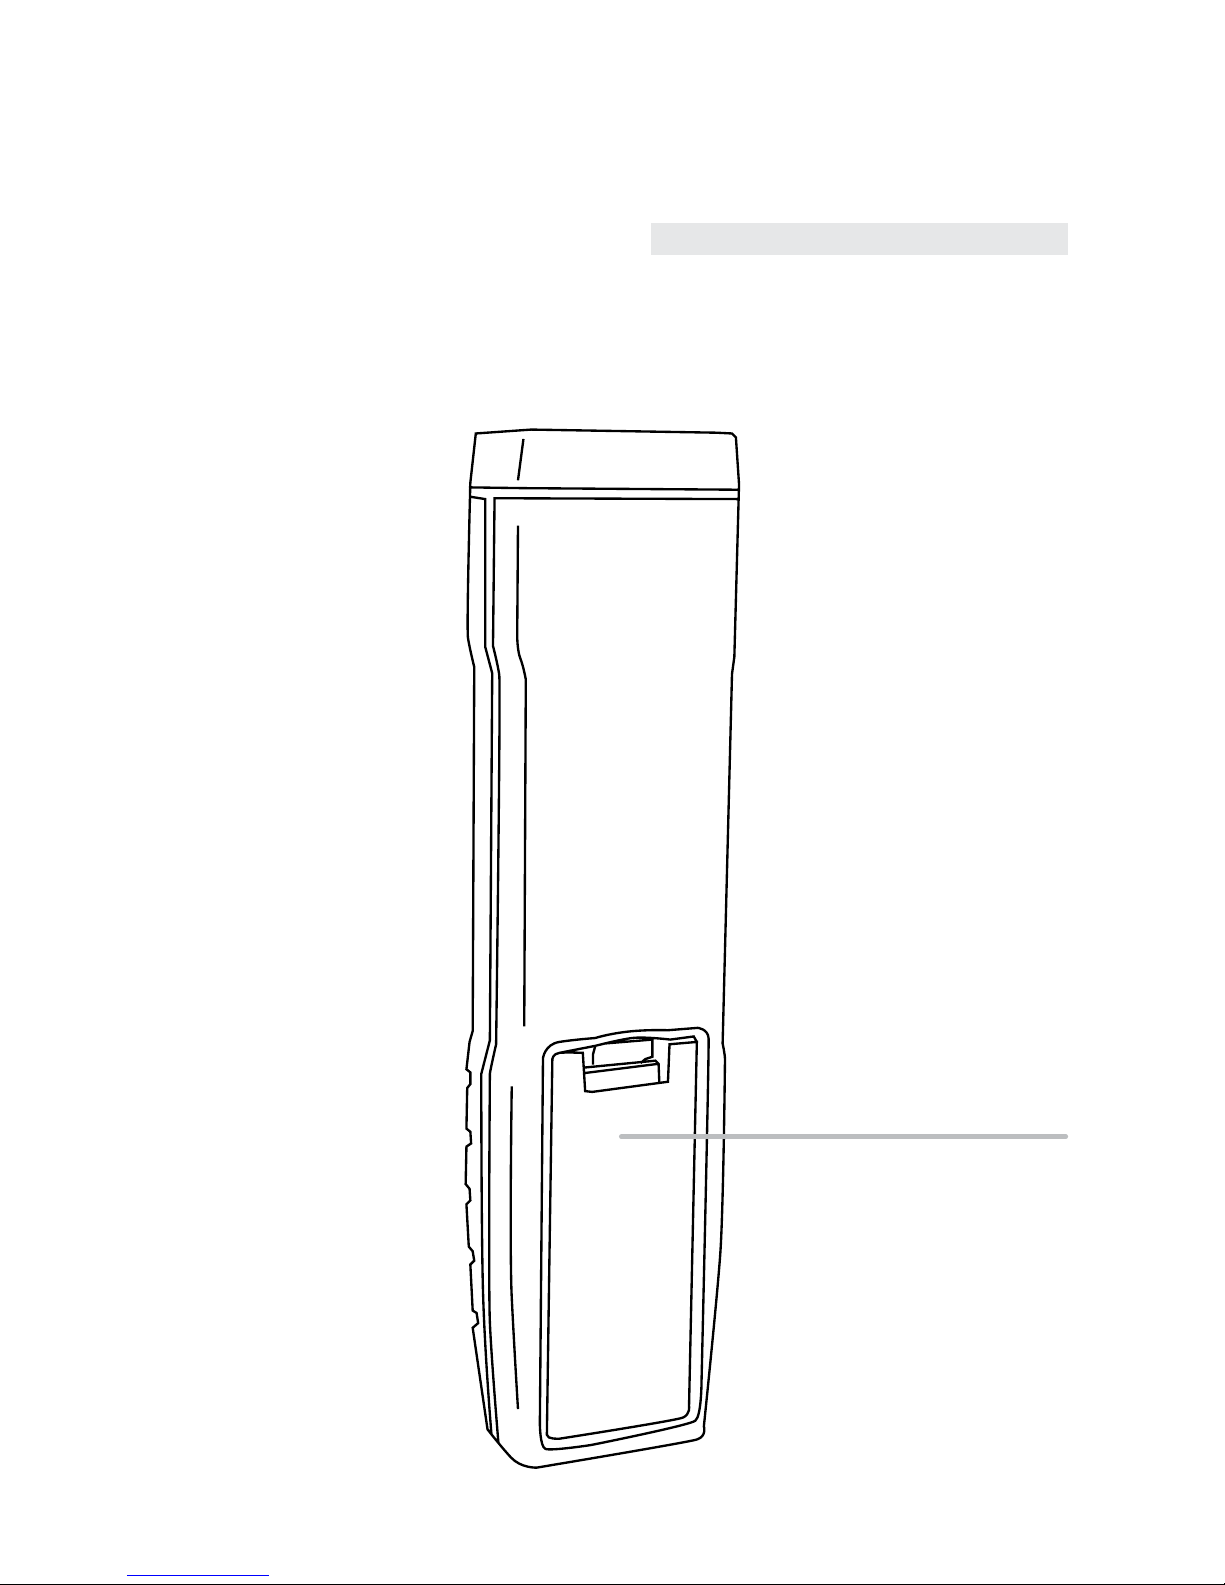
Battery compartment
LASER MEASURER BACK
Page 6
6
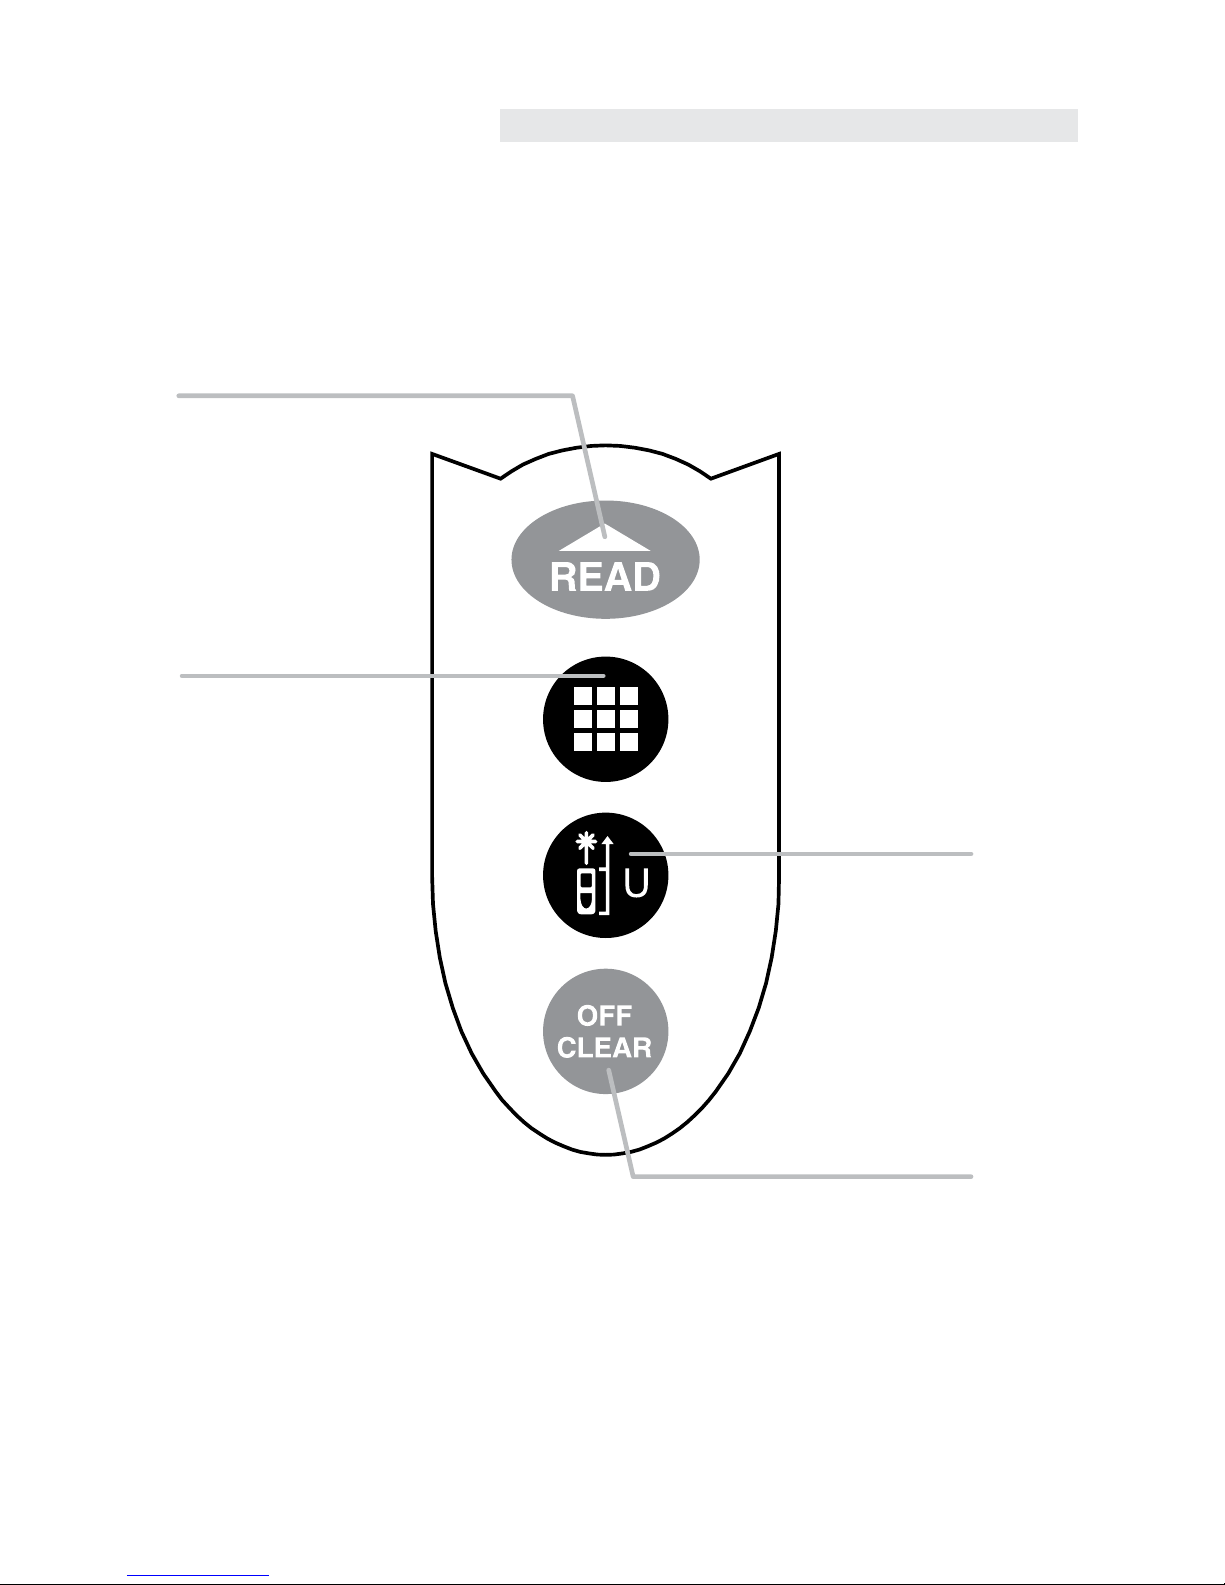
Benchmark /
unit reset
Power off / clear
Read (laser emission on)
Multi-function
CONTROL PANEL
Page 7

7
Laser emission on
Benchmark reference point
Angle measurement mode
Length measurement mode
Continuous measurement mode
Major measurement display
Previous measurement display
Unit
Battery level
Pythagorean measurement mode
Measurement mode
Measurement mode
DISPLAY SCREEN
Page 8

8
USING YOUR LASER MEASURER
POWER SUPPLY
› The General GLDM25 is supplied with two 1.5v AAA alkaline batteries.
› To replace batteries remove the battery door at the back of the device.
Place batteries according to polarity and replace battery door.
› For infrequent use, please take out the battery to avoid corrosion to the body
of the device.
ON/0FF
› Press and hold the read button to turn the laser distance measurer on.
› Press and hold the off / clear button for 3 seconds to turn the unit off. The device
will shut off automatically after 150 seconds without use.
UNIT SETTING
› To reset the current unit of measurement press and hold the benchmark / unit
reset button. To cycle through the units of measurement, press the benchmark /
unit reset button. The unit default is 0.000m.
OPERATION
OPTIONAL UNITS
Length Area Volume
0.000m 0.000m
2
0.000m
3
0.00m 0.00m
2
0.00m
3
0.0in 0.00ft
2
0.00ft
3
0.00ft 0.00ft
2
0.00ft
3
0 1/16 in 0.00ft
2
0.00ft
3
0'00' 1/16" 0.00ft
2
0.00ft
3
Page 9

9
BACKLIGHT SETTING
Press and hold the unit reset / backlight button to turn the backlight on or off.
REFERENCE POINT SETTING
To cycle between the benchmark reference points press the benchmark / unit
reset button. There are two reference points: top or bottom.
SINGLE MEASUREMENT
› Press the read button. The laser will
be emitted.
› Re-press the read button for a single
distance measurement. Results will be
displayed on the display screen.
CONTINUOUS MEASUREMENT
› Press and hold the read button. Minimum
and maximum results will be displayed on
the display screen.
› Press the read button to exit continuous
measurement.
MEASUREMENT
Page 10

10
AREA MEASUREMENT
a) Press and hold the multi-function button. A rectangle will appear on the
display screen with one edge flashing.
b) Press the read button to measure the first edge (length).
c) Press the read button to measure the second edge (width).
d) Area will be calculated automatically with results shown on the display screen.
e) Press the off / clear button to clear measurement.
VOLUME MEASUREMENT
a) Press and hold the multi-function button to enter area mode, then press again to
enter volume mode. A cube will appear on the display screen with one edge flashing.
b) Press the read button to measure the first edge (length).
c) Press the read button to measure the second edge (width).
d) Press the read button to measure the third edge (height).
e) Volume will be calculated automatically with results shown on the display screen.
f) Press the off / clear button to clear measurement.
Page 11

11
1. Calculate the side of a right angle triangle
Press and hold the multi-function button to enter area mode, then press twice to
enter pythagorean mode. A triangle will appear on the display screen with the
hypotenuse flashing. Follow the instructions displayed on the screen as follows:
a) Press the read button to measure the length (a) of the hypotenuse.
b) Press the read button to measure the length (b) of the rectangular side.
c) Length (x) will be calculated automatically with results shown on the display screen.
a
b
X
X
PYTHAGORAS MEASUREMENT
To calculate the unilateral distance of a triangle pythagorean mode can be used.
When taking measurements of the triangle, ensure the length of the right side is
shorter than the length of the hypotenuse. If not, the instrument will display an
error signal.
To ensure the accuracy of measurement, take measurements from the same
starting point of the first order hypotenuse. Then follow with the measurement
of the right side.
Please follow the instructions according to the method required. (See diagrams on
page 11 - 14 to determine the appropriate method).
Page 12

12
2. Calculate the hypotenuse of a right angle triangle
Press and hold the multi-function button to enter area mode, then press three
times to enter pythagorean mode. A triangle will appear on the display screen
with the bottom line flashing.
Follow the instructions displayed on the screen as follows:
a) Press the read button to measure the length (a) of the rectangular side.
b) Press the read button to measure the length (b) of the next rectangular side.
c) Length (x) of the hypotenuse will be calculated automatically with results
shown on the display screen.
X
X
a
b
Page 13

13
3. Calculate the third side of a triangle
Press and hold the multi-function button to enter area mode, then press four times
to enter pythagorean mode. A triangle will with appear on the display screen with
the hypotenuse flashing.
Follow the instructions displayed on the screen as follows:
a) Press the read button to measure the length (a).
b) Press the read button to measure the length of the middle line (b).
c) Press the read button to measure the length (c).
d) Length (x) of the vertical side will be calculated automatically with results shown
on the display screen.
a
b
c
X
X
X
Page 14

14
4. Calculate partial length of a right angle triangle
Press and hold the multi-function button to enter area mode, then press five times
to enter pythagorean mode. A triangle will with appear on the display screen with
the hypotenuse flashing.
Follow the instructions displayed on the screen as follows:
a) Press the read button to measure the length (a) of the hypotenuse.
b) Press the read button to measure the length (b) of the second hypotenuse.
c) Press the read button to measure the length (c) of the rectangular side.
d) Length (x) of the vertical side will be calculated automatically with results shown
on the display screen.
Page 15

15
Subtraction
a) Take the first reading by pressing the read button.
b) Press the multi-function button twice. A “-” symbol will appear on the display screen.
c) Take the second reading by pressing the read button. The values will be subtracted
automatically with the results shown on the display screen. Press the multi-function
button again to subtract more measurements.
OTHER FUNCTIONS
ADDING AND SUBTRACTING MEASUREMENT
Addition
a) Take the first reading by pressing the read button.
b) Press the multi-function button. A “+” symbol will appear on the display screen.
c) Take the second reading by pressing the read button. The values will be added
automatically with the results shown on the display screen. Press the multi-function
button again to add more measurements.
Page 16

16
CARE AND MAINTENANCE
› Inaccurate measurement results may occur in harsh environments such as
strong sunlight, excessive temperature fluctuations, weak reflective surfaces
or low battery.
› Whenever possible, store the instrument in a cool, dry place. Do not store in
high temperatures or strong humidity for long periods of time.
› Remove the batteries before storing the device for long periods of time
without use.
› To remove dust, clean the instrument with a damp, soft cloth.
Page 17

17
TROUBLE SHOOTING
ERROR CODE CAUSE & SOLUTION
ERR1
Signal is too weak.
Measure target locations that have stronger reflecting surfaces.
ERR2
Signal is too strong.
Measure target locations that have weaker reflecting surfaces.
ERR3
Battery voltage too low.
Replace battery.
ERR4
Beyond working temperature.
Carry out measurement with the meter in the specified scope.
ERR5
Improper measurement in pythagorean mode.
Re-measure and ensure the length of the hypotenuse is longer
than that of the right side.
ERR6
Memory damage.
Please contact the supplier.
Page 18

18
WARRANTY
CUSTOMER SUPPORT
The General GLDM25 comes with a 3 year manufacturers warranty.
AUSTRALIA
"Our goods come with guarantees that cannot be excluded under the Australian
Consumer Law. You are entitled to a replacement or refund for a major failure and
for compensation for any other reasonably foreseeable loss or damage. You are also
entitled to have the goods repaired or replaced if the goods fail to be of acceptable
quality and the failure does not amount to a major failure."
For more information please visit consumerlaw.gov.au
NEW ZEALAND
For more information please visit consumerprotection.govt.nz
To assist you with any queries or technical questions please contact customer support
Australia: 1300 658 338
New Zealand: 0800 367 527
Page 19

19
SPECIFICATIONS
Specications GLDM25
Product code 70083
Accuracy ±2mm
Minimum measurement range (top reference point) 0.05m
Maximum measurement range 25m
Minimum unit displayed 0.05mm
Measurement unit options m/in/ft
Continuous measurement function yes
Area measurement function yes
Volume measurement function yes
Add and subtract measurement function yes
Automatic backlight yes
Buttons sound yes
Laser class 2 Red
Laser type 635nm, <1mW
Automatic laser cut off 20s
Automatic shutdown 150s
Storage temperature -20° - 60° C
Working temperature 0° - 40° C
Storage humidity RH85%
Battery 2x 1.5v AAA
Weight (Inc battery) 96g
Dimensions 22x35x150mm
Page 20

www.spoton.com.au
 Loading...