

Page 1
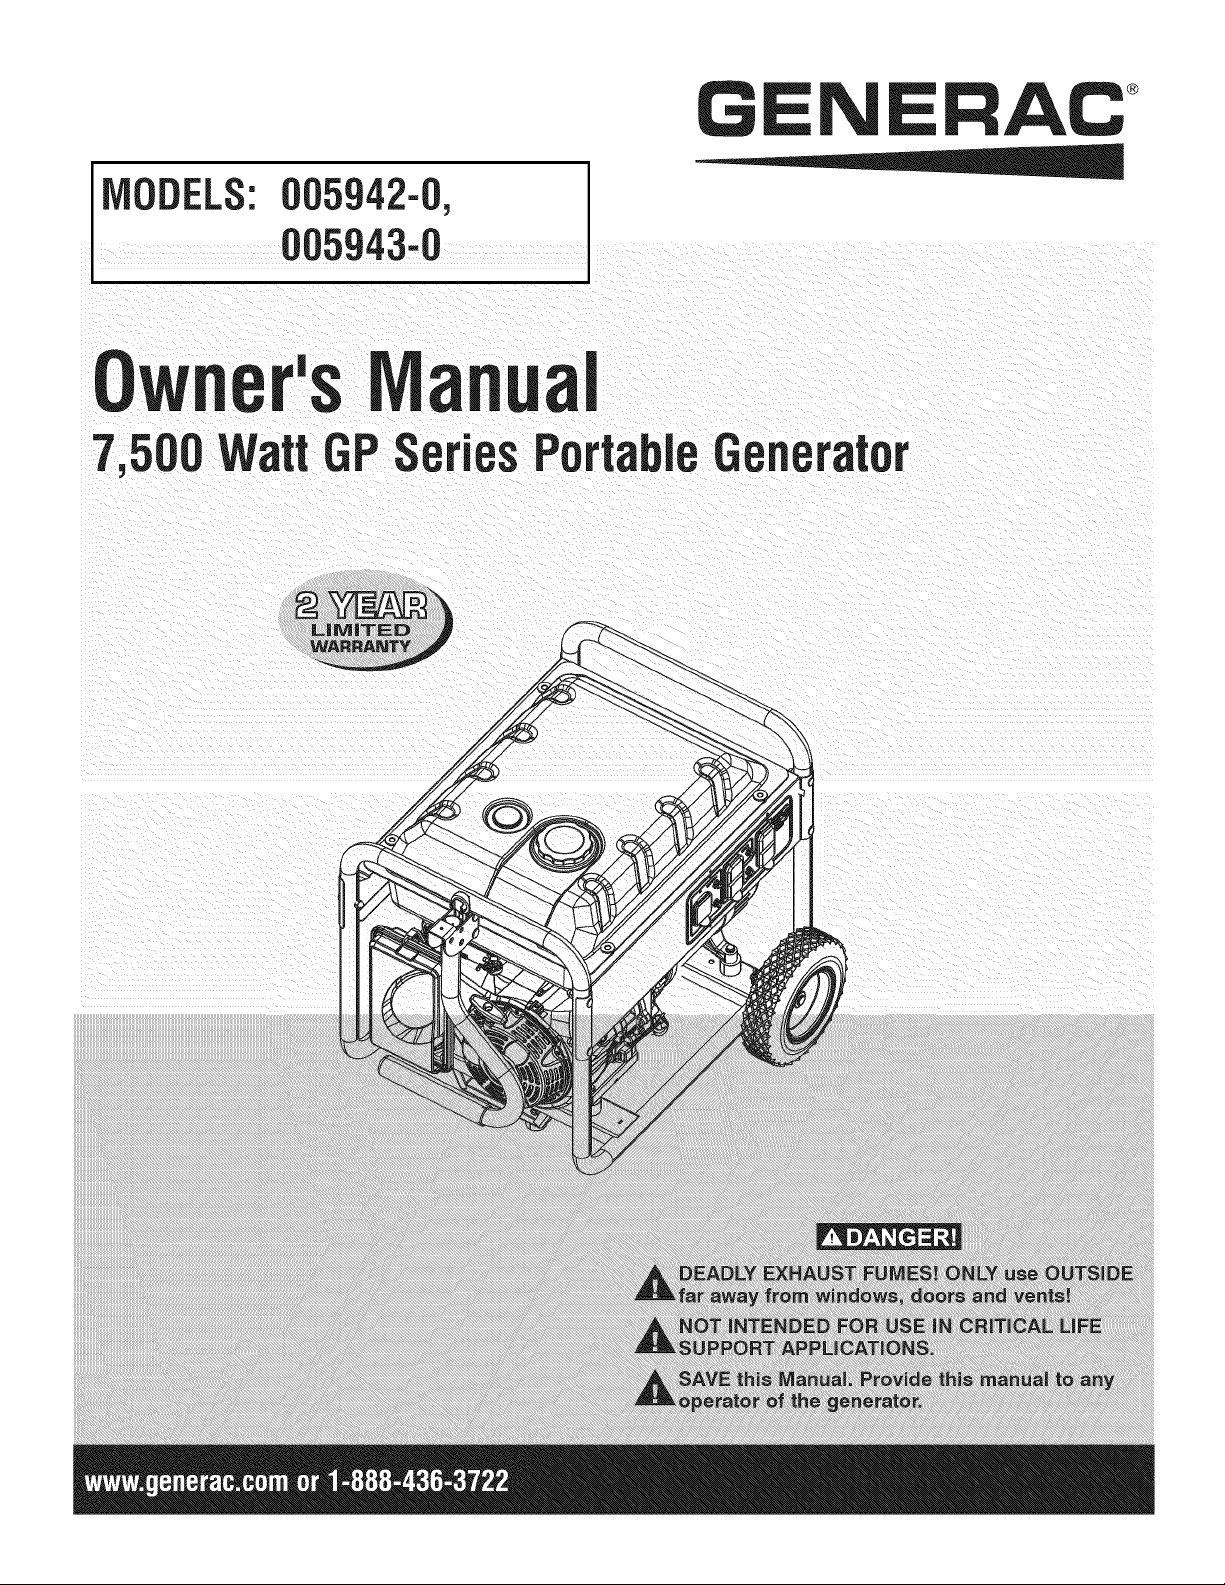
G ®
IIVlODELS:005942-0,
005943-0
Owner'siVlan
7, WattGPSeries
Generator
Page 2
introduction.............................................................1
ReadthisiVlanualThoroughly.................................1
Safety Rules...........................................................1
StandardsIndex.............................................................3
Generalinformation................................................4
1.1 Unpacking......................................................................4
1.1.1 Accessory Box..................................................4
1.2 Assembly.......................................................................4
1.2.1 Assemblingthe AccessoryKit............................4
1.2.2 BatteryCableConnection(ElectricStart Only)....4
Operation................................................................4
2.1 Knowthe Generator.......................................................4
2.2 Hourmeter......................................................................6
2.3 CordSets andConnectionPlugs....................................6
2.3.1 120 VAC,20 Amp,DuplexReceptacle...............6
2.3.2 120/240VAC,30 Amp, Receptacle....................6
2.4 Howto Usethe Generator..............................................6
2.4.1 Groundingthe Generator....................................7
2.4.2 ConnectingElectricalLoads...............................7
2.5 Don'tOverloadthe Generator..........................................7
2.6 WattageReferenceGuide...............................................7
2.7 BeforeStartingtheGenerator.........................................8
2.7.1 Adding EngineOil..............................................8
2.7.2 Adding Gasoline.................................................8
2.8 Starting Pull StartEngines..............................................8
2.9 Starting ElectricStart Engines........................................9
2.10 Stoppingthe Engine.....................................................10
2.11 Low Oil LevelShutdownSystem..................................10
2.11.1 SensingLow Oil Level......................................10
2.12 Chargingthe Battery(ElectricStart Units Only).............10
Maintenance.........................................................10
3.1 MaintenanceSchedule.................................................10
3.2 ProductSpecifications..................................................11
3.2.1 GeneratorSpecifications..................................11
3.2.2 EngineSpecifications.......................................11
3.2.3 EmissionsInformation.....................................11
3.3 GeneralRecommendations...........................................11
3.3.1 GeneratorMaintenance....................................11
3.3.2 ToCleanthe Generator.....................................11
3.3.3 EngineMaintenance.........................................11
3.3.4 CheckingOil Level...........................................11
3.3.5 Changingthe Oil..............................................12
3.3.6 Replacingthe SparkPlug.................................12
3.3.7 BatteryReplacement........................................12
3.4 ServiceAir Cleaner.......................................................12
3.5 ValveClearance............................................................13
3.6 General........................................................................13
3.5 Long TermStorage....................................................... 13
3.6 OtherStorageTips.......................................................13
Troubleshooting....................................................14
4.1 TroubleshootingGuide..................................................14
Notes....................................................................15
Warranty...............................................................16
MANUALDELPROPIETARIO.............................19
MANUELD'ENTRETIEN......................................39
Page 3
INTRODUCTION
Thankyou for purchasingthis model by GeneracPowerSystems,
Inc. This model is a compact, high performance, air-cooled,
engine driven generatordesigned to supply electrical power to
operateelectrical loads where no utility power is availableor in
placeof utility dueto apoweroutage.
BEADTHiSMANUALTHOROUGHLY
If any portion of this manual is not understood, contact the
nearest Authorized Dealer for starting, operating and servicing
procedures.
The operator is responsiblefor proper and safe use of the
equipment.We strongly recommendthat the operator read this
manualandthoroughlyunderstandall instructionsbeforeusingthe
equipment.Wealsostronglyrecommendinstructingother usersto
properlystart andoperatethe unit.This preparesthem ifthey need
to operatetheequipmentin anemergency.
Thegeneratorcan operatesafely,efficiently andreliablyonly if it
is properlylocated, operatedand maintained.Beforeoperatingor
servicingthe generator:
• Becomefamiliar with and strictly adhereto all local, stateand
nationalcodes andregulations.
• Study all safety warnings in this manual and on the product
carefully.
• Becomefamiliarwith this manualandthe unit beforeuse.
Themanufacturercannot anticipateevery possible circumstance
that might involvea hazard.Thewarnings inthis manual,and on
tags and decals affixedto the unit are, therefore,not all inclusive.
If usinga procedure,work method oroperatingtechniquethat the
manufacturerdoes not specifically recommend,ensurethat it is
safe for others. Also makesure the procedure,work methodor
operatingtechniqueutilizeddoes not renderthe generatorunsafe.
THE INFORMATIONCONTAINEDHEREIN WAS BASED ON
MACHINESIN PRODUCTIONAT THE TIME OF PUBLICATION.
GENERACRESERVESTHERIGHTTOMODIFYTHISMANUALAT
ANYTIME.
SAFETYRULES
Throughoutthis publication,and ontags anddecals affixedto the
generator,DANGER,WARNING,CAUTIONand NOTEblocks are
usedto alert personnelto special instructionsabout a particular
operation that may be hazardous if performed incorrectly or
carelessly. Observe them carefully. Their definitions are as
follows:
iNDICATESA HAZARDOUSSiTUATiONORACTIONWHICH,IF
NOTAVOIDED,WiLLRESULTiN DEATHORSERIOUSiNJURY.
Indicatesa hazardoussituationor actionwhich,if not
avoided, couldresultin deathorseriousinjury.
,ACAUTION!
Indicatesa hazardoussituationoraction which,if not
avoided, couldresultin minorormoderateinjury.
NOTE:
Notescontain additionalinformationimportantto aprocedure
and will be found within theregular textbodyof thismanual.
These safety warnings cannot eliminatethe hazards that they
indicate. Common sense and strict compliancewith the special
instructionswhileperforming theaction orserviceareessentialto
preventingaccidents.
Four commonly used safety symbols accompanythe DANGER,
WARNINGand CAUTIONblocks. The type of information each
indicatesis asfollows:
,_This symbol points out important safety
information that, if not followed, could
endanger personal safety and/or property of
others.
This symbol points out potential explosion
hazard.
i/_This symbol points out potential fire hazard.
i/_This symbol points out potential electrical
shock hazard.
GENERAL HAZARDS
• Neveroperatein anenclosedareaor indoors.
• For safety reasons, the manufacturer recommends that the
maintenanceof this equipmentis carried outby an Authorized
Dealer.Inspectthe generatorregularly,and contactthe nearest
AuthorizedDealerfor parts needingrepairor replacement.
• Operategeneratoronly on levelsurfacesandwhereit will notbe
exposedto excessivemoisture,dirt, dust orcorrosivevapors.
• Keephands, feet, clothing, etc., away from drive belts, fans,
and other moving parts. Neverremoveany fan guardor shield
whilethe unit is operating.
• Certain parts of the generator get extremely hot during
operation. Keep clear of the generator until it has cooled to
avoidsevereburns.
• Do NOToperategeneratorinthe rain.
• Do not alter the construction of the generator or change
controlswhich might createan unsafeoperatingcondition.
• Neverstart or stop the unit with electrical loads connected
to receptaclesAND with connecteddevicesturned ON. Start
the engine and let it stabilize before connecting electrical
loads. Disconnect all electricalloads beforeshutting downthe
generator.
• Do notinsert objectsthrough unit's cooling slots.
• When working on this equipment, remain alert at all times.
Never work on the equipment when physically or mentally
fatigued.
Page 4
* Neveruse the generatoror anyof its parts as a step. Stepping
on the unit can stress and break parts, and may result in
dangerousoperating conditions from leakingexhaust gases,
fuel leakage,oil leakage,etc.
* Onelectricstart models, disconnectthe POSITIVE(+) battery
cable from the enginestarter ORthe NEGATIVE(-) battery
cable from the battery terminal, whichever is easier, before
transportingthe generator.
NOTE:
This generator is equippedwith a spark arrestor muffler. The
spark arrestor must be maintained in effective working order
by the owner/ operator. In the State of California, a spark
arrestor is required by law (Section 4442 of the California
PublicResourcesCode).Otherstates may have similar laws.
Federal lawsapply on federal lands.
EXHAUST & LOCATIONHAZARDS
• Neveroperate in an enclosed areaor indoors!NEVERuse in
the home,or in partlyenclosedareassuchas garages, even
if doors and windowsare open! ONLYuse outdoors and far
fromopenwindows,doors, vents,andin anarea thatwill not
accumulatedeadly exhaust.
Using a generator indoors CAN KiLL YOU iN MINUTES.
Generator exhaust contains carbon monoxide. This is
a poison you cannot see or smell,
ELECTRICALHAZARDS
* The generator produces dangerously high voltage when in
operation.Avoidcontactwith barewires,terminals,connections,
etc., while the unit is running,even on equipmentconnected
to the generator. Ensureall appropriate covers, guards and
barriersarein placebeforeoperatingthe generator.
* Never handle any kind of electrical cord or device while
standinginwater,while barefootorwhile handsor feetarewet.
DANGEROUSELECTRICALSHOCKMAYRESULT.
* TheNationalElectricCode(NEC)requirestheframe andexternal
electrically conductive parts of the generator be properly
connectedto an approvedearthground.Local electricalcodes
may also requireproper groundingof the generator.Consult
with a local electricianfor groundingrequirementsin thearea.
* Use a ground fault circuit interrupter in any damp or highly
conductivearea(such as metaldecking or steelwork).
* Do not useworn, bare,frayed orotherwisedamagedelectrical
cord setswith the generator.
* Beforeperforminganymaintenanceonthegenerator,disconnect
the enginestarting battery (if equipped)to preventaccidental
start up. Disconnectthe cablefrom the batterypost indicated
by aNEGATIVE,NEGor (-) first. Reconnectthatcable last.
* In caseof accidentcausedby electricshock, immediatelyshut
down the source of electrical power.If this is not possible,
attempt to free the victim from the live conductor. AVOID
DIRECTCONTACTWITH THEVICTIM. Usea non-conducting
implement,such as a ropeor board,to freethevictim from the
live conductor.If the victim is unconscious, apply first aid and
getimmediatemedical help.
NEVER use insidea home
or garage, EVEN IF doors
and windows are open.
* The engine exhaust fumes contain carbon monoxide, which
can you cannot see or smell. This poisonousgas, if breathed
in sufficient concentrations, can cause unconsciousness or
evendeath.
* Adequate, unobstructed flow of cooling and ventilating air
is critical to correct generator operation. Do not alter the
installation or permit even partial blockage of ventilation
provisions, as this can seriously affect safe operationof the
generator.ThegeneratorMUSTbeoperatedoutdoors.
* Thisexhaustsystem must be properlymaintained.Do nothing
that mightrendertheexhaustsystemunsafeorinnoncompliance
with any localcodes and/or standards.
* Alwaysusea battery operatedcarbonmonoxidealarmindoors,
installedaccordingto themanufacturersinstructions.
* If you start to feet sick, dizzy,or weak afterthe generatorhas
beenrunning,moveto freshair IMMEDIATELYSeea doctor,as
you couldhavecarbonmonoxidepoisoning.
Only use OUTSIDE and
far away from windows,
doors, and vents.
FIREHAZARDS
• GasolineishighlyFLAMMABLEand itsvaporsare EXPLOSIVE.
Do notpermitsmoking,open flames, sparksor heat in the
vicinitywhilehandlinggasoline.
• Neveraddfuel whileunit isrunning or hot.Allow engineto cool
completelybeforeaddingfuel.
• Never fill fuel tank indoors, Comply with all laws regulating
storageand handlingof gasoline.
• Do not overfill the fuel tank. Always allow roomfor fuel
expansion. If tank is over=filled,fuel can overflow onto a hot
engineandcauseFIREor an EXPLOSION.Neverstoregenerator
with fuel in tank where gasolinevapors might reach an open
flame, spark or pilot light (as on a furnace, water heateror
clothes dryer). FIREor EXPLOSIONmay result. Allow unit to
cool entirelybeforestorage.
• Wipe up any fuel or oil spills immediately.Ensure that no
combustiblematerialsareleft on ornearthegenerator.Keepthe
areasurroundingthe generatorcleanandfree from debrisand
keepa clearanceof five (5) feet onall side to allow for proper
ventilationof the generator.
Page 5
* Do not insert objectsthrough unit's coolingslots.
* Do not operatethe generatorif connected electrical devices
overheat,if electricaloutputislost, if engineorgeneratorsparks
or ifflames orsmokeare observedwhileunit is running.
* Keepafire extinguishernearthe generatoratall times.
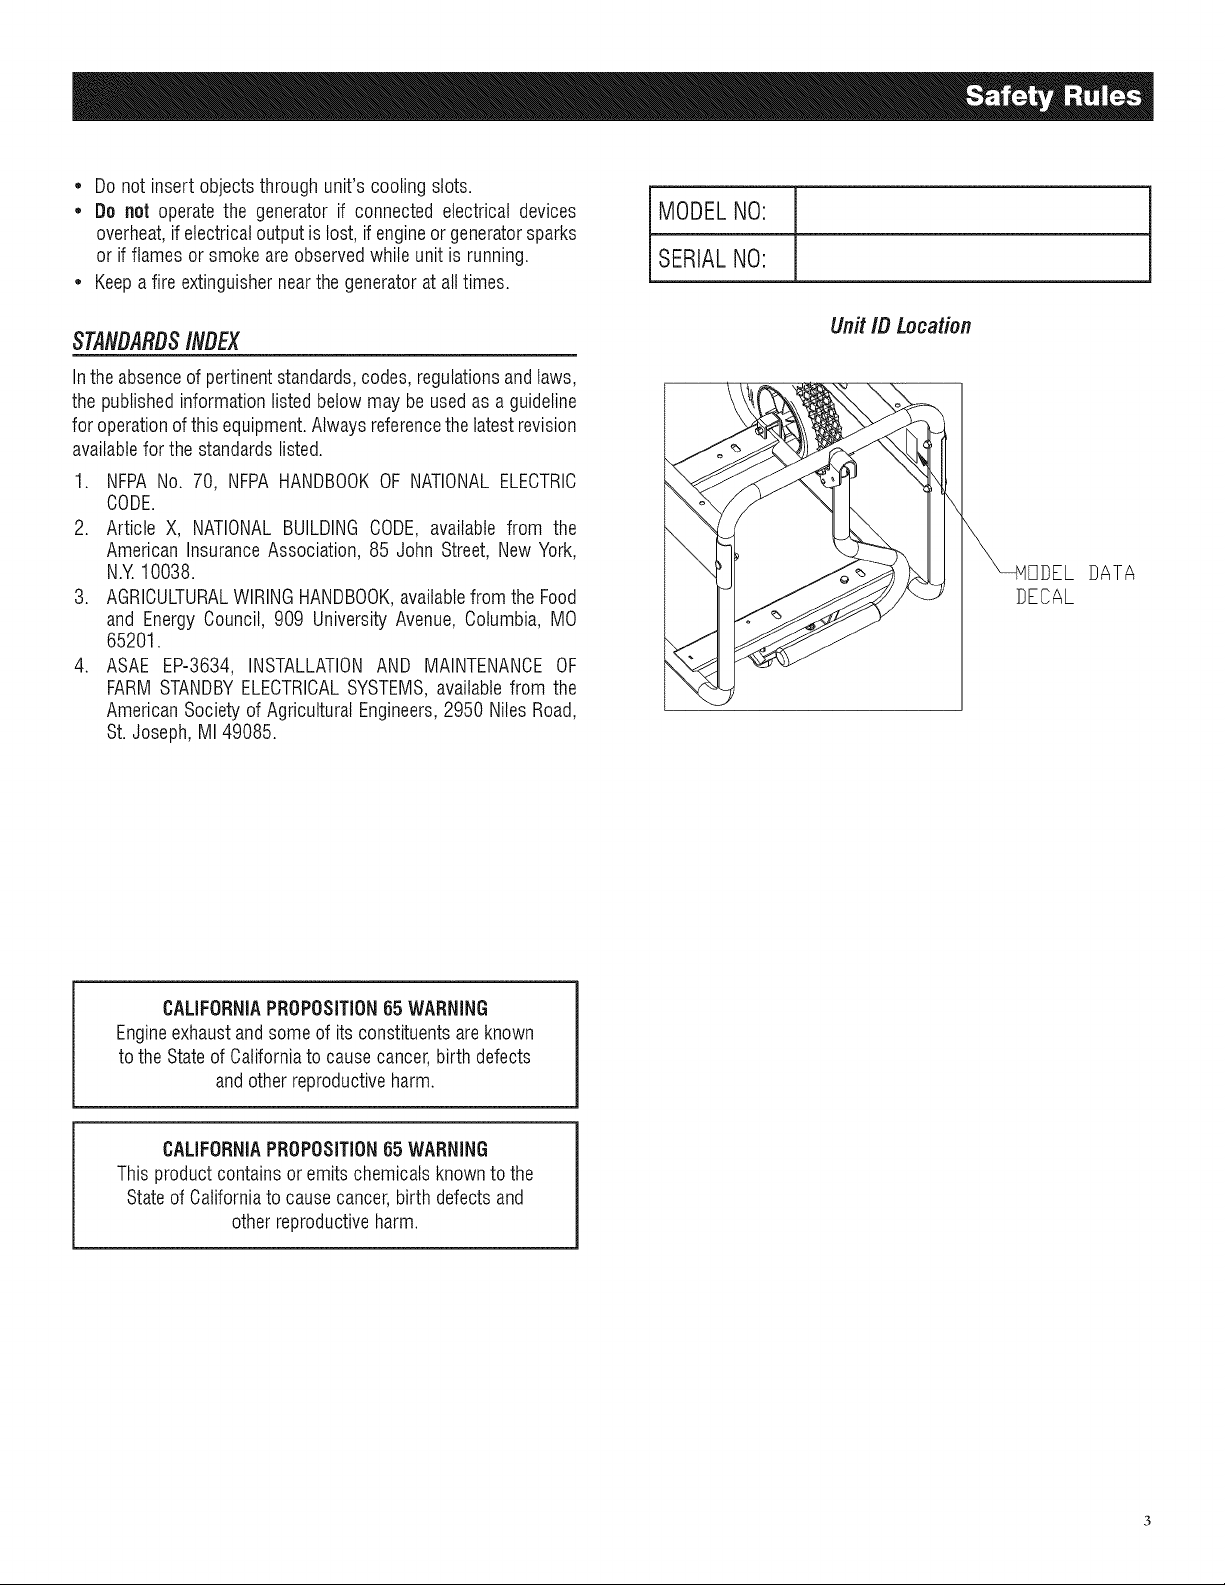
MODELNO:
SERIALNO:
STAtVDARDS/#DEX
Intheabsenceof pertinentstandards,codes,regulationsandtaws,
the publishedinformationlistedbelowmay be usedas aguideline
foroperationof this equipment.Alwaysreferencethelatestrevision
availablefor the standardslisted.
1. NFPANo. 70, NFPAHANDBOOKOF NATIONALELECTRIC
CODE.
2. Article X, NATIONALBUILDINGCODE, available from the
American InsuranceAssociation, 85 John Street, NewYork,
N.Y 10038.
3. AGRICULTURALWIRINGHANDBOOK,availablefrom the Food
and EnergyCouncil, 909 UniversityAvenue, Columbia, MO
65201.
4. ASAE EP-3634, INSTALLATIONAND MAINTENANCEOF
FARMSTANDBYELECTRICALSYSTEMS,availablefrom the
AmericanSocietyof AgriculturalEngineers,2950 NilesRoad,
St. Joseph, MI 49085.
UnitIBLocation
DATA
DECAL
CALIFORNIAPROPOSITION65 WARNING
Engineexhaustandsomeof itsconstituentsareknown
to theStateof Californiato causecancer,birth defects
andotherreproductiveharm.
CALIFORNIAPROPOSITION65 WARNING
This productcontains or emitschemicalsknown tothe
Stateof Californiato causecancer,birth defectsand
otherreproductiveharm.
Page 6

1.1 UNPACKING
• Removeall packagingmaterial.
• Removeseparateaccessorybox.
• Removethegeneratorfrom carton.
1.1.1 ACCESSORYBOX
Checkall contents.If anyparts aremissing or damaged,locatean
authorizeddealerat 1-888-436-3722.
e
1 - Owner's Manual • 1 - Handle Assembly
e
1 - Liter Oil SAE 30 • 1 - Frame Foot
e
2 - Never-Flat Wheels • 1 - Battery Charger (electric
start only)
1 - Hardware Bag (containing the following):
• 2-Rubber Feet • 2-M8 Bolt (Long)
• 2-1/2" Axle Pins • 2-M8 Bolts (Short)
• 2-Cotter Pins • 2-M8 Acorn Nut
• 2-1/2" FlatWashers • 4-Hex FlangedM8 Nuts
• 2-Short Bolts • 2-Lock Washers
• 2-FlangeNuts (electricstart only)
1.2 ASSEMBLY
Thegeneratorrequiressomeassemblypriorto usingit. Ifproblems
arise when assemblingthe generator,pleasecall the Generator
Hetplineat 1-888-77LOWES.
1.2.1 ASSEMBLINGTHEACCESSORYKIT
The wheels are designed into the unit to greatly improve the
portability ofthe generator.
You will needthe following tools to properlyinstall the accessory
kit.
• NeedleNosePliers
• Ratchetanda 13mm (1/2") socket
• 13mm (1/2") box wrench
NOTE:
The wheels are not intendedfor over-the-road use.
1. Refer to Figure 1 and install the Wheels as follows:
• Slidethe AxlePinsthroughthe Wheel,1/2" FlatWasher,andWheel
Bracketon the frame.
• Insertthe CotterPinthroughthe AxlePinthenbend thetabs (ofthe
OotterPins) outward to lock into place.
2. Refer to Figure 1 and install the Frame Foot and Rubber
Bumpers as shown.
• Slidethe RubberBumperstuds throughthe FrameFootthen install
the LockingFlangeNuts.
• Slidethe HexHeadBoltsthrough the holesin the FrameRail.
• Slide the Frame Foot onto the Hex Head Bolts then install the
LockingFlangeNuts.
3. Refer to Figure 1 and install the Handle as shown.
• Slidethe long Bolts through the HandleBracketand Handle,then
installthe HexNuts.
Figure 1- Wheel & Handle Assembly
AXLE PIN
2X
FRANE WASHER
NUT
i/£ _ FLAT
COTTER
PIN
N8
1.2.2 BATTERYCABLECONNECTION(ELECTR/CSTART
ONLY)_
The unit has been deliberatelyshipped with the battery cables
disconnected.
Toconnectthe battery(seeFigure13 for connectiondetails):
1. Cut off cable ties securing battery cables and remove red
coversfrom batteryterminals.
2. First,connecttheredcableto thepositive(+) batteryterminal
with the bolt, lock washerandnut supplied.
3. Connectthe black cable to the negative(-) batteryterminal
with the bolt, lock washerandnut supplied.
4. Makesure allconnectionsare secure.Slidethe rubber boots
overtheterminals and connectionhardware.
NOTE:
If the battery is unable to start the engine,charge it with the
12V chargerincludedinthe accessory box(seethe "Charginga
Battery" section for details).
2.1 KNOWTHEGENERATOR
Read the Owner'sManual and Safety Rules before operating
this generator.
Compare the generator to Figures 2 through 4 to become
familiarizedwiththelocations of variouscontrolsandadjustments.
Savethis manualfor future reference.
1. 120 VoltAC,20 Amp, DuplexReceptacle- Supplieselectrical
powerfor theoperationof 120Volt AC,20 Amp,single-phase,
60 Hzelectricallighting,appliance,tool and motor loads.
2. 120/240 VoltAC, 30 Amp LockingReceptacle - Supplies
electricalpowerfor the operationof 120 and/or240 Volt AC,
30 Amp, single-phase, 60 Hz, electrical lighting, appliance,
tool andmotor loads.
3. Circuit Breakers(AC)- Eachreceptacleis providedwith a
push-to-reset circuit breakerto protectthe generatoragainst
electricaloverload.
4. Oil Drain- Useto drainengineoil.
5. AirFilter - Filtersintakeair as it isdrawn intothe engine.
Page 7

6, ChokeKnob- Usedwhen startinga coldengine.
7, FuelTank- SeegeneratorSpecificationsfor tank capacity.
8, GroundingLug- Groundthe generatorto an approvedearth
groundhere.See"GroundingtheGenerator"for details.
g, Run/StopSwitch - Controls the operation of the generator
(pull start models).
CA,Start Switch - Used to start engine from the starter motor
(electricstart modelsonly).
10, Muffler - Quietsthe engine.
Figure2 - Centre/Panel
Figure3 - Generator Controls
Figure 4 - Generator Controls
11. Handle - Pivot and retract for storage. Press the spring-
loadedbuttonto move handles.
12, GasCap- Fuelfill location.
13. FuelGauge- Showsfuel levelin tank.
14. OilFill - Addoil here.
15, Recoil Starter - Useto start enginemanually.
16. FuelShut Off - Valvebetweenfueltank andcarburetor.
17. Battery Charger Input - Thisreceptacleallowsthe capability
to recharge the 12 volt DO storage battery provided with
the 12 Volt Adaptor Plug Chargerwhich is included in the
Accessory Box. Locatedbehindthe battery chargerinput is
a 1.50 Amp in-linefuse which is inside the control panelto
protectthe battery(electricstart modelsonly).
18. Battery - Powersthe electric starter (electric start models
only).
lg. Hourmeter- Trackshoursof operation.
Page 8
2.2 HOURMETER
The Hourmeter tracks hours of operation for scheduled
maintenance:
Therewill be a"CHGOIL"messageevery100 hours.Themessage
will flash one hour before and one hour after each 100 hour
interval,providinga two hourwindow to perform service.
This messagewill actuallybeginflashing at 99 hoursand disable
itselfat 101 hoursagain,providingatwo hourwindow to perform
the service.
Every200 hours the "SVC"icon on the lower left hand corner of
the displaywill flash. Themessagewill flash one hourbeforeand
onehourafter each200 hourintervalprovidingatwo hourwindow
to performservice.
Whenthe hour meter is inthe FlashAlert mode,the maintenance
message will always alternate with elapsedtime in hours and
tenths. The hours wilt flash four times, then alternate with the
maintenancemessagefourtimes untilthe meterresetsitself.
• 100 hours- CHGOIL-- OilChangeInterval(Every100 hrs)
Note:
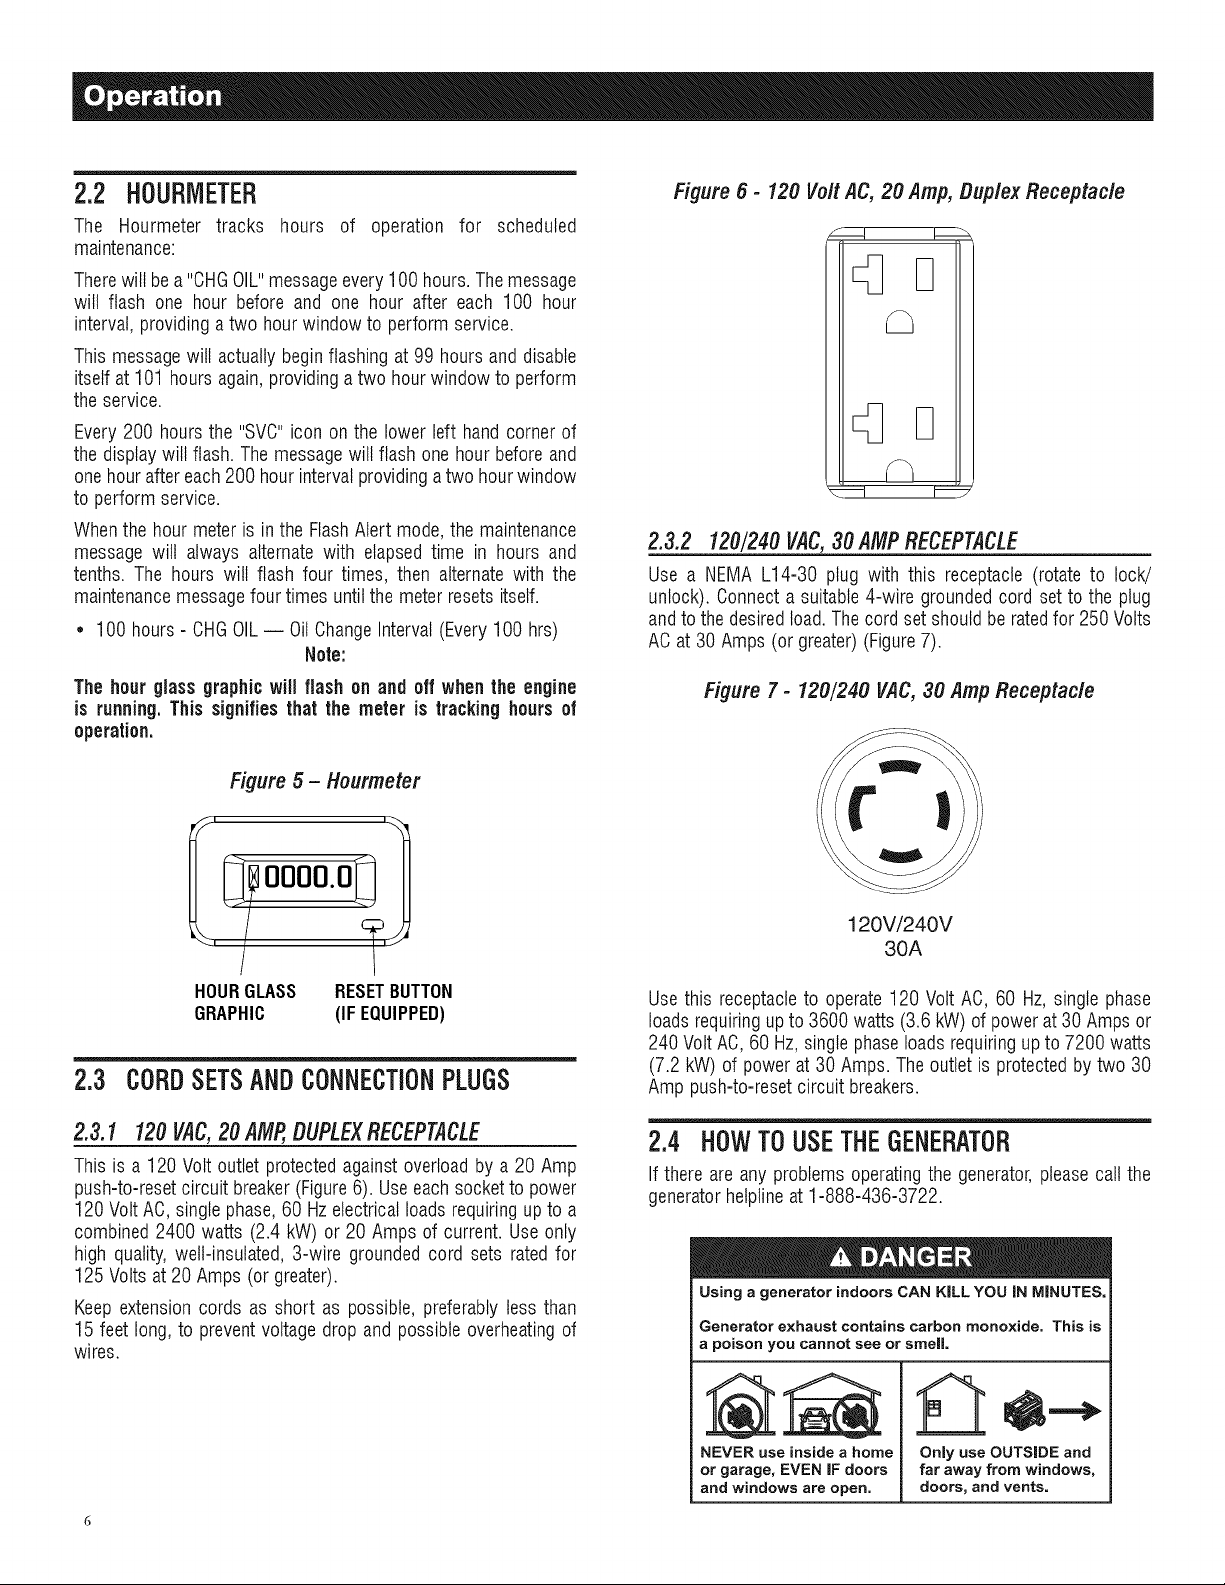
Figure 6 - 120 Volt AC, 20 Amp, Duplex Receptacle
D
2.3.2 120/240 V4C,30AMPRECEPTACLE
Use a NEMA L14-30 plug with this receptacle (rotate to lock/
unlock). Connecta suitable4-wire groundedcord set to the plug
andto thedesiredtoad.Thecordset shouldbe ratedfor 250 Volts
ACat 30Amps (or greater)(Figure7).
The hour glassgraphicwill flash on and off when the engine
is running.This signifiesthat the meter is tracking hoursof
operation.
Figure 5 - Hourmeter
oooo.oq
I!
i i
HOURGLASS RESETBUTTON
GRAPHIC (IF EQUIPPED)
2.3 CORDSETSANDCONNECTIONPLUGS
2.3.1 120V4C,20 AMP,DUPLEXRECEPTACLE
This is a 120 Voltoutlet protectedagainst overloadby a 20 Amp
push-to-resetcircuit breaker(Figure6). Useeach socketto power
120 Volt AC, singlephase,60 Hzelectricalloadsrequiringup to a
combined 2400 watts (2.4 kW) or 20 Amps of current.Use only
high quality,welt-insulated,3-wire groundedcord sets ratedfor
125 Volts at20 Amps (orgreater).
Keep extensioncords as short as possible,preferably less than
15 feet long, to preventvoltage drop and possibleoverheatingof
wires.
Figure 7 - 120/240 VAC, 30 Amp Receptacle
120V/240V
30A
Use this receptacleto operate120 Volt AC,60 Hz, single phase
loadsrequiringup to 3600 watts (3.6kW) of power at 30 Ampsor
240 Volt AC,60 Hz,singlephaseloadsrequiringup to 7200 watts
(7.2 kW) of powerat 30 Amps.Theoutlet is protectedby two 30
Amp push-to-resetcircuit breakers.
2.4 HOWTOUSETHEGENERATOR
If there are any problems operatingthe generator,pleasecall the
generatorhetplineat 1-888-436-3722.
Using a generator indoors CAN KILL YOU iN MINUTES.
Generator exhaust contains carbon monoxide. This is
a poison you cannot see or smell
NEVER use inside a home
or garage, EVEN IF doors
and windows are open.
Only use OUTSIDE and
far away from windows,
doors, and vents.
Page 9
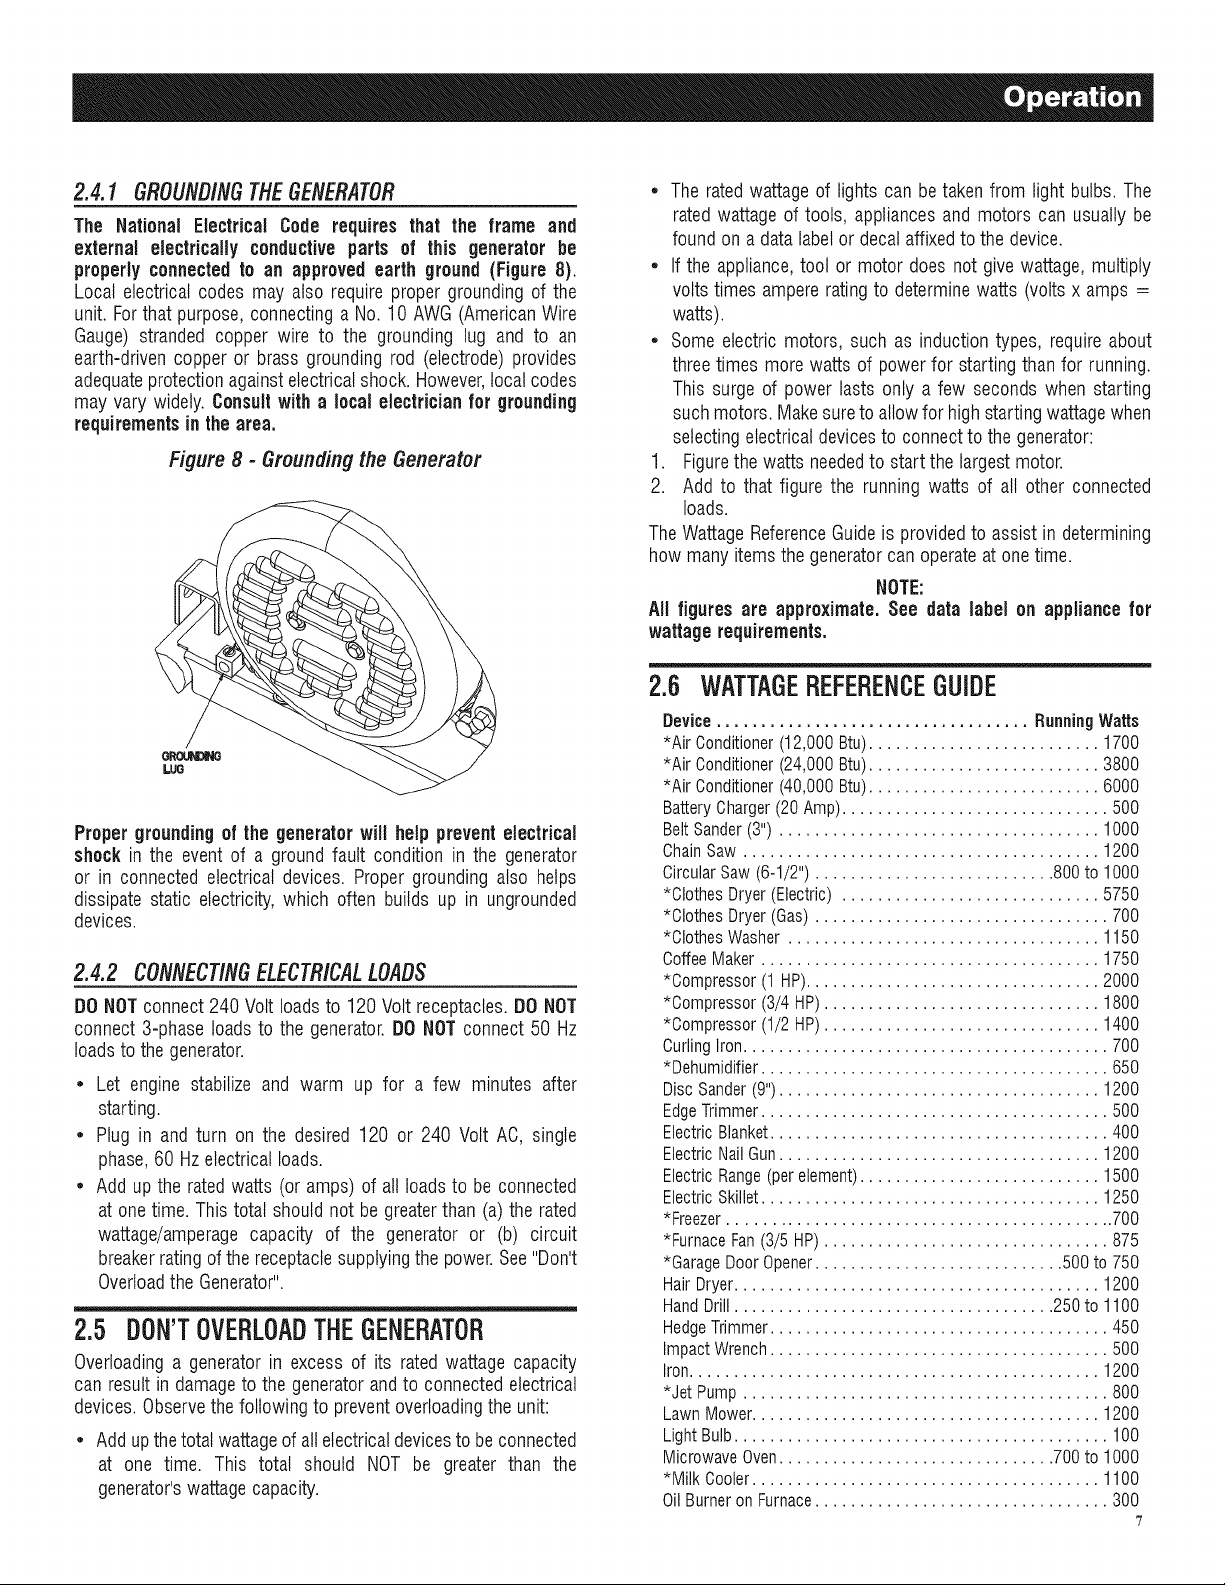
2.4.1 GROUNDINGTHEGENERATOR
The National Electrical Code requires that the frame and
external electrically conductive parts of this generator be
properlyconnectedto an approvedearth ground (Figure 8).
Local electrical codes may also requireproper groundingof the
unit. Forthatpurpose, connectinga No. 10 AWG(AmericanWire
Gauge) stranded copper wire to the grounding lug and to an
earth-driven copper or brass grounding rod (electrode)provides
adequateprotectionagainstelectricalshock. However,local codes
may vary widely. Consultwith a localelectricianfor grounding
requirementsin the area.
Figure8 - Groundingthe Generator
GROL_
LUG
Proper groundingof the generatorwill help preventelectrical
shockin the event of a ground fault condition in the generator
or in connected electrical devices. Proper groundingalso helps
dissipate static electricity,which often builds up in ungrounded
devices.
2.4.2 CONNECTINGELECTR/CALLOADS
DONOTconnect240 Volt loadsto 120Volt receptacles.DO NOT
connect 3-phaseloads to the generator.DO NOTconnect 50 Hz
loadsto thegenerator.
• Let engine stabilize and warm up for a few minutes after
starting.
• Plug in and turn on the desired 120 or 240 Volt AO, single
phase,60 Hzelectrical loads.
• Addup the ratedwatts (or amps) of all loadsto be connected
at onetime. Thistotal should not begreaterthan (a) the rated
wattage/amperagecapacity of the generator or (b) circuit
breakerratingof thereceptaclesupplyingthe power.See"Don't
Overloadthe Generator".
2.5 DON'TOVERLOADTHEGENERATOR
Overloadinga generator in excessof its ratedwattage capacity
can resultin damageto the generatorandto connectedelectrical
devices.Observethefollowing to preventoverloadingthe unit:
• Addupthetotal wattageofall electricaldevicesto be connected
at one time. This total should NOT be greater than the
generator'swattagecapacity.
• The ratedwattageof lights can betaken from light bulbs.The
ratedwattageof tools, appliancesand motors can usually be
foundon a data labelor decalaffixedto the device.
• If the appliance,tool or motor does not give wattage,multiply
voltstimes ampereratingto determinewatts (voltsx amps =
watts).
• Some electric motors, such as inductiontypes, require about
threetimes morewatts of powerfor startingthan for running.
This surge of power lasts only a few seconds when starting
suchmotors. Makesureto allowfor highstartingwattagewhen
selectingelectrical devicesto connectto the generator:
1. Figurethe watts neededto start the largestmotor.
2. Add to that figure the running watts of all other connected
loads.
TheWattageReferenceGuideis providedto assist in determining
how manyitemsthegeneratorcan operateat onetime.
NOTE:
All figures are approximate. See data label on appliance for
wattage requirements.
2.6 WATTAGEREFERENCEGUIDE
Device................................... RunningWatts
*AirConditioner(12,000Btu).......................... 1700
*AirConditioner(24,000Btu).......................... 3800
*AirConditioner(40,000Btu).......................... 6000
BatteryCharger(20Amp).............................. 500
BeltSander(3").................................... 1000
ChainSaw........................................ 1200
CircularSaw(6-1/2")........................... 800to 1000
*ClothesDryer(Electric)............................. 5750
*ClothesDryer(Gas)................................. 700
*ClothesWasher................................... 1150
CoffeeMaker...................................... 1750
*Compressor(1HP)................................. 2000
*Compressor(3/4HP)............................... 1800
*Compressor(1/2HP)............................... 1400
CurlingIron......................................... 700
*Dehumidifier....................................... 650
DiscSander(9").................................... 1200
EdgeTrimmer....................................... 500
ElectricBlanket...................................... 400
ElectricNailGun.................................... 1200
ElectricRange(perelement)........................... 1500
ElectricSkillet...................................... 1250
*Freezer............................................ 700
*FurnaceFan(3/5HP)................................ 875
*GarageDoorOpener............................ 500to 750
HairDryer......................................... 1200
HandDrill.................................... 250to 1100
HedgeTrimmer...................................... 450
ImpactWrench...................................... 500
Iron.............................................. 1200
*JetPump......................................... 800
LawnMower....................................... 1200
LightBulb.......................................... 100
MicrowaveOven............................... 700to 1000
*MilkCooler....................................... 1100
OilBurneronFurnace................................. 300
"7
Page 10
OilFiredSpace Heater(140,000 Btu) ..................... 400
OilFiredSpace Heater(85,000 Btu) ...................... 225
OilFiredSpace Heater(30,000 Btu) ...................... 150
*Paint Sprayer,Airless(1/3 HP)......................... 600
PaintSprayer,Airless (handheld)......................... 150
Radio......................................... 50 to 200
*Refrigerator........................................ 700
SlowCooker........................................ 200
*SubmersiblePump (1-1/2 HP) ........................ 2800
*SubmersiblePump (1 HP) ........................... 2000
*Submersible Pump(1/2 HP).......................... 1500
*Sump Pump................................. 800 to 1050
*Table Saw (10") ............................. 1750 to 2000
Television..................................... 200 to 500
Toaster..................................... 1000 to 1650
WeedTrimmer ...................................... 500
* Allow 3 times the listedwatts for startingthese devices.
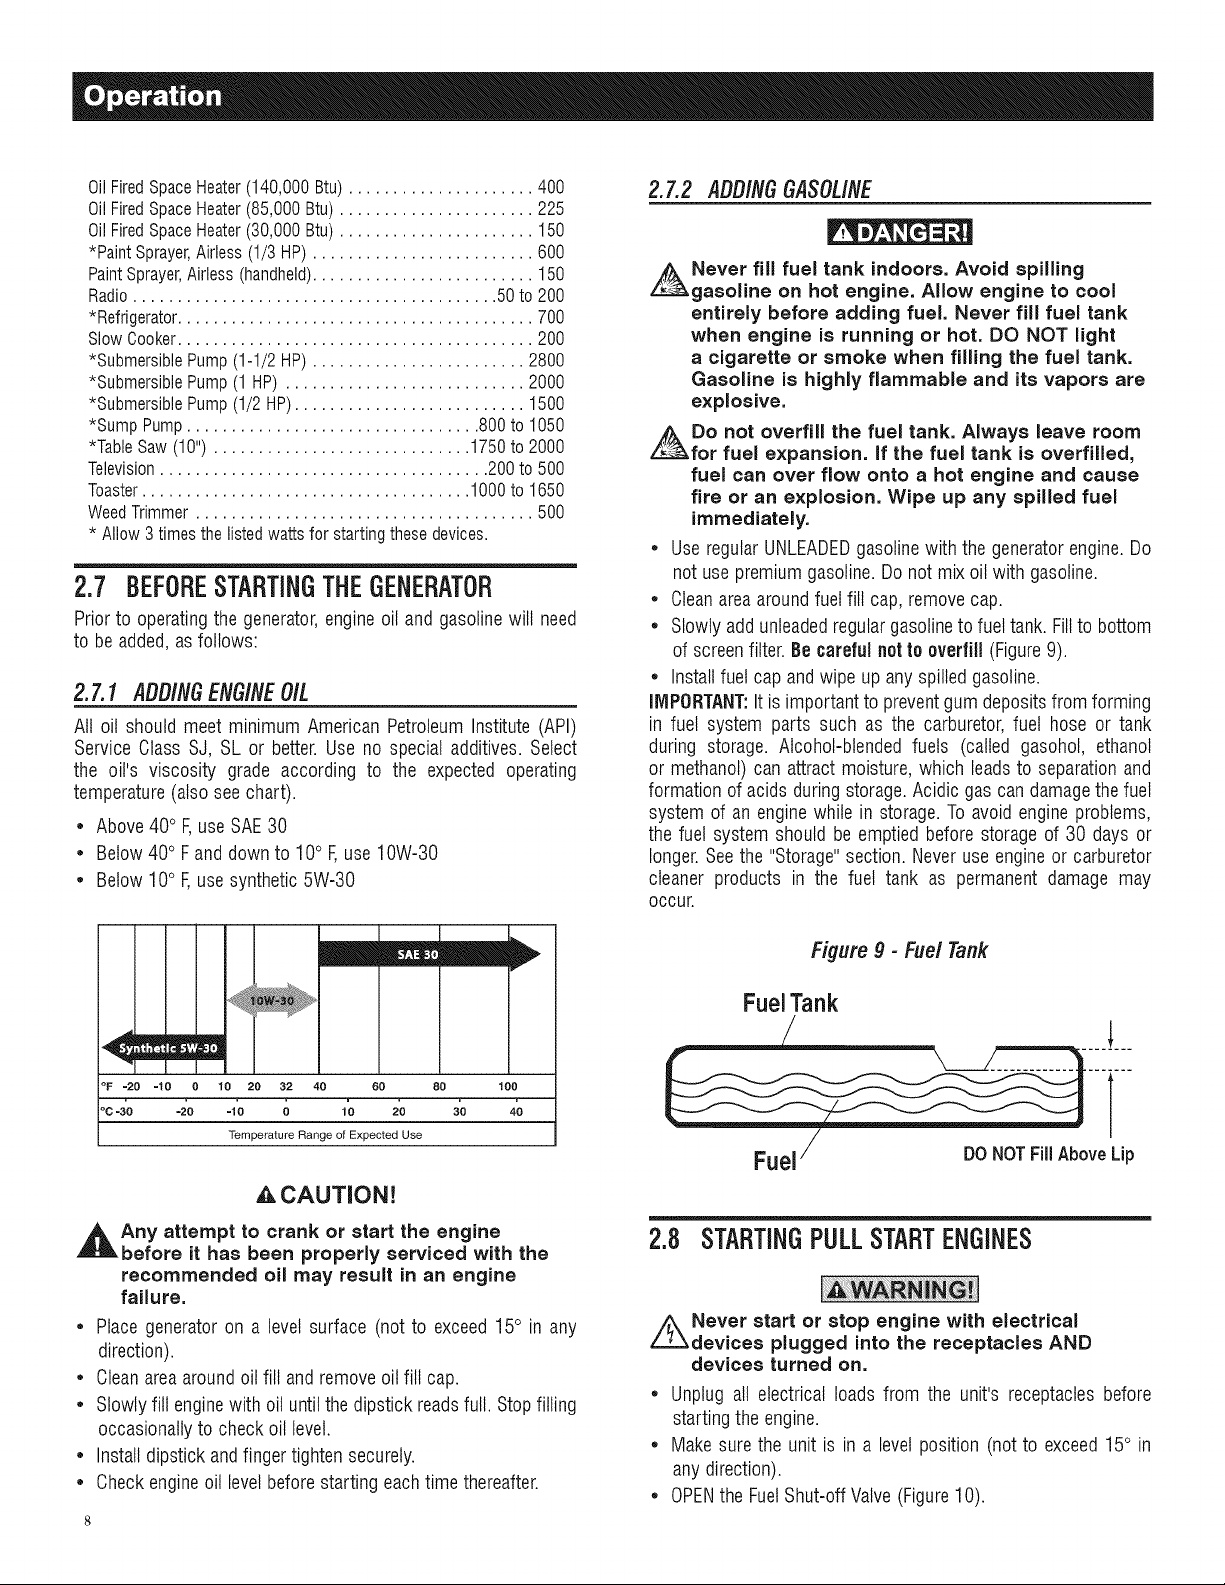
2.7 BEFORESTARTINGTHEGENERATOR
Priorto operatingthe generator,engineoil and gasolinewill need
to beadded,asfollows:
2,7,1 IIL #/tVGENG/NEO/L
All oil should meet minimum American PetroleumInstitute (API)
Service Class SJ, SL or better.Use no special additives. Select
the oil's viscosity grade according to the expected operating
temperature(also seechart).
• Above40° F,useSAE30
• Below40° Fand down to 10° F,use10W-30
• Below10° F,usesynthetic5W-30
2.7,2 IIDO/NGGASOL/NE
Never fill fuel tank indoors. Avoid spilling
gasoline on hot engine. Allow engine to cool
entirely before adding fuel. Never fill fuel tank
when engine is running or hot. DO NOT light
a cigarette or smoke when filling the fuel tank.
Gasoline is highly flammable and its vapors are
explosive.
Do not overfill the fuel tank. Always leave room
for fuel expansion, if the fuel tank is overfiJJed,
fuel can over flow onto a hot engine and cause
fire or an explosion. Wipe up any spilled fuel
immediately.
• UseregularUNLEADEDgasolinewith the generatorengine.Do
not usepremiumgasoline.Do notmix oil with gasoline.
• Cleanareaaroundfuelfill cap, removecap.
• Slowlyaddunleadedregulargasolineto fueltank. Fillto bottom
of screenfilter.Be carefulnotto overfill (Figure9).
• Installfuel cap andwipe up any spilledgasoline.
IMPORTANT."Itis importantto preventgum depositsfrom forming
in fuel system parts such as the carburetor,fuel hose or tank
during storage. Alcohol-blendedfuels (called gasohol, ethanol
or methanol)can attract moisture, which leadsto separationand
formationof acidsduringstorage.Acidic gas can damagethefuel
system of an enginewhile in storage.Toavoid engineproblems,
the fuel system should be emptiedbefore storage of 30 days or
longer.Seethe "Storage"section. Neveruseengineor carburetor
cleaner products in the fuel tank as permanent damage may
occur.
mEm
°F =20 =10 O 10 20 32 40 60 80 1OO
oc4'0 -2'o -io o io 2'o 3'0 40
Temperature Range of Expected Use
_,CAUTJON!
,_Any attempt to crank or start the engine
before it has been properly serviced with the
recommended oil may result in an engine
failure.
• Placegenerator on a levelsurface (not to exceed15° in any
direction).
• Cleanareaaroundoil fill andremoveoil fill cap.
• Slowlyfill enginewith oil until the dipstick readsfull. Stopfilling
occasionallyto check oil level.
• Installdipstick andfingertighten securely.
• Checkengineoil levelbeforestarting eachtime thereafter.
Figure9 - Fuel Tank
FuelTank
T
Fuel/ Do NOTFillAboveLip
2.8 STARTINGPULLSTARTENGINES
Never start or stop engine with electrical
devices plugged into the receptacles AND
devices turned on.
• Unplug all electrical loads from the unit's receptaclesbefore
startingthe engine.
• Makesurethe unit is in a levelposition (notto exceed15° in
anydirection).
• OPENthe FuelShut-offValve(Figure10).
Page 11
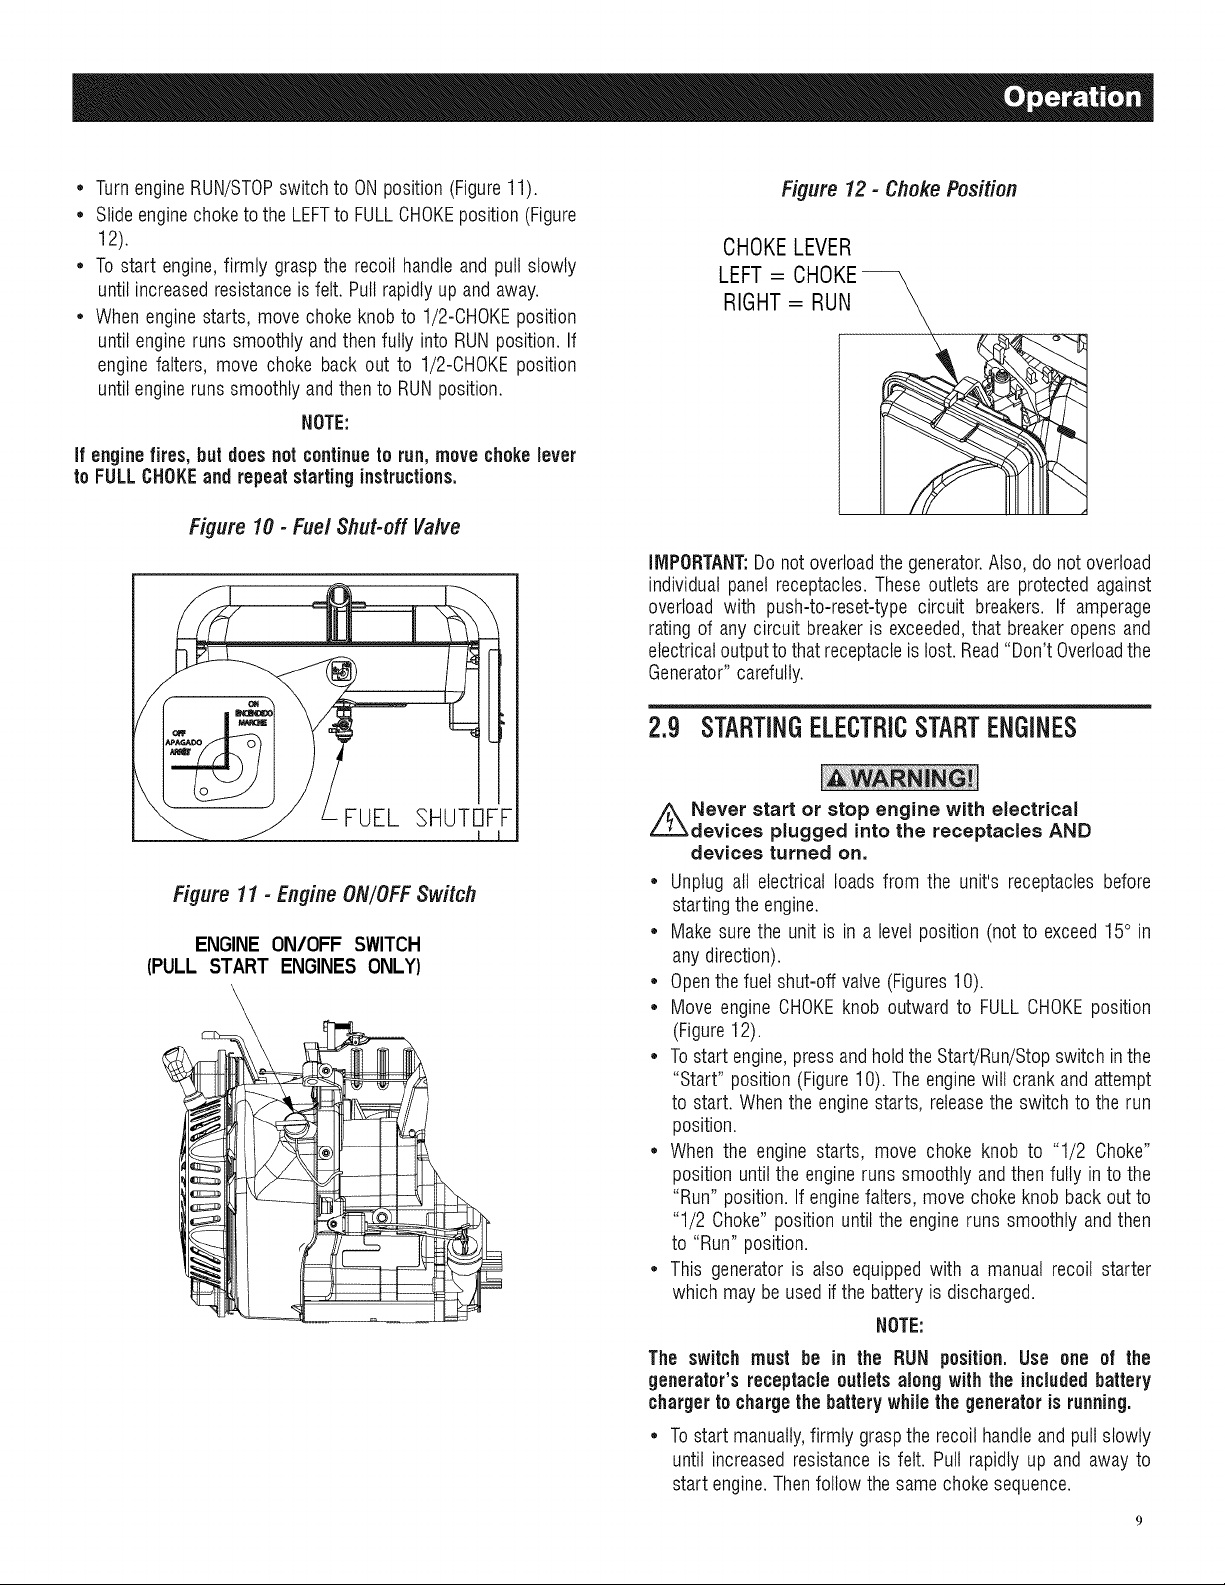
• TurnengineRUN/STOPswitch to ON position(Figure11).
• Slideenginechoketo the LEFTto FULLCHOKEposition (Figure
12).
• Tostart engine,firmly graspthe recoil handleand pull slowly
untilincreasedresistanceisfelt. Puttrapidlyup and away.
• Whenenginestarts, movechoke knobto 1/2-CHOKEposition
until engineruns smoothly andthenfully into RUNposition.If
engine falters, move choke back out to 1/2-CHOKEposition
untilengineruns smoothlyandthen to RUNposition.
NOTE:
if enginefires, but does notcontinueto run,move chokelever
to FULLCHOKEand repeatstartinginstructions.
Figure 10 - Fuel Shut-off Valve
Figure 12 - Choke Position
CHOKELEVER
LEFT= CHOKE--
RIGHT= RUN
IMPORTANT:Donotoverloadthe generator.Also, donotoverload
individual panelreceptacles.These outlets are protectedagainst
overload with push-to-reset-typecircuit breakers. If amperage
ratingof any circuit breakeris exceeded,that breakeropens and
electricaloutputto that receptacleis lost.Read"Don't Overloadthe
Generator"carefully.
2.g STARTINGELECTRICSTARTENGINES
FUEL 3HUTOFF
Figure 11 - Engine ON/OFF Switch
ENGINE ON/OFF SWITCH
(PULL START ENGINES ONLY)
\
=11
z_Never start or stop engine with electrical
devices plugged into the receptacles AND
devices turned on.
• Unplug all electrical loads from the unit's receptaclesbefore
startingthe engine.
• Makesurethe unit is in a levelposition (notto exceed15° in
anydirection).
• Openthefuel shut-off valve (Figures10).
• Move engine CHOKEknob outward to FULLCHOKEposition
(Figure12).
• Tostart engine,pressandhold the Start/Run/Stopswitch inthe
"Start" position(Figure10). Theenginewill crankand attempt
to start. Whenthe enginestarts, releasethe switch to therun
position.
• When the engine starts, move choke knob to "1/2 Choke"
position until the engineruns smoothly and thenfully into the
"Run" position. If enginefalters, movechokeknob backoutto
"1/2 Choke" positionuntil the engine runs smoothlyand then
to "Run" position.
• This generatoris also equippedwith a manual recoil starter
which may beusedif the battery is discharged.
NOTE:
The switch must be in the RUN position. Use one of the
generator's receptacle outlets along with the includedbattery
chargerto chargethe battery whilethe generator is running.
• Tostart manually,firmly graspthe recoil handleand pullslowly
until increasedresistanceis felt. Pull rapidly up and away to
start engine.Thenfollow thesame chokesequence.
Page 12
NOTE: NOTE:
if enginefires, but doesnot continueto run,movechokelever
to FULLCHOKEand repeatstartinginstructions.
IMPORTANT:Donotoverloadthe generator.Also, do not overload
individual panelreceptacles.These outlets are protectedagainst
overload with push-to-reset-type circuit breakers. If amperage
rating of any circuit breakeris exceeded,that breakeropensand
electricaloutputtothat receptacleis lost. Read"Don't Overloadthe
Generator"carefully.
2.10STOPPINGTHEENGINE
• Shutoff allloads,thenunplugthe electricalloadsfrom generator
panelreceptacles.Neverstart or stoptheenginewith electrical
devicespluggedin andturnedon.
• Let enginerun at no-load for several minutes to stabilizethe
internaltemperaturesof engineandgenerator.
• MoveRun/Stopswitch to OFFposition.
• Closefuelvalve.
2.11LOWOiLLEVELSHUTDOWNSYSTEM
Theengineis equippedwitha low oil levelsensorthat shutsdown
the engineautomaticallywhenthe oil leveldropsbelowa specified
level. If the engine shuts down by itself and the fuel tank has
enoughgasoline,checkengineoil level.
Thebattery shipped withthe generatorhasbeen fully charged.
A battery may lose some of its charge when not in use for
prolongedperiodsof time. If the battery is unableto crank the
engine, plugin the 12V chargerincludedin the accessory box
(seesection"Chargingthe Battery").RUNNINGTHEGENERATOR
DOESNOTCHARGETHEBATTERY.
Usebatterychargerplugto keepthebatterychargedandreadyfor
use. Batterychargingshouldbe done ina dry location.
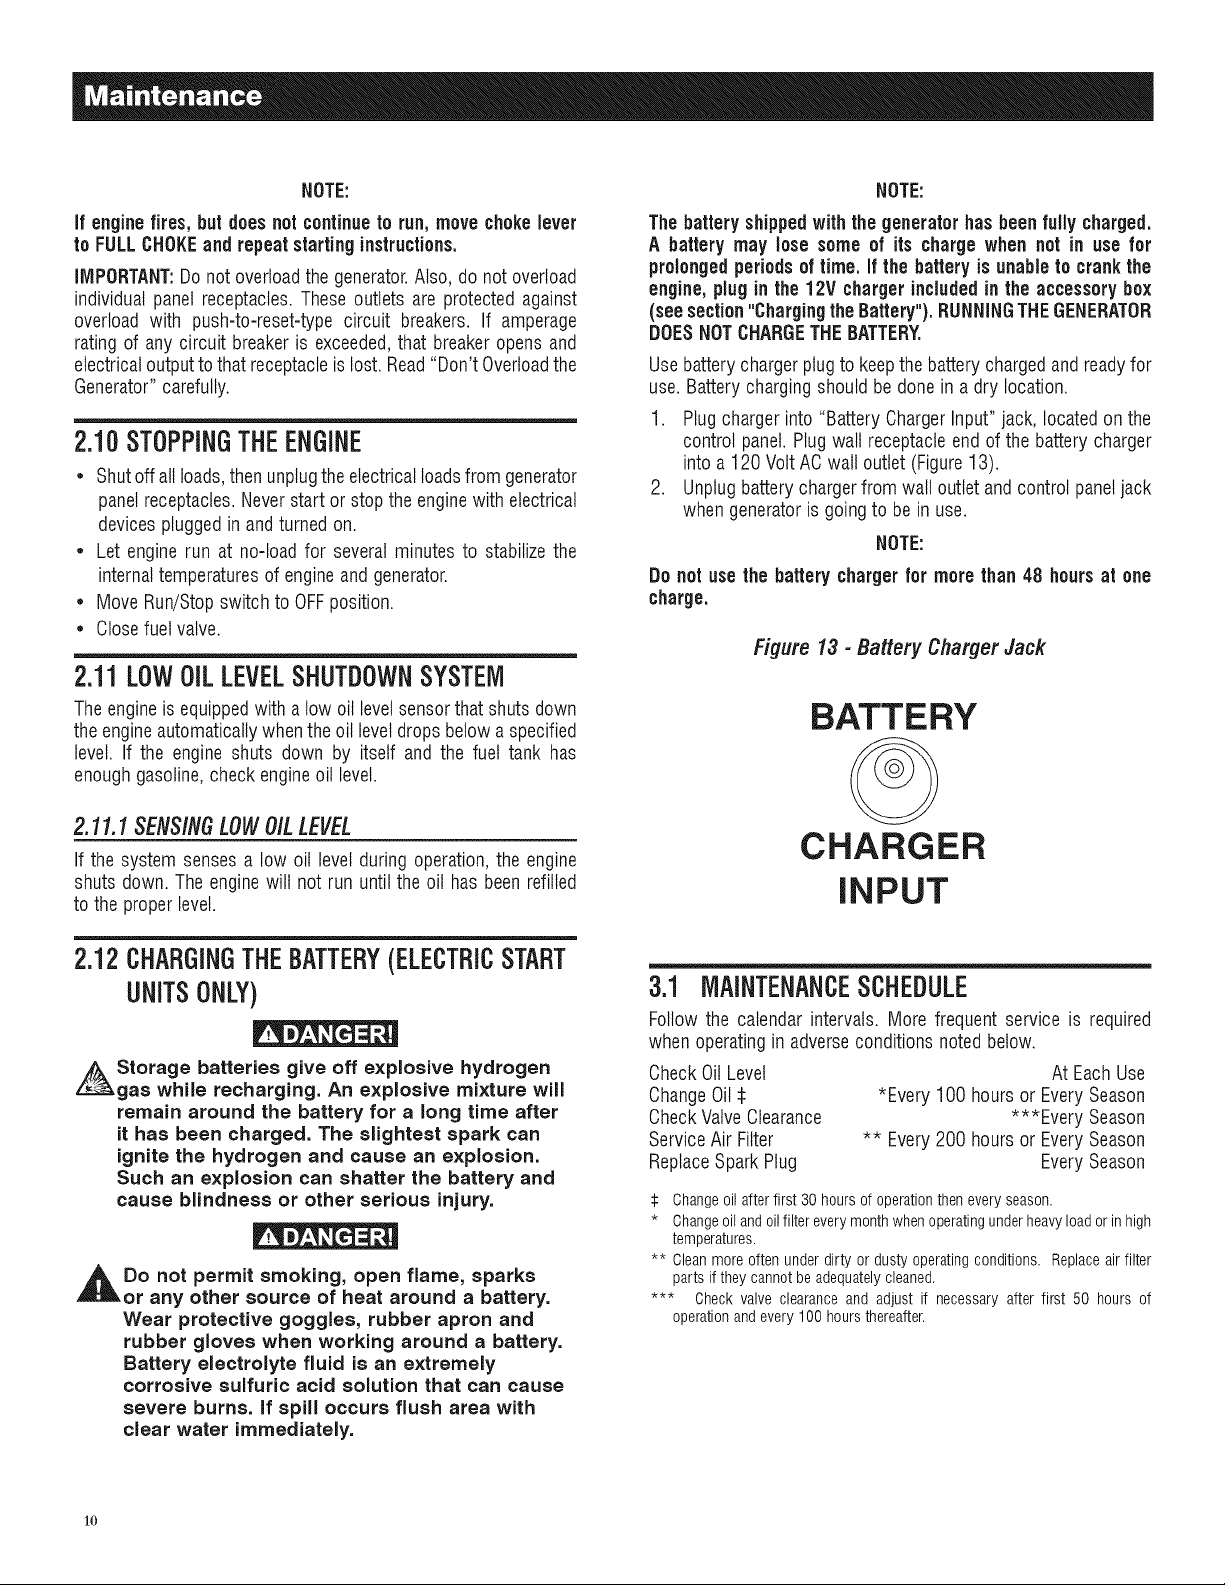
1. Plugchargerinto "BatteryChargerInput"jack, locatedon the
control panel.Plugwall receptacleendof the batterycharger
into a120 Volt AC wall outlet (Figure13).
2. Unplugbattery chargerfrom wall outlet andcontrol paneljack
whengeneratoris goingto be in use.
NOTE:
Do not use the battery chargerfor more than 48 hours at one
charge.
Figure 13 - Battery Charger Jack
BATTERY
2.11.1 SENSINGLOWOILLEVEL
If the system senses a low oil level during operation,the engine
shuts down.The enginewill not run until the oil has beenrefilled
to the properlevel.
2.12CHARGINGTHEBATTERY(ELECTRICSTART
UNITSONLY)
Storage batteries give off explosive hydrogen
gas while recharging. An explosive mixture will
remain around the battery for a long time after
it has been charged. The slightest spark can
ignite the hydrogen and cause an explosion.
Such an explosion can shatter the battery and
cause blindness or other serious injury.
,_Do not permit smoking, open flame, sparks
or any other source of heat around a battery.
Wear protective goggles, rubber apron and
rubber gloves when working around a battery.
Battery electrolyte fluid is an extremely
corrosive sulfuric acid solution that can cause
severe burns, if spill occurs flush area with
clear water immediately.
CHARGER
INPUT
3.1 MAINTENANCESCHEDULE
Follow the calendar intervals. More frequentservice is required
whenoperatingin adverseconditions noted below.
CheckOil Level
ChangeOil
CheckValveClearance
ServiceAir Filter
ReplaceSparkPlug
:i: Changeoil afterfirst 30 hours of operationthen every season.
* Changeoiland oilfilter every monthwhen operatingunderheavyload or in high
temperatures.
** Cleanmore often under dirty or dusty operatingconditions. Replaceair filter
parts ifthey cannot beadequatelycleaned.
*** Check valve clearance and adjust if necessary after first 50 hours of
operationand every100 hours thereafter.
*Every 100hoursor EverySeason
** Every200 hoursor EverySeason
At EachUse
***Every Season
EverySeason
1o
Page 13
3.2 PRODUCTSPECiFiCATiONS
3.2.1 GENERATORSPEC/F/CAT/ONS
RatedPower........................................................................... 7.5 kW**
SurgePower........................................................................... 9.375 kW
RatedACVoltage...................................................................... 120/240
RatedMax ACLoad
Current@ 240V........................................................... 31.25 Amps**
Current@ 120V............................................................. 62.5 Amps**
RatedFrequency.................................................... 60 Hz@ 3600 RPM
Phase................................................................................ SinglePhase
** Maximumwattageandcurrentaresubjectto,andlimitedby,suchfactors
asfuelBtucontent,ambienttemperature,altitude,enginecondition,etc..
Maximumpowerdecreasesabout3.5%for each1,000feetabovesealevel;
andwillalsodecreaseabout1%for each6° C(10° F)above16°C(60° F)
ambienttemperature.
3.2.2 ENG/NESPECIFICATIONS
Displacement............................................................................... 420cc
SparkPlugType................................ ChampionN9YCor NHSPLDF7TC
SparkPlug PartNo........................................................... 0G84420101
SparkPlug Gap............................................... 0.030 inch or (0.76 mm)
GasolineCapacity............................................................ 8 U.S.gallons
OilType.................................... SeeChart in "AddingEngineOil"Section
OilCapacity.......................................................... 1.0Liters (1.06Qts.)
RunTime (50%Load)..............................................................12 Hours
ClassI1EmissionCertified
3.2.3 EMISS/ONS/NFORMATiON
The EnvironmentalProtection Agency (EPA) requires that this
generatorcomply with exhaustemission standards. The engine
used in this generator is certified to meet the applicable EPA
emission levels. It is important to follow the maintenance
specifications provided in this manualsto ensurethat the engine
complies withthe applicableemission standardsfor the duration
of theengine'slife. Theemissioncontrolsystem onthis generator
consists ofthe following:
* Air Induction system * Ignition System
IntakePipe/Manifold - SparkPlug
Air Cleaner _ IgnitionCoil
* Exhaust System * Fuel System
Exhaustmanifold _ Carburetor
Muffler
The EmissionsCompliancePeriod referred to on the Emissions
Compliance Label indicates the number of operating hours
for which the engine has been shown to meet EPA emission
requirements.
3.3 GENERALRECOMMENDATIONS
Thewarranty of the generatordoesnotcover items thathavebeen
subjectedto operatorabuse or negligence.To receive full value
from the warranty, the operatormust maintain the generatoras
instructed inthis manual.
Some adjustmentswill needto be made periodicallyto properly
maintainthegenerator.
All adjustments in the Maintenancesection of this manualshould
be madeatleastonceeachseason.Followthe requirementsin the
"MaintenanceSchedule".
NOTE:
Once a year replacethe sparkplug and replacethe air filter.
A new spark plugand clean air filter assure proper fuel-air
mixture andhelpthe enginerun better andlast longer.
3.3.1 GENERATORMA/NTENANCE
Generatormaintenanceconsists of keepingthe unit cleanand dry.
Operateandstorethe unitin a cleandry environmentwhereit will
not beexposedto excessivedust, dirt, moistureor any corrosive
vapors. Cooling air slots in the generator must not become
cloggedwith snow, leaves,or anyother foreign material.
Checkthe cleanlinessof the generatorfrequently andclean when
dust, dirt, oil, moisture or otherforeign substancesarevisible on
its exteriorsurface.
A.CAUTION!
_h Never insert any object or tool through the air
cooling slots, even if the engine is not running.
NOTE:
DONOTuse agarden hoseto cleangenerator.Water can enter
the enginefuel systemand causeproblems.In addition,if water
entersthe generatorthrough coolingair slots, some water will
be retainedinvoidsand crevicesof therotorand stator winding
insulation.Water and dirt buildup on the generator internal
windingswill eventually decrease the insulationresistanceof
these windings.
3.3.2 TOCLEANTHEGENERATOR
* Usea dampcloth to wipe exteriorsurfaces clean.
* A soft, bristlebrush may be used to loosencaked ondirt, oil,
etc.
* Avacuumcleanermay beusedto pick up loosedirt anddebris.
* Low pressure air (not to exceed 25 psi) may be used to
blow away dirt. Inspect cooling air slots and openings
on the generator.These openings must be kept clean and
unobstructed.
3.3.3 ENG/NEMAINTENANCE
//_When working on the generator, always
disconnect negative cable from battery. Also
disconnect spark plug wire from spark plug and
keep wire away from spark plug.
3.3.4 CHECK/NGOILLEVEL
Seethe "BeforeStartingthe Generator"sectionfor informationon
checkingthe oil level.Theoil levelshouldbe checkedbeforeeach
use, or at least everyeight hours of operation.Keepthe oil level
maintained.
11
Page 14
3.3.5 CHANGINGTHEOIL
Changethe oil after the first 30 hours of operation.Changethe
oil every 100 hours or every seasonthereafter. If running this
unit underdirty or dusty conditions, or in extremelyhot weather,
changethe oil more often.
CAUTION!
,l_ Hot oil may cause burns. Allow engine to
cool before draining oil. Avoid prolonged
or repeated skin exposure with used oil.
Thoroughly wash exposed areas with soap.
Usethe following instructionsto changethe oil afterthe engine
coolsdown:
• Cleanareaaroundoil drain plug.
• Removeoil drain plugfrom engine andoil fill plug to drain oil
completelyintoa suitablecontainer.
• When oil has completely drained, install oil drain plug and
tighten securely.
• Filloil sumpwith recommendedoil. (See"Before Startingthe
Generator"for oil recommendations).
• Wipeup anyspilled oil.
• Disposeof usedoil at a propercollectioncenter.
3.3.6 REPLACINGTHESPARKPLUG
_,CAUTION!
,_The NEGATIVE battery terminal should:
1. Always beDISCONNECTEDFIRST.
2. Alwaysbe CONNECTEDLAST.
Figure 15 - Battery Connections
SeeEngineSpecificationsfor recommendedspark plug. Replace
the plugonce eachyear.This will helpthe enginestart easierand
run better.
1. Stopthe engineand pullthe spark plug wire off of the spark
plug.
2. Cleanthe areaaroundthe spark plug and removeit from the
cylinder head.
3. Setthe sparkplug'sgap to 0.70-0.80 mm (0.028-0.031 in.).
Installthe correctlygapped spark pluginto the cylinderhead
(Figure14).
Figure 14 - Spark Plug Gap
3.3.7 BATTERYREPLACEMENT
NOTE:
The battery shippedwiththe generator hasbeenfully charged.
A battery may lose some of its chargewhen net in use for
prolongedperiodsoftime. if the batteryis unableto crankthe
engine,plugin the 12V chargerincludedin the accessory box
(seetheCharging a Batterysection).RUNNINGTHEGENERATOR
DOESNOTCHARGETHE BATTERY.The part numberfor this
batteryis 069449.
12
3.4 SERVICEAIRCLEANER
The enginewill not run properly and may be damagedif using
a dirty air cleaner.Cleanor replacethe air cleaner paper filter
oncea year.Cleanor replacemore oftenif operatingunderdusty
conditions(Figure16). Theair filter part numberis 0G84420151.
Toclean or replacepaperair filter:
• Removeair cleanercover andremove paperfilter.
• Cleanpaperfilter by tapping it gently on a solid surface. Ifthe
filter is too dirty, replaceit with a newone. Disposeof the old
filter properly.
• Cleanaircleanercover,theninsert newpaperfilter intothe base
ofthe aircleaner.Re-installair cleanercover.
Figure 15 - Air Filter
CLIf::::>
Page 15
NOTE:
Toorder a new air filter, pleasecontactthe nearestauthorized
servicecenterat 1-800-333-1322.
3.5 VALVECLEARANCE
* Intake-- 0.15 _ 0.02mm (cold), (0.006" _ 0.0008" inches)
, Exhaust-- 0.20 _ 0.02mm (cold) (0.008" _ 0.0008" inches)
After the first 50 hours of operation, checkthe valve clearance
in the engine and adjust if necessary.
Important: If feelinguncomfortableaboutdoing this procedureor
theproper tools arenot available,pleasetakethe generatorto the
nearestservicecenterto havethevalveclearanceadjusted.Thisis
a very important stepto ensurelongestlife for theengine.
3.6 GENERAL
Thegeneratorshould be started at leastonce every 30 days and
be allowed to run at least 30 minutes.If this cannotbe done and
the unit must be storedfor more than 30 days, use thefollowing
informationas aguideto prepareitfor storage.
NEVER store engine with fuel in tank indoors
or in enclosed, poorly ventilated areas where
fumes may reach an open flame, spark or pilot
light as on a furnace, water heater, clothes dryer
or other gas appliance.
AIIow unit to cool entirely before storage.
3.7 LONGTERMSTORAGE
It is importantto preventgum depositsfrom forming in essential
fuel systemparts such asthe carburetor,fuel hoseor tank during
storage. Also, experience indicates that alcohol-blended fuels
(called gasohol,ethanol or methanol)can attractmoisture,which
leadsto separationandformation of acids duringstorage.Acidic
gascan damagethefuel systemof an enginewhile in storage.
To avoid engine problems, the fuel system should be emptied
beforestorageof 30 daysor longer,asfollows:
Drain fuel into approved container outdoors,
away from open flame. Be sure engine is cool.
Do not smoke.
• Startand runengineuntilenginestopsfrom lackof fuel.
• Allow the engineto cool, then drain oil from crankcase. Refill
with recommendedgrade.
• Removesparkplugandpour about 1/2 ounce(15 ml) of engine
oil into the cylinder. Cover spark plug hole with rag. Pull the
recoil starter a couple times to lubricatethe piston rings and
cylinder bore.
ACAUTION!
,_Avoid spray from spark plug hole when
cranking engine.
• Installandtighten spark plug.Donot connectspark plugwire.
• Cleanthe generator'souter surfaces. Check that cooling air
slots andopeningson generatorareopen andunobstructed.
• Storethe unit ina clean, dry place.
3.B OTHERSTORAGETiPS
* Do notstore gasolinefrom oneseasonto another.
, Replacethe gasolinecan if it starts to rust. Rustand/ordirt in
the gasolinewill cause problems with the carburetor andfuel
system.
, If possible,storethe unit indoorsandcover it to giveprotection
from dust anddirt. BESURETO EMPTYTHEFUELTANK.
* If it is not practicalto emptythe fuel tankand the unit is to be
storedfor sometime, useacommerciallyavailablefuelstabilizer
addedto the gasolineto increasethe lifeof thegasoline.
* Coverthe unit with a suitable protective cover that does not
retainmoisture.
,_ NEVER cover the generator while engine and
exhaust areas are warm,
• Removeall gasolinefrom the fueltank.
13
Page 16
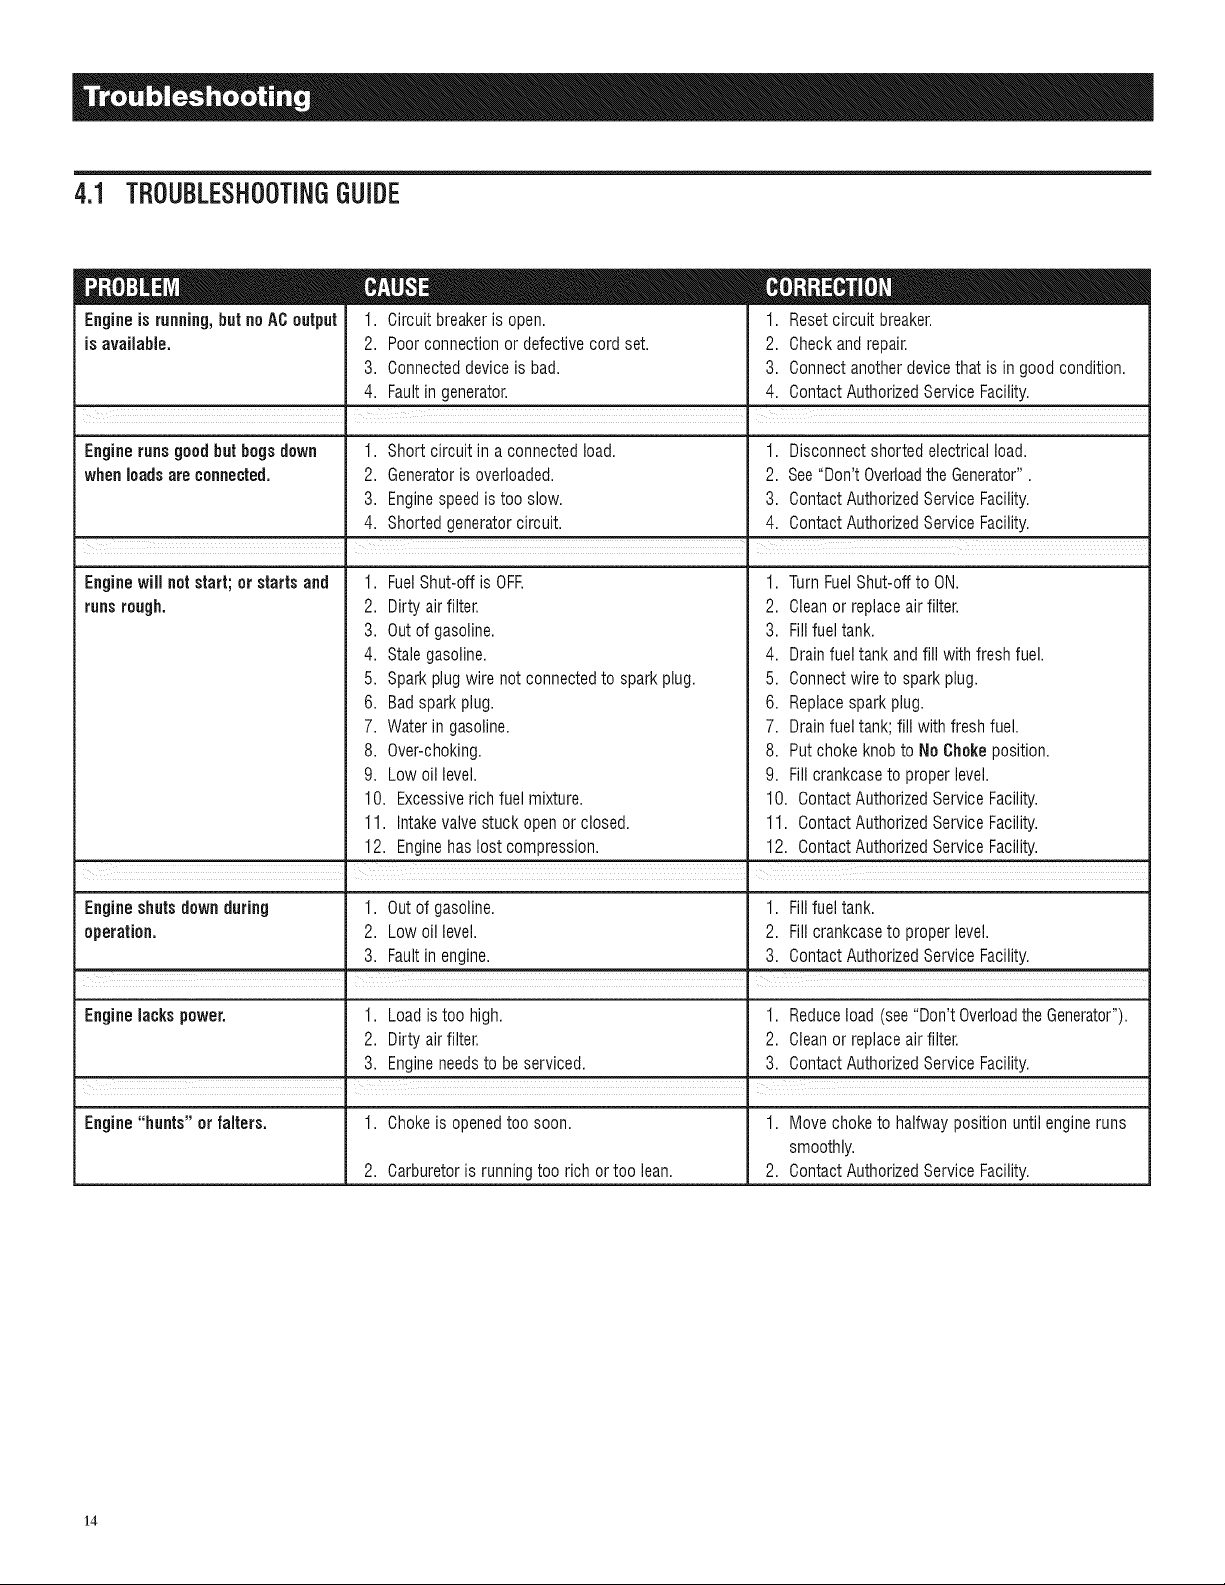
4.1 TROUBLESHOOTINGGUIDE
Engineis running,but noAC output
is available.
1. Circuit breakeris open.
2. Poorconnectionor defectivecord set.
3. Connecteddevice is bad.
4. Faultin generator.
= m ¸¸
1. Reset circuit breaker.
2. Check and repair.
3. Connect anotherdevicethat is in good condition.
4. Contact AuthorizedServiceFacility.
Engine runs good butbogs down 1. Short circuit in aconnectedload. 1. Disconnect shorted electricalload.
whenloads areconnected. 2. Generatoris overloaded. 2. See"Don't Overloadthe Generator".
3. Enginespeed is tooslow. 3. Contact AuthorizedService Facility.
4. Shorted generatorcircuit. 4. ContactAuthorizedServiceFacility.
Enginewill notstart; or startsand
runsrough.
FuelShut-off is OFR 1.
,
2.
Dirtyair filter. 2.
3.
Out of gasoline. 3.
4.
Stale gasoline. 4.
5.
Spark plugwire not connectedto sparkplug. 5.
6.
Badsparkplug. 6.
7. Water ingasoline.
8. Over-choking.
9. Low oil level.
10. Excessiverich fuel mixture.
11. Intakevalvestuck open or closed.
12. Enginehas lost compression.
. =
TurnFuelShut-offto ON.
Cleanor replaceair filter.
Fillfuel tank.
Drainfuel tank andfill with fresh fuel.
Connectwire to sparkplug.
Replacespark plug.
7. Drainfuel tank;fill withfresh fuel.
8. Put chokeknob to No Chokeposition.
9. Fill crankcaseto properlevel.
10. ContactAuthorizedService Facility.
11. ContactAuthorizedService Facility.
12. ContactAuthorizedService Facility.
Engineshuts down during 1. Out of gasoline. 1. Fillfuel tank.
operation. 2. Lowoil level. 2. Fill crankcaseto properlevel.
3. Faultin engine. 3. Contact AuthorizedServiceFacility.
Engine lacks power. 1. Loadis too high. 1. Reduceload (see"Don't Overloadthe Generator").
2. Dirty air filter. 2. Cleanor replaceair filter.
3. Engineneedsto beserviced. 3. Contact AuthorizedServiceFacility.
I |
Engine "hunts" or falters. 1. Chokeis openedtoo soon. 1. Move choke to halfway position untilengineruns
smoothly.
2. Carburetoris runningtoo rich or too lean. 2. ContactAuthorizedServiceFacility.
14
Page 17

15
Page 18
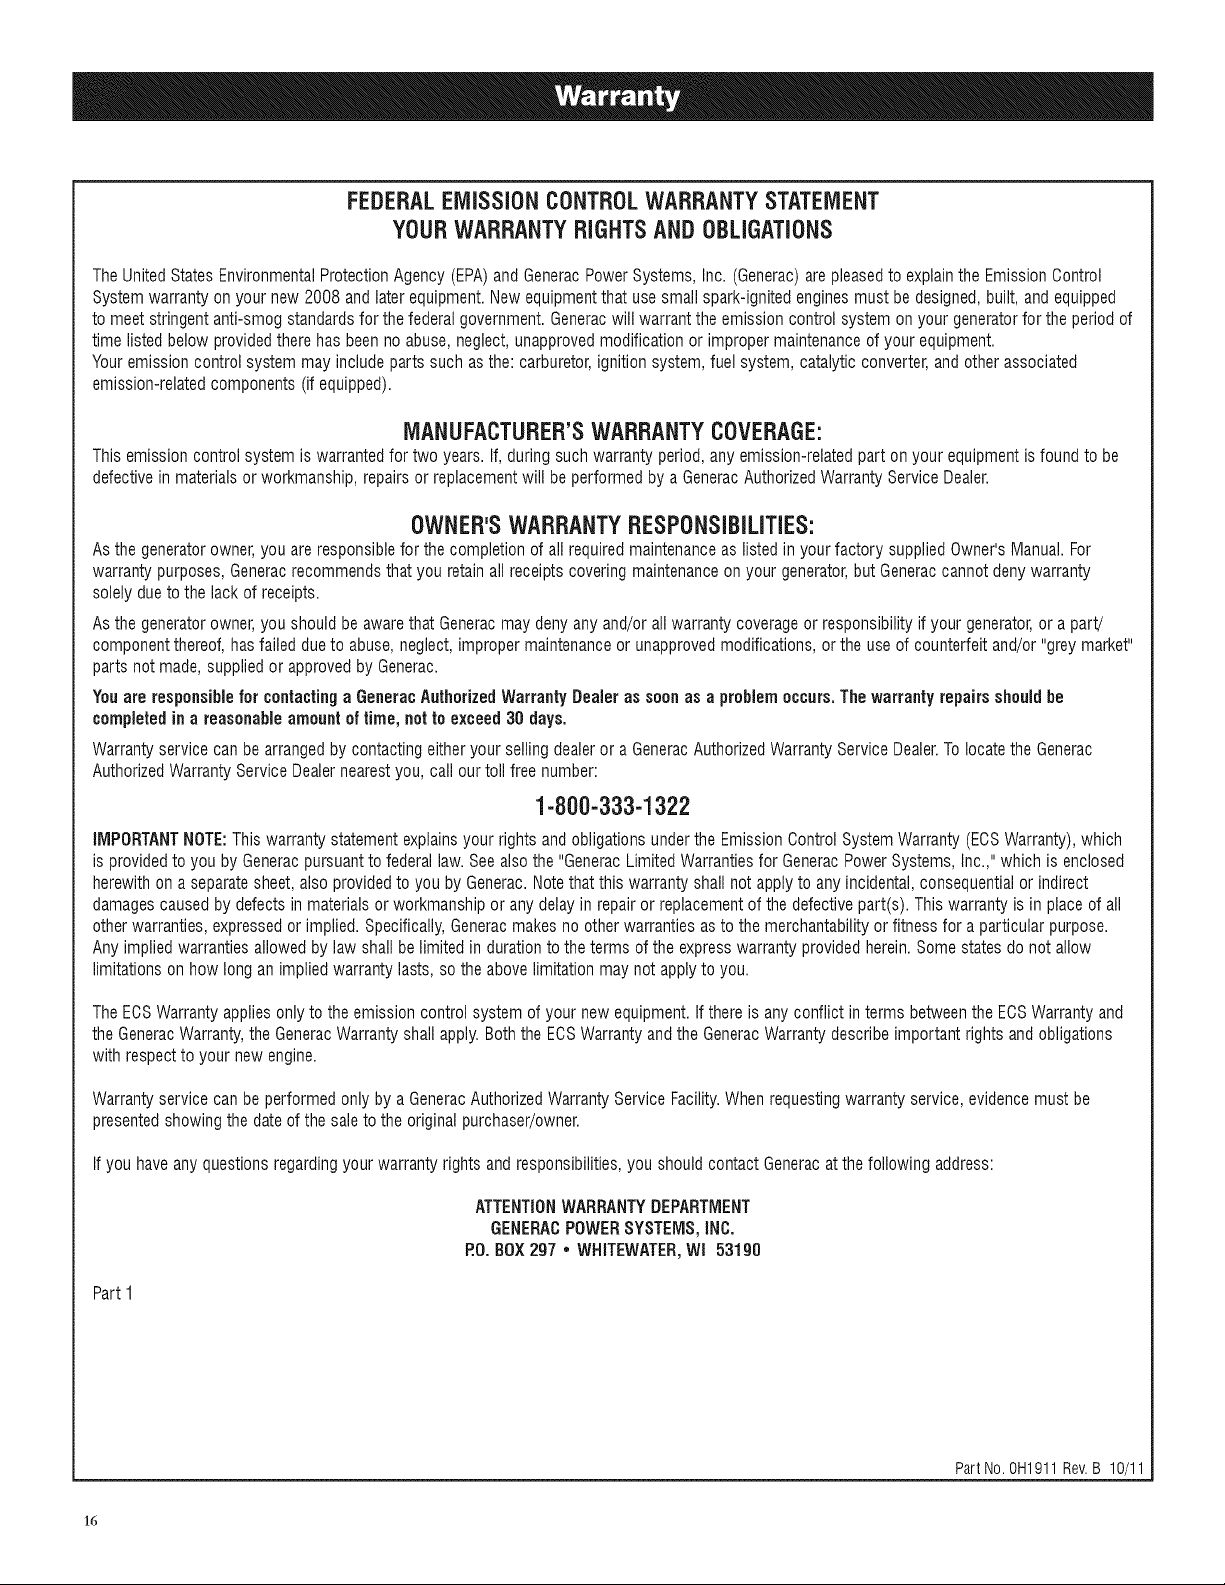
FEDERALEMiSSiONCONTROLWARRANTYSTATEMENT
YOURWARRANTYRIGHTSANDOBLiGATiONS
TheUnitedStates EnvironmentalProtectionAgency (EPA)and GeneracPowerSystems, Inc. (Generac)are pleasedto explainthe EmissionOontrol
Systemwarranty onyour new 2008and laterequipment.Newequipmentthat usesmall spark-ignitedenginesmust be designed,built, and equipped
to meetstringentanti-smog standardsfor the federalgovernment. Generacwill warrantthe emission control system onyour generatorfor the periodof
time listed below providedtherehas beenno abuse,neglect,unapprovedmodificationor improper maintenanceof your equipment.
Youremission control system may includeparts such asthe: carburetor,ignitionsystem,fuel system,catalytic converter,andother associated
emission-relatedcomponents (if equipped).
MANUFACTURER'SWARRANTYCOVERAGE:
This emission control system is warrantedfor two years. If, during such warranty period,any emission-relatedpart onyour equipmentis foundto be
defectivein materials or workmanship,repairs or replacementwill beperformed bya GeneracAuthorizedWarrantyServiceDealer.
OWNER'SWARRANTYRESPONSiBiLiTiES:
Asthe generatorowner,you areresponsiblefor the completion of all requiredmaintenanceas listedin your factory supplied Owner'sManual.For
warrantypurposes, Generacrecommendsthat you retainall receipts covering maintenanceon your generator,butGeneraccannot deny warranty
solelydueto thelack of receipts.
Asthe generatorowner,you shouldbe awarethat Generacmay denyany and/orall warranty coverageor responsibilityif your generator,or a part!
componentthereof, hasfailed dueto abuse,neglect, improper maintenanceor unapprovedmodifications,or the useof counterfeit and/or "grey market"
parts notmade, suppliedor approvedby Generac.
Youare responsible for contactinga GeneracAuthorizedWarrantyDealer as soon as a problemoccurs.The warrantyrepairsshould he
completed in a reasonable amount oftime, not to exceed30 days.
Warrantyservice canbe arrangedbycontactingeitheryour sellingdealer or a GeneracAuthorizedWarrantyService Dealer.Tolocatethe Generac
AuthorizedWarrantyService Dealernearestyou, call ourtoll free number:
1-800-333-1322
IMPORTANTNOTE:Thiswarranty statementexplainsyour rightsand obligations underthe EmissionOontrolSystemWarranty(EOSWarranty),which
is providedto youby Generacpursuanttofederal law. Seealso the "GeneracLimitedWarrantiesfor GeneracPowerSystems, Inc.,"which is enclosed
herewith on aseparatesheet, alsoprovidedto you by Generac.Notethatthis warrantyshall not applyto anyincidental,consequentialor indirect
damagescausedby defectsin materials or workmanshipor anydelayin repair or replacementof the defectivepart(s). This warranty is in placeof all
other warranties,expressedor implied. Specifically,Generacmakes no otherwarranties asto the merchantabilityor fitness for a particular purpose.
Any impliedwarrantiesallowedby law shall belimited in durationto theterms of the expresswarranty providedherein.Somestates do not allow
limitationson how longan impliedwarranty lasts, so theabovelimitation may not applyto you.
TheEOSWarrantyapplies only to theemission controlsystem of your new equipment.If thereis any conflict in termsbetweenthe ECSWarranty and
the GeneracWarranty,the GeneracWarrantyshall apply.Boththe EOSWarrantyand the GeneracWarrantydescribe importantrights and obligations
with respectto your new engine.
Warrantyservice canbe performed only by aGeneracAuthorizedWarrantyService Facility.Whenrequestingwarranty service,evidencemust be
presentedshowing the dateof thesaleto the original purchaser/owner.
If you haveany questionsregardingyour warranty rights andresponsibilities,you should contactGeneracatthe following address:
ATTENTIONWARRANTYDEPARTMENT
GENERACPOWERSYSTEMS,iNC.
P.O.BOX297 • WHITEWATER,Wl 53190
Part I
Part No. 0H1911 Rev.B 10/11
16
Page 19

EMiSSiONCONTROLSYSTEMWARRANTY
EmissionControl SystemWarranty(ECSwarranty)for equipmentusingsmall spark-ignitedengines:
(a) Applicability: Thiswarranty shallapply to equipmentthat uses small off-road engines.TheECSWarrantyperiod shall begin on thedatethe new
equipmentis purchased by/deliveredto its original,end-use purchaser/ownerand shall continuefor 24 consecutivemonths thereafter.
(b) GeneralEmissionsWarrantyCoverage:Generacwarrants to the original,end-use purchaser/ownerof thenew engineor equipmentandto each
subsequentpurchaser/ownerthat the ECSwhen installedwas:
(1) Designed,built and equippedso asto conform with all applicableregulations;and
(2) Freefrom defects inmaterials and workmanshipwhich causethe failureof awarranted part at anytime duringthe ECSWarrantyPeriod.
(c) Thewarrantyon emissions-relatedparts will be interpretedas follows:
(1) Anywarrantedpart that is not scheduledfor replacementasrequiredmaintenancein the Owner'sManualshall be warrantedfor the ECS
WarrantyPeriod.If any such part fails duringthe ECSWarranty Period,it shall berepairedor replacedby Generacaccordingto Subsection
(4) below.Any such part repairedor replacedunderthe ECSWarrantyshallbe warrantedfor the remainderof the ECSWarrantyPeriod.
(2) Anywarrantedpart that is scheduledonly for regularinspectionas specified in the Owner'sManualshall bewarranted for the ECSWarranty
Period.A statementin theOwner's Manualto the effect of "repairor replaceas necessary" shall not reducethe ECSWarrantyPeriod.Any
such part repairedor replacedunderthe ECSWarrantyshallbe warrantedfor the remainderof the ECSWarrantyPeriod.
(3) Anywarrantedpart that is scheduledfor replacementas requiredmaintenancein the Owner'sManual shall bewarranted for the period oftime
prior to first scheduledreplacementpointfor thatpart. If the partfails prior to the first scheduledreplacement,the part shallbe repairedor
replacedby Generacaccording to Subsection(4) below.Any such emissions-relatedpart repairedor replaced underthe ECSwarrantyshall
be warrantedfor the remainderof the periodprior to the first scheduledreplacementpointfor that part.
(4) Repairor replacementof any warranted,emissions-relatedpart underthis ECSWarrantyshall be performedat no chargeto theowner at a
GeneracAuthorizedWarrantyServiceFacility.
(5) Notwithstandingthe provisionsof subsection(4) above,warrantyservicesor repairs must be providedatGeneracAuthorizedService
Facilities.
(6) Whenthe engineis inspectedby a GeneracAuthorizedWarrantyServiceFacility,the purchaser/ownershallnot be heldresponsiblefor
diagnostic costs if the repairis deemedwarrantable.
(7) Throughoutthe ECSWarrantyPeriod,Generacshall maintaina supply of warrantedemission-relatedparts sufficientto meetthe expected
demandfor such parts.
(8) Any Generacauthorizedand approvedemission-relatedreplacementparts may be usedin theperformanceof any ECSwarranty maintenance
or repairs and will be providedwithout chargeto the purchaser/owner.Such useshallnot reduce GeneracECSWarrantyobligations.
(9) Unapproved,add-on, modified,counterfeit and/or "grey market"parts may not beused to modify or repaira Generacengine.Such usevoids
this ECSWarranty and shall be sufficientgroundsfor disallowingan ECSWarrantyclaim. Generacshallnot beheld liable hereunderfor
failuresof anywarranted parts of Generacequipmentcaused by the useof such anunapproved,add-on, modified,counterfeit and/or "grey
market" part.
EMISSIONRELATEDPARTSMAYINCLUDETHEFOLLOWING(IF EQUIPPED):
1) FUELMETERINGSYSTEM
A. CARBURETORANDINTERNALPARTS
B. PRESSUREREGULATOR
2) AIR INDUCTIONSYSTEM
A. INTAKEMANIFOLD
B. AIRFILTER
3) IGNITIONSYSTEM
A. SPARKPLUGS
B. IGNITIONCOILS/ MODULE
Part2
4) AIR INJECTIONSYSTEM
A. PULSEAIRVALVE
5) EXHAUSTSYSTEM
A. CATALYST
B. THERMALREACTOR
C. EXHAUSTMANIFOLD
PartNo. 0H1911Rev.B 10/11
]'7
Page 20

GENERAC POWER SYSTEMS "TWO YEAR" LiMiTED WARRANTY
FOR GP SERIES PORTABLE GENERATORS
For a period of two (2) yearsfrom the dateof original sale, GeneracPower Systems,Inc. (Generac)warrants its GPSeries generatorswill befree from defects inmaterials
andworkmanship for the items and periodset forth below. Generacwill, at its option, repair or replaceany part which, upon examination,inspection and testing by Generac
or a GeneracAuthorizedWarranty Service Dealer,is found to be defective.Repairor replacementpursuantto this limited warranty shallnot renewor extendthe original
warranty period. Any repairedproduct shall bewarrantedfor the remainingoriginal warranty periodonly. Any equipment that the purchaser/owner claims to bedefective
must bereturnedto and examinedby the nearestGeneracAuthorizedWarranty Service Dealer.All transportation costs underthe warranty,including return tothe factory,
are to be borneand prepaid by the purchaser/owneKThis warrantyapplies only to GeneracGPSeries portable generatorsand is nottransferable from original purchaser.
Saveyour proof-of-purchase receipt.If you do notprovide proof of the initialpurchase date,the manufacturer's shipping date of the product will beusedto determinethe
warranty period.
WARRANTY SCHEDULE
Consumer applicationsare warrantedfor two (2) years. Commercialand Rentalapplications arewarranted for one(1) yearor 1000 hoursmaximum, whichever comes first.
CONSUMERAPPLICATIONFORTHEUNITED STATESAND CANADAONLY
YEARONE- Limited comprehensivecoverageon Laborand Part(s) listed (proof of purchaseand maintenanceis required):
• Engine-All Components
• Alternator-All Components
YEARTWO- Limited comprehensive coverage on Part(s)listed (proof of purchaseand maintenanceis required):
• Engine-All Components
• Alternator-All Components
COMMERCIAl/RENTALAPPLICATION
YEARONE- Limited comprehensivecoverageon Laborand Part(s) listed (proof of purchaseand maintenanceis required):
• Engine-All Components
• Alternator-All Components
NOTE: Forthe purpose of this warranty "consumer use" meanspersonal residentialhousehold or recreational use byoriginal purchaseEThiswarranty does not applyto
units usedfor PrimePower in placeof utility where utility power service is presentor where utilitypower service does not normallyexist. Once a generatorhas experienced
commercial or rental use, itshall thereafter beconsidered a non-consumeruse generatorfor the purpose ofthis warranty.
GUiDELiNES:
1. All warranty repairs, must be performed and/oraddressedby an Authorized/CertifiedGeneracDealer,or branchthereof.
2. Units thathave been resoldare not coveredunderthe GeneracWarranty,as this Warrantyis not transferable.
3. Use of Non-Generacreplacementpart(s) will void the warranty in its entirety.
4. Generacmay chooseto Repair,Replaceor Refunda piece of equipment.
5. Warranty LaborRates arebased on normal working hours. Additional costs for overtime,holiday or emergencylabor costs for repairs outside of normal business hours
will be the responsibilityof the customer.
6. Warranty Parts shipment costs are reimbursed at ground shipment rates. Costsrelatedto requests for expeditedshippingwill be the responsibilityof thecustomer.
7. Batteries arewarranted by the battery manufactureK
8. Verification of required maintenancemay be requiredfor warranty coverage.
THiS WARRANTY SHALL NOT APPLY TO THE FOLLOWING:
1. Costs of normal maintenanceand adjustments.
2. Failurescaused by any contaminated fuels, oils or lack of proper oil levels.
3. Repairsor diagnostics performed by individuals otherthan Generac authorizeddealersnot authorizedin writing by Generac.
4. Failuresdue, but not limitedto, normal wear and tear,accident, misuse,abuse, negligenceor improperuse.
5. As with all mechanical devices,the Generacenginesneed periodic part(s) service and replacementto perform as designed.This warranty will not cover repair when
normal use has exhaustedthe life of a part(s) orengine.
6. Failurescaused by any external cause oract of God, such ascollision, theft, vandalism,riot or wars, nuclear holocaust,fire, freezing,lightning, earth-quake,windstorm,
hail, volcanic eruption,water orflood, tornado or hurricane.
7. Damage relatedto rodent and/or insect infestation.
8. Products that aremodified or alteredin a mannernot authorizedby Generacin writing.
9. Any incidental, consequentialor indirect damages causedby defects in materials or workmanship, or anydelay in repair or replacementof the defectivepart(s).
10. Failuredueto misapplication.
11. Expensesrelatedto "customer instruction" ortroubleshooting whereno manufacturingdefect is found.
12. Rentalequipment used while warranty repairs arebeing performed.
13. Startingbatteries, fuses, light bulbs and enginefluids.
THISWARRANTYIS IN PLACEOFALL OTHERWARRANTIES,EXPRESSEDORIMPLIED. SPECIFICALLY,GENERACMAKESNO OTHERWARRANTIESAS TO THE
MERCHANTABILITYOR FITNESSFORA PARTICULARPURPOSE.Any implied warranties allowed bylaw shall be limitedin duration to theterms of the expresswarranty
provided herein.Some states do not allow limitations on how long an implied warranty lasts, so the above limitation may not apply to you. GENERAC'SONLYLIABILITY
SHALL BETHEREPAIRORREPLACEMENTOFPART(S)AS STATEDABOVE.INNO EVENTSHALLGENERACBELIABLEFORANY INCIDENTALOR CONSEQUENTIAL
DAMAGES,EVENIFSUCHDAMAGESAREA DIRECTRESULTOFGENERAC'SNEGLIGENCE.Some states do not allow the exclusionor limitation of incidental or
consequentialdamages,so the above limitation may notapply to you.This warranty gives you specific legal rights.You also haveother rightsfrom state to state.
GENERAC POWER SYSTEMS, INC. • R0. BOX 8 • Waukesha, Wl 53187 • Ph: (888) GENERAC (436-3722) • Fax: (262) 544-4851
To locate the nearest Authorized Dealer visit our website www.generac.com
Part No. 0H8902 RevisionE (10/11)
Manual Part No. 0H9060 Rev. C (11/04/11) Printed in China
Page 21

IVlODELOS:005943-0005942"0'I
®
anual
ueneradores
0
proetari
esserieGPde7,500vatios
19
Page 22

Introduccion..........................................................21
Leaestemanualcornpletamente..........................21
Reglasde seguridad.............................................21
indicedeestandares....................................................23
Informaciongeneral..............................................24
1.1 Uesempaque................................................................24
1.1.1 Cajade accesorios..........................................24
1.2 Ensamble.....................................................................24
1.2.1 Ensamblajedel kit deaccesorios.....................24
1.2.2 Conexiondetcablede labateria(arranque
etectricosolamente)........................................24
Operation .............................................................24
2.1 Conozcaet generador...................................................24
2.2 Medidorde horas.........................................................26
2.3 Juegode cablesy conectores......................................26
2.3.1 120 VAC, 20 Amp, Receptacutoduplex.......26
2.3.2 Recept_,culode 120/240 VAC,30 Amp............26
2.4 Como usar etgenerador...............................................26
2.4.1 Conexionatierra detgenerador........................27
2.4.2 Conexionde las cargasel_ctricas....................27
2.5 Nosobrecargueetgenerador........................................27
2.6 Guiade referenciade potencias....................................27
2.7 Antes de arrancaretgenerador.....................................28
2.7.1 Agregaraceitede motor...................................28
2.7.2 Ar_adirgasolina................................................28
2.8 Arranquede motores de recute....................................28
2.9 Arranquede motores de arranqueet_ctrico..................29
2.10 DeteniendoetMotor.....................................................30
2.11 Sistemade apagadoporbajo nivelde aceite................30
2.11.1 Sensandoetnivelde aceite..............................30
2.12 Cargade la bateria(unidadesde arranqueel_ctrico
solamente)...................................................................30
iVlantenimiento......................................................30
3.1 Cronogramade mantenimiento.....................................30
3.2 Especificacionesdel producto......................................30
3.2.1 Especificacionesdelgenerador........................30
3.2.2 Especificacionesdetmotor ..............................31
3.2.3 Informacionsobre lasemisiones......................31
3.3 Recomendacionesgenerales........................................31
3.3.1 Mantenimientodetgenerador...........................31
3.3.2 Paralimpiaretgenerador.................................31
3.3.3 Mantenimientodel motor .................................31
3.3.4 Revisaret nivetde aceite..................................31
3.3.5 Cambiode aceite.............................................31
3.3.6 Reemplazodela bujia......................................32
3.3.7 Reemptazode la bateria...................................32
3.4 Darservicio allimpiadorde aire...................................32
3.5 Espaciode la vatvula....................................................32
3.6 General........................................................................33
3.7 Almacenamientoa largoplazo......................................33
3.8 Otrosconsejos paraalmacenamiento...........................33
Detecciondefallas ...............................................34
4.1 Guiade deteccionde problemas..................................34
Notas....................................................................35
Garantia................................................................36
2O
Page 23

INTRODUCCION
Gracias por comprar este modelo de Generac Power Systems, Inc.
Este modelo es un generadorimpulsado por motor, refrigeradopor aire,
compacto y de alto rendimiento disefiado para proporcionar energia
electrica para operarcargas electricas donde no haya servicio publico
de electricidado en reemplazode lared electrica encaso de apagones.
LEAESTEMANUALCOMPLETNVlENTE
Si alguna parte de este manual no se entiende bien, pongase en
contacto con el concesionarioautorizadomas cercano para conocer los
procedimientosde arranque,operaciony servicio.
El operador es responsabledel uso apropiadoy segurode este equipo.
Recomendamos encarecidamente que el operador lea este manual y
entienda completamente todas las instrucciones antes de usar este
equipo. Asimismo recomendamos con igual firmeza el instruir a otros
usuarios para arrancar y operar apropiadamente la unidad. Esto los
preparasi necesitanoperarel equipoen algunaemergencia.
El generadorpuede operar en forma segura,eficiente y confiable solo si
se leubica, sele opera y mantieneen forma apropiada.Antesde operar
o darservicio al generador:
• Familiaricese y adhierase estrictamente a todos los codigos y
regulacioneslocales,estatalesy nacionales.
• Estudietodas las advertenciasde seguridad en este manualyen el
producto con muchocuidado.
• Familiaricesecon este manualy la unidadantes deusarla.
El fabricante no puede anticipar todas las posibles circunstancias
que puedan involucrar peligros. Las advertencias en este manual y
en las etiquetas y calcomanias fijadas en la unidad son, por tanto, no
completamenteinclusivas.Si seusaun procedimiento,metododetrabajo
otecnica de operacionque el fabricanteno recomiendaespecificamente,
aseguresede quesea seguro para los demas.Asimismo asegureseque
el procedimiento,metodo detrabajo o tecnica de operacionutilizada no
vuelvainseguroal generador.
LA INFORMACIONCONTENIDAAQU[ SE BASO EN MAQUINASEN
PRODUCCIONAL MOMENTO DE LA PUBLICACION.GENERACSE
RESERVAEL DERECHODEMODtFICARESTEMANUALENCUALQUIER
MOMENTO.
BEGLASDESEGUBIDAD
A Io largo de esta publicacion, yen Io que respecta a las etiquetas
y calcomanias fijadas en el generador, los bloques de PELIGRO,
ADVERTENCIA,CUIDADOY NOTAse usan paraalertaral personal sobre
instruccionesespecialessobre una operacionen particular quepuedeser
peligrosasi seejecutaen formaincorrecta o sin cuidado. Observelascon
cuidado. Susdefiniciones soncomo sigue:
INDiCA UNA S|TUAC|ON PELJGROSA O ACC|ON QUE,
S| NO SE EV|TA, TRAERA COMO RESULTADO LA
MUERTE O UN DAI_iO SERIO.
Indica una situacion peligrosa o action que, si no se
evita, podria traer corno resu|tado la rnuerte o un da_o
serio.
_II,CUIDADO
Indica una situation peligrosa o action que, si no se
evita, puede traer corno resu|tado un dafio rnenor o
Las notas contienen informacion adicional importante para un
procedimiento yse lesencontrara dentrodel cuerpo de estemanual.
Estas advertencias de seguridad no pueden eliminar los peligros que
indican.Elsentidocomun yun estricto cumplimientodelasinstrucciones
especialescuando se realiza la accion o servicio son esenciales para
evitaraccidentes.
Ouatro simbolos de seguridad usados comunmente acompahan los
bloquesde PELIGRO,ADVERTENOIAy OUIDADO.Eltipo de informacion
quecada uno indica escomo sigue:
,t_ Este sfmbolo sehala informaciSn de
seguridad que, si no se sigue, puede porter en
peligro la seguridad personal y/o las propiedades de
otros.
Este sfrnbolo indica un peligro potential de
explosi6n.
i/_Este sfmbolo indica un peligro potencial de incendio.
//_Este sfrnbolo indica un peligro potencial de choque
el_ctrico.
rnoderado.
NOTA:
importante
PELIGBOSGENEBALES
• Nuncaopere enareascerradas o interiores.
• Por razones de seguridad, el fabricante recomienda que el
mantenimientodeesteequiposeaIlevadoa cabo porun concesionario
autorizado.Inspeccione el generador con regularidad,y pongaseen
contacto con el concesionario autorizado mD.scercano si necesita
repararloo conseguirrepuestos.
• Opere el generador solo en superficies planas y donde no este
expuestoa excesivahumedad, suciedad,polvo ovapores corrosivos.
• Mantengalas manos,pies, ropa,etc, lejos delas correasdetraccion,
ventiladoresy otras partesmoviles. Nuncaretire ningunaprotecciono
escudodeventiladormientras la unidaesteoperando.
• Ciertas partes del generador se calientan en extremo durante la
operacion. Alejesedel generadorhasta que se haya enfriado para
evitarquemadurasseveras.
• NOopereel generadoren la Iluvia.
• No altere la construccion del generador ni cambie los controles de
modo que puedancrear una condicion deoperacion no segura.
• Nuncaarranqueo detengala unidadcon cargaselectricas conectadas
alas tomas Ycon dispositivos conectadosy encendidos.Arranqueel
motory dejeque se estabiliceantesdeconectar las cargas electricas.
Desconectetodas las cargaselectricas antes de apagarel generador.
• Noinserte objetos a travesdelas ranurasdeenfriamientode launidad.
• AI trabajar con este equipo, mantengase alerta en todo momento.
Nuncatrabajeen elequipo cuandoestefisica o mentalmentefatigado.
• Nuncauseelgeneradorni algunade suspartes comoescalon.Pararse
sobre la unidad puede tensary romper partes, y puedetraer como
resultadocondicionespeligrosasde operacioncomoescapedegases,
combustibleo aceite.
• En los modelos de arranque electrico, desconecte el cable de
bateriaPOSITtVO(+) del arrancadordel motor 0 el cable de bateria
NEGATIVO(-) delterminal de labateria,Io quesea mD.sfD.cil,antes de
transportar elgenerador.
21
Page 24

NOTA:
Este generador esta equipado con un silenciador de supresor de
chispa. El duefio o el operador debenmantener el supresor de chispa
en correcto estado de funcionamiento. En el Estadode California, se
requiere per ley un supresor de chispa (Seccibn 4442 del Cbdigo de
Recursos Publicos de California). Otros estados pueden toner leyes
similares. Las leyes federales se aplican en terrenos federales.
PELIGROSDELESCAPEY UBICACiON
• iNuncaepere en areas cerradas o interiores!iNUNCAIo use en el
begat,o en areas parcialmentecerradas,comegarajes, aun si ias
puertasy ventanasest_inabiertas! OseloSOLOen exteriores y lejos
de ventanasabiertas, puertas,ductosdeventilationy en;ireas que
noacumular;in el mortal gas del escape.
ElusedeungeneradoreninterioresPUEDEIVlATARLEENMINUTOS.
Elescapedelgeneradorcontienemon6xidodecarbono,
Esteesunvenenoinvisibleysinolor,
Oselos61oEN EXTERIORES
o garaje,AUNSI laspuertasy
lasventanasestanabiertas.
• Los humos del escape del motor contienen monoxide de carbono,
que no se puede oler ni ver. Este gas venenoso, si se aspira en
concentraciones suficientes, puede hacerle perder la conciencia y
causarlela muerte.
• El flujo adecuado y sin obstrucciones de aire para ventilacion y
refrigeraciones critico para la correcta operacion del generador.No
altere la instalacion ni permita que haya siquiera unbloqueo parcial
de la provision de ventilacion,ya queesto puede afectar seriamente
la operacionsegura del generador.El generadorDEBEseroperado en
exteriores.
• Este sistema de escape debetener un apropiadomantenimiento. No
haganadaque puedaponer en peligro la seguridaddel escapeo que
no cumpla con algun codigo local o estandar.
• Siempre use una alarma de monoxide de carbono operada con
bateriasen los interiores,instaladadeacuerdoalas instrucciones del
fabricante.
• Si empiezaa sentirsemal, mareadoo debilluegode que elgenerador
este en funcionamiento,busque aire fresco INMEDtATAMENTE.Vaya
al medico, ya que podria tener envenenamientoper monoxide de
carbono.
y lejosdeventanas,puertas
y ductos de ventilaci6n.
PELIGROSELI'-:CTRICOS
• El generador produce alto voltaje peligroso durante la operacion.
Evite el contacto con cables pelados, terminales conexiones, etc.
mientras la unidad estafuncionando, aun con equipo conectado al
generador.Aseguresequetodaslas cubiertas,proteccionesy barreras
apropiadasse encuentrenen su lugarantes de operarelgenerador.
• Nunca manipule ningun cable electrico ni dispositivo mientras este
de pie sobre agua, con los pies descalzoso con las manes o pies
humedos. PUEDE HABER UNA DESCARGA ELf:CTRICACOMO
RESULTADO.
• El Codigo Electrico Nacional (NEC) requiere que el marco y las
partes externas que son conductores electricos esten conectadas
apropiadamente a una conexion a tierra aprobada. Los codigos
electricoslocalespuedenasimismo requeriruna apropiadaconexiona
tierradelgenerador.Consulteconunelectricistalocallosrequerimientos
deconexiona tierra parasu a_rea.
• Useuncircuito interrupter defalla detierra encualquierareahumedao
altamenteconductiva(come estanteriasdemetal o trabajos enacero).
• No usecables electricosgastados,pelados,deshilachadoso de algun
mode dahados con elgenerador.
• Antesderealizarcualquiermantenimientoalgenerador,desconectelos
cablesde arranquedel motor (si los hubiera) paraevitar un arranque
accidental. Desconecte primero el cable del borne de la bateria
indicadocome NEGATIVO,NEG;o (-). Reconecteese cableal final.
• En case de un accidente causado per descarga electrica, apague
inmediatamentela fuente de energiaelectrica. Si esto no es posible,
intenteliberar a la victima del conductor vivo. EVITEEL CONTAOTO
DIRECTOCONLAV[CTIMA.Uneun implementono conductive,come
unasoga o unatabla, paraliberar a la victima del conductor vivo. Si
la victima esta_inconsciente,aplique los primeros auxiliosy consiga
ayudamedicainmediatamente.
PELIGROSDEINCENDiO
• La gasolina es altamente iNFLAMABLE y sus vapores son
EXPLOSIVOS.No permitaquefumen, hagafuegos abiertos,chispas
ocaler en la vecindadmientras manipula gasolina.
• Nunca ahada gasolina mientras la unidad esta_funcionando o esta
caliente. Deje enfriar al motor completamente antes de ahadir
combustible.
• Nunca Ilene el tanque de combustibleen el interior de la casa.
Cumplatodas lasleyesque regulanel almacenamientoy manipulacion
degasolina.
• No sobrecargue el tanque de combustible.Deje siempre espacio
para la expansion del combustible.Si el tanqueesta_sobrecargado,
el combustiblepuededesparramarsesobre el motorcaliente y causar
un INCENDIOo una EXPLOSION.Nunca almaceneel generadorcon
combustible en el tanquedonde los vapores de la gasolina pueden
alcanzar llamas abiertas, chispas o fuegos piloto (come en una
chimenea,calentador de agua o secador de ropa). Puedegenerarse
unINCENDIOo unaEXPLOSION.Dejeenfriarla unidadcompletamente
antesde almacenarse.
• Limpie cualquier derrame de combustible o aceite inmediatamente.
Asegurese de que no haya materialescombustible dejadossobre o
cercadel generador.Mantengael a_reaalrededordel generadorlimpia
y libre deresidues y conserveuna claridad de cinco (5) pies aredes
los lades parapermitir unaventilacionapropiadaparael generador.
• Noinserte objetos a travesdelas ranurasdeenfriamientode launidad.
• No opere el generador si los dispositivos electricos conectados
sobrecalientan, si la salida electrica se pierde, si el motor o el
generadorbeta chispas o se observa humomientras la unidadesta.
funcionando.
•Tenga unextinguidorcercaal generadorenrode memento.
22
Page 25

JNB/CEBEESTANBARES
Enausenciade losestandares,codigos,regulacioneso leyespertinentes,
la informacion publicada listada abajo puede usarse como guia para
la operacion de este equipo. Siempreconsulte la revision mas reciente
aplicablepara elestandarlistado.
1. NFPANo.70, NFPAHANDBOOKOFNATIONALELECTRICCODE.
2. Article X, NATIONALBUILDINGCODE,disponible en la American
InsuranceAssociation,85 John Street, NewYork, N.Y.10038.
3. AGRICULTURALWIRING HANDBOOK,disponible en la Food and
EnergyCouncil, 909 UniversityAvenue,Columbia,MO65201.
4. ASAE EP-3634, INSTALLATIONAND MAINTENANCEOF FARM
STANDBYELECTRICALSYSTEMS,disponibleenla AmericanSociety
of AgriculturalEngineers,2950 Niles Road, St.Joseph, MI49085.
MODELON°:
NODESERIE:
Ubicad6n de/IP dela unidad
CALCOMAN[A
DE DATOS DEL
MODELO
ADVERTENCIAPROPOSICK)N65 DECALIFORNIA
EtEstadode Californiasabeque el escapedetmotor y algunos
desus componentescausancancer,defectosde
nacimientoy otros dafios reproductivos.
ADVERTENCIAPROPOSICI()N65 DECALIFORNIA
Esteproductocontieneo emitequimicos queel Estado
de Californiasabe quecausancancer,defectosde
nacimientou otrosdafios reproductivos.
23
Page 26

1.1 DESEMPAQUE
• Retiretodo elmaterialdeempaque.
• Retirela caja separadadeaccesorios.
• Retireel generadorde la caja.
Figura 1- Ensambledela rueda y el manubrio
PERNO M8
1.1.1 CAJADEACCESORIOS
Revisetodo el contenido.Si algunaparte nose encuentraoesta dahada,
ubiquea un concesionarioautorizadoen eltelf. 1-888-436-3722.
• 1 - Manualdel propietario • 1 - Unidaddemanubrio
• 1-litrodeaceiteSAE30 • l-Patademarco
• 2 - Ruedasqueno se bajan • 1 - Cargador de bateria (s61o
arranqueelectrico)
• 1 - Bolsade hardware(conteniendoIo siguiente):
• 2 Parasde goma • 2-pemos M8 (Largos)
• 2 pasadoresde eje de -1/2" • 2-pemos M8 (cortos)
• 2 Chavetas • 2-tuercasAcom M8
• 2 arandelasplanasde 1/2" • 4tuercas M8 de reborde
hexagonales
• 2-pernos cortos • 2 arandelasde cierre
• 2 tuercas de reborde(arranqueelectrico solamente)
1.2 ENSAIVlBLE
El generador requierealg0n ensambleantes de usarse. Si se presentan
problemas al ensamblar el generador,por favor Ilame a la Generator
Helpline al 1-888-77LOWES.
1.2.1 ENSAMBLAJEDELKITBEACCESORIOS
Las ruedas estan disehadasen launidadpara mejorarla portabilidad del
generador.
Ustednecesitaralassiguientesherramientasparainstalarapropiadamente
el juegode accesorios.
• Alicatesde cigiJeha
• Llavede criquey boca de 13mm (1/2")
• Llavede bocade 13mm (1/2")
NOTA:
Lasruedas no eshin dise_adas parasu useea laspistas.
1. Consultela figura1 e instalelas ruedas como sigue:
• Deslice los pasadores del eje a traves de las ruedas, arandela
planade 1/2" y soporte de las ruedasen elmarco.
• Inserte el pasador de chaveta a traves del pasador del eje,
luego done las pesta[_as(de los pasadores) hacia afuera para
mantenerlosenel lugar.
2. Consultela figura1 einstalela patadel marcoy los parachoquesde
goma como semuestra.
• Deslicelos tacos del parachoquesde gomaatraves dela pata del
marco, luegoinstale las contratuercasde cierre.
• Deslice los pernos de cabezahexagonala traves delos agujeros
delriel del marco.
• Deslice el pie del marco en los tomillos de cabezahexagonaly
luegoinstale lascontratuercasde cierre.
3. Consultela figura1 e instaleel manubrio como se muestra.
• Deslice los pernoslargos atraves del soporte del manubrioy del
manubrioy luegoinstale lospernos hexagonales.
TUERCA BELLOTA MS__.
UNIDAD DE_- "_
MANUBRIO {_
IL
PERNO M8
(CORTO) X 2
ARANDELA
PLANA DE 1/2"X 2
TUERCA
MSX4
1.2.2 CONEX/ONDELCABLEDEBATERJA(ARRANQUE
ELECTR/COSOLAMENTE)
La unidad ha sido enviadadeliberadamentecon los cablesde la bateria
desconectados.
Paraconectarla bateria (vet los detallesde la conexionen lafigura 13):
1. Corte losamarresdel cableque aseguranlos cables dela bateriay
retire las cubiertas rojas de losterminales de la bateria.
2. Primero, conecteel cable rojo alterminal positivo (+) de labateria
con el pemo, arandeladecierrey tuerca suministrados.
3. Conecteel cable negro al terminal negativo (-) de la bateriacon el
perno,arandeladecierre y tuercasuministrados.
4. Aseguresede que todas las conexionesesten seguras. Deslicelas
botasde goma sobre losterminalesy laferreteria deconexion.
NOTA:
Si la bateria no puedearrancar el motor, carguelacoo el cargadorde
12 voltiosiacluidoea la caja de accesorios (vet detalles ea la secci6o
Cargaodouna bateria).
2.1 CONOZCAELGENERADOR
Leaelmanualdelpropietarioylasreglasdeseguridadantesdeoperar
estegenerader.
Compareel generadorcon lasfiguras dela2 ala 4parafamiliarizarsecon
las ubicaciones de los diversos controles y ajustes. Guardeeste manual
parareferenciasfuturas.
1. Receptaculo d0plexde 120 Volt AC, 20 Amp - Proporciona
energia electrica para la operacbn de cargas de iluminacion
electrica,aparatos,herramientaso motoresde 120 VoltAC,20 Amp,
monofa_sicosde60 Hz.
2. Receptaculoconcierrede120/240 VoltAC,30 Amp- Proporciona
energia electrica para la operacion de cargas de iluminaci6n
electrica,aparatos,herramientaso motoresde 120y/o 240 Volt AC,
30 Amp, monofa.sicosde 60 Hz.
3. Interruptores de circuito(AC) -Cada recepta_culoesta.provistocon
un interruptor de circuito de presionar para reiniciarcon el fin de
protegeral generadorcontra sobrecargaselectricas.
4. Dreoaje de aceite- Usar paradrenar elaceitedel motor.
5. Filtro de aire - Filtrael aire deingreso al motor.
6. Palaoca dechoke- Sele usa al arrancarun motorfrio.
24
Page 27

7. Tanquede combustible- Revisela capacidad del tanque en las
especificacionesdel generador.
8. Lengaeta de tierra - Conecteel generadora unaconexion a tierra
aprobadadesde aqui.Vea "Conectandoel generador a tierra" para
mayoresdetalles.
g. interrupterde funcionamiente/parada - Controla la operaciondel
generador(modelos solo de arranquedetire).
9A. interrupterde arranque - Se usa para arrancar el motor desde el
motor arrancador(modelosde arranqueelectrico solamente).
10. Silenciador - Silenciael motor.
Figura 2 - Panel de control
Figura 3 - Controles de/generador
Figura 4 - Controles de/generador
11. IVlanubrio- Pivoteay se retracta para almacenarse. Presionelos
botonescon resorte paramover los manubrios.
12. Tapade gasolina - Ubicacionde Ilenadodecombustible.
13. Medider de combustible- Muestra el nivel de combustible en el
tanque.
14. Llenado deaceite - Agregueaceiteaqui.
15. Arranquedeculata- Usepara arrancarel motor manualmente.
16. Cierre decombustible-Wlvula entre eltanque de combustibley el
carburador.
17. Entrada del cargador de bateria - Este receptaculo permite
recargarla bateria de almacenamientode 12 voltios proporcionada
con el conector adaptador de 12 voltios que se incluye en la caja
de accesorios. Detr__sde la entrada del cargador de baterias se
encuentraun fusible en linea de 1.5 amperios que esta dentro del
panelde control paraproteger la bateria (solo arranqueelectrico).
18. Bateria - Energizael arrancadorelectrico (soloarranqueelectrico).
lg. Medidor de horus- Midelas horusde operacion.
25
Page 28

2.2 MEDIDOBDEHOBAS
El medidor de horas mide el tiempo de operacion para seguir los
mantenimientosprogramados.
Habraun mensajede "CHGOil" cada 100 horas. Elmensaje destellara
una hera antes y una hera despues de cada intervalo de 100 horas,
proporcionandouna ventanade doshoras pararealizarel servicio.
Este mensaje realmente empezara_a destellar a las 99 horas y se
deshabilitaraalas 101 horas proporcionandouna ventana de dos horas
pararealizarel servicio.
Cada 200 horas el icono "SVC" en la esquina inferior izquierda de la
pantalla destellara_.El mensaje destellara,una hera antes y una hera
despuesde cadaintervalo de 200 horas,proporcionandouna ventanade
dos horas pararealizarelservicio.
Cuandoel medidorde horas estaenel mode dealerta dedestello (Flash
Alert), el mensaje de mantenimiento siempre alternara con el tiempo
transcurrido en horas y decimos. Las horas destellarancuatro veces,
luego alternaracon los mensajesde mantenimientocuatro veces hasta
queel medidorse reinicia.
* 100 hrs- CHGOIL-- Intervalocambio deaceite (c/100 hrs)
NOTA:
La gr;ifica de reloj de arena centellear_iintermitentementecuando el
motor estefuncienando. Estesignificaque la unidadle est_isiguiendo
la pistaalas horas de operation.
Figura 7 - Horometro
Figura 6 - receptacu/o duplex de 120 VoRAC, 20 Amp
]
2.3.2 RECEPT,4CULODE120/240 VAC,30 AMP
Use un conector NEIVlAL14-30 con este receptaculo(girar para cerrar/
abrir).Conecteunjuego decablesde4 conductorescon conexiona tierra
al conectory a la carga deseada.El cabledebera,ser de 250 VAC y 30
Amperiosnominal (oma.s)(figura7).
Figura 7 - Receptaculo de 120/240 VAC, 30 Amp
0000.0
GRAFICODE
RELOJDE
ARENA
2.3 JUEGO DE CUERDASY CONECTORES
2.3.1 RECEPT,4CULODUPLEXDE 120VAC,20AMP
Esta es una toma de 120 voltios protegida contra sobrecarga per un
interrupterde circuito de presionarparareiniciar de 20 amperios (figura
6). Use cada una de lastomas para alimentarcargas electricasde 120
volts,monofa_sicasde 60 Haquerequieranhastaunapotenciacombinada
de 2,400 vatios (2.4 Kw) o 20 amperios de corriente.Use solo juegos de
cablesde alta calidad,bien aislados, detres conductores con conexiona
tierra para125 voltios a20 amperios(o mas).
Mantengalos cables de extensionIomas cortes posible,preferiblemente
menos de 15 pies (5 metros) de largo, para evitar caidas de voltaje y
posiblesobrecalentamientode loscables.
BOTONDE REINIClO
(SI ESTAINSTALADO)
12OV/24OV
3OA
Use este receptaculo para operar cargas monofa_sicasde 120 Voltios
AC a 60 Hzque requieranhasta3600 vatios (3.6 Kw) de potencia a 30
amperioso 240 VAC,60 hz, monofasicasquerequieranhasta7200vatios
(7.2 KW) de potencia a 30 amperios. Estatoma esta protegida per dos
interruptoresde circuitode presionarpara reiniciarde 30A.
2.4 COMOUSARESTEGENERADOR
Si hay algun problema al operar el generador, per favor Ilame a la
GeneratorHelplineal 1-888-436-3722.
ElusedeungeneradoreninterioresPUEDEMATARLEENMINUTOS,
Elescapedel generadorcontienemon6xidodecarbono.
Esteesunvenenoinvisibley sinolor.
UseiosoloENEXTERiORES
ogaraje,AUNSI iaspuertasy
iasventanasestanabiertas.
y iejosdeventanas,puertas
y ductosdeventiiacion.
26
Page 29

2.4.1 CONEXIONA TIERRADELGENERADOR
El Codigo Electrico Nacional requiere que el marco y las partes
externas de este generador que son conductoreselectricos esten
conectadasen forma apropiada a una conexiona tierra aprobada
(figura 8). Los codigos electricos locales puedenasimismo requeriruna
apropiadaconexi6na tierra dela unidad. Paraesteproposito, el conectar
un conductor de cobre NO10 AWGtrenzadoa la tuerca detierra y a una
varade bronceo cobre de tierra (electrodo)proporciona una proteccion
adecuadacontra descargaselectricas. Sinembargo,los codigos locales
pueden variar ampliamente. Consulte con un electricista local los
reqaerimientos de conexiona tierra parasa area.
Figura 8 - Conexibn a tierra del generador
DECONEXION
ATIERRA
La apropiada conexi6na tierra del generador ayudara a evitar una
descargaelectrica en el caso en que se presenteuna faNade tierra en
el generadoro enlos dispositivosconectados.Unaapropiadaconexiona
tierra tambien ayudaa disipar la electricidadestatica, quegeneralmente
se acumulaen dispositivosno enterrados.
2.4.2 CONEXiOflBELASCARGASELE-CTRICAS
NOconecte cargas de 240 Volt a receptaculosde 120Volt. NO conecte
cargastrifasicas algenerador.NOconectecargasde 50 Hzal generador.
• Deje que el motor se estabilicey caliente por unos minutos antes de
arrancar.
• Conectey enciendalas cargas electricas monofa.sicasde 120 o 240
voltiosy 60 Hzdeseadas.
• Sume la potencia nominal (o amperaje) de todas las cargas que
seran conectadasa lavez. Estetotal no deberaser mayor que (a) la
capacidadde potencia y corriente del generador o (b) la capacidad
nominaldel interruptordel circuitoque suministra la energia.Vea"No
sobrecargueel generador".
2.5 NO SOBRECARGUEELGENERADOR
Sobrecargarungeneradorenexcesodesu capacidaddepotencianominal
puede traer como resultado dahos al generador y a los dispositivos
electricos conectados. Observe Io siguiente para evitar sobrecargar la
unidad:
Sume el total de potencia de todos los dispositivos electricos a
conectarsea lavez. Estetotal NOdebera,ser mayor que la capacidad
de potenciadel generador.
La potencia nominal de las luces puede leerse en las mismas
bombillas. La potencia nominal de las herramientas, aparatos y
motores normalmente se puedeencontraren ia etiquetade datos o
calcomaniafijada en el dispositivo.
• Si elaparato,herramientaomotor no muestranla potencia,multiplique
voltios por amperios nominales para determinar los vatios (volts x
amps = vatios).
• Algunos motores electricos, como los del tipo induccion, requieren
alrededor de tres veces mas potencia para arrancar que para
funcionar.Estetransitoriode potenciadurasolo unos pocos segundos
al arrancar tales motores. Asegurese de tener en cuenta esta alta
potencia de arranque al seleccionar dispositivos electricos que se
conectaranal generador:
1. Sepala potencianecesariapara arrancarel motor ma.sgrande.
2. Sume a esa cifra la potenciade funcionamiento detodas las otras
cargasconectadas.
La guia de referencia de potencias se proporciona para ayudarle a
determinarcua.ntositemspuedeoperarel generadoral mismotiempo.
NOTA:
Todaslas cifras son aproximadas. Yea la etiqueta de datos en los
aparatos parasaber los requerimientosde potencia.
2.6 GUJADEREFERENOIADEPOTENCIAS
Dispositivo............................................... Vatiosen funcionamiento
*Aireacondicionado (12,000 Btu) ............................................ 1700
*Aireacondicionado (24,000 Btu) ............................................ 3800
*Aireacondicionado (40,000 Btu) ............................................ 6000
Cargadorde baterias (20 Amp)................................................... 500
Lijadorade bandas(3") ............................................................ 1000
Sierraelectrica.......................................................................... 1200
Sierracircular (6-1/2")................................................de 800 a 1000
*Secadorade ropa (Electrica) .................................................. 5750
*Secadorade ropa (a gas) ......................................................... 700
*Lavadorade ropa.................................................................... 1150
Cafetera.................................................................................... 1750
*Compresor (1 HP).................................................................. 2000
*Oompresor (3/4 HP)............................................................... 1800
*Oompresor (1/2 HP)............................................................... 1400
Rizadorde pelo........................................................................... 700
*Deshumedecedor...................................................................... 650
Lijadoradedisco (9") ............................................................... 1200
Oortadora................................................................................... 500
Frazadaeiectrica......................................................................... 400
Pistolaelectricade clavos......................................................... 1200
Rangoelectrico (pot elemento)................................................. 1500
Sartenelectrica......................................................................... 1250
*Congeladora....................................................................... 700
*Ventilador dechimenea(3/5 HP)................................................ 875
*Garaje de aperturaautoma.tica....................................de 500 a 750
Secadordepelo........................................................................ 1200
Taladrode mano......................................................... de 250 a1100
Cortador desetos....................................................................... 450
Herramientade impacto.............................................................. 500
Plancha.................................................................................... 1200
* Eyector.................................................................................... 800
Oortadoradecesped................................................................ 1200
Bombillade luz........................................................................... 100
Hornode microondas.................................................de 700 a 1000
*Enfriador deleche................................................................... 1100
Quemadorde aceitesobre chimenea.......................................... 300
Calentadorde chispa deaceite (140,000 Btu)............................. 400
Calentadorde chispa deaceite (85,000 Btu)............................... 225
Calentadorde chispa deaceite (30,000 Btu)............................... 150
*Pulverizadorde pintura, sinaire (1/3 HP).................................. 600
2'7
Page 30

Pulverizadordepintura,sin aire (demano).................................. 150
Radio.............................................................................. de 50 a 200
*Refrigeradora............................................................................ 700
0ocina lenta................................................................................ 200
*Bomba sumergible(1-1/2 HP)................................................ 2800
*Bomba sumergible(1 HP)....................................................... 2000
*Bomba sumergible(1/2 HP).................................................... 1500
*Bomba de desag_Je...................................................de 800 a1050
*Sierra de banco (10")............................................. de1750 a 2000
Televisor.......................................................................de 200 a 500
Tostadora.................................................................. de1000 a 1650
Podadorade cesped................................................................... 500
* Calcule3 veces lapotenciade lalista paraarrancarestos
dispositivos.
2.7 ANTESDEABBANCABELGENEBADOB
Antes de operar el generador,es necesario agregar aceite de motor y
gasolina,de estamanera:
2.7.1AGREGAR ACEITEDE MOTOR
Todo aceite debecumplir el estandarminimo de la American Petroleum
Institute(APt)ServiceOlassSJ, SLosuperior.Nouse aditivosespeciales.
Seleccioneel grado deviscosidad del aceite deacuerdo a latemperatura
esperadade operacion (ver el grafico tambien).
• Por encimade 40° F,useSAE30
• Por debajode 40° Fy hasta10° F,use 10W-30
• Por debajode 10° F,use5W-30 sintetico
mEm
2.7,2 A[IADIRGASOLItVA
Nunca llene el tanque de combustible en el interior
de la casa. Evite derramar gasolina sobre un motor
caliente. Deje enfriar al motor completamente antes
de ahadir combustible. Nunca Ilene el tanque de
gasolina mientras el motor est_ funcionando o est_
caliente. NO encienda cigarrillos o fume cuando
est6 llenando el tanque de combustible. La gasolina
es altamente INFLAMABLE y sus vapores son
EXPLOSIVOS.
No sobrecargue el tanque de combustible. Deje
siempre espacio para la expansi6n del combustible.
Si el tanque est_ muy lleno, el combustible puede
caer sobre el motor caliente y causar un incendio o
explosi6n. Limpie cualquier derrame de combustible
inmediatamente.
• Usegasolinasin plomo REGULARparael motordelgenerador.Nouse
gasolinaPremium.No use aceitecon gasolina.
• Limpieel areaalrededorde latapa de Ilenadodecombustible, saquela.
• Lentamenteahadagasolinaregularsin plomoaltanquedecombustible.
Llene hasta el fondo del filtro de pantalla. Tenga cuidad0de n0
Ilenarlo demasiado(Figura9).
• Instale la tapa del combustible y limpie la gasolina que se haya
derramado.
IIVIPORTANTE:Esimportanteevitar que se formen depositosde goma en
las partes del sistema de combustible como el carburador,la manguera
de combustibleo eltanque duranteel almacenamiento.Loscombustibles
mezclados con alcoholes (llamados gasohol,etanol o metanol) pueden
atraer la humedad, Io que Ilegaa la separaciony formacbn de a_cidos
durante el almacenamiento.Los gases acidos puedendahar el sistema
de combustible de un motor durante el almacenamiento. Para evitar
problemascon el motor,el sistemadecombustible debera,vaciarseantes
de almacenarsepor30 diaso mas. Ver la seccion de "Almacenamiento".
Nuncause productos limpiadoresde motor o carburadoren eltanque de
combustibleya que puedeocasionardahopermanente.
°F -20 -10 0 10 20 32 40 60 80 100
oc-3'o -_o -;0 o lo 2'0 3'0 4;
Rango de temperatura del uso esperado
&C U IDADO
_Cualquier intentode elmotor antes de
se Is haya dado servicio apropiado con el aceite
recomendado puede traer como resultado una falla
del motor.
• Coloque el generadoren una superficie lisa (no excedalos 15° en
ningunadireccbn).
• Limpieel area alrededorde latoma de aceitey retire la tapa.
• Llenelentamenteel aceitehastaque la varilla marque Ileno. Deje de
Ilenarocasionalmentepararevisarel nivel deaceite.
• Instalela varillay ajustelaseguramente.
• Luego, reviseel niveldeaceite antes dearrancar cada vez.
28
arranoar
que
Figura9 - Tanquedecombustible
Tanquede combustible
.......,..,_om('_'Stlhle NOLLENARm_saH_
de esta separaci6n
2.8 ABBANQUEDEMOTOBESDEBECULE
//_'_Nunca arranque ni detenga el motor con
los dispositivos el6ctricos conectados a los
recept_culos ni encendidos.
• Desconecte todas las cargas electricas de los recepta,culos de la
unidadantesde arrancar el motor.
• Aseguresede que el generadoreste en unasuperficie lisa (noexceda
los 15° enninguna direccion).
Page 31

* ABRAlavalvuladecierredecombustible(Figura10).
* GireelinterrupterRUN/STOPalaposicionON(Figura11).
* DeslicelapalancadeCHOKEdelmotoralaposicionIZQUIERDAde
"FULLCHOKE"(complete)(Figura12).
* Paraarrancarelmotor,tomefirmementeelmanubriodelreculey
tirelentemantehastaquesesientaqueaumentalaresistencia.Tire
ra_pidamentehaciaafuera.
* Cuandoelmotorarranque,muevalapalancadeChokea1/2CHOKE
hastaqueelmotorfuncioneenformasuaveyluegocompletamente
alaposicionRUN.Sielmotorarranca,muevalapalancadeChokea
1/2CHOKEhastaqueelmotorfuncioneenformasuaveyluegoala
posicionRUN.
NOTA:
Si el motordispara,peteno siguefunciooando,muevala palancade
chokea FULLCHOKEy repilalasinstruccionesdearranque.
Figura 12 -Posicion de Choke
PALANCA DECHOKE
IZQUIERDA =
DERECHA= FUNCIONAR
Figura 10- Va/vulade derre de combustible
DECOMBUSTIBLE
Figura 11 - interrupter ON/OFFdel motor
INTERRUPTER DE
ENCENDIDO/APAGADO DEL MOTOR
(SOLAMENTE MOTORES CON
CABLE DE ARRANQUE)
\
IIVlPORTANTE:No sobrecargueel generador.Asimismo, no sobrecargue
los receptaculos individuales. Estas tomas estan protegidas contra
sobrecargas con interruptores de circuito tipo presionar para reiniciar.
Si la corriente nominalde cualquiera de los interruptoresse excede,ese
interrupter seabre y la salida electricaa ese recepta.culose pierde.Lea
"No sobrecargueel generador"con muchocuidado.
2.9 ARRANQUEDEMOTORESDEARRANQUE
ELI CTRIC0
/i_Nunca arranque ni detenga el motor con
los dispositivos el_ctricos conectados a los
recept_culos ni encendidos.
* Desconectetodas las cargas electricas de los recepta.culosde la
unidadantesde arrancar el motor.
* Aseguresede que el generadoreste en unasuperficie lisa (noexceda
los 15° enninguna direccion).
* Abrala valvula decierre del combustible (figura 10).
* Mueva la palanca de CHOKEdel motor a la posicion FULL CHOKE
(completo) (Figura12).
* Para arrancar el motor, mantenga presionado el interruptor de
Start!Run/Stop en la posicion "Start". El motor intentara arrancar.
Cuando el motor arranque, suelte el interrupter a la posicion "run"
(funcionamiento).
* Cuandoel motor arranque,mueva la palancade Chole a "1/2 choke"
hastaque el motor funcione enforma suavey luegocompletamente
a la posicion "Run". Si el motor decae, mueva la palanca de Chole
nuevamentea "1/2 choke" hasta que el motor funcione en forma
suavey luegoa la posicion "Run".
* Este generadortambienesta equipado con un arrancador manual de
reculeque se puede usarsi labateria esta.descargada.
NOTA:
El interrupter debe estar en la posiciooARRANQUE.Useuno de los
recephiculos del paneldel generador juntoconel cargadorde bateria
incluido paracargarla bateriamientras el generadoreste funcionando.
* Paraarrancarmanualmente,tome firmemente elmanubriodel recule
y tire lentemantehasta que se sienta que aumenta la resistencia.
Tire rapidamentearribapara arrancarel motor. Luegosiga la misma
secuenciade choke.
NOTA:
Si el motor dispara, poreno siguefunciooaodo, mueva la palancade
chokea FULLCHOKEy repita las instrucciooesde arraoque.
29
Page 32

IIVIPORTANTE:Nosobrecargue el generador.Asimismo, no sobrecargue
los receptaculos individuales. Estas tomas estan protegidas contra
sobrecargas con interruptores de circuito tipo presionar para reiniciar.
Si la corriente nominal decualquierade los interruptoresse excede,ese
interruptor seabre y la salida electricaa ese receptaculo se pierde. Lea
"No sobrecargueel generador"con muchocuidado.
2.10DETENERELMOTOR
• Apaguetodas las cargas,luego desconecte las cargaselectricas de
los receptaculosdelpaneldelgenerador.Nuncaarranqueni detengael
motor con dispositivos electricosconectadosy encendidos.
• Deje que el motor funcione sin carga pot algunos minutos para
estabilizarlos temperaturasinternasdel motor y del generador.
• Muevael interruptor deRun/Stopa la posicion OFE
• Cierrela valvuladecombustible.
2.11SISTEMADEAPAGADOPORBAJONIVELDE
ACEITE
Elmotor esta,equipadocon un sensordebajo nivelde aceiteque apagael
motorenforma automaticacuandoel nivelde aceitecaepordebajode un
nivelespecificado.Si elmotor se apagay el tanque de combustibletiene
suficientegasolina,revise elnivel de aceitede motor.
2.11.1SENSANOOELBAJONIVELDEACEITE
Si el sistemadetectaun baj0nivel deaceitedurantela 0peracbn, el motor
se apaga. Elmotor no funci0narahasta que se hayaIlenad0 aceite de
nuevoa su nivel apropiado.
r
2.12CARGADELABATERiA(ARRANQUE
ELEECTBICOSOLAMENTE)
Las baterias almacenadas sueltan un explosivo gas
de hidr6geno al recargarse. Una mezcla explosiva
perrnanecer_ alrededor de la bateria pot largo
tiempo luego de que se haya cargado. La rn_s
ligera chispa puede encender el hidr6geno y causar
una explosi6n. Una explosi6n as_ puede destruir la
bateria y causar ceguera y otros dahos serios.
,_No perrnita que lumen, hogan fuego abierto,
chispas o cualquier otra fuente de color alrededor
de la bateria. Use guantes protectores, gafas y
delantal de gorna cuando trabaje alrededor de
la bateria. El fluido electrolitico de la bateria es
una soluci6n de _cido sulftJrico extrernadamente
corrosiva que puede causar severas quernaduras.
Si ocurre un derrame lave el _rea con agua limpia
inmediatamente.
NOTA:
La bateriaincluidaeo elgeoeradorhasido cargadacompletameote.
Uaabateriapuedeperderalgode sucargocuandonose leusaper
tiempo prolongado.Si la bateria es iacapazde arrancarel motor,
¢ooecteel cargadorde 12voltiosincluidoen la cajade accesorios
(vet la section Cargandola bateria). EL HACERFUNCIONAREL
GENERADORNOCARGALABATERIA.
30
Useel conectordelcargadordebateriaparamantenerla bateriacargaday
lista para usarse.La cargode labateriadeberahacerseen unaubicacbn
seca.
1. Conecte el cargador en el conector de "Entrada de cargador de
bateria", ubicado en el panel de control. Conecte el extremo del
receptaculode pareddelcargador de labateriaen unatoma de 120
VOA(Figura13).
2. Desconecte el cargador de bateria de la toma de la pared y del
conectordel panelde control cuandoel generadorvayaa usarse.
NOTA:
No useel cargad0r dem baterias potre;is de 48 hrs eacargo.
Figura 13 - Conector del cargador de bateria
BATERfA
ENTRADA
DEL
CARGADOR
3.1 PROGRAMADEMANTENIMIENTO
Siga los intervalosdel calendario.Se requiereun servicio mas frecuente
cuando se opera en condicionesadversascomo las quese indica abajo.
Reviseel nivelde aceite encada uso
Cambieel aceite$ *Cada 100 horaso cambio deestacion
Revisela claridaddela valvula ***Cada cambio deestacion
Serviciodelfiltro de aire ** Oada200 horas o cambio deestacion
Reemplazodebujias Cadacambio deestacion
:i: Cambieelaceiteluegodelosprimeras30horasdeoperacionyluegoencoda
cambiodeestacion.
* Cambieelaceitey el filtrode aceitecodamessi operabajocondiciones
pesadasdecargooaltostemperaturas.
** Limpieconmasfrecuenciabajocondicionesdeoperacionqueinvolucrenpolvo
y suciedad.Reemplacelospartesdelfiltrodeairesinose lespuedelimpiar
adecuadamente.
*** Reviselaclaridaddela v&lvulay ajOstelasi es necesarioluegodelos
primeras50horasdeoperaciony coda100horasluegodeello.
3.2 ESPECIFICAOIONESDELPRODUCT0
3.2.1 ESPEC/F/CAC/ONESDELGENERADOR
Oapacidadelectrica.................................................................7.5 kW**
Potenciadetransitorio.............................................................9.375 kW
VoltajeACnominal.................................................................... 120/240
Cargam_ima ACnominal
Oorriente@ 240V........................................................ 31.25 Amps**
Oorriente@ 120V.......................................................... 62.5 Amps**
Frecuencianominal................................................ 60 Hz @ 3600 RPIVl
Fase..................................................................................... Monofa.sico
** Laspotencias y corrientesmaximasestan sujetasa, ylimitadas por,factores
talescomo contenidoen BTUsdel combustible, altitud, condiciones delmotor,
etc. La potenciamaxima disminuye alrededordel3.5% por cada 1000 pies
sobre el nivel del mar,y tambien disminuiraalrededordel 1% por cada 6°0
(10°F)por encima de los 16°C(60°F) de temperatura ambiente.
Page 33

3.2.2 ESPEC/F/CAC/ONE$DE/.MOTOR
Desplazamiento............................................................................ 420cc
Tipode bujias.................................... Champion N9YCo NHSPLDF7TC
BujiaNOdeparte .............................................................. 0G84420101
Espaciamientodela bujia............................. 0.030 pulgadaso 0.76 mm
Capacidadde gasolina......................................... 8 galonesamericanos
Tipode aceite......Verla cartilla en laseccion "Agregaraceitede motor"
Capacidadde aceite................................................ 1.0 Litro (1.06 Qts.)
Tiempodefuncionamiento (50%de carga) .............................. 12 horas
Certificado paraemision de ClaseII
3.2.3 /NFORMAC/ONDE EM/S/ONES
La agencia deproteccion ambiental (EPA)requiere que este generador
cumpla con los estandaresde emision en elescape. Elmotor usado en
este generador esta certificado para cumplir los niveles de emision de
EPAaplicables.Es importanteseguir las especificacionesen la seccion
de mantenimiento proporcionadasen este manual para asegurarque su
motor cumple con los estandaresde emision aplicables por la duracion
dela vida delmotor.Elsistemade control de emisionesde estegenerador
consisteen Io siguiente:
* Sistemade induccionde aire
Tuberiddistribuidor de entrada
Limpiador deaire
* Sistemade escape
Distribuidordeescape
Silenciador
El periodo de cumplimiento de emisiones mencionadoen la etiqueta de
cumplimiento deemisiones indicael numerode horasde operacionpara
las que el motor ha demostradocumplir los requerimientosde emision
de la EPA.
• Sistemade ignicion
Bujia
Bobinade arranque
• Sistemade combustible
Carburador
3.3 RECOMENBACiONESGENERALES
La garantiadel generadorno cubreitems quehayansidoobjeto deabuso
o negligenciadel operador. Pararecibir el valor total de la garantia,el
operadordebehacerel mantenimientodelgeneradortal como seinstruye
en estemanual.
Se necesitara hacer algunos ajustes periodicamente para mantener
apropiadamenteeste generador.
Todos los ajustes en la seccion de Mantenimiento de este manual
debera_nhacerseal menos unavez en cadacambio de estacion.Siga los
requerimientosdel "Programade mantenimiento".
NOTA:
Uaa vezal a_o, reemplace losbujias y el filtro de aire. Bujias auevas
y filtro de aire limpio aseguran una apropiada mezcla de aire-
combustibleyayudan aque el motorfuncione mejor y duremas.
_CUIDADO
,_Nunca inserte ni herramienta trav_s
de los ranuras de aire de refrigeraci6n, ann si el
motor no est_ funcionando.
NO use una manguera de jardin para limpiar el generad0r. El agua
puede ingresar al sistema de combustible del motor y causar
problemas.Adicionalmente, si el agua ingresaal generador a troves
de losranurasde aire, alg0 delaguaser;i retenidaen vaci0s 0 grietas
del aislamiento del bobinado del rotor y estator. La acumulacion del
aguay el poivoen los bobinadosinfernosdelgenerador eventualmente
disminuir;inia resistenciade aisiamiento de esos bobinados.
ning_n objeto
NOTA:
a
3.3.2 PARAUMP/ARELGENERADOR
* Useuntrapo humedo paralimpiar lassuperficies exteriores.
* Una escobillasuave de cerdas puede usarsepara soltar suciedades
pegadas,aceite,etc.
* Puedeusarseunaaspiradoraparalevantarsuciedady restos.
* Sepuedeusarunabajapresion deaire (quenoexcedalas 25 psi) para
soplarla suciedad.Inspeccionelas ranurasde airedeventilacion y las
aberturasdel generador.Estasaperturas deben mantenerselimpias y
sin obstrucciones.
3.3.3 MANTENIMIENTODE!.MOTOR
i/_kCuando se trabaja en el generador, siempre se debe
desconectar el cable negativo de la baterfa. Tambi6n
desconecte el cable de la bujia y mant6ngalo lejos
de esta.
3.3.4 REV#SARELNIVE!.DEACEITE
Vea la seccion "ANTESDE ARRANCAREL GENERADOR"para mayor
informacion sobre la revisiondel nivel de aceite. Elnivel de aceitedebe
revisarseantes de cadauso, o al menos cadaocho horas de operacion.
Siempremantengael nivel de aceite.
3.3.5 CAMBiODEACE/TE
Cambieel aceiteluegodelos primeras30 horas de operacion.Cambieel
aceitecada 100 horas o cada cambio de estacion luegode ello. Siesta
haciendofuncionar la unidad en condiciones de polvo o suciedad,o en
clima extremadamenteca.lido,cambieel aceite conma.sfrecuencia.
_CUIDADO
3.3.1 MANTENIMIENTODE!.GENERADOR
El mantenimientodel generadorconsiste en mantener a la unidad limpia
y seca. Operey almacenela unidad en un ambientelimpio y seco donde
no este expuesta a excesivo polvo, suciedad, humedad ni vapores
corrosivos. Las ranuras de aire de enfriamiento en el generador no
debera.nobstruirse con nieve,hojas ni ningunmaterial extrafio.
Revise la limpieza del generadorfrecuentementey limpielo cuando el
polvo, suciedad,humedad y otras sustancias extrafias seanvisibles en
su superficieexterior.
,_EI aceite caliente puede causar quemaduras.
Permita que el motor enfrfe antes de drenar el
aceite. Evite una exposici6n prolongada o repetida
de la piel con el aceite usado. Lave completamente
los _reas expuestas con jab6n.
Use lassiguientesinstruccionespara cambiar el aceite luegoque el
motor enfrie:
Limpieel areaalrededor de lamanguerade drenajedel aceite.
* Retirela tapa de drenajede aceite del motor y la tapa de Ilenado de
aceitepara quedrenecompletamenteen un contenedoradecuado.
* Cuando el aceite haya drenado completamente, instale la tapa de
drenajede aceitey cierrela confirmeza.
31
Page 34

• Llene el carter de aceite con el aceite recomendado. (Yea "Antes
de arrancar el generador" para mayores recomendacionessobre el
aceite).
• Limpieel aceite que se haya derramado.
• Dispongadel aceite usado enun centrode recoleccion apropiado.
3.3.6 REEMPLAZOBELABUJiA
Ver labujia recomendadaen las especificacionesdel motor. Reemplace
la bujia unavez alaho. Estoayudara,aqueel motor arranquecon mayor
facilidady funcione mejor.
1. Detengael motor ytire del cablede bujias coloca.ndololejos de las
mismas.
2. Limpieel areaalrededordela bujiay retireladela cabezadel cilindro.
3. Coloqueel espaciamientode labujia en0.70-0.80 mm (0.028-0.031
in.). Instalela bujia con el espaciamientocorrecto enla cabezadel
cilindro (figura14).
Figura 14- Espaciamientode la bujia
3.4 BARSERVICiOAL LllVIPIADORDEAiRE
El motor no funcionara apropiadamentey puede daharse si se usa un
limpiadordeaire sucio. Limpieo reemplaceelfiltro depapel del limpiador
cada aho. Limpielo o reemplacelo con mayor frecuencia si se opera
en condiciones de suciedad (figura 16). El nomero de parte para esta
limpiadorde aire es0G84420151.
Limpiezao reemplazo del fillro de aire de papel:
• Retirela cubierta dellimpiador de airey quite el filtro depapel.
• Limpieel filtro de papelgolpea_ndololigeramentesobre una superficie
solida. Si elfiltro esta demasiadosucio, reempiacelocon uno nuevo.
Dispongadelfiltro viejo enforma apropiada.
• Limpie lacubierta del limpiador de aire, luego inserte un nuevofiltro
de papel en la base del limpiador de aire. Reinstalela cubierta del
limpiadorde aire.
Figura 16 - Fi/tro de aire
PASADOR_
3.3.7 REEMPLAZOBELABATERiA
NOTA:
La bateria incluida en el generador ha sido cargadacomplelamenle.
Una bateria puede perder algo desu carga cuando no se le usa pot
liempo prolongado.Si la bateria es incapaz de arrancar el motor,
conecte el cargador de 12 vollios incluido en la caja de accesorios
(vet la section Cargando una bateria). EL HACERFUNCIONAREL
GENERADORNO CARGALA BATERIA.El numero de parle para esta
bateria es OGg44g.
_,CUIDADO
,_EI terminal NEGATIVO de la bateria deber_:
1. Estarsiempre DESCONECTADOPRIMERO.
2. Eslar siempre CONECTADOAL FINAL.
Figura15 - Conexionesdela bateria
NOTA:
Para ordenarunfillro de aire nuevo, pot favor pongaseen conlacto
conel cenlrode servicio aulorizado mas cercanoal 1-800-333-1322.
3.5 ESPACIODELAVALVULA
• Admision-- 0,15 _ O,02mm(frio), (0,006" _ 0,0008" pulgadas)
• Escape-- 0,20 _ O,02mm (frio), (0,008" _ 0,0008" pulgadas)
Luegode las primeras50 horasde operation,revise el espacio de la
v;ilvulaen el motor y ajustela si es necesario.
Imporlante: Si se sienteincomodo al haceresteprocedimientoo no tiene
las herramientasapropiadas, por favor Ileve el generador al centro de
servicio mas cercanoparaqe sele ajusteel espacio dela valvula. Estees
un paso muy importante paraasegurarla mayorvida de su motor.
32
Page 35

3.B GENERAL
El generador debe ser arrancado al menos una vez cada 30 dias y
permitirsele que funcione al menos 30 minutos. Si esto no se puede
hacery la unidad debealmacenarsepor ma.sde 30 dias,use la siguiente
informacioncomo unaguia paraprepararlopara sualmacenamiento.
NUNCA almacene el motor con combustible en
el tanque en interiores o en _reas cerradas o con
poca ventilaci{on donde los gases pueden alcanzar
una llama abierta, chispa o luz piloto como en un
homo, calentador de agua, secador de ropa u otto
dispositivo de gas.
_ll Permita la unidad enfrfe totalmente antes de
almacenarla.
que
se
®
Dejeenfriar el motor, luego dreneel aceite del ca.rter.Rellenecon el
gradorecomendado.
®
Retire la bujia y Ilene alrededor de 1/2 onza (15 ml) de aceite de
motor enel cilindro. Cubrael agujerode la bujiacon untrapo. Tiredel
arrancadorderecule unpar devecesparalubricarlos anillosdelpiston
y el recorrido delcilindro.
ACUIDADO
,_ Evite la pulverizaci6n del agujero de la bujfa en el
arranque.
• Instaley ajustela bujia. No conecteel cablede bujia.
• Limpie las otras superficies del generador.Reviseque las aberturas
y ranuras de aire de ventilacionen el generador estenabiertas y sin
obstrucciones.
• Almacenela unidadenun lugar limpio yseco.
3.7 ALIVIACENAMIENTOPORLARGOPLAZO
Es importante evitar que se formen depositos de goma en las partes
esencialesdel sistemade combustible como el carburador,la manguera
de combustible o el tanque durante el almacenamiento. Asimismo,
la experiencia indica que los combustibles mezclados con alcoholes
(llamados gasohol,etanol o metanol) puedenatraerla humedad, Io que
Ilegaa la separaciony formaciGn de acidos durante el almacenamiento.
Los gases a_cidospuedendafiar el sistema de combustible de un motor
duranteel almacenamiento.
Para evitar problemas con el motor, el sistema de combustible deberb.
vaciarseantes dealmacenarsepor 30 dias o ma.s,como sigue:
• Retiretodala gasolinadeltanquede combustible.
Drene el combustible en contenedores apropiados en
exteriores, lejos de las fiamas abiertas. Aseg_rese de
que el motor est_ frfo. No fume.
• Arranquey haga funci0nar el motorhastaque sedetenga p0rfalta de
combustible.
3.80TROS CONSEJOSPABAALMACENAIVIIENTO
• No almacenegas01inade unaestaci6na 0tra.
• Reemplace la gas01inasi empieza a 0xidarse. El 0xid0 0 suciedad
en la gas01inacausarapr0blemas con el carburad0r y el sistema de
combustible.
• Si fuera p0sible, almacene la unidad en interi0res y cubrala para
pr0tegerla del p01v0y la suciedad. ASEGURESEDE VACIAR EL
TANQUE DE COMBUSTIBLE.
• Si no fuera practico vaciar el tanque de combustible y la unidadtiene
quealmacenarsepor untiempo, use un estabilizadorde combustible
comercial disponibley afia.daloala gasolinaparaprolongar la vida de
esta.
• Cubrala unidadcon unacubierta protectoraadecuadaque noretenga
humedad.
_t NUNCA cubra el mientras las _reas del
motor y el escape est_n calientes.
generador
33
Page 36

4.1 GUJADEDETECCI6NDEPROBLEMAS
EImotor esta funcionando,pero no
haysalida de AC disponiNe.
1. Elinterruptor de circuito esta_abierto.
2. Pobreconexbn o cabledefectuoso.
3. Eldispositivo conectadoesta.mal.
4. Fallaen elgenerador.
1. Reinicieel interruptor decircuito.
2. Revisey repare.
3. Conecte otrodispositivo que esteen buenas
condiciones.
4. Oontacteaun servicio autorizado.
Elmotorfuncionabien pero se 1. Oortocircuito enla carga conectada. 1. Desconectela carga electricaencorto.
siente sobrecargado cuaadolas 2. Elgeneradorestasobrecargado. 2. Vea"No sobrecargueel generador"
cargaseshin conectadas. 3. Lavelocidaddel motores muylenta. 3. Contacteaun servicio autorizado.
4. Circuito delgeneradoren corto. 4. Contacteaun servicio autorizado.
EJ motor nO arraflca_ o arranca
perofuncionaenforma ;ispera.
1. Elcierre decombustible estaen OFF.
2. Filtrode aire sucio.
3. Faltagasolina.
4. Gasolinapasada.
5. Elcable de la bujiano esta.conectadoa esta.
6. Bujias enmal estado.
7. Agua en lagasolina.
8. Over-choking.
9. Nivel de aceitebajo
10. Mezclade combustible demasiadorica.
11. Va.lvuladeentradaatascadao cerrada.
12. El motor ha perdidocompresbn.
1. Gireel cierrede combustiblea ON.
2. Limpie o reemplaceel filtro deaire.
3. Llene eltanque de combustible.
4. Droney Ileneel tanque de combustiblecon
gasolinafresca.
5. Conecte el cablea la bujia.
6. Reemplacela bujia.
7. Dreney Ileneel tanque de combustiblecon
gasolinafresca.
8. Ooloquela palancade chokeen posicbn No
Choke.
9. Llene el carter enel nivel apropiado.
10. Contacteaun servicio autorizado.
11. Contacteaun servicio autorizado.
12. Contactea un servicio autorizado.
• =
Elmotor se apaga durantela 1. Faltagasolina. 1. Lleneeltanque de combustible.
operaci6n. 2. Nivelde aceite bajo 2. Llene el carter enel nivel apropiado.
3. Fallaen elmotor. 3. Contacteaun servicio autorizado.
• =
El motor pierdepotencia. 1. Lacarga es demasiadoalta. 1. Reduzcala carga (Yea"No sobrecargueel
2. Filtrode aire sucio, generador").
3. Elmotor necesitaservicio. 2. Limpie o reemplaceel nitro deaire.
3. Contacteaun servicio autorizado.
El motor se pierdeo tartamudea. 1. Elchoke esta.abiertodemasiadopronto. 1. Muevael chokea la posicion mediahasta que el
motorfuncione suavemente.
2. Elcarburador esta.funcionandomuy rico omuy 2. Contacteaun servicio autorizado.
ralo.
34
Page 37

35
Page 38

DECLARACIONDEGARANTJADECONTROLDEEIVIISIONES
SUSDERECHOSY OBUGACIONESDEGARANTJA
La Agenciadeproteccion ambientalde los EstadosUnidos (EPA)y GeneracPowerSystems, Inc. (Generac)se complacenenexplicarla garantiadel
sistemade control de emisionesparasu nuevoequipodel aSo2008 o posterior.Equiponuevoque use motorespequeSosde chispa debenestar
diseSados,construidosy equipadosparacumplir estandaresanti-smog muyexigentesparael gobiernofederal.Generacgarantizaralos sistemas de
emisionen su motorper el periodode tiempo listadoabajosiemprequeno hayaabuse, negligencia,modificaciono mantenimientoinapropiadode su
equipo.
Su sistemadecontrol deemisionpuede incluir partescome: carburador,sistemade ignicion, sistemadecombustible, convertidorcatalitico, y otros
componentesasociadosrelacionadosa la emision (silos tuviera).
COBERTURADELAGARANTJADELFABRICANTE:
Estesistemade control de emision esta garantizadoperdos a_os.Si duranteesteperiodode garantiaseencuentraque cualquier parte relacionadaa
las emisiones estadefectuosaen materialeso manede obra,se efectuara,las reparacioneso el intercambioper partede un concesionariode servicio
autorizadode Generac.
RESPONSABILIDADESDEGARANTJADELPROPIETARIO:
Comepropietariodel generador,usted es responsablede completartodos losmantenimientosrequeridostal come se lista enel manualdel propietario
proporcionadoper lafabrica. Parapropositosde garantia,Generacrecomiendaque ustedconservetodos losrecibos que cubrenel mantenimientode
su generador,pero Generacno puede rehusarla garantiasolodebido ala falta derecibos.
Comepropietariodel generador,usted deberaser conscientede que Generacpuedenegar cualquiery/o todas lascoberturas y responsabilidadesde la
garantiasi su generador,o una parte o componentedel mismo, hafallado debidoal abuse,negligencia,mantenimientoinapropiadoo modificaciones
no aprobadas,oel use derepuestosfalsos o del mercadonegrono fabricados, suministradoso aprobadosper Generac.
Ustedes responsabledecentactara uncencesienarieauterizado degarantiade Genera¢tan prontose presenteel problema.Lasreparaciones
de garantiadeber;in completarse en un tiempo razonable,sinexceder los30 dias.
El servicio degarantiapuedearreglarsecontactandoya seaa su concesionariodeventa oa un concesionariode serviciode garantiaautorizadode
Generac.Paraubicar alconcesionario deservicio degarantia autorizadode Generacma.scercanoa usted,Ilame a nuestronumerogratuito.
1-800-333-1322
NOTAIMPORTANTE:Esta declaracionde garantiaexplicasusderechosy obligacionesbajo la Garantiadel sistemade controlde emisiones (ECS
Warranty),que Generacleproporciona Generacsiguiendolas leyesfederales.Tambienvea"Garantiaslimitadasde Generacparalos sistemas de
potencia deGenerac,Inc." que se adjuntaa este manualenuna hojaseparada,tambienproporcionadaa ustedper Generac.Tengaencuentaque
esta garantiano se aplicaraa ningun da_oincidental,consecuencialoindirecto causado per defectos en losmaterialesy manede obra, o cualquier
retrasoen repararo reemplazarlaspartes defectuosas.Estagarantiareemplazaatodas las otras garantias,expresaso implicitas. ESPEC[FICAMENTE,
GENERACNOOFRECEOTRASGARANT[ASCOMODEIVIERCANTIBILIDAD0 ADECUACIONA UNUSOPARTICULAR.Cualquiergarantiaimplicita
permitidaper ley,seralimitada en suduracion a los terminos de la garantiaexpresaproporcionadaen elpresente.AIgunosestados no permiten
limitacionesen cua.ntodurauna garantiaimplicita, de mode que la limitacion expresadaarriba puedeno aplicarseausted.
La garantiaECSse aplicasolo al sistemadecontrol deemisionesde su nuevoequipo. Si hayalgunconflicto enterminos entrela garantiaECSy la
garantiadeGenerac,se aplicara,la de Generac.Ambas garantiasdescribenderechosy obligacionesimportantes respectoa su nuevomotor.
El servicio degarantiapuedeser realizados01oper un servicio de garantiaautorizadode Generac.Cuandose requieraservicio degarantia,sedebe
presentarevidenciaque muestrela fechade ventaal comprador/propietariooriginal.
Si usted tuvieraalgunapregunta respecto a sus derechosy responsabilidadesde garantia,debera,ponerseen contactocon Generacen lasiguiente
direccion:
ATENCIONDEPARTAMENTODEGARANTiAS
GENERACPOWERSYSTEMS,iNC.
P.O.BOX297 * WHITEWATER,WI 53190
Parte1
ParteNo. 0H1911 Rev.B 10/11
36
Page 39

GARANTiADELSISTEIVlADECONTROLDEEIVIISIONES
Garantiadesistema decontrol de emisiones (garantiaECS)pardequipoque usa motores pequefiosde chispa.
(a) Aplicabilidad:Estagarantiase aplicaa equipoque utiliza motorespequefiospardfuera de pista. Elperiodo degarantiaECSempezaraen la
fecha enqueel equipo nuevoes comprado por o entregadoa su propietario/compradorfinal originaly continuara,por lossiguientes24 meses
consecutivos.
(b)
Coberturageneralde lagarantiade emisiones:Generacgarantizaal propietario/compradorfinal original delmotor o equipamientonuevoy acada
subsiguientecomprador/propietarioqueel ECScuandose instaloestuvo:
(1) Disefiado,construido y equipadopard cumplir contodas las regulacionesaplicables:y
(2) Librede defectosen materialesy mano de obraque cause la falla deuna parte garantizadaen cualquiermomentoduranteel periodode
garantiaECS.
(c)
Lagarantiasobre partesrelacionadasa la emisionse interpretara.ncomo sigue:
(1) Cualquierparte garantizadaque noesteprogramadapardreemplazocomo mantenimientorequeridoen el Manualdel propietariosera
garantizadaen elperiodo de garantiaECS.Sifallara cualquierparte duranteel periodo degarantia ECS,deberaser reparadoo reemplazado
porGeneracde acuerdoa la Subsecci6n (4) mas abajo.Cualquierparte asi reparadao reemplazadabajo la garantiaECSdebera,ser
garantizadapor el resto delperiodode garantiaECS.
(2) Cualquierparte garantizadaque esteprogramadasolo pardinspeccion regularcomo se especificaenel Manualdelpropietariosera
garantizadaen elperiodo de garantiaECS.Unadeclaraci6n en elmanual del propietarioaefecto de"reparar o reemplazarsegunsea
necesario"no reducirael periodode garantia ECS.Cualquierparte asi reparadao reemplazadabajo la garantiaECSdebera,ser garantizada
porel resto del periododegarantiaECS.
(3) Cualquierparte garantizadaqueeste programadapardreemplazosegun Iorequierael mantenimientoen el Manualdel Propietariodebera
ser garantizadopor el periodo detiempo antesdel primerpunto dereemplazoprogramadopard esaparte. Sila parte falla antesdel primer
reemplazoprogramado,la partesera reparadao reemplazadapor Generacdeacuerdo a laSubseccion (4) ma.sabajo. Cualquierparte
relacionadaalas emisionesasi reparadao reemplazadabajo la garantia ECSsera.garantizadapor el resto delperiodo antes delprimer punto
de reemplazoprogramado pardaquellaparte.
(4) Lareparaciono reemplazode cualquierparte garantizadarelacionadaalas emisionesbajo estagarantia ECSdebera,realizarsesin costo
alguno pardel propietarioenun centrode servicio de garantiaautorizadopot Generac.
(5) No obstantelas disposicionesde lasubseccion (4) arriba indicadas, losservicios o reparacionespor garantiadebenser proporcionadosen
unainstalaciondeservicio autorizadapor Generac.
(6) Cuandoel motor seainspeccionadopor un centro deservicio de garantiaautorizadode Generac,elpropietario/compradorno sera.
responsablede loscostos de diagnostico si la reparacionse considera dentrode lagarantia.
(7) A Io largo delperiodode garantiaECS,Generacmantendraun suministro departes garantizadasrelacionadasalas emisionessuficiente pard
cumplir lademandaesperadapardtales repuestos.
(8) Cualquierrepuestorelacionadoala emisionautorizadoy aprobadoporGeneracpuedeusarse enla ejecucion decualquier reparaciono
mantenimientode garantiaECSy seproporcionara,sin costo al comprador/propietario.Dicho uso noreducira,las obligacionesde garantiaECS
de Generac.
(9) Losrepuestosno aprobados,afiadidos, modificados,falsos y/o delmercado negro no sepueden usarpardmodificar o repararun motor
Generac.Dichouso invalida estagarantiaECSy serabase suficiente pard noaceptarun reclamopor garantiaECS.Generacno podra ser
declaradoresponsablepor fallas de cualquierparte garantizadade un equipoGeneraccausadasporel uso detales repuestosno aprobados,
afiadidos, modificados,falsos y/o delmercado negro.
LASPARTESRELACIONADASA LAEIVlISIONPUEDENiNCLUiRLOSIGUiENTE(SiSETIENE):
1) SISTEMADEMEDICIONDECOMBUSTIBLE
A. CARBURADORYPARTESINTERNAS
B. REGULADORDEPRESION
2) SISTEMADEINDUCCIONDEAIRE
A. DISTRIBUIDORDEENTRADA
B. FILTRODEAIRE
3) SISTEMADEIGNtCION
A. BUd[AS
B. BOBtNAS/MODULODEIGNtCION
Parte2
SISTEMADEINYECCl0NDEAIRE
4)
A. VALVULADEAIREDEPULSO
SISTEMADEESCAPE
5)
A. CATALIZADOR
B. REACTORTf'_--RMICO
C. DtSTRIBUIDORDEESCAPE
ParteNo. 0H1911 Rev.B 10/11
3"7
Page 40

GARANTiA LIMITADA DE "DOS ANOS" DE SISTEMAS DE POTENCIA GENERAC PARA
GENERADORES PORTATILES SERIE GP
Por un periodo dedos a_os (2) desdela fecha de la ventaoriginal, GeneracPowerSystems, Inc. (Generac)garantiza sus generadoresserie GPcomo libres de defectos en
materialesy mano de obra por los itemsy periodos indicadosabajo. Generac,a su opcion, repararao reemplazara,cualquier parte que,luego de un examen,inspeccion y
pruebas realizadaspor unconcesionario de servicio de garantiaautorizadode Generac,se encuentreque estadefectuosa. Lareparacion o reemplazoconforme a Io indicado
en estagarantialimitada no renovarani extenderael periodo de garantiaoriginal. Cualquierproducto reparado deberaestar bajo garantia s01opor elperiodo de garantia
original quereste. Cualquierequipoque el comprador/propietario reclamecomo defectuosodebe ser regresadoa y examinadopor elconcesionario de serviciode garantia
autorizadopor Generacmas cercano.Todos los costos de transporte bajo la garantia,incluyendo elretornoa lafabrica, seranpor cuentay prepagadospor elpropietario/
comprador. Estagarantia se aplica s01oa los generadoresportatiles serie GPde Generacy no es transferibledel propietariooriginal. Guardesu comprobantede compra. Si
usted no proporciona una pruebade lafecha dela comprainicial, se usara la fecha de embarquedel productodel fabricante paradeterminar el periodo de garantia.
PROGRAMAC|()N DE GARANTiA
Las aplicaciones paraconsumidor estan garantizadaspor dos (2) anos. Lasaplicaciones comerciales y dealquiler estan garantizadasporun (1) anoso 1000 horascomo
maximo, Ioque Ilegueprimero.
DEAPLICACIONESPARACONSUMIDORESDELOSESTADOSUNIDOSY CANADA
ANDUNO- Coberturacompleta limitada en manode obra y repuestos listados (serequierecomprobante de compray mantenimiento):
• Motor- Todoslos componentes
• Alternador - Todos los componentes
ANODOS- Cobertura completa limitada enrepuestoslistados (se requierecomprobante de compra y mantenimiento):
• Motor- Todoslos componentes
• Alternador-Todos los componentes
APLICACIONCOMERCIAL/ BEGUILER
ANOUNO - Cobertura completa limitada en manode obray repuestoslistados (se requierecomprobante de compra y mantenimiento):
• Motor- Todoslos componentes
• Alternador - Todos los componentes
NOTA: Parael proposito de esta garantia"uso deconsumidor" significa uso personalen casa residencial o recreacionalpor el comprador original. La garantiano aplica
a unidades usadas para FuentePrimariade Energiaen lugar del servicio pflblico donde el servicio pflblico se encuentrepresenteo donde el servicio pflblico de energiano
exista normalmente.Una vez queel generadorha experimentadouso comercial o dealquiler, se le considerara enadelante un generadorno para usodel consumidor para
propositos deesta garantia.
L|NEAMIENTOS:
1. Todaslasreparacionesporgarantiadebenser realizadasy/oatendidasporun concesionariodeGeneracPowerSystemsautorizadoy/o certificadoosusfiliales.
2. Unidadesquehayansidorevendidasno estancubiertasporlagarantiadeGenerac,yaqueestagarantianoestransferiNe.
3. ElusoderepuestosquenosondeGeneracinvalidalagarantiaensutotalidad.
4. Generacpuedeelegirreparar,reemplazaro reembolsarunequipo.
5. Loscostosdemanodeobracubiertosporgarantiasebasanenhorasnormalesdetrabajo.Costosadicionalesporsobretiempos,feriadosotrabajosdeemergenciafueradehorasnormalesde
trabajoserO.nresponsabilidaddelcliente.
6. Elcostodelembarquederepuestoscubiertosporgarantiaesreembolsadoaunatarifadeembarqueportierra.Loscostosrelacionadosporunasolicituddeembarque
expeditoseranresponsabilidaddelcliente.
7. Lasbateriasestangarantizadasporelfabricantedelasmismas.
8. Talvezserequieraverificarel mantenimientoparaquela coberturadegarantiaaplique.
ESTA GARANTiA NO SE APLICARA A LO SIGUIENTE-"
1. Costosdemantenimientonormaly ajustes.
2. Fallascausadasporcombustibleso aceitescontaminados,olafaltadenivelesapropiados.
3. Reparacioneso diagnOsticosrealizadosporindividuosdiferentesalos concesionariosautorizadospor Generacqueno est_nautorizadosporescritoporGenerac.
4. Fallasdebidoa,peronolimitandosea,el usoydesgastenormal,accidente,maluso,abuso,negligenciao usoinapropiado.
5. Oomotododispositivomecanico,los motoresGeneracnecesitanservicioy repuestosperiodicamenteparafuncionarcomoestandisehados.Estagarantianocubrereparacionescuandoeluso
normalhaagotadola vidafltildeunaparteomotor.
6. Lasfallascausadasporcualquiercausaexternaoactode Dios,comocolisiOn,robo,vandalismo,disturbioso guerra,holocaustonuclear,incendio,congelamiento,electricidadatmosferica,
terremoto,tormentas,granizo,erupcionvolcO,nica,aguaoinundaciones,tornadoso huracanes.
7. Eldafiorelacionadoaroedoresy/o plagadeinsectos.
8. Losproductosquesonmodificadoso alteradosdemaneranoautorizadaporGeneracporescrito.
9. Cualquierda_ioincidental,consecuencialoindirectocausadopordefectosenlosmaterialesy manodeobra,ocualquierretrasoenrepararoreemplazarlaspartesdefectuosas.
10. FalladebidoaunamalaaplicaciOn.
11. Gastosrelacionadosa"instruccionesdelcliente"o detecciondeproblemasdondenoseencuentredefectodefabrica.
12. Equipodealquilerusadomientrasserealizalasreparacionesdegarantia.
13. Bateriasdearranque,fusibles,bombillosde luzy fluidosdemotor.
ESTAGARANTiAREEMPLAZAA TODASLAS OTRASGARANTiAS,EXPRESAS0 IMPLiClTAS.ESPECiFICAMENTE,GENERACNO OFRECEOTRASGARANTiASCOMODE
MERCANTIBILIDADO ADECUACIONA UN USOPARTICULAR.Cualquiergarantia implicita permitida por ley,estara limitada enduracion a losterminos de la garantia expresa
dispuestaaqui. Algunos estados no permiten limitaciones respectoa laduracion deunagarantia implicita,de modoque la limitacion expresadaarribapuede no aplicarse
a usted. LAUNICA RESPONSABILIDADDEGENERACSERALA REPARAClONO REEMPLAZODELAS PARTESTALCOMOSEESPECIFICAARRIBA.ENNINGUNCASO
GENERACSERARESPONSABLEPORCUALQUIERDANOINCIDENTAL0 CONSECUENCIAL,AONSITALESDANOSSEANUNRESULTADODIRECTODE UNANEGLIGENCIA
DEGENERAC.Algunos estados no permitenla exclusiono limitacion de da_osaccidentales o resultantes,de modo que la limitacion mencionadas mas arriba podrian no
aplicarse a usted.Esta garantiale da a ustedderechoslegales especificos.Usted tambien tiene otros derechosdependiendodel Estado.
GENERAC POWER SYSTEIVIS, INC. • RO. BOX 8 • Waukesha, Wl 53187 • Tel:: (888) GENERAC (436-3722) • Fax: (262) 544-4851
Para ubicar al concesionario autorizado mas cercano visite nuestro sitio web: www.generac.com
No. de parte 0H8902 RevisionE (10/11)
Manual Parte No. 0H9060 Rev. C (04/11/11) Impreso en China
Page 41

IVlODELES: 005942-0,
G ®
® • ®
I .%
G'n'" r "
e eraleuportableserzeGPde7 500watts
005943-0
e treti
' rl
39
Page 42

introduction...........................................................41
Lireattentivementce manuel...............................41
Regiesde securite................................................41
Indexdes normes.........................................................43
Inforrnationsg6n6rales.........................................44
1.1 Deballage.....................................................................44
1.1.1 Boited'accessoires..........................................44
1.2 Montage.......................................................................44
1.2.1 Montagedu kit d'accessoires...........................44
1.2.2 Branchementdes c_blesde batterie
(demarrageelectriqueuniquement)..................44
Fonctionnernent....................................................44
2.1 Bienconnaitrele g6nerateur.........................................44
2.2 Horometre....................................................................46
2.3 Cordonset connecteurs...............................................46
2.3.1 Prisedouble, 120 Vc.a., 20 A.........................46
2.3.2 Prise120/240 V c.a., 30A ..............................46
2.4 Utilisationdu g@erateur...............................................46
2.4.1 Mise_,laterre dug@erateur............................47
2.4.2 Branchementdes chargeselectriques..............47
2.5 Nepassurchargerleg@erateur...................................47
2.6 Guidede referencedewattage.....................................47
2.7 Avant ledemarragedu g@erateur................................48
2.7.1 Ajout deI'huilede moteur.................................48
2.7.2 Ajout deI'essence............................................48
2.8 Demarragedesmoteursa demarragemanuel...............48
2.9 Demarragedesmoteursa demarrageelectrique...........49
2.10 Arr_tdu moteur............................................................50
2.11 Systemed'arr_tde bas niveaud'huile...........................50
2.11.1 Detectionde bas niveaud'huile........................50
2.12 Chargementdela batterie(unit_sa demarrage
electriqueuniquement).................................................50
Maintenance.........................................................50
3.1 Programmede maintenance.........................................50
3.2 Caracteristiquestechniques des produits......................50
3.2.1 Caracteristiquestechniques du g@erateur.......50
3.2.2 Caracteristiquestechniques du moteur.............51
3.2.3 Informationsrelativesaux emissions................51
3.3 Recommandationsg@erales........................................51
3.3.1 Maintenancedug@erateur..............................51
3.3.2 Nettoyagedu g@erateur..................................51
3.3.3 Maintenancedumoteur...................................51
3.3.4 Verificationdu niveaud'huile............................51
3.3.5 ChangementdeI'huile......................................51
3.3.6 Remplacementdesbougiesd'allumage............52
3.3.7 Remptacementde la batterie............................52
3.4 Entretiendu filtre aair ..................................................52
3.5 Jeudes soupapes........................................................53
3.6 G@eralit_s...................................................................53
3.7 Stockagea longterme.................................................53
3.8 Autresconseils destockage.........................................53
Depannage..........................................................54
4.1 Guidede d@annage.....................................................54
Rernarques...........................................................55
Garantie...............................................................56
4O
Page 43

iNTRODUCTiON
Nous vous remercions d'avoir achete ce mod@ fabrique par Generac
Power Systems,Inc. Ce modele est un gencrateur entra;nepar moteur
compact, __haute performance, refroidi a. I'air, con(_u pour fournir
I'alimentation@ctrique afin de faire fonctionner les charges @ctriques
Iorsqu'aucunreseau@ctrique n'estdisponible ou a.la place dureseau en
raison d'unecoupurede courant.
LIBEATTENTiVEIVIENTCEMANUEL
En cas d'incompr@ension d'une partie de ce manuel, contacter le
d@ositaire agree le plus proche pour connaitre les procedures de
demarrage,de fonctionnement et d'entretien.
L'operateurestresponsabledeI'utilisationcorrecteetsQredeI'equipement.
Nous recommandons fortement a. I'operateur de life ce manuel et
de comprendre completement toutes les instructions avant d'utiliser
I'equipement.Nous recommandons egalementfortement d'apprendre__
d'autres utilisateurscomment correctement demarreret faire fonctionner
I'unite.Celales prepareau casot_ils auraientbesoindefaire fonctionner
I'equipementpourune urgence.
Le generateurpeutfonctionner enroute securite, defa£on efficace et de
fa£onfiable uniquements'il est correctementinstalle,utilise et entretenu.
Avantdefaire fonctionnerou d'effectuerI'entretiendu generateur:
• Se familiariser avec et respecter strictement tousles codes et
reglementationsIocaux,d'Etatet nationaux.
• Life attentivementtousles avertissementsde securitefigurant dartsce
manuelet surle produit.
• Sefamiliariser avec cemanuel etI'uniteavantde I'utiliser.
Le fabricant ne peut pas anticiper toutes les situations possibles qui
peuventimpliquer undanger.Lesavertissementsde ce manuel et figurant
sur les etiquetteset lesautocollantsapposessur I'unitene sont,toutefois,
pas exhaustifs.Si vous suivezune procedure, unemethodede travailou
unetechnique defonctionnementque lefabricant nerecommandepas en
particulier,assurez-vousqu'elleestsans dangerpour les autres.S'assurer
quela procedure,la methodedetravail ou latechniquedefonctionnement
choisie nerendepas legenerateurdangereux.
LES INFORMATIONSCONTENUESDAMS LE PRESENTMANUEL SE
BASENTSUR LES MACHINESEN PRODUCTIONAU MOMENTDE LA
PUBLICATION.GENERACSE RESERVELE DROIT DE MODIFIERCE
MANUELATOUTMOMENT.
r r
REGLESDESECURITE
Danstout ce manuel, etsur les etiquetteset surles autocollantsapposes
sur le generateur,les blocs DANGER,AVERTISSEMENT,ATTENTIONet
REMARQUEservent a alerterlepersonneld'instructionsspecialesausujet
d'uneoperation specifique qui peut s'avererdangereusesi elle n'est pas
effectueecorrectementou avec precaution.Les respecterattentivement.
Leurs definitionssont lessuivantes :
INDIQUEUNESITUATIONOUUNEACTIONDANGEREUSEQUI,SIELLE
N'ESTPASF:VIT_:E,ENTRAJNERALAMORTOUDESBLESSURESGRAVES.
Indiqueunesituation onune action dangereuse qui,si elle n'est pas
evitee, pourraitentrainer la mort ondesblessures graves.
,&ATTENTION!
Indiqueunesituation ouune action dangereuse qui, si elle n'est pas
evitee, entrainera desblessures legereson moderees.
REMARQUE:
Les remarques contiennent des informations supplementaires
importantes relatives a uneprocedure et se trouventdans le corps de
texte regulier de ce manuel.
Cesavertissementsdesecuritene peuventpaseliminerlesdangersqu'ils
signalent.Le sens commun et le respectstrict des instructions speciales
lotsde I'actionou I'entretiensont essentielspour eviter lesaccidents.
Quatre symboles de securite couramment utilises accompagnent les
blocs DANGER,AVERTISSEMENTetATTENTION.Chacunindiquele type
d'informationssuivant :
,_Ce symbole indique des informations importantes
relatives a la s_curit_ qui, si elles ne sont pas
suivies, pourraient mettre en danger la s6curit6
personnelle et/ou les biens.
Ce symbole indique un risque potentiel
d'explosion.
//_Ce symbole indique un risque potentiel d'incendie.
On syrnbole indique un risque potentiel
d'61ectrocution.
DANGERS GI N :RAUX
• Nejamais faire fonctionner dans un espaceclos ou a I'interieur.
• Pour des raisons de securite, le fabricant recommande que la
maintenance de cet equipement soit effectuee par un d@ositaire
agree.Inspecterregulierementlegenerateuretcontacterle d@ositaire
agreele plus proche pourles piecesqui necessitentunereparationou
un remplacement.
• Fairefonctionnerle generateuruniquementsur des surfacesdeniveau
etouil ne serapas exposea_I'humidite,auxsaletes, a la poussiereou
auxvapeurscorrosives excessives.
• Tenirles mains,les pieds,les v_tements,etc., a distance descourroies
detransmission, desventilateursetd'autrespieces mobiles.Nejamais
retirertout protege-ventilateurpendantqueI'unitefonctionne.
• Certaines pieces du generateur deviennent extremement chaudes
pendantle fonctionnement. Restera.distance du generateurtant qu'il
n'apasrefroidi afind'eviter des brQluresgraves.
• NEPASfaire fonctionnerle generateursousla pluie.
• Ne pas modifier la construction dugenerateurni les commandes,ce
quipourrait creerune conditiondefonctionnementdangereuse.
• Ne jamais demarrer ou arreter I'unite avec les charges electriques
brancheesaux prisesET avecdes dispositifs branchessous tension.
Demarrerle moteur et le laisser se stabiliser avant de brancher les
chargeselectriques.Debranchertoutes les chargeselectriques avant
d'arreterle generateur.
• Nepas insererd'objet dans lesfentes de refroidissementde I'unite.
• Lots du travail sur cet equipement,conserver I'alerteatout moment.
Ne jamais travailler sur I'equipementen cas de fatigue physique ou
mentale.
• Ne jamais utiliser le generateurou n'importe laquellede ses pieces
comme marche. Montersur I'unitepeut ecraseret casser lespieces,
etpeut entrainerdes conditions defonctionnement dangereusessuite
une fuite de gaz d'echappement,une fuite de carburant, une fuite
d'huile,etc.
41[
Page 44

Sur les modeles a demarrage electrique, debrancher le c&ble de
batteriePOSlTIF(+) du demarreur du moteurOUle c_.blede batterie
NI_GATIF(-) de laborne de la batterie,ce qui est le plus facile, avant
detransporter leg6nerateur.
REMARQUE:
Ce generateur est equipe d'un silencieux pare-etincelles. Le
proprietaire / I'operateur du generateur devra garder /e pare-
etincelles en bon etat. Bans I'Etat de Califomie, un pare-etincelles
est exige par la Ioi (Section 4442 du California Public Resources
Code (Code de ressources publiques de Cafifornie)). Los autres Etats
peuvent avoir des IBis similaires. Les IBis federales s'appliquent sur
les terres federales.
DANGERSD'I CHAPPEiVlENTET
D'EMPLACEMENT
lie jamais fake fonclionner dans un espace clos ou a I'inlerieur.
NEJAiVlAISulilisera I'inlerieur ou dansdes espaoesparliellemenl
clos lois que les garages, m_me si les porleset les fen_Ires sonl
ouverles! Uliliser UNIQUEMENTa I'exterieur et loin des fen_Ires,
porlesouverles, venlilations,el dans unespacedans lequel le gaz
d'echappemenlne s'aocumulera pasde fagon morlelle.
Utiliser un gGnGrateur _ I'int_rieur PEUT VOUS
TUER EN QUELQUES MINUTES.
Losgazd'_chappementdug_n_rateur contiennentdu monoxyde
de carbone. C'est un gaz toxique invisible et inodore.
DANGERSELECTRICLU_
• Le generateur produit une tension dangereusement haute pendant
sonfonctionnement.Eviter le contact avec lesills nus, les bornes, les
branchements,etc., pendantle fonctionnement de I'unite, m_me sur
I'equipementbrancheaugenerateur.S'assurerquetousles couvercles,
lesdispositifs de protectionet les barrieressont enplaceavantdefaire
fonctionner legenerateur.
• Ne jamais manipuler tout type de cordon ou de dispositif electrique
qui est dans I'eau, alors que vous _tes pieds nus ou que vos
mains ou vos pieds sont mouilles. CELA ENTRA|NERAUN RISQUE
D'ELECTROCUTION.
• Le NationalElectric Code (Code electriquenational)exige quele b_ti
et queles pieces externeselectriquementconductrices du generateur
soientcorrectementreliesa uneterreapprouvee.Les codes electriques
Iocauxpeuventegalementexigerlabonneraisealaterredugenerateur.
Consulterun electricien local pourconnaitre lesexigencesde raisea.
laterre dansla region.
• LJtiliserun disjoncteurdefuite a laterre dansroutezone humideoutres
conductrice (telleque le carter protecteurmetalliqueou I'acierie).
• Ne pas utiliser de cordons electriques uses, nus, effiloches ou
autrementendommagesavec legenerateur.
• Avant d'effectuer route maintenancesur le generateur,debrancher la
batteriede demarragedu moteur(le cas echeant)afin d'emp_cherun
demarrageaccidentel. Debrancherle c__blede la bornede la batterie
signaleepar I'inscription NEGATIVE(Negatif), NEGou le signe (-) en
premier.Rebrancherce c_bleen dernier.
• En cas d'accident cause par electrocution,couper immediatementla
source d'alimentationelectrique. Si cela est !mpossible, essayer de
libererlavictime du conducteursous tension.EVITERTOUTCONTACT
DIRECTAVECLA VICTIME.Utiliser un objetnon conducteur,comme
unecordeou une planche,pour liberer lavictime du conducteur sous
tension. Si lavictime est inconsciente,assurerles premierssecourset
demanderuneaidemedicale immediate.
NE JAMAIS utiliser a rint6rieur
d'une maison ou d'un garage,
MEME Sl les portes et los
fen6tres sont ouvertes.
• Les fumees d'echappementdu moteur contiennent dumonoxyde de
carbone, un gaz toxique invisible et inodore. Ce gaz toxique,s'il est
respire en concentrations suffisantes, peut entrainer une perte de
conscienceou m_mela mort.
• LJndebit approprie, non obstrue d'air de refroidissement et de
ventilationestimportant pour corrigerlefonctionnement dugenerateur.
Nepasmodifier I'installationounepas laissermemeun blocagepartiel
deI'alimentationdeventilation,etantdonneque celapeut serieusement
affecterle fonctionnementsOrdu generateur.II FAUTfaire fonctionner
le generateura I'exterieur.
• Ce systeme d'echappementdolt _trecorrectement entretenu.Neden
fairequi pourrait rendre lesysteme d'echappementdangereuxou non
conformeauxcodes Iocauxet!ou normes locales.
• Toujours utiliser un detecteurd'oxyde de carbone a alimentationpar
batteriea I'interieur,conformement aux instructions dufabricant.
• Sivous commenceza voussentirmalade,a avoir des etourdissements
ou a vous sentirfaible apresle fonctionnementdu generateur,respirez
deI'airfrais IMMEDIATEMENT.Consultezun medecincar vouspourriez
avoirereempoisonne au monoxydedecarbone.
Utilis_r UNIQUEMENT
I'EXTERIEUR et loin des
fenGtres, portes et
ventilations.
RISQUESD'iNCENDIE
• L'essenceest extr_memenl INFLAMMABLE el ses vapeurs sonl
EXPLOSIVES.Ne pas produirede fumee, flammes hues, etincelles
ouchaleura proximilede I'endroil ouI'essence esl manipulee.
• Nejamais ajouterdecarburantIorsqueI'unitefonctionneouestchaude.
Laisserle moteur completement refroidiravant d'ajouterdu carburant.
• Ne jamais remplir le reservoir d'essence a I'inlerieur. Respecter
toutes les IBis reglementant le stockage et la manipulation de
I'essence.
• He pasIrop remplir le reservoir d'essence. Toujours laisserde la
place pourI'expansion du carburanl. En cas de suremplissagedu
reservoir,le carburantpeutdebordersur un moteur chaudet entrainer
unINCENDtEou une EXPLOSION.Nejamaisstocker legenerateuravec
lereservoir remplidecarburantetantdonneque lesvapeurs d'essence
pourraient atteindre une flamme ouverte, des etincelles ou une
veilleuse (comme il y en a sur unechaudiere,un chauffe-eauou sur
un seche-linge). Celapeutentrainerun INCENDIEou une EXPLOSION.
LaisserI'unitecompletementrefroidir avantle stockage.
= Nettoyer immediatementtoute eclaboussurede carburant ou d'huile.
S'assurerqu'aucune matierecombustible nereste sur oua proximite
du generateur.Garder I'espaceenvironnant du generateurpropre et
sans debris et garderun jeu de cinq (5) pieds surtousles c6tes afin
depermettre uneaerationadapteedu generateur.
42
Page 45

* Nepasinserer d'objet dans lesfentesde refroidissementde I'unite.
* Ne pas faire fonctionner le generateur si des dispositifs electriques
branches surchauffent ; si la puissance electrique est perdue ; si le
moteur ou le gen6rateurfait des etincelles; si desflammes ou de la
fumee sont detect6esalors que I'unitefonctionne.
* Garderun extincteur a.proximitedu gen6rateura.toutmoment.
INDEXDESNOR/V/E$
En I'absencede normes, codes, reglementationset lois applicables,les
informations publiees indiquees ci-dessous peuvent servir de directive
pour le fonctionnement de cet equipement. Toujours se reporter a. la
derniererevision disponiblepour les normes indiquees.
1. NFPA N° 70, NFPA HANDBOOKOF NATIONALELECTRICCODE
(ManuelNFPAdu codeelectriquenational).
2. ArticleX,NATIONALBUILDINGCODE(Codede constructionnational),
disponible aupres de I'American Insurance Association, 85 John
Street,NewYork,N.Y.10038.
3. AGRICULTURALWIRINGHANDBOOK(Manuelde c_.blageagricole),
disponible aupres du Food and Energy Council, 909 University
Avenue,Columbia,MO65201.
4. ASAE EP-3634, INSTALLATIONAND MAINTENANCEOF FARM
STANDBYELECTRICALSYSTEMS(Installation et maintenance des
systemeselectriquesde secourspour lesfermes), disponibleaupres
de I'AmericanSocietyof AgriculturalEngineers,2950 NilesRoad,St.
Joseph, MI49085.
N° DEMOD! LE:
N° DES¢:RIE:
Emplacement/BdeI'unite
MODELE D'ETIQUETTE
AVERTISSEMENTPROPOSITION65 CALIFORNIE
L'6chappementdu moteuret certainsdeses constituantssont
susceptiblessetonI'l_tatdeCaliforniedtentrafnerdes cancers,
desmalformationscongenitalesou pouvant_tre nocifs pour le
systemereproductif.
AVERTISSEMENTPROPOSITION65 CAUFORNIE
Ceproduit contient ou 6metdes produitschimiquessusceptibles
setonI'!_tatdeCalifornied'entrafnerdescancers,des
malformationscong6nitalesou autresmaladiespouvant_tre
nocivespourle systemereproductif.
43
Page 46

1.1 DI BALLAGE
• Retirertous les el6mentsd'emballage.
• Enleverla boited'accessoires separ6e.
• Retirerle g6nerateurdu carton.
1.1.1 BOiTED'ACCESSOIRES
Verifierlecontenudelabo;te.Sidespiecessontabsentesouendommagees,
mercide Iocaliserundepositaireagr6eau1-888-436-3722.
• 1 - Manueld'entretien • 1 - Poignee
• 1 - Litre d'huileSAE30 • 1 - Pieddu b_ti
• 2 - Rouesjamais plates • 1 - Chargeurdebatterie(demarrage
electriqueuniquement)
• 1 - Sacde materiel(contenantce quisuit) :
• 2 Piedsen caoutchouc • 2 - BoulonsM8 (longs)
• 2 Axesd'essieude 0,5 po. • 2- BoulonsM8 (courts)
• 2 Goupillesfendues • 2 - E_crousborgnesM8
• 2 Rondellesplatesde0,5 po. • 4- Ecrousa collethexagonalM8
• 2 Boulons courts * 2- Oontre-ecrous
• 2 Ecrousa.collet(demarrageelectriqueuniquement)
1.2 MONTAGE
II est necessaire d'effectuerquelques etapesde montage avant d'utiliser
le generateur.Si des problemes se presentent Iors du montage du
generateur,merci d'appeler la ligne d'assistance pour les generateurs
au 1-888-77L0WES.
1.2.1 MONTAGEDUKITD'ACCESSOIRES
Les roues sont conguesdansI'unite pour ameliorerconsiderablementla
portabilitedu g6nerateur.
Vous aurezbesoin des outils suivantspour correctement installer le kit :
• Pincesa_bec effile
• Oliquetetune douillede 13 mm (0,5 po.)
• Clepolygonale de 13mm (0,5 po.)
REMARQUE :
Lesrouesne sout pascoo(;uespouruneutilisatioosur la route.
1. Sereporter au Schema1 et installerles rouescomme suit :
• Faireglisser les axesd'essieuatravers laroue, la rondelle platede
0,5 po. et lesupport de la rouesur leb_ti.
• Inserer la goupille fendue atravers I'axe d'essieu, puis plier les
languettes(des goupillesfendues) versI'exterieurafinde lesfixer.
2. Sereporter au Schema 1 etinstaller le pied dub_.tietles butoirs en
caoutchouccomme indique.
• Faireglisser les axesdes butoirs en caoutchoucatravers le pied
du b&ti,puis installerles ecrous a_collet deblocage.
• Faireglisser les boulonsa t6te hexagonaleatravers lesrondelles
platesatravers les trous dartsle Iongeronde cadrede chassis.
• Faireglisser le pieddu b_.tisur lesboulons at_te hexagonale,puis
installerles ecrousacollet deblocage.
3. Sereporter au Schema1 et installerla poigneecomme indique.
• Faireglisser les boulonslongs a.travers le support depoigneeetla
poignee,puis installer les ecrous hexagonaux.
Schema 1 - Roue et poignee
....BOULON M8 (LONG)
2 X BOULON M8 (COURT)
f
[_ 2 XAXE D'ESStEU
_2 X RONDELLE PLATE DE 0,5 PO
2 X PIED EN CAOUTCHOUC _
_2 X GOUPILLE FENDUE
\
\
4 X ECROU M8
1.2.2 BRANCHEMENTDESCABLESDEBATTERIE
tB_'MARRAGE_'LECTR/QUEUN/QUEMENT)
L'unitea eteenvoyeeavec les c_bles debatterie debranches.
Pourbrancher la batterie (voirSchema 13pour les informations relatives
au branchement)'
1. Couperlesattachesdec&blefixant les c_blesdebatterieet retirezles
couverclesrougesdes bornes de labatterie.
2. Brancherd'abordle c_ble rougea la bornepositive (+) de labatterie
a.I'aidedu boulon,du contre-ecrouet deI'ecroufournis.
3. Brancherlec_blenoir a.laborne negative(-) dela batteriea.I'aidedu
boulon, du contre-ecrouet deI'ecroufournis.
4. S'assurer que tousles branchements soot fixes. Faire glisser
les enveloppes de caoutchouc sur les bornes et le materiel de
branchement.
REMARQUE •
S'il est impossible de demarrer le moteur a I'aide de la batterie,
brancher lechargeur de 12 Vluciusda.s la boited'aocessoires (volt la
section ,, Chargementde la batterie, pourplusd'informatious).
2.1 BIENCONNAITBELEGENEBATEUB
Mercide lifeleManueld'e.tretienetlesBeglesde seouriteavautde
fake fouctiouoer ce geoerateur.
Comparerle generateuraux Schemas2 a 4 pour vous familiariser avec
les emplacementsdesdiverscontr61eset reglages.Conservercemanuel
pour memoire.
1. Prise double a DDFT 120 V c.a., 20 A - Fournitune alimentation
electrique pour le fonctionnement d'un eclairage electrique,
d'appareils, d'outils et de charges de moteur 120 V c.a., 20 A,
monophase,60 Hz.
2. Prise a verrouillage120/240 V c.a.,30 A- Fournitune alimentation
electrique pour le fonctionnement d'un eclairage electrique,
d'appareils,d'outils et de chargesde moteur 120 V et / ou 240 V
c.a., 30 A, monophase,60 Hz.
3. Disjoucteurs(c.a.) - Chaqueprise estfournie avec un disjoncteur
de type ,<pousser pourreenclencher, pour protegerle generateur
contre les surcharges electriques.
4. Vidaoged'huile- LJtilisepourvidangerI'huilede moteur.
5. Filtre a air- FiltreI'air aspireparle moteur.
44
Page 47

5. f:trangleur- Utiliseaudemarraged'un moteurfroid.
7. Reservoir d'essence - Voir los Caracteristiques techniques du
generateurpourla contenancedu reservoir.
8. Borne de raise a la terre - Relie le gencrateur a une terre
approuvee.Voir la section ,,IVliseala terre du gencrateur>,pour plus
d'informations.
g. Interrupteur Run/Stop (IVlarche/Arret)- ContrClelefonctionnement
du generateur(modeles;_demarragemanuel).
gA. Interrupteur de demarrage - Utilise pour demarrer le moteur __
partir du demarreur du moteur (modeles a demarrage electrique
uniquement).
18. Pot d'echappement - Rendsilencieuxle moteur.
Sch#.ma2 - Panneaudecommando
Sch#.ma3- Commandosdug#.n#.rateur
Sch#.ma4- Commandosdug#.n#.rateur
11. Poignee - Pivoter et retracter pour le stockage. Appuyer sur le
boutona ressort pourdeplacerles poignees.
12. Chapeaude gazassis - Emplacementde remplissaged'huile.
13. Jauge de carburant - Indique le niveau de carburant darts le
reservoir.
14. Remplissage d'huile - Ajouter de I'huileici.
15. Lanceur a rappel- Utiliser pour demarrerle moteurmanuellement.
16. Soupape d'arret - Soupape entre le reservoir d'essence et le
carburateur.
17. Entree du chargeur de batterie - Cette prise a la capacite de
recharger la batterie rechargeablec.c. de 12 volts, equipce d'un
chargeur d'adaptateur de 12 volts qui est inclus dans la boTte
d'accessoires. Derriere I'entree du chargeur de la batterie, il y a
un fusible en ligne de 1,50 A qui setrouve __I'interieurdu panneau
de commande afin de proteger la batterie (demarrageelectrique
uniquement).
18. Batterie - Net sous tension le demarreur electrique (modeles de
demarrageelectriqueuniquement).
19. Horometre - Releveles heures defonctionnement.
45
Page 48

2.2 HOBOMi:TBE
L'horometreretevelesheuresdefonctionnementpourlamaintenance
programmee'
Un message <<OHGOIL, s'afficheratoutes les 100heures. Le message
clignotera une heure avant et une heure apres chaque intervalle de
100 heures,laissantune marge de deuxheures pour effectuerI'entretien.
Cemessagecommenceraa_clignoter ala 99eme heureet sedesactivera
la 1Oleme heure,laissant une marge de deux heurespour effectuer
I'entretien.
Toutesles 200 heures, I'ic6ne<<SVO>>situeeenbas a gauchede I'ecran
clignotera. Le message clignotera une heureavant et une heure apres
chaqueintervallede 200heures,laissant unemargede deuxheurespour
effectuerI'entretien.
Lorsque I'horometre est en mode Flash Alert (Alerte clignotante), le
message de maintenance s'affichera toujours en alternance avec le
temps ecoul6enheureset endixiemes.Lesheuresferont clignoter quatre
heures,puis s'afficheront enalternanceavecle message de maintenance
quatrefois jusqu'a_ce quela reinitialisationde I'horometre.
• 100 heures- OHGOIL-- Intervallede changementd'huile (Toutesles
100 heures)
REMARQUE •
Le graphique de sablier clignolera et s'eleindra Iorsque le moteur
est en marche. Ceci signifie que I'unite surveille los heures de
fonclionnemenl.
Schema 6 - Prise double, 120 V c.a., 20 A
2.3.2
PRISE120/240VC.A.,30A
Utiliserunefiche NEMAL14-30 aveccette prise (tournerpour verrouiller/
deverrouiller).Brancherun cordon a 4ills avecmise ala terreadapteala
priseeta la chargesouhaitee.Le cordondolt _tre congupour 250 V c.a.
a.30 A (ouplus) (Schema7).
Schema 7 - Prise 120/240 V c.a., 30 A
Figure 7 - Hommetre
fl
f
0000.0
"l
GRAPHIQUE
DE SABLIER
2.3 COBDONSETCONNECTEUBS
2.3.1 PRISEDOUBLE,120 VC.A.,20 A
II s'agit d'une prise de 120 volts proteg6e contre la surcharge par un
disjoncteur detype <<pousserpour reenclencher, de 20A (Schema6).
Utiliserchaque prisepour alimenter leschargeselectriquesmonophasees
de 120 V c.a., 60 Hz necessitant 2 400 watts (2,4 kW) ou 20 A de
courant. Utiliser uniquementdes cordons a trois ills avecmise a la terre,
bien isoles,de hautequalite conguspour 125 Volts a20 A (ou plus).
Garderlescordonsprolongateursaussicourts quepossible,depreference
a.uneIongueurinferieurea 15 pieds, afind'empecherunechutedetension
et unesurchauffe potentielledes c_.bles.
BOUTONDE
RI_INITIALISATION
(LE CASI_CHI_ANT)
(((r i
120 V/240 V
30 A
Utiliser cette prise pour faire fonctionner les charges monophaseesde
120 V c.a., 60 Hz necessitant 3 600 watts (3,6 kW) d'alimentation
30 A ou des charges monophaseesde 240 V c.a., 60 Hz necessitant
7200 watts (7,2 kW) d'alimentationa 30 A. La priseestprotegeepardeux
disjoncteursdetype <<pousserpour reenclencher>>de30 A.
2.4 UTILISATIONDU GENEBATEUB
SidesproblemessepresententIorsdufonctionnementdu generateur,merci
d'appelerlaligned'assistancepour les generateursau 1-888-436-3722.
Utiliser un gen_rateur _ I'interieur PEUT VOUS
TUER EN QUELQUES MINUTES.
Losgazd'echappernent du generateur contiennent du monoxyde
de carbone. C'est un gaz toxique invisible et inodore.
NEJAMAISutiliser &rint_rieur
d'_ne maison ou d'un garage,
MEMESl los portes et les
fen_tres sont ouvertes.
UtilisQr UNIQUEMENT
I'EXTERIEUR et loin des
fen6tres, portes et
ventilations.
45
Page 49

2.4.1M/SE,4LATERREDUGENERATEUR
Le National Electrical Code (Code electrique national) exige que
le b_ti et que les pieces externes electriquementconductricesde
ce generateur soient correctement reliees a une terre approuvee
(Schema 8). Les codes electriquesIocauxpeuvent egalement exigerla
bonne mise a_laterre de I'unite.A cette fin, brancherun fil toronne en
cuivrede10 AWG(calibreamericain desills) ala borne de misea la terre
et a,unetige en cuivreconduite a la terre ouune tige a,la terre (dectrode)
en laiton fournit une protection appropriee contre les dectrocutions.
Cependant,les codes Iocaux peuvent fortement varlet. Consulter un
electricienlocal pour coooaitre les exigeoces deraise a la terre duos
la regiou.
Schema8 - Mise a la terre dugenerateur
MISEA LA
TERREPATTE
La bonne raise a la terre du generateur aidera a emp_cher one
electrocutionen cas de condition de defaut de mise a la terre dans le
generateurou dans les dispositifs electriques branches. La bonnemise
la terre aideegalementa dissiper I'dectricite statique,qui s'accumule
souventdartsles dispositifs nonmis a,laterre.
2.4,2 BRAflCHEMEflTDESCHARGESELECTRIQUES
NE PASbrancher des chargesde 240 V ades prises de 120 V.NE PAS
brancher des chargestriphasees au generateur.NE PAS brancher des
chargesde 50 Hzau generateur.
®
Laisser le moteur se stabiliseret chauffer pendantquelquesminutes
apresle demarrage.
®
Brancheret mettresous tensionles charges electriquesmonophasees
souhaiteesde 120 ou240V c.a., 60 Hz.
®
Ajouter les watts (ou amperes) nominaux de toutes les charges
brancher en m6me temps. Ce total ne dolt pas depasser (a) la
capacitenominale dewattage/amperagedu generateurou (b)lavaleur
nominaledu disjoncteurde la prise fournissant I'alimentation.Voir la
section<,Ne passurchargerle generateur>>.
2.5 NEPASSURCHARGERLE61 NERATEUR
Surchargerun generateurau-dessusde sa capacitenominalede wattage
peut endommagerle generateuret les dispositifs electriquesbranches.
Respecterlesconsignessuivantespour emp_cherlasurchargedeI'unite:
* Calculerle wattagetotal de tousles dispositifs electriquesa brancher
enm_me temps. Cetotal nedolt PASdepasserla capacitedewattage
du generateur.
* Le wattage nominaldes lumieres peut_tre indiquesur les ampoules.
Lewattage nominaldesoutils, des appareilset des moteurssetrouve
generalementsur une etiquette ou un autocollant appose(e) sur le
dispositif.
* Si I'appareil,I'outil oule moteur n'indiquepas le wattage,multiplier la
valeurnominaledes voltsfois la valeurnominaledes amperesafin de
determinerles watts (voltsx amperes= watts).
* Certains moteurs dectriques, tels que ceux a,induction, necessitent
environ trois fois plus de watts d'alimentation pour le demurrage
que pour le fonctionnement. Cette surtension d'alimentation dure
seulement quelques secondes Iors du demarrage des moteurs en
question.S'assurerde laisserun wattagede demurrageeleveIorsdu
choixdes dispositifselectriquespour brancherle generateur:
1. Calculer les watts necessaires pour demurrer le moteur le plus
grand.
2. Ajouter ace chiffre les watts defonctionnement detoutes les autres
chargesbranchees.
Le Guide de referencede wattagesert a determinercombien d'elements
le generateurpeutfaire fonctionneren m_metemps.
REMARQUE:
Tousles chiffres sont arrondis. Voir les etiquettes sur I'unite pour
connaitreles exigences de wattage.
2.6 GUIDEDEREFI RENOEDEWATTAGE
Dispositif......................... Watts de fonctionnement
*Climatiseur(12 000 Btu)............................. 1 700
*Climatiseur(24 000 Btu)............................. 3 800
*Climatiseur(40 000 Btu)............................. 6 000
Chargeurde batterie(20 A)............................. 500
Ponceuse;_bande (3po.) ............................. 1 000
Sciea chaine ...................................... 1 200
Sciecirculaire (6,5 po.) ......................... 800 a.1 000
*Seche-linge(electrique) ............................. 5 750
*Seche-linge(a_gaz).................................. 700
*Machinea.laver ................................... 1 150
Cafetiere.......................................... 1 750
*Compresseur(1 HP)................................ 2 000
*Compresseur(0,75 HP) ............................. 1 800
*Compresseur(0,5 HP) .............................. 1 400
Fera_friser ......................................... 700
*Deshumidificateur.................................. 650
Ponceuse;_disque (9 po.) ............................ 1 200
Coupe-bordures..................................... 500
Couverturechauffanteelectrique......................... 400
CIoueuseelectrique.................................. 1 200
Cuisiniereelectrique (par element) ...................... 1 500
Poeleelectrique .................................... 1 250
*Freezer............................................ 700
*Ventilateurde chaudiere(0,6 HP)....................... 875
*Ouvre-portede garage.......................... 500 a.750
Seche-cheveux .................................... 1 200
Perceusea.main............................... 250 a.1 100
Taille-haie ......................................... 450
Cle#,chocs ........................................ 500
Fer.............................................. 1 200
*Pompe a_jet ....................................... 800
Tondeuseagazon................................... 1 200
Ampoule........................................... 100
Foura micro-codes ............................ 700 a,1 000
*Refroidisseur de lait ................................ 1 100
BrQleura,mazout dechaudiere .......................... 300
Radiateura mazout (140 000 Btu) ....................... 400
Radiateura mazout (85 000 Btu) ........................ 225
Radiateura,mazout(30 000 Btu) ........................ 150
4'7
Page 50

*Pistolet apeinture,sans air (0,3 HP)..................... 600
Pistoleta.peinture,sansair (portable)..................... 150
Radio......................................... 50 a.200
*Refrigerateur....................................... 700
Cocottemijoteuse.................................... 200
*Pompeimmergee(1,5 HP) ........................... 2 800
*Pompeimmergee(1 HP) ............................ 2 000
*Pompeimmergee(0,5 HP)........................... 1500
*Pompede vidange ............................ 800 a 1050
*Scie circulairea.table (10 po.) ................. 1 750 a 2 000
Television..................................... 200 a500
Grille-pain.................................. 1 000 a.1 650
Coupe-mauvaisesherbes.............................. 500
* Laisser3 fois les watts indiquespourle demarragedecesdispositifs.
2.7 AVANTLEDI MARRAGEDUGI NERATEUR
Avant de faire fonctionner le generateur,de I'huile de moteur et de
I'essencedevront etreajoutes,de la fagonsuivante
2.7.1 AJOUTDEL'HUILEDEMOTEUR
Toutehuiledoltrespecterla categoriedeserviceminimaleSJ,SLoumieux
de I'American PetroleumInstitute (API) (tnstitut americain du petrole).
N'utiliseraucun additifspecial. Selectionnerle degre de viscosite d'huile
selonla temperatured'exploitation(se reporter egalementautableau).
• Au-dessusde 40 °E utiliser leSAE30
• Endessous de 40°Fet jusqu'a10 °F,utiliserle 10W-30
• Endessous de 10°F,utiliserle 5W-30synthetique
mmm
I
°F =20 =10 0 10 20 32 40 60 80 100
°C -30 -20 -10 0 10 20 30 40
Gamme de temperature d'utilisation anticipee
2.7.2 AJOUTBEL'ESSENCE
Ne jarnais rernplir le reservoir d'essence & I'interieur.
Eviter de renverser de I'essence sur un moteur
chaud. Laisser le moteur compl_ternent refroidir
avant d'ajouter du carburant. Ne jamais remplir le
reservoir d'essence Iorsque le moteur fonctionne
ou est chaud. NE PAS allumer une cigarette ni
fumer lots du remplissage du reservoir d'essence.
L'essence est extrernernent INFLAMMABLE et ses
vapeurs sont EXPLOSIVES.
Ne pas trop rernplir le reservoir d'essence. Toujours
laisser de la place pour I'expansion du carburant.
En cas de surernplissage du reservoir, le carburant
peut deborder sur un rnoteur chaud et entrainer un
incendie ou une explosion. Nettoyer immediatement
toute 6claboussure de carburant.
• Utiliser de I'essence SANS PLOMB reguliere avec le moteur du
generateur.Ne pasutiliser de supercarburant.Nepas melangerI'huile
avecPessence.
• Nettoyer I'espace autour du bouchon de I'orifice de remplissage
d'essence,retirerle bouchon.
• Ajouterlentementde I'essenceregulieresans plomb dansle reservoir
d'essence.Remplirjusqu'au fond du filtre atamis. Faire attention de
ne pas trop remplir(Schema9).
• Mettreleb0uch0ndu reservoird'essenceetnett0yert0uteeclab0ussure
d'essence.
iMPORTANT: 11estimportantd'empecherla formationde depetsdegomme
dartsles piecesdu circuit de carburant,tellesque le carburateur,le tuyau
pour combustibleou le reservoirpendantle stockage.L'experiencemontre
egalementque les carburants;_based'alcool (appelesgazohol,ethanolou
methanol)peuventabsorberI'humidite,ce qui entra_neune separationet la
formationd'acidespendantle stockage.Ungaz acidepeutendommagerle
circuitdecarburantd'unmoteurpendantlestockagedecelui-ci.Afind'evitertout
problemeaveclemoteur,lecircuitdecarburantdoltetrevideavantlestockage
dumoteursi celui-ciestd'aumoins30jours.Voirla section<<Stockage>>.Ne
jamaisutiliserdeproduitnettoyantpourmoteuroucarburateurdartslereservoir
d'essenceetantdonnequecelapourraitcauserdesdommagespermanents.
Schema 9 - Reservoir d'essence
_,ATTENTION!
,i_ Toute tentative de faire tourner ou de dernarrer le
rnoteur avant qu"il ait 6t6 correctement entretenu
avec I'huile recommandee peut entrainer une panne
du rnoteur.
• Placerla generatricesur une surface a.niveau(he pas d@asser15 °
darts aucunedirection).
• NettoyerI'espaceautour de I'orificede remplissaged'huile et retirer le
bouchon.
• Remplir lentementle moteur avec de I'huilejusqu';_ ce que la jauge
d'huilelise plein.Interrompreregulierementleremplissagepourverifier
le niveaud'huile.
• Installerlajauge d'huileetla serrerfermement au doigt.
• Verifier le niveau d'huile de moteur avantle demarragea.chaque fois
par lasuite.
48
R_servoir de carburant
/ NE PAS remplir au-
Carburant dessus de la I_vre
2.8 DBVIARRAGEDESIVIOTEURSADBVIARRAGEIVIANUEL
Ne jarnais dernarrer ou arreter le rnoteur avec les
dispositifs 61ectriques branches dans les prises ET
les dispositifs sous tension.
• Debranchert0utes les chargeselectriques des prises deI'uniteavant
dedemarrer le m0teur.
Page 51

• S'assurerqueI'uniteestdansunepositiondeniveau(nopasdepasser
15°dansaucunedirection).
• OUVRIRlasoupaped'arr_t(Schema10).
• MettreI'interrupteurRUN/STOP(Marche/Arr_t)dumoteursurla
positionON(Marche)(Schema11).
• FaireglisserI'etrangleurdumoteurdelapositionLEFT(Gauche)vers
lapositionFULLCHOKE(Etrangleurplein)(Schema12).
• Pourdemarrerlemoteur,attraperfermementlapoigneederappelet
tirerjusqu'a_cequ'uneresistancesefassesentir.Remonterrapidement
etdemarrer.
• Lorsquelemoteurdemarre,mettreleboutonChoke(l_trangleur)sur
laposition1/2CHOKE(l_trangleuramottle)jusqu'acequelemoteur
fonctionnedoucementetensuitesurlapositionRUN(Marche).Si
lemoteurvibre,remettrelelevierChoke(Etrangleur)surlaposition
1/2CHOKE(l_trangleuramottle)jusqu'a,cequelemoteurfonctionne
doucementetensuitesurlapositionRUN(Marche).REMARQUE:
Silemoteurchauffe, mats ne continuepas a fonctionner, mettre le
levier de I'etrangleur sur FULLCHOKE(l':trangleurplein)et repeter los
instructionsde demarrage.
Schema 10 - Soupape d'arret
JPAPE
Figure 11 - lnterrupteur ON/OFF du moteur
INTERRUPTEUR ON/OFF DU MOTEUR
(MOTEURS A DI_MARRAGE MANUEL UNIQUEMENT)
\
Schema 12 - Position de I'etrangleur
LEVIER D'€:TRANGLEUR
GAUCHE = €:TRANGLEUR
DROITE = FONCTIONNEMENT _
iMPORTANT: Nepas surchargerie generateur.Aussi, nepas surcharger
les prisesindividueiiesdu panneau. Ces prisessent protegees centre ia
surchargeavec des disjoncteurs detype ,, pousser pour reenciencher,.
Si ia vaieur nominate d'amperage d'un disjoncteur est depassee, ce
disjoncteur s'ouvreet la puissance electriquede cette prise est perdue.
Lireattentivementla section ,, Ne pas surchargerle generateur-.
2.9 DI MARRAGEDESMOTEURSADI MARRAGE€:LECTRIQUE
//_kNe jamais d_marrer ou arr_ter le moteur avec los
dispositifs _lectriques branch_s darts los prises ET
los dispositifs sous tension.
• Debranchertoutes los chargesdectriques des prises de I'uniteavant
de demarrerle moteur.
• S'assurerqueI'uniteestdans uneposition de niveau(nopas depasser
15 ° dans aucunedirection).
• Ouvrirla soupaped'arr_t(Schema10).
• Mettre le bouton CHOKE(E_trangleur)du moteur a I'exterieursur la
position,, FullChoke, (Etrangleurplein) (Schema12).
• Pour demarrerle moteur, appuyeret maintenir enfonceI'interrupteur
Start!Run/Stop (Demarrage/Marche/Arr§t)sur la position ,, Start,
(Demarrage). Le moteur tournera et commencera ;_ demarrer.
Lorsque ie moteur demarre, rel_.cherI'interrupteur sur la position
Run (Marche).
• Lorsquele moteurdemarre,mettrele boutonChoke(Etrangleur)sur la
position ,, 1/2 Choke, (l_trangleura.moitie) jusqu'a ce quele moteur
fonctionnedoucement et ensuitesur la post!ion,, Run, (Marche).Si
le moteur vibre, remettreie bouton Choke(Etrangleur)sur ia position
,,1/2 Choke, (l_trangleura moitie)jusqu'aceque lemoteurfonctionne
doucementet ensuitesur iaposition ,, Run, (IViarche).
• Ce generateurest egalementequiped'un lanceura rappel manuel qui
peut_tre utilise en cas de dechargementdela batterie.
REIVlARQUE•
L'interrupteurdeit etre a la positionRUN (Marche). Utiliser un des
tableaux des prises avec le chargeur de batterie pour charger la
batterie Iorsque la generatrice esten fonctionnement.
Pour demarrer manuellement, attraper fermement ia poignee de
rappel ettirer jusqu'a ce qu'une resistancese fasse sentir.Remonter
rapidementetdemarrerle moteur.Puts, suivre la m_me sequencede
I'etrangleur.
REIVlARQUE•
Si le moteur chauffe, mats ne continuepas a fonctionner, mettre le
levier de I'etrangleur sur FULLCHOKE(l':trangleur plein)et repeter los
instructionsde demarrage.
49
Page 52

IMPORTANT: Nepas surcharger legencrateur.Aussi, ne pas surcharger
les prisesindividuellesdu panneau.Ces prises sent protegees centre la
surchargeavec des disjoncteurs detype <<pousserpour reenclencher,.
Si la valeur nominale d'amperage d'un disjoncteur est depassee, ce
disjoncteur s'ouvre et la puissance electriquede cette prise est perdue.
Lireattentivementla section <,Ne pas surchargerlegenerateur-.
2.10ARRltTDUMOTEUR
* ArrCtertoutes les charges, puis debrancher les charges electriques
desprises du panneaudugenerateur.Nejamais demarrerou arr_terle
moteuravec lesdispositifs electriquesbrancheset sous tension.
* Laisser le moteur fonctionner a circuit ouvert pendant plusieurs
minutes pour stabiliser les temperatures internes du moteur et du
generateur.
* Met[reI'interrupteurRun/Stop(Marche/Arr_t)sur lapositionOFF(Arr_t).
* Fermerla vannede combustible.
^
2.11SYSTEMED'ARRETDEBASNiVEAUD'HUILE
Le moteur est equiped'un detecteur de bas niveau d'huile qui arr_te le
moteur automatiquement Iorsque le niveau d'huile chute en dessous
d'un niveau specifique. Sile moteur s'arr_tetout seul et que le reservoir
d'essencea assezd'essence,verifier leniveaud'huile du moteur.
2.11.1B£-TECT/ONBEBASN/VEAUB'HU/LE
Si le systeme detecte un niveaud'huilebas pendantlefonctionnement,le
moteur s'arr_te. Le moteur ne fonctionnerapas tant quede I'huilen'aura
pas eterajoutee pour atteindrelebon niveau.
2.12CHARGEMENTDELABATTERIE(UNITESA
DI MARRAGEI:'LECTRIQUEUNIQUEMENT)
Les batteries rechargeables _mettent un gaz
hydrog_ne explosif lots du rechargement. Un
m_lange explosif restera autour de la batterie
Iongtemps apr_s son chargement. La plus petite
_tincelle peut enflammer I'hydrog_ne et causer une
explosion. Cette explosion peut faire voler en _clats
la batterie et causer la c_cit_ ou d'autres blessures
graves.
Utiliserla prisedu chargeur de batterieafin de garderla batteriechargee
etprate aI'emploi.Lechargementde labatteriedolt _treeffectuedans un
endroitsec.
1. Brancher le chargeur dans la prise jack <, Entreedu chargeur de
batterie,, situeesur le panneaudecommande. BrancherI'extremite
de la prisedecourant muraledu chargeurde batteriedansuneprise
muralec.a. de 120volts (Schema13).
2. Debrancherle chargeur de batteriede la prise murale et de laprise
jack du panneaudecommandeIorsque le generateurva _treutilise.
REMARQUE•
Ne pasutiliserle chargeurde batterie pendantplusde 48 heures
consecutives.
Schema 13 - Prise jack du chargeur de la batterie
BATTERIE
EntrCe du
chargeur
3.1 PROGRAMMEDEMAINTENANCE
Suivre les intervalles du calendrier. Un entretien plus frequent est
necessaire Iors du fonctionnement dans les conditions defavorables
indiqueesci-dessous.
Verifierle niveaud'huile Lors dechaque utilisation
ChangerI'huile$ *Toutesles 100 heures ou achaque saison
Verifierle jeu des soupapes ***A chaque saison
Entretiendufiltre a air ** Toutesles 200 heures ou a.chaque saison
Remplacerla bougie d'allumage A chaquesaison
:i: ChangerI'huileapres les30 premieresheuresde fonctionnementpuis a chaque
saison.
* ChangerI'huileet lefiltre ahuiletousles mois Iors dufonctionnement sous une
charge Iourdeou a destemperatureselevees.
** Nettoyerplus souventdans desconditions de fonctionnementsales.Remplacer
les pieces dufiltre aair s'il est impossible de les nettoyer correctement.
*** Verifier le jeu des soupapeset regler si necessaireapresles 50 premieres
heures defonctionnement et toutesles 100 heurespar la suite.
,_Ne pas produire de fum_e, flamrnes hues, _tinceHes
ou autre source de chaleur & proximit_ de la
batterie. Porter des lunettes de protection, un
tablier en caoutchouc et des gants en caoutchouc
lots du travail autour de la batterie. Le fluide
d'_lectrolyte de la batterie est une solution d'acide
sulfurique extr_mement corrosive qui peut causer
des br_lures graves. En cas d'_claboussure, tinter
imm_diatement la zone a I'eau claire.
REMARQUE'
La batterie envoyeeavec le generateur a ere compietementchargee.
Une batterie peut perdre une pattie de sa charge Inrsqu'elle n'est
pas utiliseependantdes periodesprolongees.S'il est impossible de
demarrer le moteur a I'aide de la batterie, brancher le chargeurde
12 V inclusdarts la beite d'accesseires (volt !a section,<Chargement
de la batterie ,). FAIREFONCTIONNERLE GENERATEURNE CHARGE
PASLA BATTERIE.
50
3.2 CARACTI!RISTIQUESTECHNIQUESDESPRODUITS
3.2.1 CARACTERISTIQUESTECHNIQUESDUGENERATEUR
Puissancenominale................................................................7,5 kW**
Puissancedesurtension.........................................................9,375 kW
Tensionc.a. nominale............................................................... 120/240
Chargenominalec.a. max.
Couranta 240 V .................................................................. 31,25 A**
Couranta 120 V ................................................................... 62,5 A**
Frequencenominale................................................ 60 Hza 3 600 RPM
Phase................................................................................ Monophasee
** Lewattageetlecourantmaximumsentsoumis_,,etlimitespar,cesfacteurs
telsquelecontenuenBtudecarburant,latemperatureambiante,I'altitude,
I'etatdumoteur,etc.Lapuissancemaximalediminued'environ3,5 %pour
chaquetranchede1 000piedsau-dessusduniveaudelamet ;et diminuera
egalementd'environ1%pourchaquetranchede6°C(10°F)au-dessusde
16°C(60°F)detemperatureambiante.
Page 53

3.2.2 CARACT£-RIST/QUESTECHNIQUESDUMOTEUR
Deplacement............................................................................... 420 cc
Typede bougied'allumage................ChampionN9YCou NHSPLDF7TC
N° depiece de bougied'allumage...................................... 0G84420101
Ecartementdebougie d'allumage...............0,030 pouces ou(0,76 mm)
Capacited'essence.......................................................... 8 gallonsU.S.
Typed'huile.........Voirtableaudansla section<<AjoutdeI'huiledemoteur,
Capacited'huile............................................................... 1 L (1,06 Qts.)
Tempsd'execution(chargede 50 %)...................................... 12 heures
Certifieemissionde categorieII
3.2.3 INFORMATiONSRELAtiVESAUX#LM/SSiONS
L'Agence pour la protection de I'environnement (EPA) exige que ce
generateur soit conforme aux normes en matiere d'emission
d'echappement.Ce generateur est certifie comme respectanttousles
niveauxd'emission d'echappement EPAapplicables. II est important de
respecterles specifications de maintenanceindiquees dans ce manuel
afin de s'assurerque votre moteur est conforme aux normes applicables
en matiere d'emission pendantla duree de vie du moteur. Le systeme
de contr61edes emissions de ce generateurest compose des elQments
suivants'
• Systemed'induction d'air * Systemed'allumage
Pipe/ collecteur d'admission - Bougied'allumage
Filtrea air - Bobined'allumage
• Systemed'echappement • Systemede carburant
Collecteurd'echappement _ Carburateur
Pot d'echappement
La periode de conformite des emissions a.laquelle il est fait reference
sur I'etiquettede conformite des emissions indique le hombre d'heures
de fonctionnement pendant lesquelles le moteur a prouve respecter les
exigencesEPAen matiere d'emission.
`&ATTENTION!
,_Ne jamais insererd'objet ca d'eutildabs les fentes de
refroidissement,meme si le moteur ne fonctionne pas.
REIMIARQUE:
NEPASutUiserantayau d'arrosage pournettoyer le generateur. L'eau
peat eatrer dabs le systeme de carbaraBtdu motear et causerdes
probiemes.EBButte,si I'eaa entre dabs le generatear par les fortes
de refroidissement,de I'eau restera dabs les videset los crevasses
du bobinage d'isolementdu rotor etda stator. L'accamulationd'eaa
et de saletes sur les bobinages internes du generatear diminuera
potentiellementla resistaBced'isolementde ces bobinages.
3.3.2 NETTOYAGEBUQENERATEUR
• Utiliser un chiffon humidepour lenettoyagedes surfacesexternes.
• II est possible d'utilise une brosse douce en polls pour decoller les
agglutinementsde saletes, d'huile,etc.
• Unaspirateurpourra_treutilise pourrecupererles saleteset les debris.
• Un air projeteavecunefaible pression (inferieura 25 livres par pouce
carre) pourra_tre utilise pour scuffler la salete.Inspecterlesfentes de
refroidissementet les orificesdu generateur.Cesorifices doivent_tre
propres etnon obstrues.
3.3.3 MAINTENANCEDU MOTEUR
//_Toujours dQbrancher le cable nQgatif de la batterie en
cas de travail sur le generateur. Toujours dQbrancher
les fHs de bougie des bougies d'aiiumage et les tenir
_loign_s de ceHes-ci.
3.3 BECOMMANDATIONSGENEBALES
r r
La garantiedu generateurne couvre pas les elementsqui ont6te soumis
un abus ou unenegligence de I'operateur.Afin de recevoir le montant
total de la garantie, I'operateurdolt entretenirle generateurde la fagon
indiqueedanscemanuel.
Certains reglages doivent _tre effectues regulierementpour entretenir
correctementle generateur.
Tousles reglagesde la section Maintenancede ce manuel doivent _tre
effectuesau moins unefois par saison.Respecterles exigencesdabsle
tableau de <<Programmede maintenance>>.
REMARQUE :
Une lois paraB, rempiacerla hoagie d'ailamage et le filtre a air. Une
nouvelle bougie d'allumage et an filtre a air propre garantisseat an
bob melange carbureet aide le moteur a mieux foactioaaer eta darer
plusIoagtemps.
3.3.1 MAINTENANCEDU Q_'NE-RATEUR
La maintenancedu generateurconsiste a garder I'unitepropre et seche.
Fairefonctionneret stocker I'unitedabs un environnementsec et propre
ouil neserapasexposea trop depoussieres,de saletes,d'humiditeou de
vapeurscorrosives.Lesfentesderefroidissementdugenerateurnedoivent
pas_treobstrueesparla Beige,lesfeuillesoutout autrecorpsetranger.
Verifierregulierementquele generateurestpropreetnettoyerlapoussiere,
les saletes,I'huile, I'eauoules autrescorps etrangersqui sontvisibles sur
sa surfaceexterieure.
3.3.4 VER/FICATIONDUN/VEAUD'HU/LE
Se reportera la section <<Avant le demarrage du generateur>>pour plus
d'informationssur la verificationdu niveaud'huile. Le niveau d'huile dolt
_treverifie avantchaqueutilisation,ou au minimumtoutes les huitheures
defonctionnement.IIestnecessairede conserverun certainniveaud'huile.
3.3.5 CHANGEMENTOEL'HUILE
Changer I'huile apres les 30 premieres heures de fonctionnement.
ChangerI'huile toutes les 100 heures ou a chaquesaison par la suite.
ChangerI'huile plus souvent en cas d'utilisation de cette unitedabs un
environnement sale ou poussiereux, ou dabs des temperatures tres
elevees.
,&ATTENTION!
AiDe I'huile chaude entrainer des Laisserle
moteur refroidir avaBtde vidangerI'huile.Eviter an contact
prolongeoa repetede la peaaavec de I'huile asagee.Laver
minutieusemeat les zonesexposees avecdusavoR.
Respecter les instructionssuivantes pourchangerI'huile apres que le
moteur air refroidi :
• Nettoyerla zone autour dutuyau devidange d'huile.
• Retirerle bouchon de vidange d'huile du moteur et le bouchon pour
le remplissaged'huile afin de vidanger toute I'huile dans un recipient
adapt&
• LorsqueI'huileesttotalementvidangee,revisserle bouchondevidange
d'huileet leresserrersolidement.
peat
brOlures.
51
Page 54

• Remplir le carter d'huile avec I'huile recommandee (voir la section
<,Avantle demarragedu gencrateur, pour les recommandationssur
I'huilea utiliser).
• Nettoyertoute trace d'huilerenversee.
• EliminerI'huileusageedansun centrede collecteapproprie.
3.3.6 REMPLACEMENTDESBOUGIESO'ALLUMAGE
Voir Caract_ristiques techniques du moteur pour la bougie d'allumage
recommandee.Remplacer Ins bougies une fois par an. Cela permettra
un demarrageplusfacile etun meilleurfonctionnementdu moteur.
1. Arr_ter le moteur et debrancher le fil de bougie de la bougie
d'allumage.
2. Nettoyer la zone autour de la bougie d'allumage et la retirer de la
culasse.
3. ReglerI'ecartementde bougied'allumagea 0,70- 0,80 mm (0,028 -
0,031 po.). Installerla bougied'allumagecorrectementecarteedans
la culasse (Schema14).
Schema 14 - E-cartement de la bougie d'allumage
3.3.7 REMPLACEMENTBELA BATTERIE
REMARQUE'
La batterie envoyeeavec le generateur a ere completementcharges.
Une batterie peut perdre une pattie de sa charge Inrsqu'elle n'est
pas utilisee pendantdes periodesprolnngees.S'il est impossible de
demarrer le mnteur a I'aide de la batterie, brancher le chargeurde
12 V inclusdans la boite d'accessoires (volt !a section,<Chargement
de la batterie ,). FAIREFONCTIONNERLE GENERATEURNE CHARGE
PASLABATTERIE.Le numero de piecepourcettebatterie est OGg44g.
Schema 15 - Branchements de la batterie
3.4 ENTRETIENDUFILTREAAiR
Le moteur ne fonctionnera pascorrectementet pourra _tre endommage
en cas d'utilisation d'unfiltre a air sale. Nettoyerou remplacer le papier
du filtre aair unefois par an. II sera necessairede le nettoyerou de le
remplacerplus souvent en cas defonctionnement dans des conditions
de salete (Schema 16). Le numero de piece pour cette filtre a.air est
0G84420151.
Pour nettnyer ouremplacer le papist du filtre a air :
= Retirerle couvercledu filtre aair etretirer lefiltre en papier.
• Nettoyer le filtre en papier en le tapant legerement sur une surface
solide. Si lefiltre est trop sale, il est necessairede leremplacer.Jeter
I'ancienfiltre de maniereadaptee.
• Nettoyer le couvercle du filtre a air, puis insererle nouveaufiltre en
papier dans la base dufiltre a.air.Remettrele couvercledu filtre a.air
en place.
Schema 16-Fil_e a aN
A.ATTENTION !
,_La borne NEGATIVEde la batterie dolt •
1. Toujours _tre DEBRANCHEEENPREMIER.
2. Toujours_tre BRANCHEEENDERNIER.
52
CLIP
REIVlARQUE•
Pourcommanderun nouveaufiltre a air, merci de contacterle centre
d'entretien agree le plusprocheau 1-800-333-1322.
Page 55

3.5 JEUDESSOUPAPES
* Admission--0,15 _ 0,02 mm (froid), (0,006 po _ 0,0008 po)
* Echappement-- 0,20 _ 0,02 mm (froid) (0,008 po _ 0,0008 po)
Verifier le jeu des soupapesdarts le moteur apres les 50 premieres
heuresde fonclionnemenl et I'ajustersi cela est necessaire.
Imporlanl: en cas de doutequanta la reaNsationde cetteprocedure,ou
d'absencedes outils adaptes,merci defairereglerlejeu dessoupapes de
la gen6ratricedartsle centre de reparationle plus proche. II s'agit d'une
etapetres importante pour garantirla meilleuredureedevie du moteur.
r r r
3.6 GENERAUTES
La gen6ratrice dolt _tre d6marree au moins une fois par mois et dolt
fonctionnerpendant au moins 30 minutes. Si celaest impossible et que
I'uniten'estpas utiliseependantplus de 30 jours, utiliserles informations
suivantesentantque guidepour preparerson entreposage.
NE JAMAIS ranger le moteur avec un r_setvoir rempli
d'essence a I'int_rieur ou dans des zones ferrules et
faiblement a_r_es oR des futures peuvent atteindre
une flamme hue, des _tincelles ou une veilleuse telle
qu'il yen a sur une chaudi_re, un chauffe=eau, un
s_che=linge ou d'autres appareils fonctionnant au
gaz.
,_t Laisser I'unit_ compl_tement refroidir avant
I'entreposage.
3.7 STOCKAGEA LONGTERIVlE
Pendantle stockage,il estimportantd'emp_cherlaformation dedep6tsde
gomme dansles pieces essentiellesdu circuit decarburant,telles quele
carburateur,le tuyaupourcombustibleou lereservoir.L'experiencemontre
egalementqueles carburantsabased'alcool (appelesgazohol,ethanolou
methanol)peuventabsorberI'humidite,ce qui entraineuneseparationetla
formationd'acidespendantle stockage.Ungazacidepeutendommagerle
circuit de carburantd'unmoteur pendantle stockagede celui-ci.
Afind'evitertoutproblemeaveclemoteur,le circuitdecarburantdolt_trevide
avantlestockagedumoteursicelui-ci estd'aumoins30jours. Pourcela
* Vidangerle reservoird'essencede tout le carburantqu'il contient.
* Demarreretfairefonctionner lemoteur jusqu'a,ce qu'il s'arr_tesuite a.
unepanned'essence.
* Laisserle moteur refroidir,puis viderI'huiledu carter.Remplirjusqu'au
niveaurecommande.
* Retirerlabougie d'allumageetverser environ0,5 onces (15 ml) d'huile
pour moteur dansle cylindre. Couvrir I'orificede la bougie d'allumage
avecun chiffon.Tirerplusieursfois lelanceura.rappelpour lubrifierles
segmentsdepiston etI'alesagedu cylindre.
_,ATTENTION!
,_ l:viter d'asperger a partir des ironsde la bougied'allumage
Iorsquele moteur tourne.
* Remettre et serrer la bougie d'allumage. Ne pas brancher le fil de
bougie.
* Nettoyerles surfaces externesdu gen6rateur.Verifier que les fentes
de refroidissementet les orifices du gen6rateursont ouverts et non
obstrues.
* StockerI'unitedans un endroitpropre et sec.
3.8 AUTRESCONSEILSDESTOCKAGE
* Nepasstocker I'essenced'unesaison sur I'autre.
* Remplacerle bidon d'essences'il commence a rouiller. Dela rouille
et/ ou de la saletedans I'essenceentrainerontdes problemesdans le
carburateuret lecircuit decarburant.
* Si cela est possible, stocker I'unite a I'interieur et la recouvrir afin de
la proteger de la salete et de la poussiere.S'ASSURERDE VIDERLE
RESERVOIRD'ESSENCE.
* S'il n'estpas possiblede viderle reservoird'essence etque I'uniteest
rangeependantune Iongue periode,ajouterun stabilisateurd'essence
(disponibledans le commerce) a.I'essenceafin d'augmenterla duree
devie deI'essence.
* CouvrirI'uniteavecuneprotection adapteene retenantpas I'humidite.
,_NE JAIViAIScouvrirle generateur alors que le moteur et la zone
du potd'echappementsontchauds.
Vider I'essence dans des conteneurs adapt_s situ_s
I'e×t_rieur, loin de toute flamme hue. S'assurer que le
moteur est froid. Ne pas fumer.
_3
Page 56

4.1 GUIDEDEDI PANNAGE
Le moteur Ionrne, mats aucun 1. Disjoncteurest ouvert. 1. Rearmerledisjoncteur.
conrantallernatif n'eslproduiL 2. Cordon mal brancheou defectueux. 2. Verifieret reparer.
3. Dispositif branchedefectueux. 3. Brancherun autredispositif enbun etat.
4. Erreurau niveaudu g6nerateur. 4. Contacterun centred'entretienagre6.
m II
Le moteur fonctionne bien mais
connaildes defaillancesIorsque
deschargessont branchees.
Le moteur ne demarre pas,
ondemarre et connaitdes
defaillances.
1. Court-circuit dansI'unedes chargesbranchees.
2. Surcharge du g6nerateur.
3. Vitesse dumoteurtrop faible.
4. Court-circuit du g6nerateur.
,
Lasoupaped'arr_test sur OFF(Arr_t). 1.
2.
Filtrea airsale. 2.
3.
Panned'essence. 3.
4.
Essenceviciee. 4.
1. Debrancherla charge electriquecourt-circuitee.
2. Voir lasection ,, Nepas surchargerle
gen6rateur>>.
3. Contacterun centre d'entretienagre6.
4. Contacterun centre d'entretienagre6.
Mettrela soupaped'arretsur ON (Marche).
Nettoyerou remplacer lefiltre a air.
Remplirle reservoird'essence.
Vidangerle reservoird'essenceet le remplir avec
de I'essencenouvelle.
5.
Filde bougie debranchedela bougied'allumage. 5.
6.
Bougied'allumagedefectueuse. 6.
7.
Presenced'eau dans I'essence. 7.
Brancherle fil a_la bougie d'allumage.
Remplacerla bougie d'allumage.
Vidangerle reservoird'essenceet le remplir avec
de I'essencenouvelle.
8. Sur-etranglementdes gaz.
8.
Placerle levierd'etrangleursurla positionNo Choke
(Aucunetrangleur).
9. Niveau d'huilefaible. 9. Remplir le carter jusqu'au niveau necessaire.
10. Melanged'essencetrop fiche. 10. Contacterun centred'entretienagre6.
11. Soupaped'admission bloqueeen positionouverte 11. Contacterun centred'entretienagre&
ou fermee.
12. Pertede compressiondu moteur. 12. Contacterun centred'entretienagree.
Le moteur s'arrete pendantle 1. Panned'essence. 1. Remplir le reservoird'essence.
fonctionnement. 2. Niveaud'huilefaible. 2. Remplirle carter jusqu'auniveaunecessaire.
3. Erreurau niveaudu moteur. 3. Contacterun centred'entretienagree.
II
[Vloteurpas assez puissant. 1. Chargetrop elevee. 1. Diminuerla charge (voir la section ,,Ne pas
2. Filtre;_airsale. surchargerle generateur>>).
3. Reparationnecessairedu moteur. 2. Nettoyerou remplacerlefiltre a_air.
3. Contacterun centre d'entretienagree.
m
A-coupson declin du moteur. 1. Etrangleurouvert trop t6t. 1. Placer le levierd'etrangleura mi-chemin jusqu'a,ce
quele moteurfonctionne correctement.
2. Melangetropficheoutrop pauvredanslecarburateur. 2. Contacterun centre d'entretienagree.
54
Page 57

55
Page 58

l'-'NONCl'-"DELAGARANTIEFI Di RALEDUCONTR(]LEDESI'-'MISSIONS
VOSDBOITSETOBLiGATiONSDEGABANTIE
L'Agencepour la Protectionde I'Environnementamericaine (ci-apresdenomm6eEPA)etla societ6 GeneracPowerSystems, Inc. (ci-apres denommee
Generac)sontheureuxdevous expliquerce qu'estla garantiede votrenouvelequipement2008 et ulterieur.Lenouvel equipementutilisedes petits
moteursa allumage commande doiventetre con(}us,construits et equipesdans le respectdesnormes nationalesrigoureusesen matierede pollution
pour le gouvernementfederal.Generacgarantirale systemede contr61edesemissions devotre gen6rateurpour les periodesindiqueesci-apres, en
I'absenced'acteabusif,de negligence,de modificationnon approuveeou de maintenanceinadapteedevotre equipement.
Votresysteme decontr61edesemissions pourracomprendre certaines piecestelles que:le carburateur,le systemed'allumage,le systeme de carburant,
le pot catalytiqueet les autrescomposants relatifs aux emissions(le cas ech6ant).
COUVEBTUREDEGARANTIEDU FABBICANT:
Cesystemedecontr61edesemissionsestgarantipendantunedureede deuxarts.Si un composantou systemedevotreequipementrelatif aux emissions
comporte unepiece defectueuse ou presenteun defautde fabrication pendantla duree de lagarantie, lesreparationsou remplacementsde pieces
seronteffectuesparun depositaired'entretiendegarantieagreepar Generac.
BESPONSABILITI::SDEGARANTIEDU PBOPRIi TAIBE•
Entant que proprietairedu generateur,vous etesresponsablede larealisationdetoute lamaintenancenecessairetelle que listeedans le manuel
d'entretienquivous a eteremis par I'usine.Auxfins dela garantie,Generacvous recommandede conservertous lesregus relatifs a la maintenance
effectueesur votre generateur,mais Generacnepeut pas refuserla garantieuniquementen raisonde la non-presentationdesregus.
Entant que proprietairedu generateur,vous devezcependantsavoir que Generacpourra refusertout et/ ou partie de la couverture de lagarantieou
dela responsabilitesi votre generateuret/ ou toute piecede celui-ci nefonctionne plus du fait d'unusageabusif, d'une negligence,d'une mauvaise
maintenanceou de modifications nonapprouvees,ou de I'utilisationde piecescontrefaiteset / ou provenantde I'economiesouterrainen'ayantpas ete
fabriquees,fournies ou approuveesparGenerac.
Vous_tes chargede contacterun depositairedegarantieagree par Genera¢desqu'un problemese presente.Lesreparations effectuees dartsle
cadrede la garantiedevrnnt _tre faites darts uneperioderaisnnnable, inferieurea 30 jours.
Leservice de garantiepeutetre organiseencontactantvotre depositaireou undepositairede service de garantieagreepar Generac.Pour connaitrele
depositairede service de garantieagreeparGeneracsituele pluspres, appelernotrenumero gratuit :
1-800-333-1322
REMARQUEIMPORTANTE•Cet enoncedegarantieexpliquevos droitsetobligationsdansle cadrede la garantiedu Systemede ContrCledesl_missions
(garantieduSCE)quivous estfournie parGeneracconformementaudroit deI'Etatfederal.Consulteregalementles <_Garantieslimiteesde Generacpour
GeneracPower Systems, Inc.>>jointes au presentdocumentsur unfeuillet separe,qui vous est egalementremis par Generac.Veuilleznoter quela
presentegarantiene s'applique pas aux dommagesaccessoires,importantsou indirectscausespardesdefaillancesmateriellesoude fabrication,ou
partout retardde reparationou deremplacementdela oudes piece(s)defectueuses.Lapresentegarantieremplacetoutesles autresgaranties,implicites
ouexplicites.Enparticulier,Generacn'emetaucunegarantiede conformite oud'usagepour unobjectif particulier.Toutesles garantiesimplicites qui sont
autoriseesparIoi, serontlimitees dansla dureeselon lestermes de lapresentegarantie.Certainsetatsne permettentpasde poserunelimitea.la dureede
lagarantieimplicite,la limite susmentionneenes'appliquedoncpas aces derniers.
Lagarantiedu SCEnes'appliquequ'ausysteme decontr61edes emissions de votre nouvelequipement.Encas de conflit auniveau destermes de
la presentegarantiedu SCEetde la garantieGenerac,la garantiedeGeneracprevaudra.Lesgarantiesdu SCEet deGeneracdecriventles droits et
obligationsimportantes relativesa.votrenouvelequipement.
Leservice de garantienepeut etre realisequepar uneentreprisede service agreeepar Generac.En cas dedemandedu service degarantie,des preuves
mentionnantla datede vente a.I'acquereur/ auproprietaire d'originedoiventetre presentees.
Pourtoute questionconcernantvos droits etresponsabilitesde garantie,mercide contacterGeneraca.I'adressesuivante :
ATTENTIONWARRANTYDEPARTMENT
GENERACPOWERSYSTEMS,INC.
P.O.BOX297 • WHITEWATER,Wl 53190
Ierepartie
Ref6rence0H1911Rev. B 10/11
56
Page 59

GARANTiEDU SYSTEIVIEDE CONTROLEDESI_IVliSSiONS
GarantieduSystemedeContr61edesl_missions(garantieduSCE)pourI'equipementutilisantdepetitsmoteursaallumagecommande'
(a) Applicabilite: La presentegaranties'applique a I'equipementqui utilise depetits moteurshorsroute.La periode dela garantiedu SCEcommencera
a.la date d'achat/ de livraison du nouvelequipementason acquereur/ proprietaired'origine,final, et durerapendantles 24 mois suivant ladite date.
(b) Couverturede lagarantiegeneraledes emissions: Generacgarantita I'acquereur/ au proprietaired'origine,final, dunouveaumoteur ou
equipementet a_chacun desacquereurs/ proprietairessuivant que Iorsqu'ilest installele SCE:
(1) Est congu, construit et6quipedans le respect detoutes les reglementationsapplicables; et
(2) Ne comporte aucunepiecedefectueusenine presenteaucundefaut defabrication atout momentde la periodede garantiedu SCE.
(c)
La garantiesur lespiecesrelativesauxemissions serainterpr6teede lafagon suivante :
(1) Toutepiece garantie,dont le remplacementWestpas prevuaucours des maintenancesobligatoiresmentionneesdans le Manueld'entretien
seragarantie pourtoute ladureede la Garantiedu SOE.Si I'unedeces piecesdevientdefectueusependantla dureede laGarantiedu SOE,
elleserarepar6eou remplaceeparGeneracconformement auparagraphe(4) quisuit. Cespiecesrepar6esou remplaceesdartsle cadredela
Garantiedu SOEserontgarantiespour le restede la duree dela Garantiedu SOE.
(2) Toutepiece garantiedont il estprevu uneinspectionregulieredans leManueld'entretiensera garantiependanttoute la dureede laGarantiedu
SOE.Toutedeclarationcontenuedansle Manueld'entretienet relativea I'effetde <<reparationou remplacementsi necessaire>>nereduira pas
la duree de laGarantiedu SOE.Ces pieces repareesou remplaceesdartsle cadrede laGarantieduSCEseront garanties pour le restede la
dureedela GarantieduSCE.
(3) Toutepiece garantie,dont le remplacementest pasprevu aucoursdes maintenancesobligatoiresmentionneesdans le Manueld'entretien
seragarantie pour la periodeprecedantla datedu premierremplacementprevu. Sila piecedevientdefectueuseavantle premier remplacement
prevu, elle serarepareeou remplaceepar Generac,conformementau paragraphe(4) quisuit. Oespiecesrelativesaux emissionsreparees
ou remplaceesdartsle cadre dela Garantiedu SOEseront garantiespourle restedela dureeprecedantla datedeleur premier remplacement
prevu.
(4) La reparationou le remplacementdetoute piecerelativeauxemissions etgarantiedartsle cadre dela GarantieduSOEserarealisesans frais
pour le proprietairedansun service degarantieagreeparGenerac.
(5) Nonobstantles dispositionsde lasous-section (4) ci-dessus, les servicesou reparationssous garantiedoivent etreeffectuesaux centres
d'entretienagreesGenerac.
(6) Si lemoteur estinspecte parun servicede garantieagreepar Generac,les fraisde diagnostic neseront pas a.la chargede I'acquereur/ du
proprietairesi la reparationentredans le cadrede la garantie.
(7) Generacesttenu, pendantla dureede laGarantiedu SCE,deconserver un stock de piecesrelativesauxemissionset garantiessuffisantafin
de repondrea la demandedesditespieces.
(8) Toutepiecederechangerelativeauxemissionsagreeeet approuveeparGeneracpourraetre utiliseepour larealisationdetoutemaintenanceou
reparationeffectueedansle cadrede lagarantieduSCEetserafournie sansfrais a.lachargede I'acquereur/ du proprietaire.Cetteutilisationne
reduirapasles obligationsdeGeneracdansle cadrede laGarantieduSCE.
(9) Toutepiece non approuvee,ajoutee,modifiee, contrefaite et/ provenantde I'economiesouterrainenepourra pas etreutiliseeafin de modifier
ou de reparerun moteur Generac.L'utilisationdetelles piecesannulela GarantieduSOEet constitueraun motif suffisant pour rejetertoute
demandede beneficede la GarantieduSCE.Generacne sera pas responsabledesdefaiNancesdes piecesgaranties d'un equipementGenerac
duesa.I'utilisationde piecesnonapprouvees,ajoutees,modifieescontrefaiteset/ou provenant deI'economiesouterraine.
LESPIECESRELATIVESAUX I IVIISSiONSPEUVENTiNCLURECEQUi SUIT
1) SYSTEMEDE DOSAGEDU CARBURANT
A. CARBURATEURETPtI_CESINTERNES
B. REGULATEURDEPRESSION
2) SYSTEMED'INDUCTIOND'AIR
A. COLLECTEURD'ADMISSION
B. FILTREA AIR
3) SYSTEMED'ALLUMAGE
A. BOUGIESD'ALLUMAGE
B. BOBtNES/ MODULED'ALLUMAGE
2eme partie
(LE CASI CHI ANT)•
4)
5)
SYSTI_MED'INJEOTIOND'AIR
A. VANNEA IMPULSIOND'AIR
SYSTEMED'ECHAPPEMENT
A. CATALYSEUR
B. RI_ACTEURTHERMIQUE
C. COLLECTEURD'ECHAPPEMENT
Ref6rence0H1911Rev.B 10/11
57
Page 60

GARANT|E LIMITEE DE <, DEUX ANS ,, DE GENERAC POWER SYSTEMS
POUR LES G_:NERATEURS PORTABLES SI'==RIE GP
La societ6 GeneracPower Systems, Inc. (Generac) garantit que, pendant une periode dedeux (2) annees a compter de la date d'achat d'origine, ses generateursserie
GP ne presenteront aucun defaut materiel ni de fabrication pour les elements et la periode mentionnee ci-apres. Generacr@arera ou remplacera, comme il le jugera
necessaire,toute piecejugee defectueuse apres un examen, une inspection et untest realises par Generac ou un d@ositaire de service de garantie agree parGenerac.
Tout(e) reparationou remplacementdans le cadre de lapresente garantie limiteene renouvelle pas ou ne prolonge pas la dureede garantie initiale. Toutproduit r@are
est uniquementgaranti pendant la duree restantede garantie initiale. Toutequipement declare defectueuxpar I'acquereur/le proprietaire dolt _tre retourne et examine
par le d@ositaire de service de garantieagree par Generacle plus proche.Tousles frais d'envoi a,payer dans le cadre de lagarantie, dont leretour a I'usine,seront
supportes et payes a I'avance parI'acquereur / le proprietaire. Cette garantie ne s'appliquequ'aux generateurs portables dela serie GPet n'est pastransferable par
I'acquereur d'origine. II est conseille de conserver les preuves d'achat. Si vous nefournissez pas de preuvede la dated'achat d'origine, la dated'envoi du produit par son
fabricant servira a determiner laperiode de garantie.
PROGRAMME DE GARANTIE
Les applications des clients sont garanties pendantdeux (2) ans. Les applications commercialeset delocation sont garantiespendant un(1) ans ou 1 000 heures
maximum, ala premieredes deuxdates.
DEIVlANDEDESCONSOIVlMATEURSPOURLiESETATS-UNISET AU CANADASEULEIVlENT
ANNEEUNE- Couverturecomplete limitee pour la maind'oeuvreetla (les) piece(s) listee(s) (il est necessairede presenterune preuve d'achat etde maintenance
• Moteur- tous les composants
• Alternateur- tousles composants
ANNEEDEUX- Couverture complete limitee pour la (les) piece(s) listee(s)(il est necessaire de presenterunepreuve d'achat et de maintenance):
• Moteur- tous les composants
• Alternateur- tousles composants
APPLICATIONSCONllVIERCIALES_/DELOCATION
ANNEEUNE- Couverturecomplete limitee pour la maind'oeuvreetla (les) piece(s) listee(s) (il est necessairede
• Moteur- tous les composants
• Alternateur- tousles composants
REMARQUE : Auxfins de la presente garantie,<<utilisation du consommateur_ designeune utilisation menagerepersonnelleou recreativede la part deI'acquereur
d'origine. La presentegarantiene s'applique pas aux unites utilisees pour deI'energieprimaire au lieudu reseauIorsquele reseau electriqueprincipal est presentou
n'existe normalementpas. Une lois que le generateura ete utilise de manierecommercialeou locative, ilsera considere par lasuite comme un generateura utilisation non
personnelledans le cadre de lapresente garantie.
_resenterune preuve d'achat et de maintenance
DIRECTIVES :
1. Toutereparationsous garantiedoltetreeffectueeet/outraiteeparun d@ositaireautorise/ agreeparGenerac,ou unefiliale deGenerac.
2. Lesunitesqui ont ete revenduesnesontpas couvertesparla garantiedeGeneracetantdonnequela presentegarantien'estpastransferable.
3. L'utilisationdepiece(s)de rechangeautre(s) queGeneracannuleraentierementla garantie.
4. Generacpeutchoisirde reparer,deremplacerouderembourserunepiecedeI'equipement.
5. Letauxde main-d'oeuvresous garantieest basesurles heuresnormalesdetravail.Lesautresfraisrelatifsauxheuressupplementaires,auxvacancesouauxcoots satariauxpour
lesreparationsd'urgenceendehorsdesheuresnormalesdetravailserontala chargeduclient.
6. Lesfraisdetransportdespiecessousgarantiesontremboursesa.destarifs detransportterrestre.Lesfraisassociesauxdemandesdetransportseronta lachargeduclient.
7. Lesbatteriessontgarantiesparle fabricantde batteries.
8. Laverificationdela maintenancenecessairepeutetreexigeepourla couverturede la garantie.
LA PRI'="SENTEGARANTIE NE S'APPL|QUE PAS AUX ELI'="MENTS SU|VANTS ;
1. Lescootsde maintenanceetdesmodificationsnormates.
2. Lesddaillancesentraineesparde I'essenceou de I'huilecontaminee,ou par I'utilisationde niveauxd'huilenon appropries.
3. LesreparationsoudiagnosticsrealisespardesdepositairesnonagreesparGeneracet nonautorisesparecrit parGenerac.
4. Lesddaillancesdues,sanss'y limiter,aI'usurenormale,adesaccidents,mauvaisesutilisations,usagesabusifs,negligenceouutilisationinadaptee.
5. Commepourtous lesdispositifsmecaniques,les moteursGeneracnecessitentunereparationetunremptacementperiodiquesde leurspiecespourfonctionnercommeprevu.La
presentegarantiene couvrepaslesreparationsIorsquele problemedela ou tespiece(s)ou dumoteurdecouled'uneutilisationnormale.
6. Lesddaillancescauseespartoute causeexterieureoutout casdeforce majeure,tel qu'unchoc, unvot,un actedevandalisme,uneemeute,uneguerre,un holocaustenucleaire,
unincendie,un gel,la foudre,unseisme, unetempete,la grele,uneeruptionvolcanique,I'eauou uneinondation,une tomadeou unouragan.
7. Lesdommagesdusa des rongeursetjouinsectes.
8. Lesproduitsmodifiesou atteresd'unefagonn'ayantpasete autoriseeparecrit parGenerac.
9. Lesdommagesaccessoires,importantsou indirectscausespardes ddaillancesmateriellesoudefabrication,ou partoutretarddereparationoude remplacementdelaou des
piece(s)ddectueuses.
10. Lesddaillancesduesa.unemauvaiseapplication.
11. Lesdepenseslieesa.I1nstructiondu clientouau d@annageIorsqu'aucunddautn'estdetecte.
12. LesequipementsIouesutilisespendanttarealisationdesreparationsdanslecadredela garantie.
13. Lesbatteriesde demarrage,fusibles,ampoulesetfluidesdu moteur.
LA PRESENTEGARANTIEREMPLACETOUTESLESAUTRESGARANTIES,IMPLIClTESOUEXPLIClTES.ENPARTICULIER,GENERACN'EMETAUCUNEGARANTIEDE
OONFORMITEOUD'USAGEPOURUNOBJECTIFPARTICULIER.Toutegarantieimplicite autoriseepar laIoi dolt _trelimitee en dureeconformement auxconditions de
garantie explicitestipuleesdans lapresente. Certainsetats ne permettent pas de poserune limite a,la dureede la garantieimplicite, la limite susmentionnee nes'applique
donc pas a,cesderniers. GENERACNE SERARESPONSABLEQUEDE LA REPARATIONOUDUREMPLACEMENTDELA OUDESPIECESTELQUESUSMENTIONNE.EN
AUCUNCAS GENERACNEPOURRAETRETENURESPONSABLEDETOUT DOMMAGEACCESSOIREOU IMPORTANT,MEMESI CEDOMMAGEDECOULEDIRECTEMENT
D'UNENEGLIGENCEDE GENERAC.Certains etatsne permettentpasd'exclure oude poserune limite aux dommages accessoires ou importants, lalimite susmentionneene
s'applique donc pas a ces derniers. Lapresentegarantievous confere des droits juridiques specifiques. Votre etatvous confere egalementd'autres droits.
GENERACPOWERSYSTEMS,INC. ,, P.O.BOX8 ,, Waukesha,Wl 53187 ,, Tel. : (888) GENERAC(436-3722) ,, Fax: (262) 544-4851
Reference0H8902 RevisionE(10/11)
Manuel, ref@ence 0H9060 R@. C (04/11/11) Imprim_ en Chine
Pour Iocaliser le depositaire le plusproche,visiteznotre site Intemet www.generac.com
 Loading...