

Page 1
CDT-05
Professional hybrid turntable
PROFESSIONELLER HYBRID PLATTENSPIELER
GIRADISCOS/CD HIBRIDO PROFESIONAL
ELECTROPHONE HYBRID PROFESSIONELLE
In the USA: If you experience problems with this unit, please go to http://www.geminidj.com/support.html or call 1-732-738-9003 for Gemini Customer Service. Do not attempt to return this equipment to your dealer. Gemini stands behind their products with a 1 year limited warranty on all audio products. For larger images & detailed specs visit our website @ http://www.geminidj.com. WE ARE NOT RESPONSIBLE FOR TYPOGRAPHICAL ERRORS OR OMISSIONS. WE RESERVE THE RIGHT TO CHANGE WITHOUT NOTICE. Parts of the design of this product may be protected by worldwide patents. Information in this manual is subject to
change without notice and does not represent a commitment on the part of the vendor. Gemini Sound Products Corp. shall not be liable for any loss or damage whatsoever arising from the use of information or any
error contained in this manual. No part of this manual may be reproduced, stored in a retrieval system or transmitted, in any form or by any means, electronic, electrical, mechanical, optical, chemical, including photocopying and recording, for any purpose without the express written permission of Gemini Sound Products Corp. It is recommended that all maintenance and service on this product is performed by Gemini Sound
Products Corp. or its authorized agents. Gemini Sound Products Corp. will not accept liability for loss or damage caused by maintenance or repair performed by unauthorized personnel.
USA:
Gemini Sound Products Corp.
Worldwide Headquarters
120 Clover Place
Edison, New Jersey 08837
Ph: 732.738.9003
Fax: 732.738.9006
Germany:
Gemini Sound
Products GmbH
Liebigstrasse 16
85757 Karlsfeld
Ph: + 49 8131 39171-0
Fax: + 49 8131 39171-8
Spain:
Gemini Sound Products S.A.
Rosellon 516 local
08026 Barcelona
Ph: + 34 93 436 37 00
Fax: + 34 93 347 69 61
UK:
Gemini Sound Products LTD
Unit C4 Hazleton
Industrial Estate,
Waterlooville P08 9JU
Ph: +44 (0)87 087 00880
Fax: +44 (0)87 087 00990
France:
GSL France
1, Allée d' Effiat,
Parc de l'événement
F-91160 Longjumeau
Ph: + 33 1 69 79 97 70
Fax: + 33 1 69 79 97 80
Worldwide Offices
EFX
FILTER
ECHO
FLANGER
SEAMLESS LOOP
MEMORY
CUE
1
2
3
<< TRA C K SKIP >>
A B/ EDIT
FWD
REV
TIME
RECALL CUE
ON / OFF
<<
INSTANT REV
MOTOR
SINGL E
RELOOP
KEY
4%
8%
OFF
50%
16%
>
<<
SEARCH
CUE
HO T START
Pro Hybrid TurntableCDT-05
+
PITCH BEN D
Page 2
<2>
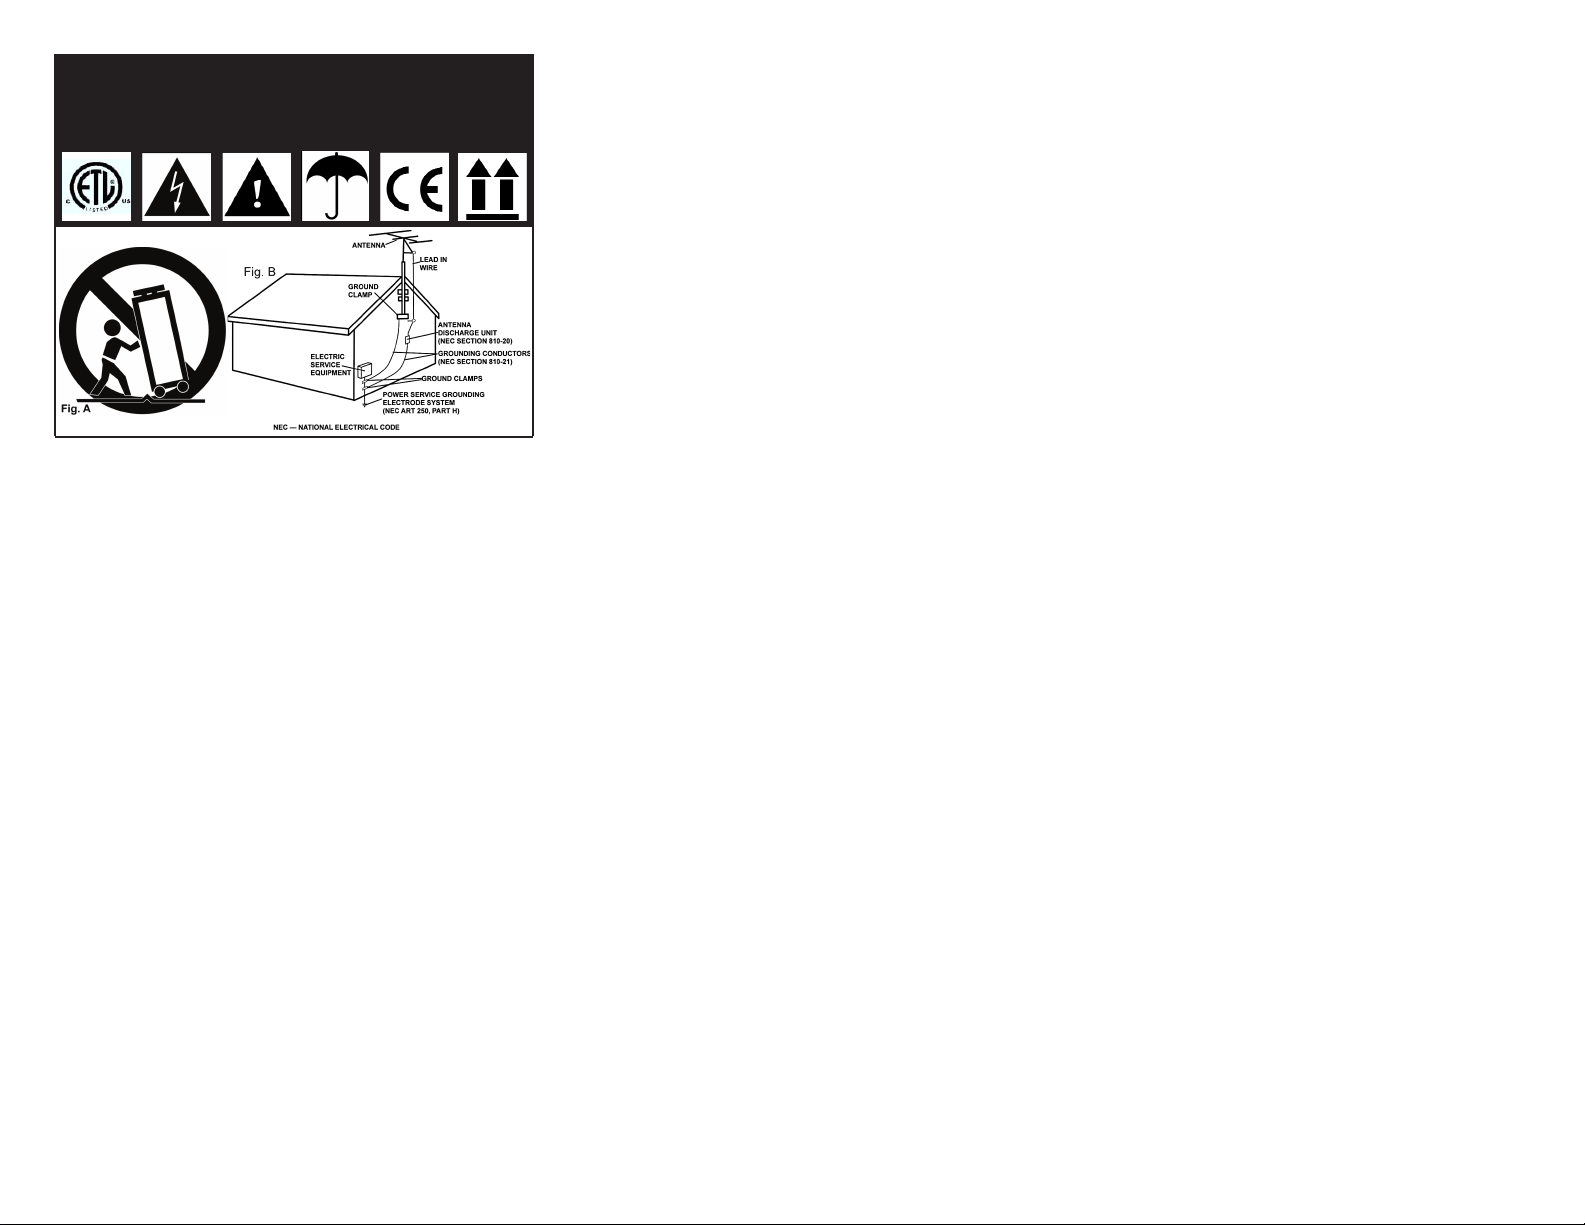
CAUTION: This product satisfies FCC regulations when shielded cables
and connectors are used to connect the unit to other equipment. To prevent electromagnetic interference with electric appliances such as radios
and televisions, use shielded cables and connectors for connections.
The exclamation point within an equilateral triangle is intended to alert
the user to the presence of important operating and maintenance (servicing) instructions in the literature accompanying the appliance.
The lightning flash with arrowhead symbol, within an equilateral triangle,
is intended to alert the user to the presence of uninsulated "dangerous
voltage" within the product's enclosure that may be of sufficient magnitude
to constitute a risk of electric shock to persons.
READ INSTRUCTIONS: All the safety and operating instructions should be
read before the product is operated.
RETAIN INSTRUCTIONS: The safety and operating instructions should be
retained for future reference.
HEED WARNINGS: All warnings on the product and in the operating
instructions should be adhered to.
FOLLOW INSTRUCTIONS: All operating and use instructions should be
followed.
CLEANING: The product should be cleaned only with a polishing cloth or
a soft dry cloth. Never clean with furniture wax, benzine, insecticides or
other volatile liquids since they may corrode the cabinet.
ATTACHMENTS: Do not use attachments not recommended by the product manufacturer as they may cause hazards.
WATER & MOISTURE: Do not use this product near water, for example,
near a bathtub, wash bowl, kitchen sink, or laundry tub; in a wet basement;
or near a swimming pool; and the like.
ACCESSORIES: Do not place this product on an unstable cart, stand, tripod, bracket, or table. The product may fall, causing serious injury to a
child or adult, and serious damage to the product. Use only with a cart,
stand, tripod, bracket, or table recommended by the manufacturer, or sold
with the product. Any mounting of the product should follow the manufacturer's instructions, and should use a mounting accessory recommended
by the manufacturer.
CART: A product and cart combination should be moved with care. Quick
stops, excessive force, and uneven surfaces may cause the product and cart
combination to overturn. S
EE FIGURE A.
VENTILATION: Slots and openings in the cabinet are provided for ventila-
tion and to ensure reliable operation of the product and to protect it from
overheating, and these openings must not be blocked or covered. The
openings should never be blocked by placing the product on a bed, sofa,
rug, or other similar surface. This product should not be placed in a builtin installation such as a bookcase or rack unless proper ventilation is provided or the manufacturer's instructions have been adhered to.
POWER SOURCES: This product should be operated only from the type of
power source indicated on the marking label. If you are not sure of the type
of power supply to your home, consult your product dealer or local power
company.
LOCATION: The appliance should be installed in a stable location.
NON-USE PERIODS: The power cord of the appliance should be
unplugged from the outlet when left unused for a long period of time.
GROUNDING OR POLARIZATION:
- If this product is equipped with a polarized alternating current line plug
(a plug having one blade wider than the other), it will fit into the outlet
only one way. This is a safety feature. If you are unable to insert the plug
fully into the outlet, try reversing the plug. If the plug should still fail to fit,
contact your electrician to replace your obsolete outlet. Do not defeat the
safety purpose of the polarized plug.
- If this product is equipped with a three-wire grounding type plug, a plug
having a third (grounding) pin, it will only fit into a grounding type power
outlet. This is a safety feature. If you are unable to insert the plug into the
outlet, contact your electrician to replace your obsolete outlet. Do not
defeat the safety purpose of the grounding type plug.
POWER-CORD PROTECTION: Power-supply cords should be routed so
that they are not likely to be walked on or pinched by items placed upon
or against them, paying particular attention to cords at plugs, convenience
receptacles, and the point where they exit from the product.
OUTDOOR ANTENNA GROUNDING: If an outside antenna or cable system is connected to the product, be sure the antenna or cable system is
grounded so as to provide some protection against voltage surges and
built-up static charges. Article 810 of the National Electrical Code,
ANSI/NFPA 70, provides information with regard to proper grounding of
the mast and supporting structure, grounding of the lead-in wire to an
antenna discharge unit, size of grounding conductors, location of antennadischarge unit, connection to grounding electrodes, and requirements for
the grounding electrode. S
EE FIGURE B.
LIGHTNING: For added protection for this product during a lightning
storm, or when it is left unattended and unused for long periods of time,
unplug it from the wall outlet and disconnect the antenna or cable system.
This will prevent damage to the product due to lightning and power-line
surges.
POWER LINES: An outside antenna system should not be located in the
vicinity of overhead power lines or other electric light or power circuits, or
where it can fall into such power lines or circuits. When installing an outside antenna system, extreme care should be taken to keep from touching
such power lines or circuits as contact with them might be fatal.
OVERLOADING: Do not overload wall outlets, extension cords, or integral
convenience receptacles as this can result in a risk of fire or electric shock.
OBJECT & LIQUID ENTRY: Never push objects of any kind into this product through openings as they may touch dangerous voltage points or shortout parts that could result in a fire or electric shock. Never spill liquid of
any kind on the product.
SERVICING: Do not attempt to service this product yourself as opening or
removing covers may expose you to dangerous voltage or other hazards.
Refer all servicing to qualified service personnel.
DAMAGE REQUIRING SERVICE: Unplug this product from the wall outlet and refer servicing to qualified service personnel under the following
conditions:
- When the power-supply cord or plug is damaged.
- If liquid has been spilled, or objects have fallen into the product.
- If the product has been exposed to rain or water.
- If the product does not operate normally by following the operating
instructions. Adjust only those controls that are covered by the operating
instructions as an improper adjustment of other controls may result in
damage and will often require extensive work by a qualified technician to
restore the product to its normal operation.
- If the product has been dropped or damaged in any way.
- When the product exhibits a distinct change in performance, this indicates a need for service.
REPLACEMENT PARTS:When replacement parts are required, be sure the
service technician has used replacement parts specified by the manufacturer or have the same characteristics as the original part. Unauthorized substitutions may result in fire, electric shock, or other hazards.
SAFETY CHECK: Upon completion of any service or repairs to this product, ask the service technician to perform safety checks to determine that
the product is in proper operating condition.
WALL OR CEILING MOUNTING: The product should not be mounted to
a wall or ceiling.
HEAT: The product should be situated away from heat sources such as
radiators, heat registers, stoves, or other products (including amplifiers)
that produce heat.
DISPOSAL: This product shall not be treated as household waste. Instead
it shall be handed over to the applicable collection point for the recycling
of electrical and electronic equipment. By ensuring this product is disposed of correctly, you will help prevent potential negative consequences
for the environment and human health, which could otherwise be caused
by inappropriate waste handling of this product. The recycling of materials
will help to conserve natural resources. For more detailed information
about recycling of this product, please contact your local city office, your
household waste disposal service or the shop where you purchased the
product.
CAUTION
PLEASE READ BEFORE USING APPLIANCE,
IMPORTANT WARNING & SAFETY INSTRUCTIONS!
RISK OF ELECTRICAL SHOCK DO NOT OPEN!
Page 3
<3>
Parts Checklist:
CDT-05 Unit
Headshell
Counterweight
Platter
Scratch Control Vinyl Plate
Slipmat
AC Power Cable
RCA Line Cable
Phono Cable w/Ground Spade
Relay Start Cable
Fader Start Cable
Manual with Warranty Info
4 x Low Profile Rubber Feet
4 x Standard Round Feet
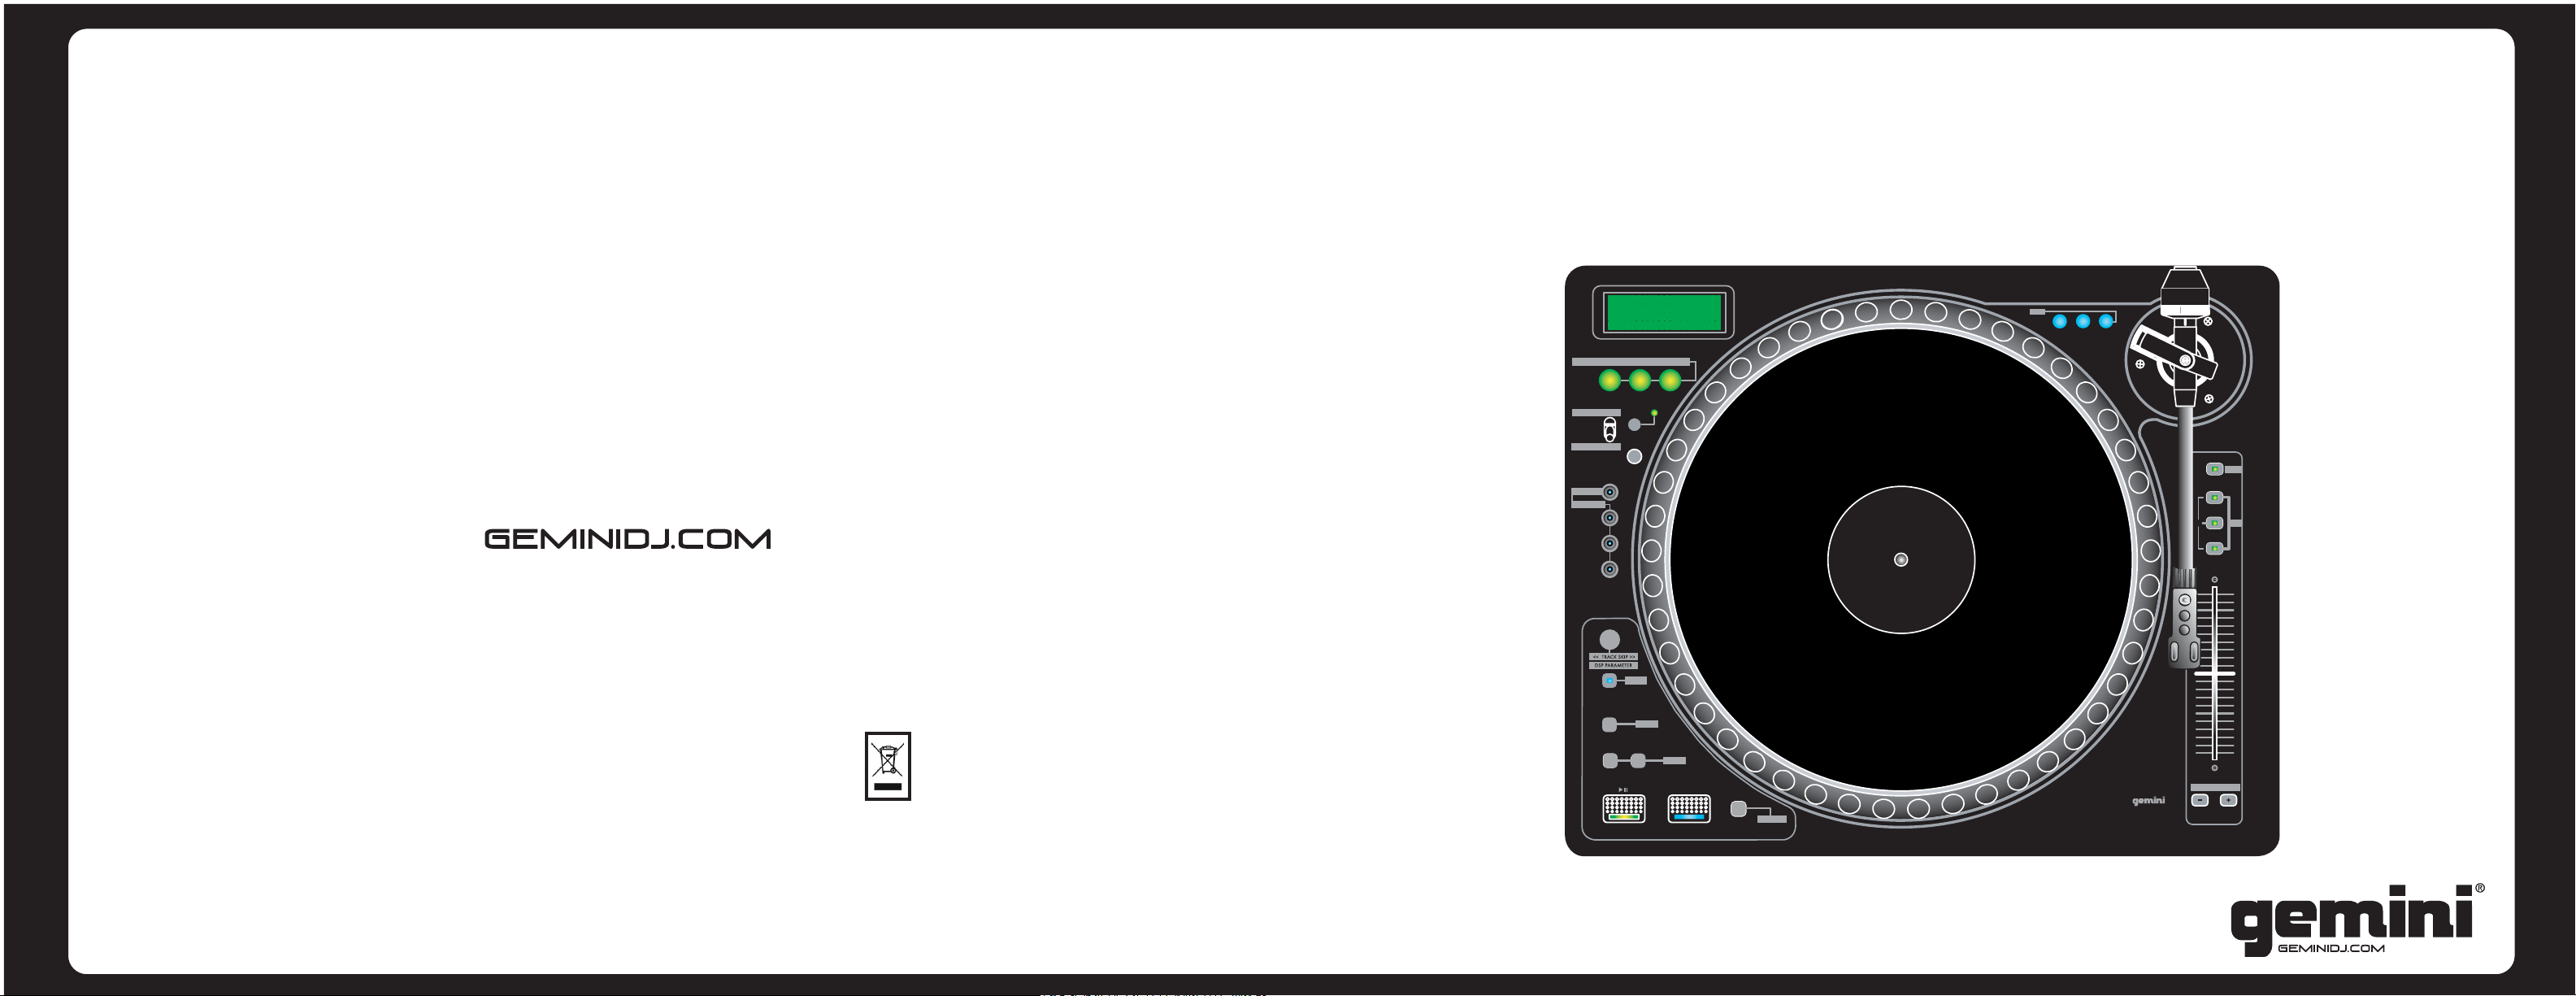
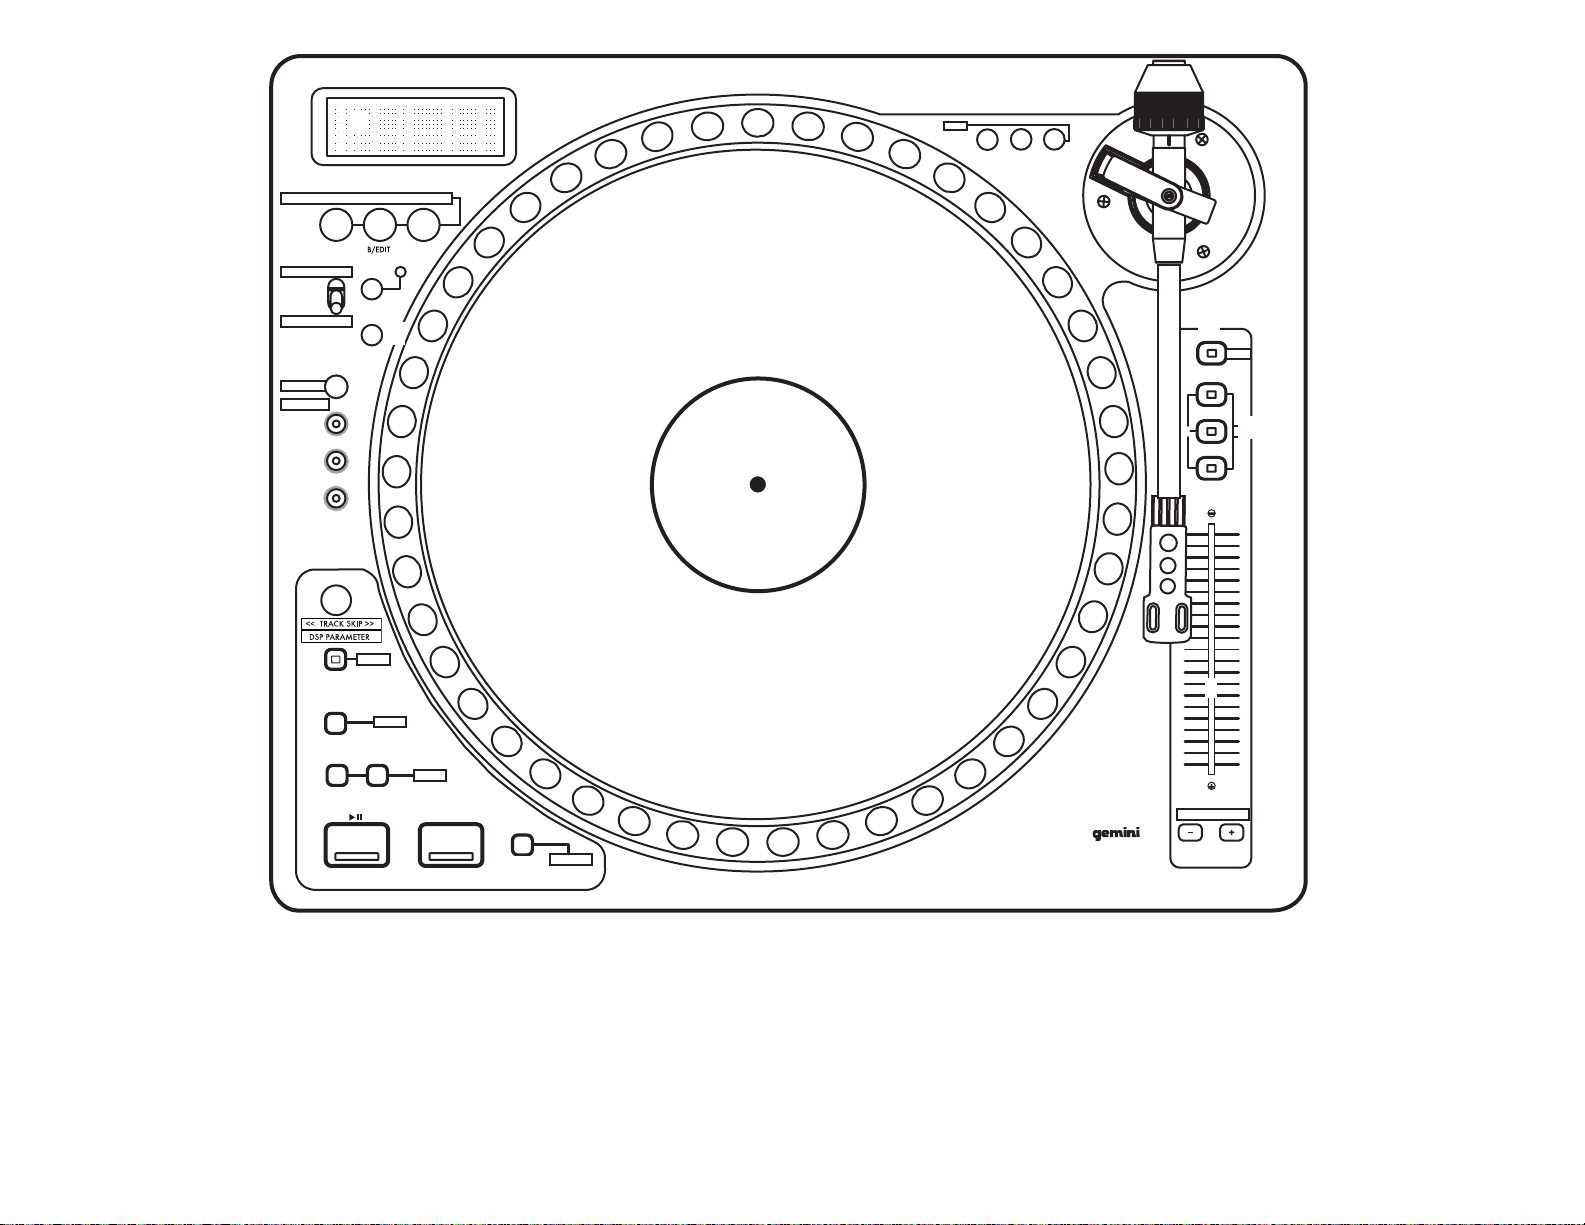
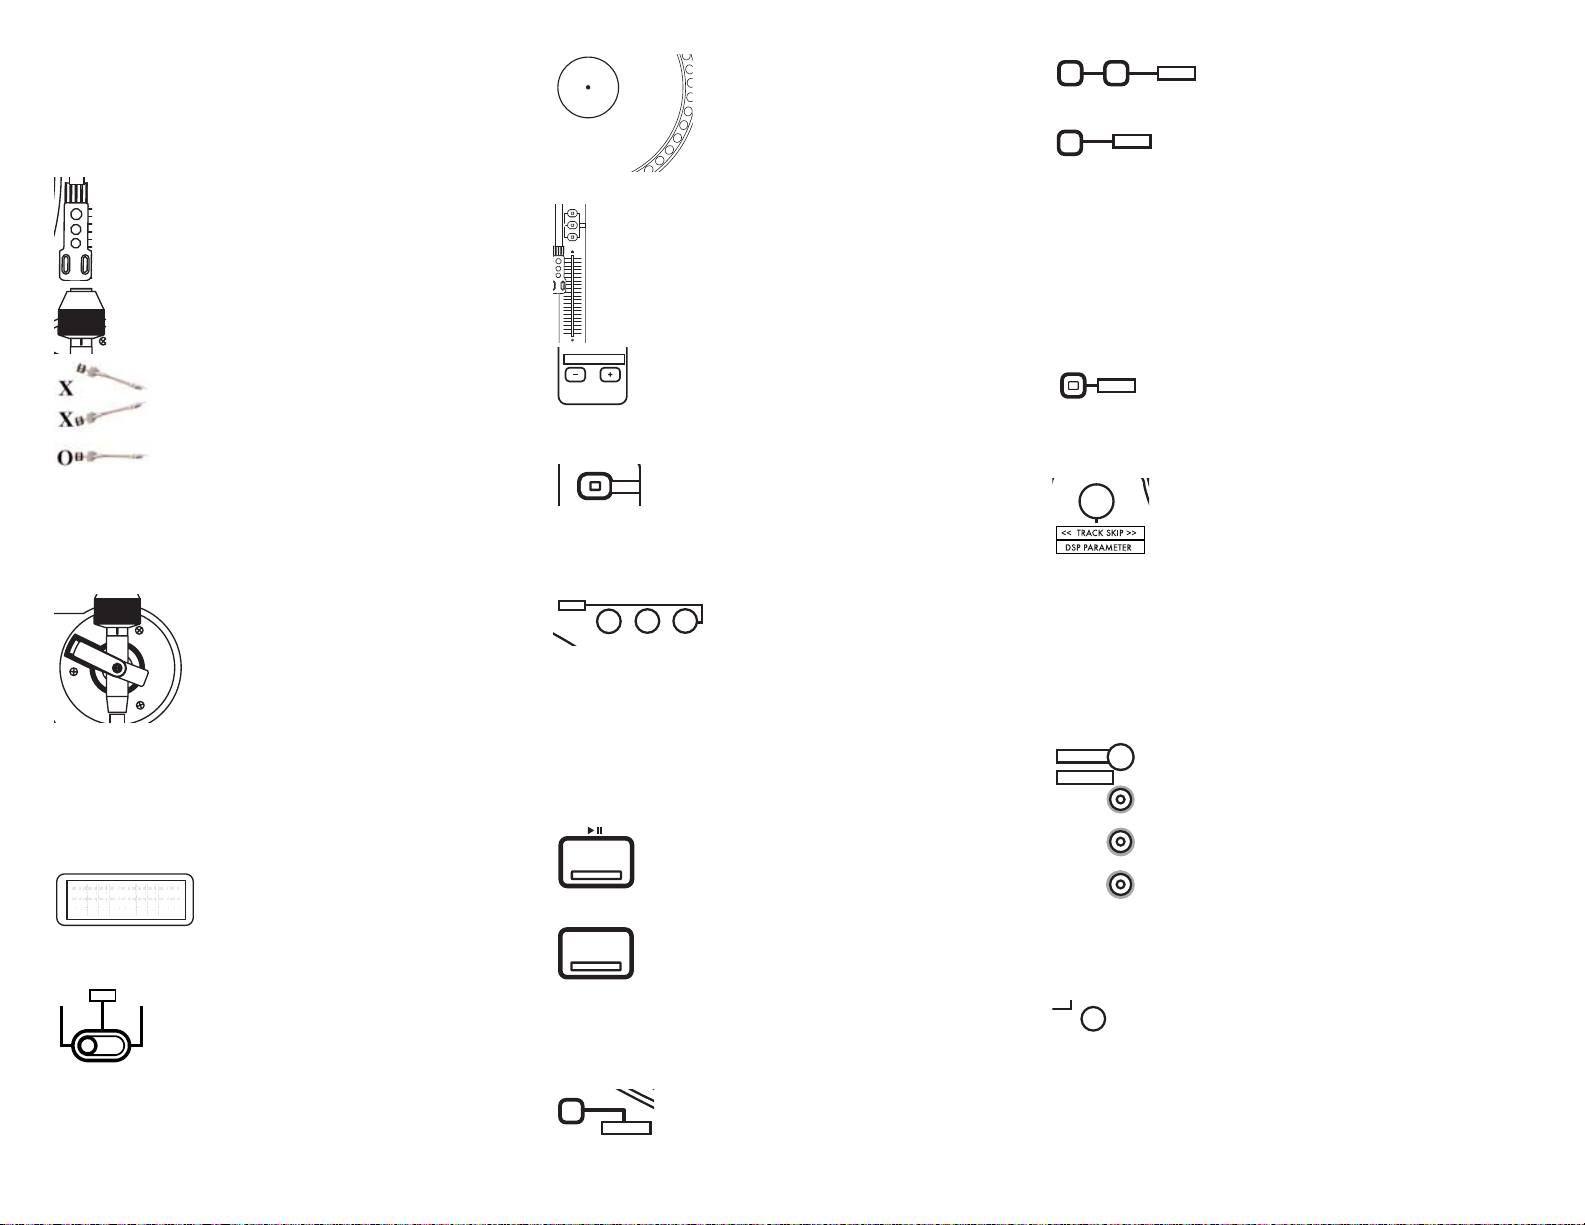
1. LCD Display
2. Platter
3. Scratch Control Vinyl Plate
4. Scratch Anchor w/Marker
5. Tonearm
6. Removable Tonearm Base
7. Headshell
8. Counterweight
9. Pitch Control
10. Pitch Bend Buttons
11. Pitch Range Select
12. Key Lock Function
13. Echo DSP Effect
14. Filter DSP Effect
15. Flanger DSP Effect
16. Play/Pause Button
17. Master Cue Button
18. Hot Start Cue Function
19. Track Search Buttons
20. Single/Continuous Modes
21. Motor On/Off
22. Track Skip & DSP Parameter
23. Memo Button
24. Hot Startable Cue Points
25. Time Mode/Recall Cue
26. Reverse Switch
27. Instant Reverse Modes
28. Loop in A
29. Loop out B/Edit
30. Reloop
ON / OFF
GE
FI
1
2
3
10
11
12
13
14
15
16
17
18
19
20
21
25
26
27
28
29
30
22
23
24
5
7
6
8
9
4
MEMORY
CUE
1
2
3
<< TR AC K SKIP >>
SEAMLESS LOOP
A B/ LOOP
FWD
INSTANT REV
REV
TIME
RECALL CUE
MOTOR
ON / OFF
SINGL E
RELOO P
EFX
EC HO
FI
LTETER
FLANGE
R
KEY
4%
8%
OFF
50%
16%
>
<<
<<
SEARC H
CUE
HO T STAR T
Pro Hybrid TurntableCDT-05
+
PITCH BEN D
Page 4

Rear
Front
Rear Panel:
31. AC Inlet
32. Voltage Selector Switch
33. Power On/Off Switch
35. Relay Start Jack
36. Digital Output
37. CD Audio RCA Outputs
38. Phono RCA Outputs
Front Panel:
40. Slot-Loading CD Mechanism
41. Stop/Eject Button
42. Platter Speed Control
43. Platter Speed LED indicators
44. Operation Mode Switch
Other:
45. Low Profile or Standard Feet
31
32
33
40
41
42
43
44
45 45
36
38
37
35
<4>
PHONO OU T
CD OUT
DIGITAL
OUT
RELA Y
MIX
CD TT
FADER
Pro Hybr id Turntabl eCDT-05
OFF
ON
45
78
33
Page 5

<5>
CDT-05 PROFESSIONAL HYBRID TURNTABLE
INTRODUCTION:
Congratulations on your purchase of a Gemini CDT-05 Professional
Hybrid Turntable. The CDT-05 is the latest advancement in DJ technolo-
gy, combining the control of a fully functional high torque turntable with
the versatility and convenience of Compact Discs. In addition, the CDT-05
has the ability to play both Vinyl records and Compact Discs simultaneously, for an endless array of performance possibilities. With the proper mainenance, the CDT-05 will provide years of reliable and solid performance.
FEATURES:
- Audio CD, CD-R, CD-RW, and MP3 compatible
- Removable, virtually unskippable straight tone arm system
- High-Torque Direct Driven platter (3.6 kg/cm) provides full control over
CD playback
- Independent audio outputs for turntable and CD sections
- 3-position CD/TT mode switch allows simultaneous playback of both CD
and vinyl
- 3 DSP effects: Filter, Echo, and Phase with variable parameters
- Reverse switch
- Motor ON/OFF switch
- 3 Hot-Startable cue points with easy to operate memo button
- Master cue w/ hot-start feature
- Key Lock (Master Tempo)
- Anti-Shock Protection using RAM buffer memory
- Slot Loading mechanism with LED illumination
- Single auto-cue/continuous play modes
- Seamless looping with reloop/stutter & loop editing
- Pitch bend via platter or buttons
- Three mode time selection
- Frame accurate search & cue
- Large 4-line backlit dot matrix display
- Sturdy aluminum platter with finger grooves
- Variable Pitch control with ranges of 4%, 8% , 16%, and 50%
- Soft touch buttons with bright LEDs
CAUTIONS:
1. All operating instructions should be read before using this equipment.
2. To reduce the risk of electrical shock, do not open the unit. There are
NO USER REPLACEABLE PARTS INSIDE. Please refer servicing to a qualified Gemini Sound Products service technician. In the USA: If you experience problems with this unit, please call 1 (732) 738-9003 for Gemini
Customer Service. Do not attempt to return this equipment to your dealer.
3. Do not expose this unit to direct sunlight or to a heat source such as a
radiator or stove. When operating, ensure that the unit has adequate ventilation.
4. This unit should be cleaned only with a damp cloth. Avoid solvents or
other cleaning detergents.
5. When moving this equipment, it should be placed in its original carton
and packaging. This will reduce the risk of damage during transit.
6. DO NOT EXPOSE THIS UNIT TO RAIN OR MOISTURE.
7. DO NOT USE ANY SPRAY CLEANER OR LUBRICANT ON ANY CON-
TROLS OR SWITCHES.
CDT-05 QUICK START INSTRUCTIONS:
1. Set up the unit according to the Connections/Setup and Tonearm Setup
section. Make sure to first review all of the warnings and cautions before
proceeding.
2. To play a CD, first insert a disc into the CD transport located on the front
right hand side of the unit, and switch the O
PERATION MODE SWITCH
(44) to
‘CD.’ Make sure the MOTOR ON/OFF (21) button is lit, and press the
PLAY/PAUSE BUTTON (16) to begin playback. You will have full access to
manipulating the music via the SCRATCH CONTROL VINYL PLATE (3), in the
same fashion as a turntable. You will also be able to apply digital effects to
the CD portion of the unit, including cue points, DSP effects, pitch,
reverse, etc. For detailed instructions on how each feature applies to CD
playback, see the Functions section.
3. To play a Vinyl record, place the specialized Slipmat on top of the
S
CRATCH CONTROL VINYL PLATE (3), so that the mat is flush with the SCRATCH
A
NCHOR
(4). Place a record on top of the Slipmat, and switch the O
PERATION
MODE SWITCH (44) to ‘TT.’ Make sure the MOTOR ON/OFF (21) button is lit,
and press the PLAY/PAUSE BUTTON (16) to begin playback. This might seem
unconventional at first, but you will find the performance to be flawless.
While in TT Mode, any manipulation of the vinyl record (or the platter)
will not be applied to the CD. In order to preserve vinyl’s unique sound
qualities as much as possible, the audio from the Turntable portion is not
sent through the DSP effects section.
4. In order to play both CD and Vinyl simultaneously, you must switch the
O
PERATION MODE SWITCH (44) to ‘MIX.’ In Mix Mode, the SCRATCH CONTROL
VINYL PLATE (3) will not control the CD. The purpose of this is so that a DJ
may play a beat off of CD, while scratching over it with a Vinyl record. Use
the MOTOR
ON/OFF
(21) button to start and stop the platter for Vinyl play-
back, and use the P
LAY/PAUSE BUTTON (16) to start and stop playback of the
CD portion. Note that the independent audio outputs on the back of the
CDT-05 allow you to connect the CD and Vinyl portion of the unit to separate channels of your audio mixer. In Mix Mode, the P
ITCH CONTROL (9)
will control the pitch of the Turntable portion, and the P
ITCH BEND BUTTONS
(10) will control the pitch of the CD portion. Because the unit shares many
functions between CD, Turntable, and Mix, it is best to read over the
Functions section to get a grasp of how each function behaves in each
mode.
5. Read the rest of the manual! Everyone (even the author of this manual) wants to start playing right away, and that is understandable - especially with such an exciting and innovative product as the CDT-05. However,
the function of it does differ from conventional products, and this manual
is written to address those differences and put them into the perspective
and context of a performing DJ. You might even discover functions you
never knew existed! We know that you want to dive right in and get started, but keep the manual at an arm’s length, just in case you get stuck or
need clarification.
CONNECTIONS / SETUP:
1. P
OWER
SWITCH: The P
OWER
SWITCH
(33) turns the unit ON or
O
FF. Make sure the switch is in the ‘OFF’ position prior to mak-
ing any connections.
2. AC I
NLET
: The AC I
NLET (31), located on the rear of the
unit, is the connector which accepts the P
OWER C
ORD
(sup-
plied) used to power the unit.
3. V
OLTAGE
SELECTOR SWITCH
: The VOLTAGE
SELECTOR
SWITCH (32) allows the unit to operate on either 115 or
230 volt configurations, for worldwide operation. Prior
to using the unit, make sure that this switch reflects the voltage supplied in
your locality.
4. CD A
UDIO RCA OUTPUTS
(37): This set of outputs carries the
audio signal from the CD player portion of the unit and should be
connected to an appropriate line-level input on your audio mixer.
5. P
HONO RCA O
UTPUTS
(38): This set of outputs carries the audio
signal from the turntable portion of the unit and should be connected to an appropriate phono-level input on your audio mixer.
6. G
ROUND TERMINAL: As you may notice, the CDT-05 does not have a tradi-
tional ground terminal, as most turntables have. The reason for this is that
the CDT-05’s turntable section is grounded internally and does not require
the use of a ground wire. If you are experiencing any type of ground hum
from the turntable section, verify that your CDT-05 is powered using the
same outlet as your mixer and the rest of your audio equipment.
7. D
IGITAL OUTPUT (36): This output carries audio from the CD
player portion of the unit in IEC-958 (S/PDIF) format, and can be
connectd to any device with the appropriate S/PDIF input, such as
a digital mixer, computer, or outboard D/A converter. Using this
particular output requires specialized equipment and may not apply to
your setup.
8. R
ELAY START JACK (35): This jack makes it possible to connect
two CDT-05s together, so that when one unit finishes playing, the
opposite unit automatically starts playback. For normal use, leave
this jack disconnected.
9. L
OW PROFILE OR STANDARD FEET (45): The
feet may be changed depending on the height
you wish to achieve. With the LOW PROFILE
OFF
ON
DIGI TAL
OUT
RE LAY
Page 6
feet, the unit should be virtually flush with most mixers. With the STANDARD
FEET, the unit will sit higher, but the Turntable portion might resist more
vibration.
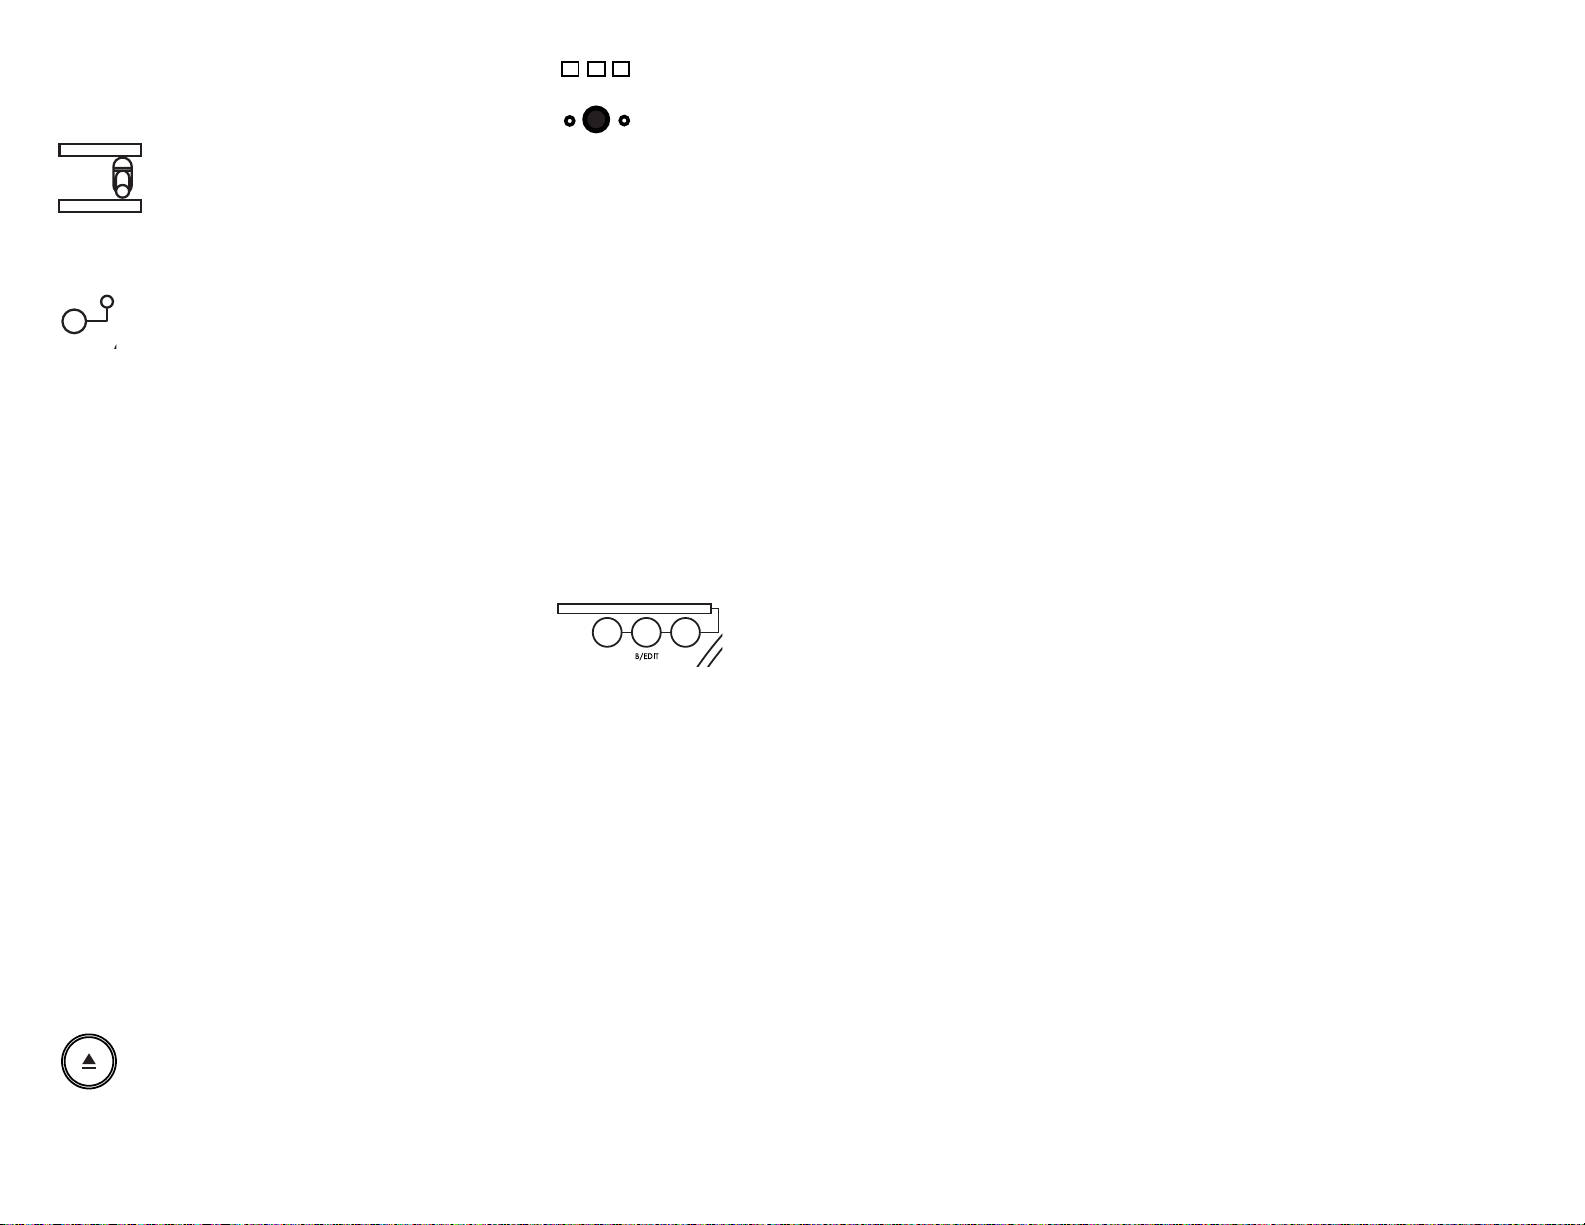
TONEARM SETUP:
1. Attach the H
EADSHELL (7) or integrated cartridge to the tonearm by
twisting the fastening screw counterclockwise. Be careful not to
overtighten the fastening screw. If you have an overhead mount cartridge, consult the cartridge manual for instructions on how to
mount it to a headshell.
2. Attach the C
OUNTERWEIGHT (8) to the back of the tonearm, with
the number scale facing forwards, by turning the weight counterclockwise.
3. Adjust the C
OUNTERWEIGHT (8) until the tonearm floats
freely when placed above the platter. The cartridge should
not sit on the vinyl, nor should it be leaning backwards.
This is the Zero Point, at which no weight is applied to the
cartridge whatsoever.
4. Set just the number scale to ‘0’ to reflect that the tonearm is balanced,
and at the Zero Point.
5. Turn the complete C
OUNTERWEIGHT (8) counterclockwise until the appro-
priate weight (in grams) is reflected on the number scale. The appropriate
weight will be furnished by the cartridge manufacturer.
6. To adjust the tonearm height, use a Philips-head
screwdriver to remove the T
ONEARM BASE (6) from the
upper right hand corner of the unit. There are 3
screws which must be completely removed. Once the
T
ONEARM BASE (6) is removed, adjust each of the
spring-loaded height modules to reflect the necessary
height required, as per the specifications of your preferred phono cartridge. All 3 of the spring-loaded height modules should be set to the same
height, to ensure that the stylus tip meets the vinyl at the appropriate angle
and position.
FUNCTIONS:
1. LCD D
ISPLAY: The LCD DISPLAY (1) is used to visu-
ally show all parameters relating to the function of
the unit. This includes track titles (on applicable
MP3 files), pitch values, mode of operation, transport functions, time, beats
per minute, and a visual graph relating to the position of the playing track.
2. O
PERATION MODE SWITCH (44): This switch has 3 posi-
tions: CD, TT, and MIX. CD Mode allows for full manipulation of audio via the S
CRATCH CONTROL VINYL PLATE (3), TT
mode allows for the playback, and MIX Mode allows for a
CD to be played with limited tactile control, while also playing a Vinyl
record simultaneously.
3. S
CRATCH CONTROL VINYL PLATE (3) and SCRATCH
ANCHOR (4): These work in conjunction with the
platter to provide realtime control to both the CD
and Vinyl playback functions of the CDT. Upon using
the unit for the first time, make sure that the SCRATCH
ANCHOR (4) is firmly seated within the SCRATCH
CONTROL VINYL PLATE (3).
4. P
ITCH
CONTROL
(9): The pitch control, along with PITCH
RANGE
SELECTION (11), allows you to manipulate the speed and tempo of the
music being played. PITCH
RANGE SELECTION
(11) allows for more dramatic manipulation, whereas the higher the percentage selected, the
more dramatic the effect is. Smaller percentages mean less dramatic
manipulation, but more precise control.
5. P
ITCH
BEND BUTTONS
(10): These allow the DJ to make temporary changes to the speed and tempo of the music being
played and are primarily used for fine adjustment during beatmixing. In M
IX M
ODE
, the PITCH
BEND BUTTONS
(10) function as
a pitch control for the CD portion of the unit.
6. K
EY LOCK
FUNCTION
(12): Key Lock allows the speed of the
music to be changed without changing the musical key. This
function is available strictly on the CD portion of the unit,
and is meant to be used in conjunction with the P
ITCH CONTROL (9) section.
Bear in mind that Key Lock may cause flanging or artifacts on certain musical programs, especially at higher percentages.
7. DSP E
FFECTS (13, 14, 15): The DSP EFFECTS (13,
14, 15) section allows for tonal, phase and delaybased manipulation of the CD section of the CDT.
To engage an effect, simply select and press the button of the effect you
desire, and use the T
RACK S
KIP/DSP PARAMETER
(22) knob to tweak the
parameter to your liking. By pressing and holding the knob for 1 second,
the unit will switch to Dry/Wet mode, and you will be able to set the
amount of audio that is sent through the DSP, for varying the intensity of
the effect. Note that when an effect is not engaged, the T
RACK SKIP/DSP
P
ARAMETER (22) knob will advance through tracks.
8. P
LAY/PAUSE BUTTON (16): In CD or Turntable (TT) Mode,
the P
LAY BUTTON
(16) starts and stops playback. In Mix Mode,
the PLAY BUTTON (16) controls CD only, and the MOTOR
ON/OFF (21) starts and stops the platter for vinyl playback.
9. M
ASTER CUE BUTTON (17): In CD Mode, the MASTER CUE
BUTTON (17) returns the unit to the position of the set Cue
Point, once it has been set. After advancing to the set Cue
Point, the unit will remain paused until the P
LAY BUTTON (16)
is pressed. Pressing and holding the MASTER CUE BUTTON (17) will allow
you to preview the cue point. For step-by-step information on the CUE
functions of the CDT-05, see the section entitled ‘Setting Cue Points and
Loops’.
10. H
OT START CUE FUNCTION
(18): This function allows you
to start from the specified Cue Point, once it has been set,
without interrupting playback.
11. T
RACK SEARCH BUTTONS (19): Pressing these but-
tons allows you to momentarily advance through a
CD track, for as long as each button is held down.
12. S
INGLE/CONTINUOUS MODES (20): This button will deter-
mine how the unit will behave at the end of each track.
When the unit is in Single Auto-Cue mode, the LCD display will show the
word ‘Single,’ and the unit will automatically cue to the first frame of audio
on the specified track. When the unit is completed playing that track, it will
stop and cue automatically to the first frame of audio on the subsequent
track. In Continuous mode, the LCD display will show the word
‘Continue,’ and the disc will play all tracks without interruption, indefinitely repeating the disc until it is stopped manually. When the display says neither ‘Single’ nor ‘Continue,’ the unit will play all tracks without interruption, but will then stop after playing the last track on the disc.
13. M
OTOR ON
/OFF
(21): This button allows you to start or
stop the rotation of the platter. In TT or CD Mode, this
requires that the unit is in Play mode. In Mix Mode, the
MOTOR ON/OFF (21) button controls the platter for vinyl playback, where
the P
LAY BUTTON (16) controls the playback of the CD player portion.
14. T
RACK SKIP & DSP PARAMETER (23): This knob, during
CD playback, allows you to advance through track numbers on the CD portion of the unit. By pressing the knob
downwards and turning in either direction, the unit will
advance through track numbers in increments of 10. When there is a DSP
effect engaged, the T
RACK SKIP & DSP PARAMETER (23) knob controls the
parameter associated with the selected effect. By pressing the knob downwards and holding for 1 second, the context of the display will change,
and you will be able to set the Dry/Wet control for the selected effect. This
will determine the intensity of the effect. As effects are highly dependent
on preference, it is advisable to take some time to experiment and find
the settings that are to your liking.
15. M
EMO BUTTON (23) and HOT STARTABLE CUE POINTS (24):
By using this function, it is possible to set up to 3 specific
points at which you can advance to, without interruption.
The M
EMO BUTTON
(23) allows you to set Cue Points on the
fly, simply by pressing the MEMO BUTTON (23) first and then
pressing the desired H
OT STARTABLE CUE POINT
(24) that you
wish to set. The M
EMO BUTTON (23) also allows you to save
the MASTER
CUE POINT
, once it has been assigned, on CD
Audio tracks (not available on MP3 discs). To save the MASTER CUE POINT,
hold the MEMO BUTTON (23) down for 3 seconds. For step-by-step information on the CUE functions of the CDT-05, see the section entitled
‘Setting Cue Points and Loops’.
16. T
IME MODE/RECALL CUE (25): With each button press, while in
CD or Mix Mode, the time display will change from Time
Elapsed, to Total Time Remaining, and to Song Time
Remaining. When the unit is in Play Mode, the time mode will change as
well as the visual graph relating to the position of the playing track. When
the unit is in Stop Mode, the LCD display will instead show ‘Elapsed,’ ‘T.
Remain,’ or ‘S. Remain,’ depending on your time selection. If you have
saved the M
ASTER CUE POINT on a CD Audio (not MP3) track, you can
<6>
FLAN
GER
ECHO
FILTER
+
FLAN
GER
ECHO
FILTER
+
ON / OFF
FLAN
GER
ECHO
FILTER
ON / OFF
FLAN
GER
ECHO
FILTER
1
2
FLAN
GER
ECHO
FILTER
3
FLANGER
ECHO
FILTER
FLAN
GER
ECHO
FILTER
ON / OFF
FLAN
GER
ECHO
FILTER
ON / OFF
FLAN
GER
ECHO
FILTER
+
FLAN
GER
ECHO
FILTER
+
FI
FLAN
GER
ECHO
FILTER
MIX
CD T T
>
4%
8%
OFF
50%
16%
+
PITCH BEN D
KEY
EFX
FI
LTETER
EC HO
FLANGEGER
CUE
HO T STAR T
<<
<<
SINGL E
MOTOR
ON / OFF
<< TR AC K SKIP >>
MEMORY
CUE
1
2
3
TIME
RECALL CUE
SEARC H
Page 7
recall it by holding the TIME MODE/RECALL CUE (25) down for 3
seconds,until the LCD display shows the word ‘LOAD’ along with the
time of the MASTER CUE POINT. Then press the MASTER CUE BUTTON (17) to
assign the recalled Cue Point.
17. R
EVERSE SWITCH (26): During playback, flipping the
reverse switch will play the audio program backwards from
the current time displayed. In CD Mode, the R
EVERSE
SWITCH (26) will affect CD playback. In TT Mode, the
REVERSE SWITCH (26) affects the playback of Vinyl only. In Mix Mode, the
REVERSE SWITCH (26) again affects the playback of Vinyl only, even if there
is a CD playing simultaneously.
18. I
NSTANT
REVERSE MODES
(27): There are 3 Reverse Modes
found on the CDT-05, which can apply to different performance
scenarios. Here is a brief explanation of each mode, and an
example of how it may be applied:
N
OT E
NGAGED - When the I
NSTANT
REVERSE MODES
(27) LED is completely
unlit, and the switch is flipped to ‘REV,’ the platter will turn counterclockwise, and the music program will play backwards. When the switch is
flipped to ‘FWD,’ the platter will turn clockwise, and the music will
resume playing forwards from the time point at which the switch was
flipped back to ‘FWD.’ This is effectively the same exact implementation
of the Reverse feature on a vinyl turntable.
I
NSTANT REVERSE MODE #1 - This mode is engaged by pressing the INSTANT
REVERSE MODES (27) button momentarily, which will solidly illuminate the
INSTANT REVERSE MODES (27) LED. When the switch is flipped to ‘REV,’ the
platter will turn counterclockwise, and the music program will play backwards, but you will not hear the sound of the motor slowing down as the
platter in order to turn in the opposite direction. When the switch is
flipped to ‘FWD,’ the platter will turn clockwise, and the music will
resume playing, without slowdown effect, forwards from the time that
would read on the display had you never engaged the Reverse feature to
begin with. This allows you to reverse at any time, even while beatmixing
with another device, as the music will stay completely in time and the
musical structure will never be altered. This is very useful for DJs that play
electronic music and rely on beatmatching for a large part of their performance.
I
NSTANT REVERSE MODE #2 - This mode is engaged by pressing and hold-
ing the I
NSTANT REVERSE MODES
(27) button for 2 seconds, which will flash
the INSTANT REVERSE MODES (27) LED. When the switch is flipped to ‘REV,’
the platter will turn counterclockwise, and the music program will play
backwards, but you will not hear the sound of the motor slowing down as
the platter in order to turn in the opposite direction. When the switch is
flipped to ‘FWD,’ the platter will turn clockwise, and the music will
resume playing, without slowdown effect, forwards from the time point at
which the switch was flipped back to ‘FWD.’
19. S
TOP/EJECT BUTTON (41): During CD playback, this button
stops the audio and disengages the laser from reading the disc.
Once the unit has stopped, pressing the S
TOP/EJECT BUTTON
(41) will eject the disc from the CD transport.
20. P
LATTER SPEED CONTROL (42): This button allows to you
to change the speed of the platter to 33, 45, or 78rpm.
Although this is the same concept as a conventional
turntable, the functionality has been extended to control a
few different areas of the unit:
C
HANGING DEFAULT CD CONTROL SPEED: Since some DJs are accustomed to
spinning records at one platter speed, the default “normal” speed can be
altered to provide the feel necessary according to preference. This can be
done while the unit is in Stop Mode (not in Pause mode) by pressing the
P
LATTER
SPEED CONTROL
(42) momentarily to toggle between 33 and
45rpm (78rpm is not supported for CD control). If the unit is in Play
Mode, press the S
TOP
/EJECT BUTTON
(41) once before changing the setting.
THE P
LATTER SPEED LED INDICATORS
(43) will reflect what speed has been
selected.
C
HANGING
PLAYBACK SPEED
: If you wish to change the actual playback speed
of a CD during playback, simply press the PLATTER
SPEED CONTROL
(42)
momentarily while in Play or Pause Modeto toggle between 33 and 45rpm
(78rpm is not supported for CD playback). You will hear an audible change
in the tempo and key of the music, as you are effectively playing the recording at a speed much slower or faster than it was intended.
C
HANGING
PLAYBACK SPEED FOR VINYL
: If you wish to change the actual play-
back speed of a Vinyl record during playback, simply press the P
LATTER
SPEED CONTROL (42) momentarily, while in Mix or TT Mode, to toggle
between 33 and 45rpm. 78rpm is engaged by holding down the PLATTER
SPEED CONTROL (42) for 3 seconds.
21. L
OOP SECTION (28), (29), (30): Using the
L
OOP SECTION
allows you to seamlessly repeat a
segment of audio from the CD section. The
L
OOP IN A (28) sets the starting point of the seg-
ment. The L
OOP OUT B/EDIT (29) sets the end point of the segment. RELOOP
(30) restarts the loop from the beginning once it has been engaged. Loop
points can be set on the fly during playback or can be set in Pause Mode.
To end looping, when it is engaged, press the L
OOP OUT B/E
DIT
(29) button.
To edit the loop points, press the LOOP OUT B/EDIT (29) button, find the
point you wish you replace, then press either The LOOP IN A (28) or LOOP
OUT B/EDIT (29) to set the point you wish you replace. For step-by-step
information on the Loop functions of the CDT-05, see the section entitled
‘Setting Cue Points and Loops’.
SETTING CUE POINTS AND LOOPS:
1. SETTING THE MASTER CUE POINT:
a. During the playback of a CD, find the point at which you want to set the
M
ASTER CUE POINT.
b. Pause the playback by pressing the P
LAY/PAUSE BUTTON (16). The platter
will stop.
c. Using the S
CRATCH CONTROL VINYL PLATE (3), make any necessary adjust-
ments to the MASTER CUE POINT. Using the SCRATCH CONTROL VINYL PLATE (3)
to make adjustments is limited to CD Mode.
d. To memorize the M
ASTER CUE POINT, press the PLAY/PAUSE BUTTON (16)
again. The platter will start again, and the music will resume playback.
e. To advance to the M
ASTER CUE POINT, press the MASTER CUE BUTTON (17).
You may now press the P
LAY/PAUSE BUTTON (16) to begin playback from the
set M
ASTER CUE POINT
f. To preview the MASTER CUE POINT, first press the MASTER CUE BUTTON (17)
to advance to the MASTER CUE P
OINT, then press and hold down the M
ASTER
CUE BUTTON (17) for as long as needed to preview. When the MASTER CUE
BUTTON (17) is released, the unit will advance back to the MASTER
CUE
POINT.
g. To advance and begin playing from the set M
ASTER CUE POINT without
interruption, press the HOT
START CUE FUNCTION
(18) button.
h. To permanently save the M
ASTER
CUE POINT
to the memory of the CDT-
05 (for CD Audio discs only, not MP3 discs), hold the MEMO
BUTTON
(23)
down for 3 seconds. When the MASTER CUE POINT has been saved to memory, the bottom line of the LCD D
ISPLAY (1) will read ‘SAVE’ along with the
track number and time of the MASTER CUE POINT. Whenever you load an
Audio CD that you have stored MASTER CUE POINT information for, the bottom left portion of the LCD D
ISPLAY (1) will flash the word ‘CUE.’
i. To recall the M
ASTER CUE POINT that has been saved, hold down the TIME
MODE/RECALL
CUE
(25) button for 3 seconds, until the bottom line of the
LCD D
ISPLAY
(1) reads ‘LOAD’ along with the track number and time of the
MASTER CUE POINT. Press the MASTER CUE BUTTON (17) to confirm the
assignment of the saved cue point to the MASTER CUE. Now you are free to
use the loaded M
ASTER CUE POINT as normal.
j. When the track is advanced using the T
RACK SKIP & DSP PARAMETER (22)
knob, the M
ASTER CUE POINT
will be cleared from temporary memory. You
may choose to set a new MASTER CUE POINT or use the RECALL CUE function
to load a saved point.
2. SETTING HOT CUE POINTS:
a. During the playback of a CD, find the point at which you want to set a
H
OT CUE P
OINT. If you want to set a H
OT CUE P
OINT
on the fly, proceed to
step B. Otherwise, while in CD Mode only, you may pause the playback by
pressing the P
LAY/P
AUSE BUTTON
(16), and adjust the position by using the
SCRATCH CONTROL VINYL PLATE (3), then proceed to step B.
b. To memorize a H
OT CUE POINT, first press the MEMO BUTTON (23)
momentarily, until the light inside of the button becomes illuminated.
c. At the point of which you wish to set the H
OT CUE POINT, press the
desired HOT STARTABLE CUE POINT (24) button which corresponds to the
bank of which you wish the point to be saved.
d. Repeat the process for up to a total of 3 H
OT STARTABLE CUE POINTS.
e. To advance to a saved H
OT STARTABLE CUE POINT, simply press the desired
HOT STARTABLE CUE POINT (24) button which corresponds to the bank of
which you wish to play. The unit will advance to this point (and the corresponding track from which the point was set) without interruption, regardless of which track is currently playing.
f. To reset a H
OT STARTABLE CUE POINT, simply repeat the process and over-
write the HOT STARTABLE CUE POINT (24) which corresponds to the bank of
which you wish to overwrite.
<7>
FLAN
GER
ECHO
FILTER
FLANGER
ECHO
FILTER
FLANGER
ECHO
FILTER
FWD
REV
INSTANT REV
45
78
33
SEAMLESS LOOP
AB/LOOP
RELOO P
Page 8
3. SETTING A SEAMLESS LOOP:
a. During the playback of a CD, find the point at which you want to set the
beginning of the S
EAMLESS LOOP (LOOP IN A). If you want to set a SEAMLESS
L
OOP
on the fly, proceed to step B. Otherwise, while in CD Mode only, you
may pause the playback by pressing the PLAY/PAUSE
BUTTON
(16), and adjust
the L
OOP IN A position by using the SCRATCH CONTROL VINYL PLATE (3), then
proceed to step B.
b. At the point of which you wish to set the L
OOP IN A position, press the
LOOP IN A (28) button. This may be done while in either Play Mode or
Pause Mode.
c. At the point of which you wish to set the L
OOP
OUT B position, press the
L
OOP O
UT B/EDIT
(29) button. This may be done while in either Play Mode
or Pause Mode.
d. Once both the L
OOP
IN A and L
OOP
OUT B position have been set, the
loop will begin to play indefinitely, without any interruption. To restart the
loop from the beginning, or to stutter the loop, press the RELOOP (30) button.
e. To edit the L
OOP OUT B point, press the LOOP OUT B/EDIT (29) button.
The loop will disengage, and you will be free to replace the LOOP O
UT B
position, simply by pressing the L
OOP OUT B/EDIT (29) button again when
you have reached the at which you wish to set the L
OOP OUT B position.
f. To edit the L
OOP IN A point, simply press the LOOP IN A (28) button dur-
ing loop playback at the time you wish to set the new L
OOP IN
A point. Note
that you will only be able to move the L
OOP IN A point to a time already
within the loop that was originally set.
g. To exit the S
EAMLESS LOOP
and resume normal playback, press the L
OOP
OUT B/EDIT (29) button. If necessary, you can set a brand new SEAMLESS
LOOP (return to step A), or restart the previously playing loop by pressing
the R
ELOOP (30) button.
SPECIFICATIONS
TURNTABLE SECTION:
Type................................................................Direct Drive Manual Turntable
Drive Method...........................Super High Torque (3.6 kgf/cm) Direct Drive
Motor..............................................................................................DC Motor
Speed................................................................................33 1/3, 45, 78 RPM
Variable Pitch.............+/- 4, 8, 16, 50% Slider with Range Selection Buttons
Wow and Flutter.......................................................Less than 0.25% WRMS*
*This rating refers to the turntable and platter assembly only and
excludes the effects of records, cartridges, or tonearms.
TONEARM SECTION:
Type......................................................Statically Balanced Straight Tonearm
Headshell Weight....................................................................................5.6 g
COMPACT DISC SECTION:
Quantization...........................................1 Bit Linear/Channel, 3 Beam Laser
Oversampling Rate.............................................................................8 Times
Sampling Frequency.........................................................................44.1 kHz
Frequency Response.............................................................20 Hz to 20 kHz
Total Harmonic Distortion....................................................Less Than 0.05%
Signal to Noise Ratio.............................................................................86 dB
Dynamic Range......................................................................................90 dB
Digital Output......................................................................IEC958 (S/PDIF)
Channel Separation..................................................................86 dB (1 KHz)
Output Level....................................................................2.0 +/- 0.2V R.M.S.
Power Supply.............................................................AC 115/230V, 60/50 Hz
Time Display...........................Track Elapsed, Song Remain, or Total Remain
Instant Start....................................................................Within 0.03 Seconds
Variable Pitch.............+/- 4, 8, 16, 50% Slider with Range Selection Buttons
WEIGHTS AND DIMENSIONS:
Dimensions: 17.75 x 14.65 x 6.3” (450 x 372 x 160.5 mm)
Unit Weight: 20.2 lbs (9.1 kg)
Specifications and design are subject to change without notice for purpose
of improvement.
*The stated warranty does not affect statutory local warranties
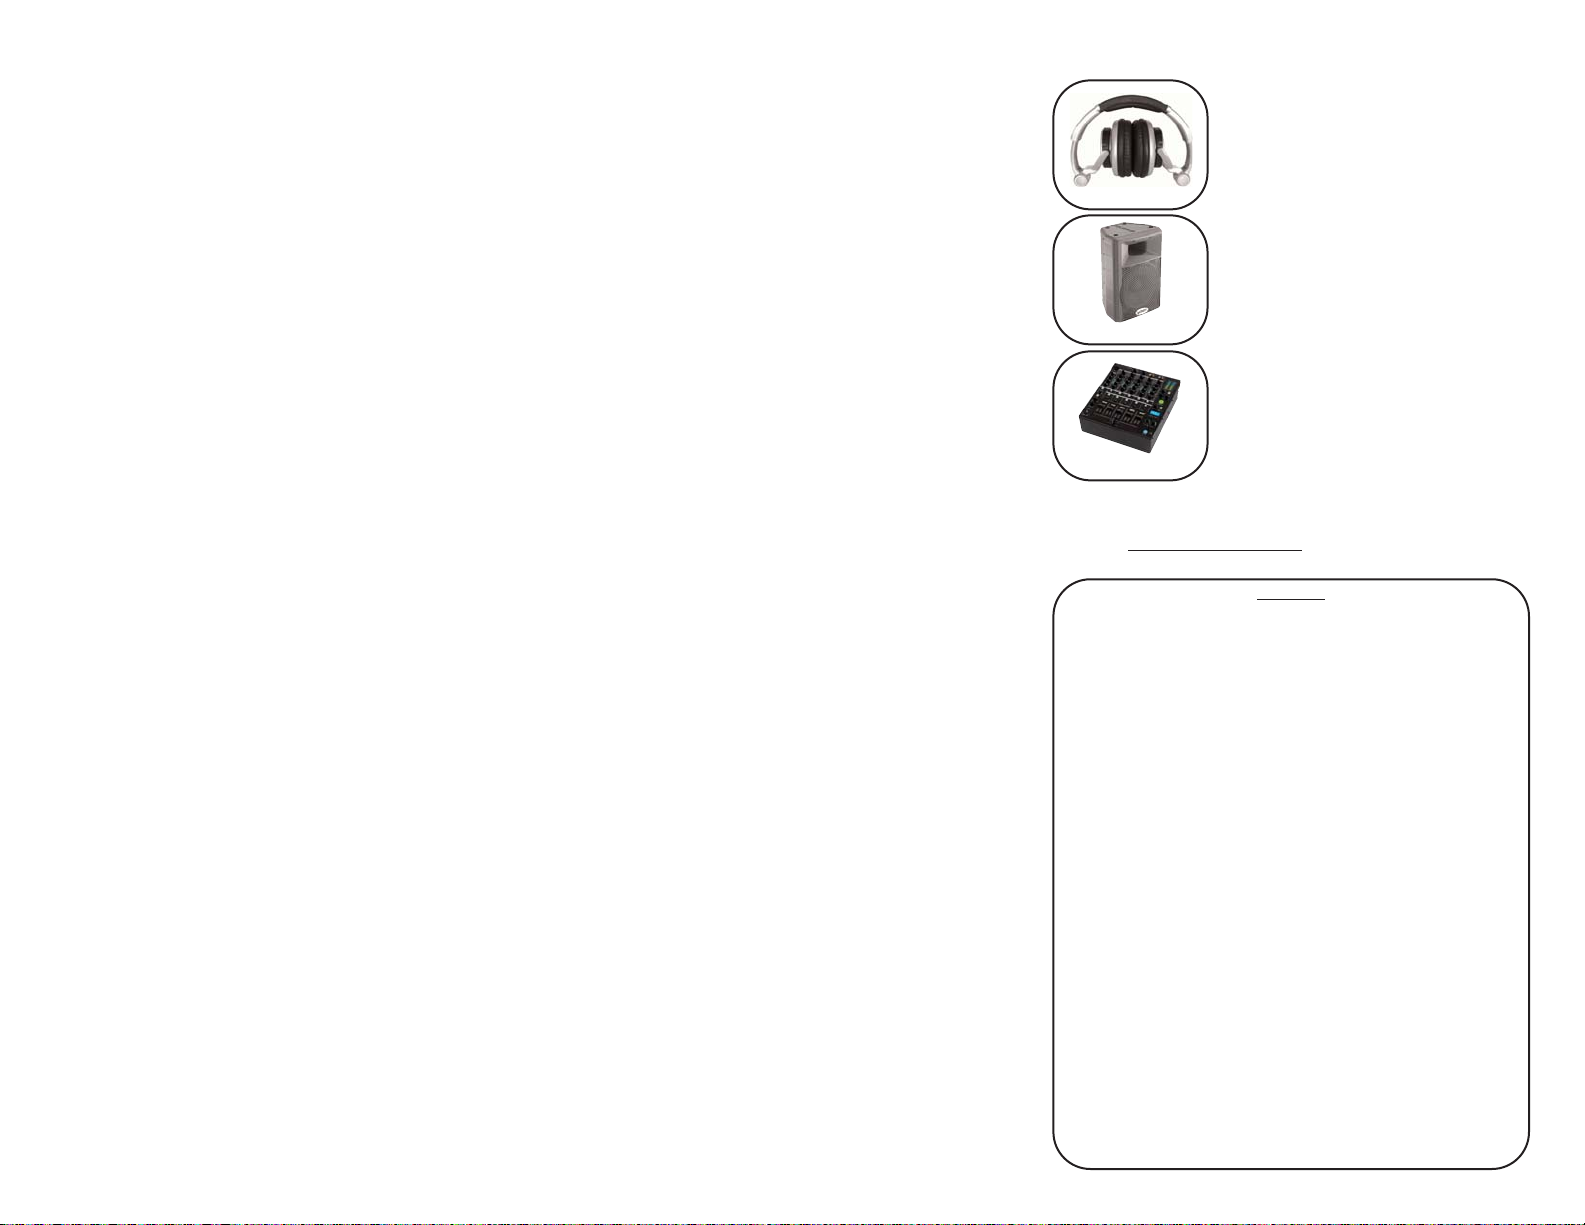
OPTIONAL ACCESSORIES:
DJX-05 Professional Monitoring Headphones
GX-450 Powered ABS Loudspeakers
CS-02 Professional 5-Channel Stereo Mixer
For more information on new and exciting Gemini products, visit our
website at http://www
.geminidj.com!
DJX-05
GX-450
CS-02
NOTES:
____________________________________________________
____________________________________________________
____________________________________________________
____________________________________________________
____________________________________________________
____________________________________________________
____________________________________________________
____________________________________________________
____________________________________________________
____________________________________________________
____________________________________________________
____________________________________________________
____________________________________________________
____________________________________________________
____________________________________________________
____________________________________________________
____________________________________________________
____________________________________________________
____________________________________________________
<8>
Page 9

VORSICHT: Dieses Produkt erfüllt die FCC-Regeln, wenn Sie zum
Anschluss abgeschirmte Kabel und Stecker verwenden, um es mit anderen
Geräten zu verbinden. Auch um elektromagnetische Störungen anderer
elektrischer Geräte wie Radios oder Fernseher zu vermeiden, benutzen Sie
abgeschirmte Kabel und Stecker für die Verbindungen.
Das Ausrufezeichen im gleichseitigen Dreieck weißt Sie in der
Bedienungsanleitung auf wichtige Bedienungsanweisungen und Wartungs/Serviceanweisungen hin.
Das Blitzsymbol im gleichseitigen Dreieck dient dazu, den Benutzer vor
gefährlichen Spannungen an nicht isolierten Stellen im Gehäuse zu warnen, die so groß sind, dass Sie eine Gefahr für den Benutzer darstellen.
ANWEISUNGEN LESEN: Lesen Sie alle Sicherheits- und
Bedienungsanweisungen, bevor Sie mit dem Produkt arbeiten.
AUFBEWAHRUNGSHINWEIS: Bewahren Sie alle Sicherheits- und
Bedienungsanweisungen gut auf.
WARNHINWEISE: Alle Warnhinweise für das Produkt und die
Bedienungsanweisungen müssen genau eingehalten werden.
ANWEISUNGEN BEFOLGEN: Alle Anweisungen zum Betrieb des Produkts
sollten befolgt werden.
REINIGUNG: Das Produkt sollte nur mit einem Polier- oder einem
weichen trockenen Tuch gereinigt werden. Benutzen Sie dazu niemals
Möbelwachs, Benzine, Insektenmittel oder andere flüchtige
Reinigungsmittel, denn Sie könnten zur Korrosion des Gehäuses führen.
ERWEITERUNGEN: Benutzen Sie keine Erweiterungen, die nicht vom
Hersteller empfohlen sind, da sie zu Risiken führen könnten.
WASSER&FEUCHTIGKEIT: Benutzen Sie dieses Produkt nicht in der Nähe
von Wasser, z. B. in der Nähe einer Badewanne, einer Waschschüssel, eines
Küchenspülbeckens eines Waschbeckens, in einem feuchten Keller, einem
Schwimmbecken oder an ähnlichen Orten.
ZUBEHÖR: Stellen Sie das Produkt nicht auf eine wackelige und labile
Unterlage. Das Produkt könnte herunterfallen und dabei Kinder oder
Erwachsene verletzen, wie auch selber beschädigt werden. Stellen Sie das
Produkt nur auf vom Hersteller empfohlene oder verkaufte Unterlagen.
Jede Befestigung und Montage des Produkts sollte nach den Anweisungen
des Herstellers ausgeführt werden. Nutzen Sie dazu ein vom Hersteller
empfohlenes Montageset.
MOBILE UNTERLAGEN: Bewegen Sie eine Kombination aus dem Produkt
und einer mobilen Unterlage mit Vorsicht. Schnelles Anhalten, zu viel
Schub oder unebene Böden können dazu führen, dass sich Produkt und
mobile Unterlage überschlagen (S
IEHE BILD A).
BELÜFTUNG: Schlitze und Öffnungen im Gehäuse sind für die Belüftung
vorgesehen. Sie stellen den zuverlässigen Betrieb des Produkts sicher und
schützen es vor Überhitzung. Diese Öffnungen dürfen nicht verschlossen,
blockiert oder bedeckt werden. Stellen Sie deswegen das Produkt niemals
auf ein Bett, ein Sofa, einen Teppich oder Stellen mit ähnlicher Oberfläche.
Wenn Sie dieses Produkt in einer festen Installation wie z. B. in einem Regal
oder einem Rack einbauen, sorgen Sie für ausreichende Belüftung oder
sorgen Sie dafür, dass die Bestimmungen des Herstellers genau eingehalten werden.
STROMANSCHLUSS: Dieses Produkt darf nur mit dem auf dem Gerät
angegebenen Strom betrieben werden. Wenn Sie sich nicht sicher sind,
welche Stromart Sie bei sich zuhause haben, fragen Sie den Verkäufer des
Geräts oder Ihren Stromversorger.
AUFSTELLUNGSORT: Stellen Sie das Gerät an einem festen Ort auf.
ZEITEN DES NICHTGEBRAUCHS: Ziehen Sie das Stromkabel aus dem
Gerät heraus, wenn Sie es für eine längere Zeit nicht gebrauchen.
ERDUNG ODER POLUNG:
- Wenn dieses Produkt mit einem gepolten Wechselstromstecker (Ein
Stecker mit einem Kontakt mehr als andere Stecker) ausgestattet ist, passt
dieser nur in einer bestimmten Richtung in die Steckdose und ist ein
besonderes Sicherheitsmerkmal. Sollten Sie den Stecker nicht komplett in
die Steckdose stecken können, versuchen Sie ihn andersherum einzustecken. Sollte der Stecker auch dann noch nicht in die Steckdose passen, beauftragen Sie einen Elektriker, um diese veraltete Steckdose auszutauschen.
- Wenn dieses Produkt mit einem geerdeten dreipoligen Stecker ausgestattet ist, hat der Stecker einen dritten (Erdungs-)Kontakt und passt nur in
eine Steckdose mit entsprechender Erdung. Auch das ist ein
Sicherheitsmerkmal. Sollte der Stecker nicht in die Steckdose passen,
beauftragen Sie einen Elektriker, um diese veraltete Steckdose auszutauschen.
SCHUTZ DES STROMKABELS: Stromkabel sollten so verlegt werden, dass
man nicht auf sie treten kann noch dass sie von darauf stehenden oder
gegen sie stoßenden Gegenständen gequetscht werden. Achten Sie besonders auf Kanten, Sicherung, Stecker und Buchsen.
AUSSENANTENNENERDUNG: Wenn Sie eine Außenantenne oder ein
Radio-/Fernsehkabelsignal an das Produkt anschließen, achten Sie darauf,
dass die Antenne oder das Kabel geerdet sind, um dafür zu sorgen, dass
Überspannungen und elektrostatische Aufladungen nicht auftreten können. Im Artikel 810 des National Electrical Code, ANSI/NFPA 70, finden Sie
Informationen über die richtige Erdung des Antennenmasts und weitere
Informationen zu diesem Thema. (S
IEHE AUCH ABBILDUNG B).
GEWITTER: Trennen Sie das Produkt während eines Gewitters oder wenn
es unbeaufsichtigt ist oder wenn es für eine lange Zeit nicht benutzt wird
durch Ziehen des Stromkabels vom Stromnetz. Trennen Sie auch die
Verbindung zu einer Antenne oder Radio-/Fernsehkabeln. Dadurch vermeiden Sie Beschädigungen des Produkts durch Blitze oder Überspannungen.
STROM- UND ÜBERLANDLEITUNGEN: Stellen Sie eine Außenantenne
nicht in der Nähe von Überlandleitungen, elektrischen Licht- oder
Stromkreisen oder an Stellen, wo sie in eine solche Leitung fallen könnte
auf. Wenn Sie eine Außenantenne aufstellen, achten Sie besonders darauf,
dass Sie auf keinen Fall irgendwelche Stromleitungen berührt. Das kann zu
gefährlichen Auswirkungen führen.
ÜBERLASTUNG: Überlasten Sie keine Steckdosen, Verlängerungskabel
oder Sicherungen. Das kann zu Bränden oder elektrischen Schlägen
führen.
EINDRINGEN VON GEGENSTÄNDEN ODER FLÜSSIGKEIT: Führen Sie
niemals irgendwelche Gegenstände durch Öffnungen in das Produkt ein.
Sie könnten mit Strom führenden Stellen in Verbindung kommen oder
Kurzschlüsse verursachen, die zu Bränden oder elektrischen Schlägen
führen können. Gießen Sie niemals irgendwelche Flüssigkeiten auf oder in
das Produkt.
SERVICE: Versuchen Sie nicht, das Produkt selber zu reparieren. Durch
das Öffnen des Gehäuses oder Entfernen von Schrauben können Sie mit
gefährlichen Spannungen oder anderen Risiken in Kontakt kommen.
Beauftragen Sie im Reparaturfall nur qualifiziertes Servicepersonal.
WANN SERVICE NÖTIG IST: Unter den folgenden Bedingungen ziehen
Sie auf jeden Fall das Stromkabel aus der Steckdose und beauftragen Sie
für eine Reparatur nur qualifiziertes Servicepersonal:
- Wenn das Stromkabel defekt ist.
- Wenn Flüssigkeit auf oder in das Produkt gelaufen ist oder Gegenstände
in das Produkt gefallen sind.
- Wenn das Produkt Regen oder Wasser ausgesetzt war.
- Wenn das Produkt trotz Befolgen der Bedienungsanweisungen nicht
normal arbeitet. Stellen Sie dabei das Produkt nur nach den Anweisungen
der Bedienungsanleitung ein, andere Einstellungen können das Produkt
beschädigen und den aufwändigen Einsatz von Technikern für die
Wiederherstellung erfordern.
- Wenn das Produkt hingefallen oder auf andere Art und Weise beschädigt
ist.
- Wenn das Produkt eine eindeutige Veränderung im Betrieb zeigt.
ERSATZTEILE: Wenn Ihr Produkt Ersatzteile benötigt, achten Sie darauf,
dass der Servicetechniker nur vom Hersteller erlaubte Ersatzteile oder
Ersatzteile, die die gleichen Eigenschaften wie die originalen Teile
aufweisen, einsetzt. Falsche Ersatzteile können zu Bränden, elektrischen
Schlägen oder anderen Risiken führen.
SICHERHEITSTEST: Bevor der Service oder eine Reparatur für dieses
Produkt beendet sind, beauftragen Sie den Servicetechniker, einen
Servicetest durchzuführen, um sicher zu stellen, dass das Produkt einwandfrei funktioniert.
WAND- ODER DECKENMONTAGE: Das Produkt sollte nicht an einer
Wand oder der Decke montiert werden.
HITZE: Stellen Sie das Produkt nicht in die Nähe von Wärmequellen wie
Radiatoren, Wärmespeichern, Öfen oder anderen Produkten (auch
Verstärker), die Hitze erzeugen.
VERWERTEN SIE WIEDER: Dieses Produkt sollte nicht als Haushaltsmüll
entsorgt werden. Entsorgen Sie das Produkt im Bedarfsfall bei einer
zuständigen Entsorgungsstelle, die das Recycling der elektrischen und
elektronischen Bauteile übernimmt. Wenn Sie das Produkt dem gemäß
entsorgen, schützen Sie die Umwelt und die menschliche Gesundheit. Bei
nicht sachgemäßer Entsorgung gefährden Sie die Umwelt und die menschliche Gesundheit. Das Recycling verschiedener Materialien hilft, die
Natur und Ihre Ressourcen zu schonen. Für nähere Informationen
bezüglich der Entsorgung dieses Produkts nehmen Sie Kontakt auf mit
Ihrer lokalen Stadtverwaltung, dem zuständigen Entsorgungsunternehmen
oder dem Händler, bei dem Sie das Produkt gekauft haben.
<9>
ACHTUNG!
BITTE UNBEDINGT VOR BENUTZUNG DES GERÄTS LESEN!
WICHTIGE HINWEISE UND SICHERHEITSANWEISUNGEN
GEFAHR EINES ELEKTRISCHEN SCHLAGS. GERÄT NICHT ÖFFNEN!
Page 10

<10>
Lieferumfang:
CDT-05
Headshell
Tonarmgewicht
Plattenteller
Scratch-Control Vinyl Platte
Slipmat
Netzkabel
Cinch-Line-Kabel
Phono-Kabel mit Erdungsgabel
Relay-Start-Kabel
Fader-Start-Kabel
Bedienungsanleitung mit Garantieinformationen
4 x niedrige Gummifüße
4 x runde Standardfüße
1. LCD-Anzeige
2. Plattenteller
3. Scratch-Control-Vinyl-Platte
4. Scratch-Anker mit Markierung
5. Tonarm
6. Abnehmbare Tonarmplatte
7. Headshell
8. Tonarmgewicht
9. Pitch-Fader
10. Pitch-Bend-Tasten
11. Pitch-Range-Wahltasten
12. Key-Lock-Funktion
13. Echo DSP-Effekt
14. Filter DSP-Effekt
15. Flanger DSP-Effekt
16. Play-/Pause-Taste
17. Master-Cue-Taste
18. Hot-Start/Cue-Funktion
19. Titelsuch-Tasten
20. Single-/Continuous-Modus
21. Motor Ein/Aus
22. Track-Skip & DSP-Parameter
23. Memo-Taste
24. Cue-Punkte mit Hot-Start
25. Zeitmodus/Recall Cue
26. Reverse-Schalter
27. Instant-Reverse-Modi
28. Loop in A
29. Loop out B/Edit
30. Reloop
ON / OFF
GE
FI
1
2
3
10
11
12
13
14
15
16
17
18
19
20
21
25
26
27
28
29
30
22
23
24
5
7
6
8
9
4
MEMORY
CUE
1
2
3
<< TR AC K SKIP >>
SEAMLESS LOOP
A B/ LOOP
FWD
INSTANT REV
REV
TIME
RECALL CUE
MOTOR
ON / OFF
SINGL E
RELOO P
EFX
EC HO
FI
LTETER
FLANGE
R
KEY
4%
8%
OFF
50%
16%
>
<<
<<
SEARC H
CUE
HO T STAR T
Pro Hybrid TurntableCDT-05
+
PITCH BEN D
Page 11

<11>
Rückseite
Vorderseite
Rear Panel:
31. Netzbuchse
32. Spannungswahlschalter
33. Ein-/Aus-Schalter
35. Relay-Start-Klinkenbuchse
36. Digital-Ausgang
37. CD-Cinch-Audioausgänge
38. Plattenspieler-Cinch-Audioausgänge
Front Panel:
40. CD-Einzugsschacht/Slot-in
41. Stop-/Eject-Taste
42. Plattentellergeschwindigkeitstaste
43. Plattentellergeschwindigkeits-LED-Anzeige
44. Betriebsartenwahlschalter
Other:
45. Niedrige oder Standardfüße
31
32
33
40
41
42
43
44
45 45
34
36
38
37
35
PHONO OU T
CD OUT
DIGITAL
OUT
RELA Y
MIX
CD TT
FADER
Pro Hybr id Turntabl eCDT-05
OFF
ON
45
78
33
Page 12

<12>
CDT-05 PROFESSIONELLER HYBRID PLATTENSPIELER
EINLEITUNG:
Wir gratulieren Ihnen zum Kauf des Gemini CDT-05 Professionellem
Hybrid Plattenspieler. Der CDT-05 stellt die neueste Errungenschaft in
Sachen DJ-Technologie dar und kombiniert die Kontrollmöglichkeiten
eines komplett funktionierenden High-Torque-Plattenspielers mit der
Vielseitigkeit und Einfachheit eines CD-Players. Zusätzlich ist der CDT-05 in
der Lage, Vinyl-Platten und CDs gleichzeitig wiederzugeben und schafft so
unbegrenzte Performance-Möglichkeiten. Bei richtiger Behandlung wird
der CDT-05 über Jahre zuverlässig und sicher arbeiten.
AUSSTATTUNG:
- Spielt Audio-CDs, CD-Rs, CD-RWs und MP3s
- Abnehmbares gerades Tonarmsystem, das nahezu nie springt
- Direkt getriebener High-Torque-Plattenteller (3.6 kg/ cm) zur kompletten
Steuerung des integrierten CD-Players
- Unabhängige Audioausgänge für Plattenspieler und CD-Player
- Betriebsartenschalter mit drei Positionen erlaubt auch das gleichzeitige
Abspielen einer CD und einer Vinyl-Platte
- Drei DSP-Effekte mit einstellbaren Parametern: Filter, Echo und Phase
- Reverse-Schalter für Rückwärtslauf
- Motor mit Ein/Aus-Schalter
- Drei Hot-Start-Cue-Punkte mit einfach zu bedienendem Memory-Taster
- Master-Cue mit Hot-Start-Funktion
- Key-Lock (Master Tempo)
- Anti-Shock-Funktion mit RAM-Speicher
- CD-Player mit Slot-in-Einzugsschacht und LED-Beleuchtung
- Single-Auto-Cue- und Continuous-Play-Modus
- Seamless Loop mit Reloop, Stutter und Loop-Editierung
- Pitch-Bend mit dem Plattenteller oder Pitch-Bend-Tasten
- Drei wählbare Zeitanzeigemodi
- Frame-genaue Suche und Cue
- Große vierzeilige Hintergrund beleuchtete Matrix-Anzeige
- Sehr robuster Aluminium-Plattenteller mit Fingermulden
- Einstellbare Geschwindigkeit: 4 %, 8 %, 16 % und 50 %
- Soft-Touch-Tasten mit hellen LEDs
VORSICHTSMASSNAHMEN:
1. Vor Anwendung dieses Geräts bitte alle Anweisungen sorgfältig durchle-
sen.
2. Das Gerät nicht öffnen, um das Risiko eines elektrischen Schocks zu ver-
meiden. Es enthält KEINE VOM ANWENDER ERSETZBAREN TEILE. Die
Wartung darf nur von befähigten Wartungstechnikern durchgeführt werden.
3. Das Gerät keinem direkten Sonnenlicht oder einer Wärmequelle wie
einem Heizkörper oder einem Ofen aussetzen. Achten Sie während des
Betriebs auf ausreichende Belüftung des Geräts
4. Dieses Gerät darf nur mit einem feuchten Tuch gesäubert werden. Keine
Lösungs-oder Reinigungsmittel benutzen.
5. Bei Umzügen sollte das Gerät in seinem ursprünglichen Versandkarton
und Verpackungsmaterial verpackt werden. Dadurch verhindert man, dass
das Gerät während des Transportes beschädigt wird.
6. DIESES GERÄT NICHT REGEN ODER FEUCHTIGKEIT AUSSETZEN.
7. AN DEN REGLERN ODER SCHALTERN KEIN SPRAYREINI-
GUNGSMITTEL ODER SCHMIERMITTEL BENUTZEN.
CDT-05 SCHNELLSTART-ANLEITUNG:
1. Bereiten Sie das Gerät wie unter Anschlüsse / Setup und Tonarm-Setup
vor. Lesen Sie vor Inbetriebnahme alle Hinweise und Warnungen.
2. Um eine CD wiederzugeben, führen Sie diese in den CD-Einzugsschacht
rechts auf der Vorderseite ein und stellen Sie den
B
ETRIEBSARTENWAHLSCHALTER (44) auf ‘CD.’ Achten Sie darauf, dass die
MOTOR E
IN/AUS-TASTE
(21) leuchtet und drücken Sie die PLAY
-/PAUSE-TASTE
(16). Mit der SCRATCH
-CONTROL-V
INYL-PLATTE
(3) können Sie die CD nun
wie mit einem Plattenspieler steuern. Zusätzlich stehen Ihnen auch CuePunkte, digitale Effekte, Pitch, Reverse, etc. zur Verfügung. Für genaue
Informationen über die Arbeitsweise der einzelnen Funktionen lesen Sie
bitte die entsprechenden Abschnitte in der Anleitung.
3. Um eine Schallplatte wiederzugeben, legen Sie, bevor Sie eine
Schallplatte auflegen, die Slipmat für Plattenwiedergabe so auf die S
CRATCH-
C
ONTROL-V
INYL-PLATTE
(3), dass sie bündig mit dem S
CRATCH
ANKER
(4) ist
und stellen Sie den B
ETRIEBSARTENWAHLSCHALTER (44) auf ‘TT.’ Achten Sie
darauf, dass die M
OTOR EIN/A
US-TASTE
(21) leuchtet und drücken Sie die
PLAY-/PAUSE-TASTE (16) um die Wiedergabe zu starten. Auch wenn das auf
den ersten Blick unkonventionell wirkt, ist es dennoch fehlerlos und Sie
werden nach kurzer Eingewöhnung das gleiche Gefühl und Performance
wie bei jedem Top-of-the-line-Plattenspieler haben. Um die einzigartige
Klangqualität der Schallplatte zu bewahren, wird das Audiosignal des
Plattenspielers nicht durch die DSP-Effekt-Sektion geleitet.
4. Wenn Sie CD und Schallplatte gleichzeitig wiedergeben wollen, stellen
Sie den B
ETRIEBSARTENWAHLSCHALTER (44) auf ‘MIX.’Im Mix-Modus steuert
die SCRATCH-CONTROL-VINYL-PLATTE (3) nicht die CD, damit Sie bspw. zu
einem von CD laufenden Beat mit der Schallplatte scratchen können. Mit
der MOTOR-EIN-/AUS-TASTE (21) starten Sie den Plattenteller zur
Schallplattenwiedergabe und mit der P
LAY-/PAUSE-TASTE (16) die CD. Mit
den unabhängigen rückseitigen Audioausgängen können Sie Plattenspieler
und CD an separate Kanäle Ihres Mixers anschließen. Der PITCH-CONTROL-
F
ADER (9) steuert im Mix-Modus den Pitch des Plattenspielers, die PITCH-
BEND-TASTEN (10) den Pitch der CD. Da viele Funktionen für die verschiede-
nen Betriebsmodi genutzt werden, lesen Sie die einzelnen Abschnitte zu
diesen Funktionen, um einen genauen Eindruck zu bekommen, wie diese
arbeiten.
5. Lesen Sie die komplette Bedienungsanleitung! Jeder (sogar der
Autor dieser Anleitung) möchte gerne sofort mit dem CDT-05 loslegen, was
wir bei einem so aufregenden und innovativem Produkt gut verstehen kön-
nen. Da der CDT-05 jedoch so einzigartig ist, gibt es viele neue Funktionen,
die diese Anleitung aus der Sicht eines DJs beleuchtet und erklärt. Sie werden Funktionen kennenlernen, von deren Existenz Sie bisher nichts
wussten. Auch wenn Sie sich gleich in das Gerät vertiefen und damit arbeiten wollen, lassen Sie die Anleitung in Griffweite, falls Sie ins Stocken kommen und weitere Erklärungen benötigen.
ANSCHLÜSSE/ SETUP:
1. E
IN
-/AUS-SCHALTER: Mit dem EIN-/AUS-SCHALTER
(33) schalten
Sie das Gerät ein oder aus. Der Schalter muss sich in der ‘O
FF’-
Position befinden, bevor Sie das Gerät verkabeln.
2. N
ETZBUCHSE: In die rückseitige NETZBUCHSE (31) wird das
mitgelieferte Netzkabel eingesteckt, um das Gerät mit Strom
zu versorgen.
3. S
PANNUNGSWAHLSCHALTER: Mit dem
S
PANNUNGSWAHLSCHALTER (32) wählen Sie, ob der CDT-05
mit 115 oder 230 Volt arbeiten soll. Überprüfen Sie vor
Inbetriebnahme, ob der Schalter auf der richtigen Position für Ihr
Stromnetz steht.
4. CD-C
INCH-AUDIOAUSGÄNGE
(37): An diesen Ausgängen liegt das
Audiosignal des CD-Players im CDT-05 an. Verbinden Sie diese mit
einem Line-Eingang Ihres Audiomixers.
5. P
LATTENSPIELER
-C
NCH-AUDIOAUSGÄNGE
(38): An diesen
Ausgängen liegt das Audiosignal des Plattenspielers im CDT-05
an. Verbinden Sie diese mit einem Phono-Eingang Ihres
Audiomixers.
6. E
RDUNGSKLEMME: Der CDT-05 hat keine Erdungsklemme, da der
Plattenspieler im CDT-05 Geräte intern geerdet wird und somit kein
Erdungskabel benötigt. Sollten Sie ein Brummen bemerken, stellen Sie
sicher, dass der CDT-05 an den gleichen Stromkreis angeschlossen ist, wie
ihr restliches Audio-Equipment.
7. D
IGITAL-AUSGANG (36): An diesem Ausgang liegt das Signal des
CD-Players im S/P-DIF-Format an, das sich für die weitere
Bearbeitung in einem Digitalmixer oder einem externen D/A-
Wandler eignet. Die Verwendung dieses speziellen Ausgangs
erfordert eventuell spezielle Geräte, die sich nicht in IHrem Setup befinden.
8. R
ELAY
-START-KLINKENBUCHSE
(35): Über diese Buchse können Sie
zwei CDT-05 miteinander verbinden. Hört die Wiedergabe des
einen CDT-05 auf, beginnt der andere automatisch mit der
Wiedergabe. Im Einzelbetrieb bleibt diese Buchse unverkabelt.
9. N
IEDRIGE ODER STANDARDFÜSSE(45): Sie können die Füße des
CDT-05 tauschen, um ihn so auf die gewünschte Höhe zu
OFF
ON
DIGI TAL
OUT
RE LAY
Page 13

bringen. Bei Verwendung der niedrigen Füße schließt der CDT-05 mit der
Oberseite der meisten Mixer ab, mit den Standardfüßen steht er etwas
höher, dafür werden für den Plattenspieler störende Vibrationen aber besser absorbiert.
TONARM-SETUP:
1. Setzen Sie die H
EADSHELL (7) oder ein integriertes System in den
Tonarm ein durch Drehen der Verschlussschraube im
Uhrzeigersinn. Achten Sie darauf, die Verschlussschraube nicht zu
fest zuzuschrauben. Für ein System mit Headshell-Montage lesen
Sie die Anweisungen des Herstellers.
2. Stecken Sie das T
ONARMGEWICHT (8) mit der nach vorne zeigen-
den Nummernskala hinten auf den Tonarm, indem Sie es im
Uhrzeigersinn drehen.
3. Stellen Sie das T
ONARMGEWICHT (8) so ein, dass der
Tonarm frei schwebt, wenn er sich über dem Plattenteller
befindet. Das System sollte weder auf der Platte aufsetzen,
noch in der Luft hängen. Das ist der N
ULLPUNKT, an dem
kein Gewicht auf dem System lastet.
4. Stellen Sie nur die Nummernskale auf ‘0’, damit Sie sehen, dass der
Tonarm ausbalanciert und im N
ULLPUNKT
ist.
5. Drehen Sie das komplette T
ONARMGEWICHT (8) so
lange im Uhrzeigersinn, bis das benötigte Gewicht (in
Gramm) auf der Nummernskala angezeigt wird. Das
richtige Gewicht entnehmen Sie der Anleitung des
Systems.
6. Um die Tonarmhöhe einzustellen, benötigen Sie
einen Kreuzschraubendreher, um die T
ONARM-PLATTE (6) oben rechts auf
dem Gerät zu entfernen. Entfernen Sie die 3 Schrauben. Nachdem die
TONARM-PLATTE (6) entfernt ist, können Sie jedes der drei gefederten
Höhenmodule auf die benötigte (je nach Vorgabe des Systemherstellers)
Höhe einstellen. Alle Höhenmodule sollten auf die selbe Höhe justiert werden um sicherzustellen, dass die Nadel im richtigen Winkel und mit der
richtigen Position auf der Platte aufliegt.
FUNKTIONEN:
1. LCD A
NZEIGE: Auf der LCD ANZEIGE (1) werden
alle Parameter einer Funktion des Geräts optisch
dargestellt. Dazu gehören Titelnamen (bei
entsprechenden MP3-Daten), Pitch-Werte, Betriebsmodi,
Transportfunktionen, Zeit, Beats-pro-minute und eine Balkengrafik, die die
jeweilige Spielposition des Titels anzeigt.
2. B
ETRIEBSARTENWAHLSCHALTER (44): Dieser Schalter hat die
drei Positionen CD, TT und MIX. Im CD-Modus können
Sie das Audiosignal komplett mit der SCRATCH-CONTROL-
V
INYL-PLATTE
(3) steuern, im TT-Modus Schallplatten
wiedergeben und im MIX-Modus eine CD und eine Schallplatte gleichzeitig wiedergeben und die CD eingeschränkt steuern.
3. S
CRATCH-CONTROL-VINYL-PLATTE (3) und SCRATCH-
ANCHOR (4): Zusammen mit dem Plattenteller kön-
nen Sie mit diesen Beiden die CD- und
Schallplattenwiedergabe in Echtzeit steuern. Überprüfen Sie, dass der S
CRATCH ANKER (4) FEST IN DER
SCRATCH
-CONTROL-VINYL-PLATTE
(3) sitzt.
4. P
ITCH-FADER (9): Mit dem Pitch-Fader und den PITCH-RANGE-
WAHLTASTEN (11) können Sie die Geschwindigkeit der Musik verän-
dern. Je größer der Prozentwert ist, den Sie mit den PITCH
-RANGE-
W
AHLTASTEN (11) auswählen, desto dramatischer fällt die Wirkung aus.
Niedrigere Prozentwerte sind weniger dramatisch, erlauben aber
präzisere Einstellmöglichkeiten.
5. P
ITCH-BEND-TASTEN (10): Mit diesen Tasten können Sie
kurzzeitige Änderungen des Musiktempos vornehmen. Sie sind
hauptsächlich für feine Veränderung beim Beatmixing gedacht.
Im M
IX-MODUS dienen die PITCH-BEND-TASTEN (10) als Pitch-
Control für den CD-Player im CDT-05.
6. K
EY-LOCK-FUNKTION (12): Mit dieser Funktion, die es nur
im CD-Bereich gibt, können Sie das Tempo der Musik
ändern, ohne dass sich die Tonhöhe ändert. Sie arbeitet im
Zusammenspiel mit dem P
ITCH-FADER
(9). Bei höheren Prozentwerten kann
es bei Verwendung von Key Lock je nach Musikstück zu Flanging oder
Artefakten kommen.
7. DSP-E
FFEKTE (13, 14, 15): Mit der DSP-
E
FFEKTSEKTION (13, 14, 15) können Sie die
Audiosignale der CD-Sektion im CDT-05 mit Echos, Flanger und Filter
verändern. Durch Drücken des gewünschten Effekttaste wird dieser Effekt
aktiviert. Mit dem T
RACK-SKIP
/DSP-PARAMETER-REGLER
(22) justieren Sie die
gewünschten Parameter. Halten Sie den Knopf für 1 Sekunde gedrückt,
wechselt der CDT-05 in den Dry/Wet-Modus, sodass Sie den Effektanteil am
Gesamtsignal regeln können. Ist kein Effekt aktiviert, können Sie mit dem
T
RACK-S
KIP/DSP-PARAMETER-REGLER
(22) durch die Titel einer CD navigieren.
8. P
LAY-/PAUSE-TASTE
(16): Während diese Taste im CD oder
TT.Modus die Wiedergabe startet oder stoppt, ist sie im MixModus nur für die CD-Wiedergabe und die M
OTOR EIN/AUS-
T
ASTE (21)für die Schallplattenwiedergabe zuständig.
9. M
ASTER-CUE-TASTE (17): Im CD-Modus springt der CDT-05
nach Drücken der MASTER-CUE-TASTE (17) an den gesetzten
Cue-Punkt zurück und geht in den Pause-Modus, bis die
P
LAY-TASTE (16) gedrückt wird. Mit gedrückter und gehaltener
MASTER-CUE- TASTE (17) können Sie den Cue-Punkt vorhören. Für eine
Schritt-für-Schritt-Anleitung der Cue-Funktion schauen Sie unter
“Definieren von Cue-Punkten und Loops”.
10. H
OT START/CUE-FUNKTION (18): Dank dieser Funktion
können Sie von einem definierten Cue-Punkt ohne
Unterbrechung de Wiedergabe sofort starten.
11. T
ITELSUCH-TASTEN (19): Durch Drücken dieser
Tasten werden die Titel einer CD so lange durch-
laufen, bis Sie die Taste wieder loslassen.
12. S
INGLE/CONTINUOUS-MODUS-TASTE (20): Mit dieser Taste
bestimmen Sie das Verhalten des CDT-05 am Ende eines
Titels. Im Single-Auto-Cue-Modus zeigt die LCD-Anzeige das Wort “Single”
an und springt automatisch auf den ersten Frame am Anfang des Titels. Ist
der Titel zu Ende gespielt, springt der CDT-05 automatisch zum ersten
Frame des nächsten Titels und stoppt. Im Continuous-Modus zeigt die
LCD-Anzeige das Wort “Continue” und die komplette CD wird ohne
Unterbrechung immer wiedergegeben, bis Sie den CD-Player stoppen.
Wird in der LCD-Anzeige weder “Single” noch “Continue” angezeigt, werden ebenfalls alle Titel der CD ohne Unterbrechung wiedergegeben, nach
dem letzten Titel stoppt jedoch die Wiedergabe.
13. M
OTOR EIN
/AUS
(21): Mit dieser Taste starten oder stop-
pen Sie den Plattenteller. Im TT oder CD-Modus muss der
CDT-05 dazu imPlay-Modus sein. Im Mix-Modus steuert die
Taste die Schallplattenwiedergabe und die PLAY-TASTE (16) die CD-
Wiedergabe.
14. T
RACK-SKIP & DSP-PARAMETER-REGLER (23): Während
der CD-Wiedergabe können Sie mit diesem Regler die
Titelnummern der CD durchlaufen. Bei heruntergedrücktem Regler werden die Titel je nach Drehrichtung in 10er-
Schritten durchlaufen. Sobald ein DSP-Effekt aktiviert ist, können Sie mit
dem T
RACK-SKIP & DSP-PARAMETER-REGLER (23) die jeweiligen Parameter
des Effekts justieren. Halten Sie den Regler für 1 Sekunde gedrückt,
ändert sich die Darstellung in der LCD-Anzeige und Sie können mit dem
Regler nun den Effektanteil am Gesamtsignal regeln. Sie werden mit
einigem Experimentieren schnell herausfinden, welche Einstellungen sich
für Ihre Musk am Besten eignet.
15. M
EMO-TASTE (23) und CUE-PUNKTE MIT HOT START (24):
Dank dieser Funktion können Sie 3 Punkte definieren, an
die Sie ohne Unterbrechung springen können. Die MEMO-
T
ASTE (23) erlaubt es Ihnen, Cue-Punkte “on the fly” zu set-
zen, indem Sie zuerst die M
EMO-TASTE
(23) drücken und
dann den gewünschten CUE-PUNKT MIT HOT START (24). Mit
der M
EMO-TASTE
(23) können Sie den M
ASTER-CUE-PUNKT
, so
er definiert ist, für CD-Audio-Titel abspeichern (nicht für
MP3-CDs verfügbar). Um den M
ASTER
-CUE-PUNKT
zu speichern, halten Sie
die MEMO-TASTE (23) für 3 Sekunden gedrückt. Für eine Schritt-für-Schritt-
Anleitung der Cue-Funktion schauen Sie unter “Definieren von CuePunkten und Loops”.
16. Z
EITMODUS/RECALL-CUE-TASTE (25): Befinden Sie sich im CD-
oder Mix-Modus, ändert sich die Zeitdarstellung bei jedem
Drücken von T
ITEL-SPIELZEIT über VERBLEIBENDE TITEL-SPIELZEIT
hin zu VERBLEIBENDE GESAMTSPIELZEIT. Im Play-Modus ändert sich die
Zeitanzeige beim Drücken genauso, wie die grafische Titelpositionsanzeige. Im Stop-Modus zeigt die LCD-Anzeige “Elapsed”, “T. Remain”
oder “S. Remain” an, abhängig von der gewählten Zeitdarstellungsart.
Haben Sie den M
ASTER-CUE-PUNKT einer Audio-CD abgespeichert (keine
MP3-CD), können Sie diesen durch Drücken der Z
EITMODUS/RECALL-CUE-
<13>
FLAN
GER
ECHO
FILTER
+
FLAN
GER
ECHO
FILTER
+
ON / OFF
FLAN
GER
ECHO
FILTER
ON / OFF
FLAN
GER
ECHO
FILTER
1
2
FLAN
GER
ECHO
FILTER
3
FLANGER
ECHO
FILTER
FLAN
GER
ECHO
FILTER
ON / OFF
FLAN
GER
ECHO
FILTER
ON / OFF
FLAN
GER
ECHO
FILTER
+
FLAN
GER
ECHO
FILTER
+
FI
FLAN
GER
ECHO
FILTER
MIX
CD T T
>
4%
8%
OFF
50%
16%
+
PITCH BEN D
KEY
EFX
FI
LTETER
EC HO
FLANGEGER
CUE
HO T STAR T
<<
<<
SEARC H
SINGL E
ON / OFF
MOTOR
<< TR AC K SKIP >>
MEMORY
CUE
1
2
3
TIME
RECALL CUE
Page 14

TASTE (25) für 3 Sekunden wieder aufrufen, bis die LCD-Anzeige das Wort
“LOAD” zusammen mit der Zeit des M
ASTER-CUE-PUNKTS anzeigt. Drücken
Sie nun die M
ASTER-CUE-TASTE (17), um den wiederaufgerufenen Cue-
Punkt zuzuweisen.
17. R
EVERSE-SCHALTER (26): Wenn Sie während der
Wiedergabe den Reverse-Schalter betätigen, wird die Musik
von diesem Punkt rückwärts abgespielt. Im CD-Modus
beeinflusst der R
EVERSE-SCHALTER (26) nur die CD-
Wiedergabe, im TT-Modus nur die Schallplattenwiedergabe. Im MixModus wird ebenfalls nur die Schallplattenwiedergabe beeinflusst, auch
wenn gleichzeitig eine CD wiedergegeben wird.
18. I
NSTANT
-REVERSE-MODI
(27): Der CDT-05 verfügt über drei
Reverse-Modi, die verschiedene Performance-Möglichkeiten
bieten. Sie finden hier eine kurze Erklärung der einzelnen Modi
und ein Beispiel, wie Sie sie einsetzen könnten:
N
ICHT AKTIV
- Wenn die I
NSTANT
-REVERSE-MODI
-LED(27) nicht leuchtet und
Sie schalten auf “REV” dreht sich der Plattenteller gegen den
Uhrzeigersinn und die Musik wird rückwärts wiedergegeben. Schalten Sie
auf “FWD”, dreht sich der Plattenteller im UHrzeigersinn und die Musik
wird ab dem Zeitpunkt, an dem Sie auf “FWD” geschaltet haben wieder
normal wiedergegeben. Dies entspricht der Arbeitsweise, wie Sie es von
einem normalem Plattenspieler auch kennen.
I
NSTANT-REVERSE-MODUS #1 - Sie aktivieren diesen Modus, indem Sie die
INSTANT-REVERSE-MODI-TASTE (27) kurz drücken, sodass die INSTANT-
REVERSE-MODI-LED (27) dauerhaft leuchtet. Schalten Sie nun auf “REV”,
dreht sich der Plattenteller gegen den Uhrzeigersinn und die Musik wird
rückwärts wiedergegeben, jedoch hören Sie dabei nicht den Klang des
herunterbremsenden Motors. Schalten Sie auf “FWD”, dreht sich der
Plattenteller im Uhrzeigersinn und die Musik wird ohne diesen
“Slowdown Effekt” wieder normal abgespielt ab der im Display ablesbaren
Stelle an welcher Sie “REW” betätigt haben. Dadurch können Sie jederzeit Musik rückwärts abspielen, sogar während des Beatmixings mit
einem anderen Gerät, da die Musik immer im richtigen Timing bleibt und
die musikalische Struktur nicht geändert wird. Vor allem DJs, die viel elektronische Musik spielen und deren Performance zu einem großen Teil aus
Beatmatching besteht, werden diesen Modus sehr nützlich finden.
I
NSTANT REVERSE MODE #2 - Um diesen Modus zu aktivieren, halten Sie
die I
NSTANT-REVERSE-MODI-TASTE
(27) für 2 Sekunden gedrückt, sodass die
INSTANT-REVERSE-MODI-LED (27) an zu blinken fängt. Schalten Sie auf
“REV”, dreht sich der Plattenteller gegen den Uhrzeigersinn und die
Musik wird rückwärts abgespielt. Auch hier hören Sie kein Geräusch des
abbremsenden Motors. Schalten Sie auf “FWD”, dreht sich der Plattenteller im Uhrzeigersinn und die Musik spielt ohne “Slowdown Effekt” von
dem Punkt, an dem Sie auf “FWD” geschaltet haben. Dieser Modus eignet
sich für DJs, die das Geräusch des bremsenden Motors nicht in ihrer
Performance hören wollen.
19. S
TOP-/EJECT-TASTE (41): Durch Drücken dieser Taste
während der CD-Wiedergabe wird diese gestoppt und der
Laser unterbricht das Lesen der CD. Hat der CDT-05 gestoppt,
wird die CD bei erneutem Drücken der S
TOP-/EJECT-TASTE (41)
ausgeworfen.
20. P
LATTENTELLERGESCHWINDIGKEITSTASTE (42): Mit dieser
Taste ändern Sie die Geschwindigkeit des Plattentellers zwischen 33, 45 oder 78 RPM. Obwohl diese Funktion der bei
einem konventionellen Plattenspieler entspricht, wurde die
Funktionalität erweitert, um weitere Bereiche des CDT-05 zu steuern:
Ä
NDERN DER VORGEGEBENEN-CD STEUERUNGSGESCHWINDIGKEIT: Da einige DJs
daran gewöhnt sind, Schallplatten bei einer gewissen
Rotationsgeschwindigkeit des Plattentellers wiederzugeben, kann die
Standarddrehgeschwindigkeit des Plattentellers verstellt werden.
Sie können dies tun, indem Sie im Stop-Modus (nicht im Pause-Modus)
die P
LATTENTELLERGESCHWINDIGKEITSTASTE (42) kurz drücken, um zwischen
33 und 45 RPM (78 RPM wird für die CD-Steuerung nicht unterstützt).
Wenn der CDT-05 im Play-Modus ist, drücken Sie die STOP-/E
JECT-TASTE
(41) einmal, bevor Sie die Einstellung verändern. Die
PLATTENTELLER
GESCHWINDIGKEITS-LEDS
(43) zeigen an, welche
Geschwindigkeit ausgewählt wurde.
Ä
NDERN DER
WIEDERGABEGESCHWINDIGKEIT
: Wollen Sie die Geschwindigkeit
einer gerade laufenden CD ändern, drücken Sie einfach kurz die
PLATTENTELLERGESCHWINDIGKEITSTASTE (42), während Sie sich im Play- oder
Pause-Modus befinden, um zwischen 33 und 45 RPM umzuschalten (78
RPM wird für die CD-Steuerung nicht unterstützt). Sie werden eine
Änderung des Tempos und der Tonhöhe der Musik hören, da die CD
schneller oder langsamer als mit der originalen Geschwindigkeit abspielen.
Ä
NDERN DER WIEDERGABEGESCHWINDIGKEIT VON SCHALLPLATTEN: Wollen Sie die
Geschwindigkeit einer gerade laufenden Platten ändern, drücken Sie einfach kurz die P
LATTENTELLERGESCHWINDIGKEITSTASTE
(42), während Sie im
Mix- oder TT-Modus sind, um zwischen 33 und 45 RPM umzuschalten.
Halten Sie für 78 RPM die P
LATTENTELLERGESCHWINDIGKEITSTASTE
(42) für 3
Sekunden gedrückt.
21. L
OOP-SEKTION
(28), (29), (30): Mit der L
OOP-
S
EKTION können Sie einen Part der CD nahtlos
repeat wiederholen. L
OOP IN A (28) bestimmt
den Startpunkt des Parts, L
OOP OUT B/EDIT (29)
den Endpunkt. Mit RELOOP (30) starten Sie den Part von vorne, wenn er einmal definiert ist. Sie können Loop-Punkte während der Wiedergabe “on the
fly” oder im Pause-Modus bestimmen. Um ein definiertes Looping zu beenden, drücken Sie die L
OOP-OUT-B/EDIT-TASTE
(29). Wollen Sie die Loop-
Punkte editieren, drücken Sie die LOOP-OUT-B/EDIT-TASTE (29) und finden
Sie den Punkt, den Sie ersetzen möchten. Drücken Sie dann entweder L
OOP
IN
A (28) oder LOOP OUT B/EDIT (29), um den neuen Punkt zu setzen. Für
eine Schritt-für-Schritt-Anleitung der Cue-Funktion schauen Sie unter
“Definieren von Cue-Punkten und Loops”.
DEFINIEREN VON CUE-PUNKTEN UND LOOPS:
1. MASTER-CUE-PUNKT DEFINIEREN:
a. Während eine CD wiedergegeben wird, suchen Sie den Punkt, an dem
Sie den M
ASTER-CUE-PUNKT setzen möchten.
b. Halten Sie die Wiedergabe durch Drücken der P
LAY-/PAUSE-TASTE (16) an.
Der Plattenteller stoppt.
c. Benutzen Sie die S
CRATCH-CONTROL-VINYL-PLATTE (3), um die nötigen
Justierungen für den M
ASTER-CUE-PUNKT vorzunehmen. Sie können die
S
CRATCH-CONTROL-VINYL-PLATTE (3) nur im CD-Modus zur Justierung
nutzen.
d. Um den M
ASTER-CUE-PUNKT abzuspeichern, drücken Sie die PLAY-/PAUSE-
T
ASTE (16) erneut. Der Plattenteller startet und die Musik wird weiter abge-
spielt.
e. Um zum M
ASTER-C
UE-PUNKT
zu gelangen, drücken Sie die MASTER-C
UE-
T
ASTE (17). Wenn Sie jetzt die PLAY-/PAUSE-TASTE (16) drücken, beginnt die
Wiedergabe ab dem definierten M
ASTER-CUE-PUNKT.
f. Um den M
ASTER-CUE-PUNKT vorzuhören, drücken Sie zuerst die MASTER-
C
UE-TASTE (17), um zum MASTER-CUE-PUNKT zu gelangen. Halten Sie die
M
ASTER-C
UE-TASTE
(17) so lange gedrückt, wie Sie vorhören wollen. Lassen
Sie die M
ASTER-C
UE-TASTE
(17) wieder los, springt der CDT-05 zurück zum
M
ASTER-CUE-PUNKT.
g. Um zum definierten M
ASTER
-CUE-PUNKT
zu gelangen und dort die
Wiedergabe ohne Unterbrechung zu starten, drücken Sie die C
UE-PUNKT
MIT
HOT START-TASTE (18).
h. Um den M
ASTER-CUE-PUNKT dauerhaft im Speicher des CDT-05 abzuspe-
ichern (nur für Audio-CDs, nicht für MP3-CDs), halten Sie die M
EMO
-TASTE
(23) für 3 Sekunden gedrückt. Wenn der MASTER-CUE-PUNKT gespeichert
wurde, zeigt die LCD-A
NZEIGE (1) in der unteren Reihe “SAVE”’, die Titel-
Nummer und die Zeit des M
ASTER-CUE-PUNKTS. Immer, wenn Sie eine Cd
einlegen, für die Sie den M
ASTER-CUE-PUNKT
gespeichert haben, zeigt die
LCD-A
NZEIGE (1) in der unteren Reihe das Wort “CUE” an.
i. Um einen gespeicherten M
ASTER-CUE-PUNKT aufzurufen, halten Sie die
Z
EITMODUS/RECALL
-CUE-TASTE
(25) für 3 Sekunden gedrückt, bis in der
unteren Reihe der LCD-A
NZEIGE (1) “LOAD”, die Titel-Nummer und die
Zeit des M
ASTER-CUE-PUNKTS angezeigt werden. Drücken Sie die MASTER-
C
UE-TASTE
(17), um die Zuweisung des gespeicherten Cue-Punkts zum
M
ASTER CUE zu bestätigen. Jetzt können Sie den geladenen MASTER-CUE-
P
UNKT ganz normal einsetzen.
j. Wenn Sie einen anderen Titel mit dem T
RACK-SKIP & DSP-PARAMETER-
R
EGLER (22) ausgewählt haben, wird der MASTER
-CUE-PUNKT
aus dem tem-
porären Speicher gelöscht. Sie können nun einen neuen M
ASTER-CUE-
P
UNKT definieren oder mit der RECALL CUE-FUNKTION einen gespeicherten
Punkt laden.
2. HOT-CUE-PUNKTE DEFINIEREN:
a. Finden Sie während der Wiedergabe einer CD den Punkt, an dem Sie
einen H
OT-C
UE-PUNKT
setzen möchten. Möchten Sie einen H
OT-C
UE-PUNKT
“on the fly” definieren, gehen Sie zu Schritt b. Andernfalls halten Sie die
Wiedergabe durch Drücken der P
LAY-/PAUSE-TASTE (16)an (nur im CD-
Modus) und justieren Sie die Position mit der S
CRATCH-CONTROL-VINYL-
P
LATTE
(3). Danach fahren Sie mit Schritt b fort.
b. Um einen HOT-CUE-PUNKT
, betätigen Sie die M
EMO-TASTE
(23) kurz, so
dass die Taste Hintergrund beleuchtet wird.
c. An der Stelle, an welcher Sie den H
OT-CUE-PUNKT setzen möchten betäti-
gen Sie die C
UE-PUNKT MIT HOT START-TASTE (24) welche mit der
Speicherbank übereinstimmt, in welcher Sie speichern möchten.
d. Wiederholen Sie den Vorgang für bis zu drei C
UE-PUNKTE MIT HOT START.
e. Um zu einem gespeicherten C
UE-PUNKT MIT HOT START
zu gelangen,
drücken Sie einfach die gewünschte CUE-PUNKT MIT HOT START-TASTE (24),
die mit der Speicherbank, die Sie wiedergeben wollen, übereinstimmt. Der
CDT-05 geht ohne Unterbrechung zu diesem Punkt (und dem übereinstim-
<14>
FLAN
GER
ECHO
FILTER
FLANGER
ECHO
FILTER
FLANGER
ECHO
FILTER
FWD
REV
INSTANT REV
33
45
78
SEAMLESS LOOP
AB/LOOP
RELOO P
Page 15
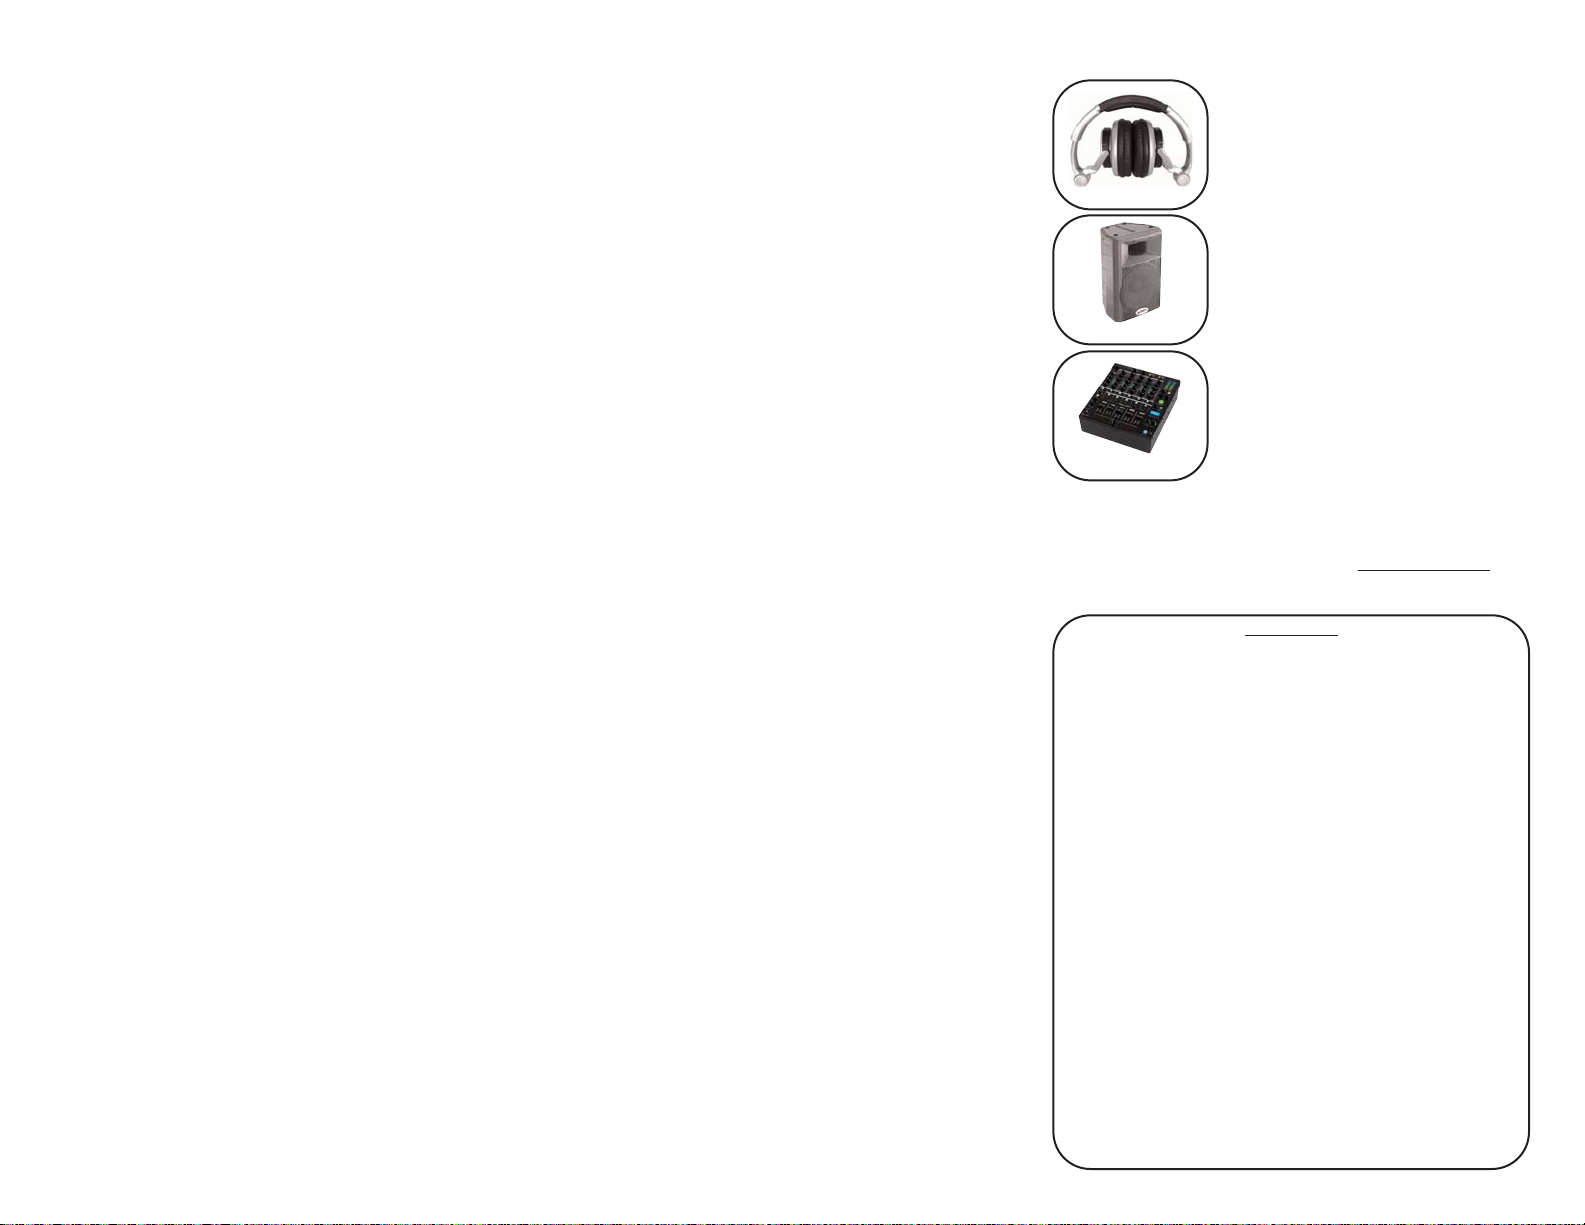
menden Titel, von dem aus der Punkt definiert wurde), ganz gleich, welcher Titel gerade wiedergegeben wird.
f. Um einen C
UE-PUNKT MIT HOT START zurückzusetzen, wiederholen Sie
einfach den Vorgang und überschreiben den CUE-PUNKT MIT HOT START
(24), der mit der Speicherbank übereinstimmt, in der Sie überschreiben
wollen.
3. SEAMLESS LOOP DEFINIEREN:
a. Während eine CD wiedergegeben wird, suchen Sie den Punkt, an dem
der S
EAMLESS LOOP(LOOP IN A) beginnen soll. Wollen Sie den SEAMLESS
LOOP sofort setzen, lesen unter Schritt b weiter. Andernfalls können Sie
(nur) im CD-Modus die Wiedergabe durch Drücken der PLAY/P
AUSE-TASTE
(16) anhalten und die LOOP IN
A-Position mit der S
CRATCH
-CONTROL-VINYL-
P
LATTE (3) verändern. Dann geht es zu Schritt b.
b. Haben Sie die gewünschte L
OOP IN A-Position gefunden, drücken Sie die
LOOP IN A-TASTE (28). Dies können Sie sowohl im Play-Modus als auch im
Pause-Modus tun.
c. Die L
OOP OUT B-Position setzen Sie, indem Sie im Play-oder Pause-
Modus an der gewünschten Stelle die LOOP OUT B/EDIT-TASTE(29) drücken.
d. Wenn Sie die L
OOP IN A- und LOOP OUT B-Position bestimmt haben, wird
der Loop unbegrenzt und ohne Unterbrechung wiedergegeben. Um den
Loop vom Anfang zu starten oder den Loop zu stuttern (Stottern), betätigen Sie die R
ELOOP-TASTE(30).
e. Um den L
OOP OUT
B-Punkt zu editieren, drücken Sie die L
OOP OUT
B/EDIT -TASTE (29). Der Loop wird unterbrochen und Sie können durch
Drücken der LOOP OUT B/EDIT-TASTE (29) die LOOP OUT B-Position an der
gewünschten Stellen setzen.
f. Um den L
OOP IN A-Punkt zu editieren, drücken Sie während der Loop
abgespielt wird einfach die L
OOP IN A-T
ASTE
(28) an der Stelle, an der Sie
den neuen LOOP IN A-Punkt setzen möchten. Sie können den neuen LOOP
IN A-Punkt nur innerhalb des ursprünglich gesetzten Loops setzen.
g. Um den S
EAMLESS LOOP
wieder zu verlassen und zur normalen
Wiedergabe zurückzukehren, drücken Sie die LOOP OUT B/EDIT-TASTE (29).
Falls nötig, können Sie einen ganz neuen SEAMLESS LOOP (Siehe Schritt a)
bestimmen oder durch Drücken der R
ELOOP-TASTE (30) den gerade gespiel-
ten Loop erneut abspielen.
TECHISCHE SPEZIFIKATIONEN
PLATTENSPIELER-SEKTION:
Typ.........................................direkt angetriebener manueller Plattenspieler
Antriebsart..............................Super-High-Torque (3.6 kg/cm) Direktantrieb
Motor.................................................................................Gleichstrommotor
Geschwindigkeit................................................................33 1/3, 45, 78 RPM
Einstellbarer Pitch..................................................+/- 4, 8, 16, 50 % Fader
mit Pitch-Bereichswahltasten
Gleichlaufschwankungen....................................weniger als 0,25 % WRMS*
*Die Daten beziehen sich auf den Plattenspieler und Plattenteller
und berücksichtigen nicht die Auswirkungen von Schallplatte,
Systemen oder dem Tonarm
TONARM-SEKTION:
Typ....................................................statisch ausgewogener gerader Tonarm
Headshell-Gewicht..................................................................................5,6 g
CD-SEKTION:
Quantisierung............................................1 Bit Linear/Kanal, 3 Strahl-Laser
Oversampling-Rate................................................................................8-fach
Sampling-Frequenz...........................................................................44,1 kHz
Frequenzgang......................................................................20 Hz bis 20 kHz
Klirrfaktor..........................................................................weniger als 0,05 %
Rauschspannungsabstand.................................................................86 dB
Dynamikumfang....................................................................................90 dB
Digitalausgang.....................................................................IEC958 (S/P-DIF)
Kanaltrennung.........................................................................86 dB (1 KHz)
Ausgangspegel.................................................................2,0 +/- 0,2 V R.M.S.
Spannungsversorgung...............................................AC 115/230 V, 60/50 Hz
Zeitanzeige.................................Titel-Spielzeit, verbleibende Titel-Spielzeit,
verbleibende Gesamtspielzeit
Instant-Start.....................................................innerhalb von 0,03 Sekunden
Einstellbarer Pitch.....................................+/- 4, 8, 16, 50 % Fader mit Pitch-
Bereichswahltasten
GEWICHT UND ABMESSUNGEN:
ABMESSUNGEN: 450 x 372 x 160,5 mm
Gewicht: 9,1 kg
Technische Daten und das Design können zwecks Verbesserung ohne
vorherige Ankündigung geändert werden.
*Die allgemeinen gesetzlichen Gewährleistungen bleiben von den
Herstellergarantien unberührt.
OPTIONALES ZUBEHÖR:
DJX-05 Professioneller DJ-Monitoring
Kopfhörer
GX-450 Aktive ABS-Kunststoff-Lautsprecher
CS-02 Professioneller 5-Kanal Stereo-Mixer
Mehr Informationen über neue und bestehende Gemini-Produkte
finden Sie auf der Gemini-Homepage unter www
.geminidj.com!
DJX-05
GX-450
CS-02
NOTIZEN:
____________________________________________________
____________________________________________________
____________________________________________________
____________________________________________________
____________________________________________________
____________________________________________________
____________________________________________________
____________________________________________________
____________________________________________________
____________________________________________________
____________________________________________________
____________________________________________________
____________________________________________________
____________________________________________________
____________________________________________________
____________________________________________________
____________________________________________________
____________________________________________________
<15>
Page 16

PRECAUCION: Este producto sigue las regulaciones FCC siempre que se
utilicen cables y conectores blindados para conectar este equipo a otras
unidades. Para prevenir interferencias electromagnéticas con otros
aparatos eléctricos como radios y televisiones, utilice siempre conectores y
cables con blindaje a masa.
El símbolo de exclamación en un triangulo equilátero alerta al usuario de
instrucciones importantes de operación y mantenimiento (servicio) en el
texto marcado.
El símbolo de luz flash con un rayo en un triangulo equilátero, alerta al
usuario de la presencia de "voltaje peligroso" no aislado en el producto
que puede ser de suficiente magnitud como para causar un shock eléctrico a personas.
LEA LAS INSTRUCCIONES: Todas las instrucciones de manejo y seguridad
deben ser leídas antes de poner en marcha el aparato.
GUARDE LAS INSTRUCCIONES: Las instrucciones deben guardarse para
futuras consultas.
OBVIAR LOS AVISOS: Todos los aviso en el propio producto y manual de
instrucciones deben ser tenidos en cuenta.
SEGUIR LAS INSTRUCCIONES: Todas las instrucciones deben ser estrictamente realizadas.
LIMPIEZA: El producto debe limpiarse solo con un trapo suave y seco.
Nunca utilice cera para muebles, gasolina, insecticidas u otro producto que
pueda corroer el chasis.
ACCESORIOS: No utilice accesorios no recomendados por el fabricante
para evitar posibles daños.
AGUA Y HUMEDAD: No use este producto cerca del agua, por ejemplo,
cerca de la ducha, el baño, la pica de la cocina, o del lavadero; en una
superficie húmeda; o cerca de una piscina o similar.
COLOCACION: No colocar este producto en mesas, soportes o brazos que
no sean totalmente estables. El producto podría caer y dañarse seriamente
o causar daños a personas. Utilice solo soportes recomendados por el fabricante, o vendidos con el producto. Al montar la unidad, siga las instrucciones del manual, y utilice los accesorios recomendados por el fabricante.
MOBILIDAD: El producto montado en soporte móvil, debe ser desplazado con cuidado. Frenazos, excesiva fuerza, y superficies deslizantes pueden
hacer volcar el conjunto entero. V
EA FIGURA A.
VENTILACION: Las ventanas y aberturas del chasis dan la ventilación nece-
saria para asegurar la correcta operativa y proteger la unidad de sobrecalentamientos, y estas aberturas no deben ser bloqueadas o tapadas en
ningún caso. Estas aberturas nunca deben bloquearse colocando el producto sobre un sofá, cama, alfombra u otra superficie similar. Este producto no debe instalarse en un sitio cerrado como una librería o rack que no
tengan la suficiente ventilación.
ALIMENTACION:Este producto debe operar solamente con fuentes de alimentación del tipo indicado en la etiqueta de voltaje. Si usted no tiene la
seguridad de la tensión que tiene en su casa, consulte a su distribuidor
local o compañía de electricidad.
COLOCACION: Este producto debe ser colocado en un sitio estable.
PERIODOS SIN USO: El cordón de alimentación debe ser desenchufado
de la corriente en caso de no uso durante un largo periodo.
MASA O POLARIZACION:
- Si este producto esta equipado con un cable de polarización alternativa
(un conector con una pata más ancha que la otra), solo se podrá conectar
en una posición. Esto es una característica de seguridad. Si usted no puede
introducir el conector, pruebe a invertir la posición. Si continua sin introducirse, contacte con un electricista para reemplazar la base. No deseche
la posibilidad de utilizar conectores de seguridad.
- Si el producto viene equipado con un conector de tres bornes, es decir
con toma de masa, solo encajara en una toma de corriente del mismo tipo.
Esto es para su seguridad. Si el conector no encaja en la toma, contacte con
un electricista para reemplazar la base. No deseche la posibilidad de utilizar conectores de seguridad.
PROTECCION DEL CABLE: Los cables de corriente deben colocarse de
forma que nadie pise o pinche los mismos, poniendo particular atención
en la unión con el conector, y en el punto donde se une a la unidad.
TOMA DE TIERRA DE ANTENA EXTERIOR: Si hay conectado a este producto un cable de antena o antena exterior, asegúrese de su correcta
conexión a tierra para proteger de posibles entradas de tensión y cargas de
electricidad estática. El Articulo 810 del Código Eléctrico Nacional,
ANSI/NFPA 70, da información de la correcta conexión de masa de los
soportes utilizados, del cable de conexión de descarga de la antena, medidas de los conductores de masa, colocación de las antenas, inserción de
electrodos de masa, y características de los electrodos. V
ER FIGURA B.
RAYOS: Para protección adicional de este producto durante una tormenta
eléctrica, o cuando este desatendido o sin utilización durante un largo
periodo de tiempo, desconecte de la toma de corriente y desconecte la
antena del sistema. Esto evitará cualquier problema debido a rayos y
subidas de tensión.
LINEA DE TENSION: Los sistemas de antena exterior nunca deben colo-
carse en la proximidad de líneas eléctricas de alta tensión o centrales de
transformación eléctrica, o donde puede ser afectado por este tipo de
líneas. Al instalar un sistema de este tipo, extreme la precaución de no
tocar ningún tipo de línea eléctrica ya que esto resultaría fatal.
SOBRECARGA: No sobrecargue las tomas de corriente, cables de alargo, o
ladrones de conexión ya que esto podría provocar fuego o shock eléctrico.
ENTRADA DE OBJECTOS & LIQUIDOS: Nunca introduzca objetos de
ningún tipo en las aberturas del producto ya que puedes provocar cortocircuitos o tocar con puntos de alto voltaje provocando fuego o shock eléctrico. Nunca tire líquidos en este tipo de productos.
SERVICIO TECNICO: No intente reparar la unidad usted mismo abriendo
o quitando las tapas ya que el producto funciona con niveles peligrosos de
tensión. Contacte con el servicio cualificado para cualquier reparación.
SOLICITUD DE REPARACION: Desconecte de la toma de corriente el producto y contacte con el servicio en caso de:
- Cuando la toma de corriente este dañada.
- Si se ha vertido líquido u objetos dentro de la unidad.
- Si el producto ha estado expuesto a lluvia o agua.
- Si el producto no funciona según las especificaciones del manual. Ajuste
tan solo los controles que le indique el manual ya que el modificar ajustes
internos puede dañar la unidad y eso requerirá mas trabajo del servicio
para reajustar la unidad a sus parámetros iniciales.
- Si el producto ha caído al suelo.
- Cuando el producto no actúa de forma normal.
RECAMBIOS: Cuando se necesiten recambios, asegúrese que los técnicos
han utilizado recambios originales especificados por el fabricante o tienen
las mismas características del recambio original. La substitución incorrecta
de piezas puede crear fuego, shock eléctrico, u otros daños.
COMPROBACIONES: Tras una reparación, solicite al servicio que testee la
unidad para comprobar su correcto funcionamiento.
INSTALACION EN TECHO O PARED: Los productos no deben ser instalados en techos ni paredes.
CALOR: El producto debe estar alejado de Fuentes de calor como radiadores, estufas, u otros productos (incluyendo amplificadores) que producen y emiten calor.
RECIRCULACIÓN: Este producto no debe tratarse del mismo modo que
los desechos domésticos. En su lugar, usted debe llevarlo al punto verde
de recogida más cercano para reciclaje de aparatos eléctricos y electrónicos. Asegurándose que este producto se desecha de forma apropiada,
usted esta ayudando a preservar posibles consecuencias negativas para la
salud humana que se producirían por incorrectas manipulaciones en caso
de utilizar otro método de desecho. El reciclaje de materiales ayudará a
conservar el entorno natural. Para información más detallada sobre el reciclaje de este producto, por favor contacte con su ayuntamiento local, el servicio local de basuras, o la tienda donde usted adquirió el producto.
PRECAUCION
POR FAVOR LEALO ANTES DE UTILIZAR LA UNIDAD,
INSTRUCCIONES IMPORTANTES DE AVISO & SEGURIDAD!
RIESGO DE SHOCK ELÉCTRICO NO ABRIR!
<16>
Page 17

<17>
Comprobación elementos:
CDT-05
Porta - Cápsula
Contrapeso
Plato
Vinilo de Control para Scratch
Patinador
Cable alimentación AC
Cable de línea RCA
Cable Phono con terminal de masa
Cable para arranque por rele
Cable para arranque por Fader
Manual con garantía
4 x pata goma bajo perfil
4 x pata redonda Standard
1. Display LCD
2. Plato
3. Vinilo de Control de Scratch
4. Centrador Scratch con marcador
5. Brazo
6. Base del brazo extraible
7. Porta - Cápsulas
8. Contrapeso
9. Pitch Control
10. Botones de Pitch Bend
11. Selección rango Pitch
12. Función Key Lock
13. Efecto DSP Echo
14. Efecto DSP Filter
15. Efecto DSP Flanger
16. Botón Play/Pausa
17. Botón Master Cue
18. Función Arranque instantaneo
19. Botón busqueda Pista
20. Modo Single/Continuous
21. Motor On/Off
22. Salto de pista y Parámetros DSP
23. Botón Memoria
24. Arranque rápido de puntos Cue
25. Modo Tiempo/Rellamada Cue
26. Interruptor Reverse
27. Modo Instantáneo de Reverse
28. Inicio Loop A
29. Salida Loop B/Edición
30. Reloop
ON / OFF
GE
FI
1
2
3
10
11
12
13
14
15
16
17
18
19
20
21
25
26
27
28
29
30
22
23
24
5
7
6
8
9
4
MEMORY
CUE
1
2
3
<< TR AC K SKIP >>
SEAMLESS LOOP
A B/ LOOP
FWD
INSTANT REV
REV
TIME
RECALL CUE
MOTOR
ON / OFF
SINGL E
RELOO P
EFX
EC HO
FI
LTETER
FLANGE
R
KEY
4%
8%
OFF
50%
16%
>
<<
<<
SEARC H
CUE
HO T STAR T
Pro Hybrid TurntableCDT-05
+
PITCH BEN D
Page 18

<18>
Detras
Delante
Panel Trasero:
31. Entrada alimentación AC
32. Interruptor Selector de Voltaje
33. Interruptor On/Off
35. Jack Relay Start
36. Salida Digital
37. Salida RCA de Audio CD
38. Salida RCA de Phono
Panel Frontal:
40. Mecanismo de carga CD Slot-Loading
41. Botón Stop/Eject
42. Control velocidad Plato
43. LED indicador velocidad plato
44. Interruptor Modo Operación
Otros:
45. Patas de bajo perfil o estandar
31
32
33
40
41
42
43
44
45 45
34
36
38
37
35
PHONO OU T
CD OUT
DIGITAL
OUT
RELA Y
MIX
CD TT
FADER
Pro Hybr id Turntabl eCDT-05
OFF
ON
45
78
33
Page 19

<19>
CDT-05 GIRADISCOS HIBRIDO PROFESIONAL
INTRODUCCIÓN:
Felicidades ha adquirido el giradiscos hibrido profesional Gemini CDT-
05. El CDT-05 es el último avance en tecnología DJ, combinando el control
completamente funcional del giradiscos high torque con la comodidad y
versatílidad del Compact Disc. En suma, el CDT-05 tiene la capacidad de
poder reproducir a la vez discos de vinilo y Compact Discs simultáneamente, para un sin fín de posibilidades de trabajo. Con el correcto mantenimiento, el CDT-05 le proporcionará años de solido trabajo y confianza.
CARACTERÍSTICAS:
- Compatible Audio CD, CD-R, CD-RW, y MP3
- Sistema de brazo recto removible, virtualemente antisaltos
- El plato de tracción directa High torque (3.6 kg/cm) proporciona el control total de la reproducción del CD
- Secciones independientes de salidas de audio para tocadiscos y CD
- Interruptor de 3 posiciones modo CD/TT que permite simultáneamente
reproducir a la vez ambos CD y vinilo
- 3 efectos DSP: Filter, Echo, y Phase con parámetros variables
- Interruptor Reverse
- Interruptor Motor ON/OFF
- 3 puntos cue de arranque rápido con botón de memoria de fácil uso
- Master cue con arranque rápido
- Key Lock (Master Tempo)
- Protección Anti-Shock usando memoria RAM buffer
- Mecanismo Slot Loading con iluminación de LED
- Modos reproducción Single auto-cue/continuous
- Seamless looping con reloop/stutter y edición de loop
- Pitch bend via plato o botones
- Tres modos de selección de tiempo
- Búsqueda de pista precisa y cue
- Gran display matricial iluminado de 4 líneas
- Plato de aluminio grueso con alojamiento para dedos
- Pitch control variable con rangos de 4%, 8% , 16%, y 50%
- Botones toque suave con LEDs brillantes
PRECAUCIONES:
1. Antes de usar este equipo lease todas las instrucciones de uso.
2. No habrá la unidad peligro de shock eléctrico. NO HAY PIEZAS REEM-
PLAZABLES EN SU INTERIOR. Por favor acuda al servicio técnico cualificado de Gemini Sound Products. En USA: Si usted tiene problemas con
esta unidad, por favor llame 1 (732) 738-9003 para el servicio al cliente de
Gemini. No intente devolver su equipo a su proveedor.
3. No exponga la unidad directamente a la luz del sol u otras fuentes de
calor como radiadores o estufas. Cuando este en funcionamiento, asegurese que la unidad tenga la adecuada ventilación.
4. Esta unidad solo se puede limpiar con un trapo húmedo. No utilizar ni
disolventes ni otros detergentes de limpieza.
5. Cuando traslade el equipo, debe utilizar el embalaje original. Esto
reducirá el riesgo de daños durante el traslado.
6. NO EXPONGA ESTA UNIDAD A LA LLUVIA O ROCIO.
7. NO UTILICE NINGÚN SPRAY LIMPIADOR O LUBRICANTE EN
NINGÚN CONTROL O INTERRUPTOR.
INSTRUCCIONES ARRANQUE CDT-05:
1. Coloque la unidad conforme la sección de Conexiones/Colocación y
Colocación de brazo. Asegurese primero de revisar los avisos y precauciones.
2. Para reproducir un CD, insertar primero un disco dentro de la bandeja
del reproductor de CD en la parte frontal a mano derecha de la unidad, y
el Interruptor de Modo O
PERACIÓN
(44) hacia ‘CD.’ Asegurate que el botón
de MOTOR
ON/OFF
(21) esté encendido, y presiona el BOTÓN
PLAY/PAUSA
(16)para empezar la reproducción. Tú podrás tener acceso completo para
poder manipular la música via V
INILO DE CONTROL DE
SCRATCH
(3), del
mismo modo que un giradiscos. Dispondrá además para aplicar efectos
digitales a la unidad del CD, incluyendo puntos de cue, efectos DSP, pitch,
reverse, etc. Para instrucciones detalladas de como aplicar estas carac-
terísticas de reproducción del CD , mire en la sección de Funciones.
3. Para reproducir un disco de Vinilo, colóquelo encima del patinador para
reproducir vinilo y encima del V
INILO DE CONTROL DE SCRATCH (3), de esta
manera acoplará con el Anclaje de S
CRATCH
(4), y coloque un disco de vini-
lo estandar encima, y el Interruptor de Modo O
PERACIÓN (44) en ‘TT.’
Asegurate que el botón de M
OTOR ON/O
FF
(21) este encendido, y presiona
el BOTÓN PLAY/PAUSA (16) antes de la reproducción. Podría parecer poco
convencional a primera vista, pero una vez lo pruebe, podrá ver que su
funcionamiento es impecable y tendrá la sensación que la interpretación
de su giradiscos es de la gama más alta. En cuanto a preservar los vinilos,
es único en sus cualidades musicales, ya que el audio del giradisco no se
envia a través de la sección de efectos DSP.
4. Para la reproducción de ambos CD y Vinilo simultáneamente, debes
conectar el Interruptor
DE MODO OPERACIÓN (44) a ‘MIX.’ En Modo Mix, el
V
INILO DE CONTROL DE SCRATCH (3) no controlará el CD. El propósito de esto
es pues que un DJ podrá tocar fuera de ritmo del CD, mientras hace scratch
encima de él con el disco de vinilo. Usa el botón MOTOR ON/OFF (21) para
iniciar y parar la reproducción del Vinilo, y usa el B
OTÓN PLAY/PAUSA (16)
para iniciar y parar la reproducción de la parte del CD. Date cuenta que las
salidas de audio son independientes en la parte trasera del CDT-05 acostumbrese a connectar el CD y el Vinilo de la unidad en canales separados
de su mezclador de audio. En Modo Mix, el P
ITCH CONTROL (9) controlará
el pitch del giradiscos, y los B
OTONES
de P
ITCH BEND
(10) controlarán el
pitch del CD. Para algunas funciones de la unidad entre CD, giradiscos, y
Mix, es mejor que lea a cerca de esta sección de Funciones así sabrá en cada
momento de funcionamiento del control según el modo.
5. Leer el resto del manual! Todo el mundo (incluso el autor de este manual) queremos comenzar a reproducir rápidamente, y esto es comprensible especialmente con semejante producto excitante e innovador como es
el CDT-05. De manera que, su funciamiento le hace ser diferente frente a
productos convencionales, y este manual esta escrito a mostrar estas diferencias e introducirse en una perspectiva y contexto de la interpretación de
un DJ. Usted podrá incluso descubrir funciones que nunca supo que
existían! Nosotros sabemos que usted quiere zambullirse enseguida en ello
y comenzar, pero mantenga el manual controlado por si necesita más información extra o para aclararse.
CONEXIONES:
1. I
NTERRUPTOR
GENERAL: El I
NTERRUPTOR
GENERAL
(33) enciende
o apaga la unidad. Asegurese que el interruptor está en la posición ‘O
FF’ antes de realizar cualquier conexión.
2. ENTRADA DE CORRIENTE
AC: La E
NTRADA DE CORRIENTE
AC
(31), localizada en la parte posterior de la unidad, es la
conexión que acepta el cable de la corriente de la unidad.
3. I
NTERRUPTOR SELECTOR DE VOLTAJE: El INTERRUPTOR
SELECTOR DE V
OLTAJE
(32) permitiendo que la unidad
opere en configuraciones de 115 o 230 voltios, para funcionar en todo el mundo. Antes de usar la unidad, asegurese que el interruptor esta en la posición adecuada según el voltaje de su localidad.
4. S
ALIDAS RCA PA RA CD (37): Estas salidas llevan la señal de audio
del reproductor de CD y deben conectarse a la entrada apropiada
de tu mezclador de audio a nivel de línea.
5. S
ALIDAS RCA PA RA PHONO (38): Estas salidas llevan la señal de
audio del giradiscos de la unidad y deben conectarse a la entrada
apropiada de su mezclador de audio a nivel phono.
6. T
ERMINAL DE MASA: Como puede ver, el CDT-05 no incorpora el terminal
de masa como es normal en los giradiscos. Esto es debido a que el CDT-05
tiene conexión a masa interna y no requiere otra conexión de masa. En
caso zumbido en la sección de giradiscos, verifique que su CDT-05 esta
conectado a la alimentación en la misma toma de corriente que el mezclador y el resto del equipo.
7. S
ALIDA DIGITAL (36): Esta salida lleva la señal de audio para el
reproductor de CD de la unidad en formato IEC-958 (S/PDIF), y
puede conectarse al mecanismo con el apropiado S/PDIF de
entrada, como un mezclador digital, ordenador, o previo. La utilización de esta particular salida requiere equipo especializado y sin él, no
podrás aplicarlo.
8. J
ACK RELAY START (35): Este conector hace posible conectar dos
CDT-05 juntos, pues cuando una unidad finaliza su reproducción,
la unidad opuesta automáticamente comienza. Para un uso nor-
mal, desconecta este jack.
OFF
ON
DIGI TAL
OUT
RE LAY
Page 20

9. PIES DE BAJO PERFIL O STANDARD (45): Los
pies pueden cambiarse dependiendo de la
altura que usted desee. Con los PIES DE BAJO
PERFIL, la unidad podrá estar de hecho nivelado con la mayor parte de mezcladores. Con los PIES DE PERFIL STANDARD, la unidad se asentará más alta,
pero esta posición del giradiscos resiste más la vibración.
COLOCACIÓN BRAZO:
1. Colocar el P
ORTACÁPSULAS (7) o cápsula integrada al brazo girando
el tornillo de subjección al contrario de las agujas del reloj. Sea prudente no pase de rosca el tornillo. Si usted tiene una cápsula de
montaje superior, consulte el manual de instrucciones para montarlo en el portacápsulas.
2. Colocar el C
ONTRAPESO (8) en la parte trasera del brazo, con la
graduación de números mirando hacia delante, lo colocará girando al sentido contrario de las agujas del reloj.
3. Ajuste del C
ONTRAPESO (8) hasta que el brazo flote libre-
mente cuando este por encima del plato. La cápsula no
debe estar aposentada en el vinilo, tampoco debe estar
inclinada hacia atrás. A esto se le llama el Punto Cero el
cual no carga el peso que es aplicado a cualquier cápsula.
4. En el momento que la escala numérica este a ‘0’ com-
prueba si el brazo esta balanceado y en el Punto Cero.
5. Gira el C
ONTRAPESO
(8) por completo al contrario de las agujas del reloj
hasta el peso (en gramos) apropiado que estará reflejado en la escala
numérica. El peso correcto será proporcionado por el fabricante de la cápsula.
6. Ajuste la altura del brazo, para ello use un destornillador de cabeza tipo Philips para quitar o poner la B
ASE
DEL
BRAZO (6) de la parte alta de la unidad en la
esquina a mano derecha. Hay 3 tornillos que puede
quitar completamente. Una vez la BASE DEL BRAZO (6)
este quitada, ajuste cada uno de los muelles para con-
seguir la altura necesaria reflejando el peso necesario
requerido por las especifícaciones de su cápsula de sonido preferida. Los 3
módulos de muelle deberán estar a la misma altura, asegurese que la punta
de la aguja se encuentre en el apropiado ángulo y posición con el vinilo.
FUNCIONES:
1. D
ISPLAY LCD: El DISPLAY LCD (1) es usado para
mostrar visualmente todos los parámetros relativos
a la función de la unidad. Esto incluye los títulos de
pista (referido a ficheros de MP3),valores de pitch, modo de operación,
funciones de transporte, tiempo, beats por minuto, y gráfico visual relativo
a la posición de la pista de reproducción.
2. I
NTERRUPTOR MODO DE OPERACIÓN (44): Este interruptor
tiene 3 posiciones: CD, TT, y MIX.El Modo CD permite la
total manipulación de la vía de audio VINILO DE CONTROL
SCRATCH (3),el Modo TT permite la reproducción y el
Modo MIX permite reproducir el CD con control táctil limitado, mientras
también reproducirá simultáneamente un disco de vinilo.
3. V
INILO DE CONTROL SCRATCH (3) y ANCLAJE DE
SCRATCH (4): Trabajando conjuntamente con el plato
proporciona un control en tiempo real de ambos en
las funciones de reproducción de CD y Vinilo del
CDT. La primera vez que comience utilizando la
unidad, asegurese que el A
NCLAJE DE
SCRATCH
(4) este
firmemente asentado con el VINILO DE
CONTROL SCRATCH
(3).
4. C
ONTROL PITCH (9): El control de pitch, junto con la SELECCIÓN DE
RANGO DE
PITCH
(11), permite que usted manipule la velocidad y el
tiempo de la música antes de reproducir. La SELECCIÓN DE
RANGO DE
PITCH (11) permite la mayor manipulación de efectos espectaculares,
teniendo en cuenta que seleccionando el porcentaje más alto, el
efecto es mayor, y con un porcentaje más pequeño. se consegue un
efecto menor pero el control es más preciso.
5. B
OTONES DE PITCH BEND (10): Este permite al DJ hacer cam-
bios provisionales de la velocidad y el tiempo de la música,
antes de comenzar a reproducir y usado primordialmente para
el ajuste preciso del beat. En M
ODO MIX, el BOTÓN DE P
ITCH
BEND (10) funciona como un control de pitch para el CD de la unidad. En
M
ODO MIX, manteniendo presionado ambos
6. F
UNCIÓN KEY LOCK (12): Key Lock permite que la velocidad
de la música cambie sin cambiar el tono musical. Esta fun-
ción esta disponible exclusivamente en el CD de la unidad,y debe ser
usado conjuntamente con la selección de C
ONTROL DE PITCH (9). Tener en
cuenta que el Key Lock puede causar extraños o artificios en los programas
musicales, especialmente en los porcentajes más altos.
7. E
FECTOS DSP (13, 14, 15): Los EFECTOS DSP (13,
14, 15) permiten la manipulación para el tono,
phase y delay de la sección CD del CDT. Para
emplear un efecto, simplemente seleccione y presione el botón del efecto
que usted desee, y use el S
ALTO DE PISTA Y PARÁMETROS DSP (22) girando el
botón del parámetro según su preferencia. Presionando 1 segundo el
botón, el interruptor entrará en modo Dry/Wet, y usted tendrá disponible
la combinación de efectos del DSP, para cambiar la intensidad del efecto.
Note que cuando el botón de efectos no es empleado, el S
ALTO DE PISTA Y
PARÁMETROS
DSP (22) avanzará a través de pistas.
8. B
OTÓN PLAY/PAUSA (16): En Modo CD o Giradiscos (TT) ,
el BOTÓN PLAY (16) comienza y para la reproducción. En
Modo Mix , el BOTÓN PLAY (16) controla el CD, y el MOTOR
ON/OFF (21) comienza y para la reproducción del plato de
vinilo.
9. B
OTÓN MASTER CUE (17): En Modo CD, el BOTÓN MASTER
CUE (17) vuelve a la unidad a la posición donde se encuentra
el Punto Cue, el primero que ha colocado. Después de avanzar hasta el Punto de Cue, la unidad permanecerá en pausa
hasta que se presione el B
OTÓN PLAY
(16). Manteniendo presionado el
BOTÓN MASTER CUE (17) le permitirá la reproducción desde el Punto de
Cue. Para más información de las funciones Cue del CDT-05, mirar paso
a paso en la sección titulada ‘Colocación de Puntos Cue y Loops’.
10. F
UNCIÓN ARRANQUE INSTANTÁNEO (18): Esta función per-
mite especifícar donde comienza el Punto Cue, volviendo
a ese punto sin interrumpir la reproducción.
11. B
OTONES BUSQUEDA DE PISTAS (19): Presionando
estos botones permite el avance momentáneo a
través de una pista del CD, durante el rato que usted presione el mismo.
12. M
ODOS SINGLE/CONTINUOUS (20): Este botón determi-
nará como la unidad se comportará al final de cada pista.
Cuando la unidad esta en modo Single Auto-Cue, el display LCD mostrará
la palabra ‘Single,’y la unidad entrará automáticamente en el primer fragmento de audio especificado de pista. Cuando la unidad ha completado la
reproducción de esta pista, se parará y automáticamente se desplazará al
primer fragmento de audio de la siguiente pista, entrando en Pausa. En
modo Continuous, el display LCD mostrará la palabra ‘Continue,’ y el
disco reproducirá todas las pistas sin interrupción, repitiendo indefinidamente el disco hasta que se pare manualmente. Cuando el display no dice
ni ‘Single’ ni ‘Continue,’la unidad reproducirá todas las pistas sin interrupción, pero entonces se parará después de reproducir la última pista del
disco.
13. M
OTOR ON/OFF (21): Este botón permite encender o apa-
gar la rotación del plato. En Modo TT o CD, estos requieren
que la unidad este en modo Play. En Modo Mix, el M
OTOR
ON/OFF (21) será el botón controla la reprodución del vinilo, a diferencia
el B
OTÓN PLAY
(16) controla la reproducción del reproductor de CD.
14. S
ALTO DE PISTA Y PARÁMETROS DSP (22): Este botón,
durante la reproducción del CD, le permite avanzar a través
de la numeración de pistas según el CD de la unidad. Con
el botón presionado y girando en cualquiera de los dos
lados, la unidad avanzará a través de los números de pista en incrementos
de 10. Cuando se esta empleando un efecto, el botón de S
ALTO DE PISTA Y
PARÁMETROS
DSP (22) controlará los parámetros asociados con el efecto
seleccionado. Presionando el botón y manteniendolo hacia abajo por 1
segundo, cambiará el contexto del display, y usted será capaz de poner el
control en Dry/Wet para el efecto seleccionado. Esto determinará la intensidad del efecto. Para efectos altamente dependientes de la prioridad, es
aconsejable utilizarlo algunas veces como experimento y así encontrar los
ajustes que están entre sus preferencias.
15. B
OTÓN DE MEMORIA (23) y ARRANQUE RÁPIDO DE PUNTOS
CUE (24): Usando esta función, es posible establecer 3 pun-
tos específicos con los que puedes avanzar sin interrupción.
El B
OTÓN DE MEMORIA (23) le permite colocar Puntos de Cue
en el aire, simplemente presionando primero el BOTÓN DE
M
EMORIA
(23) y después presionando el deseado A
RRANQUE
RÁPIDO DE PUNTOS CUE (24) que usted ha deseado colocar. El
BOTÓN DE MEMORIA (23) además le permite salvar el PUNTO
MASTER CUE, una vez fuera asignado, en Pistas de Audio CD (no
disponible en discos MP3). Para salvar el PUNTO MASTER CUE, reten el
B
OTÓN DE MEMORIA (23) por 3 segundos. Para más información de Cue
del CDT-05, mirar paso a paso en la sección titulada ‘Colocación de
Puntos Cue y Loops’.
<20>
FLAN
GER
ECHO
FILTER
+
FLAN
GER
ECHO
FILTER
+
ON / OFF
FLAN
GER
ECHO
FILTER
ON / OFF
FLAN
GER
ECHO
FILTER
1
2
FLAN
GER
ECHO
FILTER
3
ON / OFF
FLAN
GER
ECHO
FILTER
ON / OFF
FLAN
GER
ECHO
FILTER
+
FLAN
GER
ECHO
FILTER
+
FI
FLAN
GER
ECHO
FILTER
FLANGER
ECHO
FILTER
CD T T
MIX
>
4%
8%
OFF
50%
16%
+
PITCH BEN D
KEY
EFX
EC HO
CUE
FI
LTETER
FLANGEGER
<<
ON / OFF
<< TR AC K SKIP >>
MEMORY
CUE
1
2
3
HO T STAR T
<<
SEARC H
SINGL E
MOTOR
Page 21

16. MODO TIEMPO/RELLAMADA CUE (25): Con cada botón que presiono, mientras estan en M
ODO CD o MODO Mix, el tiempo
mostrado cambiará TIempo Transcurrido, a Total Tiempo
Sobrante, y al Tiempo Restante de la Canción. Cuando la unidad esta
en el MODO Play, el modo de tiempo cambiará así como el gráfico visual
en relación a la posición de la reproducción de pista. Cuando la unidad
esta en M
ODO Stop, el display LCD en cambio mostrará ‘Elapsed’(tran-
scurrido), ‘T. Remain’(Total tiempo sobrante), o ‘S. Remain’(tiempo
restante de la canción), dependiendo de su selección de tiempo. Si usted
ha salvado el PUNTO MASTER CUE en la pista del Audio del CD (no MP3),
usted podrá rellamar teniendo el M
ODO TIEMPO/RELLAMADA CUE (25) pre-
sionado por 3 segundos, hasta que el display LCD muestre la palabra
‘LOAD’ junto con el tiempo del PUNTO M
ASTER CUE
. Entonces presiona el
BOTÓN M
ASTER CUE
(17) para asignar la rellamada al Punto Cue .
17. I
NTERRUPTOR
REVERSE
(26): Durante la reproducción,
pulsando el interruptor reverse reproducirás el programa
de audio al revés desde el tiempo actual mostrado. En
M
ODO
CD, el I
NTERRUPTOR
REVERSE
(26) simulará la repro-
ducción del CD. En MODO TT, el INTERRUPTOR REVERSE (26) simulará solamente la reproducción del Vinilo. En MODO Mix, el INTERRUPTOR REVERSE
(26) de nuevo simulará la reproducción solamente del Vinilo, a la par si
hay simultáneamente una reproducción de CD.
18. M
ODOS INSTANTÁNEOS DE REVERSE (27): Hay 3 Modos de
Reverse establecidos en el CDT-05, que pueden aplicar los
diversas guias de reproducción. Aquí esta una breve explicación
de cada modo, y un ejemplo de como puede ser aplicado.
N
O EMPLEADO - Cuando el LED de MODOS INSTANTÁNEOS DE REVERSE
(27)
esta completamente apagado, y el interruptor esta dirigido hacia ‘REV,’el
plato girará al contrario de las agujas del reloj, y el programa de música
reproducirá al revés. Cuando el interruptor esta dirigido hacia ‘FWD,’ el
plato girará en la dirección normal, y la música reproducirá hacia ‘FWD’.
Esto es exactamente lo mismo que durante la ejecucción de la función de
Reverse en el giradiscos de vinilo.
M
ODO INSTANTÁNEO DE REVERSE #1 - Este modo se activa presionando el
botón de MODOS INSTANTÁNEO DE REVERSE (27) momentáneamente, el LED
se iluminará MODO INSTANTÁNEO DE REVERSE (27). Cuando el interruptor
este dirigido hacia ‘REV,’ el plato girará al contrario de las agujas del
reloj, y el programa de música reproducirá al revés, pero usted no podrá
ni siquiera notar el retardo del motor al cambiar a la dirección opuesta.
Cuando el interruptor este dirigido hacia ‘FWD’, el plato girará en el sentido de las agujas del reloj, y la música se reanudará reproduciendo, sin
efectos aminorados, avanzando desde el momento en donde usted habia
empleado la función de Reverse la primer vez. Esto le permite invertir de
forma instantanea,y mantener cuadrados los beats de otro equipo, manteniendo la música en el ritmo. Esto es verdaderamente útil para los DJs
que producen música electrónica y cuadrar los beats es una gran parte de
su trabajo.
M
ODO INSTANTÁNEO DE REVERSE #2 - Este modo se activa manteniendo
presionado por 2 segundos el botón de M
ODOS INSTANTÁNEOS DE REVERSE
(27), hasta que el LED de MODOS INSTANTÁNEOS DE REVERSE (27) destelle.
Cuando el interruptor esta dirigido hacia ‘REV,’ el plato gira al contrario
de las agujas del reloj, y el programa de música se reproducirá al revés.
Cuando el interruptor este dirigido hacia ‘FWD’, el plato girará normal, y
la música se reanudará desde el punto en que se ha pulsado ‘FWD.’
19. B
OTÓN STOP
/EJECT
(41): Durante la reproducción del CD,
este botón detiene el audio y desplaza a reposo el laser que
leía el disco. Una vez la unidad esta parada, presionando el
B
OTÓN STOP/EJECT (41) extraerá el disco de la bandeja de CD.
20. CONTROL DE VELOCIDAD DEL PLATO (42): Este botón le permite cambiar la velocidad del plato a 33, 45, o 78 rpm.
Aunque este concepto es igual a un giradiscos convencional,
la función se ha extendido a controlar algunas áreas difer-
entes de la unidad.
C
AMBIANDO EL
CONTROL DE VELOCIDAD DE CD
POR DEFECTO
: Algunos DJs
estan acostumbrados a hacer spin con los discos en un plato rápido, la
velocidad por defecto “normal” puede ser alterada según las preferencias
que usted necesite. Esto se puede hacer mientras la unidad está en Modo
Stop (no en modo Pausa) presionando el C
ONTROL DE VELOCIDAD DEL
PLATO (42) momentáneamente para cambiar entre 33 y 45 rpm (78 rpm
no es soportado por el control de CD). Si la unidad esta en Modo Play,
presiona el BOTÓN
STOP/EJECT
(41) una vez antes de cambiar la posición.
El LED I
NDICADOR DE V
ELOCIDAD DEL PLATO
(43) reflejará la velocidad que
ha sido seleccionada.
CAMBIANDO LA VELOCIDAD DE REPRODUCCIÓN: Si usted desea cambiar la actual velocidad de reproducción de un CD durante la reproducción, simplemente presione el C
ONTROL DE VELOCIDAD DEL PLATO (42) momentánea-
mente mientras está en Modo Play o Pausa para cambiar entre 33 y 45 rpm
(78 rpm no es soportado por la reproducción de CD). Usted escuchará un
cambio oíble en el ritmo y el tono de la música, creando efecto de
grabación a una velocidad más lenta o rápida según la elección.
C
AMBIANDO LA V
ELOCIDAD DE REPRODUCCIÓN PARA VINILO
: Si usted desea cam-
biar la actual velocidad de reproducción de un disco de Vinilo durante su
reproducción, simplemente presione el C
ONTROL DE VELOCIDAD DEL
PLATO
(42) momentáneamente, mientras está en Modo Mix o TT, para cambiar
entre 33 and 45 rpm. 78rpm manteniendo apretado el CONTROL DE
VELOCIDAD DEL PLATO (42) por 3 segundos.
21. S
ECCIÓN LOOP (28), (29), (30): Usando la
S
ECCIÓN LOOP
le permite sin haya saltos repetir
un segmento de audio en el reproductor de CD.
El I
NICIO LOOP A (28) coloca el punto de
comienzo del segmento. La SALIDA LOOP B/EDICIÓN (29) coloca el punto de
fin del segmento. R
ELOOP
(30) vuelve a empezar el loop al principio una vez
haya sido reproducido. Los puntos de Loop pueden estar colocados instantáneamente durante la reproducción o puede estar colocados en Modo
Pausa. Al final del looping, cuando lo este utilizando, presionando el botón
de S
ALIDA LOOP B/EDICIÓN (29). Para editar los puntos de loop, presione el
botón de SALIDA LOOP B/EDICIÓN (29), encuentre el punto deseado por
usted y reemplace, entonces presione cualquiera de los dos. El I
NICIO LOOP
A (28) o la SALIDA LOOP B/EDICIÓN (29) colocando el punto donde desee
reemplazarlo. Para más información de las funciones Loop del CDT-05,
mirar paso a paso en la sección titulada ‘Colocación de Puntos Cue y
Loops’.
COLOCACIÓN DE PUNTO CUE Y LOOPS:
1. COLOCANDO EL PUNTO MASTER CUE:
a. Durante la reproducción de un CD, encuentre el punto donde usted
quiere colocar el P
UNTO MASTER CUE .
b. Pausa reproducción presionando el B
OTÓN DE
PLAY/PAUSA
(16). El plato
parará.
c. Usando el V
INILO DE CONTROL DE SCRATCH (3), realice los ajustes para el
PUNTO
MASTER CUE. Usando el V
INILO DE
CONTROL DE SCRATCH
(3) los
ajustes estarán limitados para el Modo CD .
d. Para grabar en memoria el P
UNTO MASTER CUE, presione el BOTÓN DE
PLAY/PAUSA (16) otra vez. El plato reanudará la reproducción de la música.
e. Para avanzar hasta el P
UNTO MASTER CUE
, presionar el B
OTÓN MASTER CUE
(17). Usted podrá ahora presionar el BOTÓN DE
PLAY/PAUSA
(16) para
empezar a reproducir desde el PUNTO MASTER CUE
f. Para la pre escucha del PUNTO M
ASTER CUE
, presione el BOTÓN M
ASTER
CUE (17) para avanzar hasta el PUNTO MASTER
CUE, entonces mantenga pre-
sionado el BOTÓN MASTER CUE (17) mientras la necesite. Cuando el BOTÓN
MASTER CUE (17) se libere, la unidad avanzará hasta el PUNTO MASTER CUE.
g. Para avanzar y reproducir desde la colocación del P
UNTO MASTER CUE,
presione el botón FUNCIÓN DE ARRANQUE INSTANTÁNEO DE CUE (18).
h. Para salvar permanentemente el P
UNTO
MASTER CUE
en la memoria del
CDT-05 (solo para CD Audio discos , no MP3 discos), aguante apretando
hacia abajo el B
OTÓN MEMORIA
(23) por 3 segundos. Cuando el P
UNTO
MASTER CUE ha sido salvado en la memoria, en la línea de fondo del DISPLAY
LCD (1) leerá ‘SAVE’ junto con el número y el tiempo de la pista del PUNTO
MASTER CUE. En cualquier ocasión usted podrá cargar el Audio de un CD
que usted haya depositado para la información del PUNTO MASTER CUE, en
la parte izquierda al fondo del D
ISPLAY LCD (1) resplandecerá la palabra
‘CUE.’
i. Para rellamar el P
UNTO MASTER C
UE
que habías salvado, manteniendo
apretado el botón MODO TIEMPO/RELLAMADA CUE (25) por 3 segunddos,
hasta que en el fondo de la línea del DISPLAY LCD (1) lea ‘LOAD’ junto con
el número y tiempo de la pista del PUNTO MASTER CUE. Presione el BOTÓN
MASTER CUE (17) para confirmar la asignación del punto de cue salvado por
el MASTER CUE. Ahora usted es libre para usar la carga del PUNTO MASTER
CUE normalmente.
j. Cuando la pista avance usando el botón S
ALTO DE PISTA Y PARÁMETROS DSP
(22), el PUNTO MASTER CUE estará despejado de la memoria transitoria.
Usted puede escoger insertar un nuevo PUNTO MASTER CUE o usar la función de R
ELLAMADA CUE para cagar un punto salvado.
2. COLOCACIÓN ARRANQUE RÁPIDO DE PUNTOS DE CUE:
a. Durante la reproducción de un CD, para encontrar el punto al cual usted
coloco el P
UNTO DE ARRANQUE RÁPIDO DE CUE. Si usted quiere colocar un
PUNTO DE ARRANQUE RÁPIDO DE CUE en el aire, seguir colocando B. De otro
modo, mientras solo en Modo CD, usted podrá poner en pausa la reproducción presionando el B
OTÓN DE PLAY/PAUSA (16), y ajustar la posición
<21>
FLAN
GER
ECHO
FILTER
FLANGER
ECHO
FILTER
FLANGER
ECHO
FILTER
FLAN
GER
ECHO
FILTER
TIME
RECALL CUE
FWD
REV
INSTANT REV
45
78
33
SEAMLESS LOOP
AB/LOOP
RELOO P
Page 22

usando the VINILO DE CONTROL DE SCRATCH (3), entonces B.
b. Para memorizar el P
UNTO DE ARRANQUE RÁPIDO DE CUE, primero presione
el BOTÓN DE MEMORIA (23) momentáneamente, hasta que la luz se ilumine.
c. En el punto del cual usted desee colocar el P
UNTO DE
ARRANQUE RÁPIDO
DE
CUE, presione el botón PUNTO DE ARRANQUE
RÁPIDO DE
CUE
(24) que cor-
responda al banco que usted desea utilizar.
d. Repita el proceso hasta 3 P
UNTOS DE
ARRANQUE RÁPIDO DE CUE
.
e. Para avanzar hacia un P
UNTO DE ARRANQUE RÁPIDO DE CUE salvado, sim-
plemente presione el botón PUNTO DE ARRANQUE RÁPIDO DE CUE (24) del
banco que usted desee reproducir. La unidad avanzará hasta ese punto (y
la pista correspondiente para la cual el punto estaba colocado) sin interrupción, indiferente a la canción que está actualmente reproduciendo.
f. Para volver a poner un P
UNTO DE ARRANQUE RÁPIDO DE CUE, simplemente
repita el proceso y reescribe el P
UNTO DE ARRANQUE RÁPIDO DE CUE (24) el
cual corresponde al tramo que usted desea reescribir.
3. COLOCACIÓN DE LOOP SIN SALTOS:
a. Durante la reproducción de un CD, encontrar el punto el cual usted
desea colocar al principio de L
OOP SIN SALTOS(INICIO LOOP A). Si usted
quiere colocar un LOOP SIN SALTOS en el aire, paso B. Si no, mientras solo
en Modo CD, ponga en pausa con el BOTÓN DE PLAY/PAUSA (16), y ajuste la
posición de la INICIO LOOP A usando el VINILO DE CONTROL DE SCRATCH (3),
y paso B.
b. En el punto el cual usted desea la posición de la I
NICIO DE LOOP A, pre-
sione el botón de I
NICIO DE L
OOP A (28). Uselo en Modo Play o Modo
Pausa.
c. En el punto el cual usted desea la posición de S
ALIDA DE LOOP B, pre-
sione el botón de S
ALIDA LOOP
B/EDICIÓN
(29). Uselo en Modo Play o
Modo Pausa.
d. Una vez la posición de ambos I
NICIO DE LOOP A y SALIDA DE LOOP B esten
colocados, el loop se reproducirá por tiempo indefinido, sin ninguna interrupción. Para volver a colocar el loop desde el principio, o para tartamudear el loop, presione el botón de R
ELOOP
(30).
e. Para editar el punto de S
ALIDA DE LOOP B, presione el botón de SALIDA
LOOP B/EDICIÓN (29). El loop se desocupará, y usted estará libre para rem-
plazar la posición de S
ALIDA DE LOOP B, simplemente presionando otra vez
el botón de S
ALIDA DE LOOP B/EDICIÓN (29) cuando usted alcance la colo-
cación de la posición deseada deS
ALIDA DE LOOP B.
f. Para editar el punto de I
NICIO DE LOOP A , simplemente presione el
botón de I
NICIO DE LOOP A (28) en el momento que usted desee un nuevo
punto de INICIO DE LOOP A. Note que usted solo podrá avanzar el INICIO DE
LOOP A desden el punto que estaba colocado originariamente.
g. Para salir del L
OOP SIN SALTOS y reanudad la normal reproducción, pre-
sione el botón S
ALIDA DE LOOP B/EDICIÓN (29). Si es necesario, puede colo-
car un nuevo LOOP SIN SALTOS(vuelve a paso A), o recuperar el loop previamente a la reproducción presionando el botón de R
ELOOP (30).
ESPECIFICACIONES
SECCIÓN GIRADISCOS:
Tipo.......................................................Giradiscos Manual Tracción Directa
Tracción........................ plato de tracción directa High torque (3.6 kgf/cm)
Motor..............................................................................................DC Motor
Velocidad...........................................................................33 1/3, 45, 78 RPM
Pitch Variable...................+/- 4, 8, 16, 50% SelecciónBotones o deslizables
Fluctuaciones...........................................................mayor de 0.25% WRMS*
*Estas medidas se refiere al giradiscos con el plato solamente y
excluye los efectos de discos, cápsulas, o brazos.
SECCIÓN DE BRAZO:
Tipo.............................................................Recto balanceado estaticamente
Peso portacápsulas..................................................................................5.6 g
SECCIÓN COMPACT DISC:
Cuantificación........................................1 Bit Linear/Channel, 3 Beam Laser
Muestreo.............................................................................................8 Veces
Frecuencia Muestreo ......................................................................44.1 kHz
Respuesta de Frequencia.......................................................20 Hz a 20 kHz
Distorsion Armonica Total....................................................Mayor de 0.05%
Relación Señal ruido.............................................................................86 dB
Rango Dinámico....................................................................................90 dB
Salida Digital.........................................................................IEC958 (S/PDIF)
Separación de Canales.............................................................86 dB (1 KHz)
Nivel de salida.................................................................2.0 +/- 0.2V R.M.S.
Alimentación.............................................................AC 115/230V, 60/50 Hz
Display .............................Pista pasada, Pista remanente y Total remanente
Arranque Instantáneo........................................................en 0.03 Segundos
Pitch................4, 8, 16, 50% Deslizantes con Botón de selección de Rango
PESOS Y MEDIDAS:
Dimensiones: 17.75 x 14.65 x 6.3” (450 x 372 x 160.5 mm)
Peso unitario: 20.2 lbs (9.1 kg)
Especificaciones y diseño sujetos a cambios para mejoras.
*Lo expuesto en la garantia no afecta a las leyes locales de garantias.
ACESORIOS OPCIONALES:
DJX-05 Auriculares Profesionales Monitor
GX-450 Altavoces autoamplificados ABS
CS-02 Mezclador Profesional 5-Canales
Para mas información de los nuevos productos de Gemini, visite
nuestra web en http://www
.geminidj.com!
DJX-05
GX-450
CS-02
NOTES:
____________________________________________________
____________________________________________________
____________________________________________________
____________________________________________________
____________________________________________________
____________________________________________________
____________________________________________________
____________________________________________________
____________________________________________________
____________________________________________________
____________________________________________________
____________________________________________________
____________________________________________________
____________________________________________________
____________________________________________________
____________________________________________________
____________________________________________________
____________________________________________________
____________________________________________________
____________________________________________________
____________________________________________________
____________________________________________________
____________________________________________________
____________________________________________________
____________________________________________________
<22>
Page 23

ATTENTION: Cet appareil répond aux certifications FCC lorsqu'il est connecté à d'autres appareils à l'aide de cordons blindés. Afin de prévenir tout
risque de parasites électromagnétiques avec un poste radio ou TV, veuillez
utiliser des cordons blindés.
Le point d'exclamation situé dans un triangle est destiné à attirer votre
attention durant l'utilisation de votre appareil ou d'un entretien périodique de ce dernier. Vous en trouverez plusieurs dans le mode d'emploi
de l'appareil.
LIRE LES INSTRUCTIONS: Toutes les instructions et consignes d'utilisation doivent être lues avant l'utilisation de l'appareil.
CONSERVEZ LES INSTRUCTIONS: Nous vous recommandons de conserver les instructions et consignes d'utilisation en cas de nécessité
ultérieure.
RESPECT DES CONDITIONS D'UTILISATION: Nous vous recommandons de respecter les instructions d'utilisation.
SUIVRE LES INSTRUCTIONS D'UTILISATION: Nous vous recommandons de respecter la chronologie des instructions d'utilisation.
NETTOYAGE: L'appareil doit être nettoyé avec un chiffon légèrement
humide. Ne pas utiliser de produits chimiques corrosifs & volatiles (cire,
essence, insecticide…) afin de ne pas endommager l'appareil.
CORDON: Ne pas utiliser de cordons non préconisés par le fabricant afin
de ne pas endommager l'appareil.
EAU & HUMIDITE: Ne pas utiliser l'appareil à proximité d'une source
d'eau (cuisine, salle de bain, lavabo…), ni dans un endroit sujet à l'humidité (piscine…).
ACCESSOIRES: Ne pas installer cet appareil sur un support ou dans un
endroit instable. L'appareil pourrait tomber au risque de blesser une personne et être endommagé. Veiller à utiliser des accessoires (Pied, support,
crochet..) recommandés par le fournisseur ou vendu avec l'appareil. Tout
montage ou installation doit respecter les instructions du fabricant et utiliser des accessoires d'installation recommandés par le fabricant.
TRANSPORT SUR CHARIOT: Tout produit installé sur un chariot doit être
manipulé avec précaution. Un déplacement brusque ou trop rapide sur
une surface non plane pourrait entraîner la chute de l'ensemble et endommager l'appareil. V
OIR F
IGURE A.
VENTILATION: Les ouvertures et ouïes d'aération situées sur l'appareil
permettent une ventilation optimale de ce dernier afin d'éviter toute surchauffe. Ces ouvertures ne doivent jamais être obstruées. Ne pas placer
l'appareil sur un support souple risquant de bloquer les ouïes d'aération
(Lit, sofa, canapé…). Si l'appareil est intégré dans une installation ou dans
un rack, veillez à la ventilation et consultez le fabricant pour toute information complémentaire.
ALIMENTATION: Veillez à respecter la tension d'alimentation située au dos
de l'appareil. Si vous n'êtes pas certain de la tension d'utilisation dans votre
pays, contactez votre revendeur.
EMPLACEMENT: Veillez à installer l'appareil sur un support stable.
PERIODE DE NON UTILISATION: Débranchez le cordon d'alimentation
de l'appareil en cas de non utilisation prolongée.
MISE A LA TERRE:
- Si l'appareil est équipé d'une alimentation à courant alternatif (Prise possédant un contact plus large que l'autre), celle-ci se connectera correctement à la prise uniquement si vous respectez le sens de branchement. Il
s'agit là d'une mesure de sécurité. Si vous n'arrivez pas à insérer la fiche
dans la prise, inversez la fiche. Si vous ne pouvez toujours pas insérer cette
dernière, contactez un électricien afin de remplacer votre prise électrique
qui est obsolète. Veillez à respecter cette consigne.
- Si l'appareil est équipé d'une fiche d'alimentation avec terre, veillez à la
connecter à une prise électrique équipée d'une connexion à la terre. Il s'agit d'une mesure de sécurité. Si vous ne pouvez insérer la fiche dans la prise
électrique, contactez un électricien afin de remplacer votre prise électrique
qui est obsolète. Il est important de respecter cette mesure de sécurité.
INSTALLATION DU CORDON D'ALIMENTATION: Les cordons d'alimentation doivent être déroulés et rangés proprement afin d'éviter de se prendre les pieds dedans, en particulier les cordons reliés aux prises électriques.
ANTENNE EXTERIEURE: Si vous reliez votre appareil à une antenne ou
un câble extérieur, assurez-vous de la présence d'une connexion à la terre
afin d'éviter les surtensions et les décharges d'électricité statique. L'article
810 du National Electrical Code, ANSI/NFPAS 70, précise toutes les informations nécessaires afin d'effectuer correctement le branchement à la terre
du pylône ou de la structure porteuse, la connexion du câble à l'antenne
de décharge, dimensions des connecteurs de mise à la terre, connexions
des électrodes, consignes de mise à la terre des électrodes. V
OIR SCHÉMA B.
ORAGE/FOUDRE: En cas d'orage et de non utilisation prolongée,
débranchez le cordon d'alimentation, le câble d'antenne et les cordons
audio. Ceci afin d'éviter les dégâts occasionnés par la foudre et les sur-
charges électriques.
LIGNES ELECTRIQUES: Une antenne extérieure ne doit pas être située à
proximité immédiate de lignes électriques et/ou d'un transformateur électrique, afin de ne pas tomber dessus en cas de chute. Lors de l'installation
d'une antenne extérieure, veillez à éviter tout contact avec des lignes électriques : tout contact peut être fatal.
SURCHARGE: Ne surchargez pas les prises électriques, blocs multiprises &
rallonges en y connectant trop d'appareils. Ceci afin d'éviter tout risque de
surcharge électrique ou d'incendie (Surchauffe).
INSERTION D'OBJET & DE LIQUIDE: N'insérez pas d'objets dans les
fentes ou ouvertures de l'appareil afin d'éviter tout risque de choc électrique et d'incendie. Ne jamais renverser de liquide sur l'appareil.
SERVICE APRES VENTE: N'essayez pas de réparer cet appareil ; en l'ouvrant ou en le démontant afin d'éviter tout risque de choc électrique. En
cas de problème, veuillez prendre contact avec votre revendeur.
PANNE/SITUATION NECESSITANT UN RETOUR EN SAV: Débranchez
l'appareil de la prise électrique, remettez le dans son emballage d'origine
et contactez votre revendeur en tenant compte des situations suivantes :
- Lorsque le cordon d'alimentation est endommagé.
- Si un liquide a été renversé dessus.
- Si l'appareil a été exposé à la pluie.
- Si l'appareil ne fonctionne pas correctement malgré le respect des
instructions d'utilisation. Ajustez uniquement les réglages préconisés dans
le mode d'emploi, toute manipulation ou réglage non conseillés dans ce
dernier peut endommager l'appareil et procurer plus de travail en cas d'intervention SAV afin de remettre l'appareil en état de marche.
PIECES DE RECHANGE: Lorsque vous avez besoin de remplacer des
pièces de l'appareil, veillez à utiliser des pièces d'origine ou possédant des
caractéristiques identiques. L'utilisation de pièces non autorisées peut
endommager l'appareil : surchauffe, court-circuit, choc électrique…
CONTROLE DE SECURITE: Avant de récupérer votre appareil, assurez
vous que le SAV a effectué tous les contrôles de sécurité nécessaires afin de
vous restituer un appareil en état de marche.
INSTALLATION AU PLAFOND OU SUR UN MUR: Ce type d'installation
est déconseillé.
CHALEUR: Veillez à installer l'appareil loin de toute source de chaleur telle
que radiateur, réchaud ou tout autre appareil produisant de la chaleur.
RECYCLAGE: Cet appareil ne doit pas être considéré comme un déchet
domestique à usage unique. Vous devez le déposer dans un point de collecte destiné au recyclage des appareils électroniques et électroménagers.
AInsi vous préserverez l'environnement et éviterez les problêmes de santé
publique vis à vis de conséquences négatives; liées à leur dépôt dans un
endroit non approprié. Le recyclage contribue à préserver les ressources
naturelles. Pour plus d'informations sur les conditions de recyclage de l'appareil, veuillez contacter les autorités de votre pays, les institutions locales
ou votre revendeur.
<23>
ATTENTION
AVANT TOUTE UTILISATION DE L'APPAREIL, MERCI DE PRENDRE CON-
NAISSANCE DES INSTRUCTIONS D'UTILISATION & DE SECURITE!
RISQUE DE CHOC ÉLECTRIQUE, NE PAS OUVRIR!
Page 24

<24>
Liste des Pièces:
Platine CDT-05
Porte-cellule
Contrepoids
Plateau
Plateau de Scratch Vinyle
Feutrine de Lecture
Cordon d’Alimentation AC
Cordon Ligne RCA
Cordon Phono avec Terre Spade
Cordon Relay Start
Cordon Fader Start
Manuel d’Utilisation avec
Conditions de Garantie
4 x Pied Bas en Caoutchouc
4 x Pied Standard
1. Ecran LCD
2. Plateau
3. Plateau de Scratch Vinyle
4. Repère de Scratch
5. Bras de Lecture
6. Embase Amovible du Bras de
Lecture
7. Porte-cellule
8. Contrepoids
9. Réglage de Vitesse
10. Touches de Ratttrapage
11. Sélection Réglage de Vitesse
12. Master Tempo
13. Effet Echo DSP
14. Effet Filtre DSP
15. Effet Flanger DSP
16. Touche Play/Pause
17. Touche Master Cue
18. Touche Hot Start Cue
19. Touches de Recherche de Plages
20. Mode Lecture Simple/Continue
21. Moteur On/Off
22. Recherche de Plages &
Paramétrage des effets DSP
23. Touche Memo
24. Points Cue Hot Startable
25. Touche Mode Temps/Recall Cue
26. Commutateur Reverse
27. Modes Reverse Instantanés
28. Loop in A
29. Loop out B/Edit
30. Reloop
ON / OFF
GE
FI
1
2
3
10
11
12
13
14
15
16
17
18
19
20
21
25
26
27
28
29
30
22
23
24
5
7
6
8
9
4
MEMORY
CUE
1
2
3
<< TR AC K SKIP >>
SEAMLESS LOOP
A B/ LOOP
FWD
INSTANT REV
REV
TIME
RECALL CUE
MOTOR
ON / OFF
SINGL E
RELOO P
EFX
EC HO
FI
LTETER
FLANGE
R
KEY
4%
8%
OFF
50%
16%
>
<<
<<
SEARC H
CUE
HO T STAR T
Pro Hybrid TurntableCDT-05
+
PITCH BEN D
Page 25

Arrière
Devant
Face arrière:
31. Embase pour Cordon d’Alimentation AC
32. Sélection de la Tension d’Alimentation
33. Interrupteur Power On/Off
35. Jack Relay Start
36. Sortie Numérique
37. Sortie RCA CD
38. Sortie RCA Phono
Face avant:
40. Insertion du CD/Mécanique Slot-in
41. Touche Stop/Eject
42. Sélection de la Vitesse de Lecture
43. LED de Vitesse de Lecture
44. Sélection du Mode d’Utilisation
Divers:
45. Pied Low Profile ou Pied Standard
31
32
33
40
41
42
43
44
45 45
34
36
38
37
35
<25>
PHONO OU T
CD OUT
DIGITAL
OUT
RELA Y
MIX
CD TT
FADER
Pro Hybr id Turntabl eCDT-05
OFF
ON
45
78
33
Page 26

<26>
CDT-05 PLATINE VINYLE HYBRIDE PROFESSIONNELLE
INTRODUCTION:
Félicitations pour votre achat de la Platine Vinyle Hybride
Professionnelle Gemini CDT-05. Cette dernière possède les avancées
technologiques les plus récentes en matière d’équipement pour DJ, combinant à la fois une platine vinyle avec un couple très élevé et un lecteur
CD offrant toute la puissance et la souplesse de ce support. En complément; la CDT-05 vous offre la possibilité de lire simultanément un disque
vinyle et un CD, offrant ainsi de nouvelles possibi lités. Avec un entretien
courant, la CDT-05 vous apportera fiabilité et performances durant de
nombreuses années.
CARACTERISTIQUES:
- Compatible CD-Audio, CD-R, CD-RW, & MP3
- Bras droit de lecture hyper stable & amovible
- Entraînement Direct High-Torque (3.6 kg/cm) permettant un contrôle
total du CD en cours de lecture.
- Sorties audio séparées: platine vinyle & CD
- 3-modes: platine vinyle, CD ou les 2 simultanément.
- DSP 3 effets: Filtre, Echo & Phase avec paramètres ajustables
- Mode Reverse
- Moteur ON/OFF (Marche/Arrêt)
- 3 Points Cue faciles à programmer/enregistrer
- Master cue avec départ de lecture instantané
- Master Tempo
- Protection Anti-Shock (Mémoire RAM)
- Mécanisme de chargement CD par insertion associé à une LED témoin
- Modes lecture: Lecture simple (Single auto-cue) / Lecture continue
- Boucle parfaite avec retour instantané à la boucle & point de sortie
ajustable en temps réel
- Ajustement de la vitesse par touches +/- ou action manuelle sur le
plateau
- Affichage temps 3 modes
- Lecture à la frame (Recherche & cue)
- Large écran à affichage matriciel sur 4 lignes
- Plateau de lecture lesté
- Réglage de vitesse: 4%, 8% , 16% & 50%
- Larges touches Soft rétro-éclairées par LEDs
MISES EN GARDE:
1. Nous vous recommandons de lire l’ensemble des instructions avant
toute utilisation de l’appareil.
2. Afin d’éliminer tout risque d’électrocution nous vous recommandons de
ne pas démonter l’appareil. Il n’y a pas de pièce détachée REMPLACABLE
PAR L’UTILISATEUR dans l’appareil. En cas de problème veuillez contacter votre revendeur. USA: Si vous rencontrez un problème, appelez le
Service Technique de Gemini au 1 (732) 738-9003. Ne renvoyez pas l’appareil à votre revendeur.
3. Ne pas exposer l’appareil à la lumière directe du soleil et à toute source
de chaleur telle qu’un radiateur. Veillez à la bonne ventilation de l’appareil.
4. Cet appareil doit être nettoyé à l’aide d’un chiffon légèrement humide.
Ne pas utiliser de détergents.
5. Lorsque vous déplacez l’appareil, veillez à le remettre dans son emballage d’origine. Ceci afin d’éviter tout risque de dommage durant le transport.
6. NE PAS EXPOSER L’APPAREIL A LA PLUIE & A L’HUMIDITE.
7. NE PAS UTILISER DE VAPORISATEUR ET DE LUBRIFIANT SUR LES
BOUTONS & INTERRUPTEURS DE CONTROLE.
INSTRUCTIONS RAPIDES D’UTILISATION DE LA CDT-05:
1. Installez l’appareil en respectant les instructions précisées dans les sec-
tions Connexions/Démarrage & Réglage du Bras de Lecture. Prenez connaissance de l’ensemble des consignes de mise en garde avant toute
utilisation.
2. Pour lire un CD, insérez un disque dans la fente située en face avant sur
la droite et positionnez le C
OMMUTATEUR OPERATION MODE (44) sur ‘CD’.
Vérifiez que le bouton M
OTOR ON
/OFF
(21) est allumé, puis appuyez sur la
touche PLAY/PAUSE (16) pour démarrer la lecture. Vous aurez un contrôle
total de la lecture en manipulant le PLATEAU DE LECTURE (3), comme si vous
utilisiez une platine vinyle. Vous pouvez ajouter à la lecture d’un CD différents points cue, des effets (DSP), modifier la vitesse de lecture, activer le
mode reverse, etc. Pour toute information détaillée sur chaque fonction
ajoutée à la lecture d’un CD, veuillez consulter la section Fonctions.
3. Pour lire un disque vinyle, placez la feutrine sur le P
LATEAU DE
SCRATCH
V
INYLE
(3), vous repérez par rapport à la marque S
CRATCH ANCHOR
(4), puis
placez votre disque vinyle dessus et mettez le C
OMMUTATEUR OPERATION
MODE (44) sur ‘TT’. Vérifiez que le bouton MOTOR ON/OFF (21) est allumé,
puis appuyez sur la touche PLAY/PAUSE (16) pour démarrer la lecture. Ceci
peut vous sembler non conventionnel mais à l’usage vous vous rendrez
compte qu’en fait l’utilisation et les performances sont les mêmes que
n’importe quelle platine vinyle. Afin de préserver la qualité audio du
disque vinyle, le signal audio de ce dernier ne transite pas par la section
effets (DSP).
4. Si vous souhaitez lire simultanément un CD & un disque vinyle, vous
devez positionnez le C
OMMUTATEUR OPERATION MODE (44) sur ‘MIX’. En
Mode Mix, le PLATEAU DE SCRATCH VINYLE (3) ne contrôle pas la lecture du
CD. La finalité de cette fonction permet au DJ de scratcher un disque vinyle
durant la lecture d’un CD. Utilisez la touche MOTOR ON/OFF (21) pour
démarrer et arrêter la lecture d’un disque vinyle & utilisez la touche
P
LAY/PAUSE BUTTON (16) pour démarrer ou arrêter la lecture d’un CD.
Notez que les sorties audio séparées, situées à l’arrière de la CDT-05, vous
permettent de connecter la sortie CD et la sortie Platine Vinyle à deux voies
différentes de votre console de mixage. En Mode Mix, le réglage de
vitesse P
ITCH CONTROL (9) régle la vitesse de lecture de la platine vinyle et
les TOUCHES PITCH BEND (10) permettent de modifier la vitesse de lecture
du lecture CD. Etant donné que l’appareil associe différentes fonctions aux
modes de lecture (CD, Platine Vinyle ou Mix), nous vous recommandons
de lire soigneusement la section Fonctions précédant chaque mode d’utilisation.
5. Lisez l’ensemble du manuel d’utilisation ! Tout le monde (Y compris
l’auteur de ce manuel) souhaite utiliser l’appareil immédiatement, et ceci
est compréhensible avec un produit aussi inovant que la CDT-05. Quoiqu’il
en soit, cet appareil diffère d’autres modèles plus conventionnels. Ce
mode d’emploi vous précisera l’ensemble des possibilités offertes au DJ. et
pour nombre d’entre elles, vous n’en imaginiez même pas l’existence !
Même si vous souhaitez utiliser l’appareil dès son déballage, conservez ce
mode d’emploi pour toute clarification ultérieure
CONNEXIONS / MISE EN PLACE:
1. INTERRUPTEUR DE M
ISE SOUS TENSION: L’interrupteur P
OWER
SWITCH (33) allume (ON) ou éteint l’appareil (OFF). Assurez
vous que ce dernier soit en position ‘OFF’ avant d’effectuer
toute connexion.
2. E
MBASE CORDON ALIMENTATION AC: L’embase AC INLET (31),
située à l’arrière de l’appareil reçoit le C
ORDON
D’ALIMENTATION (fourni) destiné à alimenter l’appareil.
3. S
ELECTION DE LA
TENSION D’ALIMENTATION: Le commuta-
teur S
ELECTION DE LA TENSION D’ALIMENTATION (32) permet
de choisir entre 115V ou 230V (France) afin d’utiliser
l’appareil partout dans le monde. Avant toute utilisation,
veuillez sélectionner la tension d’alimentation en vigueur dans votre pays.
4.S
ORTIES AUDIO RCA (37): La sortie CD permet de relier l’ap-
pareil à une entrée ligne de votre console de mixage.
5. S
ORTIES PHONO RCA (38): La sortie Platine Vinyle/Phono permet
de relier l’appareil à une entrée phono de votre console de mixage
6. V
IS DE MISE A LA TERRE: La CDT-05 ne possède pas de borne de
masse comme la plupart des platines vinyles. En effet la CDT-05 possède
une connexion à la terre interne. Si vous rencontrez un problème de bruit
de ronronnement lors de l'utilisation de la partie vinyle, utilisez une alimentation électrique de l'appareil différente de celle utilisée pour la console de mixage et le reste de votre installation audio.
7. S
ORTIE NUMERIQUE (36): Par cette sortie au standard IEC-958
(S/PDIF) transite le signal du lecteur CD. Vous pouvez ainsi
brancher cette sortie à tout appareil utilisant le même standard
S/PDIF: console de mixage numérique, ordinateur, convertisseur
A/D. L’utilisation de cette sortie nécessite des appareils spécifiques
qui ne sont pas forcément présents dans votre installation.
8. R
ELAIS DE DEPART DE LECTURE (35): Ce connecteur permet de
relier deux lecteurs CDT-05 ensemble, lorsqu’un appareil termine
la lecture d’une plage, le second démarre la lecture automatiquement. Pour une utilisation normale, ne pas connecter ce cordon.
OFF
ON
DIGI TAL
OUT
RE LAY
Page 27

9. HAUTEUR DE LA
PLATINE
(45): Vous pouvez
modifier la hauteur de la platine. Avec les
pieds L
OW P
ROFILE
, l’appareil sera à la même
hauteur que la majorité des consoles de mixage. Avec les pieds STANDARD
FEET, l’appareil sera légèrement plus haut, mais la partie Platine Vinyle sera
plus résistante aux vibrations.
REGLAGES DU BRAS DE LECTURE :
1. Installez le P
ORTE-CELLULE (7) ou la cellule intégrée sur le bras de
lecture puis vissez la bague dans le sens des aiguilles d’une montre.
Attention à ne pas trop serrer. Si vous avez une cellule haute en taille,
vous référez à son manuel d’installation.
2. Installez le C
ONTRE-
POIDS
(8) à l’arrière du bras de lecture en le
tournant dans le sens des aiguilles d’une montre, avec l’échelle de
graduation tournée vers vous.
3. Réglez le C
ONTRE-POIDS (8) jusqu’à ce que le bras de lec-
ture flotte librement au dessus du plateau de lecture. La cellule ne doit pas toucher celui-ci., ni pencher dans un sens
ou dans l’autre. Il s’agît du Point Zero auquel aucun poids
n’est appliqué à la cellule.
4. Positionnez juste la bague graduée sur le chiffre ‘0’ afin de repérer le
point d’équilibre du bras de lecture. Ce dernier est maintenant équilibré.
5. Tournez le C
ONTRE-POIDS (8) dans le sens des aiguilles d’une montre
jusqu’au réglage de poids (En grammes) préconisé par le fabricant de la
cellule.
6. Pour régler la hauteur du bras de lecture, utilisez un
tournevis à tête Philips afin de démonter la B
ASE DU
BRAS DE LECTURE (6) située en haut à droite de la pla-
tine. Il y a 3 vis à enlever complêtement. Lorsque vous
avez démonté la BASE DU BRA S DE LECTURE (6) ajustez la
hauteur de chaque ressort afin d’obtenir la hauteur
nécessaire à une utilisation correcte de votre cellule (Suivre les conseils du
fabricant). Chacun des 3 ressorts doit être réglé à la même hauteur afin que
le diamant de la cellule soit correctement positionné sur le disque vinyle
durant la lecture.
FONCTIONS:
1. E
CRAN LCD: L’ECRAN LCD (1) permet de visualiser
tous les paramètres relatifs au fonctionnement de
l’appareil. A savoir, l’affichage des titres par morceau
(Pour les fichiers MP3), réglages de vitesse, mode de fonctionnement,
affichage temps, BPM, portion du morceau déjà lu (Bargraph).
2. COMMUTATEUR OPERATION MODE (44): Ce commutateur
possède 3 positions: CD, TT & MIX. Le Mode CD permet
un contrôle total du signal audio (Y compris les scratches)
via le P
LATEAU DE
SCRATCH
VINYLE
(3), le Mode TT permet la
lecture de disque vinyle & le Mode Mix autorise la lecture d’un CD (Avec
des fonctions tactiles limitées) & d’un disque vinyle simultanément.
3. P
LATEAU DE
SCRATCH VINYLE / SCRATCH CONTROL
VINYL P
LATE
(3) & REPÈRE DE
SCRATCH
/ SCRATCH
ANCHOR (4): Ces 2 éléments fonctionnent ensemble
afin d’avoir un contrôle en temps réel de la lecture
d’un CD & d’un disque vinyle. Lorsque vous utilisez
l’appareil pour la première fois, assurez vous que le
R
EPERE DE
SCRATCH
(4) soit fermement solidaire du PLATEAU DE
SCRATCH
VINYLE (3).
4. R
EGLAGE DE
VITESSE
(9): Le réglage vitesse peut être modifié à
l’aide des touches SELECTION
PITCH RANGE SELECTION
(11). Il permet
de modifier la vitesse de lecture & le tempo durant la lecture. Les
touches PITCH RANGE SELECTION (11) permettent de choisir une plage
de réglage plus ou moins précise. Plus l’amplitude de la plage sera
élevée, plus les modifications de vitesse seront élevées, voir
brusques. A l’inverse, plus l’amplitude est faible, plus le contrôle
sera précis.
5. T
OUCHES DE RATTRAPAGE +/- (10): Celles-ci permettent au DJ
de modifier temporairement la vitesse de lecture afin de caler
au tempo le disque en lecture avec un autre morceau, lui aussi
en cours de lecture. Dans le M
ODE
MIX
, les TOUCHES
PITCH
BEND
(10) servent à modifier la vitesse du CD.
6. F
ONCTION MASTER TEMPO (12): Le Master Tempo permet de
modifier la vitesse de lecture sans modifier la tonalité. Cette
fonction n’est compatible qu’avec le lecteur CD et s’appliquera dès modification de la vitesse de lecture via le R
EGLAGE DE VITESSE (9). Attention le
Master Tempo peut fonctionner avec quelques irrégularités (Effets de
flanger...) lors de mofication de vitesse de lecture importante.
7. E
FFETS DSP (13, 14, 15): Les EFFETS DSP (13, 14,
15) permettent de modifier la tonalité & la phase,
ainsi que l’ajout de retard sur les morceaux de CD
lus par la CDT-05. Pour démarrer un effet, appuyez simplement sur la
touche de l’effet désiré & utilisez le potentiomètre rotatif T
RACK SKIP/DSP
PARAMETER (22) afin de modifier l’effet sélectionné. En maintenant ce
potentiomètre enfoncé durant une seconde, celui ci se commutera en
mode D
RY/WET, pour vous permettre de doser la quantité d’effet appliqué
au signal original afin de créer des effets variés. Lorsqu’aucun effet n’est
appliqué, le potentiomètre rotatif TRACK SKIP/PARAMETRE DSP (22) permet
de sélectionner une plage de lecture.
8. T
OUCHE LECTURE/PAUSE (16): En Mode CD ou Platine
Vinyle (TT ), la T
OUCHE PLAY
(16) démarre & arrête la lec-
ture.En Mode Mix, la TOUCHE PLAY (16) contrôle seulement
le CD, & la TOUCHE MOTOR ON/OFF (21) démarre & arrête la
lecture du disque vinyle.
9. T
OUCHE MASTER CUE (17): En Mode CD, la TOUCHE MASTER
CUE (17) commute l’appareil en mode préparation d’un Point
Cue, et ce jusqu’à ce qu’un Point Cue ait été enregistré. Puis
l’appareil se met en mode pause jusqu’à ce que vous appuyez
sur la TOUCHE PLAY (16). Appuyez et maintenez enfoncé la TOUCHE MASTER
CUE (17) afin de pré-écouter votre Point Cue. Pour des informations plus
précises sur les fonctions CUE de la CDT-05, consultez la section intitulée
“Enregistrement de Points Cue & de Boucles”.
10. F
ONCTION H
OT START CUE
(18): Cette fonction vous permet de démarrer la lecture à partir de Points Cue spécifiques & enregistrés, sans interrompre la lecture.
11. T
OUCHES DE R
ECHERCHE DE PLAGE
(19): Ces
touches vous permettent d’accéder aux différentes
plages présentes sur le CD inséré.
12. M
ODE LECTURE SIMPLE/CONTINUE (20): Cette touche per-
met de sélectionner le mode de lecture. Lorsque l’appareil
est en mode Single Auto-Cue, l’écran LCD affiche le mot ‘Single’,et l’appareil se cale à la première frame/note du morceau. Lorsque l’appareil aura
lu ce morceau, il se calera automatiquement en mode pause à la première
frame/note du morceau suivant. En mode Continuous, l’écran LCD
affichera le mot ‘Continue’, et le CD sera lu de la première à la dernière
plage de façon continue, jusqu’à ce que vous arrêtiez la lecture manuellement. Lorsque l’écran n’affiche ni ‘Single’, ni ‘Continue,’ l’appareil lira
toutes les plages de la première à la dernière et s’arrêtera après la dernière
plage.
13. T
OUCHE MOTOR ON/OFF (21): Cette touche permet de
démarrer & d’arrêter la rotation du plateau. En Mode TT ou
CD, cela nécessite que la lecture soit en cours (Mode Play).
En Mode Mix, la T
OUCHE MOTOR
ON/OFF
(21) contrôle le plateau pour
disque vinyle & la T
OUCHE PLAY (16) contrôle la lecture de la partie CD.
14. P
OTENTIOMÈTRE
TRACK
SKIP & PARAMETRES DSP (23): Ce
potentiomètre, durant la lecture d’un CD, permet de
sélectionner la plage à lire. En enfonçant celui-ci et en
tournant dans un sens ou dans vous accédez aux plages
par incrément de 10. Lorsqu’un effet DSP est engagé le P
OTENTIOMÈTRE
T
RACK SKIP & PARAMETRES DSP (23) permet le contrôle des paramètres de
cet effet. En maintenant celui-ci enfoncé durant 1 seconde, l’affichage
changera et vous pourrez doser l’effet sélectionné & appliqué au signal
audio (Contrôle Dry/Wet). Nous vous recommandons de prendre le temps
de procéder à quelques essais afin de maîtriser les réglages.
15. TOUCHE MEMO (23) & POINTS CUE HOT STARTABLE (24):
Grâce à cette fonction, vous pouvez mémoriser 3 points de
démarrage. La T
OUCHE MEMO (23) vous permet de mémoris-
er à la volée des Points Cue simplement en appuyant sur la
TOUCHE MEMO (23), puis en sélectionnant l’un des POINTS
HOT STARTABLE CUE (24) où vous souhaitez l’enregistrer. La
TOUCHE MEMO (23) permet aussi de sauvegarder le POINT
M
ASTER CUE
, lorsqu’il a été assigné sur un CD Audio
(Fonction non disponible sur CD MP3). Pour sauvegarder le POINT MASTER
CUE, maintenez enfoncée la T
OUCHE MEMO
(23) durant 3 secondes.
<27>
FLAN
GER
ECHO
FILTER
+
ON / OFF
FLAN
GER
ECHO
FILTER
ON / OFF
FLAN
GER
ECHO
FILTER
1
2
FLAN
GER
ECHO
FILTER
3
FLANGER
ECHO
FILTER
ON / OFF
FLAN
GER
ECHO
FILTER
ON / OFF
FLAN
GER
ECHO
FILTER
+
FLAN
GER
ECHO
FILTER
+
FI
FLAN
GER
ECHO
FILTER
FLAN
GER
ECHO
FILTER
+
MIX
CD T T
>
4%
8%
OFF
50%
16%
+
PITCH BEN D
KEY
EFX
FI
LTETER
EC HO
FLANGEGER
CUE
HO T STAR T
<<
<<
SEARC H
SINGL E
ON / OFF
MOTOR
<< TR AC K SKIP >>
MEMORY
CUE
1
2
3
Page 28

Pour des informations plus préci ses sur les fonctions CUE de la CDT-05,
consultez la section intitulée “Enregistrement de Points Cue & de
Boucles”.
16. T
OUCHE TEMPS
/RAPPEL DU POINT
CUE
(25): A chaque pression
sur ce bouton, que vous soyez en mode Mode CD ou Mode
Mix, l’affichage change Temps Ecoulé, Temps Total Restant, &
Temps Restant sur le Morceau en Lecture. Lorsque l’appareil est en
Mode Play, le temps changera, ainsi que le bargraph permettant de visu-
aliser la progression de la lecture. Lorsque l’appareil est en Mode Stop,
l’écran affichera ‘Elapsed,’ ‘T. Remain,’ ou ‘S. Remain’, et ce en fonction
de l’affichage temps sélectionné. Si vous avez sauvegardé un P
OINT CUE
MASTER sur une plage d’un CD Audio (Non MP3), vous pouvez le rappeler
en appuyant sur la TOUCHE T
EMPS/RAPPEL DU POINT CUE
(25) durant 3 sec-
ondes, jusqu’à ce que l’écran affiche le mot ‘LOAD’, ainsi que la position en temps - du P
OINT
MASTER CUE
. Puis appuyez sur la TOUCHE
MASTER CUE
(17) pour y assigner le Point Cue rappelé.
17. TOUCHE
REVERSE
(26): Durant la lecture, actionnez la
fonction en appuyant sur la touche afin de lire le morceau
à l’envers. En Mode CD, la T
OUCHE REVERSE (26) permet de
lire le CD à l’envers. En Mode TT, la TOUCHE REVERSE (26)
inversera le sens de lecture du Disque Vinyle. En Mode Mix, la TOUCHE
R
EVERSE
(26) permet uniquement d’inverser le sens de lecture du Disque
Vinyle, même si un CD est lu simultanément.
18. MODES REVERSE INSTANTANES (27): Il y a 3 Modes Reverse sur
la CDT-05, qui peuvent être utilisés lors de différentes performances. Vous trouverez ci-après une brève explication de chacun,
ainsi qu’un exemple d’application:
N
ON ENGAGÉ - Lorsque la LED de la TOUCHE INSTANT REVERSE MODES (27)
est éteinte, & le commutateur en position ‘REV,’ le plateau tourne dans le
sens inverse des ai
guilles d’une montre et le morceau sera lu à l’envers. Lorsque le commutateur est en position‘FWD’, le plateau tourne dans le sens des aiguilles
d’une montre. Ce mode Reverse est instantané & fonctionne comme sur
n’importe quelle platine vinyle.
M
ODE REVERSE INSTANTANÉ #1 - Pour le déclencher il vous suffit d’appuyer
sur la TOUCHE INSTANT REVERSE MODES (27) momentanément, la LED associée à la touche s’alllumera. Lorsque le commutateur est sur la position
‘REV’, le plateau tournera dans le sens inverse des aiguilles d’une montre
et le morceau sera joué à l’envers, mais vous n’entendrez pas le ralentissement.du moteur lors du changement de sens de lecture. Lorsque le commutateur est positonné sur ‘FWD’, le plateau tournera dans le sens des
aiguilles d’une montre et la lecture reprendra -sans entendre le bruit d’inversion- du sens de rotation comme si vous n’aviez jamais enclenché ce
mode. Cela vous permet d’inverser le sens de lecture à tout moment y
compris en plein mix et ce sans perdre le calage des deux morceaux.Cela
s’avérera très utile pour les DJs mixant de la musique électronique.
M
ODE REVERSE INSTANTANÉ #2 - Ce mode est enclenché en maintenant
enfoncée la T
OUCHE INSTANT REVERSE MODES
(27) (27) durant 2 secondes,
la LED associée à la touche clignotera. Lorsque le commutateur est en
position ‘REV’, le plateau tournera dans le sens inverse des aiguilles
d’une montre et le morceau sera joué à l’envers, mais vous n’entendrez
pas le ralentissement du moteur lors du changement du sens de lecture.
Avec le commutateur en position ‘FWD’, le plateau tournera dans le sens
des aiguilles d’une montre et la musique reprendra sa lecture dans le sens
normal, sans que vous entendiez le bruit du moteur, et à partir de l’endroit oû vous aviez inversé le sens de lecture.
19. T
OUCHE STOP/EJECT (41): Durant la lecture d’un CD,
appuyez une première fois afin d’arrêter la lecture. Pour éjecter
le CD, appuyez une seconde fois sur cette même touche.
20. V
ITESSE DE LECTURE (42): Cette touche permet de choisir
entre 33, 45 ou 78trs/mn. Bien que le concept soit identique
à une platine vinyle conventionnelle, d’autres fonctionnalités
ont été apportées afin de contrôler d’autres fonctions de
l’appareil.
C
HANGEMENT DE LA
VITESSE DE LECTURE PAR
DEFAUT DU CD: Les DJs sont
habitués à mixer leurs disques avec une vitesse de plateau par défaut.
Vous pouvez choisir cette vitesse avec l’appareil en Mode Stop (Et non en
Mode Pause) en appuyant sur la touche S
ELECTION DE LA
VITESSE DE
LECTURE (42) et choisir ainsi entre 33 & 45trs/mn (Le contrôle de lecture
du CD ne peut être effectué en 78trs/mn). Si l’appareil est en Mode Play,
appuyez sur la TOUCHE STOP/EJECT (41) une fois avant de changer le
réglage. La LED P
LATTER SPEED
(43) indiquera alors la vitesse de rotation
du plateau sélectionnée.
C
HANGEMENT DE VITESSE DURANT LA LECTURE: Si vous souhaitez modifier la
vitesse de lecture du CD durant sa lecture appuyez simplement sur la
touche SELECTION DE LA VITESSE DE LECTURE (42) afin de sélectionner 33 ou
45trs/mn (La lecture du CD ne peut être effectué en 78trs/mn).
Vous entendrez un changement audible de tempo et de tonalité car vous
jouez le morceau à une vitesse beaucoup plus rapide ou plus lente que la
vitesse de lecture normale.
C
HANGEMENT DE VITESSE DURANT LA LECTURE (DISQUE VINYLE): Si vous
souhaitez modifier la vitesse du disque vinyle durant sa lecture, appuyez
simplement sur la touche SELECTION DE LA VITESSE DE LECTURE (42), en Mode
Mix ou TT, afin de sélectionner 33 ou 45trs/mn. La vitesse 78trs/mn est
activée après avoir appuyé durant 3 secondes sur la touche S
ELECTION DE LA
VITESSE DE LECTURE (42).
21. SECTION BOUCLE/LOOP (28), (29), (30): Cette
fonction vous permet de sélectionner des passages précis d’un CD et de les répéter autant de
fois que souhaité. La T
OUCHE LOOP IN A (28) marque le point de départ de
la boucle. La T
OUCHE LOOP OUT B/EDIT (29) indique le point de fermeture
de la boucle. La TOUCHE RELOOP (30) permet de revenir instanément au
début de la boucle préalablement enregistrée. Des points de boucle peuvent être créés à la volée durant la lecture,
ainsi qu’en Mode Pause. Pour fermer/terminer une boucle, appuyez sur la
T
OUCHE LOOP OUT B/EDIT (29). Pour éditer les points de la boucle, appuyez
sur la TOUCHE LOOP OUT B/EDIT (29), trouvez le point que vous souhaitez
modifier, puis en fonction de celui-ci, appuyez sur la TOUCHE LOOP IN A (28)
ou sur la TOUCHE LOOP OUT B/EDIT (29). Pour des informations plus précis-
es sur les fonctions CUE de la CDT-05, consultez la section intitulée
“Enregistrement de Points Cue & de Boucles”.
ENREGISTREMENT DE POINTS CUE & DE BOUCLES:
1. ENREGISTREMENT D’UN POINT CUE MASTER:
a. Durant la lecture d’un CD, cherchez le point que vous souhaitez
mémoriser comme P
OINT M
ASTER CUE.
b. Mettez la lecture en pause en appuyant sur la T
OUCHE PLAY/PAUSE BUTTON
(16). Le plateau s’arrêtera.
c. Utilisez le D
ISQUE VINYLE DE SCRATCH (3) afin de localiser précisemment
le P
OINT MASTER CUE. Attention; cette fonction ne concerne que le Mode
CD.
d. Pour mémoriser le P
OINT
MASTER CUE
, appuyez sur la TOUCHE
PLAY/PAUSE
(16) une nouvelle fois. Le plateau re-démarre et le musique reprendra.
e. Pour accéder au P
OINT MASTER CUE, appuyez sur la TOUCHE MASTER CUE
(17). Puis appuyez sur la TOUCHE PLAY/PAUSE (16) pour démarrer la lecture
à partir du Point P
OINT MASTER CUE
f. Pour visualiser le POINT MASTER CUE, appuyez sur la TOUCHE MASTER CUE
(17) afin d’avancer jusqu’au POINT MASTER CUE, puis maintenez enfoncée la
TOUCHE MASTER CUE (17) jusqu’à l’apparition de ce dernier. L’appareil se
cale alors sur le P
OINT MASTER CUE.
g. Pour avancer et démarrer la lecture à partir du P
OINT MASTER CUE sans
interruption, appuyez sur la touche H
OT START CUE FUNCTION
(18).
h. Pour sauvegarder le P
OINT MASTER CUE dans la mémoire de la CDT-05
(CD-Audio uniquement, ne fonctionne pas avec les CDs MP3), maintenez
la T
OUCHE MEMO
(23) enfoncée durant 3 secondes. Lorsque le P
OINT
MASTER CUE a été sauvegardé dans la mémoire, la ligne en bas de l’ECRAN
LCD (1) affichera ‘SAVE’, ainsi que le numéro de la plage et l’emplacement
en temps.du P
OINT MASTER CUE. Pour chaque CD-Audio, sur lequel vous
avez sauvegardé un P
OINT MASTER C
UE
, l’E
CRAN LCD (1) affichera, en bas à
gauche, le mot ‘CUE.’
i. Pour rappeler un P
OINT MASTER CUE sauvegardé, maintenez enfoncée la
touche T
IME MODE/RECALL CUE
(25) durant 3 secondes, jusqu’à ce que la
ligne du bas de l’E
CRAN LCD DISPLAY (1) affiche ‘LOAD’ avec les informa-
tions du P
OINT MASTER CUE
(N°de plage / Temps). Appuyez sur la T
OUCHE
MASTER CUE 17) afin de confirmer l’assignation de ce point cue au POINT
MASTER CUE. Maintenant vous pouvez utiliser ce dernier comme POINT
MASTER CUE.
j. Lorsque la lecture d’un morceau est en cours, vous pouvez effacer le
P
OINT MASTER CUE à l’aide du potentiomètre rotatif PARAMETRES TRACK SKIP
& DSP (22). Celui-ci sera effacé de la mémoire temporaire. Vous pouvez
alors enre
gistrer un nouveau P
OINT MASTER CUE ou utiliser la fonction RECALL CUE
afin d’accéder aux point s déjà sauvegardés.
2. ENREGISTREMENT DE POINTS HOT CUE:
a. Durant la lecture d’un CD, trouvez le point que vous souhaitez enreg-
istré comme P
OINT HOT CUE. Si vous souhaitez enregistrer un POINT HOT
CUE à la volée, reportez vous au paragraphe B. Sinon, en étant en Mode
CD, mettez la lecture en mode pause en appuyant sur la TOUCHE PLAY/PAUSE
(16), puis recherchez la position du point cue à l’aide du DISQUE VINYLE DE
S
CRATCH
(3), puis passez au paragraphe B.
<28>
FLAN
GER
ECHO
FILTER
FLANGER
ECHO
FILTER
FLANGER
ECHO
FILTER
FLAN
GER
ECHO
FILTER
TIME
RECALL CUE
FWD
REV
INSTANT REV
33
45
78
SEAMLESS LOOP
AB/LOOP
RELOO P
Page 29

b. Pour enregistrer un POINT
HOT CUE
, appuyez sur la TOUCHE
MEMO
(23)
jusqu’à ce que le bouton s’illumine.
c. A l’endroit où vous souhaitez enregistrer un P
OINT HOT CUE, appuyez sur
le bouton POINT HOT STARTABLE CUE (24) dans lequel vous souhaitez
mémoriser celui-ci.
d. Répétez l’opération pour les 3 autres P
OINTS CUE HOT STARTABLE
.
e. Pour accéder instantanément à l’un des P
OINTS CUE HOT STARTABLE, il
vous suffit d’appuyer simplement sur la touche du POINT CUE HOT
STARTABLE (24) désiré. L’appareil démarrera alors la lecture à partir de ce
dernier.
f. Pour effacer un P
OINT CUE HOT STARTABLE, répéter les opérations précé-
centes afin d’enregistrer sur les P
OINTS C
UE HOT STARTABLE
(24) existants.
3. ENREGISTREMENT D’UNE BOUCLE PARFAITE:
a. Durant la lecture d’un CD, localisez le point de départ de la B
OUCLE
PARFAITE (LOOP I
N A). Si vous souhaitez enregistrer une B
OUCLE P
ARFAITE
,
Consultez le paragraphe B. Sinon, mettez l’appareil en mode pause en
appuyant sur la T
OUCHE PLAY/PAUSE (16), puis localisez le point LOOP IN A
à l’aide DISQUE VINYLE DE SCRATCH (3), puis passez au paragraphe B.
b. Au point de départ de la boucle, appuyez sur la touche L
OOP IN A (28).
Cette opération peut s’effectuer en Mode Play ou Mode Pause.
c. Au point de fermeture de la boucle L
OOP OUT B, appuyez sur la touche
LOOP OUT B/EDIT (29). Cette opération peut s’effectuer en Mode Play ou
Mode Pause.
d. Dès que les points L
OOP IN A & LOOP OUT B ont été enregistrés, la
boucle commencera à être jouée sans interruption. Pour re-démarrer la lecture de la boucle ou revenir à son début, appuyez sur la touche RELOOP
(30).
e. Pour éditer le point de sortie L
OOP OUT B, appuyez sur la touche LOOP
OUT B/EDIT (29). La boucle s’arrête et vous pouvez alors ré-enregistrer un
point de sortie L
OOP OUT B, à votre convenance, en appuyant simplement
sur la touche L
OOP OUT B/EDIT (29)
f. Pour éditer le point L
OOP IN A, appuyez simplement sur la touche LOOP
I
N A (28) durant la lecture de la boucle et ce à l’endroit où vous souhaitez
mémoriser un nouveau point LOOP IN A.
g. Pour sortir de la B
OUCLE PARFAITE & reprendre la lecture normale,
appuyez sur la touche L
OOP OUT B/EDIT (29). Si nécessaire, vous pouvez
enregistrer une nouvelle BOUCLE PARFAITE (Retournez au paragraphe A), ou
re-jouer la boucle déjà enregistrée en appuyant sur la touche RELOOP (30).
CARACTERISTIQUES TECHNIQUES
PLATINE VINYLE:
Type..................................................Platine Manuelle à Entraînement Direct
Type moteur:........................... Super High Torque (3.6 kgf/cm) Direct Drive
Moteur...................................................................Moteur à courant continu
Vitesse de lecture ..........................................................33 1/3-45-78 trs/mn
Sélection du réglage de vitesse.........................................+/- 4, 8, 16, 50%
Pleurage & Scintillement....................................................< 0.25% WRMS*
* Cette mesure ne concerne que la platine équipée de son plateau de
lecture et exclue l’incidence de la cellule, du disque & du bras de lecture.
BRAS DE LECTURE:
Type...........................................................Bras Droit à Equilibrage Statique
Poids du porte-cellule.............................................................................5.6 g
LECTEUR CD:
Quantification......................................1 Bit Linéaire/Voie, 3 Faisceaux laser
Echantillonnage..........................................................................................x8
Fréquence d’échantillonnage...........................................................44.1 kHz
Bande passante.......................................................................20 Hz-20 kHz
Distortion Harmonique Totale.........................................................< 0.05%
Rapport Signal/Bruit.............................................................................86 dB
Dynamique...........................................................................................90 dB
Sortie Numérique................................................................IEC958 (S/PDIF)
Diaphonie................................................................................86 dB (1 KHz)
Niveau de sortie.................................................................0 +/- 0.2V R.M.S.
Alimentation..............................................................AC 115/230V, 60/50 Hz
Affichage temps: Temps écoulé, Temps restant & Temps total restant
Départ de lecture instantané.................................................< 0.03
Seconde
Potentiomètre de réglage de vitesse..................................+/- 4, 8, 16, 50%
POIDS & DIMENSIONS:
Dimensions: ...........................17.75 x 14.65 x 6.3” (450 x 372 x 160.5mm)
Poids: ....................................................................................20.2 lbs (9.1Kg)
Dans le cadre d’un souci constant d’amélioration des produits, le design et
les caratéristiques peuvent être modifiés sans préavis.
*La garantie établie n’est pas affectée par les garanties localement en
vigueur.
ACCESSOIRES EN OPTION:
DJX-05 Casque Professionnel pour Monitoring
GX-450 Enceinte ABS Amplifiée
CS-02 Console de Mixage Professionelle 5 Voies
Pour plus d’informations sur les produits et les nouveautés Gemini,
n’hésitez pas à visiter notre site: http://www
.geminidj.com!
DJX-05
GX-450
CS-02
NOTES:
____________________________________________________
____________________________________________________
____________________________________________________
____________________________________________________
____________________________________________________
____________________________________________________
____________________________________________________
____________________________________________________
____________________________________________________
____________________________________________________
____________________________________________________
____________________________________________________
____________________________________________________
____________________________________________________
____________________________________________________
____________________________________________________
____________________________________________________
____________________________________________________
____________________________________________________
____________________________________________________
<29>
Page 30

WARRANTY AND REPAIR:
All Gemini products are designed and manufactured to the highest
standards in the industry. With proper care and maintenance, your product will
provide years of reliable service.
LIMITED WARRANTY
A. Gemini warrants its products to be free from defects in materials and work-
manship for One (1) year from the original purchase date.
Exceptions: Laser assemblies on CD Players, cartridges, and crossfaders
are covered for 90 days.
B. This limited warranty does not cover damage or failure caused by abuse, mis-
use, abnormal use, faulty installation, improper maintenance or any repairs
other than those provided by an authorized Gemini Service Center.
C. There are no obligations of liability on the part of Gemini for consequential
damages arising out of or in connection with the use or performance of the
product or other indirect damages with respect to loss of property, revenues, of
profit, or costs of removal, installation, or reinstallation. All implied warranties
for Gemini, including implied warranties for fitness, are limited in duration to
One (1) year from the original date of purchase, unless otherwise mandated
by local statutes.
RETURN/REPAIR
A. In the U.S.A., please call our helpful Customer Service Representatives at
(732)738-9003, and they will be happy to give you a Return Authorization
Number (RA#) and the address of an authorized service center closest to you.
B. After receiving an RA#, include a copy of the original sales receipt, with
defective product and a description of the defect. Send by insured freight to:
Gemini Sound Products Corp, and use the address provided by your customer
service representative. Your RA# must be written on the outside of the
package, or processing will be delayed indefinitely!
C. Service covered under warranty will be paid for by Gemini and returned to
you. For non-warrantied products, Gemini will repair your unit after payment is
received. Repair charges do not include return freight. Freight charges will be
added to the repair charges.
D. On warranty service, you pay for shipping to Gemini, we pay for return
shipping within the Continental United States. Alaska, Hawaii, Puerto Rico,
Canada, Bahamas, and the Virgin Islands will be charged for fr
eight.
E. Please allow 2-4 weeks for return of your product. Under normal circum-
stances your product will spend no more than 10 working days at Gemini. We
are not responsible for shipping times.
E-mail Address: ___________________________________________________________________________________________________________________________________________________________________________________________________________________________________________________
Phone #:
Initial:
State:
or
First Name:
Last Name:
Province:
Address: (Number and Street)
City:
Apt #:
Country:
Postal Code:
Model Number:
(Example: CDT-05)
Serial Number: (Located on back of most units)
Serial Number: (Located on back of most units)
Month Day Year
Date of Purchase:
Month Day Year
Date of Purchase:
Purchase Price:
.00
$
(E
XCLUDING
TAX)
Dealer:
Zip Code:
Age:
City:
or
Month Day Year
Date of Birth
Model Number:
(Example: CDT-05)
Save postage and register your product online
at www
.geminidj.com
and automatically be
registered for great prize giveaways!
If you do not have internet access, fill out the form below and mail to the appropriate
address listed at the right side of this page.
USA
GEMINI SOUND PRODUCTS
Worldwide Headquarters
120 Clover Place
Edison, NJ 08837 USA
Tel: (732) 738-9003
Fax: (732) 738-9006
SPAIN
GEMINI SOUND PRODUCTS S.A.
Rosello, 516,
08026 Barcelona, Spain
Tel: 3493-436 37 00
Fax: 3493-347-6961
FRANCE
GEMINI FRANCE (GSL)
1, Allee d’Effiat,
Parc de l’evénement, 91160
Longjumeau, France
Tél: + 33 1 69 79 97 70
Fax: + 33 1 69 79 97 80
GERMANY
GEMINI SOUND PRODUCTS GMBH
Liebigstr. 16,
Haus B – 3. OG,
85757 Karlsfeld
Germany
Tel: 08131 – 39171 – 0
Fax: 08131 – 39171 – 8
UK
GEMINI SOUND PRODUCTS
Unit C4
Hazleton Industrial Estate, P08 9JU
Waterlooville, UK
Tel: 087 087 00880
Fax: 087 087 00990
IN SPAIN
En caso de mal funcionamiento de
esta unidad, por favor contacte con el
Servicio de Atención al Cliente en el
teléfono 93 436 37 00 que le asesorará sobre el procedimiento correcto
para solucionarlo. En caso de ser
necesario enviar la unidad para su
reparación, el Servicio de Atención al
Cliente le proveerá de un número de
incidencia, así como de la dirección
del Servicio de Asistencia Técnica más
cercano a su residencia.
IN THE
UNITED KINGDOM
In the event that you need service on
your Gemini product under warranty,
simply write a letter describing the
problem, along with your contact
information. Make sure to enclose a
copy of your receipt for proof of warranty information. A return number is
not required. You will be responsible
for shipping charges to Gemini UK,
and Gemini UK will pay to return the
unit to you if it is considered under
warranty.
IN
GERMANY
Die allgemeinen gesetzlichen
Gewährleistungen bleiben von den
Herstellergarantien unberührt. Der
Garantieanspruch erlischt bei
Eingriffen
durch den Käufer oder durch Dritte
sowie bei unsachgemässer
Behandlung.
Gewährleistungsansprüche sind ausschließlich gegenüber
Ihrem Fachhändler geltend zu
machen.
IN
FRANCE
En cas de panne, merci de contacter
votre revendeur. Tout appareil en
panne doit y être retourné, accompagné de sa facture d'achat, de son
emballage d'origine et d'un descriptif
de panne. L'appareil sera ensuite
expédié au SAV de GSL France. Tout
produit reçu sans facture sera réparé
hors garantie. GSL France réexpédiera l'appareil au revendeur
après intervention.
Cut along this line & keep the rest of this page for your records.
For your records
<30>
 Loading...