

Page 1
User Guide
CC40
Compact Cordless Telephone
with Digital Answering Machine
This equipment is not designed for making
emergency telephone calls when the power
fails. Alternative arrangements should be
made for access to emergency services.
Page 2
Charging
Contacts
In Use Light
Battery Low
Light
Recall
Memory
Direct Memory
Locations
Screen Button
Redial
Talk/End
Chan/Func
OGM1
Answer
Light
CC40
Memo
Button
Erase
Button
On/Off
Button
Charge
Light
Page
Light
Mic
Page
Button
Power
Light
In Use
Light
Play/Stop
Button
Repeat
Button
OGM2
Button
Skip
Button
OGM1
Button
Message
Display
Hi/Lo Ringer
Switch
2/4/TS Selector
Switch
On/Off Switch
Microphone
Page 3

INDEX
General & safety information 1
Multi handset facilities 1
Setting up
Connecting to the mains 2
Charging the handset 2
Setting the switches 3
Fitting a battery 3
Setting the clock 4
Setting the answering machine volume 4
Outgoing messages 4, 5
Fitting the handset aerial 5
Plugging into the telephone socket 5
Telephone 6
Basic use 6
Memory 6
Button functions 7
Separate handset battery charger 5
Charging the handset 5, 7
Lights 7
Paging 8
Interference 8
Answering machine
Setting either OGM1 or OGM2 9
Switching the machine on or off 9
Listening to messages 9
Tones or end of call signals after messages 10
If the memory's full 10
Monitoring calls 10
Leaving a memo 10
Advanced use : remote access 11
General 11
Security code 11
Listening to messages 12
Switching the machine on or off 13
Setting OGM1 instead of OGM2 13
Memory full 13
Troubleshooting the telephone 14
Troubleshooting the
answering machine 15
Guarantee/Product safety 16
Approval 17
Wall Mounting Template
Accessory Order Form
Page 4

1
CC40
Congratulations on choosing a CC40 cordless telephone. As an option,
you may add up to two extra handsets to your CC40 so calls can be
taken by any handset and transferred between handsets (although it
is not possible to speak between handsets).
Should you wish to take advantage of these extra handsets, full
instructions for their use are packed with the additional handsets
(optional extra).
We at Geemarc want you to get the most out of our product and that’s
why we’ve developed a manual which we hope will be easier to use.
So please take the trouble to read it and enjoy your CC40 to the full.
What you can use your CC40 with and
what you can’t
You can use your CC40 with:
♦ private lines
♦ business lines
♦ compatible, approved PABXs. If you have a problem, contact your
PABX supplier.
Your telephone line must accept TONE dialling.
Do not use your CC40 with:
♦ shared service or party lines
♦ 1+1 carrier systems
♦ a payphone unless it’s a private payphone with the ‘green spot’
approval mark.
Safety
(See also information on p16)
♦ Before plugging in, make sure your electricity supply is 230v 50Hz AC.
♦ Never put the base unit outdoors.
♦ Base unit : never change the length of the adaptor lead or use any other
adaptor other than the supplied type 40 AC adaptor.
♦ Separate charger (if supplied) : if the adaptor or lead gets damaged,
replace the entire remote charging unit.
Where to put your CC40 and
how to look after it
♦ Keep it away from heat, dust and damp. Don’t install it near electronic
or magnetic equipment such as TVs, computers, cassettes or disks.
♦ Clean it with a soft cloth. Keep the base and handset charging contacts
clean.
♦ Never use polishes or cleaning agents - they could damage the finish
or the electrics inside.
♦ Clean the handset and base unit charging contacts from time to time using
a soft dry cloth.
How much telephone equipment
can you have in your home?
Each item is marked (usually on the base) with a REN number. For
example, your CC40 is REN 1 and most BT phones are REN 1. The
REN numbers of all your equipment, added up, must not exceed 4.
Otherwise you’ll overload your line and your equipment may not work
properly. If you use more than one handset with your CC40, the REN
value is unchanged at REN 1.
This equipment is not designed for making
emergency telephone calls when the power
fails. Alternative arrangements should be
made for access to emergency services.
Page 5
2
SETTING UP
Thunderstorms
Unplug your CC40 from the telephone socket during thunderstorms: if
lightning strikes your phone line, it could damage the machine. Your
guarantee does not cover lightning damage.
To set up follow steps 1-8
Don’t use or attempt to set up the telephone until you’ve charged the
handset battery for 24 hours. This action is described in step 2.
STEP 1: Connect to the mains
Plug the adaptor lead into the adaptor socket at the back of the telephone
base unit. Then plug the adaptor into the mains and switch on. Don’t plug
into the telephone socket yet. The Power light will come on the answer
light will come on, the message display will count to 20; there'll be a beep.
Then '00' flashes, alternately with 'LO'. Wait for the beep before
continuing. Keep the telephone base unit plugged in - it won't work without
power.
.
STEP 2 : Charge the handset
1. Set the ON/OFF switch to ON.
2. Leave the handset on the main base unit for 24 hours.
The Charge light will stay on even after the handset is fully charged.
3. Pick up the handset, push the ON/OFF switch to OFF for a few seconds
then back to ON.
4. Place the handset on the main base unit charging recess. You should
hear a beep.
If you do not hear a beep:
♦ Leave the handset on the main base unit for 20 minutes.
♦ Pick up the handset, push the ON/OFF switch to OFF for a few seconds
then back to ON.
Note: Repeat Step 2 items 3 and 4, for each additional handset you may
have - after charging for 24 hours in a pod charger or the main base unit
charging recess.
Note: The beep is to confirm that the handset is permanently linked, for
communication, to the main base unit.
Please also note that the linking for communication can only be made by
placing the handset on the main base unit and not one of the remote pod
chargers.
Page 6
3
SETTING UP
STEP 3 : Set the switches
After how many rings do you want the
answering machine to answer?
There are three settings for the Selector switch:
♦ ‘2’: the machine will answer after 2 rings; or
♦ ‘4’: the machine will answer after 4 rings; or
♦ TOLL (toll saver). If you’re away and ringing in for your messages, toll
saver can save you the cost of a call. It’ll answer after 2 rings if you have
any new messages, or after 6 rings if you don’t. So if it rings more than twice,
you can hang up, knowing you have no messages.
You can set the ringer switch to a Low or High noise level.
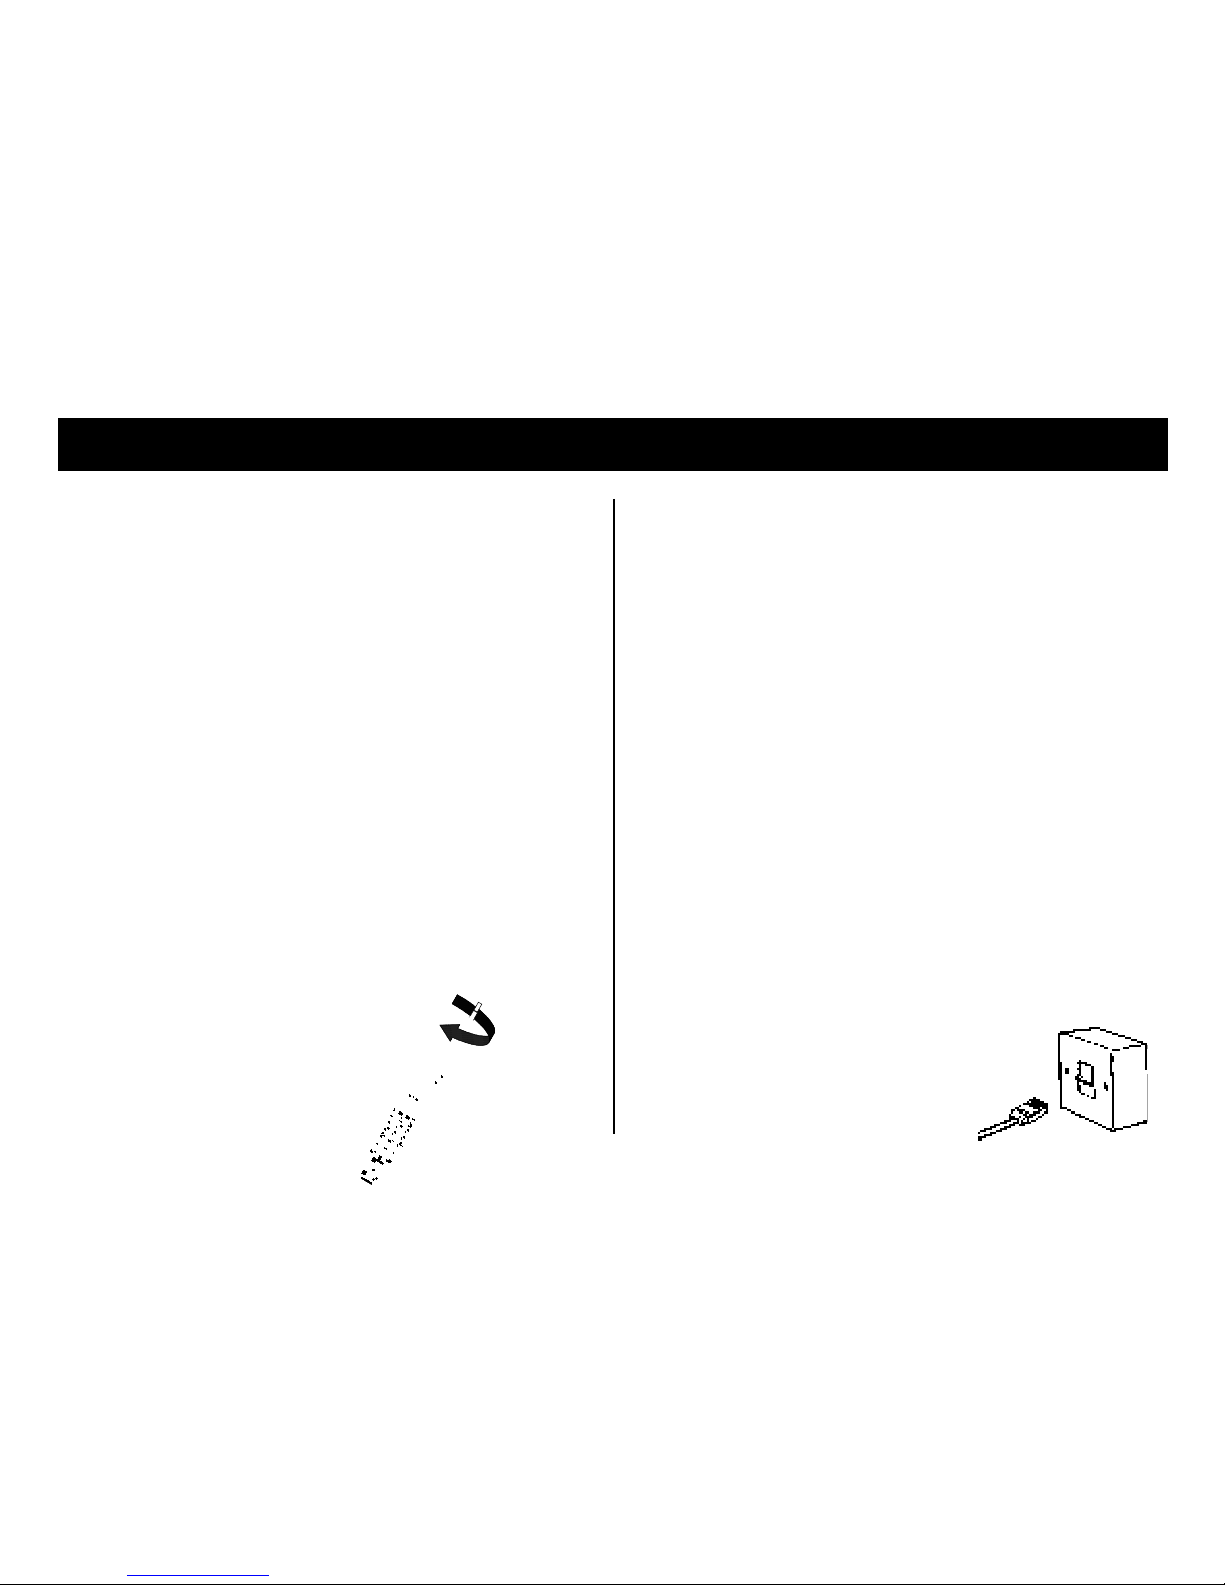
STEP 4 : Fit a leak resistant PP3
(or equivalent) alkaline battery.
Do not use a re-chargeable type
Why? Because if you have a power cut (or the mains supply is disconnected
or switched off), when power is restored or switched on again: -
♦ you won’t have to reset the clock
♦ you won’t lose your messages; and
♦ you won’t lose any outgoing message you recorded yourself. (The
machine comes with standard outgoing messages but you can record your
own instead).
The machine however will not answer calls during a power cut.
The battery will come into use only when the power is cut off and will support
the memories for several hours. The battery will eventually run down if power
is not restored. (NB If you plan to switch the power to the machine off for lengthy
periods, disconnect the machine from the telephone socket and remove the
battery. You’ll have to set the clock and record any personal outgoing
messages after re-fitting the battery and switching the machine on again).
1 Unlatch the battery cover on the underside of the base. (Make sure the
base unit is not connected to the telephone socket).
2 Fit the PP3 battery; the connector will only fit the correct way round.
3 Refit the battery cover. Make sure it’s latched back into place. The
Message Display will flash '00'.
♦ If the battery is or becomes low, the Message Display will alternate
between '00' and 'Lo' and the Power light flashes. Unplug the
machine from the telephone socket and replace the battery as above.
♦ Dispose of the old battery carefully. Never burn them or let children play
with them.
2 4 TOLL
LOW HI
POWER
Selector Switch Ringer Switch
Page 7

SETTING UP
4
STEP 5 : Set the clock
The machine speaks. If you set the clock, the machine will announce the
time and day that each message was left. When playing back messages,
you can as an option switch this day/time stamping off.
What you need to know before you start
♦ Don’t leave more than 15 seconds between button presses. Otherwise
you’ll have to start again.
♦ To programme a setting, you use OGM1 and OGM2. OGM1 takes you to
a higher setting; OGM2 takes you to a lower setting. The machine calls out
the settings.
1 Ensure the Message Display is on. If it isn’t, press On/Off.
2 Hold down the Skip until the machine calls out ‘Sunday’. Then release
Skip.
3 Press OGM1 or OGM2 to set the day. Then press Skip.
4 Press OGM1 or OGM2 to set the hour. Then press Skip.
5 Press OGM1 or OGM2 to set the minutes. Then press Skip.
The machine will call out your setting.
♦To hear the setting at any time, press Skip.
♦To change a setting, repeat items 2 to 5. (The present settings will be the
starting points).
♦ANSWER MACHINE VOLUME SETTING: You may set the
volume during day/time announcements or when messages are played
back by repeatedly pressing OGM1 to increase the volume or OGM2 to
decrease the volume (eg either press Skip then OGM1 or OGM2 OR press
Play then OGM1 or OGM2.
STEP 6 : Outgoing messages (OGMs)
The machine already has two outgoing messages: OGM1 and OGM2.
You can use these messages or record new ones.
OGM1 invites and allows callers to leave a message after hearing a beep
tone.
OGM2 makes an announcement to callers but does not normally allow them
to leave a message. A typical announcement might be: “The surgery is now
closed. Please call again between 9am and 5pm. Thank you”.
Ensure Answer light and Message display is on. If not, press ON/
OFF.
Press OGM1 to hear OGM1 (‘A1’ appears). Wait until ‘00’
appears, then press OGM2 to hear OGM2 (‘A2’ appears). If
you’re happy with these messages, go to Step 7; if you want to record
new ones, see below.
To record new outgoing messages
What you need to know before you start:
♦ Plan what you want to say. Hint: callers prefer short messages.
♦ Your message must be longer than 4 seconds and less than a minute.
♦ Speak 20cm from the front of the machine.
♦ Ask callers to speak after the tone if recording an OGM1.
♦ During recording '_ _' will flash in the Message Display.
Page 8
SETTING UP
5
To record a new OGM1
1 Ensure Answer light and Message display is on. If not, press ON/
OFF.
2 Hold down OGM1 - speak after the beep - then release OGM1.
The machine will play your message and ‘A1’ appears.
3 To hear OGM1 at any time, press OGM1.
To record a new OGM2
1 Ensure Answer light and Message display is on. If not, press ON/
OFF.
2 Hold down OGM2 - speak after the beep - then release OGM2.
The machine will play your message and ‘A2’ appears.
3 To hear OGM2 at any time, press OGM2.
♦To change your message, just record another.
♦If you don’t record a new OGM1, ‘00’ flashes.
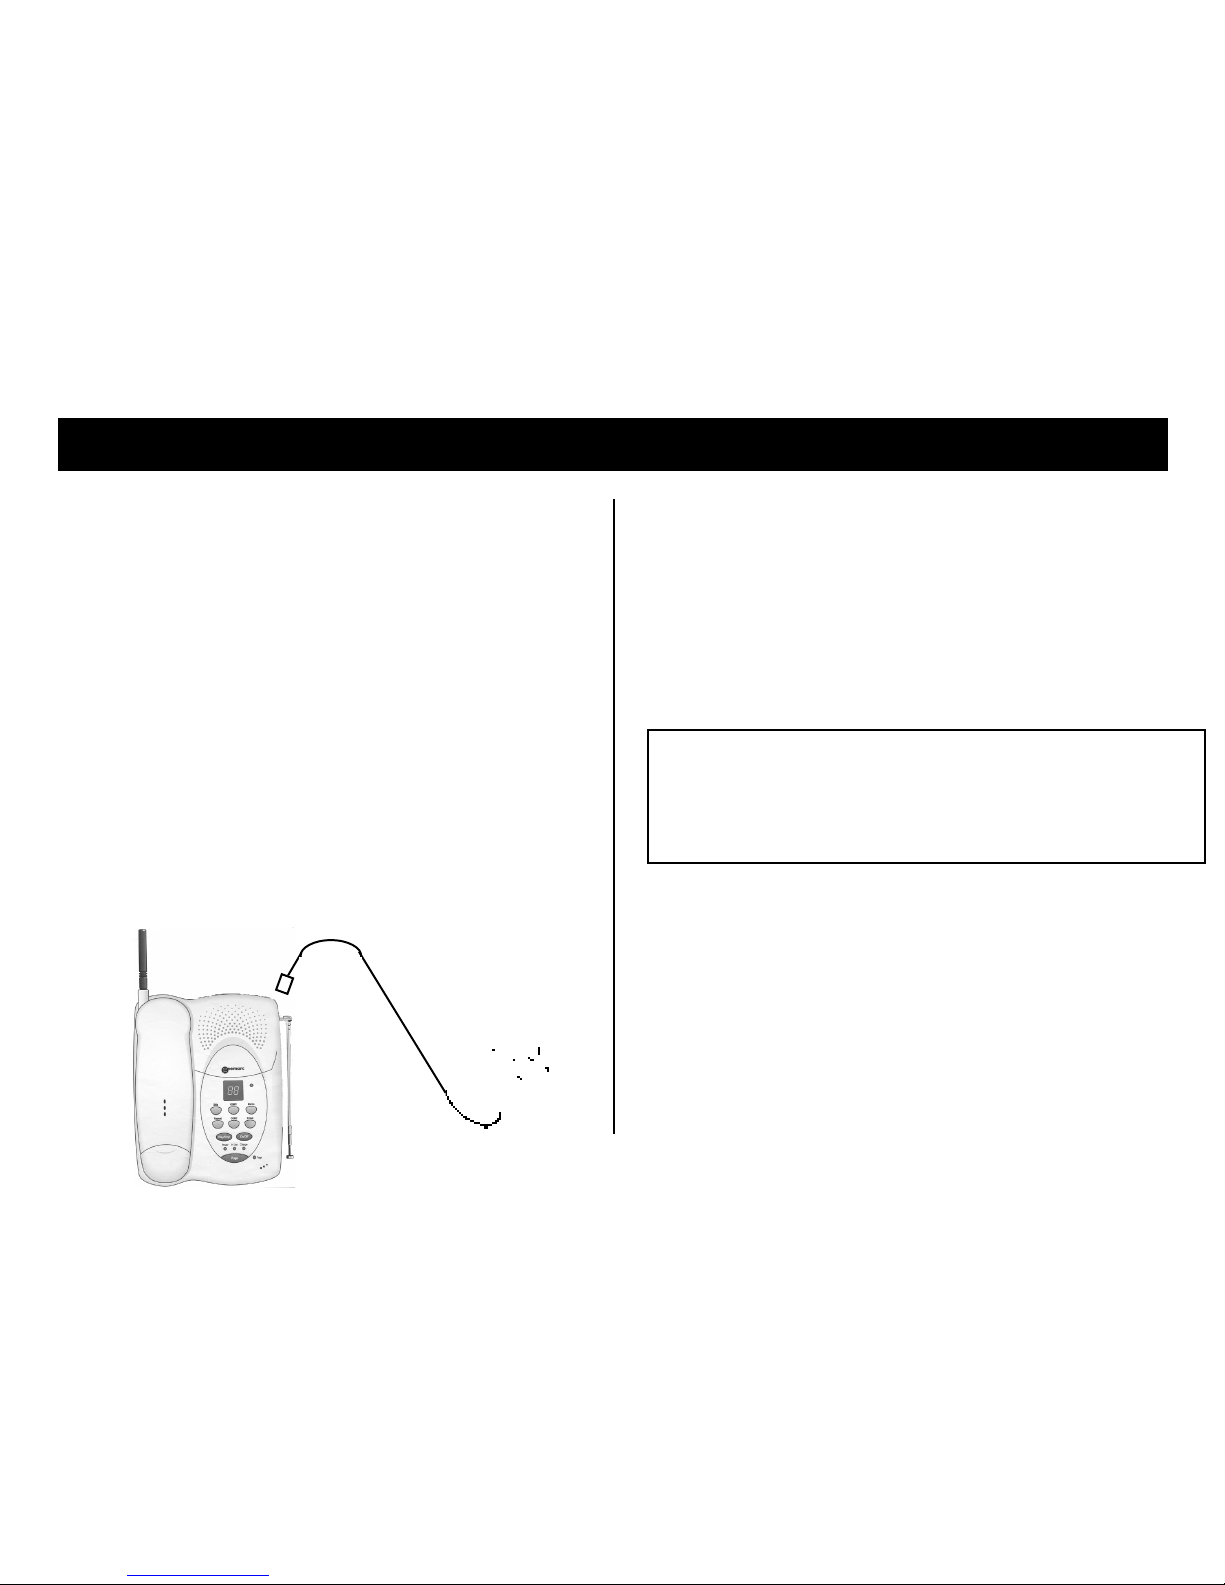
STEP 7 : Fit the handset aerial
1 Insert the aerial into the handset.
2 Tighten the base ring.
Separate handset battery charger
A separate handset battery charger may be supplied with your telephone,
or alternatively, is available as an option. This lets you keep the handset
charged away from the base unit. The charger is designed for indoor use
only.
The charger is fitted with a permanently wired power adapter. The power
adapter should be plugged into a mains power socket and the supply
switched on.
When the handset is placed in the charger, a red light will come on after 5
to 10 seconds to show that charging is taking place. The light will remain on
even when the battery is fully charged.
Note: This separate charger is to be used as a remote charging function only
and cannot be used to set up the communication link between the Handset
and the Base Unit. This can only be done by placing the handset onto the
main base unit. (See step 2 item 4).
IMPORTANT: Should the power adapter or lead become damaged, the
entire charger must be replaced. Do not attempt to replace the lead or fit any
type of replacement adapter/plug.
STEP 8 : Plug into your telephone socket
Plug into your telephone socket and extend
the base unit aerial vertically.
♦ The plug only fits in one way round.
♦ If the plug doesn’t fit your telephone socket,
contact BT or your telephone company.
Page 9

TELEPHONE
6
To make a call
♦ Extend the handset aerial, press Talk/End, await dial tone and dial.
The In Use lights on the base unit and handset come on. (To show
the communication link is made.)
To answer a call*
♦ Extend the handset aerial, press any button (except SCREEN) and
speak.
To end a call
♦ Press Talk/End. Or put the handset on the base unit or charger.
♦ Make sure the In Use light goes out.
Caution: be careful not to bend the aerial. Push it back in very gently.
*NOTE: If the Answer light is On or flashing, the answering machine
will answer incoming calls after the number of 'rings' set in Step 5. You
may however still take the call by extending the aerial and pressing any
button (except Screen). The answering machine will then stop. To switch
the answering machine Off, so that it will not take calls, press the ON/OFF
button - the Answer light will go out.
Telephone Memory
♦ You can store up to 12 numbers of up to 20 digits in each memory.
♦ There are two ‘instant’ memories (buttons M1 and M2) plus 10 other
indirect (buttons 0-9).
To store a number in the memory
1 Press Talk/End. Wait for the In Use light to stop flashing.
2 Press Memory. You’ll hear a beep.
3 Press Memory again. You’ll hear a longer beep.
4 Press the button you want to store your number under (ie M1, M2 or
a digit from 0-9).
5 Dial the phone number.
6 Press Memory. You’ll hear one or two beeps.
7 Press Talk/End. Make sure the In Use light goes out.
♦ If you make a mistake, press Talk/End and start again.
♦ Repeat for other numbers.
♦ Ignore any other tones or announcements you may hear.
♦ If you have a power cut for an extended period, you may lose your stored
numbers.
To dial a number from the memory
1 Extend the handset aerial, press Talk/End, await dial tone.
2 Press M1 or M2 if the number is stored in these locations or Memory
and then 0-9 if the number is stored in one of these locations.
Page 10

TELEPHONE
7
What are the other buttons for?
Redial
♦Press Redial to call the last number you dialled (useful if it was engaged).
Up to 32 digits can be stored in the redial memory.
♦For some PABXs or networks, press Redial where you need to store
a pause in the memory.
Recall, ✳, #
These are for special telephone services. For details, call your telephone
company.
✳ ✳
✳ ✳
✳ and # also have a secondary function in operating the
answering machine from the handset.
Chan/Func
If you get interference, press Chan/Func twice. (This button is also used
to transfer calls between handsets when you have more than one handset).
SCREEN
To monitor incoming calls to the answering machine when you’re at home.
It also allows you to playback incoming messages through the handset.
Pages 9 and 10 explain what this button does.
When and how to charge the handset
When to charge it
♦ When it’s new, charge it for 24 hours.
♦ An overnight charge will usually be enough for at least the next day’s use.
♦ If the Battery light comes on (you’ll also hear beeps), charge the handset
immediately for several hours.
♦ The handset contains a special battery. When your handset needs charging
more and more often, it’s time to change its battery. Call us on 01707 384438
and we’ll explain how.
How to charge it
1 Set the handset Off/On switch to On.
2 Put the handset on the base (or charger).
♦ Keep the base unit and handset charging contacts clean: use a soft cloth.
The base unit lights : what they mean
when they’re on
Power: it’s switched on.
Charge: the handset’s charging. (It will remain on even when the handset
is charged).
In Use: the telephone’s in use.
Page: flashes when you press Page or receive a call.
Message Display: indicates the number of messages (see page 9) and when
lit the answering machine is on.
Answer Light: the answer light is on OGM1 is set. Flashes when you’ve
set OGM2 (see page 9).
Need help?..
Call us on
01707 384438
Page 11

TELEPHONE
8
Paging the handset
Pressing Page makes the handset ring about 25 times (the ring’s different
to a phone call ring). It’s useful if you want to alert the person with the
handset - or find a lost handset!
If you have more than one handset, all handsets will ring.
If you wish to cancel paging, press Page again.
Reducing interference
In general
♦ Fully extend the handset and base unit aerials.
♦ Do not install the base unit close to other electrical equipment or
fluorescent lights.
♦ Try moving the base unit to another room (if you have a telephone
socket).
During a call (you may hear beeps)
♦ Move nearer the base unit.
♦ Try pressing Chan/Func twice.
Always ensure that the base unit aerial is fully extended to give maximum
range. If you move out of range (calls become noise with beeps possibly
sounding), you have about 15 seconds to move back into range otherwise
your call my be cut off. Repositioning the base unit may improve range.
CAUTION - Cordless telephones use radio signals and it is possible that these
signals can be picked up by certain types of specialist radios enabling your
conversations to be overheard.
You may not be able to make 999 or 112 emergency calls if:
♦ The handset battery requires charging.
♦ There is a lot of radio interference. (If this happens, try pressing Chan/
Func twice or move closer to the base unit).
Note: NO CALLS CAN BE MADE OR RECEIVED IF THE MAINS
SUPPLY HAS FAILED OR HAS BECOME DISCONNECTED.
Page 12

ANSWERING MACHINE - BASIC USE
9
To set either OGM1 or OGM2
Hold down On/Off for 2 seconds until you hear a beep.
If the Answer light is on, OGM1 is set.
If the Answer light is flashing, OGM2 is set. (OGM2 doesn’t normally let the
caller leave a message).
To switch the answering machine On or Off
Press On/Off briefly.
If the Message Display is on, the machine is on and ready to answer.
If the Message Display is off, the machine is off.
♦♦
♦♦
♦ If the machine is off, it’ll ‘answer’ calls after 15 rings and play the
pre-recorded OGM2. (Most callers will hang up well before 15 rings).
This lets you ring in and switch the machine on: see page 13.
Note: If the answer light is flashing then OGM2 is set to change this
to OGM1 please refer to OGM section.
To listen to your messages
(a) At the base unit
If you have any messages, the Message Display shows the total.
Press Play/Stop.
To PAUSE, press Memo. To continue, press Memo again.
To SKIP to the next message, press Skip.
To SKIP TO THE PREVIOUS message, press Repeat.
If you do not wish to hear the day/time announcement during message
playback, press On/Off whilst listening to the messages. Press again to
restore the day/time announcement.
To ERASE a message, press Erase before it ends. (To make sure you’ve
heard it all, it’s best to skip backwards (press Repeat) and erase it when
you hear it again).
To ERASE ALL MESSAGES: after playing them, hold down Erase until
you hear a beep.
To STOP, press Play/Stop.
♦♦
♦♦
♦ An 'erased message' isn’t erased immediately. It’s erased after the
machine says ‘end of messages’. Up until this time you can still hear an
‘erased message' again.
♦♦
♦♦
♦ Mailbox messages and memos are played last.
♦♦
♦♦
♦ To hear only the new messages, not the old ones, hold down Play/
Stop until you hear a beep.
♦♦
♦♦
♦ Don’t let the memory become full - erase the messages you don’t need
to keep.
♦♦
♦♦
♦ The longest message the machine accepts is 2 minutes. It’ll send the caller
a warning beep just before this time is up.
(b) From the handset
1 Press SCREEN and wait for In Use light to stop flashing.
2 Press (
✳✳
✳✳
✳) button. After 2 beeps, message playback will begin.
To REPEAT a message, press (0) button during following message
announcement.
To STOP playback at any time, press (
✳✳
✳✳
✳) button.
3 After announcement “end of messages”, press SCREEN and ensure
In Use light goes out.
Page 13

ANSWERING MACHINE - BASIC USE
10
Tones or end of call signals after
messages
On some systems, particularly cable telephone networks, you may hear short
periods of tone or ‘end of call’ signals after playing back messages. This can
be quite normal but if it is a cause for concern, please contact your local
telephone service provider who may be able to make an adjustment to your
particular telephone line.
If the memory’s full
If the memory’s full, the machine will answer after 15 rings and play the OGM2
that it comes with to the caller.
To check if the memory is full, hold down OGM 2 and release immediately
you hear a beep.
If the machine:
♦♦
♦♦
♦ Beeps again and plays OGM 2, the memory isn't full.
♦♦
♦♦
♦ Beeps 3 times and says "full memory", erase messages to make room
for new ones.
Monitoring calls
When you’re at home, you can listen to callers leaving a message.
If you’re at the baseunit
♦♦
♦♦
♦ '_ _' will flash on the message display
♦♦
♦♦
♦ to speak to the caller, pick up the handset and press Talk/End.
♦♦
♦♦
♦ to refuse an incoming message, press Play/Stop on the base unit.
If you’re away from the baseunit
1 To listen in, press SCREEN on the handset.
2 You can now:
♦♦
♦♦
♦ accept the incoming message by pressing SCREEN again; or
♦♦
♦♦
♦ speak to the caller by pressing Talk/End; or
♦♦
♦♦
♦ refuse the incoming message by pressing Talk/End twice.
To leave a memo (like leaving a note
for someone you live with)
Speak 20cm from the front of the machine.
Hold down Memo - speak after the beep - then release Memo when
your message is complete.
Your memo is added to the Message Display total.
To listen to memos, press Memo. If there aren’t any memos you’ll hear
“no messages”.
Page 14

ANSWERING MACHINE - REMOTE ACCESS
11
Ringing from outside and operating
the machine remotely
With remote access you can:
♦ listen to (and erase) messages and memos
♦ listen to OGMs and record new ones
♦ leave a message in a specific mailbox
♦ switch the machine to answer on or off
♦ set OGM1 or OGM2
You need to use:
♦ a phone with Tone dialling; or
♦ a Tone Dialler. But if the seal between the Tone Dialler and the mouthpiece
isn’t perfect, you won’t get perfect results.
What you need to know before you start
♦ For most functions you’ll need to enter your security code. Your security
code is set to 125 but you can change it: see below.
♦ If your phone lets you, send long tones, not short ones.
♦ Give the machine time to respond but don’t leave longer than 15 seconds
between button presses. Otherwise you’ll be cut off.
♦ The machine beeps twice when it receives a command.
Your security code
Your security code is set to 125 but you can change it. Never change it to
the emergency codes 112 or 999.
To check it
1 Ensure the Message Display and Answer Light is on. If it isn’t,
press On/Off.
2 Press Repeat. Your code will be spoken. It is set to 1 2 5 during
manufacture.
To change it
The machine will call out the settings as you go through.
1 Hold down Repeat until you hear a beep.
2 Press OGM1 or OGM2 to change the first digit. Then press
Repeat.
3 Repeat step 2 to change the second and third digits.
After 15 seconds, the machine will call out the new code.
♦ If you have a power cut and the battery is low, the code will change
back to 125.
To leave a message without waiting for the whole of the
OGM to be played
1 Call your number.
2 During the OGM, press (#) and leave your message after the beeps.
Page 15

ANSWERING MACHINE - REMOTE ACCESS
12
To listen to your messages
1 Dial your number.
2 During the OGM press (
✳✳
✳✳
✳), you'll hear 2 beeps.
3 Enter your 3 digit security code. You will hear 2 beeps. Within 6 seconds:-
Press 7 to hear all messages.
Press 6 to hear only new messages.
Press 9 4 to hear any memo messages.
If no entry is made within 6 seconds, all messages will be played back.
4 After 2-3 minutes the machine will beep and stop. Press 7 to continue.
During playback:
To PAUSE press 7. To continue, press 7 within 15 seconds.
To SKIP BACK to the previous message, press 2.
To SKIP TO the next message, press 5.
To SWITCH day/time stamping on or off, press 1.
To ERASE a message, press 3 during it. To make sure you’ve heard
it all, it’s best to skip backwards (press 2) and erase it when you hear it
again.
To ERASE ALL messages, wait for the machine to say “end of messages”
and then press 3 3. You’ll hear 5 beeps.
♦ An 'erased message' isn’t erased immediately. It’s erased after you hear
“end of messages”. Up until this time you can still hear an ‘erased message'
again.
After hearing your messages, you can do the
following:
TO LISTEN TO ALL MESSAGES AGAIN: press 7.
TO LISTEN TO MESSAGES IN A SPECIFIC MAILBOX press 9 then
the mailbox number (1, 2, 3) or 4 for memos.
TO LISTEN TO MEMOS: press 94 (memos are stored in mailbox 4).
TO LISTEN TO OGMS: press 4 1 (for OGM1) or 4 3 (for OGM2). This
only works for OGMs you recorded yourself, not for the OGMs the
machine comes with.
TO RECORD A NEW OGM: press 4 7 (for OGM1) or 4 9 (for OGM2).
Speak after the 4 beeps, then press 7. Your OGM1 will be played
back. To hear the new OGM again, press 4 1 (OGM1) or 4 3 (OGM2).
Hang-up when you have finished calling your machine.
Need help?..
Call us on
01707 384438
Page 16

ANSWERING MACHINE - REMOTE ACCESS
13
To switch the machine on or off
1 Dial your number.
If the machine’s off, it’ll answer after 15 rings.
2 *During the OGM, press (
✳✳
✳✳
✳).
You’ll hear 3 beeps.
3 Enter your security code.
You’ll hear 2 beeps.
4 Within 6 seconds, press 0 to switch on (“on” will be played), or 8 8 to
switch off. (“off” will be played).
*If you’re switching ON, the machine plays the OGM2 that it comes with,
even if you have recorded a new one.
To set OGM1 or OGM2
You can only do this if the answering machine is switched on.
1 Dial your number.
2 During the OGM, press(
✳✳
✳✳
✳).
You’ll hear 3 beeps.
3 Enter your security code.
You’ll hear 2 beeps.
4 Within 6 seconds, press 4 4 to set OGM1 ('One' will be played) or 4 6
to set OGM2 ('Two' will be played).
Need help?..
Call us on
01707 384438
Memory full
If the memory is full, the machine will answer after 15 rings and play the OGM2 that
it comes with instead of OGM1.
If OGM2 had been set, the machine will answer after 2 rings and play your OGM2
even if the memory is full.
1 During OGM2, press (#) - if the memory is full you’ll hear 2 beeps and “full memory”
.
2 Press (
✳✳
✳✳
✳), you’ll hear 2 beeps.
3 Enter your security code to start message playback.
4 Erase messages to make space for new messages – press 3 to erase an actual
message whilst it is being played or press 3 3 after playback to erase all messages.
Page 17

TROUBLESHOOTING THE TELEPHONE
Please note that BT or other service providers may make a charge if they
are called out and the line is not at fault.
Problem: you're getting interference See 'Reducing interference', page 8.
THE In Use LIGHT
STAYS OFF
Charge the handset
for several hours.
After charging, pick up
the handset. Push the
On/Off switch to Off
for a few seconds, then
back to On. Put the
handset on the base unit and
you should hear a beep.
Then try making a call.
Still no luck? Call our
helpline.
THE In Use LIGHT
FLASHES THEN GOES
OUT
Pick up the handset.
Push the On/Off
switch to Off for a few
seconds, then back to
On. Put the handset on
the base unit and you
should hear a beep.
Then try making a call.
If the In Use light still
flashes, then goes out,
call our helpline.
THE In Use LIGHT
FLASHES AND
STAYS ON
Is the telephone socket
working properly? Plug
another phone into it and
see. If the socket's faulty,
have the socket wiring
checked. If the socket's
OK, call our helpline.
14
Press Talk/End on the handset.
Check 2
Problem: the phone won’t work
Please carry out checks 1 and 2 before calling the Helpline.
Check 1
♦ Is the handset On/Off switch set to On?
♦ Is the base unit aerial fully extended?
♦ Is another phone off the hook?
♦ Is the base unit plugged in and switched on with the Power light
on?
♦ Is the base unit plugged into the telephone socket?
♦ Is the handset charged? See pages 2 and 7.
♦ Have you got too much telephone equipment in your home? See
page 1.
Having checked these points, move to check 2.
Page 18

TROUBLESHOOTING THE ANSWERING MACHINE
15
What do I do if . . . ?
See page
Can’t leave a personal
outgoing message
♦Your message must be longer than 4 seconds and less
than a minute. 4
♦Hold down the OGM button while you’re speaking. 5
♦Is the Answer light on? If not, press On/Off. 5
'00’ is flashing on Message display
♦This means the machine’s using its own outgoing message. 5
If you record a new OGM1, ‘00’ stops flashing.
‘
‘Lo’ flashes on Message display and Power light flashes
♦There's no battery or the battery's low. 3
The machine won’t answer calls
♦Is it plugged into the telephone socket? 5
♦Is it plugged into the mains and switched on? 2
♦Is it switched to answer calls? Press On/Off so that
the Message Display and Answer light is on. 9
♦Is the memory full? 10
The machine answers but won’t
take messages
♦Check OGM1 is set (Answer Light is on), not OGM2 9
♦Is it switched On to answer calls? Press On/Off so that
the Message Display and Answer light is on. 9
♦Is the memory full? 10
Your messages are announced See Page
with the wrong time and day
♦Press Skip to hear the time and day setting.
If it’s wrong, reset the clock. 4
Remote access problems
♦Are you using a phone with Tone dialling? 11
♦Try to use a phone which sends a tone for as long as
you hold down the button. Most mobile phones have a
‘long tone’ setting. 11
♦Did you leave more than 15 seconds between button
presses? 11
♦Are you using the correct security code? 11
Handsets ring for a short while after OGM2
has been played
♦This can sometimes happen on a few telephone lines
after the caller clears down.
Incoming messages, user recorded outgoing
messages and clock announcements are lost
♦ There has been a power cut and the back-up battery is
not fitted or has run down. Unplug from the telephone socket
and replace battery (step 4), then follow steps 5, 6 and 8. 2, 3, 4, 5
Nothing happens when any of the
buttons are pressed
♦Unplug from the mains and telephone sockets, disconnect
the battery and carry out the setting up procedure
(steps 1, 3 to 6 and 8) 3, 4, 5
NOTE: Should you lose incoming messages and clock announcements due to
a power failure and the back-up battery is not fitted or has run down, disconnect
from the telephone line, and carry out Step 4 on page 3 followed by steps 5,
6 and 8.
Page 19

GUARANTEE (UK ONL Y)
16
If your machine goes wrong within one year from the date of
purchase, the product will be repaired or replaced free of charge
at our option (excludes aerials and handset battery) provided:
♦ you have not damaged, misused or neglected it;
♦ it has not been tampered with or taken apart unless by a
Geemarc representative; and
♦ you send it to us with your receipt and pay the postage.
If you do have a problem, please read ‘Troubleshooting’
on page 14 and 15 first. If you still can’t solve the problem,
then in the first instance, contact the shop where you
bought your telephone product.
If you send us your machine, please enclose:
♦ your name and address;
♦ an explanation of the problem;
♦ a cheque or postal order for £5 for postage and packing; and
♦ your receipt to show when you bought the machine.
♦ Please also remove the battery before despatch.
♦ This guarantee does not affect your legal rights.
♦ Because we constantly improve our products, we reserve the
right to change their design and specification.
Note: Your receipt is your guarantee, please keep
it in a safe place.
Product safety
The apparatus is designed to operate from a 230 volt 50Hz AC supply only.
The apparatus does not incorporate an integral power on/off switch. To disconnect
the power, either switch off the supply at the mains power socket or unplug the AC
adapter. When installing the apparatus, ensure that the mains power socket is
readily accessible.
The interconnection point between the AC adapter output lead and the telephone
base unit adapter socket together with the battery connector contacts, carry Safety
Extra Low Voltages (SELV) and Telecommunication Network Voltages (TNV).
Observe safety precautions by disconnecting the apparatus from the telephone
socket should these connections become exposed. Do not connect any apparatus
to the adapter socket other than the model type 40 AC adaptor supplied.
Do not install or operate the base in outdoor conditions.
Page 20

APPROVAL
APPROVED for connection to
telecommunication systems
specified in the instructions
for use subject to the conditions
set out in them.
17
The apparatus has been approved for the use of the following facilities:
♦♦
♦♦
♦Use as a cordless telephone.
♦♦
♦♦
♦Use of up to 3 handsets.
♦♦
♦♦
♦Simple telephone operation with ability to make calls to the 999 and 112
emergency services.
♦Base unit ringer hi/low setting.
♦♦
♦♦
♦MF (tone) dialling.
♦♦
♦♦
♦10 two touch memory locations.
♦♦
♦♦
♦2 one touch memory locations.
♦♦
♦♦
♦Automatic storage of last number dialled.
♦♦
♦♦
♦Pause entry in memory locations.
♦♦
♦♦
♦Timed break recall.
♦♦
♦♦
♦Dynamic channel selection.
♦♦
♦♦
♦Answering and recording of incoming messages.
♦♦
♦♦
♦Call screening by loudspeaker and handset.
♦♦
♦♦
♦Day/time stamping of incoming messages.
♦♦
♦♦
♦Memo message facility.
♦♦
♦♦
♦2 - 4 - Toll Saver ringer switch setting.
♦♦
♦♦
♦Battery back-up for answering machine memory.
♦♦
♦♦
♦Remote access using tone telephone/dialler.
Any other usage will invalidate the approval given to the apparatus if as
a result, it then ceases to to conform with the standards against which
approval was granted.
UG/CC40 Issue 3. 04/00
650133
The cordless telephone has been designed to operate on radio frequencies
which have been assigned to the exclusive use of cordless telephones. As
the use of cordless telephones becomes more widespread, users may
experience a reduction in the quality of service obtainable from this
telephone.
The apparatus is approved for connection to direct exchange lines and to
approved, compatible PABXs. It cannot be guaranteed that the apparatus
will operate correctly under all conditions when connected to some PABXs.
If difficulties are experienced, please contact your supplier in the first
instance.
The apparatus has been approved for use with model Type 40 AC adaptor.
Use of an alternative adapter may invalidate this approval and also damage
the apparatus.
Page 21

REMOTE ACCESS CARD
To record a new outgoing message (OGM)
1 Dial your number.
2 During the OGM, press (
✳✳
✳✳
✳).
You’ll hear 2 beeps.
3 Enter your security code.
You’ll hear 2 beeps.
4 Within 4 seconds, press 4 7 (for OGM1) or 4 9 (for
OGM2).
5 Speak after the 4 beeps, then press 7. Your OGM
will be played back.
6 To hear the new OGM again press 4 1 (OGM1) or
4 3 (OGM2).
To switch the machine on or off
1 Dial your number.
If the machine’s off it’ll answer after 15 rings.
2 During the OGM press (
✳✳
✳✳
✳).
You’ll hear 2 beeps.
3 Enter your security code.
You’ll hear 2 beeps.
4 Within 6 seconds, press 0 to switch on or 8 8 to switch
off.
RC/CC40 Issue 2 04/00
REMOTE ACCESS CARD
NOTE: When leaving the factory, the security code is set
to 1 2 5.
Write down your security code.
To listen to messages
1 Dial your number.
2 During the OGM, press (
✳✳
✳✳
✳).
You’ll hear 2 beeps.
3 Enter your security code.
• To pause, press 7. To continue, press 7.
• To skip backwards, press 2.
• To skip forwards, press 5.
• To switch day/time stamping off, press 1.
• To erase an individual message, press 3
during message playback.
• To erase all messages: after you hear ‘end
of messages', press 3 3.
• To replay all messages: when they've
finished, press 7.
• To listen to memos, press 9 4.
• To stop, press 7 and hang up.
• If the machine stops during playback press
7 to continue.
Page 22

Please tick
CC40 ACCESSORY ORDER FORM
ACCESSORY ORDER FORM
The following accessories are available for your Geemarc CC40 Cordless T elephone.
T o order simply complete and return the order form below.
TELESCOPIC AERIAL £7.95 inclusive VAT & P&P
FLEXTRA HANDSET AERIAL £9.95 inclusive VAT & P&P
MAINS ADAPTOR MODEL
40 AC £12.95 inclusive VAT & P&P
HANDSET BATTERIES £12.95 inclusive VAT & P&P
HANDSET & POD COMBINATION £24.99 inclusive VAT & P&P
FOR WHICH COLOUR? WHITE BLACK BLUE
FOR WHICH MODEL? CC10 CC40
PRICES CORRECT AT TIME OF PUBLICA TION. GEEMARC RESERVE THE RIGHT TO INCREASE PRICES WITHOUT NOTIFICA TION.
NAME Allow up to 14 days for delivery.
Send this form with your cheque or postal order
ADDRESS made payable to
POSTCODE TEL NO
CHEQUE OR POSTAL ORDER AMOUNT £
CHEQUE OR POSTAL ORDER NUMBER
(Subject to availability)
GEEMARC TELECOM LTD
5 SWALLOW COURT
SWALLOWFIELDS
WELWYN GARDEN CITY
HERTS AL7 1SB
Page 23

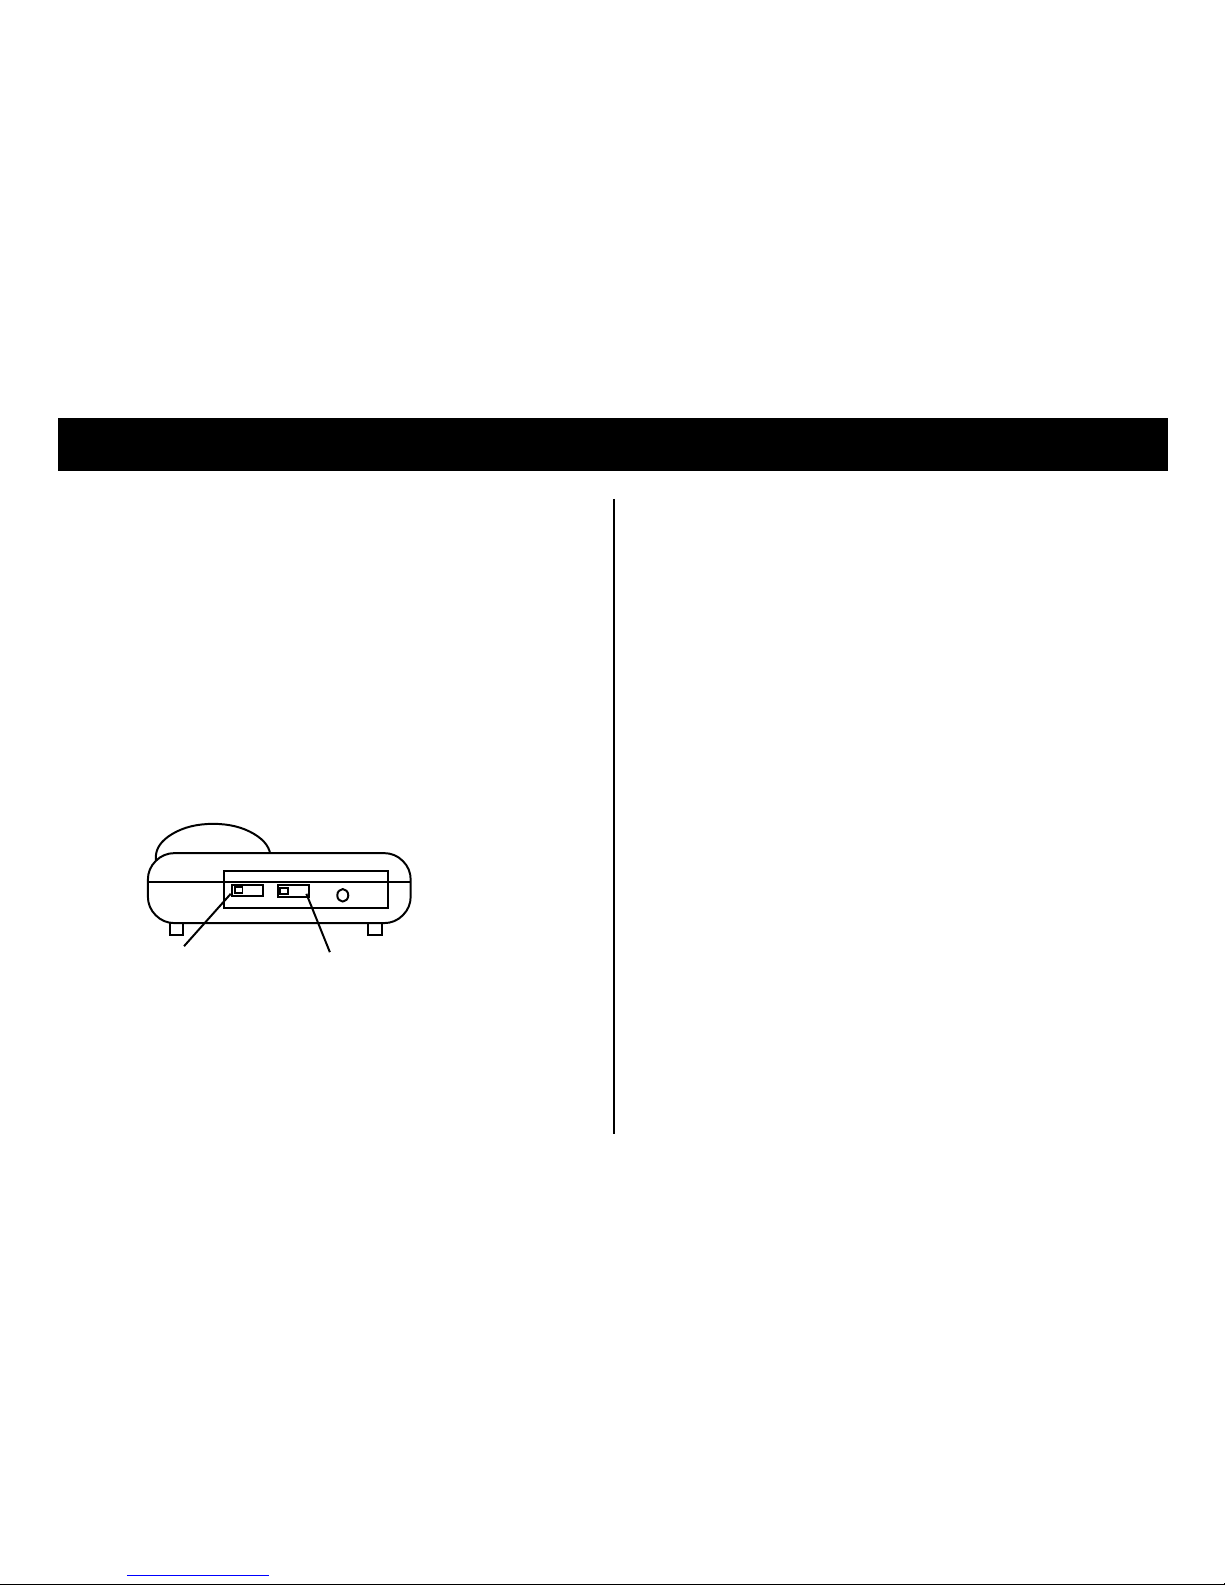
W ALL MOUNTING
TOP EDGE OF BASE UNIT
SCREW HOLE CENTRES
WT/CC40 Issue 2. 04/00
The base unit may be mounted vertically on a wall or other suitable
surface.
A template is included to enable the securing screws to be accurately
located.
Check that base unit when wall mounted has sufficient space for handset
to fit
When you wall-mount:
♦run the leads through the channels on the underside of the machine; and
♦slide the wall-mounting clip out of the base and refit it the other way round
so the handset stays on the base.
70 mm
30 mm
Page 24

TEL: 01707 384438
FAX: 01707 372529
 Loading...