

Page 1

Owners
Manual
Advaiitiiim""' Oven
ZSGIOOO
zsciooi
www.moiiogramecoiii
Monogiam!
Page 2

IMPORTANT SAFETY INSTRUCTIONS
. 4 d V a n I i ii m O v e n
PRECAUTIONS TO AVOID POSSIBLE EXPOSURE
TO EXCESSIVE MICROWAVE ENERGY
(a) Do Not Attempt to operate this oven with the
door open since open-door operation can
result in harmful exposure to microwave
energ)'. It is impoitant not to defeat or
tamper with the safety interlocks.
(b) Do Not Place any object between the oven
front face and the door or allow soil or
cleaner residue to accumulate on sealing
surfaces.
Contents Advantium
Advantium Quick Start
Cooking controls
Customer information.................................14
Oven features
Safety .......................................................2-13
What is Advantium? ....................................15
..............................................
Speedcooking
Convection Baking, Broiling
and Toasting
Cooking tips
Favorite recipes......................................24, 25
Favorite recipe log ......................................26
Power level..................................................22
Proofing......................................................29
Repeat last ..................................................21
Resume feature
Speedcook cookware ..................................23
Speedcook menu guide
Speedcook-safe cookware
Things that are normal
Using a pre-set speedcook menu.................20
Warming.....................................................29
...............................................
................................................
Microwaving
Cooking by time...........................................31
Cooking tips
Defrost by food type
Defrost b)' time
Defrosting tips
Express...................................................16, 31
Favorite recipes ..........................................31
Microwave power level(s)
ri Microwave-safe cookware
................................................
...........................................
...........................................
................................
........................................
..........................................
................................
....................................
.............................
...............................
...........................
...............................
(c) Do Not Operate the oven if it is damaged.
It is jrarticularly imjrortant that the oven
door close properl)' and that there is no
damage to the;
(1) door (bent),
(2) hinges and latches (broken or loosened),
(3) door seals and sealing surfaces.
(d) The Oven Should Not be adjusted or repaii ed
by anyone except jrroperly cjualitied service
pei'sonnel.
Precautions to avoid possible
16
19
18
exposure to excessive
microwave energ)'
Sensor cooking........................................34, 35
Things that are normal ...............................35
Using pre-set microwave selections
........................................
Other Features
28
21
21
17
27
Automatic fan
Beeper volume
Child lockout
Clock
.......................................................
Delay Start
Display ON/OFF
Help ............................................................37
Reminder....................................................36
Review ........................................................36
Scroll speed ................................................36
Timer
.........................................................
5
Care and Cleaning
Cleaning the inside
Cleaning the outside
Cooking trays and baking sheet
Removable turntable ..................................39
.............................................
............................................
..............................................
.................................................
.........................................
....................................
..................................
Troubleshooting
31
32
32
33
31
6
Problem Solver
.......................................
Customer Service
Customer information ................................14
Product Registration
Service phone munbers
Warrantv........................................Back fivver
..................................
..............................
...........
16, 36
..................
41, 42
2
30
38
36
38
36
36
38
39
40
40
14
43
Page 3

IMPORTANT SAFETY INSTRUCTIONS
/4 d V a n l i U m O v e n
A WARMING! To reduce the risk of burns, electric shock, fire, injury to persons, or
exposure to excessive microwave energy:
SAFETY PREGA UTIONS
I Read all iiistructioiis before using
this appliance. When using electrical
appliances, basic safety precautions should
be folowed, including the folowing:
I Read and follow the speci,fi,c precautions
ill the PRECAUTIONS TO AVOID
POSSIBLE EXPOSURE TO EXCESSIVE
MICROWAVE ENERGY section on page 2.
I Be sure your appliance is properly
installed and grounded by a qualified
technician in accordance with the
provided installation instructions.
I Install or locate this appliance only
in accordance with the provided
i ns tall ati on i ns true ti on s.
I Some products such as whole eggs and
sealed containers—for example, closed
jars—are able to explode and should not
be heated in this oven. Such use of the
oven could result in injury'.
I Do not mount this appliance over
a sink.
I Thi,s oven is not approved or tested for
marine use.
I This oven is IJL listed foi' standard wall
installation.
I This appliance must only be serviced
by qualified service personnel. Contact
nearest authorized service facility for
examination, repair or adjustment.
I Do not cover or block any openings on
the appliance.
I Do not store this appliance outdoors.
Do not use this product near water—
for example, in a wet basement, near a
swimming pool, near a sink or in similar
locations.
I See door surface cleaning instructions in
the Care and Cleaning of ibe Oven section
of this manual.
I To reduce the risk of fire in the oven
cavity:
-Do not overcook food. Carefully attend
appliance when paper, plastic or otlier
combustible materials are placed inside
the oven while microwave cooking.
-Remove wire twist-ties and metal handles
from paper or plastic containers before
placing them in the oven.
-Do not use the oven for storage purposes.
Do not leave paper products, cooking
utensils or food iii the oven when not in use.
I Do not operate this appliance if it has
been damaged or dropped.
I As with any appliance, close supervision
is necessary when used by children.
I Use this appliance onlv for its intended
use as described in this manual.
I Do not use corrosive chemicals or vapors
in this appliance.
I This oven is specifically designed to heat,
dry or cook food, and is not intended for
laboraton- or industrial use.
-If materials inside the oven ignite, keep
the oven dooi' closed, turn the oven off
and shut off power at the fuse or circuit
breaker panel. If the door is opened, the
fire may spread.
-Do not use the Sensor Features twice i,n
succession on the same food portion.
If food is undercooked after the first
countdown, use COOK BY TIME for
additional cooking time.
Page 4

A WAEMNG!
SAFETY PREGA UTIONS
IMPORTANT SAFETY INSTRUCTIONS
Л d V a n I i и m О v e n
ARCING
Do not. operate the oven without
the turntable in place. The turntable
must be unrestricted so it can turn.
During and after use, do not touch,
or let clothing or other flammable
materials contact any interior area of
the oven; allow sufficient time for
cooling first.
Keep the oven free from grease
buildup.
Arcing can occur during holh spccdcooking and microwave cooking. If you .see arcing, press the
CLEAR/OFF pad and correct the prohlem.
Arcing is the microwave term for sparks
in the oven. Arcing is caused by:
■ Metal or foil touching the side of
the oven.
■ Foil not molded to food (upturned
edges act like antennas).
■ Use foil only as recommended in
this guide.
I Cook meat and poultiw thoroughly—
meat to at least an INTERNAL" '
temperatuie of 160°F, and poultry to
at least an INTERNAl, temperature of
180°F. Cooking to these temperatures
usually protects against foodborne
illness.
I Potentially hot surfaces include the
oven door, floor, walls, oven rack and
turntable.
I Metal cookware used during either
speedcook or microwave cooking
(except for the pans provided with
the oven).
I Metal, such as twist-ties, poultiy pins,
or gold-rimmed dishes, in the oven.
I Recycled paper towels containing small
metal pieces being used in the oven.
FOODS
I When microwaydng, place all foods and
containers on the clear glass tray.
I Do not pop popcorn in your oven unless
in a special microwave popcorn accessory
or unless you use popcorn labeled for use
in mici'owave ovens.
I Do not boil eggs in this oven. Pressure
will build up inside egg yolk and will
cause it to burst, possibly resulting
in iiijuiy.
I Do not operate the oven without food
inside. This may cause damage to the
oven. It increases the heat around the
magnetron and can shorten the life of
the oven.
I Foods with unbroken outer “skin”
such as potatoes, hot dogs, sausages,
tomatoes, apples, chicken livers and other
giblets, and egg yolks should be pierced
to allow steam to escape during cooking.
SUPERHLAIFD WAiLR
Liciuids, such as water, coffee or tea, are able to
he mjerheated, beyond, the hoilingpoint without
appearing to he hoiling. Visible huhhling or
boiling when the con tainer is removed from the
microwave oxeen is not always presem t, THIS
COULD RESUUr IN \FRY HOT LIQUIDS
SUDDEN! J BOIJINC OVEIi. WHEN THE
аМШМЕК IS DINTURBED OR A SPOON
OR OTHER IHENSIL IS INSERTED IMEO
THEUQUID.
To reduce the risk of injuiy to persons:
-Do not overheat the liquid.
-Stir the liejuid both, before and halfway
through heating it.
-Do not use straight-sided containers with
narrow necks.
-After heating, allow the container to stand
in the microwave oven for a short time
before lemoying the container.
-Use extreme care when inserting a spoon
or other utensil into the container
Page 5
A WÆMNG!
IMPORTANT SAFETY INSTRUCTIONS
/4 d V a n l i U m O v e n
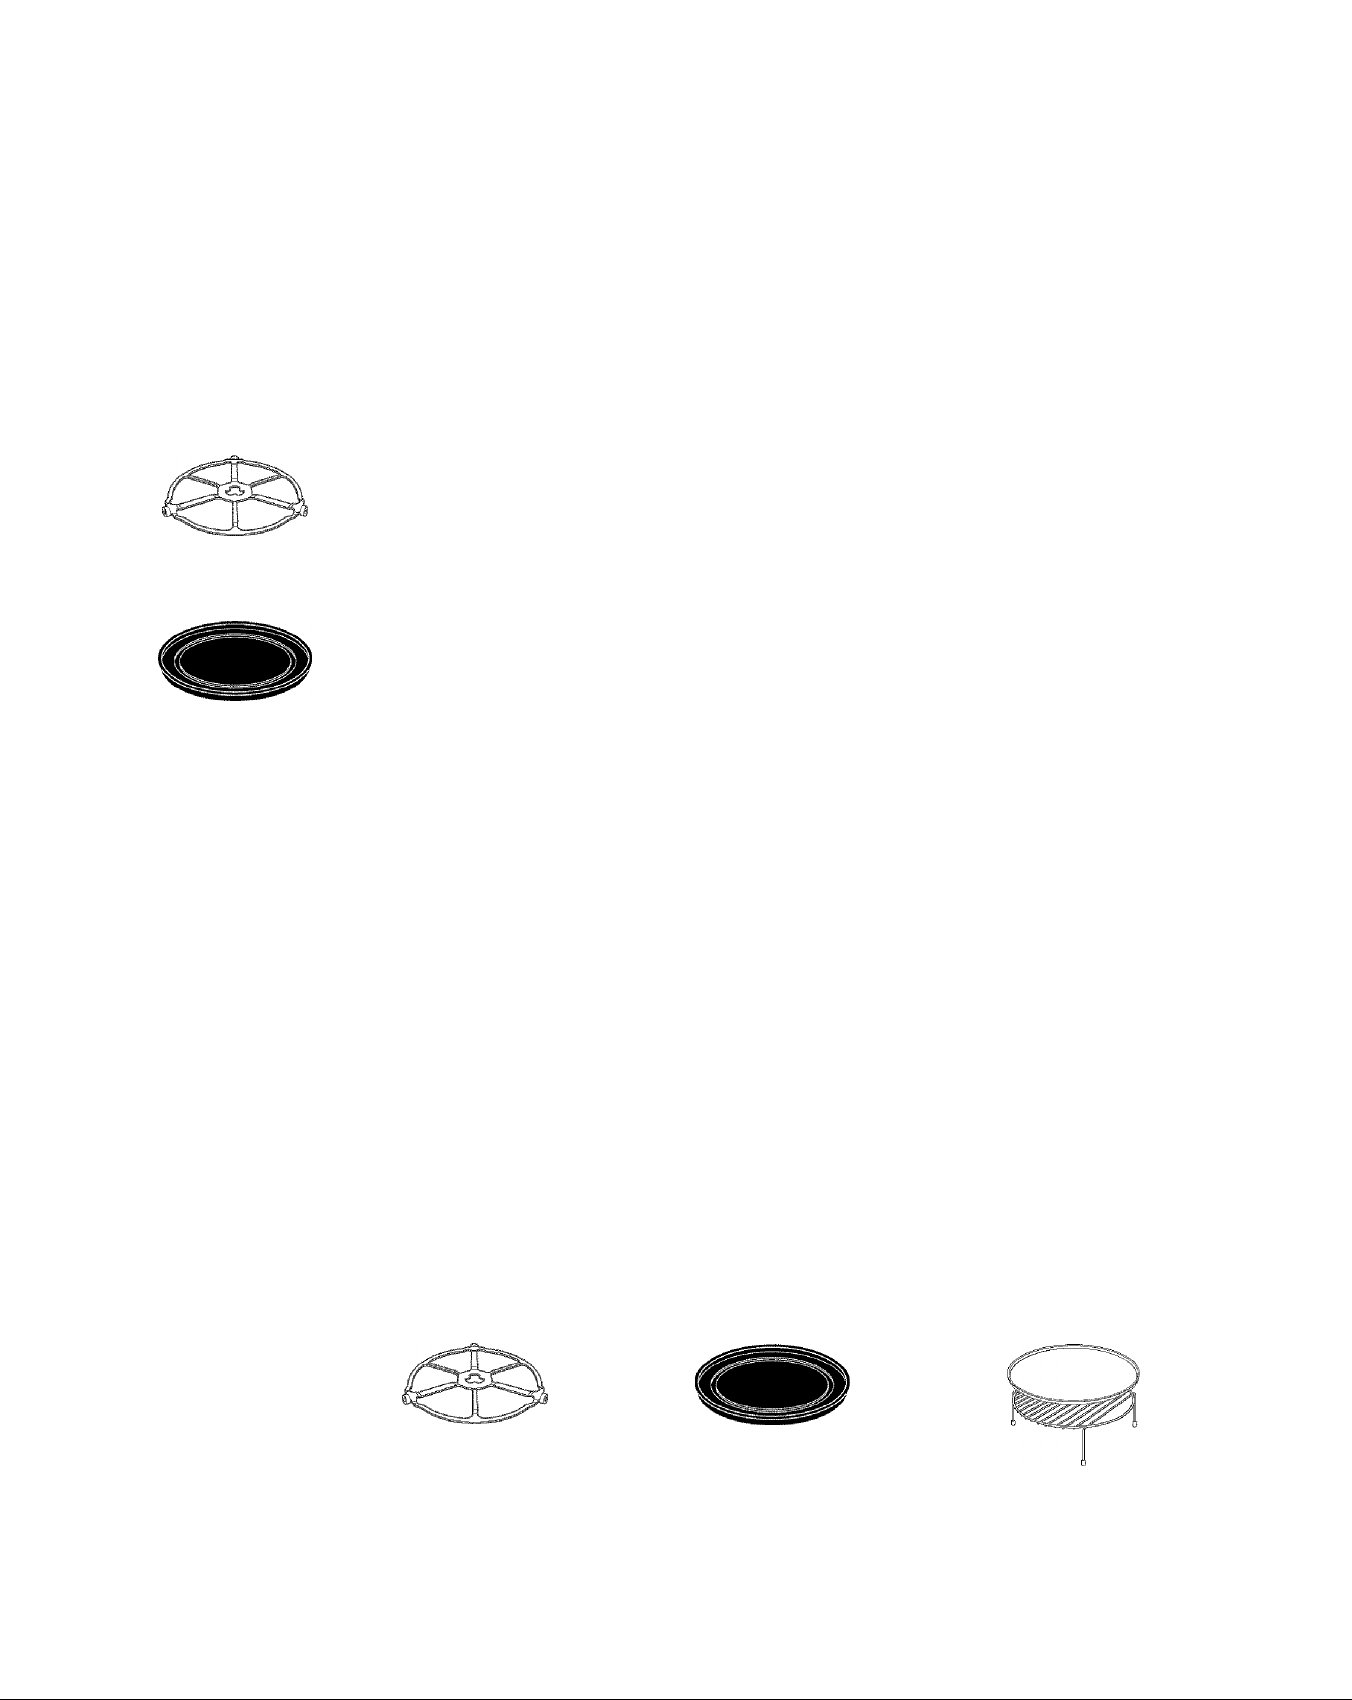
Speedcook
oven-safe
cookware
The turntable must,
always be in place when
using the oven.
Fill food- directly on the
non-stick metal tray
to speedcook.
Oven-safe
cookware
for
Baking,
Broiling,
Warming,
Proofing
àf
Toasting
I The oven and door will get very hot
when speedcooking.
I Cookware will become hot because of
heat transferred from the heated food.
Oven mitts will be needed to handle
the cookware.
I Do not use coverings, containers or
cooking/roasting bags made of foil,
plastic, wax or paper when
speedcooking.
I Do not cover the turntable, wire oven
rack, trays or any part of the oven \dth
metal foil. This will cause arcing in the
oven.
I Use the non-stick metal tray in the
same way you would use a shallow
baking pan or baking tray.
I The oven and door will get very hot
when baking, broiling, warming,
proofing or toasting.
I Cookware will become hot. Oven mitts
will be needed to handle the cookware.
I Do trot use coverings, corrtainers or
cooking/roasting bags made of foil,
plastic, wax or paper when
speedcooking.
I Do not cover the trrrntable, wir^e oven
rack, trays or any part of the oven with
metal foil. This will cause arcing in the
oven.
I Use the non-stick metal tray in the
same way you would use a shallow
bakitrg pan or baking tray.
I Place food directly on the trays when
cooking unless prompted by the oven
to do otherwise.
I Any oven-safe dish can be used in
your oven. Recipes in the Advantium
Cookbook were tested in Pyrex® glass
cookware and Corning'ware® ceramic
casseroles. Cook times and results
may vary when using other types of
oven-safe dishes. Place them directly
on the trays.
I Do not use the oven to dry newspapers.
I Use of the clear glass trav when
speedcooking \dll result in inferior
cooking perfomtance.
I Use the aluminum baking sheet on the
wire oven rack, and place them on the
non-stick metal tray when baking on
two levels, broiling or toasting foods.
I Place food directly on the trays when
cooking unless prompted by the oven
to do other'wise.
I Any oven-safe dish can be used in
your oven. Recipes in the Advantium
Cookbook were tested in Pvrex® aiass
cookware and Corning'ware® ceiamic
casseroles. Cook times and results
may vary when using other types of
oven-safe dishes. Place them directly
on the trays,
I Do not use the oven to dry newspapers.
I Use of the clear glass tray when
baking, broiling, warming, proofing or
toasting will result in inferior cooking
perfonnance.
/ O
The turntable must
always be in place when
using the oven.
Put food directly on the
non-stick metal tray
to hake on one level.
Put food directly on the
aluminum baking 'sheet on the
wire oven rack, and place them,
on the non-stick metal tray,
when baking on two levels,
hroilmg or tocisting foods.
Page 6
A WARNING!
IMPORTANT SAFETY INSTRUCTIONS
/4 d V a n I i u m O v e n
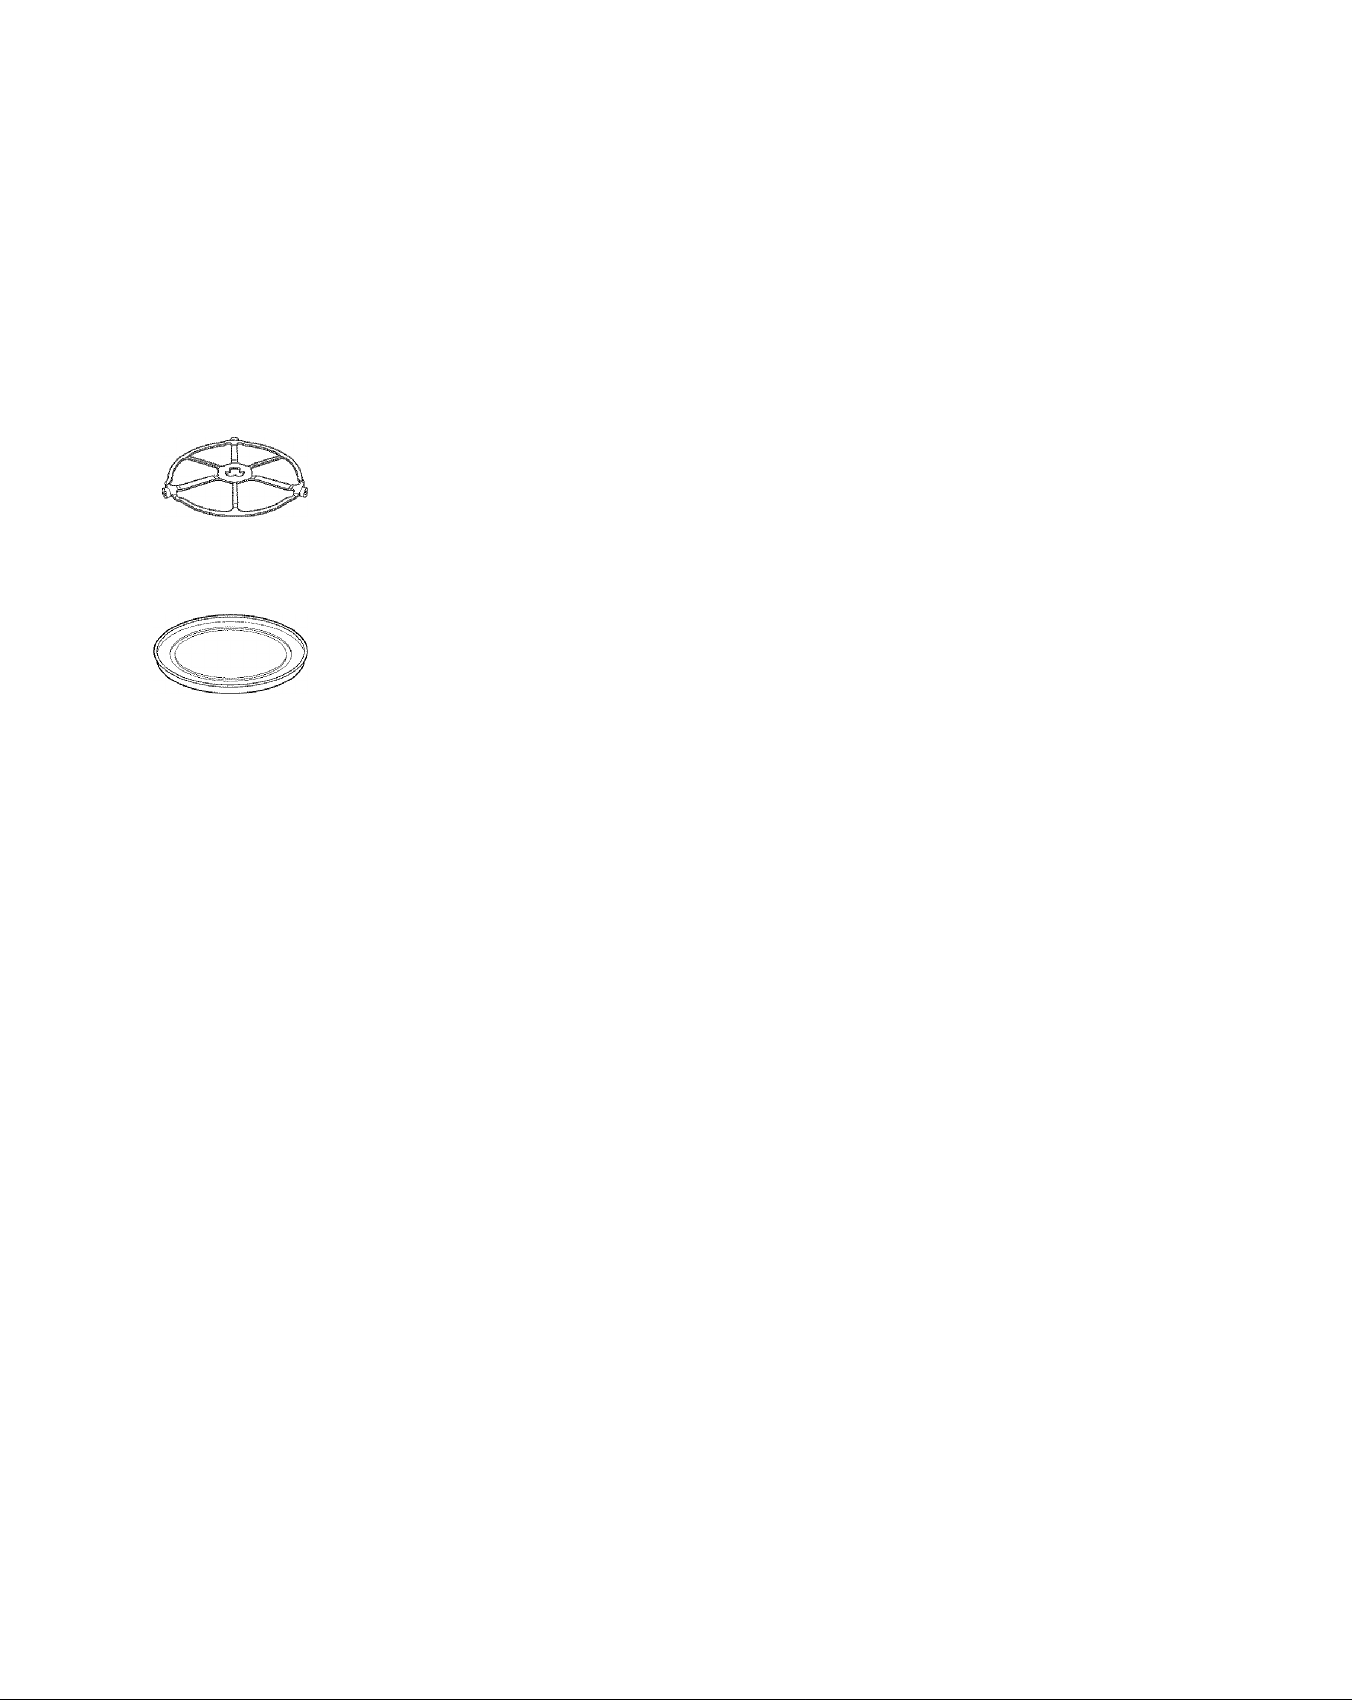
Microwave-
safe
cookware
The turntable must
always be in place -when
using the oven.
The clear ^ass tray
should always he in
place when
Make sure U> use .suilahle cookware during microwave cooking. Most glass casseroles, cooking dishes,
measuring cups, custard cups, pottery or china dinnerware which does not have metallic trim, or
glaze with a metallic sheen can be used.. Some cookware is labeled “suitable for microwaving. ”
I Place food or microwavable container
directly on the clear glass tray to cook
your food.
I Use of the non-stick metal tray during
microwave cooking will result in
inferior cooking performance.
I If you are not sure if a dish is
microwave-safe, use this test: Place in
the oven both the dish you are testing
and a glass measuring cup filled with
1 cup of water—set the measuring cup
either in or next to the dish. Microwave
.SO-45 seconds at high. If the dish heats,
it should not be used for microwaving.
If the dish remains cool and only the
water in the cup heats, then the dish
is microwave-safe.
I Cookware may become hot becatise
of heat transferred from the heated
food. Oven mitts may be needed to
handle the cookware.
I Do not use recycled paper products.
Recycled paper towels, napkin.s and
waxed paper can contain metal flecks
which may cause arcing or ignite.
Paper products containing nylon or
nylon filaments should be avoided,
as they may also ignite.
I Use foil only as directed in this guide.
TV dinners may be microwaved in foil
trays less than .8/4" high; remove the
top foil cover and return the tray to the
box. When using foil in the oven, keep
the foil at least 1" away from the sides
of the oven.
I Do not use the oven to diw newspapers.
I If you use a meat thermometer while
cooking, make sure it is safe for use
in microwave ovens.
■ Paper towels, waxed paper and plastic
wrap can be used to cover dishes in
order to retain moisture and prevent
spattering. Be sine to vent plastic wrap
so steam can escape.
■ Not all plastic wrap is suitable for use
in microwave ovens. Check the package
for proper use.
■ “Boilable” cooking pouches and tightly
closed plastic bags should be slit,
pierced or vented as directed by
package. If they are not, plastic could
burst during or immediately after
cooking, possibly resulting in injuiw.
Also, plastic storage containers should
be at least partially uncovered because
they form a tight seal. When cooking
with containers tightly covered with
plastic wrap, remove covering carefully
and direct steam away from hands
and face.
■ Plastic cookware—Plastic cookware
designed for microwave cooking is veiw
useful, but should be used carefully.
Even microwave-safe plastic may not be
as tolerant of overcooking conditions
as are glass or ceramic materials and
may soften or char if subjected to short
periods of overcooking. In longer
exposures to overcooking, the food
and cookware could ignite.
Follow these guidelines:
1. Use mici'owave-safe plastics only
and use them in strict compliance
with the cookware manufacturer’s
recommendations.
2. Do not microwave empty containers.
,S. Do not permit children to use plastic
cookware without complete supenision.
I Some styrofoam trays (like those that
meat is packaged on) have a thin strip of
metal embedded in the bottom. When
microwaved, the metal can burn the
floor of the oven or ignite a paper towel.
Page 7

A WAEMNG!
SAuFFTY PjRFCA UTI0NS
IMPORTANT SAFETY INSTRUCTIONS
/4 d V a n I i u m O v e n
Don’t defrost frozen beverages in
narrow-necked bottles (especially
carbonated beverages). Even if the
container is open, pressure can build
up. This can cause the container to
burst, possibly resulting in injury.
Foods cooked in liquids (such as
pasta) may tend to boil more rapidly
than foods containing less moisture.
Should this occur, I'efer to the (dare
and (deaning of ihe oven section for
instructions on how to clean the
inside of the oven.
Hot foods and steam can cause
burns. Be careful when opening any
containers of hot food, including
popcorn bags, cooking pouches and
boxes. To prevent possible injury,
direct steam awav from hands and face.
o
SAVE THESE INSTRUCTIONS
I Do not oveixook potatoes. They could
dehydrate and catch fire, causing
damage to your oven.
I Avoid heating baby food in glass jars,
even with the lid off. Make sure all
infant food is thoroughly cooked.
Stir food to distribute the heat evenly.
Be careful to prevent scalding when
warming formula. The container may
feel cooler than the formula really is.
Always test the fonnula before feeding
the baby.
I Do not attempt to deep fry in the oven.
Page 8

MESURES DE SECURITE IMPORTANTES
Four Advanliuni
PRECAUTIONS POUR EVITERUNE EVENTUELLE
EXPOSITION EXCESSIVE AUX MICRO-ONDES
N’essayez pas de faire f<)nct,ionner le four à
mici o-ondes loisque la porte est ouverte,
puisque cela pourrait entraîner une
exposition nocive aux micro-ondes. Il est
important de ne jamais essayer de forcei’ ou
modifier le système de verrouillage de
sécurité.
(b) Ne placez pas d’objets entre la porte et la
surface avant du four. Ne laissez pas de saleté
ou de résidus de produits nettoyants
s’accumuler sur les surfaces d’étanchéité.
(c) Ne faites pas fonctionner le four s’il est
endommagé. Il est très important cpie la porte
ferme bien et que les pièces suivantes ne
soient pas endommagées :
(1) I.a porte (tordue),
(2) Les charnières et loquets (cassés ou
desserrés),
(3) Les joints et surfaces d’étanchéité.
(d) Seul un technicien qualifié doit réparer ou régler
votre four à micro-ondes.
Page 9

MESURES DE SECURITE IMPORTANTES
Fo II r A d V a n li u m
Am SE EN
GARDE!
MESURES DE SÉCURITÉ
I Veuillez lire les mesures de sécuritié avant
d’utiliser le four. Lors de Futilisation
d’appareils électriques, il faut observer
des mesures de sécurité élémentaires, et
en particulier :
I Veuillez lire et observer les « Précautions
pour éviter une éventuelle exposition
excessive aux micro-ondes » à la page 8.
I Assurez-vous que l’appareil soit installé et
mis à la terre correctement par un
technicien qualifié conformément aux
directives d’installation fournies.
I Installez et placez cet appareil seulement
selon les directives d’installation fournies.
I Certains aliments comme les oeufs dans
leur coquille et les récipients scelléspar exemple, des pots en verre ferméspeuvent éclater s’ils sont chauffés dans le
four à micro-ondes et risquent de vous
blesser.
I N’installez pas cet appareil au-dessus d’un
évier.
Pour réduire le risque de brûlures, de choc électrique, d’incendie,
de blessures à autrui ou d’exposition excessive aux micro-ondes :
H Ne couvTez pas ou ne bloquez pas les
ouvertures cle l’appareil.
■ Ne rangez pas cet appareil à l’extérieur.
N’utilisez pas ce four à proximité de l’eau,
par exemple, dans un sous-sol mouillé,
près d’une piscine d’un évier ou dans des
emplacements semblables.
■ \oir les directives concernant le nettoyage
des surfaces dans la section « Entretien et
nettoyage du four à micro-ondes » du
présent manuel.
H Pour réduire les risques d’incendie à
l’intérieur du four :
—Ne faites pas trop cuire les aliments.
Surveillez la cuisson de près quand vous
utilisez du papier, du plastique ou d’autres
matières inflammables dans votre four
pendant la cuisson.
—Enlevez les attaches métalliques et les
poignées en métal des contenants de
papier ou de plastique avant de les mettre
dans le four.
I Ce four à micro-ondes n’a pas été
approuvé ou mis à, l’essai pour être utilisé
en mer.
I Ce four est homologué Ul. pour une
installation murale standard.
I N’utilisez pas cet appareil s’il a été
endommagé ou s’il est tombé.
I Comme avec tout appareil, il est important
de suiveiller étroitement lorsque le four
est utilisé par des enfants.
I N’utilisez cet appareil que pour l’usage
auquel il est destiné, tel que décrit dans le
présent manuel.
I N’utilisez pas de substances chimiques ou
corrosives dans cet appareil.
I Ce four à. micro-ondes a. été conçu
spécifiquement pour chauffer, sécher ou
cuire des aliments et non pour être utilisé
en laboratoire ou à des fins industrielles.
I Seul un technicien qualifié doit réparer
cet appareil. Communiquez avec le biiieaii
de service après-vente le plus près si votre
appareil doit être vérifié, réparé ou réglé.
—Ne rangez rien dans le four. Ne laissez pas
de produits en papier, ustensiles de
cuisson ou aliments dans le four lorsqu’il
n’est pas utilisé.
—Si un feu éclate dans votre four, laissez la
porte fermée, éteignez le four et
débranchez le cordon d’alimentation ou
coupez le courant en enlevant le fusible
ou en déclenchant
ouvrez la porte, les flammes risquent de se
propager.
—N’utilisez pas les fonctions de capteur
deux fois de suite sur la même section de
nourriture. Si la nourriture n’est pas assez
cuite après le premier passage, utilisez
COOK BY TIME (TEMPS DE CUISSON)
pour ajouter du temps de cuisson.
■ Ne faites pas fonctionner le four sans
plateau tournant. Le plateau doit pouvoir
tourner sans restriction.
■ Durant et après l’usage, ne touchez pas ou
ne laissez pas de vêtements ou autres
matériaux inflammables entrer en contact
avec l’intéiieur du four. Prévoyez
suffisamment de temps pour le
refroidissement. „
le disjoncteur Si vous
Page 10

MESURES DE SECURITE IMPORTANTES
A MISE EN GARDE!
MESURES DE SÉCURITÉ
Gardez le four libre de toute
accumulation de graisse.
Faites bien cuire la viande et la volaille—
la viande doit avoir une températitre
INTERNE de 160° F (7l° C), et la volaille
une température INTERNE d’au moins
180° F (83° C). Une préparation à ces
Fo II r A d V a n li u m
niveaux de température protège
normalement des maladies alimentaires.
I l,es surfaces chaudes peuvent inclure la
porte du four, le plancher, les parois, le
plateau de cuisson et le plateau
tournant.
ARC
DTTINCELIÆS
AEIMENTS
10
Un arc peuL apparaître diiranl la cuisson rapide et la cuisson à rnicfro-omies. Si vous voyez un
arc, appuyiez sur la touche annulation/cmct (CJÆAR/OFF) et corrigez le problème.
I Les ustensiles de cuisson de métalLa formation d’un arc est la façon qu’ont
les micro-ondes de produire des étincelles
dans le four. Ceci est imputable aux
causes suivantes :
■ Un article de métal ou du papier
d’aluminium est en contact avec les
parois di,i four.
■ le papier d’aluminium n’épouse pas
bien la forme de l’aliment (les bords
relevés agissent comme des antennes).
■ Utilisez de papier d’aluminium sauf
comme il est décrit dans le présent
manuel.
I Poiu' la cui,sson à micro-ondes, placez tous
les aliments et contenants sur le plateau
de veiTe transparent.
I Ne préparez pas de maïs éclaté dans
votre four à micro-ondes, à moins
d’utiliser un grille-maïs spécialement
conçu à cette lin ou du maïs éclaté
pour la cuisson aux micro-ondes.
I II n’est pas recommandé de faire
bouillir des oeufs dans le four, l.a
pression cjui se crée dans le jaune fera
éclater l’oeuf et pourrait causer des
blessures.
I I.e fait de laisser fonctionner le four à
micro-ondes sans placer d’aliment à
l’intérieur peut endommager le four.
Cela augmente la températureautour
du magnétron et peut affecter la durée
de vie de votre four.
I Percez la « peau » cjui recouvre certains
aliments, comme les pommes de terre,
les saucisses fumées, les saucissons, les
tomates, les pommes, le foie de poulet
et autres abats, les jaunes d’oeuf, pour
peimettre à la vapeur de s’échapper
pendant la cuisson.
utilisés durant la cuisson rapide ou la
cuisson à micro-ondes (sauf les
casseroles fournies avec le four).
i Des articles en métal, comme des
attaches, les broches utilisées pour la
volaille ou les garnitures dorées des
assiettes se trouvent dans le four.
i Des essuie-tout en papier recyclé
contenant de petites particules de
métal sont employés dans le four.
I EAU SURCHAUFFEE
Les liquides, tels que l'eau, le café ou le thé
peuvent être surchauffés au-delà du point
d'ébullilion sans avoir l'air de bouillir. Une
ébullition ou formation de bulles n'est pas
toujours visible, lorsque le récipient est sorti du
four à micro-ondes. CECJ PEUEEKEEAÎNER
DES DÉBOIUÆMEhrfS SOUDAINS DE
UÜUIDES BRÛIANES LORSQIE LE
IlÉXilPIENIlESr DÉPIACÉ OU SJ UNE
CLIILim OU TOUT AIIPIIE UNEENSlUi
ESP INTROD UIT DANS IN LIQUIDE.
Pour réduire le riscjue de blessures
pour autrui :
-Ne surchauffez pas le liquide.
-Mélangez le liquide avant son
réchauffement et au milieu de celui-ci.
-N'utilisez pas de récipient à bords
verticaux et à col étroit.
-Après avoir réchauffé, laissez un peu le
récipient dans le four à micro-ondes
avant de sortir le récipient,
-Faites preuve de grande pnidence lors
de l'introduction d'une cuiller ou de
tout autre ustensile dans le récipient.
Page 11
AmSE EN GARDE!
MESURES DE SECURITE IMPORTANTES
Fo II r A d V a n l i и m
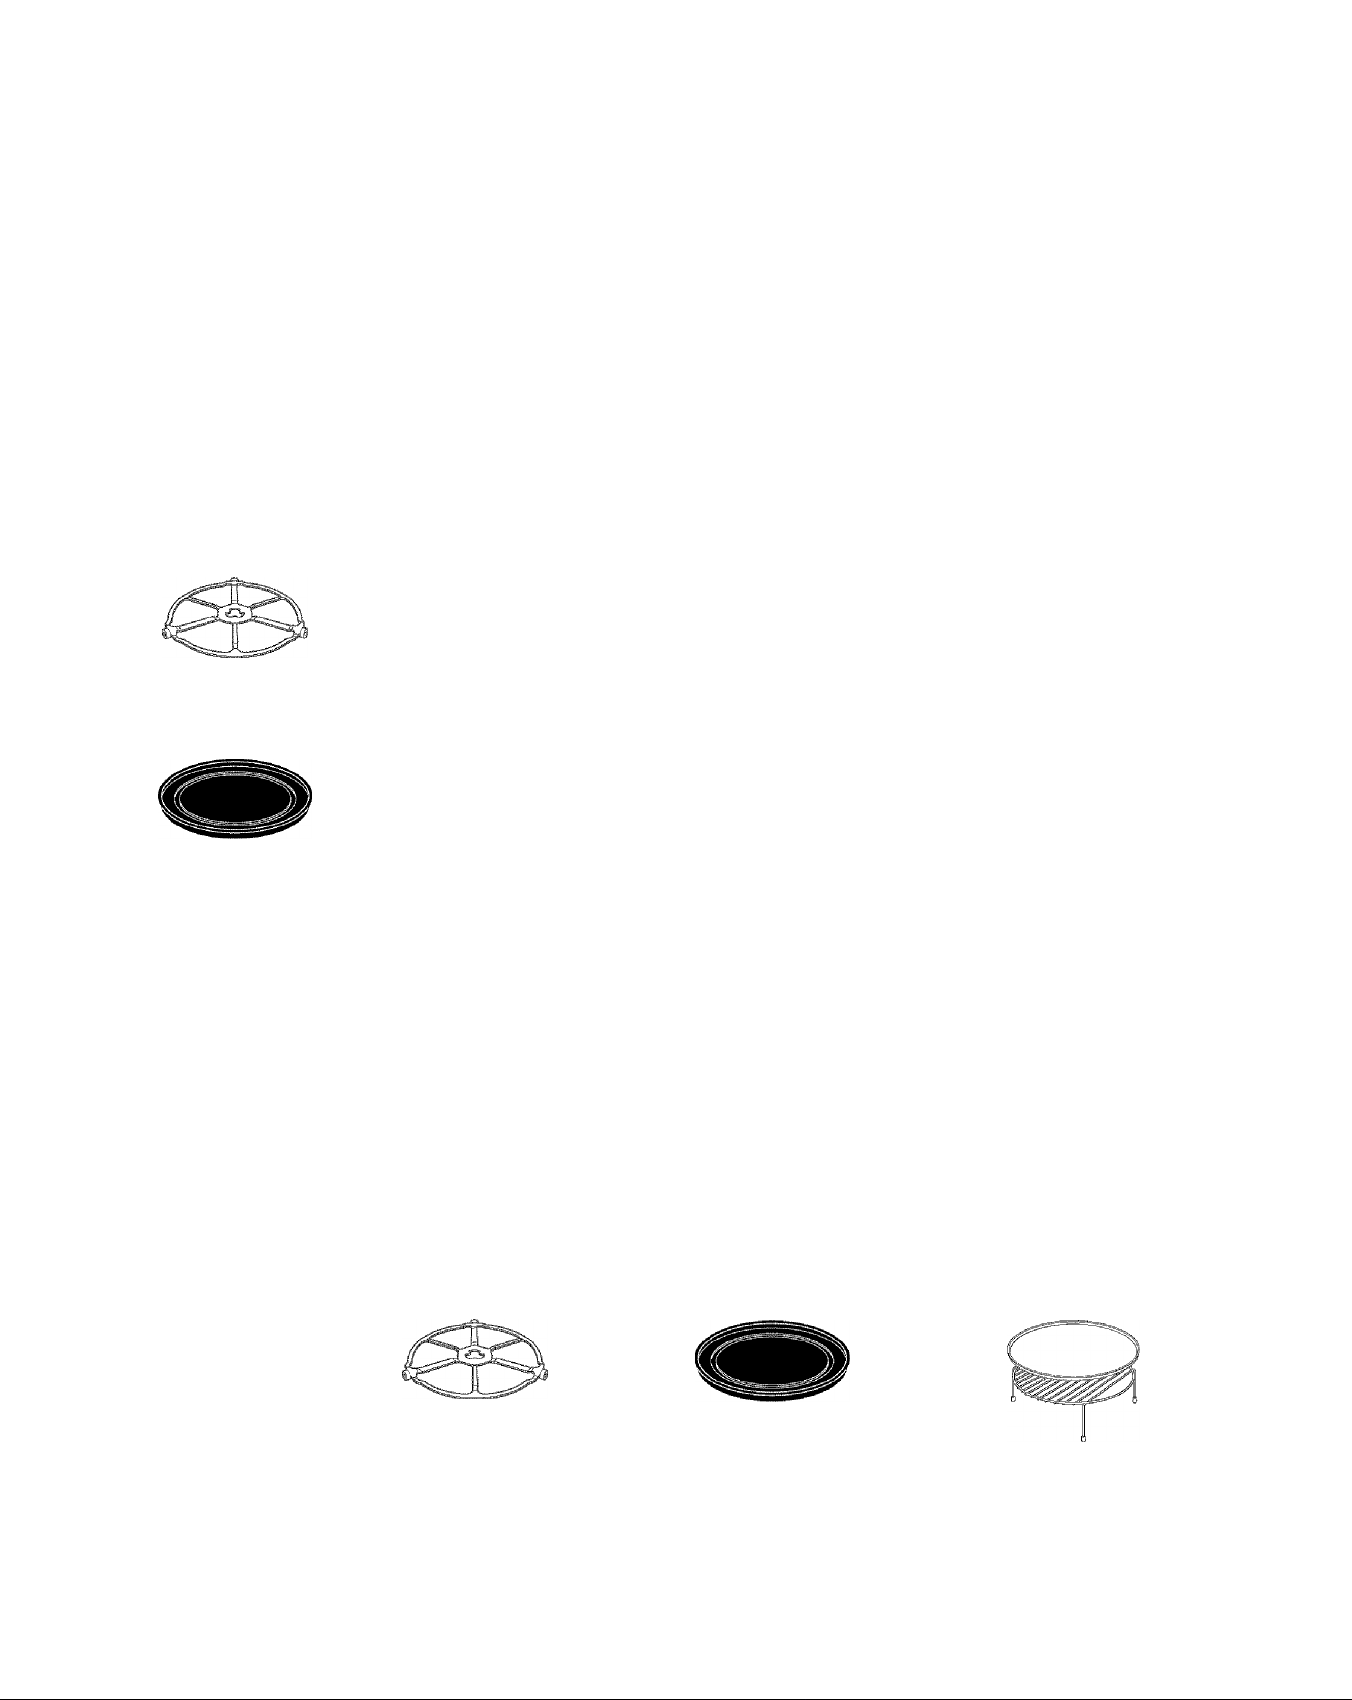
Ustensiles
de cuisson
sans danger
pour le four
à cuisson
rapide
Le plateau tournant
doit toujours (dre en
pince hrsctue vous
utilisez le four.
Placez les aliments
dinxtement sur le
plateau de métal anti
adhésif pour une
cuisson rapide.
Ustensiles
de cuisson
convenant
au four
pour
cuisiner,
griller,
réchauffer
Le four et la porte deviennent très chauds pendant la cuisson rapide.
Les ustensiles de cuisson deviennent
chauds à cause du transfert de chaleur
des aliments. Il faut porter des gants
thermorésistants pour manipuler les
ustensiles de cuisson.
N’utilisez pas de couvercles, de contenants
ou de sacs de cuisson/rôtisserie fabriqués
d’aluminium, de papier ciré ou de papier
pour la cuisson rapide.
Ne couvrez pas le plateau tournant, le
plateau de cuisson métallic|ue, les
plateaux ou toute partie du four de
papier métallicjue. Ceci provocjuera la
formation d’un arc dans le four.
Utilisez le plateau de métal anti-adhésif
de la même manière cju’un plat peu
profond ou qu’un moule.
Le four et la porte devieiment très
chauds pendant que vous cuisinez, grillez,
réchauffez ou rôtissez les aliments.
Les ustensiles de cuisson deviennent
chauds. Il fairt porter des gants
thermorésistants pour maniprtler les plats.
N’utilisez pas de couvercles, de contenants
on de sacs de cuisson/rôtisserie fabriqués
d’aluminium, de papier ciré ou de papier
porrr la cuisson rapide.
Ne couvrez pas le plateau torrr'nant, le
plateau de cuisson métallicjue, les
jrlateaux oir toute jrar tie du four de
jaajaier métallique. Ceci jrrovoquera la
formation d’rrn arc dans le four.
Utilisez un jrlateau de ntétal anti
adhésif de la même manière cju’uri jalat
jreu profond ou qu’un moule.
Utilisez la plaque de cuisson
d’alrrminium sur le jrlateau de cuisson
métallicjue et jrlacez-les sur le jrlatearr
IPI acez la nourriture directement sur les
plateaux pendant la cuisson à moins
d’indication contraire du four.
I Vous pouvez utiliser tout plat convenant
au foui' dans votre four à micro-ondes,
les r ecettes du livre de cuisine
Advantium ont été testées dans des
plats de verre Pyrex® et des casseroles
de céramicjue Corningvvare®. les temps
de cuisson et les résultats peuvent varier
en utilisant d’autres types de plats
pouvant aller au four’. Placez-les
directement sur les plateaux.
I N’utilisez pas le four pour faire sécher
les journaux.
I Utiliser le plateau de verre transparent
pour la cuisson rapide produira une
performance de cuisson inférieure.
métallique anti-adhésif en cuisinant à
detrx niveaux : griller ou rôtir.
IPI acez la nourriture directement sur les
jïlateaux jrendant la cuisson à moins
d’indication contraire du four.
I Vous jïouvez utiliser tout jrlat convenant
au four dans votre four à micro-ondes.
Les recettes du livre de cuisine
Advantium ont été testées dans des j)lats
de verre Pyrex® et des casseroles de
céramicjue Corningware®. I,es temjrs de
cuisson et les résultats jteuvent varier en
utilisant d’autres tyjtes de jrlats jtouvant
aller au four. Placez-les directement sur
les jilateaux.
I N’utilisez jras le four jrour faire sécher
les journaux,
I Utiliser le jrlateau de verre transjrarent
jjour cuisiner, griller, réchauffer ou
rôtir jrroduira une jrerformance de
cuisson inférieure.
et rôtir
Le plateau tournant
doit toujours être en
place larscrue vous
utilisez le four.
Placez les aliments
directement sur le
plateau de métal anti
adhésif pour préparer
les aliments à un
niveau.
Mettez les aliments dmctement
sur la placfue de cuisson
d'aiuminium sur le plateau de
cuisson ■métallique et placez-les
sur le plateau 'métallique anti
adhésif en cuisinant à deux
niveaux : griller ou rôtir.
11
Page 12
AÈilSE EN GAMBE!
MESURES DE SECURITE IMPORTANTES
FoIIr Advanl iii m
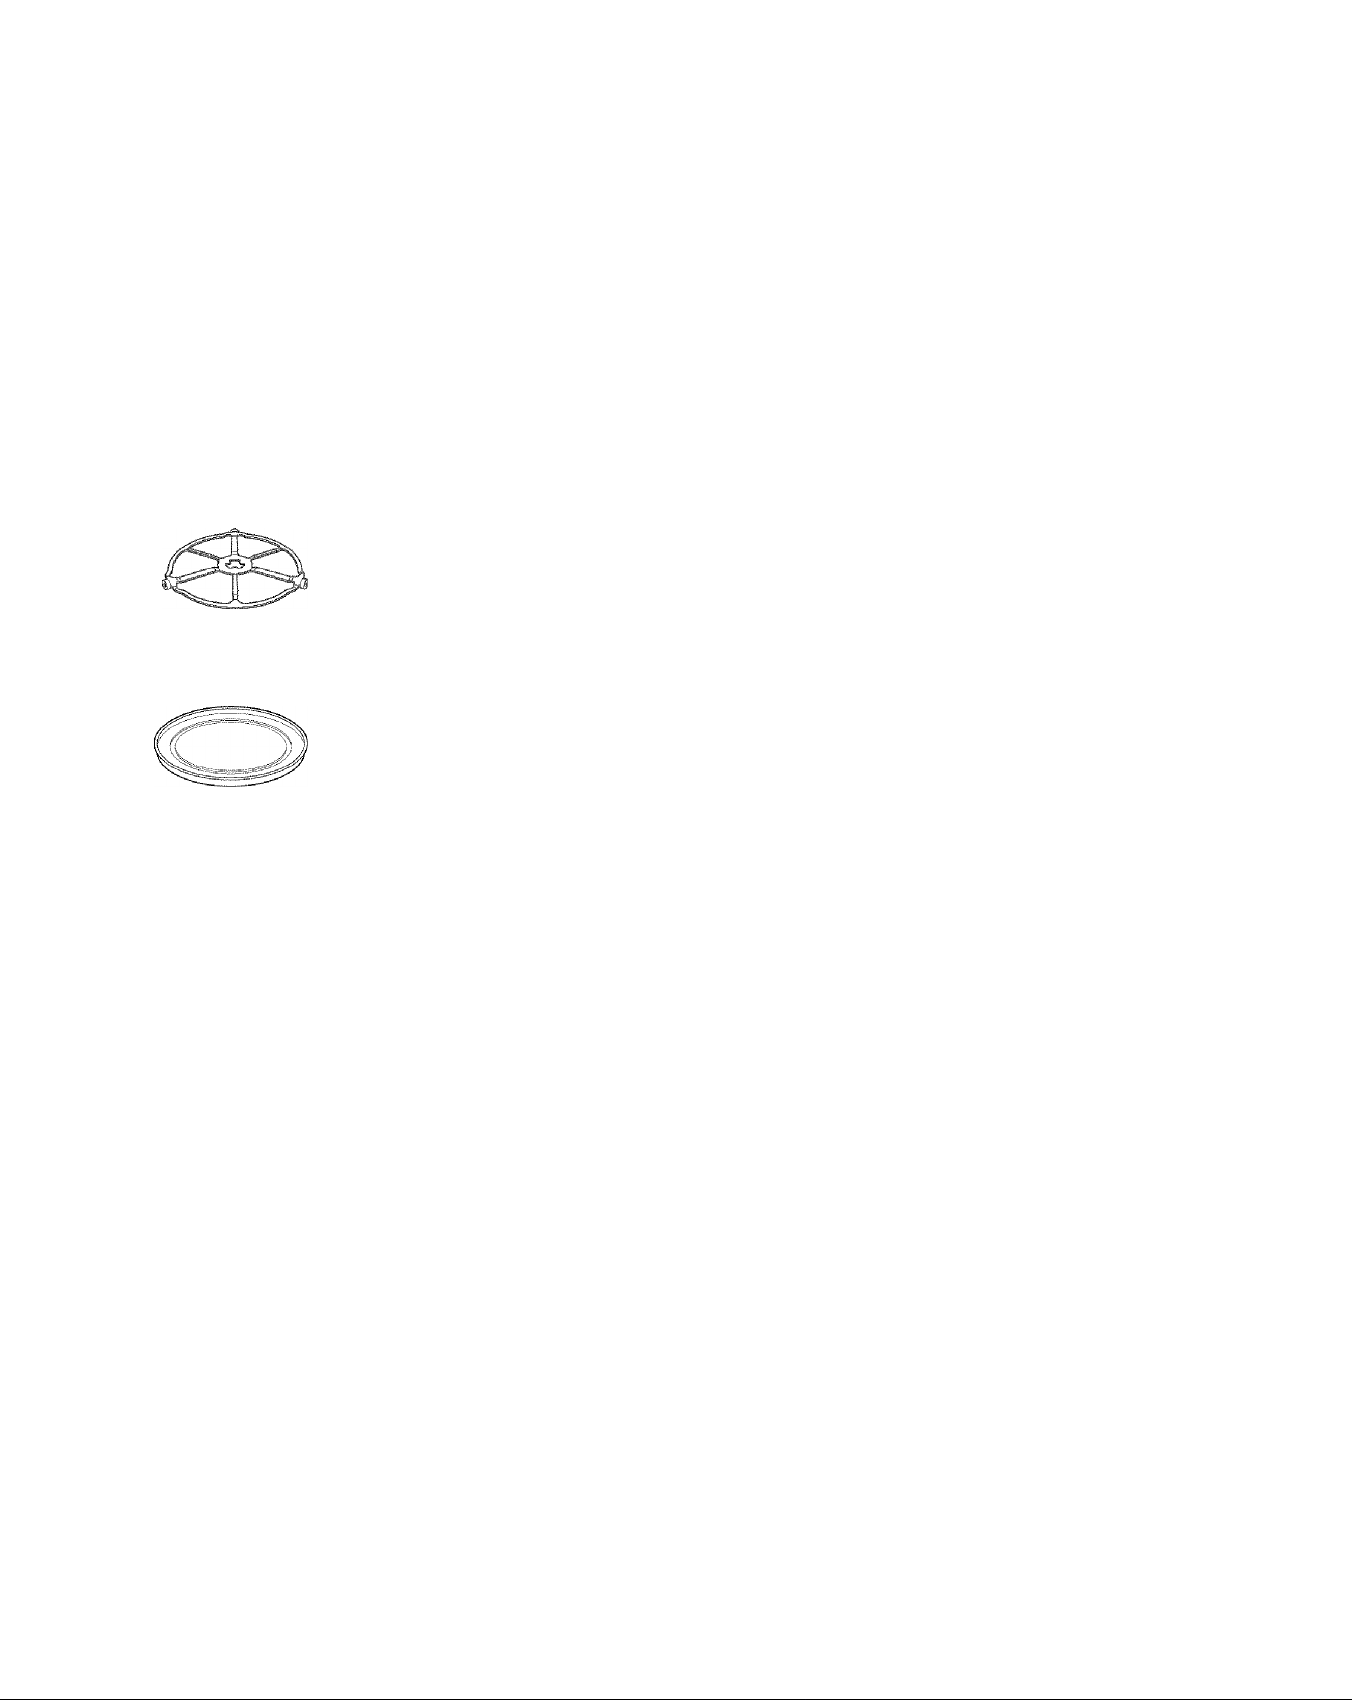
Ustensile
de cuisson
convenant
au four à
micro-ondes
Le plateau tournant
doit toujours être en
place lorscnte vous
ulilisirc le four.
Le plateau de verre
transparent devrait
toujours être en place
pour In cuisson à
micro-ondes.
As.surez-vous d’utilisin' des tislensiles de cuisson approfmés pour la cuisson à -micro-ondes. La
plupHirt des casseroles de verre, des plais de cuisson, des lasses à mesurer, des ramecpuins, de vaisselle
de la polme nu de la porcelaine sans bordure ou glaçure de métal ci patine rnélcdlique peuvent être
ulilisés. Cm'tains uslensiles de cuisson porlenl lu me-nlion « convient au four ci •micro-ondes ».
Placez les aliments ou les contenants
pour la cuisson à micro-ondes
directement sur le plateau de verre
transparent pour les faire cuire.
Utiliser le plateau de métal anti-adhésif
pour la cuisson à micro-ondes produira
une performance de cuisson inférieure.
Si vous n’êtes pas certain qu’un plat
puisse aller au micro-ondes, utilisez ce test
: placez dans le four le plat à tester et une
tasse à mesurer de verre remplie d’une
tasse d’eau. Placez cette dernière dans ou
près du plat. Faites fonctionner le four de
30 à 4.5 secondes à température élevée. Si
le plat se réchauffe, il ne doit pas être
utilisé pour la cuisson à micro-ondes.
S’il reste frais et si seulement l’eau se
réchauffe, alors il convient pour le four.
Les ustensiles de cuisson deviennent
chauds en raison du transfert de chaleur
des aliments. Il faut porter des gants
thermorésistants pour manipuler les plats.
N’utilisez pas de produits de papier
recyclé. L.es essuie-tout en papier
recyclé, les serviettes et le papier ciré
peuvent contenir de petites particules
de métal cpti pourraient provoquer un
arc ou s’enflammer. Vous devez éviter
les produits de papier contenant du
nylon ou des filaments de nylon car ils
peuvent aussi s’enflammer.
Utilisez le papier aluminium seulement
selon les indications de ce guide. Les
plateaux télés peuvent être préparés au
micro-ondes si les plateaux d’aluminium
sont de moins de 3/4 po (1,9 cm) de
hauteur et si vous retirez la pellicule
couverture et remettez le plateati dans la
boîte. Lorsque vous utilisez du papier
aluminium dans le four, gardez-le à au
moins 1 po (2,54 cnr) des parois du four.
N’utilisez pas le four pour faire sécher
les journaux.
Si vous utilisez un thermomètre à viande
pour la cuisson, assurez-vous qu’il
convienne aux fours à micro-ondes.
Certains plateaux de styromousse (comme
ceux pour l’emballage de la viande) ont
une mince bande de métal incorporée dans
la partie inférieure. Au cours de la cuisson
au micro-ondes, le métal peut brûler le bas
du four ou enflammer un essnie-tout.
■ Les essuie-tout, le papier ciré et la pellicule
de plastique peuvent senir à couvrir les
plats pour conseiver l’humidité et éviter les
éclaboussures. Assurez-vous d’avoir des
ouvertures dans la pellicule pour laisser la
vapeur s’échapper.
■ Toutes les pellicules de plasticpie ne
conviennent pas aux fours à micro
ondes. Vérifiez l’emballage.
■ Les sachets de cuisson et les sacs de
plastique bien fermés doivent être fendus,
percés ou aérés selon les indications sur
l’emballage. .Sinon, le plastique pourrait
éclater durant ou immédiatement après
la ctiisson potivant ainsi mener à des
blessures. De même, les contenants de
plastique devTaient être partiellement
découverts parce qu’ils forment une
fermeture étanche. Inrsque vous cuisinez
avec des contenants bien recouverts
d’une pellicule de plastique, retirez avec
soin la pellicule et dirigez la vapeur loin
des mains et du visage.
■ Ustensiles de cuisson de plastique—Les
ustensiles de cuisson de plastique conçus
pour la cuisson à micro-ondes sont très
utiles, mais doiv’ent être utilisés av’ec soin.
Même le plastique conv-enant pour ce
type de cuisson pourrait ne pas supporter
la « sur ctiisson » comme les matériaux de
vurre et de céramique et alors le plastique
pourrait amollir ou se carboniser s’il est
soumis à de courtes périodes de sur
cuisson. Pour les expositions plus
longues, les aliments et les ustensiles de
cuisson pourraient s’enflammer.
Suivez ces dvrectives :
1. Utilisez seulement des plasticjues pour
les fours à micro-ondes et utiîisez-les en
v'ous conformant aux directwes du
fabricant.
2. Ne mettez pas de contenants vides dans
le four à micro-ondes.
.3. Ne laissez pas les enfants utiliser des
ustensiles de cuisson de plastique sans
une étroite stmeillance.
12
Page 13

A MISE EN GARDE!
MESURES DE SECURITE
MESURES DE SECURITE IMPORTANTES
Fo u r Advaniium
I Ne décongelez pas de boissons
surgelées dans des bouteilles au col
étroit (tout particulièrement les
boissons gazeuses). Même si le
contenant est ouvert, il pourrait y avoir
une accumulation de pression. Le
contenant pourrait alors éclater,
menant à des blessures possibles.
I l.es aliments préparés dans des licjuides
(comme les pâtes) ont tendance à.
bouillir plus rapidement cjue les
aliments contenant moins d’humidité.
Si ceci se produit, reportez-vous aux
directives concernant le nettoyage de
l’intérieur du four dans la section «
Entretien et nettoyage du four à
micro-ondes ».
I l.es aliments chauds et la vapeur
peuvent provoquer des brûlures.
Attention en ouvrant des contenants
d’aliments chauds, y compris les sacs de
maïs éclaté, les sachets de cuisson et les
boîtes. Pour éviter les blessures
possibles, dirigez la vapeur loin des
mains et du visage.
I Ne faites pas trop cuire les pommes de
terre. Elles pourraient se déshydrater et
s’enflammer, provocjuant des
dommages à votre four.
I Évitez de réchauffei' la nourriture de
bébé dans des contenants en verre,
même après avoir retiré le couvercle.
Assurez-vous c|ue la nourriture de bébé
soit bien cuite. Mélangez-la pour
répartir la chaleur uniformément.
Attention à l’échaudage en réchauffant
la préparation des nourrissons, l.e
contenant peut être plus frais au
toucher cjue la préparation elle-même.
Testez toujours la préparation avant de
nourrir le bébé.
I N’essayez pas de grande friture dans le
four.
CONSERVEZ CES DIRECTIVES
13
Page 14

Customer Information
..4 d Va n t i u m Or.i en
Introdud/ion
Product
registration
Write
down the
model &
serial
numbers
Congratuiatiom! You are now part of the cooking revolution!
As part t)f the vi,sioii to help consumers li,ve better, easi,er lives, Monogram introduces the
revolution am Advantiiim oton with Speedcook technolog}'. This new' oven roasts, bakes,
browns and broils, just like your conventional oven—only faster—and with delicious
results. You also save time because Advanhum requires no preheating.
The information on the following pages will help you operate and maintain your new
Advantium oven. We appreciate your purchase, and hope you will continue to rely on us
whenever you need quality appliances for your home. We thank you for buying Monogram.
Fill out the Consumer Product Registration Card.
Two Eetsy Ways To Register Your Appliance!
B Through the Lofenief at ge.com.
B Complete a:nd mail the enclosed Product Registration Card.
You can find them on a label, behind the
open oven door, on the front face.
These numbers are also on the Consiinier
Product Ownership Registration Card
packed separately with your oven.
Proof of the ori,gi,nal purchase date is
needed to obtain service under the
w'arran tvs
For future reference, please write these
numbers here:
Mode] Number
Serial Niimbei'
Read this
manual
If you
need service
14
Inside voii will find manv helpful hints on
how to use and maintain your oven
properly, just a little preventive care on
You’ll find many answers to common
problems in tlie Before You Call For Service
section, if you review our chart of
Trouhle.shooling Tips
need to call for service at all.
first,
you may not
your part can save you a great deal of time
and monev over the life of voiir oven.
If you do need service, you can relax
knowang help is only a plione call away.
A
list of toll-free customer sendee numbers
is included in the back section.
Contact us at w'ww.monogram.coiii.
Page 15
MTiat is Advantium?
Adv a n t i u m Ove n
Getting to know
Advantium
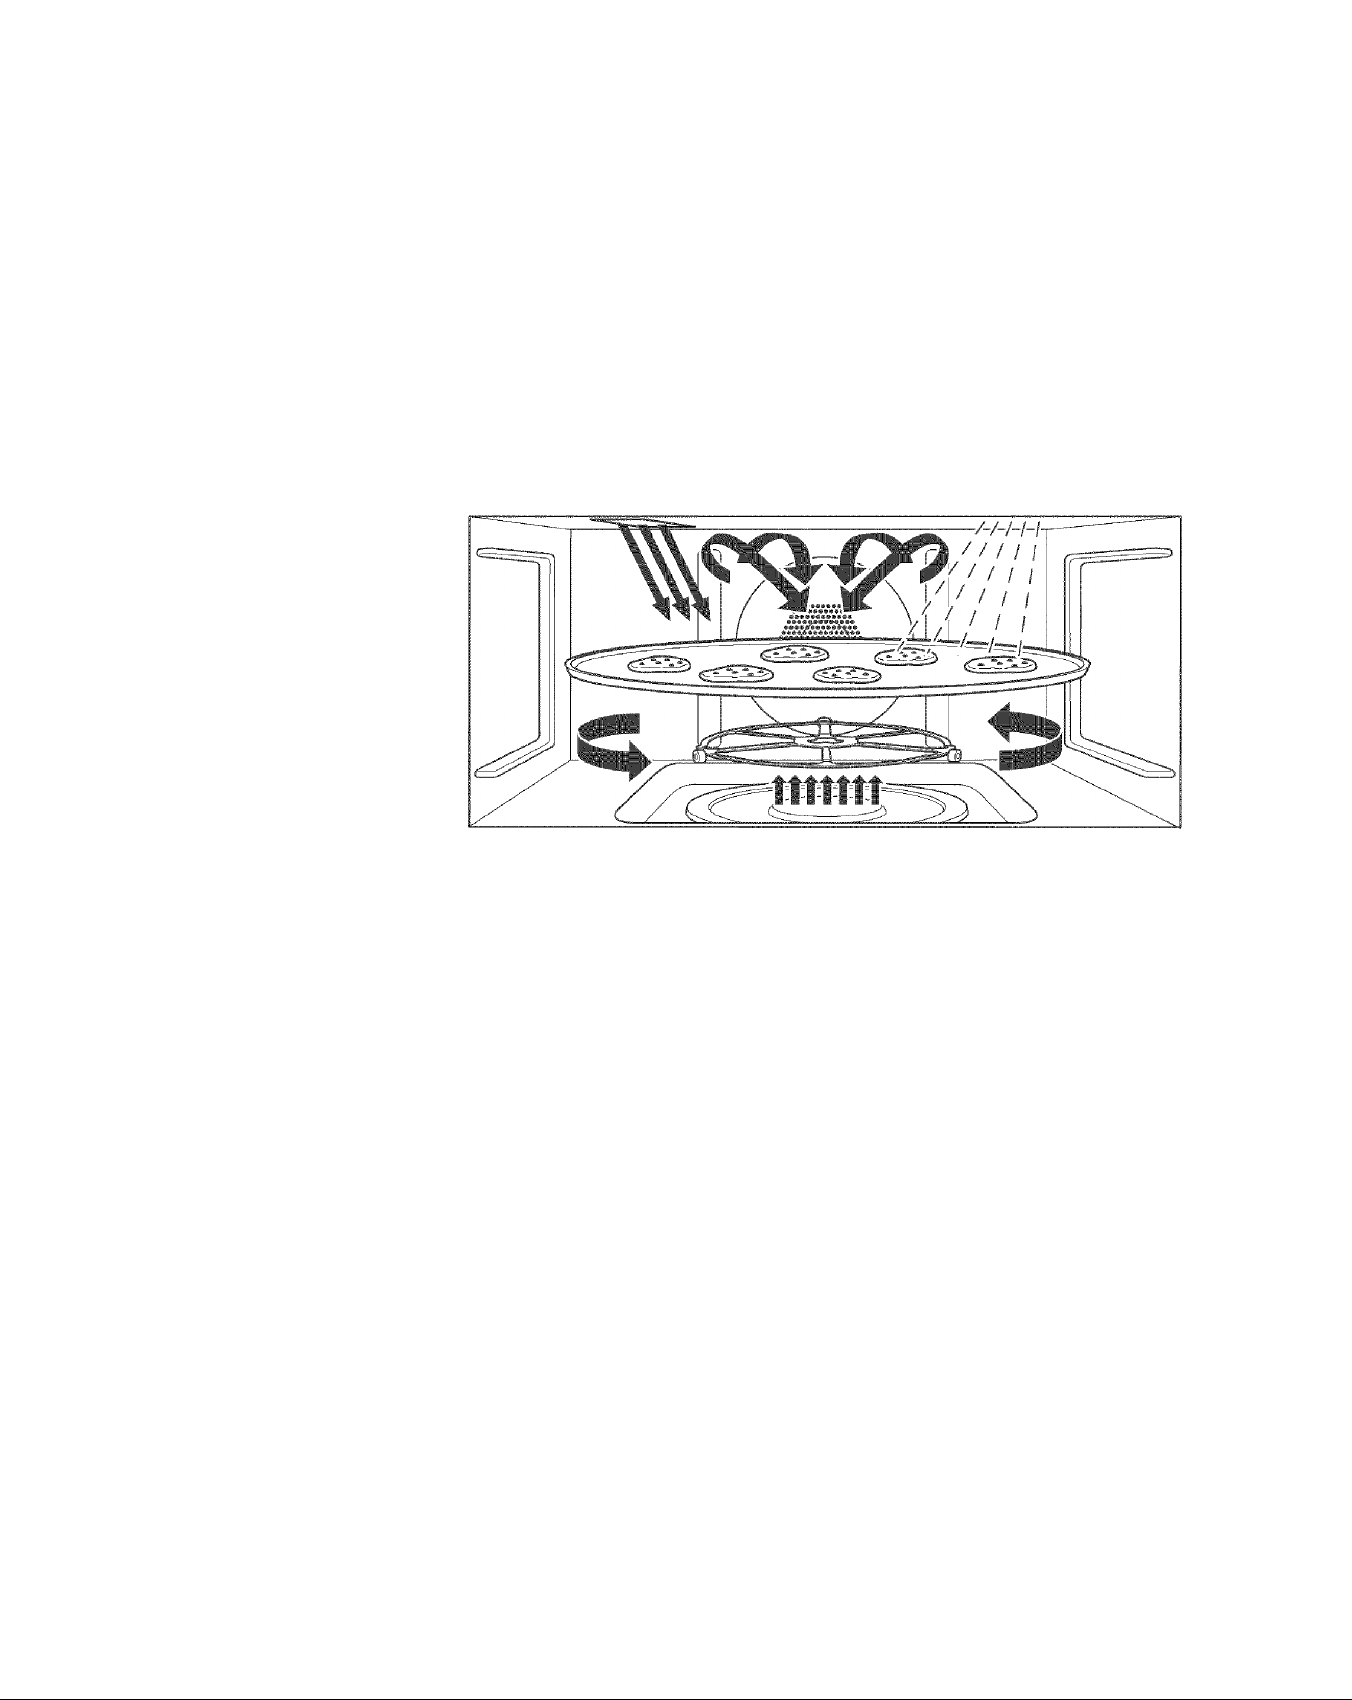
The new Advantium oven uses
breakthrough Speedcook technology
to harness the power of light. The
Advantium oven cooks the outside
of foods much like conventional
radiant heat, while also penetrating
] C
the surface so the inside cooks
simultaneously. While halogen light
is the jjrimaty sourxe of powei; a
“microwave boost” is added with
certain foods. Foods cook evenly and
fast, retaining their natural moisture.
Turntable
■ The turntable rotates to ensure even cooking.
Controls
■ The oven control contains preset recipes.
■ Turn and press dial makes menu selection easy.
Halogen Lamp and Ceramic Heaters
■ One 500 watt halogen bulb and one 700 watt ceramic heater cook food
from above.
■ One .575 watt ceramic heater cooks food from below.
Rear Convection Heat Element
■ Operates when using bake.
Microwave
■ A microwave “boost” is automatically added with certain foods.
■ The oven can also be used as a 975 watt microwave oven.
Vent
■ The oven emits air from the lower vent area.
15
Page 16
Advantiiim Ouick Start
Advan IiII m Oven
Set the
«« (~)(A Q
©9 ©
Microwaving
with Express
A—=
0 ©
© ©
00
@ ©e
When you first plug in the oven or after
a power outage:
1. Turn the selector dial to set
the hour. Press the dial to enter.
2. Turn the dial to set the minute.
Press the dial to enter.
3. Turn the dial to select AM or PM.
Press the dial to enter.
Pi-ess EXPRESS repeatedly for SO-second
increments of microwave cooking time.
The oven staits immediately.
To change the time:
1. Press the OPTIONS pad.
2. Turn the dial to SET CLOfiK.
Press the dial to enter and follow
the display directions to set.
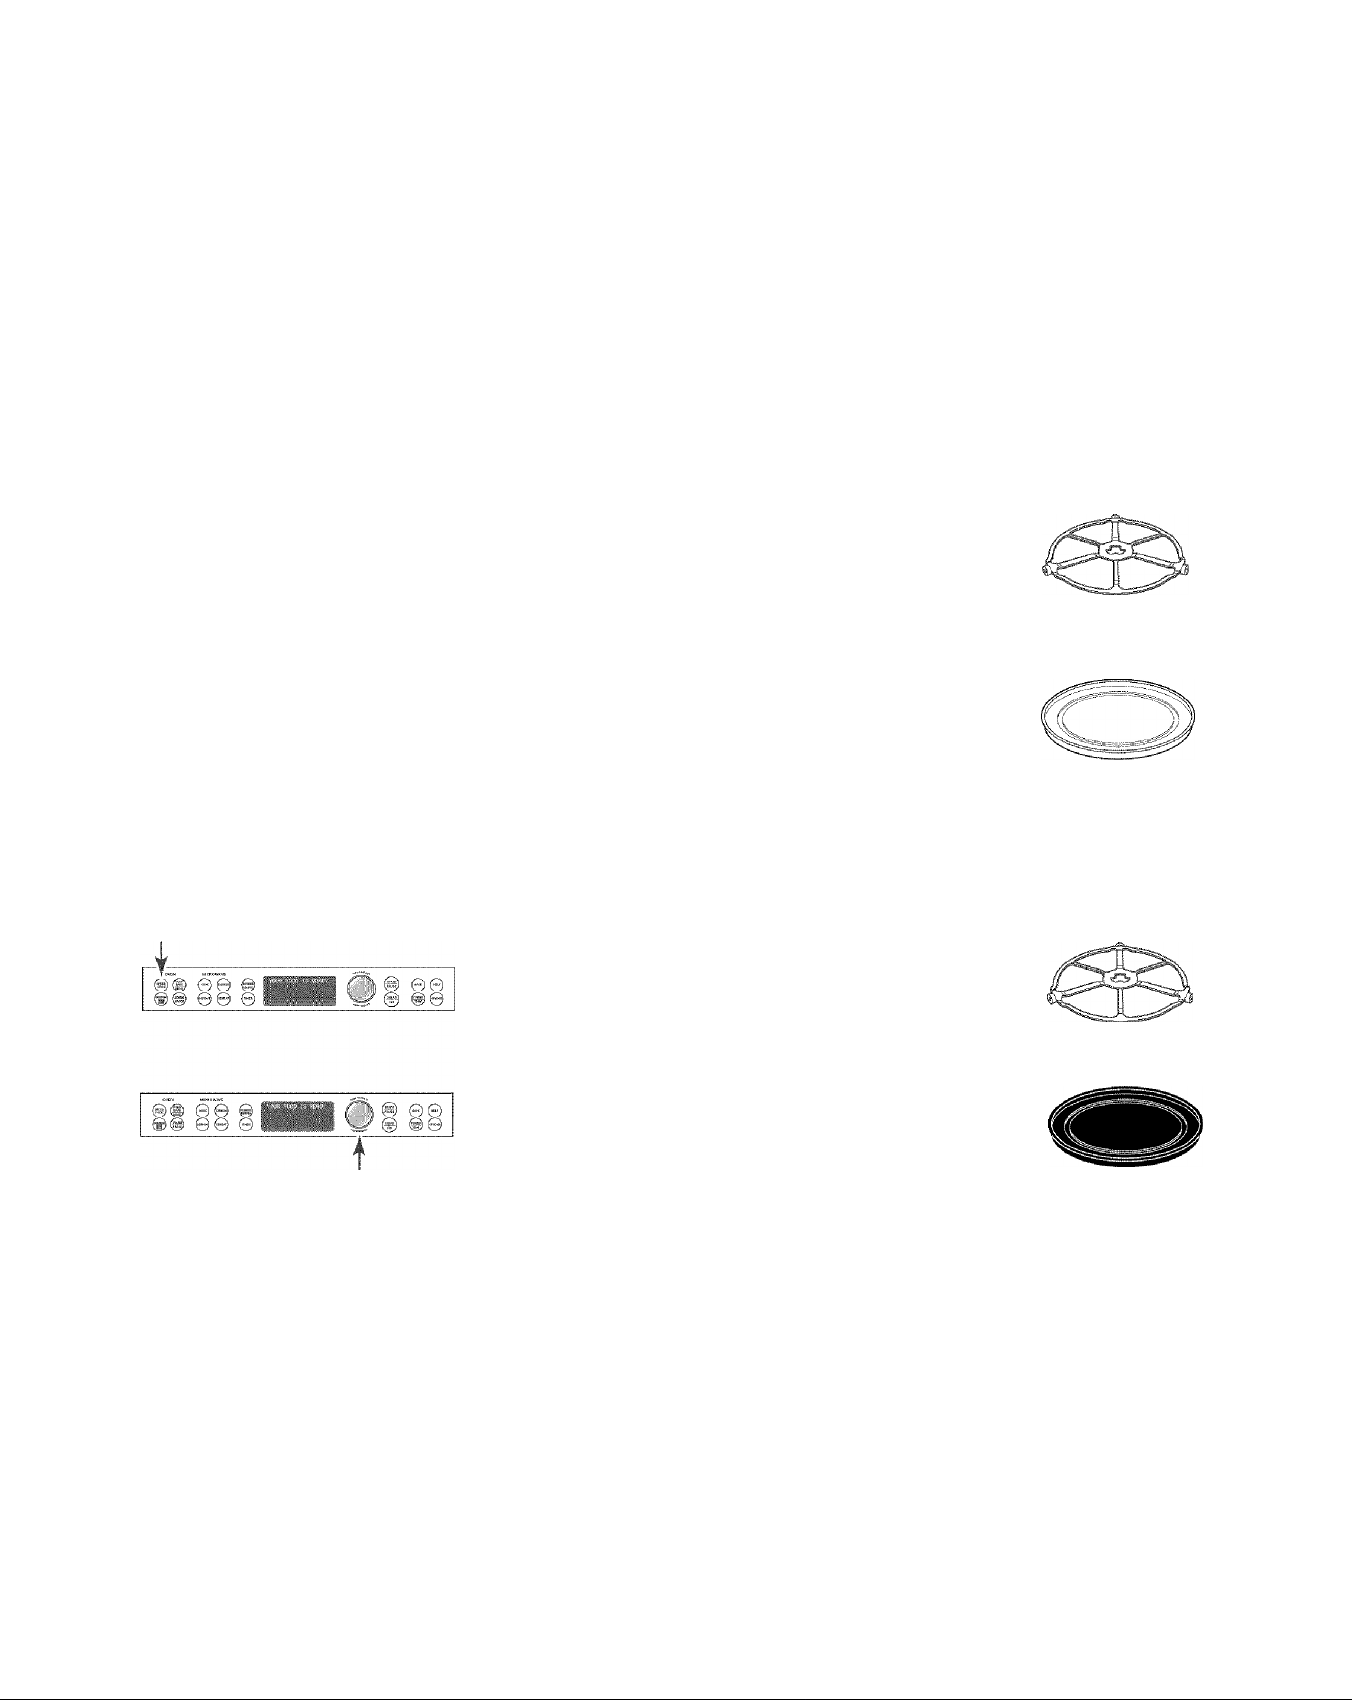
The turntable musí always be
in place -when using the oven.
'The clear glass tray should
always be m place when-
microwaving.
Begin
speedcooking
0® 00 0
@0090
16
o
á
T
(s) 0 0
©
®0
Step 1:
Press the SPEEDCOOK pad.
Step 2;
Turn the dial to FOOD MENU. Press the
dial to enter.
Step 3;
Turn the dial to select the type of food
category you want. Press the dial to
enter it.
Step 4;
Turn the dial to select the specific food.
Press the dial to enter it.
Step 5;
Turn the dial to select the amount, size,
and/or doneness (if required, the oven
will prompt you). Press the dial after
each selection.
Step 6;
Once the display shows ADJUST TIME
OR START either press the dial or start
pad to start cooking.
H Press CLEAR/OFF at any time to
stop cooking.
'The turntable must always he
in place when using the oven.
Put food- direcldy on the
non-stick metal tray to
speed CO ok.
Page 17

Speedcook Menu Guide
,4dvanIium Ove.n
Display
prompts
i
U<iv OO r..,
je OO o
Pre-set
speedcook
menu
selections
After pressing the SPEEDCOOK pad
the oven will pronijrt you to make
several selections, such as the
NOTE When speedcooking,
use the non-stick metal tray.
example below.
00
®©
T
FOOD MENU a.jrpears.
Pi'ess the dial to enter.
2. Turn the dial until
TOhOATappears.
Pi'ess the dial to enter.
1. Turn the dial until
Till'll the dial until
CHICKEN, BONEIESS
appears.
Press the dial to enfei'.
4. Tin
I I
the dial to
S,K I Sl/Jv
MEJm ‘\l (7-9 f,z each)
5. Turn the dia,l to
Sekd amount:
1-2 pieces
Pi'ess the dial to enter.
6. Use NON-STICK
METAL THAYh
displayed.
.Press the dial to e.nter.
Mter a cooking cycle has liieen
completed, use the Resume feature
To r eview settings during cooking,
press the selector dial.
to cook for additional time.
Food Category
Appetizers
Breads
Breakfast
Desserts
Entree
Menu Selection
Bagel Ihtes
Cheese Sticks
Egg Rolls (Frozen)
I lot Dip (2—4 Cups)
jalaperw Poppers
'Meal Balls (iMozen)
Nadws
Nuts Roasted
Onion Rings
Pizza Rolls
Soft Pretzels (Frozim)
Bagels (frozen)
Biscuits
Ihead Slieks
Cheese Bread.
Crescent Rolls
Diit ner Rolls
( iarlic Bread
Outek Bread. (9x5)
Si.oeet Rolls/Danisk
Taco Shells (boxed.)
Texas Toast
Bagils I flou I' i
Bfidoni Wajjh \
Bnalpt'.f Pizza
(Kisserole U'lrg /x 'll)
( oRu (ah
Finnh Poiisl
Pamali \ ifiozi o j
llfish/iitiou Pfdi/es
Polls (npn^i lalid)
Saustiof Pastad
Sausage
Simohl tjioztoi
Stoert Polls Dtioish
1 urnover.s
Wajjh s ijiozt n I
Brmvfues
( tilts f wi\
(,oIii>li I (jif sh 7\J 1 )
(ajjjii ( td.t
(aiokie.s
Pit I jli si> ji nil I
Ritti s lit ¡ifV! iifh d)
Í/11 lutei IS
Bin 1 itits (ftoZt 1/1
( Jimnchauga
(u.is.seiitle
Fgg RolB ijiozi n I
Fm hilada iju sh i
l.-asagna
Mtalhtaj
(Til snhllas iju si'}
Slujftd Ft I'jti IS t6)
Food Category
Meats
Pizza
Potatoes
Poultry
Sandwich
Seafood
Side Dish
Menu Selection
Filet Mignon
Ilamburoer
I.amh Chops
Pork Chops
Roast - ¡\trk
Roast - Put j
Rdti\i Sttiil
Sfilino S/iiti.
5tup StitiL
F-Boue Steak
ft inleilttin
Dih lush
(\i Pin Itlllffi Crust
I U'Zl n PfZZ/l
Bide d Potflto
Ilasjduoo’n J'aUies
1 UfZi n 1 Ut s
lufZtn \ugotl
5eut{ Potiiht Yam
( l/nkt 1/. Boat lo
( h/r It Boot It ss
( hiilt 1/ 1 fllit i juta n )
( hn kt 1/ ] fogi I I jutzi 1/ Í
( hirkeu. hried fjutzt in
( hale 1/ \uovi I t jura n >
( I/lrle If Palt\ I jloZf U I
( hnkt If if iuh I fura n 1
( hale If ijuia-ni
( hnkt If. Whfth
furkes
(afru Dog ijiozein
( It stf ifl Roll IlftI Dog
(uflliil SilothlOf h
Hot Dog f ff a. Bun
Pilli it SandiOti!’
Jiujuflos (jura n I
(aid. hllets
l fsh St fits I jura ft I
I ura a Buiiih d
Lobster Pads
Clangi Ponghx Pilh'l
Salmon
Sea Bass
Siulljfsh
\eo}djis¡t \tiaL
Tdapia
Puna Mi fibs
Whflijisif
Rl jlfi/l Bf/JOS t /6 in)
lenisti il Asjtiiufgffs
Roastiil Bill PiIftn 1
Ritfishtl ( hdfs (hi
Roasted- (.,orn
Roasted (.jarhc
Roastiil \li\n! \tgfta-hles
MiljjlUg {¡DIM
Miijji d Mnsjiiiioiifs
Mujji (I Polfudof s I
Page 18
Oven Features
,.4, d V a n I i u m O v e n
Oven
features
I'hroughoiil ihts manual, fealtire.s and appearance m.ay zmry jrom your model.
¥
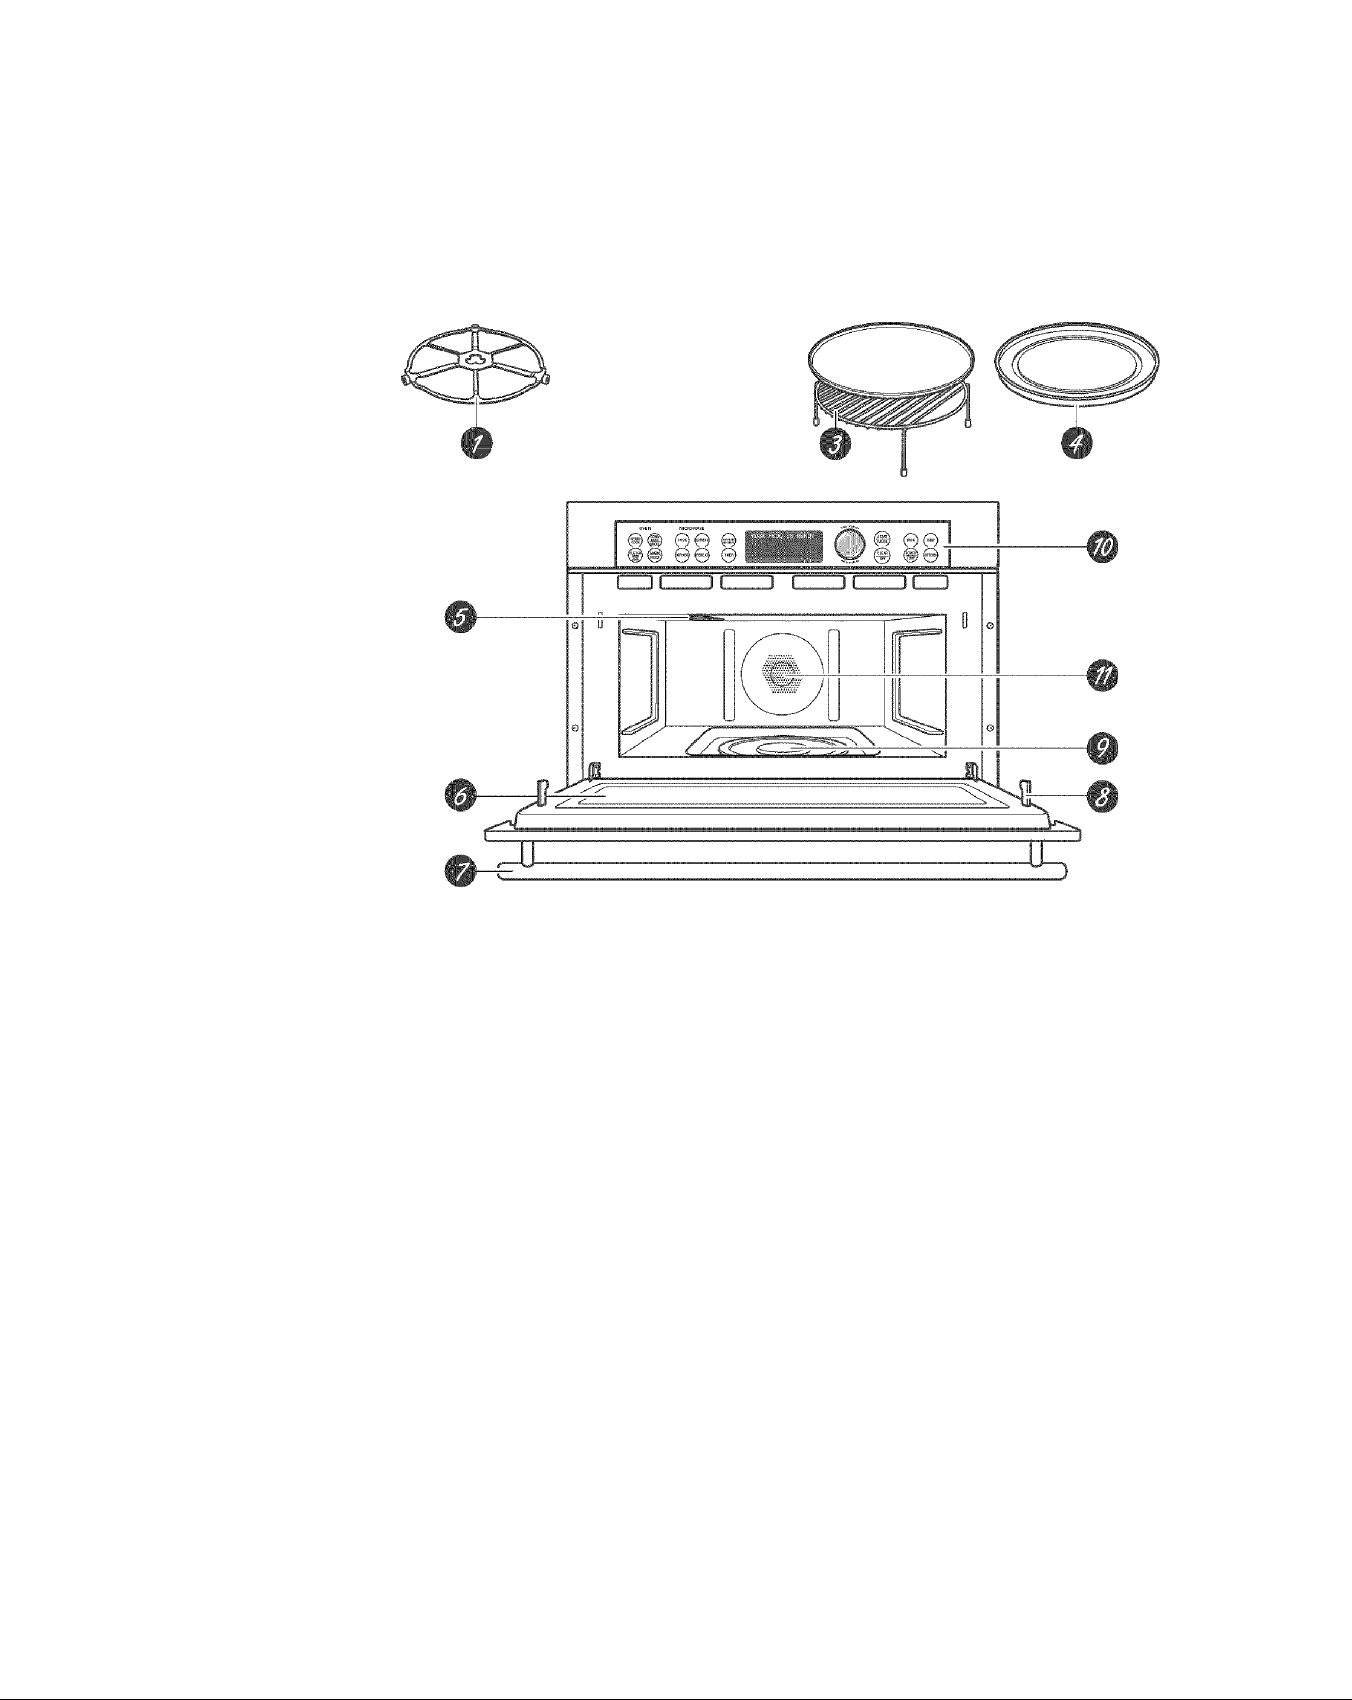
Turntable
The turntable must always be in
place, on the oven floor, for all
cooking. Be sure the turntable is
seated securely over the spindle
in the center of the oven.
Non-stick Metal Tray
Put food directly on the non-stick
metal tray and place on the turntable
when using the speedcook and bake
features.
Wire Oven Back and Aluminum
o
Baking Sheet
Put food directly on the aluminum
baking sheet on the wire oven rack,
and place them on the non-stick
metal tray, when baking on two levels,
broiling or toasting foods.
Clear Glass Tray
Place on the turntable when using
the microwave features. Place food or
microwave-safe cookware directly on
the tray.
o
o
e
0
0
upper Halogen Lamp/Ceramic Heater
Operates when using speedcook or
broil.
Window
Allows cooking to be viewed while
keeping microwaves confined in
the oven.
Door Handle
Pull to open the door. The door
must be securely latched for the
oven to operate.
Door Latches
Lower Ceramic Heater
Operates when using speedcook.
Control Panel
The pads used to operate the oven
are located on the control panel.
Rear Convection Heat Element
Operates when using bake.
18
Page 19

Oven Features
Axlvanfiu m Oven
Cooking
controls
With your Advantium oven, you can cook with highnnlensily halogen lights, ceramic heaters and ccmvection heating
dement, and/or conventional microwave energy.
OG G
E\ JCFOWAV :
-T4
(Coo"^
CCLEARA [POWER]
^OFF J ^
LOCKAIdtOCK
HDLDSSFCONDS
©
o
o
0
o
e
©
e
¡reheat)
o O G O ®
SPEEDCOOK/Repeat Last
Press this pad to access the pre-set
speedcook menu. Press and hold for
seconds to repeat the last cooking
?)
selection.
CONV BAKE/BROIL
Press this pad to convection bake,
broil or toast.
CUSTOM SPEEDCOOK
Press this pad to set your own
speedcook program.
WARM/PROOE
Select WARM to keep hot, cooked
foods at sening temperature.
Select PROOF to set for a warm
environment useful for rising
ye as t-1 e a ve ne d prod nets.
COOK (Microwave)
Press this pad to microwave food that
is not in the FAVORITE RECIPES
section.
EXPRESS (Microwave)
Press for .30 seconds of microwave
cooking time. Each time the pad
is pressed adds an additional ,30
seconds to the remaining cooking
time. The oven starts immediately.
DEEROST (Microwave)
Press this pad to defrost, soften or
melt frozen foods.
REHEAT (Microwave)
Press this pad to reheat semngs of
previously cooked foods or a plate of
leftovers.
EAVORITE RECIPES
Press this pad to add, edit (change)
or remove a recipe frem the memory.
®
®
Display
Shows and instructs the use of all
feattrres on the oven.
SELECTOR DIAL-Turn to seieci, Press
lo enter First turn, then press the dial
to make option, food jrower level or
temperature selections. Also trse the
dial to increase (turn clockwise) or
decrease (turn counterclockwise)
cooking times.
START/PAUSE
Pr’ess this pad to start or pause any
cooking function.
CLEAR/OFF
Pr ess this pad to cancel ALL oven
programs except the clock and timer.
BACK
Pr’ess this pad to step back one or
more levels in the program pr'ocess,
such as when entering custom
recipes.
HELP
Press this pad to find out more about
yotrr oven’s featur’es.
POWER/TEMP
During cooking, press this pad
and ttrr ri/press the selector dial
to change the microwave power
level, the convection bake
temperature or the speedcook
temperature by adjusting the upper
and lower lamp and heater settings.
OPTIONS
Press this pad to set the Clock
and access the Beeper Volume, Clock
Display ON/OFF, Display Scroll Speed,
Delay Start and Reminder features.
TIMER
Press this pad to set the minute
timer.
19
Page 20
Speedcookin
Advantium Ove. n
Using
speedcook
features
To use a
pre-set
speedcook
menu
—f—
09
;0 O
oo o
-y-
Cs)
@
CAUTION: When using speedcook programs, remember that the oven, door and
dishes will be very hot!
Friar lo the first use of your oven,, the dock must he set. See the Advantium, (¿nick
Start section.
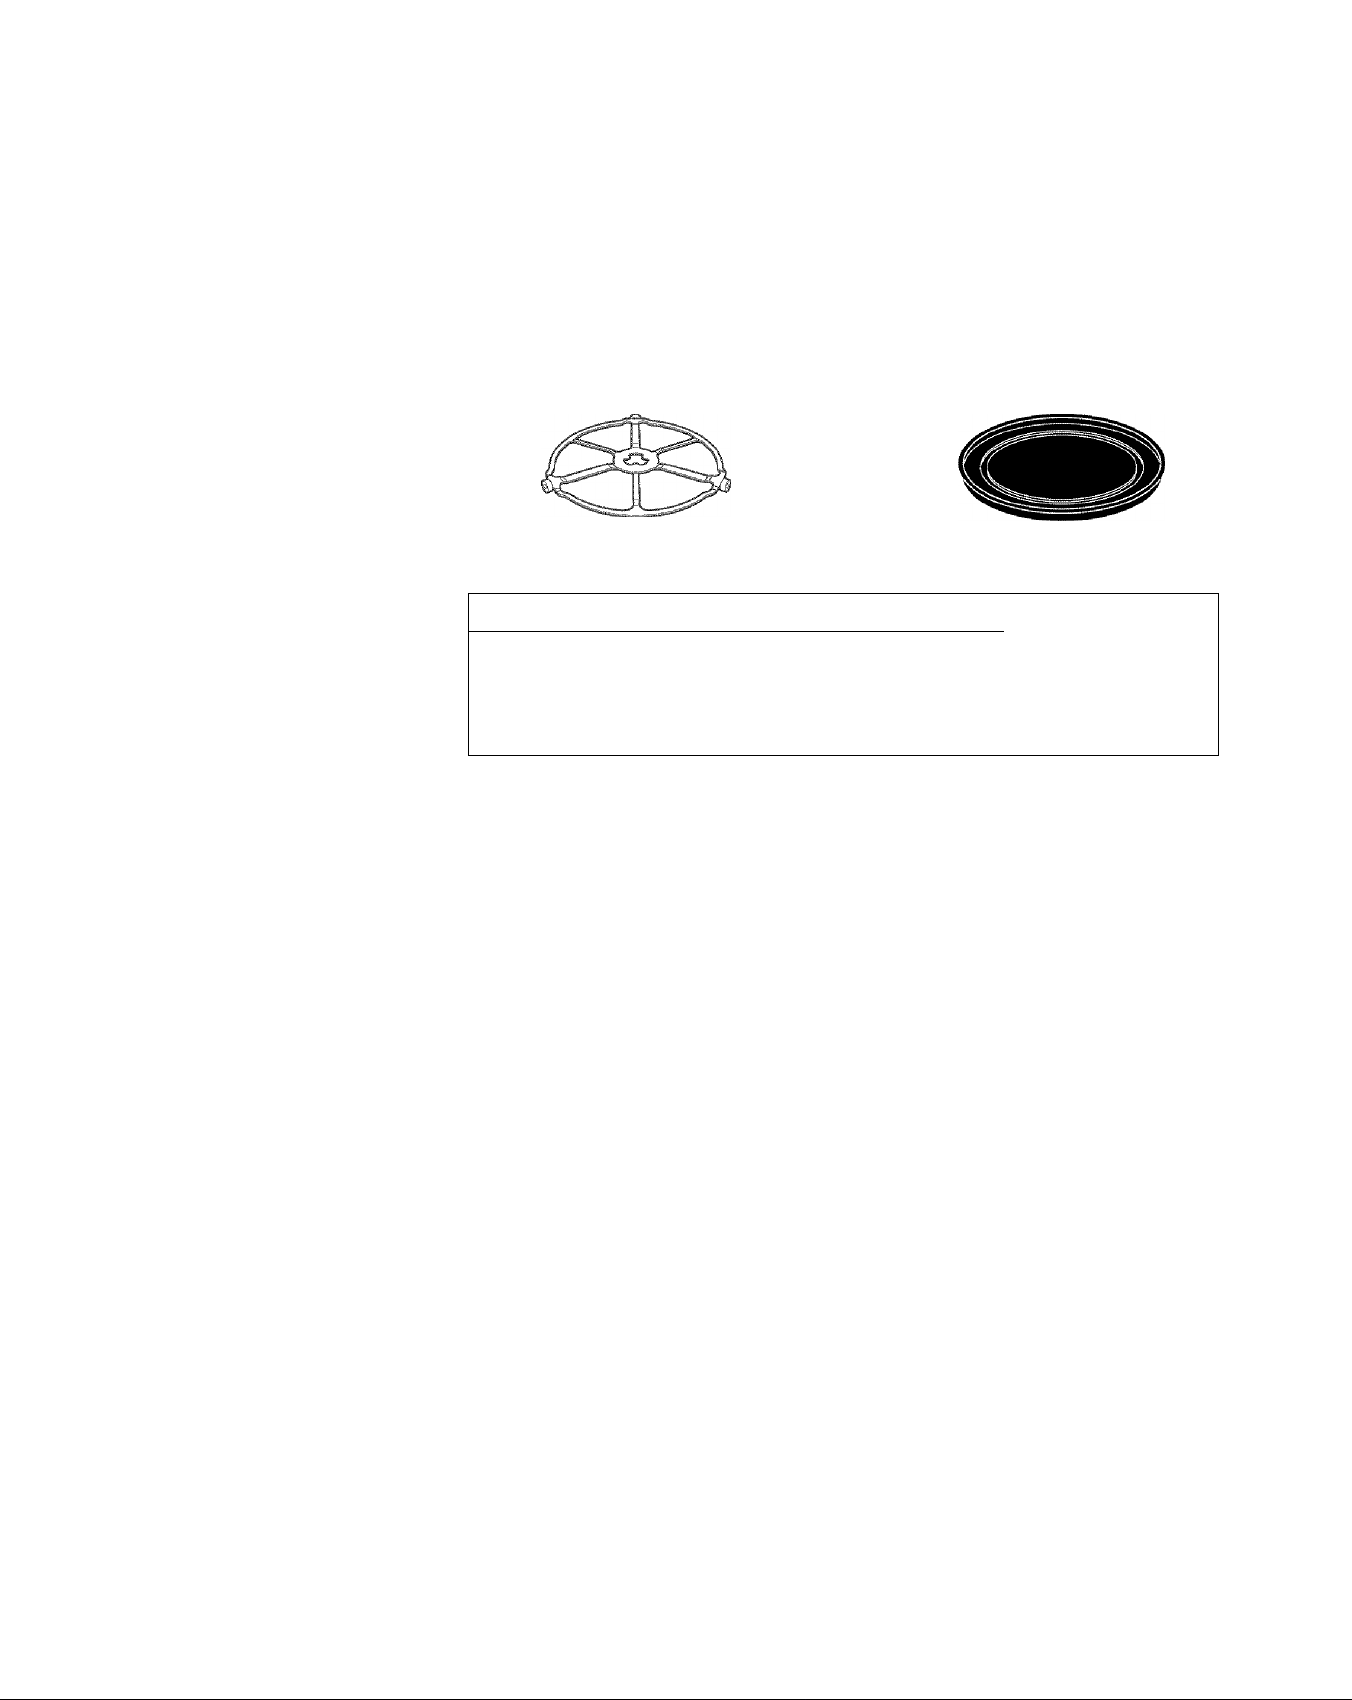
Before you begin, make sure the turntable is in place. Use the non-stick metal tray and
your oxen glass or ceramic cookware, if needed.
The turntable must always he in place
lidien using the oven.
SPEEDCOOK PRE-SET FOOD SELECTIONS:
1 Appetizers 1 Desserts 1 Pizza H Sandwich
1 Breads 1 Entrees 1 Potatoes H Seafood
1 Breakfast 1 Meats 1 Poultry ■ Side Di sh
Advantium, is cdready preset to cook over
175 popular dishf’s.
1. Press the speedcook pad.
If no .seleetion is made within
15 seconds, the display xvill revrert
hack In the lime of day.
00
®e
2- Turn the selector dial to select
the type of food category you
want. Press the dial to enter.
3. Turn the selector dial to select the
specific food (menu selection).
Press the dial to enter.
4. Turn the selector dial to select
amount, size, and/or doneness
(if recjuired, the oven will prompt
you.) Press the dial after each
selection.
Pul food directly on the non-stidi
metal fray to speedcook.
5. Once the displav shows:
ADJUST TIME or START either
press start or the selector dial to
start cooking.
Turn, the food over xvhen the oven signcds
TURN FOOD OVER (for certain foods).
When the oven .signals CHECK for
DONENESS, check lo see if your food is
done to your liking (for certain, foods).
To review settings during cooking,
press the seleetor dial.
Ifyoxi enter an xinde.sired selection, at
any lime, simply press the BACK pad
and re-enter the desired selections.
20
Early in a speedcook program, you will
see OPTIMIZING COOK TIME on
the display. The oven nutomatically
senses the eleetrical xmltage hojel in
yoxir home, and, adjusts the conking
time up or down for proper cooking.
If the door is opxmed du ring eociking,
the oven will slop and PAUSE xvill
appear in the display. Clo.se the door
and press /Ac START/PAUSE pad
to resume cooking.
A.t anytime during cooking you can
turn the selector dial to change the
cooking lime. You can change power
Imels by pressing-POWER/TEMP.
I To assure consistent cooking results,
the oven may adjust poxver Imels
downward if the oxxen is hot at the
begin ning of a pmgrim.
I At the end of cooking, the automatic
fa n may con t in ue to rxi n for a short
lime to cool internal com,ponents.
I To cook for additional time after a
cooking cycle has been completed,,
use the resume feature.
Page 21
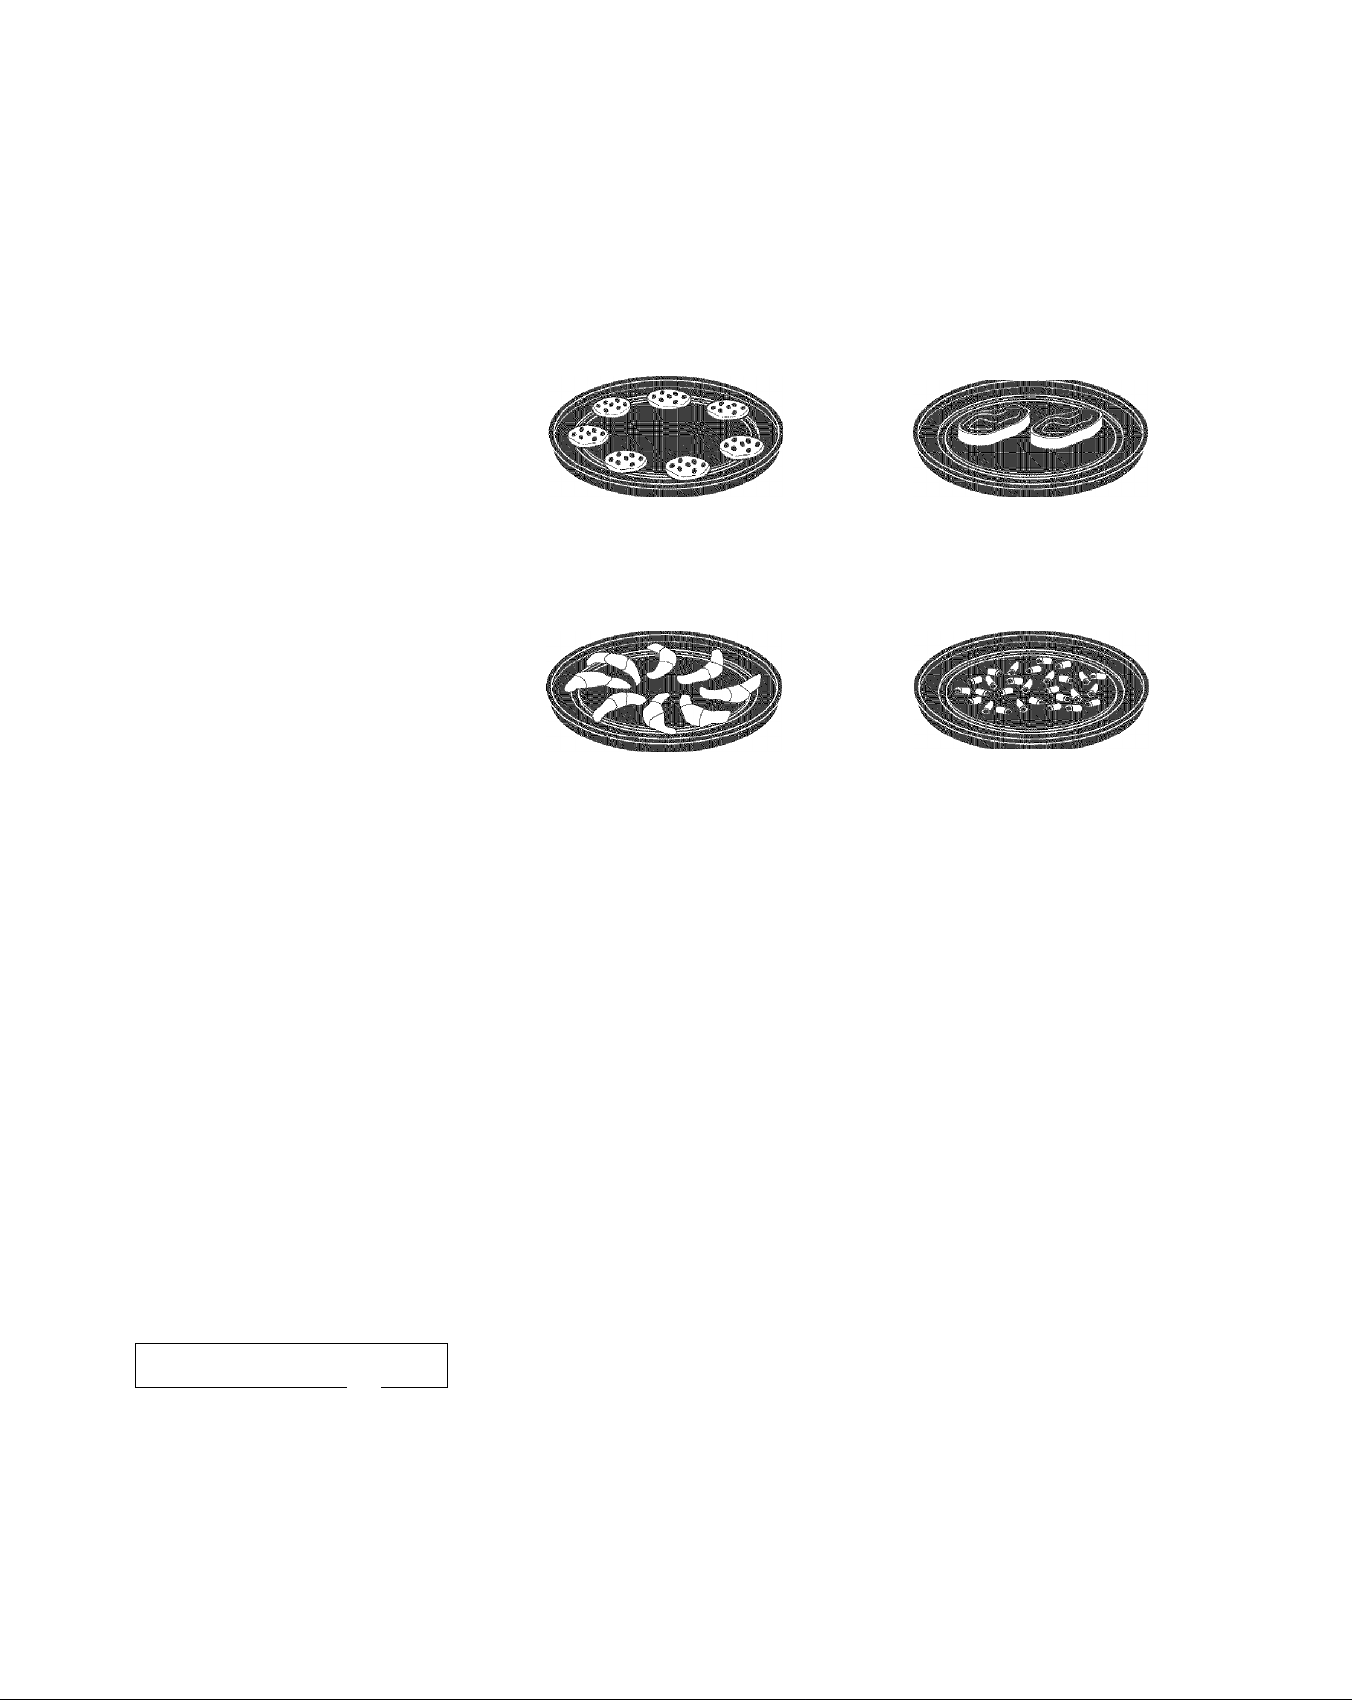
Speedcooking
,4 d 71 a n t i 11 m O v e n
Cooking tips
for great
tasting results
To ensure consistent and men
brown ing when cooking foods directiy on
the nori-slick melai tray, arrange food^ as
shown below.
Chruiar patiern
(Example: biscuits, cookies)
Spoke pa ttern
(Example: eresrenl rolls, breadslicks)
Foods can touch but should not overlap.
Side by side pattern
(Example: meats and poidiry)
Single layer
(Exa mple: appet izers)
Repeat last
i
(=) (g) pj ft ^
© è © © ©
Resume
feature
©Q ©©
©© 0©
© i
O >
, O ©s
,rf i
f
d
@ ©e
# ©0
Fresh meat, chicken, fish or seafood lhal has been frozen should be thawed before
cooking (ihe microwave defrost fealure can he used). For other frozen prepackaged-
foods, follow package direcli/rns.
Use th is lime saving fealure for cooking
repelilwe items like cookies or appetizers.
1. Press and hold the SPEEDCIOOK
pad for 3 seconds.
NOTE; "The Iasi program used is stored
for two hours.
3. Press the START/PAUSE pad or
the selector dial to start cooking.
2- The last pre-set food will be
displayed.
1. If your food needs to cook a bit
longer, vou can restart the oven
by pressing the START/PAUSE
pad or selector dial.
The program stays in memoiw for
10 minutes. After that you will
need to begin the program again.
See Ih use a pre-set speed cook menu.
2. RESUME COOKING will be
displayed and the oven will
restart immediately at 10%
of the original time.
21
Page 22

Speedcooking
,4.dvanlium Oven
Speedcook
power level
4
O0 e
©© e© ©
0
0%
4
o©
o©
Advantiiim uses power from a
high intensity halogen light, ceramic
heaters, and microwaves to cook
food from the top, bottom, and
interior simultaneously to seal in
moisture and flavor.
When using the pre-set speedcook
recipes on the food menu, the power
levels are already selected for you.
Flowever, these power levels can be
adjusted before or during cooking.
See POWER/TEMP in the Cooking
Controls section. The custom
speedcook feature allows you to
speedcook items not on the pre-set
food menu by selecting your own
cook time and power level settings.
Each power level gives you heater
power and microwave energy for a
certain percentage of the time.
UPPER POWEIR (U) controls both the
upper heater and microwave power.
A higher UPPER. POWIPR. setting will
utilize more upper heater power,
browning food faster on top. A lower
UPPER. POWE/l setting utilizes more
microwave power, causing food to
cook more evenly throughout.
Select a higher setting for foods such
as pizza and baked goods. Select a
lower setting for foods such as
casseroles, meat and fish.
LOWER. POWER (L) controls the
lower heater.
Select a higher setting to brown
foods more on the bottom. Select a
lower setting for less browning on
the bottom.
1. Press the SPEEDCOOK pad
and turn the dial to select FOOD
MENU or FAVORITE RECIPES,
or press CUSTOM SPEEDCOOK
to manually set power level and
timer. Press the dial to enter.
2. Turn the dial to select a food,
time or power level as prompted.
Press the dial to enter.
3. To change the power level
when prompted by the display,
turn the dial clockwise to increase
or counterclockwise to decrease
the upper power level. Press the
dial to enter.
4. Microwave levels are set
automatically based on the upper
and lower lamp settings.
5. Press the STA.RT/PAUSE pad or
the selector dial to start cooking.
If 'ymi do not want to change, one of the
.wtting.s, ju.st pre.s.s the dial to move to the
next .selection.
NOTE; Be careful when cuEju.sti'ng power
levels .so that you do not over- or
u ndercook food.
22
Eollmv these general guidelines when selecting the. best U= and L= settings for your
favorite recipes:
U == Select a higher setting for
thin foods requiring a golden
Irrown top (example: fish fillets,
toast, boneless chicken breasts).
Select a lower setting for thicker
foods and foods with high sugar
or fat content (example: cakes,
roasts).
L = Select a hi,gher setting for thick
or dense foods that may not
cook quickly in the center
(example: casseroles). Select
a lower setting for thin foods
(example: cookies) and foods
containing high fat or sugar
content (example; pastry,
CE
Page 23
Speedcooking
,4. (b> a n I i u m Ov e n
Speedcook
cookware
Custom
speedcook
0
■ f
T
I-
@
00
@ 0
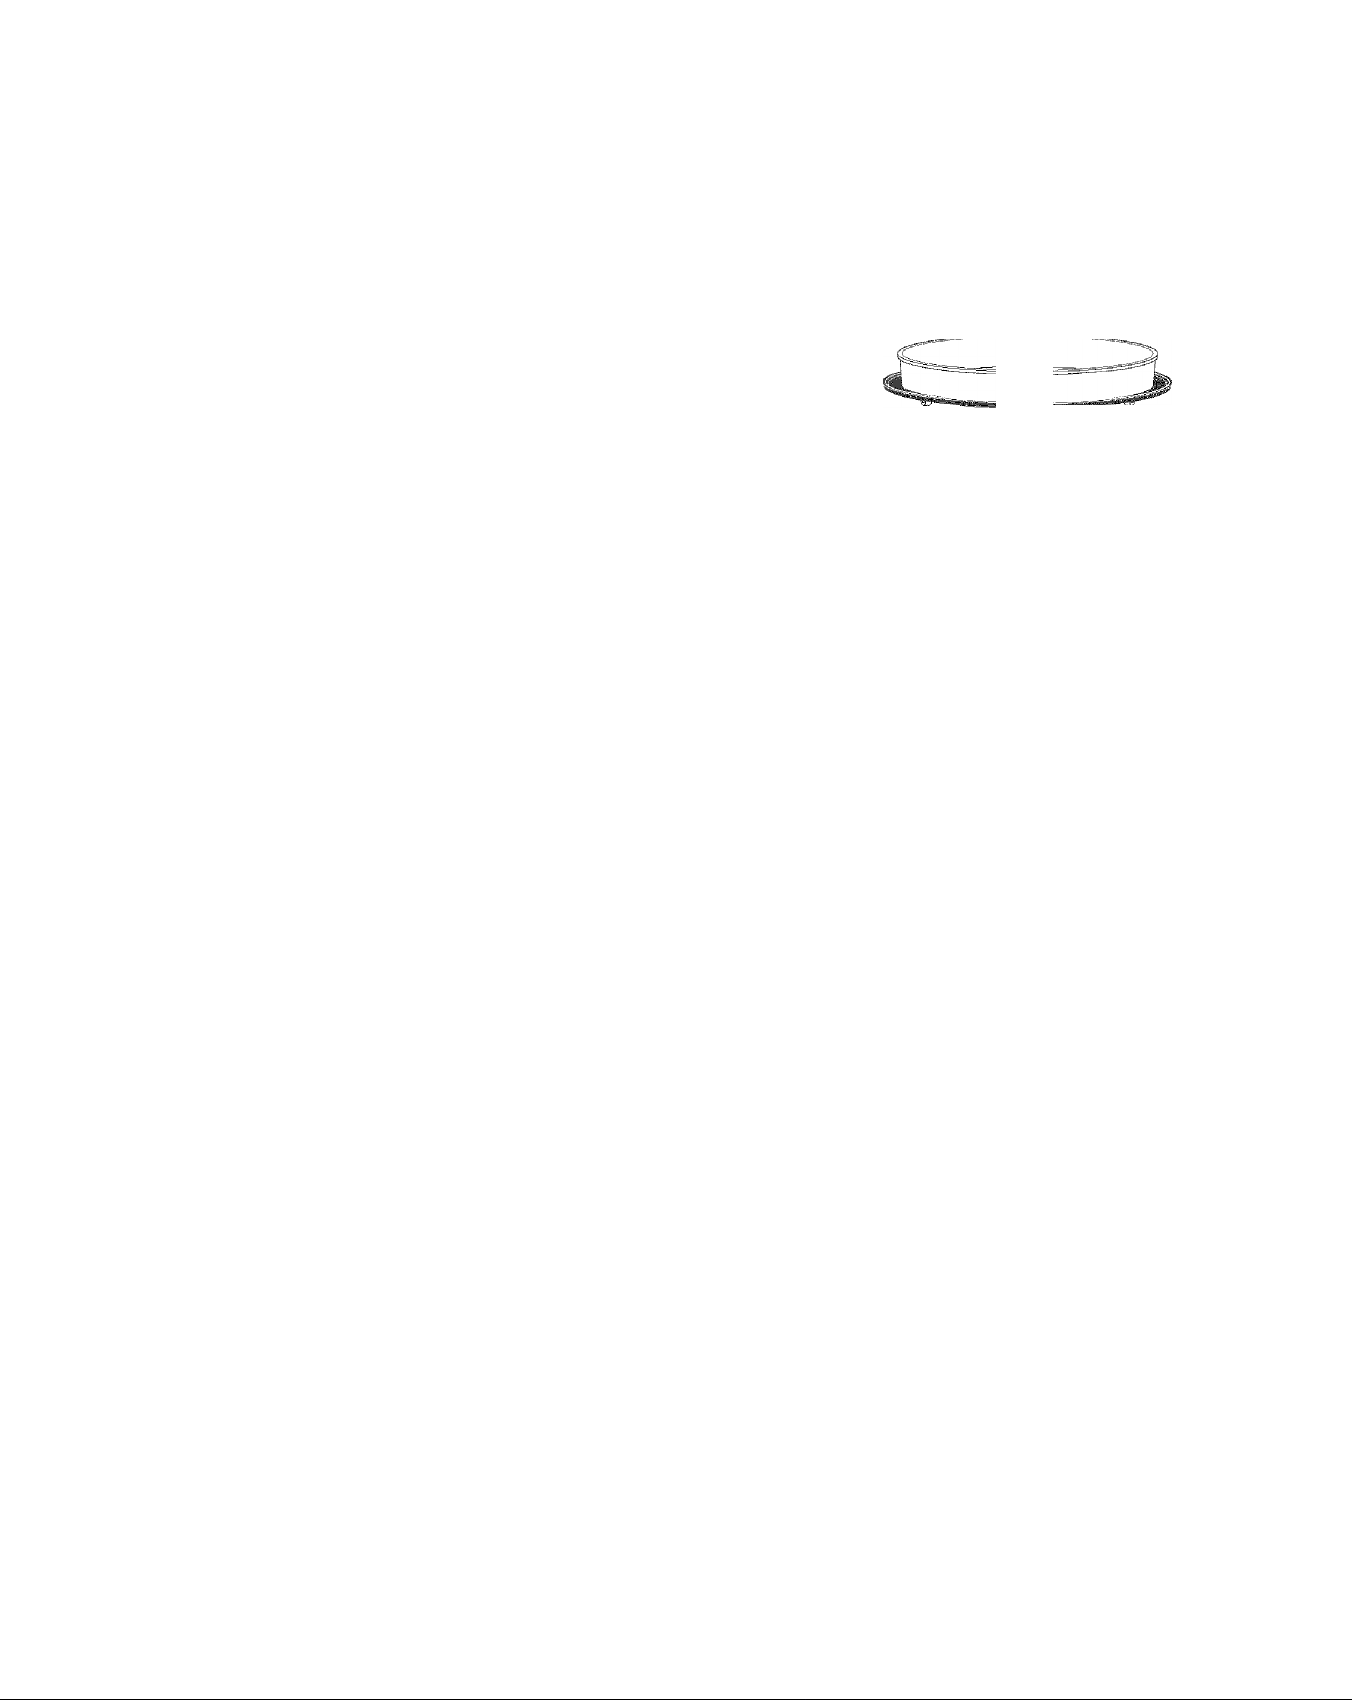
Follow cookware suggestions on the
oven d'ispkiy or in the Cookbook or
(looking guide.
(.ooha’ioe Will bi’i ome hot ¡ie> au\e oj
heat hau\jeiied jioni the hiated jood.
(Jven mitts will he needed, to handle
the cookware.
Place food, directly cm the noriwtick
metal tray when rooking, unless
prompted hy the oven to do otherwise.
Use the non-stick meted, tray in the
same way you would, use. a. .shallow
baking pan or baking tray.
In addition to the cookwa.re provided,
you can use non-metal casserole
d.ishes, pie plates and, other heat-safe
cookware. Place them, directly on the
turntable.
Advantium gives you the flexibiliO'
to cook your favorite dishes.
If you want to cook a food item that
is not among the pre-set selections,
use custom speedcook.
1. Press the CUSTOM SPEEDCOOK
pad.
If no entries are made xvithin /5 seconds,
the display will revert back to the tinie
of day.
.Be sure to select a. size, that will
rotate easily.
Place the non-stick metal tray
on the lurnlahle. Place glass or
ceramic cookware cm the tray.
Do not use cookware or coverings
made of paper, pinstie, or foil when
cooking during a. speedcook cycle.
4. Turn the dial to change the
lower pow'er level. Press the
dial to enter.
5. Press the START/PAUSE
pad or press the selector
dial to start cooking.
.For power ha.)el and cooking time
.sugge.stion.s, use your cooking guide
or cook book.
2. Turn the selector dial to select
the cooking time. Press the dial
to enter.
The display will prompt you to .select
the fxnver level(.s).
3. Turn tlie dial clockwise to increase
or counterclockwise to decrease
the upper power level,. Press the
dial to enter.
23
Page 24

Speedcooking
,.4, d V a ■» I i u m O v e n
Favorite
to enter
and seive
Add and save up to 30 of your own
Speedcook or microwave recipes, or
pre-set Speedcook menu recipes as a
favorite recipe. Once it’s done, you
can quickly recall your favorite so
that your food cooks just the way
you want it every time!
" 1. Press the FAVORITE RECIPES or
the SPEEDCOOK pad.
T
2. Turn the dial until FAVORITE
appears. Press the dial
to enter. (Skip this step if the
FAVORITE RECIPES pad was
pressed in step 1.)
3. Turn the dial until ADD RECIPE
appears. Press the dial to enter.
4. Turn the dial to COIY SPEED
RECIPE or to ADD NEW RECIPE.
Press the dial to enter.
If COPY SPEED RECIPE was
selected, turn dial to food
type(s) and press the FAVORITE
RECIPES pad to enter and save
the recipe.
5. SELECT COOK TIME appears.
Turn the dial to select the
cooking time. Press the dial
to enter.
The display will prompt you to select the
power Imells).
6. Turn the dial clockwise to
increase or counterclockwise
to decrease the power level (s).
Press the dial to enter.
For power Duel and cooking time
stiggeslums, use your cooking guide
or cook book.
7. SPELL THE FOOD NAME
appears. Turn the dial to
the first letter of your food
description and press the dial to
enter. Continue this process to
spell the rest of the food name.
Press the START/PAUSE pad to
save the recipe and its name.
Favorite
recipe—
to find,
and, use
0Ì
w
©(
0
(=-5
0
T
¡wy r.) 0 0
- A CO
T
If ADD NEWRECllVwas
selected, turn the dial to select
SPEEDCOOK or MICROWAVE
recipe. Press the dial to enter
and continue with these steps.
To find and use stored favorite
recipes:
1. Press the FAVORITE RECIPES
or the SPEEDCOOK pad.
2- Turn the dial unti] FAVORITE
RECIPES appears. Press the dial
to enter.
.3. Turn dial to USE FAVORITE
RECIPE and press to enter.
4. The recipe names you entered
will appear.
5. Turn dial until the recipe you
want is displayed and press the
dial to enter.
6. Press the START/PAUSE
pad or press the selector
dial to start cooking.
24
Page 25

Speedcooking
,.4, d V a ■» I i u m O v e n
Favorite
recipe—
to adjust
or chimue
©@ e© e
00 O
Favorite
recipe—
to delete
(0 (D 0 0
©e
T
on
T
© 00
@ @©
00
®©
To adjust or change stored custom
speedcook recipes:
1. Press the FAVORITE RECIPES or
the SPEEDCOOK pad.
2. Turn the dial until FAVORITE
RECIPES appears. Press the dial
to enter.
3. Turn the dial until EDIT RECIPE
appears. Press the dial to enter.
4. Turn the dial to tlie recipe you
want to change. Press the dial
to enter. Current settings appear.
To delete stored custom speedcook
recipes:
1. Press the FAVORITE RECIPES or
the SPEEDCOOK pad.
2. Turn the dial until FAVCIRITE
RECIPES appears. Press the dial
to entei'.
3. Turn the dial until DELETE
RECIPE appears and press the
dial to enter.
Press the dial to edit.
6. The display will prompt you to
select the power level(s) and edit
the name. Turn the dial and
press to enter the appropriate
settings.
JCrr power liruei and cooking lime
.suggesHon.s, use your cooking guide
or cook book.
4. Turn dial to the recipe you
want to delete and press the
dial to enter.
25
Page 26

Speedcooking
,.4, d V a ■» I i u m O v e n
Favorite
recipes
Ciistoiii
Recipe Name
1.
2_
4.
6.
/.
8.
9.
10.
11.
12.
13.
Cook
Time
Power Level
U L
Comments
14.
15.
16.
17.
18.
19.
20.
21.
22.
23.
24.
25.
26.
27.
28.
26
29.
30.
Page 27

Speedcooking
,.4, d V a n I i u m O v e n
Things that
are normal
Coohing Times
M When speedcooking preprogrammed
foods, you may see OFflMJZJNG COOK
TIME in the display several seconds after
you press START/IWUSE. The oven
automatically senses the electrical
voltage level in youi' home and
adjusts the cooking time up or
down for proper cooking.
Fan/Vent
■ The fan will be on during cooking. At
the end of cooking, the automatic fan
may continue to run for a short time, and
the display will read Oven is Cooling. The
fan will automatically shut off when the
internal parts of the oven have cooled.
■ The oven vent will emit warm air while
the oven is on.
Lights
■ When the oven is on, light may be visible
around the door or outer case.
Oven Heat
■ No preheating time is recjuired dui'ing
Speedcook cycles. The oven begins
cooking immediately.
■ The door and inside of the oven will be
very hot. Use caution when opening the
door and emoving food.
■ Do not use cookware or coverings made
of paper, plastic, or foil when cooking
during a speedcook cycle.
■ When cooking for an extended period
of time, the oven may automatically
reduce the power levels to maintain
the appropriate level of oven heat.
Sounds
■ Clicks and a fan blowing are normal
sounds during cooking. The relay board
is turning components on and off.
■ The halogen lights will dim and cycle
on and off during a speedcook cycle,
sometimes even at full power levels.
This is normal. The oven senses the
heat level and adjusts automatically.
27
Page 28
Baking, Broiling and Toasting
A. d V a n t i и m О v e n
Convection
Baking,
Broiling
and
Toasting
Convection baking allows you to cook foods the same
way as a conventional oven, using a heating element
to raise the temperature of the air inside the oven.
Any oven temperature from 250°F to 450°F may
be set.
Broiling allows yott to broil foods in the same way as
a conventional oven.
Toasting allows yott to toast foods the same way as a
conventional oven.
A fan gently circulates heated air throughotit the
oven, over and around the food. Because the heated
air is kept constantly modng, not pennitting a layer
of cooler air to develop around the food, some foods
cook slightly faster than in regular oven cooking.
How to
Convection Bake
II ii
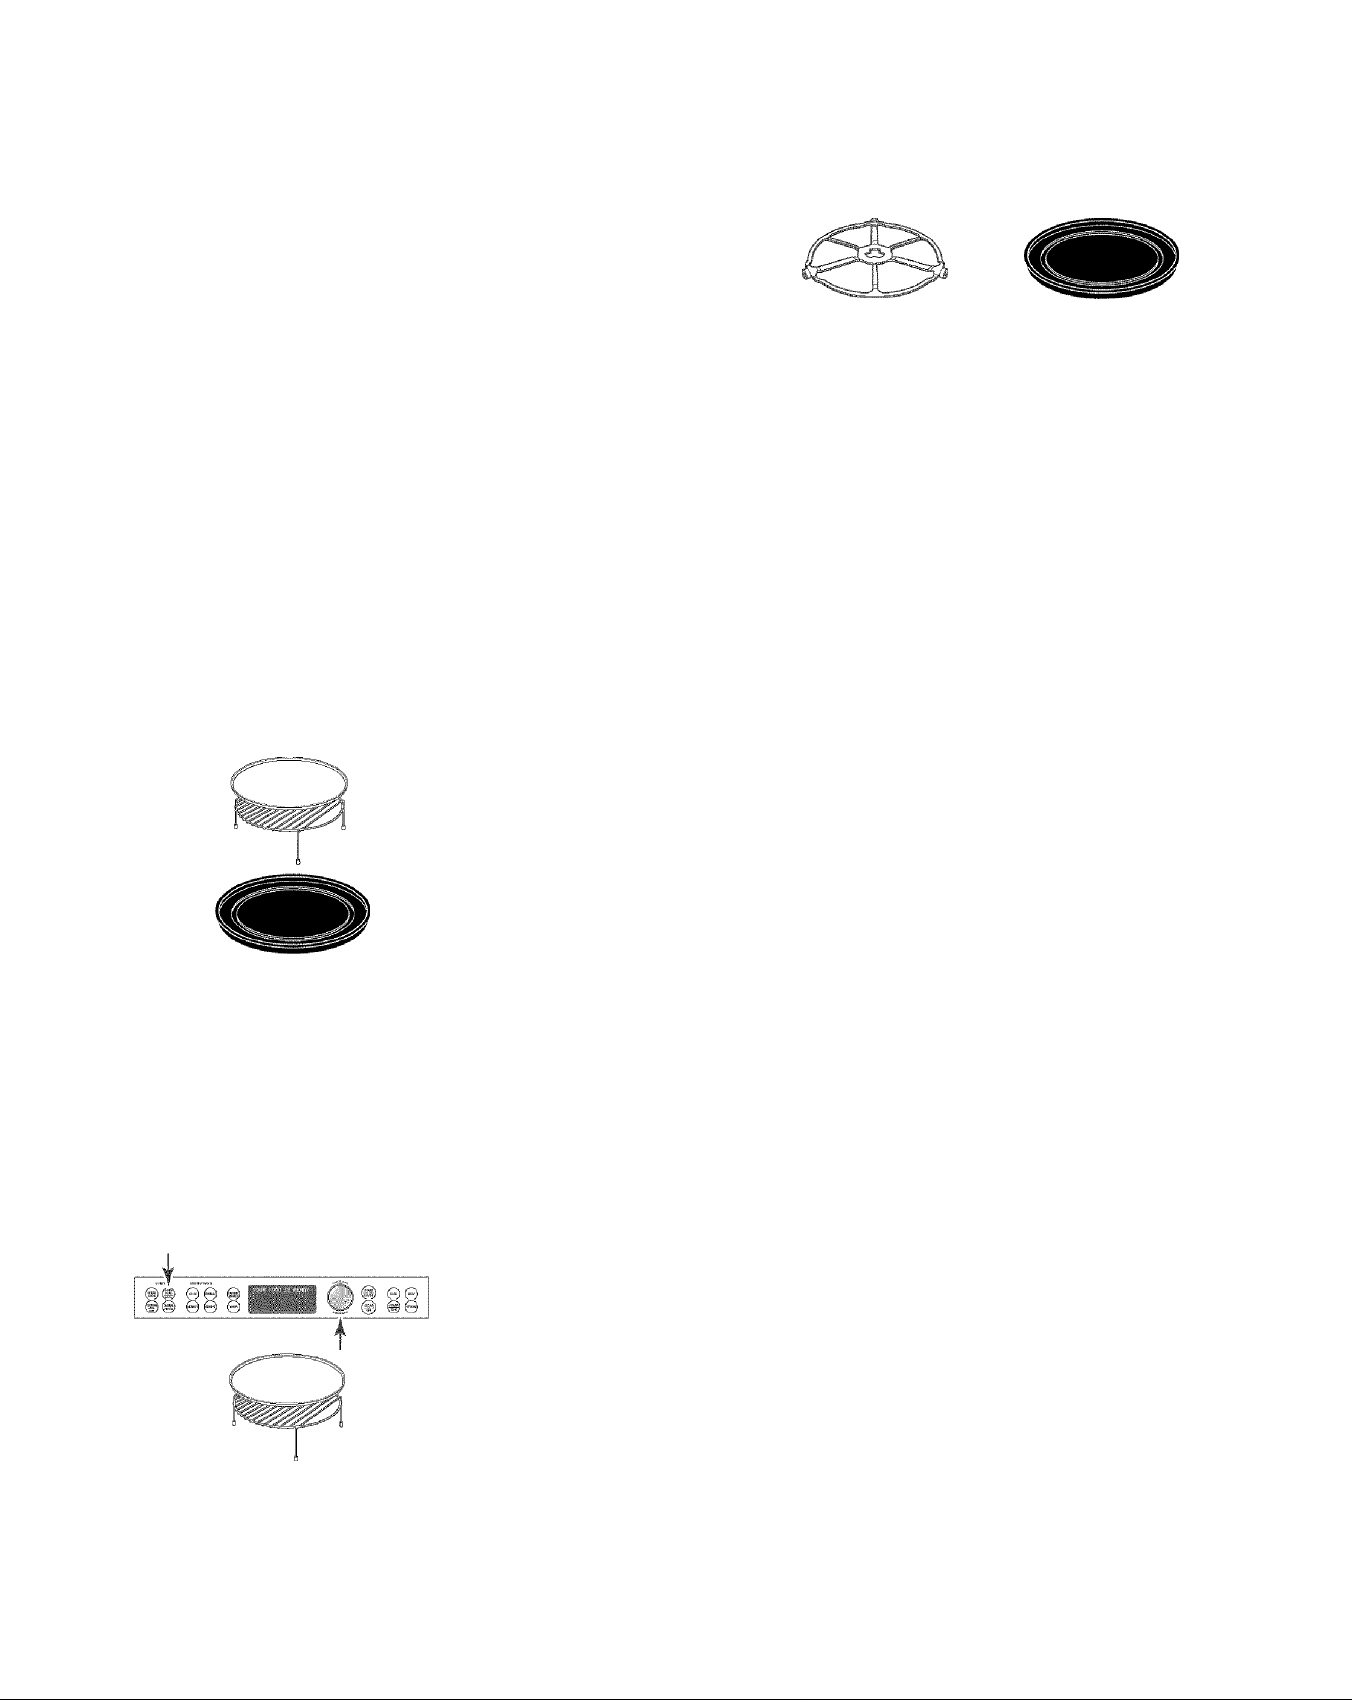
For two-level baking, pkice food in a
metal baking dish or direct^ on the
non-stick metal tray. Plaice the
aluniininn baking sheet or your
baking dish with food on top of the
wire rack. Stand the rack with'food
on the metal tray. '
i§s
Before you begin, make sure the ttmitable is in
place. Use the non-stick metal tray at all times when
CAUTION! When baking, remember that the
oven, door and dishes will be very hot!
1. Press the CONV BAKE/BROIL pad.
2. Press the dial to select В.ЖЕ.
3. Turn the dial to set the oven
tem|)erature and press to enter.
To bypass preheating:
1. When the ¡trompt shows PREHEAT
THE OfEAPtuni the dial to NO. Press
the dial or press START/PAUSE to
begin cooking.
2. Place the food in the oven, turn the dial
to set the cook time and press to enter.
The oven starts cooking immediately.
When cooking is complete, the oven
will signal and turn off.
To preheat:
1. When the ¡rrompt shows PREHEAT
THE OkKA? turn the dial to\TS. Press
the dial or press START/PAUSE to
begin cooking.
The oven starts preheating immediately.
Do not place the food in. the oven. {You
will be ¡trompted to enter the cook time,
after the oven is ¡rreheated.)
The turntable must
always be in plane xohen
iismg the oven.
2. When the ov'en is finished preheating,
it will signal. If you do not open the
door within .1 hour, the ov'eii will turn
oiTautoinatically. (.)pen the oven door
and, using caution, place the food in
the oven.
3. Close the oven door. Turn the dial
to set the cook time and press to enter
and start cooking. When cooking is
complete, the oven will signal and
off.
turn
You may change ike oven temperature diaing
prehmlhig by pressing the POWER/TEMP
pad and turning ike died to seleei the new
temperature.
If the iwen dam is opened ciitring rex ¡king,
lAlJSE will appear in the display. Close the
dmr and press SIART/IAUSEI
Cook times are shown in minutes and can
be a maximum of 119 minutes. Time mn be
changed during eminng by turning the dial.
¡htí food or ovefhsafe
eoohiuare directly on the
non-stick metal tray to bake.
How to
Broil or
Toast
Put food- directly on the cdtmiinum
baking sheet orí the wire oven rack,
and place them on the non-stick metal
tray, when broiling or toasting foods.
28
1. Press the CON\^ B,AlsE/BROII. pad.
2. Turn the dial to BROIL, or TOAST and
press to enter.
To bypass preheating:
1. When the prompt shows PREHEAT
irn OVEN? tmn the dial to NO. Press
the dial or press STAR.T/RAUSE to
begin cooking.
2. Place the food in the oven, turn the dial
to set the cook time and press to enter.
Press the dial to start cooking. When
cooking is complete, the oven will signal
and turn off.
To preheat:
1. When the prompt show's PREHIAT
THE OVEN? torn the dial to YES. Press
the dial or press START/RAUSE to
begin cooking.
The oven starts preheating immediately.
Do not place the food in the oven. (You
will be prompted to enter the cook time,
after the oven is preheated.)
2. When the oven is finished preheating, it
will signal. If you do not open the door
within 1 hour, the oven will turn off
automatically. Open the oven door and,
using caution, place the food in the
oven.
3. Close the oven door. Turn the dial to
set the cook time and press to enter
and start cooking. When cooking is
complete, the oven will signal and
turn off.
Ij the oven door is opened dimng cooking, lAISE
will appear in the display. Close the door and press
SIART/EAIJSE. '
Page 29
Wanning and Proofing
A d V a n I i и m О v e n
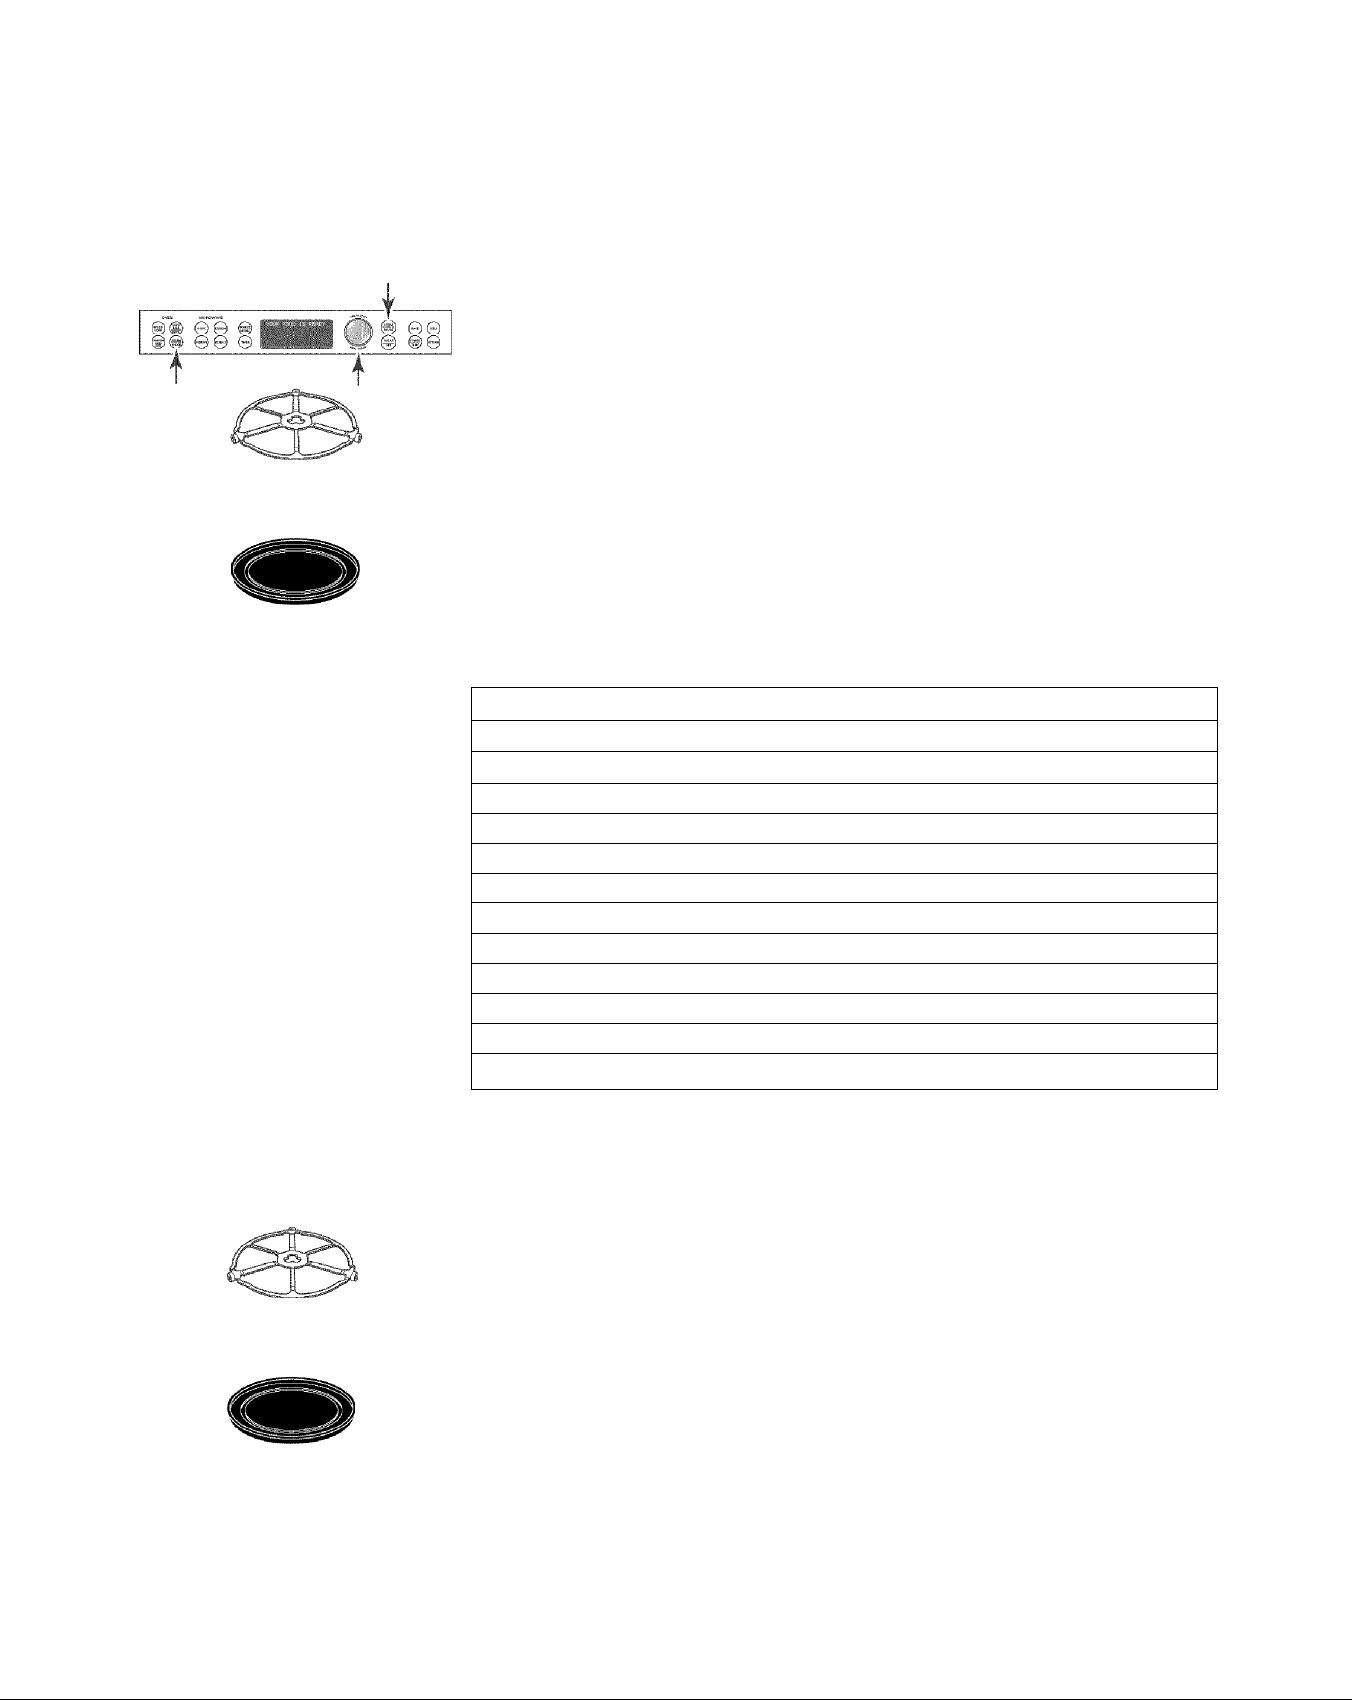
Warming
The turntable must always be
in place when using the oven.
Put food directly on the non-stick
' metal trdy to warm.
Tips for Crisp Foods;
■ I.eave food uncovered.
■ Do not use plastic containers
or plastic wrap.
■ Preheat prior to use according
to recommended times.
Tips for Moist Foods:
■ Cover food with lid or
aluminum foil.
■ Do not use plastic containers
or plastic wrap.
■ Preheat prior to use according
to recommended times.
The WARM feature will keep hot, cooked
foods at serving temperature. Always start
with hot food. Use cookware and utensils that
can withstand temperatures up to 230°K
1. Press the mRM/PROOF pad.
2. Turn the dial to select HOLD
FOOD mRM. Press the dial to
enter.
?). Tuin the dial to select the oven
temperature. See the chart and
tips below. Press the dial to enter.
LOW
..............................
140-160°F
MEDIUM.......................160-195°F
HIGH.............................I95-2.S0°F
4. Turn the dial to select the level of
moisture you want. See the chart
and tips below. Press the dial to
enter.
if the oven door is opened during warming,
PAUSE will appear in the display. Close the
door and press START/PAUSE. ^
To Crisp Stale Items:
■ Place food or dishes directly on
the black metal tray.
■ Preheat on LOW setting and
select CRISP.
■ Check crispness after 45 minutes.
Add time as needed.
Temperature and Moisture Selection Chart
Food Type Control Setting Moisture Setting
Bread, hard rolls MEDIUM CRISP
Bread, soft rolls MEDIUM MOIST
(ktsseroks 'MEDIUM MOIST
Fried foods HIGH CRISP
Meats'^ and fish MEDIUM CRISP
Pancakes, waffles HIGH CRISP
Pizza HIGH CRISP
Potatoes, baked HIGH CRISP
Potatoes, mashed. MEDIUM .MOIST
Poultry HIGH MOIST
Tortilla Chips LOW CRISP
Vegetables MEDIUM .MOIST
Proofing
The turntable must ahvnys be
in place when using the oven.
Put bread dough in a bowl/bread
pan and place on the non-stick
metal tray to proof
IJSD/K/h'SIS TfcommeiKIs mi iniernal iemptrahire of 145 as the vmmmimdoneness for heef Use a fiortahle
meat thermometer to check internal temperatures.
The proofing feat ure (.lutomaticeilly provides
the optimum lemperalure for the proofing
process, and therefore does not have a
temperedure adfustment.
1. Press the WARM/PROOF pad.
2. Turn the dial to select PROOF MEAD.
Press the dial to enter. The oven starts
proofing immediately and shows the
amount of proofing time completed.
■ To avoid lowering the oven
temperature and lengthening
NOTES;
■ Do not use the proofing mode
for warming food or keeping
food hot. The proofing oven
temperature is not hot enough to
hold foods at safe temperatures.
Use the WARM feature to keep
food warm.
■ Proofing will not operate if the
oven is too hot. Allow the oven to
cool before proofing.
proofing time, do not open the
oven door unnecessarily.
■ Check bread products early to
avoid over-proofing.
29
Page 30
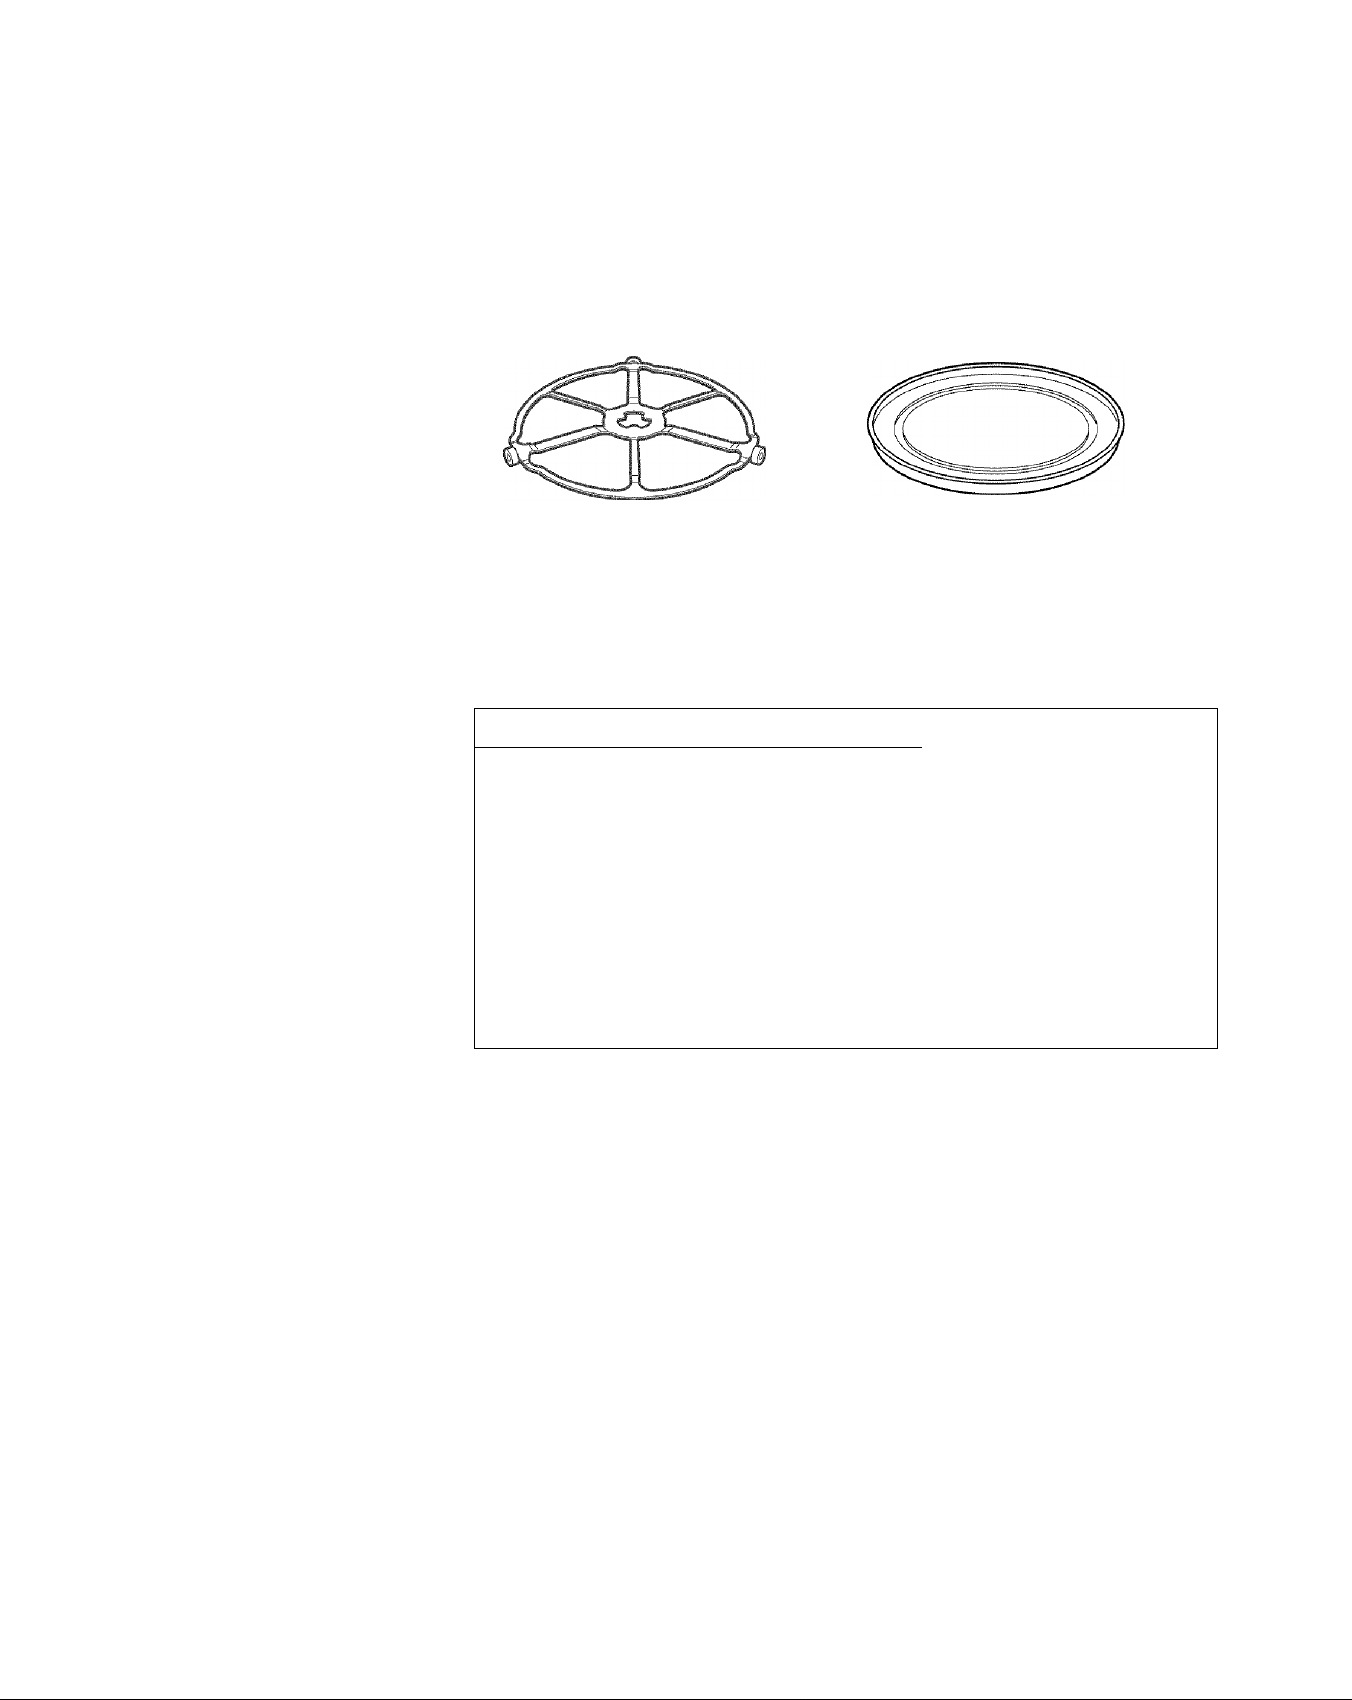
Microwa\dng
,.4, d V a ■» I i u m O v e n
Using the
microwave
features
Make sure the turntfible a,nd clear glass tray are in place.
Place food or microwavable container directly on the clear glass tray
to cook your food.
The turntable vrust always
be in place ivken using the oven.
The dear glass tray should always be in
place when microwazdng.
Cookware
■ Make sure that cookwai'e is suitable
for mierowavina;.
MICROWAVE PRE-SET SELECTIONS:
mcook
—By Food. Type
—By Time
-By Time ] &f 2
-Delciy Start
—Heal/Reheat Beverage
-Melt
-Slow Cook
-Soften
H Defrost H R.eheat
-1.0 Ih (hack -Beverage
-By Time -Casserole.
—By hood Type -Chicken
-By Weight -Pasta
-Dela.y Start -Pizza
-Melt -Plate of Food
-Soften -Rice
Place food or microwavable container
direct!)' on the clear glass tray to cook
■S’our food.
-Soup
-Steaks/Chops
-Vegela.hl.es
How to
use pre-set
microwave
selections
4
a© a a a
®
% Cr'i
a
30
c-j
T
1. Press the microwave COOK,
DEFROST or REHEAT pad.
Jj no .selection is made within 15 seconds,
the display will ircuert hack to the time
of '
l
ra
2. Turn the dial to find the food
a a
a a
you want to cook, defrost or
reheat. Press the dial to enter.
To revinr sellings during cooking, press
the selector dial.
If the door is opened during conking, the
oven will stop and PAUSE will appear
in the display. Close the door and press
START/ PAUSE to resume cooking.
if you enter an undesired selection at
any time, .simply pre.ss the BACiK padand re-enter the desired selections.
3. Turn the selector dial to select the
type, amount, weight and/or size.
(As recjuired, the oven will
prompt you). Press the dial
after each selection.
4. Press the dial or the START/
PAUSE pad to start cooking.
Page 31

Microwa\dng
,.4, d r.i a ■» I i u m O v e n
Cook By Time
and Cook By
Time 1 & 2
mnii 0 ^
iig§
Express
T
^jC Ì ' )
AO OO Of
Microwave
power level(s)
OO OO o
OO OO o
-i
© © f
) g)(=)
m ©©
T
I © 0 0
I @ @e
[ne COOK BY TIME and COOK BY
TIME ] CE 2 lo niiarmmve food iJiat is
not in the recipe section and at the ihne(s)
you set.
■ The power level is automatically
set at high, but you can change it
for more flexibility.
1. Press the COOK pad.
2. Turn the dial to select COOK BY
TIME or COOK BY TIME 1 & 2
and press the dial to enter.
3. Turn the dial to set the cook time
and press the dial to enter.
Press EXPRESS repeatedly for
30 second increments of microwave
cooking time. Oven starts
immediatelv.
1. First, follow directions for COOK
BY TIME, COOK BY TIME 1 & 2,
DEFROST BY TIME or EXPRESS,
2. Press the POWER/TEMP pad.
3. Turn, the dial clockwise to increase
and counterclockwise to decrease
the power level. Press the dial
to enter.
4. Press the dial or the START/
PAUSE pad to start cooking.
If you selected COOK BY TIME 1 & 2,
turn the dial to set the second cook time
and press the dial lo enta:
NOTE: To change the power level
if you don’t want full power; press the
P()'WER/TEMP pad after entering the
tirne(s). Turn the dial to select and press
the dud to enter
4. Press the dial or the START/
PAUSE pad to start cooking.
You may open the door during COOK BY
TIME and COOK BY TIME 1 Of 2 to
check the pood. Close the door and press
START/PAUSE to resume cooking.
Here are some examples of uses for
various fjower levels:
High 10: .Fish, bacon, vegetables,
boiling liquids.
Med-High 7: Gentle cooki.ng of meat
and poultry; baking casseroles and
reheating.
Medium 5: Slow cooking and
tenderizing for stews and less
tender cuts of meat.
Favorite
recipes
Cooking tips
H You can change the power Imel before
See the Favorite recipe sections in
the Speedcook section of this book
for instructions on how to save, use,
change or delete a favorite recipe.
I When cooking bacon, layer strips
on a. plate. Cover each layer with
a paper towel.
I When cooking vegetables,
use a microwave-safe casserole
or bowl. Cover with a microwavesafe lid or vented plastic wrap.
Imw 2 or 3: Defrosting; simmering;
delicate sauces.
Warm 1: Keeping food warm;
softening butter.
For frozen vegeta.bles, follow
the package instructions for
adding water.
For fresh vegetables, a.dd
2 tablespoons of water for
each serving.
31
Page 32

Microwa\dng
,.4, d V a n I i u m O v e n
Defrost by food type
«« 00 e
® © 0 ©
0
T
O'j
T
Auto Defrost automatically sets the
defrosting times and power levels
to give even defrosting results for
meats, poultry and fish weighitig
-i
©
up to 6 pounds.
1. Remove food from the package
and place it on a microwave-safe
dish.
2- Press the DEFROST pad.
3. Turn the dial to DEFROST BY
FOOD TYPE. Press the dial to
enter.
4. Turn the dial to select food type.
Press the dial to enter.
5. Turn the dial to tlte food weight,
using the Conversion Guide
at right. For example, dial 1.2 for
1.2 pounds (1 pound, 3 oz.)
Press the dial to enter.
6. Press the dial or START/PAIJSE
pad to start defrosting.
7. Turn the food over wlien the oven
signals TURN FOOD OVER.
I Rnnove defrosted meal or shield warm,
areas with small pieces of foil for men
defrosting.
m Ap Cl deposUng most meals need to
.stand 4 nunnles In romplite deposiaig
lairge roasts should stand, fur aljotil
30 niinules.
Conversion Guide
If the weight of food is slated in pounds
and. ounces, the ounces mii.st he converted
to tenths (.]) of a pound.
Wei^tofFood
in Ounces
1^2 .1
3 .2
4~5
9-10 .6
II . 7
12-13 .8
14-15 .9
Enter Food Wei^t
(tenths of a pound)
.3
.4
8 .5
Defrost by
time
0« 00 e
® © 0 © ©
T
©I
T
Use Time Defrost to defrost for a .selected
nth of time.
1. Press the DEFROST pad.
-i
00
@ ©
2. Turn the selector dial to
DEmOSTBY TIME. Press
the dial to enter.
3. Turn the dial to select the time
you want. Press the dial to enter.
4. Press the dial or START/PAUSE
pad to start defrosting.
5. Turn the food over when the oven
signals TURN.FOOD OVER.
Power Imel is atUnmedically .set at 3,
but can he changed. To change the power
Imels, .see the Microwave Power Lmel(.s)
.section. You can defrost small items
(¡uickly by raising the power Imel after
entering the lime. Power level 7 euLs the.
total defrosting lime in about half; power
Imel 10 cuts the toted time to about 1 /3.
When defrosting at high powew Imels,
food wilt need more freepmil attention
than usual.
32
Page 33

Microwa\dng
,.4, d V a ■» I i u m O v e n
Defrosting
tips
Use DEFROST BY FOOD lYPF Jor
meal, poultry and fish. Use DEFROST
BY 'TIME for most, other frozen foods.
H Foods frozen in paper or plastic
can be time defrosted in the
package, but foods should be
taken out of the package wlien
using DEFROST .BY FOOD TYPE.
Closed packviges should be slit,
pierced or vented after food has
paitially defrosted. Plastic storage
containers should be partially
uncovered.
B Family-size, prepackaged frozen
dinners can be defrosted and
microwaved. If the food is in
a foil container, transfer it to
a microwave-safe dish.
■ Foods that spoil easily should not
be allowed to sit out for more
than one hour after defrosting.
Room temperature promotes the
growth of harmful bacteria.
For more even defrosting of
larger foods, such as roasts, use
DEFROST :BY T1M.E. Be sure large
meats are completely defrosted
before cooking.
When defrosted, food should be
cool but softened in all areas.
If still slightly icy, return to the
microwave very briefly, or let
it stand a few minutes.
Page 34
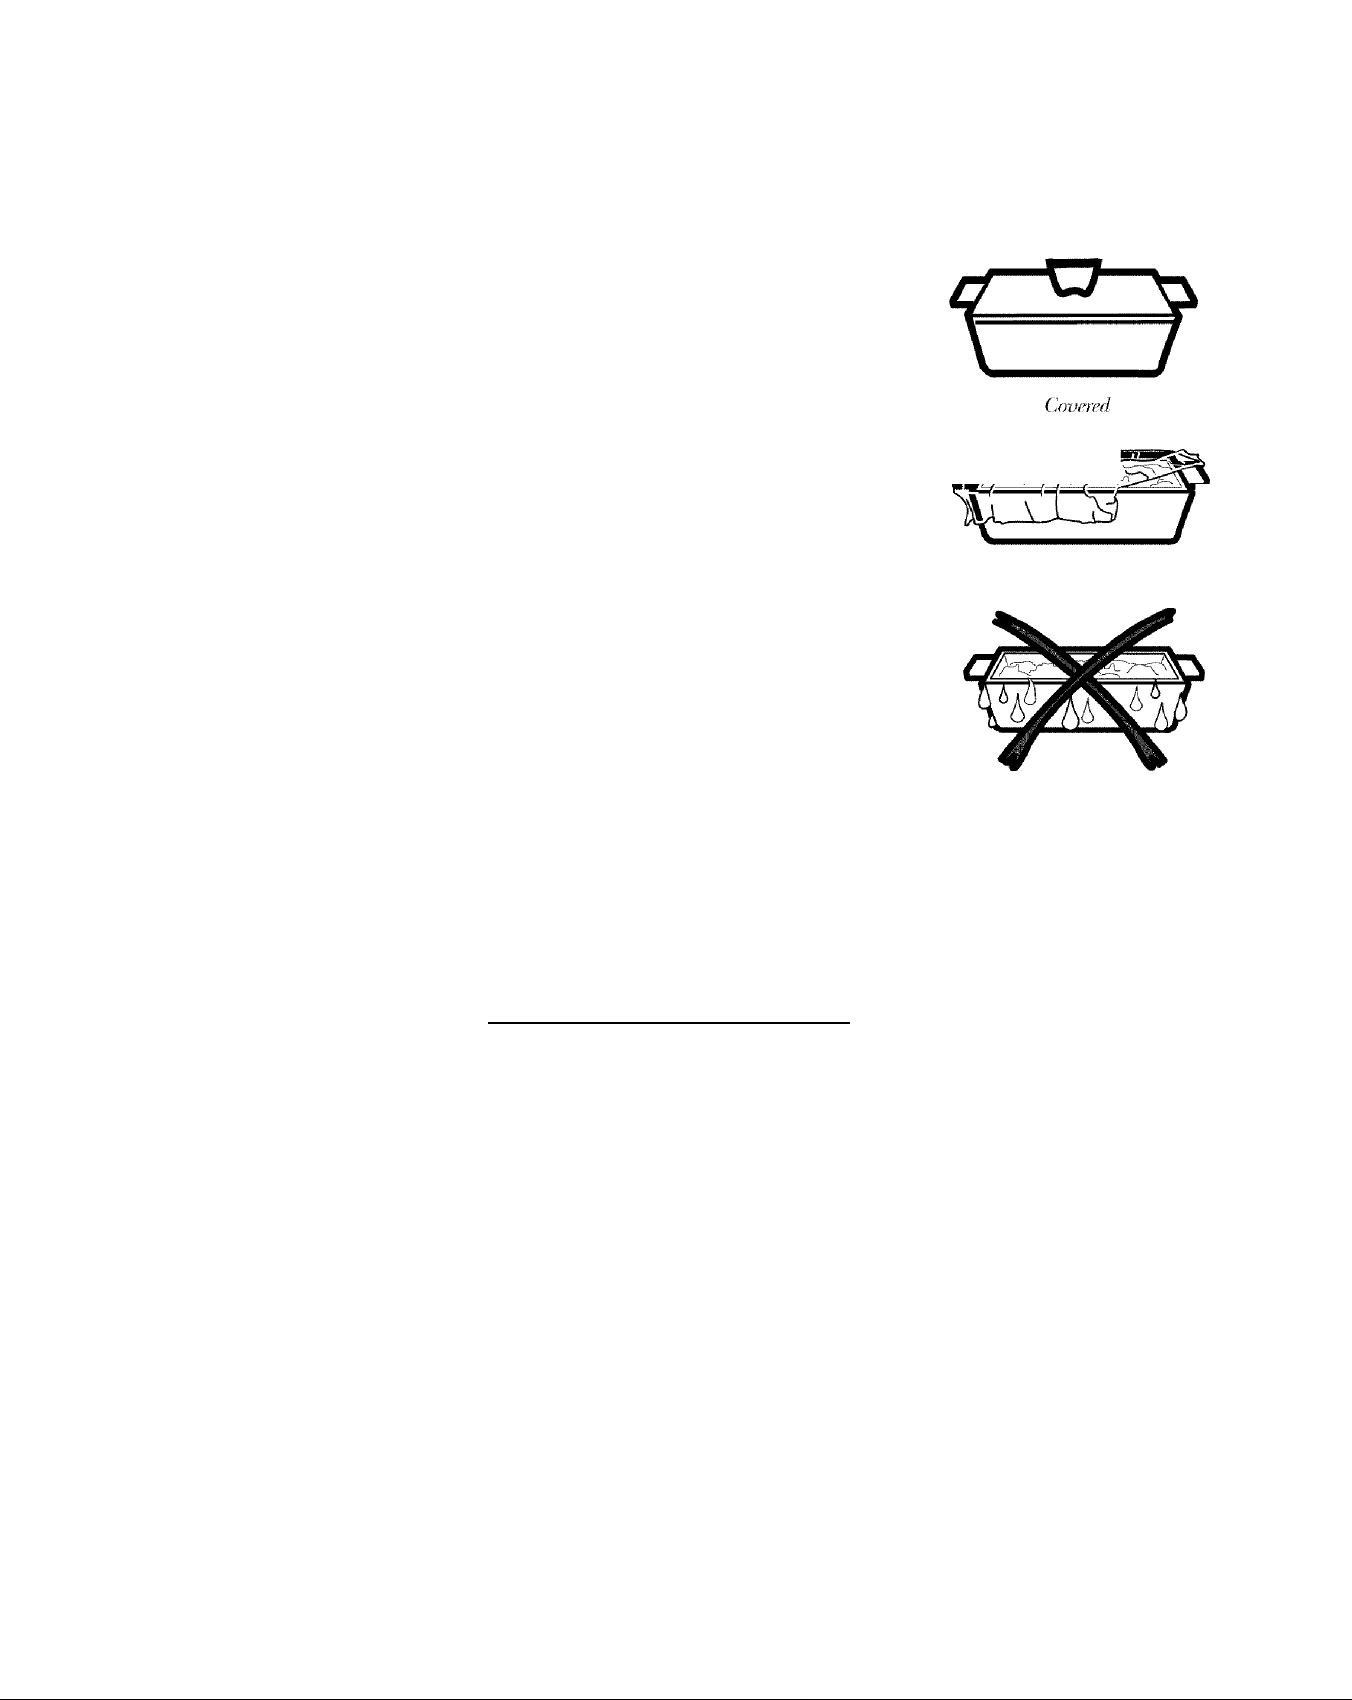
Microwa\dng
,.4, d r.i a ■» I i u m O v e n
Microwave
sensor
cooking
The sensor feature detects the maeasmg
hiirnidily- released, d.tiring cooking. The
oven niüotnaticaUy adjusts the cooking
time to various types and amounts of food.
Do not use the Sensor .Features twice in
.siicce.s.sion on. the .same food, portion—
it may result in smereiy overcooked, or
burnì food.. If food is undercooked after
ike first ermnldemin, use COOK BY TIM.E
for additional cooking âme.
The proper containers and covers are
essential for best sensor cooking.
■ Always use microwave-safe
containers and cover them with
lids or vented plastic wrap.
Never use tight sealing plastic
containers—tliey can prevent
steam from escaping and cause
food to overcook.
■ Be sure the outside of the cooking
containers and the inside of the
oven are dry before placing food
in the oven. Beads of moisture
turning into steam can mislead
the sensor.
Vented
Dry off dishes so they don'
' mislead the sensor.
■ Beverages are best heated
uncovered.
MICROWAVE SENSOR PROGRAMS;
I Ground Meat
I Popcorn — Prepackaged microwave popcorn, 3.0 oz. to 3.5 oz.
M Soup
M Rice
I Vegetables (Canned, Fresh, Frozen)
■ Chicken Reheat
M Pasta Reheat
M Plate of Food Reheat
H Soup Reheat
■ Vegetable Reheat
34
Page 35

Microwa\dng
,.4, d V a n I i u m O v e n
To use all
sensor
programs
^1=
T
©
©
T
-I-
(Si)
0©
@ 0
Advanlrwm’s tmcrowave rnode featwres
sensor cooking. The ox.wn ntdomnlically
senses when food is done and shuts itself
ofl—elmmiatnig the need, to program
cook times ami power levels.
1. Press the COOK pad and turn the
dial to COOK BY FOOD TYPE,
Press the di,al to enter. Or press
the REHEAT pad.
2. Turn the dial to select the food
you want. Press the dial to enter.
3. Press the dial or press the START/
PAUSE pad to start cooking.
Do not open the oven door until
time is counting down in the displav.
If the door is opened, close it and
press START/PAUSE immediately.
If the food is not done enough, use
COOK EY TIME in the microwave
selector to cook for more time.
NOTE: Do not use the Sensor
Features twice in succession on the
sattie food portion—it may result in
severely overcooked or burnt food.
■ To shorten or lengthen the
cook time, wait until the time
countdown shows i,n, the display.
Theti turn the dial to add or
subtract time.
■ If vou open the door while
SENSOR. Cooking, SENSOR ERROR.
will appear. Close the door, press
START/PAUSE to begin again.
Notes about the Reheat program:
Reheated foods may have wi.de
variations in temperature. Some
areas may be extremely hot.
It is best to use COOK BY 7IMEand
not REHEATioT these foods:
H Brea.d products
■ Food that must be reheated
uncovered.
■ Foods that need to be stirred
or turned.
■ Foods calling for a dry look or
crisp surface after reheating.
Things that
are normal
■ If you have been speedcooking
and the oven is already hot, it may
indicate that it is too hot for
sensor cooking. Of course, you
can always continue with COOK
BY TIMÉ or SPEEDCOOK.
NOTE: If the oven is too hot then it will
auiomatically change to time cooking.
Interference
M TV/radio interference might be
noticed witile using the nticrowuve.
Similar to the interference caused by
other small appliances, it does not indicate
a problem with the microwuve. Move
the radio or TV as far awvw from the
microwrave as possible, or check the
position of the TV/radio antenna.
Lights
M The oven cavity light will come on
during a microwuve cooking cycle.
Oven Heat
M Cookw-are may become hot because of
heat transferred from the heated food,
(dven mitts may be needed to handle
the cookw'are.
■ Steam or vapor may escape from around
the door.
Page 36

Other Advantiiim Features
,.4, d V a n I i u m O v e n
%X)OK TIME
COMPLETED^
Features
under the
OPTIONS
pad
C)C.)
CjO
To remind you that you liave food
in the oven, the oven will display
COOK TIME CmiPLElED and beep
once a minute until you either
open the oven door or press the
Cl,EAR/OFF pad.
Clock:
The dock must he .set before you can use
your oven for ihe first time (see (¿wick
Start for instructions).
1. To change the clock time, press
the OPTIONS pad and turn the
dial to CLOCK. Press the dial
to enter.
2- Turn the dial to set hours. Press
the dial to enter.
./. Turn the dial to set minutes. Press
the dial to enter.
4. Turn the dial to select AM or PM.
Press the dial to enter.
Clock Display ON/OFF:
Use this feature to turn your
clock display on or off. Press the
OPTIONS pad, turn the dial to
select CLOCK DISPLAY ON/OFF.
Turn the dial to select r/¥or OFF.
Press the dial to enter.
Delay Start:
Delay Start allows you to set the
oven to delay cooking up to 24
hours. Press the OPTIONS pad, turn
the dial to select DELAY START and
press the dial to enter. Follow the
display directions to set the Delay
Start time and feature you wish to
delay.
Beeper Volume:
Use this feature to adjust the volume
of the heeper. You can even turn it
off. Press the OPTIONS pad, turn
the dial to select BEEPER VOLUME,
press the dial to enter, and follow
the display directions.
Scroti Speed:
Is the message scroll too slow or too
fast? Change it! Press the OPTIONS
pad, turn the dial to select DISPIAY
SCRCyLL SPEED, press the dial to
enter, and follow the display
directions.
Reminder:
Use this feature to set an alarm beep
to sound at a specific the time of day.
Press the OPTIONS pad, turn the
dial to SET/CLEAR REMINDER and
press the dial to enter. Turn the dial
to select the hour and press to enter.
Turn the dial to select the minute
and press to enter. Turn the dial to
select AM or PM and press to enter.
To review the setting, turn the dial
to SET/CLEAR REMINDER and press
the dial to enter. Turn the dial to
REVIEW and press to enter.
To cancel the setting, turn the dial
to SET/CLEAR REMINDER and press
the dial to enter. Turn the dial to
CLEAR and press to enter.
Review
CO oo o
OO GO G
46
!
O GG
®0
Use this feature to rnrinv the current
cooking selections you have set.
Press the selector dial during
speedcooking or microwave cooking.
Page 37

Other Advantiiim Features
,.4, d V a n I i u m O v e n
O?) or; O
OO OO O
+
Use ikis jeature lo find out more edm.il
your oven and its features.
1, Press the HELP pad,
+
i
2. Turn the dial to select the feature
name. Press the dial to enter.
Features found, in the HELP funclton.
Adding Ttme .Defrost by Weight Set Beeper Vohime
Back Delay Start Set Clock
.Bake Express Cook Set Display On/Off
Beverage Reheat Fa.vonte Recipes Set Display Speed
Broil Help Set .Reniinder
Child Lockout
Clear/Off Opiums Soften/Melt
Cook .Power/Temp Speed Cook
Cook by Time .Proof Bread Slarl/Pause
Cook/Heat by Food Reheat Time Cook .1. & 2
Hold .Food IWirin Slow Cook
The display will show’ a description
for the program you have chosen.
Custom Speed. Cook Repeal Last Timer On/Off
Defmst Re.sume
Defrost by Food Type Revieui
Defrost by Time Sensor Cook i n.g
Toast
Warm/Proof
Page 38

Other Advantiiim Features
,.4, d V a n I i u m O v e n
Child
lock-out
AO OO 0
Tinier
OO OO o
A/utomatic
fan
■, (fe) 0 0
w @ @©
\
'!§§
You -may lock the crmlrol panel lo prevent
the oven from being ncxidentnlly skirled
or used by children.
Press and hold CITAR/OM* for
5 seconds to lock and unlock.
Use this feature anytime you need a
general purpose timer It can even he
used, while cooking in the oven.
.1. Press the TIMER pad.
2. Turn the dial to select the hours.
Press the dial to enter.
An automatic fan protects the oven
from too much heat inside the oven,
cavity.
It automatically turns on at low speed
if it senses too much heat.
When, the control panel is locked,
Crmlrol is LOCKED will be displayed
briefly aiiyti.me a pad or dial is
pressed.
3. Turn, the dial to select the
minutes. Press the dial to enter.
To cancel, press TIMER.
The fan will automatically turn off
when the i,nternal parts are cool. It
may stay on for 30 minutes or more
after the oven control is turned off.
38
Page 39
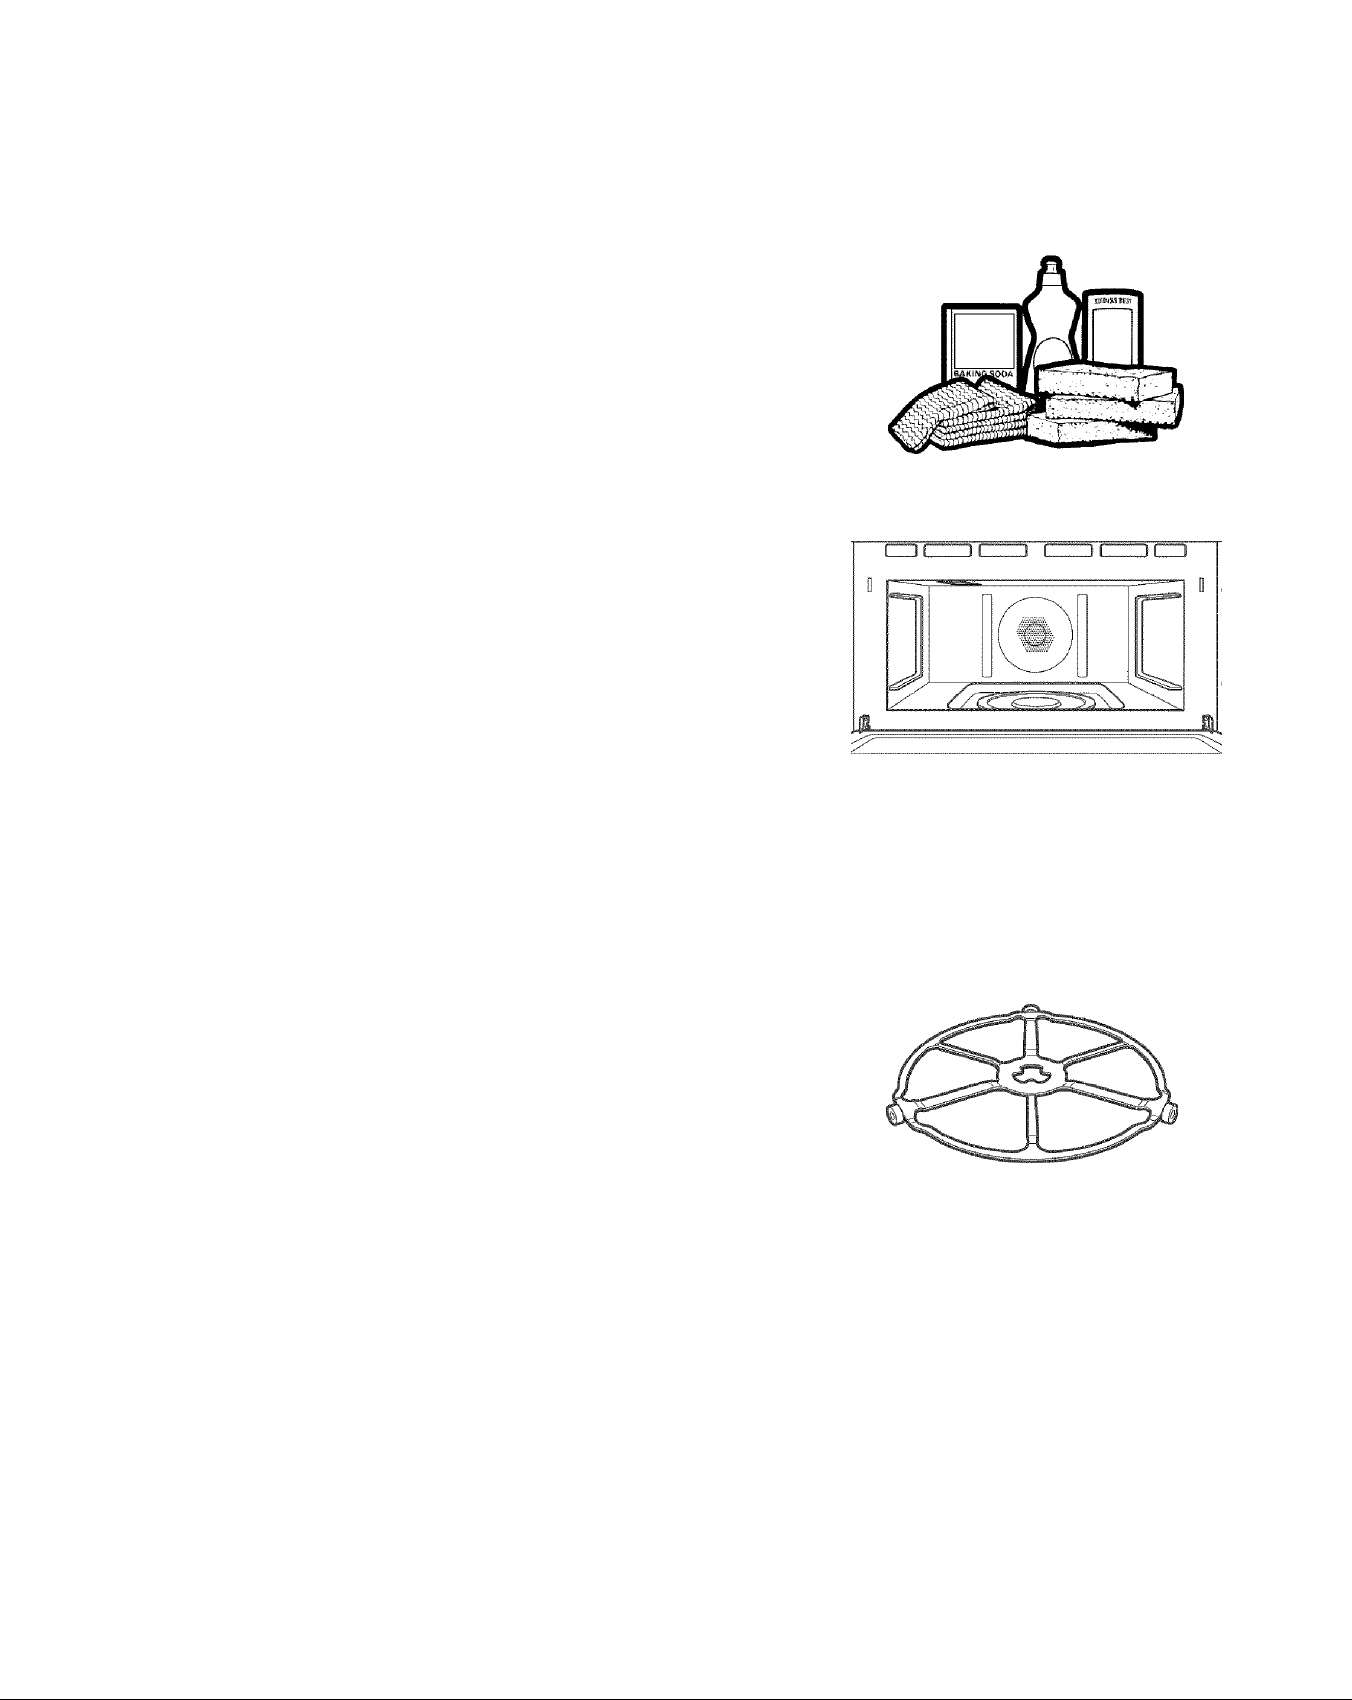
Gare and Cleaning
,.4, d V a ■» I i u m O v e n
Helpful
hints
How to
clean the
inside
An occasional thorough wiping with
a solution of baking soda and water
keeps the inside fresh.
Be certain the oven control is
turned off before cleaning any
part of this oven.
Clean, the inside of tlie oven often
for proper heating performance.
Some spatters can be removed with
a paper towel, others may require
a warm soapy cloth. Remove greasy
spatters with a sudsy cloth, then
rinse with a damp cloth.
Do not use abrasive cleaners or
sharp utensils on oven walls.
Never use a commercial oven
cleaner on any part of your oven.
\Nalls, Floor, Inside Window, Metal and
Plastic Parts on the Door
Removable
turntable
Do not clean the inside of the oven
with metal scouring pads. Pieces can
brea.k off the pad, causing electrical
shock.
The area underneath the turntable
should be cleaned frequently to
a.void odors and smoking during
a cooking cycle.
The turntable can be broken if
dropped. \'\'ash carefully in warm,
sudsy water. Dry completely and
replace.
To replace the turntable, place its
center over the spindle in the center
of the oven and turn it until it seats
into place. (Ma.ke sure the smooth
side of the turntable is facing up and
that its center seats securely on the
spindle.)
Turntable
Do not use the oven without the
turntable in place.
39
Page 40
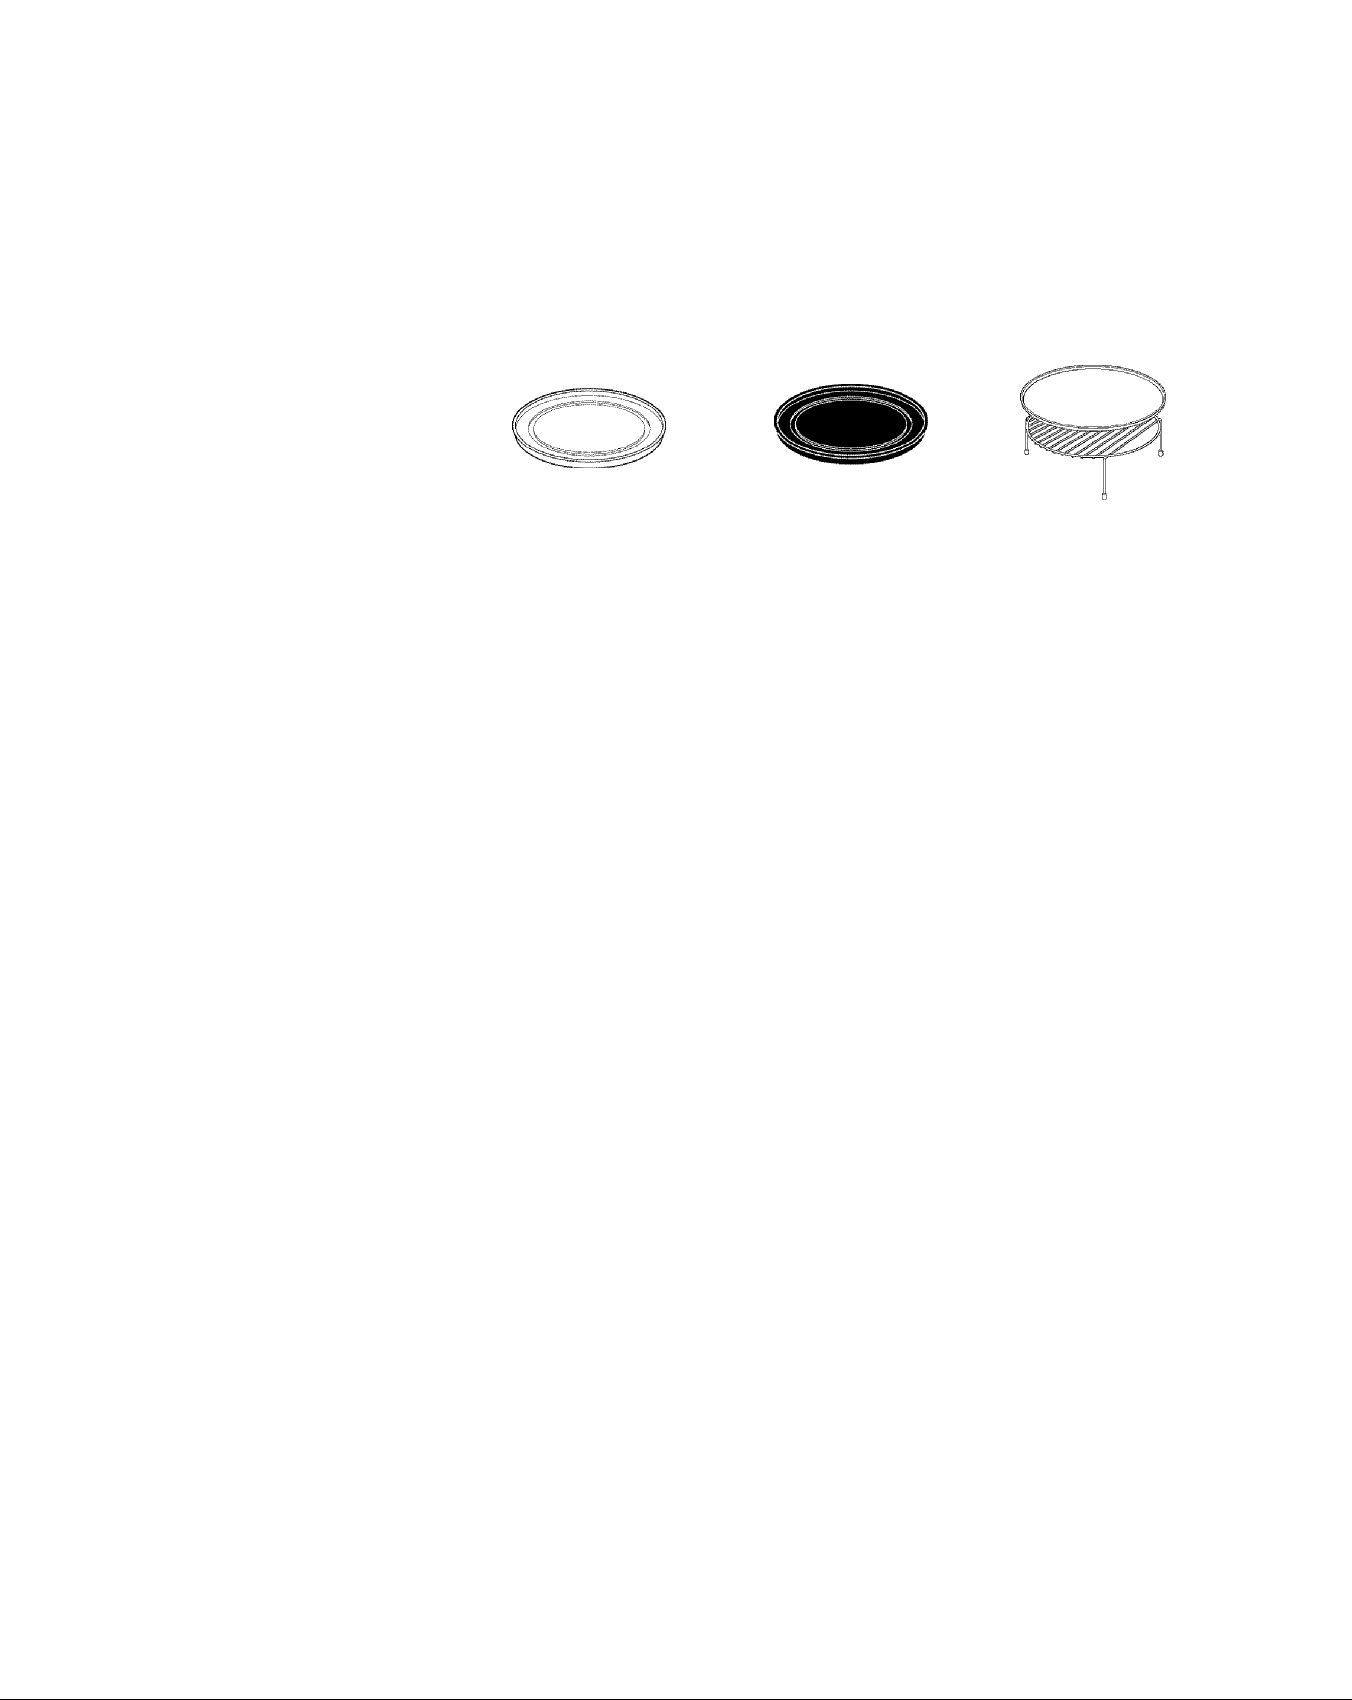
Gare and Cleaning
,.4, d V a ■» I i u m O v e n
Cooking trays
and baking
sheet
How to clean
the outside
To prevent breakage, allow the trays
to cool completely before cleaning.
Wash carefully in warm, sudsy water
or in the dishwasher.
CAmr glass Iray for
'tnicrowaxnng
We recommend against using
cleaners with ammonia or alcohol, as
they can damage the appearance of the
oven. If you choose to use a common
household, cleaner, first apply the cleaner
directly to a clean cloth, then wipe the
soiled area.
Case
Clean the outside with a sudsy cloth.
Rinse a,nd then diT. Wipe the window
dean with a damp cloth.
Non-siick molai iray for
spoedcnokmg
Do not use metal scorn ing pads
or abrasives, as they may damage
the finish. A soap-filled scouring
pad may be used to clean the trays.
Pul food donlly on I ho
aiumin/um Ixikiug shoot on
the wire ovon rrifk, mid ¡ilmo
them on the noihsliik metal
tray, when halangon two
levels, bwiliugw toasting
joods.
Glass Control Panel and Door
(on some models)
Wipe wi,th a clean damp sponge.
Dry thoroughly. Do not use cleaning
sprays, large amounts of soap and
water, abrasives or sharp objects on
the panel—they can damage it.
Door Frame
It’s important to keep the area
dean where tlie door seals against
the oven. Use only mild, non-abrasive
detei'gents applied with a dean
sponge or soft doth. Rinse well.
Stainless steel
(on some
models)
40
Do not use a steel-wool pad; it will scratch the surface.
1. Shake bottle well.
2. Place a small amount of CERAMA
BRYTE®' Stainless Steel Appliance
Cleaner on a damp cloth or damp
paper towel.
3. Clean a small area (approximately
8" X 8"), rubbing with the grain of
the stainless steel if applicable.
4. Dry and buff \dth a clean, diw
paper towel or soft doth.
5. Repeat as necessaiy.
NOTES: If a mineral oil-based
stainless steel appliance cleaner
has been used before to clean the
appliance, wash the surface with
dishwashing liquid and water prior
to using the CERAMA BRYTE®
Stainless Steel Appliance Cleaner.
After washing the surface with
dishwashing licjuid and water, use
a generous amount of CERAMA
BRYEE® Stainless Steel Appliance
Cleaner to clean the appliance.
To Order
To order CERAMA BRYTE® Stainless
Steel Appliance Cleaner, please call
our toll-free number:
National Parts Center 800.626.2002
ge.com
CERAMA BRYTE®
Stainless Steel Appliance
Cleaner .# FMJ0X311
Page 41

Troubleshooting
A.(Ivanti um Oven
Questions ?
Use this
problem
solver
Problem Possible Causes What To Do/Explanation
IIGHTS
Light during a
speedcook cycle
dims and cycles on
and off, even at fuH
power levels
Light visible around
the door and outer
case while
speedcooking
FAN
Fan continues to run
after cooking stops
Oven vent emits warm
air while oven is on
Fan comes on
automatically when
using the microwave
This is normal.
Power level has been
automatically reduced
because the oven is hot.
This is normal. • When the oven is on, light may
The oven is cooling. • The fan will automatically shut off
This is normal.
This is normal.
• This is normal. The oven senses the
heat level and adjusts automatically.
be visible around the door and
outer case.
when the internal parts of the oven
have cooled.
COOKING
The oven makes
unusual sounds
while cooking
Smoke comes out
of the oven when
I open the door
Food is not fuHy
cooked or browned
at the end of a
cooking program
SENSOR ERROR
displayed along with
an oven signal
Clicks and fans blowing
are normal. The relay
board is turning the
components on and off.
Food is high in fat
content. Aerosol spray
used on the pans.
Programmed times
may not match the size
or amount of food you
are cooking.
Food amount or type
placed in the oven does
not match the program
that was set.
Steam was not sensed by
the oven because plastic
wrap was not vented, a, lid
too tight was on the di,sh
or a liq uid was covered.
• These sounds are normal.
• Smoke is normal when cooking
high-fat foods.
• Increase or decrease time for
doneness or adjust the upper or
lower lamps for browning and
doneness.
* Press the CT .FAR/OFF pad. Set the
oven program to match the food or
liquid to be cooked or heated.
• Vent plastic wrap, use a looser lid
or uncover liquids when cooking or
heating.
41
Page 42

Troubleshooting
,4 d V a n f i ii m 01 > e n
Questions ?
Use tMis
problem
solver
Problem Possible Causes What To Do/Explaiiatioii
DISPLAY
The display is blank The clock display has
been turned off.
AAntmlis LOCKED”
appears in display
Control display is
lighted yet oven
will not start
The control has
been locked.
Clock is not set. • Set the clock.
Door not securely closed. • Open the door and close securely.
START/PAUSE pad
not pressed after entering
cooking selection.
Another selection already
entered in oven and
C1.KAR/C)FF pad not
pressed to cancel it.
Size, quantitV'', or cooking
time not entered after
final selection.
CLEAR/OFF was pressed
accidentally.
• Check the OPTIONS men u for clock
display settings. Turn the display on.
• Press and hold CLEAR/C)FF for
5 seconds to unlock the control.
• Press ST4.RT/PA.USE,
• Press CLEAR/OFF.
• Make sure vou have entered cooking
time after selecting.
• Reset cooking program and press
START/PA.USE. "
OTHER PROBLEMS
The door and inside
of the oven feels hot
Oven will not start A fuse in your home
The heat lamps
produce intense heat
a small space.
in
may be blown, or the
circuit breaker tripped.
• This is normal.
• Use oven mitts to remove food w-hen
when ready.
• Replace fuse or reset circuit breaker.
42
Page 43
WWW. 'monogram., com.
Consumer SerCces
.4dvaniium Overt
With the purchase of your new Monogram appliance, receive the
assurance that if you ever need information or assistance from GE,
well be there. All you have to do is call—toll-free!
GE Answer
Center®
In the USA:
800.626.2000
In-Home Repair
Service
In the USA:
800.444.1845
In Canada:
888.880.3030
For Customers
With Special
Needs...
In the USA:
800.626.2000
Whatever your question about an)' Monogram major appliance, CiE Answer Center'®
i.iifoniiati.on, service is available to lielp. Your call—an.d your question,—wi.ll be a,nswered
promptly a.iid courteously. .And yi„JU ca:o, ctill a:i,iy ti.i.iie. (.iE ,A.ns\vei' (.ie.iiter''-’-' servi.ce is oj;)e,ii
24 hours a day, 7 days a week.
In Canrida, call 888.8803030
A GE coiisi.imer service professional will provide expert repair service, scliedi.iled at a time
that’s convenient foryo'u. Many GE Gonsumer Service eoi:n|')an)'-operated locations offer
)'ou service today or tomorrow, or at t'our convenience (7:00 a.m. to 7:00 I'l.iii, weekdat's,
9:00 a.m. to 2:(,K.) p.rn, Satui'days), <.)ur factory-trair.ied tech.iiiciar.is know your a|;)|;)lia:i,ice
inside and out—so most repairs can be liandled in just one visit.
(.'■E offers Bi'aille co,iiti'i„ils for a variety of (.IE apj;>l:i,a,iices, ar.id a
brochure to assist in planning a barrier-free kitehen for persons
with limited mobility.
(,lo,nsutners wi.th i.ni^rai.red liea,ri:o,g or speedi wlio have access to a
TDD ora conventional teletypewTiter may call 800.TDD.GEAC
(800.833,4322) to request information or service.
Service Contracts
In the USA:
800.626.2224
In Canada:
888.880.3030
Parts and
Accessories
In the USA:
800.626.2002
In Canada:
888.880.3030
Y(.)u can have the secu.i'e feeling that GE Consi.imer Service w'ill still be tlier'e a:fter')'oi,ir
warrant)' exyrires, Pitrchase a GE contn'ict wliile y(.Hir tvarrant)' is still in effect and t'oif 11
receive a substar.itial discomit. With, a ,oiult:i,ple-yeai' c<,>ntract, you’re assui'ed of futui'e
service at today’s prices.
Indi'vid'uals qualfied to ser'vice tiieir own appliances ca.n have pa.i'ts oi' a,c.cessories sent
directly t(.> their home. The C.E parts system provides access to over 47,000 parts...and all
(.'■E (.ie,o.ui:o,e Re,iiew'al .Pai'ts ai'e fully wniTanted. V,1S,A, Mastei'C.lai'd a.iid Disci„jver cai'ds are
accepted.
User maintenance instructions contained in this manual cover procedures intended to be
performed by any user. Other servicing generally should be referred to qualified service
personnel. Caution must be exercised, since improper servicing may cause unsafe operation.
43
Page 44

Warranty for Customers in the USA
A. d V a n I i 11 m O v e n
YOUR MONOGRAM ADVANTIUM OVEN WARRANTY
Staple sales slip or cancelled check here. Proof of original purchase
date is needed to obtain service under warranty.
WHAT IS
COVERED
From the Date
of the Original
Purchase
WHAT IS NOT
COVERED
FULL ONF^YFAR WARRANTY
For one year from date of original purchase, we will provide, free of charge, parts and service
labor in your home to repair or replace any part of the oven that fails because of a defect in materials
or workmanship.
FULL TEN-YFAR WARRANTY
For ten years from date of original purchase, we will provide, free of charge, parts and service
labor in your home to repair or replace the heating system if any heater or lamp fails because of a
defect in materials or workmanship.
LIMITED TEN-YFAR WARRANTY
From the second through the tenth year, we will provide, free of charge, parts to replace
the magnetron tube it it fails because of a defect in materials or workmanship. You pay for
the service trip to your home and for service labor charges.
This warranty is extended to the original purchaser and any succeeding owner for products
purchased for ordinary home use in the 48 mainland states, Hawaii and Washington, D.C.
In Alaska the warranty is the same except that it is I.IMITED because you must pay to ship
the product to the service shop or for the service technician’s travel costs to your home.
All warranty service will be provided by our Factory Service Centers or by our authorized
Customer Care*' servicers during normal working hours.
Should your appliance need service, during warranty period or beyond, in the U.S.A call
800.444;i845. ' ' '
< Service trips to your home to teach you how
to use the product.
' Replacement of house fuses or resetting of
circuit breakers,
' Improper installation, delivery or maintenance.
■ Failure of the product if it is used for other than
its intended purpose or used commercially.
■ Incidental or consequential damage caused
by possible defects with this appliance.
■ Damage caused after delivery.
' Damage to the product caused by accident,
fire, floods or acts of God.
49-40458
06-05 JR
Printed in Korea
Some states do not allow the exclusion or limitation of incidental or consecjuential damages, so the
above limitation or exclusion may not apply to you. This warranty gives you specific legal rights, and
you may also have other rights which vary from state to state. To know what your legal rights are in
vour state, consult vour local or state consumer affairs office or vour state’s Attorney General.
Warrantor: General Electric Company, Louisville, KY 40225
Monogram'^
GE C&miimer & industrisi
GEApplianc&s
General Electric Company
LoiiisviHe, KY 40225
ge.com
 Loading...