

Owner's
Manual
Built-In
36" Single Door
Refrigerators
and
36" Single Door
Freezers
@
Monogram:
(;onstlmer lnfbrnlation
I_j} igerator/Fre_,z_,r
Int,vduction Your new Monogram refl'igerator/fl'eezer makes an eloquent statement of style, convenience
and kitchen planning flexibility. Whether you chose it flw its purity of design, practical storage
arrangements or assiduous attention to detail--or for all of these reasons--you'll find that your
Monogram relt/"igerator/lt_'eezer's superior blend of fl)rm and hmction will delight you flw years
to COlne.
The Monogram refl'igerator/fi'eezer was designed to provide the flexibiliw to blend in with
yore" kitchen cabinetry. Decorative door insert panels allow it to match your kitchen cabinets
or blend with your kitchen decor. Custom handles are also available to turther personalize
your refi'igerator/fi'eezer. Through a series of product and trim kit choices, the Monogram
refi'igerator/fi'eezer can be beautifully integrated into the kitchen.
Since this is designed to be a built-in product, custom panels are required on the fl'ont of
the Monogram refl-igerator/fl'eezel: Consult your kitchen designer or cabinetmaker fbr your
customized look.
The information on the following pages will help you operate and maintain your
reffigerator/fi'eezer properly.
If you have any other questions, visit ore" Website at: ge.com.
Contents Consumer Services
Important Phone Numbers ................ 19
Model and Serial Numbers ................. 3
Problem Solver ....................... 16, 17
Product Registration ...................... 3
Salbty Instructions ...................... 4-7
_'k_u'ranty ........................ Back Cover
Care and Cleaning
(;leaning--Outside and Inside ............. 13
Condenser . ............................. 13
I fight Bulb Replacement .................. 14
Vacation ................................ 14
Be/bre
using
yOU_"
r@igerato#
./:F(¢gZgr
Read this manual carefully. It is intended to
help you operate and maintain your new
refl'igerator/fi'eezer properly.
Kee I) it handy ii)r answers to your questions.
Operating Instructions
Automatic Icemaker ....................... 9
Shelves .............................. 11, 12
Storage Drawers ......................... 10
Temperature Controls ..................... 8
Water Filter Accessory ..................... 9
_'_] ne Rack ................................
Preparation
Clearances .............................. 15
I_eveling ................................ 15
Ixmation ................................ 15
If you don't understand something or
need more help, there is a list of toll-fl'ee
consmner ser',ice numbers included in
the back section of this manual.
OR
Visit our Website at: ge.com
-Wd te
down the
model
serial
_ tt f!zbers
You'll see them on a label inside the
refl'igerator/fl'eezer under the storage drawers.
These nmnbers are also on the ( onsumer
Product (-)wne_ship Registration Card included
with this manual.
Before sending in tiffs card, please write these
numbers here:
Model Number
Serial Number
Ijse these llHI/lbeIB ill all} correspondellce or
service calls concerning }our refl_igerator/fl'eezer.
/./you
received a
damaged
r@igerator/
.fYeezer
Save time
& money
[[you
7teed
service
Tile _,#arrallD, does llOt CO'_ er dan/age caused
after deliver}.
Before you request service, check tile Problem
Solx er in tile back of this manual.
To obtain service, see tile Consumer Services
page ill the back of this manual.
We're proud of our service and want you to be
pleased. If fl)r some reason you are not happy
with the sesMce you receive, here are steps to
fl)llow for further help.
For customers in the USA:
FIRST, contact tile people who serviced your
appliance. Explain why you are not pleased.
Ill most cases, this will solve tile problem.
hmnediatel'_ contact the dealer (or builder)
that sold }ou tile refrigerator/freezer.
It lists causes of minor operating problems that
"}()IS CiUl correct } o/srself.
For customers in Canada:
FIP, ST, contact tile people who serviced your
appliance. Explain why you are not })leased.
Ill most cases, this will solve the problem.
NEXT, if you are still not pleased, write all tile
details--inchlding your phone number to:
Managei; (;onsmner Relations
Camco Inc.
1 Factos T Lane, Suite 310
Moncton, N.B. E1C 9M3
NEXT, if you are still slot pleased, write all tile
details--including your phone number--to:
Manager, Customer Relations
GE Appliances
Appliance Park
I,ouisslle, KY 40225
IMPORTANT SAFETY INSTRUCTIONS
I ¢AD AND SAVE THESE INSTRUC '7ONS
WARNING-whe, ,,singthis
appliance, aE<l_s exercise basic safet_
precautions, including the foHo_dng:
Use this appliance only for its intended
purpose as described in this O_ner's Manual,
This refrigerator/freezer must be properly
installed in accordance with the Installation
Instructions before it is used.
, Do not allow children to climb, stand or hang
on the shelves in the refrigerator/freezer.
They could damage the refl'igerator/fl'eezer
and seriously iqjure themselves.
, Do not touch the cold surfaces in the freezer
compartment when hands axe damp or wet.
Skill may adhere to these extremely cold
surl[_lces,
, Do not store or use gasoline or other
flammable vapors and liquids in the vicinity
of this or any other appliance.
" If your freezer has an automatic icemaker,
avoid contact with tile moving parts of tile
ejector mechanism, or with the heating
element located on tile bottom of the
icemaker. Do not place fingers or hands on
the automatic icemaking mechanism while
the refl'igerator/fl'eezer is plugged in.
, Unplug your refrigerator/freezer before
deaaaing and maMng repairs. NOTE: We
strongly recommend that ally servicing be
perflmned by a qualified individual.
" Before replacing a burned-out light bulb,
tile refl'igerator/fi'eezer should be unplugged
ill order to aw)id contact with a live wire
filament. (A burned-out light bulb may break
when being replaced.) NOTE: Turning
contl'O] to OFF does 51Ot I'eln ()re power to
tile light circuit.
" Do not refreeze frozen foods which have
thawed completely.
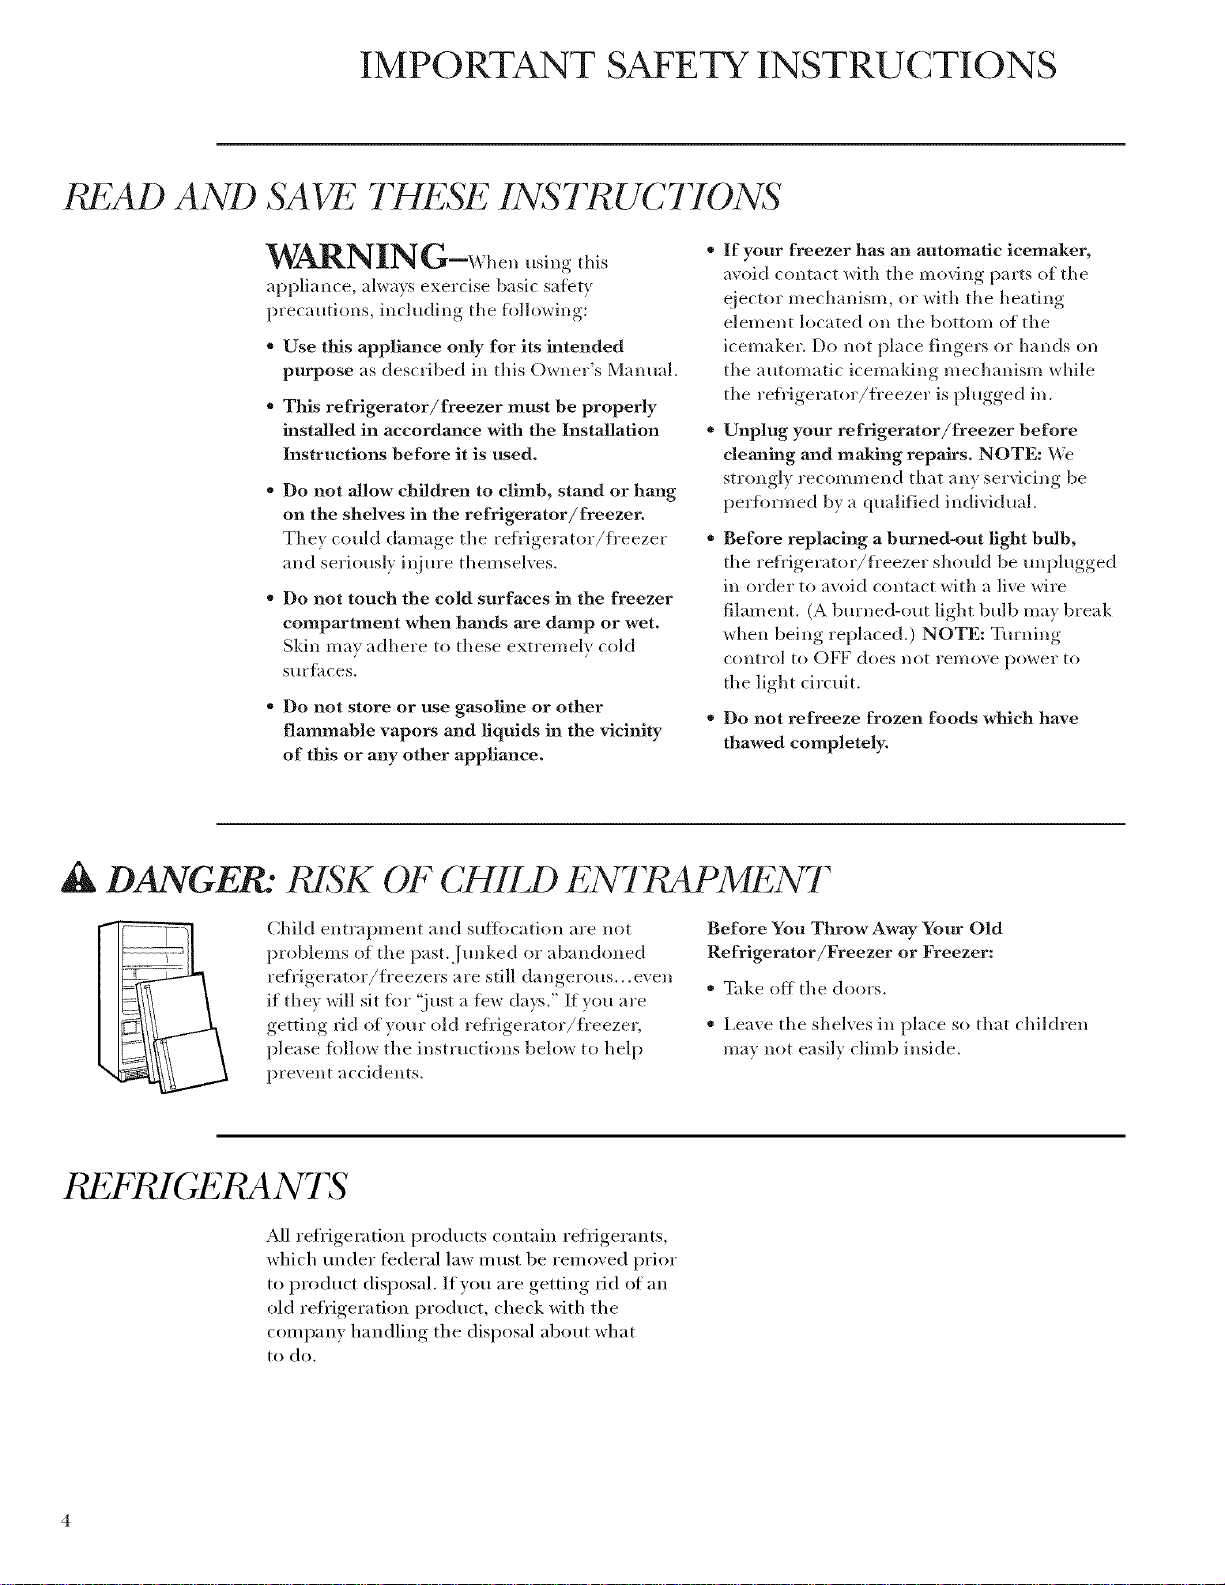
DANGER." t SK OF CHTIJ) ENTRAPMI 2NT
Child entrapment and suffocation are not
problems of tile past.flmked or abandoned
if thex will sit for 'i}ust a few days." If )ou are
getting rid of )our old refrigerator/freezer,
t refrigerator/freezers are still dangerous...even
please follow tile instructions below to help
prevent accidents.
I 2H GI ?,PudNTS
All refl'igeration products contain refligerants,
which trader federal law must be removed prior
to product disposal, If you are getting rid of an
old refl'igeration product, check with tile
company handling tile disposal about what
to do.
Before You Throw Away Your Old
Refrigerator/Freezer or Freezer:
, _Ed_e off tile doors.
" Leaxe tile sheEes in place so that children
ma) not easil) climb inside.
LIP £ ET CONSERVER CES INSTRUCTIONS
AVERTISSEMENT •
I_ol_que wins utilisez le rg_fl_igg_rilteur/conggdateul;
observez toujours certaines prg_cautions de
base, **Otal*u**el*[ :
" N'utilisez l'appaaceil que pour son usage
pr6vu, comme d(4crit darts le pr(4sent manuel
de 1'utilisatem'.
, Installez le r_frig&rateur/cong&lateur
conform&ment aux directives d'installation
avant de l'utiliser.
, Ne laissez pas les enfants grimper, s'asseoir,
se teuir debout ni se peudre aux clayettes du
r6frig&rateur/cong&lateur. Ils pomTaient
endommager le rg_t/"ig(4rateur et se blesser
gravem e**t.
" Une lois le cong&lateur en marche,
ne touchez pas les surfaces froides du
cong&lateur, surtout si vous avez les mains
humides ou mouill&es : la peas* risque
d'adh6rer 5 ces surihces tr&s fi'oides.
N'entreposez et n'utilisez pas d'essence ou
autres vapeurs et liquides inflammables fi
proximit& de cet appareil ou de tout autre
app axeil &lectrom&nager.
o
Pour les r&frig&rateurs dot& d'une machine fi
gla¢ons automatique, &'itez le contact avec les
pi_ces mobiles du m_canisme _jecteur
ou avec l'616ment chauiihl*t situ(_ _ la pattie
infl_fieure de la machine 5 glacons. Ne posez
pas les doigts ou les mains sur le mOcanisme
de la machine a glacons pendant que le
rOfl'igOrateur/congOlatem" est branch0.
, D&branchez votre r&frig&rateur/cong&lateur
avant de le nettoyer et de le r&parer,
REMARQUE : Nous wins recommandons
vivement de confier route rg_paration atm
technicien qualifi6.
" Ararat de remplacer tree mnpoule grill&e, le
r6fl_g6rateur/cong61ateur dolt 6tre d6brlmch6
aft** d'&'iter tout contact avec sm fil sons
tension. (rUne ampoule grillOe peut se briser
pendant l'op&'ation). REMARQUE : I,orsque
vous placez la commande sur <_0,,@teint),
l'alimentation _lectrique de l'ampoule n'est
})as cos*p(qe.
* Ne faites PAN recongeler des aliments
surgel&s qui out compl6tement d&gel&
DANGER : PdSQUES POUR I_ g SENFANTS
Les enfimts pris au pi&ge ou morts d'asphyxie
sont toujom's d'actualit6. Les appareils de
rOfl'igOration abandon_s sont toujours aussi
dangereux, mOme si on n'attend que "quelque
jours" pour s'en dObarasser. Si vous ne gardez
pas wme ancien appareil, veuillez suivre les
directives ci-dessous aft** de prOvenir les
accidents.
REFRIGERANT 5
Tousles appareils de r_fl'igOration contiennent
des r_fl'ig&'ants qui, confiwm&nent aux lois
tiadOrales, doivent _tre enlevOs avant toute
_limination de l'appareil. Si vous vous
dObarrassez de vieux appareils de rOfrigOration,
v&'ifiez, aupr&s de la soci_t_ qui s'occuI)e de
lem" 01imination, ce que vous devez taire.
Avaaat de vous d&barasser de votre vieux
appaxeil de r&frig&ration :
* D(4molltez les pos'tes.
" Laissez les clayettes en place aft** d'emp6cher
les enfimts de grimper 5 l'intg_riem'.
IMPORTANT SAFETY INSTRUCTIONS
HOW TO CONNECT EId 2CTPdCITY
Do not, under any circumstances, cut or
remove the third (ground) prong from the
power cord, Fur personal safety, this appliance
must be properly grounded,
Tile power cord of this appliance is equipped
with a 3-prong (grounding) plug which mates
with a standaid 3-prong (grotmding) wall
outlet to minimize the possibility of electric
shock hazard from this appliance,
Have tile wall outlet and circuit checked by
a qualified electrician to make sure tile outlet
is properly grounded.
Where a standard 2-prong wall outlet is
encountered, it is your personal responsibility
and obligation to have it replaced with a
properly grotmded 3-prong wall outlet.
Tile refrigerator/freezer should always be
plugged into its own individual electrical outlet
which has a w)ltage rating that matches the
rating plate.
DO NOT USE AN ADAPTER PLUG TO
CONNECT THE REFRIGERATOR/FRF_]ZER
TO A 2-PRONG OUTLET,
DO NOT USE AN EXTENSION CORD
WITH THIS APPLIANCE,
This provides tile best perflmnance and also
prevents overh)ading house wiring circuits
which could cause a fire hazard fl'om
overheated wires.
Never unplug your refl'igerator/fi'eezer by
pulling on tile power cord. Alwass grip plug
firefly and pull straight out ti'om tile outlet.
Repair or replace immediately all power
cords that have become fl'aved or otherwise
damaged. Do not use a cord that shows cracks
or abrasion damage ahmg its length or at
either end.
_hen moving tile refrigerator/freezer awax
froill tile wall, be carehd not to roll over or
d'lnrloe,, _ tile power cord.
SAVE THESE
INSTRUCTIONS

CCORDEMt;N7 ET£CT'tUQUE
Ne coupez ni retirez en auctm cas la troisi&me
broche (raise a la terre) de la fiche du cordon
d'alimentation. Pour votre s_curit_, cet appa_eil
doit _tre correctement mis a la terre.
Le cordon d'alimentation de cet appareil est
muni d'une fiche d 3 broches (raise 5 la terre)
qui se branche darts une prise mm'al ordinaire
d 3 alvg_oles (raise d la terre) pour rg_duire au
minimum les risques du chocs (_lectriques.
Faites examiner la prise de courant et le circuit
par tm (qectricien qualifi(4 pour vous assurer
que la prise est correctement raise fi la terre.
Si la prise murale est du type standard a
2 alvOoles, il vous incombe de la fidre
remplacer par une prise a 3 alv&Aes
COlTecteI//ent I//ise _'lla telTe.
Le rOIi'ig6rateur/cong6latem" dolt toujours 6tre
branchO darts sa propre prise de com'ant, dont la
tension nominale est identique a celle indiquOe
sur la plaque signalOtique.
N'UTILISEZ PAS UNE FICHE
D'ADAPTATION POUR RACCORDER
LE R/_ZFRIGI_ZRATEUR / C O N GI_ZLATEUR
DANS UNE PRISE MURALE A 2 ALVI_OLES.
N'UTILISEZ PAS DE CORDONS
PROLONGATEURS AVEC CET APPAREIL.
Cette prg_caution est recommandg_e pour
garantir un rendement optimum et (_viter
une surcharge des circuits (_lectriques de la
rt4sidence, ce qui pomTait crt4er tm risque
d'incendie par surschauitb des ills.
Ne &4branchezjamais l'appareil en tirant le
Col'don d'alimentation. Saisissez f}:'rI/lel//ent
la fiche du cordon et tirez droit pore" la retirer
de la prise.
Rg_parez ou remplacez immg_diatement tOtlt
cordon eltiloch_ ou endommag& N'utilisez pas
tm cordon fendill(4 ou pr(4sentant des signes
d'tlStlre.
Lorsque xous d(4placez l'appareil du ram', faites
attention de ne pas la fhire fouler sur le cordon
d'alimentation afin de ne })as l'endommager,.
CONSERVEZ CES
DIRECTIVES

Operating Instructions
I:b,/ri_'¢rator/Freezer,.....
Set the
temp ature
control
How to test
temp atures
WHEN YOU FIRST TURN THE
REFRIGERATOR/FREEZER ON,
SET THE CONTROL AT 5.
9 is tile coldest setting, 1 is tile warinest.
For (older or w_li'i/leY tenlperatures, ;a(!just
tile contFol one nIlIllbeY _lt _1 tiIlle.
IMPORTANT: When first setting the control,
or adjusting it, allow 24 hours for the
refrigerator/freezer to get cold.
NOTE: Turning the control to the OFF
position stops cooling in the refrigerator/
freezer, but does not shut off power to
the refrigerator/freezer.
Use the milk test for the refrigerator. Place a
container of milk on tile top shelf. Check it a
day later. If the milk is too warm or too cold,
at)just tile temperature control.
5 IS NORMAL
9 IS COLDEST
Use the ice cream test for the freezer. Place
a container of ice cream in tile center of the
fl'eezer. Check it after a day. If it's too hard
or too soii, a(!just the temperatm'e control.
Always allow 24 hours for the refrigerator/
freezer to reach the temperature you set.

Automatic Icemaker (fleezer models)
R_i/)'igera tor/Freezer
A utomatic
icernaher
0 }eeze'rmodels)
A newly-installed freezer may take 12-24 hours
to begin making ice.
The icemaker will produce seven cubes per
cycle--approximately ] 00-130 cubes in a
24-hour pevh)d, depending on the ii'eezer
telnperifftlre, roolll teI/lperifftlre, ntllllber of
door openings and other use conditions.
If your ti'eezer is operated befl_re the water
connection is made to the icemaker, set the
power switch to O (off).
When the freezer has been connected to the
water suppl> set the power switch to I (on).
The green light will come on.
The icemaker will fill with water when it cools
to 15°lL A newly-installed ti'eezer mav take
12-24 hours to begin making ice cubes.
Throw away the first few batches of ice to allow
the water line to clear.
Be sure nothing interferes with the sweep of
the feeler aHn.
When the bin fills to the level of the feeler
arm, the icemaker will stop producing ice.
PowerSwitch
Icemaker
Green
PowerLight FeelerAne
It is normal fl)r several cubes to be joined
together.
If ice is not used fl'equently, old ice cubes will
become cloudy, taste stale and shrink.
If ice cubes get stuck in the icemake*; the green
power light will blink. To correct this,
set the power switch to O (off) and remove the
cubes. Set the power switch to I (on) to restart
the icemaker.
After the icemaker has been turned on again,
th ere will be a delay of a bo ut 45 rain utes before
the icemaker resumes operations.
NOTE: In homes with lowe>than-average water
pressure, you may hear the icemaker cycle
multiple times when making one batch of ice.
Water filter
(lCggS'SOr_
The water filter is an option at extra cost and
is available fi'om your deale*; GE Paiq:s and
Accessories, 800.626.2002 or ge.com. Specit_' your
choice of either GXPd_Q or GXITQ. Both have
complete installation instructions and install on
1/4" ().D. water line.
Both water filters require replacement
camddges. Replacement cartridges are ax;dlable
through GE Parts and Accessories,
800.626.2002, or ge.com.
Replacement
Model No. Cartridge No.
cxRi,q CXRTqR
(;X Tq CX TqR
In-LineRefrigerator/IcemakerFilter
Model#GXRLQ
<_
RefrigeratorWater Filter Kit
Model#GXITQ

Storage Drawers
I:b',/ri_'erator/Freezer,.....
R rigerator--
Storage
drawers
t @igerator--
Sea#d snack
paTis
The upper drawers have individual, ac!iustable
lmmiditv controls that let you control the
amount of cold air entering the drawers.
Slide the control all the way to the High setting
and the drawer provides higher hmnidity levels
recommended fin" most leaI}' vegetables,
Slide the control all the way to the Low setting
and the drawer provides lower humidity levels
recommended fl)r most fl nits.
Excess water that ma) accumulate in the
bottom of the drawers should be emptied
and the drawers wiped dry.
The sealed snack pans retain high lmmidiw
fin" the convenient storage ofhmch meats and
cheese, hors d'oeuw'es, spreads and snacks.
To remove a snack pm_, pull the pan out and
lift the fl'ont of the pan up tmtil it snaps out of
the wire holder,
To replace a snack pm_, place the back of the
pan in the wire holder, i,ower the fl'ont of the
pan, then push down until the fl'ont of the pan
snaps into the wire holder:
Drawer
removal
10
Drawers in the refl'igerator/freezer will
stop befin'e coming all the way out, to hel I)
prevent contents fi'om spilling onto floor.
To remove a drawer, pull the drawer out and lilt
the fl'ont of the drawer up and out of the wire
holder. I,ili the back of the drawer up and out.
To remove the upper drawers when the door
cmmot be opened fully, the shelf above the
drawers must be removed. Push the shelf back,
then lilt up. Tilt the cover and take it out.
To replace a drawer, place the back of the
drawer in the wire holder, making sure the
extensions of the side of the drawer fit into
the back of the wire holder. I,ower the fl'ont
of the drawer into the wire holder. Press
firmly on the top of the drawer.
II

Temi)ered glass shelves in the refl'igerator and
wire shelves in the fl'eezer enable wm to inake
etticient shelf arrai_gen_ents to fit wmr talnilv's
ti_od storage needs.
To remove shelves: Tilt shelf up at fl'ont,
then lilt it up and out of tracks on rear wall
of refl'igerator/freeze_:
To replace shelves: Select desired shelf height.
With shelf ti'ont raised slightly, engage top lugs
in tracks at rear of cabinet. Then lower front of
shelf tmtil it locks into position.
Shelves
h'@'ige *'ato*'/F*'e ez e*'
Removable
wine rach
(on all
r(fdg'erator
modds)
The wine rack is designed to hold a bottle on
its side and will fit on any shelf.
To relocate the wine rack: Pull the wine rack
straight out, position its lip over the right edge
of the shelf wm want to suspend it fl'om and
push it all the way in.
11

Solne door shelves are a(!justable and can be
i/loved t1I) }lIl(1 dowll to Illeet yoIII" storage
needs. The deeper door shelves nlust be placed
at tile botton/ of tile door.
To remove: I,ift tile shelf ii I) and slide it
towards vi)/i,
Shelves
h'@ ige *a to r/F* eez e*
12

(;are and (;leaning
I_(_f) igerator/Freezer
Cleaning
outside
Cleaning
inside
Door handles and trim--Clean with a cloth
dampened with soapy water. D5y with a soil
cloth.
Keep the outside clean. Wipe with a clean
cloth lightly dampened with mild liquid dish
detergent. D5T with a clean, soil cloth.
To help prevent odors,
leave an open box
of baking soda in the
ret/"igera tor/i]'e ezer.
Turn off power at the circuit
breaker or fuse box before
cleaning. If this is not practical,
wring excess moisture out of sponge or cloth
when cleaning around switches, lights or
contl'ols.
Use warm water and baking soda solution--
about a tablespoon (15 m]) of baking soda to
a quart (1 liter) of water. This both cleans and
neutralizes odos_. Thoroughly rinse and wipe dry.
Do not wipe the reli'igerator with a soiled dish
cloth or wet towel. These may leave a residue
that can damage the finish. Do not use
scouring pads, powdered cleaners, bleach or
cleaners containing bleach because these
products can scratch and damage the finish.
Stainless steel--Regularly clean and polish the
Stainless Steel Door Panels and Handles (on
some models) with a commercially available
stainless steel cleaner such as Stai_dt_ss Sted
Magic ''_to preseiwe and protect the fine fiuish.
Stain&s,s Slued Magi_ is available through GE
Pai_s and Accessories, 800.626.2002, or ge.com.
Order part number WX10X15.
Do not use appliance wax or polish on the
stainless steel.
Other parts of the refrigerator/freezer--
including door gaskets, meat and vegetable
drawers, ice storage bin and all plastic
parts--can be cleaned the same way. _Mter
cleaning the door gaskets, apply a thin layer of
petroleum .jelly to the door gaskets at the hinge
side. This helps kee I) the gaskets from sticking
and bending out of shape.
Avoid cleaning cold glass shelves with hot water
because the extreme temperature difference
may cause them to break, Handle glass shelves
carefully, Rough handling of tempered glass
cam cause it to shatter.
Do not wash any plastic refrigerator/freezer
parts in the dishwasher.
CondeTlSeT"
To clean the condenser fins:
First turn off the power at the circuit breaker
or tuse box. _4'ait about 30 minutes tor the
condenser area to cool. Then remove the
decorative panel by lilting up and toward you.
Use a sott bristle blush to loosei_ dust and lint
on the condenser fins. Use a vactltlm hose to
YelIlOVe soil.
After cleaning: Reconnect power at the fllse
box or circnit breaker.
Replace the decorative panel.
DecorativePanel
13

(;are and (;leaning
I:_¢,fri_'erator/Freczcr,.....
l %paring
./br
vacation
Upper light
bulb
replacement
For long vacations or absences, rei/love fl)od
and unplug the refl'igerator/fl'eezer. Mo\ e the
control to OFF, and clean the interior with a
baking soda solution of one tablespoon (13 ml)
of baking soda to one quart (1 liter) of water.
Leave the doors open.
Tttnfing the control to OFF" does not remove
power to the light circuit.
There are light bulbs at the top of the
refl'igera tor/fl'eezer.
To replace a bulb:
1
TurI_ off power at the circuit breaker or
fllse box.
2
Grasp the back of the shield with both hands,
pull the light shield fl)rward and rotate down.
This will release the tabs at the back of the
shield fl'om the back wall of the refl'igerator.
Next, inove the shield back to release the tabs
at the fl'ont of the shield,
For shorter vacations, remove perishable %ods
and leave the control at the regular setting.
HoweveL if the room temperature is expected
to drop below 60°F (16°C), fl)llow the same
instructions as fin" extended x;ications.
Moxe icemaker power switch to the O (off)
position and shut oil the >_ater supl)l ) to the
refrigerator/freezer.
J
Lower light
bulb
rt,placement
Replace with the salne size bulb and reinstall
the shield.
4 Turn the power on.
To replace a bulb:
1 Turn offpower at the circuit breaker or fllse
box.
2 Remove the top two drawers.
3 Replace with the salne size bulb, reinstall the
drawers and tui'i_ the power on.
14

Preparation
Ibj) igerator fl;reezer
Rd ige ato i
location
Clearances
Do not install the refrigerator/freezer where
temperatures will be below 60°F (16°C) because
it will not run often enough to maintain proper
temi)eratures, and the refrigerator will develop
high internal hmniditv.
If tile refl'igerator/fl'eezer is to be installed in a
corne_; a 4" clearance is required on the hinge
side fin" a 90 ° door opening and access to fl'esh
fl)od drawers. A 15" clearance is required on
the hinge side to remove pans. A 25" clearance
is required on the hinge side for a flfll 130 °
door swing.
Leveling These products have a 4-point leveling system.
The fl'ont is supported by leveling legs, the
rear is supported b_ wheels.
For proper installation, the refrigerator/
freezer must be placed on a level surface of
hard material the stone height as the rest of the
flooring. This surface should be strong enough
to support a fully loaded refrigerator/freezer,
or approximately 1,200 lbs. each. See the
Installation Instructions (Pub. No. 49-60073-3)
for complete directions.
No other clearances at top, sides or back are
required. See the Installation Instructions
(Pub. No. 49-60073-3) fin" complete directions,
• A({iust rear wheels beneath the product to
just barely touch the 2x4 block.
• Turn the 7/16" hex nut located above the
fi'ont wheels. Turn to raise or lower.
• For fl'ont leveling legs, use a 1-1/4" open-end
wi'ench.
• Ac!just careflflly; the product should be level
and i)lumb with cabinetry; and should align
with toekick height.
CAUTION-The rear leveling
wheels and front leveling legs are limited to a
maximmn height a_!iustment of ] ". If tile
installation requires more than 84-1/2" height,
the installer should elew_te the refl'igerator on
a sheet of plywood or Hmners. Cabinetry trim
could also be added across the top of the
opening to shorten the opening. If you
attempt to raise the refrigerator more thm_ 1",
you will damage the front leveling legs m_d
ream leveling wheels.
See the Installation Instructions (Pub. No.
49-60073-3) tot complete directions.
Hex NutAdjusts
RearWheels
LevelingLeg
MISE EN GARDE-
I.es roues de nivellement arri&re et les pattes
de nivellement avant permettent tm r_glage
maximal de 25 mm (1 po). Si l'ouverture pour
le r_fl'ig_rateur a tree hautem" sup_rieure 5
2,15 m (84-1/9 po), l'installateur dolt _lever le
r_fl'ig_ratem" sin" tree teuille de contre-plaqu_
ou des glissi&res. I1 est _galement possible
d'ajouter des baguettes de finition des placards
sin" le haut de l'ouvertm'e afin de la r&luire.
Lever le rOfrigOrateur de plus de 25 mm ( 1 po)
endommage les pattes de ifivellement avm_t et
les roues de ifivellement arri&re.
15

The Problem Solver
I:_¢jri_'erator/Freczcr,.....
Questions ?
Use this
problem
SO[_)e)'. !
PROBLEM POSSIBLE CAUSE
REFRIGERATOR/
FREEZER DOES NOT
OPERATE
* Ma'_ be in defrost Qcle when motor does not operate for about
30 minutes.
* Temperature control in the OFF position.
* If interior light is not on, refrigerator/fi'eezer ma} not be l_lugged,, in
at wall outlet.
* The fuse is blown/circuit breaker is tripped. Replace fuse or reset
the breaker.
MOTOR OPERATES
FOR LONG PERIODS
OR CYCLES ON AND
OFF FREQUENTLY
(Modern refrigerators
and freezers with more
storage space and a
larger freezer require
more operating time,
They start and stop
often to maintain even
temperatures,)
VIBRATION OR
RATTLING
(Slight vibration
is normal.)
OPERATING
SOUNDS
* Normal when reti'igerator/ffeezer is first plugged in. _%dt 24 hours
or the reti'igerator/fi'eezer to completely cool down.
* Often occurs when large amounts of fi_od are placed in reti'igerator/
fi'eezer. This is normal.
* Door left open or package holding door open.
* Hot weather or fl'equent door openings. This is normal,
* Temperatm'e control set at the coldest setting. See Temperature
Control.
* Condenser needs cleaning. See Care and Cleaning.
* See I e'_elino
* The high speed compressor motor required to maintain near zero
temperatures in the large ti eezer may produce higher sound levels
than yore" old refl"igerator/ii'eezer.
* Normal fhn air flow--one tim blows cold air through
refl'igerator/fl'eezer--another fan cools the compressor motor.
* These NORMAL sounds will also be heard ti'om time to time:
* Det/"ost timer switch clicks at defl'ost.
1{5
* Def/"ost water dripping.
* Temperature control clicks ON or OFF.
* Refdgerant boiling or gurgling.
* Cracking or popping of cooling coils caused by expansion and
contraction dm'ing defi'ost and refi'igeration following defi'ost.
* Ice cubes dropping into the bin and water framing in pipes as
icemaker refills.
DOOR NOT CLOSING * Refrigerator/freezer not lexel. See I evelino
PROPERLY
REFRIGERATOR/
FREEZER
TOO WARM
* Temperature control m)t set cold enough. See Temperature
Control.
* \'\Tarm weather or frequent door ol)enings,.
* Door left open for long time.
* Package ma} be holding door open.

Questions ?
Use this
problem
SO[_)eY. !
PROBLEM POSSIBLE CAUSE
FROST OR ICE
CRYSTALS ON
FROZEN FOOD
* Door left open or Ix_ckage, holding door open.
* Too freqtlellt or too lollg door o})ellings, .
(Frost within package
is normal.)
SLOW ICE CUBE
FREEZING
ICE CUBES HAVE
ODOR/TASTE
AUTOMATIC
ICEMAKER
DOES NOT WORK
MOISTURE FORMS
ON OUTSIDE OF
I_]FRIGERATOR/
FREEZER
MOISTUR&]
COLLECTS INSIDE
REFRIGERATOR/
FREEZER
HAS ODOR
* Door may have been left open.
* Turn temperature control to a colder setting.
* Old cubes need to be discarded.
* Ice storage bin needs to be emptied and washed.
,_ lJnsealed packages in freezer may be transmitting odor/taste to
ice cubes.
* Interior of fl'eezer needs cleaning. See Care and Cleaning.
* PooPtasting incoming water. Install a water filter.
* Icemaker power switch is ill tile O (off) position.
* Water supply turned off or not connected.
o Freezer too Will'I/l.
o Piled up cubes in storage bill may cause icemaker to shut off
too soon. Level cubes by hand.
* Not unusual during periods of high humidity. Wipe surihce dry.
* Too fl'equent or too long door openings.
* Ill humid weathe*; air carries moisture into refi'igerator/fi'eezer when
doors are opened.
* Foods with strong odors should be tightly covered.
* Check tbr spoiled tood.
* hlterior needs cleaning. See Care and Cleaning.
* Defl'ost water s,,:stem needs cleaning.
* Keep open box of baldng soda ill refl'igerator/Keezer; replace every
3 months.
INTERIOR LIGHT
DOES NOT WORK
* No power at oudet.
'_ Light bulb needs replacing. See Care and Cleaning.
17

Notes
I:_ejri¢'erator/Freezer,.....
18

Consumer Services
I:_e/ri_'erator/Freczcr,.....
With the purchase of your new Monogram appliance, receive the
assurance that if you ever need information or assistance from GE,
we'll be there. All you have to do is call---toll-free!
GE Answer
Center ®
In the USA:
800.626.2000
In-Home Repair
Service
In the USA:
800.444.1845
In Canada:
888.880.3030
For Customers
With Special
Needs...
In the USA:
800.626.2000
Whatever your questi(m about any Monogram major appliance, GE Answer Centex _)
infln'mation service is available t(> help. Your call--and your question--will be answered
promptly and com'teouslv. And you can call any time. GE Answer Cente?: service is open
24 horn's a day, 7 days a week.
In Canada, call 888.880.3030.
OR
Visit our Website at: ge.com
AGE consumer service protessional will provide expert repair service, scheduled at a time
that's convenient fox" you. Many GE Consmner Service companDoperated locations offer
you se_Mce today or tomorrow, or at yore" convenience (7:00 a.m. to 7:00 pan. weekdays,
9:00 a.m. to 2:00 pan. Saturdays). Our filctorv-trained technicians know your appliance
inside and out--so most repairs can be handled in just one visit.
GE offers Braille controls ior a x;u'ietv of GE appliances, and a
brochure to assist in planning a barrie>fl'ee kitchen fi)r pers(ms
with limited mobility.
()msmners with impaired hearing or speech who have access to a
TDD or a conventional teletypewriter may call 800.TDD.GEAC
(800.833.4322) to request inflwmation or se_Mce.
Service Contrac_ts
In the USA:
800. 626. 2224
In Canada:
888.880.3030
Parts and
Accessories
In the USA:
800.626.2002
In Canada:
888.880.3030
You can have the secure tbeling that GE Consmner Service will still be there after your
warrant> expires. Pro'chase a GE contract while your warranty is still in effect and you'll
receive a substantial discount. With a multiplewear contract, you're assured of future
service at today's prices.
IndividuaJs qualified to service their own appliances can have parts or accessories sent directly
to their home. The GE parts system provides access to over 47,000 parts...and all GE Genuine
Renewal Parts are fully warranted. VISA, MasterCard and Discover cards are accepted.
User maintenance instructions contained in this manual cover procedures intended to be
performed by amy user. Other servicing generally should be referred to qualified service
personnel. Caution must be exercised, since improper servicing may cause unsafe operation.
19

Warranty
I:b'j rifferator/Freezer,.....
YOUR MONOGRAM REFRIGERATOR WARRANTY
Staple sales slip or cancelled check here. Proof of original purchase
date is needed to obtain service under warranty.
WHATIS
C 0 VERED
Firm the Date
of the Original
Puwhase
LIMITED TWO-YEAR WARRANTY
For t_o _(. _rs t_'om date of"original pmx:hase, w( will pro;ide, t]_e( ot charge, parts aml servic( labor in your
horn( to r(pair or rel)la(( ar0 part qjthe _/fi_k_ralarthin fi_ils be(ause ot a manuti'_( t uring defe(1.
LIMITED FIV_5-YEAR WARRANTY
For fi'_e years, trom dale of origimd i)m'chase, w_ will pro'dde, t_ee of charge, paris amI service labor
in Your, bOlll( to rel)i'dr or repl_'_( e a_t)_ [)(11"[ 0.//]H _e(ll_(_ )y,:_,JJ_'(_?(l[ll_',_3. _[(,1!1 (ill(' colu] )ressor,, ( Olldeus( r,
exal)oralor aml all (om_(cfing robing) llwu fifils be( ause of a mam_thclm'ing d(lbcu
LIMITED ADDITIONAL SEVEN-YEAR WARRANTY ON THE SEALED SYSTEM
For the sixth d_rough twelfth vear, fi:om the date of the origiiml l)urchase, w( will provide, fi:e( of charge,
l?el)la( enle]l| t)_'tl't s t()l? (l?ly [)(ll[ o/lhe _eal_d w_,_l_'pl(l[_?l_',_]_[(_l!l (tlle ( oIIll)r( ssor , ( olldei/s( r, e_ apol?a|oF all(] all
c(mne(ting tubing) that l_dls be(aus( ofa mamdh(turing de/_ ct. '_i)u pal. lot tile service tri l) to your home
and Ior service labor charges.
LIMITED THIRTY-DAY WARRANTY ON WATER FILTER CARTRIDGE (Water filter, if included)
From lhe (late of the original pro:chase we _ill lU:o;ide, ti'ee of (barge, rel)lacement l)arls for ar0 parl q/'the
wahr.filter cartridg'(, lha! t_fils because ot a maiming(tin'lug (l(Ii:( t. I)uring Ibis limiled lhirl?-da? warrant}, w(
will also l)ro;id(, fi:ee of charge, a replaceuleni _ater filter caru'idg(.
This warfare\ is exiemled _o th( original purchaser and mL_ su((eeding owmr for t)ro(huls l)mX based tot
ordim'_r_, home use in lhe 48 mainland sta_es, 1[awaii Washingion I).C. or Camula. Itflm producl is lo(aied
in an ar(a winwe ser'_ice I),. a (;E Aulhofized Ser'qcer is not a',ail;d)le, you ma} I)e resl)onsibh_ ti)r a til I)
charge or ?ou ilia? be r(quired lo bring lhe l)rodu(t to an \mhorized (;E Servi(e lo( ation tbr s(rvi( e. In
,klaska the _r Ill } is the saille excel)t that it is [ AMFI'EI) because }ou mus_ l)a} lo ship ll_e l)rodu(1 _o file
service sho 1) or ti)r |lie sel'vice |eClllli(iall'S |l?a_(1 (os|s io yo/w llol/le.
All warranl} service will I:)el)ro'_ided I)} ore" Faclor} Se_aice Ceulers or l)). our autll()lJz(d (;/_st,:)mer Care °`
ser_i(ers (hiring llOl?n/al worldug b()urs.
ShouM }ore: appliance need servi(e, din:lug wan'am} 1)( riod or be? oral, in tl_e L S,\ ( all 300.444.184:). In
Cam'_da: 888.880..)0.)0. I lease ha;e V)ur serial mm_l)er amt model nmnb(r a;ailable when calling for ser'_@e.
>)) )) _ _ ) , ,
, ) , • , , ,
] • , ) , , , ),_,
WHAT IS NOT
COVERED
162D9646PO04
49-60421
11-05 JR
Printed in the United States
* Service trips to your home to teach you how
to use the product.
* Replacement of house fuses or resetting of circuit
breakers.
* Damage to the product caused by accident, fire,
floods or acts of God.
* Failure of the product if it is used for other thm_
its intended purpose or used commercially.
* Damage caused after delivery.
* Improper installation, delivery or maintenm_ce.
If you have an installation problem, contact your
dealer or installer. Yuu are responsible for
providing adequate electrical, plumbing mid
other connecting facilities.
EXCLUSION OF IMPldED WARRANTIES Ibm" sole and exclusive remedy is p_vduct repair as provided in I
this Limited Wm_'anty. Any implied wm_*anties, im'luding the implied wm_*anties of me_chantabili{y or fitness for
a particular purpose, are limited to one year or the shortest period allowed by law.
Some states!l)rovinces do not allow the exclusion or limitation of incidental or consequential damages,
so tb( abo_e limitation or exclusion may not apply to you. This warfare? gives you sl)ecilic legal fights, and
you mm' also have other fights which _ar\. ti'om state to state!pro_inc( to proxince. 'Ib km)w what yore: legal
rights are in your state!ln'o_dnce, consult your local or star( !l)rovincial consumer allhirs ottice or your state's
Attorney G( neral.
Warrantor in USA: General Electric Company, _ 6E Consumer & Industriol
Warrantor in Cm_ada: Camco Inc. Louisville, K'f 40225
Louisville, KY 40225 _ Appliances
* Replacement of the light bulbs, if included, or
water filter cartridge, if included, other than as
noted above.
* Replacement of the water filter cartridge, if
included, due to water pressure that is ontside the
specified operating rm_ge or due to excessive
sediment in the water supply.
* Loss of food due to spoilage (in the USA only).
* Incidental or consequential damage caused by
possible defects with this applim_ce.
* Product not accessible to provide required service.
General Electric Company
ge.com
I
I
 Loading...