


GE ZEK957WD1WW, ZEK957SD1SS, ZEK957BD1BB Owner’s Manual
GE Mono_am ®
Owner's Manual
72)72)72). ))ZO'l? O_r;'(l ))Z. (0 Ill
57" Convection
Wall Oven
(;onstlmer ] ntbnnation
Wall Ovet_
Introduction
Contents
Yore" new Monogram wall o\ en makes all eloquent statement of st)le, convenience and kitchen
plamfing flexibility. Whether you chose it ti)r its pm'itv of design, assiduous attention to detail--
or flw both of these reasons--you'll find that yore" Monogram wall oven's superior blend of fbrm
and function will delight you for years to come.
Your Monogram wall oven was designed to provide the flexibility to blend in with your kitchen
cabinetr_: Its sleek design can be beautihdly integrated into the kitchen.
The infl)rmation on the fl)llowing pages will help you operate and maintain your wall oven
properly.
Care and ClemMng
Broiler Pan and Grid .................... 37
I,ifl-Ofl Oven Door . .................. 35, 36
I,ight Bulb ............................ 38
Probe ................................. 38
Selt:Cleaning Oven ................... 33, 34
Shelves ............................... 36
Stainless Steel and Metal Pints ............. 36
Consumer Services
Beflwe You Call For Service ............ 39-40
Important Phone Numbel_ .............. 43
Model and Serial Numbers ................ 3
Product Registration ................ 3, 41-42
Safbty Instructions ..................... 4, 5
_'\.uTanty .............................. 44
Oven
Ac!iust the Oven Thermostat .............. 32
Aluminum Foil .................... 4, 17, 33
Baking or Roasting ................... 16, 17
Broiling/B, oiling Guide .............. 18, 19
Control, Clock and Timer . ............. 7-12
Convection Oven .................... 25-30
Features ............................... 6
Probe .............................. 22-24
Proofing .............................. 31
Sabbath Feature ...................... 13-15
SelgCleaning Oven ................... 33, 34
Timed Baldng ....................... 20, 21
_glT_tOT?e
pachaging
t@e
To assure no damage is done to tlle finish of
tile product, the saiest way to remove adhesive
leit fl'om packaging tape on new appliances
is an application of a household liquid
dishwashing detergent, mineral oil or cooking
oil. Apply with a soft cloth and allow to soak.
Wipe dry and then apply an appliance polish
to thoroughly clean and protect the surthce.
NOTE: The plastff tape must be r_moved /mm the
_hrome trim on the ove_z parts. It _annot be r_moved
!/it is baked on.
Be[bre
using your
wall oveTt
Read this manual carefully. It is intended to
help yon operate and maintain your new wall
oven properly.
Keep it handy fi/r answel_ to your questions.
If you don't understand something or need
more help, there is a list of toll-fl'ee consmner
service numbers included in tile back section
of this manual.
OR
Visit our Website at: www.monogrmm.com
Write
down the
model &
serial
n u Tytbers
[./you
received a
damaged
wall oveTt
Save time
& money
You'll find them on a label on the fl'ont of
the oven behind the oven door (on single
oven models) or on tile fi'ont of the lower
oven behind the oven door (on double oven
m odels).
Fill out and return the Consmner Product
Registration Card that is packed with this
pioduct. If you cannot find it, please send
in the duplicate card printed in the back of
this manual.
Immediately contact the dealer (or builder)
that sold you the wall oven.
Befi/re you request service, check the Problem
Solver in tile back of this manual.
Before sending in this card, please write these
nmbers here:
Model Number
Serial Number
Use these Ii(llllbers ill all)' correspondence or
service calls concerning your wall oven.
It lists causes of minor operating problems that
you call correct yourself.
[.[you
need
service
To obtain service, see tile Consumer Services
page in the back of this manual.
We're proud of our service and want you to be
pleased. If fl/r some reason you are not happy
with tile setMce you receive, here are tile steps
to tilllow tm further help.
FIRST, contact tile people who serviced vom"
appliance. Explain wily you are not pleased.
In most cases, this will solve the problem.
NEXT, if you are still not pleased, write all tile
details--including your phone numbe_to:
Managec Customer Relations
GE Appliances
Appliance Park
Louisville, KY 40225
IMPORTANT SAFETY INSTRUCTIONS
WARNING!
For xour satetv tile infornmtion in this manual must be followed to minimize tile risk of fire or
explosion, electric shock, or to prexent property damage, personal ii_jtu'), or hiss of life.
IMPORTANT SAFF, TY NOTICE
" The California Safe Drinking Water and
Toxic Enforcement Act requires tile Governor
of Cali_brnia to publish a list of substances
known to the state to cause cancel birth
defects 05" other reproductive harm, and
requires bt(sinesses to waYn ctlstoulers of
potential exposure to such substances.
SAFETY PP&2CAUTIONS
When using your appliance, follow basic safety
precautions, including the following:
, Use this appliance only for its intended use
as described in this manual.
" Be sure your appliance is properly installed
and grounded b) a qualified technician in
accordance _dth tile provided installation
instructions.
, Be sure the oven is securely installed in a
cabinet that is firmly attached to the house
structure, Never allow anwme to climb, sit,
stand 05" hang on tile oven door.
" Have the installer show you the location of
the circuit breaker or fuse. Mark it for eas}
5"efes"ellce.
* Do not attempt to repair or replace amy part
of your wall oven unless it is specifically
recommended in this manual. All other
sesMcing should be re_brred to a qualified
technician.
, Teach children not to play with the controls
or any other I)iU't o_ tile ovell.
"Never leave the oven door open when you
are not watching the oven.
, Always keep dish towels, dish cloths, pot
holders and other linens a safe distance from
your oven.
" For your safety, never use your appliance for
warming or heating the room.
, Always keep wooden and plastic utensils
and canned food a safe distance away from
yOLW oven.
" The fiberglass insulation in self-cleaning ovens
gives off a very small amount of caMmn
monoxide during the cleaning cycle, Exposure
call be minimized by venting with all open
window or using a ventilation thn 05"hood.
.IMPORTANT: Thehe:,lth
some birds is extremely sensitive to the hmles
given oH during tile sell=cleaning cycle of any
oven. Move birds to another well-ventilated
room.
" Keep the oven free from grease buildup.
, Always keep combustible wall coverings, curtains
or drapes a safe distance from your oven.
, DO NOT STORE OR USE COMBUSTIBLE
MATERIALS, GASOLINE OR OTHER
FLAMMABLE VAPORS AND LIQUIDS IN
THE VICINITY OF THIS OR ANY OTHER
APPLIANCE.
" Do not let cooking grease or other flmnmable
materials accumulate in or near the wall oven.
* Do not use water on grease fires. Smother fire
or flame or use a muhi-l)urpose dr} chemical
or foam-type fire extinguisher.
Flame in tile oven can be smothered
completely by closing tile oven door and
turning tile oven off or by using a multi-
puq)ose dry chemical 05"tilam-type fire
extinguisher.
, Do not use aluminum foil to line oven
bottoms, except as suggested in this manual.
hnproper installation of ahllllilltlul foil ma}
result ill a risk of electric shock or fire,
" Cook meat and poultry thoroughly--meat to
at least an INTERNAL temperature of 160°E
and poultry to at least an INTERNAL
temperature of 180°E Cooking to these
temperatures usually protects against
ti/odborne illness,
"Before performing any service, DISCONNECT
THE OVEN POWER SUPPLY AT THE
HOUSEHOLD DISTRIBUTION PANEL BY
REMOVING THE FUSE OR SWITCHING
OFF THE CIR(R)IT BREAKER.
* Do not store flammable materials in the oven.
SA 2TY PP&2CAU770NS
" Do not leave children alone--children should
not be lett alone or unattended in all area
where an appliance is ill use. They should
never be allowed to sit or stand on any part
of tile appliance.
, Do not touch the heating elements or the
interior surface of the oven. These sm'times
may be hot enough to btu'n even though they
are dark in color. Dm'ing and alter use, do not
touch, or let clothing or other flammable
materials contact, any interior area of tile
oven; allow sufficient time fl)r cooling first.
Potentially hot surfimes include tile oven vent
openings and surthces near the openings,
crevices around tile oven doo_; tile edges of
the door window and metal trim parts above
the door.
Remember: The inside surfisce of tile oven
may be hot when the door is opened.
. CAUTION: ITEMSOVINTEr:ST
TO CHILDREN SHOULD NOT BE STORED
IN CABINETS ABOVE A WALL OVEN--
CHILDREN CLIMBING ON THE OVEN
TO REACH ITEMS COULD BE SERIOUSLY
INURED.
" Never wear loose-fitting or hanging garments
while using the appliance. Be careful when
reaching fi)r items stored over tile (wen.
Flammable material could be ignited if
brought ill contact with oven heating
elements and may cause severe bm'ns.
" Do not heat unopened food containers.
Pressure could build up and tile container
coMd bm_t, causing an is_jurv.
* Keep the oven vent unobstructed.
" Place the oven shelf in the desired position
w_e the oven is cool. If shelves must be
handled when hot, do slot let pot holder
contact tile heating elements.
"Never leave jaxs or cans of fat drippings in
or near your oven.
, Pulling out the shelf to the shelf stop is a
convenience in tiffing heavy foods. It is also
a precaution against burns fl'om touching
hot sm_fhces of tile door or oven walls.
, When using cooldng or roasting bags in the
oven, lbllow tile manufimmrer's directions.
" Do not use your oven to dry newspapers.
If o\ erheated, they call catch on fire.
" Do not use oven for a storage area. Items stored
in an oven can ignite.
, Do not leave paper products, cooking utensils
or food in the oven when not in use.
, Do not allow anyone to climb, stand or hang
on the door. They could damage tile oven or
cause severe pers(mal il_jury.
" Use only dry pot holders--moist or damp pot
holders on hot sm'thces ma\ Iesult in burns
fl'om steam. Do not let pot holders touch oven
heating elements. Do not use a towel
or other bulky cloth.
, After broiling, always take the broiler pan out
of the oven and dean it. Lettover grease in tile
broiler pan call catch fire tile next time you use
tile pan.
, Stand away from the oven when opening the
oven door. Hot air or steam which escapes can
cause bm'ns to hands, fi_ce and/or eves.
, Large scratches or impacts to glass doors can
lead to broken or shattered glass.
SEI_ r -CLEANING OVEN
" Do not clean the door gasket. Tile door gasket
is essential fi)r a good seal. Care should be
taken not to rub, damage or move tile gasket.
" Do not use oven deaaaers. No comm ercial
oven cleaner or oven liner protective coating
of any kind should be Hsed ill or aroHlld any
pail of tile oven. P.esidue fl'om ovell cleanel_
will damage tile inside of tile o\en when tile
serf-clean cycle is used.
SAVE THESE INSTRUCTIONS
" CleaJa only parts listed in this Owner's Manual.
, Before self-clem_ing the oven, rein ove the
broiler pan, grid and ()tiles" cookware.
" Be sure to wipe up excess spillage before
staxting the self-deaning operation.
" If the self-clemning mode maJfunctions, turn
the oven off and disconnect the power supply.
Have it sesMced by a qualified technician.
Features of Your Wall Oven
I.l_lll Ove*_
Design
inJbrmation
(NO1 all fbal*_r_<s
are o_ all models.
4ppeara_ce may vao,.)
®
.....7................... 5
®
@ IIII
® IIIIIIW
®
®
@
®
®
@
®
@
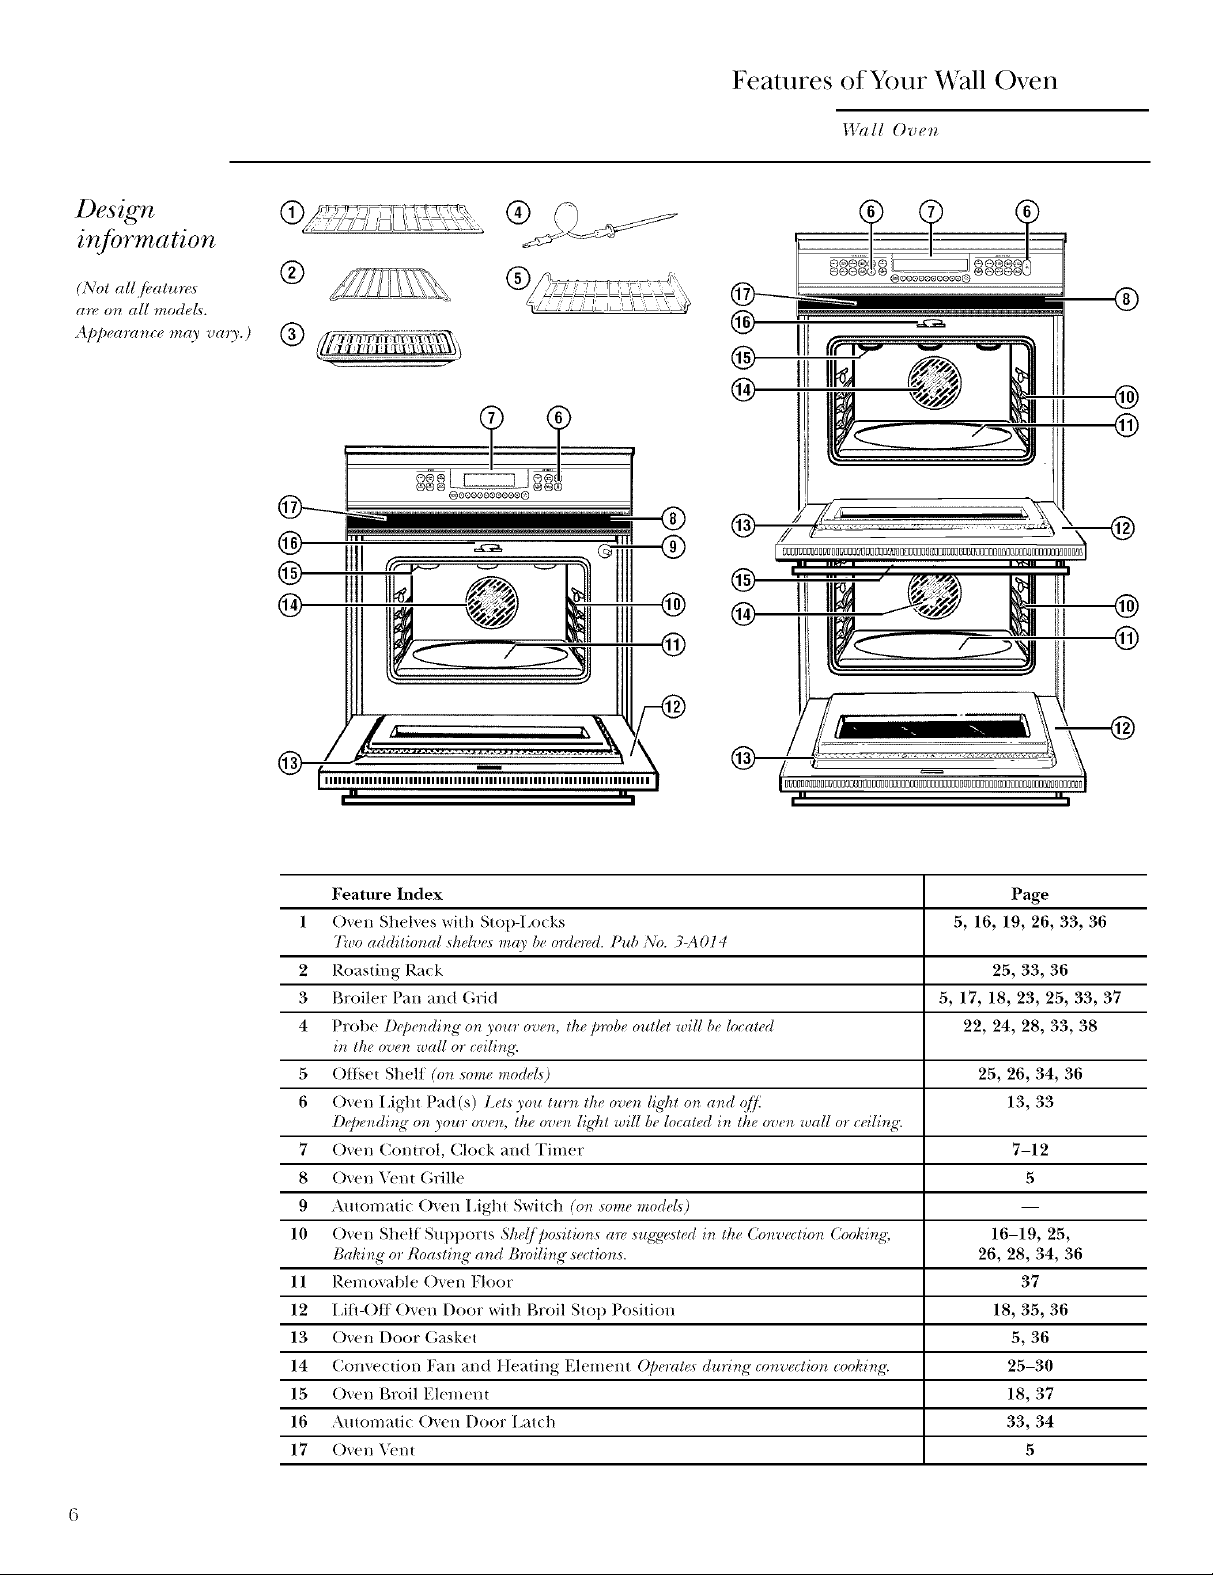
Feature Index Page
1 Oven Shelves with Stop-Locks 5, 16, 19, 26, 33, 36
Two additio_tal shdve* may b_ orde_vd. Pub No. 3-A014
2 Roasting Rack 25, 33, 36
3 Broiler Pan and (;rid 5, 17, 18, 23, 25, 33, 37
4 Probe D@e_tdi_tg on your ove_4 the probe outld will be located 22, 24, 28, 33, 38
i_t the oven wall or ceili_tg:
5 ()tli4et Shelf (on some mode£) 25, 26, 34, 36
6 Oven Light Pad (s) Lel,_ you rural the ove_t ligt_t on a_d q[]_ 13, 33
D_'pe_di_g" on your ove_4 the ove_ [ig'ht will be located i_ the oven wall or ceili_g'.
7 Oven Corer®l, Clock and Timer 7-12
8 Oven _'m Grille 5
9 Amomatic Oven 15ght Switch (on some models)
10 Oven Shelf Supports Sh_(/ po,_itions a_, sug;,_>_ted in the Cowvection Cooki)_g; 16-19, 25,
Bahing or Roasti) N"a)_d Broili)_g section,s. 26, 28, 34, 36
11 Removable ()_en Floor 37
12 15/1-()ff ()_en Door wilh Broil Stop Position 18, 35, 36
13 Oven Door Gasket 5, 36
14 Convection Fan and Ileating Element @erat(_ during co_rvectio_ cooking: 25-30
15 Oven Broil Elemeni 18, 37
16 Automatic ()_en Door I,atch 33, 34
17 Oven _'m 5
BAKI
Oven Control, Clock & Timer
14%II Oven
?
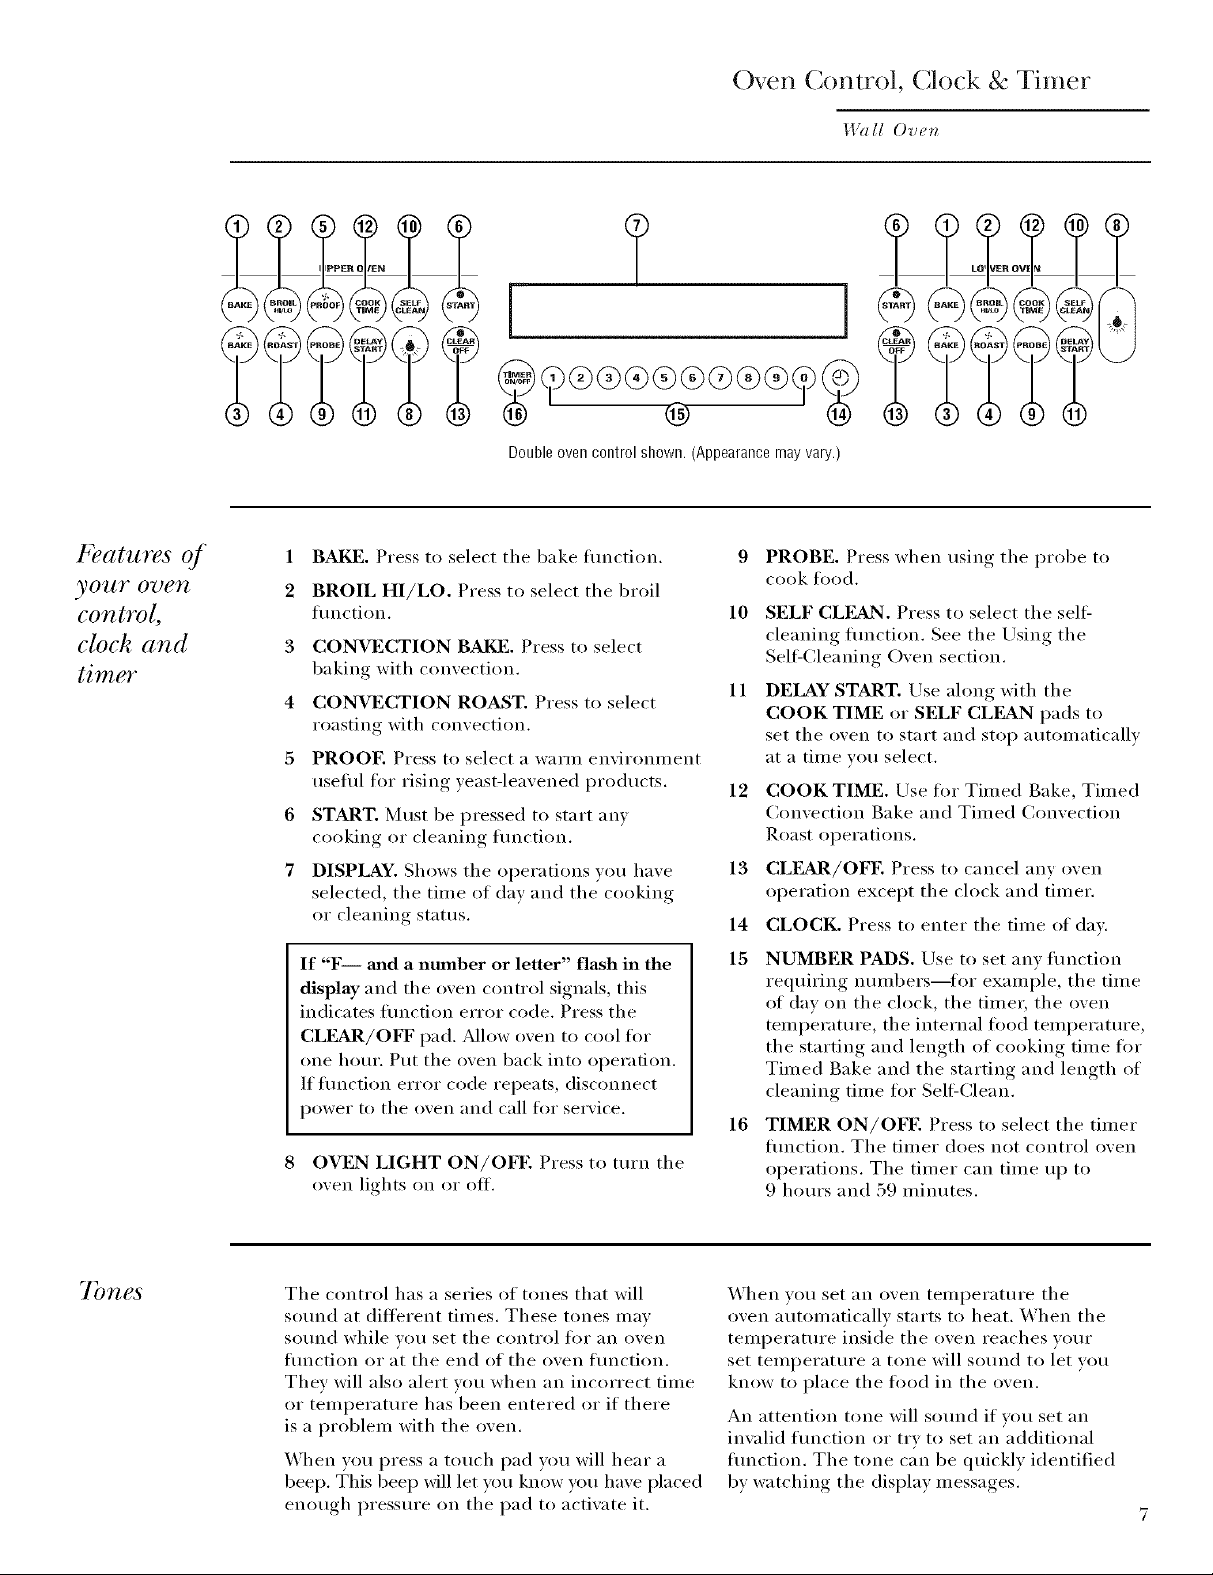
Doubleovencontrolshown.(Appearancemayvary.)
l' atures of
yO_Llr O_CTI
control,
clock and
timo
1 BAI_]. Press to select the bake flmction. 9
2 BROIL HI/LO. Press to select the broil
fimction. 10
3 CONVECTION BAKE. Press to select
baking with convection.
4 CONVECTION ROAST. Press to select
roasting with convection.
5 PROOE Press to select a warm environment
useflfl for rising )east-leaxened products. 12
6 START. Must be pressed to start anv
cooking or cleaning flmction.
7 DISPLAY. Shows the operations you have
selected, the time of day and the cooking
or cleaning status.
If "F mad a number or letter" flash in the
display and the oven control signals, this
indicates fimction error code. Press the
CLFAR/OFF pad. Mh)w ()veil to cool for
one hour. Put the oven back into operation.
If flmction error code repeats, disconnect
power to the oven and call for service.
8 OVEN LIGHT ON/OFE Press to turn the
oven lights on or off.
PROBE. Press when using the probe to
cook fl)od.
SELF CLF._q. Press to select the self
cleaning fimction. See the Using the
SeltLCleaning Oven section.
11
DELAY START. Use ahmg with the
COOK TIME or SELF CLFAN pads to
set the oven to start and stop automatically
at a time you select.
COOK TIME. Use tot Timed Bake, Timed
Convection Bake and Timed Convection
Roast operations.
13
CLF, a,R/OFE Press to cancel any ()veil
operation ex(ept the clock and timer.
CLOCK. Press to enter the time of day.
14
15
NUMBER PADS. Use to set anv flmction
requiring numbers--for example, the time
of day on the clock, the timer, the oven
temperature, the internal fi)od teml)erature,
the starting and length of cooking time for
Timed Bake and the starting and length of
cleaning time for Sell=Clean.
16
TIMER ON/OFF. Press to select the timer
flmction. The timer does not control oven
operations. The timer can time up to
9 hours and 5(.) minutes.
7bnes The control has a series of tones that will
sound at different times. These tones may
st)lind while vou set the control for an oven
flmction or at the end of the oven function.
They will also alert vou when an incorrect time
or temperature has been entered or if there
is a problem with the oven.
When vou press a touch pad you will hear a
beep. This beep will let you know you have placed
enough pressure on the pad to activate it.
When vou set an oven temperature the
oven automatically starts to heat, When the
temperature inside the oven reaches vour,
set temperature a tone will sound to let you
know to place the tood in the oven.
An attention tone will sound if vou set an
invalid flmction or try to set an additional
flmction. The tone can be quickly identified
by watching the display messages.
Oven Control, (;lock & Timer
H% II Ove_
Clock
7b set
the cloch
The c[od_ must be svt /br the atttomatic oven liming"
,/Um:tio,s to work p_vperly.
The time of day clock cmmot be changed
during Delay Start. (It can be changed during
a regular bake or broil operation.)
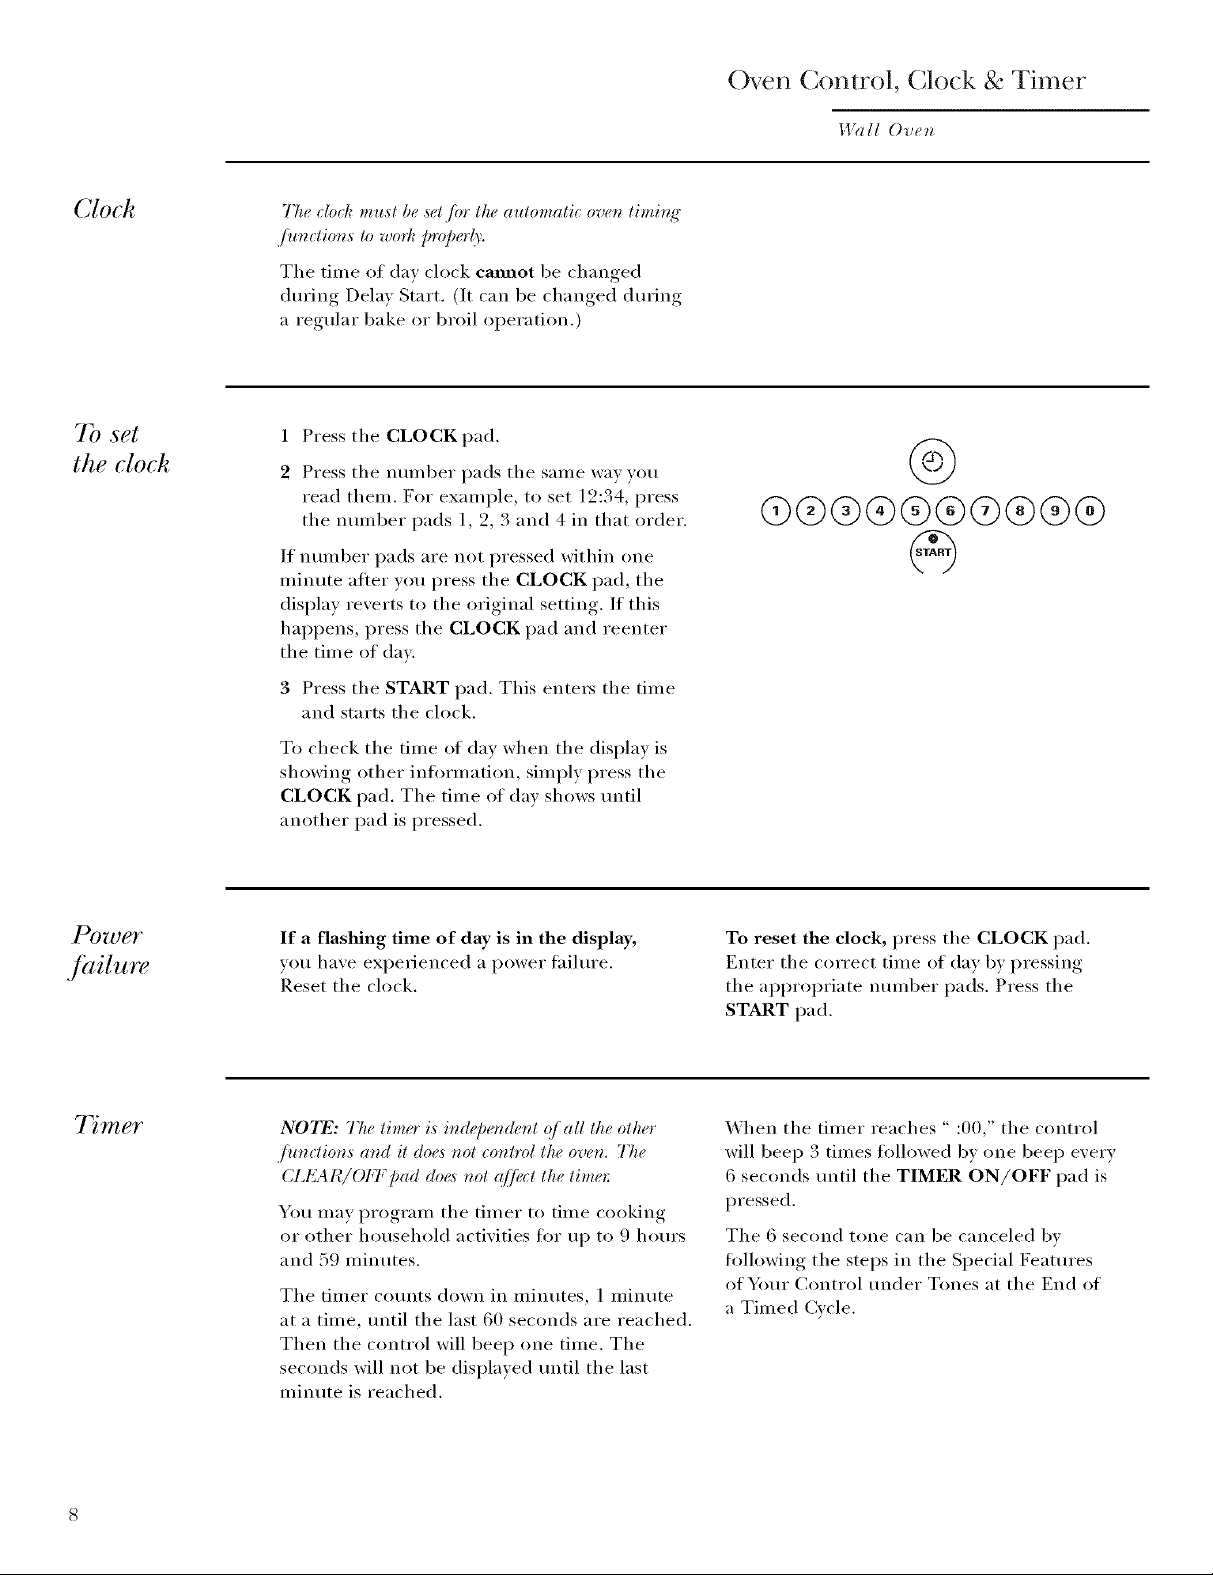
1 Press the CLOCK pad.
2 Press tile nulnber pads tile sanle way you
read them. For example, to set 12:34, press
the number pads 1, 2, 3 and 4 in that order.
If nunlber pads are not pressed within (me
minute atier you press tile CLOCK pad, tile
display reverts t() the ()riginal setting. If this
hal)pens, press the CLOCK pad and reenter
the time of day.
3 Press tile START pad. This ente_ tile time
and starts tile clock.
To check tile time of day when tile display is
showing other infl)rmation, simply press tile
CLOCK pad. Tile time of day shows tmtil
another pad is pressed.
4)
q9®®®®®@®®®
7 mer
If a flashing time of day is in the display,
you have experienced a power tailm'e.
Reset the clock.
NO_I_: The timer is in@e,&nt q]all the other
./ioz_tions and it doe,_ not _onl*_>lthe oven. The
CId_L41¢/OFF Dad doe,_ not q]fiu:t the time*'.
You may program the timer to time cooking
or other household activities fl)r up to 9 horn's
and 59 minutes.
Tile timer co/mts down in minutes, 1 minute
at a time, tmtil the last 60 seconds are reached.
Then the control will beep one time. The
seconds will not be displayed tmtil tile last
minute is reached.
To reset the clock, press tile CLOCK pad.
Enter tile correct time of day by pressing
the ai)i)ropriate nmnber pads. Press tile
START pad.
When tile timer reaches " :00," tile control
will beep 3 times fl)llowed by one beep every
6 seconds tmtil tile TIMER ON/OFF pad is
pressed.
The 6 second tone can be canceled bv
tollowing tile steps in tile Spedal Features
of Your Control under Tones at tile End of
a Timed Cycle.
Oven Control, Clock & Tinier
I,DIll Ove_
Using
the timer
Special
./eatures 4
yOUY O7)eTt
control
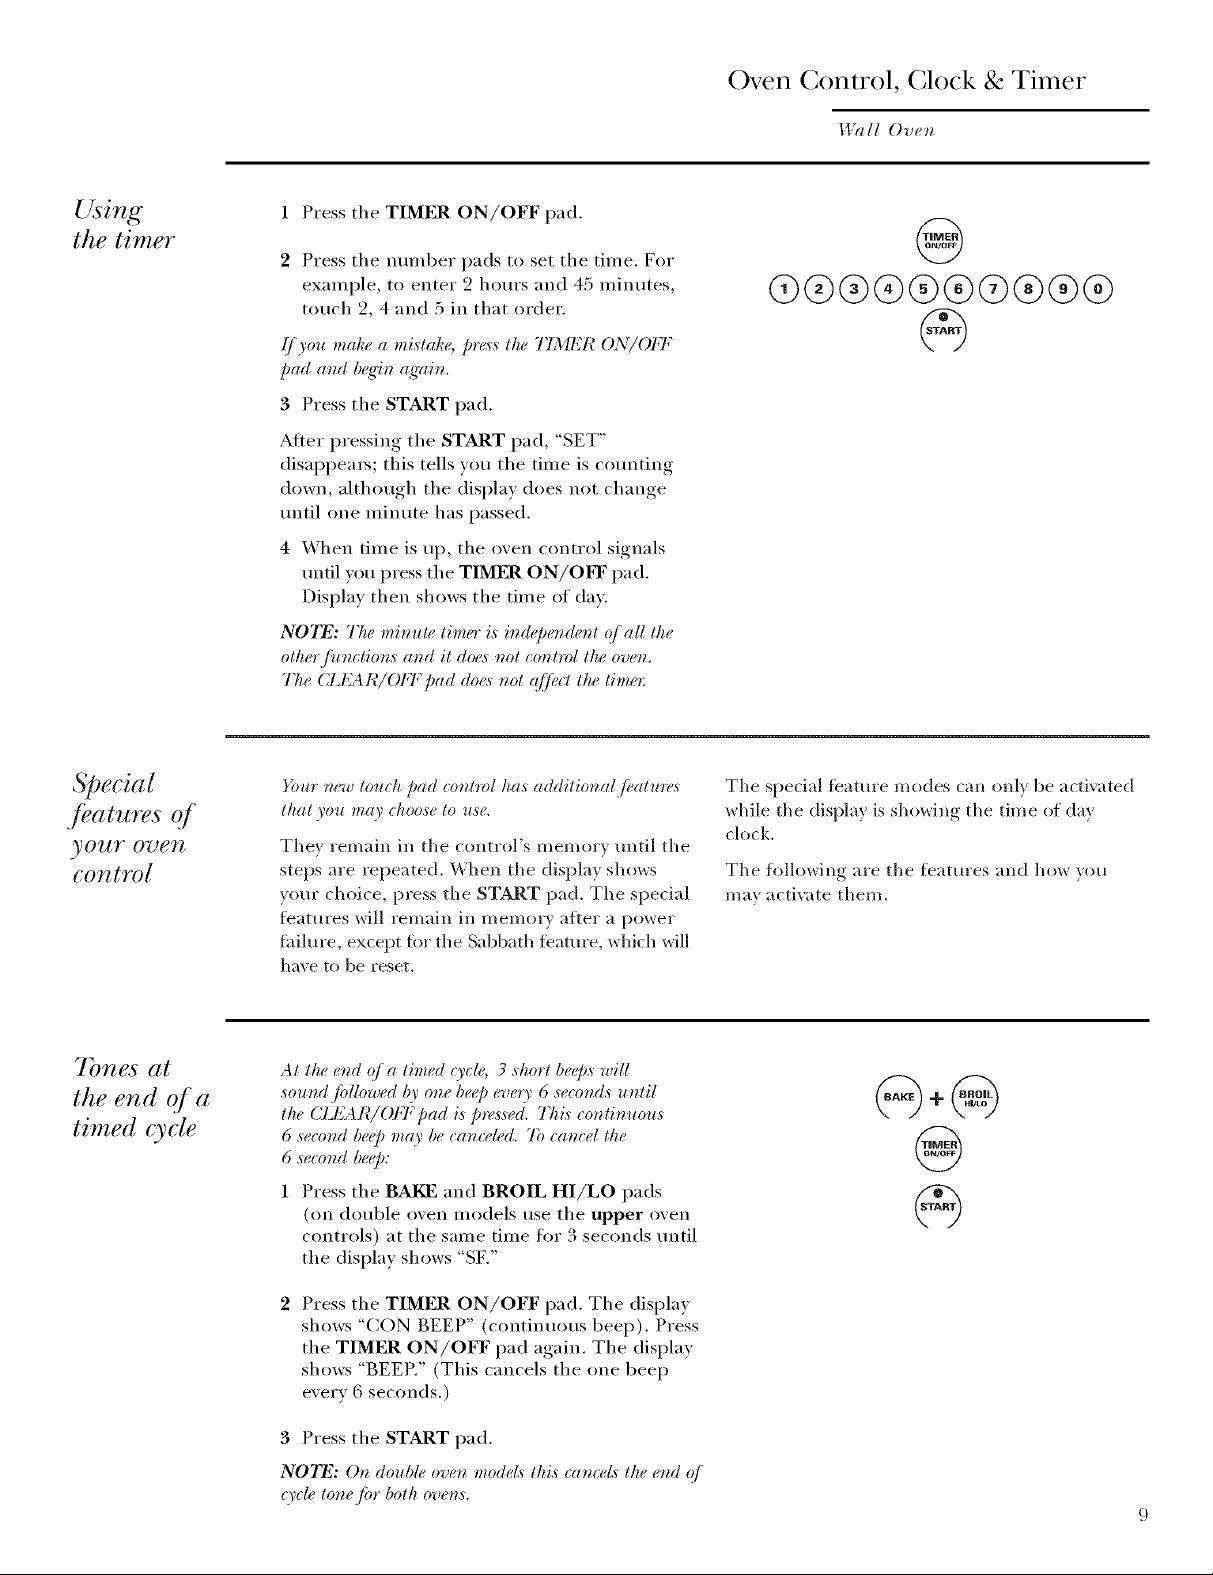
1 Press the TIMER ON/OFF pad.
2 Press the nmnber pads to set the time, For
example, to enter 2 hours and 45 minutes,
touch 2, 4 and 5 in that order.
ff you make a mistake, p_v,_sthe TIMER ON/OI:F
Dad aud b_q4u ag'ain.
3 Press the START pad.
After pressing the START pad, "SET"
disappears; this tells you the time is cotmting
down, although the display does not change
tmtil one minute has passed.
4 When time is up, the oven control signals
until you press the TIMER ON/OFF pad.
Display then shows the time of day.
N07_: The miracle timer is iu@er_(leut q/ all the
other /ituctior_,s aud it doe,_ uot cout_ol the oveu.
75e (ZI{A I¢/OFF Dad do+,,_not <(]fi+ctthe tim+,_:
_bur new touch Dad control has additional fi_atlm, s
that you may _hoose to use.
They remain in the control's memory m_til the
steps are repeated. When the display shows
your choice, press the START pad. The special
fl_atures will remain in memory aiter a power
fhilure, except fi)_ the Sabbath ieature, which will
have to be reset.
@
O)®®®®®Q®®®
The special feature modes can onl_ be activated
_hile the displa? is sho_ing the time of da?
clock.
The following are the features and how you
ma? activate them.
7bnes at
the end of a
timed cycle
At the e_zd q/ a timed O'cle, 3 shorl be@s will
sound fidlowed by one be@ every 6 seconds uutil
the CIJ_AI¢/OFF pad is pres_sed. Thi,s _ontinuous
6 second beep may be _ance#d. 7b camel the
6 seco_zd beep:
Press the BAKE and BROIL HI/LO pads
(on double oven models use the upper oven
controls) at the same time fiw 3 seconds tmtil
the display shows "SF,"
Press the TIMER ON/OFF pad. The display
shows "CON BEEP" (continuous beep). Press
the TIMER ON/OFF pad again. The display
shows "BEER" (This cancels the one beep
every 6 seconds.)
3 Press the START pad.
NOTE: Or_ double ove_ models lhis cam:el,_ lhe e,d o/
qycle lor_e fia" bolh ove_,s.
@

Oven Control, Clock & Timer
Wall Ove_
12 hour
shut off
Cook &
hold
With this fi_ature, shouhl you fi.]q_4 and leave the
oven oz_, the _ontrol will automati_ al(_' turn q[] the
oven qfler 12 hours duvir_g" bakiz_g'Junctioz_,s or ((]h,"
3 hour,s durir_g" a broil Junction. ([you wish to turz_
off this .ficature, .fidlow the steps below.
1 Press the BAKE and BROIL HI/LO pads
(on double oven inodels use the upper oven
controls) at the same time for 3 seconds tmtil
the display shows "SK"
2 Press the DELAY START pad tmtil "no shdn"
(no shut-oil) appears in the display.
3 Press the START pad to activate the no
shut-off and leave the control set in this
special featm'es mode.
NOTE: On double oven moch,L_thi,_ a_livale,s lhi,s
@ecial fi,ature ir_ both ove,,_.
}_ltr new control ha,s a cook and hoh/ fi_ature that
keeps coohed fi_o& warmJbr up to 3 hours qfler the
co&i_N'Jit,ction is fini,_hed. 7_ activate thi,Lfi_atlm,,
.iblh_w the ste/),_ bdow.
On double oven models, both ovens tollow the
same step 1. Then proceed with steps 2 through
3, using the pads tot the upper or lower oven.
@
1 Press the BAKE and BROIL HI/LO pads
(on double oven models use the upper oven
controls) at the same time fl)r 3 seconds tmtil
the display shows "SF,"
2 Press the COOK TIME pad. The display will
show "Hld OFI_2''
Press the COOK TIME pad again to activate
the ligature. The display will show "Hld ON."
Press the START pad to activate the cook
and hold feature and leave the control set in
this special features mode.
10

Oven Control, Clock & Tinier
I_1ll Ove_
12 hour;
24 hour
or clock
black-out
}}mr control is set to use a 12 hour clock. (]you
would p_,Ji_r to have a 24 hour military time dock or
black-out the dock di,s])lay, ./bl/ow lhe slep,s below.
1 Press the BAKF and BROIL HI/LO pads
(on double oven models use the upper oven
controls) at the same time fi)r 3 seconds tmtil
the display shows "SK"
2 Press the CLOCK pad once. The display will
show "12 hr." If this is the choice you want,
press the START pad.
Press the CLOCK pad again to change to the
24 hour military time clock. The display will
show "24 hr." If this is the choice wm want,
press the START pad.
Press the CLOCK pad again to black-out
the clock display. The display will show
"OFF." If this is the choice you want,
press the START pad.
NOTE: I]llu" _lod_ is in th(, blaJ¢-oltl _llo(le)'ou trill
nol be ab# to u,s_:lhe Del(O' Start[Unction.
Control
lockout
}_mr control will allow you lo lod¢ down the touch
pads so th_9' _annot be a_tivated when pre,s_sed.
1 Press the BAKE and BROIL HI/LO pads
(on double oven models use the upper oven
controls) at the same time tot 3 seconds tmtil
the display shows "SK"
2 Press the SELF CLEAN pad. The display will
show "I,OC OFE"
Press the SELF CLEAN pad again. The
display will show "I,O(Z"
3 Press the START pad to actiw_te the control
lockout feattu'e and leave the control set in
this special featm'es mode.
To tmlock the control, repeat steps 1 and 2.
Press the START pad when the display shows
"I,OC OFE"
_hen this feature is on and the touch pads are
pressed, the control will beep and the displa)
will show "I,OC."
N07_:
• Or_ double ove_ model,_ lhis aclivales lhis Special
,/i,ature /br both ove_s.
• 77ze cor_lml lockoul mode will r_ol @el lhe
(J_OCK, TIMER ON/OI+7; a_d OIT_N LIGHT
ON/OFF tol_ct_ pads. 11
Oven Control, Clock & Timer
_,lOlll Oven
f_threnheit
or Celsius
temperature
sdection
Using
convection
conversion
Your oven eonlrol i,s sel lo use lhe Fah_wdwil
lemperalure selections, but you may (hange lifts
lo u,se lhe ( eLsiu,s seleHion,s.
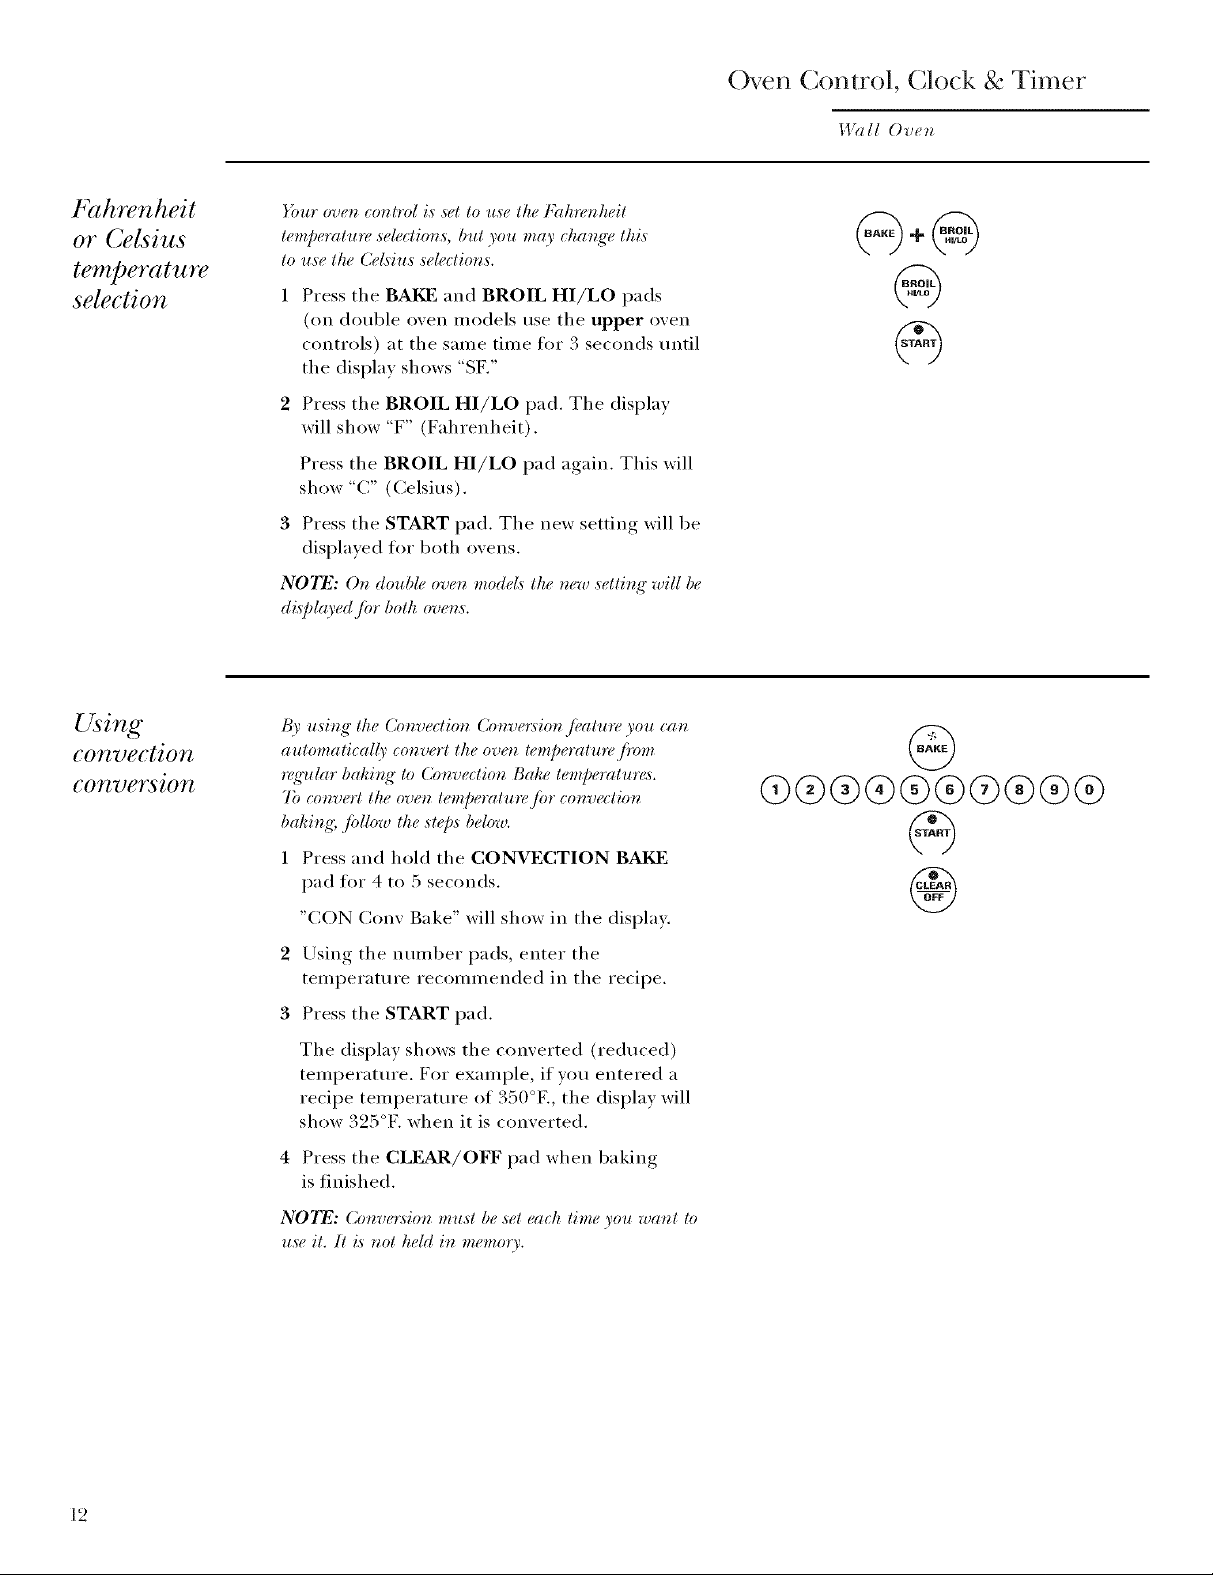
1 Press the BAKF and BROIL HI/LO pads
(on double oven models use the upper oven
controls) at the same time fi)r 3 seconds tmtil
the display shows "SF,"
2 Press the BROIL HI/LO pad. The display
will show "F" (Fahrenheit),
Press the BROIL HI/LO I)ad a_,ain This will
show "C" (Celsius),
3 Press the START pad. The new setting will be
displayed fi)r both ovens.
NOTE: O, double oven models the ,ew setting" will be
di,splto'ed Jbr both oven,s.
I_' using" the Convection Coaversion Jbatu_¢ you (:an
automatieal(r convert the oven lemperatlm, J)zmz
nqq'ular bakit_g" to Convection Bake temperature,_.
7b convert the oven le,zpemlu_,/br eonvedion
baking; fidlow the sle[),sbelow.
1 Press and hold the CONVECTION BAI_]
pad fl)r 4 to 5 seconds.
@
@@@®@@@@@@
@
"CON Cony Bake" will show in the display.
2 Lrsing the nmnber pads, enter the
temperature recommended in the recipe.
3 Press the START pad.
The display shows the converted (reduced)
temperatm'e. For example, if you entered a
recipe temperature of 350°E, the display will
show 325°K when it is converted.
Press the CLEAR/OFF pad when baking
is finished.
NOTE: Conve_:sion mu,d be ,set each time you want to
u,se it. li is nol held in memory.
12
Using the Sabbath Feature (,,,,sortienlodels)
Desig_£d for use on theJewish Sabbath and Holidays.
1.19111Oven
Sabbath
f ature:
How to set
Jbr regular
baking or
roasting
77w Sabbath fieatlm, _a_ be used for bakin@roastinq',,
o_@. It camwt be u,sed fin' com_ectio_, broiling;
self.(leatfin_', or Delay Start cookit_:
Make sure the clock sko'ws the correct time (j day and
the ove_ is OFE
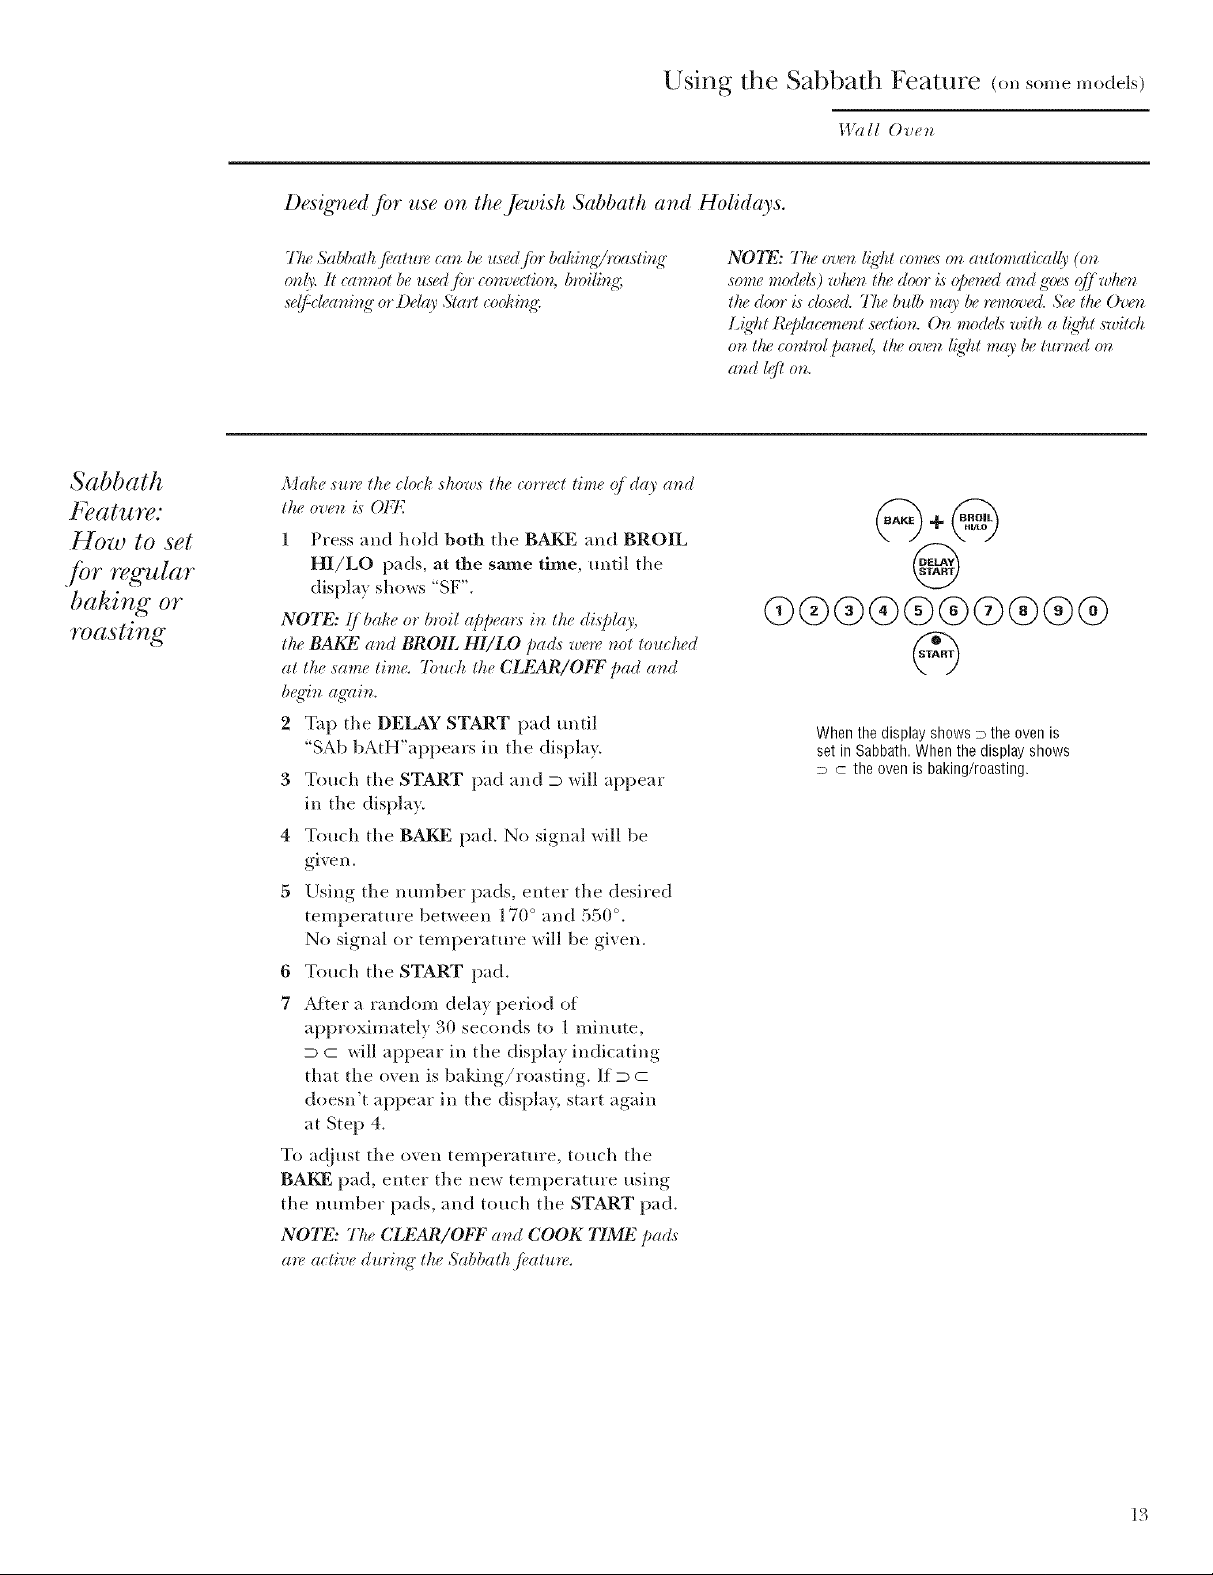
1 Press and hold both the BAKE and BROIL
HI/LO pads, at the same time, until tile
display shows "SF'.
NOTE: Ij /mke or t)*vil appea*:_ in the display,
the BAKE and BROIL HI/LO pads were not touched
at the same time. 7bluh the CLEAR/ObT pad and
b,_ffin agzfin.
2 Tap the DELAY START pad tmtil
"SAb bAtH"appears in the display.
3 Touch tile START pad and D will appear
in tile display.
4 Touch tile BAKE pad. No signal will be
given.
5 Using tile number pads, enter tile desired
temperature between 170 ° and 550 °.
No signal or temperature will be given.
6 Touch tile START pad.
7 Af*er a random delay period of
approximately 30 seconds to 1 minute,
D c will appear ill the display indicating
that the oven is baking/roasting. If D C
doesn't appear in tile display, start again
at Step 4.
To a@ust tile oven temperature, touch tile
BAKE pad, enter tile new temperature using
the number pads, and touch the START pad.
NOTE: The CLEAR/ObT at_d COOK TIME pa(Is
a*_,active durb_g" the Sabbath fi, atlm,.
NO'I_: TIm ov_'t_[{@t _omes on automatiudly (on
some mode£ ) w/u,n t/u, door is (q)(,m_da_d <g<u'sqff wken
the door is dosed. The bldb m(O' /wrem(_ed. &,e the O'u(_z
L{qllt IO,/)[aceme*ztsectiot_. On mo(lek with a [{@t switch
on th,_comrol p(md, the ou_z /iql_t m(O,be tu*wed on
@
03@@@@@@@@@
When the display shows P the oven is
set in Sabbath. When the display shows
D C the oven is baking/roasting.
13
Using the Sabbath Feature to. somemodels)
14%dlOven
Sabbath
f_ature:
HOw to set /br
timed baking
or roasting--
immediate start
and automatic
stop
_:\lake su rt_ the clod¢ sho'ws the corr_ct time o/ &O' and
the oven is OFI<
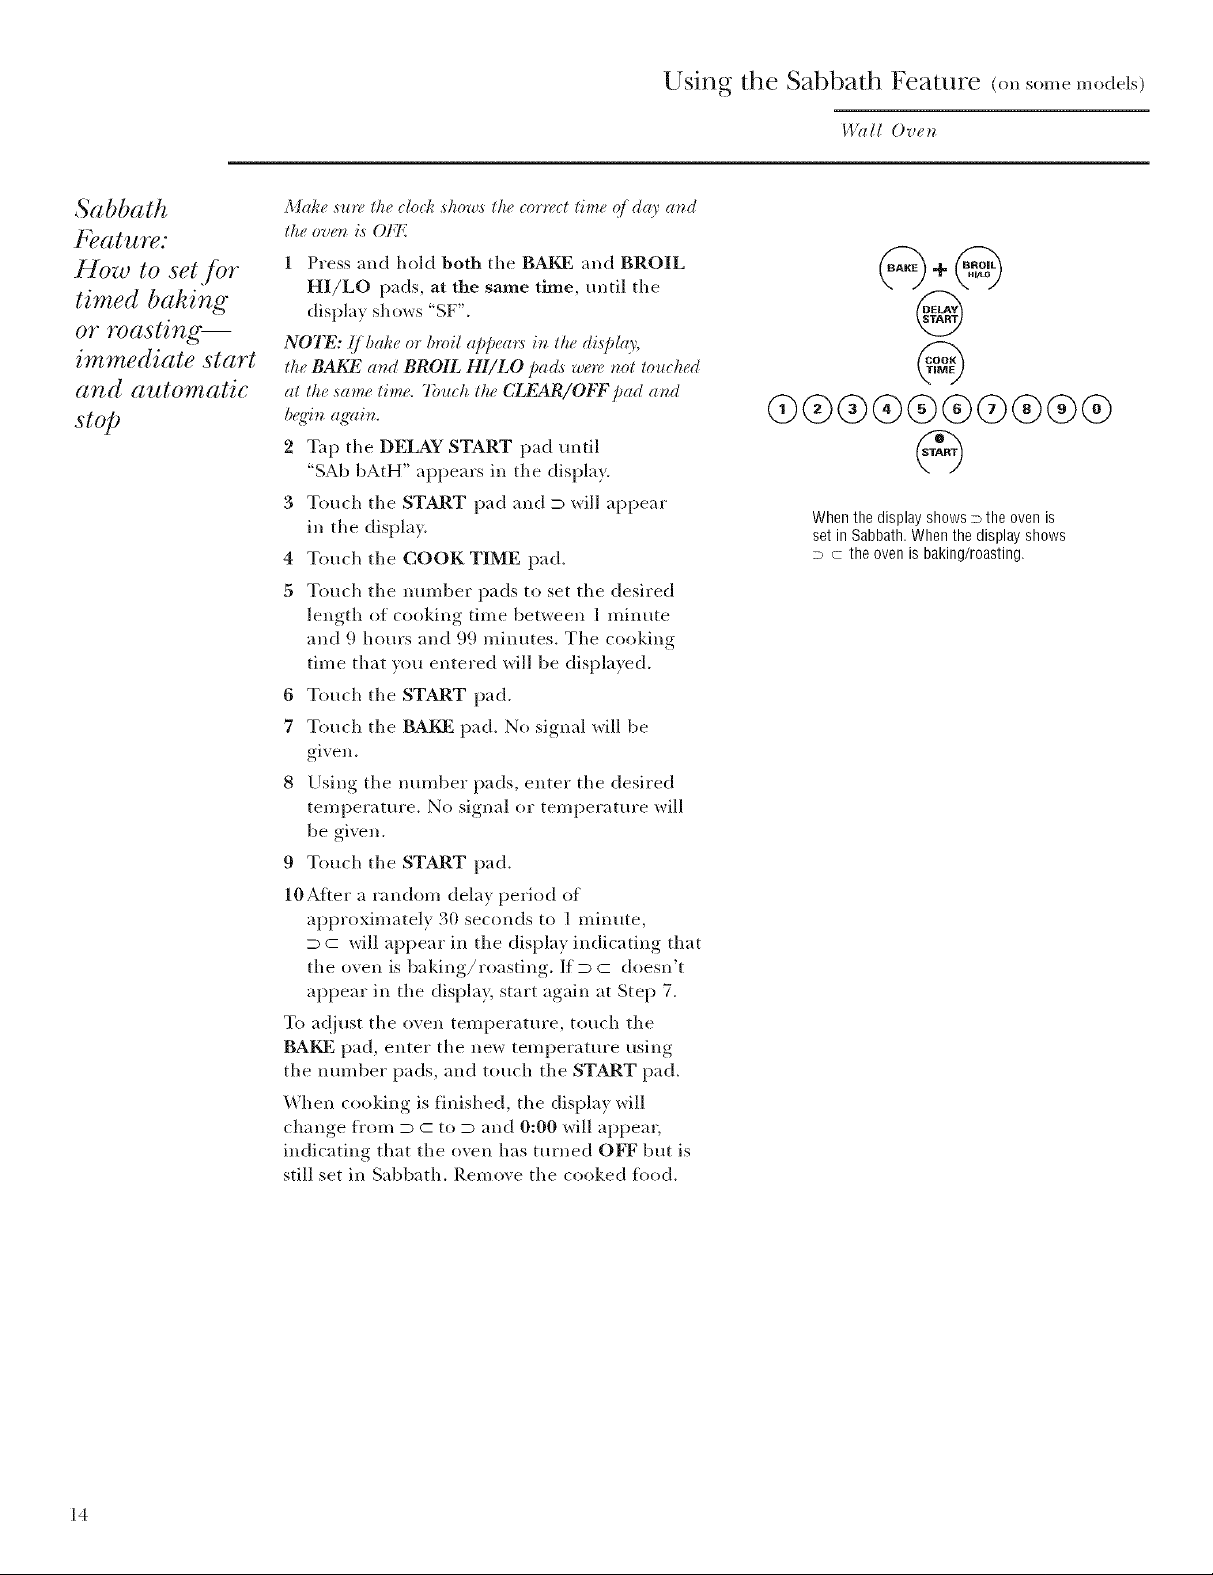
1 Press and hold both the BAKE and BROIL
HI/LO pads, at the same time, until the
display shows "SF'.
NOTE: (/ bake or broil a[)pea*:s in the (lis])[(O',
the BAKE and BROIL HI/LO [a(Ls "we**,not touched
c_tthe same time. 7bluh the CLEAR/OIb\F pad and
b<ffin again.
2 Tap the DELAY START pad tmtil
"SAb bAtH" appears in the display.
3 Touch the START pad and D will appear
in the displa>
4 Touch the COOK TIME pad.
5 Touch the nmnber pads to set the desired
length of cooking time between ] minute
and 9 hours and 99 minutes. The cooking
time that wm entered will be displayed.
6 Touch the START pad.
7 Touch the BAKE pad. No signal will be
given.
8 Using the number pads, enter the desired
temperatm'e. No signal or temperature will
be given.
9 Touch the START pad.
10After a random delay period of
approximately 30 seconds 10 ] minute,
D c will appear in the display indicating that
the oven is baking/roasting. If D C doesn't
appear in the display, start again at Step 7.
To a_!just the oven temperatme, touch the
BAKE pad, enter the new temperature using
the nmnber pads, and touch the START pad.
When cooking is finished, the display will
change flora D C to D and 0:00 will appear,
indicating that the oven has turned OFF but is
still set in Sabbath. Remove the cooked ibod.
@+@
@
@
@@®®®®@®®®
@
When the display shows m the oven is
set in Sabbath, When the display shows
D C the oven is baking/roasting.
14
 Loading...