GE
Measurement & Control
phoenix v|tome|x L – versatile and exible CT system
The phoenix v|tome|x L 240/300 and L 450 are versatile high resolution microfocus systems for
3D and 2D Computed Tomography and 2D non-destructive X-ray inspection. With their granitebased 8-axes manipulation they are handling even large samples with highest precision. Both
systems are the optimal solution for void and flaw detection and 3D metrology (e.g. first article
inspection) of castings. Furthermore, phoenix|x-rays high resolution X-ray technology with many
extras like an optionally second X-ray tube allows to adapt the v|tome|x L to any kind of industrial and scientific CT application. A variety of effective software tools minimises physical effects
like ring-artefacts or beam-hardenings for highest CT quality.
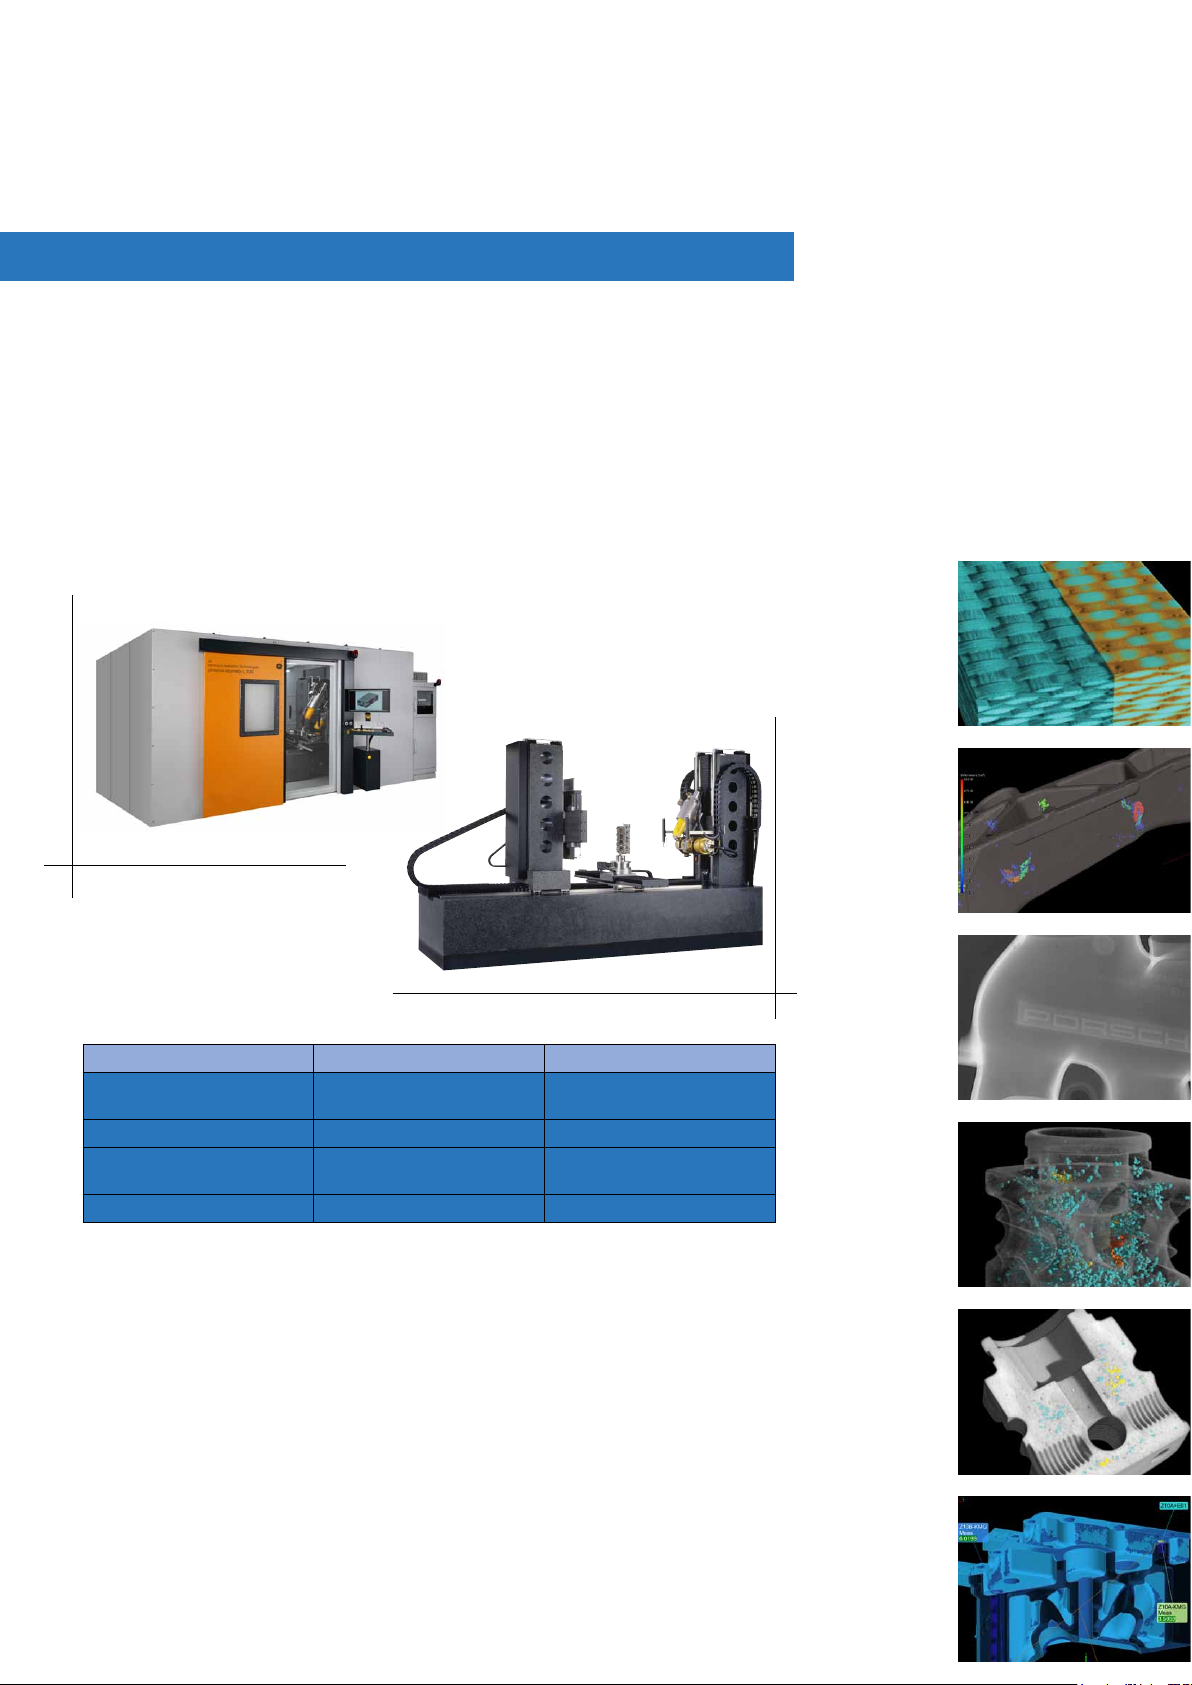
phoenix v|tome|x L 240/300
phoenix v|tome|x L 240/300 phoenix v|tome|x L 450
Optional X-ray tube combinations unipolar 240 or 300 kV microfocus /
180 kV high-power nanofocus
Max. voxel resolution 1 µm < 2 µm
Max. object size /
3D-CT eld of view
Max. object weight 50 kg 100 kg
Longlife open micro- and nanofocus
X-ray tubes
Unique 300 kV / 500 W unipolar micro-
focus tube for high magnification
Granite based precision manipulation
up to 8 axes
High precision CNC control
High dynamic temperature stabilized
detector technology
High contrast array detector + multi-
line detector or line detector for 2D CT
Ø 800 x H 1300 mm /
Ø 500 x H 600 mm
Virtual detector enlargement
Fully automated click & measure|CT
Reproducible 3D metrology and failure
analysis after short operator training
velo|CT for extreme high speed recon-
struction
Advanced surface extraction for high
precision 3D Metrology (CAD variance
analysis, reverse engineering etc.)
Automatic generation of first-article-in-
spection reports in < 1 hour possible
300 kV microfocus
450 kV macrofocus
Ø 1300 mm, H 2000 mm/
Ø 800 x H 1000 mm
Fiberglass
Cavities in an Aluminum casting
phoenix v|tome|x L 450
Aluminum casting
Cavities in an Aluminum casting
Aluminum casting
AL casting 3D measurements

GE
Measurement & Control
phoenix v|tome|x L – very high precision even for large samples
With its granite-based 8-axis manipulation unit, the phoenix v|tome|x L 450 handles even large
samples (up to 100 kg (220 lbs) in weight, up to 1300 mm in diameter and up to 2000 mm in height)
with highest precision. A supplemental detector axis enlarges the detector width up to 1200 mm.
Additional to its 300 kV / 500 W microfocus X-ray tube, the v|tome|x L 450 may come optionally
equipped with an extra, 450 kV closed minifocus tube for high absorbing samples. All v|tome|x
systems can also be used for 2D inspection with fast and easy switching between 2D and 3D
mode. The wide range of available configurations allows to adapt the v|tome|x L to almost any
kind of application in science, production control and 3D metrology.
Advanced CT software
All v|tome|x CT systems come standard with phoenix|x-rays proprietary CT acquisition and reconstruction software
package datos|x for fast and accurate CT. Due to GPU based reconstruction techniques, CT results are available after just a few minutes. For ease of use and to optimise the quality of high resolution CT data, phoenix|x-ray offers a
variety of effective software tools, e.g. for automatic geometry calibration, for <360° ROI-CT with maximized magnification, for ring artefact reduction, beam hardening correction, optimization of scans with drift effects as well as for
advanced extraction of surface points for 3D metrology applications. The high precision click & measure|CT funcitionality offers the possiblity for fully automated CT data acquisition, reconstruction and 3D volume evaluation.
Movement of all axes: v|tome|x L 450
at German aerospace centre DLR
Wall-thickness measurement
Extensive flexibility
The v|tome|x L 300 comes with a new unipolar 300 kV / 500 W microfocus source. Due to this unique technique the
system can be used for high magnification applications as well as scans of strongly absorbing samples. Major components of the system, like the X-ray tube and the temperature stabilized detector are proprietary technology of GE
For highest resolution scans, the v|tome|x L 300 can be outfitted with an additional open 180 kV high power nanofocus tube. There are many flat panel and line detector options for v|tome|x L systems. In multiline detector configuration, the reduction of scattered radiation for precise 2D scans for metrology application can be reached without
installation of an additional expensive line detector.
Highest accuracy for 3D metrology
Especially if complex parts with hidden or difficult accessible surfaces have to be measured, CT offers big advantages comparing with conventional tactile or optical coordinate measuring machines (CMMs): high density of measurement points and fast capturing of the complete sample’s geometry. v|tome|x L systems include all essential features for CT with highest accuracy: Minimised focal spot and voxel size, granite based setup in an air-conditioned
walk in cabinet for high mechanical and thermal stability, high power X-ray tube to enable beam filtering as well as
advanced software for optimised CT reconstruction quality and geometrically correct surface extraction.
16 bit multi-line detector in position
Measurements in moulded plastic
GE Sensing & Inspection
Technologies GmbH
phoenix|x-ray
Niels-Bohr-Str. 7
D-31515 Wunstorf | Germany
Tel.: + 49 5031.172-0
Fax: + 49 5031.172-299
phoenix-info@ge.com
Measurement of internal geometry
Further Offices:
phoenix-stuttgart@ge.com
phoenix-muenchen@ge.com
phoenix-france@ge.com
phoenix-asia@ge.com
phoenix-usa@ge.com
www.ge-mcs.com/phoenix
GEIT_31205_e_1213
 Loading...