

GE TPX21PRXDWW, TPX21PRXDBB, TPX21PRXDAA Owner’s Manual
o_,,_
%f;
Q_
_¢/. <
%¢
GEAppliances
F
.............qk
ProfileModels
21 Built-InStyle,
with Dispenser
Part No. 162D3941PO05 Pub.No. 49-6977
Congratulations!
YouAreNow PartoftheGEFamily.
Welcome to tim GE f_tmily.
We're proud of our quality
products and we are
commitmd toproviding
dependable se_Tice. You'll
see it in this easy-to-use
Owner' s Mmmal and you'll
hem il in the fiiendly voices
of our customer se_,ice
deparlmenl.
Best of all, you'll expe_ience
these values each time you
use your refligerator.
That's imporlanl, because
your new refligerator will
be part of your fitmily fin.
ma W yem_.And we hope
you willbe pmt of ours for a
long lime to come.
Wethankyou tbr bwing
GE. We appreciate your
purchase, and hope you
_ll conlinue lo rely on us
whenever you need quality
appliances foryour home.
important!
Staple sales slip or cancelled
check here.
Proof of the original purchase date
isneeded to obtain service under
the warranty.
Write the model and serial
numbershere.
#
#
Youcan find them on a label on the
wall beside the top drawer or at the
bottom,just inside the fresh food
2
compartment door.
GE& You,
A Service Partnership.
Ask any GEappliance owner and they will
tell you we stand behind our products with
unmatched quality service. However, did
you know that most questions result from
simple problems that you can easily fix
yourseff injust a few minutes? This
Owner's Manual can teflyou how.
ReadthisManual
Inside you _dll find many
helpflll hinls on how lo use and
maintain your refligeralor
properly..lust a lillle preventive
cme on your part can save you a
gTeal deal of time and money
over the life of your reflJgeralor.
ReviewtheSectionon
TroubleshootingTips
Safety Information
SafetyPrecautions.......... 4
How to ConnectElectricity .... 6
UseofAdapterPlugs ....... 6, 7
Useof ExtensionCords....... 7
OperatingInstructions
Controls ................. 8
Features............... 9-11
AutomaticIcemaker........ 12
Iceand WaterDispenser,, 13,14
CareandCleaning....... 15-17
Installation
Preparingto
Instaflthe Refrigerator.... 19.20
DoorPanels ............ 21-23
WaterLineInstallation ,, 24-29
You'll find many answers 1o
common problems here.
If you rexJew our chart of
Troubleshooting Tips firsl, you m W
not need to call tot sewice al all.
If YouNeedService
If you do need sewice, you can
relax knoxdng help is only a
phone call mvay.A lisl of loll-flee
cuslomer service numbers is
included in lhe back mclion. Or, in
the U.&,you can ahvays call the GE
Answer Cenler ®at 800.626.2000,
24 hours a dW, 7 dws a week.
In Canada,call 800-361-3400.
English .................. 4
Fran_ais ................ 37
Espat)ol ................. 75
Troubleshootingtips
NormalOperatingSounds.... 30
Before You
CarlForService ......... 31-34
CustomerService
Warranty
for CanadianCustomers..... 35
Warranty
for U.S.Customers......... 36
ServiceTelephone
Numbers .......... Back Cover
3

IMPORTANTSAFETYINFORMATION.
READALLINSTRUCTIONSBEFOREUSING.
A WARNING!
Use this appliance only for its intended purpose as
described in this Owner's Manual.
SAFETYPRECAUTIONS
When using electrical appliances, basic safety precautions
should be followed, including the following:
This refligerator must be
properly installed and
located in accordance _ith
file Installation Instructions
befi)re it is used.
Do not allow children to
climb, stand or hang on file
sheNes in tile refligerat,)r.
They could damage tile
refligerat,)r and seriously
injure themselves.
iiiiiiiiiiiii_iil
Do not touch tile cold
sm-fa(es in file fieezer
compartment, particulmly
when hands are dmnp or wet.
Skin m W stick to these
extremely cold sm-fa(es.
iiiiiiiiiiiii_iil
Do not store or use gasoline
or other flmnmable vapors
and liquids in tile xicini b- of
this or any other appliance.
iiiiiiiiiiiii_iil
In refligerators xdth
ram)marie icemakers, avoid
contact xdfll tile moving parts
of tile ejector mechanism, or
_dfll tile healing element that
releases tile cubes. Do not
place fingers or hands on the
mlu)matic icemaking
mechanism while tile
4
refligerator is plugged in.
Keep fingers out of file
"pinch point" areas;
clearances between tile
doors and bem'een tile doors
and cabinet are necessarily
small. Be careful closing
doors when children are in
tile area.
[Jnplug tile refligerator
befi)re cleaning and making
repairs.
NOTE:Westronglyrecommend
thatanyservicingbeperformed
bya qualifiedindividual,
iiiiiiiiiiiii_iil
Turning tile cont]-ol to tile
OFFposition does not remove
power to tile light circuit.
iiiiiiiiiiiii_iil
Do not refi-eeze fi-ozen
toods which have thawed
completely.
IMPORTANT"
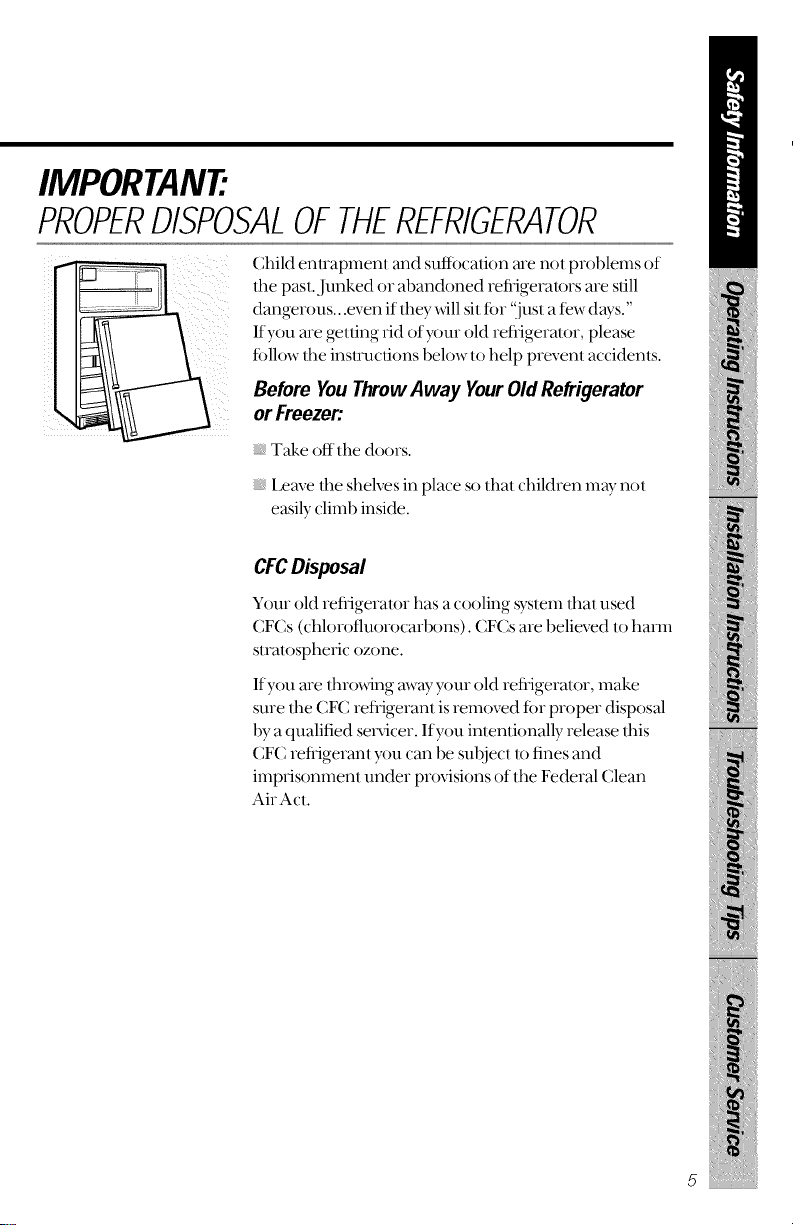
PROPERDISPOSALOFTHEREFRIGERATOR
Child enuapment and suflbcafion are not problems of
lhe past. Junked or abandoned refigerau_rs are slill
dangerous...even if lhey _dll sit for ".just a few days."
If you are gelling rid of}xmr old refigerator, please
follow the instnlclions below to help prevent accidents.
Before YouThrowAway YourOld Refrigerator
or Freezer:.
Take off the doors.
Leave the shelves in place so that children may not
easily climb inside.
CFCDisposal
Your old refiigeralor has acooling system that used
CFCs (chlorofluorocarl)ons). CFCs are 1)elieved to harm
stratospheric ozone.
If you are throating away }xmr old refigeralor, make
sure the CFC refligerant is removed for proper disposal
by a qualified sel_icer. If you inlenlionally release Ibis
CFC refigeranl >)u can be subject to fnes and
imprisonment under provisions of the Federal Clean
AirAct.
5
IMPORTANTSAFETYINFORMATION.
READALLINSTRUCTIONSBEFOREUSING.
[, WARNING!
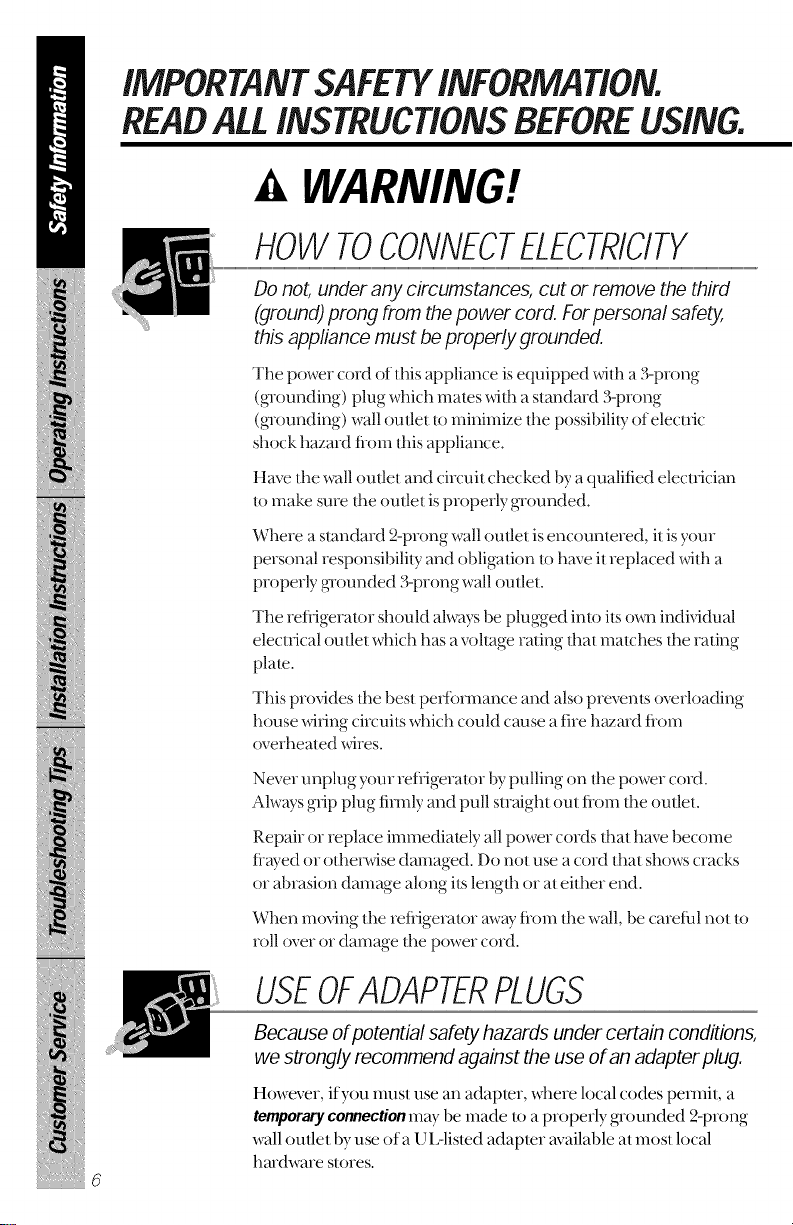
HOWTOCONNECTELECTRICITY
Do not, under any circumstances, cut or remove the third
(ground) prong from the power cord. Forpersonal safety,
this appliance must be properly grounded.
The power cord of this appliance is equipped _itl_ a 3-prong
(glounding) plug which mates _itl_ a standard 3-prong
(glounding) wall outlet to minimize d_e possibility of elecnic
shock hazard flom this appliance.
Have tl_e wall outlet and circuit checked by a qualified electrician
to make sure the oudet is properly grounded.
Where a standard 2-prong wall outlet is encountered, it is your
personal responsibility and obligation to have it replaced wid_ a
properly glounded 3-prong wall outlet.
The refligerator should ahvays be plugged into its own indi_qdual
elecnical outlet which has a vohage rating tidal matches tl_e rating
plate.
This provides d_e best pedbm_ance and also prevents overloading
house wiring circuits which could cause a fire h_ard flom
oveHmated wires.
mmmmmmmmm_
Never unplug your refligerator by pulling on the power cord.
Ahvays grip plug firefly and pull straight out flom the outlet.
Repair or replace immediately all power cords dmt have become
flayed or otherwise damaged. Do not use a cord that shows cracks
or abrasion damage along its lengd_ or at either end.
When moving the refligerator mvayflom d_ewall, be careful not to
roll over or damage d_epower cord.
USEOFADAPTERPLUGS
Because ofpotential safety hazards under certain conditions,
we strongly recommend against the use of an adapter plug.
However, if you must use an adaptor, where local codes permit, a
temporaryconnectionmay be made to aproperly gTounded 2-prong
wall outlet by use era UL-listed adapter available at most local
hmdware stores.
6
Tile larger slol in lhe adapler must be alig_md _fll file larger slot in
lhe wall ouflel lo provide proper polalily in lhe connection of lhe
power cord.
When disconnecting lhe power cord tiom lhe adapler, ahvays hold
lhe adapler in place _dlh one hand while pulling tile power cord
plug _dfll lhe odmr hand. If fllis is not done, file adapler ground
lerminal is ve D- likely 1o break _dth repealed use.
If tile adapler gTound lenninal breaks, DO NOTUSE lhe refiigeralor
until a proper ground has been eslablished.
Attachingtheadaptergroundterminaltoa waftoutletcoverscrewdoesnot
groundtheapplianceunlessthecoverscrewismetal,andnotinsulated,andthe
walloutletis groundedthroughthehousewiring,Youshouldhavethecircuit
checkedbyaqualifiedelectriciantomakesuretheoutletisproperlygrounded.
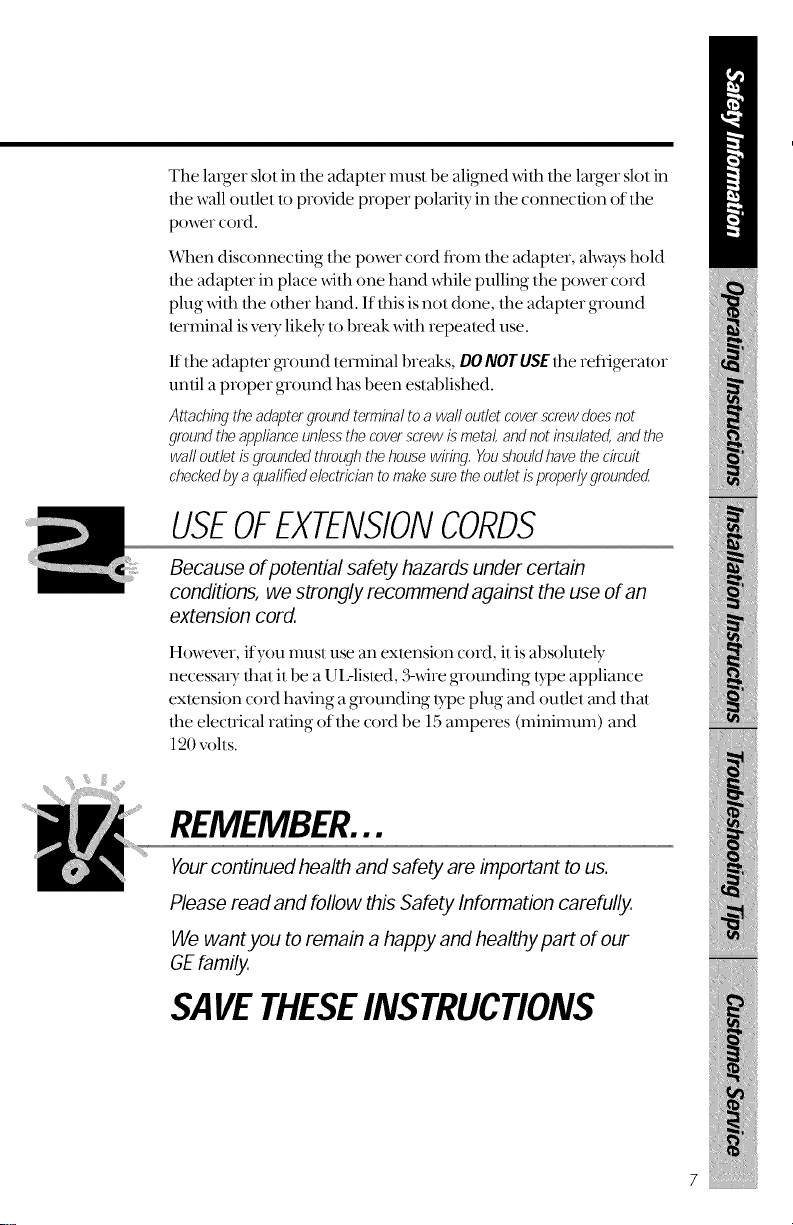
USEOFEXTENSIONCORDS
Because of potential safety hazards under certain
conditions, we strongly recommend against the use of an
extension cord.
However, if you musl use an exlension coM, it is absohnely
necessa U fllal it be a UL-lismd, 3-_dre grounding l}])e appliance
exlension cord having a grounding lype plug and ouflel and lhal
lhe elecnical rating of lhe cord be 15 amperes (minimum) and
120 vohs.
REMEMBER...
Yourcontinued health and safety are important to us.
Please read and follow this Safety Information carefully.
We want you to remain a happy and healthy part of our
GEfamily.
SAVETHESEINSTRUCTIONS
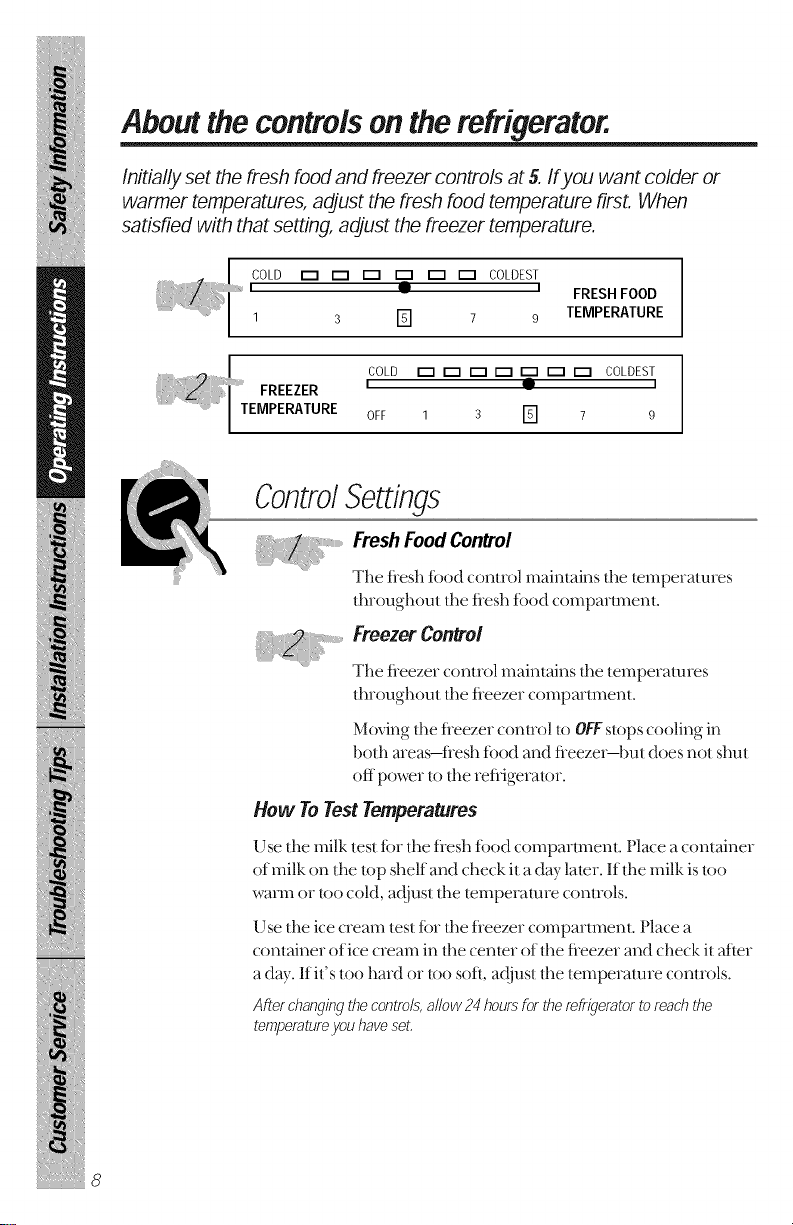
Aboutthe controlson the refrigerator.
Initiallyset the fresh food and freezer controls at 5.If you want colder or
warmer temperatures, adjust the fresh food temperature first. When
satisfied with that setting, adjust the freezer temperature.
I
ICOLD D D _ _ _ _ COLDEST
1 3 [] 7 9 TEMPERATURE
1
• ' FRESH FOOD
COLD _ _ _ _ D _ _ COLDEST
i • i
OFF 1 3 [] 7 9
ControlSettings
,,,,,_FreshFoodControl
Tile flesh food (ontrol maintains tile temperatures
throughout tile flesh food compartment.
Freezer Control
Tile fleezer control maintains tile temperatures
throughout tile fleezer conlpartmenl,
mmmmmmmmm_
Moving tile fleezer control to OFF stops cooling in
|)oth areas-flesh food and fleezei_|)ut does not shut
off power to tile refli gerator.
How ToTestTemperatures
{)se file milk lest for tile flesh food compartment. Place a container
(if milk on tile top shelf and check it a day later. If tile milk is tOO
WaTlll 0I" tOO cold, at!just tile temperature COl]IioIs,
IJse tile ice cream test tbr file fleezer comparmlent. Place a
container of ice cream in tile center of tile fleezer and check it 'atler
a day. If it's loo hard or too soft, a(!just tile temperature controls.
After changingthe contrds, allow 24hours for therefriqerator a reach the
temperatureyou have seL
8
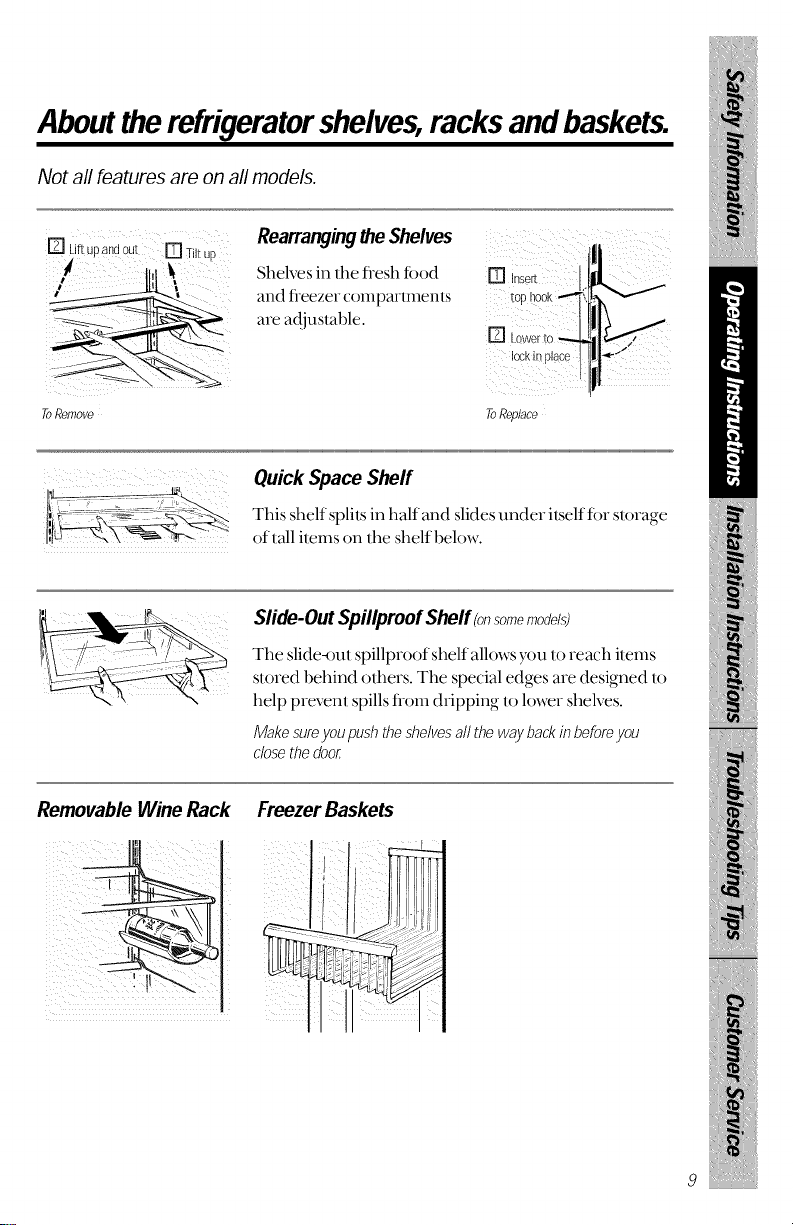
Abouttherefrigeratorshelves,racks andbaskets.
Not all features are on all models.
Rearrangingthe Shelves
Shelves in the fi-esh fi)od
and fleezer comparlmenls
me ad)ustable.
m _ IrK. j
F,,
DL0w0rt0-_la_,,
, k,np!co!it
To Remove
Quick Space Shelf
This shelf splits in half and slides under itself fi)r storage
of tail items on tim shelf below.
Slide-Out Spillproof Shelf (onsomemodels;
The slide-ouI spillproof shelf allows you lo reach ilems
slored behind odmrs. The special edges me designed lo
help prevenl spills fiom &ipping lo looser shelves.
Make sureyou push theshelves all the way backin beforeyou
close the door
ToReplace
Removable Wine Rack Freezer Baskets
9
Aboutthe storage drawers and bins.
Not all Features are on all models.
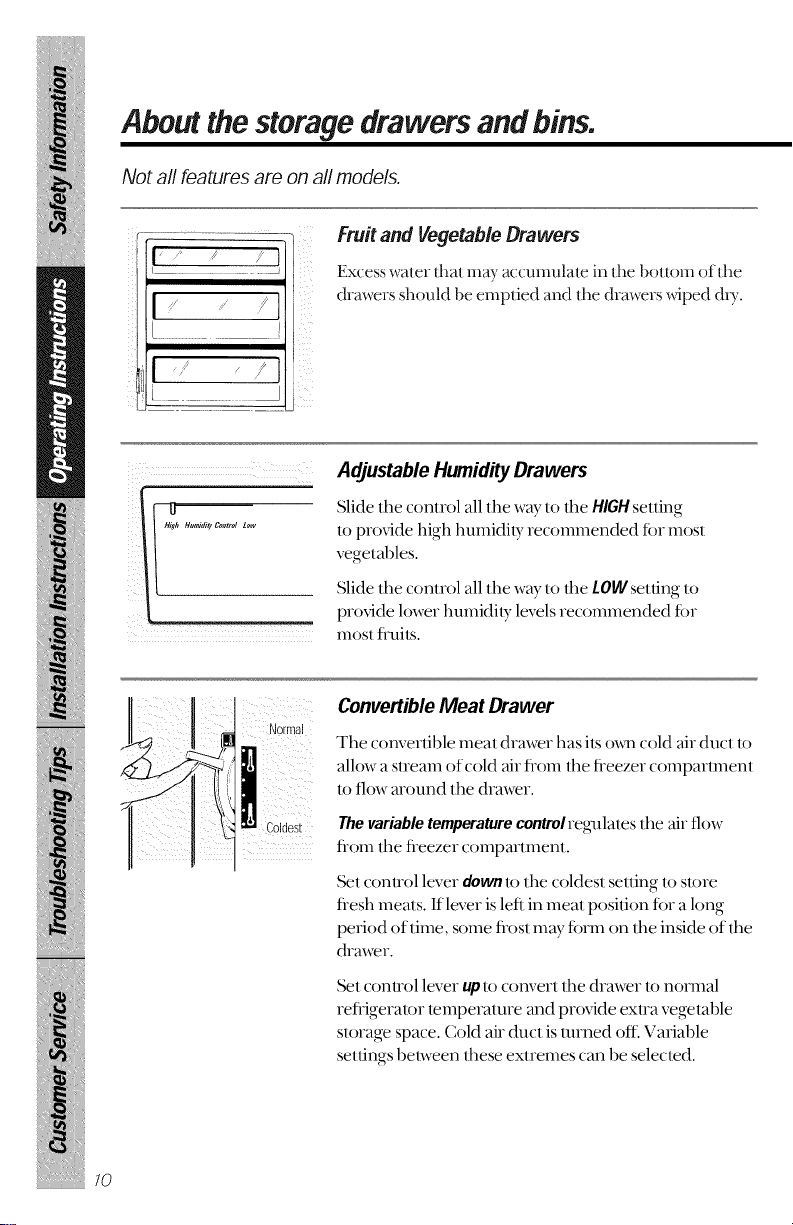
Fruitand VegetableDrawers
Excess water that may accumulate ix]tile bottom of tile
drawers should be emptied and the drawers wiped &T.
Adjustable Humidity Drawers
Slide tile control all tile way to tile HIGHsetting
to provide high humidity recommended for InOSI
vegetal)les.
Slide tile control all tile way to tile LOWsetting to
provide lower humidity levels recommended for
InosI fl-t]ils.
ConvertibleMeat Drawer
Nolmal
Tile convertible meat drawer has its oxm cold air duct to
allow a stream of cold air flom tile fleezer compartment
t,) flow around tile drawer.
mmmmmmmmm_
Coldest
Thevariable temperaturecontrolreg_flatestile air flow
fi-om tile fi-eezer compmlment.
Set conuol lever downto tile coldest setting to store
flesh meats. If lever is left in meat position for a long
period of time, some fiost m W form on tile inside of tile
drawer.
Set control lever up to convert tile drawer to normal
refligerator temperature and provide exlJa vegetable
storage space. Cold air duct is turned off. Vmiable
settings bel_veen these extremes can be selected.
70
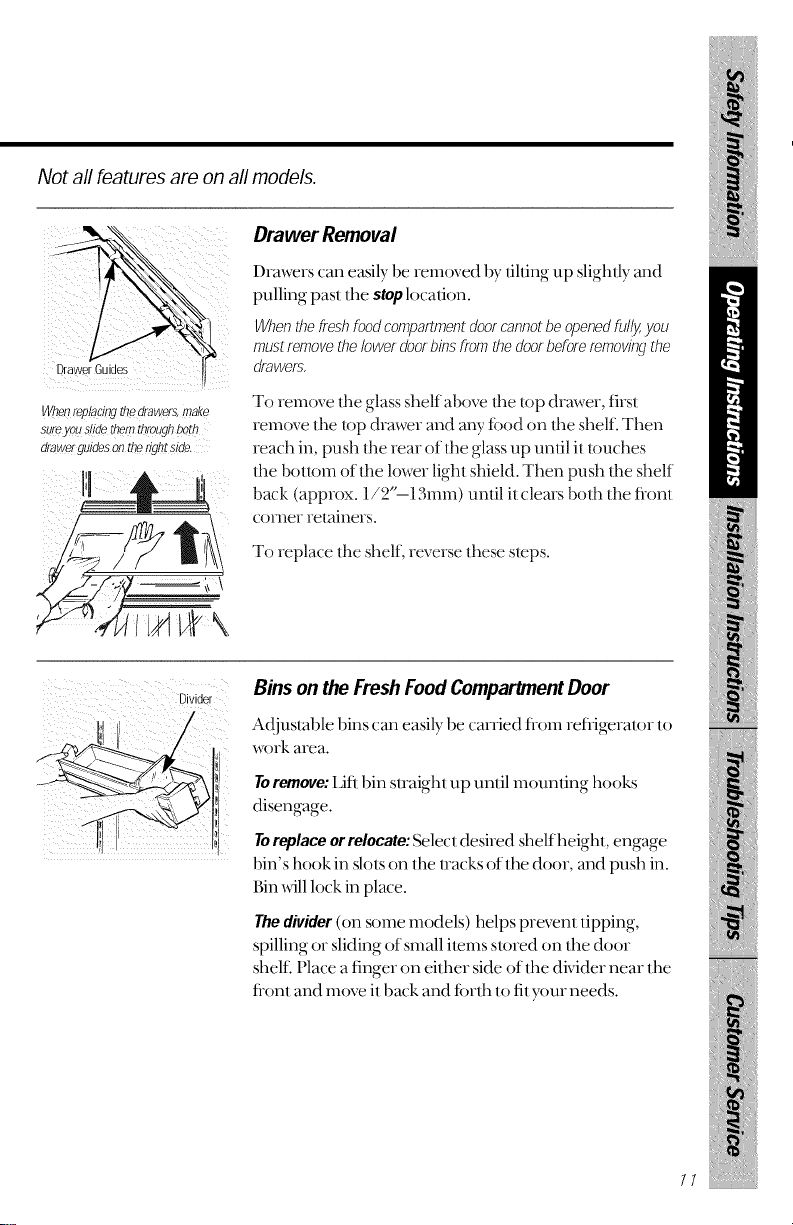
Not all features are on all models.
Drawers can easily be removed by tilting tip slightly and
pulling past the stop location.
When the fresh food compartmentdoor cannotbe openedFully,you
Drawer Removal
must remove the bvvef deal bins from thedoor before mmovin.qthe
drawers,
Whet?f_placirlcj [fie erawers, nlaKe
sure you slloe [rleltl [Rfougn bo[tl
or[.iwer gu/ees on lee flg[l[ Sloe,
To remove rite glass shelf above rite top drmver, first
remove the top drawer and any ff)od on the shelf. Then
reach in, push the rear of the glass up until it touches
the boll, mr of the lower lighl shield. Then push lhe shelf
back (approx. 1/2" 13ram) until it clems both the fionl
corner retainers.
To replace the shelf, reverse these steps.
Bins on the Fresh Food Compartment Door
Adjustable bins can easily be carried fiom refiigerator to
x_x_rkarea.
Toremove: IJfl bin straight tip until mounting hooks
disengage.
Toreplaceorrelocate:Select desired shelf height, engage
bin's hook in slols on the uacks of the door, and push in.
Bin will lock in place.
Thedivider(on some models) helps prevent tipping,
spilling or sliding of small ilems slored on the door
shelfi Place a finger on either side of the divider near the
fionl and move il back and f()rlh 1ofil your needs.
11
About theautomaticicemaker.
A newly-installed refrigerator may take 8 to 72hours to begin making ice.
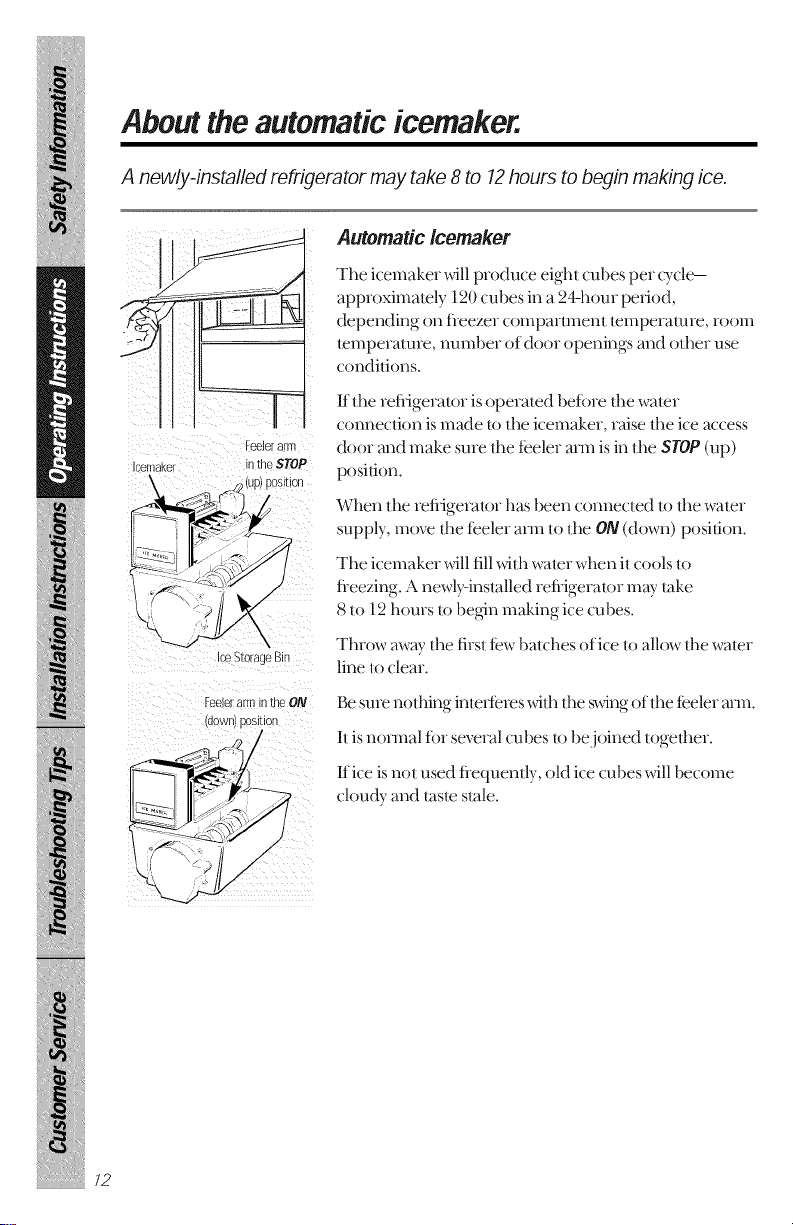
Automatic Icemaker
The icemaker _dll produce eighl cubes per (Tcle-
approxima/ely 120 cubes in a 24-hour period,
depending on fleezer colnpartlllent temperature, room
lemperature, numbe_ of door openings and other use
condilions.
If the refligerator isopera/ed before tl_e waler
connectkm is made to lhe icemaker, raise the ice access
Feelera[rrl
cemaKer intheSTOP
ceStorageBin
Feelerarm inthe ON
uownl I])SI[IOI
door and make sure the feeler mm is in tim STOP (up)
position.
When the refligerator has been connected to the water
supply move the feeler mm to the ON(down) position.
The icemaker will fill with water when it cools to
fleezing. A newly-installed refligerator may lake
8 to 12 hours to begin making ice cubes.
Throw awaythe first few batches ofice toallow thewater
line toclear.
Be sure nothing inte_ieres wifl_tl_e swing of tl_efeeler mm.
I1is nom_al fbr several cubes to be joined togelher.
If ice is not used flequenlly, old ice cubes will become
cloudy and taste stale.
Aboutthe ice and water dispenser.
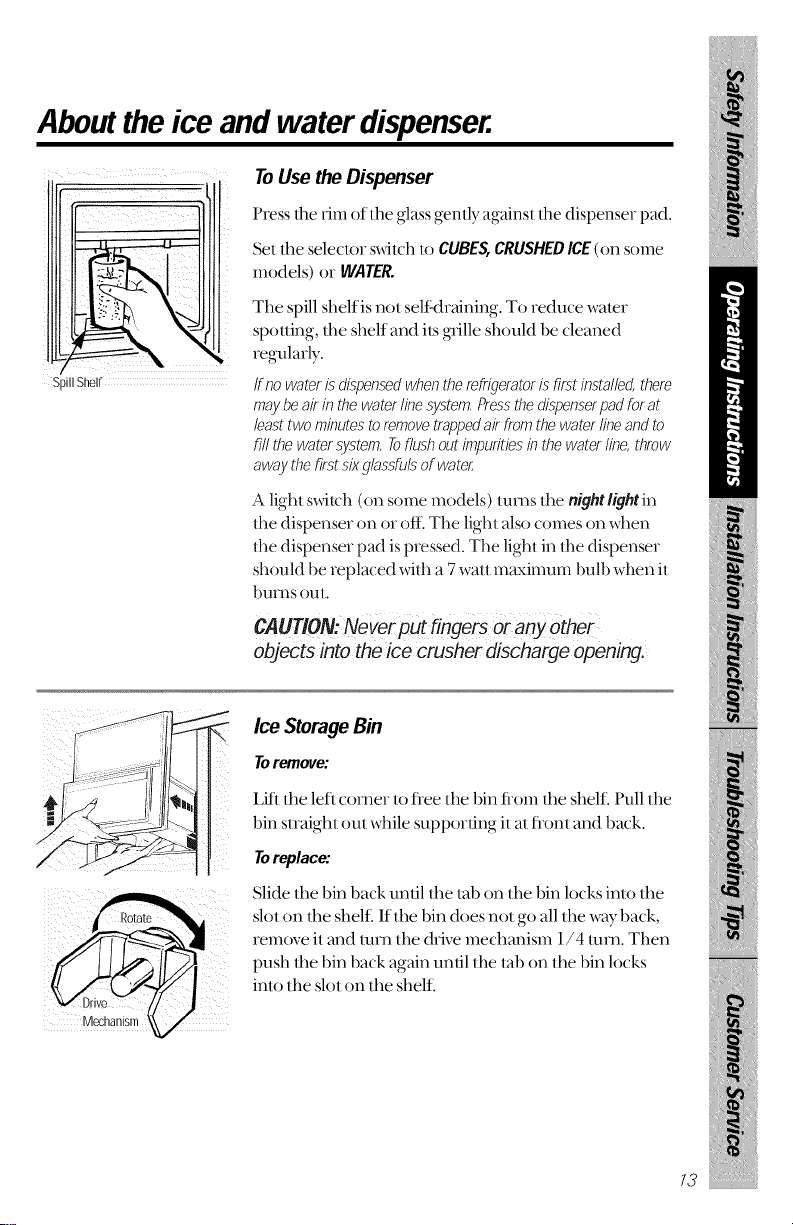
ToUse the Dispenser
Press the tim of tim glass gently against tim dispenser pad.
Set the selector sxdtch to CUBES,CRUSHEDICE(on some
models) or WATER.
iI _ _ ii iiI
SpillShelf
Tim spill shelf is not seltMraining. To reduce water
spotting, the shelf and its glJlle should be cleaned
regularly.
If no water is dispensed when themfi/gerator is first installed, there
may be air in the water line system, PrEssthedispenserpad for at
least two minutes toremove trapped air fr_)mthe water line and to
fill the water system, Toflush out impurities in the water line, thr_Jw
away the first six glassfuls of water:
A light switch (on some models) turns the nightfightin
the dispenser on or off. The light also comes on when
ll_e dispenser pad is pressed. The light in the dispenser
should be replaced with a 7 watt mm,dmum bulb when it
bums out.
CAUTION: Never pu t fingers or anJ,"Othe_
objects into the ice crusher discharge opening.
Ice StorageBin
Toremove:
Lib the left corner to flee tim bin flom tim shelf. Pull tim
bin straight out while supporting it at flont and back.
Toreplace:
Slide the bin back until the lab on tim bin locks into the
slot on the shelf. Iflhe bin does not go all the way back,
remove fl and mrn tim drive mechanism 1/4 turn. Then
push the bin back again until tim tab on tim bin locks
into tim slot on the shelf.
13
About theice andwater dispenser.
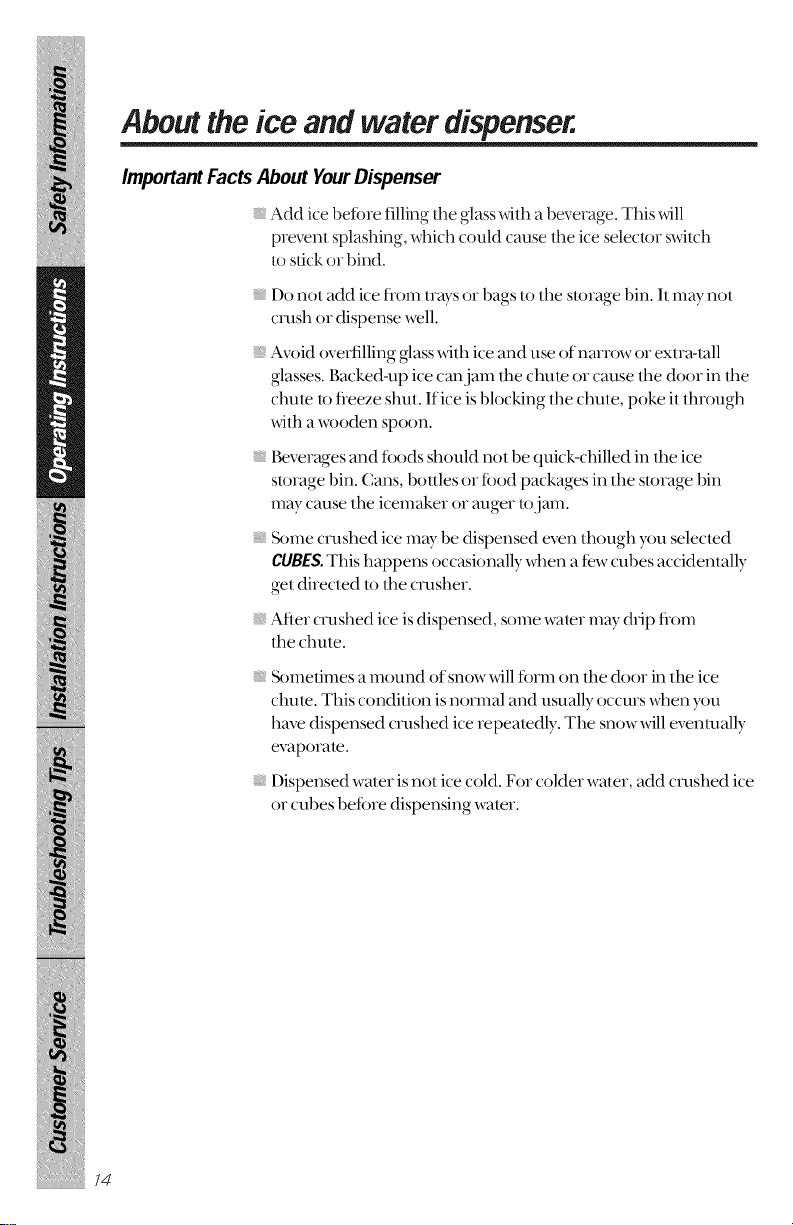
ImportantFactsAbout YourDispenser
Add ice before filling lhe glass with a beverage. This will
prevent splashing, which could cause the ice selector switch
to stick or bind.
iiiiiiiiiiiii_iil
Do not add ice from trays or bags to the storage bin. It may not
crash or dispense xxell.
iiiiiiiiiiiii_iil
Avoid oveFlilling glass _dth ice and use of nmrow or exlra-tall
glasses. Backed-up ice can jam the chule or cause the door in lhe
chum to fleeze shul. If ice is blocking the chule, poke it through
xdth a _oden spoon.
iiiiiiiiiiiii_iil
Beverages and tbods should not be quick-chilled in the ice
storage bin. Cans, bottles or food packages in the storage bin
may cause the icemaker or auger tojam.
iiiiiiiiiiiii_iil
_)me crashed ice may be dispensed even though you selecled
CUBES.This happens occasionally when a few cul)es accidentally
gel directed to the crasher.
iiiiiiiiiiiii_iil
After crushed ice is dispensed, some water may drip from
the chute.
_mmtimes a mound of snow xdll fbnn on the door in the ice
chule. This condition isnormal and usually occurs when you
have dispensed crashed ice repealedly. The snow_dll eventually
evaporale.
Dispensed waler is not ice cold. For colder waler, add crashed ice
or cubes betbre dispensing waler.

Care and cleaning of therefrigerator.
Presshere_o
"emoveg e
Cleaning the Outside
The dispenser well, beneafl_ the glille, should be _dped
&)-. Water left in the well may leave deposits. Remove
tim deposils 1)yadding undilmed _inegar lo the well.
Soak until tim deposits disappear or become loose
enough to linse aw W.
Thedispenserpad.(]lean xdth warm water and baking
soda solulion-about a tablespoon (15 ml) of baking
soda to aquart (1 L) of water. Rinse thoroughly and
_dpe dU.
HINI_Openthefreezadoorpartwaytopreventdispensingof ice
d waterwhencleaning,
The soft door handles (on some models) are easy to keep
clean if they are waxed eve U tow months. Use a
household wax such as Pledge brand or Jubilee brand t,)
coat tl_e handles. Soil _ill then easily wash ()ff_@h soapy
wamr or a non-abrasive all-purpose cleaner.
The long door handles and trim(on models with a uim kit).
(]lean with a cloth dampened with soaD_ water. DU with
a soft cloth.
Keep the outside clean. Wipe _@h a clean clofl_ ligt_tly
dampened wifl_ kitchen appliance wax or mild liquid
dish detergent. D U and polish _@h a dean, soft clofl_.
Do not wipe therefrigerator with a soiled dish cloth or wet towel,
Thesemayleave a residue that can erodethe paint. Do not use
scouringpads, powdered cleaners,bleach d cleaners containing
bleachbecause theseproducts canscratch and weaken thepaint
finish.
15
Careandcleaningof therefrigerator.
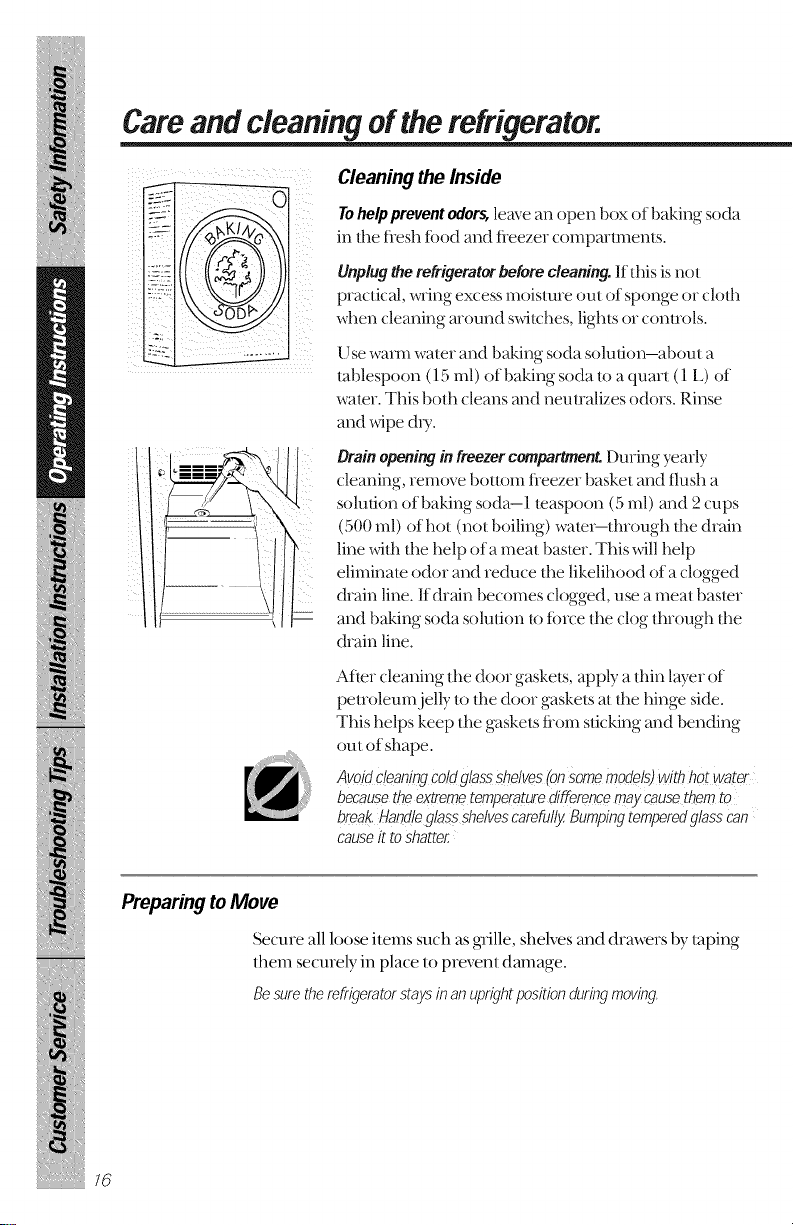
Cleaning the Inside
Tohelppreventodors,leave an open box of baking soda
in the flesh todd and fleezer (ompmlmenls.
Unplugtherefrigeratorbeforecleaning. If this is not
practical, wring excess moisture out of sponge or cloth
when cleaning around switches, lights or conliols.
1LJse warm waler and baking soda soluoon-about a
tablespoon (15 ml) of baking soda to a quart (1 L) of
waler. This both cleans and neulralizes odors. Rinse
and _pe &T.
Drainopenilglinfreezercompartment During yearly
cleaning, remove bottom fleezer basket and flush a
solution of baking soda-1 teaspoon (5 ml) and 2 cups
(500 ml) of hot (not boiling) water--through the drain
line _tb the help of a meat basmr. This will help
eliminate odor and reduce the likelihood of a clogged
drain line. If drain becomes clogged, use a meat baster
and baking soda solution to three the clog through the
drain line.
After cleaning the door gaskets, apply a thin layer of
petroleum.jelly to the door gaskets at the hinge side.
This helps keep the gaskets flom socking and bending
out of shape.
Avoidcleaningcoldglasssflefves(onSomemodels)withhot water
becausetheextremetemperaturedifferencemaycausethemto
break.Handlegbssshelvescarefully.Bumpingtemperedglasscan
causeit toshatter.
Preparing to Move
76
Secure all loose items such as glille, shelves and drawers by taping
them securely in place to prevent dmnage.
Besuretherefrigeratorstaysinanuprightpositionduringmoving,
Preparing for Vacation
For long vacations or absences, remove fi)od and unplug/he
refligeralor. Move lhe fleezer conlrol lo the OFFposifion, and clean
lhe in/e_ior wilh a baking soda solulion of one lablespoon
(15 ml) of baking soda lo one quarl (1 I,) ofwaler. Leave lhe
doors ()pen.
Move lhe icemaker feeler m_nto STOP(up) posilion and shu!
offthe water supply to the refligeralor.
If the temperature can drop 1)elow fleezing, have a qualified
servicer drain the water supply system to prevenl serious properly
damage due lo flooding.
Behind theRefrigerator
Be careflfl when moving the refligeralor mvayfl-om lhe wall. All
lypes of floor coverings can be damaged, particularly cushioned
coverings and lhose xs_lhembossed surfaces.
Pull rite refiigeralor slraighl out and relum il lo posilion 1)y
pushing it slraighl in. Moving rite refiigerau)r in a side direction
m W resuh in damage lo rite floor c()vering or refiigeralor.
Whenpushingtherefrigeratorback,makesureyoudon'trolloverthepowercord
oricemakersupplyline,
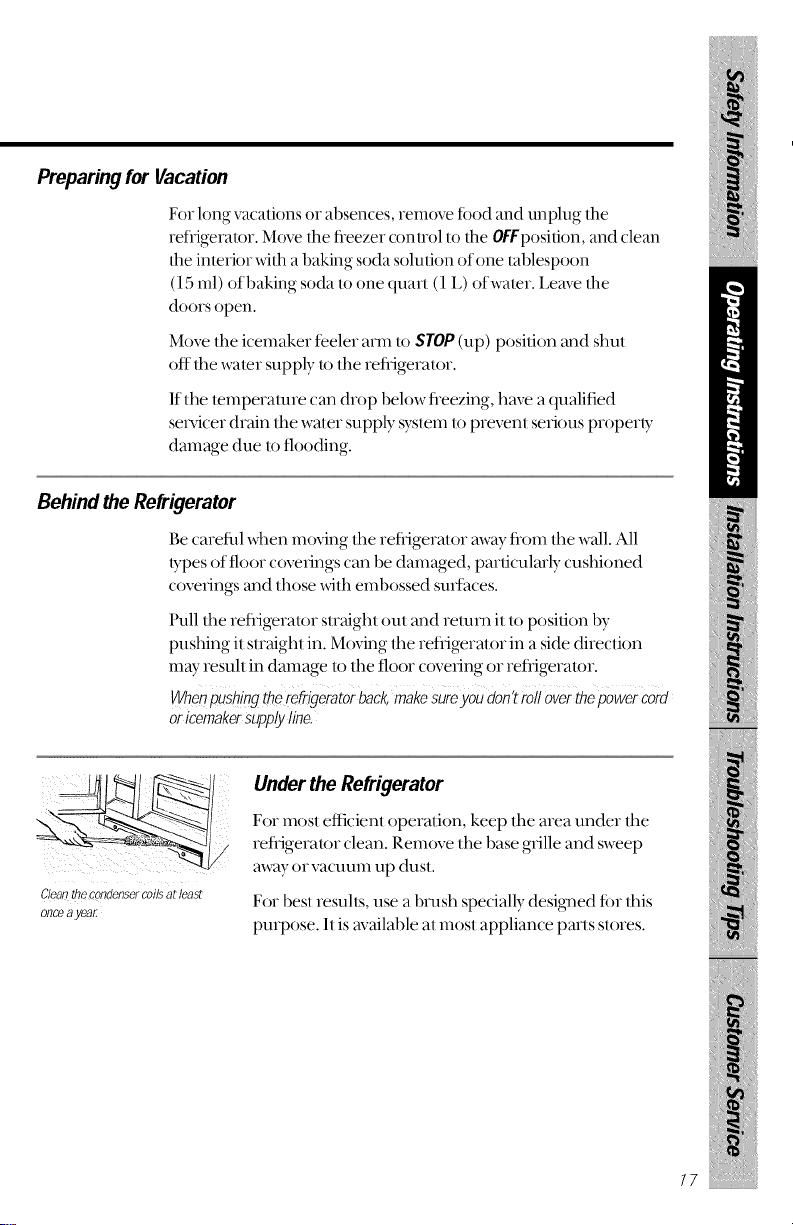
Clean the condenser coils at least
once ayeaE
Under the Refrigerator
For mosl eflicienl operalion, keep the area under the
refligeralor clean. Remove lhe base grille and sweep
away or vacuum up dusl.
For besl resuhs, use a 1)n_shspecially desig_md f{)r lhis
pm])ose. I! is available a! mos! appliance paris slores.
17
Replacing the fightbulbs.
¸ill!
I1!
Turning the control to the OFF position does not remove power to the
light circuit.
FreshFoodCompartment--Lower Light (on,somemodels)
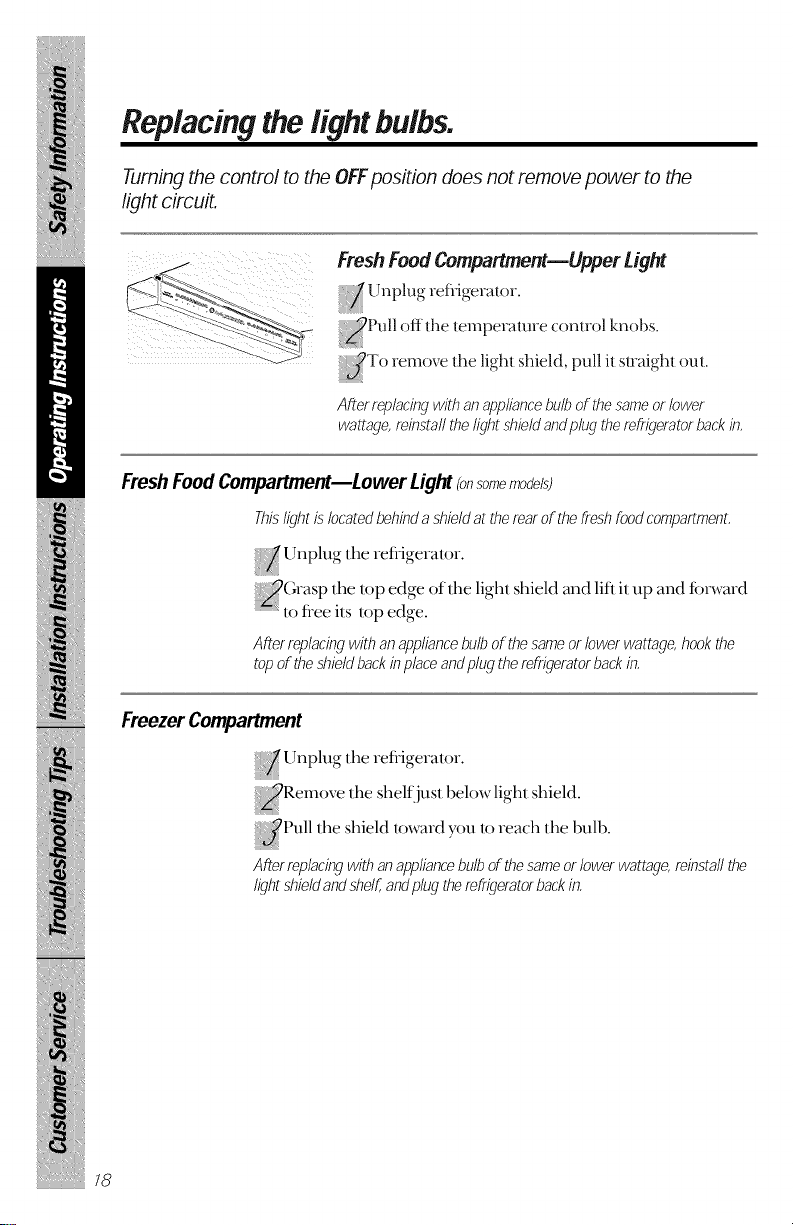
FreshFood Compartment--Upper Light
_Pull off the temperatu|e conuol knobs.
iiJTo remove tim light shield, pull it suaighl out.
Afterreplacingwithanappliancebulbofthesameor lower
wattage,minstafltheliqhts#ieldandpluqthemfriqeratorbackin,
Thislightislocatedbehindashieldattherearof thefreshfoodcompartmenL
,_ Unplug the refligerator.
_(;rasp the top edge of the light shield and lift it up and tbm'ard
....................' to flee its lop edge.
Afterreplacingwithanappliancebulbofthesameor lowerwattage,hookthe
topoftheshieldbackinplaceandplugtherefrigeratorbackin,
Freezer Compartment
Unplug tl_e refligerator.
i_Remove tim shelf just below light shield.
}{}{{ , ,
{J_ Pull t_heshield toward you, to reach the 1)ulb.
Afterreplacingwithanappliancebulbof thesameorlowerwattage,reinstallthe
lightshieldandshelf,,andplugtherefrigeratorbackin,
Preparing to install the refrigerator.
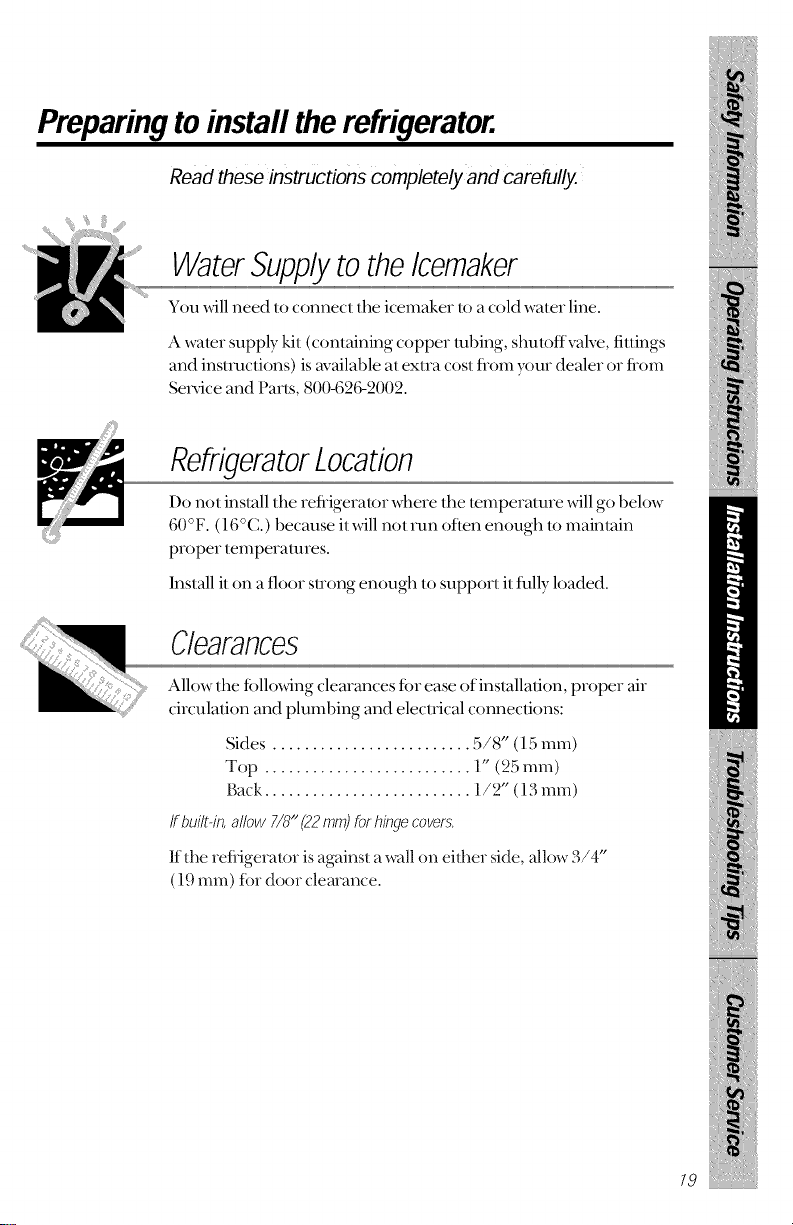
Read these instructions completely and carefully.
WaterSupplyto theIcemaker
You _dllneed 1oconnec! lhe icemaker 1o acold waler line.
A water supply kit (containing copper tubing, shuloffvalve, fittings
and instnlclions) is available al extra cos! from your dealer or from
Service and Paris, 800-626-2002.
RefrigeratorLocation
Do not inslall the refiigeralor where the temperature will go below
60 °F. (16 °C.) because il will nol nm often enough 1omainlain
proper temperatures.
Inslall i!on a floor suong enough 1o suppor! i!flflly loaded.
Clearances
Allow the fi_llo_dng clearances %r ease ofinstallalion, proper air
circulation and plumbing and elecnical conneclions:
Sides ......................... 5/8" (15 ram)
Top .......................... 1" (25 mm)
Back .......................... 1/2" (13 ram)
Ifbuilt-in,allow 7/8"(22ram)forhin.qecovers,
If the refiigeralor isagainsl a wall on either side, allow 3/4"
(19 ram) tbr door clemance.
19
Preparing toinstalltherefrigerator.
Read theSe instructions completely and carefully.
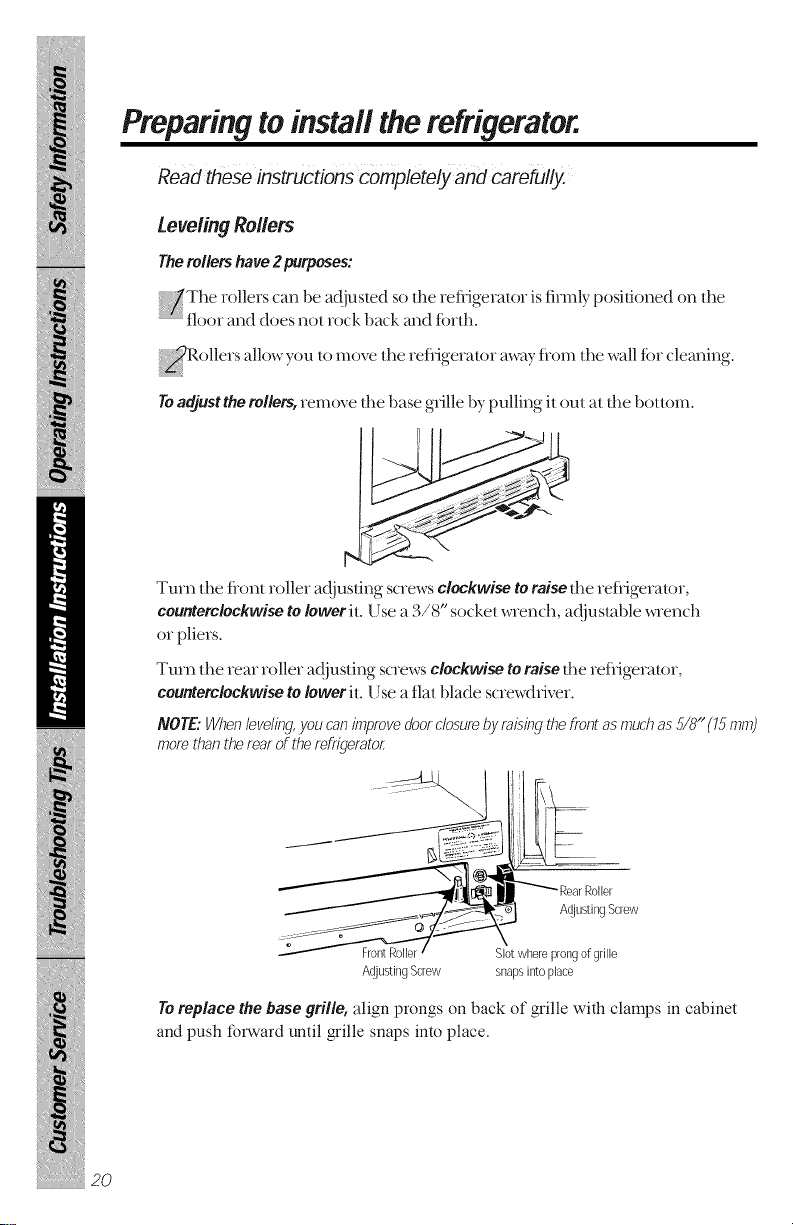
Leveling Rollers
Therollershave2purposes:
Z_ tloor and does not rock back and tbrd_i
JRollers allow you 1omove the refligerator away flom the wall tot cleaning.
Toadjust the rollers, remove d_e base g_ille by pulling il out at tl_e bottom.
rollers can be adjusted so the reiiigerator is firmly positioned on tl_e
iiiiiiiili"rliiiii'f !ll
Turn the flont roller adiusting screws clockwise to raise ll_e refligeraIor,
counterclockwise to lower it. Use a 3/8" socket wrench, ar!iusmble wrench
or pliers.
Turn the rear roller a(!iusfing screws clockwise to raise ll_ereflig_ralor,
counterclockwise to lower i_. I;so a tlat blade screwrhiver.
NOTE:Whenleveling,Nu canimprovedr)ofclosurebyrasingthefrontasmuchas5/8" (15mm)
morethanthefearoftheraffia/orator
AdJustingScrew
Toreplace the base grille, align prongs on back of grille with clamps in cabinet
and push focward until grille snaps into place.
20
Slotwhere prongofgrille
snapsintoplace
Adding doorpanels.
Onmodels with a trim kit
Read these instructions completely and carefully.
BeforeYouBegin
These instructions describe how to insert decorator panels
and what size the panels should be.
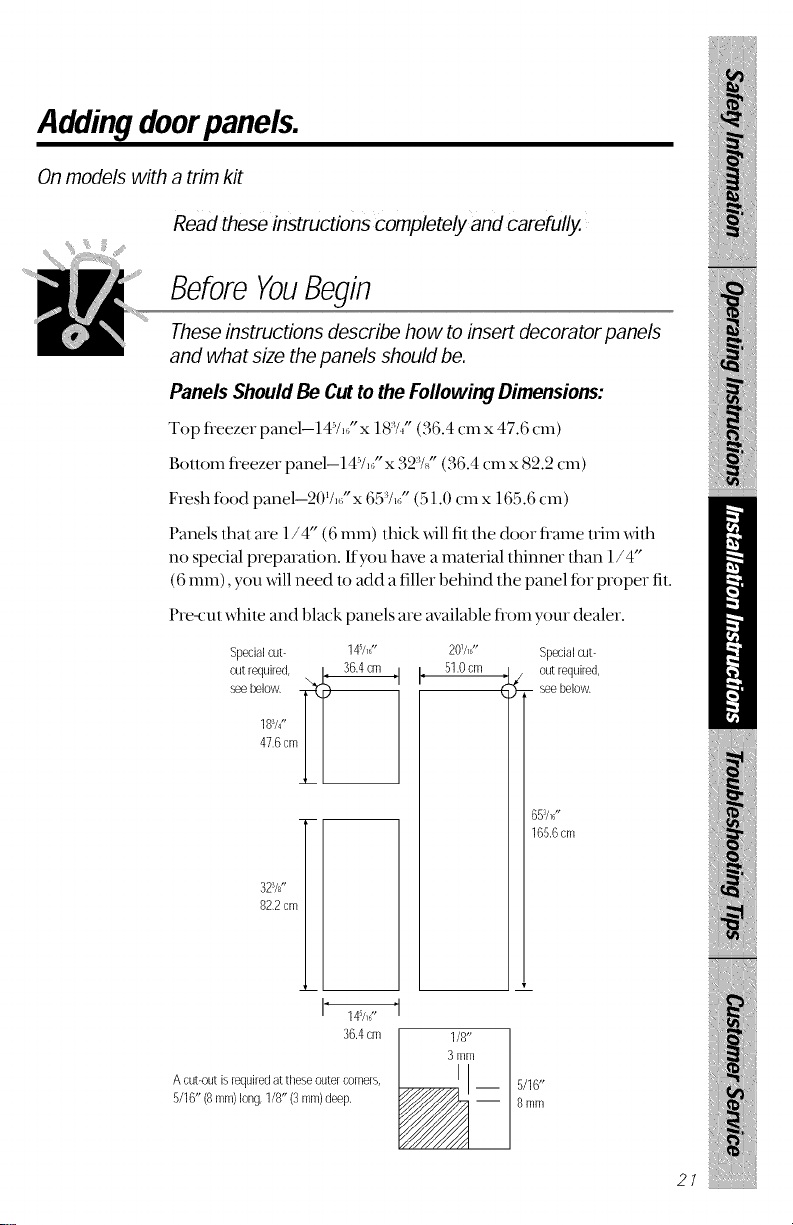
Panels Should Be Cut to the Following Dimensions:
Top fieezer panel--14:'//'x 187t" (36.4 cmx 47.6 cm)
Bouom fieeze_ panel--14/, x a2/_ (a6.4 tm x 82.2 cm)
Fresh tbod panel-20%,"x 657,/" (51.0 cmx 165.6 cm)
Panels lhat m-e 1/4" (6 ram) thick xdll fit lhe door flame ldm xdlh
no special prepmafion. If you have a malerial thinner lhan 1/4"
(6 ram), you xdll need 1oadd a filler behind lhe panel fbr proper fil.
Pre-cul while and black panels are available from your dealer.
Specialcut- 14%"
out required, \.
see below,
18_:'II I
20%" Specialcut-
51,0cm / outrequired,
( _ seebelow,
47,6cmJ_
_m
32s/8,,
82,2cm
36.4cm
Acut-outisrequiredat theseoutercorners,
5/16" (8mm)long,1/8"(3mm)deep.
3ram
1/8"
165.6cm
5/16"
8mm
21
insertingthedoorpanels.
Read theSe instructions completely and carefully.
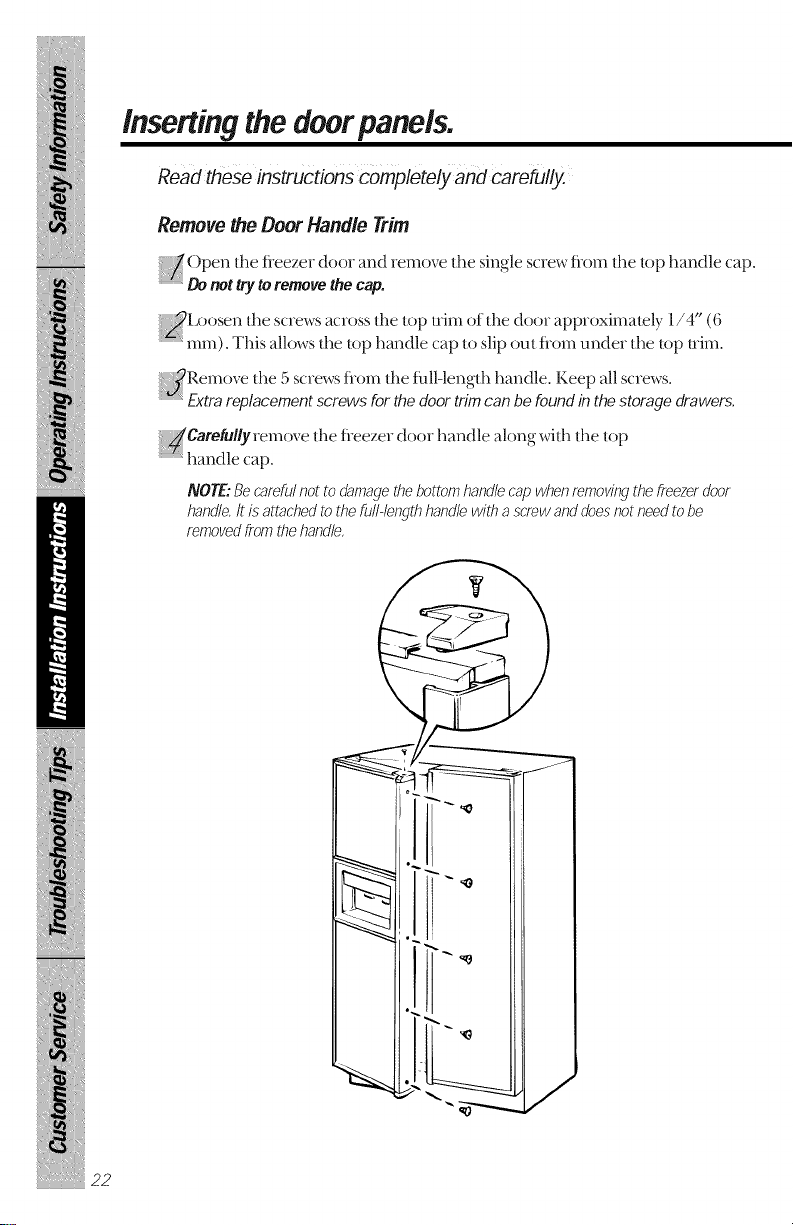
Remove the Door Handle Trim
! ;_ ()pen the fleezer door and remove the single s(Tew flom the top handle cap.
Do not tryto remove the cap.
_Ix)osen the screws across lhe top uim of d_e door approximately 1/4" (6
ram). This allows the top handle cap to slip out flom under the lop uim.
:JRemove the 5 screws flom the fl_ll-length handle. Keep all screws.
Extra replacement screws for ae door trim can be found in the storage drawers.
iiiiiiiili"rliiiii'f !ll
idCarefully remove the fleezer door handle along with the top
Nhandle cap.
NOTE:Be careful not to damage thebottom handle cap when removing the freezerdoor
handle, It is attached to the full-length handle with a screw and doesnot need to be
removed from thehandle,
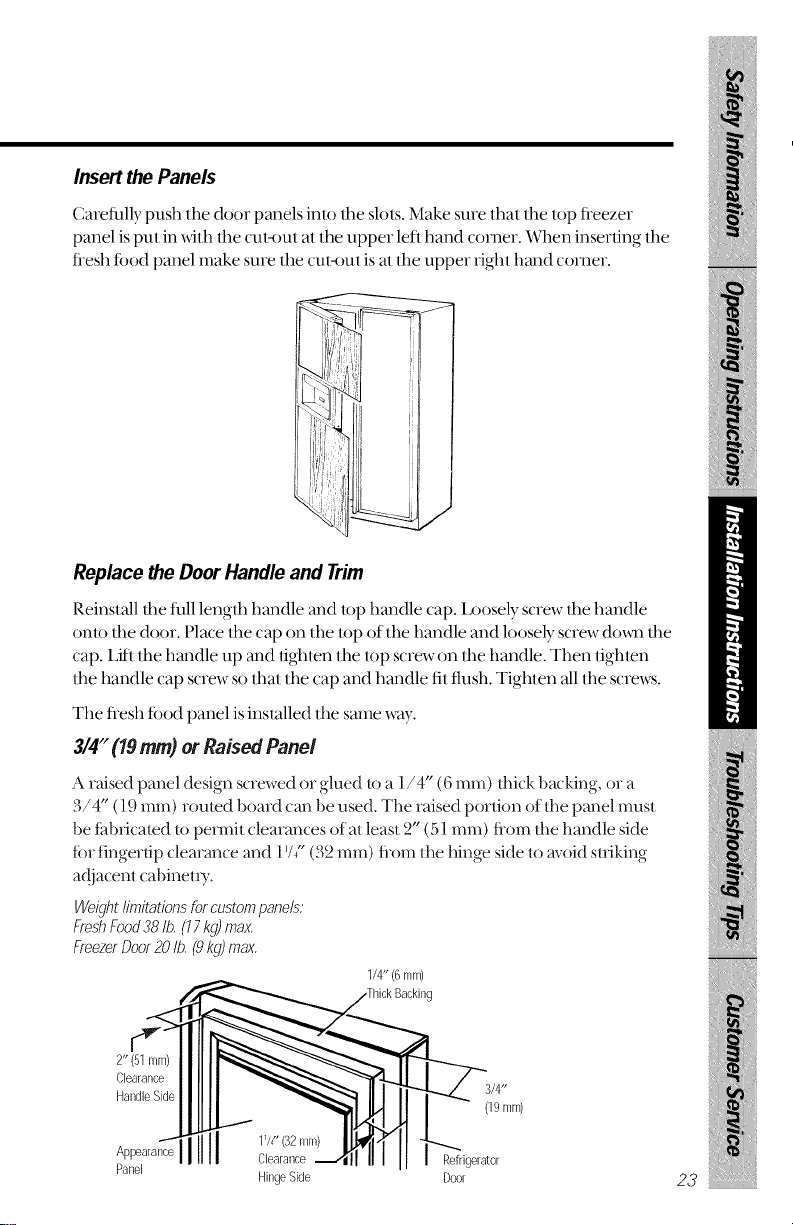
Insert thePanels
Carefully push the door panels into tile slots. Make sure that the top freezer
panel is put in _dth tile cutrout at tile upper left hand Colonel -.When inserting tile
flesh food panel make sure the cut-out is at tile upper right hand Colonel ".
Replace theDoor Handle and Trim
Reinstall tile tull length handle and top handle cap. Loosely screw file handle
onto tile door. Place tile cap on tile lop of tile handle and loosely screw doom file
cap. Litl file handle up and lighten tile lop screwon tile handle. Then fighlen
tile handle cap screw so that tile cap and handle fit flush. Tighten all tile scre,,_s.
Tile flesh food panel is installed the same way.
3/4" (19ram) or Raised Panel
A raised panel design screwed or glued to a 1/4" (6 ram) fllick backing, or a
3/4" (19 ram) toured board can be used. Tile raised portion of the panel umst
be iabricamd to permit clearances of at least 2" (51 mm) flom tile handle side
fbr fingertip clearance and 1*/_"(32 ram) fiom tile hinge side to avoid striking
ac!jacent cabinen T.
Weightlimitationsforcustompanels:
Ff_shFood38Ib,(17kg)max.
FreezerDoor20Ib,(9kg)max.
1/4" (6ram)
2" (51mm)
Clearance
HandleSide
Appearance Clearance
Panel
HingeSide
3/4"
(19ram)
Re[rigerator
Door
23
installingthe water line.
iiiiiiiiliqiiiif !ll
Read these instructions completely and carefully.
BeforeYouBegin
This water line installation is not warranted by the
refrigerator or icemaker manufacturer. Follow these
instructions carefully to minimize the risk of expensive
water damage.
Water hammer (water banging in the pipes) in house
plumbing can cause damage to refrigerator parts and lead
to water leakage or flooding. Carla qualified plumber to
correct water hammer before installing the water supply
line to the refrigerator.
Toprevent burns and product damage, do not hook up the
water line to the hot water line.
Ifyou use your refrigerator before connecting the water line,
make sure the icemaker feeler arm is kept in the STOP(up)
position.
Do not instafl the icemaker tubing in areas where
temperatures fail below freezing.
When using any electrical device (such as a power drill)
during installation, be sure the device is insulated or wired
in a manner to prevent the hazard of electric shock.
Aft installations must be in accordance with local plumbing
code requirements.
What YouWill Need
Todetermine how much copper tubing you need:
dis, ,nce wa, r °,,theb ckof
refligerator to the ,,'ate*' Supply pipe:The** add 8 tee* (244 cm)-
Be sm-e there isSufficient exlra tubing [about 8 Ie,et (244 Cm)
coiled into 3 rams of ab0ut !0 inches (25 cm)diameter] m allow
the retiigeramr m move out fl'om the wall after installationl
A water supply kit (conlaining copper lubing, shuloffvalve and
fillings lisled below) is available al exlra cosl from your dealer or
from Paris and Accessories, 800-626-2002.
Coldwater supply.The waler pressure inusI 1)e1)el_veen
20 and 120 p.s.i.
Powerdrill.
Copper tubing, 1/4" oulei diamete_ lo connecl lhe refiigeralor to
the waler supply. 1_ sure both ends of the tubing are cul square.
Donotuseplastictubingorplasticfittingsbecausethewatersupplylineisunder
pressureatall times,Certaintypesofplastictubingmaybecomebrittle withage
andcrock,resultinginwaterleakage,
Two 1/4" outer diameter compression nuts and 2 ferrules (sleeves)--
to connect the copper tubing to the shuloflvalve and the
refiigeralor water valve.
If your existing waler line has a flared fiuing al the end, you xdll
need an adapter (available at plumbing supply slDres) IDconnecl
the waler line lo the retiigeralor ORyou can cut off the flared
filling with a tube cutter and then use a compression filling.
Shutoffvalveto connect to the cold water line. The shu/offvalve
should have a waler inlel xdth a minimum inside dimneler of
5/32" al the point of connection lo the COLDWATERLINE.Saddle-
bi)e shuloffvalves are included in many wamr supply kils. Betore
purchasing, make sure a saddle-bi)e valve complies _dth your
local plumbing codes.
25
installingthe water line.
Read these instructions completely and carefully.
ShutOfftheMain WaterSupply
Turn on the nem-est framer long enough to dear the line of water.
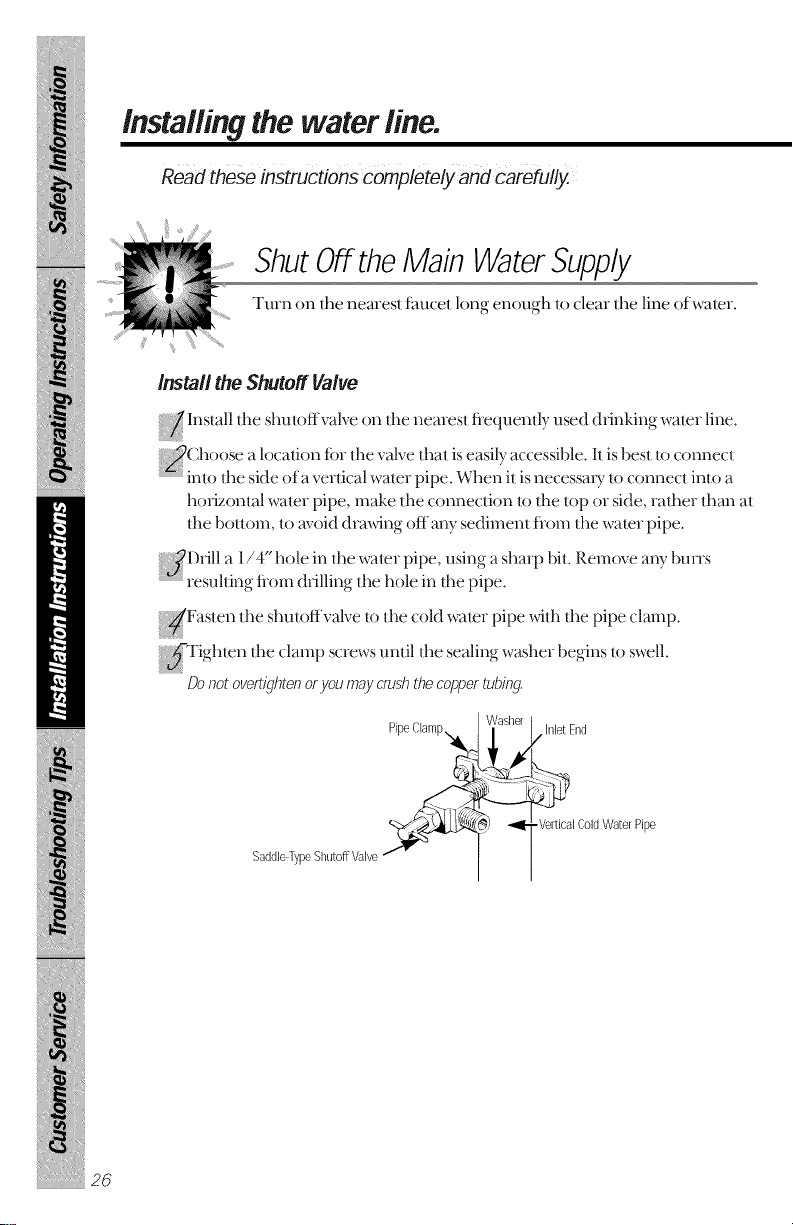
Install theShutoff Valve
iiiiiiiifliiiiif !ll
}_ Install the shutoffvalve on the nearest flequenlly used drinking water line.
_Choose a location fbr the valve Ilia! iseasily accessible.I! is best to connect
...... into the side of a vertical water pipe. When it is necessm T to connect into a
ho_ontal water pipe, make the connection to the top or side, rather than at
the bottoln, to m_oiddrawing off any sediment flom the water pipe.
_D_lll a 1/4 hole in the water pipe using a sharp bl[. Remove any buns
_resuhing fiom drilling the hole in the [_ipe.
__Faslen the shutoffvalve 1o the cold water pipe with the pipe clamp.
{
j _ighlen the clamp screws until the sealing washer begins to swell.
Donotovat{c]htenoryoumaycmsflthecoppertubiW,
Saddle-TypeShutoffValveT
PipeClamp,_
hlet End
-VeiticalColdWater Pipe
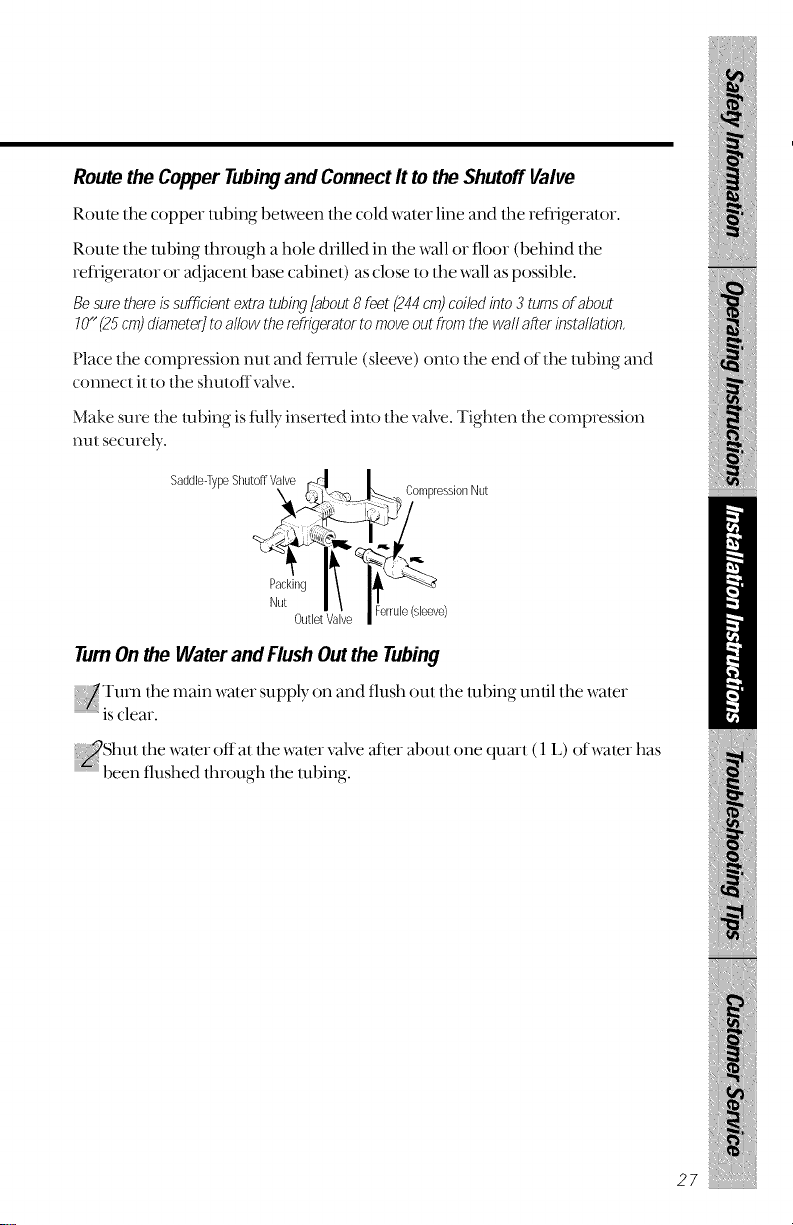
Routethe CopperTubingand ConnectIt to the Shutoff Valve
Route the copper tubing bel_en the cold water line and the refligeralor.
Roule the lubing lhrough a hole drilled in lhe wall or floor (behind the
refligeralor or adjacenl base €abinel} as €lose 1o lhe wall as possible.
Besurethereissufficientextratubing/about8 feet(244cm)coiledinto3 turnsofabout
10"(25cm)diameter]toallowthef_ff_t]eratof to move outff_mthewailafterinstallation,
Place the compression nut and fenule (sleeve) onto the end of the tubing and
connect it lo the shutoffvalve.
Make sure the tubing is fully inserted inlo the valve. Tighlen the compression
nul securely.
Saddle-TypeShutoffValve _ CompressiorlNut
Nut C2ut,et|Va_,e Ferrule(sleeve)
TurnOnthe Water and FlushOut the Tubing
the main water supply on and flush out the tubing m_fil the water
is clear.
_Shut the water off at the water valve atler aboul one quart ( 1 L) of water has
{{"{{'_been flushed through the robing.
27
installingthe water line.
Read theseinstructions completely and carefully.
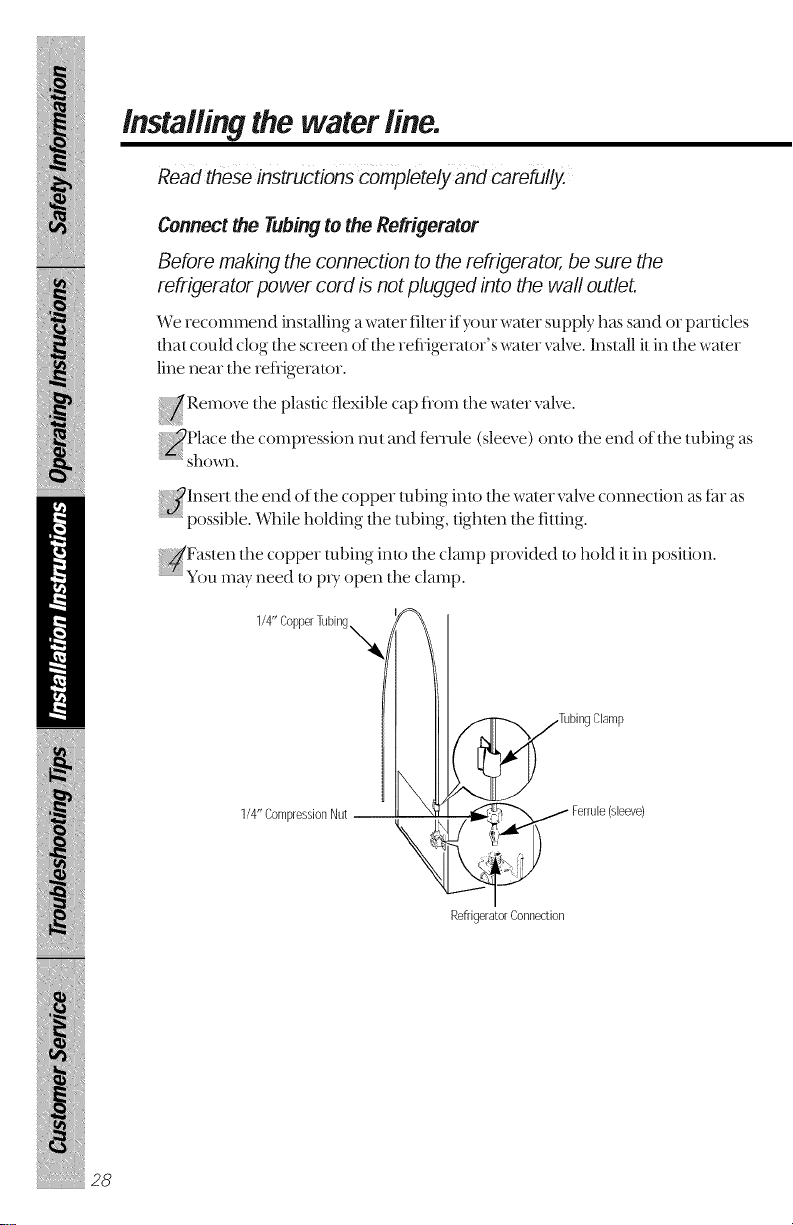
Connect the Tubing tothe Refrigerator
Before making the connection to the refrigerator, be sure the
refrigerator power cord is not plugged into the wall outlet.
We recommend installing awater filter if yore water supply has sand or panicles
dmt could clog the screen of tl_eretiJgerator's water valve. Install it in tl_e water
line near the retiJgerator.
}_ Remove the plastic flexible cap fiom the water valve.
iiiiiiiifliiiiif !ll
_Place dm compression nut and tenule (sleeve) onto tl_e end of tl_e tubing as
sho_m.
_Insen the end of the copper tubing into the wate_ valve connection as tin as
_possible. X_q_ileholding tl_e tubing, tighten tl_efitting.
!_Fasten the copper tubing into the clamp provided to hold it in position.
................................' You may need to po_ open the clamp.
1/#'CopperTubing,_ _
1/4" CompressionNut
TubingClamp
Ferrule(sleeve)
RefrigeratorConnection
Turnthe Water Onat theShutoff Valve
Tighten any (onne(lions that leak.
Plug In the Refrigerator
Anange tile coil of copper tubing SOthat it does not vibrate against tile back of
tile refligerator or against tile wall.
Push tile reflJgerator back to tile wall.
Start the Icemaker
Set tile icemaker feeler arm to tile ON (do_I1) position. Tile icemaker will
not begin to operate until it reaches its operating temperaulre of 15°F. (-9°C.)
or below. It xdll then begin operation automatically if tile icemaker teeler arm is
in tile ON (do_I1) position.
NOTE:Theicemakermaydouble-cyclewhenit firststarts,causingsomewaterspillagefrom
theicemakerint(Jtheicebucket,ThisisncJrmalandshcJuldnothappena.?ain,
29
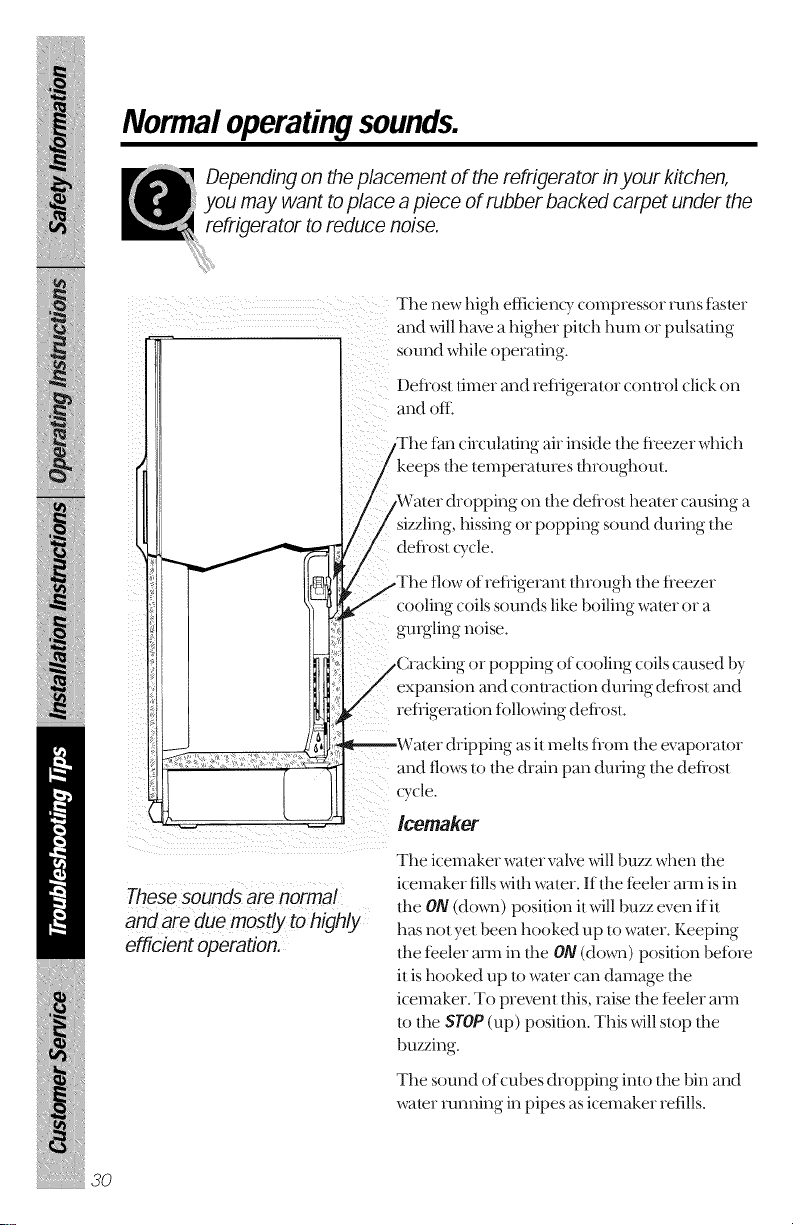
Normal operatingsounds.
Depending on the placement of the refrigerator in your kitchen,
you may want to place a piece of rubber backed carpet under the
refrigerator to reduce noise.
ii! (( ¸¸(¸¸77¸7¸¸¸(i(
These sounds are normal
and are due mostly to highly
efficient operation.
The new high eflicienQ, compressor runs fhsler
and will have a higher pitch hum or pulsa|Jng
sound while opera|Jng.
Deflost timer and refligera|or conuol click on
and ofl_
The fhn circulating air inside t}_efleezer which
Ihioui{ht)ul.
_Water dropping on the detiost heater causing a
sizzling, hissing or popping sound dining the
defrost (Tcle.
flow of refligerant through the heezer
cooling coils sounds like boiling water or a
gurgling noise.
,,or popping of cooling coilscaused by
expansion and contiaction dining deflost and
_efligeratJon tbllo,_ng detiost.
asit mehs from dm evaporator
and flows to the drain pan dining the defiost
Q_cle.
Icemaker
The icemaker water vah,e x_411buzz when tim
icemaker fills _itl_ water. If the feeler ann is in
the ON (do_m) posiuon it will buzz even if it
has not yet been hooked up to wamr. Keeping
the feeler m_n in tim ON (do_m) position befbre
it is hooked up to water can damage the
icemaker. To prevent this, raise the feeler ann
1,)the STOP(up) position. This _qll stop the
buzzing.
The sound ofcubes dropping into the bin and
water running in pipes asicemaker refills.
30
 Loading...