

GE PSB42YPHSV Specification Sheet
PSB42YPH
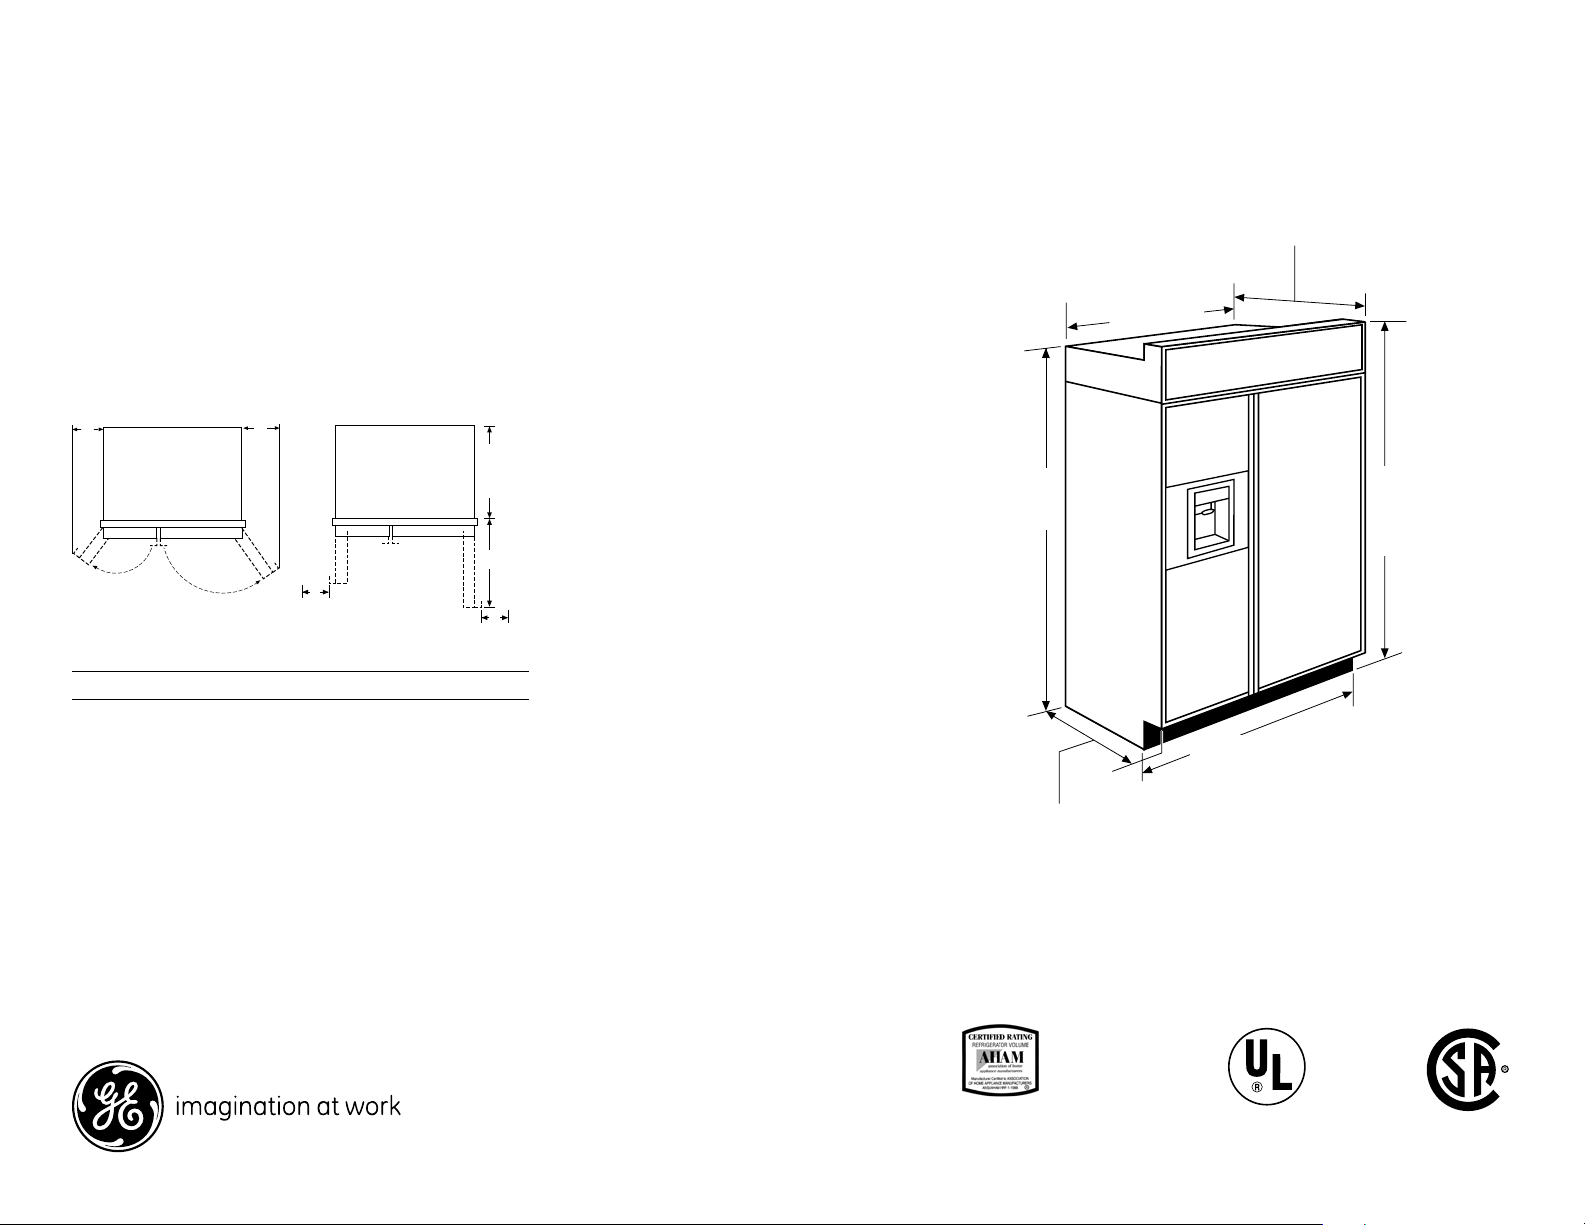
Handles 27"
25-3/8" Case Depth
Top Frame
23-7/8"
D
GE Profile™ Series 42" Built-In Stainless Side-By-Side Refrigerator with Dispenser
Dimensions and Installation Information
Product Clearances
These refrigerators are equipped with a 2 position
door stop. The factory set 130° door swing can be
adjusted to 90° if clearance to adjacent cabinets or
walls is restricted.
130° Door Swing 90° Door Swing
A
B
Stainless Steel Wrapped Refrigerators
Stainless Steel wrapped refrigerators have wrapped
doors and grille panels, and beveled edges. These
models are shipped ready for installation.
41"
Case Width
Behind
Frame
C
Models A B C D
42" 12-3/16" 16" 24" 4"
Allow minimum clearances for Freezer door (Dimension
A) and Fresh Food door (Dimension B) for a full 130°
door swing and to allow for drawer removal.
Four inch (4") minimum clearance is required when
door swing is adjusted to 90°. If the 90° door stop
position is used, drawer access is maintained, but
drawer removal is restricted.
For answers to your Monogram,® GE Profile™ or
GE® appliance questions, visit our website at
ge.com or call GE Answer Center® service,
800.626.2000.
D
*81-3/4"
at Rear
*84" From
Floor to
42" Frame-to-Frame
Depth Including
* Shipping height
* The front height may be adjusted from 83-1/2"
to 84-1/2" by adjusting front and rear leveling
legs a maximum of 1".
Total volume and shelf
area are calculated by
the Association of Home
Appliance Manufacturers’
standards.
Listed by
Underwriters
Laboratories
Specification Created 7/14
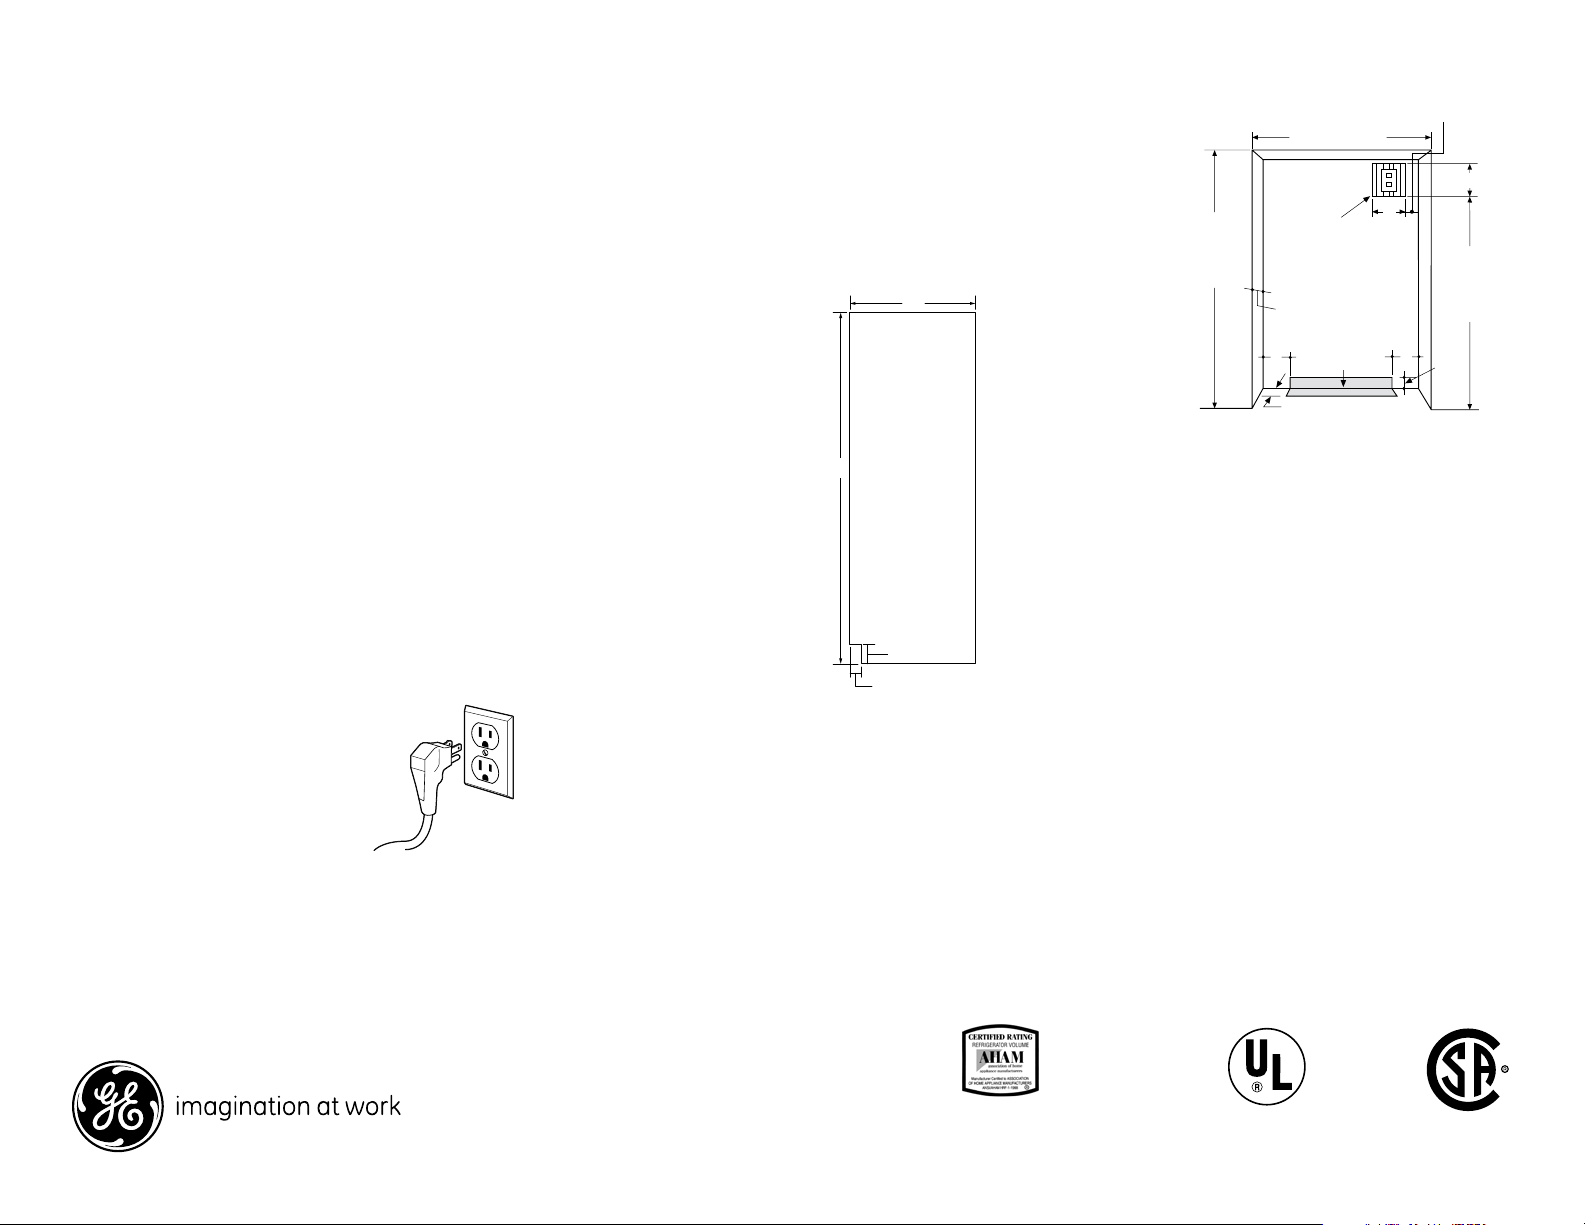
24"
*84"
1-1/2"
84 1/2" max
of Electrical
3 1/2"
3"
PSB42YPH
The Installation Space
GE Profile™ Series 42" Built-In Stainless Side-By-Side Refrigerator with Dispenser
Dimensions and Installation Information
Grounding the Refrigerator
IMPORTANT—Please read carefully
FOR PERSONAL SAFETY, THIS APPLIANCE MUST BE
PROPERLY GROUNDED.
The power supply cord of this appliance is equipped
with a three-prong (grounding) plug which mates with
a standard three-prong (grounding) wall receptacle to
minimize the possibility of electric shock hazard from
this appliance.
Have the wall outlet and circuit checked by a qualified
electrician to make sure the outlet is properly grounded.
Where a standard 2-prong wall outlet is encountered, it
is your personal responsibility and obligation to have it
replaced with a properly grounded 3-prong wall outlet.
DO NOT, UNDER ANY
CIRCUMSTANCES, CUT
OR REMOVE THE THIRD
(GROUND) PRONG FROM
THE POWER CORD.
DO NOT USE AN ADAPTER PLUG
TO CONNECT THE REFRIGERATOR
TO A 2-PRONG OUTLET.
DO NOT USE AN EXTENSION CORD
WITH THIS APPLIANCE.
For answers to your Monogram,® GE Profile™ or
GE® appliance questions, visit our website at
ge.com or call GE Answer Center® service,
800.626.2000.
Side Panels
Side panels (not supplied)
must be used whenever
the sides of the refrigerator
will be exposed. The 1/4"
side panels will slip into the
side case trim. Order side
panels from your cabinet
manufacturer.
* Depending on
installation height.
*3" to 4"
Flooring
For proper installation, this refrigerator must be placed
on a level surface of hard material that is at the same
height as the rest of the flooring. This surface should be
strong enough to support a fully loaded refrigerator, or
approximately 1500 lbs.
NOTE: Protect the finish of the flooring. Cut a large
section of the cardboard carton and place under the
refrigerator where you are working.
*The finished cutout width must be: 41-1/2" for 42" models
Water and Electrical Locations
The opening must be prepared with the electrical and
water supply located as shown.
The cutout depth must be 24"
The refrigerator will project forward, slightly beyond
adjacent cabinets, depending on your installation.
Additional Specifications
• A 120 volt, 60Hz, 15 or 20 amp power supply is required.
An individual properly grounded branch circuit or circuit
breaker is recommended. Install a properly grounded 3prong electrical receptacle recessed into the back wall.
Electrical must be located on rear wall as shown.
Note: GFI (ground fault interrupter) is not recommended.
• Water line can enter the opening through the floor or
rear wall. The water line installed should be 1/4" O.D.
copper tubing or GE SmartConnect™ tubing between
the cold water line and water connection location. The
line should be long enough to extend to the front of the
refrigerator. Installation of an easily accessible shutoff
valve in the water line is required.
Total volume and shelf
area are calculated by
the Association of Home
Appliance Manufacturers’
standards.
83 1/2" min
Finished
Opening
*Finished Width
7"
Electrical
Area
24"
5"
Water Supply
Listed by
Underwriters
Laboratories
7"
74"
From Floor
to Bottom
5"
3 1/2"
Specification Created 7/14
 Loading...