

Page 1

GE Fanuc Automation
Programmable Control Products
Panel C
Industrial Computer
Hardware User's Manual
GFK-2251 May 2003
Page 2

Warnings, Cautions, and Notes
as Used in this Publication
Warning notices are used in this publication to emphasize that hazardous
voltages, currents, temperatures, or other conditions that could cause personal
injury exist in this equipment or may be associated with its use.
In situations where inattention could cause either personal injury or damage to
equipment, a Warning notice is used.
Caution notices are used where equipment might be damaged if care is not
taken.
GFL-002
Warning
Caution
Note: Notes merely call attention to information that is especially significant to
understanding and operating the equipment.
This document is based on information available at the time of its publication. While
efforts have been made to be accurate, the information contained herein does not
purport to cover all details or variations in hardware or software, nor to provide for
every possible contingency in connection with installation, operation, or maintenance.
Features may be described herein which are not present in all hardware and software
systems. GE Fanuc Automation assumes no obligation of notice to holders of this
document with respect to changes subsequently made.
GE Fanuc Automation makes no representation or warranty, expressed, implied, or
statutory with respect to, and assumes no responsibility for the accuracy,
completeness, sufficiency, or usefulness of the information contained herein. No
warranties of merchantability or fitness for purpose shall apply.
The following are trademarks of GE Fanuc Automation North America, Inc.
Alarm Master Genius PROMACRO Series Six
CIMPLICITY Helpmate PowerMotion Series Three
CIMPLICITY 90–ADS Logicmaster PowerTRAC VersaMax
CIMSTAR Modelmaster Series 90 VersaPro
Field Control Motion Mate Series Five VuMaster
GEnet ProLoop Series One Workmaster
©Copyright 2003 GE Fanuc Automation North America, Inc.
All Rights Reserved.
Page 3

Content of This Manual
This manual describes the features and operation of the following Panel C industrial computer
products:
15.0" Industrial Computer with Windows NT® operating system
15.0" Industrial Computer with Windows 2000® operating system
Preface
GFK-2251 iii
Page 4

Page 5

Contents
Chapter 1 Panel C Industrial Computer Features............................................................. 1-1
Feature Summary................................................................................................ 1-2
Removable Hard Disk Drive...............................................................................1-3
CD-ROM .............................................................................................................. 1-3
Front Panel Keypads........................................................................................... 1-3
Status LEDs..........................................................................................................1-3
Front Access Panel ..............................................................................................1-4
I/O Channels ........................................................................................................ 1-4
Network Interface................................................................................................ 1-5
Expansion Slots.................................................................................................... 1-6
Application Software........................................................................................... 1-6
Chapter 2 Powerup and Software Installation ...................................................................2-1
Setup ..................................................................................................................... 2-1
Initial Startup Procedure ................................................................................................... 2-1
Startup for Windows NT Systems ....................................................................................2-2
Startup for Windows 2000 Systems.................................................................................. 2-3
Configuring the Industrial Computer to Run on a Microsoft Network............................. 2-4
Installing Application Software .........................................................................2-8
Directory Structure ............................................................................................. 2-8
Image Recovery ...................................................................................................2-9
Shutting Down the Computer.............................................................................2-9
Chapter 3 Hardware Installation......................................................................................... 3-1
Warnings for Class 1 Division 2 Approval........................................................ 3-1
Installation Guidelines ........................................................................................ 3-2
AC Input Power ................................................................................................................ 3-2
Panel Mounting................................................................................................................. 3-2
Cutting the Panel Cutout................................................................................................... 3-2
Installing Panel Mounting Clips .......................................................................................3-3
Installing Expansion Cards ................................................................................3-5
Blanking Plates........................................................................................................... 3-5
Configuring Expansion Cards (Legacy ISA Only) ........................................................... 3-6
Chapter 4 Connectors and Cabling .....................................................................................4-1
Power Input..........................................................................................................4-2
Communications Ports........................................................................................4-3
Port Configurations........................................................................................................... 4-3
GFK-2251 v
Page 6

Contents
USB Ports ......................................................................................................................... 4-3
Compact Flash Port........................................................................................................... 4-3
Mouse and Keyboard Ports............................................................................................... 4-4
Floppy Disk Drive and CD-ROM Ports............................................................................ 4-5
Video Output Port............................................................................................................. 4-5
Printer Port LPT1.............................................................................................................. 4-6
Serial Communication Ports ............................................................................................. 4-7
Shielding..................................................................................................................... 4-7
Grounding................................................................................................................... 4-7
Ethernet Communication Port...........................................................................................4-8
Grounding................................................................................................................... 4-8
Alternate Grounding Method ..................................................................................... 4-8
Chapter 5 System Operation ................................................................................................ 5-1
System Peripherals ..............................................................................................5-2
Removable Hard Disk Drive............................................................................................. 5-2
CD-ROM Drive ................................................................................................................5-2
Floppy Disk Drive............................................................................................................. 5-2
External Keyboard and Mouse.......................................................................................... 5-2
Graphic System................................................................................................................. 5-2
Operator Interfaces .............................................................................................5-3
Keypads ............................................................................................................................ 5-3
Control and Status LEDs............................................................................................ 5-6
Touch Screen.............................................................................................................. 5-6
Touch Screen Driver for Windows.............................................................................5-6
Communications.................................................................................................. 5-7
Chapter 6 BIOS Settings....................................................................................................... 6-1
Chapter 7 Diagnostics and Troubleshooting....................................................................... 7-1
Self-Test Diagnostics ...........................................................................................7-1
System Test and Initialization ............................................................................7-1
System Configuration Verification .................................................................... 7-1
Troubleshooting...................................................................................................7-2
Powerup ............................................................................................................................ 7-2
Display .............................................................................................................................. 7-2
Memory............................................................................................................................. 7-3
External PS/2 Mouse......................................................................................................... 7-3
Keyboard........................................................................................................................... 7-3
vi Panel C Industrial Computer Hardware User's Manual–May 2003 GFK-2251
Page 7

Contents
Communications ............................................................................................................... 7-4
PLC/PC Connection ................................................................................................... 7-4
CNC/PC Communications..........................................................................................7-4
Network Communications.......................................................................................... 7-5
Printing ....................................................................................................................... 7-5
CMOS Checksum Error .....................................................................................7-6
To replace the battery: ...................................................................................................... 7-6
Chapter 8 Technical Data ..................................................................................................... 8-1
Monitor System.................................................................................................... 8-1
Industrial PC........................................................................................................8-1
Appendix A Product Agency Approvals, Standards, and General Specifications ............A-1
Agency Approvals............................................................................................... A-1
Government Regulations ................................................................................... A-2
General Specifications........................................................................................ A-3
Nonincendive Field Wiring (Control Drawing #DR00) .................................. A-4
GFK-2251 Contents vii
Page 8

Contents
Figure 1-1. Ethernet port and side expansion slots....................................................................................... 1-5
Figure 3-1. Panel C Industrial Computer Dimensions................................................................................... 3-3
Figure 3-2. Installing Retaining Clips ...........................................................................................................3-4
Figure 4-1. Connectors Located Behind Front Access Panel ........................................................................4-3
Figure 4-2. Connector Locations on Right Side Panel .................................................................................. 4-4
Figure 4-3. High Frequency Grounding ........................................................................................................4-7
Figure 4-4. Cable Cover Shielding................................................................................................................ 4-8
Figure 4-5. Ground Plate Outline, Mounting Dimensions, and Cable Clamp............................................... 4-9
Figure 4-6. Example of Cable Shield Clamping Assembly Installation...................................................... 4-10
Figure 4-7. Cross Section of Cable Secured by Clamp ............................................................................... 4-10
Figure 4-8. Clamped Cable with Exposed Shield........................................................................................ 4-11
viii Panel C Industrial Computer Hardware User's Manual–May 2003 GFK-2251
Page 9

Contents
Table 3-1. I/O Port Range Table....................................................................................................................3-6
Table 5-1. Membrane Keypad Scan Codes [Reviewers: Verify AT Character and scan codes here].......... 5-4
Table 5-1. Membrane Keypad Scan Codes – Continued...............................................................................5-5
Table 5-2. Indicators...................................................................................................................................... 5-6
Table 5-3. Installed Network Components.................................................................................................... 5-7
GFK-2251 Contents ix
Page 10
Chapter
1
Panel C Industrial Computer Features
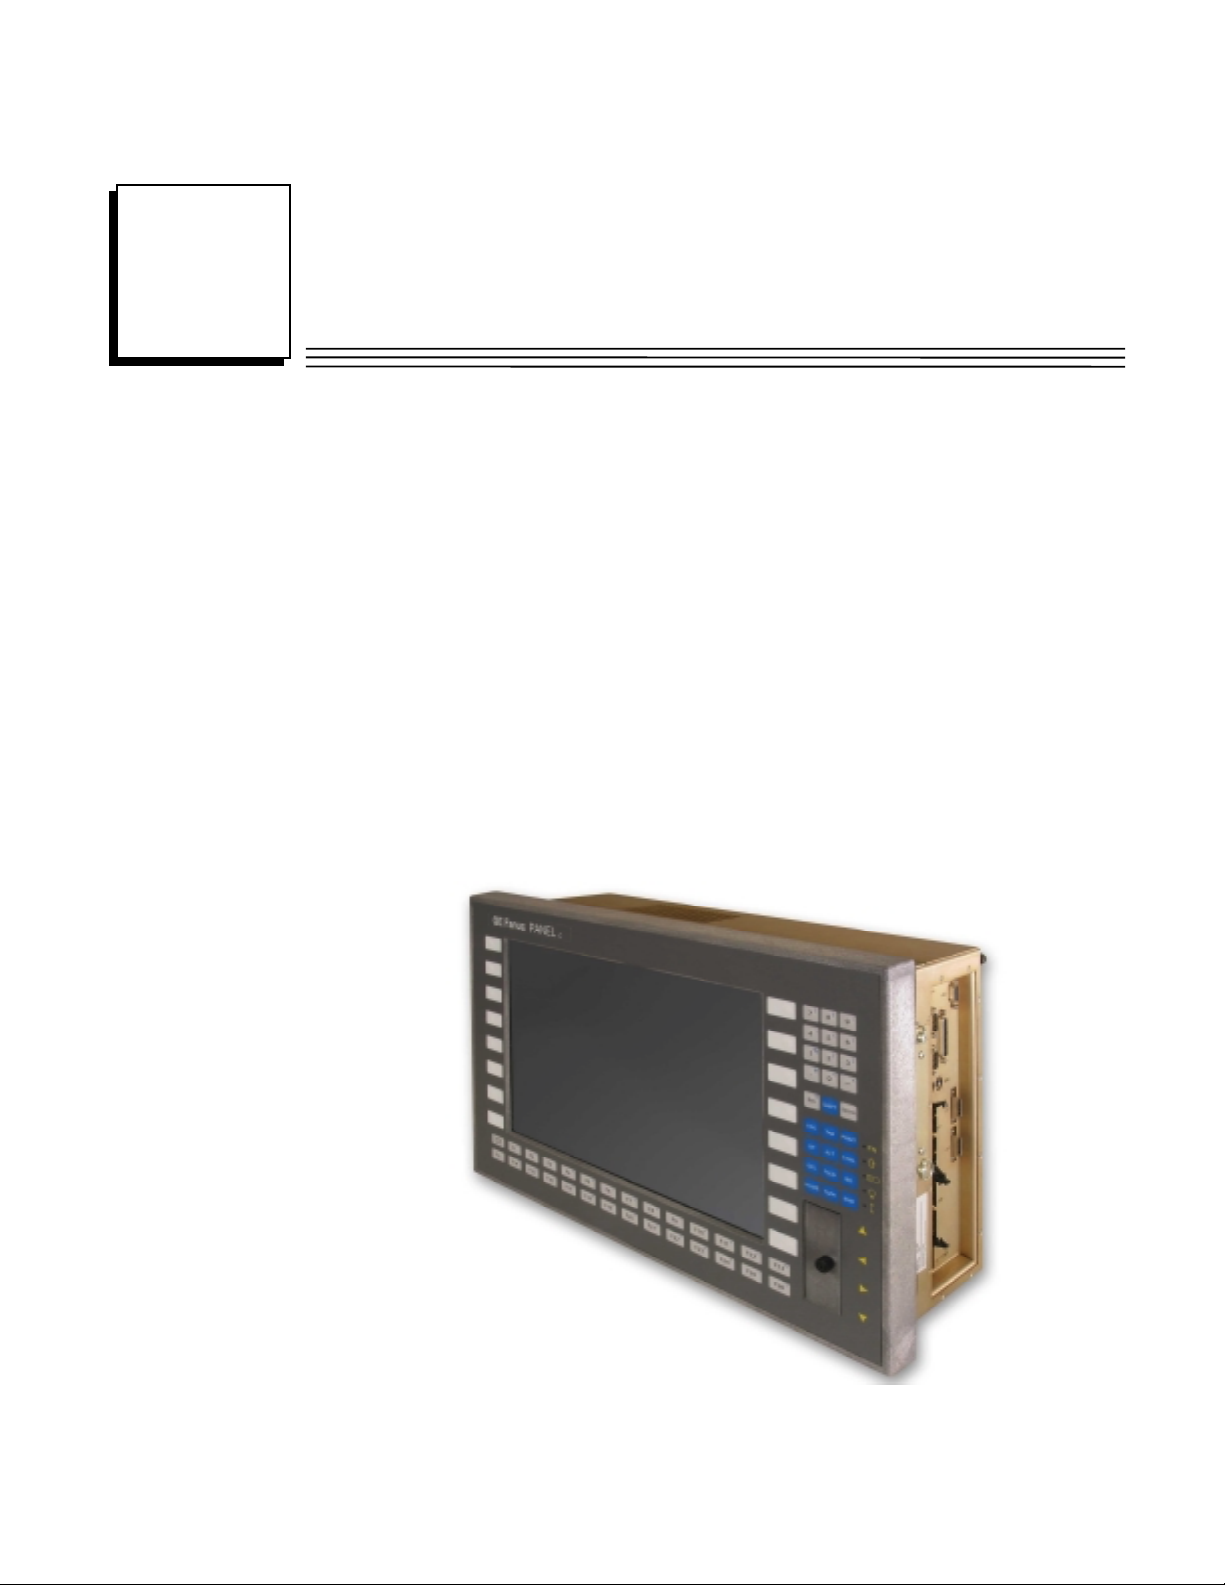
The Panel C industrial computer is a high performance workstation designed primarily for
use as a hardware platform for Human Machine Interface (HMI) and/or Supervisory
Control and Data Acquisition (SCADA) software packages running on Windows NT® or
Windows 2000® operating systems.
The Panel C industrial computer is a fully self contained PC-compatible computer with a
built-in flat screen display and resistive touch screen. The unit is housed in a rugged metal
case to protect the system against dust, water, and damage.
Panel C industrial computers accept either 115 VAC or 230 VAC input power.
The unit is supplied completely assembled and requires only mounting and connecting.
The use of special clips to secure the unit to the panel eliminates the need for mounting
holes and requires only one cut-out to mount the unit.
Before powering up your system for the first time, you should refer to the procedures in
Chapter 2, which contains information you need to set up the operating system and
network communications.
GFK-2251 1-1
Page 11

1
Feature Summary
When you purchase a Panel C, you receive:
■ Industrial computer with the operating system software installed.
■ Installation hardware
■ Microsoft Windows documentation, software distribution, Certificate of Authenticity
■ Power cord
■ Image Recovery Disk with instructions.
■ Installation/User's Manual
Feature Description
Operating system Microsoft Windows NT or Windows 2000
CPU Intel PIII 1 GHz
Cache 128K L2
Expansion slots One PCI, one shared PCI/ISA
Hard disk 20GB (minimum) (Removable)
Floppy disk drive 3.5 inch, 1.44MB (external connection)
RAM 256MB Maximum installed by factory.
Display 15.0” Color Active Matrix TFT –XGA 1024 x 768 resolution
Touch Screen High Resolution Resistive 1024 x 1024
Parallel ports One side access (LPT1)
Serial port Two side access (RS232)
USB ports Three available, two front access USB ports, one side
Compact Flash Type I, Compact Flash port.
Communications PCI 10/100 Ethernet (RJ-45) (side access)
Keyboard port PS/2, Side access
Mouse port PS/2, Side access
CD-ROM 32X (minimum) side access external connector.
Front Panel Keypads 74 Front panel keys; 26 Function keys. Refer to Chapter 5
and license agreement
Maximum upgrade: 512MB with non-registered, non-ECC
DIMMs,
access port.
for keypad layout.
1-2 Panel C Industrial Computer Hardware User's Manual – May 2003 GFK-2251
Page 12

Removable Hard Disk Drive
The Hard Disk Drive can be quickly removed for servicing or substitution.
Before installing or removing the Hard Disk Drive, remove power
from the unit. The proper method for removing power from the unit
is to switch off power at the circuit breaker.
CD-ROM
The external CD-ROM connector is located on the side access panel.
Before installing or removing the CD-ROM, remove power from the
unit. The proper method for removing power from the unit is to
switch off power at the circuit breaker.
1
Warning
Warning
Front Panel Keypads
The front panel is supplied with 26 function keys that double as a full alpha keypad. You
can enter all 26 alpha characters, selecting lower or upper case via the Fn and CAPS
LOCK keypads. A full numeric keypad with 13 additional alpha characters is available with
the SHIFT keypad. There are 12 control keys and 4 arrow keys. There are 16 special
function keypads for use in application software.
Status LEDs
Front panel mounted LEDs indicate Power, Hard Disk Drive (HDD) status, Compact Flash
inserted, and System error status. An LED will also indicate when the Fn keypad is
selected. The floppy drive has its own status indicator.
GFK-2251 Chapter 1 Panel C Industrial Computer Features 1-3
Page 13

1
Front Access Panel
The Panel C is equipped with a front access panel that provides access to the Compact
Flash port and two USB ports.
I/O Channels
The Panel C industrial computer provides the following I/O interface channels:
• Two RS-232 serial ports, COM1 and COM2 are accessible on the side panel.
Warning
Do not connect or disconnect to Compact Flash or USB ports while
power is applied to the industrial computer, unless the area is
known to be non-hazardous.
For Non-incendive field connections, refer to Control Drawing DR00,
which is provided in Appendix A.
• One enhanced parallel port, LPT1 is located on the side.
• PS2 connectors for Keyboard and Mouse.
• Three USB ports (includes two USB ports in the front access panel and one USB port
on the right side panel).
• Connector for external floppy disk drive (side access)
• Connector for external CD-ROM drive (side access)
• Video output (side access)
• Ethernet 10/100 base T (RJ-45) (side access)
If the end application requires serial or parallel interfaces in addition to those provided by
the standard system, these can be provided by the addition of specific PCI or ISA I/O
cards. A wide selection is available from third party sources to provide user flexibility.
Warning
Do not connect or disconnect to COM1, COM2, and LPT1 ports while
power is applied to the industrial computer, unless the area is
known to be non-hazardous.
1-4 Panel C Industrial Computer Hardware User's Manual – May 2003 GFK-2251
Page 14
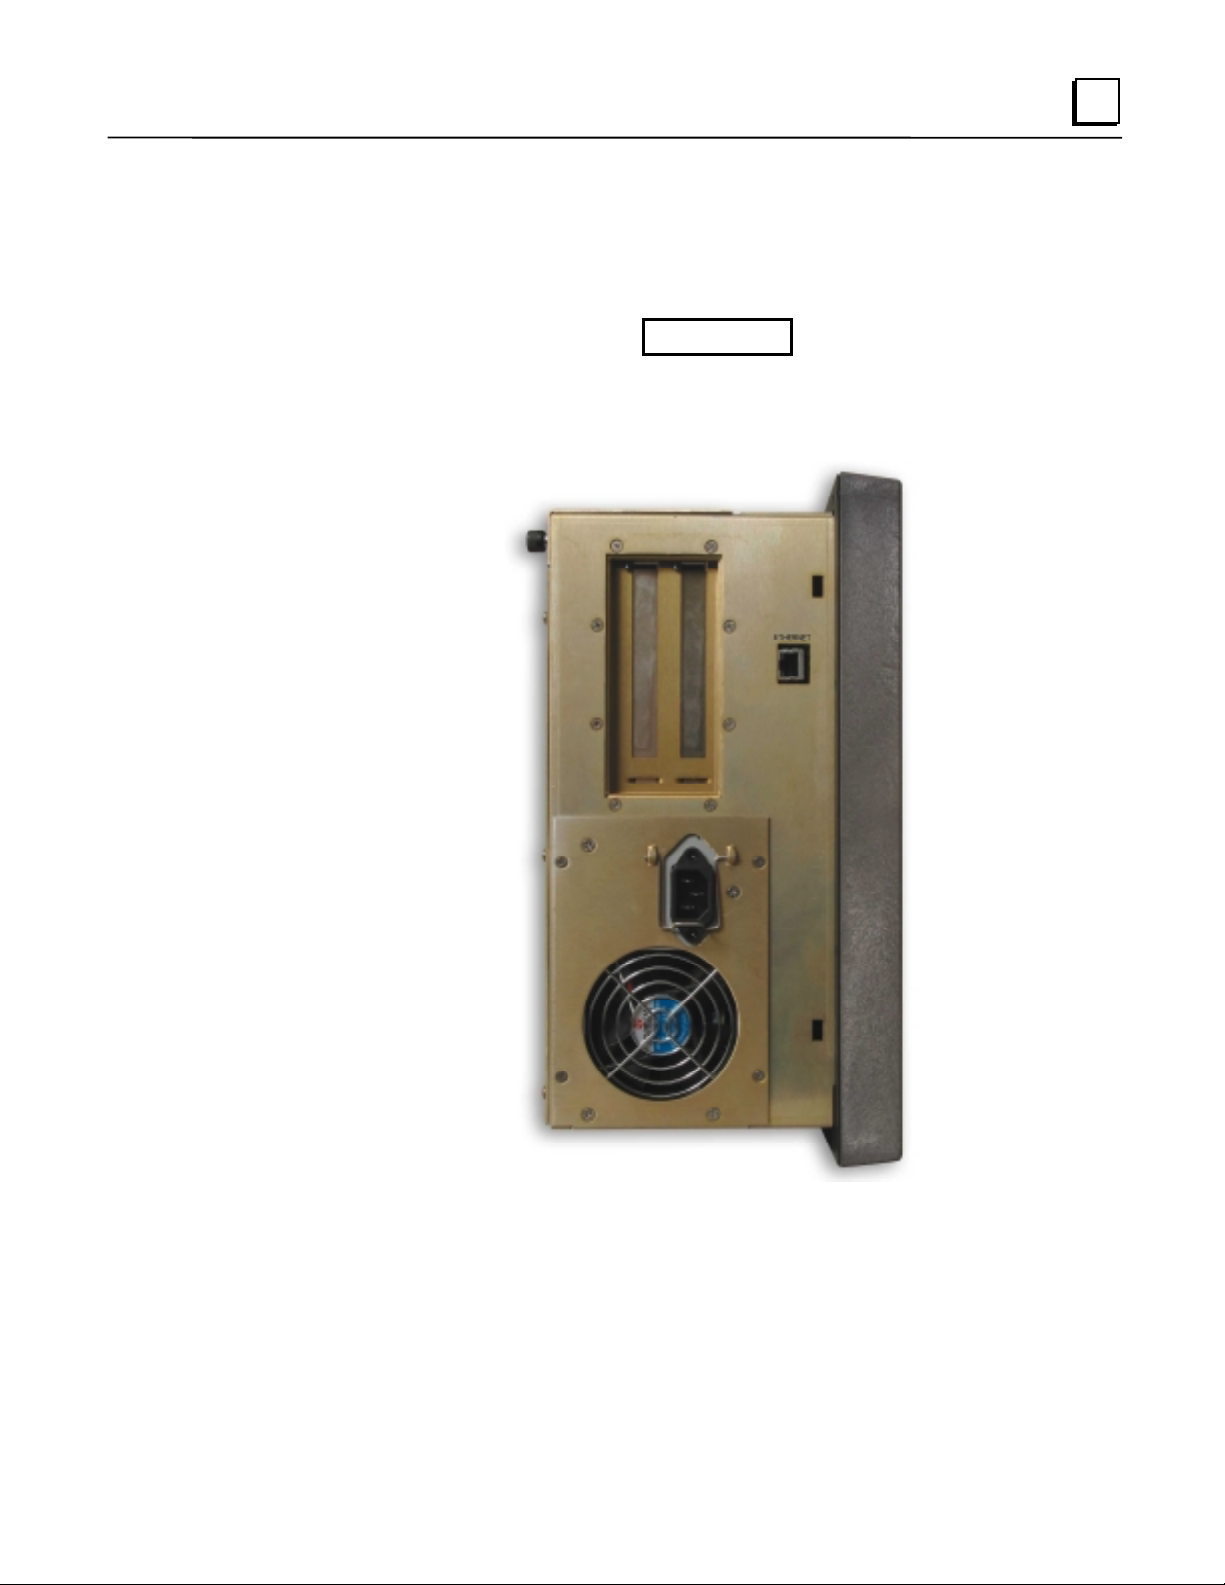
Network Interface
The Panel C includes an autosensing 10/100 Ethernet adapter that provides a RJ-45
connector for shielded twisted pair cable.
1
Warning
Do not connect or disconnect to Ethernet port while power is
applied to the industrial computer, unless area is known to be nonhazardous.
Figure 1-1. Ethernet port and side expansion slots
GFK-2251 Chapter 1 Panel C Industrial Computer Features 1-5
Page 15

1
Expansion Slots
The Panel C industrial computer provides multiple expansion slots.
• One PCI slot
• One shared expansion slot for either PCI or ISA
All the expansion slots within the system use the standard PC card clamping system.
Application Software
Unit is available as a standalone product or bundled with a variety of GE Fanuc software
titles.
Warning
Do not connect or disconnect expansion cards or cables while
power is applied to the unit, unless area is known to be nonhazardous.
GE Fanuc’s Industrial-Hardened Computers can be bundled with our award winning
software—offering an unbeatable combination of design flexibility, power, and reliability in
a packaged hardware / software solution. The power of GE Fanuc’s automation software
along with the rugged NEMA 4 construction and extensive functionality of these units
makes them ideal for the most demanding industrial applications.
A bundled solution from GE Fanuc takes the worry out of selecting technically compatible
hardware and software and finding support for the combined solution. A complete bundled
solution tested and supported at the factory—providing added value, minimizing start-up
issues, and saving you time.
For more information regarding bundled solutions, contact your representative or visit us
online at: www.gefanuc.com.
1-6 Panel C Industrial Computer Hardware User's Manual – May 2003 GFK-2251
Page 16
Chapter
Powerup and Software Installation
2
This chapter contains information you need to set up your Panel C industrial computer’s
operating system and network communications.
Setup
Before you attempt to power up the system for the first time, inspect the unit for loose or
damaged components. Remove the top cover and make sure there are no loose or
damaged assemblies. Applying power to a system with damaged components may cause
additional damage.
Initial Startup Procedure
Warning
Installation of the Panel C industrial computer in hazardous
locations requires the use of a cable mounting clamp with the power
connector.
Caution
Do not connect or disconnect external devices, such as a printer,
keyboard or a mouse while the unit is powered on. Failure to
observe this precaution could result in damage to the equipment.
1. Plug the power cable into the unit’s power connector and connect to the power
source.
2. Plug in the serial/parallel data transfer cables and screw the plugs to the connectors.
3. Power up the unit and check whether any concealed damage has been caused by
incorrect transportation, incorrect operating/storage conditions or incorrect handling
(e.g. smoke coming out of the unit, etc.). If you notice any damage, remove power
from the unit immediately and secure it against unintentional use.
During power up, the processor runs its normal diagnostic checks and indicates the
presence of any errors with screen prompts .
GFK-2251 2-1
Page 17

2
Startup for Windows NT Systems
Connecting a PS/2 keyboard and Mouse is recommended before you get started. The soft
keyboard and touch panel will not work until the Windows 2000 operating system is
licensed. Therefore an external keyboard is required to license the product.
. Plug in the keyboard and PS/2 mouse (if available).
1
. Connect the input power cord.
2
3
. Read license agreement
. TAB to your choice and press ENTER.
4
5
. Press ENTER to start the Windows NT Setup.
. Type your name
6
7
. Press the TAB key and type your company name.
. Press ENTER.
8
. Enter the Authentication number found on your Windows NT manual. You will need to
9
use the T
Note: Computer names must be less than or equal to ten characters to run CIMPLICITY
AB key to get to each number field. If correct, press ENTER.
Plant Edition HMI software.
. Enter a Computer name. This name must be unique to other computers on the same
10
network. Press E
Note: Your system has been set up to enable auto logon. Auto logon allows the
operating system to boot without your having to use a keyboard to press C
EL.
D
11
. You will be prompted for a password.
• To use the auto logon feature, type admin for the password. Press the T
and type admin in the Confirm Password box. Press E
• To skip the password, press E
• To assign a password, type in a password, press the TAB key, and type the
password in the Confirm Password box. Press E
. Press ENTER to continue with the operating system Setup.
12
. After completing setup, the system will copy files over and finalize its setup.
13
14
. At the end of the setup process, you will be asked to reboot the system. Press ENTER.
Login Recommendation
If you type admin as your Administrator password, your industrial computer will
automatically log on as Administrator.
Log onto the system as Administrator when you power up the system. Doing so eliminates
the requirement to log on to Panel C when you run the Panel C Demo or any other project
that includes a user named Administrator. All Panel C projects are configured with an
Administrator user by default.
NTER.
TL-ALT-
AB key
NTER.
NTER
NTER.
2-2 Panel C Industrial Computer Hardware User's Manual – May 2003 GFK-2251
Page 18

Startup for Windows 2000 Systems
Before you get started, you need to connect a PS/2 keyboard. A PS/2 mouse is
recommended to help navigate through the setup screens.
1. Plug in the keyboard, PS/2 mouse (if available), and power cord.
. Power on the unit.
2
. Read the license agreement.
3
. Select your choice and press NEXT >.
4
. Choose your regional settings (US default) and press NEXT >.
5
. Type your name.
6
7
. Press the TAB key and type your company name.
8
. Press NEXT >.
. Enter your Windows 2000 Product Key found on the back of the Panel C computer
9
itself. When correct, press N
Note: Computer names must be less than or equal to ten characters to
run CIMPLICITY Plant Edition HMI software. Each computer on a
network must have a unique name
2
EXT >.
10. Enter a Computer name. This name must be different from other computer names on
the same network. Press Next >.
11. If desired, enter an Administrator password. You will need to enter it twice to confirm.
When done, press Next >.
12. You can now set the Date, Time and Time Zone for the computer. When the
information is correct, press Next >.
13. Choose Typical settings for the factory setting of TCP/IP protocol at IP
111.111.111.111 and subnet 255.0.0.0, or, choose Custom and press Next > to
change these settings. Consult your network Administrator for your network’s
configuration settings.
14. Choose whether this computer will be on a workgroup or domain and enter the name
and press Next >.
15. After completing the network setup, the system will finalize its setup.
At the end of the setup process, you will be asked to reboot the system. Press Finish.
After restarting, you will need to configure the login settings for Windows 2000. When the
“Network Identification Wizard” dialog box appears press Next >.
The “Users of This Computer” dialog box appears.
• If you wish to have the computer automatically log on with the administrator
account, select the “User name” pull down and choose “Administrator.” Enter the
password used in step 11 and press N
on when it starts up.
• If you wish to require a logon when the computer is restarted, select “Users must
enter a user name and password to use this computer” and press N
then be asked for a user name and password when the computer starts up.
16. Press Finish and the setup is complete.
EXT >. The computer will automatically log
EXT >. You will
GFK-2251 Chapter 2 Powerup and Software Installation 2-3
Page 19
2
Configuring the Industria l Computer to Run on a Microsoft Network
Before configuring your Panel C computer for a network, you should consult your network
administrator. Duplicate TCP/IP addresses and duplicate computer names on the same
network can cause network problems.
. Click the Start Icon, then click Settings, and Control Panel.
1
2
. In the Control panel window, double click the Network icon. The Network dialog box
appears.
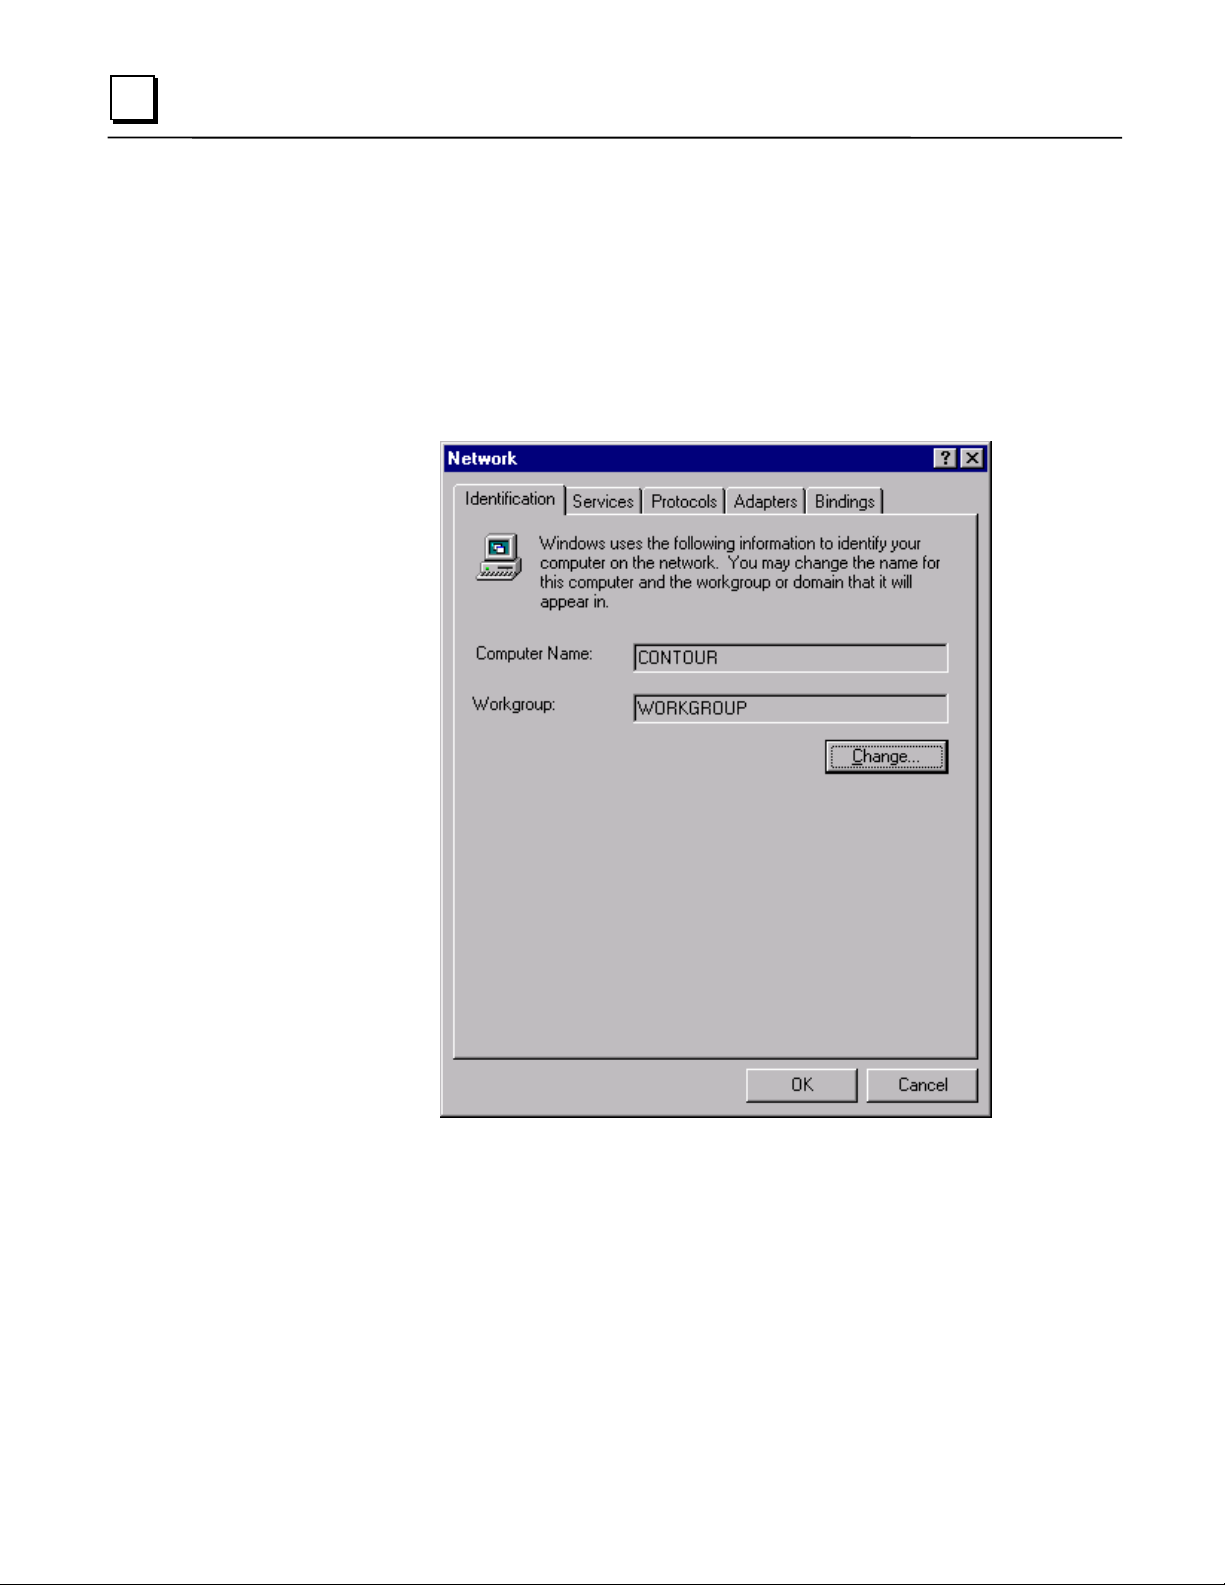
3. On the Identification tab, click Change. You will need to verify your Computer Name
(entered at machine startup) and Workgroup name.
Note: Computer names must be less than or equal to ten characters to run Panel
C software. Each computer on a network must have a unique name.
2-4 Panel C Industrial Computer Hardware User's Manual – May 2003 GFK-2251
Page 20

4. To modify the TCP/IP properties,
A
. Go to the Protocols Tab, highlight TCP/IP protocol, and click Properties.
2
B. In the Microsoft TCP/IP Properties, change the Address from 111.111.111.111 to
a unique address and change the subnet mask from 255.0.0.0 to your subnet
mask. If your network's IP addresses are controlled by a DHCP server, change
the setting from Specify an IP address to Obtain an IP address from a DHCP
Server.
GFK-2251 Chapter 2 Powerup and Software Installation 2-5
Page 21

2
Note: The factory setting for the IP is 111.111.111.111 and for the Subnet is 255.0.0.0.
If necessary, consult your network engineer to select appropriate addresses.
5
. To add other protocols such as NetBEUI, on the Protocols tab of the Network dialog
box, click Add. A list of available prot ocols wi ll app ear. C hoose the pr otoc o l you wish
to install and click OK. The system may ask where the Setup files are located. They
are in the C:\I386\ directory.
2-6 Panel C Industrial Computer Hardware User's Manual – May 2003 GFK-2251
Page 22

2
Note: It is recommended that after the system accesses the original Windows NT install
files, the Windows NT Service Pack be reinstalled to update any files that were
added or overwritten.
. When you have finished setting up the Network, click OK in the Network dialog box.
6
Click Yes to reboot your system now.
7
. The network shares for the system have been left at their default administrative
settings. To modify them, double click My Computer on the desktop, highlight C:, and
view the drive's properties by clicking File, Properties. Select the Sharing tab.
GFK-2251 Chapter 2 Powerup and Software Installation 2-7
Page 23

2
Installing Application Software
The Windows operating system and GE Fanuc software are loaded onto the industrial
computer at manufacture. If it is necessary to reload software, follow the instructions in the
documentation supplied with the software.
Directory Structure
The contents of the industrial computer hard drive, as shipped from GE Fanuc are listed
below.
C:\i386 Windows OS CD
C:\Drivers\Touch Touch screen drivers
C:\Drivers\Ethernet Netw ork drivers
C:\SP6 Service pack 4 drivers (NT ONLY)
Add any Other Dirs for Service Pacs per Op
Note: If you reload any Windows NT component requiring files, such as a network
driver, you must reload service pack 6.
2-8 Panel C Industrial Computer Hardware User's Manual – May 2003 GFK-2251
Page 24

Image Recovery
The following procedure provides instruction on how to use the Field Image Recovery
Disk (44A749863-G01Rxx). This disk will enable you to recover all software on your
computer as received initially from GE Fanuc.
Instructions for Image Recovery
1. Prior to Image Recovery, you will need to connect the following equipment:
2
Caution
Before attempting an Image Recovery on your unit, make sure to
record all critical settings and conduct a full back up of all software
projects and critical documents. You will also need to have your
application software registration and Microsoft Authorization
Numbers handy. This process will clear all contents from your Hard
Drive and return your system to the factory configuration.
− a standard PS/2-type keyboard
− an external floppy disk drive (available from GE Fanuc – IC850FDD101)
2. Insert the Field Image Recovery Disk into the floppy drive.
3. After inserting the Recovery Disk, the system will prompt you to restore the image.
Select <1> to “RESTORE SYSTEM TO ORIGINAL CONDITION”. If you have initiated
this process in error, press <2> and Exit the Recovery program.
4. Select <1> again to “PROCEED WITH SOFTWARE RESTORE”. Choose <2> to
cancel Recovery and exit to MS-DOS .
5. At this point the factory image will be recovered from a hidden partition on the Hard
Drive. This will take approximately 12 minutes. When prompted, reboot your system.
6. After rebooting your unit, the system will bring you to the initial startup screens as
received from the factory.
If you have questions about this procedure, please contact 1-800 GE FANUC.
Shutting Down the Computer
To avoid damaging files, always shut down Windows software
before removing power from your Panel C.
To shut down Windows operating system software, select Shut
Down from the Start menu.
Caution
MS-DOS is a regist ered trademark of Microsoft Corporation.
GFK-2251 Chapter 2 Powerup and Software Installation 2-9
Page 25

Chapter
Hardware Installation
3
This chapter describes the procedures for the safe location and securing of the Panel C
industrial computer. The Panel C industrial computers have been designed to ensure
simple installation of the system.
A single cut-out in the mounting panel is all that is required when mounting the industrial
computer. No extra mounting holes are needed. Instead, 10 clips are supplied and are
used to secure the unit from behind the mounting panel.
This chapter also describes how to install ISA and PCI cards.
Warnings for Class 1 Division 2 Approval
■ Input and output wiring methods must be in accordance with Class I, Division 2 wiring
methods and in accordance with the authority having jurisdiction.
■ This equipment is suitable for use in Class I, Division 2, Groups A, B, C, or D or nonhazardous locations only.
■ WARNING - Explosion Hazard - Substitution of components may impair suitability for
Class 1 Division 2.
■ WARNING - Explosion Hazard - Do not disconnect equipment unless power has been
switched off or the area is known to be non-hazardous.
■ WARNING - Explosion Hazard - Do not replace equipment unless power has been
switched off or the area is known to be non-hazardous.
■ Equipment shall be connected to no greater than a 20 Amp branch circuit.
■ Do not install or remove SCSI devices or cards while circuit is alive.
■ WARNING – Battery may explode if mistreated. Do not recharge, disassemble or
dispose of in fire.
■ Replace battery with Duracell part no. 2032 only. Use of another battery may present
a risk of fire or explosion.
■ Keyboard and mouse are to be used for initial programming only and not to be left
connected.
■ For non-incendive field wiring, use only 64MB flash card
SANDISK SDCFBI-64-101-00.
Note: The proper method for removing power from the unit is to switch off power at the
circuit breaker.
GFK-2251 3-1
Page 26

3
Installation Guidelines
AC Input Power
■ The Panel C input power shall be connected to no greater than a 20 Amp branch
circuit.
■ To remove power from the unit, the proper method is to switch off power at the circuit
breaker.
Panel Mounting
■ In an industrial environment, the panel into which the unit is mounted should provide
protection from dust, dirt and water.
■ The panel should be capable of supporting the weight (22.2lb/10.07kg) of the
industrial computer without distortion to the panel. The mounting clips will support a
panel thickness of up to 5mm (0.2 inch).
■ All of the mounting clips must be fitted properly to achieve a seal between the
industrial computer and the panel to which it is mounted.
■ Inlets and outlets must have at least 25mm of space around them and not be
obstructed.
Adequate airflow around the exterior of the unit is important to the interior temperature
of the unit. Fans are used to create air flow through the industrial computer ensuring
that a correct working temperature is maintained. There are three fans in the unit. One
of the fans is located on top of the CPU chip and is used to cool the processor. The
second fan is built into the power supply housing and blows air out of the unit. The
third fan is located on the rear of the chassis cover and pulls air into the unit.
Cutting the Panel Cutout
Cut an opening in the panel to the dimensions shown. The cut-out dimensions of 18.09"
(460mm) x 12.88" (328mm) allow a 1.2mm clearance on each edge of the industrial
computer front assembly. The unit requires a minimum of 178mm (7") depth when
mounted.
18.09" (460mm)
12.88" (328mm)
3-2 Panel C Industrial Computer Hardware User's Manual – May 2003 GFK-2251
Page 27

3
Figure 3-1. Panel C Industrial Computer Dimensions
Installing Panel Mounting Clips
1. Position the Front Panel in the cut-out and fit the 10 retaining clips into the slots on the
industrial computer. To produce a good seal, you must use all the clips.
2. Screw in the tightening screws on each clip so that the clip is held snug. To ensure a
seal between the computer front panel and the mounting panel, the clips must be
tightened evenly. (Tighten each of the clips in turn, a little at a time.) Torque setting
must be within 2.6 to 4.4 in-lbs (0.29 to 0.50 newton-meters).
GFK-2251 Chapter 3 Hardware Installation 3-3
Page 28

3
Figure 3-2. Installing Retaining Clips
3-4 Panel C Industrial Computer Hardware User's Manual – May 2003 GFK-2251
Page 29

Installing Expansion Cards
The Panel C industrial computer provides multiple expansion slots.
• One PCI slot
• One Shared ISA/PCI slot
Note: If your card is a Legacy ISA type, follow the instructions on page 3-6, then
proceed with installation.
All the expansion slots within the system allow the card to be clamped into place using
standard PC card clamping.
The top cover of the industrial computer must be removed in order to access the ISA and
PCI bus cards. Two thumb screws are used to secure the panel cover to the unit.
When the thumb screws are loosened, the back plate will slide upwards and can then be
lifted clear of the main unit.
3
Warning
Blanking Plates
Do not connect or disconnect expansion cards or cables while circuit is alive
unless area is known to be non-hazardous.
Caution
To avoid damage from electrostatic discharge, adhere to the following
precautions when installing ISA and PCI cards:
• The card is packaged in a static-safe bag that protects the product during shipping.
Before removing the card from this bag, be prepared to handle it in a static-safe
environment.
• Wear a properly functioning antistatic strap and be sure that you are fully grounded.
Never touch the card, or any components inside the computer, unless you are wearing
an antistatic strap.
• Any surface upon which you place the unprotected card should be static-safe,
facilitated by antistatic mats, if possible.
• Extra caution should be taken in cold, dry weather, when static charges can easily
build up.
Blanking plates are fitted to each unused card position. These blanking plates can be
removed as necessary in order to install new cards. Any empty slots must have a blanking
plate fitted to maintain agency EMI approvals.
GFK-2251 Chapter 3 Hardware Installation 3-5
Page 30

3
Configuring Expansion Cards (Legacy ISA Only)
For most applications an IRQ or address cannot be shared by more than one
resource. If more than one resource is set to the same interrupt or address,
the application may not respond properly and could cause your PC to lock
up. Following these instructions when installing Legacy ISA cards will
prevent problems with resource conflicts.
Legacy ISA cards are the oldest standard and require memory, I/O, and IRQ settings to
be manually set on the card using jumpers, DIP switches, or a configuration program. The
card and system need to have the same hardware settings.
1
. Connect a keyboard, turn on the system power, and press F2 when prompted to enter
the BIOS Setup program.
. Select Advanced, then PCI Configuration, and PCS/PNP ISA Resource Exclusion.
2
3. If the card requires one or more interrupts, go to an IRQ that currently reads
"Available" and change it to "Reserved" by pressing +/-. Do not use an IRQ that
already reads "Reserved."
Caution
. If the card requires memory space, press the arrow key to return to the PCI
4
Configuration screen. Select PCI/PNP ISA UMB Region Exclusion. Go to a memory
block that currently reads "Available" and change it to "Reserved" by pressing +/-. Do
not use a memory block that already reads "Reserved."
5
. Press ESC to exit the configuration screen. In the Exit menu, select Exit Saving
Changes and to save and exit Setup. When the screen goes blank, turn off the power.
6
. If the card has jumpers or DIP switches, set them so that they match the IRQ and
memory addresses set in the BIOS Setup.
. Set the I/O port settings of the card (if any) so that they fall within the ranges labeled
7
"Available" in the following table.
8
. If the card is set up using a configuration program, proceed with installation, run the
card’s configuration program. Set the IRQ and memory address settings to be the
same as those put into BIOS Setup. Set the I/O port settings (if any) to a range
labeled "Available" in the following table.
Table 3-1. I/O Port Range Table
000-1FF Reserved
200-277 Available
278-2FF Reserved
300-377 Available
378-3DF Reserved
3E0-3EF Reserved
3F0-3FF Reserved
3-6 Panel C Industrial Computer Hardware User's Manual – May 2003 GFK-2251
Page 31

Chapter
4
Connectors and Cabling
This chapter describes the connector layout and cabling requirements on the standard
Panel C industrial computer. Power and communication connectors are described in this
section.
Communication connectors are provided from the main CPU motherboard. Some of the
CPU motherboard connectors are available under the front access panel as well as on the
right side of the unit.
• Three USB ports, including two USB ports (front access) and one USB port (side
access).
• One Compact Flash port (front access)
• PS/2 Keyboard (side access)
• PS/2 mouse port (side access)
• Connector for external floppy disk drive (side access)
• Connector for external CD-ROM drive (side access)
• Video output (side access)
• Parallel port, LPT1 (side access)
• Two serial ports, COM1 and COM2 (side access)
• Ethernet 10/100 base T (RJ-45) (side access)
For details about connectors on proprietary cards you have installed in your industrial
computer, refer to the manufacturer’s documentation provided with your card.
GFK-2251 4-1
Page 32

4
Power Input
The power supply input to the industrial computer uses a standard IEC cable, which is
provided with the unit.
For power requirements, refer to specifications in chapter 8. There are no userserviceable fuses.
Warning
For all equipment that is connected to a power outlet, the socket outlet shall
be installed near the equipment and shall be easily accessible. (For nonhazardous locations only.)
Caution
External devices (printer, external disk drive etc.) should not be powered up
when connecting to ports.
4-2 Panel C Industrial Computer Hardware User's Manual – May 2003 GFK-2251
Page 33

Communications Ports
Two USB ports and a Compact Flash port are located behind the front access cover in the
lower right-hand side of the unit (Figure 4-1). To open the cover, loosen the thumb screw.
All other ports are located on the right side panel (Figure 4-2).
Port Configurations
Port IRQ Addresses
COM1 4 3F8h
COM2 3 2F8h
COM3 (Touch Option) 9 2E8h
LPT1 7 378h
USB Ports
4
These USB ports, along with the USB port on the side of the unit, are intended for such
tasks as initial set up, downloading data, and uploading software. It is not intended for
these ports to be connected continuously to devices.
Compact Flash Port
A Compact Flash device can be connected to this port for tasks such as backing up data.
For nonincendive field wiring, use only 64MB flash card SANDISK SDCFBI-64-101-00
Figure 4-1. Connectors Located Behind Front Access Panel
GFK-2251 Chapter 4 Connectors and Cabling 4-3
Page 34

4
USB
Video
COM1
Printer Port,
LPT
COM2
Keyboard
Mouse
External Floppy
Disk Drive
Figure 4-2. Connector Locations on Right Side Panel
Mouse and Keyboard Ports
Two PS2 ports, labeled MOUSE and KBRD, are located on the right side access panel.
This temporary connection is intended to be used for such things as initial setup,
downloading data, uploading software, etc.
Keyboard/Mouse (6-pin mini-DIN PS/2 socket)
Pin Number Signal name
1 Data
2 NC
3 GND
4 +5V
5 Clock
6 NC
External
CD-ROM Drive
External
Power
4-4 Panel C Industrial Computer Hardware User's Manual – May 2003 GFK-2251
Page 35

Floppy Disk Drive and CD-ROM Ports
Connectors for an external floppy disk drive and an external CD-ROM drive are located on
the right side access panel. These ports are labeled accordingly. This temporary
connection is intended to be used for such things as initial setup, downloading data,
uploading software, etc.
Video Output Port
Video monitor output is accessible on the DB15 side access connector. The pinouts are
shown in the following table: This port is not intended to be connected continuously to a
video monitor.
1 RED
2 GREEN
3 BLUE
4 MONITOR ID BIT 2
5 SELF TEST (GND)
6 GND
7 GND
8 GND
9 NC
10 GND
11 MONITOR ID BIT 0
12 MONITOR ID BIT 1
13 H SYNC
14 V SYNC
15 MONITOR ID BIT 3
4
VGA DB15
GFK-2251 Chapter 4 Connectors and Cabling 4-5
Page 36

4
Printer Port LPT1
A 25-pin D-type female printer port (LPT1) connector is available on the right side access
panel. The port is labeled accordingly and is not intended to be connected continuously to
printers.
113
1425
Pin Assignment Pin Assignment
1 Strobe 10 Acknowledge
2 Data Bit 0 11 Busy
3 Data Bit 1 12 Paper End
4 Data Bit 2 13 Select Out
5 Data Bit 3 14 Auto Feed XT
6 Data Bit 4 15 Error
7 Data Bit 5 16 Initialize Printer
8 Data Bit 6 17 Select In (from Printer)
9 Data Bit 7 18 to 25 Ground
4-6 Panel C Industrial Computer Hardware User's Manual – May 2003 GFK-2251
Page 37

Serial Communication Ports
The COM1and COM2 serial ports are available on the side panel. The COM3 serial port is
used by the touchscreen and is not accessible to the user. The standard 9-pin D-sub
connector pin out is shown below.
RS-232C Name Pin Assignment
CF 1 DCD (Data Carrier Detect)
BB 2 RX (Receive Data)
BA 3 TX (Transmit Data)
CD 4 DTR (Data Terminal Ready)
AB 5 GND (Signal Ground)
CC 6 DSR (Data Set Ready)
CA 7 RTS (Request to Send)
CB 8 CTS (Clear to Send)
CE 9 RI (Ring Indicator)
4
Shielding
Grounding
The D type connector covers should be metallized plastic or die cast metal and terminated
with 360-degree termination of the shield, as illustrated in Figure 4-3 below.
Figure 4-3. High Frequency Grounding
Serial cables (COM1 and COM2) must be shielded and grounded in order to maintain CE
Mark compliance, provide higher EMC immunity, and satisfy the requirements of
IEC/EN61000-4-4 and IEC/EN61000-4-5. The shield conductor should remain continuous
to the unit, and insulation should be removed only at the grounding point. The grounding
should be such that a 360-degree contact is made to the cable shield. Figure 4-4 shows
an example with the insulating cover of the cable stripped back.
GFK-2251 Chapter 4 Connectors and Cabling 4-7
Page 38

4
Figure 4-4. Cable Cover Shielding
Ethernet Communication Port
The Panel C provides an RJ-45 (10BaseT/100BaseT) Ethernet connector on the left side of the unit.
The RJ-45 twisted pair connector is an 8-pin MAU MDI connector.
Strip wire
to expose
shield.
a45528
User-provided clamp
12345678
Grounding
Ethernet cable must be shielded and grounded in order to maintain CE Mark compliance,
provide higher EMC immunity, and satisfy the requirements of IEC/EN61000-4-4,
IEC/EN61000-4-5, and ANSI C37.90a. The shield conductor should remain continuous to
the unit, and insulation should be removed only at the grounding point. The grounding
should be such that a 360-degree contact is made to the cable shield. Figure 4-4 shows
an example with the insulating cover of the cable stripped back.
Alternate Grounding Method
An alternative to the user-provided clamp as described in the previous sections, is the
cable shield clamping assembly (IC697ACC736) available from GE Fanuc. This cable
shield clamping assembly provides a high frequency ground for shielded cables via a
ground plate and six cable clamps. Figure 4-5 shows the dimensions required for
mounting. The figure also shows a cable clamp.
Pin No. Signal Description
1 TD+ Transmit Data +
2 TD- Transmit Data –
3 RD+ Receive Data +
4 NC no connection
5 NC no connection
6 RD- Receive Data –
7 NC no connection
8 NC no connection
4-8 Panel C Industrial Computer Hardware User's Manual – May 2003 GFK-2251
Page 39

4
2.95"
(75 mm)
4.25"
(108 mm)
Side View with
Spacing Requirements
.250"(6.35 mm) dia. (QTY.2)
Mounting
Surface
Front View with Mounting Dimensions
Cable Clamp
19.00"
(483 mm)
18.31"
(465 mm)
(Six cable clamps included with assembly.)
* Additional cable clamps available (12 per package), catalog number IC697ACC737.
Figure 4-5. Ground Plate Outline, Mounting Dimensions, and Cable Clamp
The ground plate should be mounted near the unit. The cable clamp provides mechanical
relief as well as electrical grounding. A typical installation is shown in Figure 4-6.
The cable clamp attaches to the ground plate by sliding it into two adjacent slots at the
selected location for the cable. The cable is inserted between the ground plate and the
cable clamp after removing the required section of the cable’s outer cover. Tighten the
cable clamp by turning the thumbscrew clockwise. Do not over-tighten the thumbscrew—
hand-tighten or tighten lightly with a tool.
Note: If you are installing the ground plate on a painted surface, the paint must be
removed where the ground plate is to be mounted to ensure a good ground
connection between the plate and mounting surface.
GFK-2251 Chapter 4 Connectors and Cabling 4-9
Page 40

4
(
)
Ground Plate
Cable Clamp
Figure 4-6. Example of Cable Shield Clamping Assembly Installation
The maximum diameter cable that can be used with the cable clamp is 0.51 inches
(13mm) as shown below in Figure 4-7. Minimum cable diameter that can be used with the
clamp is 0.24 inches (6mm). Multiple cables can be placed in the clamp if the cable
diameter is smaller than the minimum.
Ground
Plate
Cable
Maximum
Diameter
.51"
13mm
Minimum
Diameter
.24" (6mm)
.51"
13mm
.67"
17mm
Cable
Clamp
a45522
Figure 4-7. Cross Section of Cable Secured by Clamp
4-10 Panel C Industrial Computer Hardware User's Manual – May 2003 GFK-2251
Page 41

The insulating cover on the shielded cable must be removed to allow maximum contact
between the cable shield and the cable clamp as shown in Figure 4-6.
a45523
Cable
Clamp
Foot
1.58"
40mm
Shield
Figure 4-8. Clamped Cable with Exposed Shield
4
GFK-2251 Chapter 4 Connectors and Cabling 4-11
Page 42

Chapter
5
System Operation
This chapter provides details of system operation. The following topics are covered:
• System Peripherals
• External Keyboard and Mouse
• Graphic System
• Operator Interface
• Communications
GFK-2251 5-1
Page 43

5
System Peripherals
Removable Hard Disk Drive
The Panel C industrial computer system has a single removable hard disk drive. The drive
is located on the side of the unit. The disk drive has a standard EIDE/ATA-2 interface. The
standard size is 20GB or larger.
To remove the disk drive,
1
. Shut down the operating system and remove power from the computer.
2
. Turn the locking keys ¼ turn. The locking keys cannot be removed from the drive
assembly.
3
. Using the handles on the locking keys, pull the drive out of the enclosure.
4. Disconnect the IDE interface cable from the hard drive.
CD-ROM Drive
Panel C industrial computers include a connector for an external CD-ROM drive option.
The CD-ROM connector and power connector are located on the side access panel.
Floppy Disk Drive
Panel C industrial computers include a connector for an external 3.5” 1.44Mb floppy disk
drive option. The floppy drive connector and power connector are located on the side
access panel.
External Keyboard and Mouse
An external keyboard and mouse (both using PS/2 connectors) can be attached via the
connectors on the side access panel.
The touch screen and PS/2 mouse will work simultaneously if the mouse is Microsoft or
IBM PS/2 compatible.
Graphic System
The standard Panel C industrial computer includes a 15 inch color TFT (XGA resolution)
screen. The flat screen display has the following features:
• High Luminance (equal to or greater than 200cd/m2)
• Wide angle viewing
• A built-in back light with a long life back light tube (equal to or greater than 25,000 hrs)
5-2 Panel C Industrial Computer Hardware User's Manual – May 2003 GFK-2251
Page 44

Operator Interfaces
Keypads
5
The Panel C industrial computer incorporates a keypad with 75 front panel keys to provide
a wide range of alphanumeric and control functions.
• Function keys, which provide 26 alpha characters when used in the Function (FN)
mode
• Full numeric keypad with special character keys when used in the SHIFT mode
• Control keys including 4 arrow keys
• 16 Operator defined keys
The main keypad returns the same scan codes as a standard PC/AT keyboard, listed in
Table 5-1.
If an external PC/AT keyboard is connected, the integral keypads remain functional.
GFK-2251 Chapter 5 System Operation 5-3
Page 45

5
Table 5-1. Membrane Keypad Scan Codes [Reviewers: Verify AT Character and scan codes here]
Without SHIFT Key With SHIFT Key With CAPS LOCK Key
Keypad
7 7 0837 \ 2B5C \ 2B5C
8 8 0938 / 352F / 352F
9 9 0A39 : 273A : 273A
4 4 0534 ; 273B ; 273B
5 5 0635 , 332C , 332C
6 6 0736 " 2822 " 2822
1 1 0231 % 0625 % 0625
2 2 0332 [ 1A5B [ 1A5B
3 3 0433 ] 1B5D ] 1B5D
0 0 0B30 _ 0C5F _ 0C5F
- - 4A2D + 4E2B + 4E2B
. (PERIOD) . (PERIOD) 342E ? 353F ? 353F
INSERT Insert 5200 * 372A * 372A
ENTER ENTER 1C0D ENTER 1C0D ENTER 1C0D
ESCAPE Escape 011B Escape 011B Escape 011B
TAB Tab 0F09 Shift Tab 0F00 Shift Tab 0F00
PRINT None None None None None None
SPACE Space 3920 Space 3920 Space 3920
ALT Left
CTRL CTRL None None None None None
DELETE Delete 5300 Delete 5300 Delete 5300
PAGE↑
BKSP BKSP 0E08 BKSP 0E08 BKSP 0E08
HOME Home 4700 Home 4700 Home 4700
PAGE↓
END End 4F00 End 4F00 End 4F00
←
→
↑
↓
LOCK
CAPS
SHIFT (1) SHIFT (1) None None None None None
F1 F1 3B00 a 1E61 A 1EF1
F2 F2 3C00 b 3062 B 3042
F3 F3 3D00 c 2E63 C 2E43
F4 F4 3E00 d 2064 D 2044
F5 F5 3F00 e 1265 E 1245
F6 F6 4000 f 2166 F 2146
F7 F7 4100 g 2267 G 2247
F8 F8 4200 h 2368 H 2348
F9 F9 4300 i 1769 I 1749
F10 F10 4400 J 246A J 244A
F11 F11 8500 k 256B K 254B
F12 F12 8600 l 266C L 264C
AT
Character
alternate
Pageup 4900 Pageup 4900 Pageup 4900
Pagedown 5100 Pagedown 5100 Pagedown 5100
Left arrow 4B00 Left arrow 4B00 Left arrow 4B00
Right arrow 4D00 Right arrow 4D00 Right arrow 4D00
Up arrow 4800 Up arrow 4800 Up arrow 4800
Down arrow 5000
LOCK CAPS None None None None None
Scan
Code
(Hex)
None None None None None
AT
Character
Down
arrow
Scan
CodeATCharacter
5000
Down
arrow
Scan
Code
(Hex)
5000
5-4 Panel C Industrial Computer Hardware User's Manual – May 2003 GFK-2251
Page 46

Table 5-1. Membrane Keypad Scan Codes – Continued
Without SHIFT Key With SHIFT Key With CAPS LOCK Key
Keypad
F13 Ctrl Alt F3 6A00 m 326D M 324D
F14 Ctrl Alt F4 6B00 n 316E N 314E
F15 Ctrl Alt F5 6C00 o 186F O 184F
F16 Ctrl Alt F6 6D00 p 1970 P 1950
F17 Ctrl Alt F7 6E00 q 1071 Q 1051
F18 Ctrl Alt F8 6F00 r 1372 R 1352
F19 Ctrl Alt F9 7000 s 1F73 S 1F53
F20 Ctrl Alt F10 7100 t 1474 T 1454
F21 Ctrl Alt F11 8B00 u 1675 U 1655
F22 Ctrl Alt F12 8C00 v 2F76 V 2F56
F23 Left shift F11 8700 w 1177 W 1157
F24 Left shift F12 8800 x 2D78 X 2D58
F25 Ctrl F11 8900 y 1579 Y 1559
F26 Ctrl F12 8A00 z 2C7A Z 2C5A
(2)
L1
L2 Left shift F2 5500 Left shift F2 5500 Left shift F2 5500
L3 Left shift F3 5600 Left shift F3 5600 Left shift F3 5600
L4 Left shift F4 5700 Left shift F4 5700 Left shift F4 5700
L5 Left shift F5 5800 Left shift F5 5800 Left shift F5 5800
L6 Left shift F6 5900 Left shift F6 5900 Left shift F6 5900
L7 Left shift F7 5A00 Left shift F7 5A00 Left shift F7 5A00
L8 Left shift F8 5B00 Left shift F8 5B00 Left shift F8 5B00
(2)
R1
R2 Ctrl F2 5F00 Ctrl F2 5F00 Ctrl F2 5F00
R3 Ctrl F3 6000 Ctrl F3 6000 Ctrl F3 6000
R4 Ctrl F4 6100 Ctrl F4 6100 Ctrl F4 6100
R5 Ctrl F5 6200 Ctrl F5 6200 Ctrl F5 6200
R6 Ctrl F6 6300 Ctrl F6 6300 Ctrl F6 6300
R7 Ctrl F7 6400 Ctrl F7 6400 Ctrl F7 6400
R8 Ctrl F8 6500 Ctrl F8 6500 Ctrl F8 6500
AT
Character
Left shift F1 5400 Left shift F1 5400 Left shift F1 5400
Ctrl F1 5E00 Ctrl F1 5E00 Ctrl F1 5E00
Scan
Code
(Hex)
AT
Character
Scan
CodeATCharacter
5
Scan
Code
(Hex)
Table 5-1. Notes:
1. The SHIFT key produces no scan codes on its own, but modifies the scan codes
produced by the other keys as indicated in the table above.
2. The white, unmarked soft keys located on both sides of the display are listed as L1-L8
(left side) and R1-R8 (right side) above.
GFK-2251 Chapter 5 System Operation 5-5
Page 47

5
Control and Status LEDs
The Panel C industrial computer includes five status LEDs, located in a vertical column
above the arrow keys on the lower right-hand side of the unit. The five LEDs have the
following functions, in order from top to bottom:
Table 5-2. Indicators
Symbol Name Function
FFFFNNNN
Function Key Indicates the function key is active.
Shift Indicates the Shift lock is enabled..
HDD/Error This is a tri-color LED. Red indicates a BIOS detected error. Green is
the normal IDE drive activity indicator. During an error the HDD/Error
LED will be Amber.
Power Indicates system power (lighted when power is applied).
Compact
Flash
Touch Screen
The Panel C includes a resistive overlay touch screen on the flat panel display.
The touch screen has a resolution of 1024 x 1024 touch points (independent of screen
size) and provides an efficient and reliable method of entering information. The screen
responds to the touch of your finger with or without a glove.
The touch screen is connected internally to the COM3 serial port. If you install a card that
has settings that conflict with those of the COM3 serial port, you will need to change the
card’s configuration.
Touch Screen Driver for Windows
The integral touch screen of the Panel C is internally connected to COM3. Parameters
must be set within the driver so that they match the hardware settings. The factory default
settings are:
COM Port = 3
Address = 3F8 Hex
Interrupt = Com3 IRQ 9
Indicates Compact Flash card is inserted.
These parameters are written into the system registry file by the driver setup utility. The
driver is installed, configured and calibrated at the time of manufacture.
5-6 Panel C Industrial Computer Hardware User's Manual – May 2003 GFK-2251
Page 48

Communications
Your industrial computer has been configured with networking components that enable
you to establish new networks or connect to existing networks easily. If you intend to use
Microsoft NetBEUI, TCP/IP, or Direct Cable Connection, some minimal setup changes are
required before you can use the system for network applications. In Windows operating
systems, these settings are changed using the Network application in the Control Panel
program group.
Table 5-3. Installed Network Components
Network Component Comments
PCI Network Adapter Automatically configured in system
TCP/IP Default settings must be changed before connecting to an existing
NetBEUI Default settings must be changed before connecting to an existing
System Identification Computer Name: Each system is uniquely identified by its serial number
network. Contact your network administrator for appropriate settings.
network. Contact your network administrator for appropriate settings.
and can be renamed before adding it to an existing network
Workgroup: The default workgroup is Workgroup. This should be
renamed before adding it to an existing network.
5
Caution
The IP Address must be changed to a unique address. If it is not
changed, conflicts could occur on your network.
GFK-2251 Chapter 5 System Operation 5-7
Page 49

Chapter
6
BIOS Settings
It is normally not necessary to change the hardware configuration settings in the CMOS
memory. If settings become corrupted, follow the procedures here to reload the factory
configuration.
1
. Power down the computer, connect a keyboard and turn on the power. Enter the
Setup mode by pressing the F2 key when prompted during the computer power-up
sequence. The main BIOS setup utility screen will appear offering several options for
changing settings.
2
. In the EXIT menu - Load BIOS defaults.
3. In the ADVANCED menu, select Installed OS. Change to “Other.”
4
. Arrow to IO Device Configuration. Press ENTER.
5. Make the following menu selections:
USB Disable
Audio Disable
COM: A (COM1 on side) 3F8 / IRQ 4
COM: B (COM2, touch screen) 2F8 / IRQ3
COM: C (COM3 on side) 3E8 / IRQ 9
COM: D (COM4 on front) 2E8 / IRQ11
LPT:A (LPT1 on front) ECP / 378 / IRQ7 / DMA3
LPT:B (LPT2 on side) ECP / 278 / IRQ5/ DMA0
6. To save your changes, press ESC. In the Exit menu, select Exit Saving Changes.
GFK-2251 6-1
Page 50

Chapter
Diagnostics and Troubleshooting
7
This chapter consists of “Self-Test Diagnostics,” “Troubleshooting,” and “Corrective
Actions.” “Self-Test Diagnostics,” describes how to respond to errors that could be
detected by the automatic self test that is performed each time the Panel C industrial
computer powers up. “Troubleshooting” contains tables of symptoms, their possible
causes, and recommended corrective actions. “Corrective Actions” contains detailed
procedures that are too lengthy to include in the Troubleshooting tables.
Self-Test Diagnostics
The computer automatically performs self-test diagnostics each time it is powered up. The
self-test consists of a series of checks that verify correct performance of the computer
hardware. When the self-test is being performed, you will see the message XXXX KB OK
displayed on the screen, where XXXX is a number that increases until it matches the
amount of usable memory.
System Test and Initialization
These routines test and initialize board hardware. If the routines encounter an error during
the tests, you will see an error message on the screen. There are two kinds of errors: fatal
and non-fatal. If a non-fatal error occurs, the system can usually continue the boot up
sequence. Non-fatal error messages usually appear on the screen with the following
instruction:
Write down the message and press the F1 key to continue the bootup sequence.
System Configuration Verification
These routines check the current system configuration against the values stored in the
CMOS memory. If they don’t match, the program will generate an error message. To
correct this condition, you will need to run the BIOS setup program and correct the
configuration information in memory.
There are three situations in which you might need to change the CMOS settings:
1
. You are starting your system for the first time.
2
. You have changed the hardware attached to your system.
3
. The CMOS memory had lost power and the configuration information has been
erased. If this has happened, call GE Fanuc’s Support Hotline at 1-800-800-433-2682.
press <F1> to RESUME
GFK-2251 7-1
Page 51

7
Troubleshooting
Powerup
Symptom Possible Causes Solution
Computer does not power up. Power not on (PWR indicator is
not lit or display completely
dark).
Display is blank (PWR indicator
is lighted).
Non-System disk or disk
error message displayed.
Safe Recovery Error message
displayed.
Memory count during powerup
self-test is incorrect.
CMOS checksum error —
Defaults loaded
CMOS battery failed
message displayed.
A screen appears just after
powerup, or just after reset,
which has the title “CMOS
Setup Utility.”
The computer has reset even
though the power was not
interrupted.
A:> appears instead of
software.
See “Display” topic in this
Chapter
Disk in floppy disk drive. Remove floppy disk and then
Occurs on initial power up if the
unit is accidentally turned off
without first shutting down the
Windows software.
Optional DIMM is installed
incorrectly or is incompatible
with the Panel C industrial
computer CPU.
CMOS battery failure. Replace the battery. For more
F2 key has been
The
accidentally pressed.
CTRL-ALT-DEL keys were
The
pressed twice at the same
time.
A system floppy disk is
inserted.
Make sure that computer is
plugged in. Make sure that
power source is functioning
properly.
See “Display” topic in this
Chapter
reboot or cycle power .
The computer will power up
normally.
Make sure that the appropriate
memory is installed correctly.
information, see “CMOS
Checksum Error” topic in this
chapter.
Cycle power again. The
computer will power up
normally.
This should never be done,
unless you are attempting to
reset the computer.
Remove disk and cycle power.
Display
Symptom Possible Causes Solution
Characters are dim. Computer screen is in direct
light.
Display is blank (PWR indicator
is lit).
7-2 Panel C Industrial Computer Hardware User's Manual – May 2003 GFK-2251
Screen temperature is outside
operating range.
Computer is set up for invalid
video mode.
Screen saver is active. Touch a key on the keypad.
Change lighting.
If computer is in direct sunlight,
move it and allow it to cool.
Reboot. Select VGA Mode
Page 52

Memory
Memory count during powerup
self-test is incorrect.
Out of Memory message is
displayed or insufficient
memory error occurs during
operation.
External PS/2 Mouse
Cursor does not respond to
mouse movement
Symptom Possible Causes Solution
Optional DIMM is installed
incorrectly or is incompatible
with the Panel C industrial
computer CPU.
System ran out of memory for
the application.
Too many terminate and stay
resident (TSR) programs
running.
Symptom Possible Causes Solution
Mouse not plugged in. Power down computer. Plug
The type of mouse is not
supported.
System is busy.
Mouse not detected.
Make sure that the appropriate
memory is installed correctly.
Check the memory
requirements for the
application. (Refer to the
application documentation.)
Install additional memory.
Modify the startup folder to use
only those TSR applications
that are really needed.
mouse into mouse port on
computer and reboot.
Use a PS/2 mouse.
CTRL-ALT-DELETE to
Press
view task list.
Restart computer with external
mouse connected.
7
Keyboard
Symptom Possible Causes Solution
External keyboard locks up The type of keyboard is not
supported.
Keyboard not plugged into
keyboard port on the computer.
System is busy.
GFK-2251 Chapter 7 Diagnostics and Troubleshooting 7-3
Use PS/2 compatible keyboard
Plug keyboard in. (Power down
computer first.)
Press
CTRL-ALT-DELETE to
view task list.
Page 53

7
Communications
PLC/PC Connection
Symptom Possible Causes Solution
PANEL C does not
communicate with a PLC that
has been autoconfigured
(AUTOCONFIG/DEFAULT/I/O
error).
Communications between the
host computer and the
controller are unsuccessful.
The system is attempting to
communicate with a 90-30 PLC
using the SNP driver and a
PANEL C project.
COM port not configured in
system.
Cabling between computer and
controller.
Baud rate and parity configured
incorrectly.
Wrong address. Verify that the slave address is
1. With the PLC powered up
and connected to the Display
Station, establish
communication between the
Display Station and PLC via
the 90-30 SNP driver.
2. Using a Hand-Held
Programmer, toggle the Default
I/O (Enable or Disable)
configuration parameter for the
CPU. Communications
between the computer and the
PLC will be stopped.
(Communications are stopped
when you toggle from Enable
to Disable, or vice versa.)
3. Power cycle the PLC.
Verify that the COM port is
configured in the system.
Verify that the cable between
the computer and the controller
is correctly wired.
Verify that the baud rate and
parity on the computer are
consistent with those on the
controller.
correct.
CNC/PC Communications
Symptom Possible Causes Solution
Communications between the
host computer and the CNC
are unsuccessful.
7-4 Panel C Industrial Computer Hardware User's Manual – May 2003 GFK-2251
If an ISA interface HSSB card,
the I/O address may be in
conflict with other devices
HSSB switch setting may be
incorrect.
The HSSB driver is not
installed
The HSSB option may not be
active in the CNC
The cable connecting the CNC
and the PC may not be
attached
Check PC for conflicting I/O
addresses
Check that the switch is set to
0, 1 or 2.
Check Windows event log for
errors that the HSSB driver
(MMCNCD) is not installed
Verify that the option and
correct CNC Executive
Software is installed in the
CNC
Verify that the green LED on
the HSSB board is on.
Page 54

Network Communications
Conflicts on network. IP Address not unique. Change the IP address to a
Printing
Printer will not turn on. Cables not connected properly.
Printer will not print. Printer is not turned on. Turn on the printer
Printer is offline. Paper tray is empty. Fill the paper tray with paper.
Printer prints garbled
information.
Symptom Possible Causes Solution
unique address. (Contact your
system administrator if this or
other settings need to be
changed.)
Symptom Possible Causes Solution
Ensure that the cables are
Printer power cord not plugged
in.
Printer is not online. Set the printer to online.
The device drivers for your
application are not installed.
Printer that is set up for a
network is not connected to the
network.
Printer cable is too long,
unshielded, or defective.
Correct printer drivers not
installed.
Cable is not connected
properly.
Problem specific to printer. Run a printer self-test. Refer to
properly connected and that
the power cord is connected to
the electrical outlet.
Install the correct printer
drivers for your application in
Windows.
Connect the printer to the
network.
Replace the cable.
Set printer to online.
Install the correct printer driver.
Ensure that the printer cable is
connected properly to the
computer.
the documentation provided
with your printer for
instructions. If the self-test fails,
the problem is printer-specific.
The printing section of the
software documentation and in
Windows online Help may also
be helpful.
7
GFK-2251 Chapter 7 Diagnostics and Troubleshooting 7-5
Page 55

7
CMOS Checksum Error
If the CMOS battery has failed, the following error messages will be displayed on the
screen:
CMOS checksum error - Defaults loaded
CMOS battery failed
To replace the battery:
The Panel C uses a Panasonic 3V battery, part number BR2032 or Duracell part no 2032.
Only replace the battery with this type or equivalent.
Battery may explode if mistreated. Do not recharge, disassemble, or
dispose of in fire
1. To remove the battery, press down on the removal tab (shown in one of the socket
pictures). The side of the battery opposite the removal tab will eject from the retainer
clip, allowing the battery to be removed from the socket.
Warning
Removal tab
2. To install the replacement battery, position the battery with its '+' side on top and slide
the battery into the socket at a slight angle under the removal tab. Press the battery
down to snap it in place.
Note: The socket will not allow the battery to be inserted incorrectly ('+' side down).
7-6 Panel C Industrial Computer Hardware User's Manual – May 2003 GFK-2251
Page 56

Chapter
Technical Data
8
Monitor System
Display
Diagonal
Resolution (Pixel)
VGA controller
Colors
Brightness
TFT LC-Color Touch Display
383.5 mm (15.1")
XGA (1024 x 768)
Integrated 3-D Graphics Controller with 4M Video Memory
256K
200 cd/m²
Note: Back-lighting systems are consumable parts and are
therefore not covered by the warranty.
Industrial PC
CPU
Processor
RAM
Storage
Ports
Network
Slots
Power supply
Power
consumption
FCPGA-Socket for Intel processor
1.0 Ghz
128 MB / 256 MB SDRAM (1 DIMM Slot)
Hard disk min. 20 Minimum GB (3.5" UDMA)
Optional External 3.5" Floppy disk
Optional External 5.25" CD-ROM
COM1/2 (RS232)
LPT1
Keyboard PS/2
Mouse PS/2
3 USB
Front Access Compact Flash
External Floppy Drive Port
External CD-ROM Drive Port (IDE)
10/100BaseT (RJ45, 10/100Mbit full duplex)
Two PCI
115/230VAC, 50/60Hz, 10.0/5.0 Amps
(Accepts 90-264VAC input)
120 watts maximum
GFK-2251 8-1
Page 57

Appendix
Product Agency Approvals, Standards, and General
Specifications
A
Agency Approvals
Description Agency Standard
or Marking
N.A. Safety for Industrial Control Equipment Certification by Underwriter's
Laboratories to UL508 standard and
equivalent CSA C22.2 No 142 -
M1987standard
N.A. Safety for Hazardous Locations
Class I, Div. 2, Groups A, B, C, D
Low Voltage Directive
European Safety for Industrial Control
Equipment
Certification by Underwriter's
Laboratories to UL1604 standard and
equivalent CSA C22.2 No 213-M1987
standard
Self-Declaration in accordance with
European Directives; Refer to
Declaration of Conformity found at
www.gefanuc.com
Comments
Electromagnetic Compatibility Directive
European EMC for Industrial Control Equipment
GFK-2251 A-1
Certification by Competent Body in
accordance with European Directives;
Refer to Declaration of Conformity found
at www.gefanuc.com
Page 58

A
Government Regulations
U.S., Canadian, Australian, and European regulations are intended to prevent
equipment form interfering with approved transmissions or with the operation of other
equipment through the AC power source.
The Panel C has been tested and found to meet or exceed the requirements of U.S.
(47 CFR 15), Canadian (ICES-003), Australian (AS/NZS 3548), and European
(EN55022) regulations for Class A digital devices when installed in accordance with
the guidelines noted in the appropriate product section. These various regulations
share commonality in content and test levels with that of CISPR 22 and based on this
commonality testing to the each individual standard was deemed inappropriate.
The FCC requires the following note to be published according to FCC guidelines:
Note: This equipment generates, uses, and can radiate radio frequency energy and,
if not installed in accordance with this instruction manual, may cause harmful
interference to radio communications. It has been tested and found to comply
with the limits for a Class A digital device pursuant to Part 15 of the FCC
Rules, which are designed to provide reasonable protection against harmful
interference when operated in a commercial environment. Operation of this
equipment in a residential area is likely to cause harmful interference, in
which case the user will be required to correct the interference at his own
expense.
Industry Canada requires the following note to be published:
Note: This Class A digital apparatus complies with Canadian ICES-003.
A-2 Panel C Industrial Computer Hardware User's Manual – May 2003 GFK-2251
Page 59

General Specifications
GENERAL SPECIFICATIONS
ISOLATION
Dielectric Withstand
ENVIRONMENTAL
Vibration
Shock
Operating Temperature
Storage Temperature
Humidity
Enclosure Protection
EMC EMISSIONS
Radiated, Conducted
Harmonics
EMC IMMUNITY
Electrostatic Discharge
RF Susceptibility
Fast Transient Burst
Surge Withstand
Conducted RF
Input Dips & Variation
Voltage Flicker
Standard(s)
UL 508, UL 840,
IEC 664
IEC 68-2-6
IEC 68-2-27
NEMA 250
CISPR 11/EN 55011
CISPR 22/EN 55022
47 CFR 15
EN 61000-3-2
EN 61000-4-2
EN 61000-4-3
ENV 50140/
ENV 50204
EN 61000-4-4
EN 61000-4-5
ANSI C37.90A
EN 61000-4-6
EN 61000-4-11
EN 61000-3-3
Conditions
1.5KV DC (input power to secondary outputs)
10 - 57 Hz, 0.012" displacement peak-peak
57 - 500 Hz, 1.0g acceleration
15g, 11ms, sinusoidal
0°C to 50°C
-20°C to +60°C
5% to 95% RH (non-condensing)
NEMA Type 4, 4x and 12 when mounted in panel
[applies to CE Marked units]
“Industrial Scientific & Medical Equipment”
(Group 1, Class A)
“Information Technology Equipment” (Class A)
referred to as FCC part 15, “Radio Devices” (Class A)
Class D
[applies to CE Marked units]
±8KV Air, ±4KV Contact
10V
10V
±2KV: AC Input Port
±1KV: Signal Ports
±2KV (12Ω) CM, ±1kV (2Ω) DM: AC Input Port
±1kV (2Ω) CM: Signal Ports (shielded)
+2.5KV CM & DM: AC Input Port
+2.5KV CM: Signal Ports (shielded)
10V
AC Input Dips: 30 & 100% Nominal (10ms)
AC Input Variation: ±10% Nominal (10s)
D
/m, 80Mhz to 1000Mhz, 80% AM, 1kHz sine wave
rms
/m, 900 ± 5Mhz, 100% PM, 200Hz square wave
rms
, 0.15 to 80Mhz, 80%AM: AC Input & Signal Ports
rms
< 3.3%, Dc < 3.3%, D
t
< 4.0%, Pst < 1.0: AC Input Port
max
A
GFK-2251 Appendix A Product Agency Approvals, Standards, and General Specifications A-3
Page 60

1
y
A
A
Nonincendive Field Wiring (Control Drawing #DR00)
Hazardous (Classified) Location Class I,
Division 2 Groups A, B, C, and D
USB Port PL6
USB Port PL6
USB Port PL10
Ethernet Port
Panel C
Ke
board Port
Mouse Port
Non-hazardous Area
ssociated Nonincendive
Field Wiring Apparatus
Notes:
1. Nonincendive Circuit Parameters:
Panel C Industrial Computer
Vmax = 5VDC Voc = 5 VDC
Imax = 500mA Isc = 500mA
Ci = 34.2µF Ca = 1000µF
Li = 0mH La = 5mH
2. Selected Associated Nonincendive Field Wiring Apparatus must satisfy the
following requirements:
Associated Nonincendive
Field Wiring Apparatus
Voc
Isc
C a
La
Vmax
Imax
Ci + Ccable
Li + Lcable
Panel C
Industrial Computer
Vmax
≤
Imax
≤
Ci + C cable
≥
Ci + C cable
≥
Voc
≥
Isc
≥
Ca
≤
La
≤
3. If the electrical parameters of the cable are unknown, the following values may be
used:
Capacitance – 60 pF/ft
Inductive – 0.20 µH/ft
4. Nonincendive Field Wiring must be installed in accordance with Article 501.4(B)(3)
of the National Electrical Code ANSI/NFPA 70.
A-4 Panel C Industrial Computer Hardware User's Manual – May 2003 GFK-2251
Page 61

A
Agency approvals, A-1
Air flow, 3-2
Application software, 1-6
Audible warning, 2-1
Autologon, 2-2
B
Battery
CMOS, 7-6
BIOS settings, 6-1
Blanking plates, 3-5
C
Cards
installation, 3-5
CD-ROM drive, 1-3, 5-2
Class 1 Division 2 Approval
warnings, 3-1
CMOS
battery, 7-2, 7-6
settings, 7-1
CMOS checksum error, 7-6
COM ports
pinout, 4-7
Communications, 5-7
troubleshooting, 7-4
Configuring the Network
Windows 95/98, 2-4
Connectors, 4-1
Control drawing #DR00
nonincendive field wiring, A-4
D
Diagnostics
bootup sequence, 7-1
self-test, 7-1
system configuration verification, 7-1
system test and initialization, 7-1
Display
troubleshooting, 7-2
Index
Non-system disk, 7-2
Out of Memory, 7-3
Safe Recovery, 7-2
Ethernet port, 4-8
External keyboard and mouse, 5-2
F
FCC notice, A-2
Field image recovery disk, 2-9
Field wiring
nonincendive, A-4
Floppy disk drive, 5-2
Front access panel, 1-4
G
Graphic system, 5-2
H
Hard disk drive, 1-3, 5-2
I
I/O Port Range Table
for legacy expansion cards, 3-6
Image recovery, 2-9
Industrial PC
technical data, 8-1
Initial startup, 2-1
Installation
cards, 3-5
panel mounting, 3-2
Installation guidelines, 3-2
Installed network components, 5-7
Installing application software, 2-8
K
Keyboard
troubleshooting, 7-3
Keypads, 1-3
described, 5-3
Scan Codes, 5-4
E
Error messages
AUTOCONFIG/DEFAULT I/O, 7-4
CMOS checksum error, 7-2, 7-6
CMOS Setup Utility, 7-2
Disk Error, 7-2
Insufficient memory, 7-3
non-fatal, 7-1
GFK-2251 Index-1
Legacy ISA cards, 3-6
Login recommendation, 2-2
LPT1, LPT2
L
pinout, 4-6
Page 62

Index
M
Memory
troubleshooting, 7-3
MODBUS RTU communications
troubleshooting, 7-4
Monitor system
technical data, 8-1
Mounting
guidelines, 3-2
N
Network communications
setting up for Windows NT, 2-4
troubleshooting, 7-5
Network components, 5-7
Network interface, 1-5
Nonincendive field wiring, 4-3, A-4
O
Operator interfaces, 5-3
P
Panel cutout, 3-2
Panel mounting clips, 3-3
Parallel ports
pinout, 4-6
Peripherals, 5-2
PLC/CPU connection
troubleshooting, 7-4
Power input, 4-2
Powering up
troubleshooting, 7-2
Printer ports, 4-6
Printing
troubleshooting, 7-5
R
Setting up
Windows 2000 systems, 2-3
Windows NT systems, 2-2
Shutting down the computer, 2-9
Specifications
general, A-3
industrial PC, 8-1
monitor system, 8-1
Standard features, 1-2
Status LEDs, 1-3
System Configuration Verification, 7-1
System Test and Initialization, 7-1
T
Technical data
general specifications, A-3
industrial PC, 8-1
monitor system, 8-1
Temperature
effect on contrast setting, 7-2
Touch Screen, 5-6
driver for Windows, 5-6
Troubleshooting, 7-2
communications, 7-4
display, 7-2
keyboard, 7-3
memory, 7-3
MODBUS RTU communications, 7-4
network communications, 7-5
PLC/CPU connection, 7-4
powerup, 7-2
printing, 7-5
serial mouse, 7-3
TSRs, 7-3
W
Warning, audible, 2-1
Windows 2000 systems
setting up, 2-3
Windows NT systems
setting up, 2-2
Recovery, image, 2-9
Reset
accidental, 7-2
RFI standards, A-2
S
Scan Codes, 5-4
Self-test diagnostics, 7-1
Serial communication ports, 4-7
Serial Mouse
troubleshooting, 7-3
Index-2 Panel C Industrial Computer Hardware User's Manual–May 2003 GFK-2251
 Loading...