

Page 1

1
We bring good things to life.
40-Channel 900 MHz Caller ID
Cordless Telephone/Answerer
User’s Guide
26993/26994
Page 2

2
FCC NUMBER IS LOCATED ON THE CABINET BOTTOM
REN NUMBER IS LOCATED ON THE CABINET BOTTOM
FCC REGISTRATION INFORMATION
Your telephone equipment is registered with the Federal Communications Commission and is in compliance with
parts 15 and 68, FCC Rules and Regulations.
1 Notification to the Local Telephone Company
On the bottom of this equipment is a label indicating, among other information, the FCC Registration number
and Ringer Equivalence Number (REN) for the equipment. You must, upon request, provide this information to
your telephone company.
The REN is useful in determining the number of devices you may connect to your telephone line and still have
all of these devices ring when your telephone number is called. In most (but not all) areas, the sum of the
RENs of all devices connected to one line should not exceed 5. To be certain of the number of devices you
may connect to your line as determined by the REN, you should contact your local telephone company.
Notes
• This equipment may not be used on coin service provided by the telephone company.
• Party lines are subject to state tariffs, and therefore, you may not be able to use your own telephone
equipment if you are on a party line. Check with your local telephone company.
• Notice must be given to the telephone company upon permanent disconnection of your telephone from
your line.
2 Rights of the Telephone Company
Should your equipment cause trouble on your line which may harm the telephone network, the telephone
company shall, where practicable, notify you that temporary discontinuance of service may be required.
Where prior notice is not practicable and the circumstances warrant such action, the telephone company may
temporarily discontinue service immediately. In case of such temporary discontinuance, the telephone
company must: (1) promptly notify you of such temporary discontinuance; (2) afford you the opportunity to
correct the situation; and (3) inform you of your right to bring a complaint to the Commission pursuant to
procedures set forth in Subpart E of Part 68, FCC Rules and Regulations.
The telephone company may make changes in its communications facilities, equipment, operations of
procedures where such action is required in the operation of its business and not inconsistent with FCC Rules
and Regulations. If these changes are expected to affect the use or performance of your telephone equipment,
the telephone company must give you adequate notice, in writing, to allow you to maintain uninterrupted
service.
INTERFERENCE INFORMATION
This device complies with Part 15 of the FCC Rules. Operation is subject to the following two conditions: (1) This
device may not cause harmful interference; and (2) This device must accept any interference received, including
interference that may cause undesired operation.
This equipment has been tested and found to comply with the limits for a Class B digital device, pursuant to Part
15 of the FCC Rules. These limits are designed to provide reasonable protection against harmful interference in a
residential installation.
This equipment generates, uses, and can radiate radio frequency energy and, if not installed and used in
accordance with the instructions, may cause harmful interference to radio communications. However, there is no
guarantee that interference will not occur in a particular installation.
If this equipment does cause harmful interference to radio or television reception, which can be determined by
turning the equipment off and on, the user is encouraged to try to correct the interference by one or more of the
following measures:
• Reorient or relocate the receiving antenna (that is, the antenna for radio or television that is “receiving” the
interference).
• Reorient or relocate and increase the separation between the telecommunications equipment and receiving
antenna.
• Connect the telecommunications equipment into an outlet on a circuit different from that to which the
receiving antenna is connected.
If these measures do not eliminate the interference, please consult your dealer or an experienced radio/television
technician for additional suggestions. Also, the Federal Communications Commission has prepared a helpful
booklet, “How To Identify and Resolve Radio/TV Interference Problems.” This booklet is available from the U.S.
Government Printing Office, Washington, D.C. 20402. Please specify stock number 004-000-00345-4 when
ordering copies.
HEARING AID COMPATIBILITY
This telephone system meets FCC standards for Hearing Aid Compatiblility.
Page 3

3
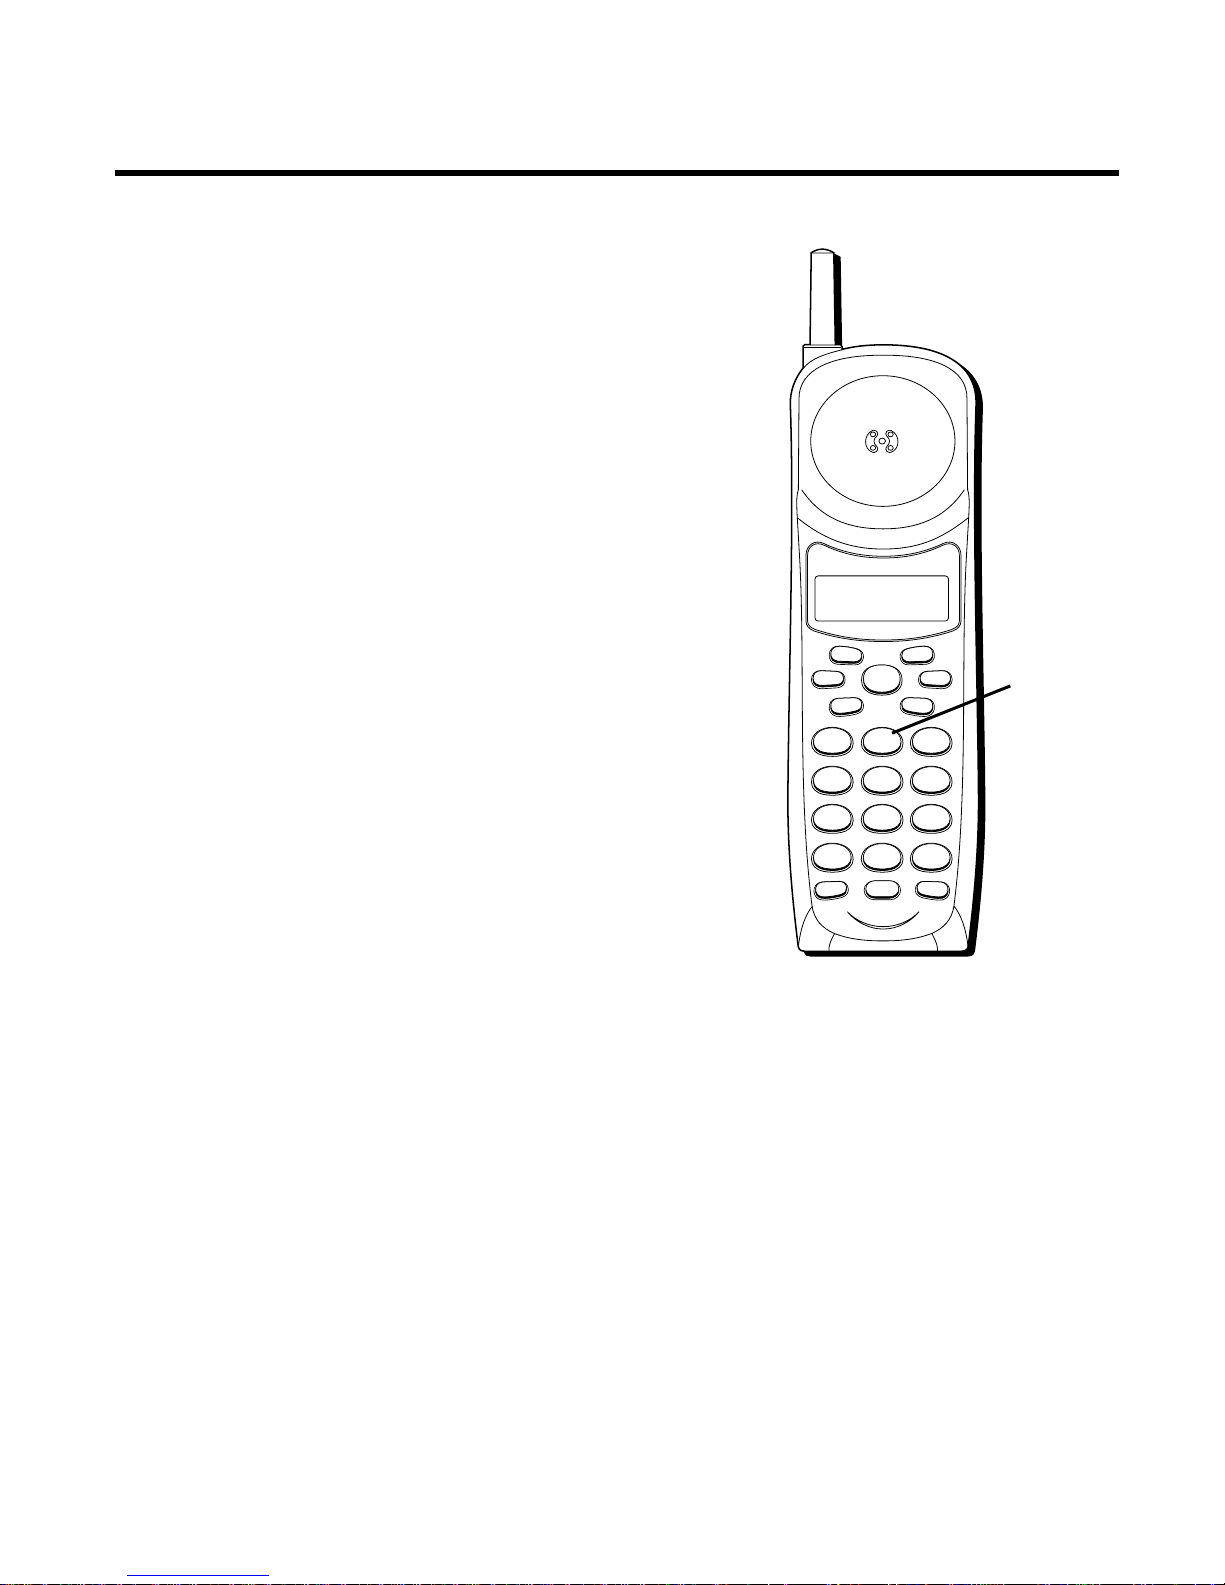
INTRODUCTION
Your cordless telephone/answerer with Caller ID is designed to give you flexibility
in use and high quality performance. To get the most from your new cordless
telephone/answerer, we suggest that you take a few minutes right now to read
through this instruction manual.
TABLE OF CONTENTS
FCC REGISTRATION INFORMATION .......... 2
INTERFERENCE INFORMATION .................. 2
HEARING AID COMPATIBILITY.................. 2
GETTING STARTED ......................................... 5
BEFORE YOU BEGIN................................... 5
MODULAR JACK REQUIREMENTS............. 5
DIGITAL SECURITY SYSTEM ......................... 5
DESKTOP INSTALLATION .............................. 6
WALL MOUNT INSTALLATION....................... 7
ANSWERING MACHINE SETUP ..................... 9
SETTING THE VOICE TIME/DAY STAMP..... 9
SETTING THE SPEAKER VOLUME ........... 10
VOICE INSTRUCTIONS .......................... 10
SETTING THE RING SELECT .................. 10
USING TOLL SAVER ............................ 10
RECORDING THE OUTGOING
ANNOUNCEMENT ......................... 11
REVIEWING ANNOUNCEMENT................ 11
TELEPHONE SETUP .................................. 12
SETTING THE DISPLAY LANGUAGE ......... 12
SETTING THE LOCAL AREA CODE .......... 12
CORDLESS PHONE BASICS ............................ 13
MAKING A CALL...................................... 13
REDIAL .................................................. 13
RECEIVING A CALL ................................... 14
FLASH ................................................... 14
VOLUME ................................................ 14
MUTE.................................................... 14
RINGER SWITCH ...................................... 15
FINDING THE HANDSET ............................. 15
CALLER ID FEATURES................................... 16
CALLER ID WITH CALL WAITING ................ 16
RECEIVING AND STORING CALLS ................ 16
REVIEWING MESSAGES ............................. 17
DELETING RECORDS ................................. 18
DELETING THE CURRENT RECORD .......... 18
DELETING ALL RECORDS ..................... 18
DIALING A CALLER ID NUMBER ................. 18
CHANGING THE NUMBER FORMAT .............. 19
THE MEMORY FEATURE ................................ 20
STORING A NUMBER IN MEMORY............... 20
CHANGING A STORED NUMBER.................. 21
DIALING A STORED NUMBER ..................... 22
USING DIAL ........................................... 22
CHAIN DIALING FROM MEMORY ............ 23
INSERTING A PAUSE IN THE DIALING
SEQUENCE ................................. 24
REVIEWING AND DELETING STORED
NUMBERS .................................. 24
ADVANCED FEATURES................................... 25
CHANNEL BUTTON ................................... 25
TEMPORARY TONE ................................... 25
MESSAGES INDICATOR .............................. 26
SCREENING CALLS FROM THE BASE ............. 26
ANSWERING MACHINE OPERATION ................. 26
MESSAGE PLAYBACK ............................... 27
MEMORY FULL........................................ 27
ERASING MESSAGES ................................ 27
LEAVING A MEMO ................................... 28
WARNING:
TO PREVENT FIRE
OR ELECTRICAL SHOCK HAZARD,
DO NOT EXPOSE THIS PRODUCT
TO RAIN OR MOISTURE.
SEE MARKING ON BOTTOM / BACK OF PRODUCT
CAUTION
RISK OF ELECTRIC SHOCK
DO NOT OPEN
THE EXCLAMATION
POINT WITHIN THE
TRIANGLE IS A
WARNING SIGN
ALERTING YOU OF
IMPORTANT
INSTRUCTIONS
ACCOMPANYING
THE PRODUCT.
THE LIGHTNING
FLASH AND ARROW HEAD WITHIN THE
TRIANGLE IS A
WARNING SIGN
ALERTING YOU OF
"DANGEROUS
VOLTAGE" INSIDE
THE PRODUCT.
CAUTION: TO REDUCE THE
RISK OF ELECTRIC SHOCK,
DO NOT REMOVE COVER
(OR BACK). NO USERSERVICEABLE PARTS INSIDE. REFER SERVICING
TO QUALIFIED SERVICE
PERSONNEL.
(Table of Contents continued on
the following page.)
Page 4

4
REMOTE ACCESS ......................................... 29
USING THE HANDSET ............................... 30
ANSWERER INDICATOR ........................ 30
SCREENING CALLS
FROM
THE HANDSET..................... 31
ACCESSING THE ANSWERER FROM ANOTHER
LOCATION .................................. 32
CHANGING THE SECURITY CODE................. 33
HEADSET AND BELT CLIP OPERATION .............. 34
CONNECTING A HEADSET TO THE HANDSET ... 34
CONNECTING THE BELT CLIP ...................... 34
CHANGING THE BATTERY ............................... 35
BATTERY SAFETY PRECAUTIONS ............ 35
GENERAL PRODUCT CARE ............................. 36
HANDSET SOUND SIGNALS ........................... 36
HANDSET INDICATORS .................................. 37
ANSWER STATUS INDICATORS ........................ 38
TROUBLESHOOTING GUIDE ............................ 39
CORDLESS PHONE SOLUTIONS ............. 39
CALLER ID........................................ 40
ANSWERING MACHINE SOLUTIONS........ 41
CAUSES OF POOR RECEPTION ........................ 42
SERVICE ..................................................... 42
INDEX ........................................................ 43
ACCESSORY ORDER FORM ............................ 45
LIMITED WARRANTY ..................................... 47
Page 5
5
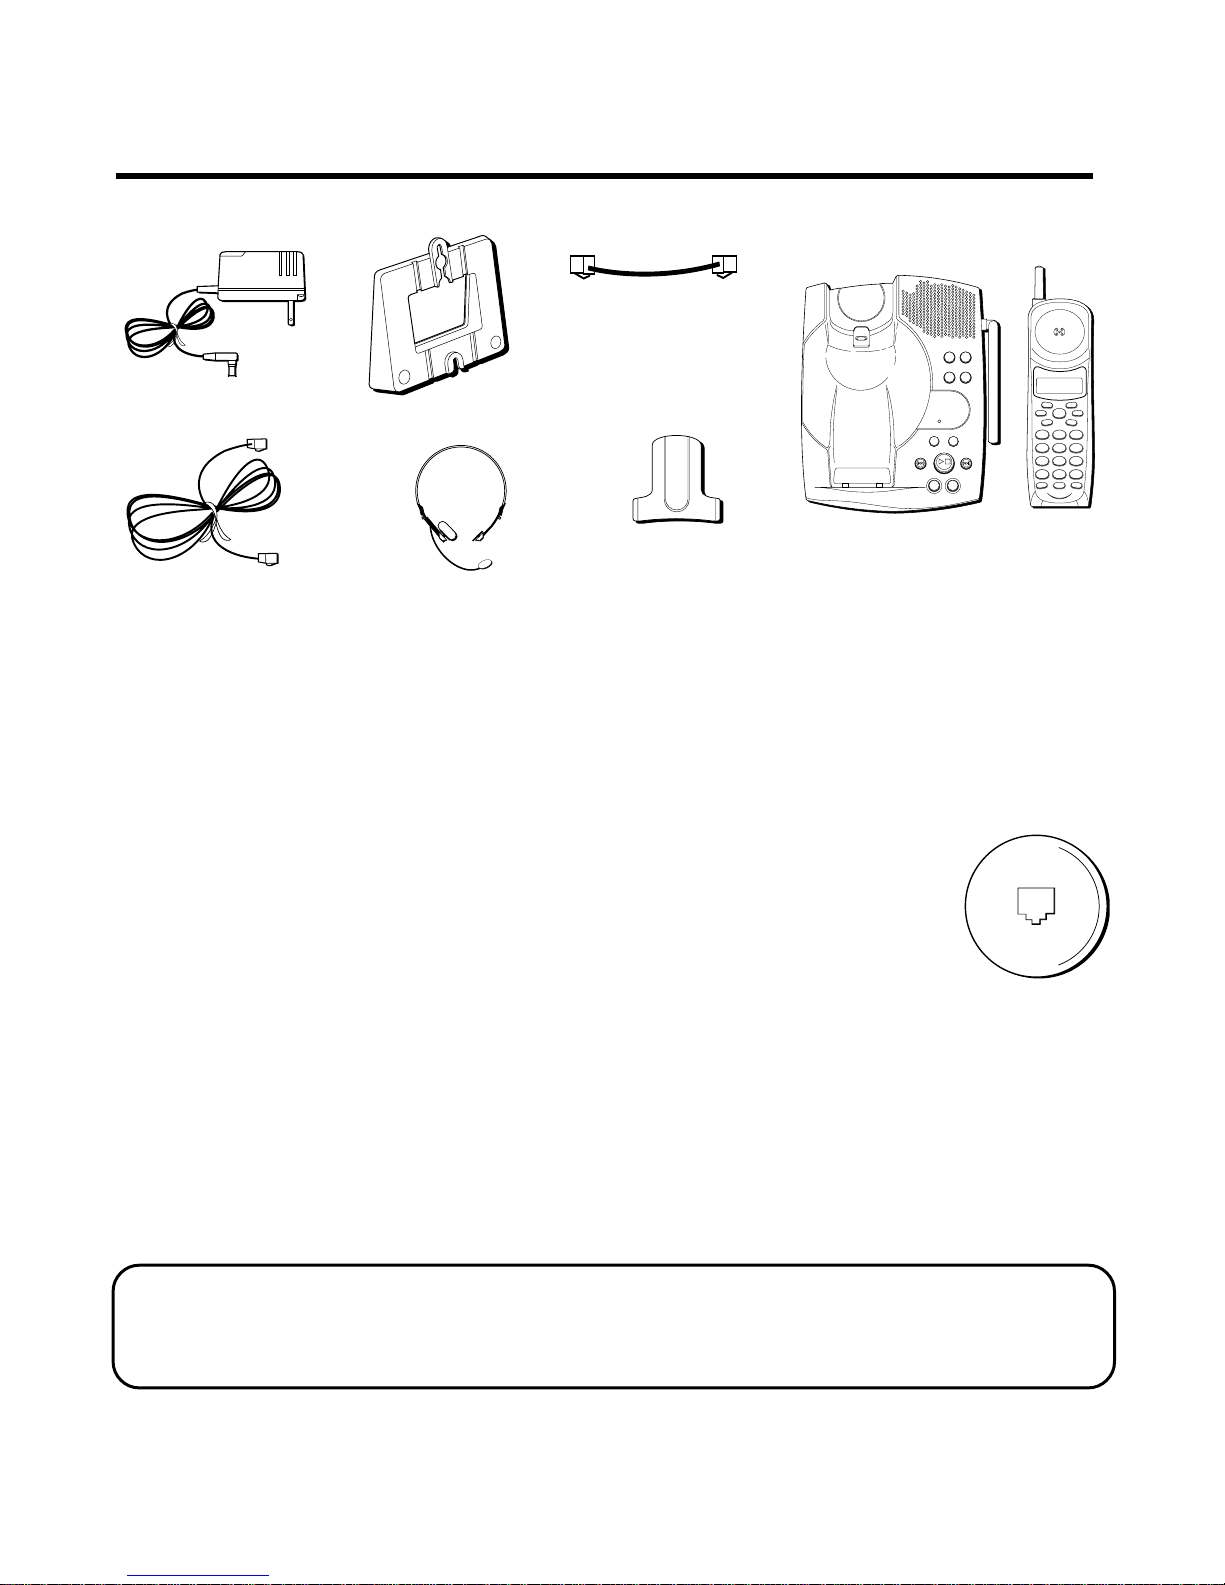
GETTING STARTED
Make sure your package includes the items shown here.
Base Handset
W
X
Y
Z
9
T
U
V
8
P
Q
R
S
7
M
N
O
6
J
K
L
5
G
H
I
4
D
E
F
3
A
B
C
21
#
O
P
E
R
0
T
O
N
E
*
C
H
A
N
N
E
L
F
L
A
S
H
I
N
T
R
E
D
I
A
L
M
E
M
D
E
L
E
T
E
D
I
A
L
F
O
R
M
A
T
M
U
T
E
P
R
O
G
P
A
U
S
E
TA
LK
A
N
S
W
E
R
A
S
E
P
L
A
Y
/
S
T
O
P
S
K
I
P
R
E
V
I
E
W
AC power supply
Telephone line cord
Wall mount bracket
NEXT
ANNOUNCE
MEMO
ERASE ANSWER
ON/OFF
HOUR MIN
DAY/
CHECK
PAGE
CORDLESS TELEPHONE
DIGITAL ANSWERER
900 MHz
CHARGE/
IN USE
MESSAGES
8.8.
S
K
I
P
R
E
V
I
E
W
P
L
A
Y
/
S
T
O
P
BEFORE YOU BEGIN
MODULAR JACK REQUIREMENTS
You need an RJ11 type modular jack, which is the most
common type of phone jack and might look like the one
pictured here. If you don’t have a modular jack, call your
local phone company to find out how to get one installed.
DIGITAL SECURITY SYSTEM
Your cor dless phone uses a digital security system to protect against false
ringing, unauthorized access, and charges to your phone line.
When you place the handset in the base, the unit verifies its security code.
After a power outage or battery replacement, you should place the
handset in the base for about 20 seconds to reset the code.
IMPORTANT: Because cordless phones operate on electricity, you should
have at least one phone in your home that isn’t cordless, in case the power in
your home goes out.
Short telephone
line cord
Headset (provided
with 26994 only)
Belt clip
(provided with
26994 only)
Page 6

6
DESKTOP
INSTALLATION
1. Make sure wall mount bracket is securely fastened.
2. Set the T/P switch to T for touch-tone service, or P for pulse (rotary)
service. If you don’t know which type of service you have, check with
the phone company.
3. Set RINGER switch (on the handset) to ON.
4. Plug the power supply cord into the POWER 9V DC jack on the base and
into an AC outlet.
5. Place handset in the base to charge for 12 hours. The CHARGE light (on the
base) comes on to indicate that the battery is charging. If you don’ t charge
the handset battery properly (for 12 hours) when you first set up the
phone, performance of the battery will be compromised.
6. Plug the telephone line cord into the TEL LINE jack on the base and into
a modular jack.
7. Raise the base antenna.
CAUTION: Use only the Thomson 5-2472(black)/5-2471(white) power supply
that came with this unit. Using other power supplies may damage the unit.
INSTALLATION NOTE: Some cordless telephones operate at frequencies that
may cause interference to nearby TVs and VCRs. To minimize or prevent such
interference, the base of the cordless telephone should not be placed near or on
top of a TV or VCR. If interference continues, moving the cordless telephone
farther away from the TV or VCR will often reduce or eliminate the interference.
T/P switch
5
3
2
7
1
4
6
Page 7

7
NEXT
ANNOUNCE
MEMO
ERASE ANSWER
ON/OFF
HOUR MIN
DAY/
CHECK
PAGE
CORDLESS TELEPHONE
DIGITAL ANSWERER
900 MHz
CHARGE/
IN USE
MESSAGES
8.8.
S
K
I
P
R
E
V
I
E
W
P
L
A
Y
/
S
T
O
P
4
2
WXYZ9TUV
8
PQRS
7
MNO6JKL5GHI
4
DEF3ABC
21
#
OPER0TONE
*
CHANNEL FLASHINT
REDIAL MEM
DELETEDIAL
FORMAT MUTE
PROG
PAUSE
TALK
ANSW
ERASE
PLAY/STOP SKIPREVIEW
3
WALL MOUNT INSTALLATION
Because it is necessary to charge the
handset for 12 hours prior to connecting
the phone for use the first time, it is
better to leave the unit on a flat surface
during initial charge before attempting
to hang it on the wall.
1. Make sure the wall mount bracket is
securely fastened.
2. Set the T/P switch to T for touch-tone
service, or P for pulse (rotary) service.
If you don’t know which type of
service you have, check with the
phone company.
3. Set RINGER switch to ON.
4. Place the handset in the base.
5. Connect the power supply cord into
the base and the other end into an AC
outlet. The CHARGE light comes on,
indicating the battery is charging.
Allow the phone to charge for 12
hours before using the first time.
If you don't charge the phone
properly when you first set up
the phone, performance of the
battery will be compromised.
(Installation continued on the
following page.)
5
1
CAUTION: Use only the Thomson
5-2472(black)/5-2471(white)
power supply that came with this
unit. Using other power supplies
may damage the unit.
Page 8

8
6. Remove the wall mount bracket. Rotate
it so that the bottom of the phone is flat.
Reattach the wall mount bracket by
inserting the tabs into the slots on the
top of the unit first, and then snapping
the bottom tabs into place.
7. Plug the short telephone line cord into
the jack marked TEL LINE on the back of
the unit and plug the other end into a
modular wall jack.
8. Slip the mounting holes over the wall
plate posts and slide the unit down
firmly into place. (Wall plate not
included.)
9. Remove the handset hook; turn it
upside down, and put it back in the slot.
You need to do this so the handset
doesn’t fall out of the base.
10. Raise the base antenna.
9
7
6
8
10
Page 9

9
NEXT
ANNOUNCE
MEMO
ERASE ANSWER
ON/OFF
CHARGE/
IN USE
MESSAGES
8.8.
S
K
I
P
R
E
V
I
E
W
P
L
A
Y
/
S
T
O
P
ANSWER ON/OFF
(answerer on/off) button
MESSAGES indicator light
ANSWERING MACHINE SETUP
This section shows you how to set up your
answering machine to receive incoming
calls. Before you begin the setup, you
must turn on the answerer.
• Press the ANSWER ON/OFF button to
turn the answering machine on and off.
The MESSAGES indicator lights when
the answering machine is on. The
indicator blinks when you have
messages.
NOTE: The answerer displays “- -” when it is
off.
SETTING THE VOICE TIME/DAY STAMP
1. Make sure the answerer is ON.
2. Press and hold the DAY/CHECK button
to set the day of the week.
3. Press the HOUR button to set the hour
(a.m. or p.m.).
4. Press the MIN button to set the minute.
When you press and hold the MIN
button, the time advances in 5-minute
intervals.
5. Press and release the DAY/CHECK
button to review the day and time
settings.
Time set buttons
HOUR MIN
DAY/
CHECK
PAGE
CORDLESS TELEPHONE
DIGITAL ANSWERER
900 MHz
Page 10

10
RING SELECT switch
V
O
L
Speaker volume control
SETTING THE SPEAKER VOLUME
Use the VOL (volume) control to adjust
speaker volume to a comfortable level.
VOICE INSTRUCTIONS
If you need additional assistance, press the
REVIEW button when you plug in the
answerer and follow the voice instructions.
SETTING THE RING SELECT
Set the RING SELECT switch on the back of
the unit to choose the number of times you
want the phone to ring before the machine
answers the call. You can choose 2 rings, 5
rings, or TOLL SAVER.
USING TOLL SAVER
Toll Saver can save you the cost of a call
when you access your messages from
another phone:
• If you have new messages, the unit
answers after the 2nd ring.
• If you have no new messages, the unit
answers after the 5th ring.
You can hang up after the 3rd or 4th ring
and save the pay telephone or long distance
charge.
Page 11

11
RECORDING THE OUTGOING
ANNOUNCEMENT
For best results when recording, you should
be about 9 inches from the microphone,
and eliminate as much background noise as
possible.
1. Make sure the answerer is ON.
2. Press and hold the ANNOUNCE button.
You need to hold the button until you
finish the announcement.
3. Begin talking after you hear the beep.
4. Release the button when you finish your
announcement.
If you choose not to record an outgoing
announcement, a default announcement
will play. To r eturn to the default
announcement after you have recorded
your own outgoing announcement, press
the ANNOUNCE button and release it when
you hear the beep.
Sample Outgoing Announcement
Hi, this is (use your name here), I can't answer the
phone right now, so please leave your name, number
and a brief message after the tone, and I'll get back to
you. Thanks.
REVIEWING ANNOUNCEMENT
• Press and release ANNOUNCE button to
review your outgoing announcement.
NEXT
ANNOUNCE
MEMO
ERASE ANSWER
ON/OFF
S
K
I
P
R
E
V
I
E
W
P
L
A
Y
/
S
T
O
P
ANNOUNCE
button
Microphone
Page 12
12
TELEPHONE SETUP
SETTING THE DISPLAY LANGUAGE
1. Press and release PROG until
SET
LANGUAGE
shows on the display.
2. Use the CID REVIEW buttons to change
the display to the desired language.
3. When finished, press and release PROG
again to store the setting and enter the
Local Area Code menu.
SETTING THE LOCAL AREA CODE
1. Press and release PROG until
LOCAL
AREA CODE
shows on the display.
2. Use the keypad to enter the area code.
3. When finished, press and release PROG
again to store the area code and exit
setup.
NOTE: If you make a mistake, repeat steps 1-3.
WXYZ
9
TUV
8
PQRS
7
MNO
6
JKL
5
GHI
4
DEF
3
ABC
21
#
OPER
0
TONE
*
CHANNEL FLASHINT
REDIAL MEM
DELETEDIAL
FORMAT MUTE
PROG
PAUSE
TALK
ANSW
ERASE
PLAY/STOP SKIPREVIEW
CID
REVIEW
buttons
PROG
button
Page 13

13
REDIAL
button
WXYZ
9
TUV
8
PQRS
7
MNO
6
JKL
5
GHI
4
DEF
3
ABC
21
#
OPER
0
TONE
*
CHANNEL FLASHINT
REDIAL MEM
DELETEDIAL
FORMAT MUTE
PROG
PAUSE
TALK
ANSW
ERASE
PLAY/STOP SKIPREVIEW
TALK
button
CORDLESS PHONE BASICS
MAKING A CALL
The only two things you need to know to
make a call are:
• Press the TALK button before you dial.
• Press TALK button or place the handset in
the base to hang up.
Otherwise, it works just like any other
phone.
IMPORTANT: Because cordless phones
operate on electricity, you should have at
least one phone in your home that isn’t
cordless, in case the power in your home
goes out.
REDIAL
Press the REDIAL button to redial the last
number you called (up to 32 digits).
If you get a busy signal, and want to keep
dialing the number, press TALK to turn off
the phone. Press TALK again to turn it back
on. Then press REDIAL to dial the number.
Page 14

14
WXYZ
9
TUV
8
PQRS
7
MNO
6
JKL
5
GHI
4
DEF
3
ABC
21
#
OPER
0
TONE
*
CHANNEL FLASHINT
REDIAL MEM
DELETEDIAL
FORMAT MUTE
PROG
PAUSE
TALK
ANSW
ERASE
PLAY/STOP SKIPREVIEW
VOL
button
FLASH
button
RECEIVING A CALL
To answer a call you must press the TALK
button on the handset before you can talk.
FLASH
Use the FLASH button to activate custom
calling services such as call waiting or call
transfer, which are available through your
local phone company.
TIP: Don't use the TALK button to activate
custom calling services such as call waiting,
or you’ll hang up the phone.
VOLUME
When the phone is ON, press the VOL
buttons to adjust the volume of the
handset's earpiece. There are four settings.
MUTE
Use the MUTE button to interrupt a phone
conversation to talk privately with someone
else in the room.
1. Press MUTE to activate mute feature. The
display shows
MUTE
.
2. Press MUTE again to turn it off.
MUTE
button
TALK
button
Page 15

15
HOUR MIN
DAY/
CHECK
PAGE
CORDLESS TELEPHONE
DIGITAL ANSWERER
900 MHz
PAGE button
RINGER SWITCH
The RINGER switch must be ON for the
handset to ring during incoming calls.
FINDING THE HANDSET
This feature helps to locate a misplaced
handset.
Press the PAGE button on the base. The
display shows
PAGING YOU
. The handset
beeps continuously for about 2 minutes or
until you press TALK or ANSW on the
handset.
NOTE: You can still page the handset with
the ringer off.
WXYZ
9
TUV
8
PQRS
7
MNO
6
JKL
5
GHI
4
DEF
3
ABC
21
#
OPER
0
TONE
*
CHANNEL FLASHINT
REDIAL MEM
DELETEDIAL
FORMAT MUTE
PROG
PAUSE
TALK
ANSW
ERASE
PLAY/STOP SKIPREVIEW
RINGER
switch
TALK
button
Page 16

16
WXYZ
9
TUV
8
PQRS
7
MNO
6
JKL
5
GHI
4
DEF
3
ABC
21
#
OPER
0
TONE
*
CHANNEL FLASHINT
REDIAL MEM
DELETEDIAL
FORMAT MUTE
PROG
PAUSE
TALK
ANSW
ERASE
PLAY/STOP SKIPREVIEW
CALLER ID FEATURES
This unit receives and displays information
transmitted by your local phone company.
This information can include the phone
number, date, and time; or the name,
phone number, date, and time. The unit can
store up to 40 calls for later review.
CALLER ID WITH CALL WAITING
Provided you subscribe to Caller ID with
Call Waiting service from your phone
company, you are able to see who is calling
when you hear the call waiting beep. The
caller identification information appears in
the display after you hear the tone.
• Press the FLASH button to put the
current person on hold so that you can
answer the incoming call.
RECEIVING AND STORING CALLS
When you receive a call, the information is
transmitted by the phone company to your
Caller ID Telephone between the first and
second ring.
VERY IMPORTANT: The Caller ID feature
of this product requires a subscription to
Caller ID service from your telephone
company.
CHANNEL
button
FLASH
button
TALK
button
REDIAL
button
Page 17

17
When the memory is full, a new call automatically replaces the oldest call
in memory.
NEW
appears in the display for calls received that have not
been reviewed.
REVIEWING MESSAGES
As calls are received and stored, the display
is updated to let you know how many calls
have been received.
• Press the CID REVIEW arrow down
button to scroll through the call records
from the most recent to the oldest.
• Press the CID REVIEW arrow up button to
scroll through the call records from the
oldest to the newest.
Time
Date
Caller ID name
Number of calls
Caller ID phone number
317-555-4231
10:51
A.M.
8/11
REPT
CALL
NEW
MEMO
#
25
SMITH JOHN
NOTE: Check with your local
phone company regarding
name service availability.
Page 18

18
WXYZ
9
TUV
8
PQRS
7
MNO
6
JKL
5
GHI
4
DEF
3
ABC
21
#
OPER
0
TONE
*
CHANNEL FLASHINT
REDIAL MEM
DELETEDIAL
FORMAT MUTE
PROG
PAUSE
TALK
ANSW
ERASE
PLAY/STOP SKIPREVIEW
DELETING RECORDS
Use the DELETE button to erase the record
currently shown in the display or all
records.
DELETING THE CURRENT RECORD
Press DELETE. The display shows
DELETED
.
DELETING ALL RECORDS
1. Press and hold DELETE. The display
shows
DELETE ALL?
2. Press DELETE again to erase all records.
DIALING A CALLER ID NUMBER
1. Make sure the phone is OFF.
2. Use the CID REVIEW buttons to display
the desired Caller ID record.
3. Press the DIAL button to dial the number.
CID
REVIEW
buttons
DIAL
button
DELETE
button
Page 19

19
WXYZ
9
TUV
8
PQRS
7
MNO
6
JKL
5
GHI
4
DEF
3
ABC
21
#
OPER
0
TONE
*
CHANNEL FLASHINT
REDIAL MEM
DELETEDIAL
FORMAT MUTE
PROG
PAUSE
TALK
ANSW
ERASE
PLAY/STOP SKIPREVIEW
CHANGING THE NUMBER FORMAT
The FORMAT button lets you change the
format of the displayed number. The
available formats are as follows.
7-digit 7-digit telephone number.
10-digit 3-digit area code + 7-digit
telephone number.
11-digit long distance code “1” + 3-digit
area code + 7-digit telephone
number.
1. Use the CID REVIEW buttons to scroll to
the number you want to call back.
2. If the number will not dial as shown,
press the FORMAT button. Repeat if
necessary, until the correct number of
digits are shown.
3. Press DIAL.
NOTE: To clear the local area code, press
and release PROG, until SET AREA CODE is
displayed. Then enter "000". Press PROG
again to confirm.
FORMAT
button
DIAL
button
CID
REVIEW
buttons
PROG
button
Page 20
20
WXYZ
9
TUV
8
PQRS
7
MNO
6
JKL
5
GHI
4
DEF
3
ABC
21
#
OPER
0
TONE
*
CHANNEL FLASHINT
REDIAL MEM
DELETEDIAL
FORMAT MUTE
PROG
PAUSE
TALK
ANSW
ERASE
PLAY/STOP SKIPREVIEW
THE MEMORY FEATURE
Store up to ten 24-digit numbers in
memory for quick dialing. This memory
feature is in addition to the 40 Caller ID
records that can be stored in memory.
STORING A NUMBER IN
MEMORY
The phone must be OFF when you store
numbers.
1. Press the MEM button.
2. Press the memory location number (0-9).
3. Press MEM again. The display shows
ENTER NAME.
4. Use the keypad to store a name (up to 16
characters). More than one letter is
stored in each of the number keys. For
example, to enter Joe Smith, press 5 for
J; press 6 three times for O; press 3 two
times for E; press 1 to enter a space
before you start entering the last name;
press 7 four times for S; press 6 for M;
press 4 three times for I; press 8 for T;
NOTE: If you don't want to enter the
name, skip step 4.
MEM
button
Page 21

21
and 4 two times for H. If you're using two
letters consecutively that are stored in
the same number key, you must pr ess
FORMAT between the letters. For example, if you enter Barb, press 2 two
times for B; press FORMAT; press 2 for A;
7 three times for R; and 2 two times for
B. You need to press FORMAT between
the B and the A since they are stored
within the same number key.
5. Press MEM. The display shows
ENTER
TEL NUMBER
.
6. Use the keypad to enter the number you
want to store (up to 24 digits).
7. Press MEM again to store the number.
8. Record whose number is stored in the
location on the memory label provided.
You will also be able to view the name
and number in the phone's display.
CHANGING A STORED NUMBER
Use the same procedure to change a stored
number as you do to store a number—
you’re just replacing the phone number
with a different one.
WXYZ
9
TUV
8
PQRS
7
MNO
6
JKL
5
GHI
4
DEF
3
ABC
21
#
OPER
0
TONE
*
CHANNEL FLASHINT
REDIAL MEM
DELETEDIAL
FORMAT MUTE
PROG
PAUSE
TALK
ANSW
ERASE
PLAY/STOP SKIPREVIEW
MEM
button
FORMAT
button
Page 22
22
DIALING A STORED NUMBER
1. Make sure the phone is ON by pressing
the TALK button.
2. Press MEM.
3. Press the number (0-9) for the desired
memory location. The number dials
automatically.
USING DIAL
This feature allows you to call back Caller
ID records that were previously stored.
1. Make sure the phone is OFF.
2. Press MEM.
3. Use the CID REVIEW buttons to scroll
through the numbers stored in memory
until the desired number is shown.
4. Press DIAL. The number dials
automatically.
IMPORTANT: If you make test calls to
emergency numbers stored in memory,
remain on the line and briefly explain the
reason for the call to the dispatcher. Also,
it’s a good idea to make these calls in
off-peak hours, such as early morning or
late evening.
MEM
button
TALK
button
WXYZ
9
TUV
8
PQRS
7
MNO
6
JKL
5
GHI
4
DEF
3
ABC
21
#
OPER
0
TONE
*
CHANNEL FLASHINT
REDIAL MEM
DELETEDIAL
FORMAT MUTE
PROG
PAUSE
TALK
ANSW
ERASE
PLAY/STOP SKIPREVIEW
DIAL
button
CID
REVIEW
buttons
Page 23

23
CHAIN DIALING FROM MEMORY
Use this feature to make calls which require a sequence of numbers such
as using a calling card for a frequently called long distance number.
Basically, you dial each part of the sequence from memory. The following
example shows how you can use chain dialing to make a call through a
long distance service:
The Number For Memory Location
Long distance access number 7
Authorization code 8
Frequently called long distance number 9
1. Make sure the phone is ON.
2. Press MEM and then press 7.
3. When you hear the access tone, press
MEM and then press 8.
4. At the next access tone, press MEM and
then 9.
TIP: Wait for the access tones before
pressing the next memory button, or your
call might not go through.
MEM
button
WXYZ
9
TUV
8
PQRS
7
MNO
6
JKL
5
GHI
4
DEF
3
ABC
21
#
OPER
0
TONE
*
CHANNEL FLASHINT
REDIAL MEM
DELETEDIAL
FORMAT MUTE
PROG
PAUSE
TALK
ANSW
ERASE
PLAY/STOP SKIPREVIEW
Page 24

24
INSERTING A PAUSE IN THE
DIALING SEQUENCE
Press the REDIAL button to insert a delay
in the dialing sequence of a stored
telephone number when a pause is needed
to wait for a dial tone (for example after
you dial 9 for an outside line, or to wait for
a computer access tone). Each pause
counts as 1 digit in the dialing sequence.
REVIEWING AND DELETING
STORED NUMBERS
1. Press MEM.
2. Use the CID REVIEW buttons to scroll
through the numbers stored in memory
until the desired number is shown.
3. While the entry is displayed, press
DELETE to delete the entry. The display
shows
DELETED.
DELETE
button
REDIAL
button
MEM
button
WXYZ
9
TUV
8
PQRS
7
MNO
6
JKL
5
GHI
4
DEF
3
ABC
21
#
OPER
0
TONE
*
CHANNEL FLASHINT
REDIAL MEM
DELETEDIAL
FORMAT MUTE
PROG
PAUSE
TALK
ANSW
ERASE
PLAY/STOP SKIPREVIEW
CID
REVIEW
buttons
Page 25

25
TONE
button
CHANNEL button
ADVANCED FEATURES
CHANNEL BUTTON
While talking, you might need to manually
change the channel in order to reduce static
caused by baby monitors, garage door
openers, or other cordless phones. Press
and release the CHANNEL button to
advance to the next clear channel.
TEMPORARY TONE
This feature enables pulse (rotary) service
phone users to access touch-tone services
offered by banks, credit card companies,
etc. Press the TONE button to temporarily
make the phone touch-tone compatible. To
get information about your bank account,
for example, you would:
1. Call the bank’s information line.
2. Press the TONE key, denoted with (*) on
the keypad, when your call is answered.
3. Follow the voice menu instructions to get
the information. When you hang up, the
phone goes back to pulse (rotary) service.
WXYZ
9
TUV
8
PQRS
7
MNO
6
JKL
5
GHI
4
DEF
3
ABC
21
#
OPER
0
TONE
*
CHANNEL FLASHINT
REDIAL MEM
DELETEDIAL
FORMAT MUTE
PROG
PAUSE
TALK
ANSW
ERASE
PLAY/STOP SKIPREVIEW
Page 26

26
A
NSWERING
M
ACHINE
O
PERATION
This section discusses the buttons
and features on the answering machine.
MESSAGES INDICATOR
The MESSAGES indicator shows you how
many new messages you have. The
ANSWER ON/OFF button must be on in
order for the MESSAGES indicator to work.
SCREENING CALLS FROM
THE
BASE
You can screen incoming calls by waiting for
the caller to begin leaving a message (to
hear who it is), then pick up the handset,
and press TALK to talk to the caller. The
answering machine automatically stops
recording when you activate the handset or
pick up an extension phone.
TIP: Make sure the volume on the base is set
loud enough to hear your incoming calls.
MESSAGES indicator
NEXT
ANNOUNCE
MEMO
ERASE ANSWER
ON/OFF
CHARGE/
IN USE
MESSAGES
8.8.
S
K
I
P
R
E
V
I
E
W
P
L
A
Y
/
S
T
O
P
SKIP
button
ANSWER
ON/OFF
button
PLAY/
STOP
button
REVIEW
button
Page 27

27
MESSAGE PLAYBACK
The messages indicator lets you know when you have messages. To play
messages, press PLAY/STOP.
While a message is playing, you can do the following:
• Press PLAY/ STOP to stop the message playback.
• Press and release REVIEW to restart the current message; continue to
press and release REVIEW to go to previous messages.
• Press and release SKIP to go to the next message.
• Press PLAY/ STOP to stop message playback.
MEMORY FULL
When the memory is full, the system answers after 10 rings. You need to
erase some messages so the answerer can record new messages.
ERASING MESSAGES
You can erase messages three ways: one message at a time using the
ERASE button on the base; all messages using the ERASE button on the
base; or one message at a time using the ERASE button (0) on the handset
or a phone in another location.
• To erase a message, press PLAY/STOP on the base and press and
release ERASE button on the base to erase the message that is playing.
• To erase all messages, press the ERASE button on the base when
messages have stopped playing.
Page 28

28
• To erase a message from the handset:
1. Press ANSWER button on the handset.
2. Press PLAY/STOP on the handset (the 2 button).
3. Press ERASE on the handset (the 0 button) to erase the
message that is playing.
NOTE: Erased messages cannot be restored. Also, be careful you don't press
ERASE button as the next unheard message is playing because that message
will also be erased.
LEAVING A MEMO
Use the Memo feature to leave a message.
1. Press and hold the MEMO button. You need to hold the button until you
finish the message.
2. Begin talking after you hear the beep.
3. Release the MEMO button when you finish.
Page 29
29
WXYZ
9
TUV
8
PQRS
7
MNO
6
JKL
5
GHI
4
DEF
3
ABC
21
#
OPER
0
TONE
*
CHANNEL FLASHINT
REDIAL MEM
DELETEDIAL
FORMAT MUTE
PROG
PAUSE
TALK
ANSW
ERASE
PLAY/STOP SKIPREVIEW
REMOTE ACCESS
This section explains two types of remote
access: using the handset to access the
answering machine and accessing the
answering machine from another phone.
The handset contains integrated buttons
that enable you access the answering
machine with the handset.
You can also access your answering
machine from any phone that is tone-dial
compatible by entering a 3-digit security
code after you hear the outgoing
announcement. A voice menu system
guides you through all of the procedures.
PLAY/
STOP
Page 30

30
USING THE HANDSET
Press the ANSWER button to access the
answering machine from the cordless
handset.
After you access the answerer, use the
marked handset keys just as if you were
pressing the corresponding buttons on the
base (see "Answering Machine Operation"
for details on functions). To make it easy
for you, the functions are listed on the
handset above each number. For example,
to play messages:
1. Press the ANSWER button.
2. Press 2 (PLAY/STOP).
3. When you are finished listening to your
messages, press ANSWER again.
ANSWERER INDICATOR
You know the answerer is active when you
see the Answerer indicator on the handset
come on.
WXYZ
9
TUV
8
PQRS
7
MNO
6
JKL
5
GHI
4
DEF
3
ABC
21
#
OPER
0
TONE
*
CHANNEL FLASHINT
REDIAL MEM
DELETEDIAL
FORMAT MUTE
PROG
PAUSE
TALK
ANSW
ERASE
PLAY/STOP SKIPREVIEW
ANSWER
button
PLAY/
STOP
Page 31

31
SCREENING CALLS
FROM
THE HANDSET
Use the handset to screen calls even when
you can't hear the answering machine.
When the phone rings:
1. Press the ANSWER button to gain access
to the answering machine.
2. Listen to the caller leaving a message.
3. Press the TALK button to talk to the
person or press ANSWER to stop
screening the call.
MEMORY FULL
When the memory is full, the system
answers after 10 rings, beeps and waits for
the caller to enter the 3-digit security code. If
you don't enter the security code within 10
seconds after the unit beeps, the phone
hangs up.
You need to erase some of the messages in
order for the system to record new
incoming messages.
NOTE: The unit also answers after the 10th
ring if it is turned off. To access the
answerer, enter your 3-digit security code
after you hear the beep.
ANSWER
button
WXYZ
9
TUV
8
PQRS
7
MNO
6
JKL
5
GHI
4
DEF
3
ABC
21
#
OPER
0
TONE
*
CHANNEL FLASHINT
REDIAL MEM
DELETEDIAL
FORMAT MUTE
PROG
PAUSE
TALK
ANSW
ERASE
PLAY/STOP SKIPREVIEW
TALK
button
Page 32

32
A
CCESSING THE
A
NSWERER FROM
A
NOTHER
L
OCATION
You can access your answering machine from a touch-tone phone by
entering your 3-digit security code after you hear the outgoing
announcement.
1. Dial the phone number for the answering machine.
2. Enter the security code after you hear the tone.
3. Follow the voice menu to use the answerer's remote functions.
The remote feature enables you to perform the following functions:
To Press this Button
Review message 1
Play back messages 2
Stop message playback 2
Erase message 0 (during message playback)
Skip message 3
Turn off/on answerer 4
Review voice menu options 7
TIP: You can bypass the outgoing announcement by pressing any numbered
key on the keypad while the announcement is playing. Then, you can enter
your security code to access the answering machine.
Page 33

33
CHANGING THE SECURITY CODE
The default security code for accessing the
answerer from another location is 1 2 3.
You must use the handset to change the
security code. With the phone off, follow
these steps:
1. Press ANSWER (the ANSWER indicator
comes on).
2. Press TONE (*).
3. Enter 3 numbers to be used as the new
security code.
4. Press TONE (*) again.
ANSWER
button
WXYZ
9
TUV
8
PQRS
7
MNO
6
JKL
5
GHI
4
DEF
3
ABC
21
#
OPER
0
TONE
*
CHANNEL FLASHINT
REDIAL MEM
DELETEDIAL
FORMAT MUTE
PROG
PAUSE
TALK
ANSW
ERASE
PLAY/STOP SKIPREVIEW
TONE
button
Page 34

34
HE
AD
SET
Handset
jack
Headset
plug
Slot for
belt clip
Slot for
belt clip
HEADSET AND BELT CLIP OPERATION
CONNECTING A HEADSET TO
THE
HANDSET
For hands free conversation, connect the
headset (provided with 26994 only) to the
HEADSET jack as shown. The handset
receiver and microphone are disabled when
the headset is connected.
Adjust the headset to rest comfortably on
top of your head and over your ear. Move
the microphone to approximately 2 to 3
inches from your mouth.
• Press the TALK button to answer or place
a call before using the headset.
CONNECTING THE BELT CLIP
There are two slots, one on each side of the
handset.
• Attach the belt clip (provided with 26994
only) by inserting the sides of the belt
clip into the slots. Snap the ends of the
belt clip into place.
Page 35

35
CHANGING THE BATTERY
Make sure the telephone is OFF before you replace
battery.
1. Remove the battery compartment door.
2. Disconnect the battery plug and remove the
battery pack from the handset.
3. Insert the new battery pack and reconnect the battery
plug.
4. Put the battery compartment door back on.
5. Place handset in the base to charge. If you don’t
charge the handset battery properly (for 12 hours) when you
first set up the phone and/or when you install a new battery
pack, the battery’s long-term performance will be compromised.
BATTERY SAFETY PRECAUTIONS
• Do not burn, disassemble, mutilate, or puncture. Like other batteries of
this type, toxic materials could be released which can cause injury.
• To reduce the risk of fire or personal injury, use only the battery listed in
the User’s Guide.
• Keep batteries out of the reach of children.
Ni-Cd
RBRC
RBRC
NOTE: The RBRC seal on the battery used in your
Thomson Consumer Electronics product indicates that
we are participating in a program to collect and recycle
Nickel Cadmium batteries throughout the United States
of America. Please call 1-800-8-BATTERY for information
or contact your local recycling center.
Page 36

36
GENERAL PRODUCT CARE
To keep your telephone working and looking good, follow these guidelines:
• Avoid putting the phone near heating appliances and devices that
generate electrical noise (for example, motors or fluorescent lamps).
• DO NOT expose to direct sunlight or moisture.
• Avoid dropping the handset, as well as other rough treatment to the
phone.
• Clean the phone with a soft cloth.
• Never use a strong cleaning agent or abrasive powder because this will
damage the finish.
• Retain the original packaging in case you need to ship the phone at a
later date.
• Periodically clean the charge contacts on the handset and base with a
soft cloth.
H
ANDSET
S
OUND
S
IGNALS
Signal Meaning
A long warbling tone (with ringer on) Signals an incoming call
One short beep, one long beep (several times) Page signal
Three short beeps Out of range
Four short beeps Low battery warning
Page 37

37
HANDSET INDICATORS
The following indicators show the status of a message or of the unit.
ERROR Caller information has been interrupted during transmission
or the phone is excessively noisy.
ENTER NAME Prompt telling you to enter name one of the 10 memory
locations.
DELETE ALL? Prompt asking you if you want to erase all Caller ID records.
DELETE CALL ID? Prompt asking you if you want to erase the
current Caller ID record that is shown on the display.
DELETE MEMO? Prompt asking you if you want to erase one of the 10
numbers stored in the phone's outgoing memory.
START/END Indicates that there is no additional information in Caller ID
memory.
NEW Indicates call or calls have not been reviewed.
UNKNOWN The incoming call is from an area not serviced by Caller ID or
the information was not sent
PAGING YOU Someone has pressed the PAGE button on the base.
BLOCKED The person is calling from a number that has been blocked
from transmission.
REPT Repeat call message. Indicates that a new call from the same
number was received more than once.
NO CALLER ID No Caller ID information was received.
Page 38

38
ANSWER STATUS INDICATORS
The following indicators show the status of the answerer.
0-59 Total number of messages.
CL (blinking) The voice time/day stamp needs set.
- - Answerer off.
An (blinking) Currently answering a call.
F (blinking) Memory is full.
Six bars (blinking) Recording a memo or announcement.
Page 39

39
T
ROUBLESHOOTING
G
UIDE
CORDLESS PHONE SOLUTIONS
Problem Solution
No dial tone • Check installation:
— Is the base power cord connected to a working outlet?
— Is the telephone line cord connected to the base unit
and the wall jack?
• Connect another phone to the same jack; the problem
might be your wiring or local service.
• Is the handset out of range of the base?
• Make sure the battery is properly charged (12 hours).
• Is the battery pack installed correctly?
• Did the handset beep when you pressed the TALK button?
Did the IN-USE indicator come on? The battery may need to
be charged.
• Place the handset in the base for at least 20 seconds.
Dial tone is OK, • Make sure the T/P switch on the base is
but can’t dial out correctly set .
Handset does not ring • Make sure the RINGER switch on the handset is turned to
ON.
• Move closer to the base. The handset may be out of range.
• You may have too many extension phones on your line. Try
unplugging some phones.
• Check for dial tone.
You experience static, • Change channels.
noise, or fading in and out • Move closer to base (handset might be out of range).
• Does the base need to be relocated? Make sure base is not
plugged into an outlet with another household appliance.
• Charge battery.
Page 40

40
CORDLESS PHONE SOLUTIONS (CONTINUED)
Problem Solution
Unit beeps • Place handset in base for 20 seconds; if it still beeps,
charge battery for 12 hours.
• Clean charging contacts on handset and base with a soft
cloth, or an eraser.
• See solutions for “No dial tone.”
• Replace battery.
Memory Dialing • Did you program the memory location keys
doesn't work correctly?
• Did you follow proper dialing sequence?
CALLER ID
Problem Solution
No Display • Is battery fully charged? Try replacing the battery.
• Make sure that the unit is connected to a non-switched
electrical outlet. Disconnect the unit from the plug and
plug it in again.
• Did you order Caller ID service from your local telephone
company? The display won't work unless you order Caller
ID service from your phone company.
Caller ID Error Message • The unit displays this message if it detects anything other
than valid Caller ID information during the silent period
after the first ring. This message indicates either the
presence of noises on the line, or that an invalid message
has been sent from the telephone company.
Page 41

41
ANSWERING MACHINE SOLUTIONS
Problem Solution
Can’t hear messages, • Adjust speaker volume.
beep, etc.
Time/Day setting • Set the time clock.
stuck at 12 a.m Mon.
Answers on 10th ring • Make sure answerer is turned on.
• Memory may be full.
Incoming messages • Was an extension phone picked up?
are incomplete • Memory is full.
• Accidentally pressed PLAY button during playback and
stopped message.
Won’t respond to • Must use tone-dial phone.
remote commands • Must enter correct security code.
• Did unit hang up? If you take no action for a period of time,
it automatically hangs up.
Page 42

42
CAUSES OF POOR RECEPTION
• Aluminum siding.
• Foil backing on insulation.
• Heating ducts and other metal construction that can shield radio signals.
• You’re too close to appliances such as microwaves, stoves,
computers, etc.
• Atmospheric conditions, such as strong storms.
• Base is installed in the basement or lower floor of the house.
• Base is plugged into AC outlet with other electronic devices.
• Baby monitor is using the same frequency.
• Handset battery is low.
• You’re out of range of the base.
S
ERVICE
The FCC requires this product to be serviced only by the manufacturer or
its authorized service agents. In accordance with FCC requirements,
changes or modifications not expressly approved by Thomson Consumer
Electronics could void the user’s authority to operate this product. For
instructions on how to obtain service, refer to the warranty included in this
Guide or call Consumer Information, 1-800-448-0329.
Attach your sales receipt to the booklet for future reference or jot down the
date this product was purchased or received as a gift. This information will
be valuable if service should be required during the warranty period.
Purchase date _____________ Name of store_____________________
Page 43

43
INDEX
A
Accessing the Answerer from another
phone 32
Accessory Order Form 45
Answerer-in-Use Light 30
Answering Machine Operation 26
Answering Machine Setup 9
Answering Machine Solutions 41
B
Battery Safety Precautions 35
Before You Begin 5
Belt Clip 34
C
Call Back 22
Caller ID operation 16
Caller ID with Call Waiting 16
Causes of Poor Reception 42
Changing the Battery 35
Changing the Security Code 33
Channel Button 25
CHARGE/IN USE light 6
Connecting a headset to the handset 34
Connecting the Belt Clip 34
Cordless Phone Basics 13
D
Deleting all records 18
Deleting records 18
Desktop Installation 6
Dialing a Caller ID number 18
Digital Security System 5
E
Erasing Messages 27
F
FCC Registration Information 2
Finding the Handset 15
Flash Button 14
G
General Product Care 36
Getting Started 5
H
Handset Sound Signals 42
Hearing Aid Compatibility 2
I
Interference Information 2
Introduction 3
L
Leaving a Memo 28
M
Making a Call 13
Memory 20
Memory Full 27, 31
Message Playback 27
Messages Indicator 26
Modular Jack Requirements 5
Mute Button 14
Page 44

44
O
Order form 45
R
Receiving a Call 14
Recording the Outgoing Announcement 11
Redial 13
Remote Access 29
Reviewing and deleting stored numbers 24
Reviewing Announcement 11
Ringer Switch 15
S
Screening Calls from the base 26
Screening Calls from the Handset 31
Service 42
Setting the Display Language 12
Setting the Local Area Code 12
Setting the Ring Select 10
Setting the Speaker Volume 10
Setting the Voice Time/Day Stamp 9
Stored numbers 21
changing 21
reviewing and deleting 24
Storing a number in memory 20
T
Telephone Setup 12
Temporary Tone 25
Troubleshooting Guide 39
U
Using the Handset 30
Using Toll Saver 10
V
Voice Instructions 10
Volume Button 14
Page 45

45
Please make sure that this form has been filled out completely.
ACCESSORY
O
RDER
F
ORM
(
OR
C
ALL
1-800-338-0376)
CUSTOMER: CUT ALONG DOTTED LINE.
✂
*Prices are subject to change without notice.
Total Merchandise.........................................$_______________
Sales Tax........................................................$_______________
We are required by law to collect the appropriate sales tax for each individual state,
county, and locality to which the merchandise is being sent.
Use VISA or Master Card or Discover preferably. Money order or check must be in U.S.
currency only. No COD or Cash. All accessories are subject to availability. Where
applicable, we will ship a superseding model.
Shipping/Handling....................................... $_______________
Total Amount Enclosed.................................$_______________
Mail order form and money order or check (in U.S. currency)
made payable to Thomson Consumer Electronics, Inc. to:
TCE
Mail Order Department
P.O. Box 8419
Ronks, PA 17573-8419
Name_______________________________________________________
Address_____________________________________ Apt.____________
City ________________________State________ ZIP_________________
Daytime Phone Number ( )_______________________________
$5.00
____________________________________________________________________
Authorized Signature
My card expires:
Copy the number above your
name on the Master Card
For credit card purchases
Your complete charge card number, its expiration date and your
signature are necessary to process all charge card orders.
Copy your complete account number from your VISA card.
My card expires:
Copy your complete account number from your
Master Card or Discover.
DESCRIPTION
AC power supply
CATALOG NUMBER
TOTAL
QUANTITY
PRICE*
5-2471
$10.00
Belt clip
5-2452
$10.85
Headset
5-2425
$36.35
5-2472
5-2459
$10.00
Replacement handset battery
5-2451
5-2444
(white)
(black)
Page 46

46
Page 47

47
LIMITED WARRANTY
What your warranty covers:
• Any defect in materials or workmanship.
For how long after your purchase:
• One year.
(The warranty period for rental units begins with the first rental or 45 days from date of shipment to
the rental firm, whichever comes first.)
What we will do:
• Provide you with a new or, at our option, a refurbished unit.
• The exchange unit is under warranty for the remainder of the original product’s warranty period.
How to make a warranty claim:
• Properly pack your unit. Include any cables, etc., which were originally provided with the product. We
recommend using the original carton and packing materials.
• Include evidence of purchase date such as the bill of sale. Also print your name and address and a
description of the defect. Send via standard UPS or its equivalent to:
Thomson Consumer Electronics, Inc.
11721 B Alameda Ave.
Socorro, Texas 79927
• Pay any charges billed to you by the Exchange Center for service not covered by the warranty.
• Insure your shipment for loss or damage. Thomson accepts no liability in case of damage or loss en
route to Thomson.
• A new or refurbished unit will be shipped to you freight prepaid.
What your warranty
does not
cover:
• Customer instruction. (Your Owner’s Manual provides information regarding operating instructions
and user controls. For additional information, ask your dealer.)
• Installation and set-up service adjustments.
• Batteries.
• Damage from misuse or neglect.
• Products which have been modified or incorporated into other products.
• Products purchased or serviced outside the USA.
• Acts of God, such as but not limited to lightning damage.
Product Registration:
• Please complete and mail the Product Registration Card packed with your unit. It will make it easier to
contact you should it ever be necessary. The return of the card is not required for warranty coverage.
How state law relates to this warranty:
• This warranty gives you specific legal rights, and you may have other rights which vary from state to
state.
If you purchased your product outside the USA:
• This warranty does not apply. Contact your dealer for warranty information.
Page 48

Model 26993/26994
15433020 (Rev. 1 E/S)
99-39
Printed in China
P.O. BOX 1976, Indianapolis, IN 46206
© 1999 Thomson Consumer Electronics, Inc.
Trademark(s) ® Registered
Marca(s) Registrada(s)
Page 49

1
Creamos cosas buenas para la vida.
Teléfono / Contestador Inalámbrico
de 900 MHz con 40 Canales e
Identificador de Llamadas (Caller ID)
Guía del Usuario
26993/26994
Page 50

2
El número de la FCC está ubicado en el fondo de la base
El numero REN esta ubicado en el fondo de la base
INFORMACIÓN DE LA RREGISTRACIÓN DE LA FCC
Su equipo telefónico de la ha sido registrado con la Comisión Federal de Comunicaciones (FCC) y está en acuerdo con las Partes 15 y
68 de las Regulaciones y Reglas de la FCC.
1 Notificación a la Compañía Telefónica Local
Al fondo de este equipo Ud. hallará un rótulo indicando, entre otra información, el número de la Registración con la FCC y el
Número del Equivalente Timbre (REN) para este equipo. Ud. deberá, a petición, proveer esta información a su compañía
telefónica.
El REN es útil para determinar el número total de artefactos que Ud. puede conectar a su línea telefónica, todavía asegurando
que todos estos artefactos sonarán cuando se llame su número telefónico. En la mayoría de las áreas (pero no en todas), el total
de los números REN de todos los artefactos conectados a una línea no debe exceder 5. Para estar seguro del número total de
artefactos que Ud. pueda conectar a su línea (determinado por el REN), Ud. deberá ponerse en contacto con su compañía
telefónica local.
NOTAS:
• No se puede usar este equipo con un teléfono de previo pago proveído por la compañía telefónica.
• Las líneas compartidas son sujetas a las tarifas del estado, y por eso, es posible que Ud. no pueda usar su propio equipo
telefónico si Ud. estuviera compartiendo la misma línea telefónica con otros abonados.
• Se debe notificar la compañía telefónica cuando se desconecte permanentemente su teléfono de la línea.
2 Derechos de la Compañía Telefónica
Si su equipo causase algún problema en su línea que pudiera dañar la red telefónica, la compañía telefónica siempre que sea
posible le avisará de la posible interrupción temporal de su servicio. En caso que la compañía no pudiera avisarle de antemano y
hubiera necesidad de tomar tal acción, la compañía telefónica podrá interrumpir su servicio inmediatemente. En caso de tal
interrupción telefónica temporal la compañía debe : (1) darle aviso al momento de tal interrupción temporal de servico, (2)
concederle a Ud. la oportunidad de corregir la situación, (3) informarle a Ud. de sus derechos de presentar una questa a la
Comisión de acuerdo con los procedimientos dictados en la Subparte E de la Parte 68 de las Regulaciones y Reglas de la FCC.
La compañía telefónica puede hacer los cambios en sus instalaciones de comunicación, en equipos, en sus funcionamientos o
procedimientos que digne necesarios para el manejo de sus negocios y que no sean incompatibles con las Reglas y
Regulaciones de l a FCC. Si estos cambios pudieran alterar el uso o el funcionamiento de su equipo telefónico, la compañía
telefónica deberá darle aviso adecuado en escrito para que Ud. goce de un servico ininterrumpido.
INFORMACIÓN DE INTERFERENCIAS
Este artefacto cumple con la Parte 15 de las Reglas de la FCC. Su funcionamiento es sujeto a las dos condiciones siguientes: (l) Este
artefacto no puede causar interferencia dañosa, y (2) Este artefacto debe aceptar cualquier interferencia recibida, incluyendo
interferencia que puede causar un funcionamiento no deseado.
Este equipo ha sido probado y cumple con los límites para un artefacto digital de la Clase B, de conformidad con la Parte 15 de las
Reglas de la FCC. Estos límites han sido diseñados para proporcionar una protección razonable contra una interferencia dañosa que
pueda existir en una instalación doméstica.
Este equipo genera, usa y puede radiar la energía de frecuencia de una radio y , si no fuera instalado y usado de acuerdo con las
instrucciones, puede causar interferencia dañosa a las transmisiones radiales. Sin embargo, no hay garantía que la interferencia no
ocurrirá en una instalación en particular.
Si este equipo causa en efecto una interferencia dañosa a la recepción de la radio o de la televisión, lo cual puede ser determinado
apagando y prendiendo el equipo, le animamos a Ud. de tratar de corregir la interferencia por medio de una (o más) de las
sugerencias siguientes:
• Cambie la posición o la ubicación de la antena (quiere decir la antena de la radio o de la televisión que está
recibiendo la interferencia).
• Cambie la posición o cambie la ubicación y aumente la distancia entre el equipo de telecomunicaciones y la
antena receptora de la radio o de la televisión que está recibiendo la interferencia.
• Conecte el equipo de telecomunicaciones a una toma en un circuito diferente del circuito al cual la antena
receptora esté conectada.
Si estas medidas no eliminan la interferencia, favor de consultar a su distribuidor o a un técnico de radio/televi
sión experto por otras sugerencias. También, la Comisión Federal de Comunicaciones (FCC) ha preparado un folleto muy útil, “How T o
Identify and Resolve Radio/TV Interference Problems” (“Como Identificar y Resolver Problemas de Interfer encia de Radio/Televisión”).
Este folleto se puede obtener del U.S. Goverment Printing Office, Washington, D.C. 20402. Favor de especificar el número
004-000-00345-4 cuando haga su pedido.
COMPATIBILIDAD CON AUDÍFONOS
Se juzga que este teléfono es compatible con audífonos, en base a las normas de la FCC.
Page 51

3
INTRODUCCIÓN
Su teléfono/contestador inalámbrico está diseñado para darle flexibilidad
de uso y rendimiento de la más alta calidad. Para aprovechar al máximo
su nuevo teléfono/contestador inalámbrico, le sugerimos que se tome
unos minutos ahora mismo para leer este manual de instrucciones.
CONTENIDO
INFORMACIÓN DE LA RREGISTRACIÓN DE LA
FCC ........................................... 2
INFORMACIÓN DE INTERFERENCIAS ........... 2
COMPATIBILIDAD CON AUDÍFONOS ........... 2
ANTES DE EMPEZAR ................................... 5
REQUISITOS DE ENCHUFE MODULAR ......... 5
SISTEMA DIGITAL DE SEGURIDAD ................. 5
PREPARACIÓN ................................................ 5
INSTALACIÓN SOBRE SUPERFICIE PLANA ......... 6
INSTALACIÓN SOBRE PARED ......................... 7
PROGRAMACIÓN DE LA MÁQUINA
CONTESTADORA ............................ 9
PARA PROGRAMAR LA SEÑAL DE VOZ DEL
DÍA Y LA HORA ............................. 9
PARA PROGRAMAR EL VOLUMEN DE LA
BOCINA ..................................... 10
INSTRUCCIONES DE VOZ ...................... 10
PARA PROGRAMAR LA SELECCIÓN DEL
TIMBRE ...................................... 10
PARA USAR EL AHORRADOR DE CARGOS 10
PARA GRABAR EL ANUNCIO SALIENTE ........ 11
PARA REVISAR EL ANUNCIO ................. 11
PROGRAMACIÓN DEL TELÉFONO ................. 12
PARA PROGRAMAR EL IDIOMA DE LA
PANTALLA .................................. 12
PARA PROGRAMAR LA CLAVE DE ÁREA
LOCAL ....................................... 12
INFORMACIÓN BÁSICA DEL TELÉFONO
INALÁMBRICO ........................................... 13
PARA HACER UNA LLAMADA ..................... 13
RE-DISCADO........................................... 13
PARA RECIBIR UNA LLAMADA .................... 14
BOTÓN DE SERVICIOS ESPECIALES O
CENTELLO (“FLASH”) ............... 14
VOLUME ................................................ 14
BOTÓN ENMUDECEDOR (“MUTE”)........... 14
SELECTOR DEL TIMBRE (“RINGER”) ........ 15
PARA ENCONTRAR EL AURICULAR............... 15
FUNCIONES DEL IDENTIFICADOR DE LLAMADAS .. 16
IDENTIFICADOR DE LLAMADAS CON
LLAMADA EN ESPERA ................... 16
PARA RECIBIR Y ALMACENAR LLAMADAS ..... 16
PARA REVISAR MENSAJES .......................... 17
PARA BORRAR DATOS .............................. 18
PARA BORRAR EL DATO ACTUAL .......... 18
PARA BORRAR TODOS LOS DATOS ........ 18
PARA DISCAR UN NÚMERO DEL
IDENTIFICADOR DE LLAMADAS ........ 18
PARA CAMBIAR EL FORMATO DEL NÚMERO .. 19
LA FUNCIÓN DE MEMORIA ............................ 20
PARA ALMACENAR UN NÚMERO EN LA
MEMORIA .................................. 20
PARA CAMBIAR UN NÚMERO ALMACENADO .21
PARA MARCAR UN NÚMERO ALMACENADO .22
PARA REGRESAR LA LLAMADA ................... 22
DISCADO EN CADENA DESDE LA
MEMORIA .................................. 23
PARA INTRODUCIR UNA PAUSA EN LA
SECUENCIA DE DISCADO ............... 24
PARA REVISAR Y BORRAR NÚMEROS
(La Tabla de Contenido continua en
la siguiente página)
ADVERTENCIA:
PARA
PREVENIR EL RIESGO DE UNFUEGO O DE
UNA SACUDIDA ELECTRICA, NO EXPONGA
ESTE APARA TO A LA LLUVIA O A LA HUMEDAD.
VEA ADVERTENCIA EN LA PARTE POSTERIOR/BASE DEL PRODUCTO.
A TTENTION:
RIESGO DE SACUDIDA
ELÉCTRICA NO ABRA
EL RELÁMPAGO Y LA
PUNTA DE FLECHA
DENTRO DEL TRIÁNGULO ES UNA SEÑAL
DE ADVERTENCIA,
ALERTÁNDOLE A
UD. DE QUE HAY
"VOLTAJE PELIGROSO" DENTRO
DEL PRODUCTO.
CUIDADO: PARA REDUCIR
EL RIESGO DE UNA SACUDIDA ELÉCTRICA, NO
QUITE LA CUBIERTA
(O PARTE POSTERIOR) NO
USE PARTES DE REPUESTO DENTRO. CONSULTE A
ALGUNA PERSONA CALIFICADA DEL SERVICIO DE
REPARACIONES.
EL SIGNO DE EXCLAMACIÓN DENTRO
DEL TRIÁNGULO ES
UNA SEÑAL DE
ADVERTENCIA,
ALTERTÁNDOLE A
UD. DE QUE EL
PRODUCTO, TRAE
INCLUCIDO, IN
STRUCTIONES MUY
IMPORTANTES.
Page 52

4
ALMACENADOS ........................... 24
FUNCIONES AVANZADAS ............................... 25
BOTÓN PARA CANALES (“CHANNELS”).. 25
TONO TEMPORARIO ................................. 25
INDICADOR DE MENSAJES ......................... 26
PARA FILTRAR LLAMADAS DESDE LA BASE ... 26
OPERACIÓN DE LA MÁQUINA CONTESTADORA... 26
REPRODUCCIÓN DE MENSAJES ................... 27
MEMORIA LLENA ..................................... 27
PARA BORRAR MENSAJES ........................ 27
PARA DEJAR UN RECADO ......................... 28
ACCESO REMOTO ........................................ 29
PARA USAR EL AURICULAR ....................... 30
INDICADOR DEL CONTESTADOR.............. 30
PARA FILTRAR LLAMADAS DESDE EL
AURICULAR ................................ 31
MEMORIA LLENA ..................................... 31
PARA TENER ACCESO AL CONTESTADOR
DESDE OTRA LOCALIZACIÓN .......... 32
PARA CAMBIAR EL CÓDIGO DE SEGURIDAD .. 33
OPERACIÓN DEL AUDÍFONO Y BROCHE DEL
CINTURÓN ............................................... 34
CONEXIÓN DEL AUDÍFONO AL AURICULAR .... 34
CONEXIÓN DEL BROCHE DEL CINTURÓN ........ 34
PARA CAMBIAR LA BATERÍA ........................... 35
PRECAUCIONES DE SEGURIDAD PARA LA
BATERÍA..................................... 35
CUIDADO GENERAL DEL PRODUCTO ................ 36
SEÑALES SONORAS DEL AURICULAR ............... 36
INDICADORES DEL AURICULAR ....................... 37
INDICADORES DEL ESTADO DEL CONTESTADOR .38
DETECCIÓN DE AVERÍAS ................................ 39
SOLUCIONES PARA EL TELÉFONO
INALÁMBRICO .............................. 39
SOLUCIONES PARA EL TELÉFONO
INALÁMBRICO (CONTINUACIÓN)...... 40
IDENTIFICADOR DE LLAMADAS ............... 40
SOLUCIONES PARA LA MÁQUINA
CONTESTADORA .......................... 41
CAUSAS DE UNA MALA RECEPCIÓN .................. 42
CÓMO OBTENER SERVICIOS DE MANTENIMIENTO .42
INDICE ....................................................... 43
FORMULARIO PARA HACER PEDIDOS DE
ACCESORIOS
............................................. 45
GARANTÍA LIMITADA ..................................... 47
Page 53

5
PREPARACIÓN
Asegúrese de que la caja contiene lo siguiente:
Base Auricular
W
X
Y
Z
9
T
U
V
8
P
Q
R
S
7
M
N
O
6
J
K
L
5
G
H
I
4
D
E
F
3
A
B
C
21
#
O
P
E
R
0
T
O
N
E
*
C
H
A
N
N
E
L
F
L
A
S
H
I
N
T
R
E
D
I
A
L
M
E
M
D
E
L
E
T
E
D
I
A
L
F
O
R
M
A
T
M
U
T
E
P
R
O
G
P
A
U
S
E
TA
LK
A
N
S
W
E
R
A
S
E
P
L
A
Y
/
S
T
O
P
S
K
I
P
R
E
V
I
E
W
Adaptador de CA
Cable de conexión a la
línea telefónica
Placa para montaje
sobre pared
NEXT
ANNOUNCE
MEMO
ERASE ANSWER
ON/OFF
HOUR MIN
DAY/
CHECK
PAGE
CORDLESS TELEPHONE
DIGITAL ANSWERER
900 MHz
CHARGE/
IN USE
MESSAGES
8.8.
S
K
I
P
R
E
V
I
E
W
P
L
A
Y
/
S
T
O
P
ANTES DE EMPEZAR
REQUISITOS DE ENCHUFE MODULAR
Se requiere un jack modular RJ11C, que es el tipo de jack más
común y puede parecerse a la ilustración aquí. Si Ud. no tiene
un jack modular, llame a su compañía telefónica local para
información sobre la instalación del jack requerido.
SISTEMA DIGITAL DE SEGURIDAD
Su teléfono inalámbrico usa un sistema de seguridad digital para evitar el
timbrado falso, el uso no autorizado y cargos a su línea telefónica.
Cuando usted coloca el auricular en la base, el aparato verifica su código
de seguridad. Después de una interrupción de corriente, o de reemplazar
la batería, usted debe colocar el auricular en la base aproximadamente 20
segundos para re-programar el código.
IMPORTANTE: Como los teléfonos inalámbricos operan con electricidad,
usted debe tener por lo menos un teléfono en su casa que no sea inalámbrico,
en caso de una interrupción de corriente.
Cable corto de
línea telefónica
Audífonos(provisto
unicamente con el
modelo 26994)
Gancho para
cinturón (provisto
unicamente con el
modelo 26994)
Page 54

6
INSTALACIÓN SOBRE
SUPERFICIE PLANA
1. Asegúrese de que la placa
de montaje sobre pared está
sujeta adecuadamente.
2. Programe el selector de T/P
(tono/pulso) en la “T” para
servicio de tono
(touch-tone), o en la “P” para
servicio de pulso (rotatorio). Si usted no
sabe qué tipo de servicio tiene, cheque con su compañía telefónica.
3. Ponga el selector del timbre -”RINGER”- (en el auricular) en la posición
de encendido (ON).
4. Conecte el cable de corriente en el enchufe marcado “POWER 9V DC”
en la base y en un contacto de corriente AC.
5. Coloque el auricular sobre la base para cargar durante 12 horas. La luz
indicadora de carga —”CHARGE/ PAGE”- (en la base) se iluminará para indicar
que la batería se está cargando. Si usted no carga la batería del auricular
adecuadamente (durante 12 horas) cuando usted instala inicialmente el
teléfono, el funcionamiento de la batería puede deteriorarse.
6. Conecte el cable de la línea telefónica al contacto marcado “TEL LINE”
en la base y en un enchufe modular.
7. Levante la antena de la base.
PRECAUCIÓN: Use unicamente el cable de corriente Thomson 5-2472
(negro)/ 5-2471 (blanco) que es compatible con este aparato. El uso de otros
cables de corriente puede resultar en daño al aparato.
selector de T/P
5
3
2
7
1
4
6
NOTA SOBRE LA INST ALACIÓN: Algunos teléfonos inalámbricos operan a
frecuencias que pudieran causar interferencia con aparatos de televisión o
videocassetteras. Para minimizar o evitar dicha interferencia, la base del teléfono
inalámbrico no debe ser colocada cerca o encima de un aparato de televisión o
videocassettera. Si la interferencia continúa, el mover el teléfono inalámbrico lejos de
la televisión o videocassettera normalmente reduce o elimina dicha interferencia.
Page 55

7
NEXT
ANNOUNCE
MEMO
ERASE ANSWER
ON/OFF
HOUR MIN
DAY/
CHECK
PAGE
CORDLESS TELEPHONE
DIGITAL ANSWERER
900 MHz
CHARGE/
IN USE
MESSAGES
8.8.
S
K
I
P
R
E
V
I
E
W
P
L
A
Y
/
S
T
O
P
4
2
WXYZ9TUV
8
PQRS
7
MNO6JKL5GHI
4
DEF3ABC
21
#
OPER0TONE
*
CHANNEL FLASHINT
REDIAL MEM
DELETEDIAL
FORMAT MUTE
PROG
PAUSE
TALK
ANSW
ERASE
PLAY/STOP SKIPREVIEW
3
INSTALACIÓN SOBRE PARED
Como es necesario cargar el auricular
durante 12 horas antes de conectar el
teléfono para usarlo por primera vez, es
mejor dejar el aparato sobre una
superficie plana durante la carga inicial
antes de intentar colgarlo sobre la pared.
1. Asegúrese de que la placa para
montaje esté sujeta adecuadamente.
2. Programe el selector de T/P (tono/
pulso) en la “T” para servicio de tono
(touch-tone), o en la “P” para servicio
de pulso (rotatorio). Si usted no sabe
qué tipo de servicio tiene, cheque con
su compañía telefónica.
3. Ponga el selector del timbre ”RINGER”- (en el auricular) en la
posición de encendido (ON).
4. Coloque el auricular sobre la base.
5. Conecte el cable de corriente en la
base y el otro extremo en un contacto
de corriente AC. La luz indicadora de
carga —”CHARGE/ PAGE”- (en la
base) se iluminará para indicar que la
batería se está cargando.
Si usted no carga la batería del
auricular adecuadamente (durante 12
horas) cuando usted instala
inicialmente el teléfono, el
funcionamiento de la batería puede
deteriorarse.
(Instalación se continúa en la siguiente
página)
5
1
PRECAUCIÓN: Use unicamente
el cable de corriente Thomson
5-2472 (negro)/ 5-2471 (blanco)
que es compatible con este
aparato. El uso de otros cables de
corriente puede resultar en daño
al aparato.
Page 56

8
6. Quite la placa para montaje sobre
pared. Gírela de manera que la parte de
abajo del teléfono esté plana. Vuelva a
colocar la placa para montaje
simplemente introduciendo las
lengüetas dentro de las ranuras en la
parte superior primero, y después
ajustando en su sitio las lengüetas en la
parte inferior.
7. Conecte el cable corto de la línea
telefónica dentro del contacto marcado
“TEL LINE” en la parte de atrás del
aparato y conecte el otro extremo en un
contacto modular de pared.
8. Deslice los agujeros para montaje sobre
los postecitos en la placa de pared y
empuje el aparato hacia abajo hasta que
quede sujeto en su sitio (placa de pared
no incluida).
9. Quite el gancho para colgar el auricular;
gírelo a que quede de cabeza, y vuelva a
colocarlo en la ranura. Usted necesita
hacer esto para para que el auricular no
se caiga de la base.
10.Levante la antena de la base.
9
7
6
8
10
Page 57

9
NEXT
ANNOUNCE
MEMO
ERASE ANSWER
ON/OFF
CHARGE/
IN USE
MESSAGES
8.8.
S
K
I
P
R
E
V
I
E
W
P
L
A
Y
/
S
T
O
P
Contestador encendido/
apagado (Botón para
encender/ apagar)
Luz indicadora de
mensajes (“MESSAGES”)
PROGRAMACIÓN DE LA
MÁQUINA CONTESTADORA
Esta sección le muestra cómo programar su
contestador para recibir llamadas entrantes.
Antes de comenzar la programación, usted
debe encender el contestador.
• Oprima el botón para encender o
apagar el contestador (“ANSWER ON/
OFF”). El indicador de mensajes
(“MESSAGES”) se iluminará cuando el
contestador está encendido. El
indicador parpadea cuando usted tiene
mensajes.
NOTA: El contestador muestra “- -”
cuando está desactivado .
PARA PROGRAMAR LA SEÑAL DE VOZ
DEL
DÍA Y LA HORA
1. Asegúrese de que el contestador está
activado (ON).
2. Oprima y sostenga el botón “DAY/
CHECK” para programar el día de la
semana.
3. Oprima el botón “HOUR” para
programar la hora (a.m. o p.m.).
4. Oprima el botón “MIN” para programar
los minutos. Cuando usted oprime y
sostiene el botón “MIN,” la hora avanza
en intervalos de 5 minutos.
5. Oprima y suelte el botón “DAY/ CHECK”
para revisar las programaciones del día
y la hora.
Botones para
programar la hora
HOUR MIN
DAY/
CHECK
PAGE
CORDLESS TELEPHONE
DIGITAL ANSWERER
900 MHz
Page 58

10
Selector del timbre
(“RING SELECT”)
V
O
L
Control del volumen de
la bocina
PARA PROGRAMAR EL VOLUMEN DE LA
BOCINA
Use el control “VOL” (volumen) para ajustar
el volumen de la bocina a un nivel cómodo.
INSTRUCCIONES DE VOZ
Si usted necesita asistencia adicional,
oprima el botón “REVIEW” cuando usted
conecta el contestador y siga las
instrucciones orales.
PARA PROGRAMAR LA SELECCIÓN DEL
TIMBRE
Coloque el selector del timbre (“RING
SELECT”) en la parte trasera del aparato
para escoger el número de veces que usted
quiere que el teléfono timbre antes de que
el aparato conteste la llamada. Usted puede
escoger 2 timbres, 5 timbres, o ahorrador
de cargos (“TOLL SAVER”).
PARA USAR EL AHORRADOR DE CARGOS
El ahorrador de cargos puede ahorrarle el
costo de una llamada cuando usted tiene
acceso a sus mensajes desde otro teléfono:
• Si usted tiene mensajes nuevos, el
aparato contesta después del 2o. timbre.
• Si usted no tiene mensajes, el aparato
contesta después del 5o. timbre.
Usted puede colgar después del 3o. o 4o.
timbre y ahorrarse el cargo del teléfono
público o la llamada de larga distancia.
Page 59

11
PARA GRABAR EL ANUNCIO
SALIENTE
Para mejores resultados mientras graba,
usted debe estar a alrededor de 9 pulgadas
del micrófono, y elimine tanto ruido de
fondo como le sea posible.
1. Asegúrese de que el contestador está
activado (ON).
2. Oprima y sostenga el botón de saludo
(“ANNOUNCE”). Usted tiene que
sostener el botón oprimido hasta que
termine el anuncio.
3. Comience a hablar después de que
escuche el tono.
4. Suelte el botón después de que termine
su anuncio.
Si usted prefiere no grabar su anuncio
saliente, un anuncio saliente preprogramado será reproducido. Para
regresar al anuncio pre-programado
después de que usted ha grabado su propio
anuncio saliente, oprima el botón
“ANNOUNCE” y suéltelo cuando escuche el
tono.
Ejemplo de anuncio saliente
Hola, este/esta es (use aquí su nombre), no puedo
atender el teléfono en este momento, así que por favor
deje su nombre, número y un mensaje breve después
del tono, y yo le llamaré. Gracias.
PARA REVISAR EL ANUNCIO
• Oprima y suelte el botón “ANNOUNCE”
para revisar su mensaje saliente.
NEXT
ANNOUNCE
MEMO
ERASE ANSWER
ON/OFF
S
K
I
P
R
E
V
I
E
W
P
L
A
Y
/
S
T
O
P
Botón para saludo
(“ANNOUNCE”)
Micrófono
Page 60

12
PROGRAMACIÓN DEL
TELÉFONO
PARA PROGRAMAR EL IDIOMA DE LA
PANTALLA
1. Oprima y suelte el botón “PROG” hasta
que la indicación “SET LANGUAGE”
aparezca en la pantalla.
2. Utilice los botones “CID REVIEW” para
cambiar la pantalla al idioma deseado.
3. Cuando haya terminado, oprima y suelte
nuevamente el botón “PROG” para
almacenar este programa y pasar al
menú para inscribir la Clave de Área
Local.
PARA PROGRAMAR LA CLAVE DE ÁREA
LOCAL
1. Oprima y suelte el botón “PROG” hasta
que la indicación “LOCAL AREA CODE”
aparezca en la pantalla.
2. Utilice el teclado para inscribir la clave
de área.
3. Cuando haya terminado, oprima y suelte
nuevamente el botón “PROG” para
almacenar la clave de área y salir de la
función programadora.
NOTA: Si usted comete un error, repita los
pasos 1-3.
WXYZ
9
TUV
8
PQRS
7
MNO
6
JKL
5
GHI
4
DEF
3
ABC
21
#
OPER
0
TONE
*
CHANNEL FLASHINT
REDIAL MEM
DELETEDIAL
FORMAT MUTE
PROG
PAUSE
TALK
ANSW
ERASE
PLAY/STOP SKIPREVIEW
Botón para
programar
(“PROG”)
Botones
para revisar
(“CID
REVIEW”)
Page 61

13
Botón para
rediscado
(“REDIAL”)
WXYZ
9
TUV
8
PQRS
7
MNO
6
JKL
5
GHI
4
DEF
3
ABC
21
#
OPER
0
TONE
*
CHANNEL FLASHINT
REDIAL MEM
DELETEDIAL
FORMAT MUTE
PROG
PAUSE
TALK
ANSW
ERASE
PLAY/STOP SKIPREVIEW
Botón
para
hablar
(“TALK”)
INFORMACIÓN BÁSICA DEL TELÉFONO INALÁMBRICO
PARA HACER UNA LLAMADA
Las únicas dos cosas que usted necesita
saber para hacer una llamada son:
• Oprima el botón para hablar (“TALK”)
antes de marcar.
• Oprima el botón para hablar (“T ALK”) o
ponga el auricular sobre la base para colgar.
Por lo demás, funciona igual que cualquier
otro teléfono.
IMPORTANT: Como los teléfonos
inalámbricos operan con electricidad, usted
debe tener por lo menos un teléfono en su
casa que no sea inalámbrico, en caso de que
un corte de corriente ocurriese en su casa.
RE-DISCADO
Oprima el botón “REDIAL” para volver a
marcar el último número al que usted llamó
(hasta 32 dígitos).
Si usted escucha la señal de ocupado, y
quiere continuar marcando ese número,
oprima el botón “TALK” para desactivar el
teléfono. Oprima nuevamente el botón
“TALK” para volver a activarlo. Después
oprima “REDIAL” para marcar el número.
Page 62

14
WXYZ
9
TUV
8
PQRS
7
MNO
6
JKL
5
GHI
4
DEF
3
ABC
21
#
OPER
0
TONE
*
CHANNEL FLASHINT
REDIAL MEM
DELETEDIAL
FORMAT MUTE
PROG
PAUSE
TALK
ANSW
ERASE
PLAY/STOP SKIPREVIEW
Botón de
volumen
(“VOLUME”)
Botón de
centello
(“FLASH”)
PARA RECIBIR UNA LLAMADA
Para contestar una llamada usted debe
oprimir el botón para hablar (“TALK”) en el
auricular antes de que usted pueda hablar.
BOTÓN DE SERVICIOS
ESPECIALES O CENTELLO
(“FLASH”)
Use el botón de centello (“FLASH”) para
activar servicios especiales como llamada
en espera o transferencia de llamada, que
son disponibles a través de su compañía
telefónica local.
SUGERENCIA: No use el botón “TALK”
para activar los servicios especiales como
llamada en espera, o de lo contrario usted
colgará el teléfono.
Indicador
enmudecedora
(“MUTE”)
Botón
para
hablar
(“TALK”)
VOLUMEN
Cuando el teléfono está activado (“ON”), oprima los botones de volumen
(“VOL”) para ajustar el volumen de la bocina del auricular. Hay cuatro
niveles.
BOTÓN ENMUDECEDOR (“MUTE”)
Use el botón “MUTE” para interrumpir una conversación y hablar
privadamente con otra persona en el cuarto.
1. Oprima el botón “MUTE” para activar la función enmudecedora. La
pantalla indica “MUTE”.
2. Oprima el botón “MUTE” nuevamente para cancelar la función.
Page 63

15
HOUR MIN
DAY/
CHECK
PAGE
CORDLESS TELEPHONE
DIGITAL ANSWERER
900 MHz
Botón localizador
(“PAGE”)
SELECTOR DEL TIMBRE
(“RINGER”)
El selector del timbre (“RINGER”) debe
estar activado (ON) para que el auricular
timbre cuando hay llamadas entrantes.
PARA ENCONTRAR EL
AURICULAR
Esta función le ayuda a localizar el auricular
extraviado.
Oprima el botón localizador (“PAGE”) en la
base. La pantalla muestra la indicación
“
PAGING YOU
”. El auricular emite tonos
continuamente durante aproximadamente
2 minutos o hasta que usted oprima los
botones “TALK” o “ANSW” en el auricular.
NOTA: Usted puede aun llamar al auricular
con el timbre desactivado.
WXYZ
9
TUV
8
PQRS
7
MNO
6
JKL
5
GHI
4
DEF
3
ABC
21
#
OPER
0
TONE
*
CHANNEL FLASHINT
REDIAL MEM
DELETEDIAL
FORMAT MUTE
PROG
PAUSE
TALK
ANSW
ERASE
PLAY/STOP SKIPREVIEW
Selector de
timbre
(“RINGER”)
Botón
para
hablar
(“TALK”)
Page 64

16
WXYZ
9
TUV
8
PQRS
7
MNO
6
JKL
5
GHI
4
DEF
3
ABC
21
#
OPER
0
TONE
*
CHANNEL FLASHINT
REDIAL MEM
DELETEDIAL
FORMAT MUTE
PROG
PAUSE
TALK
ANSW
ERASE
PLAY/STOP SKIPREVIEW
FUNCIONES DEL IDENTIFICADOR DE LLAMADAS
Este aparato recibe y muestra información
transmitida por su compañía telefónica
local. La información puede incluir el
número telefónico, fecha y hora; o el
nombre, número telefónico, fecha y hora.
El aparato puede almacenar hasta 40
llamadas para ser revisadas después.
IDENTIFICADOR DE LLAMADAS CON
LLAMADA EN ESPERA
Suponiendo que usted está suscrito a l
servicio de Identificador de Llamadas con
Llamada en Espera a través de su compañía
telefónica, usted será capaz de ver quién está
llamando cuando escucha el tono de
Llamada en Espera. La información del
identificador de llamadas aparece en el visor
después de que usted escucha el tono.
Botón para
cambiar
canales
(“CHANNEL”)
Botón para servicios
especiales (“FLASH”)
Botón
para
hablar
(“TALK”)
Botón para
rediscado
(“REDIAL”)
• Oprima el botón de servicios especiales (“FLASH”) para poner a la
persona con la que está hablando en espera y así poder contestar la
llamada entrante.
PARA RECIBIR Y ALMACENAR LLAMADAS
Cuando usted recibe una llamada, la información es transmitida por la
compañía telefónica a su Teléfono con Identificador de Llamadas entre el
primero y el segundo timbre.
MUY IMPORTANTE: La función del identificador de Llamadas de este
producto requiere la suscripción al servicio de Identificador de Llamadas de
su compañía telefónica.
Page 65

17
Cuando la memoria está llena, una llamada nueva automaticamente
reemplaza a la llamada más antigua en la memoria. La indicación de
llamada nueva (
“NEW”
) aparece en el visor para llamadas recibidas que
no han sido revisadas.
NOTA: Cheque con su compañía telefónica local con respecto a la
disponibilidad de servicio de nombre.
PARA REVISAR MENSAJES
Conforme las llamadas se van recibiendo y
almacenando, el visor le mantiene al día
para informarle cuántas llamadas se han
recibido.
• Oprima el botón “CID REVIEW” con la
flecha hacia abajo para recorrer los
archivos de llamadas desde la más
reciente a la más antigua.
• Oprima el botón “CID REVIEW” con la
flecha hacia arriba para recorrer los
archivos de llamadas desde la más
antigua a la más reciente.
Hora
Fecha
Nombre de la persona que llama
Número de Llamadas
Teléfono que llama
317-555-4231
10:51
A.M.
8/11
REPT
CALL
NEW
MEMO
#
25
SMITH JOHN
Page 66

18
WXYZ
9
TUV
8
PQRS
7
MNO
6
JKL
5
GHI
4
DEF
3
ABC
21
#
OPER
0
TONE
*
CHANNEL FLASHINT
REDIAL MEM
DELETEDIAL
FORMAT MUTE
PROG
PAUSE
TALK
ANSW
ERASE
PLAY/STOP SKIPREVIEW
PARA BORRAR DATOS
Use el botón “DELETE” para borrar el dato
que se muestra actualmente en el visor o
todos los datos.
PARA BORRAR EL DATO ACTUAL
Oprima el botón para borrar (“DELETE”).
La pantalla muestra la indicación
“DELETED.”
PARA BORRAR TODOS LOS DATOS
1. Oprima y sostenga el botón “DELETE”.
La pantalla le pregunta si borra todos los
archivos (“
DELETE ALL?
”).
2. Oprima “DELETE” nuevamente para
borrar todos los datos.
PARA DISCAR UN NÚMERO DEL
IDENTIFICADOR DE LLAMADAS
1. Asegúrese de que el teléfono está
apagado (“OFF”).
2. Utilice los botones “CID REVIEW” para
mostrar el archivo del Caller ID deseado.
3. Oprima el botón “DIAL” para marcar el
número.
Botones
para revisar
(“CID
REVIEW”)
Botón
para
marcar
(“DIAL”)
Botón
para
borrar
(“DELETE”)
Page 67

19
WXYZ
9
TUV
8
PQRS
7
MNO
6
JKL
5
GHI
4
DEF
3
ABC
21
#
OPER
0
TONE
*
CHANNEL FLASHINT
REDIAL MEM
DELETEDIAL
FORMAT MUTE
PROG
PAUSE
TALK
ANSW
ERASE
PLAY/STOP SKIPREVIEW
PARA CAMBIAR EL FORMATO
DEL
NÚMERO
El botón “FORMAT” le permite cambiar el
formato del número mostrado en el visor.
Los formatos disponibles son como sigue:
7-dígitos número telefónico
de 7 dígitos.
10-dígitos código de área de 3
dígitos + número
telefónico de 7 dígitos.
11-dígitos código de larga
distancia 1 + código de
área de 3 dígitos +
número telefónico de 7
dígitos.
1. Utilice los botones “CID REVIEW” para
encontrar el número al que usted quiere
llamar.
2. Si el número no puede ser marcado
como se muestra, oprima el botón
“FORMAT.” Repita si es necesario hasta
que se muestre el número correcto de
dígitos.
3. Oprima el botón “DIAL.”
Botón
para
hablar
(“TALK”)
Botón para
marcar
(“DIAL”)
Botón
para
programar
(“PROG”)
Botones
para revisar
(“CID
REVIEW”)
NOTA: Para eliminar la clave de área local, oprima y suelte el botón “PROG”,
hasta que la indicación “SET AREA CODE” sea mostrada. Después inscriba
“000.” Oprima nuevamente el botón “PROG” para confirmar.
Page 68

20
WXYZ
9
TUV
8
PQRS
7
MNO
6
JKL
5
GHI
4
DEF
3
ABC
21
#
OPER
0
TONE
*
CHANNEL FLASHINT
REDIAL MEM
DELETEDIAL
FORMAT MUTE
PROG
PAUSE
TALK
ANSW
ERASE
PLAY/STOP SKIPREVIEW
LA FUNCIÓN DE MEMORIA
Almacene hasta diez números de 24 dígitos
en la memoria para marcado rápido. Esta
función de la memoria es además de los 40
archivos para información del Identificador
de Llamadas (Caller ID) que pueden ser
almacenados en la memoria.
PARA ALMACENAR UN
NÚMERO EN LA MEMORIA
El teléfono debe estar apagado (OFF)
cuando usted almacena números.
1. Oprima el botón de memoria (“MEM”).
2. Oprima el número de la localización de
memoria (0-9).
3. Oprima el botón “MEMORY”
nuevamente. El visor le indica que
inscriba el nombre (
“ENTER NAME”
).
4. Use el teclado para almacenar un
nombre (hasta 16 caracteres). Más de
una letra es almacenada en cada una de
las teclas numéricas. Por ejemplo, para
inscribir “Joe Smith”, inscriba 5 para J;
oprima el 6 tres veces para la O; oprima
el 3 dos veces para la E; oprima el 1 para
introducir un espacio antes de inscribir
el apellido; oprima el 7 cuatro veces
para la S; oprima el 6 para la M; oprima
NOTA: Si usted no quiere inscribir el
nombre, sáltese el paso 4.
Botón para
memoria
(“MEMORY”)
Page 69

21
el 4 tres veces para la I; oprima el 8 para
la T; y el 4 dos veces para la H. Si usted
está usando dos letras consecutivas que
están almacenadas en la misma tecla
numérica, usted debe oprimir el botón
“FORMAT” entre las dos letras. Por
ejemplo, si usted inscribe “Barb”,
oprima el 2 dos veces para la B; oprima
el botón “FORMAT”; oprima el 2 para la
A; el 7 tres veces para la R; (Page 18) y el
2 dos veces para la B. Usted tiene que
oprimir el botón “FORMAT” entre la B y
la A porque las dos están almacenadas
en la misma tecla numérica.
5. Oprima el botón “MEMORY”. El visor le
indica que inscriba el número telefónico
(
“ENTER TEL NUMBER”
).
6. Use el teclado para inscribir el número
que usted quiere almacenar (hasta 24
dígitos).
7. Oprima el botón “MEMORY” otra vez
para almacenar el número.
WXYZ
9
TUV
8
PQRS
7
MNO
6
JKL
5
GHI
4
DEF
3
ABC
21
#
OPER
0
TONE
*
CHANNEL FLASHINT
REDIAL MEM
DELETEDIAL
FORMAT MUTE
PROG
PAUSE
TALK
ANSW
ERASE
PLAY/STOP SKIPREVIEW
Botón para
memoria
(“MEMORY”)
Botón para
formatear
(“FORMAT”)
8. Anote de quién son los números que están almacenados en esa
localización, en la etiqueta de memoria que viene incluída. Usted
también podrá ver el nombre y número en el visor del teléfono.
PARA CAMBIAR UN NÚMERO ALMACENADO
Use el mismo procedimiento para cambiar un número almacenado que el
que usa para almacenar un número- usted está simplemente
reemplazando el número telefónico con otro diferente.
Page 70

22
PARA MARCAR UN NÚMERO
ALMACENADO
1. Asegúrese de que el teléfono está
encendido (ON), simplemente
oprimiendo el botón para hablar
(“TALK”).
2. Oprima el botón de memoria (“MEM”).
3. Oprima el número (0-9) para la
localización de memoria deseada. El
número se marca automaticamente.
PARA REGRESAR LA LLAMADA
Esta función le permite contestar llamadas
a los números que estaban previamente
almacenados en el Identificador de
Llamadas.
1. Asegúrese de que el teléfono esté
apagado (OFF).
2. Oprima el botón de memoria (“MEM”).
3. Utilice los botones “CID REVIEW” para
recorrer los números almacenados en la
memoria hasta que el número deseado
se muestra en la pantalla.
4. Oprima el botón “DIAL.” El número es
marcado automaticamente.
Botón para
memoria
(“MEMORY”)
Botón para
hablar
(“TALK”)
WXYZ
9
TUV
8
PQRS
7
MNO
6
JKL
5
GHI
4
DEF
3
ABC
21
#
OPER
0
TONE
*
CHANNEL FLASHINT
REDIAL MEM
DELETEDIAL
FORMAT MUTE
PROG
PAUSE
TALK
ANSW
ERASE
PLAY/STOP SKIPREVIEW
Botón
DIAL
IMPORTANTE: Si usted hace llamadas de prueba a números de emergencia
almacenados en la memoria, permanezca en la línea y explique brevemente al
operador la razón de su llamada. También, es buena idea hacer estas llamadas
fuera de las horas más congestionadas, como temprano por la mañana o tarde
por la noche.
Botones
para revisar
(“CID
REVIEW”)
Page 71

23
DISCADO EN CADENA DESDE LA MEMORIA
Use esta función para hacer llamadas que requieren una secuencia de
números como el usar una tarjeta para llamar por teléfono o un número
de larga distancia llamado frecuentemente. Basicamente, usted marca
cada parte de la secuencia desde la memoria. El siguiente ejemplo le
muestra cómo puede usted utilizar el discado en cadena para hacer una
llamada a través de un servicio de larga distancia:
El Número para Localización en la Memoria
Número de Acceso de Larga Distancia 7
Código de Autorización8
Número de larga distancia llamado frecuentemente 9
1. Asegúrese de que el teléfono está
encendido (“ON”).
2. Oprima el botón “MEMORY” y después
oprima 7.
3. Cuando usted escuche el tono de acceso,
oprima ”MEMORY” y después oprima 8.
4. Al siguiente tono de acceso, oprima
“MEMORY” y después oprima 9.
SUGERENCIA: Espere a los tonos de acceso
antes de oprimir el siguiente botón de
memoria, o su llamada puede no pasar.
Botón para
memoria
(“MEMORY”)
WXYZ
9
TUV
8
PQRS
7
MNO
6
JKL
5
GHI
4
DEF
3
ABC
21
#
OPER
0
TONE
*
CHANNEL FLASHINT
REDIAL MEM
DELETEDIAL
FORMAT MUTE
PROG
PAUSE
TALK
ANSW
ERASE
PLAY/STOP SKIPREVIEW
Page 72

24
PARA INTRODUCIR UNA PAUSA
EN
LA SECUENCIA DE DISCADO
Oprima el botón “REDIAL” para introducir
un retraso en la secuencia de discado de
un número telefónico almacenado cuando
una pausa es necesaria para esperar al
tono de marcar (por ejemplo después de
que usted marca 9 para obtener línea
externa, o para esperar e tono de acceso
en una computadora).
PARA REVISAR Y BORRAR
NÚMEROS ALMACENADOS
1. Oprima el botón de memoria (“MEM”).
2. Utilice los botones “CID REVIEW” para
recorrer los números almacenados en la
memoria hasta que el número deseado
se muestre en la pantalla.
3. Mientras el número se muestra, oprima
el botón “DELETE” para borrarlo. La
pantalla indica que está borrado
(“
DELETED
”).
Botón para
borrar
(“DELETE”)
Botón para
rediscado
(“REDIAL”
Botón para
memoria
(“MEMORY”)
WXYZ
9
TUV
8
PQRS
7
MNO
6
JKL
5
GHI
4
DEF
3
ABC
21
#
OPER
0
TONE
*
CHANNEL FLASHINT
REDIAL MEM
DELETEDIAL
FORMAT MUTE
PROG
PAUSE
TALK
ANSW
ERASE
PLAY/STOP SKIPREVIEW
Botones de
flechas
(“CID
REVIEW”)
Page 73

25
Botón de
tono
(“TONE”)
Botón para canales
(“CHANNEL”)
FUNCIONES AVANZADAS
BOTÓN PARA CANALES
(“CHANNELS”)
Mientras usted está hablando, usted puede
necesitar cambiar manualmente el canal para
reducir la estática causada por monitores de
bebé, control para abrir la puerta del garage,
u otros teléfonos inalámbricos. Oprima y
suelte el botón “CHANNEL” para avanzar al
siguiente canal.
TONO TEMPORARIO
Esta función le permite a los usuarios de
servicio de discado de pulso (o rotatorio)
tener acceso a los servicios que son
accesibles en la modalidad de tono (touchtone) que ofrecen las instituciones bancarias,
compañías de tarjetas de crédito, etc. Oprima
el botón “TONE” para hacer el teléfono
temporalmente compatible a tono (touchtone). Para obtener información acerca de su
cuenta bancaria, por ejemplo, usted:
1. Llame a la línea de información del
banco.
2. Oprima la tecla de tono, marcada “*” en
el teclado, cuando su llamada es
contestada.
3. Siga las instrucciones orales en el menú
para obtener la información. Cuando
ustedcuelga, el teléfono regresa al
servicio de pulso (rotatorio).
WXYZ
9
TUV
8
PQRS
7
MNO
6
JKL
5
GHI
4
DEF
3
ABC
21
#
OPER
0
TONE
*
CHANNEL FLASHINT
REDIAL MEM
DELETEDIAL
FORMAT MUTE
PROG
PAUSE
TALK
ANSW
ERASE
PLAY/STOP SKIPREVIEW
Page 74

26
OPERACIÓN DE LA MÁQUINA CONTESTADORA
Esta sección se refiere a los botones y
funciones de la máquina contestadora.
INDICADOR DE MENSAJES
El indicador de mensajes (“MESSAGES”)
le muestra cuántos mensajes tiene usted.
El botón “ANSWER ON/OFF” debe estar
activado para que el indicador funcione.
PARA FIL TRAR LLAMADAS DESDE
LA
BASE
Usted puede filtrar llamadas entrantes,
simplemente esperando a que la persona
que llama comience a dejar su mensaje
(para escuchar quién es), después levante
el auricular, y oprima el botón “TALK” para
hablar con la persona que llama. La
máquina contestadora automaticamente
deja de grabar cuando usted activa el
auricular o levanta una extensión del
teléfono.
SUGERENCIA: Asegúrese de que el
volumen en la base está programado lo
suficientemente alto para escuchar sus
llamadas entrantes.
Indicador de mensajes
(“MESSAGES”)
NEXT
ANNOUNCE
MEMO
ERASE ANSWER
ON/OFF
CHARGE/
IN USE
MESSAGES
8.8.
S
K
I
P
R
E
V
I
E
W
P
L
A
Y
/
S
T
O
P
Botón
SKIP
Botón
(“ANSWER
ON/OFF ”)
Botón
(“PLAY/
STOP ”)
Botón
REVIEW
Page 75

27
REPRODUCCIÓN DE MENSAJES
El indicador de mensajes le hace saber cuando usted tiene mensajes. Para
reproducir los mensajes, oprima “PLAY/STOP.”
Mientras un mensaje se está reproduciendo, usted puede hacer lo siguiente:
• Oprima el botón “PLAY/STOP” para suspender la reproducción del mensaje.
• Oprima y suelte el botón “REVIEW” para volver a comenzar la
reproducción del mensaje actual; continúe oprimiendo y soltando el
botón “REVIEW” para volver a mensajes previos.
• Oprima y suelte el botón “SKIP” para ir al siguiente mensaje.
• Oprima el botón “PLAY/STOP” para suspender la reproducción del mensaje.
MEMORIA LLENA
Cuando la memoria está llena, el sistema contesta después de 10 timbres.
Usted tiene que borrar algunos de los mensajes para que el contestador
pueda grabar nuevos mensajes.
PARA BORRAR MENSAJES
Usted puede borrar mensajes de tres maneras: un mensaje a la vez, utilizando
el botón para borrar (“ERASE”) en la base; todos los mensajes usando el
botón para borrar (“ERASE”) en la base; o un mensajes a la vez, utilizando el
botón “ERASE” (0) en al auricular o en un teléfono en otra localización.
• Para borrar un mensaje, oprima el botón “PLAY/STOP” en la base y
oprima y suelte el botón “ERASE” en la base para borrar el mensaje
que se está reproduciendo.
• Para borrar todos los mensajes, oprima el botón “ERASE” en la base
después de que todos los mensajes han sido reproducidos.
Page 76

28
• Para borrar un mensaje desde el auricular:
1. Oprima el botón para contestar (“ANSWER”) en el auricular.
2. Oprima el botón “PLAY/STOP” en el auricular (la tecla con el número 2).
3. Oprima el botón para borrar (“ERASE”) en el auricular (la tecla con el
número 0) para borrar el mensaje que se está reproduciendo.
NOTA: Los mensajes borrados no pueden ser recuperados. También, tenga
cuidado de no oprimir el botón para borrar (“ERASE”) mientras el siguiente
mensaje no escuchado se reproduce porque ese mensaje también será borrado.
PARA DEJAR UN RECADO
Use la función de Recado (MEMO) para dejar un recado.
1. Oprima y sostenga el botón “MEMO.” Usted necesita sostener el botón
hasta que termine el mensaje.
2. Comience a hablar después de que usted escuche el tono.
3. Suelte el botón “MEMO” cuando haya terminado.
Page 77

29
WXYZ
9
TUV
8
PQRS
7
MNO
6
JKL
5
GHI
4
DEF
3
ABC
21
#
OPER
0
TONE
*
CHANNEL FLASHINT
REDIAL MEM
DELETEDIAL
FORMAT MUTE
PROG
PAUSE
TALK
ANSW
ERASE
PLAY/STOP SKIPREVIEW
ACCESO REMOTO
Esta sección explica los dos tipos de acceso
remoto: el usar el auricular para tener
acceso a la máquina contestadora y el tener
acceso a la máquina contestadora desde
otro teléfono.
El auricular contiene botones integrados
que le permiten tener acceso a la máquina
contestadora con el auricular.
Usted también puede tener acceso a su
máquina contestadora desde cualquier
teléfono que sea compatible con la
modalidad de discado de tono, simplemente
inscribiendo el código de seguridad de 3
dígitos después de que usted ha escuchado
el anuncio saliente. Un sistema de menú oral
le guiará a través de todos los
procedimientos.
Botón
(“PLAY/
STOP ”)
Page 78

30
PARA USAR EL AURICULAR
Oprima el botón “ANSWER” para tener
acceso a la máquina contestadora desde al
auricular inalámbrico.
Después de que usted ha tenido acceso al
contestador, use las teclas marcadas del
auricular como si usted oprimiera las teclas
correspondientes en la base (vea “Operación
de la Máquina Contestadora” para detalles
de las funciones). Para facilitarle a usted, las
funciones están enlistadas en el auricular
arriba de cada número. Por ejemplo, para
reproducir mensajes:
1. Oprima el botón “ANSWER.”
2. Oprima el 2 (“PLAY/STOP”).
3. Cuando usted haya terminado de
escuchar sus mensajes, oprima el botón
“ANSWER” nuevamente.
INDICADOR DEL CONTESTADOR
Usted sabe que el contestador está activo
cuando usted ve que se ilumina el
indicador de que el contestador está en
uso.
WXYZ
9
TUV
8
PQRS
7
MNO
6
JKL
5
GHI
4
DEF
3
ABC
21
#
OPER
0
TONE
*
CHANNEL FLASHINT
REDIAL MEM
DELETEDIAL
FORMAT MUTE
PROG
PAUSE
TALK
ANSW
ERASE
PLAY/STOP SKIPREVIEW
Botón
(“ANSWER ”)
Botón
(“PLAY/
STOP ”)
Page 79

31
PARA FILTRAR LLAMADAS
DESDE
EL AURICULAR
Use el auricular para filtrar llamadas,
incluso cuando usted no puede escuchar la
máquina contestadora.
Cuando el teléfono timbra:
1. Oprima el botón “ANSWER” para tener
acceso a la máquina contestadora.
2. Escuche a la persona que llama dejar un
mensaje.
3. Oprima el botón “TALK” para hablar con
la persona u oprima “ANSWER” para
dejar de filtrar la llamada.
MEMORIA LLENA
Cuando la memoria está llena, el sistema
contesta después de 10 timbres, emite un
tono y espera a que la persona que llama
inscriba el código de seguridad de 3
dígitos. Si usted no inscribe el código de
seguridad dentro de 10 segundos después
de que el aparato pita, el teléfono cuelga.
Usted necesita borrar algunos de los
mensajes para que el sistema pueda grabar
nuevos mensajes entrantes.
Botón del contestador
(“ANSWER”)
WXYZ
9
TUV
8
PQRS
7
MNO
6
JKL
5
GHI
4
DEF
3
ABC
21
#
OPER
0
TONE
*
CHANNEL FLASHINT
REDIAL MEM
DELETEDIAL
FORMAT MUTE
PROG
PAUSE
TALK
ANSW
ERASE
PLAY/STOP SKIPREVIEW
Botón
para
hablar
(“TALK”)
NOTA: Este aparato también contesta después del décimo timbre si está
desactivado. Para tener acceso al contestador, inscriba su código de seguridad
de 3 dígitos después de que usted escucha un tono.
Page 80

32
PARA TENER ACCESO AL CONTESTADOR DESDE
OTRA LOCALIZACIÓN
Usted puede tener acceso a su máquina contestadora desde un teléfono
con modalidad de discado de tono (touch-tone), inscribiendo su código de
seguridad de 3 dígitos después de que usted escucha el anuncio saliente.
1. Marque el número de teléfono para la máquina contestadora.
2. Inscriba el código de seguridad después de que usted escuche el tono.
3. Siga las instrucciones orales del menú para usar las funciones remotas
del contestador.
Las funciones remotas le permiten efectuar las siguientes funciones:
Para Oprima este Botón
Revisar un Mensaje 1
Reproducir Mensajes 2
Para suspender la reproducción2
Borrar el Mensaje 0 (durante la reproducción)
Saltar el Mensaje 3
Active/desactive el contestador 4
Revisar las opciones orales del menú 7
SUGERENCIA: Usted puede saltarse el anuncio saliente oprimiendo cualquier tecla
numérica en el teclado mientras el anuncio se reproduce. Después, usted puede
inscribir su código de seguridad para tener acceso a su máquina contestadora.
Page 81

33
PARA CAMBIAR EL CÓDIGO DE
SEGURIDAD
El código de seguridad pre-programado de
fábrica para tener acceso al contestador
desde otra localización es 123. Usted debe
utilizar el auricular para cambiar el código
de seguridad. Con el teléfono apagado,
siga los siguientes pasos:
1. Oprima el botón “ANSWER” (el indicador
del contestador en uso se iluminará).
2. Oprima el botón de tono (*).
3. Inscriba los 3 números que serán usados
como el nuevo código de seguridad.
4. Oprima el botón de tono (*)
nuevamente.
Botón del contestador
(“ANSWER”)
WXYZ
9
TUV
8
PQRS
7
MNO
6
JKL
5
GHI
4
DEF
3
ABC
21
#
OPER
0
TONE
*
CHANNEL FLASHINT
REDIAL MEM
DELETEDIAL
FORMAT MUTE
PROG
PAUSE
TALK
ANSW
ERASE
PLAY/STOP SKIPREVIEW
Botón de
tono
(“TONE”)
Page 82

34
HE
AD
SET
Clavija
del
Audífono
Enchufe
del
Audífono
Ranura
para el
broche
del
cinturón
Ranura
para el
broche
del
cinturón
OPERACIÓN DEL AUDÍFONO Y BROCHE DEL CINTURÓN
CONEXIÓN DEL AUDÍFONO AL
AURICULAR
Para conversar sin sostener el auricular en
la mano, conecte el audífono (provisto
unicamente con el modelo 26994) al
enchufe del audífono como se muestra. El
receptor del auricular y el micrófono
quedan deshabilitados cuando se conecta
el audífono.
Ajuste el audífono para que descanse
cómodamente sobre su cabeza y sobre su
oído. Mueva el micrófono a entre 2 y 3
pulgadas de su boca.
• Oprima el botón de HABLAR para
contestar o hacer una llamada antes de
usar el audífono.
CONEXIÓN DEL BROCHE DEL
CINTURÓN
Hay dos ranuras, una a cada lado del
auricular.
• Fije el broche del cinturón (provisto
unicamente con el modelo 26994)
insertando los lados del broche en las
ranuras. Apriete hasta oír el chasquido
que indica que el broche quedó en su
lugar.
Page 83

35
PARA CAMBIAR LA BATERÍA
Asegúrese de que el teléfono esté desactivado (OFF) antes
de reemplazar la batería.
1. Quite la puerta del compartimento de la batería.
2. Desconecte el enchufe de la batería y saque el paquete
de batería del auricular.
3. Introduzca el paquete de batería nuevo y vuelva a
conectar el enchufe de la batería.
4. Vuelva a colocar la puerta del compartimento de la
batería.
5. Coloque el auricular sobre la base para cargarlo. Si
usted no carga la batería del auricular
adecuadamente (durante 12 horas) cuando usted
instala inicialmente el teléfono y/o cuando usted
instala un nuevo paquete de batería, el
rendimiento a largo plazo de la batería se verá comprometido.
PRECAUCIONES DE SEGURIDAD PARA LA BATERÍA
• No queme, desarme, mutile, o agujere. Igual que otras baterías de este
tipo, materiales tóxicos pueden escaparse y causarle daño.
• Para reducir el riesgo de fuego o daño personal, use unicamente la
batería indicada en la Guía del Usuario.
• Mantenga las baterías fuera del alcance de los niños.
Ni-Cd
RBRC
RBRC
OBSERVACIÓN: el Sello RBRC de la pila utilizada en su
producto Thomson Consumer Electronics indica que
participamos en un programa para recoger y reciclar las
pilas de níquel cadmio que se realiza en todos los
Estados Unidos. Para más información sírvase llamar al 1800-8-BATTERY o entre en contacto con su centro local
de reciclaje.
Page 84

36
CUIDADO GENERAL DEL PRODUCTO
Para mantener su teléfono funcionando bien y con buena apariencia,
observe las siguientes pautas:
• Evite poner el teléfono cerca de calentadores (calefactores) de ambiente
y dispositivos que generen interferencia eléctrica ejemplo, motores o
lámparas fluorescentes).
• No lo exponga a la luz solar directa o a la humedad.
• No deje caer la extensión móvil y no maltrate el teléfono.
• Limpie el teléfono con un trapo suave.
• Nunca use un agente de limpieza fuerte ni un polvo abrasivo, ya que
esto dañará el acabado.
• Retenga el empaque original en caso de que necesite embarcar el
teléfono en el futuro.
• Limpie periódicamente los contactos de carga en la extensión móvil y
en la base con un trapo suave.
SEÑALES SONORAS DEL AURICULAR
Señal Significado
Un tono de gorgeo (con timbre encendido) Señala que una llamada está entrando
Un tono corto, un tono largo (3 veces) Señal del localizador
Tres tonos cortos Fuera de rango
Cuatro tonos largos Advertencia de baja batería
Page 85

37
INDICADORES DEL AURICULAR
Los siguientes mensajes especiales indican el estado actual de un mensaje
o del aparato:
ERROR La información de la persona que llama ha sido interrumpida
durante la transmisión o el teléfono es excesivamente
ruidoso.
ENTER NAME Indicación para pedirle que inscriba el primer nombre 10 en
una de las 10 localizaciones dememoria.
DELETE ALL? Indicación preguntándole si quiere borrar todos los datos del
Identificador de Llamadas.
DELETE CALL ID? Indicación preguntándole si quiere borrar el dato actual del
Indicador de Llamadas que se muestra en el visor.
DELETE MEMO? Indicación preguntándole si quiere borrar uno de los 10
números almacenados en la memoria saliente del teléfono.
START/END Indicación de que no hay información adicional en la
memoria del Identificador de Llamadas.
NEW Indica llamada o llamadas que no han sido revisadas.
UNKNOWN La llamada entrante es de un código de área no incluído en el
servicio del Identificador de Llamadas o la información no fué
enviada.
PAGING YOU Alguien ha oprimido el botón localizador (“PAGE”) en la
base.
BLOCKED La persona está llamando desde un número cuya transmisión
ha sido bloqueada.
REPT Repetir el mensaje de llamada. Indica que una nueva llamada
del mismo número fué recibida más de una vez.
NO CALLER ID Ninguna información del Identificador (Caller ID) fué recibida.
Page 86

38
INDICADORES DEL ESTADO DEL CONTESTADOR
Los siguientes indicadores muestran el estado del contestador.
0-59 Número total de mensajes.
CL (parpadeando) La marca de voz para indicar hora/fecha necesita ser
programada.
- - Contestador desactivado.
An (parpadeando) Actualmente contestando una llamada.
F (parpadeando) La memoria está llena.
Six bars (parpadeando) Grabando un recado o mensaje.
Page 87

39
DETECCIÓN DE AVERÍAS
SOLUCIONES PARA EL TELÉFONO INALÁMBRICO
Problema Solución
No hay tono de marcar • Cheque la instalación:
— Está el cable de la base conectado a un contacto que sirve?
— Está el cable telefónico conectado a la base del aparato
y a un contacto de pared?
• Conecte otro teléfono al mismo contacto; el problema
puede estar en el cableado o en el servicio local.
•¿Está el auricular fuera del rango de la base?
• Asegúrese de que la batería ha sido cargada
adecuadamente (12 horas).
•¿Está el paquete de la batería instalado adecuadamente?
•¿El auricular emitió un tono cuando usted oprimió el botón
“TALK”? ¿Se iluminó el indicador de “IN-USE.” La batería
puede necesitar cargarse.
• Coloque el auricular sobre la base durante por lo menos 20
segundos.
El tono de marcar está bien, • Asegúrese de que el selector de tono/pulso está
pero no da línea programado correctamente.
El auricular no timbra • Asegúrese de que el selector de timbre (“RINGER”) está
encendido (ON).
• Acérquese a la base. El auricular puede estar fuera de rango.
• Usted puede tener demasiadas extensiones de teléfono en
su línea. Intente desconectar algunos teléfonos.
• Cheque que haya tono de marcar.
Usted experimenta estática, • Cambie canales.
ruido, o debilitamiento del • Asegúrese a la base (el auricular puede estar fuera de rango).
sonido entrante o saliente •¿La base necesita moverse a otra localización? Asegúrese
de que la base no esté conectada en un contacto con otro
aparato eléctrico.
• Cargue la batería.
Page 88

40
SOLUCIONES PARA EL TELÉFONO INALÁMBRICO (CONTINUACIÓN)
Problema Solución
El aparato pita • Coloque el auricular en la base durante 20 segundos; si
sigue pitando, cargue la batería durante 12 horas.
• Limpie los contactos del cargador en el auricular y la base
con un trapo suave o una goma de borrar.
• Vea las soluciones para “No hay tono de marcar”.
• Cambie la batería.
El Discado de Memoria •¿Programó usted las teclas de las localizaciones de
no funciona memoria correctamente?
•¿Siguió la secuencia de discado adecuada?
IDENTIFICADOR DE LLAMADAS
Problema Solución
El visor no muestra nada •¿Está la batería completamente cargada?
• Asegúrese de que el aparato esté conectado a un
contacto eléctrico que no tenga selector para apagarse.
Desconecte el aparato del contacto y conéctelo
nuevamente.
•¿Ordenó usted el servicio de Identificador de Llamadas de
su compañía telefónica local? El visor no funcionará a
menos que usted haya ordenado el servicio de
Identificador de llamadas a su compañía telefónica local.
Error en el Mensaje del • El aparato muestra este mensaje si detecta
Identificador de Llamadas cualquier cosa que no sea información válida del
Identificador de Llamadas durante el periodo de silencio
después del primer timbre. Este mensaje indica, ya sea la
presencia de ruidos en la línea, o que un mensaje
inválido ha sido enviado desde la compañía telefónica.
Page 89

41
SOLUCIONES PARA LA MÁQUINA CONTESTADORA
Problema Solución
No se oyen los mensajes, • Ajuste el volumen de la bocina.
tono, etc.
La programación de la Hora/ • Programe el reloj.
Está atorada en Lunes 12 a.m.
Contesta en el 10o. timbre • Asegúrese de que el contestador está activado.
• La memoria puede estar llena.
Los mensajes entrantes •¿Alguna extensión del teléfono fué levantada?
están Incompletos. • La memoria está llena.
• El botón “PLAY” fué oprimido accidentalmente durante la
reproducción y suspendió el mensaje.
No responde a los comandos • Debe usar un teléfono con modalidad de discado
de tono remotos. (touch-tone).
• Debe inscribir el código de seguridad correcto.
•¿El aparato colgó? Si usted no lleva a cabo ninguna acción
durante un período de tiempo, el aparato cuelga
automaticamente.
Page 90

42
CAUSAS DE UNA MALA RECEPCIÓN
• Recubrimiento externo de la casa con aluminio.
• Aislación con revestimiento de papel de aluminio.
• Conductos de calefacción y otras construcciones de metal que paran las
señales de radio.
• Está demasiado cerca de los aparatos eléctricos como microondas,
cocina, computadoras, etc.
• Condiciones atmosféricas, como una tormenta eléctrica.
• La base está instalada en el sótano o en un piso más bajo de la casa.
• La base está enchufada en un tomacorriente con otros aparatos
electrónicos.
• El monitor del bebé está usando la misma frecuencia.
• La pila del microteléfono está descargada.
• Está fuera del ámbito de la base.
C
ÓMO OBTENER SERVICIOS DE MANTENIMIENTO
La FCC requiere que este producto sea sometido a servicios de
mantenimiento solamente por el fabricante o por sus agentes de servicio
autorizados. De acuerdo con los requerimientos de la FCC, los cambios o las
modificaciones que no hayan sido expresamente aprobadas por Thomson
Consumer Electronics podrían anular la autoridad que tiene el usuario de
operar este producto. Para recibir instrucciones sobre cómo obtener servicios
de mantenimiento, por favor consulte la garantía incluida en esta Guía, o
llame a Información para el Usuario, 1-800-448-0329.
Adjunte su recibo al folleto, para futura referencia, o anote la fecha en la
que se compró o recibió este producto como regalo. Esta información será
valiosa si se llegase a requerir durante el período de garantía.
Fecha de compra __________ Nombre de la tienda__________________
Page 91

43
INDICE
A
Acceso Remoto 29
Antes de empezar 5
B
Botón de Servicios Especiales o Centello
(“FLASH”) 14
Botón Enmudecedor (“MUTE”) 14
Botón para Canales (“CHANNELS”) 25
C
Causas de una mala recepción 42
Cómo obtener servicios de
mantenimiento 42
Compatibilidad con Audífonos 2
Conexión del Audífono al Auricular 34
Conexión del broche del cinturón 34
Cuidado General del Producto 36
D
Detección de Averías 39
Discado en Cadena desde la Memoria 23
F
Formulario para hacer pedidos de
accesorios 45
Funciones Avanzadas 25
Funciones del Identificador de Llamadas 16
G
Garantía limitada 47
I
Identificador de Llamadas 40
Identificador de Llamadas con Llamada en
Espera 16
Indicador de Mensajes 26
Indicador del Contestador 30
Indicadores Del Auricular 37
Indicadores Del Estado Del Contestador 38
Información Básica del Teléfono
Inalámbrico 13
Información de Interferencias 2
Información de la Rregistración de la FCC 2
Instalación sobre Pared 7
Instalación sobre Superficie Plana 6
Instrucciones de Voz 10
Introducción 3
L
La Función de Memoria 20
M
Memoria Llena 27, 31
O
Operación de la Máquina Contestadora 26
Operación del Audífono y Broche del
Cinturón 34
Page 92

44
P
Para Almacenar un Número en la
Memoria 20
Para Borrar Datos 18
Para Borrar el Dato Actual 18
Para Borrar Mensajes 27
Para Borrar Todos los Datos 18
Para Cambiar el Código de Seguridad 33
Para Cambiar el Formato del Número 19
Para Cambiar la Batería 35
Para Cambiar un Número Almacenado 21
Para Dejar un Recado 28
Para Discar un Número del Identificador de
Llamada 18
Para Encontrar el Auricular 15
Para Filtrar Llamadas desde el Auricular 31
Para Filtrar Llamadas desde la Base 26
Para Grabar el Anuncio Saliente 11
Para Hacer una Llamada 13
Para Introducir una Pausa en la Secuencia
de Disca 24
Para Marcar un Número Almacenado 22
Para Programar el Idioma de la Pantalla 12
Para Programar el Volumen de la Bocina 10
Para Programar la Clave de Área Local 12
Para Programar la Selección del Timbre 10
Para Programar la Señal de Voz del Día y la
Hora 9
Para Recibir una Llamada 14
Para Recibir y Almacenar Llamadas 16
Para Regresar la Llamada 22
Para Revisar el Anuncio 11
Para revisar mensajes 17
Para Revisar y Borrar Números
Almacenados 24
Para Tener Acceso Al Contestador Desde
Otra Locali 32
Para usar el Ahorrador de Cargos 10
Para Usar el Auricular 30
Precauciones de Seguridad para la
Batería 35
Preparación 5
Programación de la Máquina
Contestadora 9
Programación del Teléfono 12
R
Re-Discado 13
Reproducción de Mensajes 27
Requisitos de enchufe modular 5
S
Selector del Timbre (“RINGER”) 15
Señales Sonoras del Auricular 36
Sistema Digital de Seguridad 5
Soluciones para el Teléfono Inalámbrico 39
Soluciones para la Máquina
Contestadora 41
T
Tono Temporario 25
V
Volumen 14
Page 93

45
Adaptador de fuente de poder AC
5-2471
$10.00
Broche de cinturón
5-2452
$10.85
Audíofonos
5-2425
$36.35
5-2472
5-2459
$10.00
Batería
5-2451
5-2444
(blanco)
(negro)
DESCRIPCIÓN
F
ORMULARIO
PARA
HACER
PEDIDOS
DE
ACCESORIOS
(
O
LLAME
AL
1-800-338-0376)
NÚMERO DE CATÁLOGO
TOTAL
CANTIDAD
PRECIO*
CORTE EN LA LÍNEA PERFORADA.
Por favor asegúrese de haber llenado este formulario por completo.
*Los precios están sujetos a cambios sin previo aviso.
Total de la mercancía....................................$_______________
Impuestos sobre la venta..............................$_______________
La ley nos requiere que cobremos el impuesto sobre la venta apropiado para cada
estado, condado y área individuales a las cuales se env
íe la mercancía.
De preferencia, use VISA o Master Card o Discover. Los cheques o giros postales se
aceptan únicamente en moneda estadounidense. No se hacen env
íos COD (de pago
contra reembolso) ni se acepta efectivo. Todos los accesorios est
án sujetos a
disponibilidad. Cuando se aplique, enviaremos un modelo m
ás reciente.
Embarque/Envío.......................................$_______________
Monto total incluido.................................$_______________
Envíe el formulario de pedido y giro postal o cheque (en moneda
estadounidense) a nombre de Thomson Consumer Electronics, Inc. a:
TCE
Mail Order Department
P.O. Box 8419
Ronks, PA 17573-8419
Nombre_______________________________________________________
Dirección_____________________________________ Depto.____________
Ciudad________________Estado________ Código Postal_________
Número Telefónico durante el D
ía ( )_______________________
$5.00
____________________________________________________________________
Firma autorizada
Mi tarjeta vence el:
Copie el número que aparece arriba
de su nombre en la tarjeta Master Card.
Para compras con tarjeta de cr
édito
Para tramitar las
órdenes pagadas con tarjeta de cr
édito, se
requiere el número completo de su tarjeta de cr
édito, la fecha de
vencimiento y su firma.
Copie el número completo de su cuenta de su tarjeta VISA.
Mi tarjeta vence:
Copie el número completo de su cuenta de su tarjeta
MasterCard o Discover.
Page 94

46
Page 95

47
GARANTÍA LIMITADA
Lo que cubre su garantía:
• Cualquier defecto en material o mano de obra.
Por cuánto tiempo después de la compra:
• Un año.
(El periodo de garantía para unidades arrendadas se inicia con la primera renta o 45 días de la fecha
del embarque a la firma de arrendamiento, lo que ocurra primero).
Lo que haremos:
• Proporcionarle una unidad nueva o, a nuestra opción, una reacondicionada.
• La unidad de intercambio quedará bajo garantía por el resto del periodo de garantía del producto
original.
Cómo hacer un reclamo de garantía:
• Empaque bien la unidad, incluyendo todos los cables, etc., que originalmente venían con el producto.
Se recomienda usar el cartón y materiales de empaque originales.
• Incluya en el paquete la evidencia de la fecha de compra , por ejemplo, la factura. También imprima su
nombre y su domicilio y una descripción del defecto. Envíe por medio del servicio UPS estándar o su
equivalente a:
Thomson Consumer Electronics, Inc.
11721 B Alameda Ave.
Socorro, Texas 79927
• Pague cualquier cargo que le facture el Centro de Intercambio por servicio que no esté cubierto por
garantía.
• Asegure su embarque en contra de pérdida o daño. Thomson no acepta ninguna responsabilidad en
caso de daño o de pérdida.
• La unidad nueva o reacondicionada le será embarcada con flete prepagado.
Lo que
no
cubre la garantía:
• Instrucciones al cliente. (Su manual de propietario le proporciona la información con respecto a las
instrucciones de operación y los controles del usuario. Para información adicional, pregunte a su
distribuidor).
• Ajustes de instalación y de preparación del servicio.
• Baterías.
• Daño por mal uso o negligencia.
• Productos que han sido modificados o incorporados a otros productos.
• Productos comprados o que han recibido servicio fuera de los Estados Unidos.
• Desastres naturales, por ejemplo y sin limitarse a ellos, daños por relámpagos.
Registro del Producto:
• Por favor llene y envíe por correo la Tarjeta de Registro del Producto que se embarcó con su producto.
Hará más fácil que hagamos contacto con usted si fuera necesario. No se requiere la devolución de la
tarjeta para tener la cobertura de la garantía.
Cómo se Relaciona la Ley Estatal a esta Garantía:
• Esta garantía le da a usted derechos legales específicos y podrá tener otros derechos que varían de
estado a estado.
Si compró su producto fuera de los Estados Unidos:
• Esta garantía no se aplica. Vea a su distribuidor para información sobre la garantía.
Page 96

Model 26993/26994
15433020 (Rev. 1 E/S)
99-39
Printed in China
P.O. BOX 1976, Indianapolis, IN 46206
© 1999 Thomson Consumer Electronics, Inc.
Trademark(s) ® Registered
Marca(s) Registrada(s)
 Loading...