

Page 1
122518/16915207ESM1
If you have a claim under this warranty, please call our Customer Assistance
Number. For faster service, please have the model number and product name
ready for the operator to assist you. This number can be found on the bottom of
your appliance and on the front page of this manual.
Model Number: ___________________ Product Name: ______________________
Customer Assistance Number 1.877.207.0923 (US) or 1.877.556.0973 (Canada)
Keep these numbers for future reference!
For more information, please visit us at www.gehousewares.com
TWO-YEAR LIMITED WARRANTY
What does your warranty cover?
• Any defect in material or
workmanship.
For how long after the original
purchase?
•Two years.
What will we do?
•Provide you with a new one!
• For those items still under warranty
but no longer available, WAL-MART
reserves the right to replace with a
similar GE branded product of equal
or greater value.
How do you make a warranty claim?
• Save your receipt.
•Properly pack your unit. We
recommend using the original carton
and packing materials.
•Return the product to your nearest
WAL-MART store or call Customer
Assistance at 1-877-207-0923 (US) or
1-877-556-0973 (Canada)
What does your warranty not cover?
•Parts subject to wear, including,
without limitation, glass parts, glass
containers, cutter/strainer, blades,
seals, gaskets, clutches, motor
brushes, and/or agitators, etc.
• Commercial use or any other use not
found in printed directions.
• Damage from misuse, abuse, or
neglect, including failure to clean
product regularly in accordance with
manufacturer’s instructions.
How does state law relate to this
warranty?
• This warranty gives you specific legal
rights, and you may also have other
rights which vary from state to state
or province to province.
• THIS WARRANTY IS IN LIEU OF ANY
OTHER WARRANTY OR CONDITION,
WHETHER EXPRESS OR IMPLIED,
WRITTEN OR ORAL, INCLUDING,
WITHOUT LIMITATION, ANY
STATUTORY WARRANTY OR
CONDITION OF MERCHANTABILITY OR
FITNESS FOR A PARTICULAR
PURPOSE.
•WAL-MART, GE AND THE PRODUCT
MANUFACTURER EXPRESSLY
DISCLAIM ALL RESPONSIBILITY FOR
SPECIAL, INCIDENTAL AND
CONSEQUENTIAL DAMAGES OR
LOSSES CAUSED BY USE OF THIS
APPLIANCE. ANY LIABILITY IS
EXPRESSLY LIMITED TO AN AMOUNT
EQUAL TO THE PURCHASE PRICE PAID
WHETHER A CLAIM, HOWEVER
INSTITUTED, IS BASED ON CONTRACT,
INDEMNITY, WARRANTY, TORT
(INCLUDING NEGLIGENCE), STRICT
LIABILITY OR OTHERWISE. SOME
STATES OR PROVINCES DO NOT
ALLOW THIS EXCLUSION OR
LIMITATION OF INCIDENTAL OR
CONSEQUENTIAL LOSSES SO THE
FOREGOING DISCLAIMER MAY NOT
APPLY TO YOU.
What if you encounter a problem with
this product while using it outside the
country of purchase?"
• The warranty is valid only in the
country of purchase and you follow the
warranty claim procedure as noted.
is a trademark of General Electric
Company and is used under the
license by WAL-Mart Stores, Inc.,
Bentonville, AR 72716
g
MARKETED IN CANADA BY:
Wal-Mart Canada Corp.
1940 Argentia Road,
Mississauga, Ontario L5N1P9
Printed in China
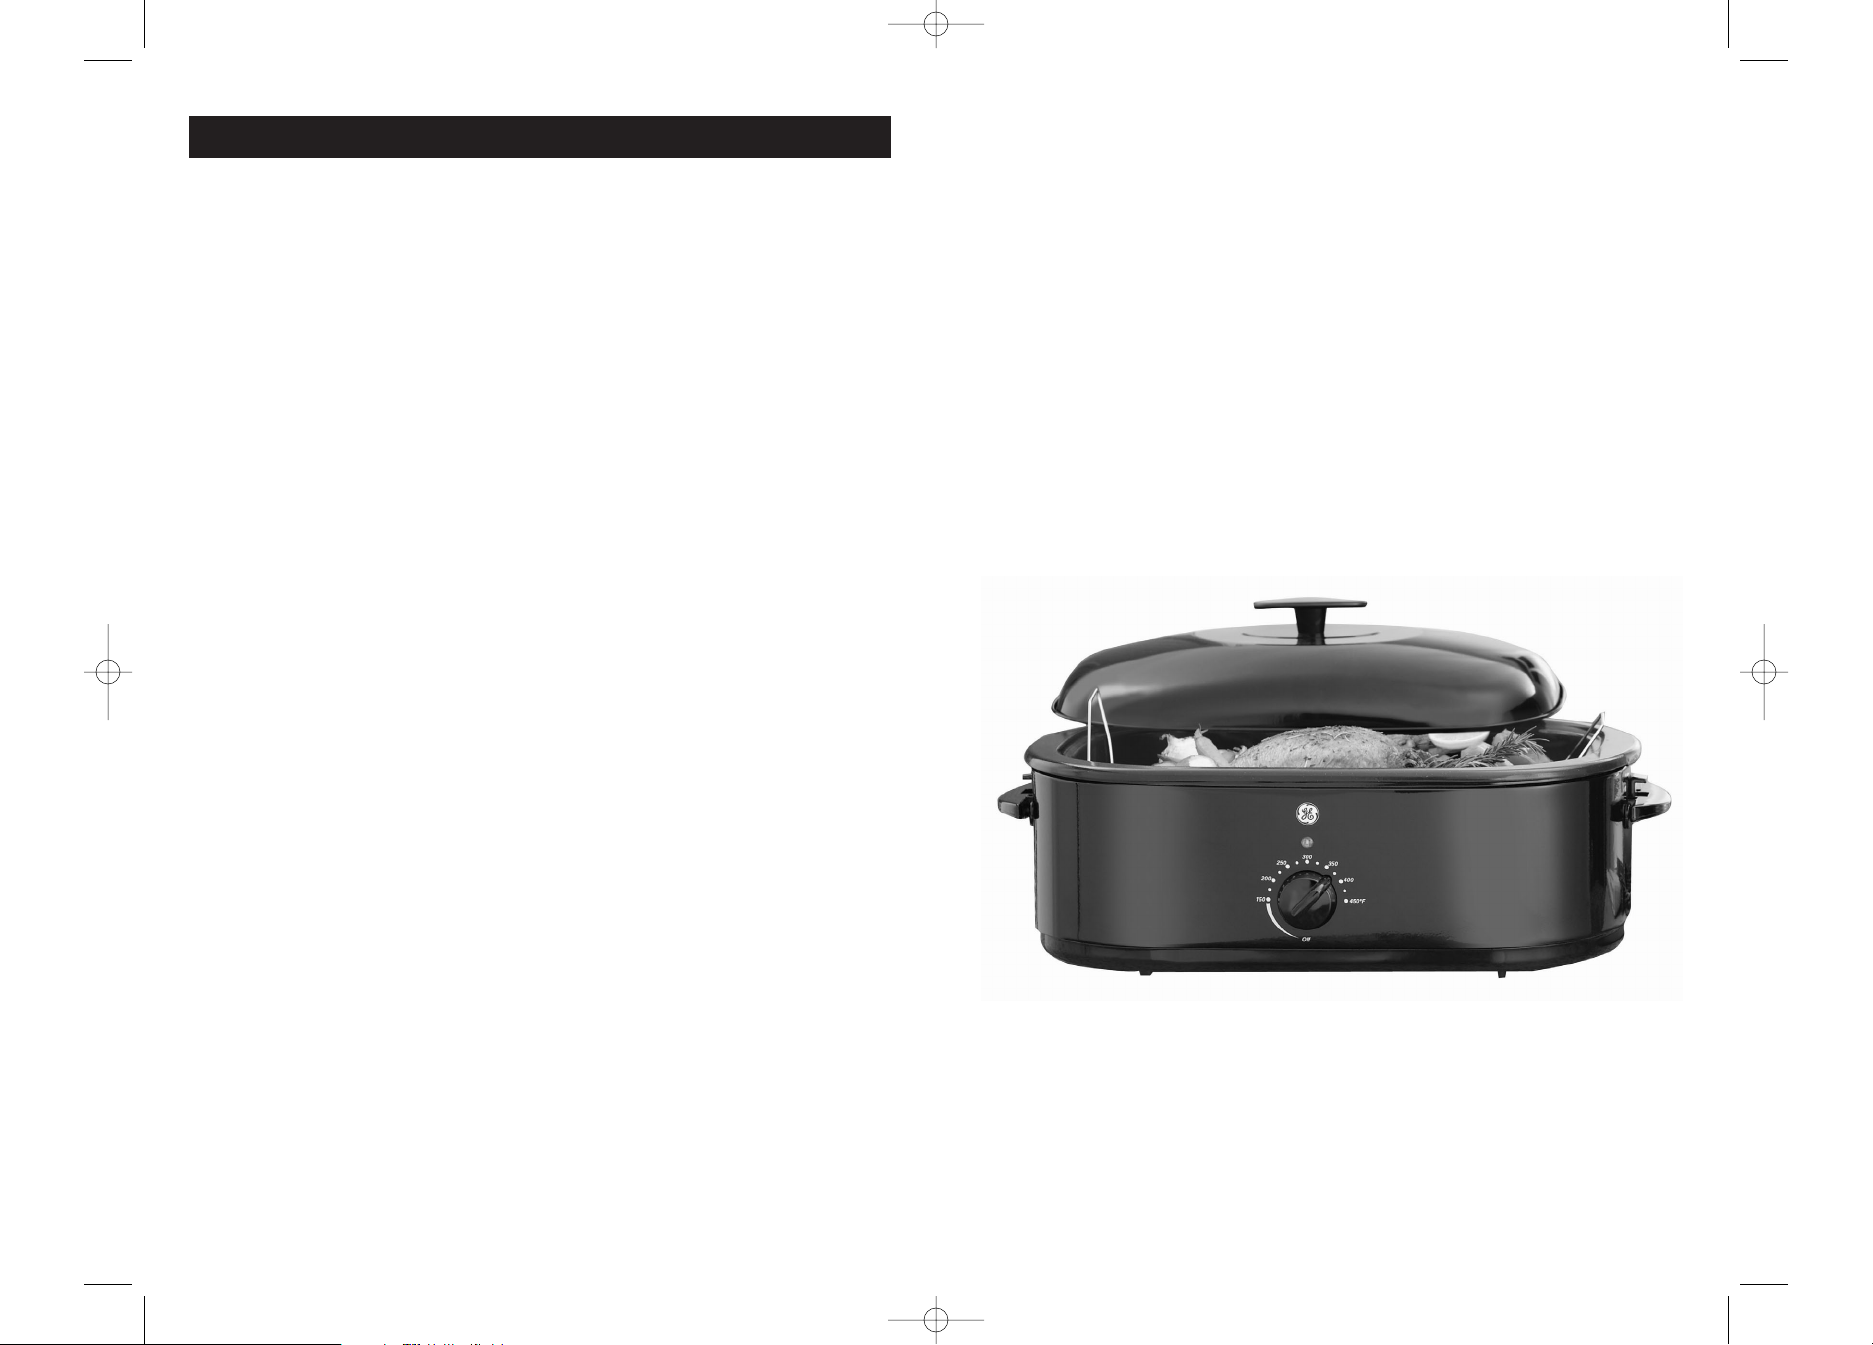
Roaster Oven
Model Number: 169152
UPC: 681131691529
Customer Assistance
1 877 207 0923 (US)
1 877 556 0973 (Canada)
Thank you for purchasing a GE small appliance.
In keeping with the GE ecomagination initiative, please consider the option to recycle
the packaging material and donate the appliance you are no longer using.
To read more about GE’s ecomagination commitment visit:
ge.ecomagination.com
g
CUSTOMER ASSISTANCE
16915207ESM1.qxd 5/10/07 11:15 AM Page 1
Page 2
THIS APPLIANCE IS FOR HOUSEHOLD USE ONLY. No user-serviceable parts inside.
Do not attempt to service this product. A short power supply cord is provided to
reduce the risk resulting from becoming entangled in or tripping over a longer
cord. An extension cord may be used with care; however, the marked electrical
rating should be at least as great as the electrical rating of the roaster oven. The
extension cord should not be allowed to drape over the counter or tabletop where
it can be pulled on by children or tripped over unintentionally.
SAVE THESE INSTRUCTIONS
IMPORTANT SAFEGUARDS
When using electrical appliances, basic safety precautions should always be
followed, including the following:
1. Read all instructions before using.
2. Do not touch hot surfaces. Use handles or knobs.
3. To protect against electric shock, do not immerse Roaster Oven Body, cord or
plug in water or other liquids.
4. Close supervision is necessary when any appliance is used by or near children.
5. Unplug from outlet when not in use and before cleaning. Allow to cool before
putting on or taking off parts, and before cleaning.
6. Do not operate Roaster Oven with a damaged cord or plug or after the
appliance malfunctions, or has been damaged in any manner. Return
appliance to the manufacturer (see warranty) for examination, repair, or
adjustment.
7. The use of accessory attachments not recommended by the manufacturer
may cause injuries.
8. Do not use outdoors.
9. Do not let cord hang over the edge of table or counter, or touch hot surfaces,
including the stove.
10. Do not place on or near a hot gas or electric burner, or in a heated oven.
11. Extreme caution must be used when moving an appliance containing hot oil or
other liquids.
12. CAUTION: Steam escaping from under Lid or Removable Cooking Pan is hot
and can cause burns.
13. Do not use appliance for other than intended use.
14. Use oven mitts to remove the Cooking Pan from the Roaster Oven, or to
remove a baking pan or cooked food from the Cooking Pan.
15. To disconnect, turn Temperature Control to OFF, then remove plug from wall
outlet.
16. Some countertop and table surfaces are not designed to withstand the
prolonged heat generated by certain appliances. We recommend placing a hot
pad or trivet under your product to prevent possible damage to the surface.
E2
E3
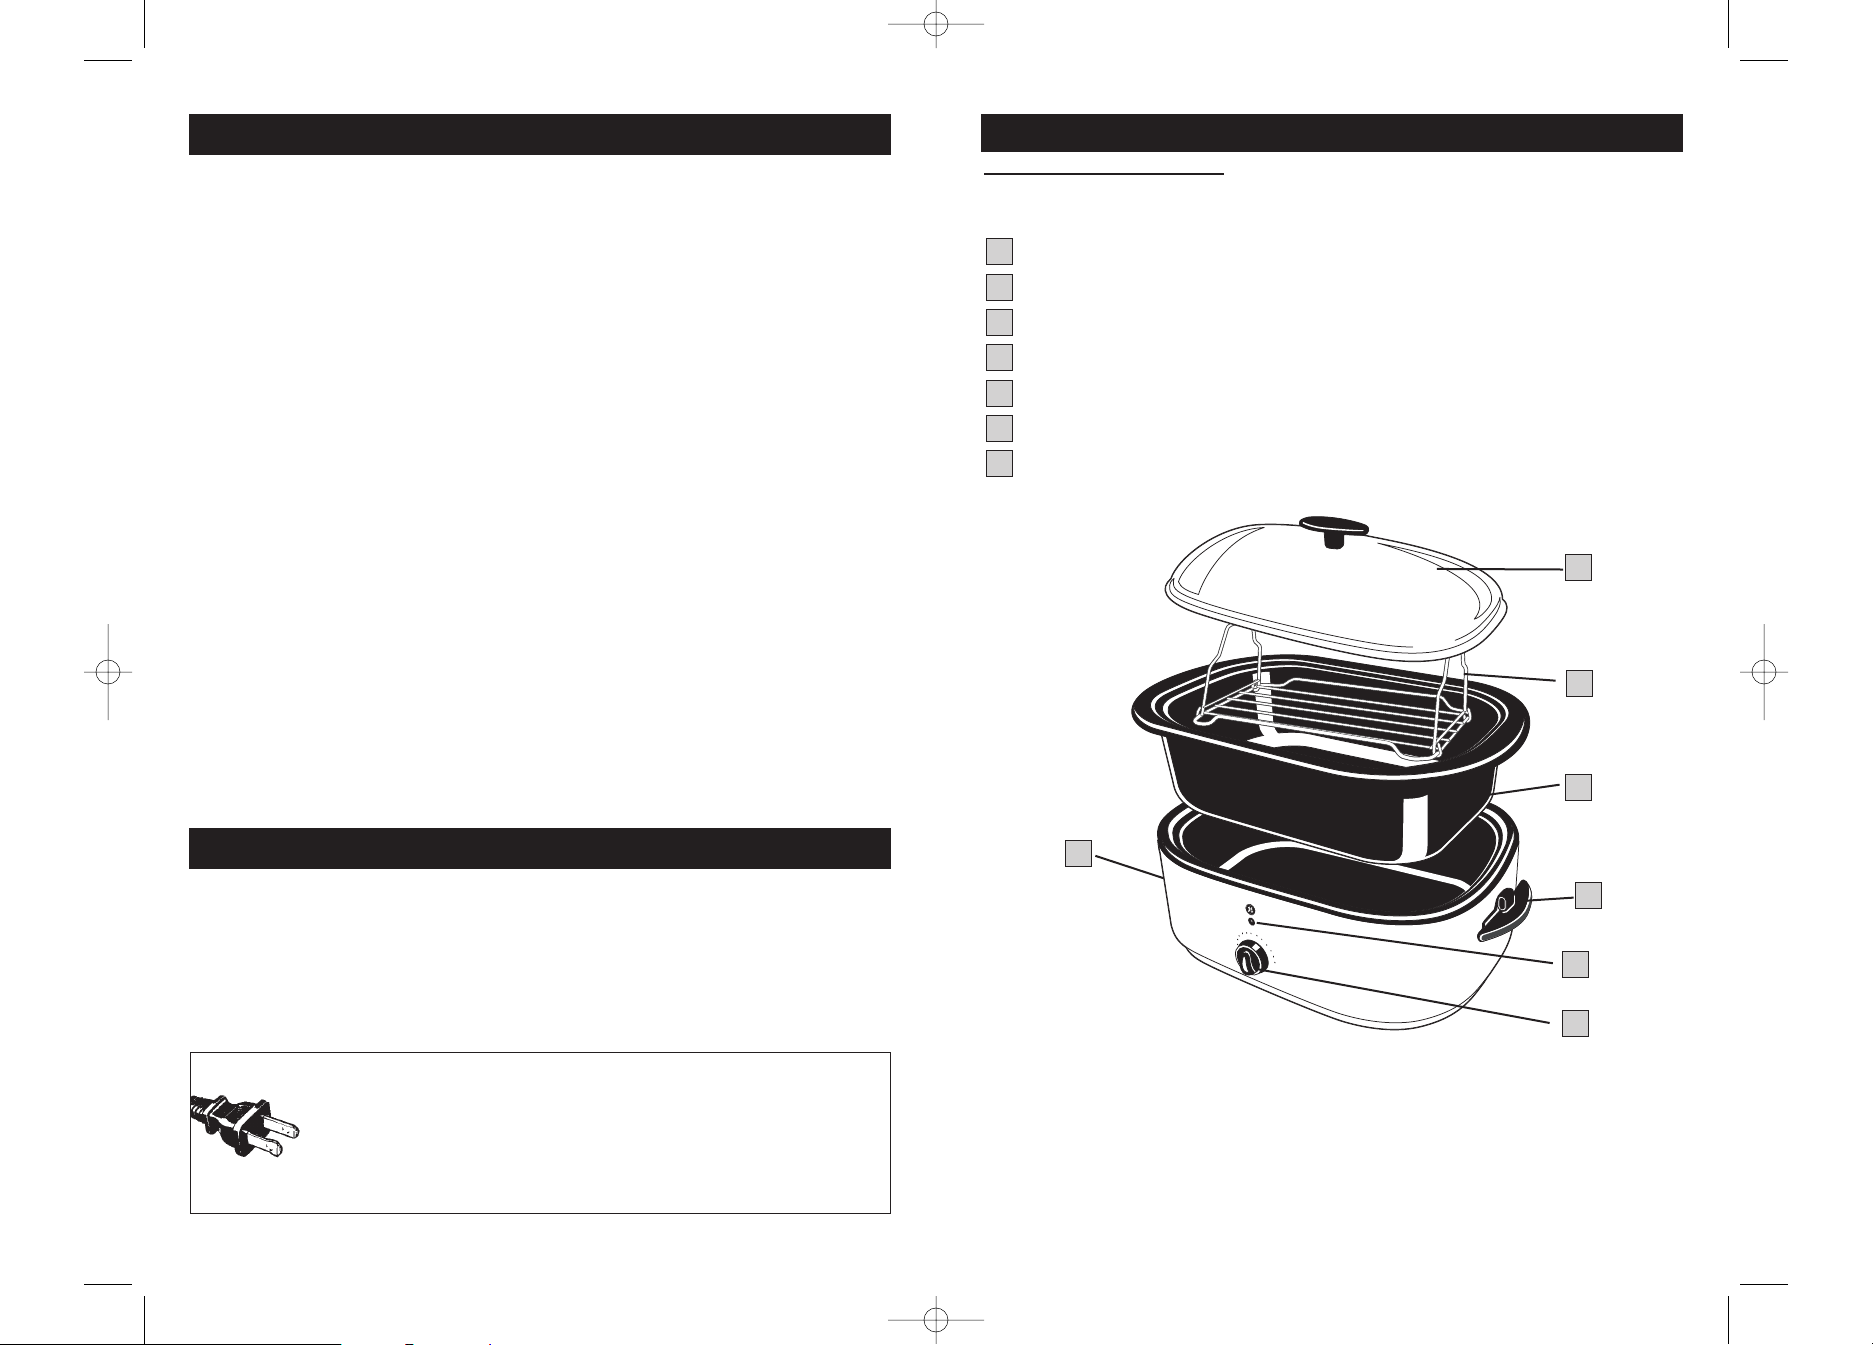
KNOW YOUR ROASTER OVEN
Parts and Features
1
2
3
4
5
Lid with Steam Vents
Removable Roasting Rack
Removable Cooking Pan
Lid Rest
Roaster Oven Body
Indicator Light
Temperature Control
6
7
POLARIZED PLUG
This appliance has a polarized plug (one blade is wider than the other). To reduce the
risk of electric shock, this plug is intended to fit into a polarized outlet only one way.
If the plug does not fit fully into the outlet, reverse the plug. If it still does not fit,
contact a qualified electrician.
Do not attempt to modify the plug in any way. If the plug fits loosely into the AC outlet
or if the AC outlet feels warm do not use that outlet.
4
0
0
o
4
5
0
o
3
5
0
o
1
5
0
o
2
0
0
o
2
5
0
o
3
0
0
o
1
2
3
4
6
7
5
16915207ESM1.qxd 5/10/07 11:15 AM Page 3
Page 3

CAUTION: Do not immerse the Roaster Oven Body in water or other liquid. Do not
put Cooking Pan in dishwasher.
1. Turn Temperature Control to the OFF position.
2. Unplug the Roaster Oven from outlet and allow unit to cool.
3. Wash the Cooking Pan, Lid and Roasting Rack in hot soapy water – using a
sponge or cloth. Rinse thoroughly in hot water, then towel dry.
4. Wipe the inside and outside of the Roaster Oven Body with a damp cloth.
HOW TO CLEAN YOUR ROASTER OVEN
PREPARING YOUR ROASTER OVEN FOR USE
1. Remove all packaging materials.
2. Wash the Cooking Pan, Roasting Rack and Lid in hot, soapy water using a
sponge or wash cloth. Rinse thoroughly.
3. The outside of the Roaster Oven Body may be cleaned with a soft cloth and
warm soapy water. Wipe dry. Do not use abrasive cleaners. Do not immerse
the Roaster Oven Body in water.
NOTE: Due to manufacturing process, some smoke and odor may be noticed
during the first use. This should disappear after the first heating of the Roaster
Oven.
• Always use the Cooking Pan in the Roaster Oven when cooking.
NOTE: Never place food or liquid directly into the Roaster Oven Body.
• Caution should be used when removing the Lid so that the steam escapes
away from you.
•Avoid the Steam Vents when removing or lifting the Lid.
• Significant amounts of heat escape whenever the Lid is removed; therefore the
cooking time must be extended. Avoid frequent removal of the Lid for checking
cooking progress or stirring.
•To use Lid Rest feature, hold the Lid upright by the Handle and place the edge
of the Lid under the tabs just above either Side Handle.
• Convenience foods can be baked in the Roaster Oven. Place container on
Roasting Rack. Follow package directions.
• Meats roasted in your Roaster Oven will be moist and tender. For additional
browning, brush oil or butter over the meat before cooking.
•To create a darker roasted, crispier skin on poultry, do not add liquids (with the
exception of the basting butter or oil) until there are only 30 minutes left of
cooking.
NOTE: The roaster pan has a capacity of 17 quarts.
IMPORTANT POINTS
1. Place the Cooking Pan into the Roaster Oven Body.
2. Make sure that the Temperature Control is in the OFF position, then plug Cord
into a 120 volt AC outlet.
3. Turn the Roaster on by turning the Temperature Control to the desired
temperature.
4. Preheat for 15 to 20 minutes. (Indicator Light will shut off when temperature is
reached.)
5. Place Roasting Rack into the Cooking Pan, put food on the Rack, and place the
Lid on the Roaster Oven. NOTE: Some foods or recipes do not require the
Roasting Rack to be used.
6. When finished, turn the Temperature Control to the OFF position and unplug
Roaster Oven from outlet.
7. Remove Lid and using oven mitts, remove the Roasting Rack with food and
serve.
HOW TO USE YOUR ROASTER OVEN
E4 E5
16915207ESM1.qxd 5/10/07 11:15 AM Page 5
Page 4

Slow Cooking
Slow cooking is best for less tender cuts of meat. Heat is gradual with slow
cooking. It is not necessary to stir when slow cooking. Avoid removing the cover
during slow cooking. Heat escapes during slow cooking and you may need to
increase the cooking time. When using a standard recipe, slow cook 11⁄2hours for
every 30 minutes. Slow cook using the 250°F setting.
Baking*
• Baking pans should always be placed on the Roasting Rack. Do not place pans
on bottom of Cooking Pan.
• Metal pans are recommended for use in the roaster as they provide better heat
transfer and browning.
CAUTION: Use hot pads or mitts when removing food from oven. Rack will be hot,
allow to cool or remove with hot pads/mitts.
COOKING GUIDE (CONT’D)
MUFFINS 425°F 15 to 20
QUICK BREAD 375°F 65 to 75
YEAST BREAD 400°F 40 to 45
YEAST ROLLS 400°F 18 to 20
COOKIES 350°F 8 to 13
BROWNIES 350°F 25 to 30
CUPCAKES 350°F 20 to 30
SHEET CAKE 350°F 40 to 45
POUND CAKE 350°F 50 to 60
BUNDT CAKE 350°F 50 to 60
CHEESECAKE 325°F 50 to 60
FRUIT PIE 425°F 45 to 50
CUSTARD PIE 350°F 50 to 60
PASTRY SHELL 425°F 10 to 13
PIZZA (9-inch) 425°F 20 to 25
BAKED POTATOES 350° to 400°F 50 to 60
SWEET POTATOES 350° to 400°F 55 to 65
SCALLOPED POTATOES 350°F 75 to 90
WINTER SQUASH 400°F 45 to 60
BAKED APPLES 350°F 35 to 45
FOOD TEMP. SETTING BAKING TIME (MIN)
DETERMINING MEAT DONENESS
It is recommended that you use a meat thermometer to determine doneness when
cooking meat and poultry. Insert the thermometer into the center of the thickest
portion of the meat. Cook until temperature for desired doneness is reached.
COOKING GUIDE
BEEF
PORK
LAMB
SMOKED HAM
Cook before eating
Fully cooked
POULTRY
Roasting Chicken
Turkey
140°F
*
140°F
*
*
160°F
160°F
160°F
170°F
170°F
170°F
160°F
140°F
180°F
180°F
MEAT RARE MEDIUM WELL DONE
*Rare pork, ham or poultry is not recommended.
ROASTING MEATS AND POULTRY
Tender cuts of meat are best suited for roasting. The time guide below is for use
with tender cuts such as from the sirloin area. Less tender cuts of meat should be
slow cooked in liquid. Times indicated below are approximate and should be used
as a guideline only.
BEEF ROASTS
Standing Rib 4 – 6 325°F 17 to 21
Sirloin Tip 3 – 5 350°F 17 to 21
Tenderloin 3
1
⁄2– 4 450°F 7 to 10
Pot Roast 4 – 6 300°F 26 to 34
Corned Beef 3
1
⁄2– 4 300°F 15 to 17
LAMB
Leg 5 – 8 350°F 20 to 22
Shoulder, boneless 3 – 4 350°F 20 to 22
PORK
Loin Roast 3 – 5 350°F 21 to 26
Shoulder 4 – 6 350°F 30 to 34
Chops 4 – 5 325°F 15 to 17
Country-Style Ribs 8 – 10 450°F to brown and…
…then decrease temp. to 250°F 15 to 17
SMOKED HAM
Bone-in 10 – 15 325°F 17 to 21
Boneless 8 – 12 325°F 15 to 17
Fully cooked 5 – 10 325°F 13 to 24
VEAL
Loin 4 – 6 325°F 26 to 30
Shoulder 3 – 5 325°F 26 to 30
POULTRY
Chicken, whole 3
1
⁄2– 5 350°F 13 to 15
Chicken, whole 6 – 8 350°F 15 to 17
Chicken, pieces 6 – 8 350°F 7 to 9
Turkey, prebasted 10 – 14 375°F 12 to 15
Turkey, prebasted 14 – 22 375°F 13 to 15
Turkey, fresh 10 – 14 350°F 15 to 17
MEAT WEIGHT (LBS.) TEMP. MIN./LB.
E6
E7
16915207ESM1.qxd 5/10/07 11:15 AM Page 7
Page 5

Roasted Vegetable Soup
2 small yellow squashes 1 pint whipping cream
2 lb. asparagus, tips and tender portion only
1
⁄4cup. oil
2 small red bell peppers, cut into 1" pieces 1 tsp. ground black pepper
2 can (14
1
⁄2-oz) chicken broth 2 tsp. minced fresh rosemary
1 lb. small whole, fresh mushrooms 2 tsp. salt
1 red onion, quartered
Combine oil, salt and pepper in a bowl. Add vegetables and stir well to coat. Add
vegetables to Cooking Pan. Roast at 450°F for 30 minutes, stirring every 10 minutes.
Reduce heat to 250°F. Add broth and cream. Stir well and cook until simmering.
Chicken Tetrazzini for a Crowd
16 oz. spaghetti, broken and cooked 2 cups chicken broth
according to package directions 1
1
⁄2cup chopped onion
10 cups cooked chicken, cut up 1 cup chopped red bell pepper
2 lb. grated American cheese 1 cup chopped green bell pepper
4 cans (10
1
⁄2oz. each) condensed 1 tsp. ground black pepper
cream of mushroom soup
Combine all ingredients in Cooking Pan. Place in Roaster Oven Body and cover. Bake
at 350°F for 30 minutes or until heated through.
Asian Spareribs
4 large cloves garlic, minced 2 tbs. sesame oil
1 tsp. five spice powder 2 tbs. minced fresh ginger
8 green onions, thinly sliced 1 tbs. chili puree
1
⁄2cup brown sugar 2 tsp. salt
8 tbs. hoisin sauce 6 to 8 lbs. pork spareribs,
cut to fit into pan
Combine first 8 ingredients to make marinade. Sprinkle ribs with salt and brush with
marinade. Place ribs in Cooking Pan. Roast at 350°F for 1
1
⁄2to 2 hours.
* Always preheat roaster prior to baking (Maximum 15 minutes)
Baked Potatoes
8 to 12 baking potatoes
Wash potatoes and pierce with a fork. Place rack in the pan. Stack potatoes on
Roasting Rack, making sure that they don’t touch the sides of Cooking Pan. Cover and
bake at 400°F for 1 hour.
Pot Roast with Vegetables
6 to 8 lbs. beef chuck roast 2 cups beef broth
2 cups baby carrots 1 tbs. salt
8 medium potatoes, peeled and quartered 1 tsp. ground black pepper
2 onion, quartered
Place roast in bottom of Cooking Pan. Place vegetables around sides of roast. Add
salt, pepper and broth. Cover; cook at 300°F 3 to 4 hours or until tender.
Hickory-smoked brisket
6 to 8 lb. beef brisket 1 tsp. onion powder
1
⁄2cup liquid smoke 1 tsp. celery salt
1 tsp. garlic salt
Place brisket on large piece of aluminum foil. Sprinkle generously with the liquid
smoke and seasonings. Wrap the brisket with the foil and crimp edges. Place in
Cooking Pan. Cover and cook at 250°F for 4 hours.
Lemon Garlic Roast Chicken
7 to 8 lb. chicken
1
⁄4cup lemon juice
4 cloves garlic, minced 2 tsp. salt
1
⁄2cup butter, softened 1 tsp. ground black pepper
Rinse chicken in cold water and pat dry with paper towels. Combine remaining
ingredients and rub over skin and between skin and meat of chicken. Place Roasting
Rack in Cooking Pan. Place chicken on Roasting Rack and cover. Bake at 350°F for 2
to 21⁄2hours or until chicken is done.
Beef Stew
4 lbs. beef stew meat
2
⁄3cup dry bread crumbs
6 potatoes, peeled and cubed
2
⁄3cup quick-cooking tapioca
2 stalks celery 2 tsp. salt
2 medium onion, cut into eighths 2 tsp. basil
4 cans (10
1
⁄2-oz. each) condensed
1
⁄2tsp. pepper
tomato soup 2 cups beef broth
2 cans (8 oz.) sliced mushrooms, undrained
Toss stew meat with bread crumbs, salt and pepper. Place beef in Cooking Pan and
add remaining ingredients; stir well. Cover and roast at 250°F for 4 to 5 hours or until
meat and vegetables are tender.
RECIPES RECIPES
E8
E9
16915207ESM1.qxd 5/10/07 11:15 AM Page 9
 Loading...