

Page 1
EASY INSTALLATION
Shut off power at fuse box or circuit breaker before installation.
1. Remove wall plate and existing single pole switch, if applicable.
2. Strip building wire to 3/8”.
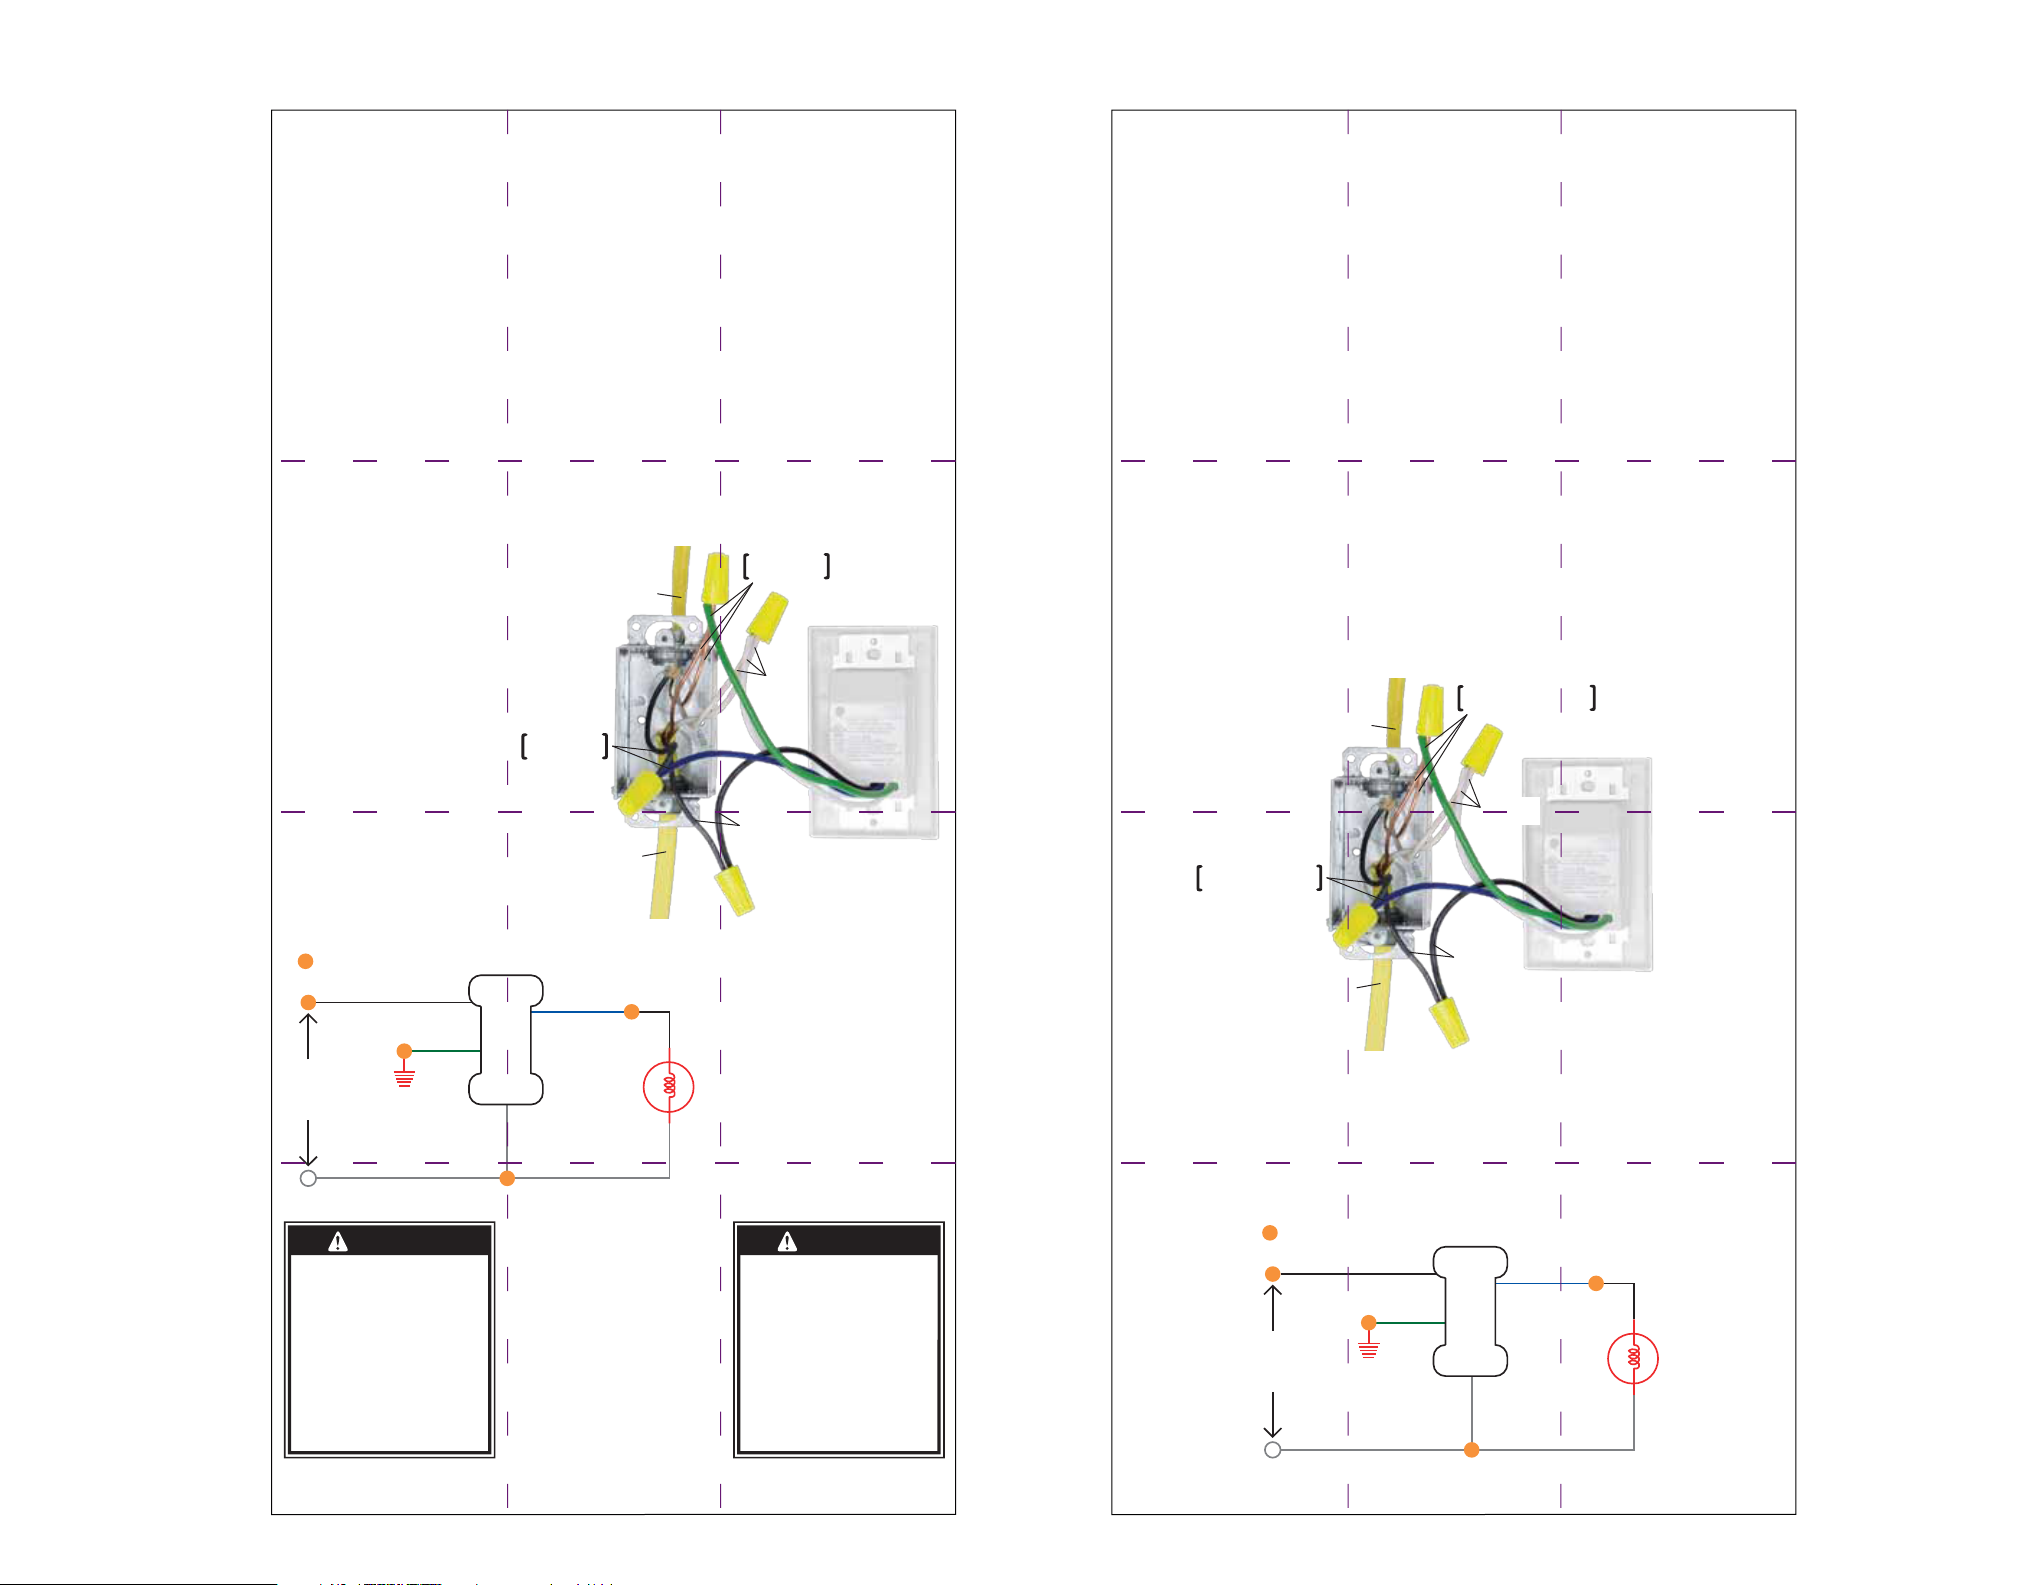
3. Connect wires using the provided twist-on connectors (Use with copper wire only). BLACK
lead to circuit’s (HOT) line conductor; BLUE lead to circuit’s Load conductor; WHITE lead to
circuits Neutral conductor. (Often the Neutral wire can be found pushed in the back of the
switch box, bound by a wire nut. If you are uncertain as to which wire is which or cannot
locate your neutral wire, please consult a certified electrician.) GREEN conductor to ground.
4. Mount the timer securely into the box using screws provided. Carefully snap the screwless
wall plate into place or you may use any Décora style wall plate with this timer.
5. Restore power at fuse box or circuit breaker.
OPERATION
1. For timed switching, simply press the 1 hr., 2 hr., 4 hr. or 8 hr.
pad on the face of the timer. Red LED indicator light
confirms switch will stay ON for selected time period.
2. For manual switching, simply press the on/off pad in the
center of the timer. Red LED indicator light confirms switch
is ON.
GROUND
TIMER-GREEN
WALL-BARE
LOAD
FÁCIL INSTALACIÓN
Antes de la instalación, corte el suministro de energía en la caja de fusibles o
cortacircuitos.
1. Retire la placa de pared y el interruptor unipolar, si existe.
2. Pele 3/8 pulg. del aislamiento del cable de construcción.
3. Conecte los cables utilizando los conectores de rosca (use con alambre de cobre
únicamente). El cable conductor NEGRO a la línea conductora (VIVA) del circuito. (A menudo
el cable neutro se encuentra contra la parte posterior de la caja del interruptor, unido a una
tuerca para cable. Si no está seguro de cuál cable es cuál o no puede localizar el cable
neutro, consulte a un electricista certificado). El conductor VERDE a tierra.
4. Monte el temporizador de forma segura en la caja utilizando los tornillos que se
suministran. Encaje en su lugar cuidadosamente la placa de pared que viene sin tornillos o
puede utilizar con este temporizador cualquier placa de pared estilo Décora.
5. Restablezca la energía en la caja de fusibles o disyuntor.
FUNCIONAMIENTO
1. Para realizar programaciones de tiempo programado, simplemente presione el botón de 10 min., 20
min., 30 min. ó 60 min. en la parte frontal del temporizador. El LED indicador rojo confirma que el
interruptor permanecerá encendido durante el período de tiempo seleccionado.
2. Para realizar programaciones de manera manual, simplemente presione el botón de
encendido/apagado en el centro del temporizador. El LED indicador rojo confirma que el interruptor
está encendido.
Typical Wiring Schematic
= Wiring Nut
Black
Green
120 VAC
Power
Source
Ground
White
WARNING
Risk of electric shock
•
Shut off power at fuse box or circuit
breaker before installation
•
Do not use in wet locations
•
Use indoors only
Risk of fire
•
Do not exceed electrical ratings
•
Use copper wire only with this device
Timer
White
LOAD
TIMER-BLUE
WALL-BLACK
Blue
LINE
White
Black
NEUTRAL
[WHITE]
LINE
[BLACK]
Light
ADVERTENCIA
Riesgo de choque eléctrico
• Corte la corriente antes de efectuar
una instalación
• No lo use en lugares húmedos
• Use solamente en interiores
Riesgo de incendio
• No exceda los límites eléctricos
permitidos
• Utilícelo con alambre de cobre
únicamente
15095
Manual Version 2
www.jascoproducts.com
11-24-2009
CARGA
CARGA
TEMPOIZADOR-AZUL
PARED-NEGRO
LÍNEA
Esquema de cableado típico
= Tuercas para cable (empalmes plásticos)
Negro
Fuente de
alimentación
120 VCA
Blanco
A tierra
Verde
A TIERRA
TEMPORIZADOR-VERDE
PARED-DESNUDO
NEUTRO
[NLANCO]
LÍNEA
[NEGRO]
Temporizador
Azul
Blanco
Black
Luz
Blanco
 Loading...