

Page 1

User Guide
Gateway Profile™ 5/5.5
Page 2

Page 3

Contents
1Getting Help. . . . . . . . . . . . . . . . . . . . . . . . . . . . . . . . . . . . . . . . . . . . . . . . . . . . . . . . . . . . 1
Gateway Web site . . . . . . . . . . . . . . . . . . . . . . . . . . . . . . . . . . . . . . . . . . . . . . . . . . . . . . . . . 3
Using eSupport . . . . . . . . . . . . . . . . . . . . . . . . . . . . . . . . . . . . . . . . . . . . . . . . . . . . . . . . 4
Help and Support . . . . . . . . . . . . . . . . . . . . . . . . . . . . . . . . . . . . . . . . . . . . . . . . . . . . . . . . . . 5
Searching for a topic . . . . . . . . . . . . . . . . . . . . . . . . . . . . . . . . . . . . . . . . . . . . . . . . . . . . 6
BigFix . . . . . . . . . . . . . . . . . . . . . . . . . . . . . . . . . . . . . . . . . . . . . . . . . . . . . . . . . . . . . . . . . . . 6
Using Your Computer guide . . . . . . . . . . . . . . . . . . . . . . . . . . . . . . . . . . . . . . . . . . . . . . . . . 7
Online help . . . . . . . . . . . . . . . . . . . . . . . . . . . . . . . . . . . . . . . . . . . . . . . . . . . . . . . . . . . . . . . 7
Gateway contact information . . . . . . . . . . . . . . . . . . . . . . . . . . . . . . . . . . . . . . . . . . . . . . . . . 8
2 Checking Out Your Gateway Computer . . . . . . . . . . . . . . . . . . . . . . . . . . . . . . . . 9
Front . . . . . . . . . . . . . . . . . . . . . . . . . . . . . . . . . . . . . . . . . . . . . . . . . . . . . . . . . . . . . . . . . . . 10
Back . . . . . . . . . . . . . . . . . . . . . . . . . . . . . . . . . . . . . . . . . . . . . . . . . . . . . . . . . . . . . . . . . . . 12
Right side . . . . . . . . . . . . . . . . . . . . . . . . . . . . . . . . . . . . . . . . . . . . . . . . . . . . . . . . . . . . . . . 14
Microsoft Certificate of Authenticity . . . . . . . . . . . . . . . . . . . . . . . . . . . . . . . . . . . . . . . . . . . 15
Finding your specifications . . . . . . . . . . . . . . . . . . . . . . . . . . . . . . . . . . . . . . . . . . . . . . . . . 15
Accessories . . . . . . . . . . . . . . . . . . . . . . . . . . . . . . . . . . . . . . . . . . . . . . . . . . . . . . . . . . . . . 16
3Getting Started. . . . . . . . . . . . . . . . . . . . . . . . . . . . . . . . . . . . . . . . . . . . . . . . . . . . . . . . 17
Working safely . . . . . . . . . . . . . . . . . . . . . . . . . . . . . . . . . . . . . . . . . . . . . . . . . . . . . . . . . . . 18
Reducing eye strain . . . . . . . . . . . . . . . . . . . . . . . . . . . . . . . . . . . . . . . . . . . . . . . . . . . . 18
Setting up your computer desk and chair . . . . . . . . . . . . . . . . . . . . . . . . . . . . . . . . . . . 18
Setting up your computer and computer accessories . . . . . . . . . . . . . . . . . . . . . . . . . 19
Sitting at your computer . . . . . . . . . . . . . . . . . . . . . . . . . . . . . . . . . . . . . . . . . . . . . . . . 19
Avoiding discomfort and injury from repetitive strain . . . . . . . . . . . . . . . . . . . . . . . . . . 19
Protecting from power source problems . . . . . . . . . . . . . . . . . . . . . . . . . . . . . . . . . . . . 20
Starting your computer . . . . . . . . . . . . . . . . . . . . . . . . . . . . . . . . . . . . . . . . . . . . . . . . . . . . 20
Waking up your computer . . . . . . . . . . . . . . . . . . . . . . . . . . . . . . . . . . . . . . . . . . . . . . . 21
Turning off your computer . . . . . . . . . . . . . . . . . . . . . . . . . . . . . . . . . . . . . . . . . . . . . . . . . . 22
Restarting (rebooting) your computer . . . . . . . . . . . . . . . . . . . . . . . . . . . . . . . . . . . . . . . . . 23
Using the cord cover . . . . . . . . . . . . . . . . . . . . . . . . . . . . . . . . . . . . . . . . . . . . . . . . . . . . . . 24
Locking your computer . . . . . . . . . . . . . . . . . . . . . . . . . . . . . . . . . . . . . . . . . . . . . . . . . . . . 25
Adjusting the volume . . . . . . . . . . . . . . . . . . . . . . . . . . . . . . . . . . . . . . . . . . . . . . . . . . . . . . 26
Using the keyboard . . . . . . . . . . . . . . . . . . . . . . . . . . . . . . . . . . . . . . . . . . . . . . . . . . . . . . . 27
Standard keyboard . . . . . . . . . . . . . . . . . . . . . . . . . . . . . . . . . . . . . . . . . . . . . . . . . . . . 27
Multifunction keyboard . . . . . . . . . . . . . . . . . . . . . . . . . . . . . . . . . . . . . . . . . . . . . . . . . . 28
Wireless keyboard . . . . . . . . . . . . . . . . . . . . . . . . . . . . . . . . . . . . . . . . . . . . . . . . . . . . . 30
Using the mouse . . . . . . . . . . . . . . . . . . . . . . . . . . . . . . . . . . . . . . . . . . . . . . . . . . . . . . . . . 31
Connecting the modem . . . . . . . . . . . . . . . . . . . . . . . . . . . . . . . . . . . . . . . . . . . . . . . . . . . . 33
Connecting to a wired Ethernet network . . . . . . . . . . . . . . . . . . . . . . . . . . . . . . . . . . . . . . . 33
Computer display . . . . . . . . . . . . . . . . . . . . . . . . . . . . . . . . . . . . . . . . . . . . . . . . . . . . . . . . . 34
External controls . . . . . . . . . . . . . . . . . . . . . . . . . . . . . . . . . . . . . . . . . . . . . . . . . . . . . . 34
www.gateway.com
i
Page 4

OSD options . . . . . . . . . . . . . . . . . . . . . . . . . . . . . . . . . . . . . . . . . . . . . . . . . . . . . . . . . . 35
Installing a printer, scanner, or other peripheral device . . . . . . . . . . . . . . . . . . . . . . . . . . . 38
4 Using Drives and Ports. . . . . . . . . . . . . . . . . . . . . . . . . . . . . . . . . . . . . . . . . . . . . . . . 39
Using the diskette drive . . . . . . . . . . . . . . . . . . . . . . . . . . . . . . . . . . . . . . . . . . . . . . . . . . . . 40
Using the memory card reader . . . . . . . . . . . . . . . . . . . . . . . . . . . . . . . . . . . . . . . . . . . . . . 41
Memory card types . . . . . . . . . . . . . . . . . . . . . . . . . . . . . . . . . . . . . . . . . . . . . . . . . . . . 41
Inserting a memory card . . . . . . . . . . . . . . . . . . . . . . . . . . . . . . . . . . . . . . . . . . . . . . . . 42
Using the CD or DVD drive . . . . . . . . . . . . . . . . . . . . . . . . . . . . . . . . . . . . . . . . . . . . . . . . . 43
Identifying drive types . . . . . . . . . . . . . . . . . . . . . . . . . . . . . . . . . . . . . . . . . . . . . . . . . . 43
Inserting a CD or DVD . . . . . . . . . . . . . . . . . . . . . . . . . . . . . . . . . . . . . . . . . . . . . . . . . . 44
Playing a CD . . . . . . . . . . . . . . . . . . . . . . . . . . . . . . . . . . . . . . . . . . . . . . . . . . . . . . . . . 46
Playing a DVD . . . . . . . . . . . . . . . . . . . . . . . . . . . . . . . . . . . . . . . . . . . . . . . . . . . . . . . . 46
Creating CDs and DVDs . . . . . . . . . . . . . . . . . . . . . . . . . . . . . . . . . . . . . . . . . . . . . . . . 46
5 Maintaining Your Computer . . . . . . . . . . . . . . . . . . . . . . . . . . . . . . . . . . . . . . . . . . . 47
Caring for your computer . . . . . . . . . . . . . . . . . . . . . . . . . . . . . . . . . . . . . . . . . . . . . . . . . . . 48
Updating Windows . . . . . . . . . . . . . . . . . . . . . . . . . . . . . . . . . . . . . . . . . . . . . . . . . . . . . . . . 48
Protecting your computer from viruses . . . . . . . . . . . . . . . . . . . . . . . . . . . . . . . . . . . . . . . . 49
Cleaning your computer . . . . . . . . . . . . . . . . . . . . . . . . . . . . . . . . . . . . . . . . . . . . . . . . . . . . 51
Cleaning the exterior . . . . . . . . . . . . . . . . . . . . . . . . . . . . . . . . . . . . . . . . . . . . . . . . . . . 51
Cleaning the keyboard . . . . . . . . . . . . . . . . . . . . . . . . . . . . . . . . . . . . . . . . . . . . . . . . . . 52
Cleaning the computer display . . . . . . . . . . . . . . . . . . . . . . . . . . . . . . . . . . . . . . . . . . . 52
Cleaning the mouse . . . . . . . . . . . . . . . . . . . . . . . . . . . . . . . . . . . . . . . . . . . . . . . . . . . . 52
Cleaning CDs or DVDs . . . . . . . . . . . . . . . . . . . . . . . . . . . . . . . . . . . . . . . . . . . . . . . . . 54
Restoring your system . . . . . . . . . . . . . . . . . . . . . . . . . . . . . . . . . . . . . . . . . . . . . . . . . . . . . 54
Preventing static electricity discharge . . . . . . . . . . . . . . . . . . . . . . . . . . . . . . . . . . . . . . . . . 55
Opening the case . . . . . . . . . . . . . . . . . . . . . . . . . . . . . . . . . . . . . . . . . . . . . . . . . . . . . . . . . 56
Closing the case . . . . . . . . . . . . . . . . . . . . . . . . . . . . . . . . . . . . . . . . . . . . . . . . . . . . . . . . . . 57
Replacing the hard drive . . . . . . . . . . . . . . . . . . . . . . . . . . . . . . . . . . . . . . . . . . . . . . . . . . . 58
Installing memory . . . . . . . . . . . . . . . . . . . . . . . . . . . . . . . . . . . . . . . . . . . . . . . . . . . . . . . . . 62
Adding and removing PC Cards . . . . . . . . . . . . . . . . . . . . . . . . . . . . . . . . . . . . . . . . . . . . . 64
Adding a PC Card . . . . . . . . . . . . . . . . . . . . . . . . . . . . . . . . . . . . . . . . . . . . . . . . . . . . . 64
Removing a PC Card . . . . . . . . . . . . . . . . . . . . . . . . . . . . . . . . . . . . . . . . . . . . . . . . . . . 65
6 Troubleshooting. . . . . . . . . . . . . . . . . . . . . . . . . . . . . . . . . . . . . . . . . . . . . . . . . . . . . . . 67
Safety guidelines . . . . . . . . . . . . . . . . . . . . . . . . . . . . . . . . . . . . . . . . . . . . . . . . . . . . . . . . . 68
First steps . . . . . . . . . . . . . . . . . . . . . . . . . . . . . . . . . . . . . . . . . . . . . . . . . . . . . . . . . . . . . . . 68
Troubleshooting . . . . . . . . . . . . . . . . . . . . . . . . . . . . . . . . . . . . . . . . . . . . . . . . . . . . . . . . . . 69
Audio . . . . . . . . . . . . . . . . . . . . . . . . . . . . . . . . . . . . . . . . . . . . . . . . . . . . . . . . . . . . . . . 69
Battery . . . . . . . . . . . . . . . . . . . . . . . . . . . . . . . . . . . . . . . . . . . . . . . . . . . . . . . . . . . . . . 69
CD or DVD drives . . . . . . . . . . . . . . . . . . . . . . . . . . . . . . . . . . . . . . . . . . . . . . . . . . . . . 69
Computer . . . . . . . . . . . . . . . . . . . . . . . . . . . . . . . . . . . . . . . . . . . . . . . . . . . . . . . . . . . . 70
Diskette drive . . . . . . . . . . . . . . . . . . . . . . . . . . . . . . . . . . . . . . . . . . . . . . . . . . . . . . . . . 70
Display . . . . . . . . . . . . . . . . . . . . . . . . . . . . . . . . . . . . . . . . . . . . . . . . . . . . . . . . . . . . . . 71
ii
www.gateway.com
Page 5

DVD drives . . . . . . . . . . . . . . . . . . . . . . . . . . . . . . . . . . . . . . . . . . . . . . . . . . . . . . . . . . 72
File management . . . . . . . . . . . . . . . . . . . . . . . . . . . . . . . . . . . . . . . . . . . . . . . . . . . . . . 73
Hard drive . . . . . . . . . . . . . . . . . . . . . . . . . . . . . . . . . . . . . . . . . . . . . . . . . . . . . . . . . . . 73
Internet . . . . . . . . . . . . . . . . . . . . . . . . . . . . . . . . . . . . . . . . . . . . . . . . . . . . . . . . . . . . . . 74
Keyboard . . . . . . . . . . . . . . . . . . . . . . . . . . . . . . . . . . . . . . . . . . . . . . . . . . . . . . . . . . . . 75
Memory . . . . . . . . . . . . . . . . . . . . . . . . . . . . . . . . . . . . . . . . . . . . . . . . . . . . . . . . . . . . . 76
Memory card reader . . . . . . . . . . . . . . . . . . . . . . . . . . . . . . . . . . . . . . . . . . . . . . . . . . . 76
Modem (dial-up) . . . . . . . . . . . . . . . . . . . . . . . . . . . . . . . . . . . . . . . . . . . . . . . . . . . . . . 76
Mouse . . . . . . . . . . . . . . . . . . . . . . . . . . . . . . . . . . . . . . . . . . . . . . . . . . . . . . . . . . . . . . 79
Networks . . . . . . . . . . . . . . . . . . . . . . . . . . . . . . . . . . . . . . . . . . . . . . . . . . . . . . . . . . . . 80
Passwords . . . . . . . . . . . . . . . . . . . . . . . . . . . . . . . . . . . . . . . . . . . . . . . . . . . . . . . . . . . 80
Power . . . . . . . . . . . . . . . . . . . . . . . . . . . . . . . . . . . . . . . . . . . . . . . . . . . . . . . . . . . . . . . 80
Printer . . . . . . . . . . . . . . . . . . . . . . . . . . . . . . . . . . . . . . . . . . . . . . . . . . . . . . . . . . . . . . 81
Sound . . . . . . . . . . . . . . . . . . . . . . . . . . . . . . . . . . . . . . . . . . . . . . . . . . . . . . . . . . . . . . 82
Telephone support . . . . . . . . . . . . . . . . . . . . . . . . . . . . . . . . . . . . . . . . . . . . . . . . . . . . . . . . 83
Before calling Gateway Customer Care . . . . . . . . . . . . . . . . . . . . . . . . . . . . . . . . . . . . 83
Telephone numbers . . . . . . . . . . . . . . . . . . . . . . . . . . . . . . . . . . . . . . . . . . . . . . . . . . . . 84
Self-help . . . . . . . . . . . . . . . . . . . . . . . . . . . . . . . . . . . . . . . . . . . . . . . . . . . . . . . . . . . . . 85
Tutoring . . . . . . . . . . . . . . . . . . . . . . . . . . . . . . . . . . . . . . . . . . . . . . . . . . . . . . . . . . . . . 85
Training . . . . . . . . . . . . . . . . . . . . . . . . . . . . . . . . . . . . . . . . . . . . . . . . . . . . . . . . . . . . . 85
7 Networking Your Computer . . . . . . . . . . . . . . . . . . . . . . . . . . . . . . . . . . . . . . . . . . . 87
Introduction to networking . . . . . . . . . . . . . . . . . . . . . . . . . . . . . . . . . . . . . . . . . . . . . . . . . . 88
Using a network . . . . . . . . . . . . . . . . . . . . . . . . . . . . . . . . . . . . . . . . . . . . . . . . . . . . . . . 88
Selecting a network connection . . . . . . . . . . . . . . . . . . . . . . . . . . . . . . . . . . . . . . . . . . 89
Creating an Ethernet network . . . . . . . . . . . . . . . . . . . . . . . . . . . . . . . . . . . . . . . . . . . . . . . 96
Installing Ethernet cards and drivers . . . . . . . . . . . . . . . . . . . . . . . . . . . . . . . . . . . . . . 96
Making sure your broadband connection works . . . . . . . . . . . . . . . . . . . . . . . . . . . . . . 97
Naming the computers and the workgroup . . . . . . . . . . . . . . . . . . . . . . . . . . . . . . . . . . 97
Configuring the TCP/IP protocol . . . . . . . . . . . . . . . . . . . . . . . . . . . . . . . . . . . . . . . . . . 98
Setting up a wireless Ethernet network . . . . . . . . . . . . . . . . . . . . . . . . . . . . . . . . . . . 101
Setting up a wired Ethernet network . . . . . . . . . . . . . . . . . . . . . . . . . . . . . . . . . . . . . . 108
Configuring your router . . . . . . . . . . . . . . . . . . . . . . . . . . . . . . . . . . . . . . . . . . . . . . . . 110
Testing your network . . . . . . . . . . . . . . . . . . . . . . . . . . . . . . . . . . . . . . . . . . . . . . . . . . . . . 111
Sharing your resources . . . . . . . . . . . . . . . . . . . . . . . . . . . . . . . . . . . . . . . . . . . . . . . . . . . 112
Sharing an Internet connection . . . . . . . . . . . . . . . . . . . . . . . . . . . . . . . . . . . . . . . . . . 112
Sharing drives and printers . . . . . . . . . . . . . . . . . . . . . . . . . . . . . . . . . . . . . . . . . . . . . 115
Using the network . . . . . . . . . . . . . . . . . . . . . . . . . . . . . . . . . . . . . . . . . . . . . . . . . . . . 117
Connecting to hotspots . . . . . . . . . . . . . . . . . . . . . . . . . . . . . . . . . . . . . . . . . . . . . . . . 120
Troubleshooting Your Ethernet network . . . . . . . . . . . . . . . . . . . . . . . . . . . . . . . . . . . . . . 121
Wired Ethernet network . . . . . . . . . . . . . . . . . . . . . . . . . . . . . . . . . . . . . . . . . . . . . . . . 121
Wireless Ethernet network . . . . . . . . . . . . . . . . . . . . . . . . . . . . . . . . . . . . . . . . . . . . . 122
www.gateway.com
iii
Page 6

A Safety, Regulatory, and Legal Information . . . . . . . . . . . . . . . . . . . . . . . . . . . 125
B Specifications . . . . . . . . . . . . . . . . . . . . . . . . . . . . . . . . . . . . . . . . . . . . . . . . . . . . . . . . 131
Index . . . . . . . . . . . . . . . . . . . . . . . . . . . . . . . . . . . . . . . . . . . . . . . . . . . . . . . . . . . . . . . . . . . . 137
iv
www.gateway.com
Page 7

Chapter 1
Getting Help
■ Using the Gateway W eb site
■ Using Help and Support
■ Using BigFix
■ Using Y our Computer guide
■ Using Do More With Ga teway
■ Using online help
■ Contacting Gateway
1
Page 8

Thank y ou for purchasing our computer!
You have made an excellent decision choosing Gateway. We are sure that you will be
pleased with the outstanding quality, reliability, and performance of your new computer.
Each and every Gateway computer uses the latest technology and passes through the most
stringent quality control tests to ensure that you are provided with the best product
possible.
Please read this manual carefully to familiarize yourself with our range of services and
support. We have highlighted some basic care and safety information to help you keep
your computer in good operating condition.
Gateway stands behind our value proposition to our custom ers — to provide best-of-cla ss
service and support in addition to high-quality, brand-name components at affordable
prices. If you ever have a problem, our knowledgeable, dedicated customer ser vice
department will provide you with fast, considerate service.
We sincerely hope that you will receive the utmost satisfaction and enjoyment from your
new Gateway computer for years to come.
Thanks again, from all of us at Gateway.
2
www.gateway.com
Page 9

Gatewa y W eb site
Gateway's online support is available 24 hours per day, 7 days per week and provides the
most current drivers, product specifications, tutorial s, and personalized information a bout
your computer. Visit the Gateway eSupport Web site at support.gateway.com
.
www.gateway.com
3
Page 10

Using eSupport
The eSupport site is divided into six major areas:
■ Support Home
■ Product Support
■ Downloads
■ Contact Us
■ Account Info
■ PC Tools
Each of these areas is represented by a menu across the top of the Web page.
Support Home
Click Suppor t Home, then click All Support Documents to access product documentation,
specifications, and guides. You can also browse through the reference area to locate an
article specific to the question you have.
Click
Support Home, then click General Tutorials to access an extensive library of how-to
articles and videos on top ics, such as making au dio CDs and installing a hard drive.
Product Support
Click Product Support to view a list of all the products that Gateway supports.
Downloads
Click Downloads, then click My Downloads to get the latest software updates for BIOS and
driver upgrades. By entering your serial number you get drivers specific to your computer.
Click
All Downloads to walk through a step-by-step wizard to locate your drivers.
Contact Us
Click Contact Us to access links to technical support with a live technician, including chat
and e-mail. Click
support. For more information, see “Telephone support” on page 83.
Call Us to get a list of Gateway telephone numbers for both sales and
Account Info
Click Account Info to access support for non-technical issues, such as the status of your
order or changing your accoun t address.
PC T ools
Click PC Tools to access utilities to help you manage your computer.
4
www.gateway.com
Page 11

Help and Support
Your computer includes Help and Support, an easily accessible collection of help
information, troubleshooters, and automated support. Use Help and Support to answer
questions about Windows and to help you quickly discover and use the many features of
your Gateway computer.
To start Help and Support:
■ Click Start, then click Help and Support. Help and Support op ens.
You can find help information by clicking a link, performing a search, or browsing the
index.
www.gateway.com
5
Page 12

Searching for a topic
To search for a topic in He lp an d Supp ort, ty pe a word or phra se ( keywor d) in th e Search
box located at the top of any Help and Support screen, then click the arrow button.
For each search, you receive the following search result types:
■ Suggested Topics - These topics are located in Help and S upport and are releva nt to
your search topic.
■ Full-text Search Matches - These topics are located in Help and Support and contain
the words you entered in the
■ Microsoft Knowledge Base - These topics are located on the Microsoft Web site and
contain the words you entered in the
Internet to search for and acces s these topics.
To view a list of your search results, click the results header for the type of results you
want to view.
Search box.
Search box. You must be connected to the
To view a topic, clic k the top ic name in the
Search Result s list.
BigFix
BigFix monitors your computer for problems and conflicts. It automatically gathers
information about the latest bugs, security alerts, and updates from BigFix sites on the
Internet. Whenever BigFix detects a problem, it alerts you by flashing the blue taskbar icon.
To fix the problem, click on that icon to open BigFix.
To start BigFix:
■ Click Start, All Programs, Accessories, System Tools, then click BigFix.
To learn more about using BigFix:
■ From the BigFix program, click Help, then click Tutorial.
6
www.gateway.com
Page 13
Using Your Computer guide
In addition to this guide, the Using Your Computer guide has been included on your hard
drive. This guide includes information on using Windows, using the Internet, sending a
fax, and changing power-saving settings as well as other topics.
To access the Using Your Computer guide:
■ Click Start, All Programs, then click Gateway Documentation.
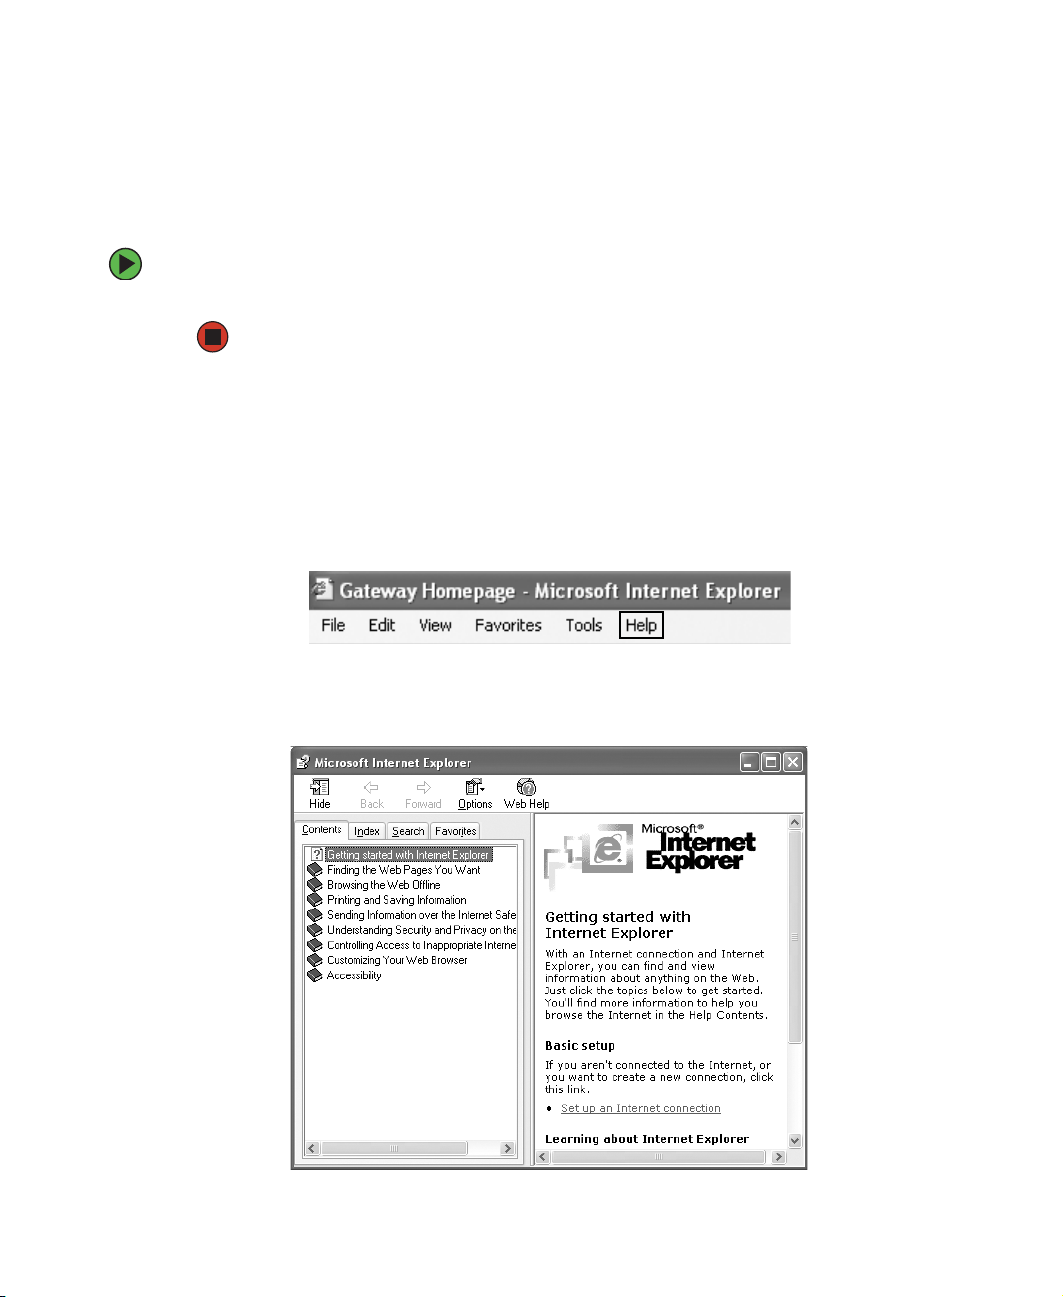
Online help
Many programs provide information online so you can research a topic or learn ho w to
perform a task while you are using the program. You can access most online help
information by selecting a topic from a
Help menu or by clicking a Help button.
Y ou can search fo r information by viewing the help contents, c hecking the index, searchi ng
for a topic or keyword, or browsing through the online help.
www.gateway.com
7
Page 14

Gateway c ontact information
To help you locate Gateway contact information, you can find the Gateway Web site,
Online Support, and technical support contact information on the label located on your
computer case.
8
www.gateway.com
Page 15

Chapter 2
Checking Out Your
Gateway Computer
■ Identifying features
■ Locating your compu ter model and serial
number
■ Locating the Microsoft Certificate of
Authenticity
■ Locating the specifications for your
computer
■ Purchasing accessories
9
Page 16

Front
Display
controls
Speaker
Headphone
jack
Microphone
jack
Memory card
reader or
diskette drive
Volume control
buttons
Speaker
Power buttonCD/DVD/
Recordable
drive
10
www.gateway.com
Page 17

Component Icon Description
Speakers Provide stereo audio output when headphones or amplified
speakers are not plugged in.
Headphone jack Plug headphones into this jack.
Microphone jack Plug a microphone into this jack to record sound.
Vo l ume co n t ro l
buttons
Diskette drive or
memory car d reader
CD/D VD/Recordable
drive
Power button Press this button to turn the power on or off. You can also
Press these buttons to adjust speaker volume.
Diskette dri ve: Use this d rive to stor e smaller files on
diskettes. For more information, see “Using the diskette drive”
on page 40.
Memory card reader: Use this to read from and write to
memory cards. For more information, see “Using the memory
card reader” on page 41.
Use this drive to listen to audio CDs, install games and
programs , w atc h DVDs, and store large files onto rec orda ble
CDs or DVDs. For more information, see “Using the CD or
DVD drive” on page 43 and “Creating CDs and DVDs” on
page 46.
This drive may be a CD, recordable CD, DVD, or
recordable DVD driv e. To identify your driv e type and f or more
information about your drive, see “Identifying drive types” on
page 43.
configure the power button to operate in Standby/Resume
mode or Hibernate mode. For more information on changing
the power button setting, see “Changing Power-Saving
Settings” in
on your hard drive. To access this guide, click Start,
All Programs, then click Gateway Documentati on.
Using Your Computer
which has been included
Display controls Use these controls to enter the OSD (on-screen display) and
adjust the computer display settings. For more information
about the comput er displa y and OSD , se e “Computer display”
on page 34.
www.gateway.com
11
Page 18

Back
Monitor out port
(optional)
Modem jack
(optional)
USB ports
Ethernet
jack
Audio
line out
jack
PS/2
mouse port
Audio
line in
jack
Microphone
jack
PS/2
keyboard
port
Parallel
port
Serial
port
KB/Mouse
Connect button
(optional)
Monitor
in port
Power
connector
12
www.gateway.com
Page 19

Component Icon Description
Monitor (VGA) out
Plug an additional monitor into this port.
port (optional)
Ethernet jack Plug a 10/100 Ethernet network cable or a device (such as a
DSL or cable mo dem fo r a broadband Int ernet connection) in to
this jack. For more information, see “Connecting to a wired
Ethernet network” on page 33.
Audio line in jack Plug an ex ternal audio inp ut source (such as a stereo) in to this
jack so you can record sound on your computer.
PS/2 mouse p or t Plug a Personal Sys tem/2
®
(PS/2) mous e into th is por t.
Parallel port Plug a parallel device (such as a printer) into this port. For more
information, see “Installing a printer, scanner, or other
peripheral device” on page 38.
KB/Mouse Connect
button (optional)
Modem jack
(optional)
Establishes communication between your wireless keyboard,
wireless mouse , and y our computer . F or more information , see
Wireless keyboard setup guid e
the
.
Plug a modem cable into this jack. For more information, see
“Connecting the modem” on page 33.
USB ports Plug USB (Universal Serial Bus) devices (such as a USB
Iomega™ Zip™ drive, printer, scanner, camera, keyboard, or
mouse) into th ese po rts. For more infor matio n, se e “Installing
a printer, scanner, or other peripheral device” on page 38.
Audio line out jack Plug an external audio output source (such as external
speakers) into this jack.
Microphone jack Plug a microphone into this jack to record sound.
®
PS/2 keyboard port Plug a Personal System/2
(PS/2) keyboard into this port.
Serial port Plug a serial device (such as a digital camera) into this port.
For more inf ormation, see “Installing a printer , scanner , or other
peripheral device” on page 38.
Monitor (VGA) in
Plug an external video source into this port.
port
Power connector Plug the power cable into this connector.
www.gateway.com
13
Page 20

Right side
PC Card slot
IEEE 1394 port
(4-pin)
IEEE 1394 port
(6-pin)
USB ports
14
Component Icon Description
PC Card slot Insert a Type I or TypeII PC Card into this slot. For more
information, see “Adding a nd re moving PC Cards” on pag e 64.
IEEE 1394 ports Plug IEEE 1394 (also known as Firewire
(such as a digital video camera) into these 4-pin and 6-pin
IEEE 1394 ports. For m ore information, se e “Installing a p rinter,
scanner, or other peripheral device” on page 38.
USB ports Plug USB (Universal Serial Bus) devices (such as a USB
Iomega™ Zip™ drive, printer, scanner, camera, keyboard, or
mouse) into these ports. For more information, see “Installing
a printer, scanner, or other peripheral device” on page 38.
www.gateway.com
®
or i.Link®) devices
Page 21

Microsoft Certificate of A uthenticity
The Microsoft Certificate of Authenticity label found on the back or side of your computer
includes the product key code for your operating system.
Finding y our specifications
For more information abo ut your computer, such as memory size, memory type, and hard
drive size, see visit Gateway’s eSupport page at support.gateway.com
has links to additional Gateway documentation and detailed specifications. For more
information, see “Using eSu pport” on page 4.
. The eSupport page also
www.gateway.com
15
Page 22

Accessories
To order accessories, visit the Accessory Store at accessories.gateway .com.
Memory
Large programs, such as multimedia games or graphics programs, use a lot of memory. If
your programs are running more slowly than you think they should, try adding more
memory.
Printers
You can attach almost any type of printer to your computer. The most common types are
inkjet and laser printers, which print in color or black and white. See “Installing a printer,
scanner, or other peripheral device” on page 38 for more information about attaching a
printer.
Inkjet printers and cartridges are relatively inexpensive, but they are slower than laser
printers. Using an inkjet color prin ter, you can print pictures, banners, and greeting cards,
as well as documents.
Laser printers and cartridges are more expensive, but they print much faster than inkjet
printers. Laser printers are better than inkjet printers when you are printing large
documents.
USB flash drive
Use a USB flash drive for storing files or transferring files to another computer.
Uninterruptible power supplies
A standby, uninterruptible power supply (UPS) protects your computer from data loss
during a total power failure. A UPS uses a battery to keep your computer running
temporarily during a power failure so you can save your work and shut down your
computer correctly. A UPS may also provide protection from power surges.
16
www.gateway.com
Page 23

Chapter 3
Getting Started
■ Using your computer safely
■ Protecting your computer from power
source problems
■ T urning your computer on and off
■ Adjusting the volume
■ Using the keyboard and the mouse
■ Using the computer display
■ Installing peripheral devices
17
Page 24

W orking safely
Before using your computer , read the following recommendations for setting up a safe and
comfortable work area and avoiding discomfor t and strain.
Top of screen is not
higher than eye level
Screen is
perpen dicular to
Hands and
arms ar e
parallel to
the floor
Feet are flat on the floor
your line of sight
Reducing eye strain
Sunlight or bright indoor lighting should not reflect on the display or shine directly into
your eyes.
■ Position the computer desk and display so you can avoid glare on your screen and
light shining directly into your eyes. Reduce glare by installing shades or curtains on
windows, and by installing a glare screen filter on your display.
■ Use soft, indirect lighting in yo ur work area. Do not use your computer in a dark ro om.
■ Avoid focusing your eyes on your computer screen for long periods of time. Look away
from your computer occasionally, and try to focus on distant objects.
Setting up your computer desk and chair
When you are setting up your computer desk and chair, make sure that the desk is the
appropriate height and the chair helps you maintain good posture.
■ Select a flat surface for your computer desk.
18
www.gateway.com
Page 25

■ Adjust the height of the computer desk so your hands and arms are positioned parallel
to the floor when you use the keyboard and mouse. If the desk is not adjustable or
is too tall, consider using a keyboard drawer.
■ Use an adjustable chair that is comfortable, distributes your weight evenly , and keeps
your body relaxed.
■ Position your chair so the keyboard is at or slightly below the level of your elbow.
This position lets your shoulders relax while you type.
■ Adjust the chair height, adjust the forward tilt of the s eat, or use a footrest to distribute
your weight evenly on the chair and relieve pressure on the back of your thighs.
■ Adjust the back of the chair so it supports the lower curve of your spine. You can use
a pillow or cushion to provide extra back support.
Setting up your computer and computer accessories
■ Set up the computer so the top of the display is no higher than eye level, the controls
are within reach, and the screen is tilted to be perpendicular to your line of sight.
■ Place your keyboard and mouse at a comfortable distance. You should be able to reach
them without stretching.
■ Set paper holders at the same height and distance as the display.
Sitting at your computer
■ Avoid bending, arching, or angling your wrists. Make sure that they are in a relaxed
position when you type.
■ Do not slouch forward or lean far back. Sit with your back straight so your knees,
hips, and elbows form right angles when you work.
■ Take breaks to stand and stretch your legs.
■ Avoid twisting your torso or neck.
A voiding discomfort and injury from repetitive strain
■ Vary your acti vities to a void exces sive repe tition.
■ Take breaks to change your position, stretch your muscles, and relieve your eyes.
■ Find ways to break up the work day, and schedule a variety of tasks.
www.gateway.com
19
Page 26

Protecting from pow er source pr oblems
During a power surge, the voltage level of electricity coming into your computer can
increase to far above normal levels and cause data loss or system damage. Protect yo ur
computer and peripheral devices by connecting them to a surge protector, which absorbs
voltage surges and prevents them from reaching your computer.
Warning High voltages can enter your computer through both the power cord
and the modem connection. Protect your computer by using a surge
protector . If you ha v e a telep hone mod em, us e a su rge prot ector th at
has a modem jac k. If y ou ha ve a c able modem, u se a surge pro tector
that has an antenn a/cable TV jac k. During an electrical sto rm, unplug
both the surge protector and the modem.
An uninterruptible power su pply (UPS) supplies battery power to your computer during a
power failure. Although you cannot run your computer for an extended period of time
with a UPS, a UPS lets you run your computer long enough to save your work and shut
down your computer normally.
Starting your computer
To start your computer:
1 Connect the cables to your computer. See the setup poster for more information.
2 Press the power button.
Power button
20
www.gateway.com
Page 27

3 If you are starting your computer for the first time, follow the on-screen instructions
to set up your computer.
Important Your computer has a built-in variable speed fan. In addition, your
computer uses a powerful processor which produces heat. Both the
system fan and processor can run at different speeds at times to
ensure proper syst em co oli ng. You may notice an in crease in the f an
noise when the fan is running at high speed and a decrease in the
fan noise when it switches to normal speed.
4 Turn on any peripheral devices, such as printers or scanners, an d see the
documentation that came with the device for setup instructions.
W aking up your c omputer
When you have not used your computer for several minutes or have not turned off your
computer, it may enter a power-saving mode called Standby. While in Standby, the power
indicator flashes.
If your computer is in Standby mode, move the mouse or press the power butt on to “wake”
it up.
Tips & Tricks For more information about changing the power button mode, see
“Changing Po wer-Saving Setting s” in
been included on your hard drive. To access this guide, click Start,
All Programs, then click Gateway Documentation.
www.gateway.com
Using Y o ur Computer
which has
21
Page 28

T urning off your c omputer
Warning When you turn off your computer, certain components in the power
supply and system board remain energized. In order to remove all
electrical power from your computer, unplug the power cord and
modem cable from the w all outlets. We recommend disconnecting the
power cord and modem cable when your computer will not be used
for long periods.
For more information about changing the power button mode, see
“Changing Po wer-Saving Setting s” in
been included on your hard drive. To access this guide, click Start,
All Programs, then click Gateway Documentation.
Using Y o ur Computer
To turn off your computer:
1 Click Start, then click Turn Off Computer. The Tu r n Of f C o mp u t e r dialog box open s.
2 Click Tur n O ff. Windows shuts down and turns off your computer.
Important If for some reason you cannot use the Tur n Off Computer option in
Windows to turn off your computer, press and hold the power button
for about five seconds, then release it.
which has
22
www.gateway.com
Page 29

Restarting (rebooting) your co mputer
If your computer does not respond to keyboard or mouse input, you may have to close
programs that are not responding. If closing unresponsive programs does not restore your
computer to normal operation, you may have to restart (reboot) your computer.
To close unresponsive programs and restart your computer:
1 Press CTRL+ALT+DEL. The Task Manager window opens.
2 Click the Applications tab, then click the program that is not responding.
3 Click End Task.
4 Click X in the top-right corner of the Windows Task Manager dialog box.
5 If your computer does not respond, turn it off, wait ten seconds, then turn it on again.
Important If your computer does not turn off, press and hold the power button
for about five seconds, then release it.
As a part of the regular startup process, a program to check the disk status runs
automatically. When the checks are finished, Windows starts.
www.gateway.com
23
Page 30

Using the cord cover
After you have the power and peripheral device cords connected to your computer, you
can install the optional cord cover to make your computer look less cluttered.
To install the optional cord cover:
■ Align the tabs on the top of the cover with the sl ot s above the bac k ports, then swing
the cord cover’ s bottom tabs into the slots on the botto m of the computer (view shown
from below for clarity).
Tips & Tricks If you hav e d ifficu lty s liding the c over’s bo ttom ta bs in to the c ompu ter
slots, press the bottom corners of the cord cover inward while
pressing the cord cover into place.
To remove the cord cover:
■ Press the cord cover’s bottom tabs inward, then rotate the cord cover away from the
computer.
24
www.gateway.com
Page 31

Locking your computer
You can install a Kensington™ cable lock to prevent the theft of your computer or its
internal components. While the cable lock is installed, the computer’s back panel cannot
be removed.
To lock your computer:
■ Install a cable lock into the Kensington lock slot on the back of your computer.
Kensington
lock slot
www.gateway.com
25
Page 32

Adjusting the v olume
You can use the volume controls to adjust the overall volume and the volume of specific
sound devices in your computer.
To adjust the overall volume level using hardware controls:
■ If you are using external speakers, turn the knob on the front of the speakers.
-ORUse the mute and volume control buttons on the keyboard. For more information,
see “Using the keyboard” on page 27.
Tips & Tricks For instructi ons on how to adjust the volume in Wind ows, see
“Adjusting the Volume” in
included on your hard drive. To access this guide, click Start,
All Programs, then click Gateway Documentation.
Using Your Co mputer
which has been
26
www.gateway.com
Page 33

Using the keyboard
Standard keyboard
This keyboard is the basic model of keyboard available with your computer. Your
keyboard’s appearance may vary.
Function keys Navigation keys Indicators
Windows keys Applicatio n
Press these keys... To...
Function keys Start program actions. Each program uses different function keys for
different purposes. See the program documentation to find out more
about the function key actions.
Navigation keys Press these keys to move the cursor to the beginning of a line, to the
end of a line, up the page, down the page, to the beginning of a
document, or to the end of a document.
Indicators Show if your
activated. Press the corresponding key to activate the function.
Windows keys Press one of these keys to open the Windows Start menu. These keys
can also be used in combination with other keys to open utilities like
F (Search utility), R (Run utility), and E (Explorer utility).
Application key Access shortcut menus and help assistants in Windows.
Directional keys Move the cursor up, down, right, or left.
Numeric keypad Use these keys to type numbers when the numeric keypad (
is turned on.
NUM LOCK, CAPS LOCK, or SCROLL LOCK key s are
key
Directional
keys
Numeric
keypad
NUM LOCK)
www.gateway.com
27
Page 34

Multifunction keyboard
This keyboard is the full-featured model available with your computer.
Function keys Navigation keys Indicators
Press these
Windows keys Applicatio n
key
To...
Directional
keys
Numeric
keypad
keys...
Function keys Start program actions . Each progr am uses diff erent funct ion ke ys for di fferent
purposes. See the program’s help to learn more about function key actions.
Navigation keys Press these keys to move the cursor to the beginning of a line, to the end
of a line, up the page, down the page, to the beginning of a document, or
to the end of a document.
Indicators Show if your NUM LOCK, CAPS LOCK, or SCROLL LOCK keys are activ ated.
Press the corresponding key to activate the function.
Windows keys Press this key to open the Windows Start menu. This key can also be used
in combination wi th o ther keys to open u til iti es like
utility), and
Application key Access shortcut menus and help assistants in Windows.
Directional keys Move the cursor up, down, right, or left.
Numeric keypad Use these keys to type numbers when the numeric keypad (
turned on.
E (Explorer utility).
F (Search utility), R(Run
NUM LOCK) is
28
www.gateway.com
Page 35

Special-function button s
Previous
Play/Pause
Volume down
Volu me up
Special-function buttons
Previous Return to the previous CD track or DVD chapter.
Play/Pause Start or pause the play of the CD or DVD.
Stop Stop the play o f CD or DVD.
Icons Press to...
Mute
My Documents
Stop
Help
Next
Search
InternetE-mail
Next Move to the next CD track or DVD chapter.
Volume down Decrease th e volume.
Volume up Increase th e volume.
Mute Turn off all sound.
My Documents Opens the My Documents folder . You can customize this
button to open another program.
Help Open online he lp . You can custom ize thi s bu tton to open
another program.
E-mail Open your e-mail program. You can customize this
button to open another program.
www.gateway.com
29
Page 36

Special-function buttons
Search Open online search. You can customize this button to
Internet Open your Web browser. You can customize this button
Icons Press to...
open another program.
to open another program.
Wireless keyboard
This keyboard does not connect to your computer with cables. If a wireless keyboard came
with your computer, use the instructions included in the box to set it up and use it.
Special-function
Function keys Navigation keys
buttons
30
Application
key
www.gateway.com
Directional
keys
Numeric
keypad
Page 37

Using the mouse
The mouse is a device that controls the pointer movement on the computer display.
Scroll wheel
Right button
Left button
As you move the mouse, the pointer (arrow) on the display moves in the same direction.
You can use the left and right buttons on the mouse to select objects on the display.
You can use the scroll wheel on the mouse to move through a document. This feature is
not avai lable in a ll progr ams.
www.gateway.com
31
Page 38

To... Do this...
Move the pointer
on the computer
display
Select an object o n
the computer
display
Start a program or
open a file or folder
Access a shortcut
menu or find more
information about
an object on the
computer display.
Move an object on
the computer
display.
click
click
click
click
click,
click,
click
click
and drag
and drag
click
Move the mouse around on the mouse
pad. If you run out of space on your
mouse pad and need to move th e pointer
farther , pic k up the mouse , set it do wn in
the middle of the mouse pad, then
continue moving t he mouse.
Position the pointer over the object.
Quickly pre ss and release th e left mouse
button once. This action is called
clicking
.
Position the pointer over the object.
Quickly pre ss and release th e left mouse
button twice. This action is called
double-clicking
Position the pointer over the object.
Quickly press an d release t he rig ht
mouse button once. This action is called
right-clicking
Position the pointer over the object.
Press the left mouse button and hold it
down. Move (drag) th e objec t to the
appropriate part of the computer d ispla y.
Release the button to drop the object
where you want it.
.
.
Tips & Tricks For more information about how to adjust the double-click speed,
pointer speed, right- hand or left-ha nd configur ation, an d other mouse
settings, see “Changing the mouse or touchpad settings” in
Your Computer
access this guide, click Start, All Programs, then click Gateway
Documentation.
which has been included on your hard drive. To
For instructions on how to clean the mouse, see “Cleaning the mouse” on page 52.
32
www.gateway.com
Using
Page 39

Connecting the modem
Your computer may have the optional 56K modem that you can use to connect to a
standard telephone line.
Warning To reduce the risk of fire, use only No. 26 AWG or larger
telecommunications line cord.
To connect the modem:
1 Insert one end of the modem cable into the modem jack on the back of your
computer.
2 Insert the other end of the modem cable into a telephone wall jack. The modem will
not work with digital or PBX telephone lines.
3 Start your computer, then start your communications program.
Connecting to a wir ed Ethernet network
Y o ur computer has a network jack tha t you can use to connect to a 10/100 or 10/1 00/1000
wired Ethernet network. For information about setting up a wired or wireless Ethernet
network, see “Networking Your Computer” on page 87.
To connect to a wired Ethernet network:
1 Insert one end of the network cable into the network ja ck on the back of your
computer.
2 Insert the other end of the network cable into a network jack.
Tips & Tricks You can use your computer’s Ethernet jack for more than just
networking. Many broadband Internet connections, such as cable
modems and DSL modems, connect to your computer’s Ethernet
jack. For more information, see “Using the Internet” in
Computer
guide, click Start, All Programs, then click Gateway
Documentation.
which has been includ ed on your hard driv e. To access this
www.gateway.com
Using Your
33
Page 40

Comput er display
You can adjust your computer display image by using external controls (located near the
display itself) and software controls (accessible in Windows). For more information about
software controls, see “Adjusting the screen and desktop settings” in Using Your Computer
which has been included on your hard drive. To access this guide, click
then click
Gateway Documentation.
External controls
The computer display features an on-screen display (OSD) that lets you adjust and save
contrast, brightness, and other settings for the display. Your computer saves changes you
make to the settings, even if you turn off the display.
Start, All Programs,
■ Auto.
Press the
■ Menu/Select.
Press to view the OSD. Press again to select OSD options.
■ – and +.
OSD active: Press to move through menu screens and adjust OSD options.
OSD inactive: Press to adjust the brightness.
■ Exit/Source.
OSD active: Press to deselect a menu screen. Press again to exit the OSD.
OSD inactive: Press to switch to the external video source (if present).
34
AUTO
button
AUTO button to automatically optimize the display’s settings.
MENU
SELECT
button
– adjust
button
www.gateway.com
+ adjust
button
EXIT SOURCE
button
Page 41

OSD options
To adjust the OSD settings:
1 Press the MENU/SELECT button. The OSD menu opens.
2 Use the – and + buttons to highlight a control, then press the MENU/SELECT button.
3 Use the – and + buttons to adjust the control to the desired level.
4 When you have finished making adjustments, press the EXIT button to return to the
main menu screen.
5 If you want to adjust additional ODS options, repeat Step 2 through Step 4 until all
adjustments are made.
6 Press the EXIT button again to exit the OSD.
OSD menus
You can access any of these menus in the OSD:
OSD menu Description
Brightness. Adjusts the
brightness of the computer
display. Use the l owest
brightn ess setti ng you are
comfortable with to m aximiz e the
life of the display backlights.
You may need to readjust
brightn ess after t he comput er
display has war med up.
Contrast. Adjusts the contr ast of
the computer display.
www.gateway.com
35
Page 42

OSD menu Description
Preset. Adjusts the color
temperature.
9300K is bluish white.
6500K is reddish white (default).
Red, Green, Blue. Customize
the color levels.
(This menu is unavailable on
some models)
Vertical position. Moves the
image up and down.
Horizonta l pos itio n. Moves the
image left and right.
You c an also us e the Auto
function to configure the vertical
and horizontal position
automatically. For more
information on the Auto function,
see “External controls” on
page 34.
36
(This menu is unavailable on
some models)
Clock. Minimizes any vertical
bars or stripes visible on the
computer display background.
The horizontal display size will
also change.
Phase. Removes any horizontal
distortion and clears or sharpens
the image of characters.
www.gateway.com
Page 43

OSD menu Description
Language. Changes the OSD
language setting.
OSD Position. Adjusts the OSD
window position on the display.
1280 x 1024
/
USER
For more information about adjusting the color depth and screen resolution us ing software
controls, see “Adjusting the screen and desktop settings” in Using Your Computer which
has been included on your hard drive. To access this guide, click
click
Gateway Document ation.
Start, All Programs, then
www.gateway.com
37
Page 44

Installing a printer, scanner, or other peripheral devic e
Important Before you install a printer, scanner, or other peripheral device, see
the device doc umentation and instal lation in structi ons.
Y our c omputer has one or mo re of the following ports: IEEE 1394 (also known as F irewire®
or i.Link
peripheral devices such as printers, scanners, and digital cameras to your computer. For
more information about port locations, see “Checking Out Your Gateway Computer” on
page 9.
IEEE 1394 and USB ports support plug-and-play and hot-sw appi ng, whi ch mean s that yo ur
computer will usually recognize such a device whenever you plug it into the appropriate
port. When you use an IEEE 1394 or USB device for the first time, your computer will
prompt you to install any software the device needs. After doing this, you can disconnect
and reconnect the device at any time.
Parallel and serial port devices are not plug-and-play. See the device documentation for
detailed information and installation instructions.
®
), Universal Serial Bus (USB), serial, and parallel. You use these ports to connect
Help and
Support
For more information about installing peripheral devices, click Start,
then click Help and Support.
Type the keyword installing devices in the Search box
, then click the arrow.
38
www.gateway.com
Page 45

Chapter 4
Using Drives and Ports
■ Using the diskette drive
■ Using the memory card re ader
■ Using CD or DVD drives
39
Page 46

Using the disk ette drive
The optional diskette drive uses 3.5-inch diskettes (sometimes called floppy disks).
Diskettes are useful for storing files or transferring files to another computer.
Diskette drive
activity light
Diskette
slot
Diskette
eject button
To use a diskette:
1 Insert the diskette into the diskette drive with the label facing up.
2 To access a file on the diskette, click Start, then click My Computer. Double-click the
diskette drive letter (for example, the A: drive), then double-click the file name.
3 To remove the diskette, make sure that the drive activity light is off, then press the
diskette eject button.
40
www.gateway.com
Page 47

Using the memory card reader
Y ou c an use optional memory card reader to tran sfer pictures from a digit al camera to your
computer . Y ou can also use the memory card reader to transfer data between your computer
and a device that uses memory cards, such as a PDA, MP3 player, or cellular phone.
Activity indicator
ompactFlash
nd IBM Microdrive
MultiMediaCard
SmartMedia and
Secure Digital
Memory Stick and
Memory Stick PRO
Memory card types
The memory card reader supports the following card types:
Card Type Slot Insert
CompactFlash
IBM Microdr ive
Secure Di gital
SM (Smar tMedia
MultiMediaCard
Memory Sti ck
Memory Sti ck PRO
Each slot is assigned a different drive letter (for example, the E: and F: drives) so data can
be transferred from one media type to another.
®
™
™
™
) Lower left Label facing down (gold
™
®
™
Upper left Label facing up
Upper left Label facing up
Lower left Label facing up
contact area facing up)
Upper right Label facing up
Lower right Label facing up
Lower right Label facing up
www.gateway.com
41
Page 48

Inserting a memory card
Caution To avoid memory card damage or errors while usi ng a memo ry card,
insert only one memory card in a slot at a time.
To use a memory card:
1 Insert the memory card into the memory card slot as indicated in the previous table.
2 To access a file on the memory card, click Start, then click My Computer. Double-click
the drive letter (for example, the E: drive), then double-click the file name.
To remove a memory card:
■ Wait for the media reader activity indicator to stop blinking, then pull the media out
of the slot.
Caution Do not remove the media or turn off the computer while the media
reader activity indi cator is b linki ng. You could lose d ata. Also , re mov e
the media from the reader before you turn off the computer.
Important Do not use the remove hardware icon in the taskbar to remove
the memory card. If you use the remove hardware icon, your
computer will not reco gnize y our memory card reader u ntil you res tart
the computer.
42
www.gateway.com
Page 49

Using the CD or D VD drive
You can use your computer to enjoy a wide variety of multimedia features.
Identifying drive types
Your Gateway computer may contain one of the following drive types. Look on the front
of the drive for one or more of the following logos:
If your drive has this logo... This is your drive type... Use your drive for...
CD drive
CD-RW drive
DVD/CD- RW driv e
DVD drive
DVD+RW
DVD R/RW drive
Double layer DVD+RW
Installing programs, playing audio CDs, and
accessing data.
Installing programs, playing audio CDs,
accessing data, and creating CDs.
Installing programs, playing audio CDs,
accessing data, creating CDs, and playing
DVDs.
Installing programs, playing audio CDs,
playing DVDs, and accessing data.
Installing programs, playing audio CDs,
playing DVDs, accessing data, and recording
video and data to DVD+R or DVD+RW discs.
Installing programs, playing audio CDs,
playing DVDs, accessing data, and recording
video and data to DVD+R, DVD+RW, DVD-R,
and DVD-RW discs.
Installing programs, playing audio CDs,
playing DVDs, accessing data, and recording
video and data to double layer DVD+R discs.
Note: To use the double lay er capa bility of the
double layer recordable DVD drive, the blank
DVDs you purchase must state Double Layer,
Dual Layer, or DL. Using other types of blank
media will resu lt in less ca pacity.
www.gateway.com
43
Page 50

Inserting a CD or DVD
Manual eject hol e
Important Some music CDs hav e cop y protect ion softwa re. You ma y not be able
to play these CD s on your comp uter.
Activity indicator
Eject button
44
www.gateway.com
Page 51

To insert a CD or DVD:
1 Press the eject button on the CD or DVD drive. After the tray opens slightly, pull the
disc tray completely open.
2 Place the disc in the tray with the label facing up, then press down carefully on the
disc until it snaps into place. You can place your other hand underneath the disc tray
to support it while you press the disc into place.
Important When you place a single-sided disc in the tray, make sure that the
label side is facing up. If the disc has two playable sides, place the
disc so the name of the side you want to play is facing up.
3 Gently push the tray in until it is closed.
www.gateway.com
45
Page 52

Playing a CD
Use the music program or Windows Media Player on your computer to:
■ Play music CDs
■ Create MP3 music files from your music CDs
■ Edit music track information
■ Use your music files to build a music library
■ Listen to Internet Radio
Tips & Tricks For more inf ormation a bou t playing CDs, see “Playing CDs” in
Your Computer
access this guide, click Start, All Programs, then click Gateway
Documentation.
which has been included on your hard drive. To
Using
Playing a DVD
A Digital Versatile Disc (DVD) is similar to a standard CD but has greater data capacity.
Because of this increased capacity, full-length movies, several albums of music, or several
gigabytes of data can fit on a single disc. You can play DVDs with the DVD program or
Windows Media Player.
Tips & Tricks For more information about playing DVDs, see “Playing DVDs” in
Using Your Computer
To access this guide, click Start, All Programs, then click Gateway
Documentation.
which has been included on your hard drive.
Creating CDs and DVDs
You can use the CD and DVD burning program on your computer to copy tracks from a
music CD to your hard drive, copy or create data CDs and DVDs, create music CDs, create
video DVDs, and more.
46
Tips & Tricks For more information about creating CDs and DVDs, see “Creating
CDs and DVDs” in
on your hard drive. To access this guide, click Start, All Programs,
then click Gateway Documentation.
Using Your Computer
www.gateway.com
which has been included
Page 53

Chapter 5
Maintaining Your Computer
■ Caring for your computer
■ Updating Windows
■ Protecting your computer from viruses
■ Cleaning your computer
■ Restoring your system
■ Opening the computer case
■ Adding memory and replacing the
battery
47
Page 54

Caring for y our computer
To extend the life of your computer:
■ When transporting your computer, we recommend that you put it in the original
packaging ma terials.
■ Keep diskettes and your computer away from magnetic fields. Magnetic fields can erase
data on both diskettes and hard drives.
■ Avoid subjecting your computer to extreme temperature changes.
■ Keep all liquids away from your computer . When spilled onto computer components,
almost any liquid can result in extremely expensive repairs that are not covered under
your warranty.
■ Avoid dusty or dirty work environments. Dust and dirt can clog the int ernal
mechanisms.
■ Do not block the ventilation fan.
■ When storing your computer for an extended period of time, unplug AC power.
Updating Windo ws
Windows Update is the online extension of Windows that helps yo u to keep your computer
up-to-date. Use Windows Up date to choose up dates for your computer’s operating system,
software, and hardware. New content is added to the site regularly, so you can always get
the most recent updates and fixes to protect your computer and keep it running smoothly.
Windows Update scans your computer and provides you with a tailored selection of
updates that apply only to the software and hardware on your computer.
To run Windows Update:
1 Connect to the Internet.
2 Click Start, All Programs, then click Windows Update.
3 Click Scan for Available Updates.
Help and
Support
48
For more informa tion about W indows U pdate, c lick Start, then click
Help and Support.
Type the keyword Windows Update in the HelpSpot Search box
, then click the arrow.
www.gateway.com
Page 55

Protecting your computer from viruses
A virus is a program that attaches itself to a fil e on a computer, then spreads from one
computer to another. Viruses can damage data or cause your computer to malfunction.
Some viruses go undetected for a period of time because they are activated on a certain date.
Protect your computer from a virus by:
■ Registering and subscribing to Norton AntiVirus. You received a free, limited-time
subscription to the Norton AntiVirus service when you purchased your computer.
■ Using the Norton
diskettes, attached to e-mail messages, or downloaded from the Internet.
■ Checking all programs for viruses before installing them.
■ Disabling macros on suspicious Microsoft Word and Excel files. These programs will
warn you if a document that you are opening contains a macro that might have a
virus.
■ Periodically updating the Norton AntiVirus program to protect against the latest
viruses.
®
AntiVirus program to check files and programs that are on
Help and
Support
For more inf ormation about protecting y our computer aga inst viruses,
click Start, then click Help and Support.
Type the keyword viruses in the Search box ,
then click the arrow.
To scan for viruses:
1 Click Start, All Programs, Norton AntiVirus, then click Norton AntiVirus 2004. Norton
AntiVirus opens.
Scan for
viruses
www.gateway.com
49
Page 56

2 Click Scan for Viruses.
Scan
3 Click the type of scan you want to make in the Scan for Viruses area, then under
Actions, click
Scan.
To remove a virus:
1 If Norton AntiVirus finds a virus, follow all on-s creen instructions to remove the virus.
2 Turn off your computer and leave it off for at least 30 seconds.
3 Turn on your computer and rescan for the virus.
50
www.gateway.com
Page 57

To update Norton AntiVirus:
Tips & Tricks You received a free, l imite d-ti me subscription to the Norton AntiVirus
service when you purchased your computer. To update Norton
AntiVirus after the free subscription period, you must extend your
subscription.
1 Make sure that you are connected to the Internet.
2 Click Start, All Programs, Norton AntiVirus, then click LiveUpdate - Norton AntiVirus. The
LiveUpdate wizard opens.
3 Follow the on-screen instructions to update your Norton AntiV irus p rogram with the
latest virus protection files.
4 When the program has finished, click Finish.
Cleaning your c omputer
Keeping your computer clean and the vents free from dust helps keep your computer
performing at its best. You may want to gather these items and put together a computer
cleaning kit:
■ A soft, lint-free cloth
■ An aerosol can of air that has a narrow, straw-like extension
■ Cotton swabs
■ A CD or DVD drive cleaning kit
Cleaning the exterior
Warning When you shut down your computer, the power turns off, but some
electrical current still flows through your computer. To avoid possible
injury from electrical shoc k, unplu g the po wer cor d and mo dem cab le
from the wall outlets.
Always turn off your computer and other peripherals before cleaning any components.
Use a damp, lint-free cloth to clean your computer and other parts of your system. Do
not use abrasive or solvent cleaners because they can damage the finish on components.
www.gateway.com
51
Page 58

Your computer is cooled by air circulated through the vents on th e case, so keep the vents
free of dust. With your computer turned off and unplugged, brush the dust away from
the vents with a damp cloth. B e careful not to drip any water into the ven ts. Do not attempt
to clean dust from the inside of your computer.
Cleaning the keyboard
You should clean the keyboard occasionally by using an aerosol can of air with a narrow,
straw-like extension to remove dust and lint trapped under the keys.
If you spill liquid on the keyboard, turn off your computer and turn the keyboard upside
down. Let the liquid drain, then let the keyboard dry before trying to use it again. If the
keyboard does not work after it dries, you may need to replace it.
Cleaning the computer displa y
Use a soft cloth and water to clean the display. Squirt a little water on the cloth (never
directly on the screen), and wipe the screen with the cloth.
Caution A flat panel display or computer LCD screen is made of specially
coated glass and can be scratched or damaged by abrasive or
ammonia-based glass cleaners.
Cleaning the mouse
If the mouse pointer begins moving erratically across the computer screen or becomes
difficult to control precisely, cleaning the mouse will likely improve its accuracy.
To clean your optical mouse:
■ Wipe the bottom of the mouse with a damp lint-free cloth
52
www.gateway.com
Page 59

To clean your trackball mouse:
1 Turn the mouse upside down.
2 Rotate the retaining ring on the bottom of the mouse counter-clockwise, then remove
the retaining ring and mouse ball.
3 Remove any dust, lint, or dirt from the mouse ball with a soft cloth.
4 Clean the mouse rollers with a cotton swab dipped in isopropyl alcohol.
Mouse rollers
5 Replace the mouse ball and lock the retaining ring into place.
www.gateway.com
53
Page 60

Cleaning CDs or DVDs
Wipe from the center to the edge, not around in a circle, using a product made especially
for the purpose.
Restoring your sy stem
All programs that were preinstalled on your computer are available on the backup Restore
CDs or DVDs that you created or they are available on the hard drive. If you need to restore
your computer to the original configuration, you can restore from the backup Restore CDs
or DVDs or you can restore from the backup files locate d on the hard drive.
The instructions to use the Restore CDs or DVDs or hard drive backup files are including
with the blank CDs or DVDs that came with your computer.
54
www.gateway.com
Page 61

Pre venting static electricity discharge
The components inside your computer are extremely sensitive to static electricity, also
known as electrostatic discharge (ESD).
Warning T o av oid e xposure to dangerous e lectrical v oltages and movin g parts,
turn off your computer and unplug the power cord and modem and
network cables before opening the case.
Caution ESD can permanently damage electrostatic discharge-sensitive
components in your computer. Prevent ESD damage by following
ESD guidelines every time you open the computer case.
Before opening the computer case, follow these guidelines:
■ Turn off your computer.
■ Wear a grounding wrist strap (available at most electronics stores) and attach it to a
bare metal part of your computer.
Warning To prevent risk of electric shock , do not inse rt any object into the ven t
holes of the power supply.
■ Touch a bare metal surface on the back of the computer.
■ Unplug the power cord and the modem and network cables.
Before working with computer components, follow these guidelines:
■ Avoid static-causing surfaces su ch as carpeted floors, pl astic, and packing foam .
■ Remove components from their antistatic bags only when you are ready to use them.
Do not lay components on the outside of antistatic bags because only the inside of
the bags provide electrostatic protection.
■ Always hold expansion cards by their edges or their metal mounting brackets. Avoid
touching the edge connectors and components on the cards. Never slide expansion
cards or components over an y surface.
www.gateway.com
55
Page 62

Opening the case
Your computer case provides easy access to internal components.
Warning T o av oid e xposure to dangerous e lectrical v oltages and movin g parts,
turn off your computer, then unplug the power cord, modem cable,
and network cable before opening the case.
To remove the back panel:
1 Turn off your computer and remove the cord cover (if installed). For more information,
see “Using the cord cover” on page 24.
2 Following all static electricity discharge precau tions, disconnect t he power c ord and
all other external cables.
3 Press the power button to drain any residual power from your computer.
4 Remove the four screws on the back of the computer case.
Screw
Screw
Screw
Screw
5 With your hands positioned on each side of the case, swing the back panel up and
away from the case and set the panel aside.
56
www.gateway.com
Page 63

Closing the case
To replace the back panel:
1 Lay your computer face-down on a towel or other non-abrasive surface.
2 Hook the back panel’s tabs into the notches on the top of the open computer’s back,
then swing the back panel down and press it into place.
3 Replace the four screws removed previously.
4 Return your computer to an upright position, then reconnect the ext ernal cables and
power cord.
www.gateway.com
57
Page 64

Replacing the hard drive
Use this procedure to replace the hard drive. The photographs in this procedure show the
Profile 5. Although the cable connections for the Profile 5.5 are different, the procedure
is the same.
Tips & Tricks For more stability, place your computer face down to perform this
procedure. Avoid scratching the computer display by placing it on a
towel or other non-abrasive surface.
To replace the hard drive:
1 Open the case by following the instructions in “Opening the case” on page 56.
Warning Make sure that you removed all external cables and the power cord.
2 Press the drive cage release latch.
58
www.gateway.com
Page 65

3 While holding the latch, pull the drive cage out of the computer. (Profile 5 shown)
4 Disconnect the drive cable and power cable from the hard driv e.
www.gateway.com
59
Page 66

5 Remove the four screws that secure the hard drive to the hard drive cage.
Screw
Screw
Screw
Screw
6 Remove the drive.
60
www.gateway.com
Page 67

7 Make sure that the jumpers on the new drive are set the same as the drive you are
replacing.
8 Insert the new drive into the drive cage and secure it with the four screws removed
earlier.
9 Connect the drive cable and power cable to the drive.
10 Slide the drive cage into the computer until it clicks into place.
11 Close the case by following the instructions in “Closing the case” on page 57.
www.gateway.com
61
Page 68

Installing memory
When you upgrade the computer memory, make sure that you install the correct type
of memory module for your computer. Your computer uses DIMM memory.
To install or replace DIMM memory:
1 Open the case by following the instructions in “Opening the case” on page 56.
Warning Make sure that you removed all external cables and the power cord.
2 Find the memory module banks, some times called add-in slots, on your system board.
3 If you are removing a memory module from the memory module bank, gently pull
the plastic tabs away from the sides of the memory module and remove it.
62
www.gateway.com
Page 69

- OR -
If you are adding a memor y modul e to an emp ty memo ry mo dule ban k, gent ly pull
the plastic tabs away from the sides of the memory module bank.
4 Align the notch on the new memory module with the notch on the memory module
bank and press firmly into the bank. The tabs on the sides of the memory module
should secure the memory module automatically. When the module is secure, you
hear a click.
5 Close the case by following the instructions in “Closing the case” on page 57.
6 Turn on your computer. Windows starts and the Windows desktop appears.
7 Click Start, Control Panel, then click Performance and M aintenance (if in Category View).
Click
System. The amount of memory in your computer is shown at the bottom of
the S ystem Proper ties window in the General tab.
www.gateway.com
63
Page 70

Adding and remo ving PCCards
Y our computer has one PC Card slot (also known as a PCMCIA card slot). This slot accepts
Type I and Type II PC Cards.
You do not need to restart your computer when changing most cards because your
computer supports hot-swapping. Hot-swapping means that you can i nsert a PC Card while
your computer is running. If the PC Card does not work after hot-swapping, see the
PC Card manufacturer’s documentation for further information.
Adding a PC Card
To insert a PC Card:
■ Push the card firmly into the PC Card slot with the label side facing the front until
the outer edge of the card is flush with the side of your computer.
64
www.gateway.com
Page 71

Removing a PCCard
To remove a PC Card:
1 Click the remove hardware icon in the taskbar, then select the PC Card name and
click
Stop.
-ORTurn off your computer.
Important If the remov e hardw are ic on do es n ot app ear on th e task bar, click the
show hidden icons button.
2 Release the eject button by pressing the PC Card eject button once.
3 Eject the PC Card by pressing the eject button again.
www.gateway.com
65
Page 72

66
www.gateway.com
Page 73

Chapter 6
Troubleshooting
■ T roubleshooting typical hardware and
software problems
■ Getting telephone support
■ Using automated troubleshooting
systems
■ Getting tutoring and training
67
Page 74

Safety guidelines
While troubleshooting your computer, follow these safety guidelines:
■ Never remove your back panel while your computer is turned on and while the
modem cable and the power cord ar e connected.
■ Make sure that you are correctly grounded before accessing internal components. For
more information about preventing damage from static electricity, see “Preventing
static electricity discharge” on page 55 .
Warning To avoid bodily injury, do not attempt to troubleshoot your computer problem if:
■
Power cords or plugs are damaged
■
Liquid has been spilled into your computer
■
Your computer was dropped
■
The case was damaged
Instead, unplug your computer and contact a qualified computer technician.
First steps
If you have problems with your computer, try these things first:
■ Make sure that the AC power adapter is connected to your computer and an AC outlet
and that the AC outlet is supplying power.
■ If you use a power strip or surge protector, make sure that it is turned on.
■ If a peripheral device (such as a keyboard or mouse) does not work, make sure that
all connections are secure.
■ Make sure that your hard drive is not full.
■ If an error message appears on the screen, write down the exact message. The message
may help Gateway Custo mer Care in diagnosing and fixing th e problem.
■ If you added or removed peripheral device s, review the installation procedures you
performed and make sure that you followed each instruction.
■ If an error occurs in a program, see the program’s printed documentation or the online
help.
Help and
Support
68
For more information about troubleshooting, click Start, then click
Help and Support.
Type the keyword troubleshooting in the Search box
, then click the arrow.
www.gateway.com
Page 75

Troubleshooting
Audio
See “Sound” on pa ge 82.
Battery
See “Power” on pa ge 80.
CD or DVD drives
The computer does not recognize a disc or the CD or DVD drive
■ Make sure that the disc label is facing up, then try again.
■ Try a different disc. Occasionally discs are flawed or become scratched and cannot be
read by the CD or DVD drive.
■ If you are trying to play a DVD, make sure that you have a DVD drive. To identify
your drive type, see “Identifying drive type s” on page 43.
■ Your computer may be experiencing some temporary memory problems. Shut down
and restart your computer.
■ Some music CDs have copy protection software. You may not be able to play these
CDs on your computer.
■ Clean the disc. For more information, see “Cleaning CDs or DVDs” on page 54.
■ Make sure that the drive is configured correctly by following the instructions in the
drive documentation.
■ Reinstall the device driver.
Audio CD does not produce sound
■ Make sure that the disc label is facing up, then try again.
■ Some music CDs have copy protection software. You may not be able to play these
CDs on your computer.
■ Make sure that the volume controls are turned up. For more information, see
“Adjusting the volume” on page 26.
■ Make sure that the mute controls are turned off. For more information, see “Adjusting
the volume” on page 26.
www.gateway.com
69
Page 76

■ Shut down and restart your computer.
■ Clean the disc. For more information, see “Cleaning CDs or DVDs” on page 54.
■ Reinstall the audio device drivers.
A DVD movie will not play
■ Make sure that you have a DVD drive. To identify your drive type, see “Identifying
drive types” on page 43.
■ Make sure that the disc label is facing up, then try again.
■ Try a different disc. Occasionally discs are flawed or become scratched and cannot be
read by the DVD drive.
■ Shut down and restart your computer.
■ Clean the disc. For more information, see “Cleaning CDs or DVDs” on page 54.
■ Reinstall the device driver.
■ Make sure that the DVD program has been installed on your computer.
■ DVDs and DVD drives c on tain re gi onal code s that help control DVD title exports and
help reduce illegal disc distribution. To be able to play a DVD, the disc’s regional code
and your DVD drive’s regional code must match.
The regional code on your DVD drive is determined by your computer’s delivery
address. The regional code for the United States and Canada is 1 . The regional code
for Mexico is 4. Your DVD drive’s regional code must match the regional code for the
disc. The regional code for the disc is on the disc, disc do cumentation, or disc
packaging.
If the DVD movie does not play, the disc’s regional code and your DVD drive’s regional
code may not match.
Computer
The computer will not start
■ Make sure that the power cord is connected to an AC power source and yo ur computer
is turned on.
Diskette drive
The diskette drive is not recognized
■ Shut down and restart your computer.
70
www.gateway.com
Page 77

You cannot save a file to diskette or you see the message “ disk is full or
write-protected”
■ Make sure that the write-protection tab on the upper-right corner of the diskette is
down (unpr otected).
■ Delete unnecessary files on the diskette and try again.
■ Make sure that the diskette you are using is IBM-compatible.
■ Try a different diskette. Occasionally diskettes are flawed and cannot be read by the
diskette drive.
■ Run Error-checking on the diskette. For more information, see “Checking the hard
drive for errors” in Using Your Computer which has been included on your hard drive.
To access this guide, click
Start, All Programs, then click Gateway Documentation.
If errors are detected and corrected, try using the diskette again.
You see a “ A ccess Deni ed” or “W rit e prot ect” erro r message
■ Move the write-protection tab in the upper-right corner of the diskette down
(unprotected).
■ The diskette may be full. Delete unnecessary files on the diskette and try again.
■ Make sure that the diskette you are using is IBM-compatible.
■ Try a different diskette. Occasionally diskettes are flawed and cannot be read by the
diskette drive.
You see a “Non-system disk” or “Dis k erro r” error me ssage
■ Eject the diskette from the diskette drive, then press ENTER.
■ Make sure that the diskette you are using is IBM-compatible.
The diskette drive LED is lit continuously
■ Remove the diskette from the drive. If the light stays on, try restarting your computer.
Display
The screen resolution is not correct
Change the screen resolution from the Display Properties dialog box.
Tips & Tricks For more information, see “Adjusting the color depth” in
Computer
guide, click Start, All Programs, then click Gateway
Documentation.
which has been includ ed on your hard driv e. To access this
www.gateway.com
Using Your
71
Page 78

Help and
Support
For more information about changing the screen resolution, click
Start, then click Help and Support.
Type the keyword screen resolution in the Search box
, then click the arrow.
The com puter i s runnin g but th ere i s no pictu re
■ Adjust the brightness and contrast controls to the center position.
■ Reinstall the device driver.
The color is not uniform
Make sure that the computer warms up for at least 30 minutes before making a final
judgment about color uniformity.
Make sure that:
■ Non-shielded speakers are not placed too close to the comp uter.
■ The computer is not positioned too close to a monitor, electric fan, fluorescent light,
metal shelf, or laser printer.
The text on the display is dim or difficult to read
■ Adjust the brightness and contrast controls.
■ Change the display settings.
Tips & Tricks For more information, see “Adjusting the screen and desktop settings”
Using Your Computer
in
To access this guide, click Start, All Programs, then click Gateway
Documentation.
DVD drives
See “CD or DVD drives” on page 69.
72
which has been incl ude d on y our hard driv e .
www.gateway.com
Page 79

File management
A file was accidentally deleted
If a file was deleted while holding down the SHIFT key, the file cannot be restored.
To restore deleted files:
1 Double-click the Recycle Bin icon.
2 Right-click the file you want to restore, then click Restore. The file is restored to
the place where it was originally deleted from.
If the Recycle Bin was emptied before you try to restore a file, the file cannot be
restored.
Help and
Support
For more information about restoring deleted files, click Start, then
click Help and Support.
Type the keyword System Restore in the Search box
, then click the arrow.
Hard drive
You see an “Insufficient disk spac e ” error message
■ Delete unnecessary files from the hard drive using Disk Cleanup. For instructions on
deleting unnecessary files, see “Using Disk Cleanup” in Using Your Comp uter which
has been included on your hard drive. To access this guide, click
then click
■ Empty the Recycle Bin by right-clicking the Recycle B in icon, then clicking Empty
Recy cle B in
Caution A ll delete d files w ill be los t when you empt y the Recyc le Bin.
■ Save your files to another drive. If the hard drive is full, copy any files not regularly
used to backup media, then delete them from the hard drive.
Gateway Documentation.
.
Start, All Programs,
www.gateway.com
73
Page 80

Help and
Support
For more information about file management, click Start, then click
Help and Support.
Type the keyword file management in the Search box
, then click the arrow.
You see a “Data err or” message
This may be the result of a defective area on the hard drive. To fix hard drive problems,
run the Error checking program. For instructions on fixing hard drive problems, see
“Checking the hard drive for errors” in Using Your Computer which has been included on
your hard drive. To access this guide, click
Documentation
.
Start, All Programs, then click Gateway
The hard driv e canno t be acc essed , or y ou see a “Gener al f ailur e rea ding d rive C” err or
message
■ If a diskette is in the diskette drive, eject it and restart your computer.
■ Press CTRL+ALT+DEL to restart your computer.
■ If your computer has been subjected to static electricity or physical shock, you may
need to reinstall the operating system.
You see a “Non-system disk” or “disk error” error message
■ Eject the diskette from the diskette drive, then press ENTER.
Internet
You cannot connect to the Internet
■ If you are using a dial-up modem, make sure that the modem cable is plugged into
the modem jack and not the Ethernet network jack. See “Back” on page 12 to make
sure that the connections have been made correctly.
- OR If you are using a cable or DSL modem, make sure that the modem cable is plugged
into the Ethernet network jack and not the modem jack. See “Back” on page 12 to
make sure that the connections have been made correctly.
■ Make sure that you do not have a problem with your modem. For more information,
see “Modem (dial-up)” on page 76.
■ Make sure that your account with your Internet service provider (ISP) is set up
correctly. Contact your ISP technical support for help.
74
www.gateway.com
Page 81

Help and
Support
For more information about troubleshooting Internet connections,
click Start, then click Help and Support.
T ype the keyword troubleshooting connections in the Search box
, then click the arrow.
You see an “Unable to l ocat e host” mes sage and a re un able t o bro wse th e Inte rnet
This problem can occur when you have typed a URL (Web address) incorrectly, you have
lost your Internet connection, or your ISP is having technical difficulties.
Double-check the URL or try a different URL. If the error message still appears, disconnect
from the ISP connection and close your browse r, then reconnect and open the browser.
If you still get the error, your ISP may be having technical difficulties.
Connecting to a Web site takes too long
Many factors can affect Int ernet performance:
■ The condition of the telephone lines in your residence or at your local telephone
service
■ The condition of the Internet computers to which you connect and the number of
users accessing those computers
■ The complexity of graphics and multimedia on Web pages
■ Having multiple We b browsers open, performing multiple downloads, and having
multiple programs open on your computer
People are sending you e-mail messages, but you have not received any mail
■ Click the receive button in your e-mail program.
■ Make sure that your account with your Internet service provider (ISP) is set up
correctly. Contact your ISP for technical support.
Keyboard
The keyboard does not work
■ Make sure that the keyboard cable is plugged in correctly. For more information, see
the poster that came with your computer.
■ Remove all extension cables and switch boxes.
■ Clean the keyboard by using an aerosol can of air with a narrow, straw-like extension
to remove dust and lint trapped under the keys.
■ Try a keyboard that you know works to make sure that the keyboard port works.
■ Reinstall the keyboard device driver.
www.gateway.com
75
Page 82

A keyboard character keeps repeating or you see a “keyboard stuck” or “key failure”
error message
■ Make sure that nothing is resting on the keyboard.
■ Make sure that a key is not stuck. Press each key to loosen a key that might be stuck,
then restart your computer.
Liquid spilled in the keyboard
If you spilled liquid in the keyboard, turn off your computer and unplug the keyboard.
Clean the keyboard and turn it upside down to drain it. Let th e keyboard dry before using
it again. If the keyboard does not work after it dries, you may need to replace it.
Memory
You see a “Memory error” me ssage
■ Use a third-party diagnostic program to help determine if a memory module is failing.
You see a “Not enough memory” error me ssage
Close all programs, then restart your computer.
Help and
Support
For more information about troubleshooting memory errors, click
Start, then click Help and Support.
Type the keyword memory error in the Search box
, then click the arrow.
Memory card reader
Drive let ters for th e memory car d slot s do not appear in the My C ompu ter win dow
■ Reboot your computer.
Modem (dial-up)
Your modem does not dial or does not connect
■ Make sure that the modem cable is p lugged into the modem jac k and not the Ethernet
network jack. See “Back” on page 12 to make sure that the connections have been
made correctly.
■ Make sure that your computer is connected to the telephone line and the telephone
line has a dial tone.
■ Make sure that the modem cable is less than 6 feet (1.8 meters) long.
76
www.gateway.com
Page 83

■ Remove any line splitters or surge protectors from your telephon e line, then check
for a dial tone by plugging a working telephone into the telephone wall jack.
■ If you have additional telephone services such as call waiting, call messaging, or voice
mail, make sure that all messages are cleared and call waiting is disabled before using
the modem. Contact your telephone service to get the correct code to temporarily
disable the service. Also make sure that the modem dialing properties are set correctly .
To check the dialing properties:
1 Click Start, then click Control Panel. The Control Panel window opens. If your
Control Panel is in Category View, click
Printers and Other Hardware.
2 Click the Phone and Modem Options icon, then click the Dialing Rules tab.
3 Click the location from which you are dialing, then click Edit.
4 Make sure that all settings are correct.
Help and
Support
■ Disconnect any answering machine, fax machine, or printer that is on the same line
For more information about dialing properties, click Start, then click
Help and Support.
T ype the keyword dialing in the Search box ,
then click the arrow.
as the modem. Do not connect these devices to t he same telephone line as the modem.
■ Make sure that you are not using a digital, rollover, or PBX line. These lines do not
work with your modem.
■ Check for line noise (scratchy , crackling, or popping sounds). Line noise is a common
problem that can cause the modem to connect at a slower rate, abort downloads, or
even disconnect. The faster the modem, the less line noise it can tolerate and still
work correctly.
Listen to the line using your telephone. Dial a single number (such as 1). When the
dial tone stops, listen for line noise. Wiggle the modem cable to see if that makes a
difference. Make sure that the connectors are free from corrosion and all screws in
the wall or telephone wall jack are secure.
Y ou can also call your telephone service and have the telephone line checked for noise
or low line levels.
■ Try another telephone line (either a different telephone number in your house or a
telephone line at a different location). If you can connect on this line, call your
telephone service.
www.gateway.com
77
Page 84

■ Try connec ting with the modem at a l ower conne ction speed. If reduci ng the co nnect
speed lets you connect, call your telephone service. The telephone line may be too
noisy.
You cannot connect to the Internet
■ The ISP may be having techn ical difficulties. Contact your ISP for technical support.
■ See if the modem works with a different communic ations progr am. The problem may
be with just one program.
■ Review the troubleshooting information under “Internet” on page 74.
Your 56K modem does not connect at 56K
Current FCC regulations restrict actual data transfer rates over public telephone lines to
53K. Other factors, such as line noise, telephone service provid er equipment, or ISP
limitations, may lower the speed even further.
If your computer has a v.90 modem, the speed at which you can upload (send) data is
limited to 33.6K. If your computer has a v.92 modem, the speed at which you can upload
data is limited to 48K. Your ISP may not support 48K uploads.
Your fax communications program only sends and receives fax es at 14,400bps when
you have a 56K modem
Current fax technology only supports a maximum send and receive rate of 14,400 bps.
The modem is n ot rec ognize d by y our c ompute r
■ Make sure that the line connected to the modem is working and plugged into the
appropriate port on your computer. See “Back” on page 12 to make sure that the
connections have b een made correctly.
■ If the modem shares the telephone line with another device, make sure that the
telephone line is not in use (for example, some one is on the telephone, or another
modem is in use).
■ Use the modem cable that came with your computer. Some telephone cables do not
meet required cable standards and may cause problems with the modem conn ection.
■ Shut down and restart your computer.
■ Run Windows modem diagnostics.
To run modem diagnostics:
1 Close all open programs.
2 Click Start, then click Control Panel. The Control Panel window opens. If your
Control Panel is in Category View, click
Printers and Other Hardware.
3 Click the Phone and Modem Options icon, then click the Modems tab.
78
www.gateway.com
Page 85

4 Click your modem, then click Properties. The Modem Properties dialog box opens.
5 Click the Diagnostic tab, then click Query Modem. If information about the modem
appears, the modem passed diagnostics. If no modem information is available,
a white screen appears with no data, or if you get an error such as port already
open or the modem has failed to respond, the modem did not pass diagnostics.
Help and
Support
For more inf ormation about modem troub leshoo ting, clic k Start, then
click Help and Support.
Type the keyword modem troubleshooting in the Search box
, then click the arrow.
The modem is noisy when it dials and connects
When your modem tries to connect to another modem, it begins handshaking.
Handshaking is a digital “getting acquainted” conversation between the two modems that
establishes connection speeds and communicati on protocols. You may hear unusual
handshaking sounds when the modems first connect. If the handshaking sounds are too
loud, you can turn down the modem volume.
To turn down the modem volume:
1 Click Start, then click Control Panel. The Control Panel window opens. If your
Control Panel is in Category View, click
Printers and Other Hardware.
2 Click the Phone and Modem Options icon, then click the Modems tab.
3 Click the modem you want to adjust, then click Properties.
4 Click the Modem tab, then adjust the Speaker volume control.
5 Click OK twice to close the Phone and Modem Options dialog box.
Mouse
The mouse does not work
■ Make sure that the mouse cable is plugged in correctly.
■ Shut down and restart your computer.
■ Remove all extension cables and switch boxes.
■ Try a mouse you know is working to make sure that the mouse port works.
www.gateway.com
79
Page 86

The mous e wor ks er ra tica lly
If the mouse pointer begins moving erratically across the computer display or becomes
difficult to control precisely, cleaning the mouse will likely improve its accuracy.
■ If you have an optical mouse, clean the mouse by wiping the bottom with a clean,
damp cloth. Make sure that the optical sensor is clean and free of debris.
■ If you have an optical mouse, use it on a patterned, flat surface. The mouse does not
perform well on glossy surfaces, such as glass or some desktops.
■ If you have a trackball mouse, see “Cleaning the mouse” on page 52.
Networks
You cannot connect to your company network
Every ne twork is u nique. Co ntact you r company computer departm ent or netw ork
administrator for help. For more information about setting up a network in your home,
see “Networking Y our Computer” on page 87. For more information about troubleshooting
your network, see “Troubleshooting Your Ethernet network” on page 121.
Help and
Support
For more inf ormation about network trou bleshoo ting, click Start, then
click Help and Support.
Type the keyword network troubleshooting in the Search box
, then click the arrow.
Passwords
Your computer does not accept your password
Make sure that CAPS LOCK is turned off, then retype the password.
Power
Your computer will not turn on
■ Make sure that your power cord is connected correctly to your computer.
■ If your computer is plugged into a surge protector, make sure that the surge protector
is connected securely to an electrical outlet, turned on, and working correctly. To test
the outlet, plug a working device, such as a lamp, into the outlet and turn it on.
■ Make sure that the power cord is free from cuts or damage. Replace any damaged
cables.
80
www.gateway.com
Page 87

Printer
The printer will not turn on
■ Make sure that the printer is online. Many p rinters have an online/offlin e button tha t
you may need to press.
■ Make sure that the power cable is plugged into an AC power source.
The printer is on but will not print
■ Check the cable between the printer and your computer. Make sure that it is connected
to the correct port.
■ Make sure that the printer is online. Many p rinters have an online/offlin e button tha t
you may need to press so the printer can start printing. Press the button to put the
printer online.
■ Check the cable for bent or broken pins.
■ If the printer you want to print to is not the default printer, make sure that you have
selected it in the printer setup.
To set a default printer:
1 Click Start, then click Control Panel. The Control Panel window opens. If your
Control Panel is in Category View, click
Printers and Other Hardware.
2 Click the Printers and Faxes icon. The Printers and Faxes window opens.
3 Right-click the name of the printer you want to be the default printer, then click
Set as Default Printer.
■ Reinstall the printer driver. See the guide that came with your printer for instructions
on installing the printer driver.
You see a “Printer queue is full” error message
■ Make sure that the printer is not set to work offline.
To make sure that the printer is not set to work offline:
1 Click Start, then click Control Panel. The Control Panel window opens. If your
Control Panel is in Category View, click
Printers and Other Hardware.
2 Click the Printers and Faxes icon. The Printers and Faxes window opens.
www.gateway.com
81
Page 88

3 Right-click the name of the printer you want to use. If the menu shows a check
mark next to
Use Printer Offline, click Use Printer Offline to clear the check mark.
Help and
Support
■ Wait until files have been printed before sending additional files to the printer.
■ If you print large files or many files at one time, you may want to add additional
For more information about printer troubleshooting, click Start, then
click Help and Support. Type the keyword printer troubleshooter
in the Search box , then click the arrow.
memory to the printer. See the printer documentation for instructions for adding
additional memory.
You see a “Printer is out of paper” err or messa ge
After adding paper, make sure that the printer is online. Most printers have an
online/offline button that you need to press after adding paper.
Sound
You are not getting sound from the speakers
■ Make sure that the volume controls are turned up. For more information, see
“Adjusting the volume” on page 26.
■ Make sure that mute controls are turned off. For more information, see “Adjusting
the volume” on page 26.
■ If you are using external speakers, see the speaker setup poster to check your speake r
connections.
82
Help and
Support
For more information about sound troubleshooting, click Start, then
click Help and Support. Type the keyword sound troubleshooter
in the Search box , then click the arrow.
www.gateway.com
Page 89

Telephone support
Before calling Gatewa y Cust omer Care
If you have a technical problem with your computer, follow these recommendations before
contacting Gateway Customer Care:
■ Make sure that your computer is connected correctly to a grounded AC outlet that is
supplying power. If you use a surge protector, make sure that it is turned on.
■ If a peripheral device, such as a keyboard or mouse, does not ap pear to work, make
sure that all cables are plugged in securely.
■ If you have recently installed hardware or software, make sure that you have installed
it according to the instructions provided with it. If you did not purchase the hardware
or software from Gateway, see the manufacturer’s documentation and technical
support resources.
■ If you have “how to” questions about using a program, see:
■ Online Help
■ Printed documentation
■ The Microsoft Windows documentation
■ The software publisher’s Web site
■ See the troubleshooting section of this chapter.
Warning To avoid bodily injury, do not attempt to troubleshoot your computer
problem if:
■
Power cords or plugs are damaged
■
Liquid has been spilled into your computer
■
Your computer was dropped
■
The case was damaged
Instead, unplug your computer and contact a qualified computer
technician.
■ Have your customer ID, serial number, and order number available, along with a
detailed description of your problem, including the exact text of any error messages,
and the steps you have taken.
■ Make sure that your computer is nearby at the time of your call. The technician may
have you follow troubleshooting steps.
www.gateway.com
83
Page 90

Telephone numbers
Gateway offers a wide range of customer service, Customer Care, and information services.
Automat ed tro ubleshooti ng sy stem
Service description How to reach
Use an automated menu system and your telep hone
keypad to find answers to common problems.
800-846-2118
(US and Canada)
T elep hone numbers
You can access the following services through your telephone to get answers to your
questions:
Resource Service description How to reach
Gateway’s
fee-based
software tutorial
service
Gateway
Customer Care
Get tutorial assistance for software
issues billed by the minute.
Talk to a Gateway Customer Care
representative about a non-tutorial
technical support question.
(See “Before calling Gateway
Customer C are” on page 83 before
calling.)
TDD Customer Care (for hearing
impaired) is available:
Weekdays 8:00 a.m. - 10:00 p.m.
Pac if ic Ti m e
Weekends 8:00 a.m. - 7:00 p.m.
Pac if ic Ti m e
800-229-1103 (charged to
your credit card)
900-555-4695 (charged to
your telephone bill)
Gateway Customer Care
telephone numbers var y
by country or region. See
the label on the front of
your computer.
800-846-1778 (US)
605-232-2191
(all other countries)
84
Sales,
accounting, and
warranty
Get information about available
systems, pricing, orders, billing
statements, wa rra nty se rvice, or ot h er
non-technical issues.
www.gateway.com
800-846-2000 (US)
888-387-7752 (Canada)
Page 91

Self-help
If you have how-to questions about using your Gateway-supplied hardware or software,
see the following resources:
■ The printed or online documentation that came with your hardware or software. In
many cases, additional product information and online documentation for
Gateway-supplied hardware can be found in our Web site's Documentation Library.
■ This user guide and the Using Your Computer guide.
■ The software publisher's Web site.
Help and
Support
For more how-to information about Windows, click Start, then click
Help and Support.
T ype the keyword practice in the Search box ,
then click the arrow.
Tutoring
For help on using hardware or software that came with your Gateway computer, contact
Gateway's fee-based tutorial hotline:
■ 800-229-1103 (rate charged per minute; charged to a major credit card)
■ 900-555-4695 (rate charged per minute; charged to your telephone bill)
Training
Gateway provides the following computer-based training:
Resource Service description For more information
Gateway Learning
Libraries
A variety of courses and tutorials
are available on CD. Select from
several easy-to-use learning
libraries.
www.gateway.com/training
Online Training
from Learn With
Gateway
More than 450 online courses are
availa ble f rom
Learn With Gate w ay. All you have
to do is go online and log in. You
select the subject matter, and the
learni ng format ( self-pace d
tutorials or virtual classrooms), all
from the comfort of yo ur comput er .
www.gateway.com
www.learnwithgateway.com
85
Page 92

86
www.gateway.com
Page 93

Chapter 7
Networking Your Computer
■ Introducing networking
■ Creating an Ethernet network
■ T esting your network
■ Sharing your resources
■ T roubleshooting your Ethernet network
87
Page 94

Introduction to networking
A network is a collection of computers and other devices that communicate with each
other.
Using a network
A network lets you:
■ Share a single Internet connection
■ Share computer drives
■ Share peripheral device s
■ Stream audio and video files
■ Play multi-player games
Sharing a single Internet c onnection
Each computer connected to the network can share the same broadband connection or
modem and telephone line to access the Internet at the same time. This saves on the cost
of installing another telephone line for your second computer and paying for a second
Internet service provider (ISP) account.
Sharing driv es
With a network, you can copy files from computer to computer by copying and pasting
or dragging and dropping. You will no longer waste your time transferring files by using
recordable media. In addition, you can map a drive on a networked comp uter to a nother
computer, and access the files as if they were located on the hard drive of the computer
you are using.
Sharing peripher al devic es
Each computer that is connected to the network can share the same peripher al devices,
such as a printer. Select print from the computer you are currently using and your file is
automatically printed on your printer no matter where it is located on your network.
Streaming audio and vid eo files
With a network, you can store audio files (such as the popular .MP3 files) and video files
on any networked compu ter, then play them on any of the other compute rs or devices
connected to your network. This process is called streaming.
88
www.gateway.com
Page 95

Playing multi-player game s
With a home network, you ca n play m ulti- pla yer gam es. Lo ad a ga me l ike Micr osoft Racing
Madness 2 on your computers, and in minutes, you and your friends can rac e in competing
cars or on competing motorcycles .
Help and
Support
For more information about using a network, click Start, then click
Help and Support.
Type one of these keywords in the Search box
, then click the arrow:
■
internet sharing
■
sharing network drives
■
streaming
■
network games
Selecting a network connection
The biggest decision you need to make when creating your network is what type of
connection you will use. Gateway products support wired and wireless Ethernet networks.
Use the following criteria as a guide when selecting a network connection.
Wireless Ethernet network
A wireless Ethernet network is created by using radio emitters that may be embedded into
your computer or plugged into it. Create a wireless Ethernet (IEEE 802.11a, IEEE 802.11b,
or IEEE 802.11g) network if:
■ You are looking for an alternative to installing cable for connectivity
■ The ability to move about with your computer is as important as network speed
■ Your computer has wireless Ethernet for networking
Using a wireless Ethernet network
A wireless Ethernet network is ideal for creating a home or office network or adding
mobility to an existing wired Ethernet network. A wireless Ethernet network lets you move
about your home or office with your notebook or tablet PC. For example, you can take
your notebook or tablet PC from your home office to your patio without having an
Ethernet jack available.
Warning Radio frequency wireless communication can interfere with
equipment on commercial aircraft. Current aviation regulations
require wireless de vices to be turned off while tra veling i n an airplane.
IEEE 802.11a, IEEE 802.11b, and IEEE 802.11g communication
devices are examples of devices that provide wireless
communication.
www.gateway.com
89
Page 96

Important If your computer came equipped with an internal radio frequency
wireless device, see “Safety, Regulatory, and Legal Information” in
your user’s guide for general wireless regulatory and safety
guidelines. To find out if your computer has an internal wireless
device, check the device manager. For more information, see
“Determining if wireless Ethernet is already installed on your
computers” on page93.
Important Note any antenna placement constraints in the user guide of each
type of wireless device in your network.
Wireless Ethernet speed and frequency
Wireless Ethernet is available at two different speeds and at two different frequencies. The
following table compares the various wireless Ethernet network types.
Network Type Speed Frequency Advantages Disadvantages
IEEE 802.11a 54 Mbps 5 GHz Less possible
interference than
IEEE 802.11b and
IEEE 802.11g
IEEE 802.11b 11 Mbps 2.4 GHz
■
Large number of
access points
already exist in
airports, college
campuses, and
businesses
■
Compatible with
IEEE 802.11g
networks
■
Longer range (100
to 150 feet) th an
IEEE 802.11a
■
Shorter range (25
to 75 feet) than
IEEE 802.11b and
IEEE 802.11g
■
Not compatible
with
IEEE 802.11b or
IEEE 802.11g
networks
■
Possible
interference from
cordless
telephones and
microwaves
■
Not compatible
with
IEEE 802.11a
networks
90
www.gateway.com
Page 97

Network Type Speed Frequency Advantages Disadvantages
IEEE 802.11g 54 Mbps 2.4 GHz
■
Compatible with
IEEE 802.11b
networks
■
Longer range (100
to 150 feet) than
IEEE 802.11a
■
Possible
interference from
cordless
telephones and
microwaves
■
Not compatible
with
IEEE 802.11a
networks
Important The speed of a wireless network is related to signal strength. Signal
strength is affected by the distance between your wireless network
devices, by radio interference, and by interference from natural
obstruc tions such as walls, flo ors, and door s.
The most common way to set up a wireless Ethernet network is Dynamic Host Control
Protocol (DHCP) using a wireless access point router.
A DHCP network configuration uses
an access point router to automatically assign IP addresses to each computer or network
device.
Example access point router wireless Ethernet network
By using an access p oint, you can join a wireless Ethernet network and access a wired
Ethernet network.
The following is an example of an access point wireless Ethernet network that shows how
an access point also lets you access the Internet. The network is made up o f an access point,
a cable or DSL modem, and your computers. The access point is the central control point
for the network. Attached to the access point is the cable or DSL modem that provides
access to the Internet. Each of the computers or Ethernet-ready devices communicate with
the access point using radio waves. If your computer does not have a built-in wireless
Ethernet emitter, you need to add a wireless PCI card (desktop), PC card (notebook), or
USB adapter.
www.gateway.com
91
Page 98

Cable/DSL
modem
Access point
USB wireless
adapter
Tips & Tricks To add the ability to access a wired Ethernet netw ork to y our wireles s
Ethernet network, connect an access point to the router or use a
router that has a built-in access point, such as the Linksys wireless
access point router with 4-port switch. For more information about
accessing a wired Ethernet, see “Using a wired Ethernet network”
on page 94.
Equipment you need for an access point wireless Ethernet network
For an access point wireless Ethernet network you need:
■ Two or more computers with wireless Ethernet emitters
■ One access point
■ One broadband Internet conn ection (optional)
92
www.gateway.com
Page 99

Important IEEE 802.11b and IEEE802.11g use the same radio frequency.
IEEE 802.11a uses a different radio frequency than IEEE 802.11b
and IEEE 802.11g. All wireless Ethernet components must use the
same frequency. A combination of IEEE 802.11a and IEEE 802.11b
or IEEE 802.11a and I EEE 802.11g components will not work. Some
wireless devices can broadcast and receive signals on both
frequencies.
A mixture of IEEE 802.11b and IEEE 802.11g componen ts wil l resu lt
in your network running at the speed of the slower IEEE 802.11b
components.
Tips & Tricks When buying your access point, be sure the model includes
everything your network needs, including:
■
802.11g support - for next-generation, high-speed wireless
communications
■
Internet security features - such as a firew all to protect y our network
from unwanted intruders
■
Wireless security features - such as 128-bit WEP encryption
■
4-port switch - to elimin ate the need f or addi tional netw ork hardware
■
DHCP server/dynamic IP address assignment - to automatically
configure network and IP addresses
Determining if wireless Ethernet is already installed on your computers
To determine if wireless Ethernet is already installed on your computer:
1 Click Start, then click Control Panel. The Control Panel window opens. If your Control
Panel is in Category View, click
Performance and Maintenance.
2 Click/Double-click System, click the Hardware tab, then click Device Manager . The Device
Manager window opens.
3 Click the plus (+) in front of Network adapters. The wireless Ethernet device installed
in your computer is listed. If one is not listed, you must install one.
www.gateway.com
93
Page 100

Wired Ethernet network
Create a wired Ethernet network by using special wires to connect all the computers and
devices on your network. Wired Ethernet networks are typically faster than other network
types. Create a wired Ethernet network if:
■ You are building a new home or your existing home already has Ethernet cable
installed in each room that has a device you want to connect
■ You are creating a network in an office or business where network speed is more
important than moving about with your computer
■ Your computer has an Ethernet jack for connecting to the network
Using a wire d Ethe rnet netwo rk
A wired Ethernet network consists of two or more computers connected together through
an Ethernet cable. This connection type is commonly used in offices around the world
and can be used to build computer networks in the home.
Ethernet, Fast Ethernet, or Gigabit Ethernet
Ethernet is available at three different speeds. Standard Ethernet runs at 10 Mbps, Fast
Ethernet runs at 100 Mbps, and Gigabit Ethernet runs at 1000 Mbps. Most home networks
are built using Standard or Fast Ethernet components. B usiness networks are typically buil t
using Fast or Gigabit Ethernet components.
To create a wired Ethernet network, you or your electrician must install special Ethernet
cables in your home or office.
Important Check local code requirements before installing Ethernet cable or
other wiring in your home or office . Your municipality ma y require y ou
to obtain a permit and hire a licensed installer.
The most common way to set up a wired Ethernet network is Dynamic Host Control
Protocol (DHCP) using a router. A DHCP network configuration uses a router to
automatically assign IP addresses to each computer or network device.
94
www.gateway.com
 Loading...