

Page 1
Operating Instructions
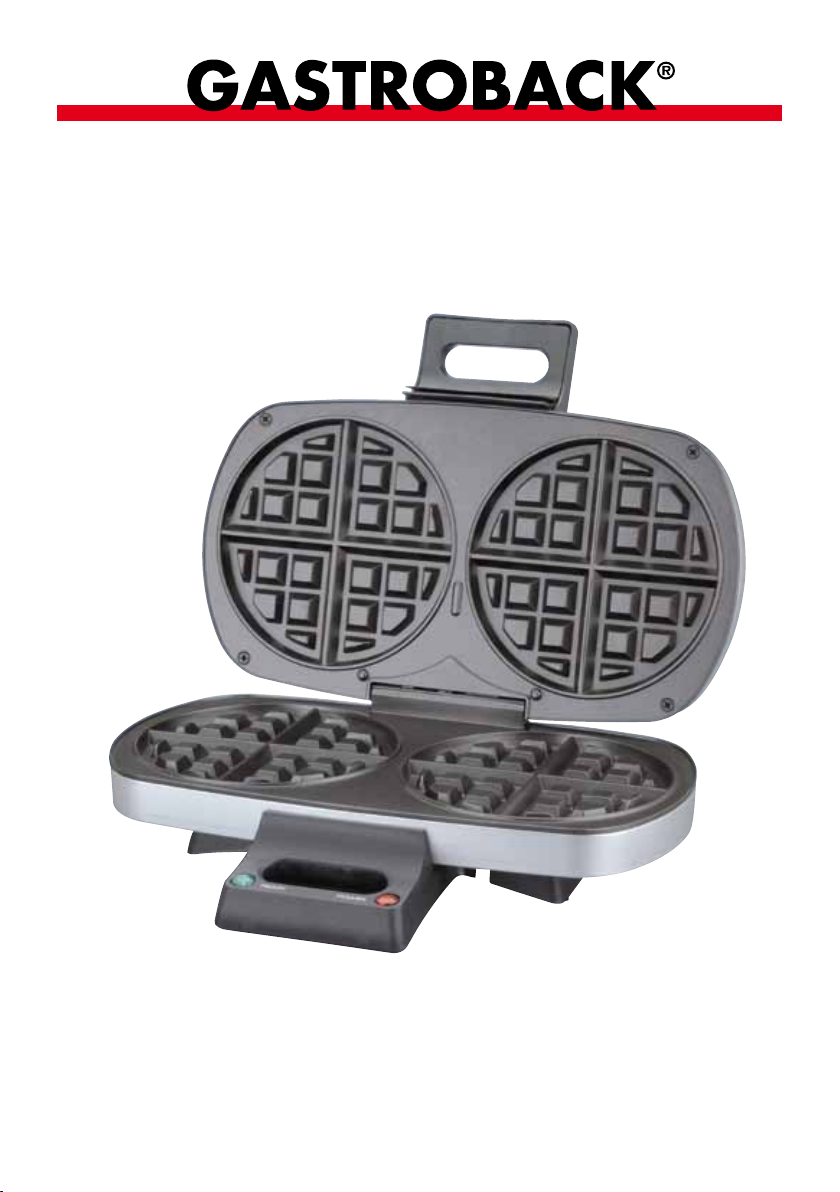
Design Waffle Maker Pro
Art.-No. 42405 Design Waffle Maker Pro
Read all provided instructions before first use!
Model and attachments are subject to change!
For household use only!
19
Page 2

Carefully read all provided instructions before you start running
the appliance and pay attention to the warnings mentioned in
these instructions.
Table of Contents
Knowing the Design Waffle Maker Pro ...............................................................22
Important safeguards ........................................................................................23
For all electrical appliances ...........................................................................24
High temperatures - Risk of burns ...................................................................25
Non-stick coating .........................................................................................26
Technical specifications .....................................................................................26
Using your Design Waffle Maker Pro ..................................................................27
Before first use .............................................................................................27
Use ...........................................................................................................27
Tips for making perfect waffles ...................................................................................28
Care and cleaning ...........................................................................................29
Storage ...........................................................................................................29
Notes for disposal ............................................................................................30
Information and service .....................................................................................30
Warranty ........................................................................................................30
Recipes ...........................................................................................................27
20
Page 3

Dear Customer!
Congratulations on the purchase of your new Gastroback Design Waffle Maker Pro.
Delicious, airy, light and delicate Belgian waffles with the Gastroback Design Waffle Maker
Pro guarantee a perfect treat for the whole family. In addition, the waffles succeed quickly
and practically with the twin-cake pan waffle maker for two round waffles. To have a good
wafflemaker in the kitchen is not only worthwhile if you have kids at home.
Always perfectly baked - top and bottom heat for optimum heat distribution and variable
temperature adjustment ensure that each waffle is a success. The waffles arrive evenly browned and crispy on your plate. On this appliance, the degree of browning is continuously
adjustable with the temperature control. With its modern glass design is your new waffle
maker a visual highlight in every kitchen. Low-fat baking and easy cleaning of the appliance
are possible thanks to the non-stick coating.
These instructions for use will inform you about the various functions and features, which make
it easy to take pleasure in your new waffle maker.
We hope you enjoy your new Gastroback Design Waffle Maker Pro.
Your Gastroback GmbH
21
Page 4
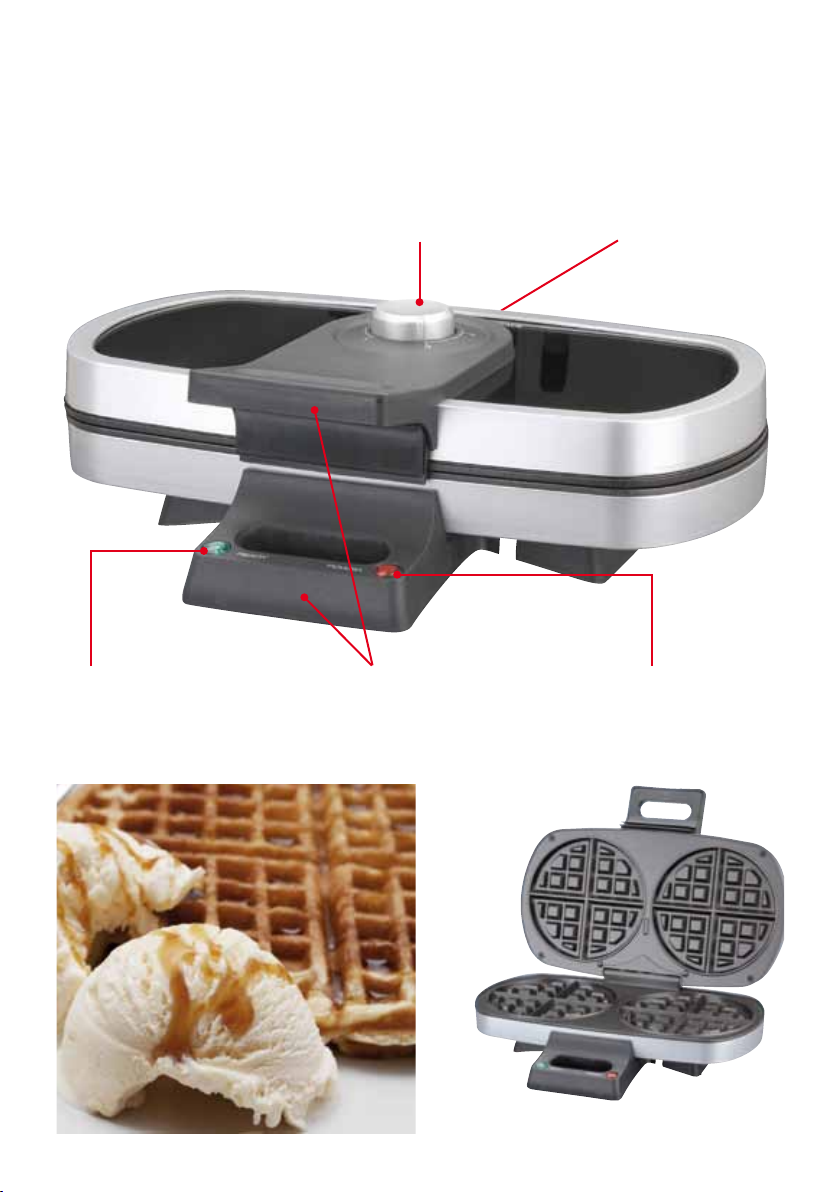
Knowing the Design Wafflemaker Pro
Temperature light (green)
lights up when the waffle
maker is warming up.Lights
off when the waffle maker is
ready to use.
Temperature control
Handle
Indicator light (red) lights up
when the waffle maker is connected
to the power supply.
Power cord
twin-cake pan waffle maker
22
Page 5

Important safeguards
Carefully read all instructions before operating this appliance and save for further reference.
Do not attempt to use this appliance for any other than the intended use, described in these
instructions. Any other use, especially misuse, can cause severe injuries or damage by electric
shock, heat, or fire. This product complies with all binding CE labelling directives.
These instructions are an essential part of the appliance. Do not pass the appliance without
this booklet to third parties.
Any operation, repair and technical maintenance of the appliance or any part of it other than
described in these instructions may only be performed at an authorised service centre. Please
contact your vendor.
General safety instructions
This appliance is for household use only and NOT intended for use in moving vehicles. Do
not operate or store the appliance in humid or wet areas or outdoors. Any use of accessories,
attachments or spare parts that are not recommended by the manufacturer or damaged in any
way may result in injuries to persons and/or damage.
Check the entire appliance regularly for proper operation – especially the power cord (e.g.
check for distortion, discolouration, cracks, corroded pins of the power plug). Do not operate
the appliance, when the appliance or any part of it is likely to be damaged, to avoid risk
of fire, electric shock or any other injuries to persons and/or damage. The appliance or its
parts are likely to be damaged, if the appliance has been subject to inadmissible strain (e.g.
overheating, mechanical or electric shock), or if there are any cracks, excessively frayed or
melted parts, or distortions, or if the appliance is not working properly. In one of these cases
occur during operation, immediately unplug the appliance. Get in contact with an authorized
service centre for examination and/or repair.
Operate the appliance on a well accessible, stable, level, dry, and suitable large table or
counter that is resistant against water, fat, and heat. Do not place the appliance on plastic surfaces or surfaces with plastic coatings (e.g. painted surfaces), and do not place any delicate
objects near the appliance during operation, to avoid damage.
Always keep the appliance and the table or counter clean and dry, and wipe off spilled liquids
immediately. Do not place any clothes or tissue or other foreign objects under or on the appliance during operation, to avoid risk of fire, electric shock and overheating. Do not place the
appliance over a power cord or on any surfaces sensitive to heat, fat, or moisture, or near the
edge of the table or counter, or on wet or inclined surfaces.
During operation keep the appliance in an appropriate distance of at least 50 cm on each
side to the edge of the working space and furniture, walls, boards, curtains to avoid damage
due to heat and splashes. Leave at least 1 m of free space above the appliance. Do not operate the appliance under over hanging boards or drop lights.
Exclusively use the appliance for domestic use and for processing food that is fit for consumption. Immediately unplug the appliance, if there is any kind of malfunction or problem (e.g.
overheating).
This appliance is NOT intended for use by persons (including children) with reduced physical,
sensory or mental capabilities, or lack of experience and knowledge, unless they have been
given supervision or instruction concerning use of the appliance by a person responsible for
their safety. Children must always be supervised to ensure that they do not play
with the appliance or any parts of the appliance or the packaging. Always keep
23
Page 6

the appliance where it is dry, frost-free, and clean, and where young children cannot reach
it. Do not leave the appliance or any part of it unattended, when in reach of young children.
Do not place the appliance or any part of it in a range, or on or near hot surfaces (e.g. burner,
heater or oven). Do not use any parts of the appliance with any other device or for any other
purpose. Before operation, always ensure that the appliance is assembled and
connected completely and correctly according to the instructions in this booklet. Do not handle the appliance or any part of it with violence.
Do not hold your hands or any foreign objects (e.g. clothes, cooking utensils) on the heating
plate, with the appliance connected to the power supply. For example, use barbecue tongs
made of plastic to take your waffle.
• Freshmoisteneddoughwillsplash,whenplacedonthehotheatingplate,andhotsteam
will escape. During operation, do not hold any part of your body or delicate objects over the
heating plate. Always ensure that persons (including you) keep sufficient distance to the appliance during operation.
• Donotmoveortilttheapplianceorplaceitintheuprightposition,whentheapplianceis
still hot. Also, ensure that the appliance will not fall over, when opening the lid. Do not hold
the appliance at the power cord for moving the appliance. Open and close the lid carefully
without violence.
• Donotleavetheapplianceunattended,whenitisconnectedtothepowersupply.Always
unplug the appliance, and leave the appliance cool down, before moving, or cleaning the
appliance, or assembling or disassembling any parts, or when the appliance is not in use. Do
not place any hard and/or heavy objects on the appliance or any part of it.
• Donotuseanyabrasivecleaners,cleaningpads(e.g.metalscouringpads),oranycorrosive
chemicals (e.g. bleach) for cleaning.
•Donotplacethehousingorthepowercordinanautomaticdishwasher.
• Donotleaveanyfooddryontheappliance.Alwaysclean theapplianceaftereachuse
to prevent an accumulation of baked-on foods (see: ›Care and cleaning‹). Always keep the
appliance and its parts, where it is clean.
• Thisapplianceisintendedtobeusedinhouseholdandsimilarapplications,suchas:
– staff kitchen areas in shops, offices and other commercial environments;
– agricultural areas, farm houses;
– by clients in hotels, motels and other residential type environments;
– bed and breakfast type environments.
Important safeguards for electrical appliances
The appliance is heated electrically. Place the appliance near a suitable wall power socket to
connect the appliance directly to a protected mains power supply with protective conductor
(earth/ground) connected properly. Ensure that the voltage rating of your mains power supply
corresponds to the voltage requirements of the appliance (230 V, 50 Hz, AC, rated for at least
16 A). The power outlet socket must be installed separately from other power outlet sockets to
avoid interference with other appliances.
The installation of a residual current operated circuit breaker (r.c.c.b.) with a maximum rated
residual operating current of 30 mA in the supplying electrical circuit is strongly recommended. If in doubt, contact your electrician for further information.
In various foreign countries, the specifications for power supplies are subject to incompatible
norms. Therefore it is possible that power supplies in foreign countries do not meet the requi-
24
Page 7

rements for safe operation of the appliance. Thus, before operating the appliance abroad,
ensure that safe operation is possible.
• Donotuseanydesktopmultisocketoutlet,externaltimer,orremotecontrolsystems.Itis
best to avoid using an extension cord, but if you wish to use one, only use an extension cord
rated for a maximum continuous current of at least 16 A with safety plug and safety coupler
plug and protective conductor (earth/ground) connected properly. Additionally, the extension
cord must be of sufficient length. When laying power cords, always ensure that no one will
step on the power cord or get entangled or trip over the power cords. Also, ensure that no
tension is applied to any part of the power cords. Tie the extension cord loosely onto the leg
of the table using a separate cord, to ensure that no one will pull the power cord. To connect:
always connect the appliance to the extension cord first. To disconnect: Always unplug the
extension cord from the power supply first.
• Alwayshandlepowercordswith care. The pinsofthepowerplugmust be smooth and
clean. Always completely unwind the power cord before use. Do not place the appliance on
a power cord. Power cords may never be knotted, twisted, pulled, strained or squeezed. Do
not let the plug or power cord hang over the edge of the table or counter. The power cord may
not touch hot surfaces or sharp edges. Ensure that no one will pull the appliance by the power
cord. Take care not to entangle in the power cord. Always grasp the plug to disconnect the
power cord. Do not touch the appliance or power plug with wet hands when the appliance is
connected to the power supply.
• DO NOT drip or spill any liquids on the housing or power cord. Do not immerse the appli-
ance or power cord in water or other liquids. Do not pour or spill any liquids on the housing
or power cord. Do not place the appliance on wet surfaces. When liquids overflowed or are
spilled on the housing or power cord, immediately unplug the appliance. Thereafter, clean
the appliance and let it dry for at least 1 day. (see: ›Care and cleaning‹) Do not clean the
appliance in an automatic dishwasher.
High temperatures – risk of burns
WARNING! HOT SURFACE!
The Design Waffle Maker Pro is designed for baking food. For this purpose, the heating plates
are heated electrically. The heating elements start heating as soon as you connect the appli-
ance to the power supply. Thus, improper handling could cause severe injuries
and damage. Please keep this in mind to avoid burns and damage.
• Theheating plate, frameoftheheatingplate, lidandhousingofthe appliance can be very hot during operation and shortly thereafter. Additionally,
during preparation of your food, hot steam and splashes could escape. Do
not touch the hot surfaces with any parts or your body or any heat-sensitive or
moisture-sensitive objects during operation or while the appliance is still hot. Only touch the
appliance and its parts at the handles and operating elements during operation and shortly
thereafter. Beware of hot steam and condensate, when placing food on the heating plate. Do
not leave any foreign objects on the hot heating plate.
• Donotmovetheappliancewhenstillhot.Alwaysleavetheapplianceandallitspartscool
down before moving the appliance or cleaning the appliance. Do not place the appliance on
heat-sensitive surfaces, for operation or when hot.
• Donotoperatetheapplianceclosetoinflammable,volatilematerials(e.g.alcohol,spirit,or
benzine), or high-proof alcoholic beverages. Alcohol will quickly evaporate due to the heat,
thus building up an inflammable mixture that could be ignited by any source of ignition (e.g.
25
Page 8

candles, cigarettes, and heating elements of the appliance), causing severe injuries to persons
and serious damage. DO NOT cook any high-proof alcoholic liquid or alcoholic
foodstuffs (e.g. mulled wine, grog) on the appliance. Do not pour any alcoholic liquid on the appliance to avoid risk of explosion and fire.
Non-stick coating
The heating plates of your Design Waffle Maker Pro are provided with non-stick coatings. Even
without using additional oil, food will not stick to the coated surfaces. Due to the baked food,
some discolouration may occur. However, this will not affect the baking performance.
Please adhere to the following precautions:
• Before first use, wipe the non-stick coatings of the heating plates with a little cooking oil.
Thereafter, there is no need to add any further oil for baking.
• Donotusetheappliance,ifthenon-stickcoatingisscratched,crackedordetacheddueto
overheating.
• Onlyusewoodenorheat-resistantplasticcookingutensilswiththeappliance.Donotuse
hard or sharp objects for scratching, stirring, or cutting on the coatings. We will not be liable
for damage to the non-stick coating, if metal utensils or similar objects have been used. Do not
use any spray-on non-stick coatings.
• Thenon-stickcoatingsminimisetheeffortofcleaning.Donotuseabrasivescourersorabrasive cleaners for cleaning. Even stubborn residues can be removed via a soft sponge or soft
nylon brush and warm dishwater.
Technical specifications
Model:
Power supply:
Power consumption:
Length of power cord:
Weight:
Dimensions:
Art. No. 42405 Design Waffle Maker Pro
220 – 240 V AC, 50 Hz
1,100 – 1,300 W
approx. 80 cm
approx. 3 kg
approx. 350 x 270 x 105 mm
(width x depth x height)
Certification:
Using your Design Waffle Maker Pro
Before first use
Before firts use the waffle maker should be preheated for ten minutes closed and the temperature control set to the highest setting. This will remove the smell typically encountered when
first switching on the waffle maker. Please ensure sufficient ventilation. Clean the appliance
afterwards as described in ›Care and cleaning‹.
Before first use and after a long period of storage, clean the appliance with a damp soft cloth
26
Page 9

and warm soapy water (see: ›Care and cleaning‹).
WARNING! Always unplug the appliance and wait for the appliance to cool down, before
cleaning. Do not pour or drip any liquids on the appliance or power cord. When liquids are
spilled on the appliance, immediately unplug the appliance and dry it to avoid risk of electric
shock or fire. Do not attempt to operate the appliance, when liquids are on or in the electrical
section of the appliance. Do not clean the appliance in the dishwasher.
1. Remove all promotional materials and packing and place the appliance on a convenient
surface (see: ›Safety instructions‹). Do not remove the rating label.
2. Wipe the heating plates with a damp soft cloth and warm soapy water. Dry it properly after
cleaning.
Note: When using the Design Waffle Maker Pro for the first time, you may notice a fine smoke
haze, because of the first heating of some of the components. There is no need for concern. To
prevent smell and taste of your food from being affected, you should heat the appliance on the
highest temperature control setting without any dough. If the burnt smell occurs again on later
use, clean the appliance (see: ›Care and cleaning‹). If the burnt smell persists stubbornly even
after thoroughly cleaning the appliance, return the appliance to an authorised service centre
for examination and repair.
3. To grease the heating plates, brush the hot grids with a flavourless oil. Then wipe with a
paper towel or pastry brush.
4. Preheat your Design Waffle Maker Pro on the highest temperature control setting, turn on
the appliance and wait round about 8 minutes. The green indicator light will be illuminated
when the appliance is preheated and ready for filling in the dough. Turn the temperature control to the preferred setting. For best results, do not open waffle maker during cooking process.
Use
1. Prepare the dough. You will find a ›Recipes‹ section at the end of this manual.
2. Place the appliance on a well accessible, stable, level, dry, and suitable large table or
counter. Do not place any cloth or tissue beneath or on the appliance, to avoid any risk of fire,
electric shock and overheating. Always keep the table or counter clean and dry and immediately wipe off spilled liquids. Ensure that there is no foreign substance on the heating plates.
Close the lid.
Do not touch the exterior of the Design Waffle Maker Pro while the appliance is in use. Always
keep your hands, face and arms as well as any clothing and other heat-sensitive objects away
from the waffle maker during operation and only touch the handle, or the temperature control.
Do not touch the heating plates.
Connect the appliance directly to a separately protected mains power supply wall socket with
protective conductor (earth/ground; 220/240 V, 50 Hz, AC, rated for 16 A). The red indicator light will turn on as soon as the plug is connected to the power outlet.
3. Preheat your Design Waffle Maker Pro on the highest temperature control setting. Therefore
turn on the appliance and wait round about 8 minutes. The green indicator light will be illuminated when the appliance is preheated and ready for filling in the dough. Turn the temperature
control to the preferred setting. For best results, do not open the waffle maker during cooking
process. It is important that the heating plates are preheated and greased before the first use.
After finishing the first waffle no more greasing is necessary. To grease brush them with a
flavourless oil. Then wipe with a paper towel or pastry brush.
27
Page 10

4. Make sure the appliance is ready-to-operate and the green indicator light is illuminated
before pouring the dough onto the heating plate.
Note: It is normal that a slight burnt smell occurs during the first operation (see: ›before first use‹).
WARNING! Pouring dough onto the preheated heating plates dough or grease might spurt
out. Keep enough distance to the appliance during operation and do not touch the hot exterior
or heating plates of the waffle maker. For opening the lid use the handle only.
5. Pour dough evenly into the centre of the waffle grids. Use a heat-proof spatula (no metal
cooking cutlery!) to spread the dough evenly over the grids. Close the lid. Pay attention not
touch the hot exterior of the appliance. Shortly after having filled in the dough the green control lamp turns off. The red control lamp lights up.
6. The baking time is in general 3 – 5 minutes, depending on the nature of the dough as well
as the selected temperature. Choose your preferred setting on the temperature control. Check
the level of browning. Should the waffle be too light or too dark, adjust the temperature control
or baking time. Once the baking process is finished, the red control lamp turns out, and the
green one lights up again. Remove the waffle immediately. To prevent damage to the non-stick
coating, do not use any sharp or pointed objects to remove the food.
7. Once the waffle is ready, open the lid and remove waffle by gently loosening the edges
with a heat-proof plastic spatula. Never use metal utensils, as they may damage the non-stick
coating.
8. Place fresh dough into the waffle maker immediately after removing the waffle.
9. After use, remove the plug from the wall socket and allow the appliance to cool down with
its cooking plates open.
ATTENTION! Never cut or scratch on the heating plates with sharp-edged cutlery. This would
harm the non-stick coating. Removing the waffle from the heating plates you can refill the heating plates. Always disconnect the plug from the wall outlet once baking has been completed.
Tips for making perfect waffles
To measure flour, stir the flour first to aerate it, since it settles when it sits. Then spoon it into a
measuring cup, levelling off the top with the back of a knife – do not pack down into measuring cup. These quick steps will help you to avoid heavy waffles.
For best results: For loose dough, fill to the 3/4 mark (for thicker dough, fill to the top) or enough
to fill the entire lower grid. Pour dough evenly into the centre of the waffle grids.
Note: Do not cover the heating plates with too much dough. If the dough has baking agents
(such as soda, bakingpowder or yeast) the dough will leak out of the sides of the waffle maker.
Use a heat-proof spatula to spread the batter evenly over the grids.
Belgian waffles taste best when made to order, but baked Belgian waffles may be kept warm
in a 100 degree oven. Place in a baking pan or wrap in foil while in the oven. (Waffles wrapped in foil may lose their crispness.)
Baked waffles may be frozen. Allow to cool completely, and then place in plastic food storage
bag. Use waxed paper to keep waffles separated. Reheat in an oven, toaster or toaster oven
when ready to use and serve the waffles warm.
To serve we recommend maple syrup, fruit syrups, warm fruit compote, fruit sauce, fresh
28
Page 11

berries, chopped fruit, chopped nuts, powdered sugar, whipped cream, ice cream, sorbet,
chocolate sauce or fruit yogurt. Give your fancy full scope.
Care and cleaning
Always ensure that the appliance is switched off. Remove the plug from the power outlet before cleaning and storing the appliance.
WARNING! Allow the appliance to cool down, before cleaning or moving the appliance.
Do not place the appliance or power cord in an automatic dishwasher. Do not immerse the
appliance or power cord in any liquids or spill any liquids on it. Always wipe off spilled liquids
immediately. Do not pour or drip any liquids on the appliance or power cord. Do not place
the appliance on wet or damp surfaces. When liquids are spilled on the appliance, immediately unplug the appliance and dry the appliance to avoid risk of electric shock or fire. For easy
cleaning – immediately after each use clean the appliance. This way no leftover dough will
stick, burn-in or carbonise to the heating plates.
ATTENTION: Abrasive and strong cleaner damage the surface of the non-stick coating. Never clean the appliance with abrasive and strong cleaner. Never use hard or sharp-edged
subjects when using or cleaning the appliance as this may damages the non-stick coat. Do not
use force when using the appliance to avoid damages.
Carefully clean the heating plates with a damp sponge or cloth and warm soapy water. Do not
clean the waffle maker in the dishwasher. Wipe the exterior of the waffle maker and power
cord with a damp soft cloth. Take care not to spill or drip water or any other liquids on the
appliance.
Thoroughly dry the waffle maker and all parts of the appliance after each cleaning. Polish the
surface with a dry towel.
Storage
WARNING: Young children must be supervised that they do not play with the appliance or
any part of it. When the appliance is not in use, always turn the temperature control to the
lowest temperature setting. Thereafter, unplug the appliance. Do not leave the appliance unattended while connected to the power supply to avoid risk of electric shock or fire.
Always clean the appliance before storing to avoid accumulation of dried-on food. Operate
according to the instructions ›Care and cleaning‹. Make sure that there are no foreign substances on the heating plates and close the lid for storing. Ensure to store the appliance where
it is clean, dry and safe from frost, direct sunlight and inadmissible strain (mechanical or
electric shock, heat, moisture) and where it is out of reach of young children. Place the
appliance on a clean and stable surface, where it cannot fall. Do not place any hard or heavy
objects on the appliance or any part of it.
Always handle power cords with special care. Electric cables may never be knotted, twisted,
pulled, strained, or squeezed.
Do not use any parts or accessories of the appliance for any other purpose than operating the
appliance. It is good advice to store the parts of the appliance with the appliance.
CAUTION: Do not hold the appliance by the power cord for moving the appliance. To move
the appliance, always grasp the appliance at the handle or at both sides of the housing, to
avoid damage.
29
Page 12

Notes for disposal
Dispose of the appliance and packaging must be effected in accordance with the corresponding local regulations and requirements for electrical appliances and packaging.
Please contact your local disposal company.
Do not dispose of electrical appliances as unsorted municipal waste, use separate
collection facilities. Contact your local government for information regarding the collection
systems available. If electrical appliances are disposed of in landfills or dumps, hazardous
substances can leak into the groundwater and get into the food chain, damaging your health
and well-being.When replacing old appliances with new once, the retailer is legally obligated
to take back your old appliance for disposal at least for free of charge.
Information and service
Please check www.gastroback.de for further information. For technical support, please contact Gastroback Customer Care Center by phone: +49 (0)4165/22 25-0 or e-mail:
info@gastroback.de.
Warranty
We guarantee that all our products are free of defects at the time of purchase. Any demonstrable manufacturing or material defects will be to the exclusion of any further claim and
within warranty limits of the law free of charge repaired or substituted. There is no warranty
claim of the purchaser if the damage or defect of the appliance is caused by inappropriate
treatment, over loading or installation mistakes. The warranty claim expires if there is any
technical interference of a third party without an written agreement.
The purchaser has to present the sales slip in assertion-of-claim and has to bear all charges
of costs and risk of the transport.
30
Page 13

Recipes
31
Page 14

Basic Waffle recipe
Makes 1-2 waffles:
Ingredients
1 egg
4 tablespoons unsalted butter, melted and
cooled
1 heaped tablespoon sugar
1 small pinch salt
approx. 100 ml milk
6 heaped tablespoons flour
Preparation
Take the melted butter and add the egg,
sugar, and salt; stir until mixture is smooth
and creamy. Add the flour and blend. Add
as much milk as it needs to make the dough
easy to pour.
Tip: Flavour and spice the dough ad libitum
using i.e. gingerbread spices, vanillaflavour,
chocolateflavour or cinnamon.
mixture begins to foam.
Put the flour and salt into a large bowl; stir to
blend and reserve. Add the egg yolks, one
of the egg whites, and remaining sugar to
the yeast mixture; stir to blend. Add the remaining water, milk, melted butter, oil, and
vanilla; stir until the mixture is smooth. Stir the
liquid mixture into the flour mixture and beat
until the mixture is smooth.
Beat the egg whites until stiff peaks form.
Fold the egg whites gently into the dough.
Let the dough stand for 1 hour, stirring every
15 minutes.
Preheat your wafflemaker on preferred setting (green indicator light will be illuminated
when preheated) and act upon the instructions described in ›Use‹. Serve with whipped cream, fruit, jam, powdered sugar, or a
warm fruit syrup.
Classic belgian waffles
Classic Belgian waffles have a crispy outside
and are soft and moist on the inside. They are
often served as part of a celebration – even
to celebrate something as simple as a beautiful day. Try these waffles with your favourite
syrup or a topping such as sliced fresh strawberries and freshly whipped cream.
Makes 10 waffles:
Ingredients
355 ml water
2¼ teaspoons active dry yeast (one packet)
3 cups (approx. 360 gr.) sifted flour
¼ teaspoon salt
3 large eggs, separated + 1 egg white
1
/3 cup (approx. 75 gr.) sugar
236 ml milk
8 tablespoons unsalted butter, melted and
cooled
2 teaspoons vegetable oil
2 teaspoons vanilla extract
Preparation
Heat ½ of the water to lukewarm.
Note: Do not use water that is too hot be-
cause the yeast wont rise. Dissolve the yeast
in the water with a pinch of the sugar from
the recipe; let stand 5 to 10 minutes, until the
Gingerbread belgian waffles
These waffles have the flavour of just-baked
gingerbread and are delicious served with
fresh fruit or caramelised apples and pears.
Makes 6 waffles:
Ingredients
118 ml warm water
1 teaspoon granulated sugar
2¼ teaspoons active dry yeast (1 packet)
1½ cups (approx. 180 gr.) all-purpose flour
1 cup (approx. 250 gr.) shortbread biscuit
crumbs
¼ cup (approx. 55 gr.) granulated sugar
3 cups (approx. 360 gr.) sifted flour
¼ teaspoon salt
1 teaspoon ground ginger
¼ teaspoon lemon zest, finely chopped
472 ml cups warm milk
3 large eggs, separated
½ cup unsalted butter, melted and cooled
1 teaspoon vanilla extract
Preparation
Measure water into a large bowl.
Note: Do not use water that is too hot be-
cause the yeast wont rise. Add 1 teaspoon
granulated sugar and yeast; stir to dissolve.
Let stand 10 minutes.
32
Page 15

In a separate bowl, combine the flour, shortbread biscuit crumbs, ¼ cup sugar, salt, ginger, and lemon zest; stir to combine. Add
the milk, egg yolks, melted cooled butter,
and vanilla to the yeast mixture. Stir until
smooth. Add the dry ingredients and beat
until smooth, using hand mixer at low speed.
Cover with waxed paper and let stand to rise
in a warm, draft-free place for 30 minutes.
Beat the egg whites until stiff, but not dry.
Gently fold into the dough.
Preheat your wafflemaker on preferred setting (green indicator light will be illuminated
when preheated) and act upon the instructions described in ›Use‹. Serve with lemon
curd, fruit, jam, powdered sugar, a warm
fruit syrup, or whipped cream.
Good night waffles
Most of the mixing for these waffles is done
the night before. In the morning, just mix in
the eggs, vanilla and a pinch of baking soda
while the wafflemaker is heating. Leftover
dough may be covered and kept in the refrigerator for up to three days. Heat your wafflemaker in the morning, stir the dough and
have a freshly baked waffle for breakfast.
Makes 6 waffles:
Ingredients
118 ml lukewarm water
1 tablespoon granulated sugar
2¼ teaspoons active dry yeast (1 yeast packet)
472 ml whole milk, warmed
½ cup (approx. 115 gr.) unsalted butter, melted and cooled
1 teaspoon salt
2 cups (approx. 240 gram) all-purpose flour
2 large eggs, lightly beaten
2 teaspoons vanilla extract
¼ teaspoon baking soda
Preparation
The night before, or at least 8 hours before
baking, combine the warm water, granulated
sugar and yeast. Let stand 10 minutes, until
foamy.
Stir in the warm milk, melted butter and salt.
Beat in the flour until smooth (this may be
done using a hand mixer on low speed).
Wrap bowl tightly with plastic wrap and let
stand overnight (or for 8 hours) on the countertop – do not refrigerate. When ready to
bake, preheat your wafflemaker on preferred
setting (green indicator light will be illuminated when preheated).
While the waffle maker is heating, stir the
eggs, vanilla and baking soda into the dough. Bake upon the instructions described in
›Use‹. Serve with sliced fresh fruit, jam, powdered sugar, a warm fruit syrup, or whipped
cream.
Pumpkin nut belgian waffles
These waffles taste like freshly baked pumpkin muffins and are delicious served with
warm maple syrup.
Makes 6 waffles:
Ingredients
1½ cups (approx. 180 gr.) all-purpose flour
1 ounce (approx. 30 gr.) finely chopped walnuts (best if toasted first)
1 tablespoon cornstarch
1 tablespoon baking powder
1 teaspoon salt
1 teaspoon ground cinnamon
½ teaspoon ground ginger
¼ teaspoon freshly ground nutmeg
3
/4 cup (approx. 75 gr.) pumpkin puree (can-
ned solid pack pumpkin)
2 large eggs, separated
236 ml whole milk
59 ml real maple syrup (do not use pancake
syrup)
3 tablespoons unsalted butter, melted
1 teaspoon vanilla extract
3 large egg whites
Preparation
In a large bowl, combine the flour, chopped
nuts, cornstarch, baking powder, salt, cinnamon, ginger, and nutmeg. Stir to blend
and reserve. In a second bowl, combine
the pumpkin puree, egg yolks, milk, maple
syrup, melted butter, and vanilla; stir until
33
Page 16

smooth. Add the liquid ingredients to the dry
ingredients and stir to blend until smooth,
using a whisk.
In a clean, dry bowl, beat all the egg whites
until stiff peaks form. Gently fold them into
the dough.
Preheat your wafflemaker on preferred setting (green indicator light will be illuminated
when preheated) and act upon the instructions described in ›Use‹. Serve with warm
maple syrup, powdered sugar, or whipped
cream.
34
Page 17

GASTROBACK GmbH
Gewerbestraße 20 . D-21279 Hollenstedt / Germany
Telefon +49 (0)41 65/22 25-0 . Telefax +49 (0)41 65/22 25-29
info@gastroback.de . www.gastroback.de
20121130
 Loading...