

Garmin STYLUS COLOR 440 User Manual

Start Here
Start Here
To get up and running with your
EPSON Stylus
1 Set up the printer
1 Set up the printer
2 Install the software
2 Install the software
3 Print an image
3 Print an image
®
COLOR 440, you need to:
CPD 7046R1
1 Set Up the Printer
1 Set Up the Printer
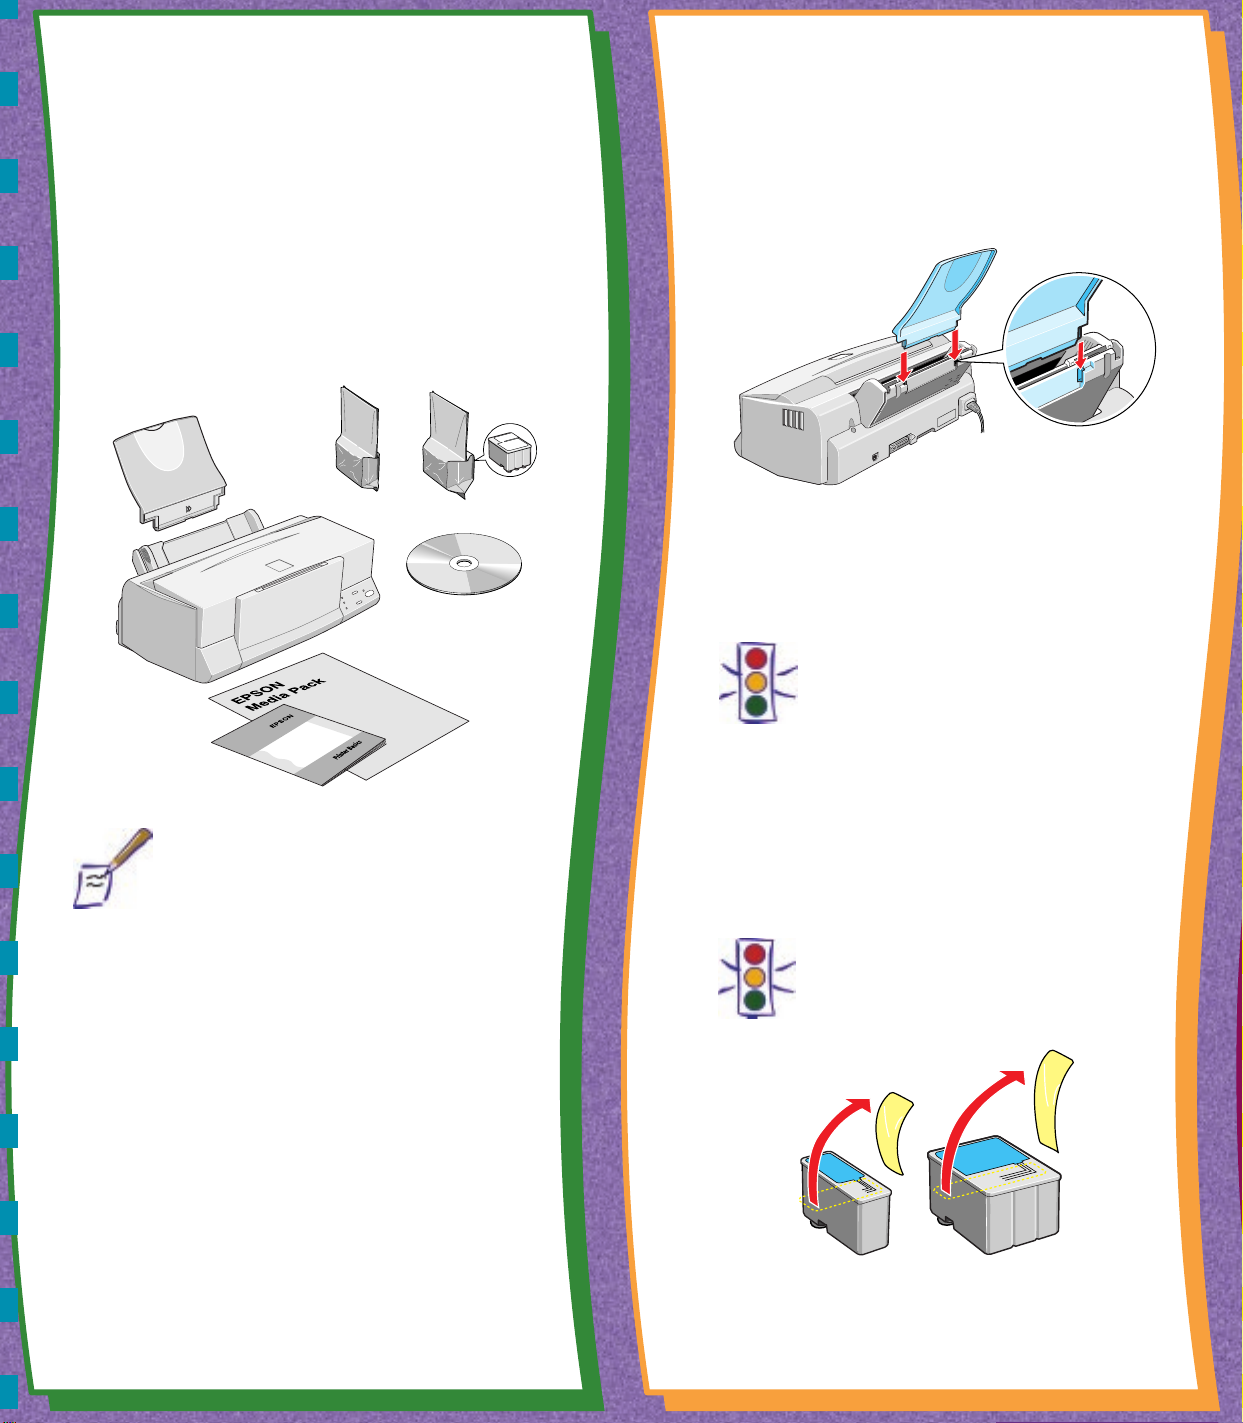
2 Attach the Paper Support
1 Unpack the Printer
Remove all the tape and packing material as described
on the Unpacking Sheet in the printer box. Make sure
you’ve got a cable to connect the printer to your
computer, plus all these items:
paper support
printer
Printer Basics
book
black ink
cartridge
printer software CD-ROM
Media Pack with samples
of EPSON® ink jet papers
color ink
cartridge
Insert the paper support in the slots at the back of
the printer’s sheet feeder.
3 Install the Ink Cartridges
1. Plug the power cord into a grounded outlet.
Caution:
Don’t use an outlet controlled by a wall
switch or timer, or one on the same
circuit as a large appliance. This may
disrupt the power, which can erase the
printer’s memory or damage its power
supply.
Note:
To connect to a PC, you’ll need a highspeed, bidirectional, IEEE-1284 compliant,
parallel cable 6 to 10 feet long.
Place the printer near your computer and an
available grounded outlet, but avoid areas:
■
with high temperature or humidity
■
in direct sunlight or dusty conditions
■
near sources of heat or electromagnetic
interference, such as a cordless telephone
base unit
Be sure to check the System Requirements and
follow all the Safety Instructions in your Printer
Basics book. If you need help as you set up your
printer, see “Problems? Need Help?” in your Printer
Basics book.
2. Remove the ink cartridges from their foil
packages. Then pull off only the yellow part of
the tape seal on the top of each cartridge.
Caution:
You must remove the yellow tape seal
from the top of the cartridge or you will
permanently damage it.
Open to continue
▼
 Loading...