

Garmin Nuvi 700 Series Owner's Manual
Garmin
Corporation
No.
68,
Jangshu
2nd
Road,
Shijr,
Taipei
County,
Taiwan
Tel.
886/2.2642.9199
Fax
886/2.2642.9099
©
2007
Garmin
Ltd.orits
subsidiaries
Garmin
International,
Inc.
Garmin
(Europe)
Ltd.
1200
East
151stStreet,
Liberty
House,
Hounsdown
Business
Park,
Olathe,
Kansas
66062,
USA
Southampton,
Hampshire,
S040
9RB,
UK
Tel.
(913)
397.8200
or
Tel.
+44
(0)
870.8501241
(outside
the
UK)
(800)
800.1020
08082380000
(within
the
UK)
Fax
(913)
397.8282
Fax
+44
(0)
870.8501251
All
rights
reserved.
Exceptasexpressly
provided
herein,nopartofthis
manual
maybereproduced,
copied,
transmitted,
disseminated,
downloadedorstoredinany
storage
medium,
for
any
purpose
without
the
express
prior
written
consentofGarmin.
Garmin
hereby
grants
permissiontodownloadasingle
copy
of
this
manual
ontoahard
driveorother
electronic
storage
mediumtobe
viewed
andtoprint
one
copy
of
this
manualorof
any
revision
hereto,
provided
that
such
electronicorprinted
copyofthis
manual
must
contain
the
complete
textofthis
copyright
notice
and
provided
further
that
any
unauthorized
commercial
distributionofthis
manualorany
revision
heretoisstrictly
prohibited.
Informationinthis
documentissubjecttochange
without
notice.
Garmin
reserves
the
righttochange
or
improve
its
products
andtomake
changesinthe
content
without
obligationtonotify
any
person
or
organizationofsuch
changesorimprovements.
Visit
the
Garmin
Web
site
(www.gannin.com)
for
current
updates
and
supplemental
information
concerning
the
use
and
operationofthis
and
other
Garmin
products.
Garmin~,
nuvi®,
MapSource~\
and
TourGuide®
are
trademarksofGarmin
Ltd.orits
subsidiaries,
registeredinthe
USA
and
other
countries.
Garmin
Lock'"
and
myGarmin'"
are
trademarksofGarmin
Ltd.
or
its
subsidiaries.
These
trademarks
may
notbeused
without
the
express
permissionofGarmin.
The
Bluetooth®
word
mark
and
logos
are
ownedbythe
Bluetooth
SIG,
Inc.,
and
any
useofsuch
name
by
Garminisunder
license.
Windows®isa
registered
trademarkofMicrosoft
Corporationinthe
United
States
and/or
other
countries.
Mac®
and
iTunes®
are
registered
trademarksofApple
Computer,
Inc.
Audible.com®,
AudibleManager®,
and
AudibleReady®
are
registered
trademarksofAudible,
Inc.
©
Audible,
Inc.
1997-2005.
SaversGuide®isa
registered
trademarkofEntertainment
Publications,
Inc.
RDS-
TMC
Traffic
Information
Services
France©ViaMichelin
2006.
(t:'
11'.
Other
trademarks
and
trade
names
are
thoseoftheir respective
owners.
~
\iI
September
2007
Part
Number
190-00859-00
Rev.
0
PrintedinTaiwan
PREFACE
Thank
you
for
purchasing
the
Garmin®
niivi®
700
Series
navigation
device.
Manual
Conventions
When
you
are
instructedto"touch"
something,
use
your
fingertotouch
an
item
on
the
screen.
The
small
arrows
(»
usedinthe
text
indicate
that
you
should
touchaseries
of
items.
For
example,ifyou
see
"touch
Where
to
> Favorites"
you
should
touch
Where
to,
and
then
touch
Favorites.
nuvi
Tips
and
Shortcuts
•
To
quickly
returntothe
Menu
page,
touch
and
hold
Back.
•
Touch"
and
to
see
more
choices.
Touch
and
holdtoscroll
faster.
nuv!
700
Series
O'/vner's
Manual
PREFACE
myGarmin™
Gotohttp://my.gannin.comtoaccess
the
latest
services
for
your
Garmin
products:
•
Register
your
Garmin
unit.
•
Subscribetoonline
services
for
safety
camera
information
(see
page
46).
•
Unlock
optional
maps.
Contact
Garmin
,
Contact
Garminifyou
have
any
questions
while
using
your
niivi.Inthe
1
USA,
contact
Garmin
Product
Support
I
by
phone:
(913)
397-8200or(800)
800-1020,
Monday-Friday,
8AM-5
PM
Central
Time;orgo
to
www.garnlin.com/support.
In
Europe,
contact
Garmin
(Europe)
Ltd.at+44
(0)
870.8501241
(outside
the
UK)or0808
2380000
(within
the
UK).
PREFACE
TABLE
OF
CONTENTS
Preface
i
Manual
Conventions
i
nuvi
Tips
and
Shortcuts
i
G
.
TM
•
my
armln
1
Contact
Garmin
i
Getting
Started
1
What'sinthe
Box?
1
nuvi
700
Series
Features
1
Your
nuvi
Unit
2
Step1:Mount
the
nuvi
3
Step2:Configure
the
nuvi
.4
Step3:Acquire
Satellites
.4
Step4:Use
the
nuvi
.4
Finding
Your
Destination
5
Following
Your
Route
6
AddingaVia
Point.
6
TakingaDetour
7
Stopping
the
Route
7
Adjusting
the
Volume
7
Locking
the
Screen
7
if
Where
To
8
Go
Page
Options
8
FindinganAddress
8
FindingaPlacebySpelling
the
Name
9
SettingaHome
Location
9
Finding
Recently
Found
Places
1a
Favorites
1a
Creating
and
Taking
Routes
12
FindingaPlace
Using
the
Map
13
Entering
Coordinates
13
Searching
Near
Another
Location..14
Navigating
Off
Road
14
Walkingtoa
Destination
14
Using
the
Main
Pages
15
Map
Page
15
Trip
Information
Page
16
Turn
List
Page
16
Next
Turn
Page
16
Using
Hands-free
Calling
17
Pairing
Your
Phone
17
nOvi
700
Series
Owner's
tVlanuai
ReceivingaCall
18
InaCall
18
Phone
Menu
19
SMSlText
Messaging
21
Using
the
Media
Players
22
Playing
Music
22
ListeningtoAudible
Books
24
M .
F'I
anaglng I
es
25
Supported
File
Types
25
Loading
Files
25
Deleting
Files
26
Using
the
Tools
27
Settings
27
Where
Am
1
27
Help
27
Media
Player
27
Picture
Viewer
27
Traffic
28
MSN®
Direct.
28
Routes
28
My
Data
28
".
'
''''~o/\.
(""0'
.......
')UVI
IU
;:;en8S
Owner's
IVlanual
PREFACE
World
Clock
28
Language
Guide
29
Calculator
30
Currency
Converter
31
Unit
Converter
31
Using
FM
Traffic
32
LED
Blink
Codes
32
TrafficInYour
Area
33
Traffic
on
Your
Road
33
Traffic
on
Your
Route
33
Traffic
Icons
34
Severity
Color
Code
34
Traffic
Subscriptions
34
Playing Audio Through
the
Vehicle's
Speakers
35
Manually
Tuning
the
FM
Transmitter
35
Auto
Tuning
the
FM
Transmitter
35
Frequency
Selection
Tips
36
FM
Transmitter
Information
36
iii
PREFACE
Customizing
the
nuvi
37
Changing
the
System
Settings
37
Changing
the
Navigation
Settings..37
Setting
the
Languages
39
Changing
the
Map
Settings
39
Adding
Security
Settings
.40
Viewing
Traffic
Subscription
Information
40
Bluetooth
Technology
Settings
42
Changing
the
Proximity
Points
Settings
42
Adjusting
the
Volume
Levels
43
Restoring
All
Settings
.43
Clearing
User
Data
43
Appendix
44
WaystoCharge
Your
nuvi
44
Calibrating
the
Screen
44
Resetting
the
nuvi
.44
Locking
Your
nuvi
.44
Additional
Maps
45
Updating
the
Software
.45
Extras
and
Optional
Accessories
45
iV
Battery
Information
.48
Changing
the
Fuse
.48
Removing
the
nuvi
and
Mount..
49
MountingonYour
Dashboard
.49
About
GPS
Satellite
Signals
50
Caring
for
Your
nuvi
50
DeclarationofConformity
51
Important
Legal
Notice
Regarding
Your
FM
Transmitter.
52
Software
License
Agreement
53
Specifications
54
Troubleshooting
55
Index
57
GETTING STARTED
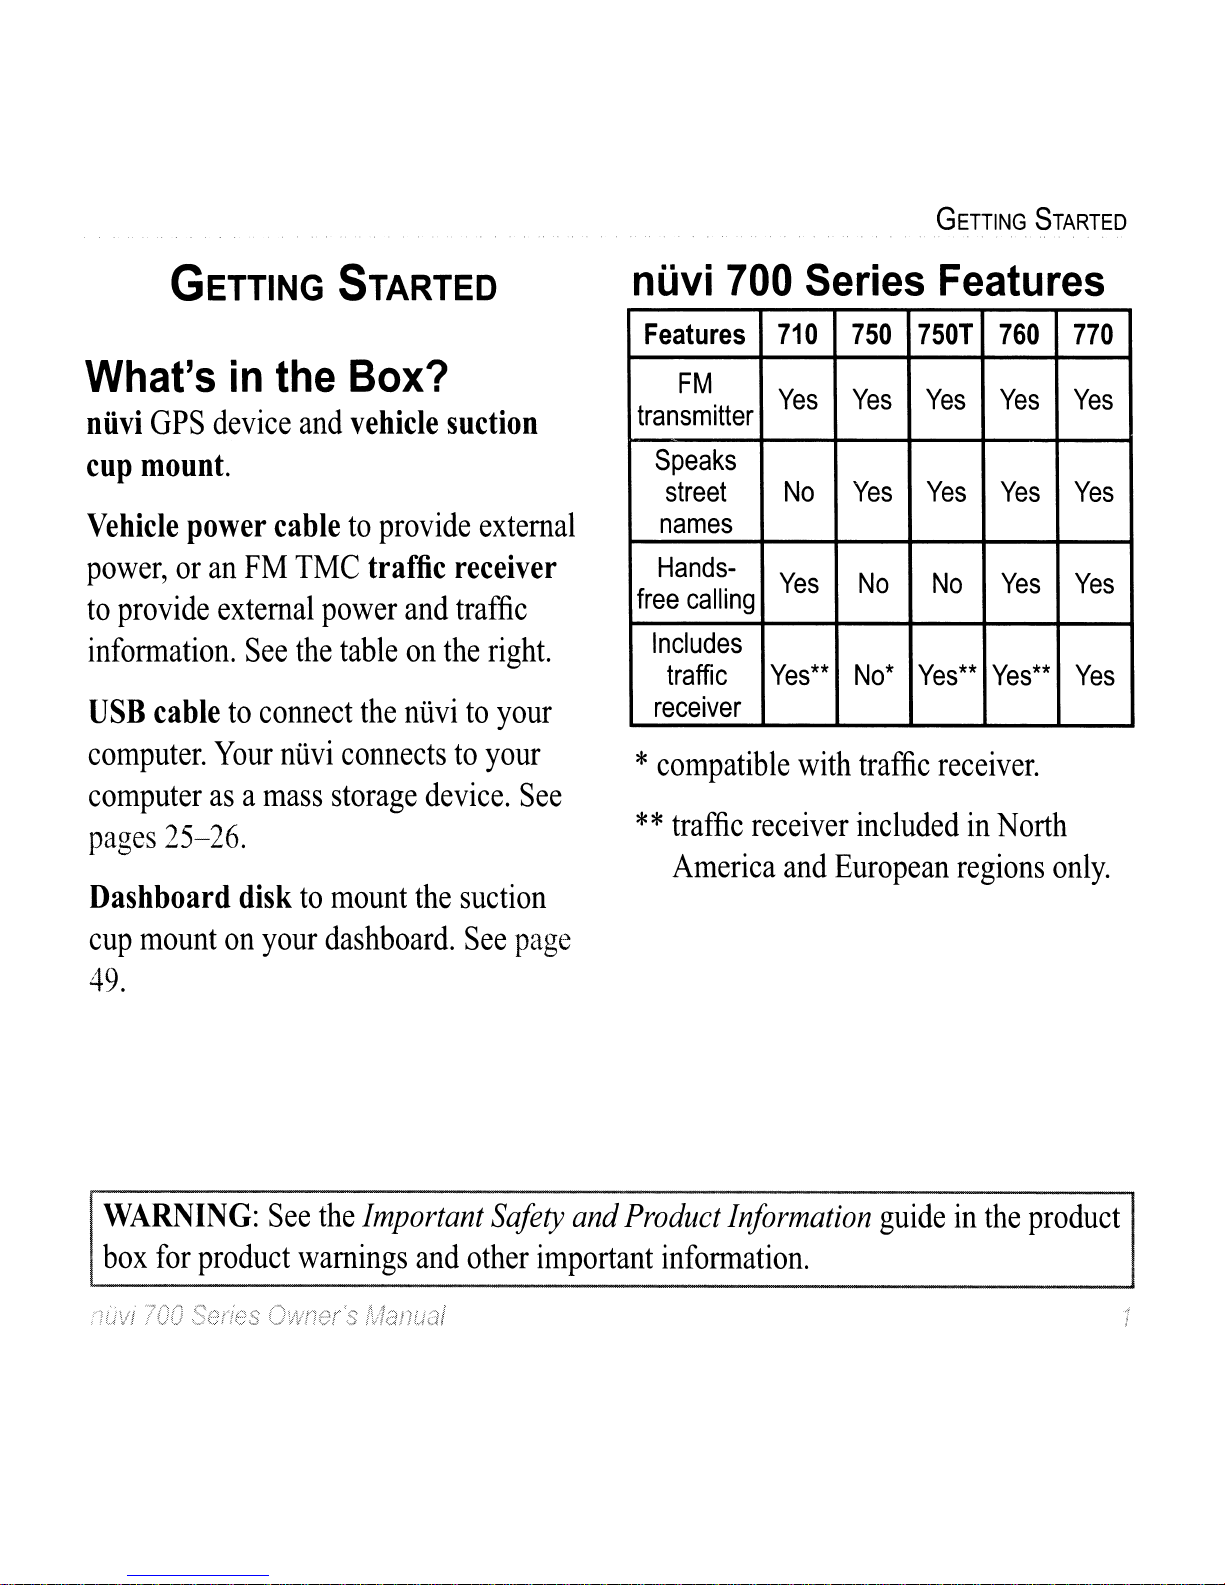
What's
in
the
Box?
niivi
GPS
device
and
vehicle
suction
cup
mount.
Vehicle
power
cabletoprovide
external
power,oran
FM
TMC
traffic receiver
to
provide
external
power
and
traffic
information.
See
the
table
on
the
right.
USB
cabletoconnect
the
nlivitoyour
computer.
Your
nlivi
connectstoyour
computerasa
mass
storage
device.
See
pages
25-26.
Dashboard
disk
to
mount
the
suction
cup
mount
on
your
dashboard.
See
page
49.
GETTING
STARTED
nUvi
700
Series
Features
Features
710 750
7501
760 770
FM
Yes Yes
Yes
Yes
Yes
transmitter
Speaks
street
No
Yes
Yes Yes Yes
names
Hands-
Yes
No
No
Yes Yes
free
calling
Includes
traffic
Yes**
No*
Yes**
Yes**
Yes
receiver
*
compatible
with
traffic
receiver.
**
traffic
receiver
includedinNorth
America
and
European
regions
only.
WARNING:
See
the
Important
Safety
and
Product
Information
guideinthe
product
box
for
product
warnings
and
other
important
information.
mJv!
700
Series
Owner's
Manual

GETTING
STARTED
Your
nOvi
Unit
GPS
antenna
Speaker
External
antenna
connector
Serial
number
<!,)
Power
key:
slidetothe
lefttoturn
the
unit
on/off;
slidetothe
righttolock
the
screen
/
Microphone'
\-VARNING:
This
product
containsanon-replaceable,
lithium-ion
battery.
See
the
Important
Sqfety
and
Product
InfiJrmation
guideinthe
product
box
for
important
battery
safety
information.
Check
your
state
and
local
traffic
laws
before
mounting.
Currently,
state
laws
in
I
California
and
Minnesota
prohibit
dlivers
fro.
m
usin~
suc~ion
mounts
on
th~ir.
wmdshlelds
while
operatmg
motor
vehIcles.
Other
Garmm
dashboardorfflctlon
mounting
options
should
be
used.
See
page
49.
GETTING
STARTED
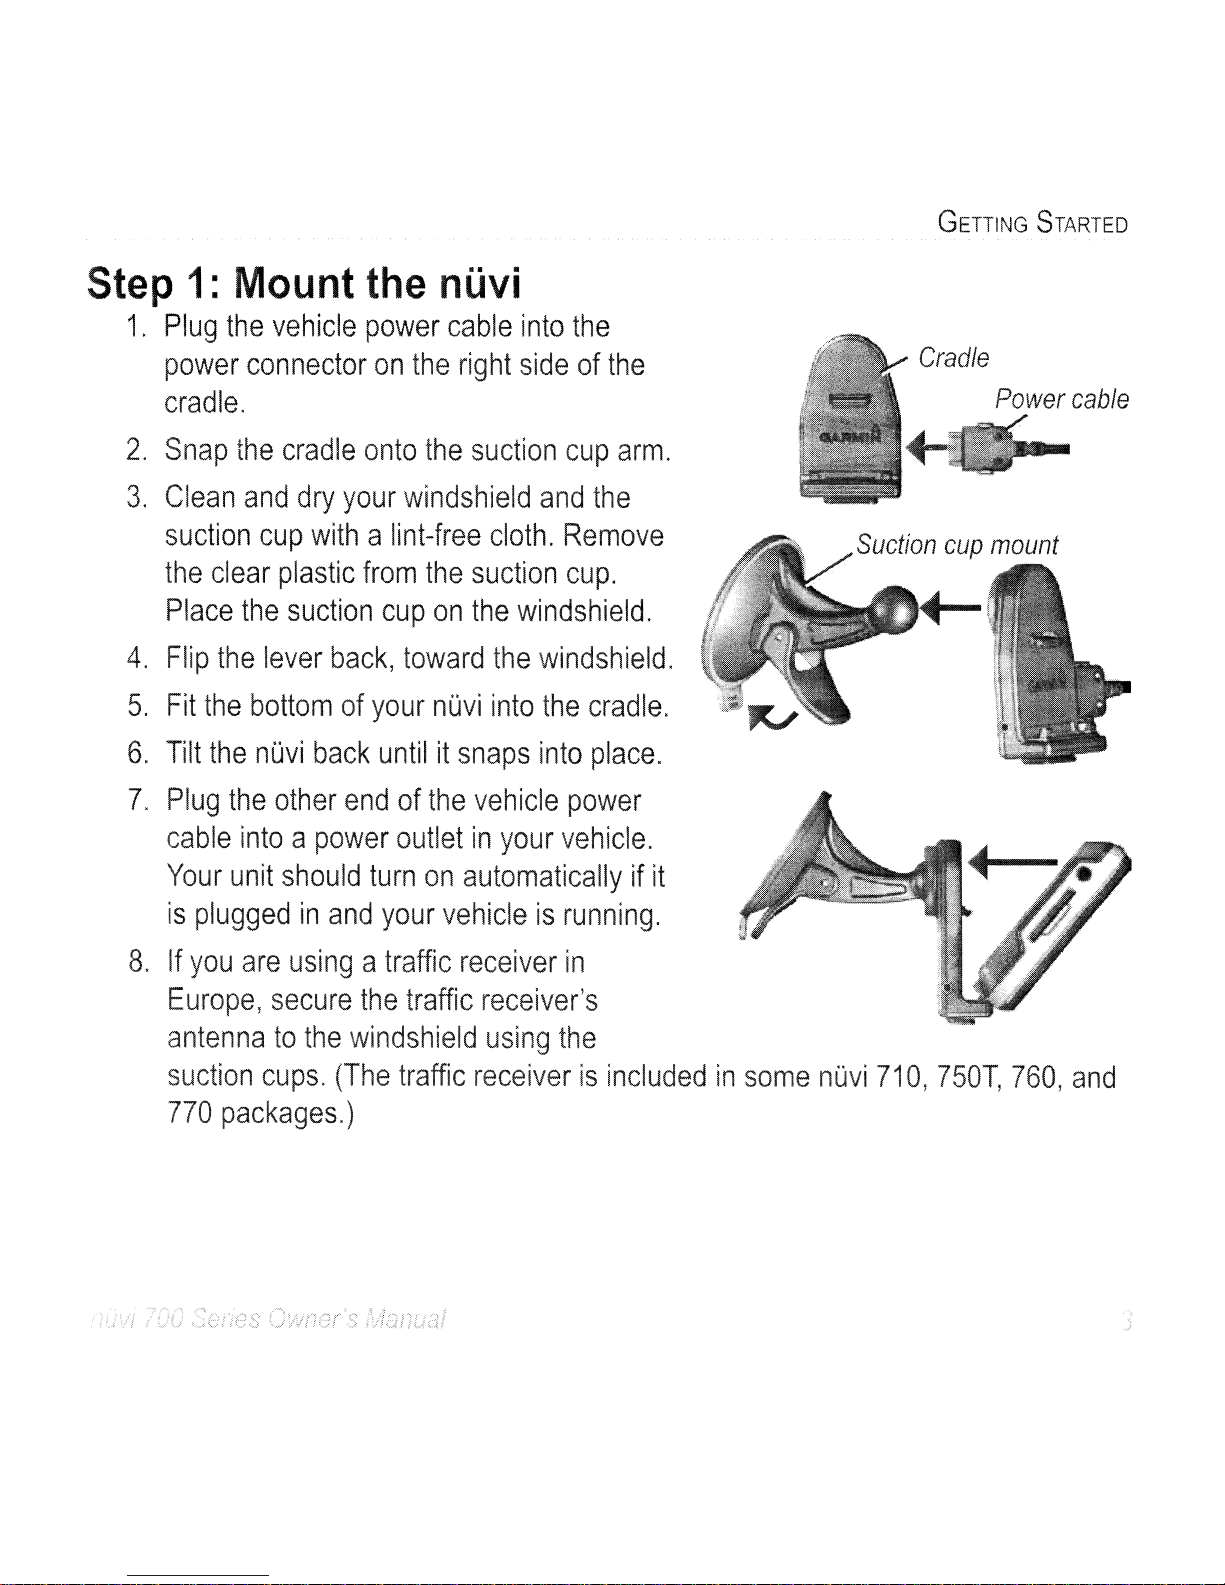
Suction
cup
mount
Cradle
Power
cable
Step
1:
Mount
the
nUvi
1.
Plug
the
vehicle
power
cable
into
the
power
connectoronthe
right
sideofthe
cradle.
2.
Snap
the
cradle
onto
the
suction
cup
arm.
3.
Clean
and
dry
your
windshield
and
the
suction
cup
withalint-free
cloth.
Remove
the
clear
plastic
from
the
suction
cup.
Place
the
suction
cup
on
the
windshield.
4.
Flip
the
lever
back,
toward
the
windshield.
5.
Fit
the
bottomofyour
nuvi
into
the
cradle.
6.
Tilt
the
nuvi
back
untilitsnaps
into
place.
7.
Plug
the
other
endofthe
vehicle
power
cable
intoapower
outletinyour
vehicle.
Your
unit
should
turn
on
automaticallyifit
is
pluggedinand
your
vehicleisrunning.
8.Ifyou
are
usingatraffic
receiver
in
Europe,
secure
the
traffic
receiver's
antennatothe
windshield
using
the
suction
cups.
(The
traffic
receiverisincludedinsome
nuvi
710,
750T,
760,
and
770
packages.)
GETTING
STARTED
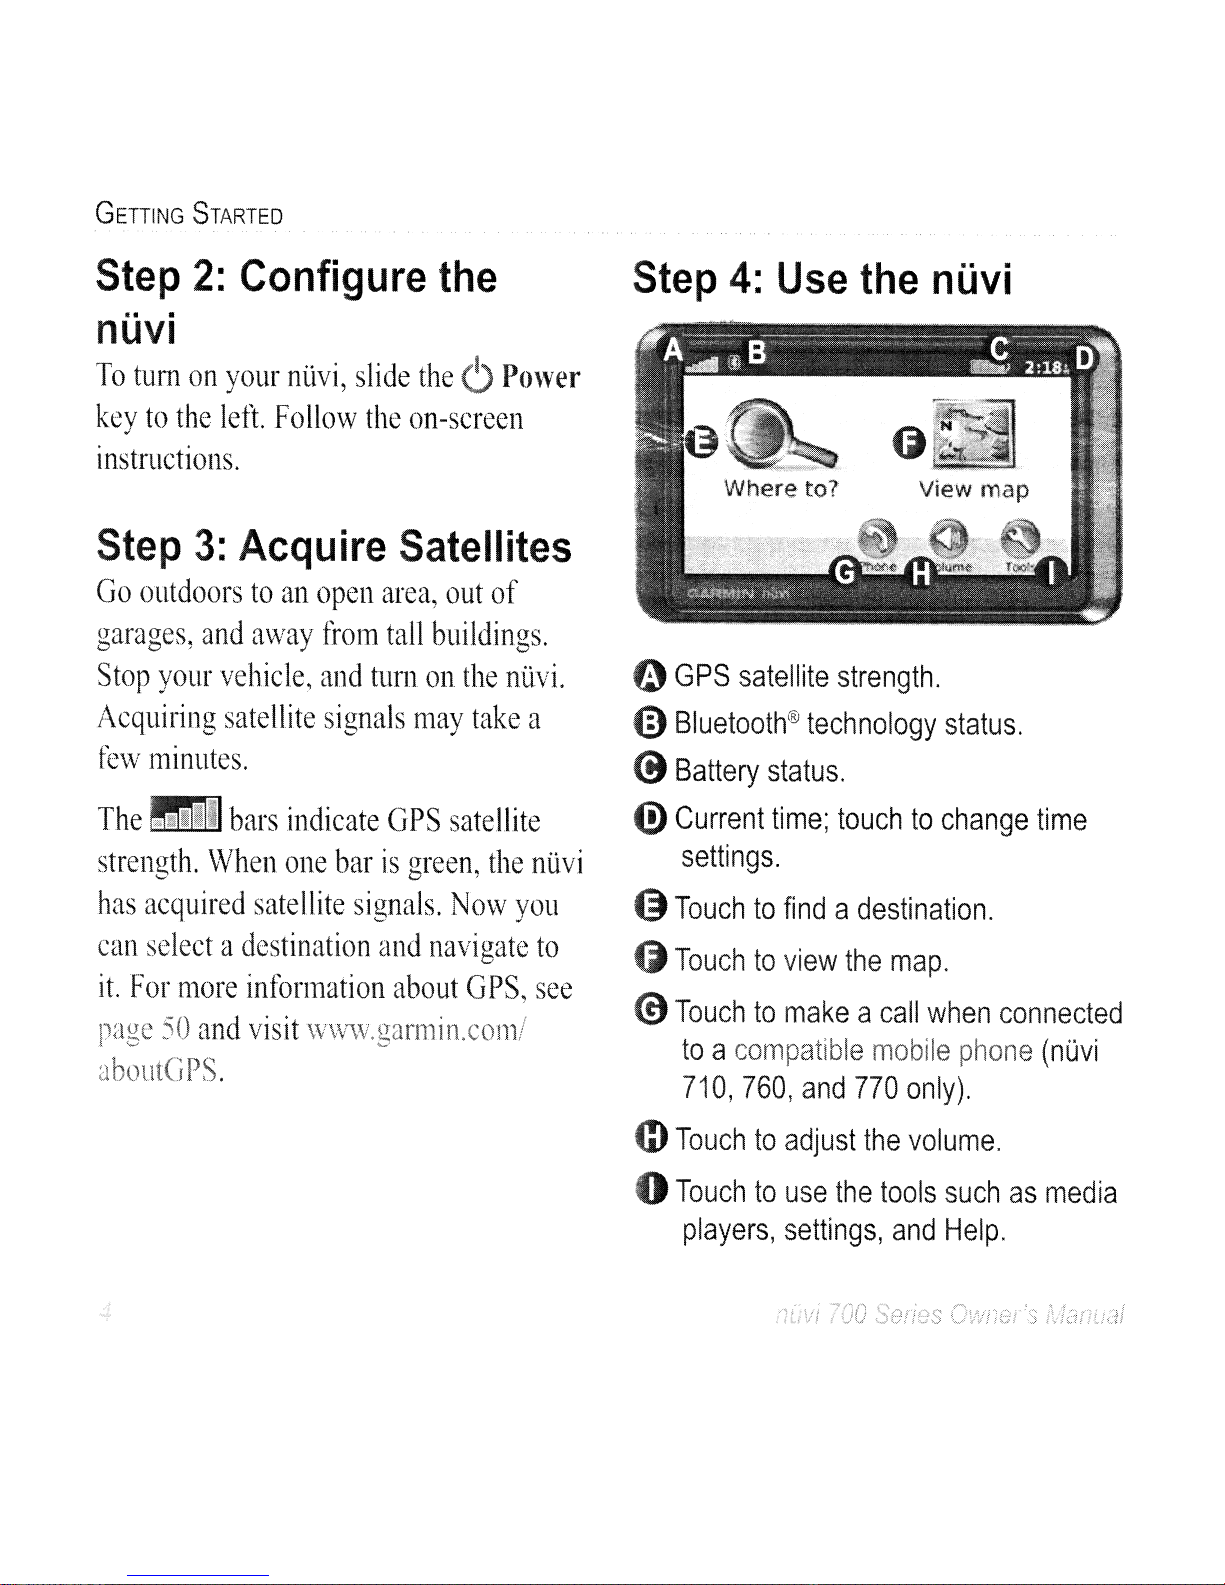
Step
2:
Configure
the
..
.
nuvi
To
tum
on
your
nUvi,
slide
the
6
Power
keytothe
left.
Follow
the
on-screen
instructions.
Step
3:
Acquire
Satellites
Go
outdoorstoan
open
area,
out
of
garages,
and
away
from
tall
buildings.
Stop
your
vehicle,
and
turn
on
the
nuvi.
Acquiring
satellite
signals
may
take
a
few
minutes.
The
III
bars
indicate
GPS
satellite
strength.
\Vhen
one
barisgreen,
the
niivi
has
acquired
satellite
signals.
Now
you
can
selectadestination
and
navigate
to
it.
For
more
information
aboutGPS,
see
page
50
and
visit
www.garmin.com/
aboutGPS.
Step
4:
Use
the
nuvi
o
GPS
satellite
strength.
€)
Bluetooth®
technology
status.
~
Battery
status.
(!)
Current
time;
touchtochange
time
settings.
43
Touchtofindadestination.
4)
Touchtoview
the
map.
@
Touchtomakeacall
when
connected
toacompatible
mobile
phone
(nOvi
710,760,
and
770
only).
m
Touchtoadjust
the
volume.
o
Touchtouse
the
tools
suchasmedia
players,
settings,
and
Help.

GETTING
STARTED
Finding
Your
Destination
The
Wheretomenu
provides
several
different
categories
for
youtouse
when
searching
for
addresses,
cities,
and
other
locations.
The
detailed
map
loadedinyour
niivi
contains
millionsofpointsofinterest,
suchasrestaurants,
hotels,
and
auto
servIces.
o
Touch
Where
to.
f)
Selectacategory.
@)
Selectasub-category.
o
Enjoy
the
route!
lOlOQ
to;;e
..
~
iJ",d
O,,~rlMd
l"<lrl<.
KS
66:110
Doubletree·Corporate Woods
o
Touch
Go.
7.0-
E;
1.5.
HE
f5'"i)iJQI~""l
~~xC.OI
pQf
<Jl1;1'
W~;):jS
~;;;;-('.-.:)r;-'~,
E:<tt'~de"
Slayamerica
.
;.!:')(,
s~.s~"~"
;·4
IJt
..
~SC
H(}t~s.e
~wt~s
I~y
txt~~de:d
"'"
.<".",j,
o
Selectadestination.
nuv!
700
Series
Owner's
Iv1anual
GETTING
STARTED
TIP:
If
you
wanttoadd
more
than
one
stoptothe
route,
edit
the
current
route.
See
page
12.
1.
Witharoute
active,
touch
Menu>
Where
to.
2.
Search
for
the
extra
stop.
3.
Touch
Go.
4.
Touch
AddasVia
Pointtoadd
this
stop
before
your
destination.
Touch
Set
as
new
Destination
to
make
this
your
new
final
destination.
Adding
a
Via
Point
You
can
addastop
(via
point)toyour
route.
The
niivi
gives
you
directions
to
the
stop
and
thentoyour
final
destination.
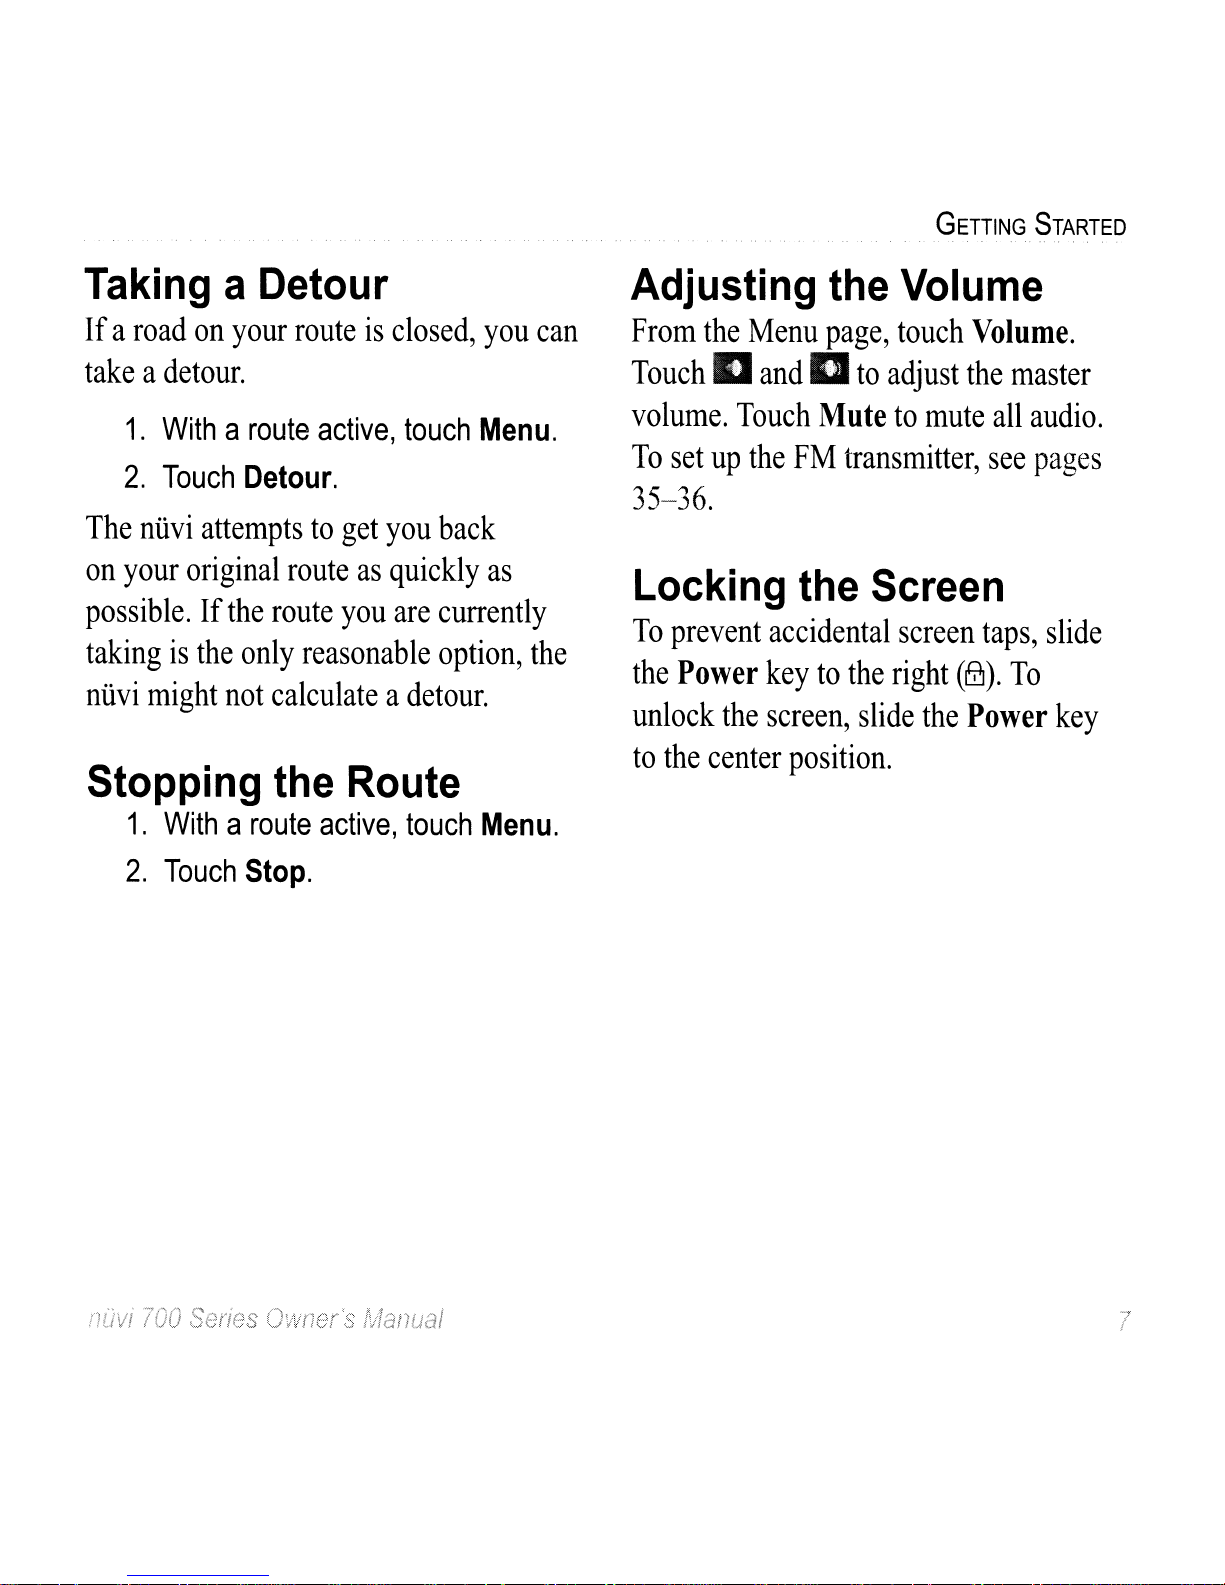
2:2.:
2"00:
A
checkered
flag
marks
your
destination.
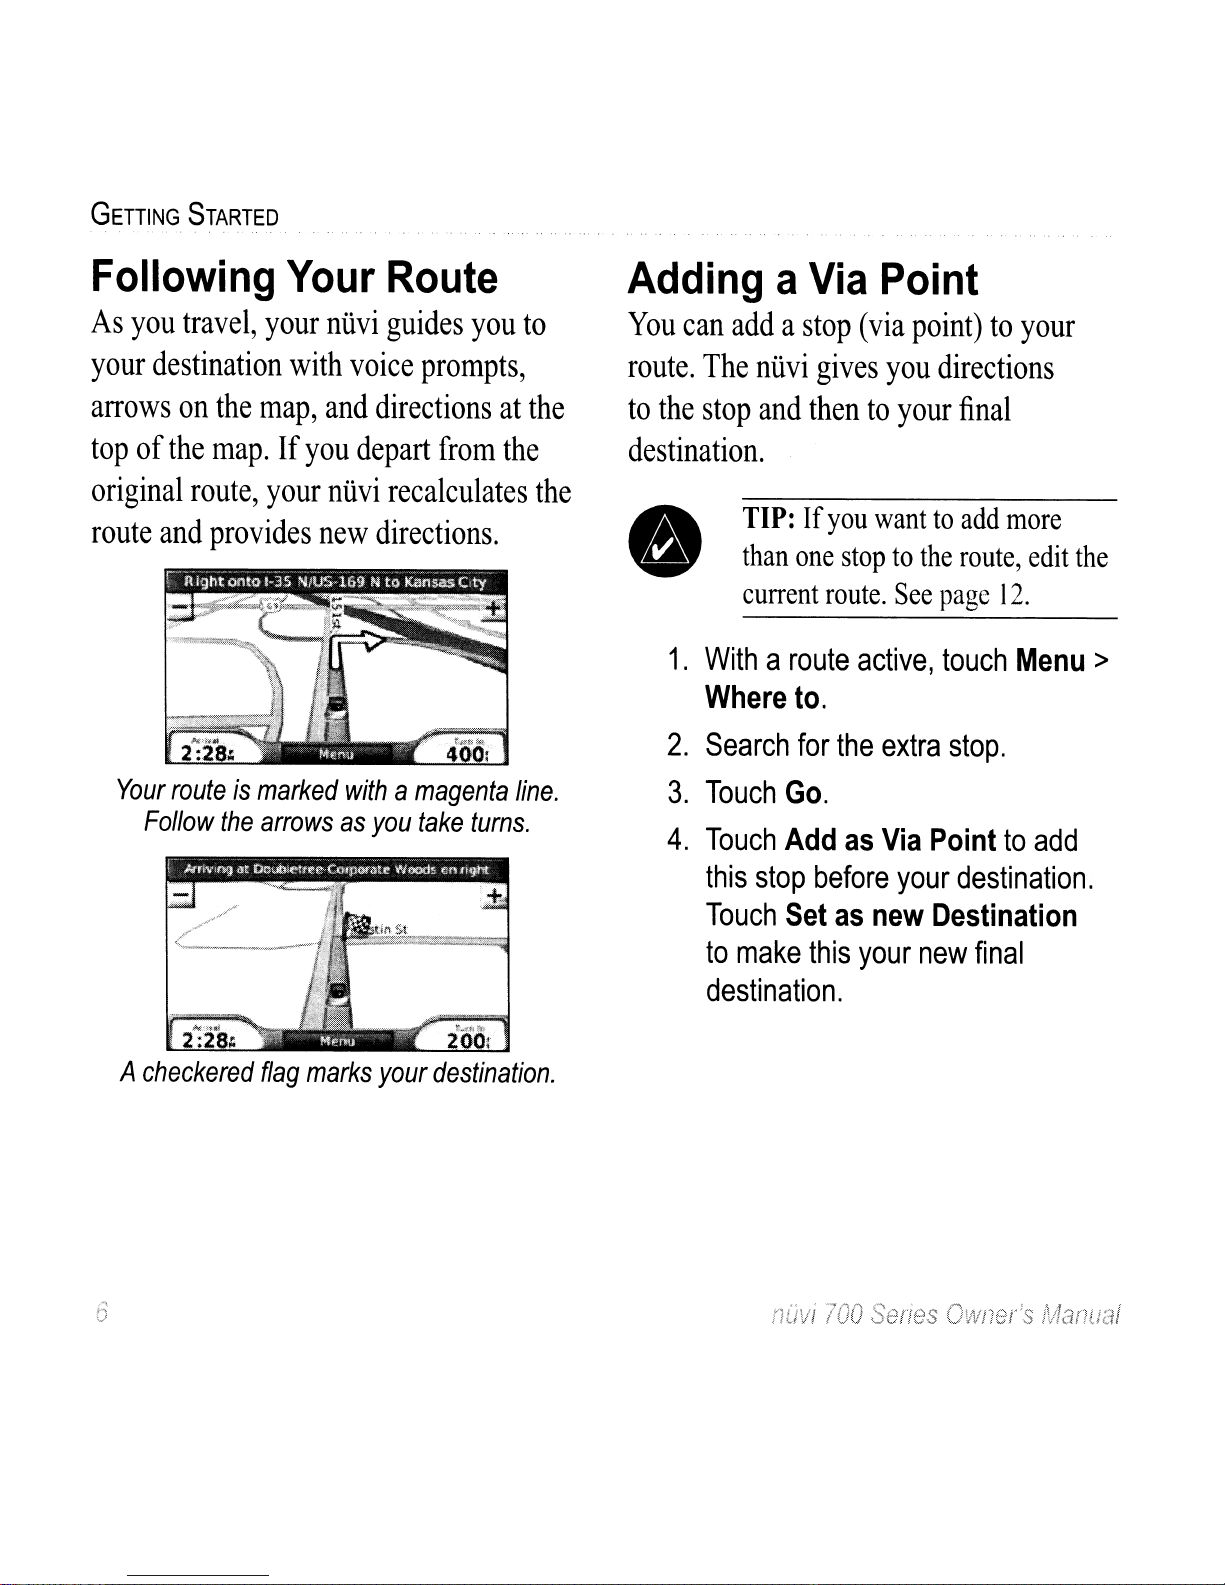
NIW~
~._
2:28.: 400:
Your
routeismarked
withamagenta
line.
Follow
the
arrowsasyou
take
turns.
Following
Your
Route
As
you
travel,
your
niivi
guides
you
to
your
destination
with
voice
prompts,
arrows
on
the
map,
and
directionsatthe
topofthe
map.Ifyou
depart
from
the
original
route,
your
ntivi
recalculates
the
route
and
provides
new
directions.
nOvi
700
Series
Owner's
AJ1anuai
Taking
a
Detour
Ifa
road
on
your
routeisclosed,
you
can
takeadetour.
1.
Witharoute
active,
touch
Menu.
2.
Touch
Detour.
The
niivi
attemptstoget
you
back
on
your
original
routeasquickly
as
possible.Ifthe
route
you
are
currently
takingisthe
only
reasonable
option,
the
niivi
might
not
calculateadetour.
Stopping
the
Route
1.
Witharoute
active,
touch
Menu.
2.
Touch
Stop.
nOvi
700
Series
Owner's
tvlanua!
GETTING
STARTED
Adjusting
the
Volume
From
the
Menu
page,
touch
Volume.
Touch
II
and
II
to
adjust
the
master
volume.
Touch
Mutetomute
all
audio.
To
set
up
the
FM
transmitter,
see
pages
35-36.
Locking
the
Screen
To
prevent
accidental
screen
taps,
slide
the
Power
keytothe
right
(12J).
To
unlock
the
screen,
slide
the
Power
key
to
the
center
position.
7
WHERE
To
WHERE
To
The;
Wheretomenu
provides
several
different
categories
you
can
usetosearch
for
locations.
To
learn
howtoperform
a
simple
search,
see
page
5.
TIP:
Touch
Near
to
change
the
search
area.
See
page
13.
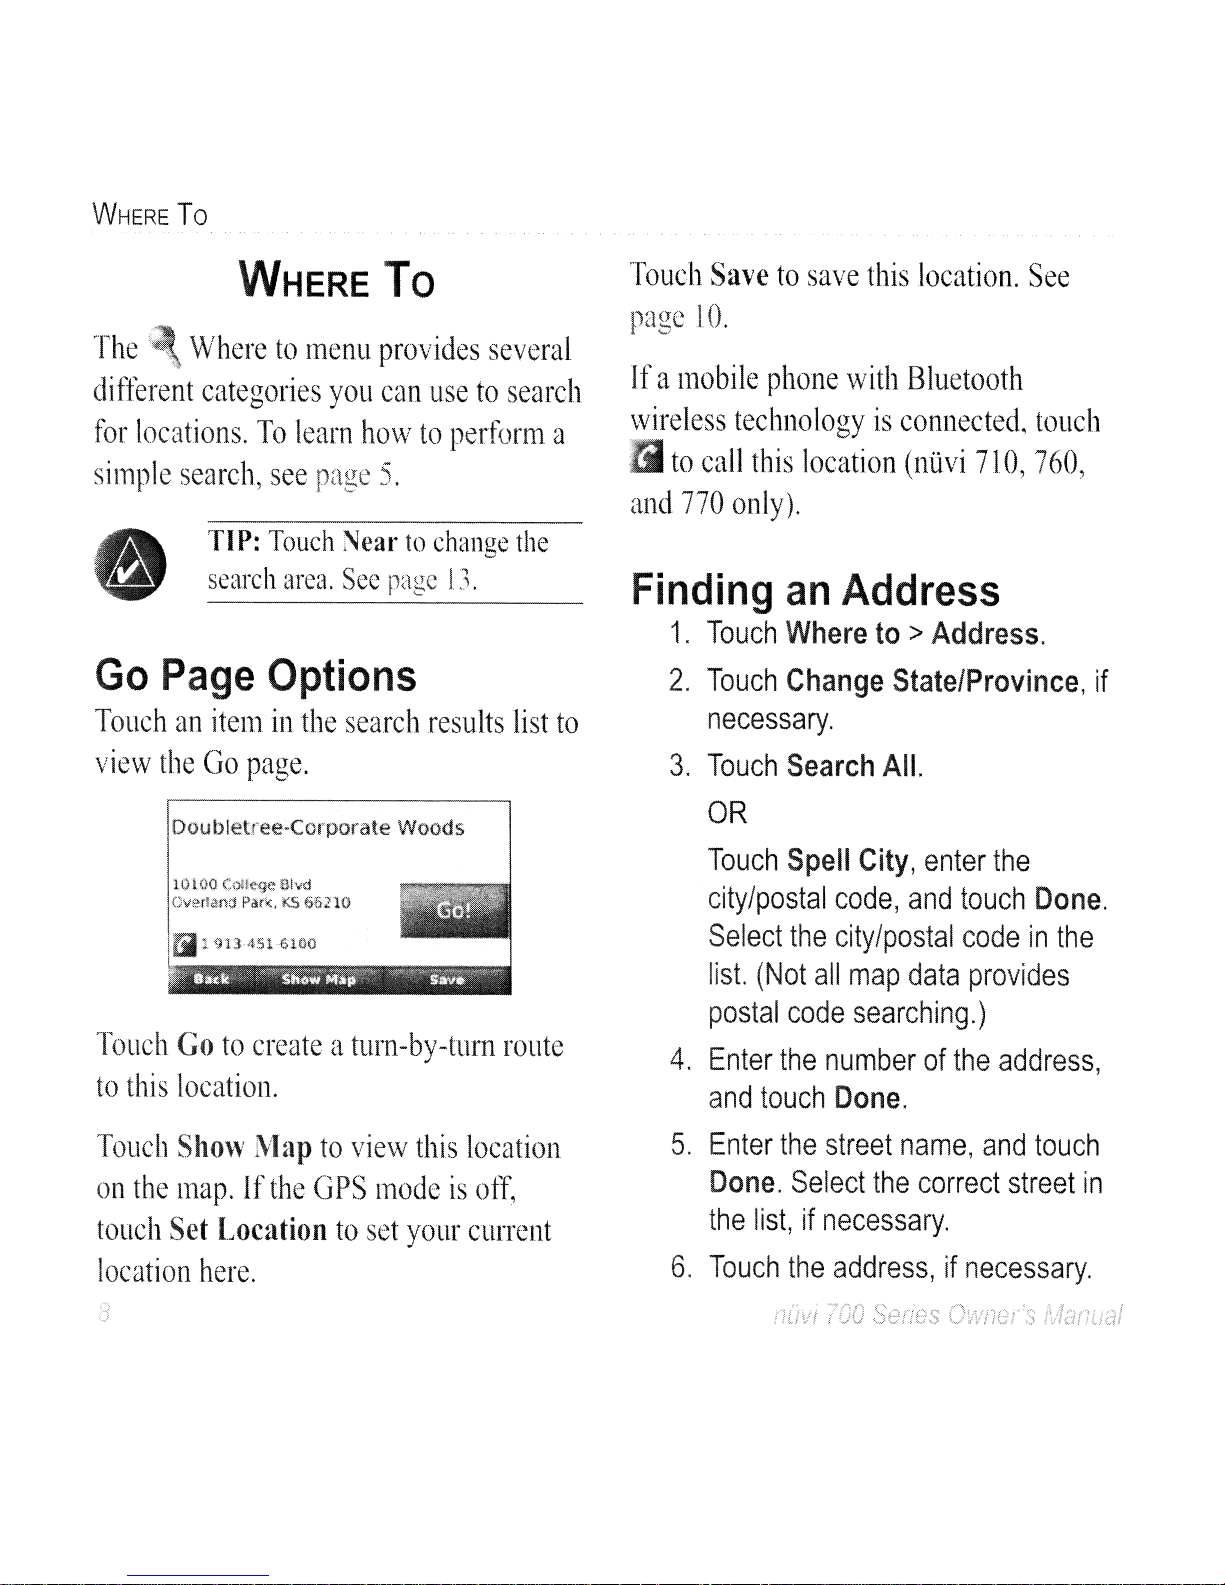
Go
Page
Options
Touchanitenlinthe
search
results
list
to
view
the
Go
page.
Doubletree·Corporate Woods
10100
College
$ivd
Cve,rlan(;j
P!l!i'~.
KS
66210
Touch
Go
to
createaturn-by-turn
route
to
this
location.
Touch
Show
lVlap
to
view
this
location
on
the
map.Ifthe
GPS
modeisoff,
touch
Set
Locationtoset
your
current
location
here.
Touch
Save
to
save
this
location.
See
page
JO.
Ifamobile
phone
with
Bluetooth
wireless
technologyisconnected,
touch
to
call
this
location
(nuvi
710,
760,
and
770
only).
Finding
an
Address
1.
Touch
Where
to>
Address.
2.
Touch
Change
State/Province,
if
necessary.
3.
Touch
Search
All.
OR
Touch
Spell
City,
enter
the
city/postal
code,
and
touch
Done.
Select
the
city/postal
codeinthe
list.
(Not
all
map
data
provides
postal
code
searching.)
4.
Enter
the
numberofthe
address,
and
touch
Done.
5.
Enter
the
street
name,
and
touch
Done.
Select
the
correct
street
in
the
list,ifnecessary.
6.
Touch
the
address,ifnecessary.
Finding
a
Place
by
Spelling
the
Name
If
you
know
the
nameofthe
location
you
are
looking
for,
you
can
spellitusing
the
on-screen
keyboard.
You
can
also
enter
letters
containedinthe
nametonarrow
the
search.
1.
Touch
Whereto>
Points
of
Interest>
Spell
Name.
2.
Using
the
on-screen
keyboard,
enter
lettersinthe
name.
Touch
Done.
Using
the
On-Screen
Keyboard
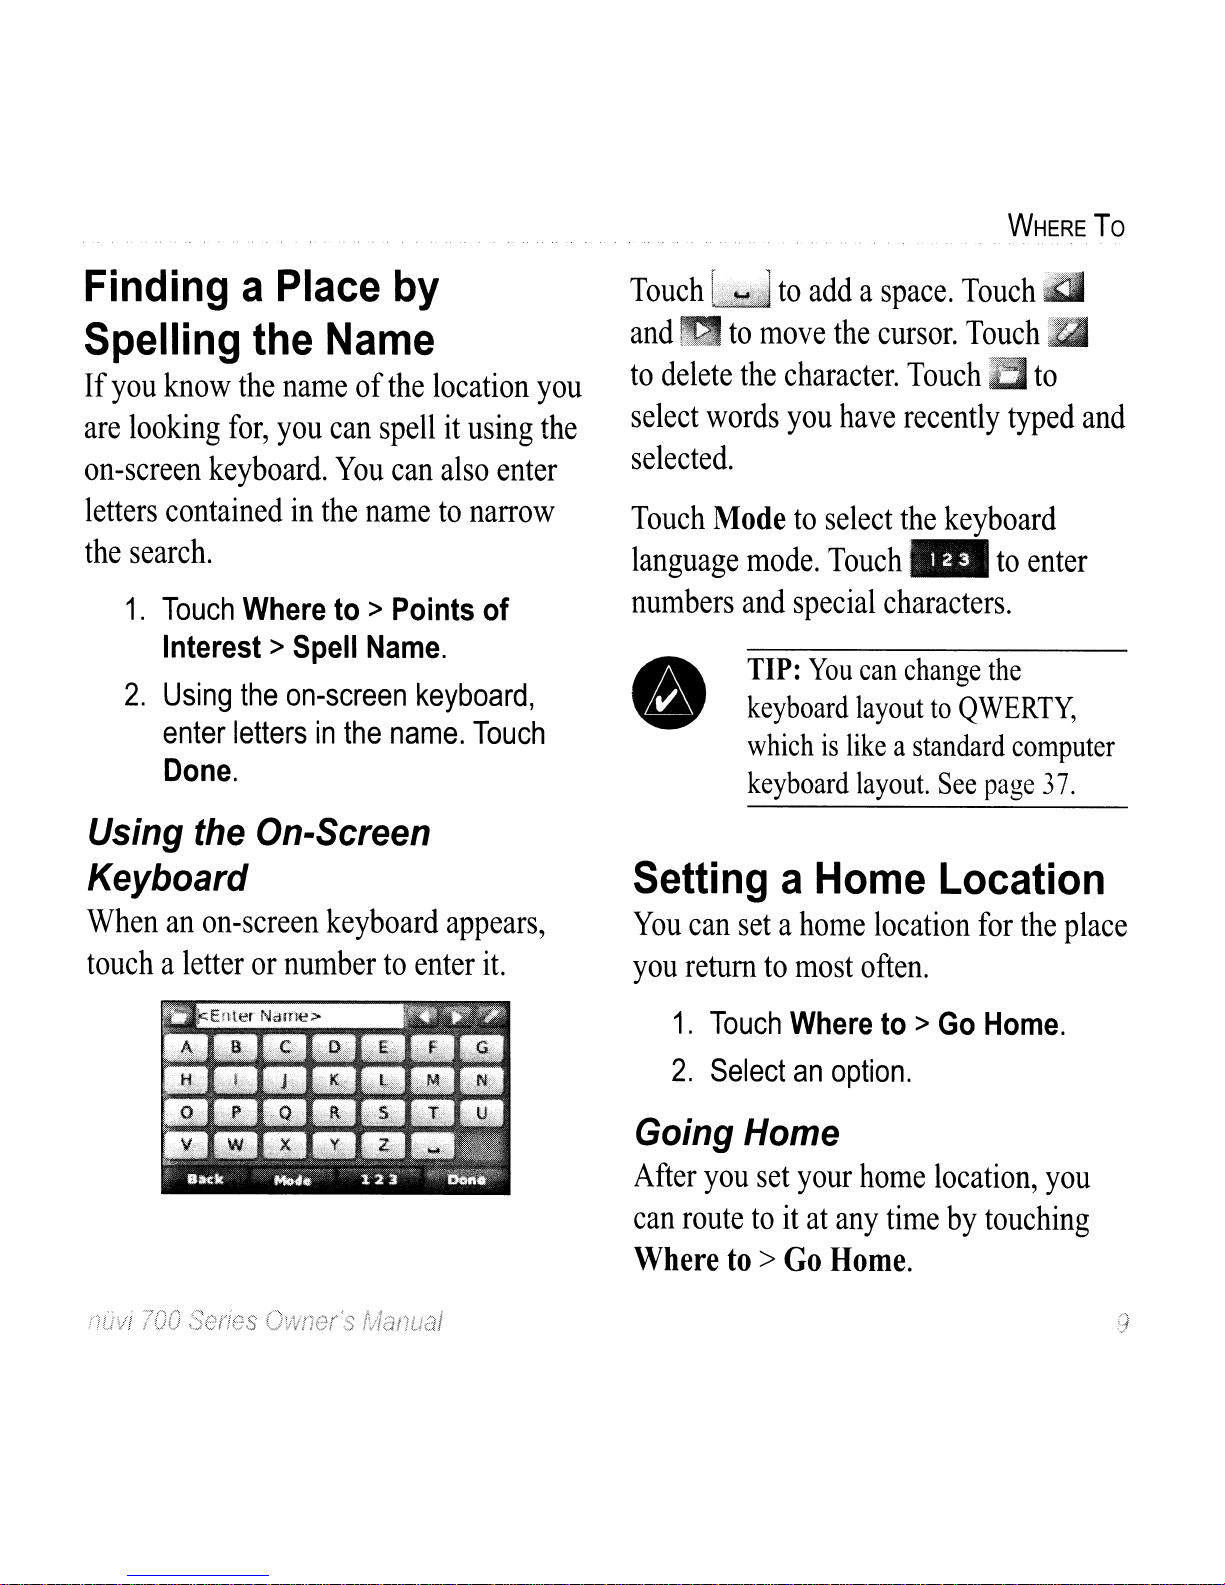
Whenanon-screen
keyboard
appears,
touchaletterornumbertoenter
it.
WHERE
To
Touch
to
addaspace.
Touch
~
and
II
to
move
the
cursor.
Touch
lSI
to
delete
the
character.
Touch
E;I
to
select
words
you
have
recently
typed
and
selected.
Touch
Modetoselect
the
keyboard
language
mode.
Touch
_
to
enter
numbers
and
special
characters.
TIP:
You
can
change
the
keyboard
layouttoQWERTY,
whichislikeastandard
computer
keyboard
layout.
See
page
37.
Setting
a
Home
Location
You
can
setahome
location
for
the
place
you
returntomost
often.
1.
Touch
Whereto>
Go
Home.
2.
Select
an
option.
Going
Home
After
you
set
your
home
location,
you
can
routetoitatany
time
by
touching
Where
to>Go
Home.
9
WHERE
To
Changing
Your
Home
Location
To
change
your
home
location~
you
must
first
deleteitfrom
Favorites.
1.
Touch
Whereto>
Favorites.
2.
Touch
Home>
Edit>
Delete>
Yes.
After
you
delete
your
home
location,
resetitby
following
the
stepsinthe
"SettingaHome
Location"
section
above.
Finding
Recently
Found
Places
Your
nUvi
stores
the
last
50ofyour
recent
findsinthe
Recentlv
Found
list.
,l
The
most
recently
viewed
places
appear
at
the
topofthe
list.
Touch
\Vhere
to>
Recentlv
Found
to
view
your
recentlv
~
-
~
found
items.
, ,
v
Deleting
Recently
Found
Places
To
remove
all
places
from
the
Recently
Found
list,
touch
Clear>
Yes.
NOTE:
When
you
touch
Clear,
all
items
from
the
list
are
removed.Itdoes
not
delete
the
actual
place
from
your
unit.
Favorites
You
can
save
placesinyour
Favorites,
so
you
can
quickly
find
them
and
create
routestothem.
Your
home
location
is
also
storedinFavorites.
Saving
Your
Current
Location
From
the
lVlap
page,
touch
.
Touch
Save
Location
to
save
vour
CUITent
,l
location.
Saving Places
You
Find
1.
After
you
have
foundaplace
you
wanttosave,
touch
Save.
2.
Touch
OK.
The
placeissaved
in
Favorites.
Finding Saved Places
1.
Touch
Where
to.
2.
Touch
Favorites.
Your
saved
locations
are
listed.
TIP:
Your
Last
Position
is
automatically
saved
each
time
you
remove
the
niivi
from
the
cradle.
Use
this
featuretofind
your
car
in
a
parking
lot.
Editing Saved Places
1.
Touch
Where
to > Favorites.
2.
Touch
the
location
you
want
to
edit.
3.
Touch
Edit.
WHERE
To
Chanoe Map S)'mbc!
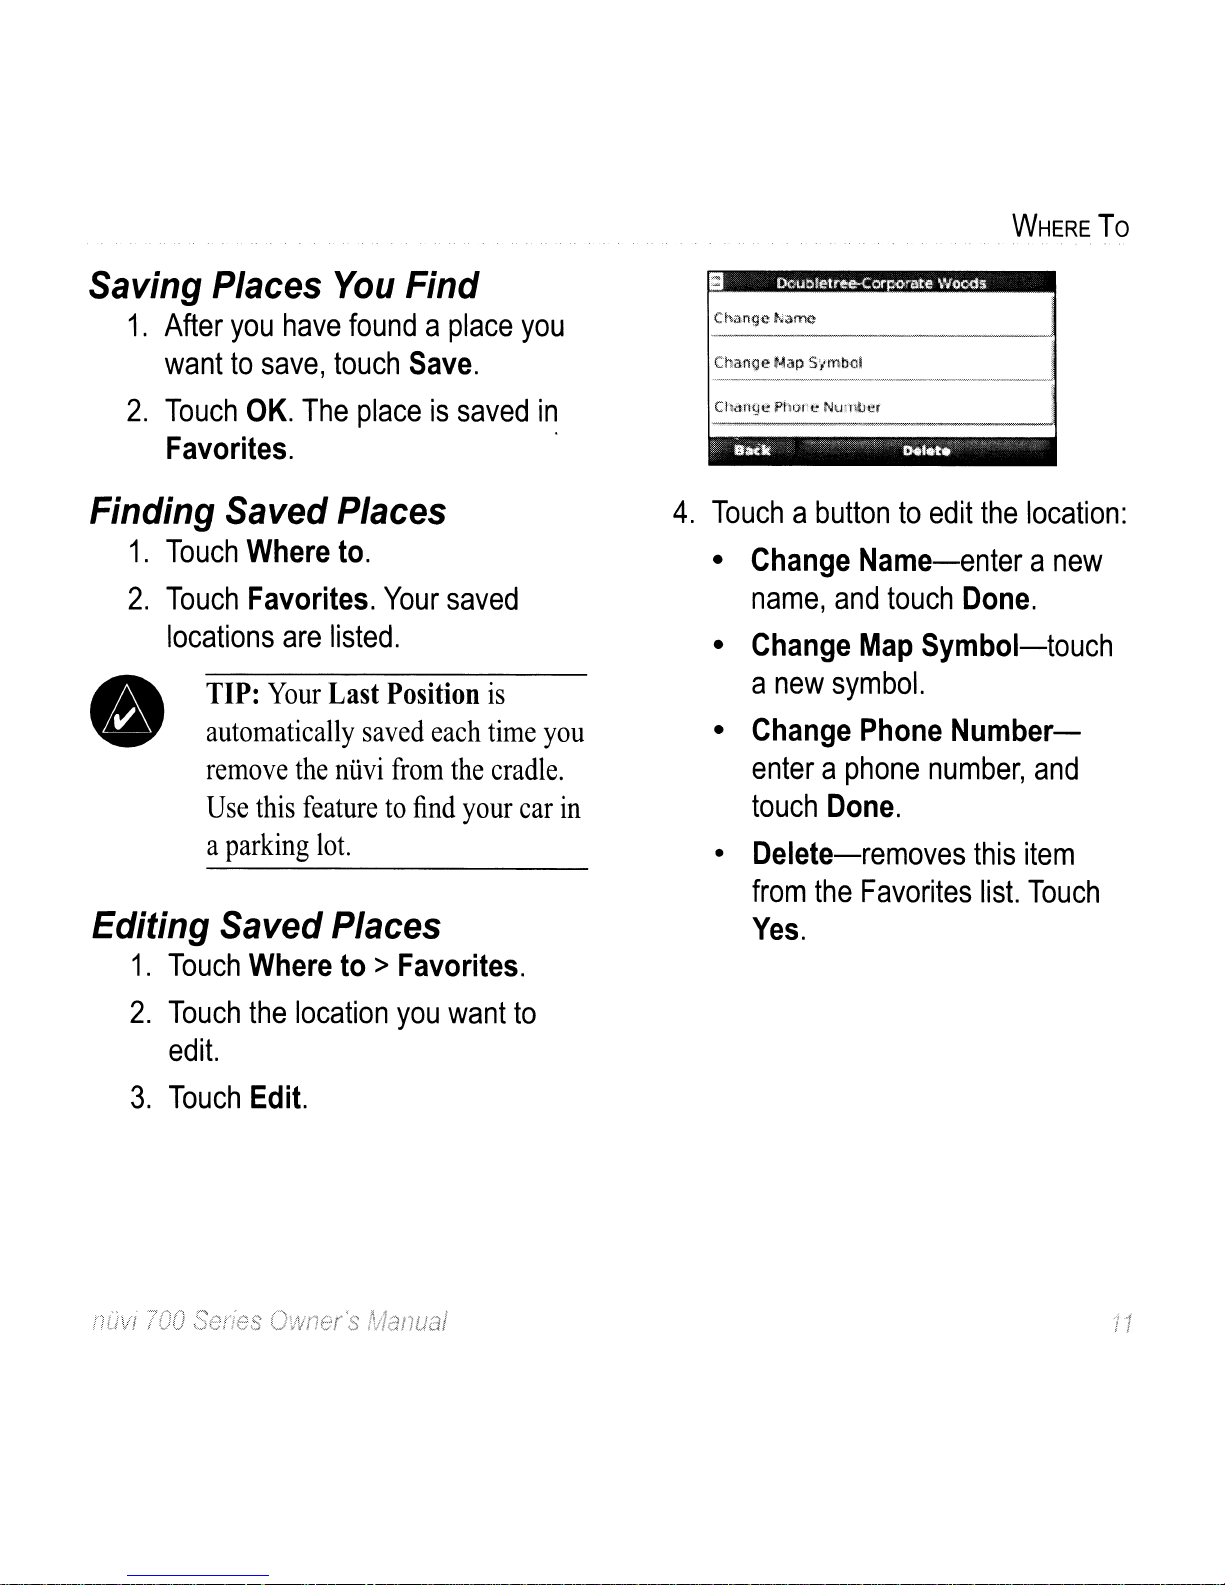
4.
Touchabuttontoedit
the
location:
•
Change
Name-enter a
new
name,
and
touch
Done.
•
Change
Map
Symbol-touch
a
new
symbol.
•
Change
Phone
Number-
enteraphone
number,
and
touch
Done.
• Delete-removes
this
item
from
the
Favorites
list.
Touch
Yes.
1
WHERE
To
Creating
and
Taking
Routes
Touch
"Vhere
to>Routes.
Select
the
route
you
wanttotake
and
touch
Go.
CreatingaSaved
Route
Use
your
ntivitocreate
and
save
routes
before
your
next
trip.
You
can
save
up
to
10
routes.
1.
Touch
Where
to
(or
Tools)
>
Routes>
New.
2.
Touch
Add
New
Start
Point.
3.
Findalocation
as
your
starting
point,
and
touch
Select.
4.
Touch
Add
New
End
Point.
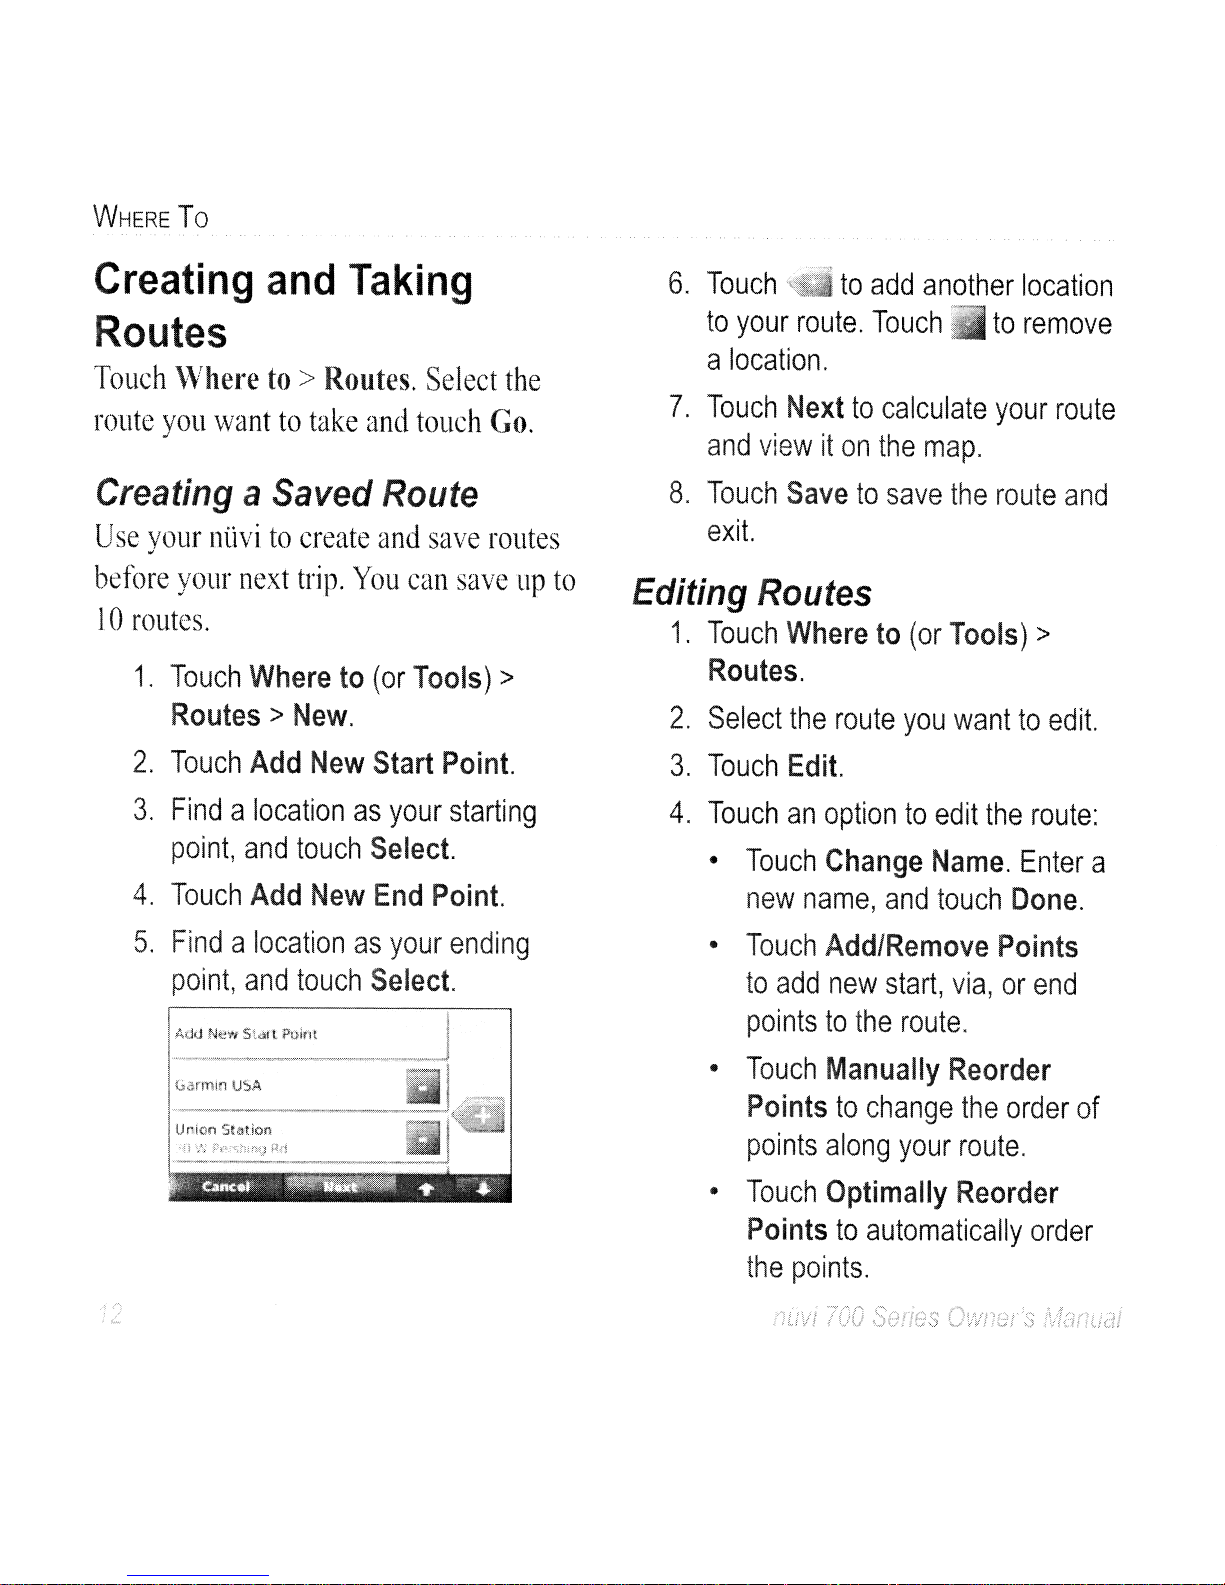
5.
Findalocation
as
your
ending
point,
and
touch
Select.
Union Station
6.
Touch
.toadd
another
location
to
your
route.
Touch
to
remove
a
location.
7.
Touch
Next
to
calculate
your
route
and
viewiton
the
map.
8.
Touch
Save
to
save
the
route
and
exit.
Editing
Routes
1.
Touch
Where
to
(or
Tools)
>
Routes.
2.
Select
the
route
you
wanttoedit.
3.
Touch
Edit.
4.
Touchanoptiontoedit
the
route:
•
Touch
Change
Name.
Enter
a
new
name,
and
touch
Done.
•
Touch
Add/Remove
Points
to
add
new
start,
via,orend
pointstothe
route.
•
Touch
Manually
Reorder
Points
to
change
the
order
of
points
along
your
route.
•
Touch
Optimally
Reorder
Points
to
automatically
order
the
points.
•
Touch
Recalculatetochange
the
route
preference
to
calculatebyfaster
time,
shorter
distance,oroff
road.
•
Touch
Deletetoremove
this
item.
NOTE:
Your
changes
are
automatically
saved
when
you
exit
anyofthe
route
edit
pages.
Finding
a
Place
Using
the
Map
Use
the
Browse
Map
pagetoview
different
partsofthe
map.
Touch
Where
to>Browse
Map.
Tips
for
Browsing
the
Map
•
Touch
the
map,
and
dragtoview
different
partsofthe
map.
•
Touch+and-to
zoominand
out.
•
Touch
any
object
on
the
map.
An
arrow
appears
pointingatthe
object.
WHERE
To
•
Touch
Savetosave
this
location.
•
Touch
Gotonavigatetothe
location.
• If
the
GPS
modeisoff,
touch
Set
Loetoset
your
locationtothe
selected
location.
(See
page
37.)
Entering
Coordinates
If
you
know
the
geographic
coordinates
of
your
destination,
you
can
use
your
niivitonavigatetoany
location
using
its
latitude
and
longitude
coordinates.
This
can
be
especially
helpful
when
geocaching.
Touch
Where
to
> Coordinates.
To
change
the
typeofcoordinates,
touch
Format.
Because
different
maps
and
charts
use
different
position
formats,
the
niivi
allows
youtochoose
the
correct
coordinate
format
for
the
typeofmap
you
are
usmg.
Enter
the
coordinates,
and
then
touch
Next.
Touch
Gotocreateatum-by-tum
13
NOTE:
Your
ntivi
automatically
searches
for
places
near
your
current
location.
WHERE
To
routetothe
coordinates.
Searching
Near
Another
Location
e
1.
Touch
Where
to>Near.
2.
Selectanoption:
•
WhereIAm
Now-search
near
your
current
location.
• ADifferent City-search
near
the
city
you
enter.
•
My
Current Route-search
along
your
route.
•
My
Destination-search
near
your
current
destination.
3.
Touch
OK.
,14
Navigating
Off
Road
If
you
are
not
following
roadways
as
you
navigate,
use
Off
Road
mode.
Touch
Tools>
Settings> Navigation>
Route
Preference>
Off
Road>
OK.
Select
a
destination
and
touch
Gotonavigate
off
roadtothe
destination.
Walking
to
a
Destination
If
you
are
walkingtoyour
destination,
use
Pedestrian
modetooptimize
your
route
for
walking.
Touch
Tools>
Settings>
System>
Usage
Mode>
Pedestrian>
OK.
nOvi
700
Series
Owner's
IVlanuai

USING
THE
MAIN PAGES
USING
THE
MAIN PAGES
Map
Page
Touch
\etI
View
map
to
open
the
Map
page.
The
me
vehicle
icon
shows
your
current
location.
Touch
and
drag
the
maptoviewadifferent
areaofthe
map
(see
page
13).
Touch
the
text
bartoopen
the
Tum
List
page.
Touch-to
zoom
out.
Touch
Menu
to
return
to
the
Menu
page.
Touch
Arrival
or
Speed
to
open
the
Trip
Information
page.
Touch+to
zoom
in.
To
save
your
current
location,
touch
the
vehicle
icon.
~-=~--
Touch
Turn
In
to
open
the
Next
Tum
page.
Trip Information Page Turn List Page Next Turn Page
TIP:
A
speed
limit
icon
16.~
I
may
appearasyou
travel
on
major
roachvays.
This
icon
displays
the
current
speed
limitofthe
roadway.
USING
THE
MAIN
PAGES
Trip
Information
Page
The
Trip
Information
page
displays
your
current
speed
and
provides
helpful
statistics
about
your
trip.
To
view
the
Trip
Information
page,
touch
the
Speed
or
Arrival
field
on
the
Map
page.
If
you
make
frequent
stops,
leave
the
nlivi
turnedonsoitcan
accurately
measure
elapsed
time
during
the
trip.
Resetting
Trip
Information
If
you
want
accurate
trip
information,
reset
the
trip
information
before
beginningatrip.
Touch
Reset
Trip
to
reset
the
informationonthe
Trip
Information
page.
Touch
Reset
Max
to
reset
the
maximum
speed.
I
i~
, v
Turn
List
Page
When
you are
navigatingaroute,
the
Tum
List
page
displays
turn-by-turn
instructions
for
your
entire
route
and
the
distance
between
turns.
Touch
the
green
text
bar
on
the
topofthe
Map
page
to
open
the
Tum
List
page.
Touchatum
on
the
listtoview
the
Next
Tum
page
for
that
tum.
Touch
Show
Maptoview
the
entire
route
on
the
Browse
Map.
Next
Turn
Page
When
you
are
navigatingaroute,
the
Next
Tum
page
shows
the
tum
on
the
map
and
the
distance
and
time
left
before
you
reach
the
tum.
To
view
an
upcoming
tum
on
the
map,
touch
the
Turn
In
field
on
the
Map
page,ortouch
any
tum
from
the
Tum
List
page.
nOvi
700
Series
Owner's
tv/anual
USING HANDS-FREE
CALLING
Bluetoothisavailable
onlyinthe
niivi
710,760,
and
770.
Using
Bluetooth
wireless
technology,
your
niivi
can
connecttoyour
mobile
phonetobecome
a
hands-free
device.
To
seeifyour
device
with
Bluetooth
technology
is
compatible
with
the
niivi,
visit
www.gam1in.com/bluetooth.
Bluetooth
wireless
technology
establishesawireless
link
between
devices,
suchasa
mobile
phone
and
the
niivi.
The
first
time
you
use
two
devices
together
you
must
"pair"
them
by
establishingarelationship
usingaPIN/
passkey.
After
the
initial
pairing,
the
two
devices
can
connect
automatically
each
time
you
tum
them
on.
USING
HANDS-FREE
CALLING
Pairing
Your
Phone
To
pair
and
connect,
your
phone
and
the
niivi
must
be
turned
on
and
be
within
10
metersofeach
other.
Initiate
pairing
from
your
niiviorfrom
your
mobile
phone.
Refertoyour
phone's
instructions.
To
pair
using
the
phone
settings:
1.
Enable
the
phone's
Bluetooth
component.
This
might
beina
menu
called
Settings,
Bluetooth,
Connections,orHands-free.
2.
Initiateasearch
for
Bluetooth
devices.
3.
Select
the
nuvi
from
the
list
of
devices.
4.
Enter
the
nuvi's
Bluetooth
PIN
(1234)
into
your
phone.
NOTE:
You
might
havetoset
your
devicetoconnecttothe
nlivi
automatically
whenitis
turned
on.
nuvi
700
Series
Ovvner's
Manual
~!
7
USING HANDS-FREE CALLING
To
pair using the nuvi settings:
1.
From
the
Menu
page,
touch
Tools
>Settings> Bluetooth >
Add.
2.
Enable
your
phone's
Bluetooth
component
and
enable
Find
Mel
Discoverable/Visible
mode.
These
settings
might
beina
Bluetooth,
Connections,orHands-free
menu.
3.
Touch
OK
on
the
nuvi.
4.
Select
your
phone,
and
touch
OK.
5.
Enter
the
nuvi's
Bluetooth
PIN
(1234)inyour
phone.
When
your
phoneisconnectedtoyour
niivi,
you are
readytomake
phone
calls.
Touch
Phonetoaccess
the
Phone
menu.
\Vhen
you
turn
on
the
nUvi,ittries
to
connecttothe
last
phonetowhichitwas
connected.
NOTE:
Not
all
phones
support
all
featuresofthe
nUvi
Phone
Menu.
Receiving
a
Call
When
vou
get
acall
the
Incoming
Call
~
~
~
\vindow
opens.
Touch
Answertoanswer
the
call
Touch
Ignore
to
ignore
the
call
and
stop
the
phone
from
ringing.
The
internal
microphoneisin
the
front
of
the
nHvi;
speak
normally.
In
a
Call
Duringacall,
the
In
Call
icon
appears.
'rouch
>
F:nd
Calltohang
up.
Touch
1>
Call
Options
for
the
following
options:
•
Touch
Tones-displays a
keypad
pagesoyou
can
use
automated
systems,
suchasvoice
mail.
• Transfer
Audio
To
Phone-this
is
helpfulifyou
wanttoturn
otf
the
niivi.
but
stav
on
the
call
or
if
. "
you
need
privacy.Toswitch
back,
touch
Transfer i\udio
To
Device.
•
Mute
iVlicrophone.
~SerfOS

Using
Call
Waiting
vVhen
you
are
onacall
and
you
receive
a
second
call
(call
waiting),
the
ntivl
displays
the
Incoming
Call
window.
Touch
Answer
to
answer
the
call.
The
first
callisplaced
on
hold.
To
switch
between
calls:
1.
Touch
>
Switch
To.
2.
Touch
End
Calltohang
up;
this
does
not
disconnect
the
calion
hold.
Phone
Menu
From
the
Menu
page,
touch
Phone
to
open
the
Phone
menu.
Press
Status
to
view
the
connected
phone's
signal
strength,
battery
level,
and
name.
NOTE:
Not
all
phones
support
all
featuresofthe
nlivi
Phone
Menu.
USING HANDS-FREE CALLING
Using
Your
Phone
Book
Each
time
your
mobile
phone
connects
with
the
nUvi,
the
phone
book
is
automatically
loaded
into
the
niivi.
It
Inay
takeafew
minutes
for
the
phone
booktobe
available.
1.
Touch
Phone>
Phone
Book.
2.
Touch
the
phone
book
entry
(contact)
you
wanttocall.
3.
Touch
Dialtocall
the
contact,
or
touch
Composetosend
an
SMS/text
message.
Dialing a Point
of
Interest
1.
Touch
Phone>
Points
of
Interest.
2.
Search
for
the
pointofinterest
you
wanttocall.
3.
Touch
Dial
or
ri.
Dialing a Number
1.
Touch
Phone>
Dial.
2.
Enter
the
number,
and
touch
Dial.
J
USING
HANDS-FREE
CALLING
Viewing Your Call History
Each
time
your
phone
connectstothe
niivi,
your
call
historyisautomatically
transferredtothe
niivi.Itmay
takeafew
minutestotransfer
this
datatothe
niivi.
1.
Touch
Phone>
Call
History.
2.
Touchacategorytoview
those
calls.
The
calls
are
listed
in
chronological
order;
the
most
recent
calls
areatthe topofthe
list.
3.
Touchanentry,
and
touch
Dial.
Calling Home
Enteraphone
number
for
your
home
location,soyou
can
quickly
call
home.
To
enter
your
phone
number:
1.
Touch
Phone>
Call
Home.
2.
Touch
Enter
Phone
Number
to
use
the
keypad
pageorSelect
From
Phonebook
(only
available
if
your
phone
supports
phone
book
transfer).
3.
Touch
Done>
Yes.
The
nuvi
dials
your
home
phone
number.
NOTE:Toedit
home
location
or
phone
number,
touch
Whereto>
Favorites>
Home>
Edit.
To
call
home:
1.
Touch
Phone>
Call
Home.
2.
The
nuvi
dials
your
home
phone
number.
Placing Calls Using Voice Dial
You
can
place
calls
by
speaking
the
contact's
name.
1.
Touch
Phone>
Voice
Dial.
2.
Speak
the
contact
name.
NOTE:
You
may
needto"train"
your
mobile
phonetorecognize
your
voice
dial
commands.
Refer
to
your
phone's
instructions.
 Loading...