


WARNING: READ BEFORE USING YOUR PLAYSTATION® GAME CONSOLE.
A very small percentage of individuals may experience epileptic seizures when exposed to certain light patterns or flashing lights. Exposure to certain patterns or backgrounds on a television screen or while playing video games, including games played on the PlayStation game console, may induce an epileptic seizure in these individuals. Certain conditions may induce previously undetected epileptic symptoms even in persons who have no history of prior seizures or epilepsy. If you, or anyone in your family, has an epileptic condition, consult your physician prior to playing. If you experience any of the following symptoms while playing a video game – dizziness, altered vision, eye or muscle twitches, loss of awareness, disorientation, any involuntary movement, or convulsions – IMMEDIATELY discontinue use and consult your physician before resuming play.
WARNING TO OWNERS OF PROJECTION TELEVISIONS:
Do not connect your PlayStation game console to a projection TV without first consulting the user manual for your projection TV, unless it is of the LCD type. Otherwise, it may permanently damage your TV screen.
USE OF UNOFFICIAL PRODUCT:
The use of unofficial products and peripherals may damage your PlayStation game console and invalidate your console warranty.
HANDLING YOUR PLAYSTATION DISC:
•This compact disc is intended for use only with the PlayStation game console.
•Do not bend it, crush it or submerge it in liquids
•Do not leave it in direct sunlight or near a radiator or other source of heat.
•Be sure to take an occasional rest break during extended play.
•Keep this compact disc clean. Always hold the disc by the edges and keep it in its protective case when not in use. Clean the disc with a lint-free, soft, dry cloth, wiping in straight lines from center to outer edge. Never use solvents or abrasive cleaners.
CONTENTS - FINAL FANTASY V |
1 |
Prologue . . . . . . . . . . . . . . . . . . 1
Getting Started . . . . . . . . . . . . . . 2
Controls . . . . . . . . . . . . . . . . . . . 3
Story . . . . . . . . . . . . . . . . . . . . . 4
Saving/Ending . . . . . . . . . . . . . . . 5
The Menu Screen . . . . . . . . . . . . 6
Gathering Information . . . . . . . . 12
Vehicles & Shops . . . . . . . . . . . . 13
Battle . . . . . . . . . . . . . . . . . . . . 14
Status Abnormalities . . . . . . . . . 16
Jobs & Changing Jobs . . . . . . . . . 17
Abilities . . . . . . . . . . . . . . . . . . . 18
Job & Ability List . . . . . . . . . . . . 19
Magic & Song Effects . . . . . . . . . 23
Items & Combinations . . . . . . . . 24
FINAL FANTASY ANTHOLOGY SOUNDTRACK . . . . . 54
Credits . . . . . . . . . . . . . . . . . . . . . . . . . . . . . . . . 58
Limited Warranty . . . . . . . . . . . . . . . . . . . . . . . . 61
PROLOGUE
Dreams fill the land with hope
Courage ignites flames
Water is the source of sympathy
Investigation carries intelligence in the Wind
If people possess the four wills, light can arise

2 |
GETTING STARTED |
disc cover |
|
|
RESET button |
RESET |
|
POWER button |
|
|
|
POWER |
OPEN |
POWER indicator |
|
OPEN button |
Controller port 1 |
|
MEMORY CARD slot |
TO START A NEW GAME
Set up your PlayStation game console according to the instructions in its Instruction Manual. Make sure the power is off before inserting or removing a compact disc. Insert the Final Fantasy® V disc and close the disc cover. Insert game controllers and turn on the PlayStation game console. Follow on-screen instructions to start a game.
CONTINUE FROM SAVED DATA
When saved data exists, pressing the START button or the button at the Title Screen will switch the display to the Loading Screen. If the player selects a MEMORY CARD with saved data, the screen will switch to a File Screen. With the cursor, select the file to continue from, and press the button.
If starting a new game, the player must select <New Game>.
ENTERING NAMES
During the game, the player will have the opportunity to change the names of important characters. When the opportunity arises, pressing the button will switch the screen to the Name Entering Screen. Use the directional button to move the cursor next to the desired letter to be entered, and press the button to confirm the selection. To cancel a selection, press the button. Once the desired name is entered, press the START button to return to the original screen.
CONTROLS |
3 |
L2 button |
|
R2 button |
L1 button |
|
R1 button |
L |
|
R |
|
|
button |
directional button |
|
button |
SELECT |
START |
button |
|
|
button |
SELECT button |
|
START button |
button
In addition to gathering information and items, this button serves the following purposes:
•Execute a command selected with the directional button.
•Talk to people in castles, villages, and towns by positioning the character next to them.
•Search the contents within a Treasure Box.
•Ride and dismount various modes of transportation such as the Zeppelin or Chocobo.
•Activate door switches, elevators, etc.
button
Cancel the selected command (return to the previous menu) and close an opened screen. If the character is moved while the button is pressed, its movement will increase to twice its regular speed.
button
Bring up the World Map only if the character possesses <World Map> and is in the field. The World Map displays the character’s present location, and the nearby towns, villages, and castles. This map provides an excellent reference guide if a character should become lost. (Chocobos, Flying Dragons, and Zeppelin locations will also be displayed).
çbutton
Switch the display to the Menu Screen. The command will not work during battles or events. See the Menu Screen section (p.6) for a detailed explanation.
directional button
Direct movement of characters and vehicles. The directional button is also used to move the cursor to select commands and items.
R1 button
Allow the party to escape from battle when pressed in conjunction with the L1 button.
R2 button
Not used during gameplay.
L1 button
Allow the party to escape from battle when pressed in conjunction with the R1 button.
L2 button
Not used during gameplay.
SELECT button
Not used during gameplay.
START button
Pause the game during battle. Pausing the game is useful for planning battle strategies.
NOTE: Within the command windows of the Menu Screen, the player will be able to shift through the information displayed on the screen by pressing the L1, L2, R1 or R2 button.
4 |
STORY |
The world thrived on the power of four particular crystalsWind, Earth, Fire, and Water. With the power of Wind, people sailed ships. With the power of Fire, they began the industrial movement. With Water, people quenched their thirst, and from Earth, they received blessings.
One day, the Tycoon King, upon feeling an irregularity in the air currents, rushed to the Wind Shrine, only to find the Wind Crystal shattering to pieces right before his eyes. In addition to this catastrophe, an enormous meteor had fallen to the ground, causing earthquakes in the surrounding land near Tycoon Castle.
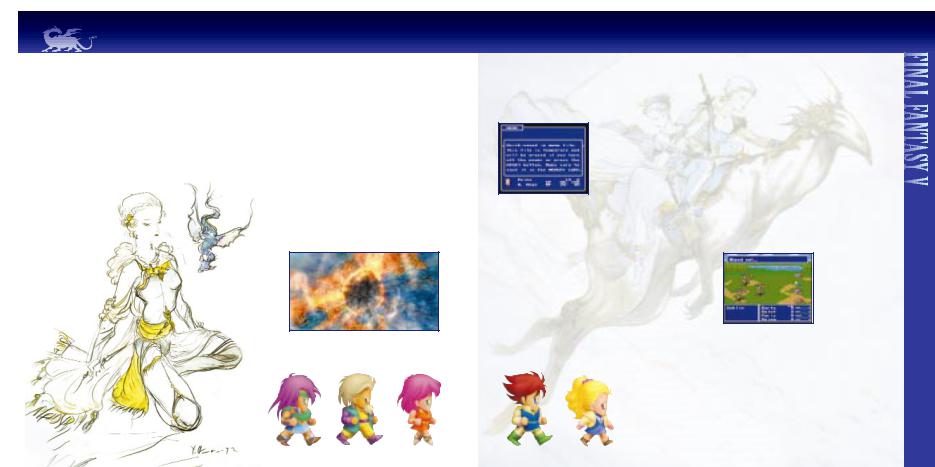
Unbeknownst to them, this event is about to bring four people from different walks of life together on a common journey. There is Faris, a pirate who felt the impending disaster of the Wind; Galuf, a mysterious old soldier who has lost his memory due to the force of the fallen meteor; Reina, a girl who has left Tycoon Castle in search of her father; and Bartz, a wandering traveler.
Why did the Crystal shatter? What happened to the missing Tycoon
King? What meaning does the fallen meteor have?
The answers will start to unfold as this grand adventure
filled with new encounters and many mysteries begins...
SAVING/ENDING |
5 |
SAVING ONTO THE MEMORY CARD
Insert a MEMORY CARD into the PlayStation MEMORY CARD slot 1 or 2. The player will be able to save in the field or in areas such as dungeons where save points exist. Select <Save> on the Menu Screen. If the player selects a MEMORY CARD onto which the data will be saved, the screen will switch to the MEMORY CARD File Screen From this screen, the player will be able to choose a MEMORY CARD slot on which current game data can be saved.
SAVING ONTO THE MEMO FILE
A Memo File save is not the same as a MEMORY CARD save. The Memo File system will leave one temporary record in the PlayStation’s memory. Once the power is turned OFF or the RESET button is pressed, the saved Memo File will be deleted. Data that the player wishes to save permanently should be stored on the MEMORY CARD. In order to record to the Memo File, the player must select <Save> from the Menu Screen and then select <Memo>. Once <Memo> has been selected, press the button to save.
SOFT RESET
To restart a game from a saved Memo File, execute a soft reset (simultaneously pressing the R1, R2, L1, L2, START, and the SELECT buttons). The player will be taken back to the opening movie after which they will be able to access the Loading Screen. Selecting <Memo> from this screen will allow the player to resume the game from their saved Memo File.
GAME OVER
The game is considered over if any of the following instances or combination of instances occur to the whole party:
•Party members HP reaches zero.
•Party members become Petrified.
•Party members turn into Zombies.
Once a game is over, it is possible to continue from the last saved point. During battle, instead of constantly attacking, the player should utilize Recovery Magic and other items in order to prevent the decrease of HP to a critical level. Be aware of other characters’ HP level at all times. If a character is poisoned, becomes petrified, turns into a Zombie, or gets paralyzed, it is crucial that the character is quickly healed before their HP reaches zero.
6 |
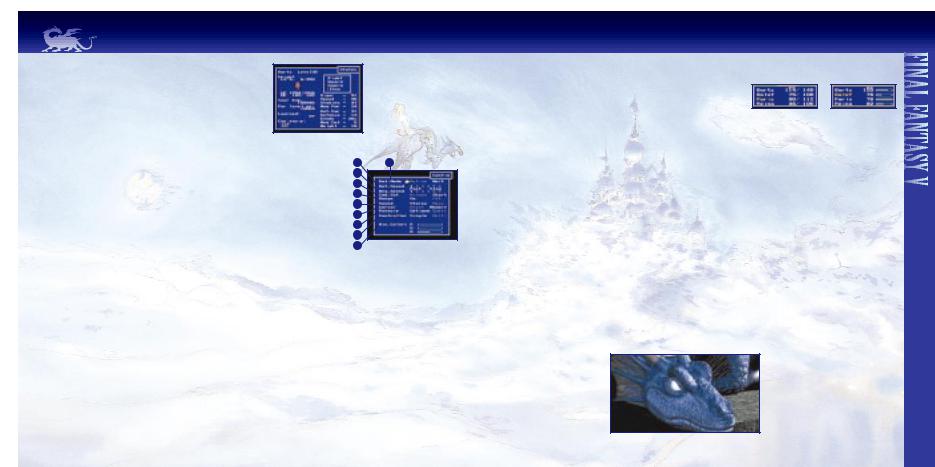
THE MENU SCREEN |
The Menu Screen can be accessed at any time except during battles or events by pressing the ç button. Commands such as viewing character status, changing Jobs and switching equipment are all
executed from this screen.
1
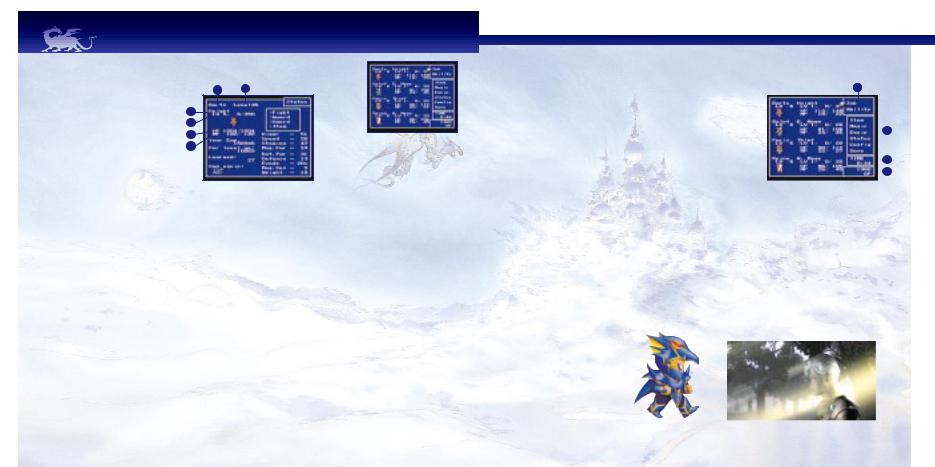
CHARACTER DATA
|
3 |
1. Name |
4 |
Displays the character’s name. |
5 |
6
2. Level
Displays the character’s current level.
3. Job
Displays the character’s current Job name and/or status (see Status Abnormalities on page 16).
4. Job Level
Displays the character’s current Job Level, acquired Ability Points, and Ability Points necessary to reach the next level.
5. HP (Hit Point)
Displays the character’s Current/Maximum HP value.
6. MP (Magic Point)
Displays the character’s Current/Maximum MP value.
FORMATION CHANGES
In addition to the order in which characters are displayed during battle, characters can be assigned to the Front or Back Row of the formation. Characters in the Front Row can do more damage and hit enemies easier, though they are also more vulnerable to enemy attacks. Characters in the Back Row have a more difficult time attacking, but are better shielded from direct attacks by the enemy. A basic strategy is to place warriors in the Front Row while magic users cast spells from the Back Row. To change formation, first go to the Menu Screen. When the directional button is pressed to the LEFT, the <Order> command will appear.
To change a character’s position, move the cursor to the character to be changed, and press the button twice. To switch the positions of two characters, the player must move the cursor to one character, press the button, then move the cursor to the other character and press the button again to complete the switch. (The character located at the top of the Menu Screen will represent the character/party when in the field).
|
|
|
|
|
|
|
|
|
|
|
|
|
|
|
|
|
|
|
|
|
|
|
|
THE MENU SCREEN |
7 |
|
|||||
MENU SCREEN |
|
|
|
|
|
|
|
|
|
|
|
|
|
||
|
|
|
|
|
|
||
|
|
|
|
|
|
||
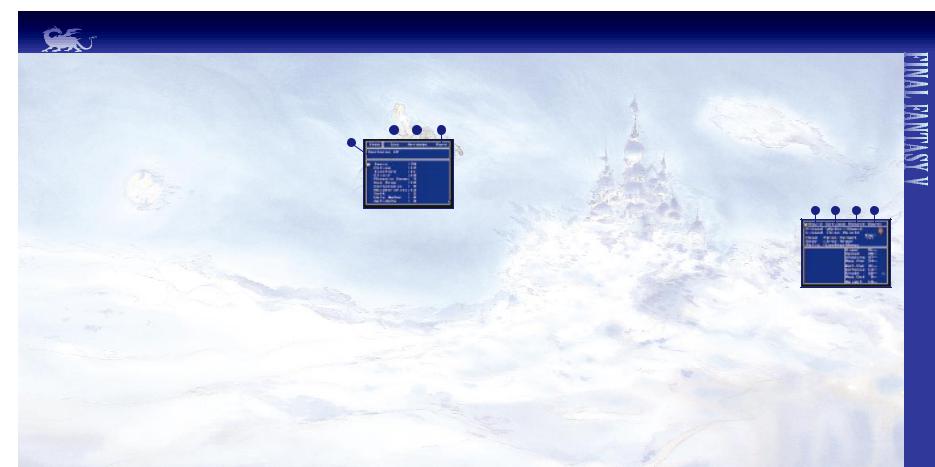
The Menu Screen consists of character data and four windows. Brief |
1 |
|
|
|
|
|
|
|
|
|
|
|
|||
descriptions on how to read each window will be discussed in the following |
|
|
|
|
|
|
|
section. See page 8 for more details on how to use the Menu Screen. |
|
|
|
|
|
|
|
|
|
|
|
|
|
||
1. Job/Ability Window |
|
|
|
|
2 |
|
|
|
|
|
|
|
|||
This window allows the player to change the Job and Ability of characters. See |
|
|
|
|
|
|
|
page 17 for instructions on how to change Jobs, and page 18 for methods on |
|
|
|
|
|
|
|
how to combine Abilities. |
|
|
|
|
3 |
|
|
|
|
|
|
|
|||
2. Menu Command Window |
|
|
|
|
|
||
|
|
|
|
4 |
|
||
This window allows the player to select and execute the following commands: |
|
|
|
|
|
|
|
|
|
|
|
|
|
||
• Item |
|
|
|
|
|
|
|
• Magic |
|
|
|
|
|
|
|
• Equip |
|
|
|
|
|
|
|
• Status |
|
|
|
|
|
|
|
• Config |
|
|
|
|
|
|
|
• Save |
|
|
|
|
|
|
|
3. Time Window |
|
|
|
|
|
|
|
This window displays the amount of time spent playing the game. |
|
|
|
|
|
|
|
4. Money Window |
|
|
|
|
|
|
|
This window displays the amount of money (in the form of GP) the party |
|
|
|
|
|
|
|
currently possesses. |
|
|
|
|
|
|
|
|
|
|
|
|
|
|
|
|
|
|
|
|
|
|
|
|
|
|
|
|
|
|
|
8 |
THE MENU SCREEN |
USING MENU COMMANDS
The usage of each Menu Command on the Menu Screen (see The Menu Screen on page 6) will |
introduced in the following |
||||
section. Within the Menu Command Screens, it is possible to recover HP and MP, check status |
equip items. These commands will |
||||
help the character advance smoothly in the game. |
|
|
|
|
|
NOTE: Within the Menu Command Screens, the player will be able to shift through the |
displayed on the screen by |
||||
pressing the L1, L2, R1 or R2 button. |
|
|
|
3 |
|
|
|
|
|
||
|
4 |
|
|
|
|
|
|
|
|
|
|
ITEM
This command allows the player to use and arrange items. On the Menu Screen, move the cursor to <Item>. When the button is pressed, the screen shown on the right will appear. The items that currently can be used are highlighted, whereas items that cannot be used are darkened. When the
button is pressed, the cursor will move to the <Use>, <Arrange>, and <Rare> Window.
1.Use
Press the button after moving the cursor to <Use>. Select the item to be used, and press the button twice to confirm. Next, move the cursor to the character that will use the item and press the button to finalize the selection.
2. Arrange
When items, weapons and armor are randomly displayed in the Item column, moving the cursor to <Arrange> and pressing thebutton will allow the player to quickly organize these items by groups.
3. Rare
Moving the cursor to <Rare> and pressing the button will display crucial items that are necessary in moving the game forward. Only rare items that are possessed will be displayed.
4. Item Use
Moving the cursor to an item name displays the usage for that particular item. Weapons and armor will not contain usage information. Only the traits of weapons and armor that have specific abilities will be displayed.
ORDER OF ITEMS
The player will be able to switch the location of two items by using the cursor and button. Select an item to move with the cursor and press the button. Then, select the item to be switched with the first item and press the button again. The two items will switch positions.
THE MENU SCREEN |
9 |
MAGIC
Depending on the Job assigned, a character may have the ability to use magic spells possessed by the party. Press the button after moving the cursor to <Magic>. Select a character with the cursor, and press the button again to display the screen shown on the right. Next, select a magic type and press the button to display a Magic Spell List (magic that can be used will be highlighted, whereas magic that cannot be used will appear darkened). After selecting the magic spell to be used and pressing the button to confirm, the cursor will move to the Character Selection Window. To cast a magic spell on a particular character, select the character with the cursor, and press the button. There are also certain types of magic spells that can have multiple targets. Please refer to the next section for more information on these types of magic spells.
MULTIPLE TARGET MAGIC SPELLS
There are some types of magic spells that can be cast on all characters or enemies. When selecting a character or an enemy, press the directional button to the LEFT/RIGHT until the cursor starts blinking over the entire targeted party. Press the button to cast the spell.
EQUIP |
1 2 3 4 |
It is possible to equip and remove weapons and armor for each character. Press the button after selecting <Equip>, and select a character. After the selection has been made, press the button again to display the screen shown on the right.
1. Equip
Press the button after selecting <Equip> to choose the part of the body to equip. If the button is pressed again, a list of weapons and armor that may be equipped will be shown on the bottom left section of the screen. From the list, select the item to be equipped. Once the selection
has been made, press the button to complete the equipping (or switching) process. Press the button to return to the Menu Screen. When equipping items, equipment stats with increasing abilities will be displayed in yellow, and equipment stats with decreasing abilities will be displayed in gray.
2. Optimum
This command will instantly equip the selected character with the best weapons and armor available in the party’s inventory depending on their Job.
3. Remove
This command allows a specific piece of equipment to be removed. Once the selection has been made, press the button to complete the process.
4. Empty
This command allows the player to instantly remove every piece of equipment on a selected character.
10 |
THE MENU SCREEN |
STATUS
Press the button after selecting <Status>. Select a character and press the button again to display character information. Some of the information available from this screen include:
•Current Character Level
•Job
•HP/MP
•Status
1
CONFIG |
3 |
Various System Settings within the game, such as Battle Mode, Sound, and Window Color may be altered within the Config Screen. Settings should be adjusted to the player’s preference. For example, if the player is not accustomed to the game controls, Battle Mode can be set to <Wait> (see Battle on page 14) and Battle Speed can be set to a slower speed to give the player more time to become familiar with the controls. In this way, the game will progress at the player’s pace.
1. Battle Mode
The player can select between <Active> or <Wait> mode. When set to <Active>, time will continue to pass (enemies will attack) even though the Magic/Item Screen is open. When set to <Wait>, time comes to a standstill (enemies will not attack) when the Magic/Item Screen is open.
2. Battle Speed
The player can change the speed at which time passes during battle, ranging from 1 (fast) to 6 (slow). Press the directional button to the LEFT/RIGHT to operate the controls.
3. Message Speed
The player can change the speed at which battle messages are to be displayed in the upper part of the screen. Press the directional button to the LEFT/RIGHT to select a speed ranging from 1 (fast) to 6 (slow).
4. Command Setting
The player can select between two different Battle Command Screens. The first option is <Window>, which is the default setting. When set to <Window>, battle commands will appear in a column, and are accessed by pressing the directional button UP/DOWN. Pressing the directional button to the LEFT/RIGHT allows the player to access <Row> or <Defend>. The second is the <Short> option, in which commands are accessed by pressing UP, DOWN, LEFT, RIGHT on the directional button, and <Row> and <Defend> are accessed by pressing the L1 and R1 buttons, respectively.
THE MENU SCREEN |
11 |
5. Gauge
The player can change the appearance of the HP Window during battle. When set to <ON>, the time remaining until attack will be displayed in gauges. When set to <OFF>, the Current HP/Maximum HP will be displayed in numbers.
6. Sound
The player can select between <Stereo> and <Mono> sound output.
7. Cursor
<OFF> displays the Current HP/Maximum HP in numbers.
The player can select between <Reset> and <Memory> cursor positions.
If set to <Reset> the cursor in a command window defaults to the top of the screen each time. If set to <Memory> the cursor will appear in its last position on the screen.
<ON> displays the Current HP in numbers and the time remaining until attack in gauges.
8. Re-Equip
The player can choose how equipment is distributed for a character right after a Job change or an Ability selection.
If <Optimum> is selected, a character will automatically be equipped with the best equipment in inventory. If <Empty> is selected, every item equipped by a character will be removed when a Job or Ability change occurs.
9. Controller
The player can choose between <Single> (one controller), and <Multi> (two controllers). If <Multi> is chosen, the player can assign each character’s command during battle to any one of the two controllers, and the game can be enjoyed by two players.
10. Window Color
Window Color can be changed based on the player’s preference. Adjust each color gauge (R=Red, G=Green, B=Blue) by pressing the directional button to the LEFT or RIGHT.
12 |
GATHERING INFORMATION |
INFORMATION GATHERING BASICS
Gathering information is vital in progressing through the game. The button is the key control in gathering information. If the player thinks something is hidden nearby, pressing the button at that location may reveal something valuable.
Talk
To obtain information in the towns, villages, and castles, position the character in front of people and press the button to open up a dialogue window. Gathering information will enable the character to be informed as to what lies ahead.
Inspect
Pressing the button while standing in front of Treasure Boxes and Vases will allow the character to inspect and examine the contents within. If something is found inside, the character will automatically obtain the item.
Activate Switches & Levers
To activate door and device switches or pull elevator levers, position the character in front of the switch or lever, and press the button.
VEHICLES & SHOPS |
13 |
MODES OF TRANSPORTATION
In the following section, various modes of transportation in the FINAL FANTASY V world will be introduced. These various modes of transportation are essential to the party’s journey as they permit the party to travel to places that cannot normally be reached. It should be noted that the party can still be attacked when riding on a Chocobo or the Ship.With the exception of the Ship, boarding and disembarking are done with the button.
Ship
The party will be able to freely ride a Ship across the sea. A Ship’s speed will vary depending on its type.
Chocobo
A birdlike creature that helps the party travel across land, rivers, and lakes at twice the normal walking speed.
Zeppelin
An airship that can fly across the sky, but can only take off and land on flat land or water.
SHOPS
This next section will introduce the many establishments in the FINAL FANTASY V world. In addition to the Inns, there are various types of shops in towns and villages. To prepare for the next leg of the journey, it is wise to stock up on essential items and get plenty of rest.
Inns
Here, the party will be able to recover HP/MP and Status Abnormalities with the exception of the Zombie status effect.
Weapons Shop
Various weapons can be purchased here. However, the weapons sold will vary according to each shop.
Armor Shop
Various types of armor can be purchased here. However, the armor sold will vary according to each shop.
Item Shop
Essential items for the journey such as Potions and Phoenix Downs can be purchased here.
Magic Shop
Various types of magic spells can be purchased here. However, the magic spells sold will vary according to each shop.
14 |
BATTLE |
The FINAL FANTASY V battle system uses an ATB (Active Time Battle) system in which time flows continuously during battle. With this feature, the player will have to take advantage of each turn and plan ahead to avoid giving enemies more time to act. Also, as mentioned earlier, both Battle Mode and Battle Speed within the Config Screen may be adjusted to the player’s preference (see Config Screen on page 10). Besides normal encounters with random enemies, there are times when the party will be surprised by a group of enemies, and gets attacked first. Other times, an enemy attack may come from the rear, resulting in a surprise attack made against the party’s more vulnerable Back Row.
Once in battle, the time at which a character can act is signified by the time gauge located in the lower right of the screen. Once the gauge fills up for a particular character, the Battle Screen will appear, listing the available commands. The command listed at the top of the Battle Screen is <Fight>, followed by a Job specific command if a Job is assigned to the character. The third slot is generally taken up by another Job specific command, though it may also remain empty if one is not assigned, or if the assigned ability is not a command. The last slot is occupied by the <Item> command.
Fight
When the <Fight> command is selected, a cursor will appear on an enemy. Using the directional button, the player can choose to target different enemies or allies. Once a target has been chosen, press the button to execute the command.
Special Commands
If a character has been assigned a Job, a Job specific command will become available below the <Fight> command of the Battle Screen. The third slot of the Battle Screen is used to display an ability that was previously assigned to the slot through the Combining Abilities function explained on page 18. All Special Commands that can be used in battle are represented by a (!) and can be executed by pressing the button.
Magic
If a character is equipped with a magic-using Job such as the Black Mage or White Mage, the special command during battle will be <Black> or <White>, respectively. Pressing the button after selecting the magic type, such as White, Black and Blue Magic, will open up a window which will display every magic spell available to that particular character. Select the magic spell to be used with the directional button, and press the button to confirm the selection. When a targeting cursor appears, select the target of the magic spell with the directional button, and press the button again to cast. Some magic spells can have multiple targets. To use this feature, move the targeting cursor to the rear most target in an enemy (or an ally) group, and press the directional button in its direction one more time to select the whole group. The party can be targeted in the same manner.
BATTLE |
15 |
Item
The party can also use items during battle. Select the <Item> command in the Battle Screen, and press the button to display all items held in inventory. To use an item, move the cursor to the item to be used and press the button twice. Next, with the cursor, select the recipient (enemy or ally) of the item, and press the button to execute the command.
CHANGING WEAPONS DURING BATTLE
To change a character’s weapon during battle, first go to the <Item> command and press the button to display the Item Window. Next, select the weapon to equip, and press the button again. Once the selection has been made, move the cursor to the very top of the Item Window, and press the directional button UP one more time to display the Weapon Equip Window. This window displays the items that the selected character currently has equipped. Finally, move the cursor to the weapon to be replaced, and press the button to complete the command.
Defend
Pressing the directional button to the RIGHT when the Battle Screen is displayed will reveal the <Def.> command. When this command is executed (with the button), the character will take no action, but will also take less damage from enemy attacks.
Row
Pressing the directional button to the LEFT when the Battle Screen is displayed will reveal the <Row> command. When this command is executed with the button, the selected Front and
Back Row characters will switch positions. This command is useful in the event of a rear or surprise attack, where the weaker Back Row is exposed.
ESCAPE
Although there is no display for this command, the player can remove the party from a battle situation by simply holding down the L1 and R1 buttons simultaneously. While this is possible most of the time, be advised that there are some enemies that the party will not be able to escape from, or enemies that are difficult to escape from.
END OF BATTLE
Upon winning a battle, the character will obtain money (in the form of GP), Experience Points (EXP), and Ability Points (ABP). The amount of money or points obtained depends on the number of enemies defeated, and their type. Money will be necessary when staying in Inns and buying weapons, items, and magic. Experience Points will be added automatically, and once a certain level of points is reached, the character’s level will increase. According to the Job, Ability Points will automatically be added as well. Once the set number is reached, the type of Job and the corresponding Ability for that particular level can be learned.
ENEMIES WITH TREASURES
Occasionally, after an enemy has been defeated, treasure will be left behind. This is signified by the appearance of a Treasure Screen after the Ability Points earned display disappears. To collect this treasure, merely select the <Take All> command.
16 |
STATUS ABNORMALITIES |
During battle, various Status Abnormalities such as Poison, Frog, Age, and Confuse can occur. Some Status Abnormalities will recover after battle, and some will not.
NON-RECOVERABLE STATUS ABNORMALITIES
Knockout When HP reaches zero, the character is knocked out until revived with a Phoenix Down or Raise Spell.
Petrify The character becomes petrified, making movement impossible until restored by a Soft potion.
Toad Attack and Defense Power become weaker and the character loses the ability to cast all magic spells except for Toad.
Mini Attack and Defense Power become weaker, but the character can still cast magic spells.
Poison Poison circulates through the character’s body decreasing HP gradually.
Dark The character is blinded by darkness, lowering Hit Percentage Rate.
Zombie The character transforms into a Zombie and begins attacking allies. Only Holy Water will enable recovery.
RECOVERABLE STATUS ABNORMALITIES
Age |
The character begins to age rapidly, causing character attributes to decrease. |
Silence Magic spells are nullified and the character loses the ability to cast magic.
Sleep The character falls into a deep sleep and can no longer act.
Paralyze Magical paralysis drains the character’s strength, making movement impossible.
Confuse The mind of the character gets clouded, making it impossible to distinguish between friend and foe.
JOBS & CHANGING JOBS |
17 |
JOB DEFINITION
The Jobs a character can equip originates from the essence of past heroes embedded within fragments of the elemental crystals. By obtaining and changing Jobs using the method shown below, a character absorbs the past hero’s powers, and their special abilities. For instance, characters with the power of the Knight will become expert Swordsmen, while those with the power of the White Mage will gain the ability to wield powerful White Magic and those with the power of the Geomancer will be able to control nature at will.
NOTE: Within the command windows of the Menu Screen, such as the Job and Ability Windows, the player will be able to shift through the information displayed on the screen by pressing the L1, L2, R1 or R2 button.
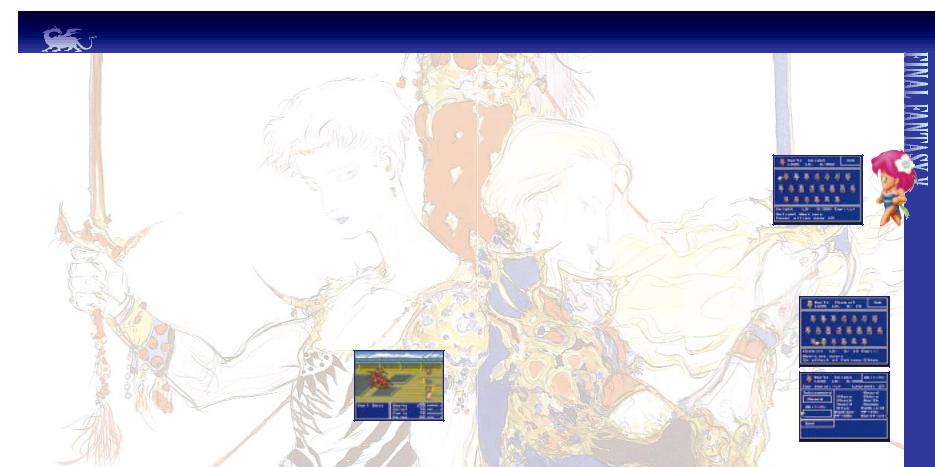
1.
READING THE JOB SCREEN
1.Current character status
Displays the current Job and Job Level.
See “Ability Definition" on page 18 to learn how to read Job Level numbers.
2.Jobs which are available
The Jobs that can currently be assigned will be displayed in the Job Screen. The selected Job will be displayed in color.
3. Data of selected Jobs
The name of the selected Job, Job Level, and remaining ABP necessary for the next Job Level are displayed.
JOB CHANGE METHOD
2.
During the game, press the çbutton to display the Menu Screen. Next, move the cursor to <Job> and press the button to execute the command. The player must now choose a character whose Job is to be changed, and then press the button to display the Job Screen seen on the upper right of this page. Use the directional button to choose a Job, and make the final selection by pressing the button twice. When pressed twice, the Job selected and its data will be displayed in the window on the left page. After the Job change is complete, the screen will change to the Ability Screen seen to the right. After choosing an Ability
(please see page 18 for the Attachment Method) and equipping a character with equipment 3. from the Equip Screen, seen on the lower right of this page (see the “Equip” section on page
9 for methods on how to equip), return to the Menu Screen by pressing the button. If the party has not yet acquired any Jobs, the <Job> command will be inaccessible. If a party has Jobs available without any Abilities, the Ability Screen will not appear after a Job change.
Instead, the Equip Screen would appear. Depending on the setting made in the Config Screen, the Equip Screen will either automatically equip the strongest equipment for the Job, or remove every item that the character had equipped (see page 11).
 Loading...