

Page 1
Page 2

Prologue . . . . . . . . . . . . . . . . . . 1
Getting Started . . . . . . . . . . . . . . 2
Controls . . . . . . . . . . . . . . . . . . .3
Story . . . . . . . . . . . . . . . . . . . . . 4
Saving/Ending . . . . . . . . . . . . . . . 5
The Menu Screen . . . . . . . . . . . . 6
Gathering Information . . . . . . . . 12
Vehicles & Shops . . . . . . . . . . . . 13
Battle . . . . . . . . . . . . . . . . . . . . 14
Status Abnormalities . . . . . . . . . 16
Jobs & Changing Jobs . . . . . . . . . 17
Abilities . . . . . . . . . . . . . . . . . . . 18
Job & Ability List . . . . . . . . . . . . 19
Magic & Song Effects . . . . . . . . . 23
Items & Combinations . . . . . . . . 24
FINAL FANTASY ANTHOLOGY SOUNDTRACK . . . . . 54
Credits . . . . . . . . . . . . . . . . . . . . . . . . . . . . . . . . 58
Limited Warranty . . . . . . . . . . . . . . . . . . . . . . . . 61
PROLOGUE
Dreams fill the land with hope
Courage ignites flames
Water is the source of sympathy
Investigation carries intelligence in the Wind
If people possess the four wills, light can arise
CONTENTS - FINAL FANTASY V
1
WARNING: READ BEFORE USING YOUR PLAYSTATION®GAME CONSOLE.
A very small percentage of individuals may experience epileptic seizures when exposed to certain
light patterns or flashing lights. Exposure to certain patterns or backgrounds on a television screen
or while playing video games, including games played on the PlayStation game console, may
induce an epileptic seizure in these individuals. Certain conditions may induce previously
undetected epileptic symptoms even in persons who have no history of prior seizures or epilepsy.
If you, or anyone in your family, has an epileptic condition, consult your physician prior to
playing. If you experience any of the following symptoms while playing a video game – dizziness,
altered vision, eye or muscle twitches, loss of awareness, disorientation, any involuntary
movement, or convulsions – IMMEDIATELY discontinue use and consult your physician before
resuming play.
WARNING TO OWNERS OF PROJECTION TELEVISIONS:
Do not connect your PlayStation game console to a projection TV without first consulting the user
manual for your projection TV, unless it is of the LCD type. Otherwise, it may permanently damage
your TV screen.
USE OF UNOFFICIAL PRODUCT:
The use of unofficial products and peripherals may damage your PlayStation game console and
invalidate your console warranty.
HANDLING YOUR PLAYSTATION DISC:
• This compact disc is intended for use only with the PlayStation game console.
• Do not bend it, crush it or submerge it in liquids
• Do not leave it in direct sunlight or near a radiator or other source of heat.
• Be sure to take an occasional rest break during extended play.
• Keep this compact disc clean. Always hold the disc by the edges and keep it in its protective
case when not in use. Clean the disc with a lint-free, soft, dry cloth, wiping in straight lines
from center to outer edge. Never use solvents or abrasive cleaners.
Page 3
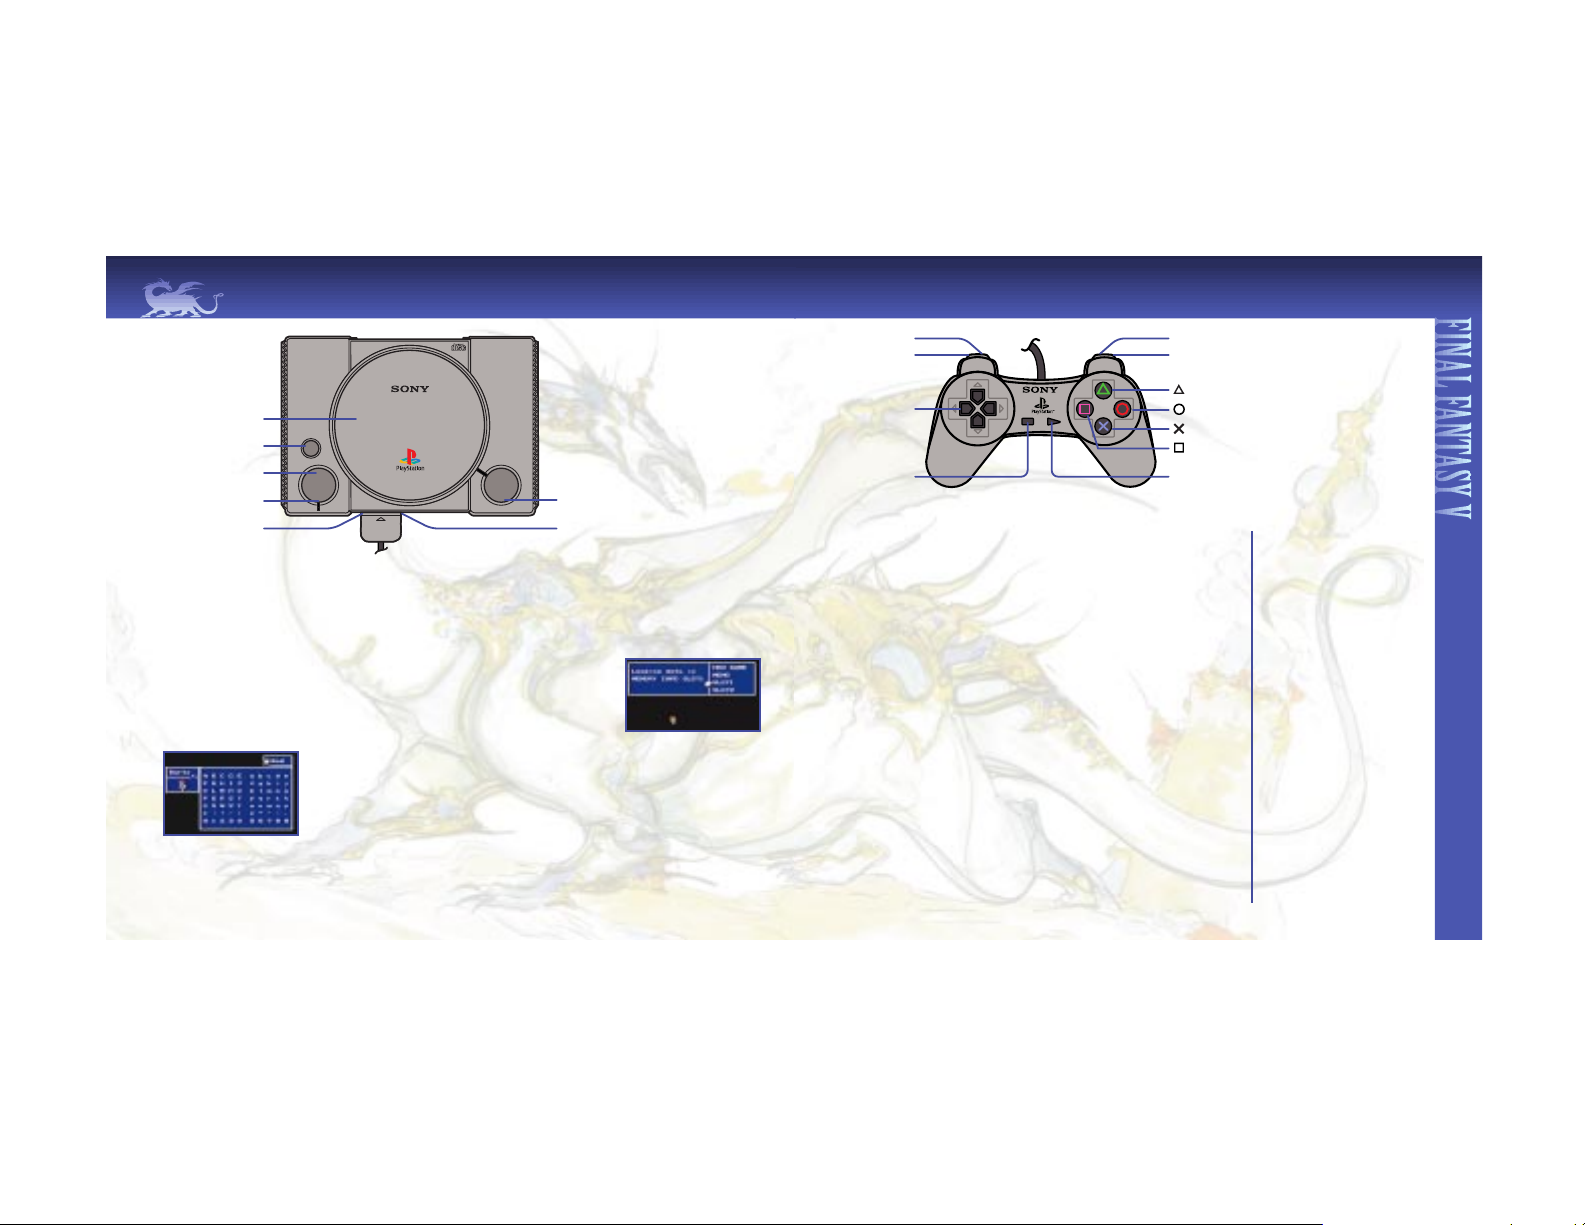
≈ button
In addition to gathering information and items, this button serves the following purposes:
• Execute a command selected with the directional button.
• Talk to people in castles, villages, and towns by positioning the character next to them.
• Search the contents within a Treasure Box.
• Ride and dismount various modes of transportation such as the Zeppelin or Chocobo.
• Activate door switches, elevators, etc.
Ω button
Cancel the selected command (return to the previous menu) and close an opened screen.
If the character is moved while the
Ω button is pressed, its movement will increase to
twice its regular speed.
√ button
Bring up the World Map only if the character possesses <World Map>and is in the
field. The World Map displays the character’s present location, and the nearby towns,
villages, and castles. This map provides an excellent reference guide if a character should
become lost. (Chocobos, Flying Dragons, and Zeppelin locations will also be displayed).
ç button
Switch the display to the Menu Screen. The command will not work during battles or
events. See the Menu Screen section (p.6) for a detailed explanation.
directional button
Direct movement of characters and vehicles. The directional button is also used to move
the cursor to select commands and items.
CONTROLS
3
L
R
SELECT
START
L2 button
directional button
SELECT button
START button
L1 button
R2 button
R1 button
button
button
button
button
R1 button
Allow the party to escape from
battle when pressed in
conjunction with the L1 button.
R2 button
Not used during gameplay.
L1 button
Allow the party to escape from
battle when pressed in
conjunction with the R1 button.
L2 button
Not used during gameplay.
SELECT button
Not used during gameplay.
START button
Pause the game during battle.
Pausing the game is useful for
planning battle strategies.
NOTE: Within the command
windows of the Menu Screen, the
player will be able to shift
through the information displayed
on the screen by pressing the L1,
L2, R1 or R2 button.
TO START A NEW GAME
Set up your PlayStation game console according to the instructions in its Instruction Manual. Make sure the power is off before
inserting or removing a compact disc. Insert the Final Fantasy
® V disc and close the disc cover. Insert game controllers and turn on
the PlayStation game console. Follow on-screen instructions to start a game.
CONTINUE FROM SAVED DATA
When saved data exists, pressing the START button or the ≈ button at the Title Screen will switch the
display to the Loading Screen. If the player selects a MEMORY CARD with saved data, the screen will
switch to a File Screen. With the cursor, select the file to continue from, and press the
≈ button.
If starting a new game, the player must select <New Game>.
ENTERING NAMES
During the game, the player will have the opportunity to change the names of important characters.
When the opportunity arises, pressing the
≈ button will switch the screen to the Name Entering
Screen. Use the directional button to move the cursor next to the desired letter to be entered, and
press the
≈ button to confirm the selection. To cancel a selection, press the Ω button. Once the
desired name is entered, press the START button to return to the original screen.
GETTING STARTED
2
OPEN
®
POWER
RESET
disc cover
RESET button
POWER button
POWER indicator
Controller port 1
OPEN button
MEMORY CARD slot
Page 4
SAVING ONTO THE MEMORYCARD
Insert a MEMORY CARD into the PlayStation MEMORY CARD slot 1 or 2. The player will be able to save in the field or in areas
such as dungeons where save points exist. Select <Save> on the Menu Screen. If the player selects a MEMORY CARD onto
which the data will be saved, the screen will switch to the MEMORY CARD File Screen From this screen, the player will be able
to choose a MEMORY CARD slot on which current game data can be saved.
SAVING ONTO THE MEMO FILE
A Memo File save is not the same as a MEMORY CARD save. The Memo File system will leave one
temporary record in the PlayStation’s memory. Once the power is turned OFF or the RESET
button is pressed, the saved Memo File will be deleted. Data that the player wishes to save
permanently should be stored on the MEMORY CARD. In order to record to the Memo File, the
player must select <Save> from the Menu Screen and then select <Memo>. Once <Memo>
has been selected, press the
≈ button to save.
SOFT RESET
To restart a game from a saved Memo File, execute a soft reset (simultaneously pressing the R1, R2, L1, L2, START, and the
SELECT buttons). The player will be taken back to the opening movie after which they will be able to access the Loading Screen.
Selecting <Memo> from this screen will allow the player to resume the game from their saved Memo File.
GAME OVER
The game is considered over if any of the following instances or
combination of instances occur to the whole party:
• Party members HP reaches zero.
• Party members become Petrified.
• Party members turn into Zombies.
Once a game is over, it is possible to continue from the last saved point. During battle, instead of constantly attacking, the player
should utilize Recovery Magic and other items in order to prevent the decrease of HP to a critical level. Be aware of other
characters’ HP level at all times. If a character is poisoned, becomes petrified, turns into a Zombie, or gets paralyzed, it is
crucial that the character is quickly healed before their HP reaches zero.
SAVING/ENDING
5
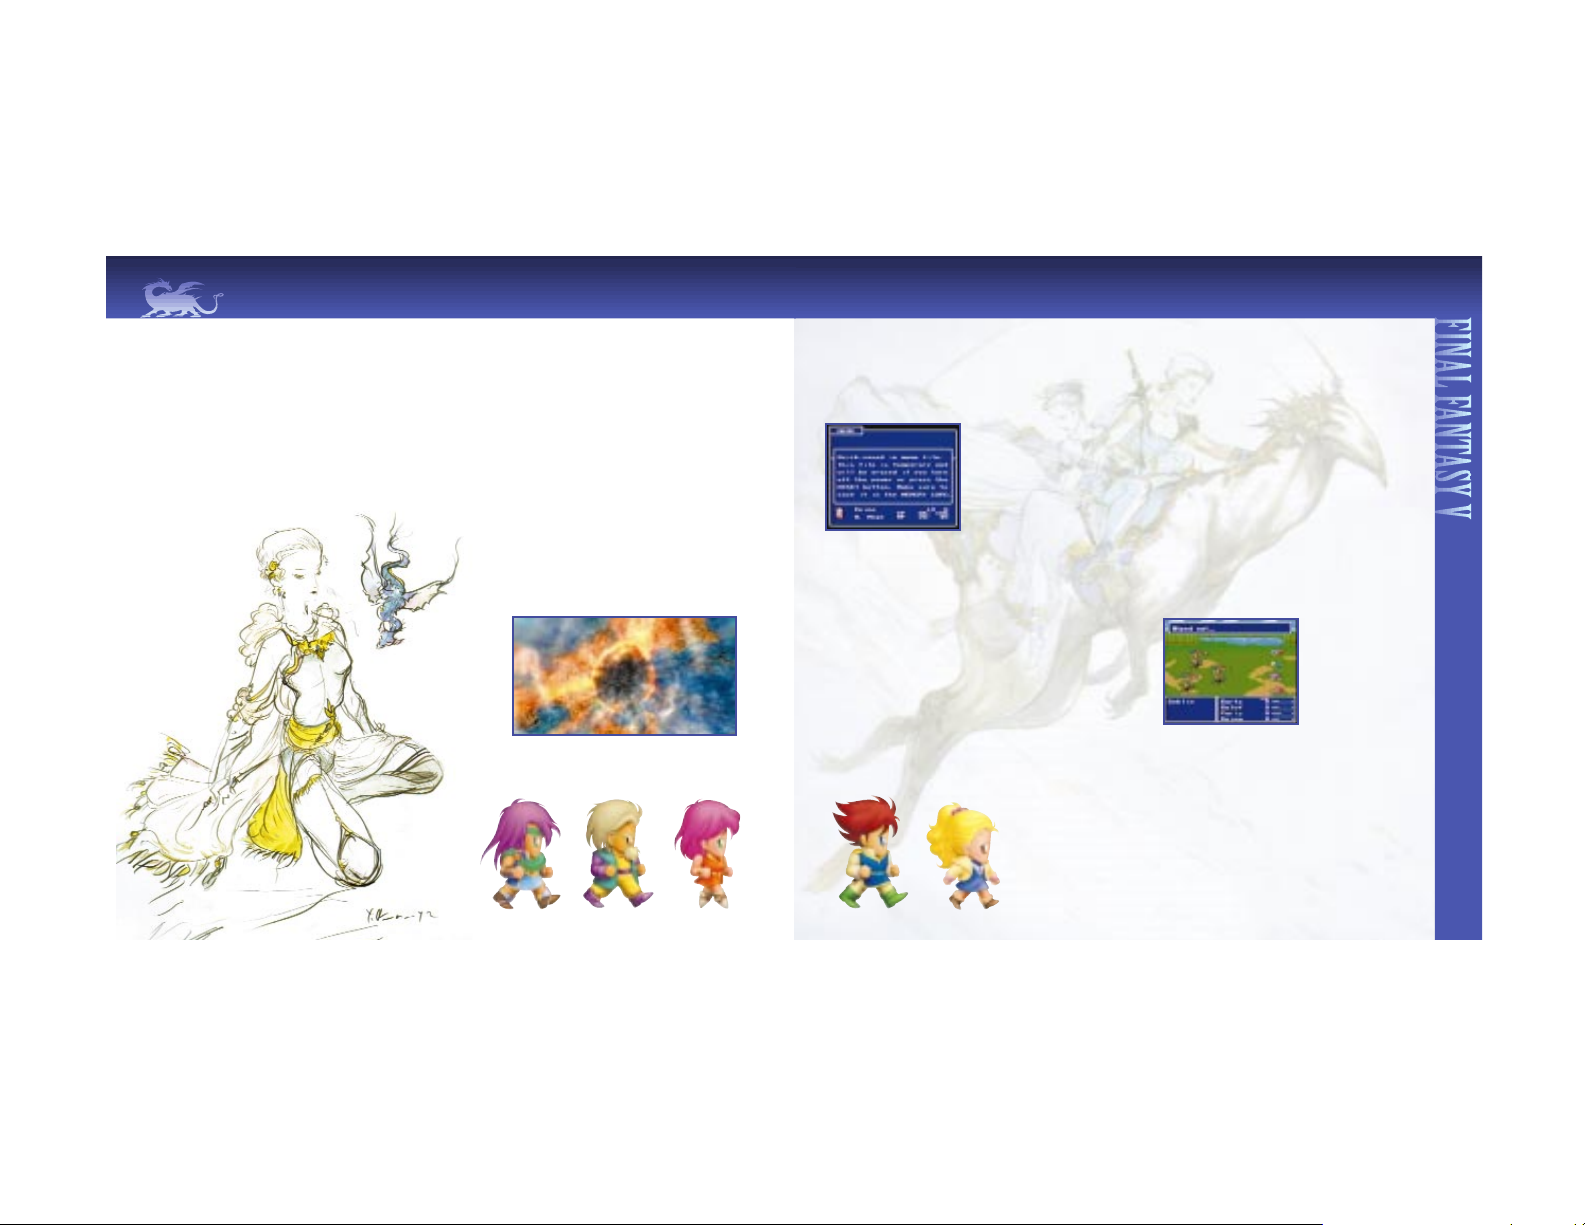
The world thrived on the power of four particular crystals- Wind, Earth, Fire, and Water. With the power of Wind, people sailed
ships. With the power of Fire, they began the industrial movement. With Water, people quenched their thirst, and from Earth, they
received blessings.
One day, the Tycoon King, upon feeling an irregularity in the air currents, rushed to the Wind Shrine, only to find the Wind Crystal
shattering to pieces right before his eyes. In addition to this catastrophe, an enormous meteor had fallen to the ground, causing
earthquakes in the surrounding land near Tycoon Castle.
Unbeknownst to them, this event is about to bring four people from different walks of life together on a common journey. There is
Faris, a pirate who felt the impending disaster of the Wind; Galuf, a mysterious old soldier who has lost his memory due to the
force of the fallen meteor; Reina, a girl who has left Tycoon Castle in search of her father; and Bartz, a wandering traveler.
Why did the Crystal shatter? What happened to the missing Tycoon
King? What meaning does the fallen meteor have?
The answers will start to unfold as this grand adventure
filled with new encounters and many mysteries begins...
STORY
4
Page 5
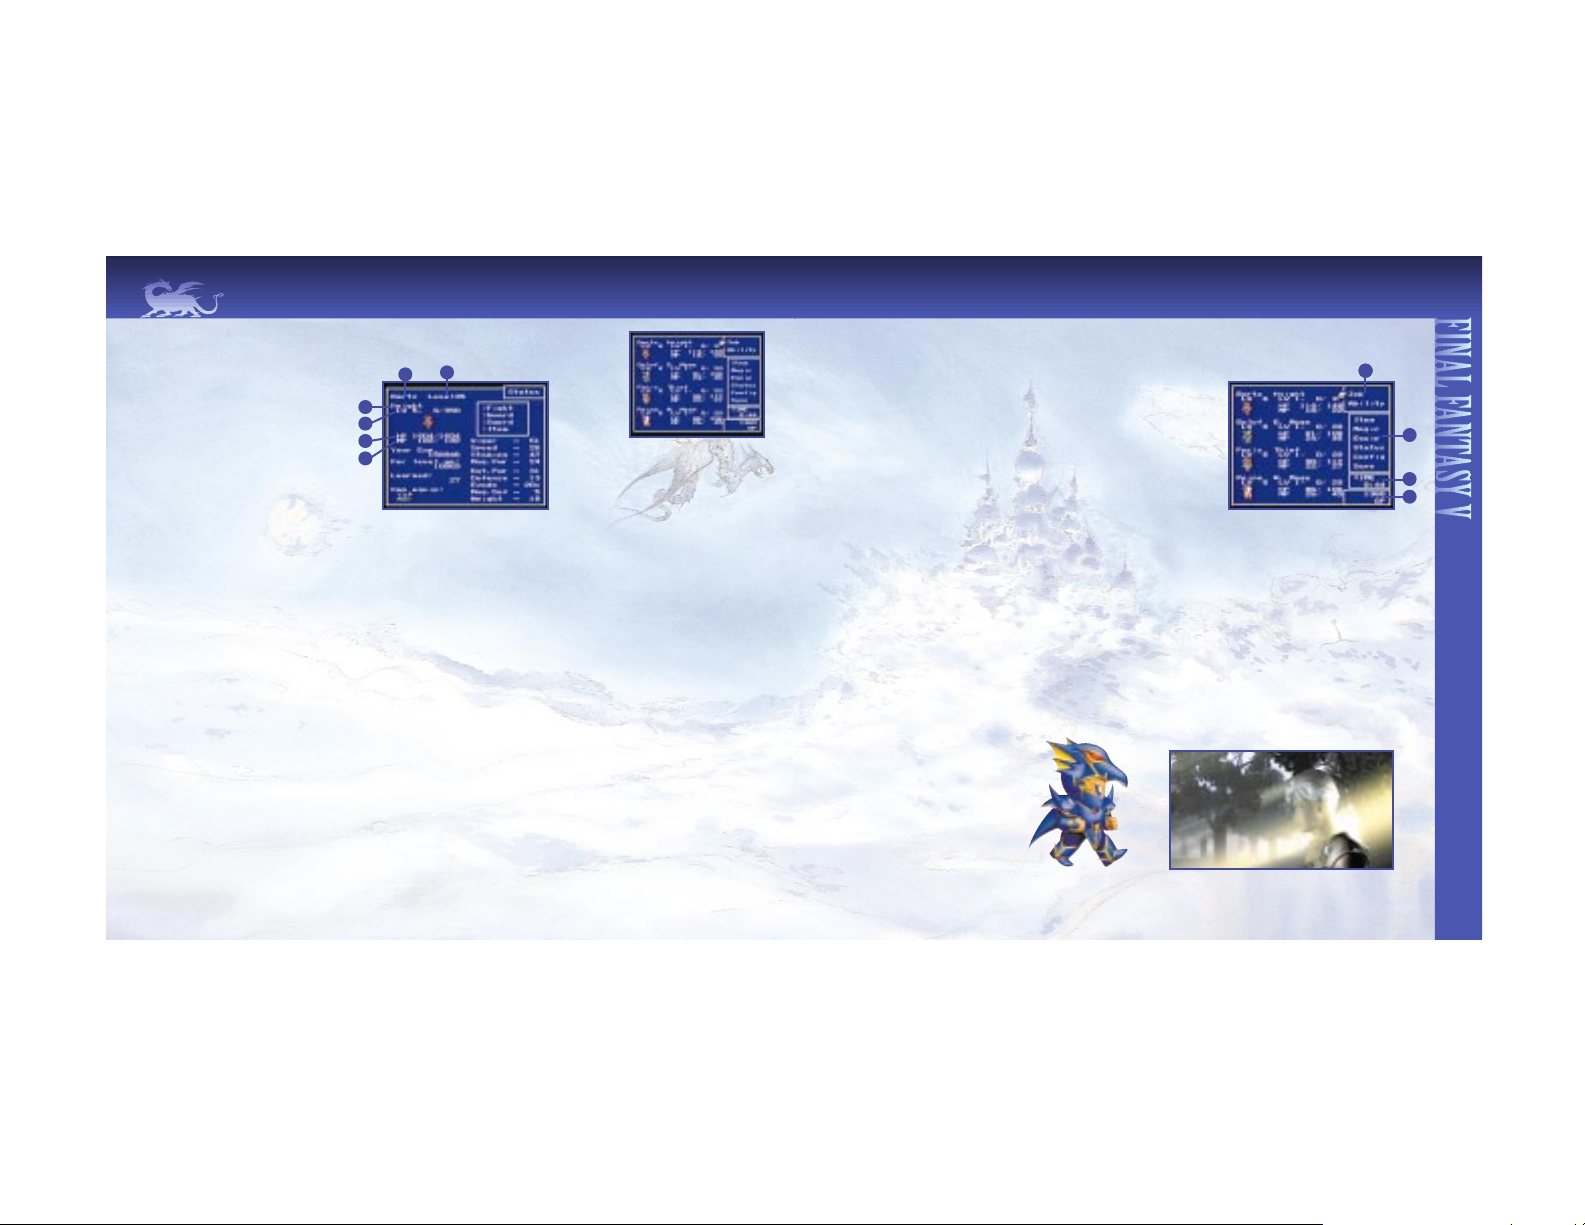
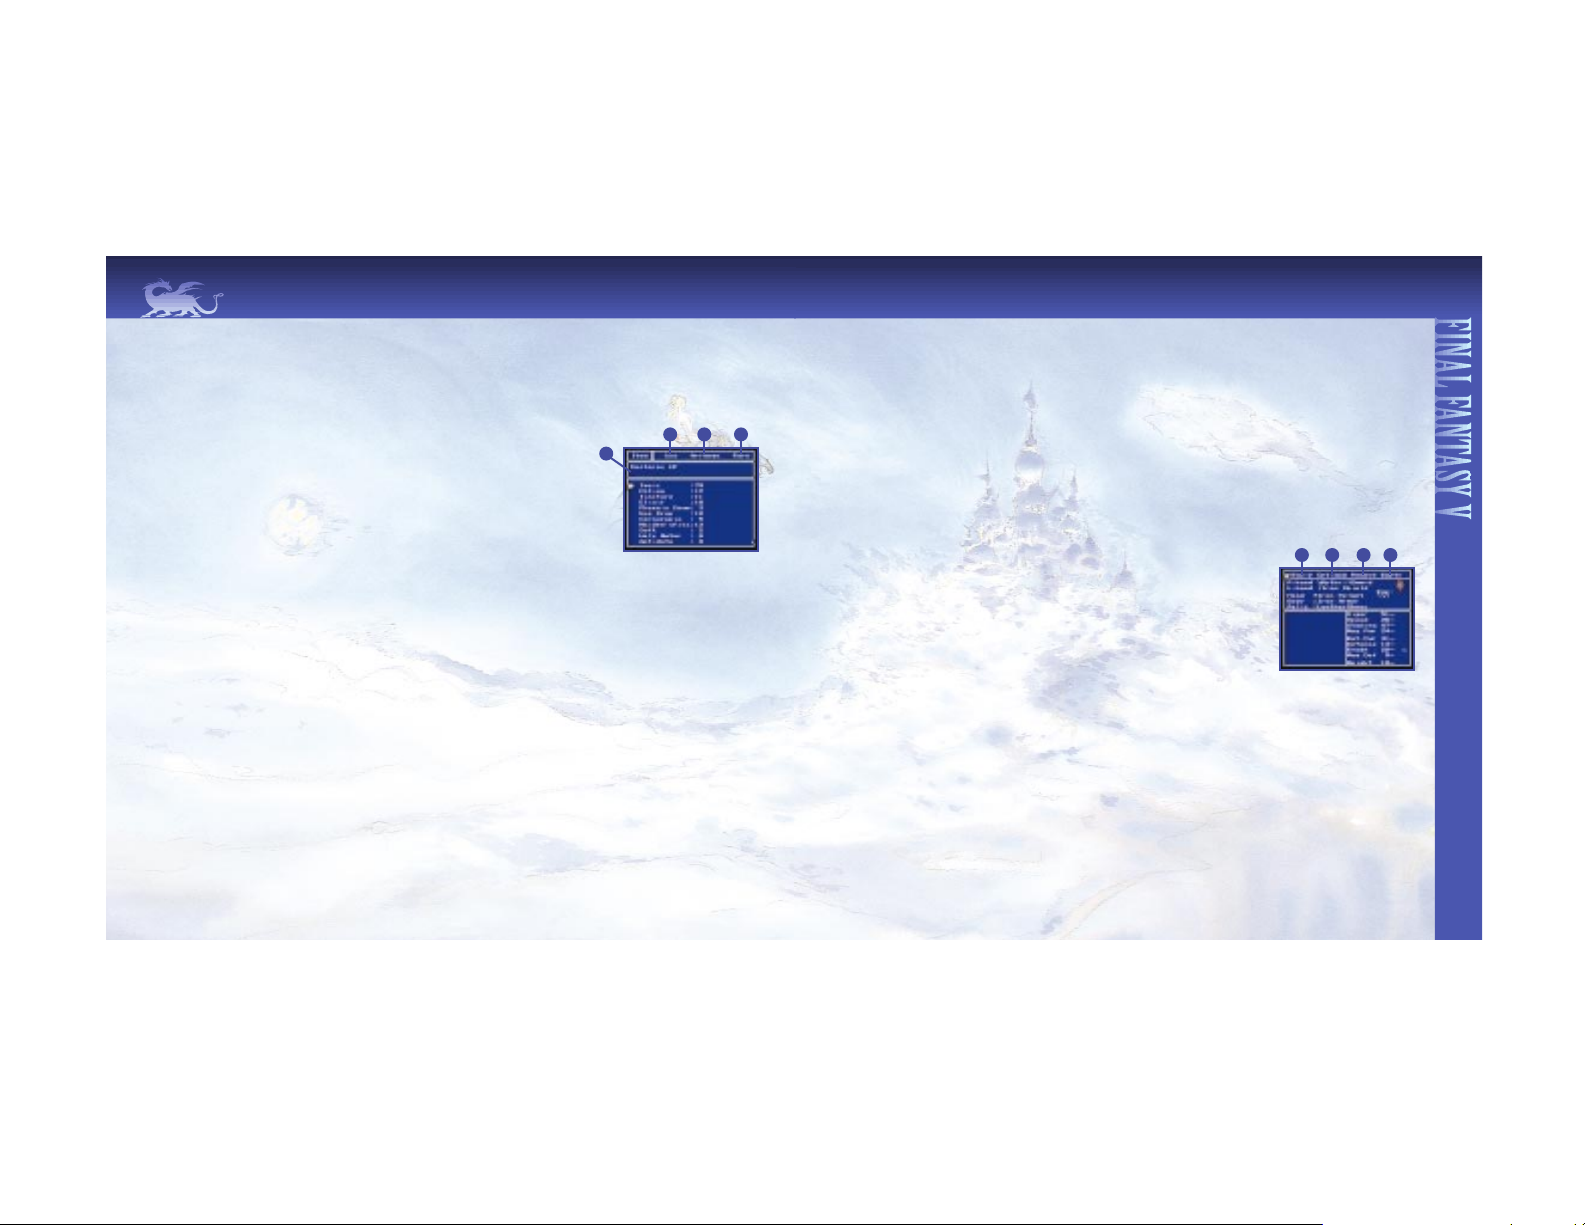
MENU SCREEN
The Menu Screen consists of character data and four windows. Brief
descriptions on how to read each window will be discussed in the following
section. See page 8 for more details on how to use the Menu Screen.
1. Job/Ability Window
This window allows the player to change the Job and Ability of characters. See
page 17 for instructions on how to change Jobs, and page 18 for methods on
how to combine Abilities.
2. Menu Command Window
This window allows the player to select and execute the following commands:
• Item
• Magic
• Equip
• Status
• Config
• Save
3. Time Window
This window displays the amount of time spent playing the game.
4. Money Window
This window displays the amount of money (in the form of GP) the party
currently possesses.
THE MENU SCREEN
7
111
2
3
4
The Menu Screen can be accessed at any time except during battles or events by pressing the ç
button. Commands such as viewing character status, changing Jobs and switching equipment are all
executed from this screen.
CHARACTER DATA
1. Name
Displays the character’s name.
2. Level
Displays the character’s current level.
3. Job
Displays the character’s current Job name and/or status (see Status Abnormalities on page 16).
4. Job Level
Displays the character’s current Job Level, acquired Ability Points, and Ability Points necessary to reach the next level.
5. HP (Hit Point)
Displays the character’s Current/Maximum HP value.
6. MP (Magic Point)
Displays the character’s Current/Maximum MP value.
FORMATION CHANGES
In addition to the order in which characters are displayed during battle, characters can be assigned to the Front or Back Row of the
formation. Characters in the Front Row can do more damage and hit enemies easier, though they are also more vulnerable to
enemy attacks. Characters in the Back Row have a more difficult time attacking, but are better shielded from direct attacks by the
enemy. A basic strategy is to place warriors in the Front Row while magic users cast spells from the Back Row. To change
formation, first go to the Menu Screen. When the directional button is pressed to the LEFT, the <Order> command will appear.
To change a character’s position, move the cursor to the character to be changed, and press the
≈ button twice. To switch the
positions of two characters, the player must move the cursor to one character, press the
≈ button, then move the cursor to the
other character and press the
≈ button again to complete the switch. (The character located at the top of the Menu Screen will
represent the character/party when in the field).
THE MENU SCREEN
6
2
1
3
4
5
6
Page 6
MAGIC
Depending on the Job assigned, a character may have the ability to use magic spells possessed by the party. Press the ≈ button
after moving the cursor to <Magic>. Select a character with the cursor, and press the
≈ button again to display the screen
shown on the right. Next, select a magic type and press the
≈ button to display a Magic Spell List (magic that can be used will be
highlighted, whereas magic that cannot be used will appear darkened). After selecting the magic spell to be used and pressing
the
≈ button to confirm, the cursor will move to the Character Selection Window. To cast a magic spell on a particular
character, select the character with the cursor, and press the
≈ button. There are also certain types of magic spells that can have
multiple targets. Please refer to the next section for more information on these types of magic spells.
MULTIPLE TARGET MAGIC SPELLS
There are some types of magic spells that can be cast on all characters or enemies. When selecting a character or an enemy,
press the directional button to the LEFT/RIGHT until the cursor starts blinking over the entire targeted party. Press the
≈ button
to cast the spell.
EQUIP
It is possible to equip and remove weapons and armor for each character. Press the ≈ button
after selecting <Equip>, and select a character. After the selection has been made, press the
≈
button again to display the screen shown on the right.
1. Equip
Press the
≈ button after selecting <Equip> to choose the part of the body to equip. If the ≈
button is pressed again, a list of weapons and armor that may be equipped will be shown on the
bottom left section of the screen. From the list, select the item to be equipped. Once the selection
has been made, press the
≈ button to complete the equipping (or switching) process. Press the Ω button to return to the Menu
Screen. When equipping items, equipment stats with increasing abilities will be displayed in yellow, and equipment stats with
decreasing abilities will be displayed in gray.
2. Optimum
This command will instantly equip the selected character with the best weapons and armor available in the party’s inventory
depending on their Job.
3. Remove
This command allows a specific piece of equipment to be removed. Once the selection has been made, press the
≈ button to
complete the process.
4. Empty
This command allows the player to instantly remove every piece of equipment on a selected character.
THE MENU SCREEN
9
1 2 3
4
USING MENU COMMANDS
The usage of each Menu Command on the Menu Screen (see The Menu Screen on page 6) will be introduced in the following
section. Within the Menu Command Screens, it is possible to recover HP and MP, check status and equip items. These commands will
help the character advance smoothly in the game.
NOTE: Within the Menu Command Screens, the player will be able to shift through the information displayed on the screen by
pressing the L1, L2, R1 or R2 button.
ITEM
This command allows the player to use and arrange items. On the Menu Screen, move the cursor to
<Item>. When the
≈ button is pressed, the screen shown on the right will appear. The items that
currently can be used are highlighted, whereas items that cannot be used are darkened. When the
Ω button is pressed, the cursor will move to the <Use>, <Arrange>, and <Rare> Window.
1. Use
Press the
≈ button after moving the cursor to <Use>. Select the item to be used, and press the ≈ button twice to confirm.
Next, move the cursor to the character that will use the item and press the
≈ button to finalize the selection.
2. Arrange
When items, weapons and armor are randomly displayed in the Item column, moving the cursor to <Arrange> and pressing the
≈ button will allow the player to quickly organize these items by groups.
3. Rare
Moving the cursor to <Rare> and pressing the
≈ button will display crucial items that are necessary in moving the game forward.
Only rare items that are possessed will be displayed.
4. Item Use
Moving the cursor to an item name displays the usage for that particular item. Weapons and armor will not contain usage
information. Only the traits of weapons and armor that have specific abilities will be displayed.
ORDER OF ITEMS
The player will be able to switch the location of two items by using the cursor and ≈ button. Select an item to move with the cursor
and press the
≈ button. Then, select the item to be switched with the first item and press the ≈ button again. The two items will
switch positions.
THE MENU SCREEN
8
4
1 2 3
Page 7
5. Gauge
The player can change the appearance of the HP Window during battle. When set
to <ON>, the time remaining until attack will be displayed in gauges. When set to
<OFF>, the Current HP/Maximum HP will be displayed in numbers.
6. Sound
The player can select between <Stereo> and <Mono> sound output.
7. Cursor
The player can select between <Reset> and <Memory> cursor positions.
If set to <Reset> the cursor in a command window defaults to the top of the screen each time.
If set to <Memory> the cursor will appear in its last position on the screen.
8. Re-Equip
The player can choose how equipment is distributed for a character right after a Job change or an Ability selection.
If <Optimum> is selected, a character will automatically be equipped with the best equipment in inventory. If <Empty> is
selected, every item equipped by a character will be removed when a Job or Ability change occurs.
9. Controller
The player can choose between <Single> (one controller), and <Multi> (two controllers). If <Multi> is chosen, the
player can assign each character’s command during battle to any one of the two controllers, and the game can be enjoyed by
two players.
10. Window Color
Window Color can be changed based on the player’s preference. Adjust each color gauge (R=Red, G=Green, B=Blue) by
pressing the directional button to the LEFT or RIGHT.
THE MENU SCREEN
11
<OFF> displays the
Current HP/Maximum
HP in numbers.
<ON> displays the
Current HP in numbers
and the time remaining
until attack in gauges.
STATUS
Press the ≈ button after selecting <Status>. Select a character and
press the
≈ button again to display character information. Some of
the information available from this screen include:
• Current Character Level
• Job
• HP/MP
• Status
CONFIG
Various System Settings within the game, such as Battle Mode, Sound, and Window Color may be
altered within the Config Screen. Settings should be adjusted to the player’s preference. For
example, if the player is not accustomed to the game controls, Battle Mode can be set to
<Wait> (see Battle on page 14) and Battle Speed can be set to a slower speed to give the player
more time to become familiar with the controls. In this way, the game will progress at the
player’s pace.
1. Battle Mode
The player can select between <Active> or <Wait> mode. When set to <Active>, time will continue to pass (enemies will attack)
even though the Magic/Item Screen is open. When set to <Wait>, time comes to a standstill (enemies will not attack) when the
Magic/Item Screen is open.
2. Battle Speed
The player can change the speed at which time passes during battle, ranging from 1 (fast) to 6 (slow). Press the directional button to
the LEFT/RIGHT to operate the controls.
3. Message Speed
The player can change the speed at which battle messages are to be displayed in the upper part of the screen. Press the directional
button to the LEFT/RIGHT to select a speed ranging from 1 (fast) to 6 (slow).
4. Command Setting
The player can select between two different Battle Command Screens. The first option is <Window>, which is the default setting.
When set to <Window>, battle commands will appear in a column, and are accessed by pressing the directional button UP/DOWN.
Pressing the directional button to the LEFT/RIGHT allows the player to access <Row> or <Defend>. The second is the <Short>
option, in which commands are accessed by pressing UP, DOWN, LEFT, RIGHT on the directional button, and <Row>and
<Defend> are accessed by pressing the L1 and R1 buttons, respectively.
THE MENU SCREEN
10
2 1
4
5
6
7
8
9
10
3
Page 8
MODES OF TRANSPORTATION
In the following section, various modes of transportation in the FINAL FANTASY Vworld will be introduced. These various
modes of transportation are essential to the party’s journey as they permit the party to travel to places that cannot normally be
reached. It should be noted that the party can still be attacked when riding on a Chocobo or the Ship.With the exception of the
Ship, boarding and disembarking are done with the
≈ button.
Ship
The party will be able to freely ride a Ship across the sea. A Ship’s speed will vary depending on its type.
Chocobo
A birdlike creature that helps the party travel across land, rivers, and lakes at twice the normal
walking speed.
Zeppelin
An airship that can fly across the sky, but can only take off and land on flat land or water.
SHOPS
This next section will introduce the many establishments in the FINAL FANTASY V world. In addition to the Inns, there are
various types of shops in towns and villages. To prepare for the next leg of the journey, it is wise to stock up on essential items
and get plenty of rest.
Inns
Here, the party will be able to recover HP/MP and Status Abnormalities with the exception of the Zombie status effect.
Weapons Shop
Various weapons can be purchased here. However, the weapons sold will vary according to each shop.
Armor Shop
Various types of armor can be purchased here. However, the armor sold will vary according to each shop.
Item Shop
Essential items for the journey such as Potions and Phoenix Downs can be purchased here.
Magic Shop
Various types of magic spells can be purchased here. However, the magic spells sold will vary according to each shop.
VEHICLES & SHOPS
13
INFORMATION GATHERING BASICS
Gathering information is vital in progressing through the game. The ≈ button is the key control in gathering information.
If the player thinks something is hidden nearby, pressing the
≈ button at that location may reveal something valuable.
Talk
To obtain information in the towns, villages, and castles, position the character in front of people and press the
≈ button to open up
a dialogue window. Gathering information will enable the character to be informed as to what lies ahead.
Inspect
Pressing the
≈ button while standing in front of Treasure Boxes and Vases will allow the character
to inspect and examine the contents within. If something is found inside, the character will
automatically obtain the item.
Activate Switches & Levers
To activate door and device switches or pull elevator levers, position the character in front of the
switch or lever, and press the
≈ button.
GATHERING INFORMATION
12
Page 9
Item
The party can also use items during battle. Select the <Item> command in the Battle Screen, and press the
≈ button to display
all items held in inventory. To use an item, move the cursor to the item to be used and press the
≈ button twice. Next, with the
cursor, select the recipient (enemy or ally) of the item, and press the
≈ button to execute the command.
CHANGING WEAPONS DURING BATTLE
To change a character’s weapon during battle, first go to the <Item> command and press the
≈ button to display the Item
Window. Next, select the weapon to equip, and press the
≈ button again. Once the selection has been made, move the cursor to
the very top of the Item Window, and press the directional button UP one more time to display the Weapon Equip Window. This
window displays the items that the selected character currently has equipped. Finally, move the cursor to the weapon to be
replaced, and press the
≈ button to complete the command.
Defend
Pressing the directional button to the RIGHT when the Battle Screen is displayed will reveal the
<Def.> command. When this command is executed (with the
≈ button), the character will take
no action, but will also take less damage from enemy attacks.
Row
Pressing the directional button to the LEFT when the Battle Screen is displayed will reveal the
<Row> command. When this command is executed with the
≈ button, the selected Front and
Back Row characters will switch positions. This command is useful in the event of a rear or surprise attack, where the weaker
Back Row is exposed.
ESCAPE
Although there is no display for this command, the player can remove the party from a battle situation by simply holding down
the L1 and R1 buttons simultaneously. While this is possible most of the time, be advised that there are some enemies that the
party will not be able to escape from, or enemies that are difficult to escape from.
END OF BATTLE
Upon winning a battle, the character will obtain money (in the form of GP), Experience Points (EXP), and Ability Points (ABP).
The amount of money or points obtained depends on the number of enemies defeated, and their type. Money will be necessary
when staying in Inns and buying weapons, items, and magic. Experience Points will be added automatically, and once a certain
level of points is reached, the character’s level will increase. According to the Job, Ability Points will automatically be added as
well. Once the set number is reached, the type of Job and the corresponding Ability for that particular level can be learned.
ENEMIES WITH TREASURES
Occasionally, after an enemy has been defeated, treasure will be left behind. This is signified by the appearance of a Treasure
Screen after the Ability Points earned display disappears. To collect this treasure, merely select the <Take All> command.
BATTLE
15
The FINAL FANTASY Vbattle system uses an ATB (Active Time Battle) system in which time flows continuously during battle. With
this feature, the player will have to take advantage of each turn and plan ahead to avoid giving enemies more time to act. Also, as
mentioned earlier, both Battle Mode and Battle Speed within the Config Screen may be adjusted to the player’s preference (see Config
Screen on page 10). Besides normal encounters with random enemies, there are times when the party will be surprised by a group
of enemies, and gets attacked first. Other times, an enemy attack may come from the rear, resulting in a surprise attack made against
the party’s more vulnerable Back Row.
Once in battle, the time at which a character can act is signified by the time gauge located in the
lower right of the screen. Once the gauge fills up for a particular character, the Battle Screen will
appear, listing the available commands. The command listed at the top of the Battle Screen is
<Fight>, followed by a Job specific command if a Job is assigned to the character. The third slot is
generally taken up by another Job specific command, though it may also remain empty if one is not
assigned, or if the assigned ability is not a command. The last slot is occupied by the <Item>
command.
Fight
When the <Fight> command is selected, a cursor will appear on an enemy. Using the directional button, the player can choose to
target different enemies or allies. Once a target has been chosen, press the
≈ button to execute the command.
Special Commands
If a character has been assigned a Job, a Job specific command will become available below the <Fight> command of the Battle
Screen. The third slot of the Battle Screen is used to display an ability that was previously assigned to the slot through the Combining
Abilities function explained on page 18. All Special Commands that can be used in battle are represented by a (!) and can be
executed by pressing the
≈ button.
Magic
If a character is equipped with a magic-using Job such as the Black Mage or White Mage, the special command during battle will be
<Black> or <White>, respectively. Pressing the
≈ button after selecting the magic type, such as White, Black and Blue Magic, will
open up a window which will display every magic spell available to that particular character. Select the magic spell to be used with
the directional button, and press the
≈ button to confirm the selection. When a targeting cursor appears, select the target of the
magic spell with the directional button, and press the
≈ button again to cast. Some magic spells can have multiple targets. To use
this feature, move the targeting cursor to the rear most target in an enemy (or an ally) group, and press the directional button in its
direction one more time to select the whole group. The party can be targeted in the same manner.
BATTLE
14
Page 10
JOB DEFINITION
The Jobs a character can equip originates from the essence of past heroes embedded within fragments of the elemental crystals.
By obtaining and changing Jobs using the method shown below, a character absorbs the past hero’s powers, and their special
abilities. For instance, characters with the power of the Knight will become expert Swordsmen, while those with the power of the
White Mage will gain the ability to wield powerful White Magic and those with the power of the Geomancer will be able to
control nature at will.
NOTE: Within the command windows of the Menu Screen, such as the Job and Ability Windows, the player will be able to shift
through the information displayed on the screen by pressing the L1, L2, R1 or R2 button.
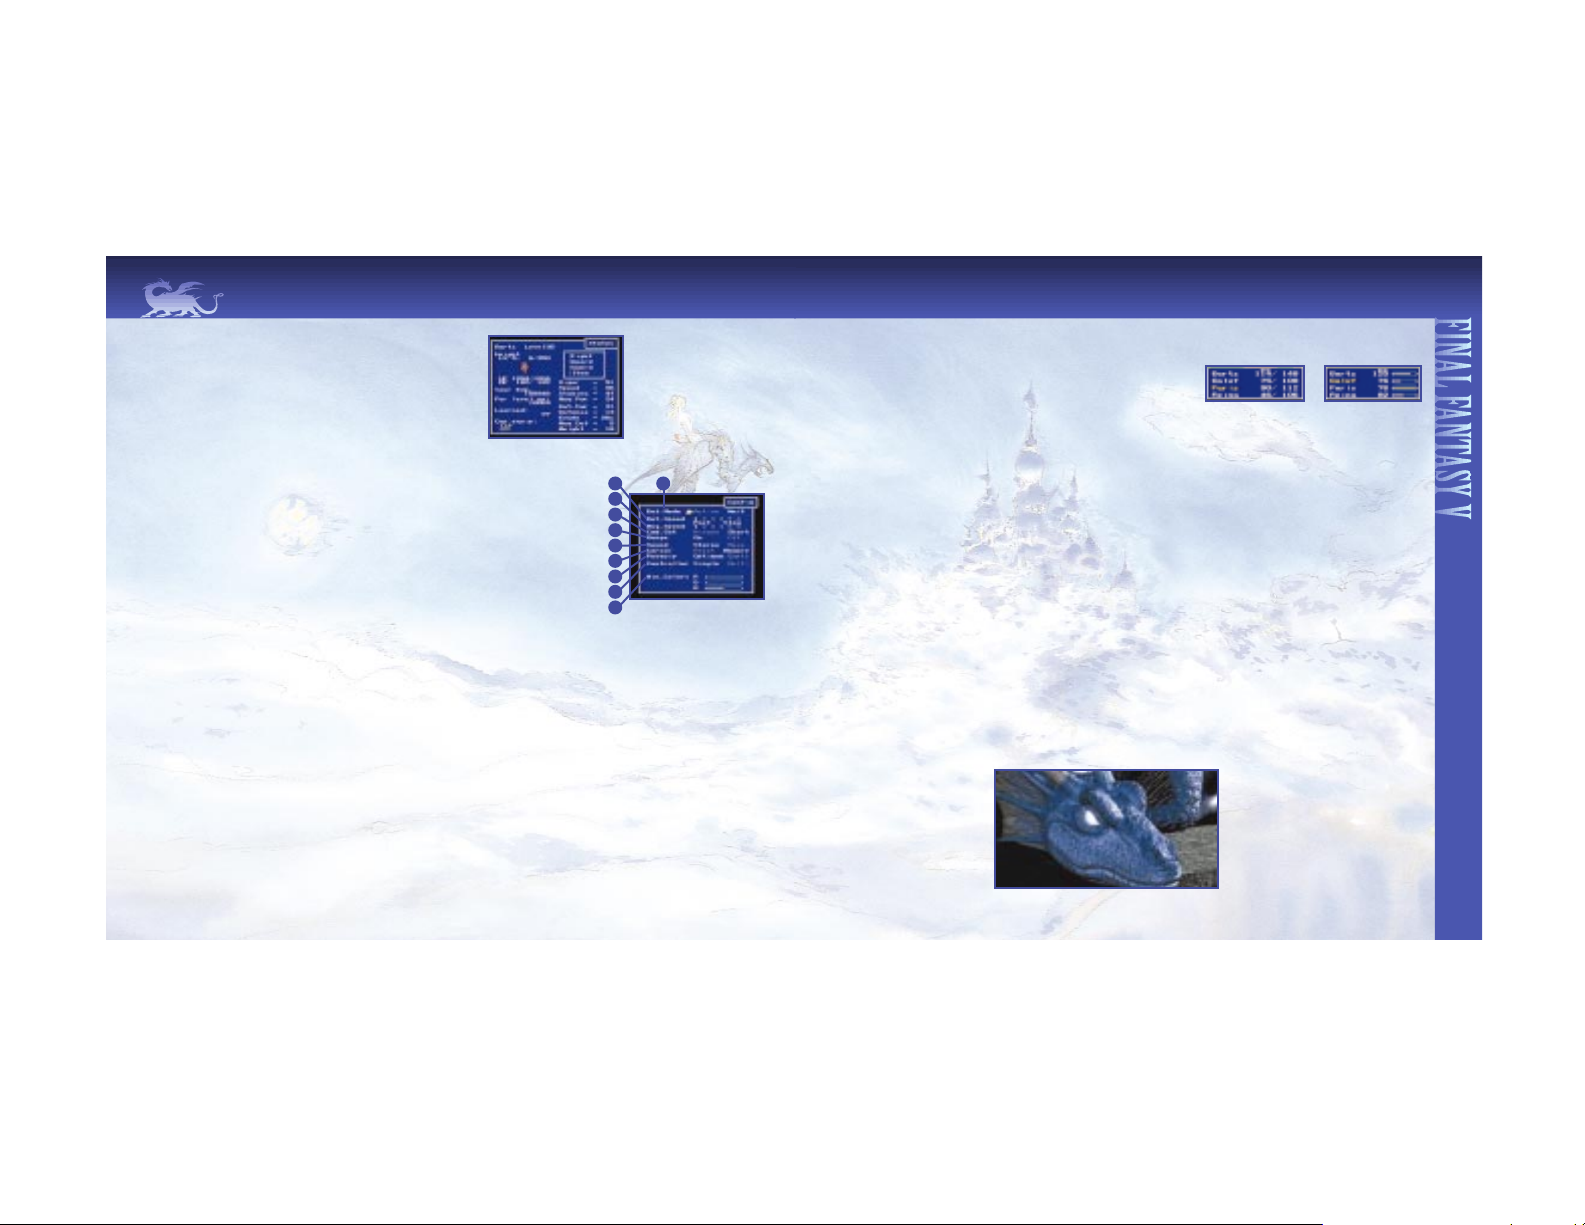
READING THE JOB SCREEN
1. Current character status
Displays the current Job and Job Level.
See “Ability Definition" on page 18 to learn how to read Job Level numbers.
2. Jobs which are available
The Jobs that can currently be assigned will be displayed in the Job Screen. The selected Job will be displayed in color.
3. Data of selected Jobs
The name of the selected Job, Job Level, and remaining ABP necessary for the next Job Level are displayed.
JOB CHANGE METHOD
During the game, press the ç button to display the Menu Screen. Next, move the cursor to
<Job> and press the
≈ button to execute the command. The player must now choose a
character whose Job is to be changed, and then press the
≈ button to display the Job Screen
seen on the upper right of this page. Use the directional button to choose a Job, and make
the final selection by pressing the
≈ button twice. When pressed twice, the Job selected and
its data will be displayed in the window on the left page. After the Job change is complete,
the screen will change to the Ability Screen seen to the right. After choosing an Ability
(please see page 18 for the Attachment Method) and equipping a character with equipment
from the Equip Screen, seen on the lower right of this page (see the “Equip” section on page
9 for methods on how to equip), return to the Menu Screen by pressing the
Ω button. If the
party has not yet acquired any Jobs, the <Job> command will be inaccessible. If a party has
Jobs available without any Abilities, the Ability Screen will not appear after a Job change.
Instead, the Equip Screen would appear. Depending on the setting made in the Config
Screen, the Equip Screen will either automatically equip the strongest equipment for the Job,
or remove every item that the character had equipped (see page 11).
JOBS & CHANGING JOBS
17
1.
2.
3.
During battle, various Status Abnormalities such as Poison, Frog, Age, and Confuse can occur. Some Status Abnormalities will recover
after battle, and some will not.
NON-RECOVERABLE STATUS ABNORMALITIES
Knockout When HP reaches zero, the character is knocked out until revived with a Phoenix Down or Raise Spell.
Petrify The character becomes petrified, making movement impossible until restored by a Soft potion.
Toad Attack and Defense Power become weaker and the character loses the ability to cast all magic spells except for Toad.
Mini Attack and Defense Power become weaker, but the character can still cast magic spells.
Poison Poison circulates through the character’s body decreasing HP gradually.
Dark The character is blinded by darkness, lowering Hit Percentage Rate.
Zombie The character transforms into a Zombie and begins attacking allies. Only Holy Water will enable recovery.
RECOVERABLE STATUS ABNORMALITIES
Age The character begins to age rapidly, causing character attributes to decrease.
Silence Magic spells are nullified and the character loses the ability to cast magic.
Sleep The character falls into a deep sleep and can no longer act.
Paralyze Magical paralysis drains the character’s strength, making movement impossible.
Confuse The mind of the character gets clouded, making it impossible to
distinguish between friend and foe.
STATUS ABNORMALITIES
16
Page 11

JOB & ABILITY LIST
19
KNIGHT
JOB
LEVEL ABILITY CHARACTERISTICS
1 Cover Protect weakened ally from being directly attacked.
2 !Guard Completely block direct attacks (zero damage).
3 2 Handed Double Attack Power, but cannot equip Shields.
4 EqShield Characters that cannot equip Shields will be able to equip them.
5 EqArmor Characters who cannot equip Heavy Armor will be able to equip them.
6 EqSword Equip a Sword, and have the same “power” as a Knight.
Special Command: Guard Job characteristic: Cover Possible to equip: Short Sword, Sword
1 !Store Accumulate power for one turn, and Attack Power doubles on the next attack.
2 Barefist Bare hand Attack Power becomes the same as that of the Monk’s.
3 !Chkra Recover one’s own HP, and status abnormalities such as Dark, and Poison.
4 Counter If the character receives a direct attack, a counterattack is possible.
5 HP 10% Max HP increases by 10 %.
6 HP 20% Max HP increases by 20 %.
7 HP 30% Max HP increases by 30 %.
Special Command: Kick Job characteristic: Counter, Fight Possible to equip: None
1 Secret Hidden passageways become visible.
2 !Flee Run away from battle. Faster than the L1/R1 buttons.
3 Dash Move at four times the normal speed through towns and villages by holding
down the
Ω button while moving with the directional button.
4 !Steal Steal treasures from enemies.
5 Caution Prevent rear attacks by 100%.
6 !Mug Attack enemies and steal their treasure.
7 Footwork "Speed” becomes the same as the Thief’s.
Special Command: Steal Job characteristic: Secret, Caution, Dash Possible to equip: Short Sword
1 !Jump Perform Jump Attack. With a Lance, Attack Power doubles.
2 !Lance Steal enemy’s HP and MP to recover one’s own.
3 EqLance Characters that cannot equip Lances will be able to equip them.
Special Command: Jump Job characteristic: None Possible to equip: Short Sword, Lance
1 !Dustb Run away from battle. Faster than the L1/R1 buttons.
2 !Twin Produce two duplicates of oneself and prevent two direct attacks.
3 Firstatk Percentage of first attacks increases.
4 !Throw Attack by throwing weapons. Stronger than normal attacks.
5 2 Sword Hold weapons in both hands, attack twice.
Special Command: Throw Job Characteristic: First Attack Possible to equip: Short Sword
MONK
THIEF
LANCER
NINJA
ABILITY DEFINITION
Each Job has a level different from the one a character possesses. This represents how much experience the player has
accumulated with this particular Job. When the player obtains a certain amount of Ability Points (ABP), the level will increase.
When Job Level increases, the player will learn various Abilities. These Abilities are special techniques unique to the Job. Once the
Ability is learned, it will not be lost during a Job Change. By combining them with Abilities from other Jobs, the player will be able
to create extremely versatile characters. On the Menu and Job Screens, the Current Job Level/Current ABP Value is displayed on the
right side of the Character Level, and thus, the player will be able to check how many points are necessary for a level increase.
(When the level increases, the current ABP value will become zero).
READING THE ABILITYSCREEN
1. Job Command
Displays the characteristic command of the Job that is present from the beginning.
2. Current Ability
Displays the Ability that the character currently has equipped.
3. Acquired Ability
Displays the Abilities that have been acquired up to the present.
4. Characteristics
Displays the characteristics of the acquired Abilities.
COMBINING ABILITIES
To display the Ability Screen as shown above, after accessing the Menu Screen
during the game by using the
ç button, move the cursor to <Ability> and press the ≈ button. At this point, if the player presses
the
≈ button once on window (2) (above), a cursor will appear in window (3). Use the cursor to select an Ability, and press the
≈ button to execute the command. Then, move the cursor to <End> on the screen as shown above and press the ≈ button to
exit the Ability Screen. (The Ability Screen can also be exited by pressing the
Ω button). The player now only needs to equip the
character with weapons and armor in the Equip Screen, and everything should be set. If no Abilities have been obtained, the
command will not be available (in this case, the <Ability> command will appear in darkened font on the Menu Screen).
Warning On Combining Abilities
Abilities should not be combined randomly. For example, if the Berserker Level 1 Ability, “Berserk”, is attached to a White Mage,
the character will go “Berserk” in battle, and come under computer control, denying the player any use of the White Mage’s
Abilities. Also, attaching a Knight’s Level 4 Ability, “Shield”, to a Magic Swordsman who already has the innate ability to “Shield” will
have no extra effect since the two Abilities are the same. Thus, the player should try to think of useful combinations to avoid
wasting valuable Abilities.
ABILITIES
18
2 3
1
2
3
4
Page 12

JOB & ABILITY LIST
21
BLACK
MAGE
JOB
LEVEL ABILITY CHARACTERISTICS
1 Black 1 Cast Black Magic up to Level 1.
2 Black 2 Cast Black Magic up to Level 2.
3 Black 3 Cast Black Magic up to Level 3.
4 Black 4 Cast Black Magic up to Level 4.
5 Black 5 Cast Black Magic up to Level 5.
6 Black 6 Cast Black Magic up to Level 6.
7 MP+30% MAX MP will increase by 30%.
Special Command: Black Job characteristic: None Possible to equip: Short Sword, Rod
1 Time 1 Cast Time Magic up to Level 1.
2 Time 2 Cast Time Magic up to Level 2.
3 Time 3 Cast Time Magic up to Level 3.
4 Time 4 Cast Time Magic up to Level 4.
5 Time 5 Cast Time Magic up to Level 5.
6 Time 6 Cast Time Magic up to Level 6.
7 EqRod Characters that cannot equip Rods will be able to equip them.
Special Command: Time Job characteristic: None Possible to equip: Short Sword, Rod
1 Summn 1 Cast Summoned Magic up to Level 1.
2 Summn 2 Cast Summoned Magic up to Level 2.
3 Summn 3 Cast Summoned Magic up to Level 3.
4 Summn 4 Cast Summoned Magic up to Level 4.
5 Summn 5 Cast Summoned Magic up to Level 5.
6 !Call Randomly call one Summoned Beast without using MP.
Special Command: Summon Job characteristic: None Possible to equip: Short Sword, Rod
1 !Check Examine an enemy’s MAX HP/MP and weaknesses.
2 Learning Learn an enemy’s characteristic attacks as Blue Magic.
3 !Blue Cast Blue Magic (see Magic List, p. 21).
4 !View In addition to <Check>, also examines current status.
Special Command: Blue Job characteristic: Learning Possible to equip: Short Sword, Sword, Rod
1 Red 1 Cast Red Magic up to Level 1.
2 Red 2 Cast Red Magic up to Level 2.
3 Red 3 Cast Red Magic up to Level 3.
4 !Redx2 Cast magic twice consecutively.
Special Command: Red Job characteristic: None
Possible to equip: Short Sword, Sword, Rod, Staff
TIME
MAGE
SUMMONER
BLUE
MAGE
RED
MAGE
JOB & ABILITY LIST
20
SAMURAI
JOB
LEVEL ABILITY CHARACTERISTICS
1 !Sslap Attack enemies and paralyze them.
2 !$Toss Attack by throwing GP. If the level is high, more money will be thrown.
3 Swrdgrab Perform a Sword Grab against direct attacks, deflecting the blow.
4 EqKatana Characters that cannot equip Katanas will be able to equip them.
5 !Fdraw Clean sweep enemies at lightning speed.
Special Command: Coin Toss Job Characteristic: Sword Grab Possible to equip: Short Sword, Katana
1 Berserk Always in Berserk mode during battle.
2 EqAxe Characters that cannot equip Axes will be able to equip them.
Special Command: None Job Characteristic: Berserk Possible to equip: Short Sword, Axe
1 !Critt Call for critters of the forest (animals).
2 !Aim Aim to raise hit percentage.
3 EqBow Characters that cannot equip a Bow and Arrow will be able to equip them.
4 !Sshot Attack four consecutive times. But for each successive attack, the Attack
Power will be cut in half.
Special Command: Aim Job Characteristic: None Possible to equip: Short Sword, Bow
1 Magiwall Put a barrier over oneself when knocked out.
2 Sword 1 Cast Magic Sword up to Level 1.
3 Sword 2 Cast Magic Sword up to Level 2.
4 Sword 3 Cast Magic Sword up to Level 3.
5 Sword 4 Cast Magic Sword up to Level 4.
6 Sword 5 Cast Magic Sword up to Level 5.
7 Sword 6 Cast Magic Sword up to Level 6.
Special Command: Sword Job characteristic: Magiwall Possible to equip: Short Sword, Sword
1 White 1 Cast White Magic up to Level 1.
2 White 2 Cast White Magic up to Level 2.
3 White 3 Cast White Magic up to Level 3.
4 White 4 Cast White Magic up to Level 4.
5 White 5 Cast White Magic up to Level 5.
6 White 6 Cast White Magic up to Level 6.
7 MP+10% MAX MP will increase by 10 %.
Special Command: White Job characteristic: None Possible to equip: Staff
BERSERKER
HUNTER
SORCERER
WHITE
MAGE
Page 13

MAGIC & SONG EFFECTS
23
WHITE
MAGIC LV EFFECT
Cure 1 Recover HP. Attack the Undead.
Scan 1 Read enemy information.
Antdot 1 Cleanse Poison from body.
Mute 2 Nullify spells.
Protes 2 Increase defense.
Mini 2 Shrink and brings back to normal.
Cure2 3 Recover HP. Stronger version of Cure.
Raise 3 Recover Knockout. HP recovers a little.
Muddle 3 Affect brain and causes confusion.
TIME
MAGIC LV EFFECT
Speed 1 Reduce battle speed.
Slow 1 Slow down time lapse around enemies.
Regen 1 Recover HP at a designated time.
Mute 2 Disable spells and songs.
Haste 2 Speed up time lapse around allies.
Float 2 Prevent damage received from the ground.
Demi 3 Reduce HP to a half with Gravity Bomb.
Stop 3 Stop time around enemies for a limited time.
Telepo 3 Escape from dungeons and battle.
BLACK
MAGIC LV EFFECT
Fire 1 Attack with Flames (small damage).
Ice 1 Attack with Ice (small damage).
Bolt 1 Attack with Lightning (small damage).
Poison 2 Slowly drain HP with the power of Poison.
Sleep 2 Put enemies to sleep.
Toad 2 Turn enemies into Frogs; turns them back.
Fire2 3 Attack with Flames (medium damage).
Ice2 3 Attack with Ice (medium damage).
Bolt2 3 Attack with Lightning (medium damage).
BLUE MAGIC EFFECT
L5 Doom Cast “Death” on enemies with levels that are multiples of 5.
Toad Song Turns enemies into Toads.
Flash Blinds enemies with powerful light.
Pep Up Sacrifice a character in order to recover party.
Red Feast Drains enemies’ HP.
Exploder Explodes oneself to damage enemies.
Aero Damage enemies who are weak against the power of Wind.
Gob Punch Attack with a powerful invisible punch.
WhitWind Recover all members with the amount of the character’s own HP.
Condemnd Become dead after 30 counts.
SONG EFFECT
Power Song Increase “Power” of all allies.
Speed Song Increase “Speed” of all allies.
Str. Song Increase “Strength” of all allies.
MP Song Increase “MP” of all allies.
Lvl Song Increase “Level” of all allies.
Requiem Give damage to “Undead” types.
Love Song Stop all enemy movement.
Temptation Song Confuse all enemies.
SUMMON
MAGIC LV EFFECT
Chocobo 1 Summon Chocobo to kick enemies.
Sylph 1 Attack using Wind and party’s HP gets recovered.
Remora 1 Cling onto enemies and stops movement.
Shiva 2 Summon Blizzard and freezes enemies.
Ramuh 2 Strike enemies with powerful Lightning.
Ifrit 2 Burn enemies with Flames from hell.
Titan 3 Attack all enemies by causing an Earthquake.
Listed here are samples of some of the effects caused by various magic spells and songs in the game. Other types of magic and
songs can be found.
JOB & ABILITY LIST
22
TRAINER
JOB
LEVEL ABILITY CHARACTERISTICS
1 !Tame Tame magical beasts.
2 !Cntrl Control beasts and have them attack one another.
3 EqWhip Equip a Whip to have the same “power” and “speed” as a Trainer.
4 !Catch Catch a somewhat weak enemy.
Special Command: Catch/Free Job characteristic: None Possible to equip: Short Sword, Whip
1 Medicine Double the effect of Tonics and Tinctures.
2 !Mix During battle, create a new medicine from two medicines.
3 !Drink Drink an item specifically for Chemists.
4 !Recvr Recover status abnormalities for everyone in the party.
5 !Rvive Revive all characters who can no longer battle.
Special Command: Drink, Giant’s Medicine Job characteristic: Medicine
Possible to equip: Short Sword
1 !Earth Attack using elements from that particular terrain the character is in.
2 Findhole Will not receive damage from the damage floor.
3 Antitrap Traps become visible.
Special Command: Earth Job characteristic: Findhole, Antitrap
Possible to equip: Short Sword, Bell
1 !Hide Hide. Cannot become an attack target when hidden.
2 EqHarp Equip a Harp to obtain the same “speed” and “magical power” as a Bard.
3 !Sing Sing songs with various abilities. (See Song Effects, p. 23).
Special Command: Sing Job characteristic: None Possible to equip: Short Sword, Harp
1 !Flirt When successful, enemies become nervous and anxious.
2 !Dance When performed, mysterious dances inflict random effects on enemies.
3 EqRibbon Characters that cannot equip Ribbons will be able to equip them.
Special Command: Dance Job characteristic: None Possible to equip: Ribbon, Short Sword
1 Mime Imitate the previous character’s actions.
Special Command: Mime Job characteristic: None
Possible to equip: Short Swords other than Ninja Katanas, Rod, Staff, Thief weapons such as Full Moon** and
other Ninja exclusive weapons.
Special Command: None
Job characteristic: None
Possible to equip: Possible to equip everything
CHEMIST
GEOMANCER
BARD
DANCER
MIME
BARE
(
NO JOB
)
NOTE: For magic and abilities with an “!” mark attached in front, the player will be able to use them as a command during battle.
Page 14

25
Listed here is a sample of some of the useful items to be found in the game. These items can be combined
by using the Chemist Ability <Mix>. There are other items which will be encountered.
COMBINATION METHOD
1. During battle, select <Mix> and press the
≈ button.
2. From the item list which appears, the player must select the first item to be mixed and press the
≈
button.
3. Next, the player will select the other item to be mixed and press the
≈ button.
4. After selecting the character who will use this item, the player must press the
≈ button. (When the item
created is an item which can cause damage, a cursor will flash alongside the enemies).
ITEMS & COMBINATIONS
24
ITEM EFFECT
Tonic Recover HP (small effect).
Potion Recover HP (large effect).
Ether Recover MP.
Elixir Recover HP/ MP completely.
Phoenix Down Recover “Knockout” status.
Maiden’s Kiss Recover “Toad” status.
Holy Water Recover “Zombie” status.
Turtle Shell Item exclusive for combinations.
Dragon Fang Item exclusive for combinations.
Dark Matter Item exclusive for combinations.
Page 15

THE WAR OF THE MAGI
Many centuries have passed since the war. Civilizations
have been rebuilt with iron, machines, and technology.
For years the Espers have existed only in ancient
legends. Now an Esper has been discovered and the
forces of magic are beginning to return. The risk of
another, more devastating war is about to surface.
PROLOGUE
27
CONTENTS
Prologue . . . . . . . . . . . . . . . . . . 27
Getting Started . . . . . . . . . . . . . . 28
Controls . . . . . . . . . . . . . . . . . . 29
Saving . . . . . . . . . . . . . . . . . . . . 30
The Menu Screen . . . . . . . . . . . . 31
Menu Commands . . . . . . . . . . . . 32
Vehicles . . . . . . . . . . . . . . . . . . . 37
Shops . . . . . . . . . . . . . . . . . . . . 38
Party Formation . . . . . . . . . . . . . 39
Battle . . . . . . . . . . . . . . . . . . . . 40
Status Abnormalities . . . . . . . . . 41
Battle Commands . . . . . . . . . . . . 42
Special Character Commands . . . 44
Magicite & Espers . . . . . . . . . . . 47
Learning Magic . . . . . . . . . . . . . 48
Relics . . . . . . . . . . . . . . . . . . . . 49
Bonuses . . . . . . . . . . . . . . . . . . 50
FINAL FANTASY ANTHOLOGY SOUNDTRACK . . . . . 54
Credits . . . . . . . . . . . . . . . . . . . . . . . . . . . . . . . . 58
Limited Warranty . . . . . . . . . . . . . . . . . . . . . . . . 61
CONTENTS - FINAL FANTASY VI
26
Page 16

CONTROLS
29
L
R
SELECT
START
L2 button
directional button
SELECT button
START button
L1 button
R2 button
R1 button
button
button
button
button
≈ button
In addition to gathering information and items, this button serves the following purposes:
• Execute a command selected with the directional button.
• Talk to people in castles, villages, and towns by positioning the character next to them.
• Search the contents within Treasure Boxes, Vases, and Clocks for Items.
• Ride and dismount from various modes of transportation such as the Zeppelin or
Chocobo.
• Activate door switches, elevator levers, etc.
Ω button
• Cancel the selected command (return to the previous menu) and close an opened
screen.
• Increase character movement to twice its regular speed. If the character is equipped
with the relic <Sprint Shoes>, movement will increase to four times normal speed.
√ button
Switch the Magic Menu Screen display between percentage of learned magic and
consumed MP.
ç button
Bring up the Menu Screen. This command will not work during battles or events.
L1/L2 button, R1/R2 button, SELECT button
• Allow the player to scroll through menus and items when navigating the Menu Screen.
• Target entire party of allies or enemies when casting magic.
• Scroll through characters in the <Status>, <Skills>, and <Equip> screens.
• Allow swift scrolling of the Magic Spell List and Item Lists during battle.
(Only the R1,R2, or the SELECT button).
directional button
Direct movement of characters and
vehicles. It is also used to move the
cursor to select commands and
items.
START button
Toggle the World Map ON/OFF when
in the field. It is also used to pause
the game during battle, and to
finalize selections when naming
characters.
TO START A NEW GAME
Set up your PlayStation game console according to the instructions in its Instruction Manual. Make sure the power is off before
inserting or removing a compact disc. Insert the FINAL FANTASY
® VI disc and close the disc cover. Insert game controllers and
turn on the PlayStation game console. Follow on-screen instructions to start a game.
CONTINUE FROM SAVED DATA
When Saved Data exists, pressing the START button or the ≈ button at the Title Screen will switch the display to the Loading
Screen. If the player selects a MEMORY CARD with Saved Data, the screen will switch to a File Screen. With the cursor, select the
file to continue from, and press the
≈ button. If starting a new game, the player must select <New Game>.
ENTERING NAMES
During the game, the player will have the opportunity to change the names of important characters. When the opportunity arises,
pressing the
≈button will switch the screen to the Name Entering Screen. Use the directional button to move the cursor next to the
desired letter to be entered, and press the
≈ button to confirm the selection. To cancel a selection, press the Ω button. Once the
desired name is entered, press the START button to return to the original screen.
GETTING STARTED
28
OPEN
®
POWER
RESET
Disc cover
Reset button
Power button
Power indicator
Controller port one
Open button
MEMORY CARD slot
Page 17

When the ç button is pressed during times other than battles and events, the screen will change to the Menu Screen.
1. Current Party Members
These are the characters that compose the active party which the player controls.
The character’s portrait, name, current level, Current / Maximum HP and MP
are displayed here.
2. Menu Commands
The player will be able to select and execute the following commands:
• Item
• Skills
• Equip
• Relic
• Status
• Config
• Save
Note: Commands which currently cannot be used will be displayed in a darkened font.
3. Time
Displays the amount of time spent playing the game.
4. Steps / Money (GP)
Displays the distance walked in steps from the beginning of the game until present, and the amount of money (in the form of GP)
that the party currently has. Obtain money by defeating enemies or by opening Treasure Boxes.
THE MENU SCREEN
31
SAVING ONTO THE MEMORYCARD
Insert the MEMORY CARD into the PlayStation MEMORY CARD slot 1 or 2. The player will be able to save in the field or in areas such
as dungeons where Save Points exist.
Select <Save> on the Menu Screen. If the player selects a MEMORY CARD onto which the data will be saved, the screen will switch
to the MEMORY CARD File Screen. From this screen, the player will be able to choose a MEMORY CARD slot in which current Game
Data can be saved.
SAVING ONTO THE MEMO FILE
A Memo File save is not the same as a MEMORY CARD save. The Memo File system will leave one
temporary record in the PlayStation’s memory. Once the power is turned OFF or the RESET button is
pressed, the saved Memo File will be deleted. Data that the player wishes to save permanently should
be stored on a MEMORY CARD. In order to record to the Memo File, the player must select <Save>
from the Menu Screen and then select <Memo>. Once <Memo> has been selected, press the
≈
button to save.
SOFT RESET
To restart a game from a saved Memo File, execute a Soft Reset (simultaneously pressing the R1, R2, L1, L2, START, and the SELECT
buttons). The player will be taken back to the opening movie after which they will be able to access the Loading Screen. Selecting
<Memo> from this screen will allow the player to resume the game from their saved Memo File.
SAVING
30
1
2
3
4
Page 18

MENU COMMANDS
33
SKILLS
This command allows the player to equip a selected character with an Esper to give the character magic powers. To select this
command, move the cursor to <Skills> and press the
≈ button. Upon doing so, it is possible to see the battle commands of
the selected character. Please see “Special Character Commands” (p. 45) for an example of the five types of battle commands
specific to each character.
Espers
• This subcommand displays the Esper List. Esper names in darkened fonts indicate that they have
been equipped by other party members.
• Select <Espers> and press the
≈ button to display the magic spells that can be learned from
that particular Esper. (Refer to the section, Magicite & Espers, on page 47).
Magic
• Magic spells that can be used are displayed in light fonts, while those that cannot be used are displayed in darkened fonts.
The number displayed next to the magic spell indicates the percentage of that particular magic spell that has been learned.
(Refer to the section, Learning Magic, on page 48) When the
≈ button is pressed at this time, the Magic Point (MP) cost of the
spell will be displayed.
• When using a magic spell, move the cursor to select a magic spell, then press the
≈ button, and select the spell’s target..
• To target multiple characters or enemies with a magic spell, press the directional button to the LEFT/ RIGHT, the L1/R1 button
or the SELECT button to choose a specific target for the magic spell.
Individual Character Commands
Every character has a special ability that is unique to him or her. For more details, refer to “Special Character Commands” on
page 45.
SwdTech Cyan’s special ability. Sword Techniques are based on Samurai fighting styles.
Blitz Sabin’s special ability. Blitz requires player input in order to enact the Martial Arts techniques.
Lore Strago’s special ability. Magic spells learned from enemies.
Rage Gau’s special ability. Fighting techniques learned from enemies encountered in the Veldt.
Dance Mog’s special ability. Nature dances invoking the power of the elements.
MENU COMMANDS
32
Note: Within each of the menu commands, the player will be able to scroll through the
information displayed on the screen by pressing the L1 or R1 buttons.
ITEM
This command allows the use of Potions and Tents and other items that the party currently
holds. If this command is selected, the display will switch to the screen shown on the right.
When the
Ω button is pressed, the cursor will move to the following subcommands:
Use
Use the items in possession. After selecting which item to use, press the
≈ button. If the item is immediately usable (Potions,
Ethers, etc.), the Character Selection Screen will appear. Select the character who will use the item, and press the
≈ button.
Items that cannot be used will be displayed in darkened font.
Arrange
Organize items, weapons, armor and miscellaneous objects. Move the cursor to <Arrange> and press the
≈ button to
arrange.
Rare
Display crucial items that are necessary to advance the game. Move the cursor to <Rare> and press the
≈ button to display
important objects.
1. Explanation of items
Display the explanation of the item which has been highlighted with the cursor. For weapons and armor, only those that have
special effects will have a description displayed. The number to the right of the explanation designates the quantity of that item in
possession.
2. Item list
Display the description of items in inventory, and the item name. The player must move
the cursor to the item to be used. When the number of items possessed can no longer fit
on one screen, the player will be able to switch between the screens by pressing the L1,
R1, and SELECT buttons.
Weapons / Armor / Relics
For those items which can be equipped, setting the cursor to a particular item and pressing the
≈ button twice will display the
screen on the right. On this screen, in addition to the characters who can equip the particular item selected, status changes during
equipping, and special attributes of the armor will also be displayed.
Rearranging Items
To change the order of the items, move the cursor to the item to be first on the list, and press the
≈ button. Next, move the cursor
to the item to be second on the list and press the
≈ button again. Continue this process until all items have been set to the desired
order. It would be convenient to place those items that are frequently used during battle near the top of the list.
1
2
Page 19

MENU COMMANDS
35
CONFIG
This command allows the player to customize the game options. This operation is done with the directional button.
• Battle Mode
This option allows the player to switch between <Active> mode in which the enemies will continue to attack while the player
makes selections, and <Wait> mode where the enemies will wait for the player to make a selection before attacking.
• Battle Speed
This option allows the player to change the speed at which time passes during battle, ranging from
1 (fast) to 6 (slow). Press the directional button to the LEFT/RIGHT to operate the controls.
• Message Speed
This option allows the player to change the speed at which battle messages are displayed in the
upper part of the screen. Press the directional button to the LEFT/RIGHT to select a speed ranging
from 1 (fast) to 6 (slow).
• Command Settings
This option allows the player to set the Battle Command Screen to be displayed one of two ways. The <Window> option is the
first and default setting. The second option is <Short> which features a shorter window with commands arranged in a more
compact manner. When <Short> is chosen, commands will be selected by pressing UP, DOWN, LEFT, or RIGHT on the directional
button. <Change> and <Defend> are accessed by pressing the L1 and R1 buttons, respectively.
• Short
Selecting <Short> and pressing the
≈ button will allow the player to change the battle command positions. After selecting the
character, switch commands by pressing the directional button and the
≈ button. When switching other characters, after moving
the cursor to the character names with the
Ω button, proceed to set commands in the same manner. When returning to the initial
state, select <Arrange>, which is listed at the top and press the
≈ button. In order to return to the menu, the player must select
the character name or press the
Ω button in the <Arrange> position.
• Gauge
This option allows the player to change the appearance of the HP Window during battle. When set to <ON>, the Active Time Battle
(ATB) gauge will be displayed, showing the time remaining until a character becomes active. When set to <OFF>, the Current HP
/ Maximum HP will be displayed in numbers.
• Sound
This option allows the player to select between <Stereo> and <Mono> sound output.
• Cursor
This option allows the player to select between <Reset> and <Memory> cursor positions. If set to <Reset>, the cursor in a
command window defaults to the top of the screen each time. If set to <Memory>, the cursor will appear in its last position on
the screen.
MENU COMMANDS
34
EQUIP
This command allows the player to equip and remove weapons and armor for each character. Press the ≈ button after selecting
<Equip>, and select a character. After the selection has been made, press the
≈ button again to display the Equipment Menu with
the following subcommands:
• Equip
Equip a character with weapons and armor. First, select the part of the body to be equipped with the
directional button, then press the
≈ button to display the weapons or armor that can be equipped.
Select the weapons or armor and press the
≈ button once again to confirm. Weapons or armor that
will increase status when equipped will be displayed in yellow, and those that will decrease status
when equipped will be displayed in darkened fonts.
• Optimum
Equip the selected character with the weapon or armor in the party’s inventory with the strongest Attack Power or Defense Power.
• Remove
Remove a specific piece of equipment on a selected character. Once the selection has been made, press the
≈ button to complete
the process.
• Empty
This command allows the player to instantly remove every piece of equipment on a selected character.
RELIC
This command allows the player to equip relics with various abilities onto the characters. First, select
<Relic> from the Menu Screen. Next, press the directional button to the LEFT to set the cursor on
all of the characters. Finally, press the
≈ button to display the Equipment Chart (Refer to the section
on “Relics” on page 49).
Note: The current party’s Equipment Menu can be viewed by selecting either the <Equip>or
<Relic> commands in the Menu Screen.
STATUS
This command allows the player to view individual character attributes such as levels and HP.
Page 20

VEHICLES
37
MODES OF TRANSPORTATION
Many different travel options exist in this game. As the player advances in the game, the party will encounter and gain the use of
many different modes of transportation. Taking advantage of these different types of travel options will enable the party to visit
areas otherwise impossible to reach on foot.
Chocobo
A birdlike creature that helps the party travel across land, rivers, and lakes. Chocobos can be rented from Chocobo rental shops.
Once the character dismounts the Chocobo, it will return to its original place. While riding the Chocobo, the character will not
encounter any enemies.
directional button UP/
≈ button: Move the Chocobo forward
directional button LEFT/RIGHT: Turn the Chocobo left or right
L1 / R1 button: Turn the Chocobo sharply when used with the directional
button LEFT/ RIGHT
Ω button: Dismount from the Chocobo
Zeppelin
A large airship which can travel at high speeds through the sky. Characters may go into the interior of the airship. Inside, the
player will find Item Shops and will also be able to have other characters standby. Zeppelins can only take off and land on flat
land.
≈ button: Board the Zeppelin / Move it forward
directional button UP: Enable the Zeppelin to descend
directional button DOWN: Enable the Zeppelin to ascend
directional button LEFT / RIGHT: Turn the Zeppelin left or right
L1 / R1 button: Turn the Zeppelin sharply when used with the directional button LEFT/ RIGHT
Ω button: Disembark from the Zeppelin
ç button: Enter the interior of the Zeppelin. In order to fly the Zeppelin again, press the ≈ button at the
controls and select <Take Off>
√ button: Press together with the directional button to move the Zeppelin in any direction
ABOUT MAP ON / OFF
Pressing the START button on the field will display a small map which can be turned ON/OFF. The
large red dot on top of the map designates the current location, and the small dot shows the
direction the player is facing.
MENU COMMANDS
36
• Re-Equip
This option allows the player to change between the <Optimum> and <Empty> options. If set to <Optimum>, the party will
automatically be re-equipped with the most optimal pieces of equipment to fit the equipped Relic. If set to <Empty>, every
piece of equipment on the characters will be removed.
• Controller
This option allows the player to change the controller settings.
• Single
This is the setting for one player. Normally, the game is played in this mode.
• Multi
This setting allows two people to play during battle. The players must decide which
characters will correspond to which controller.
• Magic Order
This option allows the player to choose one of six patterns from the Magic Spell List. to arrange their spells.
• Window
The player will be able to select a back window pattern from eight selections.
• Color
This option allows the fonts and window colors to be changed by adjusting the three colors R (Red), G (Green), and B (Blue).
In order to return the adjustment to the original state, move the cursor to <Color> and press the
≈ button.
SAVE
This command will save the game. Basically, saves can only be conducted on the field or at Save Points. In locations where
saving is not possible, this command will be displayed in a darkened font.
Page 21

PARTY FORMATION
39
Many characters appear in this game. A maximum of four characters can be selected to create an active party to progress through
the game together.
LOCATION FOR PARTYFORMATION
Locations where parties may be formed will depend on the story flow. At locations where parties may be changed, the message
<Will you switch party members?> will be displayed after talking to a character.
COMBINING PARTIES
1. The characters that can be combined to form a party will be displayed in the center row.
From this selection, select the characters to form the party. Certain party members cannot
be selected during certain segments of the game.
2. After selecting a character, press the
≈ button, and set the cursor to the Party Window
below and press the
≈ button once again. Continue this process until all desired
characters have joined the party, and then, press the
Ω button.
Note: It is possible to move the game forward with parties that have less than four members.
SWITCHING PARTIES
There will be times when the player will need to control several parties simultaneously.. To switch between the different active
parties, press the
√ button.
SHOPS
38
SHOPS
In this game, various types of shops are featured. Items bought in shops can
be used by party members.
Buying & Selling
1. After talking to a shopkeeper, the following commands become available:
• <Buy>
This command will allow the player to see and purchase items the
shopkeeper has in stock.
• <Sell>
This command will display the items the party has in inventory, allowing the
player to sell items to the shopkeeper at half the purchasing cost of the item.
• <Exit>
This command will let the player exit from the Buying/Selling Screen.
2. When buying items, a screen similar to the
one shown on the right will be displayed.
A. A list of items sold in the shop
B. Current amount of money
C. Number of selected items owned
D. Number of selected items equipped
E. Party members
▲ shows that Attack/Defense Power will increase by equipping the item,
▼ shows that Attack/Defense power will decrease, and
=designates that the
value will remain the same. The mark below the characters shows the
current party members, and the characters with their arms in the air are
characters that can equip the selected item. Those with an “E” mark have
already been equipped with the particular item in question.
3. Determine the number to be sold and bought. Pressing the directional
button to the RIGHT increases quantity by 1; pressing it to the LEFT decreases
quantity by 1; pressing it UP increases by increments of 10; and pressing it
DOWN decreases by increments of 10. The maximum number of a particular
item that can be held is 99. When buying an item, the number will only
increase as much as the character can hold or purchase.
SHOP INTRODUCTIONS
Inns
The party will be able to recover HP/MP and
certain Status Abnormalities by staying here.
Weapons Shop
Various types of weapons such as swords and
rods are sold here.
Armor Shop
Various types of protective gear such as shields
and armor are sold here.
Item Shop
Essential items for the journey such as Potions
and Phoenix Downs are sold here.
Relic Shop
A variety of relics are sold here. Relics grant
characters many different abilities.
Chocobo Stable
Chocobos can be rented from the Chocobo
Stable. If riding the Chocobo directly from the
stable, the character will automatically be
transported to the outside of the city. Press the
Ω button to dismount the Chocobo. Once the
character has dismounted, the Chocobo will
return to the stable on its own.
Page 22

During battle when a character is hit by an enemy’s special attack, the following status
abnormalities are known to occur. Some abnormalities will recover after a battle, and some
will not. Inns and Tents will recover every type of status abnormality,, while the Sleeping Bag
will recover everything except “Wounded”. The list below represents some of the status
abnormalities in the game.
Non-Recoverable Status Abnormalities
Name: Symptoms Recovery Method
Wounded HP reduces to zero; can no longer battle Life Spells, Phoenix Down
Petrify Become stone; can no longer battle Remedy, Soft
Imp Cannot use special commands; can only use Green Cherry, Remedy
the Imp spell
Invisible Become invisible, not affected by Physical Attacks Any magic
Poison Continual decrease of HP during battle, Remedy, Antidot Spell, Antidote
and while walking
Zombie Indiscriminately attack enemies and allies Revivify
Dark Decrease in Attack Hit Rate Eyedrop, Remedy
Float Float above the ground; will not receive Dispel
damage from ground attacks
Recoverable Status Abnormalities
Name: Symptoms Recovery Method
Sleep Character nods off; cannot enter commands Physical Attack
until the character awakens
Muddled Become confused, and begin attacking enemies Physical Attack, Remedy
and allies indiscriminately
Mute Will not be able to cast magic Remedy, Echo Screen
Condemned Become wounded when the number above Win battle before countdown reaches zero
the affected character reaches zero
STATUS ABNORMALITIES
41
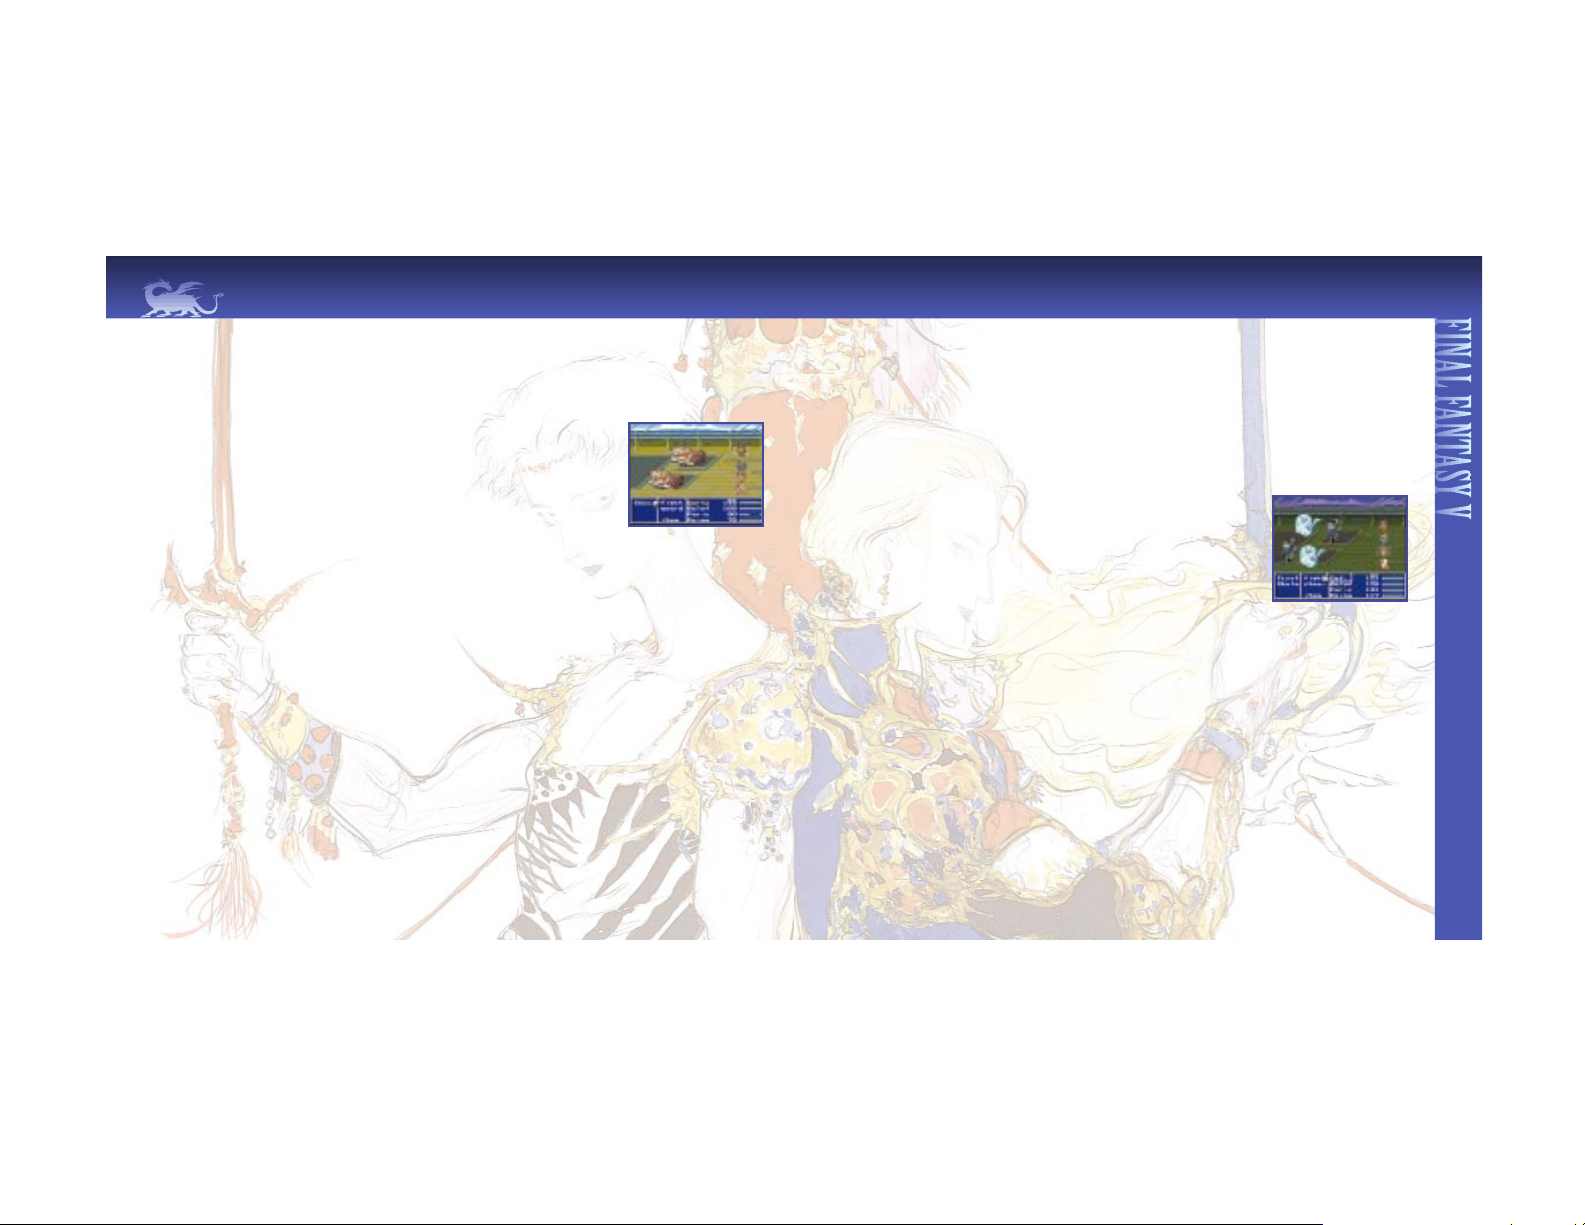
BATTLE SCREEN
The Battle Screen for FINAL FANTASY VIdisplays the following information:
1. Messages during battle are displayed
2. Party character graphics
3. Enemy graphics
4. Enemy name is displayed
5. Battle commands (different for each character)
6. Character HP and ATB Gauge
(Depending on the configuration, the Current HP / Maximum HP may be displayed)
BATTLE FORMATION
Regarding the enemy appearance patterns, other than the normal battle formation, the following formation types may also be
encountered:
Pincher/Side Attack
By attacking from both sides at the same time, Attack Power will be increased. When the party attacks the enemy, it is known as a
“Side Attack”, and when the enemy attacks the party, it is known as a “Pincher Attack”. During a “Pincher Attack”, the party will not
be able to run away from battle.
Back Attack
In this situation, the player’s party will be attacked by the enemy from behind, with the Back Row taking the brunt of the assault.
The enemy will also attack first.
Preemptive Attack
In a preemptive attack, the active party will be given the first attack in the battle.
BATTLE
40
1
2
5
4
6
3
Page 23

CHARACTER FORMATION
• If the directional button is pressed to the LEFT in the Menu Screen, the <Row> command will appear. To move a character to
the Front Row (advantage for direct attacks, disadvantage for defense) or Back Row (disadvantage for direct attacks, advantage
for defense), move the cursor to the character to be moved, and press the
≈ button twice.
• To switch the position of two characters, move the cursor to one character, and press the
≈button. Next, move the cursor to
the other character to be interchanged, and press the
≈ button again. (NOTE: The character at the very top of the character
lineup will be displayed in the field).
DEFEND
Concentrating on defense reduces damage incurred from an enemy’s Physical Attacks. However,
the damage received from Magic Attacks will not be reduced. When the command setting is set
to <Window>, the directional button must be pressed to the RIGHT in order to defend. When
set to <Short>, the R1 button must be pressed.
ESCAPE
When the L1 and R1 buttons are pressed simultaneously, the party will be able to escape from battle. Beware, as there are some
enemies that the party will not be able to escape from. In those instances, the message, <Can’t run away!!> will be displayed.
PAUSE
When the START button is pressed during a fight, the battle will be put on hold temporarily. The game will resume when the
START button is pressed again.
END OF BATTLE
Battle will continue until party members defeat the enemies or until one party runs away.. When the enemies are successfully
defeated, money (GP) and Experience Points (EXP) will appear, and acquired Magic Points will be gained and distributed.
These values will differ according to enemy type and the number of enemies defeated.
GAME OVER
When all party members can no longer battle (HP reaches zero), become Zombies or Petrified, the game will be over. Once a
game is over, the game will automatically begin from the previous Save Point. When this occurs, the items taken from Treasure
Boxes and character parameters will not be saved, but character levels and Experience Points (EXP) will not diminish.
BATTLE COMMANDS
43
The FINAL FANTASY VIbattle system uses the ATB (Active Time Battle) system in which time will continue to pass during battle.
The player should battle by selecting commands and attacks corresponding to the enemy’s weaknesses or techniques.
FIGHT
Battle with equipped weapons. If weapons have not been equipped, the character must fight with bare hands.
MAGIC
The Magic Spell List will be displayed, allowing the player to select the magic spell to be used with the
≈ button. After selecting the target of the magic spell, press the ≈ button to cast it. When there is not
enough Magic Points (MP), magic cannot be used. When the Magic Spell List is displayed, scroll to the
very top of the list and press UP on the directional button to select the Esper that is equipped. Once
selected, the Esper can be summoned by pressing the
≈ button. (Refer to the Summoning Espers
section on page 47).
ITEM
The Item List will be displayed, allowing the player to use an item in inventory. To use an item, first select it with the directional
button, and then press the
≈ button twice. Next, select the character who will use the item, then press the ≈ button again to
execute the command. Items that may be used will be highlighted, whereas those that cannot be used will be displayed in darkened
font. It is possible to rearrange items even during battle. (Refer to the section on Item Arrangement section on page 32).
SWITCHING WEAPONS & ARMOR DURING BATTLE
Pressing UP on the directional button while at the top of the Item List will display the items currently equipped by the selected
character. To switch an item, first move the cursor to the item to be replaced, and press the
≈ button. The items that can be
equipped will then be highlighted. Upon making a selection, press the
≈ button again to execute the switch. The Item and Magic
Spell Lists that appear during battle can be scrolled by pressing UP or DOWN on the directional button.
ROW
Formation change of the Front and Back Row can take place during the current battle. When the command setting is set to
<Window>, the directional button must be pressed to the LEFT in order to execute a formation change. When set to <Short>,
the L1 button must be pressed.
BATTLE COMMANDS
42
Page 24

SPECIAL CHARACTER COMMANDS
45
SPECIAL CHARACTER COMMANDS
45
CYAN
SwdTech
• Cyan uses Sword Techniques learned as a samurai to attack.
• This technique can only be used when a sword that can perform the Sword
Techniques is equipped.
• When Cyan increases his level, he will automatically learn new Sword Techniques.
• When <SwdTech>is selected, a window similar to the one on the right will be
displayed, and a gauge will begin to grow during battle. When the gauge reaches the
particular Sword Technique the player would like to use, the player must press the
≈
button.
• The available Sword Techniques can be seen by selecting Cyan in the <Skills>command of the Menu Screen,
and pressing the
≈ button at the <SwdTech> heading.
GAU
Leap / Rage
• When the player selects <Leap> while battling enemies in the Veldt, Gau will leap onto an enemy and the
battle will end.
• If the remaining party members continue to battle in the Veldt, Gau will eventually reappear after a battle ends,
and rejoin the party.
• When he returns, Gau will have learned the Enemy Techniques from the time he leaps onto an enemy up until
when he returns to the party. These learned technique commands are called “Rage” Techniques, and can be
used to attack enemies during battle.
• The names of the “Rage” Techniques that have been learned can be checked by selecting Gau in the <Skills>
command of the Menu Screen, and by pressing the
≈ button at the <Rage> heading.
• After selecting <Rage> in the Battle Window, select the Rage Technique to be used and press the
≈ button.
• <Leap> is a command that can only be used in the Veldt.
• In the Veldt, only the enemies that have previously been encountered will appear. Thus, it may be wise to
return regularly to the Veldt with Gau to learn new Rage Techniques.
SETZER
Slot
• Setzer has access to the powerful Slot Attack. When he uses it, the wheels of a slot machine appear and start
spinning. Results of the spin determine the nature of the attack. from damaging an enemy to healing the party.
• Not all combinations are beneficial. The Joker Doom combination brings defeat to both parties.
• When this command is selected, three wheels will begin spinning. Press the
≈ button three times to stop the
wheels. When all three wheels have stopped, press the
≈ button once again to trigger the results of the spin.
LOCKE
Steal
• The ability to steal items from an enemy during battle.
• There are some items that can be obtained only through this particular command.
• After selecting this command, select which enemy to steal from by using the directional button.
MOG
Dance
• By invoking the name of the terrain dance, Mog will be able to attack using the powers of nature.
• By fighting battles on different terrain, Mog will learn new dances.
• After selecting this command, select the dance to be used and press the
≈ button.
SABIN
Blitz
• Will attack an enemy with the Martial Art techniques he has learned.
• When Sabin increases his level, new techniques will be learned automatically.
• After selecting <Blitz> in Sabin’s Battle Window, enter the commands of the technique to be used and press
the
≈ button.
• When Blitz Commands are entered incorrectly, Sabin will fail to act when his turn arrives.
• Each special technique and attack effect , or any commands entered can be checked by selecting Sabin in the
<Skills> section of the Menu Screen and pressing the
≈ button at the <Blitz> heading.
TERRA
Magic
• Born with magical powers, Terra possesses the <Magic>command from the beginning.
• Other characters, however, will not be able to use magic unless they are equipped with Espers (See page 47).
EDGAR
Tools
• Attack by using tools that are constructed primarily for battle.
• There are some tools that will attack only one individual enemy and others that will attack all enemies at once.
• Advancing in the game will allow the player to obtain newer and more powerful tools for attacking.
• After selecting this command, select which tool to use and press the
≈ button.
SPECIAL CHARACTER COMMANDS
44
Page 25

In the beginning of FINAL FANTASY VI, only a few characters will be able to use magic. The ability to use magic is granted by
Magicite that can be found as the story progresses.
Espers live in the land of the unknown, and are beings with tremendous magical power. When these creatures die, they
condense their magical powers and crystallize. The resulting crystals are known as Magicite. By equipping Magicite, the
characters will be able to learn different magic spells.
EQUIPPING MAGICITE
In order to equip Magicite, select, <Esper> from the <Skills> command in the Menu Screen.
Stones that are highlighted can be equipped, and those which are in darkened font cannot as they
have already been equipped by another member. The numbers designate the amount of MP that is
necessary to summon the Esper, which is the essence of the Magicite.
After selecting the Magicite and pressing the
≈ button, magic that can be learned from equipping
the crystal will be displayed. To equip the Magicite, press the
≈ button once again. Magicite can
only be equipped one at a time. To remove the Magicite, press the
≈ button in accordance with the
empty space on the Magicite List.
Magicite Bonus Points
Below the magic display of the Magicite, a phrase such as <Physical Strength + 1> can be seen. This refers to the bonus
attribute points granted by the Magicite when a character Levels UP. For example, if a character is equipped with the Magicite
when their level increases, their Physical Strength will increase by +1. Note: not all Magicite have bonus attributes.
SUMMONING ESPERS
The Esper of the equipped Magicite can be summoned during battle to fight. To see which Esper has what type of effect, select
the Esper with the <Esper> command, and the information will be displayed.
1. Select <Magic> command
In order to summon Espers, first select the <Magic> command during battle to display the Magic Spell List.
2. Summon the Esper with the UP directional button
Next, scroll to the top of the Magic Spell List, and press UP on the directional button to display the equipped Esper. Once the
Esper is displayed, press the
≈ button to summon it.
Summoning of the Esper
In order to summon an Esper, a certain amount of MP is necessary. In addition, an Esper can only be summoned once per
battle per character. Espers that cannot be summoned will be displayed in darkened font in the Magic Spell List during battle.
MAGICITE & ESPERS
47
STRAGO
Lore
• Strago’s Lore ability lets him learn certain spells from enemies that use the spell against him. After he has
learned the spells, he can use them as his own during battle.
• Since Strago’s Lore abilities are magic spells, MP will be consumed when used.
• After selecting this command, the player must select the spell to be used and then press the
≈ button to
execute the selection.
SHADOW
Throw
• Shadow’s throwing skill allow him to throw objects such as the Ninja Shuriken with strength and accuracy.
• By throwing ancient scrolls, he will also be able to use ninja techniques that are written on the scrolls.
• After selecting this command, select the item to be thrown, and then press the
≈ button to execute the
command.
CELES
Runic
• When Runic is used during battle, Celes will absorb certain enemy magic spells that has been cast, and use
them to restore her Magic Points (MP).
• Runic will last until Celes enters another command, or until she absorbs a magic spell.
• Runic cannot be used unless Celes is equipped with a specific sword.
• Be advised that there are some spells that cannot be absorbed by Runic.
RELM
Sketch
• Relm attacks by first sketching an enemy, and then summoning the illusion of the sketch to battle against the
enemy for her. Beware, as there will be times when Relm will not be able to sketch complex looking
enemies correctly.
• After selecting this command, select the enemy to be sketched, and then press the
≈ button to execute the
command.
SPECIAL CHARACTER COMMANDS
46
Page 26

By equipping relics in FINAL FANTASY VI, the characters will be able to acquire various abilities with special effects. Relics are
divided into two groups:
• Those that will change commands
• Those with special effects
RELICS THAT WILL CHANGE COMMANDS
When this type of relic is equipped, the character’s battle commands will change. The image on
the right shows Locke before and after equipping the “Thief Glove” relic. Locke’s battle command
will change from <Steal> to <Capture>, allowing him to steal and attack enemies at the same
time. In addition to this, there are other relics that are known to change commands.
RELICS WITH SPECIAL EFFECTS
The majority of relics fall into this category. Some of these relics have been known to increase character attributes while others
provide resistance to certain kinds of attacks. The attribute change which occurs when relics are equipped will be displayed in
yellow for those that increase, and will be displayed in darkened fonts for those that will decrease. There are also some relics
that will allow the characters to hold weapons in both hands and others that will automatically summon magic in order to
defend the characters against enemy attacks.
ARMOR WITH RELIC EFFECTS
Some armors grant the same abilities gained from equipping certain relics. Unfortunately, no weapons have this effect.
Equipping Relics
From the Menu Screen, select <Relic> to access the Relic Screen. After selecting <Equip>, the cursor will move to the “Relic”
List. Pressing the
≈ button at this point will display the relics that the character is currently equipped with. (Items that have
already been equipped will not be displayed). After selecting the relic of choice, press the
≈ button. In the lower right corner
of the screen, the status changes for equipping a particular relic will be displayed. Each character can equip up to two relics.
After equipping the relic, press the
Ω button twice. For relics which enable the player to equip the characters with weapons in
both hands, the player will need to re-equip weapons and armor accordingly.
RELICS
49
Magic is learned from Espers. Generally, the more powerful the Esper, the better the spells it can teach. The type of spells an Esper
can teach is related to the abilities of the Esper itself.
Obtain Magic Points
Each Esper has access to a number of magic spells with a corresponding number next to them showing the rate at which they can be
learned. As characters fight through battles, they will obtain Magic Points at the end of battle. These points are multiplied with the
learning rate number to generate the amount of Magic Points earned toward learning a spell.
If MP Reaches 100%, the Magic Spell Will Be Learned
Once all the spells have been learned from a particular Esper, it is recommended that the player
equip another Esper to continue the process.
If an Esper is Switched During the Learning Process
Even if the Esper which a character has been using to learn magic is removed and switched to
another character, the Magic Points which have been accumulated to this point will not disappear.
The magic spells which are in the process of being learned can be checked in the Magic List and
the Esper Magic Screen.
Even With the Same Magic Spell...
It is possible to learn the same magic spell from different Espers. However, depending on the Esper, the rate of learning magic may
be different (the multiplier rates will differ). For example, the Esper on the upper left has listed “Care x 5”, but the Esper listed
below has listed “Care x 3”. If the player receives one Magic Point after battle, the percentage of added to the Magic Point total will
be 5 % for the Esper on top, and 3 % for the Esper on the bottom. To maximize the rate at which magic spells are learned, players
should equip Magicite with the most efficient learning rate.
Obtaining Magic Spells through Equipment & Relics
Certain items in the game possess the magic power to teach magic spells to characters. To find out which items have this ability,
examine an item in the Item List by pressing the
≈ button. If the phrase <Magic Name x Value> is displayed, then the item in
question has the ability to teach spells in the same manner as Magicite.
Explanations of Espers & Magic
By selecting the <Skills> command from the Menu Screen, and then selecting the subcommand <Esper> or <Magic>, the effects
of magic spells and Espers will be displayed in the top left window. Bonus point explanations will also be displayed in this section as
well. It is recommended that the player know in advance which effects are connected to which Esper.
LEARNING MAGIC
48
Page 27

BONUS SCREEN
The button controls are basically the same as those found on the normal game screen. Special uses for each heading will be
explained in the following section.
Accessing the Bonus Screen
1. Select <Bonus> on the Loading Screen and press the
≈ button.
2. Select the MEMORY CARD slot with the System File and press the
≈ button. (If the game has never been completed to the
end, select <See Without Loading>).
3. Once the Bonus Screen appears, select the menu to see and press the
≈ button.
OPERATION OFEACH HEADING
Studio - Theater
• If the <Theater> section of the Studio is selected, several movie titles will be shown.
• Selecting the movie of choice and pressing the
≈ button will start the video.
• Pressing the START button, the
Ω button, or the ≈ button during viewing will interrupt the video, and take the player back to
the Theater Menu.
Studio - Gallery
• If the <Gallery> section of the Studio is selected, several titles will be shown.
• Select the title of choice and press the
≈ button to view the first image.
• Press the
≈ button to view the next image.
• Once the player sees all the images, the screen will loop back to the first image shown.
Gallery Button Functions
directional button: Move enlarged images
Ω button: Return to the “Gallery” Screen
ç button: Enlarge / Reduce image size
L1 button: Scroll back five images
√ button: Return to previous image
R1 button: Scroll forward five images
BONUSES
51
For the PlayStation version of FINAL FANTASY VI, there is a Bonus Mode which is an added feature to the normal game.
When Bonus Mode is accessed, the following menus become available::
STUDIO
The headings in this screen lets the player access the movie clips and artwork images
developed for the game.
• Theater
The player will be able to view the full motion videos seen in the game.
• Gallery
The player will be able to view some of the original artwork developed for the game.
STATUS
The data for games which have been finished will be displayed in one chart, letting the player see how much time has been spent on
a particular game. This data is only available if the player has completed the game. By finishing the game multiple times, maximum
and minimum records will be displayed in each heading, and will continue to accumulate as new records are set.
SECRET
While many headings are available in this menu, only “Bestiary” is immediately accessible in the beginning.
• Bestiary
A collection of all the enemies that appear in the game.
SYSTEM FILE
Headings which cannot be viewed until the game is completed will be displayed as “????” in the Bonus Menu, and the player will not
be able to select them. In order to view these headings, it is necessary to complete the game, and save a file onto a MEMORY CARD
called the “System File”, which is different from Saved Data. This file will record detailed play situations data used in the Bonus
Menu. After a System File has been loaded, headings previously displayed as “????” will become accessible.
Creating a System File
After the words, “The End” appear at the ending, the screen will automatically switch to the System File Creation Screen. Here, the
player must select <Save> and press the
≈ button to execute the command. If a System File is already present on the MEMORY
CARD, the old file will be overwritten, and updated to the new one.
BONUSES
50
Page 28

Enemy Screen Button Functions
directional button (DOWN/RIGHT) or the
≈ button: Move to the next Enemy Data Screen
directional button (UP/LEFT) or the
≈ button: Return to the previous Enemy Data Screen
SELECT button: Move to the Enemy Selection Screen of the selected area
ç button: Switch between the Enemy Data Screen and the Enemy Explanation Screen
Ω button: Return to the Enemy Encyclopedia Menu
L1 button: Return to the enemies of the previous location
R1 button: Move to the enemies of the next location
After Completing the Game
Additional bonuses await the player upon completion of the game. Previously, some headings
were labeled as “????” in the Bonus Screen, making them inaccessible. Once the player
completes the game, the following secret rooms will become accessible:
• Bestiary of each location after world destruction.
• Strago’s Lore Magic Encyclopedia
• Encyclopedia of Espers
• Dragon Head Colosseum items, opponents & list of obtained items
Note: The button functions on this screen are the same as those on the Enemy Screen. (There will be some functions which will
not be available for use).
BONUSES
53
STATUS
Cannot be seen unless the game has been finished at least once and a System File has been created.
If <Status> is selected, the screen will switch to the one shown on the right.
1. This window displays the amount of steps taken, play time, maximum amount of GP, and
lowest amount of GP for a finished game.
2. In this window, if a particular character is selected, and the
≈ button is pressed, the
screen will display the following information:
a. Character Usage Rate
When the percentage reaches 100%, a special title will appear above the character’s head. It is possible to continue updating the
records even after 100%, but the percentage will no longer rise.
b. This window displays headings relating to the spells and special techniques a character was able to learn throughout the game.
Selecting a heading and pressing the
≈ button will display the learned spells or techniques. Since not all characters can learn
spells or special techniques, some may only have the “Learned Magic” heading available or no heading at all.
c. The Maximum/Minimum value for each displayed parameter.
Note: It is possible to go back to a previous screen by pressing the
Ω button on any screen.
Secret - Bestiary
• Selecting <Bestiary> after entering the Secret Room will display the screen shown on the right. Selecting <Before World
Destruction> will display the appropriate locations in the lower window.
• Before finishing the game (no System File), the player will only be able to make this selection.
• If the player selects a location and executes the command, the screen will switch to the Bestiary for enemies that appear in that
particular location.
Enemy Screen
This refers to the data screen for each enemy.
When the
ç button is pressed, the screen will switch to an Enemy Explanation Screen.
BONUSES
52
1
2
Page 29

55
FINAL FANTASY ANTHOLOGY SOUNDTRACK
54
Included in this special Collector’s Package is The FINAL FANTASY ANTHOLOGY SOUNDTRACK, containing musical selections
from the scores of FINAL FANTASY Vand FINAL FANTASY VI. This audio CD can be played through your PlayStation game console CD
Player, or through any standard audio CD player.
In order to use the PlayStation game console CD Player, set up your PlayStation game console
according to the instructions in its Instruction Manual. Make sure the power is off before inserting
or removing a compact disc. Insert the FINAL FANTASY ANTHOLOGY SOUNDTRACKdisc and
close the disc cover. Insert game controllers and turn on the PlayStation game console. The CD
Player Screen will appear. Use the directional button to move the cursor to the blue Playbutton (
➤)
on the left side of the screen and press the
≈, Ω, ç, or √ button to begin. Refer to your
PlayStation game console Instruction Manual for further information on how to use the CD Player.
TRACKS: 1: FFV Opening Theme
2: The Dungeon
3: We're Pirates!
4: City Theme
5: Parting Sorrow
6: Mambo de Chocobo
7: Distant Homeland
8: Music Box Memories
9: To My Beloved Friend
10: The Phantom Forest
11: Phantom Train
12: Wild West
13: Kids Run Through The City
14: Terra
15: Slam Shuffle
16: Spinach Rag
17: Johnny C Bad
18: Mog
19: Dark World
20: Epitaph
21: The Magic House
22: The Prelude
1-9 & 1992 Square Co., Ltd., 10-22 & 1994 Square Co., Ltd.
Composer/Arranger: Nobuo Uematsu
Producers: Nobuo Uematsu & Kensuke Matsushita
Page 30

57
56
Page 31
CREDITS
59
FINAL FANTASYVI
Producer Hironobu Sakaguchi
Director Yoshinori Kitase, Hiroyuki Itou
Main Programmers Ken Narita, Kiyoshi Yoshii
Graphic Directors Tetsuya Takahashi, Kazuko Shibuya,
Hideo Minaba, Tetsuya Nomura
Music Composer Nobuo Uematsu
Image Designer Yoshitaka Amano
Battle Planner Yasuyuki Hasebe
Field Planner Satoru Tsuji
Event Planners Tsukasa Fujita, Keisuke Matsuhara
Effect Programmers Hiroshi Harata, Satoshi Ogata
Battle Programmer Akihiro Yamaguchi
Sound Programmer Minoru Akao
Effect Graphic Designer Hirokatsu Sasaki
Field Graphic Designers Takaharu Matsuo, Yusuke Naora,
Nobuyuki Ikeda, Tomoe Inazawa,
Takamichi Shibuya,
Shinichirou Hamasaka,
Akiyoshi Masuda, Hidetoshi Kezuka
Monster Graphic Designer Hitoshi Sasaki
Object Graphic Designer Kazuhiro Ohkawa
Sound Engineer Eiji Nakamura
System Engineer Masahiro Nakajima, Mitsuo Ogura,
Yasunori Orikasa
FINAL FANTASY VI REMAKE STAFF
Director Katsuyoshi Kawahara
Producer Yusuke Hirata
Publicity Yuuki Kitayama, Tetsuya Tanaka, Masako Hozawa
Coordinators Kiyomi Tanikawa, Rei Komatsu,
Kiyomi Nakamura,
Terutaka Komorizono
Quality Managers Hiromi Matsuda, Nishiki Sugi
Executive Producer Tomoyuki Takechi
Transplantation Tose Co., Ltd
Special Thanks To
Minoru Akao, Rie Nishi, Chizuko Ono, Hiroki Nakai, Hiroyuki Miura,
Ikuyo Kitagawa, Siho Sasaki, Miki Akakura, Hiromichi Baba
Development Quality Management
Management Hiromi Masuda
Coordinator Yoshia Shibano
Coordinator Assistants Koji Shirasugi, Takashi Sannohe
International Business Department
Management Yuji Shibata
Localization Support Yoshinori Uenishi, Kazuyoshi Tashiro
Translation Support Sho Endo, Alex Smith
SQUARE SOFT, INC.
Localization Management Masahiro Nakajima
Assistant Localization Manager Aki Kozu
QA Manager Jonathan Williams
Assistant QA Manager Mike Givens
Editor Richard E. Amtower
Lead Analyst Derek C. Smith
Assistant Lead Analyst Mohammed A.C. Wright
Product Analysts Ben Norman, Justin Norman, James P. Wong,
Sissie Chang, Bennett A. Neale, Jim Robles,
Terry Stone, Takahiro So, Stan Ng
CREDITS
58
FINAL FANTASYV
Director Hironobu Sakaguchi
Image Design Yoshitaka Amano
Music Composer Nobuo Uematsu
Field Plan Yoshinori Kitase, Ikuya Dobashi
Battle Plan Hiroyuki Itou, Akihiko Matsui
Field Program Ken Narita
Battle Program Kiyoshi Yoshii, Katsuhisa Higuchi
Field Graphics Tetsuya Takahashi, Hideo Minaba
Obj Graphics Kazuko Shibuya, Hiromi Ito
Battle Graphics Masanori Hoshino, Tetsuya Nomura,
Hiroshi Takai, Hirokatsu Sasaki
Menu Program Shinichi Tanaka
Sound Program Minoru Akao
Visual Program Keizo Kokubo
Map Design Kaori Tanaka, Yukiko Sasaki,
Hidetoshi Kezuka
Sound Effects Kenji Ito, Yasunori Mitsuda,
Yoshihiko Maekawa
Test Assist Akiyoshi Ohta, Nobuyuki Ikeda,
Mami Kawai
Executive Producer Hitoshi Takemura
Special Thanks To
Kazuhiko Torishima, Koichi Ishii, Takashi Tokita,
Keitaro Adachi, Tomoki Anazawa, Satoru Yoshieda,
Kyoji Koizumi, Takaaki Tonooka, Yasushi Shimizu,
Yusuke Hirata, Michio Okamiya, Tadashi Nomura,
Kiyotaka Sosui, Kei Hirata, Noriko Watanabe,
Kiyomi Tanikawa, Manabu Denno, Shinobu Hidaki,
Shinichiro Kajitani, Koji Yamashita, Kimie Inagi,
Masashi Kanashige, Kaori Masuda, Tohru Morita,
Rei Tsukakoshi, Hitomi Nakamura, Wakako Sato,
Akitoshi Kawazu, Hiroshi Kobayashi, Hisashi Suzuki,
Tomoyuki Takechi
FINAL FANTASY V REMAKE STAFF
Executive Producers H. Sakaguchi, S. Hashimoto
Director K. Kawahara
Supervisor K. Aoki, K. Narita
Sound Supervisor M. Akao
CG Supervisor A. Murata
Producer Y. Hirata
Publicity T. Inoue
Transplantation Tose Co., Ltd
Quality Managers H. Masuda, R. Komatsu, Y. Yamamoto
Special Thanks To
T. Naito, M. Tateoka, M. Kasuya, H. Yukitake, K. Nakata, K. Tanikawa, H. Hujii
Development Quality Management
Management Hiromi Masuda
Coordinator Yoshia Shibano
Coordinator Assistants Koji Shirasugi, Takashi Sannohe
International Business Department
Management Yuji Shibata
Localization Support Yoshinori Uenishi, Kazuyoshi Tashiro
Translation Support Sho Endo, Alex Smith
SQUARE SOFT, INC.
Localization Management Masahiro Nakajima
Assistant Localization Manager Aki Kozu
QA Manager Jonathan Williams
Assistant QA Manager Mike Givens
Editor Richard E. Amtower
Lead Analyst David "Ribs" Carrillo
Assistant Lead Analyst Troy A. Boren
Product Analysts Kelly Chun, Benjamin A. Gajek, Jonathan A. Mankin,
Kyoko Makino, Tam Nguyen, Richard Williams,
Jeff Love, Stan Ng
Page 32

LIMITED WARRANTY
61
For a period of ninety (90) days from the date of purchase, Square Electronic Arts L.L.C. (SQEA) warrants to the original
purchaser of this SQEA software product that the medium on which this computer program is recorded is free from
defects in materials and workmanship. SQEA agrees for a period of ninety (90) days from the date of purchase, to either
repair or replace, at its option, free of charge, any SQEA software product that does not meet the above warranty, postage
paid, with proof of purchase. This warranty is not applicable to normal wear and tear. This warranty shall not be
applicable and shall be void if the defect in the SQEA software product has arisen through abuse, unreasonable use,
mistreatment or neglect.
LIMITATIONS– The above warranty is in lieu of all other warranties, and no other representations or claims of any
nature shall be binding on or obligate SQEA. ANY IMPLIED WARRANTIES APPLICABLE TO THIS SOFTWARE PRODUCT,
INCLUDING WARRANTIES OF MERCHANTABILITY, COURSE OF DEALING IN TRADE AND FITNESS FOR A PARTICULAR
PURPOSE, ARE LIMITED TO THE NINETY (90) DAY PERIOD DESCRIBED ABOVE. IN NO EVENT WILL SQEA BE LIABLE FOR
ANY SPECIAL, INCIDENTAL, OR CONSEQUENTIAL DAMAGES RESULTING FROM POSSESSION, USE OR MALFUNCTION OF
THIS SQEA SOFTWARE PRODUCT. Some states do not allow limitations as to how long an implied warranty lasts and/or
exclusions or limitations of incidental or consequential damages so the above limitations and/or exclusions of liability may
not apply to you. This warranty gives you specific rights, and you may also have other rights that vary from state to state.
NOTICE – This manual and the software described in this manual are copyrighted. All rights in the manual and the
software are reserved. No part of this manual or the described software may be copied, reproduced, translated, or reduced
to any electronic medium or machine-readable form without the prior written consent of SQEA. The described software
may not be reversed engineered, decompiled or otherwise disassembled.
RETURNS WITHIN 90 DAY WARRANTY PERIOD – To replace defective media within the 90-day warranty period, send
the defective media, a copy of the original sales receipt, a return address, and a small note describing the difficulties you
are experiencing to Electronic Arts Customer Warranty, P.O. Box 9025, Redwood City, CA 94065-9025. If you have warranty
questions, you can also contact Customer Warranty at (650) 628-1900, fax (650) 628-5999. Hours of operation: Monday
- Friday, 8:30am - 11:45am and 1pm - 4:30pm, Pacific Standard Time.
RETURNS AFTER WARRANTY– To replace defective media after the ninety (90) day warranty period has expired, send
the original CD to the Electronic Arts’ address above. Enclose a statement of the defect, your name, your return address,
and a check or money order for $15.
REPLACEMENT MEDIA – The above provisions apply to any replacement media or software provided by SQEA
hereunder, including the above warranties and limitations.
TECHNICAL SUPPORT – For technical support questions, you can call (714) 428-0599. Representatives are available
Monday-Friday 8am - 5pm, Pacific Standard Time.
CREDITS
60
SQUARE ELECTRONIC ARTS L.L.C.
Senior Customer Service Manager Rick Thompson
Assistant Customer Service Manager Fernando Bustamante
Customer Service Lead Alaine DeLeon
Customer Support Representatives Patrick Cervantes, James Dilonardo,
Tony Kim, Caroline Liu,
John Montes, Arthur Yang, Mark
Abarca, Mark Acero, Alan DeGuzman
Public Relations/Events Manager Lisa M. Ahern
Public Relations Associate Francine DeMore
Business Development Manager Elaine Di Iorio
Product Coordinator Beth Faust
Sales Coordinator Sean Montgomery
Media Planner Kyoko Yamashita
Creative Planner Keiko Kato
Assistant Product Managers Andrew Shiozaki, George Torii
Product Associates Andy Hsu, Irene Sam, Brad Varey,
Junko Shibata-Burke
Product Administrative Assistant Mari Nishikawa
Marketing Assistant Rika Maruya
Product Manager Kenji Mimura
Vice Chairman Yoshihiro Maruyama
President Jun Iwasaki
Packaging/Manual Design
Steven Wright, Beeline Group, Inc.
Special Thanks To
Hideo Yotsuya, Lynn Biscoe, Beeline Group, The Kenwood Group,
Saatchi & Saatchi, CHEN PR
 Loading...