


WARNING: READ BEFORE USING YOUR PLAYSTATION®2 COMPUTER ENTERTAINMENT SYSTEM.
A very small percentage of individuals may experience epileptic seizures when exposed to certain light patterns or flashing lights. Exposure to certain patterns or backgrounds on a television screen or while playing video games, including
games played on the PlayStation 2 console, may induce an epileptic seizure in these individuals. Certain conditions may induce previously undetected epileptic symptoms even in persons who have no history of prior seizures or epilepsy. If you, or anyone in your family, has an epileptic condition, consult your physician prior to playing.
If you experience any of the following symptoms while playing a video game — dizziness, altered vision, eye or muscle twitches, loss of awareness, disorientation, any involuntary movement, or convulsions — IMMEDIATELY discontinue use
and consult your physician before resuming play.
WARNING TO OWNERS OF PROJECTION TELEVISIONS:
Do not connect your PlayStation 2 console to a projection TV without first consulting the user manual for your projection TV, unless it is of the LCD type. Otherwise, it may permanently damage your TV screen.
USE OF UNAUTHORIZED PRODUCT:
The use of software or peripherals not authorized by Sony Computer Entertainment America may damage your console and/or invalidate your warranty. Only official or licensed peripherals should be
used in the controller ports or memory card slots.
HANDLING YOUR PLAYSTATION 2 FORMAT DISC:
•This disc is intended for use only with PlayStation 2 consoles with the NTSC U/C designation.
•Do not bend it, crush it or submerge it in liquids.
•Do not leave it in direct sunlight or near a radiator or other source of heat.
•Be sure to take an occasional rest break during extended play.
•Keep this disc clean. Always hold the disc by the edges and keep it in its protective case when not in use. Clean the disc with
a lint-free, soft, dry cloth, wiping in straight lines from center to outer edge. Never use solvents
or abrasive cleaners.
CONTENTS |
|
GETTING STARTED . . . . . . . . . . . . |
. . 2 |
CONTROLLER . . . . . . . . . . . . . . . . . |
. 3 |
LARA . . . . . . . . . . . . . . . . . . . . . . . |
. 4 |
MAIN MENU . . . . . . . . . . . . . . . . . . . |
. 5 |
DIFFICULTY LEVELS/SCREEN MODES |
. . 7 |
SAVING AND LOADING THE GAME . . . . . 8 |
|
CONTROLLING LARA . . . . . . . . . . . . . |
. 9 |
Movement Controls |
9 |
Swimming Controls |
9 |
Combat and Item Controls |
10 |
Driving Controls |
10 |
COMBAT . . . . . . . . . . . . . . . . . . . . |
. 11 |
Combat Strategies |
11 |
Aiming and Firing Controls |
11 |
Melee Attacks |
11 |
Defensive Combat Controls |
12 |
Targeting |
12 |
HUD (Head’s-Up Display) . . . . . . . . . . |
. 13 |
PDA . . . . . . . . . . . . . . . . . . . . . . . |
. 14 |
EQUIPMENT . . . . . . . . . . . . . . . . . . |
. 14 |
REWARDS . . . . . . . . . . . . . . . . . . . |
. 16 |
CREDITS . . . . . . . . . . . . . . . . . . . . . |
. 17 |
2
GETTING STARTED
open button
memory card slot 2 |
disc cover |
memory card slot 1
on/standby/ reset button
IR receiver
USB connectors
controller port 1 controller port 2
Set up your PlayStation®2 computer entertainment system according
to the instructions in its Instruction Manual. Make sure the MAIN POWER switch (located on the back of the console) is turned ON. Press the RESET button. When the power indicator lights up, press the OPEN button
and the disc tray will open. Place the TOMB RAIDER: LEGEND™ disc
on the disc tray with the label side facing up. Press the OPEN button again and the disc tray will close. Attach game controllers and other peripherals, as appropriate. Follow on-screen instructions and refer
to this manual for information on using the software.
MEMORY CARD 8MB for PlayStation®2
To save game settings and progress, insert a memory card (8MB)(for PlayStation®2) into MEMORY CARD slot 1 before powering on the system. At least 155KB of free space on the memory card is required to save game data.
This game supports saving and loading of game data in MEMORY CARD slot 1 only. You can load saved game data from the same memory card or from any memory card containing previously saved TOMB RAIDER:
LEGEND™ games.
3
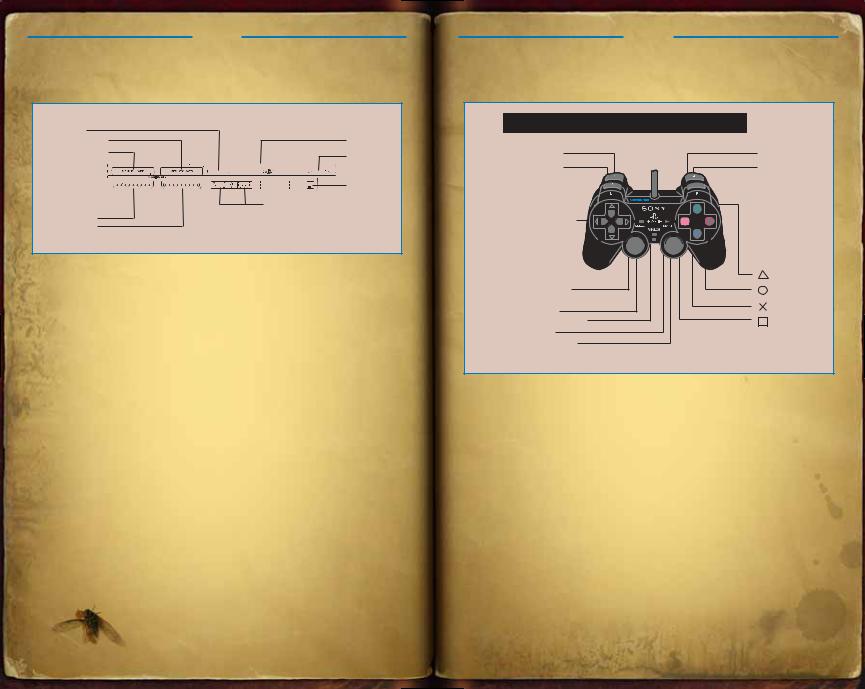
CONTROLLER
DUALSHOCK®2 ANALOG CONTROLLER CONFIGURATIONS
L2 button |
R2 button |
L1 button |
R1 button |
directional |
|
buttons |
|
|
button |
left analog stick |
button |
(L3 button when pushed down) |
button |
SELECT button |
|
ANALOG mode button |
button |
START button |
|
right analog stick |
|
(R3 button when pushed down) |
|
Connect the DUALSHOCK®2 analog controller to controller port 1 before starting play. When the vibration function is ON, the controller will vibrate in response to game events. You can reconfigure the controls and toggle the vibration function ON/OFF in Options mode (page 6).
NOTE: All controls used in this manual are the default controls.
MENU CONTROLS
You can select and adjust options from the Main Menu and from
the in-game Pause menu (press the w button during play to pause).
■ Use the directional buttons to view and cycle through the game options.
■Press the x button to select an option, change a current option, confirm any changes made or progress to the next screen.
■Press the t button in a submenu to return to the previous screen.
NOTE: See pages 5-7 for a list of game options.
4
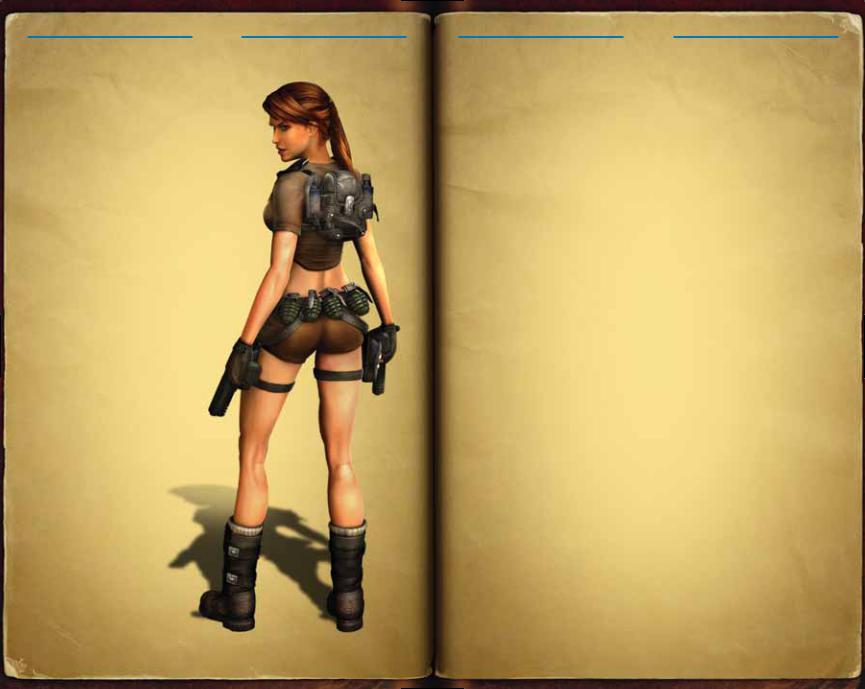
LARA
At the age of nine, Lara survived a plane crash in the Himalayan mountains that led to the death of her mother. After miraculously surviving a ten-day solo trek from the crash site to Kathmandu, she spent the rest of her childhood under the close tutelage of her archeologist father — the late Earl
of Abbingdon, Richard Croft.
At the age of 18, after the death of her father, Lara inherited the Croft estates and became Countess of Abbingdon. Since then she has been credited
with the discovery of some 16 archeological sites of international significance.
Lara Croft has been hailed both as an Archeological Wunderkind and a glorified Treasure Hunter, depending on whom you listen to. There are thousands
of rumors surrounding Lara's exploits, invariably involving the unexplained or outright
unbelievable. Lady Croft herself is rarely available for comment, which further adds to the fog of mystery that surrounds
her life and work.
Consequently, Lara Croft continues to be the focus of wild speculation and intense debate. Idealized and vilified in equal measure, she is perhaps one of the most fascinating and enigmatic figures
of our times.
5
MAIN MENU
START GAME
Start a new game. If saved data is present on your memory card, this option changes to RESUME GAME and resumes play from the last save.
LOAD
■NEW GAME Start a new game.
■LOAD GAME Displays a list of saved games. Select a save
and press the x button to load it.
■ LOAD LEVEL Displays a list of completed levels (present in the loaded save). Replay these levels to collect rewards, play
in different difficulty modes, or attempt a Time Trial.
CROFT MANOR
You can visit Lara’s expansive manor via the Main Menu throughout the game. However, to gain full access you must have a saved game containing at least one completed mission. Only then will all the Manor's secrets become approachable for you to discover.
OPTIONS
Press the left analog stick or directional buttons */@ to select an option and $/^ to change the setting. Press the x button to confirm your Options changes, or press the t button to return to the Main Menu without change.
■ SOUND |
Adjust the |
volume of MUSIC, SFX and VOICE VOLUME. |
■ DISPLAY |
Use the Display Menu to adjust the following options: |
|
SUBTITLES |
|
Set subtitles ON/OFF or to your |
|
|
preferred language. |
SCREEN POSITION U/D |
Use the slide bar to adjust the screen |
|
|
|
position up/down. |
SCREEN POSITION L/R |
Use the slide bar to adjust the screen |
|
|
|
position left/right. |
WIDESCREEN Turn ON/OFF. Selecting ON enables a widescreen 16:9 aspect ratio image.
PROGRESSIVE SCAN MODE Turn ON/OFF. Selecting ON switches
to a 525p image. Progressive scan offers higher-quality pictures but requires
a screen that supports this feature.
 Loading...