

Page 1
http://www.replacementdocs.com
http://www.replacementdocs.com
Page 2
WARNING: READ BEFORE USING YOUR PLAYSTATION®2 COMPUTER ENTERTAINMENT SYSTEM.
A very small percentage of individuals may experience epileptic seizures when
exposed to certain light patterns or flashing lights. Exposure to certain patterns or
backgrounds on a television screen or while playing video games, including games
played on the PlayStation 2 console, may induce an epileptic seizure in these
individuals. Certain conditions may induce previously undetected epileptic
symptoms even in persons who have no history of prior seizures or epilepsy. If you,
or anyone in your family, has an epileptic condition, consult your physician prior
to playing. If you experience any of the following symptoms while playing a video
game—dizziness, altered vision, eye or muscle twitches, loss of awareness,
disorientation, any involuntary movement, or convulsions—IMMEDIATELY
discontinue use and consult your physician before resuming play.
WARNING TO OWNERS OF PROJECTION TELEVISIONS:
Do not connect your PlayStation 2 console to a projection TV without first
consulting the user manual for your projection TV, unless it is of the LCD type.
Otherwise, it may permanently damage your TV screen.
USE OF UNAUTHORIZED PRODUCT:
The use of software or peripherals not authorized by Sony Computer
Entertainment America may damage your console and/or invalidate your warranty.
Only official or licensed peripherals should be used in the controller ports or
memory card slots.
HANDLING YOUR PLAYSTATION 2 FORMAT DISC:
• This disc is intended for use only with PlayStation 2 consoles with the NTSC
U/C designation.
• Do not bend it, crush it or submerge it in liquids.
• Do not leave it in direct sunlight or near a radiator or other source of heat.
• Be sure to take an occasional rest break during extended play.
• Keep this compact disc clean. Always hold the disc by the edges and keep it in
its protective case when not in use. Clean the disc with a lint-free, soft, dry
cloth, wiping in straight lines from center to outer edge. Never use solvents or
abrasive cleaners.
SOCOM II: U.S. Navy SEALs Tips and Hints
Consumer Service/Technical Support Line 1-800-345-7669
Call this number for technical support, installation or general questions regarding
PlayStation
6AM–8PM and Sunday 7AM–6:30PM Pacific Standard Time.
Game Hint Guide Information
PlayStation Underground Game Guides
For free hints and tips visit us at
Sign up and become a member of the PlayStation Underground and access
free hints, tips, and cool moves for games produced by Sony Computer
Entertainment America.
No hints will be given on our Consumer Service/Technical Support Line.
®2 and its peripherals. Representatives are available Monday–Saturday
www.us.playstation.com.
CONTENTS
The Ultimate Evolution In Combat 2
Setting Up Your Console 4
Network Adaptor
(Ethernet/Modem) (for PlayStation 2) 4
Memory Cards 5
Headset (Optional) 5
Controls 6
Configuration 6
Menu Controls 6
SEAL Movement and Actions 7
Using the Headset 8
Issuing Voice Commands (Single Player) 8
Listening 9
Issue Commands Using Button Controls 9
The Commands (Single Player) 10
Movement and Position Commands 10
Tactical Commands 11
Starting the Game 12
Main Menu 12
New Game 12
Load Game 12
Online 13
LAN 13
Options 13
Hard Disc Drive 13
Extras 13
Single Player Team Structure and Movement 14
Other Special Forces 14
The Mission Briefing 15
Overview 15
Mission Details 15
Objectives 15
Maps/Intel 15
Armory 15
The Single Player Game Screen 17
TacMap and Tracking Mission Objectives 18
Using the TacMap 18
Keep Track of Mission Objectives 19
Special Actions 20
For the most up-to-date version of this manual, go to www.us.playstation.com
and check out the SOCOM II: U.S. Navy SEALs mini-site.
Using Weapons 22
Single Player Mission Success 24
Stealth 24
Accuracy 24
Teamwork 24
Primary Objectives 24
Secondary Objectives 24
Single Player Mission Failure 25
The Pause Menu 26
Resume 26
Abort 26
Invert Pitch 26
Help 26
Aim Assist 26
Replay Mission 26
SOCOM II Online 27
Creating a Network Configuration 27
Online Communication 29
Using the On-Screen Keyboard
to Enter Data and Chat 29
Text Chat During Missions
Using the Chat Menu 29
Using the Headset Online 30
Get Connected to SOCOM II Online 31
Playing the Online Game 33
Online Mission Types 33
Finding a Game 34
SOCOM II Online Screen 34
The Briefing Room 35
The Game Lobby 37
Friends List 38
The Online Game Screen 38
Player Rankings (Rank Insignias) 39
Create Your Own Clan 40
Saving and Loading Game Data 41
Saving Game Data 41
Loading Game Data 41
Game Credits 42
Are You Interested In a SEAL Career? 45
1
Page 3
1
THE ULTIMATE
EVOLUTION IN COMBAT
or decades, SEAL teams have been elite U.S fighting forces. Naval Special
F
Warfare and the SEALs evolved from the necessities of World War II amphibious
combat. Before delivering thousands of soldiers onto beaches in landing craft,
underwater demolition teams wearing swim masks and fins had to sneak in from the
ocean, recon the area and remove hazards, sometimes with high explosives. SEAL
teams are small, highly lethal attack squads of stealthy soldiers. By 1962 this
method of fighting had a name: Unconventional Warfare, and the SEALs were
formed to meet the needs of a new type of combat.
SEALs are exceptionally well-trained, tactically intelligent students of warfare,
masters of hand-to-hand combat, and experts with any weapon from knives
to heavy machine guns. While a single SEAL is dangerous, an entire
fireteam is even more so. When the smoke clears,
SEALs are victorious because of teamwork. In a
firefight, no terrorist threat is a match for an
efficient SEAL fireteam. Each member
is trained to protect other team
members, never hesitating to
act for the good of the
mission, and the team,
in every
combat
scenario.
Now you are the commanding officer of a four-man SEAL fireteam. You will deploy
on missions to neutralize terrorist threats from South America to Russia. Take on
explosive urban firefights, breach hardened defenses, rescue non-combatants or
capture terrorist assets. The success of each mission will depend on extreme stealth
and the lethal teamwork that marks every SEAL operation.
When you are ready for SEAL warfare online, join up to 15 other players and take
sides as a SEAL, Terrorist, or other special operations units. This is the true test of
teamwork. Each battlefield will offer even the most seasoned soldier a tactical
challenge. The headset will keep you in voice contact with every other teammate so
you can adapt your strategy even as the bullets fly.
Terrorism is a threat to freedom all over the world and
the unconventional tactics of U.S. Navy SEALs are
needed. This is the time. When they picked a fight,
they never planned on fighting these guys.
2
3
Page 4

2
MEMORY CARD slot 1
MEMORY CARD slot 2
USB connector
S400 i.LINK connector
controller port 1
controller port 2
disc tray
RESET button
(OPEN) button
SETTING UP YOUR CONSOLE
Set up your PlayStation®2 computer entertainment system according to the
instructions in its Instruction Manual. Make sure the MAIN POWER switch (located
on the back of the console) is turned on. Press the RESET button. When the power
indicator lights up, press the open button and the disc tray will open. Place the
SOCOM II: U.S. Navy SEALs disc on the disc tray with the label side facing up. Press
the open button again and the disc tray will close. Attach game controllers and
other peripherals, as appropriate. Follow on-screen instructions and refer to this
manual for information on using the software.
MEMORY CARDS
A memory card is required to play SOCOM II: U.S. Navy SEALs both online and
offline. Before playing online, a valid Network Configuration must be saved to the
memory card using either the Network Adaptor Start-Up Disc or the SOCOM II
Network Configuration utility.
To save game settings and progress, insert a memory card (8MB) (for PlayStation
into the MEMORY CARD slot 1 of your PlayStation 2 computer entertainment
system. You can load saved SOCOM II: U.S. Navy SEALs game data from the same
card or any memory card containing previously saved data. See “Creating a Network
Configuration” on page 27.
®2)
NETWORK ADAPTOR (ETHERNET/MODEM) (FOR PLAYSTATION®2)
In order to play SOCOM II: U.S. Navy SEALs online, you must have installed a
Network Adaptor (Ethernet/Modem) (for PlayStation
computer entertainment system before playing. Set up the Network Adaptor
according to the instructions included in its packaging.
Caution: Unplug the AC power cord on your PlayStation 2 computer
entertainment system before adding any networking equipment to the system.
Note: SOCOM II: U.S. Navy SEALs must be played over a broadband internet
connection (DSL, cable modem, or higher speeds).
45
®2) on your PlayStation 2
HEADSET (OPTIONAL)
The SOCOM headset or USB headset (for PlayStation®2) allows you to issue voice
commands to fellow SEALs and talk with teammates during online games. Connect
the headset to either of the USB (Universal Serial Bus) connectors located on the
front of your PlayStation 2 computer entertainment system with the USB symbol on
the plug facing UP.
Page 5
3
button
button
button
button
directional
buttons
left analog stick
(L3 button
when pushed down)
L2 button
L1 button
R2 button
R1 button
SELECT button
START button
right analog stick
(R3 button
when pushed down)
ANALOG mode switch
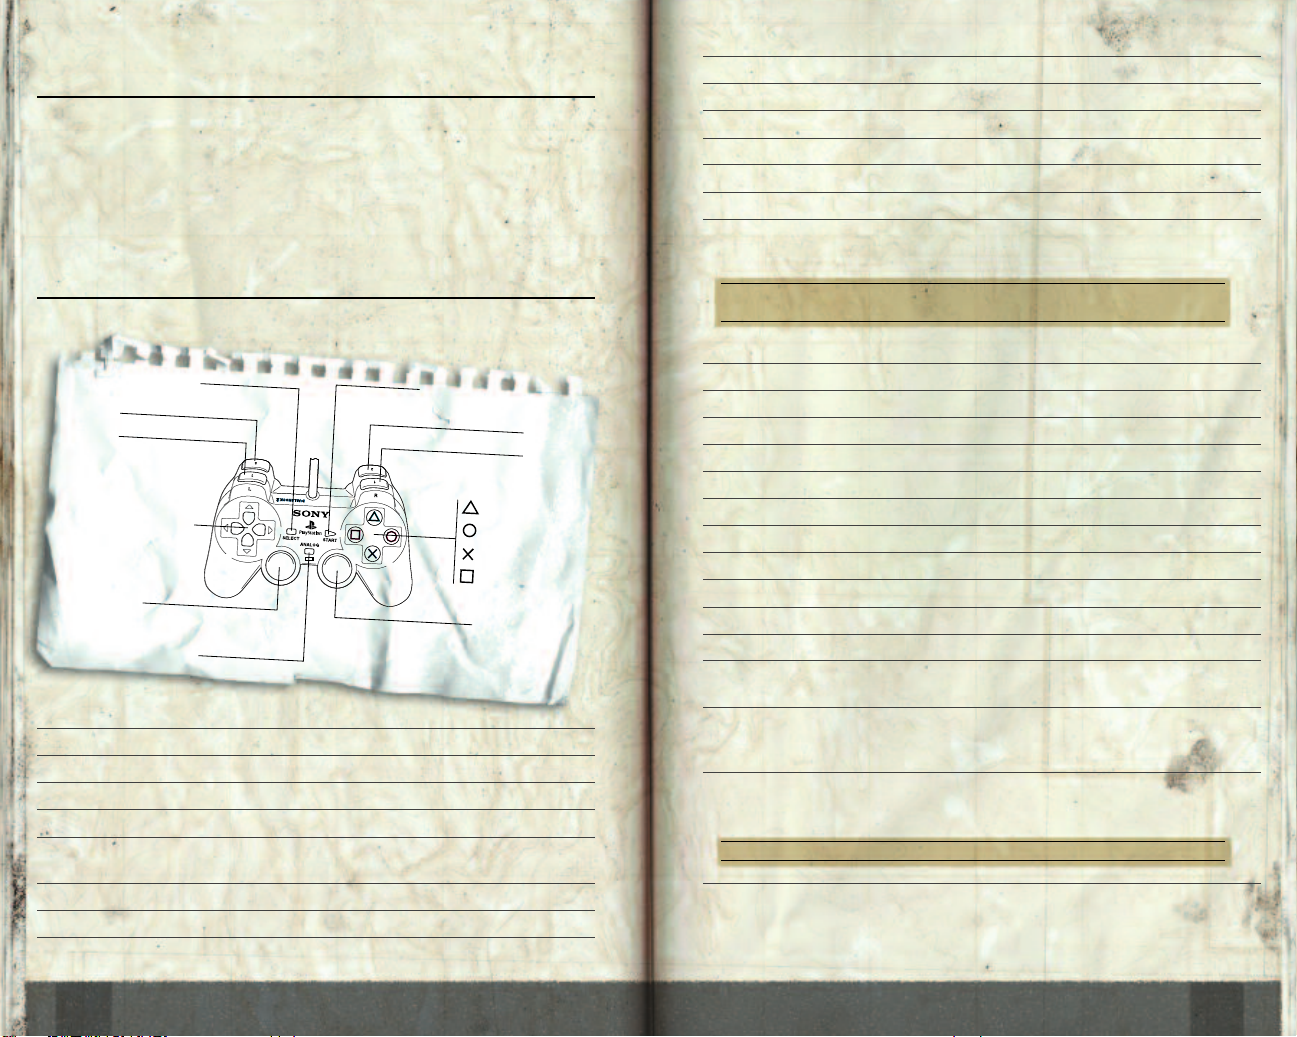
CONTROLS
DUALSHOCK®2 ANALOG CONTROLLER CONFIGURATION
MENU CONTROLS
Highlight menu item directional button or left analog stick
Select highlighted menu item directional button or left analog stick + x
Previous screen/Return to Main Menu t
Pause game w
Utilize team command menu (with headset) c + voice
Utilize team command menu
(via controller) c + directional button 1/2
Open team command sub-menu x or c
Highlight tactical command on sub-menus directional button 1/2
Execute command x
Cycle through Weapons/Equipment d + directional button 1/2
Select Weapon/Equipment d or x
Open/close tactical map q
Move map (Briefing Room) directional button or left analog stick
Zoom map in/out (Briefing Room/in-game) right analog stick 1/2
Move map (in-game) left analog stick
SEAL MOVEMENT AND ACTIONS
Note: These are the default precision shooter controls. You can change
controls on the Options Menu.
Move SEAL left analog stick
Aim weapon/look right analog stick
Move sideways left analog stick 4/3
Change body position (stand, prone, crouch) t (press hard to go prone)
Jump s
Dive run + t firmly
Peek around corner directional button 4 or 3
Fire/throw/deploy weapon r
Equip primary weapon or l quick select l
Equip secondary weapon or , quick select ,
Toggle weapon to semi/full auto press L3 twice or hold
Reload weapon R3
Toggle special action icons Hold
Toggle perspective, directional button
3rd person, 1st person, binoculars, weapon scope,
nightvision goggles (when available)
Cycle through teammates during online play directional button
Note: You will be able to do this in Spectator mode as well.
x + directional button
4/3, then release
1/2
1/2/4/3
after you are out of action
67
Page 6
4
USING THE HEADSET
LISTENING
You hear three different types of communication during single player games:
• Team member communications which include acknowledging your orders or giving
situation reports including kills, warnings and personal status.
• Objective status reports and new intel important to the mission.
• Warnings when you drift out of the mission area.
5
Note: SOCOM II: U.S. Navy SEALs is designed to issue voice commands
via the SOCOM headset or USB headset (for PlayStation
headset is optional. You can also issue commands using button controls.
Use the headset to:
• Issue voice commands to your SEAL team during single player missions.
• Receive Commands and Intel updates from SOCOM during single player missions.
• Conduct 2-way conversations with other players during Online Games. See “Online
Communication” for information on headset usage.
®2). However, the
ISSUING VOICE COMMANDS (SINGLE PLAYER)
To send a voice command to your team, first press c to open the command menu.
Say the command exactly as it appears on the menu out loud until you become
comfortable with them. A command consists of three basic components spoken with
a normal voice into your headset microphone:
1. Say WHO you are commanding—This is the first part of a command and the first
menu you see displayed on-screen. Say “FIRETEAM” if you are directing an order
to all three members. Say “BRAVO” if you intend to issue an order to only the
two members of Bravo Element. Say “ABLE” if you want only your partner to take
action. Say “ESCORTEE” to direct an order to someone traveling with your team.
Note: Other names will appear for various characters that can travel with
your SEAL team in later missions.
2. Say WHAT you want done—This is the second part of
the command to communicate what you want done.
The menu will appear to prompt you.
3. Say WHERE or HOW you want the order carried out—
in some cases you need to further define your order.
It may be a map location or the type of explosive you
want deployed. See “The Commands” section to view
all the commands you can issue to your team.
ISSUE COMMANDS USING
BUTTON CONTROLS
Alternatively, you can issue commands using buttons.
1. Open the team command menu, and press
2. Designate WHO will receive the order. Press the directional button
select TEAM, ABLE, or BRAVO.
x to open the sub-menu for the highlighted command, then press x
3. Press
again to execute the command.
c.
1/2 to
98
Page 7
6
Run to
SEALs run to a designated position.
Lead To
Use this command to decide whether Able or Bravo will take point when moving
from one objective to the next. Bravo unit leads only if you are within a certain
distance of them. If you are outside that distance they will wait until you are in
range to begin leading again. Able teammate Jester will take the lead but change to
“Following” if you drift too far from him.
THE COMMANDS
(SINGLE PLAYER)
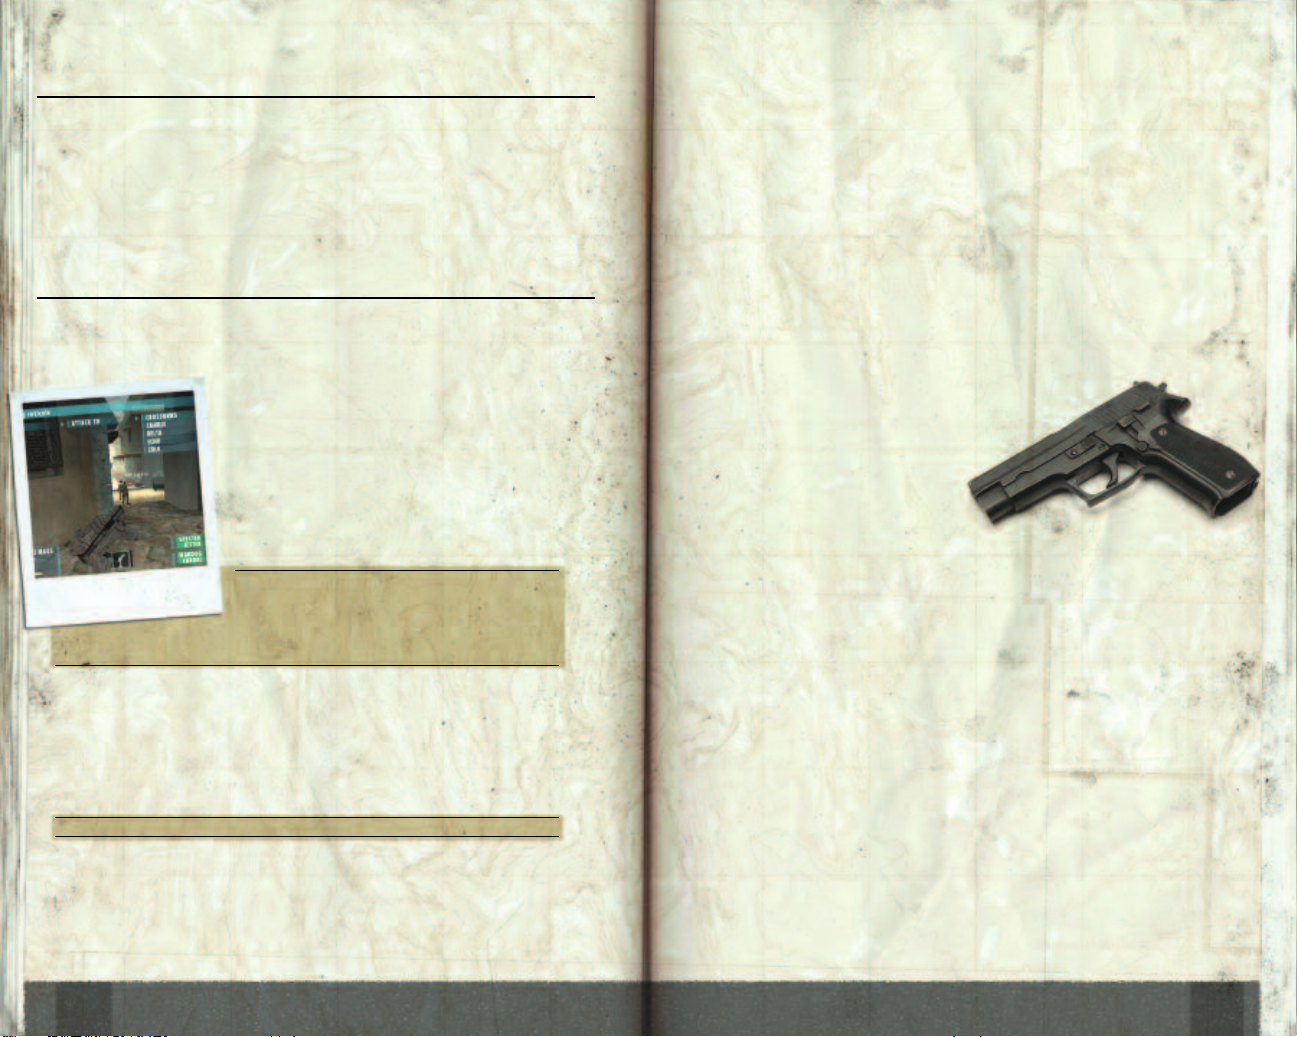
MOVEMENT AND POSITION COMMANDS
Use movement and position commands to specify exact positions or map coordinates.
Using the Crosshairs as a Pointer
Use the crosshairs to send team member(s) to a position
or alert them to something at a specific location.
Position the crosshairs on the point of interest and
issue your command finishing with the word
“Crosshairs.” For example, place your crosshairs over
an enemy and issue the command “BRAVO…ATTACK
TO…CROSSHAIRS.” Bravo will move into position
and attack the enemy.
Note: Your crosshairs do not have to be on an
enemy to execute an “ATTACK TO” command.
even the ground, and your teammates will move to that position,
attacking any targets of opportunity they see.
Using Nav Points
Nav Points are map coordinates marking key positions in your op area and are created
prior to insertion. They are always Charlie, Delta, Echo, Foxtrot, Juliet, Romeo, Whisky,
X-Ray or Zulu. View them on the Tactical Map display by pressing
analog sticks to navigate and zoom the map. See “TacMap and Mission Objectives” for
detailed instructions on using the Tactical Map.
Your crosshairs can be on a door, building or
q and using the
Attack To
Designate who will advance to a specified position, while firing at any enemy
encountered. If using the crosshairs to point at an enemy, your team will attempt
a shot instantly.
Stealth To
Advance as quietly as possible in a prone position while taking advantage of the
terrain, structures or foliage to minimize the chance of discovery.
Hold Position
Hold position until commanded otherwise.
Regroup
The team will move to your position.
TACTICAL COMMANDS
Fire At Will
SEALs will fire on any enemy encountered.
Deploy
Use explosive weapons. If your SEALs are equipped with grenades, C-4 or satchel
charges, they will respond.
Cover Target
Give the command to cover a specific point. Enemies entering that zone will be
fired upon. Place your crosshairs on the location and issue the command. Your
SEALs must have visual contact on the specified area to carry out this order.
Hold Fire
Hold fire until you countermand the order.
Note: Moving to a specific point during a mission may be a required objective.
Follow
You take point and the team follows behind you and assumes your body position.
For example, if you advance in prone position, they will too.
10
Overwatch
Teammates will cover a designated area, calling out any enemies that they see.
Place your crosshairs on the location and issue the command.
Frag/Clear
Deploy a fragmentation grenade and clear the breached area.
11
Page 8
Bang/Clear
Deploy a flashbang and clear the breached area.
Breach
Open door, deploy grenade and clear area on other side.
ONLINE
Connect to the Internet to play SOCOM II: U.S. Navy SEALs Online. You must be
connected via broadband service (either DSL, cable
modem or higher speeds) in order to play online. See
“Playing the Online Game” on page 33.
Escort
When traveling with an escortee who needs protection, give this command to Bravo
Element and they will bring the escortee with them, and follow additional commands.
7
STARTING THE GAME
While loading, the game will search for SOCOM II: U.S. Navy SEALs game data on
any memory card inserted in your PlayStation 2 system. To continue, press
x.
8
MAIN MENU
Press the directional pad or left analog stick 1/2 to highlight an option and press x.
NEW GAME
Begin a new single player game.
LOAD GAME
Load a saved SOCOM II: U.S.
Navy SEALs game. See “Saving
and Loading Game Data” on
page 41.
LAN
Play on a local area network through an Ethernet
connection. Each player must have a PlayStation 2
system equipped with a configured Network Adaptor
(for PlayStation
SEALs to play.
®2) and a copy of SOCOM II: U.S. Navy
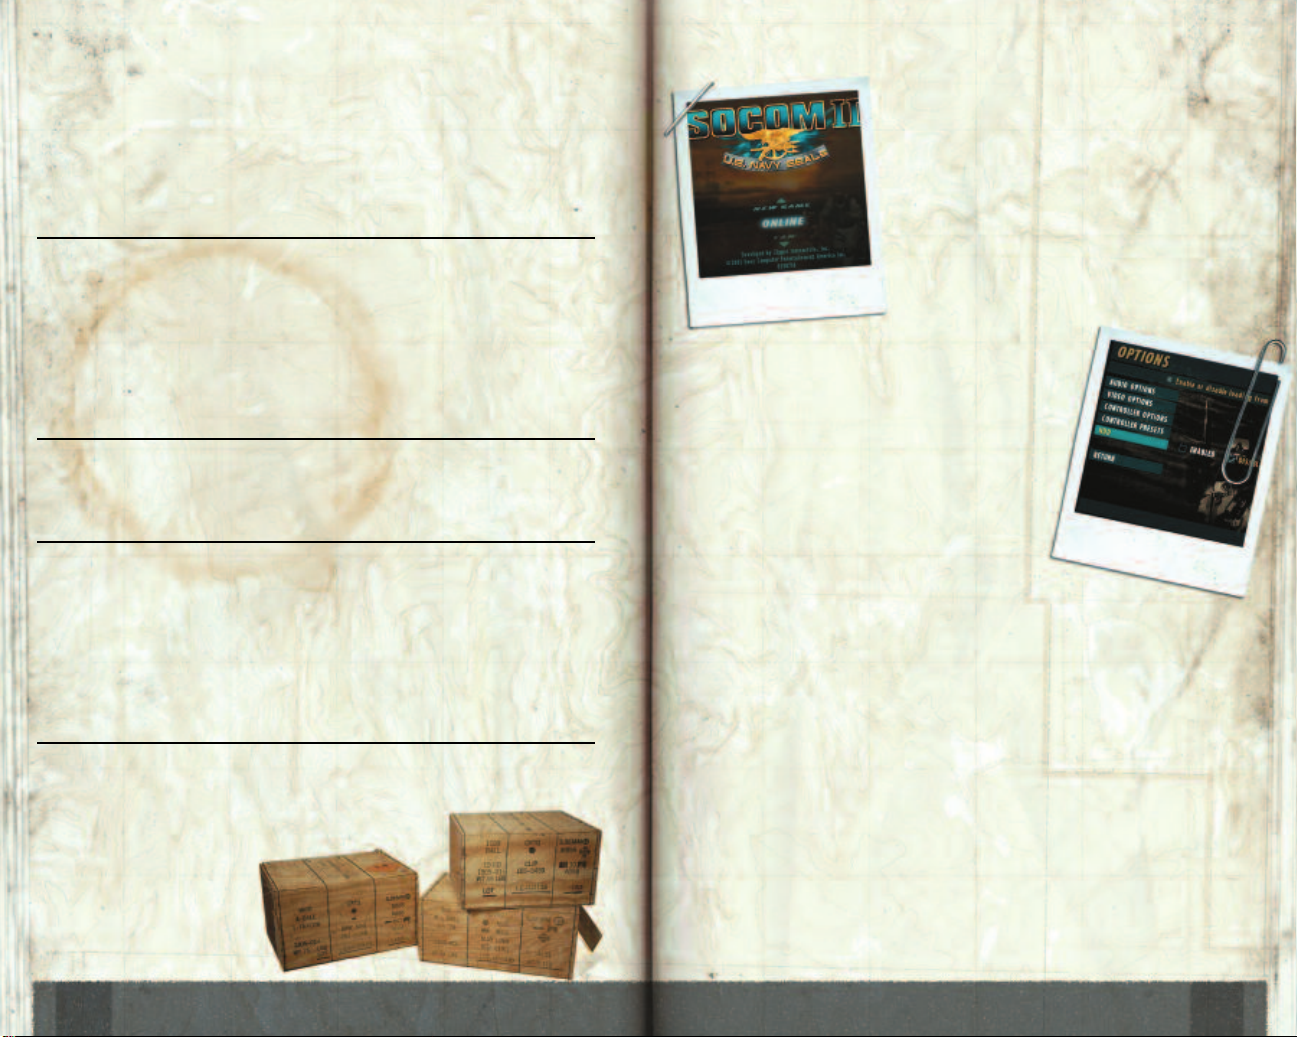
OPTIONS
Set game options.
Audio Options
Music Volume—Set the level of background music.
Sound Volume—Set the level of sound effects.
Dialog Volume—Set level of spoken words.
Sound—Set STEREO or MONO to match your
television or sound system.
Default—Reset everything.
Video Options
Brightness—Set the brightness of the screen
image.
Video Mode—Set to INTERLACED or
PROGRESSIVE SCAN (480p) to match your television.
Hard Disk Drive
SOCOM II: U.S. Navy SEALs supports the Internal Hard Disk Drive (for
PlayStation
SOCOM II you must first purchase an HDD and install it into your PlayStation
console according to the instruction manual provided with the HDD. Once the HDD
is installed you must “enable” HDD functionality in SOCOM II on the SOCOM II
Options screen. Select the “HDD” option on the SOCOM II options screen and then
select “ENABLED”. Exit the options screen and save your preferences to the memory
card (8MB) (for PlayStation
Downloadable content for SOCOM II will be made available through the HDD. After
HDD support in SOCOM II is enabled, you must first download the SOCOM II
content before you can use it in the game.
HDD available March 2004*
®2) with downloadable content. In order to use downloaded content in
®2
®2).
EXTRAS
View and select extras that you have unlocked while playing the game.
*Launch date subject to change.
12
13
Page 9
9
10
SINGLE PLAYER TEAM
STRUCTURE AND MOVEMENT
The Team you command consists of two elements:
• Specter (You) and Jester are Able Element.
• Wardog and Vandal are Bravo Element.
The SEALs in Bravo operate close together and execute your orders as a pair. You can
send them almost anywhere in the op area, giving you flexibility in suppression of
enemy forces, ambushes and extraction of personnel.
You can send Jester a short distance from you to execute some orders, but one of
his primary jobs is to cover you, so he will never travel too far from your position. If
you move away from his position, Jester always joins up with you.
OTHER SPECIAL FORCES
During certain missions, your Bravo Element will be replaced with special forces
from other allied countries.
THE MISSION BRIEFING
View your mission orders, arm your team and start your mission from here.
OVERVIEW
This summarizes your orders with a general mission description, including
intelligence, target specifics, and diplomatic concerns.
MISSION DETAILS
Read this for additional intel gathered by intelligence agencies or people at the
mission location. You may also learn of informants or agents within the op area who
can help your fireteam accomplish the mission.
OBJECTIVES
These objectives appear in the order that they should be executed. You will be
notified of additional objectives by SOCOM as they become necessary.
MAPS/INTEL
View the mission area and/or other important intel for the mission.
• Pan with the directional button or left analog stick.
• Zoom using the right analog stick
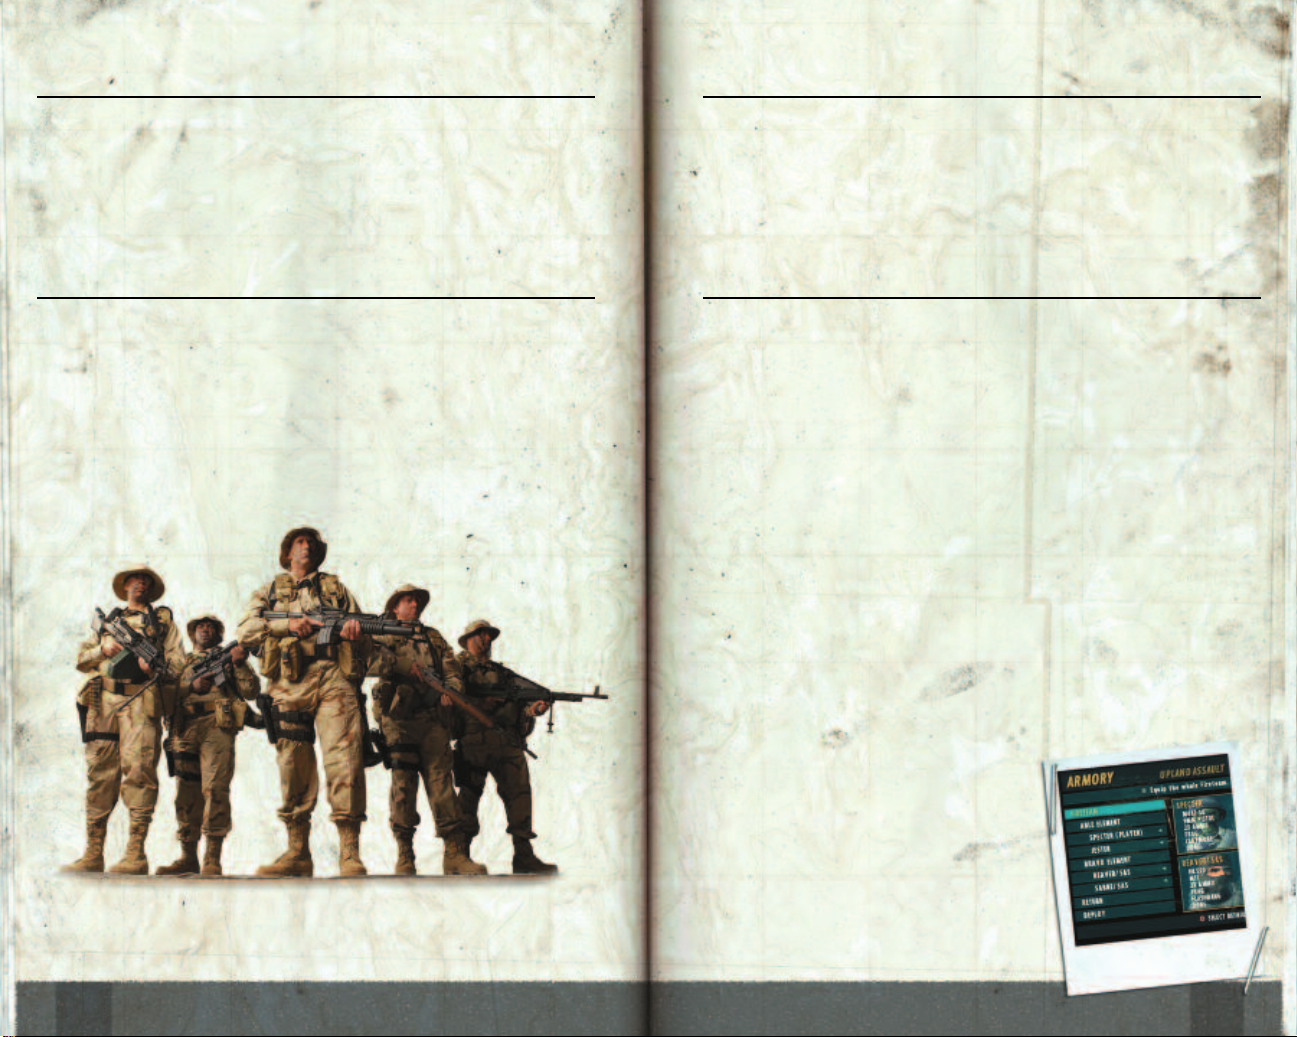
ARMORY
Your team is already armed with default weapons.
However, you can review or change weaponry
and equipment for any fireteam member here.
Change weapons and items for a single SEAL
element or the entire team.
1. Select the fireteam, element or individual SEAL.
2. Select PRIMARY (rifles, machine guns),
SECONDARY (pistols) or EQUIPMENT (includes
grenades, ammo, mines, explosives and rocket
launchers).
1/2.
14
15
Page 10

3. Press the directional button 4/3 to display weapon/equipment choices. Press x
to select the displayed weapon/equipment.
t or select DONE and press x to save your selections and return to
4. Press
Armory character selection.
See the Online Armory for information about online weapon and item selection on
page 37.
11
THE SINGLE PLAYER GAME SCREEN
Crosshairs/Weapon Sight
Use the crosshairs or other sights to aim weapons. The
crosshairs appear whenever you are holding a firearm,
including rocket propelled grenades or rockets. A
grenade sight appears when you arm yourself with any
grenade.
• “Crosshairs” is a “WHERE” option when sending
your team to positions. This is the most precise way
of positioning your team or pointing to something of
tactical interest.
Note: Also see “The Online Game Screen” on page 38.
Compass
• You are always in the center of the compass.
• North is indicated by the letter N on the compass.
To view a legend explaining each symbol that appears on the compass, press
then press
See “TacMap and Tracking Mission Objectives” for a more detailed battlefield view.
d.
Crosshairs
Team member status
Compass
q,
16
Team Member Status
Status includes current activity and health of each team member.
Activity is listed next to the team member’s name.
Examples: If you issued the order to Bravo: STEALTH TO CHARLIE, the word
TRAVELING will appear next to both Bravo element operators. If you issued an
ATTACK order, the word ENGAGING appears when they start firing.
Health is shown by the green bar under each SEAL’s name. When a SEAL is injured,
the green bar will decrease and become red. When the green bar disappears and
becomes fully red the SEAL is incapacitated.
17
Page 11

12
TACMAP AND TRACKING
MISSION OBJECTIVES
KEEP TRACK OF MISSION OBJECTIVES
Each mission has objectives established by SOCOM prior to deployment. Track the
status of each mission objective here. The original objectives match those you see
during the Mission Briefing, but additional objectives can be added.
• Select an objective and press
location with a brief set of orders.
• A checkmark appears next to completed objectives.
• Failed objectives are grayed out.
x to view an intelligence movie of the objective
Use the TacMap to navigate the area and keep
track of the mission specifics. Press
TacMap/Mission Objectives screen. The Tactical Map
and Mission Objectives contain all current objectives
and intelligence about the operational area.
w to open the
USING THE TACMAP
• Press the left analog stick to move the
map view.
• Press the right analog stick
the map.
d to review the legend which shows
• Press
key map symbols.
c to center your view.
• Press
Your Positions
You appear on the map as a cone of light with a circled letter A (Able Element), just
as if you were shining a flashlight in the direction you are facing. Bravo Element
appears as the circled letter B.
Mission Path
Follow the green line to complete the mission as planned. The path is created
based on known objectives. A mission path will not be available for every objective
or mission.
Nav Points
Nav Points mark key locations within the op area. Use these geographical reference
points to issue commands. See “Using Nav Points” for more info on commands.
Structures
Move through the op area using these as navigational aids.
1/2 to zoom
Structures
Your position
Nav points
Mission path
18
19
Page 12

Body Carry
Avoid discovery by hiding enemy bodies or downed teammates.
13
SPECIAL ACTIONS
Special action icons appear at the bottom of the screen when some immediate task or
item close by needs attention. For example: if there is a rifle next to a fallen enemy, a
Special Action icon appears giving you the option to pick it up.
x to execute the highlighted special action.
• Press
• Press and hold
icons appear to select the action you want to perform. Release
the selected action.
Pick-up Weapons
Downed enemies may have useful weapons or ammo. Use
Special Action icons to exchange your current weapon for
the one you pick up. A Rifle Icon appears for primary
weapons and the Pistol Icon appears for secondary
weapons. Note the name of each weapon below the icon.
Pick-up Items
Point the crosshairs at items of interest. They may be vital to your
mission and you may have the option of picking them up.
Mount/Dismount Turret
Machine guns and grenade launchers are sometimes turret
mounted. You cannot pick them up but you can take
control and fire them. There are two icons for Turret Mount,
one to grab the gun and one to let go.
x, then press the directional button 4/3 when multiple
x to perform
Climb Up/Down
Climb up ledges or ladders.
Ladder Slide
Slide down ladder for faster descent.
Close Quarters Combat
This option appears when an enemy is at arm’s length giving you the
opportunity to nail him with the butt of your weapon.
Place Bomb
When the mission requires that you position a satchel charge for
demolition, this icon appears.
Place C-4 Charge
Place a C-4 charge and set detonator.
Restrain Hostage
An enemy may surrender or a rescued hostage might need to be tied up
for transport.
Follow/Hold Position/Get Down
The Follow, Hold Position and/or Get Down Icons appear when you aim
your crosshairs at a person under your protection, press
person the selected command.
x to give the
Open/Close Door
This icon appears when you face a door that is unlocked.
20
21
Page 13

Use a Rifle Scope
Press the directional button 1 to zoom in the scope on a rifle. Scope performance
and power is different depending on the weapon in hand. You are a steadier shooter
from a crouched or prone position.
14
USING WEAPONS
Change Weapons
• Press l to select your primary weapon (or l quick select).
, to select your secondary weapon (or , quick select).
• Press
• To select an item from the inventory, press
press the directional buttons
select the item.
• When holding an RPG, you will automatically change to a rifle or handgun
if you move.
Note: For online play, when you are killed in action, you can change weapons
before the next round begins. Press
the directional button
to select, and 4/3 to display the options. Press x to select the new weapon.
Set Weapon Quick Select
l and , can be set to any equipment in your inventory, not only your primary
and secondary weapons. To set
Then highlight the equipment or weapon you want to set and press
Set Weapon Fire Mode
Many assault weapons have multiple firing modes ranging from semi-automatic
single shot to a three shot burst or more. To switch firing modes, press L3 (press
the left analog stick in like a button) twice or hold it. The Bullet Icons will increase
or decrease depending on the setting.
1/2 to highlight an item. Press d or x to
1/2 to select the weapon (or item) to change, press x
l or ,, press d to open your inventory.
d to open the inventory screen and
d to display the armory screen. Press
l or ,.
Throw a Grenade
To throw a grenade, press d to open the inventory, select a grenade and press x
or d again to display the grenade sight. Use the right
analog stick to set the trajectory of the grenade lob, then
r. Pressing harder on r will increase the
press
distance of the lob.
Don’t Forget—If one of your team has a better
position for a grenade toss, give the DEPLOY order
in single player games.
Set a Claymore Mine
To set a Claymore:
1. Select it from your weapons cache.
2. Determine the location you want to cover and
place the mine by pressing
3. The remote control detonator will appear in your active weapon
slot. Press
4. To plant multiple mines plant one mine then press
Select the claymore mine again and plant your next mine. Repeat this process
for as many mines as you have in your inventory. To simultaneously detonate all
mines select the detonator from your inventory and press
Plant a Pressure Mine
1. Select it from your weapons cache.
2. Press
It will detonate when a player steps on it.
r to detonate the mine.
r to place the mine.
r.
d to open your inventory.
r.
Note: The firing mode must be switched to use M203 grenade launcher
equipped weapons.
Reloading
Reloading is automatic as long as you have ammo for the weapon in hand. Manually
reload your weapon by pressing R3.
Aiming a weapon
Use the right analog stick to aim a weapon.
22
23
Page 14

15
16
SINGLE PLAYER MISSION SUCCESS
The success of your mission is measured by several factors. Perfection for any factor
is 100% for completing all objectives. You are graded from A to F.
STEALTH
One thing that makes SEALs deadly is their ability to strike undetected. Each time
your team is discovered and the enemy communicates your presence to others, you
lose points for stealth.
ACCURACY
Hitting targets increases your accuracy ratings, while missed shots lower it. The
accuracy of your teammates is also counted
TEAMWORK
Use your team for cooperative engagements. The more you use your teammates
during the course of a mission, the higher your Teamwork rating will be.
PRIMARY OBJECTIVES
These are the most important Mission
Objectives and have the largest impact
on mission success. Primary objectives
must be completed to accomplish a
mission.
SINGLE PLAYER MISSION FAILURE
Your mission fails under the following conditions:
• You are incapacitated.
• A mission critical character, such as a
hostage or escortee, is killed.
• A mission critical target escapes.
• A key ally is killed.
• You abort a mission.
• All three of your SEAL teammates
are incapacitated.
SECONDARY OBJECTIVES
You can fail a secondary objective and
still succeed at the overall mission, but
failed secondary objectives lower your
overall grade.
24
25
Page 15

17
18
THE PAUSE MENU
Press w to pause gameplay and display the Pause
Menu. Press
option.
RESUME
Continue the current mission.
VIBRATION
Turn ON/OFF.
FIREMODE AND TACMAP
Swap buttons used for Firemode and TacMap.
ABORT
Quit the current mission, resulting in Mission Failure. Stats for the completed
portion of the mission will appear.
INVERT PITCH
Turn ON/OFF to change aiming with the right analog stick.
HELP
Turn pop-up windows that appear to give you advice ON/OFF.
AIM ASSIST
Aim Assist places red brackets over a hostile target when your crosshairs are close
to their position. To turn ON/OFF, automatically aim in the direction of that target
when you fire.
REPLAY MISSION
Start the mission over from the insertion point.
x to change a setting or select an
SOCOM II ONLINE
For more intense combat, select ONLINE from the Main Menu. Team up with other
SOCOM II: U.S. Navy SEALs players and compete as a SEAL unit or a Terrorist force.
• A memory card (8MB) (for PlayStation
required to play online. See “Creating a Network Configuration” for instructions.
• The online game is broadband only. You must connect through a DSL, cable
modem, higher speed internet connection or a Local Area Network.
• To talk directly to teammates during games, use the optional SOCOM headset or
USB headset (for PlayStation
“Using The Headset” on page 8.
CREATING A NETWORK CONFIGURATION
Note: If you have already created a valid network configuration using the
PlayStation
for another online PlayStation 2 game and have the memory card containing
that configuration in your PlayStation 2 console, skip this section and review
the remaining sections.
Before you can play SOCOM II: U.S. Navy SEALs online, you must have a valid
network configuration saved to a memory card. If you have already created and
saved a network configuration using the PlayStation
Disc, you are good to go. If not, you can use the Network Configuration application
on your SOCOM II: U.S. Navy SEALs disc.
Note: For more detailed information on creating a Network Configuration,
see the PlayStation®2 Network Adaptor Start-Up Disc Instruction Manual.
To Create a Network Configuration using the application on the SOCOM II: U.S. Navy
SEALs disc, have your Internet Settings ready for reference and follow the steps below:
1. Make sure a memory card is inserted into a Memory Card slot on your
PlayStation 2 system.
2. From the Main Menu select ONLINE. The Login to SOCOM II Online screen will
appear with a prompt stating that there is no Network Configuration. Press
®2 Network Adaptor Start-Up Disc or network start-up application
®2) with a valid network configuration is
®2). See “Setting Up Your Console” on page 4 and
®2 Network Adaptor Start-Up
x.
26
27
Page 16

3. Select EDIT NETWORK CONFIGURATIONS to start
the Network Configuration application.
• Press the Directional button
menu option, then
advance to the next screen.
• If you change your mind about a setting, press the
directional button
screen.
4. Select ADD SETTING and select MEMORY CARD Slot 1
or 2.
5. Select Hardware. Select SCE/ETHERNET (NETWORK
ADAPTOR). If you are using a different type of network adaptor, please consult
its manual.
t to open the Advanced Setting Menu if necessary. It is highly
• Press
recommended you leave this setting on AUTO
DETECT unless you are sure of a different setting.
6. Select OK at the prompt and proceed with entering
settings. Are a User ID and password required to connect
to the internet through your ISP (Internet Service
Provider)? Select REQUIRED or NOT REQUIRED. If
required, enter the User ID and password.
Note: Some ISPs require a username and password
for e-mail but allow you to connect to the internet
without them.
7. Set the IP Address if needed.
• The usual setting is AUTO and you are not required to
enter the IP Address which is automatically assigned using DHCP (Dynamic
Host Configuration Protocol). However, a DHCP host name may also be
required. If so, press
• If your ISP requires a “static IP address”, select MANUAL and enter the
address. You must also enter the Netmask and possibly the address of the
Default Router. Check with your ISP if you are not sure about any of these
numbers.
8. Set the DNS Address if needed. The usual setting is AUTO and you are not required
to enter the IP Address of the Domain Name Service. If
required, select MANUAL and enter primary and
secondary addresses.
9. On the Name Your Setting screen, press
the Virtual Keyboard if you want to give your Network
Configuration a specific name. Press the directional
3, then press x to save your new setting with
button
the default name. You will be prompted to “Test the
Connection” prior to exiting the Setting Guide Mode.
This is optional, but recommended.
3 to accept settings and
4 or c to return to the previous
1/2to highlight a
t to open the advanced setting and enter the host name.
x to display
19
ONLINE COMMUNICATION
USING THE ON-SCREEN KEYBOARD TO ENTER
DATA AND CHAT
When data entry is required, the on-screen keyboard
displays automatically. To chat press
Online Keyboard.
• Press the directional button or left analog stick to
highlight a key, then press
character in the field.
s to backspace.
• Press
r to toggle Caps Lock.
• Press
• Select ENTER or press
t to close the keyboard without transmitting or entering data.
• Press
Note: You can use a USB keyboard to enter data and chat. Press ENTER on
your keyboard to activate it in data entry or chat situations.
c to enter data or transmit chat.
TEXT CHAT DURING MISSIONS USING THE CHAT MENU
Tap c to open the Chat Menu. Press the directional button to highlight a chat
menu option and press
Tactical Orders
Select tactical commands that appear on-screen.
Taunts
These are preset vocal taunts and
customizable text message taunts you
can direct at the opposition.
Radio
Select an Active channel for voice
communication using the headset. See
“Using the Headset Online” on page 30.
x to transmit the message.
c to open the
x to select and enter the
28
29
Page 17

Teammates
This shows you a list of your teammates. After selecting a teammate you have
the option to either mute his voice chat or enter a vote to remove that teammate
from the game.
Messages
These are customizable messages you can direct to teammates.
Note: Customize Tactical and Taunt messages by selecting Options on the
SOCOM II Online screen and selecting SETUP MESSAGING or SETUP
TAUNTS. Select one of the default messages and change it using the
Virtual Keyboard or USB keyboard.
USING THE HEADSET ONLINE
Communication with your team is the key to victory.
Use your headset for voice communication with your
team during gameplay. Enemy players cannot hear
your team’s communications.
Communicate with online teammates over
five channels. Tap
the Chat Menu, then select the channel you
want to speak over.
Team—Say something to all team members.
Offense—Communicate with other teammates
on the Offense Channel.
Defense—Communicate with other teammates on the
Defense Channel.
Spectator—Communicate with other spectators when in that mode.
Dead—Get killed and talk to other dead teammates.
On/Off—Toggle voice chat on/off.
The Who’s Talking Icon will appear when someone is communicating.
c and select RADIO from
To speak:
1. Press and hold
the Comm Icon appears at the bottom of the screen.
2. Speak normally and keep it brief. Transmit a message
of 10 seconds or less. Minimize line chatter to give
everyone a chance to communicate. Release
when done.
c until you hear the ready tone and
c
20
GET CONNECTED
TO SOCOM II ONLINE
The online portion of this game is subject to the terms and conditions under the
User Agreement located within the game. A full copy of the User Agreement is
available at www.us.playstation.com/support/useragreements.
1. On the Main Menu select ONLINE.
2. Select LOGIN to connect to the Internet.
3. On the Select Universe Screen, select a Universe to connect to the SOCOM II
Online screen.
4. Select PLAYER NAME and NEW PERSONA. Enter a screen name and select
ENTER. Select PASSWORD, enter a password, then select ENTER. Select
HOMETOWN. Enter the name of your Hometown, then select ENTER.
Highlight GENDER and press
You are not required to enter your GENDER or
HOMETOWN to create a persona or play online.
Note: Be sure to write down or remember your
password. Lost passwords cannot be retrieved by
SCEA Consumer Services. If you lose your
password, create a new player name and
password for online play.
5. Select CONNECT. When prompted to write down
name and password info, press x.
6. When prompted to save to a memory card, select
YES if you want to save your password. This is
highly recommended.
7. If the player name you have selected is available you
will be prompted to register that name. Press
If you receive an incorrect password error, someone has already registered that
player name and you must select a new one. After registering your player name,
please read the User Agreement and select “AGREE” if you agree to the terms.
You will then connect to SOCOM II Online.
x to toggle to your gender.
x to register the player name.
30
Note: You must agree to the terms of the User Agreement in order to
connect to SOCOM II Online.
31
Page 18

8. On the SOCOM II Online screen, select BRIEFING ROOMS. Press the directional
button or left analog stick to select a briefing room you would like to enter and press
x. Highlight JOIN GAME, then press x to select a game from the list and enter the
Game Lobby. If you receive notification that the game is already in progress, press
x to go to the Game Lobby. Select READY in the game lobby and press x. If the
game is already in progress, you will join the game when you select READY. If in
between games, selecting READY indicates that you are ready to play.
Note: Select WATCH GAME to enter the game in spectator mode.
21
PLAYING THE ONLINE GAME
ONLINE MISSION TYPES
As you cycle through Game Lobbies on the Briefing Room screen, check under
Game Details on the lower left side of the screen. The mission type appears at the
top of the list to help you decide which game to join.
Breach
SEALs attempt to break through barriers and destroy key targets in a terrorist
stronghold. Terrorists use their fortifications to prevent the SEAL incursion. Air
strikes are available on BREACH maps.
Demolition
Find the bomb and blow up the opposition headquarters. Get hold of the bomb and
you become the hunted as enemy troops try to kill you and your team before their
headquarters is destroyed. Lose the bomb and you’re on defense. Plant the bomb in
the enemy base and prevent it from being defused by the enemy until it blows up.
Suppression
This is a pure fight to the death between SEALs and terrorists with a five minute time
limit. The winner has the most men left standing. Suppression maps can be set to
respawn and players will instantly come back to life after being killed to rejoin the fight.
Escort
Key personnel need to be moved to a secure location. SEALs win by getting at least
two VIPs to the extraction point or killing all terrorists. Terrorists win by eliminating
all VIPs or all SEALs.
Extraction
This is a hostage situation. SEALs win by killing all terrorists or escorting at least
two hostages to the extraction point. Terrorists win by killing the SEALs. If the
terrorists murder a hostage, it counts as a rescued hostage for the SEALs.
32
33
Page 19

FINDING A GAME
1. Start your search by selecting a Universe on the Select Universe screen that
appears as soon as you connect. If a Green light appears next to the Universe, it
is online.
2. Connect and select YES on the User Agreement Screen to enter the SOCOM II
Online Screen. From this screen, you have two options for finding a game.
Autoplay
Automatically select a Briefing Room and game for you to
play in. The game is determined by your game filter
preferences. Select INPUT FILTERS from the SOCOM II
Online Options to set your preferences. See “Finding a
Game” on page 34 for more information.
Join manually (Browse through Briefing Rooms and games)
1. Select BRIEFING ROOMS and make a room selection.
2. Select JOIN GAME and scroll through the games to
select the one you want to join.
Use Input Filters to Set Game Preferences
1. Select OPTIONS from the SOCOM II
Online Screen.
2. Select INPUT FILTERS.
3. On the Online Filters Menu, select and change
each Input Filter parameter to the game
description you want and select RETURN when
finished. You’ll have the option to save these
settings to a memory card (which locks your online game
preferences).
4. Select BRIEFING ROOMS and make a room selection.
5. Select JOIN GAME and scroll through the games list based on your filtering
preferences. If the maximum 16 players are already in the game, select a different
game. Or select AUTOPLAY to automatically join a
game based on your filtering preferences.
THE SOCOM II ONLINE SCREEN
The SOCOM II Online Screen is where you
check messages, select Briefing Rooms and set
game options.
• Highlight an option and press
, or directional buton1/2to scroll through
• Press
the list.
Messages
View the news of the day, messages, and clan messages.
l and , to scroll up and down the text.
Press
Briefing Rooms
Navigate through the list of available Briefing Rooms and select one. See “Finding a
Game” and “The Briefing Room” for more information.
x.
Clan
Create and manage a clan.
Player Ranking
Press x to view the top ten online players and the
These rankings are also featured on the web at www.us.playstation.com.
Clan Ranking
Press x to view the top clans and the ranking of all
other clans by scrolling through the list.
Invitations
View and respond to clan invitations you have received.
Refresh List
Updates the Briefing Room List and the number of
players in each game.
Options
Set a player description, select your in-game messages and
set up your online gaming filters.
Add Friends
See page 38 for more information.
ranking of all other players by scrolling through the list.
THE BRIEFING ROOM
From the Briefing Room you can select a game to
join as a player/spectator, create a game or chat with
other players.
Create Game
Create and Host your own game. On the Create
Game Screen, select the options to customize your
game. Make sure you select CHOOSE GAMES to
create a play list of games. When everything is the
way you want it, press
s to create your game.
34
35
Page 20

Watch Game
Spectator Mode is a great way to watch an online game. Study the various maps and
learn from the tactics of other players before joining the action. Scroll through the
available games and make a selection. In the Lobby for that game, your screen name
will appear as a spectator.
Player List
This lists all players in the current Briefing Room.
Select a player from the list and view his or her
Player Stats. When the Player Stats screen is
displayed, press
(or ENTER on a USB keyboard) to send a chat
message to that player.
Refresh list
Select this to refresh
the list of all
games/lobbies within
the Briefing Room.
In/Max—Shows the number of players currently in
the game and the maximum allowed.
Spec/Max—Spectator maximum limit
Game—This is the type of game.
Eligible Ranks—This shows what player ranking is
required to join the game. See “Player Rankings”
on page 39.
Ping—This is the latency for the listed game. A
Green Dot indicates a good connection. A Red
Dot indicates no connection or a bad connection.
Pass—A password is required to join this game.
Clan—This specifies whether the game is a clan match or not.
r to use the Virtual Keyboard
THE GAME LOBBY
Prepare for battle and view the SEAL and terrorist
forces. Players with a green dot next to their name
have signaled they are ready to play. Those with red
dots have not.
Armory
Customize your character’s
appearance and weapons
loadout. First, press the
directional button
to highlight the
character you want.
x to view your
Press
weapon/equipment
loadout.
To change weapons or
equipment:
• Press the directional buttons
the current loadout and
weapon/equipment type. Check out the tips and data
that appears with each highlighted weapon/equipment.
c to return the loadout to default.
• Press
t to return to the character selection screen with
• Press
your selected loadout.
s to store the loadout and character information to the game server.
• Press
A unique loadout can be saved for each online map.
• When you have the loadout the way you want it, select DONE.
Note: Certain character skins for multiplayer are locked and can only be
unlocked through the single player game.
Switch Teams
Switch to the opposing team.
Ready
Select this when you are ready to play.
Not Ready
If you change your mind about team or armory choices after selecting READY, select
this and return to the Armory or Switch Teams.
1/2 to cycle through
4/3 to change the
4/3
36
37
Page 21

FRIENDS LIST
The Friends List helps you chat with other online players or see online status of
friends and find their location. Access FRIENDS from the SOCOM II Online Screen
after you are logged in.
Add New Friend
To add a friend, you have to know his or her screen name and request “friend
authorization” from that person. Select ADD NEW FRIEND, press
screen name, then press
x. A prompt will appear telling you the request has been
sent. Select CONTINUE. When the person confirms you as a friend, your screen
names show on each other’s list.
Message
Send a Chat Message to a friend.
x, enter the
Crosshairs
Use the crosshairs to aim your weapon or point to a teammate to view their health.
• Crosshairs turn green when aimed at friendlies.
• Crosshairs turn red when aimed at a hostile.
• Crosshairs can change depending on the selected weapon.
Health Gauge
The gauge begins to fill with red each time you are injured. As long as green
remains, you can fight. To view the health of a teammate or escortee, aim the
crosshairs at the person and his or her health gauge will appear.
Skull & Crossbones
This indicates that you have died. You can speak on the dead channel, change
weapon loadouts and piggy back on your living teammates.
View Info
View a friend’s lobby location and specific game.
Remove Friend
Select this to display the list of current friends. Select the one you want to remove,
and select YES when prompted to remove the player.
Confirm Friend
Select this to review any friend requests that have been sent to you. To confirm
the request, press
x and select the name you want to accept. Select YES when
prompted.
Reject Friend
Select the one you want to reject, and select YES when prompted to reject the player.
THE ONLINE GAME SCREEN
Shots Remaining
Current Weapon
Crosshairs
Tactical Map
Special Action Icon
Countdown timer
Countdown Timer
Counts down to zero in games with time limits.
Current Weapon
• Press l to select your primary weapon or l quick select.
, to select your secondary weapon (pistol) or , quick select.
• Press
• To select an item from inventory, press and hold
and press the directional button
1/2 to highlight an item. Press d or x to
d to open the inventory screen
select the item.
See “Using Weapons” on page 22.
Shots Remaining
View shots remaining and maximum total for the clip. Press R3 to reload manually.
PLAYER RANKINGS (RANK INSIGNIAS)
Depending on your performance, you can attain any of
five Player Rankings. Online rankings are an
indicator of your skill and experience, but also
determine what Briefing Rooms and games you
can enter. Certain Briefing Rooms are
restricted to specific Player Rankings.
38
Your Health
39
Page 22

CREATE YOUR OWN CLAN
Create and manage a clan of fighters.
1. On the SOCOM II Online screen, select CLAN to open the Create Clan screen and
x (or ENTER on a USB keyboard) to open the virtual keyboard. Create a
press
name for your clan.
2. Select CREATE CLAN.
Managing Your Clan
Once your clan is created, anytime you select
CLAN on the SOCOM II screen, clan management
options will appear.
Edit News
Create or edit clan news that is sent to all
members.
Invitations
Invite or revoke invitations to join your clan.
Remove Players
Remove a player from your clan.
View Info
See Player Stats screen for any player in your clan.
Leave Clan
Before leaving the clan you must appoint a new
leader.
Appoint Leader
Appoint a new clan leader to replace you.
Disband Clan
Disband your clan. This is irreversible.
Clan Tag
Create or edit a 3 character clan tag that appears with your clan name.
22
SAVING AND LOADING GAME DATA
SAVING GAME DATA
You can save game progress data after each successful mission. At the completion
of a mission, review the completed mission data and press
screen will display giving you the option of continuing to the next mission or
returning to the Main Menu. When you make your selection, press
Prompt will appear.
1. Select YES, then press
2. Press the directional button
want to save the game.
You can also save:
• Controller configurations
• Network configurations
• Online username and passwords
• Online map specific weapon loadouts
• Audio/Video options
x to save game data.
4/3 to select the MEMORY CARD slot where you
LOADING GAME DATA
Load any saved game data you have with the load game option.
1. On the Main Menu select LOAD GAME.
2. Press the directional buttons
1/2 to select a file to load.
x. The debriefing
x and the Save
Return
Return to the SOCOM II screen.
40
41
Page 23

CREDITS
Zipper
Interactive, Inc.
President and CEO
Jim Bosler
Chief Technical Officer
Brian Soderberg
Creative Director
David Sears
Art Director
Russ Phillips
Project Manager
Cyrus Kanga
Test Manager
Craig Bradford
Sound Producer
Rick Yates
Programmers
Bob Gutmann,
Multiplayer Lead
Mike Gutmann,
AI Lead
Mark Heinen
Eric Housden
Rick Jarvis
David Korus
Henrik Lind
Troy Mason
Aaron Schneider
Brian Soderberg
Artists
David Kern,
Art Lead
Doug Wilcox,
Animation Lead
Jay Banchero
Dan Henley
Nathan Herzog
Phil Knowles
Scott Luse
Michael Maddux
Mark Nicolino
Arnel Ramac
Terry Schmidbauer
Tom Sternberg, UI Lead
Mike Gladfelter
Dima Veryovka
Victor von Beck
Designers
Graham Kays,
Design Lead
CJ Heine,
Multiplayer Lead
Jeff Betterley
Arnel Ramac
Travis Steiner
Erin Korus
Consultant Programmers
David Blevins
Conrad Albrecht
Consultant Storyboard Artist
Steve Hartley
QA Analysts
Evan Pence,
Multiplayer Lead
John Largis,
Single Player Lead
Dan Matanski
Elizabeth Ingram
Lucas Perez
James Pence
Cade Myers
Jim Vick
Sean Lancaster
Sean Meichle
Lindsay Soderberg
Network Support
Scott Ward
Office Support
Holly Salmonson
Test Support
Ryan Bosler
Dan Soderberg
Special Thanks
Rick May
John Cizin
Eugene Evans
Sony Computer
Entertainment
America Inc.
PRODUCT DEVELOPMENT
Senior Producer
Seth Luisi
Associate Producer
Shawn Torin Rettig
Director of Product
Development
Connie Booth
Vice President of Product
Development
Shuhei Yoshida
Product Development
First Party QA Group
Director
Michael Blackledge
Test Team
Senior Manager
Ritchard Markelz
Test Manager
Sam Bradley
Bill Person
Game Test Engineers
Andrew E. Stein
Christian Low
Assistant Leads
Samir Gupta
Jason Tonick
Freeman Chu
Analysts
Joe Mazel
Cecil McGriff
Dave Looby
Donald String
Larry Heminez
Tomasi Akimeta
John Michael Adams
Andrew Mirelez
Justin Paek
Laird Rishworth
Sirikul “Mee”
Samadthasinwanich
Nathan Carbino
Sean Daniel
Gabe Ausiello
Will Shepard
Aaron Safronoff
Dave Kellum
Owen Nelson
Victor Tong
Alexandra Fonseca
Chris Chambers
Christian Buquid
Keith Vedol
Robert String
Post Deployment Test Team
Analysts
Mat Zahuer
Chris Cromwell
Mike Gallina
Masa Ogasawara
Technology Team
Technology Manager
Kevin Simmons
Lab Technician
Ara Demirjian
Desk Support
Corey Strock
Web Support
Tim Brown
Database Administrator
Christian Davis
Project Management Team
Project Coordinator
Jason Villa
Release Coordinator
Eric Ippolito
Product Development
Services Group
Director
Dwayne Mason
Motion Capture Group
Motion Capture Manager
Brian Rausch
Motion Capture Project
Coordinators
Scott Peterson
Jerry Ashworth
Motion Capture Technology
Supervisor
Percy Sagun
Motion Capture
Animation Lead
Chad Moore
Motion Capture Animators
Brian Phipps
Frank Strocco
Michael Graessle
Eryn Roston
Motion Capture Specialists
Johnny Walker
Jake Wilson
Travis Parks
Motion Capture Studio
Supervisor
James Scarafone
Motion Capture Studio
Technicians
Daniel Legg
Ryan Beeson
3-D Scanner Lead
Chip Parsons
3-D Scanner Technology
Supervisor
Tyler Crook
3-D Scanner Technicians
Tony Lui
Doug Hagstrom
Motion Capture Tracking
Supervisor
Michael Shinkle
Motion Capture Tracking
Technician
David Ibarra
Motion Capture Actors
Commander May
Kurt “D1” Olsen
John Cizin
Russ Phillips
David Sears
Jerry Ashworth
Ryan Beeson
Eryn Roston
Rebecca Sashenbrecker
Jenifer Clucas
Jennifer Kacizak
Cinematic Solutions Group
Cinematic Manager
Scott McMahon
Production Supervisor
Brian Johnson
Lead Designer
Ron Padua
Pre-Viz Artists
Lucas Graciano
Mark Hill
Ron Lemen
Vanessa Lemen
Graven Tung
Edwin Ushiro
Jeff Watts
Ben Young
Pre-Viz Support
Gina Cafasso
Ian O’Roarty
CG Supervisor
Greg Jung
Lead Character Technical
Directors
Jason Parks
Chad Moore
CG Artists
Jung-Yoon Choi
Bill Johnston
Hock Wong
Salvador Arditti
Howard Birnbaum
Floyd Bishop
Tom Bisogno
Richard Cheek
David Chiapperino
Eli Enigenberg
Ramahan Faulk
Michael Graessle
Frank Strocco
Shaded Box, United States
Omens Studios, Singapore
Virgin Lands Computer
Animation, Germany
Production Assistants
Janelle Pitchford
Kaori Toda
Nonet Vargas
Editor/Compositors
Aaron McFarland
Devin Olden
Gene Strocco
Jeff Vargas
Tools and Technology
Manager
Brian Dawson
Dev. Tools and Accounts
Administrator
Jason Young
Communications Engineer
David Randolph
Technology Team
Lead Engineer
Wei Xu
Technical Artist
Jason Parks
Tools Team
Lead Tools Engineer
Dan Hilton
Sr. Tools Engineers
David Hubbard
Unni Pillai
Maya Technical
Support Group
Lead Engineer
Rick Harding
Sr. Engineers
Chris Mayberry
Cyndi Monter
SCE-RT Online
Technology Group
Director
Glen Van Datta
Program Manager
Greg Becksted
Developer Support
Brian Fernandes
Ramana Prakash
SCE-RT Engineers
Adam Harris
Trang Ho
Mark Jacob
Sunmee Jang
Erika Kato
Glen Kawano
John Kleven
Anthony Mai
William McCarroll
Ken Miyaki
Allen Pouratian
Tom Sawyer
Steve Schneider
Steve Slover
Steve Wagner
Eric Whelpley
Information
Technology Group
Director
Charles Connoy
Online Games Group
Manager
Ken Kribs
Ron Andres
Richard Bennett
Chip Capelik
Madhukar Yedulapuram
Network Operations
Specialists
Aaron Johnston
Jose Madrigal
Rudy Wiley
Infrastructure and
Network Engineering
Manager
Tom Perrine
Robert Clark
Chris Dudley
Derrell Jenkins
Andrew Lee
Randy Lopez
Sven Nielson
Help Desk and Project
Administration
Rick Rossitter
Chad Sousa
Jeff Eng
Tracy Rossitter
Audio
Audio Director
Buzz Burrowes
Music Director
Chuck Doud
Sound Design Manager
Dave Murrant
Lead Sound Designer
Nathan Brenholdt
Cinematics Post Production
Mark Reis
Tristan desPres
Dialog Coordinator
Mark Reis
Music Supervisor
Victor Rodriguez
Music Editor
Chuck Carr
Additional Post Production
Greg deBeer
Audio Intern
Sarita Relis
Weapon Consultant
Gary Cain
Support with Pave Hawk
Helicopter recording
41st RQS
Moody AFB, GA
PA
1Lt Alysia Harvey
Jolly Pilot
Capt Bob “Lurch” Remey
Jolly Pilot
Capt Mel Bonifacio
(on intercom)
Jolly CoPilot
1Lt Matthew Miller
(on intercom)
Jolly Engineer
SSgt Bob Schnoor
(hoist, panels, and
background noise)
Jolly Gunner
SSgt Eric Barker
(50 Cal, nose compartment,
noise)
Gun Shop
A1C Gregory Boggs
(50 Cal)
Gun Shop
SSgt Kevin Klavon
(Gau-2 Minigun)
Voice Actors
HQ
Vanessa Marshall
Specter
Paul Mercier
Jester
Jason Spisak
Wardog
Michael Clark Duncan
Vandal
Larry Cedar
Sabre
Greg Ellis
Reaver
Julian Stone
Polaris
Jim Ward
Bludshot
Quinton Flynn
Albania Voice Actors
Pashko
Kastriot Hasa
Pius Platz
Meti Kusari
Foreman Besnik
Isa Jonay
General Rugova
Shukri Rexha
Castrioti Sesseri
Kastriot Hasa
Additional Albania VO
Kastriot Hasa
Isa Jonay
Mikush Llashdedaj
Val Marijan
Brazil Voice Actors
Quixada Christo
Fatima Marques
Felix the Informant
Marcio Rosario
Lucimar
Marzia Larpin
Vidonia the Interrogator
Rackel Urey
Bernaldo the Butcher
Marcio Rosario
Feral
Rene Raudman
Additional Brazil VO
Malcolm Groome
Samy Langs
Marzia Larpin
Solomon Macedo
Fatima Marques
Jackeline Olivier
Mario Roman
Edward Shkolnikov
Rackel Urey
Damien Valencia
North Africa Voice Actors
General Heydar Mahmood
Ghassan Mashini
President Sihab
Sal Koussa
Additional North Africa VO
Emily Debinie
Said Faraj
Kamel Haddad
Sal Koussa
Ghassan Mashini
Al No’Mani
Sam Sako
Russia Voice Actors
Valeska
Olga Vilner
Arjan Manjani
Phil Proctor
Additional Russia VO
Elya Baskin
Endre Hules
Mark Ivanir
Igor Korosec
Roman Varshavsky
Alex Veadov
Leeza Vinnichenko
Euro Merc Voice Actors
Dee Bradley Baker
James Horan
Thailand Voice Actors
Eck Stone
Eddie Vee
Additional Voice Actors
Dee Bradley Baker
James Horan
Larry Cedar
Phil Proctor
Rene Raudman
Soundelux Design
Music Group an Ascent
Media Company
Casting and Voice Over
Direction
Kris Zimmerman
Additional Voice Over
Direction
Ginny McSwain
Jaime Mortellaro
Producer and VO Manager
Amanda Wyatt
Recording Engineer
Glynna Grimala
R. Dutch Hill
VO Editors
R. Dutch Hill
Tom Ozanich
Glynna Grimala
Bryan Celano
Bryan Bowen,
Robert Rankin
Cindy Gershin
Vehicle SFX Editor
R. Dutch Hill
Audio Visual Coordinator
James Tabb
Asset Coordinator
Sara Huddleston
Voice Over Coordinator
Dominika Shiell
Production Assistant
Justin Langley
Music Composed and
Produced by
Inon Zur
Music Performed by
Northwest Sinfonia
Orchestra Contractor
Simon James
Additional Music Support
Dori Amarilio
Dana Bourke
Matt Goodwin
Reed Ruddy
John Schluckebier
Paul Taylor
Brian Valentino
Riptide Music
“KGM” and “Gnostec”
Courtesy of RipTide Music
Artist: DJ Kambo Kam
© 2003 Riseform Music
[ASCAP]
MasterSource Music Catalog
“Dark In Your Heart”
Courtesy of Marc
Ferrari/MasterSource
Artist: Alex Mostepan
© 2003 Red Engine Music
[ASCAP]
Dori Amarilio
“Beach Bossa”
Courtesy of Casa Amarilio
Artist: Ana Gazola
© 2003 Casa Amarilio
Music
“Brazalicious”
Courtesy of Casa Amarilio
Artist: Casa Amarilio
Ensemble
© 2003 Casa Amarilio Music
MARKETING
Executive Vice-President of
Marketing
Andrew House
Director of Marketing
Ami Matsumura-Blaire
Product Marketing Manager
John Koller
Product Marketing
Chuck Lacson
Maggie Rojas
Director of Public Relations
Molly Smith
Public Relations
Patrick Seybold
Heather Sorensen
Director of Promotions
Sharon Shapiro
Promotions
Andrew Adams
Donna Armentor
Aimee Duell
Bob Johnson
Natasha Mirosnkoff
Johanna Legarda
Mary Thomas
Director of Creative
Services
Ed DeMasi
Creative Services
Josh Bingham
T.J. Consunji
Peggy Gallagher
Ted Jalbert
Marie Macaspac
Jack Siler
Vice-President of Brand
Loyalty and Channel
Marketing
Marilyn Weyant
Director of Brand Loyalty
and Channel Marketing
Steve Williams
Brand Loyalty and Channel
Marketing
Kim Yuen
Jesse Caid
Chris Hagedorn
Josh Meighen
Web
Paul Howell
Eric Lempel
Michael Person
Jonathan Ries
Cyril Tano
Legal and Intellectual
Property
Riley Russell
Diane Tucker
Kirsten Costello
Brian Fukuji
Susan O’Driscoll
Jim Williams
Package Design
Origin Studios
Package Photography
Robert Fujioka Studios
Documentation
Hanshaw Ink & Image
USB Headset Audio Driver
Provided by
Logitech
Speech compression and
decompression technology
are licensed from
Nellymoser, Inc.
Speech Recognition System
Provided by
ScanSoft ©
Special Thanks
We would like to thank each
individual at Sony Computer
Entertainment America for
their contributions, support,
and dedication to the
success of SOCOM II: U.S.
Navy SEALs with special
recognition to the Executive
Management team
including:
Kaz Hirai
Jim Bass
Andrew House
Steve Ross
Riley Russell
Jack Tretton
Marilyn Weyant
and Shuhei Yoshida.
Special thanks to the men
and women of Naval Special
Warfare who helped in the
development of this game.
42
43
Page 24

23
ARE YOU INTERESTED
IN A SEAL CAREER ?
DO YOU HAVE WHAT IT TAKES TO WEAR
THE TRIDENT OR SWCC PIN?
THE REAL WORK—FIND, FIX AND FINISH
he terrorist attacks on America September 11, 2001 and the escalation of
T
large-scale, indiscriminate attacks worldwide demands that the U.S. military
adapt to this new kind of war being waged. To meet
the challenge, Special Operations has become the
force of choice to combat terrorism, and Naval
Special Warfare is leading the fight. At the tip of the
NSW spear are SEALs (sea, air, land) commandos
and SWCCs (Special Warfare Combatant-craft
Crewmen), boat warriors who operate and maintain
the state-of-the art, high performance surface craft
used in overseas coastal patrol and interdiction, and
in support of maritime special operations missions.
Naval Special Warfare employed the largest number of
SEALs and SWCCs in its history during Operation
IRAQI FREEDOM. NSW forces were instrumental in
numerous special reconnaissance and direct action
missions including securing oil infrastructures and offshore gas and oil terminals to avoid ecological catastrophe;
clearing strategic waterways to enable the first
humanitarian aid to be delivered to the vital
port city of Umm Qasr; capturing high value
targets; carrying out raids on suspected
chemical, biological and radiological sites; and
conducting the first successful POW rescue
since WWII. They are known for their trigger
discipline—no SEAL or SWCC operators were
injured or killed in accomplishing these missions.
During Operation ENDURING FREEDOM in
Afghanistan, Naval Special Warfare conducted
45
Page 25

advanced force operations, gathered perishable intelligence and provided eyes on target
to positively “find” the enemy and destroy more than 500,000 pounds of explosives
and weapons. NSW forces exploited tactical intelligence and conducted timely
operations to “fix and finish,” and capture or eliminate the terrorist threat. While much
of the world’s focus has shifted to Iraq during OIF, NSW forces continue to operate in
Afghanistan, routing out Taliban, Al Qaeda and enemy terrorist forces.
The Global War on Terror is a long-term engagement of the utmost importance.
While there have been many operational successes in the war on terror, the fight is
far from over. One of the challenges facing Special Operations Forces in general,
and NSW, in particular, is the considerable time and resources it takes to train an
individual to become a highly skilled, effective warrior. SEALs spend more than 2
years in training, and SWCCs, more than 1 year, before being deployed with a
Squadron. Naval Special Warfare is exploring ways to grow its forces to meet future
wartime requirements, without diminishing the quality of its individual war fighters.
CONSIDER A CAREER IN NAVAL SPECIAL WARFARE
Are you motivated to succeed? Are you determined to persevere? Are you ready to
accelerate your life?
NSW is continuously seeking smart, fit, hardworking young men from all
backgrounds to join its elite team of special operations forces. SEAL and SWCC
training is extremely demanding, both mentally and physically. It’s meant to be. The
end result is a cadre of the best-trained warriors in the world. During training,
instructors focus on three core pillars:
Men of Character: The nature of the NSW mission requires men who are disciplined,
focused, mentally tough and determined to persevere. They are dependable, mature,
highly educated professionals who are counted on for their uncompromising integrity
and good judgment under extreme stress. These men take pride in upholding the
Navy’s Core Values—Honor, Courage and Commitment.
Physical: The nature of NSW missions demands men who are physically fit and
capable of operating in every environment, especially the water.
Technical: Finally, maritime Special Operations require operators who are intelligent
and can learn new tasks quickly.
Throughout NSW’s rigorous training, students are
taught how to think, not what to think. In addition
to developing experts in special reconnaissance
and direct action missions—the skill sets needed
to combat terrorism—NSW forces are taught the
tactical skills, advanced technologies and
unconventional mindset to succeed against any
enemy.
Careers in NSW offer unmatched challenges,
adventure and job satisfaction to motivated
candidates. To find out more about becoming a
SEAL or SWCC, visit NSW’s official websites at
www.seal.navy.mil or www.swcc.navy.mil.
ONLINE USER AGREEMENT
PLEASE READ THE ENTIRE AGREEMENT AND INDICATE WHETHER OR NOT YOU AGREE TO ITS TERMS BY CLICKING THE
“AGREE” OR “DISAGREE” BUTTON AT THE BOTTOM OF THIS SCREEN. IF YOU CLICK THE “DISAGREE” BUTTON YOU WILL
NOT BE ABLE TO PLAY THE ONLINE VERSION OF THIS GAME. CHECK WITH SONY COMPUTER ENTERTAINMENT
AMERICA INC. (“SCEA”) CONSUMER SERVICES AT 1–800–345–7669 WITHIN 30 DAYS OF YOUR PURCHASE FOR
REFUND OR RETURN INFORMATION. PLEASE HAVE YOUR PURCHASE RECEIPT AVAILABLE.
1. ACCEPTANCE OF AGREEMENT. This Agreement can be accepted only by an adult 18 years or older. By clicking
the “AGREE” button, you affirm that you are an adult 18 years or older and you are accepting this Agreement
on your own behalf or on behalf of your minor child (under 18).
GRANT OF LICENSE. SCEA grants you a non-exclusive right to use this software for play on a PlayStation®2
2.
computer entertainment system only. You may not (i) rent, lease or sublicense the software, (ii) modify, adapt,
translate, reverse engineer, decompile or disassemble the software, (iii) attempt to create the source code
from the object code for the software, or (iv) download game content for any purpose other than game play.
You may, however, transfer all your rights to use the software to another person provided that you transfer the
original product and this Agreement with the software.
AUTHENTICATION. This software uses “DNAS” (Dynamic Network Authentication System), a proprietary
3.
authentication system created by Sony Computer Entertainment Inc. (SCEI). “DNAS” retrieves
information about a user’s hardware and software for authentication, copy protection, account blocking,
system, rules, or game management and other purposes. The information collected does not identify the
user personally. SCEI, SCEA and their affiliates cannot guarantee the continuous operation of the
“DNAS” servers and shall not be liable for any delay or failure of the “DNAS” servers to perform. If you
receive a message during login identifying a “DNAS” authentication error, please contact SCEA
Consumer Services at 1–866–466–5333. For additional information concerning “DNAS”, visit
www.us.playstation.com/DNAS. In the event of a systems incompatibility or inoperability with “DNAS”,
the sole liability of SCEI, SCEA and their affiliates shall be limited to the repair or replacement of the
user’s affected game software, console, or peripherals at the option of SCEA. SCEI, SCEA and their
affiliates shall not be liable for any delays, system failures, authentication failures, or system outages,
which may, from time to time, affect online game play or access thereto.
COLLECTION OF INFORMATION. When you login to play online, SCEA may retrieve information about the
4.
hardware, software and online connection you are using for copy protection, administration of the game site,
account blocking, system, rules or game management and other purposes. Before you can play, you will be
asked to create an account with a user, player or other game name (“game name”) and password. You may
also be asked to select or provide additional information for a game profile. This game does not contain any
personally identifying information.
PROTECTION OF IDENTITY. When you choose a game name, choose an alias to protect your identity. Avoid using
5.
any part of your game name in your password. When you choose a password, choose a unique combination
of letter and numbers that is unrelated to your game name or to any information you may share with other
players in the game. SCEA will not ask you for your password and you should not provide this information to
any third party. If the game is designed to save your game name, profile and password it will do so
automatically and only to facilitate future game play. If your game name is inactive for a period of thirty days
or more your account may be deactivated. To inquire about a deactivated account, please contact SCEA
Consumer Services at 1–866–466–5333. Games without an automatic save feature will ask you to save your
information to a memory card or hard disc drive. Always keep your memory card in a secure location and do
not lend it to others. You agree that you have no expectation of privacy or confidentiality in the personal
information you may intentionally or unintentionally disclose through login, game play and chat. You should
avoid saying anything personally identifying in chat. SCEA has no liability for any violation of this Agreement
by you or by any other player.
ONLINE CONDUCT. When you play, you agree to be respectful of your fellow players and never to engage in any
6.
behavior that would be abusive or offensive to other players, disruptive of the game experience, fraudulent
or otherwise illegal. This includes but is not limited to:
(a) Harassing or intimidating other players while chatting or playing this game online or using
information obtained while chatting or playing this game to harass or intimidate fellow players
outside of the game;
(b) Using language, selecting names or creating any other content that is racially, ethnically or religiously
offensive, sexually abusive, obscene or defamatory;
(c) Using content that is commercial in nature such as advertisements, solicitations and promotions for
goods or services;
(d) Using as a game name the real name of any other person;
(e) Disrupting the normal flow of chat in game chat rooms;
(f) Making a false report of user abuse to SCEA Consumer Services (see below);
46 47
Page 26

(g) Violating any local, state or national law including but not limited to laws related to copyright,
trademark, defamation, invasion of privacy, identity theft, hacking and the distribution of
counterfeit software;
(h) Using a cheat code or cheat device. For a detailed explanation of the SCEA policy on cheating visit
www.us.playstation.com/onlinecheating.
If you violate this Agreement in any manner, SCEA may at its discretion and without notice to you temporarily
or permanently block your account in this game and any related games. In appropriate cases, SCEA may bring
legal action against you or cooperate in any government or private legal action or investigation relating to your
conduct within the game. To report violations of this Agreement or to inquire about a blocked account, call SCEA
Consumer Services at 1–800–345–7669. SCEA has no liability for any violation of this Agreement by you or by
any other player.
INTELLECTUAL PROPERTY RIGHTS. All title and intellectual property rights in and to the content of this software
7.
is the property of the content owner(s) and may be protected by applicable copyright and other intellectual
property laws and treaties. This Agreement grants you no ownership rights in such content. All rights not
expressly granted are reserved by SCEA.
WARRANTY/DISCLAIMER. SCEA WARRANTS TO THE ORIGINAL PURCHASER OF THE GAME DISC THAT THE DISC
8.
IS FREE FROM DEFECTS IN MATERIALS AND WORKMANSHIP FOR A PERIOD OF NINETY (90) DAYS FROM THE
DATE OF PURCHASE. SEE GAME MANUAL FOR LIMITED WARRANTY DETAILS. EXCEPT AS PROVIDED HEREIN, THE
GAME DISC, SOFTWARE AND ALL RELATED SERVICES ARE PROVIDED “AS IS” AND, TO THE MAXIMUM EXTENT
PROVIDED UNDER LAW, SCEA DISCLAIMS ALL WARRANTIES OF ANY KIND, WHETHER EXPRESS OR IMPLIED,
INCLUDING BUT NOT LIMITED TO ANY WARRANTIES OF MERCHANTABILITY OR FITNESS FOR A PARTICULAR
PURPOSE. Without limiting the foregoing, SCEA does not promise that that this software will work properly with
any network adaptor, modem, memory card or other peripheral device that has not been licensed by SCEI or
SCEA. To insure compatibility use only PlayStation
not guarantee that you will be able to play this game at any time you want. From time to time, there may be
problems related to access, delay and failure to perform that are beyond the immediate and reasonable control
of SCEA. In the event of a dispute regarding the online functionality of this software (except with regard to the
operation of “DNAS” explained in paragraph 3 above), you agree that the sole liability of SCEA and its affiliated
companies will be limited to repair or replacement of the software. SCEA may, at its sole discretion,
discontinue hosting of the game server at any time. SCEA has no liability for such discontinuance.
9. MODIFICATION. SCEA at its sole discretion may modify the terms of this Agreement at any time. You are
responsible for reviewing the terms of this Agreement each time you login to play. By accepting this
Agreement and by playing the game online, you agree to be bound by all current terms of the
Agreement. To print out a current copy of this Agreement using your computer, go to
www.us.playstation.com/support/useragreements.
GOVERNING LAW. This Agreement shall be construed and interpreted in accordance with the laws of the State
10.
of California applying to contracts fully executed and performed within the State of California. Both parties
submit to personal jurisdiction in California and further agree that any dispute arising from or relating to
this Agreement shall be brought in a court within San Mateo County, California.
ENFORCEABILITY. If any provision of this Agreement shall be held invalid or unenforceable, in whole or in
11.
part, such provision shall be modified to the minimum extent necessary to make it valid and enforceable,
and the validity and enforceability of all other provisions of this Agreement shall not be affected thereby.
ENTIRE AGREEMENT. This Agreement constitutes the entire agreement between the parties hereto related to
12.
the subject matter hereof and supercedes all prior oral and written and all contemporaneous oral
negotiations, commitments and understandings of the parties, all of which are merged herein.
®
or PlayStation®licensed products. Additionally, SCEA does
24
LIMITED WARRANTY
Sony Computer Entertainment America (SCEA) warrants to the original purchaser of this
SCEA product that this software is free from defects in material and workmanship of a
period of ninety (90) days from the original date of purchase. SCEA agrees for a period
of ninety (90) days either repair or replace, at its option, the SCEA product. You must call
1-800-345-SONY to receive instructions to obtain repair/replacement services.
This warranty shall not be applicable and shall be void if the defect in the SCEA product
has arisen through abuse, unreasonable use, mistreatment or neglect. THIS WARRANTY
IS IN LIEU OF ALL OTHER WARRANTIES AND NO OTHER REPRESENTATIONS OR
CLAIMS OF ANY NATURE SHALL BE BINDING ON OR OBLIGATE SCEA. ANY IMPLIED
WARRANTIES APPLICABLE TO THIS SOFTWARE PRODUCT, INCLUDING
WARRANTIES OF MERCHANTABILITY AND FITNESS FOR A PARTICULAR PURPOSE,
ARE LIMITED TO THE NINETY (90) DAY PERIOD DESCRIBED ABOVE. IN NO EVENT
WILL SCEA BE LIABLE FOR INCIDENTAL OR CONSEQUENTIAL DAMAGES
RESULTING FROM POSSESSION, USE OR MALFUNCTION OF THE SCEA SOFTWARE
PRODUCT.
Some states do not allow limitations as to how long an implied warranty lasts and/or
exclusions or limitations of consequential damages, so the above limitations and/or
exclusions of liability may not apply to you. This warranty gives you specific legal rights,
and you may also have other rights which vary from state to state.
®
RSA BSAFE
registered trademark of RSA Security Inc. BSAFE is a registered trademark of RSA Security Inc. in the
United States and other countries. RSA Security Inc. All rights reserved.
This software uses “DNAS” (Dynamic Network Authentication System), a proprietary authentication
system created by Sony Computer Entertainment Inc., to provide security and to help protect copyrighted
content. The unauthorized transfer, exhibition, export, import or transmission of programs and devices
circumventing its authentication scheme may be prohibited by law. For additional information see
www.us.playstation.com/DNAS.
The U.S. Navy provided technical support but does not officially endorse this product.
SSL-C and Crypto-C software from RSA security Inc. have been installed. RSA is a
48
49
Page 27

USB HEADSET
(for PlayStation®2)
Syphon Filter®: The Omega Strain (RP)
NFL GameDay
™ 2004 (E)
NBA ShootOut 2004 (E)
Command your teammates to attack a fixed target, provide
crucial intel to a friendly yet deadly operative, call plays as
quarterback of a championship team, or simply talk trash
with another gamer who thinks he can unseat your hoops
dynasty. A sleek peripheral for use with today’s hottest
games, the USB headset (for PlayStation
recognition and online chat capabilities for compatible titles.
© 2003 Sony Computer Entertainment America Inc. “PlayStation” and the “PS” Family logo are registered trademarks of Sony Computer Entertainment Inc.
®2) offers voice
• For use with PlayStation®2 games that support VoIP
(online chat) as well as voice recognition.
• Form-fitting headset designed for comfort and long
hours of playing.
• Noise canceling microphone to minimize outside
interferences.
• Mute button to cancel the microphone and prevent online
teammates from listening in on private conversations.
• Volume control to increase or decrease sound from headset.
 Loading...