


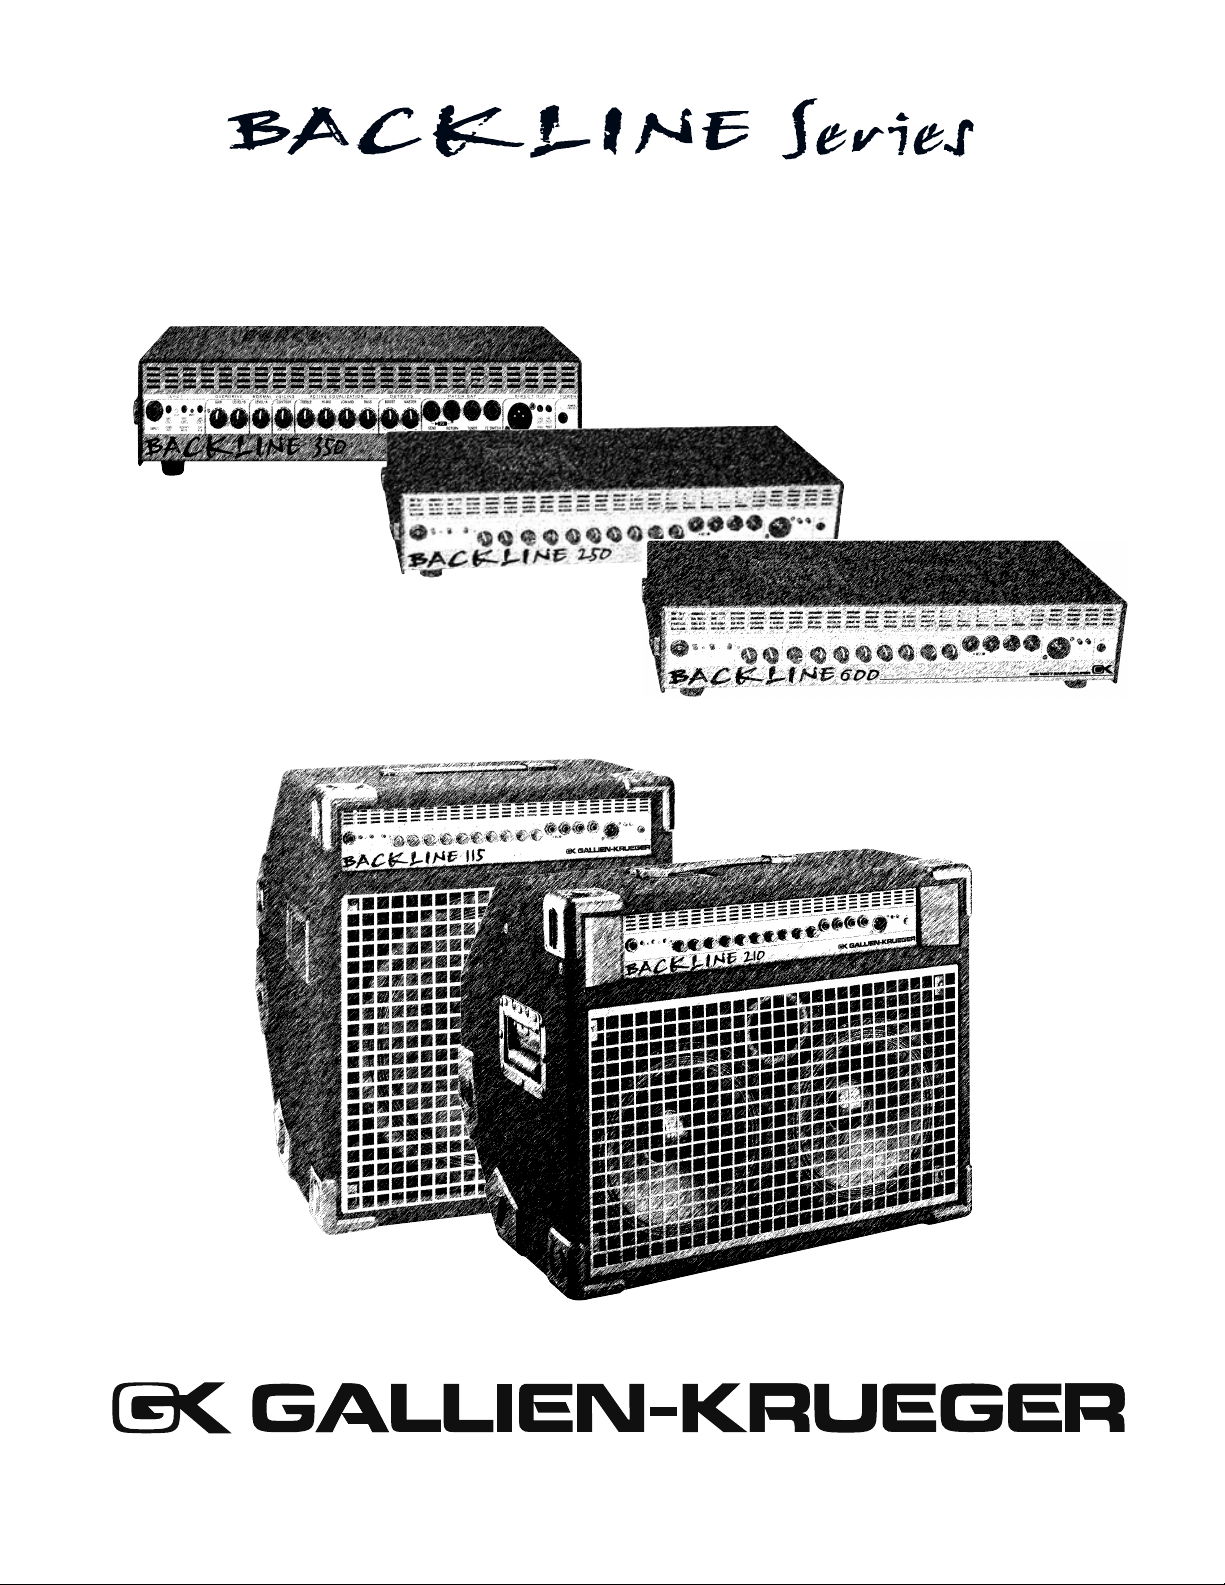
Backline 250
1
Owner’s Manual
Backline 350
Backline 210
Backline 250
Backline 115
Backline 600

2
Backline SeiesBackline Seies
Backline SeiesBackline Seies
Backline Seies
Table Of Contents
Gallien-Krueger
2234 Industrial Drive
Stockton, CA 95206
phone: 209-234-7300
fax: 209-234-8420
www.gallien-krueger.com
Introduction.....................................................................
Safety Information..........................................................
Quick Start.......................................................................
Settings & Sounds............................................................
Sound Tips.......................................................................
Front & Rear Panel Controls........................................
Installation & Maintenance..........................................
Backline Combo............................................................
Tech Talk........................................................................
Specifications.................................................................
*All Features and specifications are subject to change without notice
.
**This list is subject to change without notice.
Table of Contents
8
10
11
12
13
3
4
5
6
7
IMPORTANT SAFETY INSTRUCTIONS.
Please read the Safety Information section on page 5 before continuing.

3
Backline SeriesBackline Series
Backline SeriesBackline Series
Backline Series
Congratulations
Your purchase of a new Gallien-Krueger Backline product
is surely the result of much careful consideration on your
part. For our part, we at Gallien-Krueger are pleased that
you chose us, and are determined that you will be a
satisfied customer. In choosing a Backline product, you
now own an amplifier with many unique features, which
will allow you to create your own distinct sound.
To get the most out of your new purchase please take a
few minutes to read through this manual. If you are in a
hurry, we suggest you at least read through the Quick
Start and Safety Information sections before setting up
your new rig. This will help get you started and give you a
few quick tips, but is not a substitute for reading the rest of
the manual.
Your Backline unit should have come with the following
items, please check the contents of the box to ensure that
you have everything.
Included with your Backline 350/250/600 Head:
Backline 350/250/600 1
Power cord 1
Owner’s manual 1
Warranty card 1
Safety instructions sheet 1
Included with your Backline 210/115 Combo:
Backline 210/115 1
Power Cord 1
Owner’s Manual 1
Warranty Card 1
Safety Instructions Sheet 1
If your new unit did not come with all the items listed,
or if you encounter problems while setting up your new
equipment, please contact your local dealer, or GK
customer service at:
Gallien-Krueger, Inc.
2234 Industrial Drive
Stockton, CA 95206
phone: (209) 234-7300
fax: (209) 234-8420
Internet: www.gallien-krueger.com
Email: sales@gallien.com
We wish you a lifetime of good playing and remember
to always have fun!
Introduction
GK Philosophy
I have never seen the point in doing things the way
others have done them. I also have not been very
interested in following the latest fad. I am a Stanford
educated engineer who worked his way through school
as a musician. Like all musicians, I have lugged
amplifiers up stairways and into car trunks, always
wondering why these things had to be so heavy, bulky,
and hard to handle.
As I am the principal innovator at
GKGK
GKGK
G K, our products
reflect my attitudes and life experiences. I don’t model
my designs after other manufacturer’s products (as
some of our competitors are proud of reciting). Instead,
I believe new and old problems are best solved with new
solutions. Having taken our own path,
GKGK
GKGK
G K products
enjoy a unique, unmatched sound, allowing the artist
using them every opportunity to make an original
statement.
Having supported my products for over thirty years, I
have learned from the story they tell.
Gallien-Gallien-
Gallien-Gallien-
Gallien-
KruegerKrueger
KruegerKrueger
Krueger is a reflection of that story, and has a commit-
ment to support that legacy. Just as the products I
created thirty years ago are still telling their story, the
products we create today will be talking to us tomorrow.
We’ll be listening,
Robert Gallien
Founder & President

4
Backline SeriesBackline Series
Backline SeriesBackline Series
Backline Series
Safety Information
Safety Information
Verify Line Voltage and Amperage Before
Use:
Your new Backline unit has been factory
configured for use with:
120 Volt/60Hz 15 Amp circuit for USA &
Canada.
230 Volt/50Hz 10 Amp circuit for Europe
& Australia.
100 Volt/50Hz 15 Amp circuit for Japan.
Proper AC circuit for all other countries.
Connecting the amplifier to a line with specifications
other than indicated above can create a safety and fire
hazard, and may damage the amplifier. If you have any
questions about the voltage requirements for your specific
model, or about the line voltage in your area, contact your
dealer before plugging the unit into a wall outlet.
Verify AC Circuit Capacity Before Use:
The high power output of your amplifier may require
heavy current draw under Full-Load conditions. To insure
proper performance and avoid potential safety hazards, we
recommend connection to line circuits with Amperage
specified “as above”. Connecting multiple amplifiers to
the same circuit, or connecting the amplifier to the same
circuit used by other heavy-power devices, such as high-
wattage lights, may cause circuit breakers to trip. It is
always a good idea to avoid using any audio equipment
on the same AC circuit as equipment with motors, such as
air conditioners or refrigerators. This will lessen to
possibility of power variation and electrical start-up noise
affecting your sound.
Warning: Do not disconnect or plug in the
instrument/speaker cable with the amplifier
power on. Be sure the amplifier unit is turned
off before connecting anything to it.
Do Not Use Extension Cords:
To avoid safety hazards, use only the power cord supplied
with your unit. If a replacement cord is used, make
certain that it is of consistent quality and gauge as the
original. We do not recommend using extension cords
with this product. As with all electrical devices, do not run
power cords under rugs or carpets or place heavy objects
on them. Damaged power cords should be replaced
immediately with cords meeting factory specifications.
Handle The AC Power Cord Gently:
When disconnecting the power cord from an AC outlet,
always pull the plug, never pull the cord. If you do not
intend to use the amplifier for a considerable length of
time, disconnect the plug from the AC outlet.
Mains Disconnect:
If the AC mains has to be completly disconnected, the
plug/power cord is used as the mains disconnect device
and shall remain readily operable.
Do Not Open The Amplifier Enclosure:
There are no user-serviceable components inside this
product. Opening the amplifier enclosure may present a
shock hazard, and modification to the product will void
your warranty. If liquid enters the unit, or any metal
object such as a paper clip, wire, or staple accidentally
falls inside the enclosure, disconnect the unit from the AC
power source immediately and consult an authorized
service station.
Unpacking:
The carton and packing materials used in shipping your
new amplifier were specially designed to cushion it from
the shocks and vibration that occur during transport. We
suggest that you save the carton and packing materials for
use in shipping, in the event you move, or the amplifier
needs repair.
.
.
.

5
Backline SeriesBackline Series
Backline SeriesBackline Series
Backline Series
Quick Start
Quick Start
Your Backline unit is designed to be simple to operate. All
controls have a well defined purpose and are well behaved.
These directions will take you through the basics and give
you a good start for setting up your sound.
1.
Set the power switch to Off and connect the supplied power
cord from the amplifier AC receptacle to an AC power
outlet of proper voltage and power rating (see safety
information on page 5 for details).
2. (Backline 350/250/600 Only)
Connect your speaker cabinet to the amplifier output
marked 175W/125W/300W. Be sure not to go below the
recommended speaker load listed below. Take note also
that the speaker cabinets power capacity must be equal or
higher than the ouput power of the unit.
Minimum Recommended Speaker Load:
One 4 0hm or two 8 ohm cabinets or One 8 ohm cabinet
for
Backline 350Backline 350
Backline 350Backline 350
Backline 350 and
Backline 600.Backline 600.
Backline 600.Backline 600.
Backline 600.
For
Backline 250 Backline 250
Backline 250 Backline 250
Backline 250 minimum load impedance is 8 Ohm,
that will translate to one 8 Ohm cabinet or two 16 Ohm
cabinet.
If you are using a
GK RBH/SBXGK RBH/SBX
GK RBH/SBXGK RBH/SBX
GK RBH/SBX series cabinet, set the
crossover switch to full range.
For
Backline 115Backline 115
Backline 115Backline 115
Backline 115 and
Backline 210Backline 210
Backline 210Backline 210
Backline 210, The minimum
load impedance is 4 ohms. With the internal cabinet
connected, the minimum impedance of an external
speaker cabinet that can be connected is 8 ohms
3.
Set all EQ controls and the Boost control to 12 o’clock.
The Voicing Filter should be turned all the way down to
get a flat response. Set the Gain, Level-A, Level-B and
Master Volumes at 0. Set the A/B switch to off (Channel
A).
4.
Using an instrument cable, connect your bass to the Input
jack and turn the power switch on, set the master control
to 3 o’clock, slowly bring the Level-A volume up and play.
If the clip LED flashes excessively, push the button marked
--
--
-10db in. Occasional clip light flashes while playing very
hard, is normal and should not raise any concern . Do
not turn the volume control in the input section past 1
o’clock unless you want an overdrive effect. If you have a
bass with passive electronics make sure that the controls
on the bass guitar are all the way up. If you have a bass
with active electronics, set all controls on the bass to the
middle or flat position.
At This Point:
You should be hearing your bass quite well. You can use
the volume and Master to achieve a comfortable sound
level.
5.
Now you are ready to check out the overdrive feature
(Channel-B). Push in the Level A/B button. The over-
drive LED should light. Set the Gain control to 9 o’clock
as a starting point. Slowly raise the Level-B volume to the
desired sound level. This will give a slightly distorted
sound. Raising the gain will add more distortion and
sustain. (See Sound Tips for more detail).
Characteristics of the Backline:
The Backline Series are flexible, user-friendly state-of-the-
art bass series, designed to deliver maximum perfor-
mance. This is accomplished through these important
features:
Extremely high current power supply and
power amp circuitry, gets the sound
out of your head.
Four bass specific bands of active equalization
for Precise tone control.
An adjustable voicing filter for shaping and
customizing your sound.
Balanced direct output eliminates the need for
a direct box.
Bass specific overdrive channel for all
modern sounds.
.
.
.
.
.
 Loading...