

Page 1

Type RI8260, SUP047G
GAGGIA VELASCA
USER MANUAL
BENUTZERHANDBUCH
MANUALE UTENTE
Page 2

Page 3

ESPRE SSO
ESPRE SSO LUNGO
STEAM
A
R
O
M
A
S
T
R
E
N
G
T
H
MENU
HOT WATER
1
2
4
13
14
15
26 25
16
19
20
18
17
21 22
24
23
3
8
9
6
5
10
11
7
12
2728
Page 4

Contents
Introduction ______________________________________________________________________ 4
Important ________________________________________________________________________ 5
Warning_________________________________________________________________________ 5
Caution__________________________________________________________________________ 6
Electromagnetic fields (EMF)________________________________________________________ 7
Machine overview (Fig. 1)___________________________________________________________ 7
The display ______________________________________________________________________ 7
First installation ___________________________________________________________________ 8
Manual rinsing cycle _______________________________________________________________ 10
AquaClean filter __________________________________________________________________ 10
AquaClean filter installation _________________________________________________________ 11
Replacing the AquaClean filter ______________________________________________________ 11
Using the machine ________________________________________________________________ 12
Brewing coffee with beans__________________________________________________________ 12
Adjusting the coffee quantity ________________________________________________________ 12
Adjusting the grind setting__________________________________________________________ 12
Frothing milk_____________________________________________________________________ 13
Hot water ________________________________________________________________________ 13
Cleaning and maintenance _________________________________________________________ 13
Weekly cleaning of the brew group___________________________________________________ 13
Lubrication ______________________________________________________________________ 14
Classic milk frother cleaning (daily) ___________________________________________________ 15
Classic milk frother and steam wand cleaning (weekly) __________________________________ 15
Descaling ________________________________________________________________________ 15
Descaling procedure ______________________________________________________________ 16
Interruption of the descaling cycle ___________________________________________________ 17
Warning icons and error codes ______________________________________________________ 17
Meaning of error codes_____________________________________________________________ 19
Ordering accessories_______________________________________________________________ 19
Guarantee and support ____________________________________________________________ 20
Recycling________________________________________________________________________ 20
Troubleshooting___________________________________________________________________ 20
Introduction
Congratulations on buying this Gaggia Velasca full automatic espresso
machine! The machine is suitable for preparing espresso coffee using whole
coffee beans.
4
English
Page 5

Important
Warning
-
Connect the machine to a wall socket with a voltage matching the
technical specifications of the machine.
-
Connect the machine to an earthed wall socket.
-
Do not let the power cord hang over the edge of a table or
counter, or touch hot surfaces.
-
Never immerse the machine, mains plug or power cord in water
(danger of electrical shock).
-
Do not pour liquids on the power cord connector.
-
Never direct the hot water jet towards body parts: danger of burns.
-
Do not touch hot surfaces. Use handles and knobs.
-
Switch off the machine with the main switch located on the back
and remove the mains plug from the socket:
-
If a malfunction occurs.
-
If the machine will not be used for a long time.
-
Before cleaning the machine.
-
Pull on the plug, not on the power cord.
-
Do not touch the mains plug with wet hands.
-
Do not use the machine if the mains plug, the power cord or the
machine itself is damaged.
-
Do not make any modifications to the machine or its power cord.
-
Only have repairs carried out by a service center authorized by
Gaggia to avoid a hazard.
-
The machine should not be used by children younger than 8 years
old.
-
This machine can be used by children aged from 8 years and
above and by persons with reduced physical, sensory or mental
capabilities or lack of experience and knowledge if they have been
given supervision or instruction concerning use of the machine in a
safe way and if they understand the hazards involved.
5
English
Page 6

-
Cleaning and user maintenance shall not be made by children
unless they are older than 8 and supervised.
-
Keep the machine and its cord out of the reach of children aged
less than 8 years.
-
Children should be supervised to ensure that they do not play with
the machine.
-
Never insert fingers or other objects in the coffee grinder.
-
The machine shall not be placed in a cabinet when in use.
Caution
-
This machine is intended for normal household use only. It is not
intended for use in environments such as staff kitchens of shops,
offices, farms or other work environments.
-
Always put the machine on a flat and stable surface. Keep it in
upright position, also during transport.
-
Do not place the machine on a hotplate or directly next to a hot
oven, heater or similar source of heat.
-
Only put roasted coffee beans in the bean hopper. If ground
coffee, instant coffee, raw coffee beans or any other substance is
put in the coffee bean hopper, it may cause damage to the
machine.
-
Let the machine cool down before inserting or removing any parts.
The heating surfaces may retain residual heat after use.
-
Never fill the water tank with warm, hot or sparkling water, as this
may cause damage to the water tank and the machine.
-
Never use souring pads, abrasive cleaning agents or aggressive
liquids such as petrol or acetone to clean the machine. Simply use
a soft cloth dampened with water.
-
Descale your machine regularly. The machine indicates when
descaling is needed. Not doing this will make your appliance stop
working properly. In this case repair is not covered under your
guarantee.
-
Do not keep the machine at temperatures below 0°C.Water left in
the heating system may freeze and cause damage.
6
English
Page 7

-
Do not leave water in the water tank when the machine is not used
over a long period of time. The water can be contaminated. Use
fresh water every time you use the machine.
Electromagnetic fields (EMF)
This Gaggia appliance complies with all applicable standards and
regulations regarding exposure to electromagnetic fields.
Machine overview (Fig. 1)
1 Lid of the bean hopper
2 Coffee bean hopper
3 Socket for cord
4 Water tank
5 Pre-ground coffee compartment
6 Grinder adjustment knob
7 Control panel
8 Coffee grounds container
9 Coffee dispensing spout
10 Drip tray
11 Drip tray cover
12 Drip tray full indicator
13 ESPRESSO button
14 ESPRESSO LUNGO button
15 AROMA STRENGTH button
16 Standby button
17 MENU button
18 HOT WATER button
19 STEAM button
20 Cord
21 Cleaning brush (for specific types only)
22 Grease (for specific types only)
23 Pre-ground coffee measuring spoon
24 Water hardness tester
25 Coffee residues drawer
26 Brew group
27 Hot water/steam wand
28 Classic milk frother
The display
Some buttons can be used to navigate through the menus:
ES PR ES SO
-
ESPRESSO button = ESC button: you can press this button to return to
the main menu.The ESC button takes you back one level.You may have
to press the ESC button. several times to get back to the main menu.
7
English
Page 8
A
R
O
M
A
S
T
R
E
N
G
T
H
-
AROMA STRENGTH button = OK button: you can press this button to
select, confirm or stop a function.
ST EAM
-
STEAM button = UP button: press this button to scroll up through the
display menu
MEN U
-
MENU button = DOWN button: press this button to scroll down through
the display menu.
First installation
1 Slide the drip tray with drip tray cover into the machine.
2 Remove the water tank.
3 Fill the water tank to the MAX level with fresh water.
4 Fill the coffee bean hopper with coffee beans.
5 Insert the small plug into the socket located on the back of the machine.
Insert the mains plug into the wall socket.
6 Attach the classic milk frother to the hot water/steam dispensing spout.
7 Place a container under the classic milk frother.
8 Press the STANDBY button to switch on the machine.
9 Press the OK button to start the automatic circuit priming cycle.
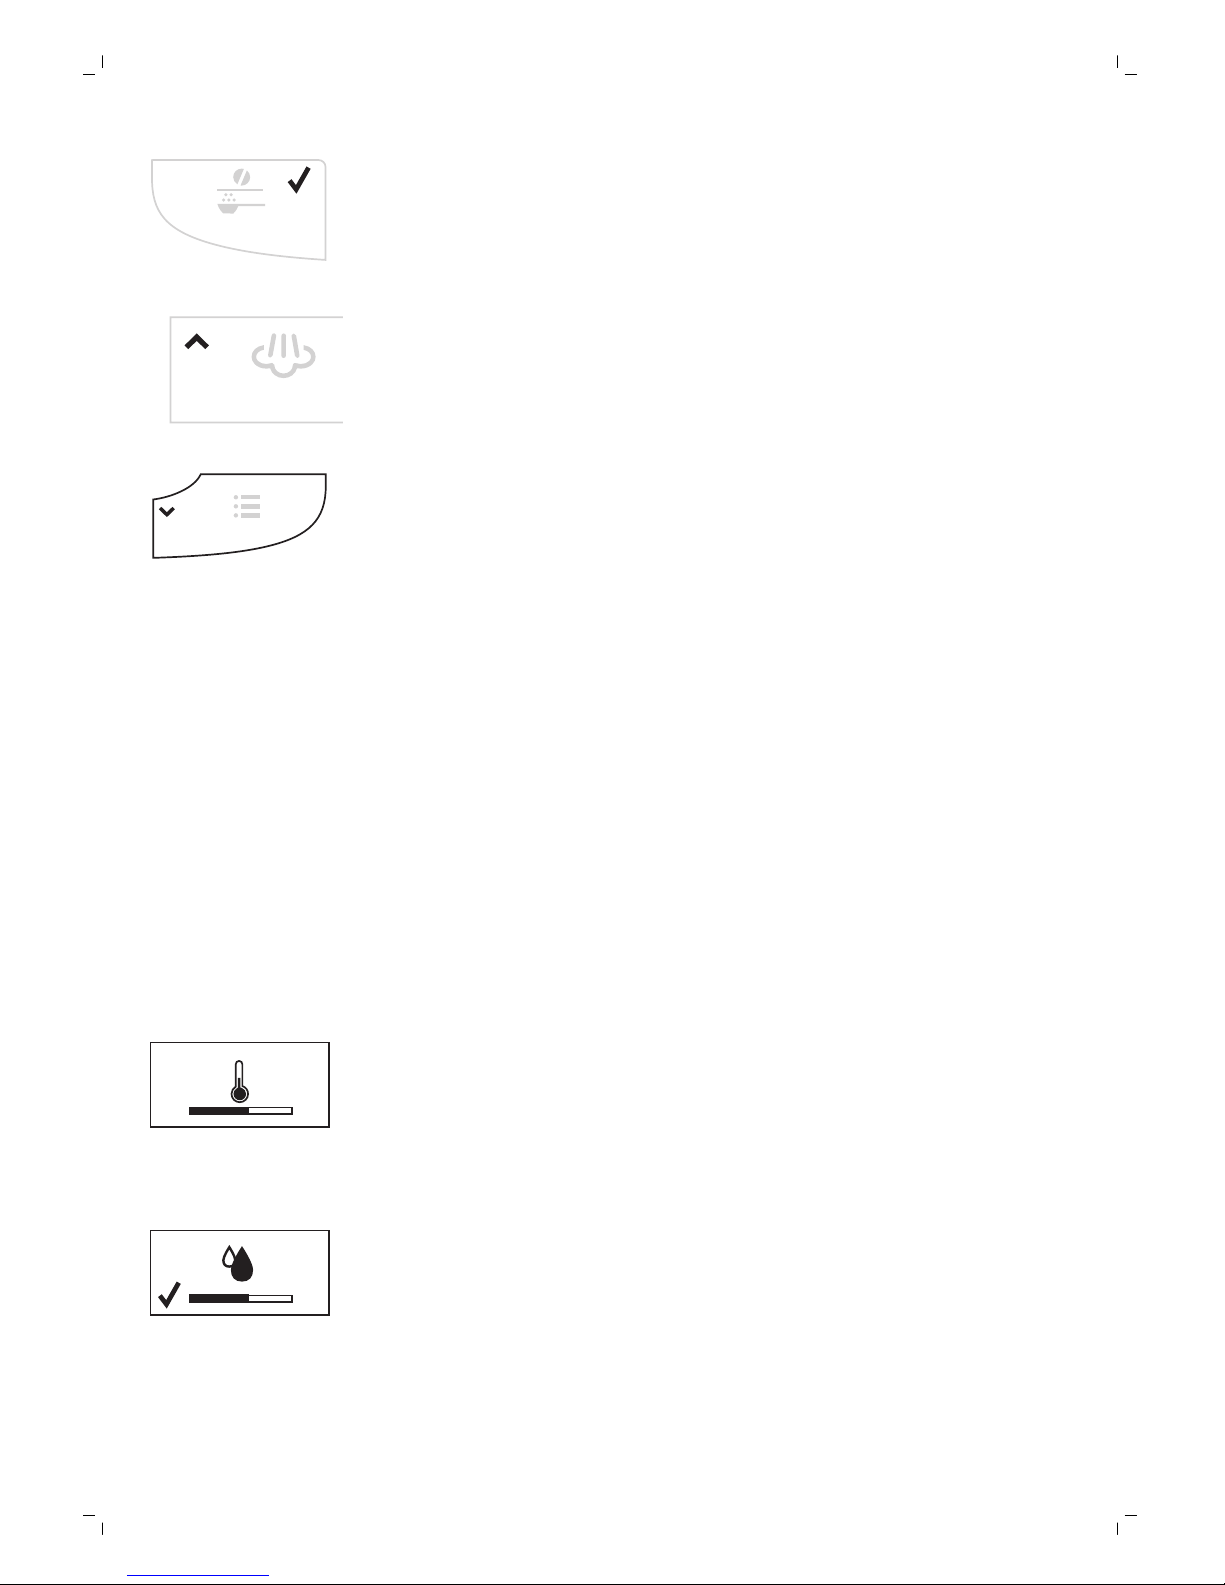
10 The display shows the following icon to indicate that the machine is
heating up.
-
The machine performs an automatic rinsing cycle.
8
English
Page 9

AQUA
CLE AN
AQUA CL EAN
FILT ER?
11 The display shows the following icon to indicate you have to install the
AquaClean filter.
If you want to install the AquaClean filter afterwards, press the ESC
button and continue with the manual rinsing cycle. For installation, see
chapter ‘AquaClean filter’.
AQUA
CLE AN
INS TALL
FILT ER
12 Press the OK button. The display shows the following icon.
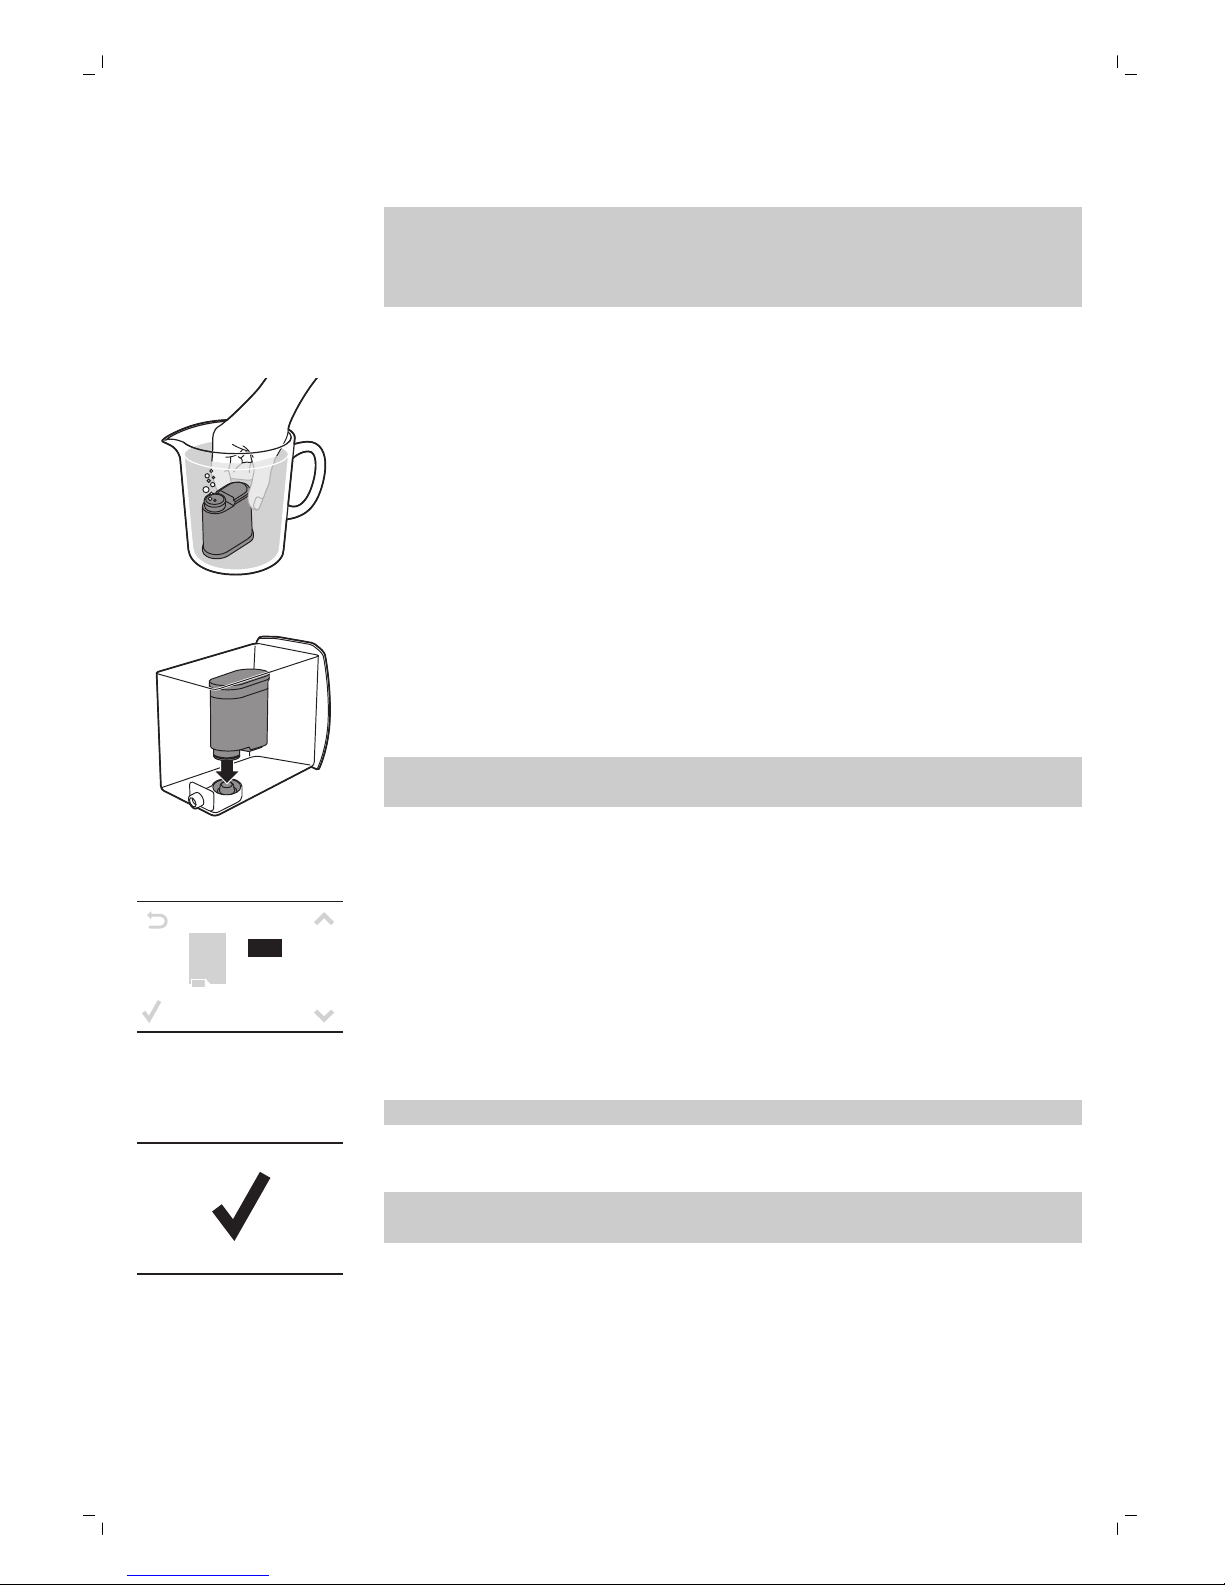
13 Remove the AquaClean filter from its packaging. Shake the filter for about
5 seconds.
14 Immerse the filter upside down in a jug with cold water and wait until no
more air bubbles come out.
15 Remove the water tank from the machine, empty it and insert the filter
vertically onto the filter connection.
16 Fill the water tank with fresh water and slide it back into the machine.
17 Press the OK button.
AQ U A
CLE AN
0/8
ON
OFF
18 Select ON on the display and confirm the activation by pressing the OK
button.
9
English
Page 10
The display shows a tick icon to confirm the activation.
AQUA
CLE AN
10 0%
19 The display shows the filter ready icon to indicate the AquaClean filter
has been installed correctly.
20To rinse the filter, press the HOT WATER button and let half a litre of
water flow out from the hot water/steam dispensing spout. Discard this
water.
It can take a while until water comes out of the hot water dispensing
spout. The filter needs to be fully filled and rinsed with water.
The machine is ready for use.
After installing the AquaClean filter, you do not have to perform the manual
rinsing cycle.
Manual rinsing cycle
1 Place a container under the coffee dispensing spout.
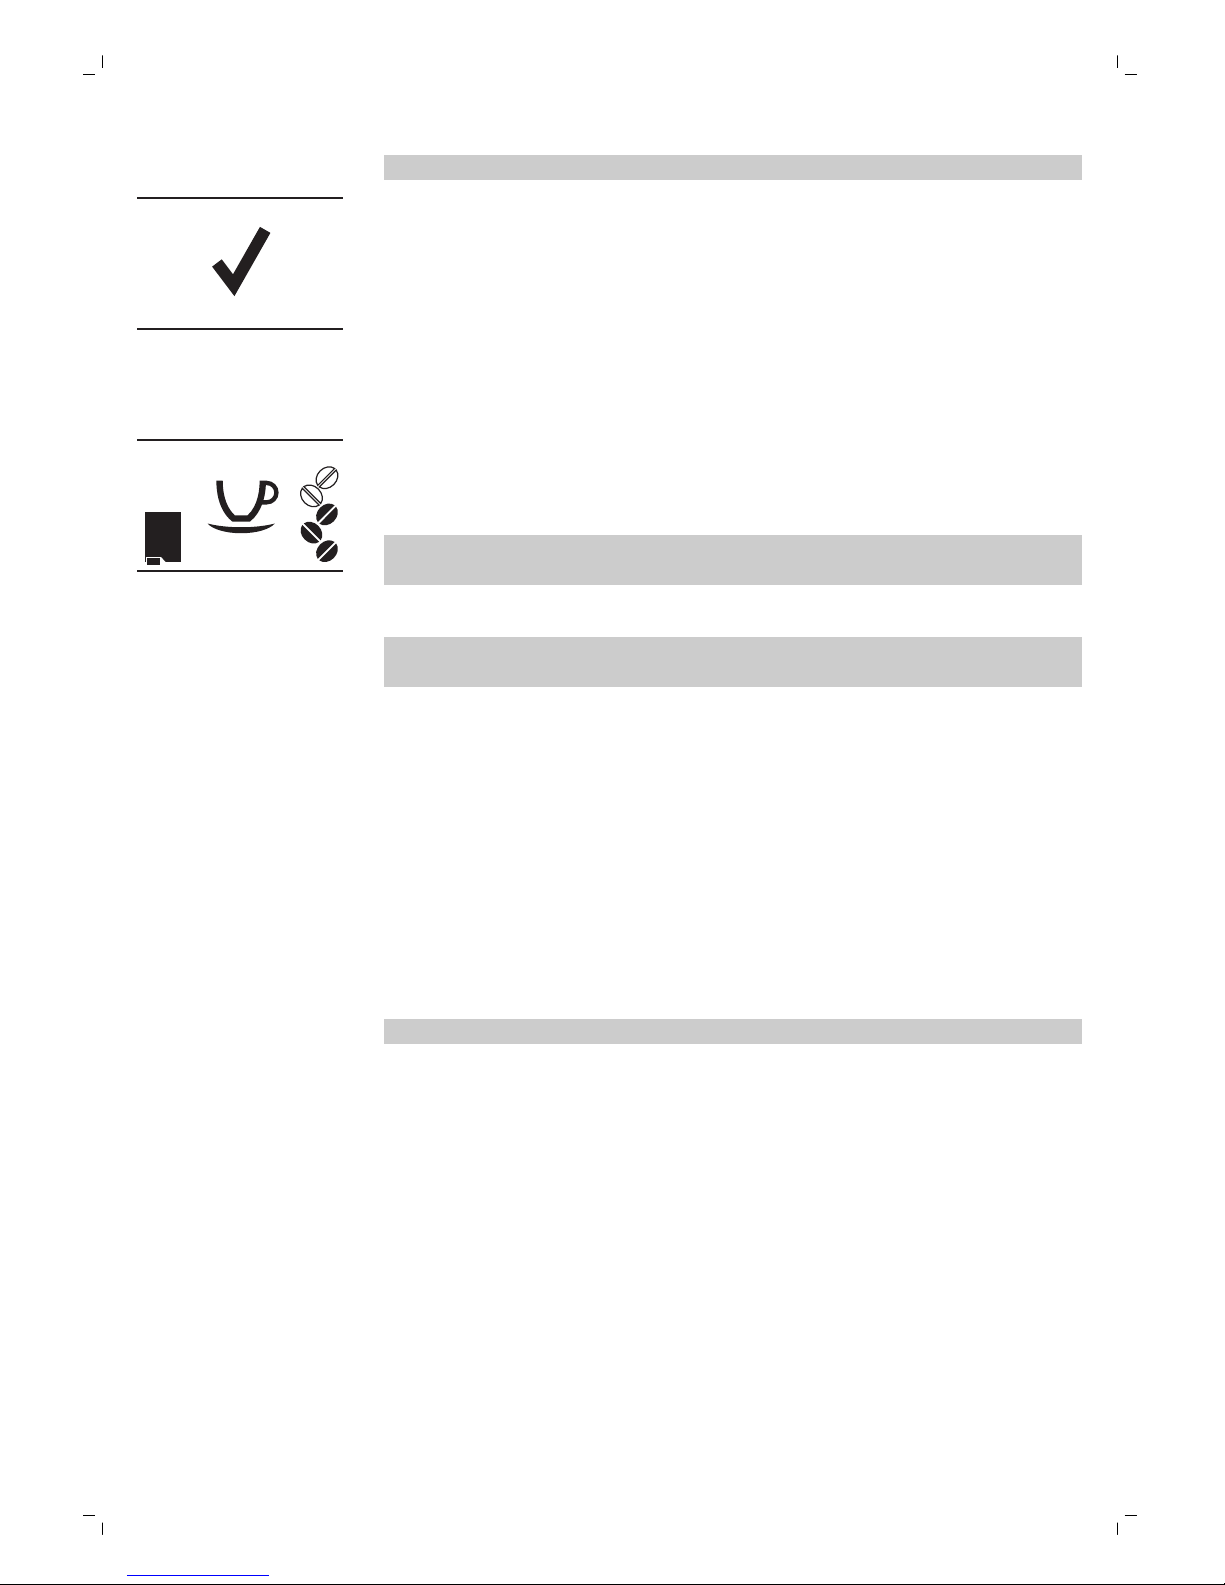
2 Press the AROMA STRENGTH button to select pre-ground coffee. Do not
add pre-ground coffee.
3 Press the ESPRESSO LUNGO button. The machine starts dispensing
water.
4 When the machine stops dispensing, empty the container. Repeat steps
1-3 twice.
5 Place a container under the classic milk frother.
6 Press the HOT WATER button. Hot water dispensing starts automatically.
Dispense water until the display shows the no water icon.
7 Fill the water tank with fresh water up to the MAX level and remove the
container.
The machine is ready for use.
AquaClean filter
The AquaClean filter is designed to reduce limescale deposits in your coffee
machine and provide filtered water to preserve the aroma and flavor of each
cup of coffee. If you use a series of 8 Aquaclean filters as indicated in this
user manual, you don't have to descale your machine for 5000 cups (with a
capacity of 100 ml).
10
English
Page 11
AquaClean filter installation
Your machine has to be completely limescale-free before you start to use
the AquaClean filter. If you did not activate the filter upon first use and
brewed more than 50 cups (with 100 ml capacity), you need to descale the
machine before you activate the filter.
1 Remove the AquaClean filter from its packaging. Shake the filter for about
5 seconds.
2 Immerse the filter upside down in a jug with cold water and wait until no
more air bubbles come out.
3 Remove the water tank from the machine and insert the filter vertically
onto the filter connection.
4 Fill the water tank with fresh water and slide it back into the machine.
5 Press the MENU button and scroll to the AquaClean filter option. Then
press the OK button to select the AquaClean filter option.
If you are installing the filter at first time use, follow the steps in chapter
‘First installation’.
AQ U A
CLE AN
0/8
ON
OFF
6 Select ON on the display and confirm the activation by pressing the OK
button.
Note: The display shows a tick icon to confirm the activation.
7 To rinse the filter, press the HOT WATER button and let half a litre water
flow out from the hot water/steam dispensing spout. Discard this water.
Note: It can take a while until water comes out of the hot water
dispensing spout. The filter needs to be fully filled and rinsed with water.
8 Use the sticker attached to the plastic packaging of the AquaClean filter
to write down the date of the next filter replacement (after 3 months).
Place the sticker on the water tank.
The filter and machine are now ready for use.
Replacing the AquaClean filter
Replace the filter every 3 months or at machine request.
11
English
Page 12

Display icon AquaClean filter What to do
10% + icon flashes The performance of this filter is decreasing. It is
recommended to remove the old filter and place the
new filter as described in section 'AquaClean filter
installation’ to retain proper filter performance.
0% + icon flashes Remove the old filter immediately and place the new
filter as described in section ‘AquaClean filter
installation’. When you activate a new filter, the display
shows the word NEW. Press the OK button to confirm
the activation.
0% and icon disappears from display You first need to descale the machine before you can
place and activate a new filter.
After 8 filter replacements you need to descale the machine chapter
‘Descaling’, section ‘Descaling procedure’.
Using the machine
Brewing coffee with beans
1 Adjust the coffee dispensing spout to suit the size of your cup.
2 Press the AROMA STRENGTH button to select the desired coffee
strength from 1-5 beans.
3 Press the ESPRESSO button to brew an espresso or press the ESPRESSO
LUNGO button to brew a coffee.
Adjusting the coffee quantity
1 Press and hold the ESPRESSO button or ESPRESSO LUNGO button until
the display shows the word MEMO.
2 When the cup contains the desired amount of coffee, press the OK
button to save the selected quantity.
Adjusting the grind setting
Note: You can only adjust the grinder settings when the machine is grinding
coffee beans.
1 Open the lid of the bean hopper.
2 Place a cup under the coffee dispensing spout.
3 Press the ESPRESSO button.
4 While the machine grinds the coffee, place the end of the measuring
spoon handle on the grinder adjustment knob in the coffee bean hopper.
Use the spoon to press and turn the knob to the left or to the right one
notch a time.
5 There are 10 different grinding degree settings you can choose from. The
smaller the dot, the stronger the coffee.
-
Coarse grind: lighter taste, for dark roasted coffee blends.
-
Fine grind: bolder taste, for light roasted coffee blends.
12
English
Page 13
6 Brew 2-3 coffees to taste the difference.
Frothing milk
Warning: Danger of scalding. Only grab the steam wand by its
protective handle. Dispensing may be preceded by small jets of
hot water.
1 Fill 1/3 of a jug with cold milk.
2 Immerse the classic milk frother in milk. Press the STEAM button.
3 Froth the milk by gently swirling the jug and moving it up and down.
4 Press the OK button to stop frothing.
Hot water
Warning: Danger of scalding. Only grab the steam wand by its
protective handle. Dispensing may be preceded by small jets of
hot water.
1 Place a jug under the classic milk frother.
2 Press the HOT WATER button. Hot water dispensing starts automatically.
3 Press the OK button to stop hot water dispensing. Remove the container.
Cleaning and maintenance
Weekly cleaning of the brew group
Clean the brew group once per week.
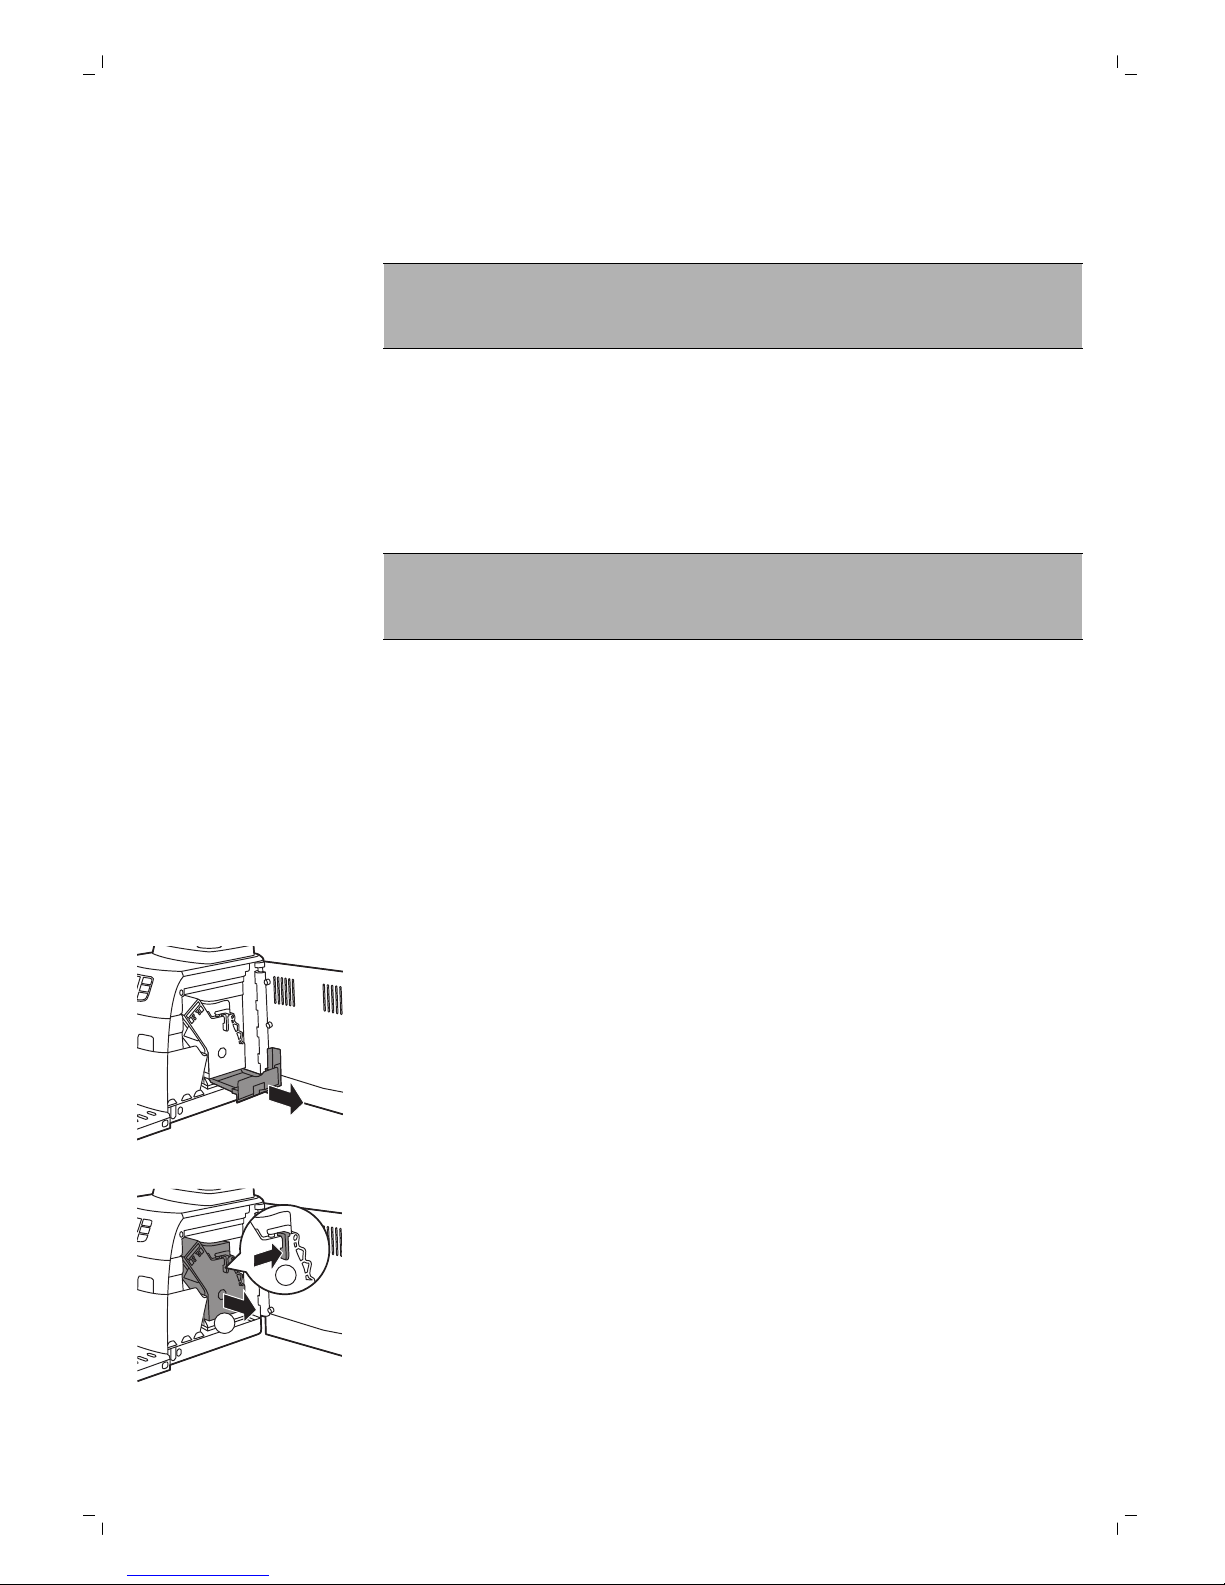
1 Remove the coffee grounds container and open the service door.
2 Remove the coffee residues drawer.
1
2
3 To remove the brew group, press the lever and pull the brew group out of
the machine.
4 Rinse the brew group with fresh water and let it air dry.
13
English
Page 14
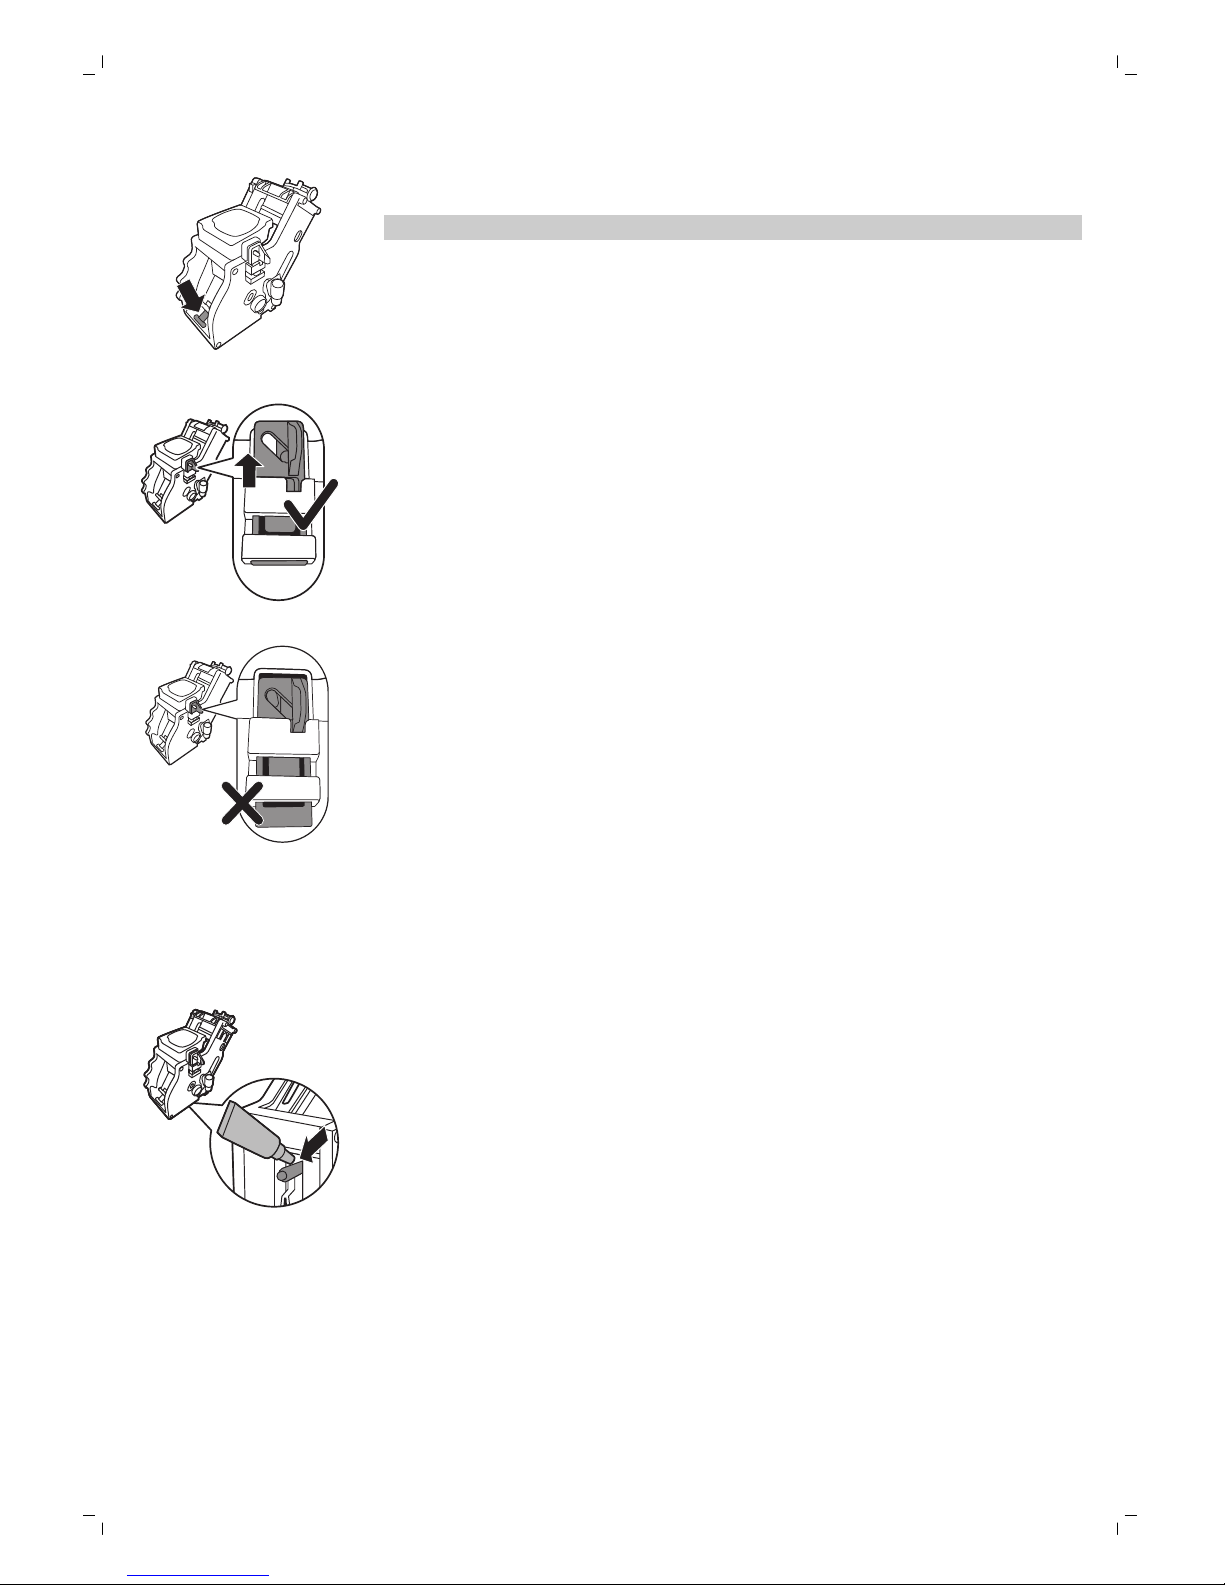
5 To place the brew group back, make sure that the lever is in contact with
the base of the brewing unit.
Note: If it is not in contact with the base, push it down.
6 Make sure the locking hook of the brew group is in the correct position.
To position the hook correctly, push it upwards until it is in uppermost
position.
7 The hook is not correctly positioned if it is still in bottommost position.
8 Slide the brew group back into the machine along the guiding rails on the
sides until it clicks into position. Then place the coffee residues drawer
back in the machine.
Lubrication
Lubricate the brew group after approximately 500 cups of coffee or once a
month.
1 Apply some lubricant around the shaft in the bottom of the brewing unit.
14
English
Page 15

2 Apply lubricant to the rails on both sides, as shown in the illustration.
3 Slide the brew group back into the machine along the guiding rails on the
sides until it clicks into position. Then place the coffee residues drawer
back in the machine.
Classic milk frother cleaning (daily)
Remove the external part of the classic milk frother and rinse it with fresh
water.
Classic milk frother and steam wand cleaning (weekly)
1 Remove the external part of the classic milk frother and rinse it with fresh
water.
2 Remove the upper part of the classic milk frother from the steam wand
and rinse it with fresh water.
3 Clean the steam wand with a wet cloth.
4 Reassamble all the classic milk frother parts.
Descaling
You have to descale the machine when the display shows the CALC CLEAN
icon or after 8 AquaClean filter replacements.
15
English
Page 16

START
CALC
CLEAN
If you do not descale when the display shows the CALC CLEAN icon or after
8 AquaClean filter replacements, the machine may stop working properly. In
this case, repairs are not covered by the guarantee).
Never drink the water with descaling mixture that you pour into
the water tank or any water with residues that comes out of the
machine during the descaling procedure.
The descaling procedure lasts approximately 30 minutes.
Only use Gaggia descaling solution to descale the machine. Gaggia
descaling solution is designed to ensure optimal performance of the
machine. The use of other products may damage the machine and leave
residues in the water. You can buy Gaggia descaling solution from your local
reseller or from the authorized service centers. Contact details are included
in the warranty booklet supplied separately or visit www.gaggia.com/n-m-
co/espresso/world-wide or www.gaggia.it/n-m-co/espresso/contact.
Descaling procedure
CA LC
CL EA N
You can pause the descaling or rinsing cycle by pressing the ESC button.
The display will show the following icon. To continue the descaling or rinsing
cycle, press the OK button.
1 Remove and empty the drip tray. Slide the drip tray back into the
machine.
Note: Remove the AquaClean water filter from the water tank (if present).
2 Remove the classic milk frother from the steam wand.
3 Press the OK button.
4 The display shows the following icon to indicate that the machine enters
the descaling cycle. If you want to exit the descaling cycle, press the ESC
button.
5 Pour the entire bottle of Gaggia descaling solution (250ml) into the water
tank.
6 Add water to the descaling solution in the water tank up to the CALC
CLEAN indication.
7 Place a large container (1.5 l) under the steam wand and dispensing
spout.
8 Press the OK button to start the descaling cycle.
-
The machine dispenses the entire descaling solution at regular intervals
through the steam wand and dispensing spout (this takes approximately
25 minutes).
9 Wait until all of the descaling solution has been dispensed. Remove and
empty the container.
10 Remove and empty the drip tray. Slide the drip tray back into the
machine.
11 Rinse the water tank and fill it with fresh water up to the CALC CLEAN
indication. Slide the water tank back into the machine.
12 Place the container back under the steam wand and dispensing spout.
13 Press the OK button to start the rinsing cycle (this takes approximately 4
minutes).
16
English
Page 17

CALC
CLEAN
-
The display shows the following icon to indicate that the rinsing cycle is
finished.
14 The display shows a tick icon.
15 Rinse the water tank and fill it with fresh water up to the MAX level. Slide
the water tank back into the machine.
16 Press the OK button to end the descaling cycle.
17 Place a container under the steam wand and dispensing spout.
18 The display shows the following icon to indicate that the machine is
heating up.
-
The machine performs an automatic rinsing cycle.
19 Remove the container. Remove and empty the drip tray. SLide the drip
tray back into the machine.
20Place the AquaClean filter back in the water tank. Reinsert the classic milk
frother.
21 Remove and rinse the brew group see chapter ‘Cleaning and
maintenance’, section ‘Clean the brew group’.
The machine is now ready for use.
Interruption of the descaling cycle
Once the descaling cycle has started, you must complete it till the very end
without turning off the machine. In case you get stuck during the cycle or in
case of power failure or accidental disconnection of the power cord, you
can exit by pressing the standby button. If this occurs, empty and rinse
carefully the water tank, then fill it up to the CALC CLEAN level. Follow the
instructions in chapter ‘First installation’, section ‘Manual rinsing cycle’
before brewing any beverage. If the cycle was not completed, the machine
will require another descaling cycle to be performed at your earliest
convenience.
Warning icons and error codes
Warning signals are displayed in red. Below you find a list of the
warnings that may appear on the display and their meaning.
-
Fill the water tank with fresh water to the MAX level indication.
17
English
Page 18

-
The bean hopper is empty. Put new coffee beans in the bean hopper.
-
The brew group is not in the machine. Insert the group.
-
Close the service door.
-
Remove the coffee grounds container and empty it.
-
There is too much powder in the brew group. Clean the brew group.
-
If an error code is triggered, check the section 'Meaning of error codes' to
see what the code on the display means and what you can do. The
machine cannot be used when this icon is on the display.
18
English
Page 19

-
You forgot to place the lid on the pre-ground coffee compartment. If you
do not place it back within 30 seconds the display will return to the main
menu and the brewing cycle will be stopped.
Meaning of error codes
Error code
Problem Cause Possible solution
1 Coffee grinder blocked Coffee exit duct
clogged
Clean the coffee exit
duct thoroughly with
the handle of the
multifunctional tool or a
spoon handle.
3 - 4 The brew group cannot
be removed.
The brew group is not
positioned correctly.
Close the maintenance
door. Switch the
machine off and back
on again. Wait for the
‘machine ready’ icon on
the display and then
remove the brew group.
5 Water circuit problem There is air in the water
circuit.
Remove and place back
the water tank a couple
of times. Make sure you
insert it into the
machine properly.
Check if the water tank
compartment is clean.
Other error codes Switch the machine off
and switch it back on
again after 30 seconds.
Try this 2 or 3 times.
If the above solutions do not help to remove the error code icon from the
display and bring the machine back to normal working order, contact the
Gaggia hotline. Contact details can be found in the warranty booklet or or
visit www.gaggia.com/n-m-co/espresso/world-wide or www.gaggia.it/n-
m-co/espresso/contact.
Ordering accessories
To clean and descale the machine, only use the Gaggia maintenance
products. These products can be purchased from your local reseller or from
the authorized service centers.
Maintenance products:
-
Descaling solution
-
AquaClean filter
-
Brew group grease
-
Degreasing tablets
19
English
Page 20

Guarantee and support
If you need information or support, please visit www.gaggia.com/n-mco/espresso/world-wide or www.gaggia.it/n-m-co/espresso/contact, or
read the separate warranty booklet.
Recycling
-
This symbol means that this product shall not be disposed of with normal
household waste (2012/19/EU).
-
Follow your country's rules for the separate collection of electrical and
electronic products. Correct disposal helps prevent negative
consequences for the environment and human health.
Troubleshooting
Problem
Cause Solution
The machine does not
switch on
The machine is disconnected or
the main switch is in the OFF
position.
Check if the mains cord is inserted
correctly
Make sure the main switch is set in ON
position.
The machine is in DEMO
mode.
The standby button has been
pressed for more than 8 seconds.
Switch the machine off and then on
again using the main switch on the
back of the machine.
The drip tray is quickly
filled.
This is normal. The machine uses
water to rinse the internal circuit
and brew group. Some water
flows through the internal system
directly into the drip tray.
Empty the drip tray when the 'drip tray
full' full indicator pops up through the
drip tray cover.
Place a cup under the dispensing
spout to collect rinsing water.
The coffee grounds
container full icon remains
displayed.
The coffee grounds container
was emptied while the machine
was switched off.
Always empty the coffee grounds
container while the machine is ON. If
the coffee grounds container is
emptied while the machine is switched
off, the coffee cycle counter is not
reset. In that case, the 'empty coffee
grounds container' message will stay
on the display even though the
container is not full.
The coffee grounds container
was placed back too fast.
Do not place back the coffee grounds
container until the screen message
prompts you to put it back
20
English
Page 21

The brew group cannot
be removed.
The brew group is not positioned
correctly.
Close the maintenance door. Switch
the machine off and back on again.
Wait for the machine ready screen to
appear and then remove the brew
group.
The coffee grounds container is
not removed.
Remove the coffee grounds container
before removing the brew group.
The machine is still in the
descaling process.
You cannot remove the brew group
when the descaling process is active.
First complete the descaling process
and then remove the brew group.
The brew group cannot
be inserted.
The brew group is not in the
correct position.
The brew group was not put in rest
position before it was placed back.
Make sure that the lever is in contact
with the base of the brew group and
that the hook of the brew group is in
the correct position.
Reset the machine by switching it on
and off. Place the drip tray and the
coffee grounds container back. Leave
the brew group out. Close the
maintenance door and switch the
machine on and off. Then try to
reinsert the brew group.
The coffee has too little
cream or is watery.
The grinder is set to a coarse
setting.
Adjust the grinder to a finer setting.
The brew group is dirty. Clean the brew group. For thorough
cleaning, follow the monthly cleaning
procedure with the degreasing tablet.
The coffee exit duct is dirty. Clean the coffee exit duct thoroughly
with the handle of the multifunctional
tool or a spoon handle.
The coffee blend is not the
correct one.
Try another coffee blend.
The machine is performing its
self-adjustment.
Brew a few cups of coffee.
The coffee is not hot
enough.
The cups you use are cold. Preheat the cups by rinsing them with
hot water.
The temperature is set too low.
Check the menu settings.
Set the temperature to high in the
menu.
You added milk. Whether the milk you add is warm or
cold, it will always decrease the
temperature of the coffee to some
extent.
21
English
Page 22

The machine grinds the
coffee beans, but coffee
does not come out.
The grind is set too fine. Adjust the grinder to a coarser setting.
The brew group is dirty. Clean the brew group.
The coffee dispensing spout is
dirty.
Clean the coffee dispensing spout and
its holes with a pipe cleaner.
The coffee exit duct is blocked. Clean the coffee exit duct with the
handle of the multifunctional tool or a
spoon handle.
The coffee comes out
slowly.
The grind is ground too finely. Change the grinder to a coarser
setting.
The brew group is dirty. Clean the brew group.
The coffee exit duct is blocked. Clean the coffee exit duct with the
handle of the multifunctional tool or a
spoon handle.
The machine circuit is blocked by
limescale.
Descale the machine.
The milk does not froth. The automatic milk frother is
dirty or not assembled or
installed correctly.
Clean the automatic milk frother and
make sure it is correctly assembled or
installed.
The type of milk used is not
suitable for frothing.
Different types of milk result in
different amounts of froth and
different froth qualities. Semi-skimmed
or full-fat cow's milk give good results.
The AquaClean filter
cannot be activated as
the tick does not appear
on the display.
A filter has just been activated. You have to dispense at least 10 cups
(of 100ml each) before you can
activate a new filter. Be careful as you
activate a new filter, the filter counter
will increase automatically.
The filter cannot be
activated and the
machine asks for
descaling.
You have already replaced 8
AquaClean filters. After 8 filter
replacements you need to
descale the machine.
Descale your machine first and install
the filter.
The filter has not been replaced
in time after the AquaClean
water filter signal started
flashing.
Descale your machine first and install
the filter.
The filter has not been installed
during first installation but after
having brewed approx.50
coffees (based on 100ml cups).
The machine has to be
completely limescale-free
before installing the AquaClean
filter.
First descale the machine and then
install a new AquaClean filter. After
descaling, the filter counter is reset to
0/8. Always confirm filter activation in
the machine menu, also after filter
replacement
22
English
Page 23

The AquaClean filter was not
correctly activated during first
installation.
Follow the instructions on the display
until you receive confirmation that the
filter has been activated.
The AquaClean filter is
installed, but the
descaling message
appears.
After 8 filter replacements, you
need to descale the machine
First descale the machine and then
install a new AquaClean filter. This will
reset the filter counter to 0/8. Always
confirm filter activation in the machine
menu, also after filter replacement.
The descaling message
appears before 8 filters
were replaced.
You did not activate the
AquaClean filter correctly during
first installation.
First descale the machine and then
install a new AquaClean filter. Always
activate the filter in the machine menu.
You placed the AquaClean filter
after having used the machine
for a while.
You did not activate the
replacement filter in the machine
menu.
You did not replace the filter
when the filter symbol started
flashing.
The filter does not fit. You need to remove air from the
filter.
Let air bubbles come out of the filter.
There is still water in the water
tank.
Empty the water tank before you
install the filter.
You try to install another filter
than the AquaClean filter.
Only the AquaClean filter will fit.
There is water under the
machine.
The drip tray is too full and
overflowed.
Empty the drip tray when the drip tray
full indicator pops up through the drip
tray. Always empty the drip tray before
you start descaling the machine.
The machine is not placed on a
horizontal surface.
Place the machine on a horizontal
surface so that the drop iray full
indicator works properly.
Note: If you are unable to solve the problem with the information in this
table, contact your local reseller or an authorized service center. Contact
details are included in the warranty booklet supplied separately or visit
www.gaggia.com/n-m-co/espresso/world-wide or www.gaggia.it/n-mco/espresso/contact.
23
English
Page 24

Inhalt
Einführung _______________________________________________________________________ 24
Wichtig __________________________________________________________________________ 25
Warnhinweis______________________________________________________________________ 25
Achtung_________________________________________________________________________ 26
Elektromagnetische Felder (EMF)____________________________________________________ 27
Übersicht über die Maschine (Abb. 1)__________________________________________________ 27
Das Display ______________________________________________________________________ 28
Inbetriebnahme __________________________________________________________________ 28
Manueller Spülzyklus ______________________________________________________________ 30
AquaClean-Filter _________________________________________________________________ 31
Installation des AquaClean-Filters ___________________________________________________ 31
AquaClean-Filter austauschen ______________________________________________________ 32
Verwenden des Geräts _____________________________________________________________ 32
Kaffee aus Kaffeebohnen zubereiten_________________________________________________ 32
Einstellen der Kaffeemenge ________________________________________________________ 33
Mahlgrad einstellen________________________________________________________________ 33
Aufschäumen von Milch____________________________________________________________ 33
Heißes Wasser ____________________________________________________________________ 33
Reinigung und Pflege ______________________________________________________________ 34
Wöchentliche Reinigung der Brühgruppe______________________________________________ 34
Schmierung ______________________________________________________________________ 35
Reinigen des klassischen Milchaufschäumers (täglich) ___________________________________ 35
Reinigung des klassischen Milchaufschäumers und der Dampfdüse (wöchentlich) ____________ 35
Entkalken ________________________________________________________________________ 36
Entkalkungsvorgang _______________________________________________________________ 36
Unterbrechung des Entkalkungsvorgangs _____________________________________________ 37
Warnsymbole und Fehlercodes _____________________________________________________ 38
Bedeutung der Fehlercodes_________________________________________________________ 39
Bestellen von Zubehör_____________________________________________________________ 40
Garantie und Support ______________________________________________________________ 40
Recycling________________________________________________________________________ 40
Fehlerbehebung__________________________________________________________________ 41
Einführung
Herzlichen Glückwunsch zum Kauf dieses Espresso-Vollautomaten Gaggia
Velasca. Die Maschine ist geeignet zur Vorbereitung von Espressokaffee
unter Verwendung von ganzen Kaffeebohnen.
24
Deutsch
Page 25

Wichtig
Warnhinweis
-
Die Maschine benötigt eine Netzsteckdose mit
Netzanschlusswerten, die mit den Angaben auf der Maschine
übereinstimmen.
-
Die Netzsteckdose muss schutzgeerdet sein.
-
Lassen Sie das Netzkabel nicht über die Kante des Tischs oder der
Arbeitsfläche hängen oder heiße Flächen berühren.
-
Tauchen Sie die Maschine, den Netzstecker oder das Netzkabel
nie in Wasser (Stromschlaggefahr).
-
Schütten Sie keine Flüssigkeiten über den Netzstecker.
-
Richten Sie die Heißwasserdüse nie auf Teile des Körpers:
Verbrühungsgefahr.
-
Berühren Sie keine heißen Oberflächen. Fassen Sie die Maschine
an den Griffen und Knöpfen an.
-
Schalten Sie die Maschine mit dem Hauptschalter an der Rückseite
aus, und trennen Sie den Netzstecker von der Steckdose:
-
Wenn eine Störung auftritt
-
Wenn die Maschine längere Zeit nicht in Gebrauch sein wird
-
Zum Reinigen der Maschine
-
Ziehen Sie am Stecker, nicht am Kabel.
-
Berühren Sie den Netzstecker nicht mit nassen Händen.
-
Verwenden Sie die Maschine nicht, wenn der Netzstecker, das
Netzkabel oder die Maschine selbst defekt oder beschädigt ist..
-
Nehmen Sie an der Maschine und an dem Netzkabel keine
Veränderungen vor.
-
Lassen Sie Reparaturen ausschließlich von einem GaggiaVertragskundendienst durchführen, um Gefahren zu vermeiden.
-
Die Maschine soll nicht von Kindern unter 8 Jahren bedient
werden.
25
Deutsch
Page 26

-
Dieses Gerät kann von Kindern ab 8 Jahren und Personen mit
eingeschränkten physischen, sensorischen oder geistigen
Fähigkeiten oder ohne Erfahrung und besondere Kenntnisse
verwendet werden, wenn sie beim Gebrauch des Geräts
beaufsichtigt werden oder in den sicheren Gebrauch des Geräts
unterwiesen wurden und die verbundenen Gefahren verstanden
haben.
-
Reinigung und Pflege dürfen nicht von Kindern durchgeführt
werden, außer sie sind älter als 8 Jahre und werden beaufsichtigt.
-
Sorgen Sie dafür, dass Kinder unter 8 Jahren keinen Zugang zu der
Maschine und zum Kabel der Maschine haben.
-
Achten Sie darauf, dass Kinder nicht mit der Maschine spielen.
-
Stecken Sie nie die Finger oder andere Gegenstände in das
Mahlwerk.
-
Die Maschine darf während der Benutzung nicht in einem Schrank
platziert werden.
Achtung
-
Diese Maschine ist nur für den normalen Hausgebrauch bestimmt.
Sie ist nicht für den Gebrauch in Personalküchen, Büros,
landwirtschaftlichen Betrieben oder anderen gewerblichen
Umgebungen vorgesehen.
-
Stellen Sie die Maschine auf eine ebene und stabile Fläche. Halten
Sie die Maschine aufrecht, auch beim Transport..
-
Stellen Sie die Maschine nicht auf eine Warmhalteplatte, direkt
neben einen heißen Ofen, eine Heizung oder eine ähnliche
Wärmequelle.
-
Befüllen Sie den Bohnenbehälter nur mit gerösteten
Kaffeebohnen. Gemahlener Kaffee, Instantkaffee, rohe
Kaffeebohnen oder irgendetwas anderes im
Kaffeebohnenbehälter kann zu Schäden an der Maschine führen.
-
Lassen Sie die Maschine abkühlen, bevor Sie Teile anbauen oder
entfernen. Die Heizflächen können nach dem Gebrauch noch heiß
sein.
26
Deutsch
Page 27

-
Füllen Sie den Wasserbehälter nie mit warmem, heißem oder
Mineralwasser, da dies zu Schäden am Wasserbehälter und an der
Maschine führen kann.
-
Reinigen Sie die Maschine nie mit einem Scheuerschwamm oder
Scheuermittel oder mit aggressiven Flüssigkeiten wie Benzin oder
Azeton. Verwenden Sie einfach ein weiches, mit Wasser
angefeuchtetes Tuch.
-
Entkalken Sie Ihre Maschine regelmäßig. Die Maschine zeigt an,
wenn sie entkalkt werden muss. Wenn Sie dies ignorieren,
funktioniert das Gerät nicht mehr richtig. In dem Fall ist auch die
Reparatur von der Gewährleistung ausgeschlossen.
-
Setzen Sie die Maschine nicht Temperaturen unter 0 °C aus.
Wasser im Heizsystem kann einfrieren und Schäden verursachen.
-
Lassen Sie kein Wasser im Wasserbehälter, wenn die Maschine
längere Zeit nicht in Gebrauch sein wird. Das Wasser kann
verschmutzen. Verwenden Sie bei jedem Gebrauch Ihrer Maschine
frisches Wasser.
Elektromagnetische Felder (EMF)
Dieses Gaggia-Gerät erfüllt sämtliche Normen und Vorschriften bezüglich
Gefährdung durch elektromagnetische Felder.
Übersicht über die Maschine (Abb. 1)
1 Deckel des Kaffeebohnenbehälters
2 Kaffeebohnenbehälter
3 Buchse für Kabel
4 Wasserbehälter
5 Behälter für vorgemahlenen Kaffee
6 Mahlgradregler
7 Bedienfeld
8 Kaffeesatzbehälter
9 Kaffeeauslauftrichter
10 Abtropfschale
11 Abdeckung für Abtropfschale
12 Abtropfschale voll-Anzeige
13 ESPRESSO-Taste
14 ESPRESSO LUNGO-Taste
15 AROMASTÄRKE-Taste
16 Start-/Standby-Taste
17 MENU-Taste (Menütaste)
18 HOT WATER-Taste (Heißwasser)
19 STEAM-Taste (Dampf)
27
Deutsch
Page 28

20 Netzkabel
21 Reinigungsbürste (nur für bestimmte Gerätetypen)
22 Fett (nur für bestimmte Gerätetypen)
23 Messlöffel für vorgemahlenen Kaffee
24 Wasserhärtetester
25 Kaffeeresteschublade
26 Brühgruppe
27 Heißwasser-/Dampfdüse
28 Klassischer Milchaufschäumer
Das Display
Einige Tasten können zum Navigieren durch die Menüs verwendet werden:
ES PR ES SO
-
ESPRESSO-Taste = ESC_Taste: Drücken Sie diese Taste, um zurück zum
Hauptmenü zu gelangen. Die ESC-Taste bringt Sie eine Stufe zurück. Sie
müssen unter Umständen die ESC-Taste mehrmals drücken, um wieder
zum Hauptmenü zu gelangen.
A
R
O
M
A
S
T
R
E
N
G
T
H
-
AROMA STRENGTH-Taste (Aromastärke) = OK-Taste: Drücken Sie diese
Taste, um eine Funktion auszuwählen, zu bestätigen oder zu beenden.
ST EAM
-
STEAM-Taste (Dampf) = UP-Taste (Auf): Drücken Sie diese Taste, um im
Displaymenü nach oben zu gehen
MEN U
-
MENU-Taste = DOWN-Taste (Unten): Drücken Sie diese Taste, um im
Displaymenü nach unten zu gehen.
Inbetriebnahme
1 Schieben Sie die Tropfschale mit dem Tropfschalendeckel in das Gerät.
2 Nehmen Sie den Wassertank vom Gerät.
3 Füllen Sie den Wasserbehälter bis zur Markierung MAX mit frischem
Wasser.
4 Füllen Sie den Kaffeebohnenbehälter mit Kaffeebohnen.
5 Stecken Sie den kleinen Stecker in die Buchse auf der Rückseite der
Maschine. Stecken Sie den Netzstecker in die Steckdose.
6 Befestigen Sie den klassischen Milchaufschäumer am
Heißwasser/Dampfauslauf.
7 Stellen Sie einen Behälter unter den klassischen Milchaufschäumer.
28
Deutsch
Page 29

8 Drücken Sie zum Einschalten der Maschine die STANDBY-Taste.
9 Drücken Sie die OK-Taste, um die automatische Kreislaufvorbereitung zu
starten.
10 Das folgende Symbol in der Anzeige zeigt an, dass sich das Gerät
aufheizt.
-
Die Maschine führt einen automatischen Spülzyklus durch.
AQUA
CLE AN
AQUA CL EAN
FILT ER?
11 Das Display zeigt das folgende Symbol an, um Sie auf den Einbau des
AquaClean-Filters hinzuweisen.
Hinweis: Wenn Sie den AquaClean-Filter nachträglich einbauen
möchten, drücken Sie die ESC-Taste und fahren mit dem manuellen
Spülzyklus fort. Informationen zur Installation finden Sie im Kapitel
„AquaClean-Filter“.
AQUA
CLE AN
INS TALL
FILT ER
12 Drücken Sie die OK-Taste. Das Display zeigt das folgende Symbol an.
13 Nehmen Sie den AquaClean Filter aus der Verpackung. Schütteln Sie den
Filter ca. 5 Sekunden.
14 Tauchen Sie den Filter kopfüber in einen Becher mit kaltem Wasser und
warten Sie, bis keine Blasen mehr herauskommen.
29
Deutsch
Page 30

15 Nehmen Sie den Wassertank aus dem Gerät, entleeren Sie ihn und
setzen Sie den Filter senkrecht auf den Filteranschluss.
16 Füllen Sie den Wassertank mit frischem Wasser, und setzen Sie ihn
wieder ein.
17 Drücken Sie die OK-Taste.
AQ U A
CLE AN
0/8
ON
OFF
18 Wählen Sie ON (Ein) auf dem Display und bestätigen Sie die Aktivierung
durch Drücken der OK-Taste.
Die Aktivierung wird im Display mit einem Häkchen bestätigt.
AQUA
CLE AN
10 0%
19 Das Display zeigt das Symbol „Filter bereit” an, wenn der AquaClean-
Filter korrekt installiert wurde.
20Drücken Sie zum Spülen des Filters die HOT WATER-Taste (Heißwasser)
und lassen Sie einen halben Liter Wasser durch den
Heißwasser/Dampfauslauf fließen. Schütten Sie dieses Wasser weg.
Es kann eine Weile dauern, bis das Wasser aus dem Heißwasserauslauf
läuft. Der Filter muss vollständig gefüllt und mit Wasser gespült sein.
Die Maschine ist einsatzbereit.
Nach der Installation des AquaClean-Filters müssen Sie nicht den
Spülzyklus ausführen.
Manueller Spülzyklus
1 Stellen Sie einen Behälter unter den Kaffeeauslauftrichter.
2 Drücken Sie die AROMA STRENGTH-Taste (Aromastärke), um den
vorgemahlenen Kaffee zu wählen. Fügen Sie keinen vorgemahlenen
Kaffee hinzu.
3 Drücken Sie die ESPRESSO LUNGO-Taste. Die Maschine beginnt Wasser
auszugeben.
4 Wenn kein Wasser mehr läuft, leeren Sie den Behälter. Wiederholen Sie
die Schritte 1-3 zwei Mal.
30
Deutsch
Page 31

5 Stellen Sie einen Behälter unter den klassischen Milchaufschäumer.
6 Drücken Sie die HOT WATER-Taste (Heißwasser). Die Ausgabe des
heißen Wassers beginnt automatisch.
Lassen Sie Wasser laufen, bis das Symbol „Kein Wasser" gezeigt wird.
7 Füllen Sie den Wassertank bis zur Markierung MAX mit frischem Wasser
und entfernen Sie den Behälter.
Die Maschine ist einsatzbereit.
AquaClean-Filter
Der AquaClean-Filter reduziert Kalkablagerungen in Ihrer Kaffeemaschine
und bereitet gefiltertes Wasser, damit Aroma und Geschmack jeder Tasse
Kaffee optimal sind. Wenn Sie einen Satz aus 8 AquaClean-Filtern wie in
dieser Bedienungsanleitung vorgeschlagen verwenden, brauchen Sie Ihre
Maschine 5000 Tassen (à 100 ml) lang nicht zu entkalken.
Installation des AquaClean-Filters
Ihre Maschine muss zum Einbau des AquaClean-Filters vollkommen kalkfrei
sein. Falls Sie den Filter nicht beim ersten Gebrauch aktiviert haben und
mehr als 50 Tassen (mit 100 ml Kapazität) gebrüht haben, müssen Sie die
Maschine entkalken, bevor Sie den Filter aktivieren.
1 Nehmen Sie den AquaClean Filter aus der Verpackung. Schütteln Sie den
Filter ca. 5 Sekunden.
2 Tauchen Sie den Filter kopfüber in einen Becher mit kaltem Wasser und
warten Sie, bis keine Blasen mehr herauskommen.
3 Nehmen Sie den Wassertank aus der Maschine, und setzen Sie den Filter
senkrecht auf den Filteranschluss.
4 Füllen Sie den Wassertank mit frischem Wasser, und setzen Sie ihn
wieder ein.
5 Drücken Sie die MENU-Taste und scrollen Sie zur Option AquaClean-
Filter. Drücken Sie dann die OK-Taste, um die Option AquaClean-Filter
auszuwählen.
Wenn Sie den Filter gleich zu Anfang bei der Inbetriebnahme des Geräts
einbauen, folgen Sie den Schritten im Kapitel „Inbetriebnahme".
31
Deutsch
Page 32

AQ U A
CLE AN
0/8
ON
OFF
6 Wählen Sie ON (Ein) auf dem Display und bestätigen Sie die Aktivierung
durch Drücken der OK-Taste.
Hinweis: Die Aktivierung wird im Display mit einem Häkchen bestätigt.
7 Drücken Sie zum Spülen des Filters die HOT WATER-Taste (Heißwasser)
und lassen Sie einen halben Liter Wasser durch den
Heißwasser/Dampfauslauf fließen. Schütten Sie dieses Wasser weg.
Hinweis: Es kann eine Weile dauern, bis das Wasser aus dem
Heißwasserauslauf läuft. Der Filter muss vollständig gefüllt und mit
Wasser gespült sein.
8 Verwenden Sie den auf der Plastikverpackung des AquaClean-Filters
aufgebrachten Aufkleber, um das Datum des nächsten Filterwechsels
(nach 3 Monaten) zu notieren. Bringen Sie den Aufkleber am Wassertank
an.
Der Filter und die Maschine sind nun betriebsbereit.
AquaClean-Filter austauschen
Ersetzen Sie den Filter alle 3 Monate oder nach Aufforderung durch das
Gerät.
Anzeigesymbol AquaClean-Filter
Das müssen Sie tun
10 % + Symbol blinkt Die Leistung dieses Filters wird schwächer. Es wird
empfohlen, den alten Filter zu entfernen und den
neuen Filter wie im Abschnitt „Installation AquaCleanFilter“ beschrieben einzusetzen. So wird die
bestmögliche Filterleistung erhalten.
0 % + Symbol blinkt Entfernen Sie den alten Filter sofort und setzen Sie
den neuen Filter ein, wie im Abschnitt „Installation
AquaClean-Filter“ beschrieben. Beim Aktivieren eines
neuen Filters wird im Display das Wort NEU angezeigt.
Bestätigen Sie die Aktivierung mit der OK-Taste.
0 % und Symbol verschwinden aus dem
Display
Sie müssen das Gerät zuerst entkalken, bevor Sie einen
neuen Filter einsetzen und aktivieren können.
Nachdem der Filter 8-mal gewechselt wurde, müssen Sie das Gerät
entkalken. Siehe dazu Kapitel „Entkalken“, Abschnitt „Entkalkungsvorgang“.
Verwenden des Geräts
Kaffee aus Kaffeebohnen zubereiten
1 Stellen Sie den Kaffeeauslauftrichter auf die Größe Ihrer Tasse ein.
32
Deutsch
Page 33

2 Drücken Sie die Taste AROMA STRENGTH (Aromastärke), um die
gewünschte Kaffeestärke von 1 bis 5 Bohnen auszuwählen.
3 Drücken Sie die ESPRESSO-Taste, um einen Espresso zu brühen, oder
die ESPRESSO LUNGO-Taste, um einen Kaffee zu brühen.
Einstellen der Kaffeemenge
1 Halten Sie die ESPRESSO-Taste oder die ESPRESSO LUNGO-Taste
gedrückt, bis das Display das Wort MEMO anzeigt.
2 Wenn sich die gewünschte Menge Kaffee in der Tasse befindet, drücken
Sie die OK-Taste, um die ausgewählte Menge zu speichern.
Mahlgrad einstellen
Hinweis: Den Mahlgrad können Sie nur einstellen, während die Maschine
Kaffeebohnen mahlt.
1 Öffnen Sie den Deckel der Kaffeebohnenbehälters.
2 Stellen Sie eine Tasse unter den Kaffeeauslauftrichter.
3 Drücken Sie die ESPRESSO-Taste.
4 Während das Gerät den Kaffee mahlt, setzen Sie das Ende des
Messlöffelgriffs auf den Einstellregler des Mahlgrades im
Kaffeebohnenbehälter. Mit dem Löffel drücken und drehen Sie den
Regler jeweils um eine Stufe nach links oder rechts.
5 Es stehen 10 verschiedene Mahleinstellungen zur Auswahl. Je kleiner der
Punkt, desto stärker der Kaffee.
-
Grobe Mahlung: leichterer Geschmack, für dunkelgeröstete
Kaffeemischungen
-
Feine Mahlung: stärkerer Geschmack, für leichtgeröstete
Kaffeemischungen.
6 Brühen Sie 2-3 Tassen Kaffee, um den Unterschied zu schmecken.
Aufschäumen von Milch
Warnhinweis: Verbrühungsgefahr. Greifen Sie die Dampfdüse nur
mit dem Schutzgriff. Vor der Ausgabe können Heißwasserspritzer
austreten.
1 Füllen Sie eine Kanne bis zu 1/3 mit kalter Milch.
2 Tauchen Sie den klassischen Milchaufschäumer in die Milch. Drücken Sie
die STEAM-Taste (Dampf).
3 Schäumen Sie die Milch vorsichtig, indem Sie den Behälter drehen und
ihn hoch und runter bewegen.
4 Drücken Sie auf OK, um die Milchschäumung zu stoppen.
Heißes Wasser
Warnhinweis: Verbrühungsgefahr. Greifen Sie die Dampfdüse nur
mit dem Schutzgriff. Vor der Ausgabe können Heißwasserspritzer
austreten.
33
Deutsch
Page 34

1 Stellen Sie einen Behälter unter den klassischen Milchaufschäumer.
2 Drücken Sie die HOT WATER-Taste (Heißwasser). Die Ausgabe des
heißen Wassers beginnt automatisch.
3 Drücken Sie die OK-Taste, um die Heißwasserausgabe zu stoppen,
Entfernen Sie den Behälter.
Reinigung und Pflege
Wöchentliche Reinigung der Brühgruppe
Reinigen Sie die Brühgruppe einmal pro Woche.
1 Entfernen Sie den Kaffeesatzbehälter und öffnen Sie die Serviceklappe.
2 Entfernen Sie die Kaffeereste-Schublade.
1
2
3 Um die Brühgruppe zu entfernen, drücken Sie den Hebel und ziehen Sie
die Brühgruppe aus dem Gerät.
4 Spülen Sie die Brühgruppe mit frischem Wasser aus und lassen Sie sie an
der Luft trocknen.
5 Um die Brühgruppe wieder einzusetzen, achten Sie darauf, dass der
Hebel die Unterseite der Brühgruppe berührt.
Hinweis: Falls er die Brühgruppe nicht berührt, drücken Sie ihn nach
unten.
6 Stellen Sie sicher, dass der Verriegelungshaken der Brühgruppe in der
richtigen Position ist. Um den Haken in die richtige Position zu bringen,
schieben Sie ihn so weit wie möglich nach oben.
34
Deutsch
Page 35

7 Der Haken ist nicht richtig positioniert, wenn er noch in der untersten
Position ist.
8 Schieben Sie die Brühgruppe entlang der Führungsschienen an den
Seiten wieder in das Gerät, bis sie hörbar einrastet. Setzen Sie dann die
Kaffeeresteschublade wieder in das Gerät ein.
Schmierung
Schmieren Sie die Brühgruppe nach ungefähr 500 Tassen oder einmal im
Monat.
1 Tragen Sie etwas Schmiermittel rund um den Schaft an der Unterseite der
Brühgruppe auf.
2 Tragen Sie wie in der Abbildung dargestellt etwas Schmiermittel auf den
beidseitigen Schienen auf.
3 Schieben Sie die Brühgruppe entlang der Führungsschienen an den
Seiten wieder in das Gerät, bis sie hörbar einrastet. Setzen Sie dann die
Kaffeeresteschublade wieder in das Gerät ein.
Reinigen des klassischen Milchaufschäumers (täglich)
Entfernen Sie den äußeren Teil des klassischen Milchaufschäumers und
spülen Sie ihn mit frischem Wasser.
Reinigung des klassischen Milchaufschäumers und der
Dampfdüse (wöchentlich)
1 Entfernen Sie den äußeren Teil des klassischen Milchaufschäumers und
spülen Sie ihn mit frischem Wasser.
35
Deutsch
Page 36

2 Entfernen Sie den oberen Teil des klassischen Milchaufschäumers von
der Dampfdüse und spülen Sie ihn mit frischem Wasser.
3 Reinigen Sie die Dampfdüse mit einem feuchten Tuch.
4 Setzen Sie alle Teile des klassischen Milchaufschäumer wieder
zusammen.
Entkalken
Wenn das Display das Symbol CALC CLEAN anzeigt oder der AquaCleanFilter 8 Mal ausgewechselt wurde, muss das Gerät entkalkt werden.
START
CALC
CLEAN
Wenn Sie das Gerät bei Anzeige des Symbols CALC CLEAN oder nach
8-maligem Auswechseln des AquaClean-Filters nicht entkalken, funktioniert
es unter Umständen nicht mehr richtig. Reparaturen, die hierauf
zurückzuführen sind, fallen nicht unter die Garantie.
Trinken Sie niemals das Wasser mit der Entkalkungsmischung,
das Sie in den Wasserbehälter gießen, oder Wasser mit
Rückständen, das während des Entkalkungsvorgangs aus dem
Gerät kommt.
Der Entkalkungsvorgang dauert ungefähr 30 Minuten.
Verwenden Sie zum Entkalken Ihrer Maschine nur Gaggia-
Entkalkungslösung. Gaggia-Entkalkungslösung gewährleistet die optimale
Funktion der Maschine. Der Gebrauch von anderen Produkten kann zu
Schäden an der Maschine führen und Rückstände im Wasser hinterlassen.
Sie können Gaggia-Entkalkungslösung bei Ihrem lokalen Händler oder von
den autorisierten Kundenzentren erwerben. Die Anschriften und
Rufnummern finden Sie in dem getrennt beiliegenden Garantieheft oder auf
www.gaggia.com/n-m-co/espresso/world-wide oder www.gaggia.it/nm-co/espresso/contact.
Entkalkungsvorgang
CA LC
CL EA N
Sie können den Entkalkungs- oder Spülzyklus anhalten, indem Sie die ESCTaste drücken. Das Display zeigt dann das folgende Symbol an. Um den
Entkalkungs- oder Spülzyklus fortzusetzen, drücken Sie die OK-Taste.
1 Entnehmen und leeren Sie die Tropfschale. Schieben Sie die Tropfschale
wieder in die Maschine ein.
Hinweis: Entfernen Sie den AquaClean-Filter aus dem Wasserbehälter
(wenn vorhanden).
2 Entfernen Sie den klassischen Milchaufschäumer von der Dampfdüse.
3 Drücken Sie die OK-Taste.
36
Deutsch
Page 37

4 Das Display zeigt das folgende Symbol an, um anzuzeigen, dass das
Gerät den Entkalkungsvorgang startet. Wenn Sie den
Entkalkungsvorgang abbrechen möchten, drücken Sie die ESC-Taste.
5 Gießen Sie die gesamte Flasche Gaggia Entkalkungslösung (250 ml) in
den Wasserbehälter.
6 Füllen Sie die Entkalkungslösung im Wasserbehälter bis zur Markierung
CALC CLEAN mit Wasser auf.
7 Stellen Sie einen großen Behälter (1,5 l) unter die Dampfdüse und den
Kaffeeauslauftrichter.
8 Drücken Sie die OK-Taste, um den Entkalkungszyklus zu starten.
-
Die Maschine gibt die gesamte Entkalkungslösung in regelmäßigen
Intervallen über die Dampfdüse und den Kaffeeauslauftrichter aus (dies
dauert etwa 25 Minuten).
9 Warten Sie, bis die gesamte Entkalkungslösung ausgegeben wurde.
Entnehmen und leeren Sie den Behälter.
10 Entnehmen und leeren Sie die Tropfschale. Schieben Sie die Tropfschale
wieder in die Maschine ein.
11 Spülen Sie den Wassertank und füllen Sie ihn bis zur Markierung CALC
CLEAN mit frischem Wasser. Schieben Sie den Wasserbehälter wieder in
die Maschine ein.
12 Stellen Sie den Behälter wieder unter die Dampfdüse und den
Kaffeeauslauftrichter.
13 Drücken Sie die OK-Taste, um den Spülzyklus zu starten (dies dauert
etwa 4 Minuten).
CALC
CLEAN
-
Das folgende Symbol in der Anzeige zeigt an, dass der Spülzyklus
beendet ist.
14 Das Display zeigt ein Häkchensymbol an.
15 Spülen Sie den Wasserbehälter und füllen Sie ihn bis zur Markierung MAX
mit frischem Wasser. Schieben Sie den Wasserbehälter wieder in die
Maschine ein.
16 Drücken Sie die OK-Taste, um den Entkalkungszyklus zu beenden.
17 Stellen Sie einen Behälter unter die Dampfdüse und den
Kaffeeauslauftrichter.
18 Das folgende Symbol in der Anzeige zeigt an, dass sich das Gerät
aufheizt.
-
Die Maschine führt einen automatischen Spülzyklus durch.
19 Entfernen Sie den Behälter. Entnehmen und leeren Sie die Tropfschale.
Schieben Sie die Tropfschale wieder in die Maschine ein.
20Setzen Sie den AquaClean-Filter wieder in den Wassertank. Setzen Sie
den klassischen Milchaufschäumer wieder ein.
21 Entfernen und spülen Sie die Brühgruppe (siehe Kapitel „Reinigung und
Pflege", Abschnitt „Reinigen der Brühgruppe").
Die Maschine ist nun einsatzbereit.
Unterbrechung des Entkalkungsvorgangs
Der gestartete Entkalkungsvorgang muss bis ganz zum Schluss
durchlaufen – das Gerät darf währenddessen nicht ausgeschaltet werden.
Wenn das Gerät während dieses Zyklus stehenbleibt, der Strom ausfällt
37
Deutsch
Page 38

oder das Stromkabel versehentlich ausgesteckt wird, können Sie den
Entkalkungsvorgang abbrechen, indem Sie die Standby-Taste drücken. In
diesem Fall leeren und spülen Sie den Wassertank gründlich und füllen Sie
ihn dann bis zur Markierung CALC CLEAN mit frischem Wasser. Bevor Sie
Getränke zubereiten, führen Sie nochmals einen manuellen Spülzyklus wie
im Kapitel „Inbetriebnahme“, Abschnitt „Manueller Spülzyklus“ beschrieben
durch. Wenn der Vorgang nicht beendet wurde, muss ein weiterer
Entkalkungsvorgang so bald wie möglich durchgeführt werden.
Warnsymbole und Fehlercodes
Warnsignale erscheinen in Rot. Unten finden Sie eine Liste der
Warnungen, die im Display stehen können, und die Bedeutung.
-
Füllen Sie den Wasserbehälter bis zur Markierung MAX mit frischem
Wasser.
-
Der Bohnenbehälter ist leer. Geben Sie neue Kaffeebohnen in den
Bohnenbehälter.
-
Die Brühgruppe ist nicht in der Maschine. Setzen Sie die Einheit ein.
-
Schließen Sie die Serviceklappe.
38
Deutsch
Page 39

-
Entnehmen Sie den Kaffeesatzbehälter, und leeren Sie den Behälter.
-
Es ist zu viel Pulver in der Brühgruppe. Reinigen Sie die Brühgruppe.
-
Wenn ein Fehlercode ausgelöst wird, sehen Sie im Abschnitt „Bedeutung
der Fehlercodes“ nach, was der Code im Display bedeutet und was Sie
tun können. Die Maschine ist nicht einsetzbar, wenn dieses Symbol im
Display steht.
-
Sie haben vergessen, den Deckel auf den Behälter für vorgemahlenen
Kaffee zu setzen. Wenn Sie ihn nicht innerhalb von 30 Sekunden
aufsetzen, kehrt das Display zum Hauptmenü zurück und der
Brühvorgang wird gestoppt.
Bedeutung der Fehlercodes
Fehlercode
Problem Ursache Mögliche Lösung
1 Mahlwerk blockiert Kaffeeauswurfschacht
verstopft
Reinigen Sie den
Kaffeeauswurfschacht
gründlich mit dem Griff
des
Multifunktionswerk
zeugs oder einem
Löffelgriff.
3 - 4 Die Brühgruppe lässt
sich nicht entnehmen.
Die Brühgruppe ist nicht
richtig positioniert.
Schließen Sie die
Serviceklappe. Schalten
Sie die Maschine aus
und wieder ein. Warten
Sie, bis der Bildschirm
das Symbol „Gerät
bereit“ angezeigt wird,
und entnehmen Sie die
Brühgruppe dann.
39
Deutsch
Page 40

5 Problem im
Wasserkreislauf
Es ist Luft im
Wasserkreislauf.
Den Wasserbehälter
mehrmals entfernen
und wieder einsetzen.
Vergewissern Sie sich,
dass Sie ihn
ordnungsgemäß in die
Machine einfügen.
Überprüfen Sie, ob der
Wasserbehälterbereich
sauber ist.
Andere Fehlercodes Schalten Sie das Gerät
aus und nach
30 Sekunden wieder
ein. Versuchen Sie dies
2 oder 3 Mal.
Wenn die obigen Lösungen nicht helfen, die Maschine in den normalen
Betriebszustand zurückzuholen, und der Fehlercode im Display bleibt,
wenden Sie sich an die Gaggia-Hotline. Die Anschriften und Rufnummern
finden Sie in dem Garantieheft oder auf www.gaggia.com/n-m-
co/espresso/world-wide oder www.gaggia.it/n-m-co/espresso/contact.
Bestellen von Zubehör
Verwenden Sie zum Reinigen und Entkalken der Maschine nur GaggiaWartungsprodukte. Sie können diese Produkte bei Ihrem lokalen Händler
oder von den autorisierten Kundenzentren erwerben.
Wartungsprodukte:
-
Entkalkungslösung
-
AquaClean-Filter
-
Fett für Brühgruppe
-
Entfettungstabletten
Garantie und Support
Informationen oder Unterstützung finden Sie in dem getrennt beiliegenden
Garantieheft oder auf www.gaggia.com/n-m-co/espresso/world-wide
oder www.gaggia.it/n-m-co/espresso/contact.
Recycling
-
Dieses Symbol bedeutet, dass das Produkt nicht mit dem normalen
Hausmüll entsorgt werden kann (2012/19/EU).
-
Beachten Sie die örtlichen Vorschriften zur getrennten Entsorgung von
elektrischen und elektronischen Produkten. Die ordnungsgemäße
Entsorgung dient dem Schutz von Umwelt und Gesundheit.
40
Deutsch
Page 41

Fehlerbehebung
Problem
Ursache Die Lösung
Das Gerät schaltet sich
nicht ein.
Die Maschine ist nicht
angeschlossen, oder der
Hauptschalter steht auf OFF
(Aus).
Prüfen Sie, ob das Netzkabel richtig
eingesteckt ist.
Kontrollieren Sie, dass der
Hauptschalter auf ON (Ein) steht.
Das Gerät befindet sich im
DEMO-Modus.
Die Standby-Taste wurde länger
als 8 Sekunden gedrückt.
Die Maschine mit dem Hauptschalter
an der Rückseite der Maschine ausund wieder einschalten.
Die Tropfschale wird
schnell voll.
Das ist normal. Die Maschine
spült den internen Kreislauf und
die Brühgruppe mit Wasser. Ein
Teil des Wassers fließt durch das
interne System direkt in die
Tropfschale.
Leeren Sie die Tropfschale, wenn die
Anzeige "Tropfschale voll" durch die
Abdeckung der Tropfschale zu sehen
ist.
Stellen Sie eine Tasse unter den
Heißwasserauslauf, um das
Spülwasser aufzufangen.
Das Symbol
„Kaffeesatzbehälter voll“
bleibt im Display.
Der Kaffeesatzbehälter wurde
bei ausgeschaltetem Gerät
geleert.
Leeren Sie den Kaffeesatzbehälter
immer bei eingeschaltetem Gerät.
Wenn der Kaffeesatzbehälter bei
ausgeschaltetem Gerät geleert wird,
wird der Kaffeezykluszähler nicht
zurückgesetzt. In dem Fall bleibt die
Meldung „Empty coffee grounds
container“ (Kaffeesatzbehälter leeren)
im Display stehen, auch wenn der
Behälter nicht voll ist.
Der Kaffeesatzbehälter wurde zu
schnell zurückgesetzt.
Setzen Sie den Kaffeesatzbehälter erst
zurück, wenn das Display Sie dazu
auffordert
Die Brühgruppe lässt sich
nicht entnehmen.
Die Brühgruppe ist nicht richtig
positioniert.
Schließen Sie die Serviceklappe.
Schalten Sie die Maschine aus und
wieder ein. Warten Sie, bis die Anzeige
"Maschine bereit" angezeigt wird, und
entnehmen Sie die Brühgruppe dann.
Der Kaffeesatzbehälter ist nicht
ausgebaut.
Entnehmen Sie den
Kaffeesatzbehälter, bevor Sie die
Brühgruppe ausbauen.
Die Maschine ist noch beim
Entkalken.
Während des laufenden
Entkalkungsprozesses kann die
Brühgruppe nicht entnommen werden.
Lassen Sie den Entkalkungsprozess
zuerst zu Ende laufen und entnehmen
Sie dann die Brühgruppe.
41
Deutsch
Page 42

Die Brühgruppe lässt sich
nicht einsetzen.
Die Brühgruppe ist nicht in der
richtigen Position.
Die Brühgruppe wurde vor dem
Zurückbauen nicht in die
Ausgangsposition gebracht. Achten Sie
darauf, dass der Hebel die Unterseite
der Brühgruppe berührt und dass der
Haken der Brühgruppe in der richtigen
Position ist.
Initialisieren Sie die Maschine, indem
Sie sie ein- und ausschalten. Setzen
Sie die Tropfschale und den
Kaffeesatzbehälter wieder ein. Lassen
Sie die Brühgruppe ausgebaut.
Schließen Sie die Serviceklappe und
schalten Sie das Gerät ein und aus.
Versuchen Sie danach, die Brühgruppe
einzubauen.
Der Kaffee hat zu wenig
Creme oder ist wässrig.
Es ist ein grober Mahlgrad
eingestellt.
Stellen Sie einen feineren Mahlgrad
ein.
Die Brühgruppe ist verschmutzt. Reinigen Sie die Brühgruppe. Zur
gründlichen Reinigung führen Sie die
Reinigung monatlich mit der
Entfettungstablette durch.
Der Kaffeeauswurfschacht ist
verschmutzt.
Reinigen Sie den
Kaffeeauswurfschacht gründlich mit
dem Griff des Multifunktionswerkzeugs
oder einem Löffelgriff.
Die Kaffeemischung stimmt
nicht.
Versuchen Sie eine andere
Kaffeesorte.
Die Maschine führt die
Selbsteinstellung durch.
Brühen Sie einige Tassen Kaffee.
Der Kaffee ist nicht heiß
genug.
Die Tassen sind kalt. Wärmen Sie die Tassen vor, indem Sie
sie mit heißem Wasser ausspülen.
Die Temperatur ist zu niedrig
eingestellt. Prüfen Sie die
Einstellungen im Menü.
Setzen Sie die Temperatur im Menü
höher.
Sie haben Milch hinzugefügt. Ob warme oder kalte Milch, die Milch
senkt die Temperatur des Kaffees
immer in einem gewissen Maß.
Die Maschine mahlt
Kaffeebohnen, aber es
kommt kein Kaffee.
Der Mahlgrad ist zu fein
eingestellt.
Stellen Sie einen gröberen Mahlgrad
ein.
Die Brühgruppe ist verschmutzt. Reinigen Sie die Brühgruppe.
Der Kaffeeauslauftrichter ist
verschmutzt.
Reinigen Sie den Kaffeeauslauftrichter
und die Öffnungen mit Pfeifenreiniger.
42
Deutsch
Page 43

Der Kaffeeauswurfschacht ist
blockiert.
Reinigen Sie den
Kaffeeauswurfschacht mit dem Griff
des Multifunktionswerkzeugs oder
einem Löffelgriff.
Der Kaffee läuft langsam
aus der Maschine.
Der Kaffee ist zu fein gemahlen. Stellen Sie einen gröberen Mahlgrad
ein.
Die Brühgruppe ist verschmutzt. Reinigen Sie die Brühgruppe.
Der Kaffeeauswurfschacht ist
blockiert.
Reinigen Sie den
Kaffeeauswurfschacht mit dem Griff
des Multifunktionswerkzeugs oder
einem Löffelgriff.
Der Maschinenkreislauf ist von
Kalk zugesetzt.
Entkalken Sie die Maschine.
Die Milch schäumt nicht
auf.
Der automatische
Milchaufschäumer ist
verschmutzt oder nicht richtig
montiert.
Reinigen Sie den automatischen
Milchaufschäumer, und stellen Sie
sicher, dass er richtig montiert wurde.
Die verwendete Milchsorte
eignet sich nicht zum
Aufschäumen.
Mit unterschiedlichen Milchsorten
werden verschiedene
Milchschaummengen und -qualitäten
erzielt. Fettarme oder Vollmilch führt
zu guten Ergebnissen.
Der AquaClean-Filter lässt
sich nicht aktivieren, das
Häkchen im Display wird
nicht angezeigt.
Es wurde kürzlich ein Filter
aktiviert.
Sie müssen mindestens 10 Tassen (à
100 ml) entnehmen, bevor Sie einen
neuen Filter aktivieren können. Gehen
Sie beim Aktivieren eines neuen Filters
vorsichtig vor, da der Filterzähler
automatisch hochzählt.
Der Filter lässt sich nicht
aktivieren und das Gerät
will entkalkt werden.
Sie haben bereits 8 AquaCleanFilter ersetzt. Nach
8 Filterwechseln müssen Sie das
Gerät entkalken.
Entkalken Sie das Gerät zuerst und
bauen Sie dann den Filter ein.
Der Filter wurde nicht rechtzeitig
ausgetauscht, nachdem das
AquaClean-Wasserfilter-Signal
zu blinken begonnen hatte.
Entkalken Sie das Gerät zuerst und
bauen Sie dann den Filter ein.
Der Filter wurde nicht bei der
Inbetriebnahme des Geräts,
sondern erst nach ca. 50 Tassen
Kaffee (à 100 ml) eingebaut. Das
Gerät muss zum Einbau des
AquaClean-Filters vollkommen
kalkfrei sein.
Entkalken Sie das Gerät zuerst und
bauen Sie dann den AquaClean-Filter
ein. Nach dem Entkalken ist der
Filterzähler auf 0/8 zurückgesetzt.
Kontrollieren Sie die Filteraktivierung
immer im Maschinenmenü, auch nach
dem Filterwechsel.
43
Deutsch
Page 44

Der AquaClean-Filter wurde bei
der Inbetriebnahme des Geräts
nicht richtig aktiviert.
Folgen Sie den Anweisungen auf dem
Display, bis Sie die Bestätigung
erhalten, dass der Filter aktiviert
wurde.
Der AquaClean-Filter ist
eingebaut, aber die
Entkalkungsmeldung wird
angezeigt.
Nach 8 Filterwechseln müssen
Sie die Maschine entkalken.
Entkalken Sie das Gerät zuerst und
bauen Sie dann den AquaClean-Filter
ein. Dadurch wird der Filterzähler auf
0/8 zurückgesetzt. Kontrollieren Sie
die Filteraktivierung immer im
Gerätemenü, auch nach dem
Filterwechsel.
Die Entkalkungsmeldung
wird angezeigt, bevor
8 Filter gewechselt
wurden.
Sie haben den AquaClean-Filter
bei der Inbetriebnahme der
Maschine nicht richtig aktiviert.
Entkalken Sie das Gerät zuerst und
bauen Sie dann den AquaClean-Filter
ein. Aktivieren Sie den Filter immer im
Gerätemenü.
Sie haben den AquaClean-Filter
eingebaut, nachdem das Gerät
schon eine Weile in Gebrauch
war.
Sie haben den Austauschfilter
nicht im Gerätemenü aktiviert.
Sie haben den Filter nicht
ausgetauscht, als das
Filtersymbol zu blinken begann.
Der Filter passt nicht. Sie müssen die Luft aus dem
Filter drängen.
Warten Sie, bis keine Luftblasen mehr
aus dem Filter treten.
Es ist noch Wasser im
Wasserbehälter.
Leeren Sie den Wasserbehälter vor
dem Einbau des Filters.
Sie versuchen einen Filter zu
installieren, der kein AquaCleanFilter ist.
Es passen nur AquaClean-Filter.
Es ist Wasser unter der
Maschine.
Die Tropfschale ist voll und läuft
über.
Leeren Sie die Tropfschale, wenn
durch die Tropfschale der Anzeiger
erscheint, dass die Tropfschale voll ist.
Leeren Sie die Tropfschale immer,
bevor Sie die Maschine entkalken.
Die Maschine steht nicht auf
einer gerade Oberfläche.
Setzen Sie die Maschine auf eine
gerade Fläche, damit der Anzeiger der
vollen Tropfschale normal funktioniert.
Hinweis: Wenn Sie das Problem mit den Informationen in dieser Tabelle
nicht beheben können, wenden Sie sich an Ihren lokalen Händler oder ein
autorisiertes Kundendienstzentrum. Die Anschriften und Rufnummern
finden Sie in dem getrennt beiliegenden Garantieheft oder auf
44
Deutsch
Page 45

www.gaggia.com/n-m-co/espresso/world-wide oder www.gaggia.it/n-mco/espresso/contact.
45
Deutsch
Page 46

Indice
Introduzione _____________________________________________________________________ 46
Importante _______________________________________________________________________ 47
Avvertenza_______________________________________________________________________ 47
Attenzione_______________________________________________________________________ 48
Campi elettromagnetici (EMF)_______________________________________________________ 49
Panoramica della macchina (Fig. 1)___________________________________________________ 49
Il display ________________________________________________________________________ 50
Prima installazione ________________________________________________________________ 50
Ciclo di risciacquo manuale _________________________________________________________ 52
Filtro AquaClean __________________________________________________________________ 53
Installazione del filtro AquaClean ____________________________________________________ 53
Sostituzione del filtro AquaClean ____________________________________________________ 54
Modalità d'uso della macchina ______________________________________________________ 55
Preparazione del caffè con caffè in grani______________________________________________ 55
Regolazione della quantità di caffè ___________________________________________________ 55
Adjusting the grind setting__________________________________________________________ 55
Come montare il latte______________________________________________________________ 55
Acqua calda _____________________________________________________________________ 56
Pulizia e manutenzione ____________________________________________________________ 56
Pulizia settimanale del gruppo infusore________________________________________________ 56
Lubrificazione ____________________________________________________________________ 57
Pulizia del pannarello classico (quotidiana) ____________________________________________ 57
Pulizia del pannarello classico e dell'erogatore di vapore (settimanale) _____________________ 58
Rimozione del calcare _____________________________________________________________ 58
Procedura di rimozione del calcare ___________________________________________________ 59
Interruzione del ciclo di pulizia anticalcare _____________________________________________ 60
Icone di avvertenza e codici di errore _________________________________________________ 60
Significato dei codici di errore________________________________________________________ 61
Ordinazione degli accessori_________________________________________________________ 62
Garanzia e assistenza ______________________________________________________________ 63
Riciclaggio_______________________________________________________________________ 63
Risoluzione dei problemi___________________________________________________________ 63
Introduzione
Congratulazioni per l'acquisto della macchina per caffè espresso
superautomatica Gaggia Velasca. La macchina consente di preparare caffè
espresso utilizzando il caffè in grani.
46
Italiano
Page 47

Importante
Avvertenza
-
Collegate la macchina a una presa di corrente a muro con
voltaggio corrispondente alle specifiche tecniche della macchina.
-
Collegate la macchina a una presa di corrente dotata di messa a
terra.
-
Assicuratevi che il cavo di alimentazione non penda dal bordo del
tavolo o del bancone e che non tocchi superfici calde.
-
Non immergete mai la macchina, la spina o il cavo di
alimentazione in acqua (pericolo di scosse elettriche).
-
Non versate liquidi sul connettore del cavo di alimentazione.
-
Non puntate mai il getto di acqua calda verso parti del corpo:
pericolo di ustioni.
-
Non toccate le superfici calde. Utilizzate impugnature e manopole.
-
Spegnete la macchina dall'interruttore principale sulla parte
posteriore e rimuovete la spina di alimentazione dalla presa di
corrente:
-
in caso di malfunzionamento
-
se la macchina non verrà utilizzata per un lungo periodo
-
prima delle operazioni di pulizia.
-
Tirate la spina e non il cavo di alimentazione.
-
Non toccate la spina con le mani bagnate.
-
Non utilizzate la macchina se la spina, il cavo di alimentazione o la
macchina stessa sono danneggiati..
-
Non apportate modifiche alla macchina o al cavo di alimentazione.
-
In caso di riparazioni rivolgetevi esclusivamente a un centro di
assistenza autorizzato Gaggia per evitare pericoli.
-
La macchina non deve essere usata da bambini di età inferiore agli
8 anni.
47
Italiano
Page 48

-
Questa macchina può essere usata da bambini di età superiore
agli 8 anni e da persone con capacità mentali, fisiche o sensoriali
ridotte, prive di esperienza o conoscenze adatte, a condizione che
tali persone abbiano ricevuto assistenza o formazione per
utilizzare la macchina in maniera sicura e capiscano i potenziali
pericoli associati a tale uso.
-
La manutenzione e la pulizia possono essere eseguite da bambini
purché di età superiore agli 8 anni e in presenza di un adulto.
-
Tenete la macchina e il relativo cavo lontano dalla portata di
bambini di età inferiore agli 8 anni.
-
Adottate le dovute precauzioni per evitare che i bambini giochino
con la macchina.
-
Non inserite mai dita o altri oggetti nel macinacaffè.
-
La macchina non dovrebbe essere posizionata in un armadietto
quando in uso.
Attenzione
-
Questa macchina è destinata esclusivamente a un uso domestico.
Non deve essere utilizzata in ambienti quali cucine dei dipendenti
all'interno di punti vendita, uffici, aziende agricole o altri ambienti
lavorativi.
-
Posizionate sempre la macchina su una superficie piana e stabile.
Tenetela in posizione verticale, anche durante il trasporto..
-
Non posizionate la macchina su una piastra calda o vicino a un
forno caldo, un calorifero o fonti di calore simili.
-
Inserite esclusivamente chicchi di caffè tostato nel contenitore del
caffè in grani. L'inserimento di caffè macinato, caffè solubile, caffè
in grani non tostato o qualsiasi altra sostanza potrebbe
danneggiare la macchina.
-
Lasciate raffreddare la macchina prima di inserire o rimuovere
qualsiasi componente. Le superfici riscaldanti potrebbero
trattenere calore residuo dopo l'uso.
48
Italiano
Page 49

-
Non riempite mai il serbatoio dell'acqua con acqua calda, bollente
o frizzante per evitare di danneggiare il serbatoio stesso e la
macchina.
-
Non usate prodotti o sostanze abrasive o detergenti aggressivi,
come benzina o acetone, per pulire la macchina. Utilizzate
semplicemente un panno morbido inumidito con acqua.
-
Eseguite regolarmente la pulizia anticalcare della macchina. Sarà
la macchina stessa a indicare quando è necessaria. In mancanza di
tale pulizia l'apparecchio smetterà di funzionare correttamente. In
questo caso un'eventuale riparazione non è coperta da garanzia.
-
Non sottoponete la macchina a temperature inferiori a 0 °C.
L'acqua che rimane nel sistema di riscaldamento potrebbe
congelarsi e causare danni.
-
Non lasciate acqua nel serbatoio quando la macchina non verrà
utilizzata per un lungo periodo di tempo. L'acqua potrebbe subire
contaminazioni. Utilizzate acqua fresca tutte le volte che usate la
macchina.
Campi elettromagnetici (EMF)
Questo apparecchio Gaggia è conforme a tutti gli standard e alle norme
applicabili relativi all'esposizione a campi elettromagnetici.
Panoramica della macchina (Fig. 1)
1 Coperchio del contenitore caffè in grani
2 Contenitore caffè in grani
3 Presa per filo
4 Serbatoio dell'acqua
5 Scomparto caffè pre-macinato
6 Manopola di regolazione del macinacaffè
7 Pannello di controllo
8 Recipiente fondi di caffè
9 Beccuccio di erogazione del caffè
10 Vassoio antigoccia
11 Coperchio vassoio antigoccia
12 Indicatore vassoio antigoccia pieno
13 Pulsante ESPRESSO
14 Pulsante ESPRESSO LUNGO
15 Pulsante AROMA STRENGTH (Intensità aroma)
16 Pulsante standby
17 Pulsante MENU
18 Pulsante HOT WATER
19 Pulsante STEAM
49
Italiano
Page 50

20 Cavo
21 Spazzolina per la pulizia (solo per alcuni modelli)
22 Lubrificante (solo per alcuni modelli)
23 Misurino per caffè pre-macinato
24 Tester della durezza dell'acqua
25 Cassetto residui di caffè
26 Gruppo infusore
27 Erogatore di acqua calda/vapore
28 Pannarello classico
Il display
Alcuni pulsanti possono essere utilizzati per navigare nei menu:
ES PR ES SO
-
Pulsante ESPRESSO = Pulsante ESC: premete questo pulsante per
tornare al menu principale. Con il pulsante ESC potete tornare al livello
precedente. Potrebbe essere necessario premere il pulsante ESC diverse
volte per tornare al menu principale.
A
R
O
M
A
S
T
R
E
N
G
T
H
-
Pulsante AROMA STRENGTH = Pulsante OK: premete questo pulsante
per selezionare, confermare o interrompere una funzione.
ST EAM
-
Pulsante STEAM = Pulsante SU: premete questo pulsante per scorrere
verso l'alto il menu del display
MEN U
-
Pulsante MENU = Pulsante GIÙ: premete questo pulsante per scorrere
verso il basso il menu del display.
Prima installazione
1 Inserite il vassoio antigoccia e il relativo coperchio nella macchina.
2 Rimuovete il serbatoio dell'acqua.
3 Riempite il serbatoio fino al livello MAX con acqua dolce.
4 Riempite di caffè in grani l'apposito contenitore.
5 Inserite lo spinotto nella presa situata sulla parte posteriore della
macchina. Inserite il cavo di alimentazione nella presa di corrente.
6 Collegate il pannarello classico all'erogatore di acqua calda/vapore.
7 Posizionate un recipiente sotto il pannarello classico.
8 Premete il pulsante STANDBY per accendere la macchina.
50
Italiano
Page 51

9 Premete il pulsante OK per avviare il ciclo automatico di preparazione del
circuito.
10 Il display mostra l'icona seguente per indicare che la macchina si sta
riscaldando.
-
La macchina esegue un ciclo di risciacquo automatico.
AQUA
CLE AN
AQUA CL EAN
FILT ER?
11 Il display mostra l'icona seguente per indicare che è necessario installare
il filtro AquaClean.
Se desiderate installare il filtro AquaClean in un secondo momento,
premete il pulsante ESC e proseguite il ciclo di risciacquo manuale. Per
l'installazione, consultate il capitolo "Filtro AquaClean".
AQUA
CLE AN
INS TALL
FILT ER
12 Premete il pulsante OK. Il display mostra la seguente icona.
13 Rimuovete il filtro AquaClean dalla confezione. Scuotetelo per circa 5
secondi.
14 Immergete il filtro capovolto in una caraffa di acqua fredda e attendete la
completa fuoriuscita delle bolle d'aria.
51
Italiano
Page 52

15 Estraete il serbatoio dell'acqua dalla macchina, svuotatelo e inserite il
filtro verticalmente sul punto di aggancio del filtro.
16 Riempite il serbatoio dell'acqua con acqua del rubinetto e reinseritelo
nella macchina per il caffè.
17 Premete il pulsante OK.
AQ U A
CLE AN
0/8
ON
OFF
18 Selezionate ON sul display e confermate l'attivazione premendo il
pulsante OK.
il display mostra un segno di spunta per confermare l'attivazione.
AQUA
CLE AN
10 0%
19 Il display mostra l'icona del filtro pronto per indicare che il filtro
AquaClean è stato installato correttamente.
20Per sciacquare il filtro, premete il pulsante HOT WATER (Acqua calda) e
lasciate scorrere mezzo litro di acqua dall'erogatore di acqua
calda/vapore. Gettate questa acqua.
Potrebbero volerci alcuni istanti prima che l'acqua inizi a fuoriuscire dal
beccuccio di erogazione dell'acqua calda. Il filtro deve essere
completamente riempito e sciacquato con acqua.
La macchina è pronta all'uso.
Dopo avere installato il filtro AquaClean, non dovete effettuare il ciclo di
risciacquo manuale.
Ciclo di risciacquo manuale
1 Posizionate un recipiente sotto il beccuccio di erogazione del caffè.
2 Premete il pulsante AROMA STRENGTH (Intensità aroma) per selezionare
il caffè premacinato. Non aggiungete caffè pre-macinato.
3 Premete il pulsante ESPRESSO LUNGO. La macchina inizia a erogare
acqua.
4 Quando la macchina smette di erogare, svuotate il contenitore. Ripetete i
passaggi da 1 a 3 due volte.
52
Italiano
Page 53

5 Posizionate un recipiente sotto il pannarello classico.
6 Premete il pulsante HOT WATER. La macchina inizia a erogare acqua
calda automaticamente.
Erogate acqua fino a quando viene visualizzato il simbolo di mancanza di
acqua.
7 Riempite il serbatoio dell'acqua fino al livello MAX e rimuovete il
recipiente.
La macchina è pronta all'uso.
Filtro AquaClean
Il filtro AquaClean è progettato per ridurre i depositi di calcare all'interno
della macchina da caffè e fornire acqua filtrata per conservare l'aroma e il
gusto di ogni tazza di caffè. Usando la serie di 8 filtri AquaClean come
indicato nel presente manuale dell'utente, non sarà necessario eseguire la
pulizia anticalcare della macchina per 5000 tazze (della capacità di 100 ml).
Installazione del filtro AquaClean
Prima di iniziare a utilizzare il filtro AquaClean, la macchina deve essere del
tutto priva di calcare. Se non avete attivato il filtro al primo utilizzo e avete
preparato più di 50 tazze (della capacità di 100 ml), dovete rimuovere il
calcare dalla macchina prima di attivare il filtro.
1 Rimuovete il filtro AquaClean dalla confezione. Scuotetelo per circa 5
secondi.
2 Immergete il filtro capovolto in una caraffa di acqua fredda e attendete la
completa fuoriuscita delle bolle d'aria.
3 Estraete il serbatoio dell'acqua dalla macchina e inserite il filtro
verticalmente sul punto di aggancio del filtro.
4 Riempite il serbatoio dell'acqua con acqua del rubinetto e reinseritelo
nella macchina per il caffè.
5 Premete il pulsante MENU e scorrete fino all'opzione del filtro
AquaClean. Quindi premete il pulsante OK per selezionare l'opzione del
filtro AquaClean.
Se state installando il filtro per la prima volta, seguite le istruzioni
riportate nel capitolo "Prima installazione".
53
Italiano
Page 54

AQ U A
CLE AN
0/8
ON
OFF
6 Selezionate ON sul display e confermate l'attivazione premendo il
pulsante OK.
Nota: il display mostra un segno di spunta per confermare l'attivazione.
7 Per sciacquare il filtro, premete il pulsante HOT WATER (Acqua calda) e
lasciate scorrere mezzo litro di acqua dall'erogatore di acqua
calda/vapore. Gettate questa acqua.
Nota: Potrebbero volerci alcuni istanti prima che l'acqua inizi a fuoriuscire
dal beccuccio di erogazione dell'acqua calda. Il filtro deve essere
completamente riempito e sciacquato con acqua.
8 Usate l'adesivo allegato alla confezione in plastica del filtro AquaClean
per annotare la data della prossima sostituzione del filtro (dopo 3 mesi).
Posizionate l'adesivo sul serbatoio dell'acqua.
Il filtro e la macchina ora sono pronti per l'uso.
Sostituzione del filtro AquaClean
Sostituite il filtro ogni 3 mesi o quando necessario.
Simbolo del filtro AquaClean
Azione
Il simbolo 10% + lampeggia Le prestazioni del filtro sono diminuite. Si raccomanda
di rimuovere il vecchio filtro e di sostituirlo con quello
nuovo come descritto nella sezione "Installazione del
filtro AquaClean" per garantire le prestazioni ottimali
del filtro.
Il simbolo 0% + lampeggia Rimuovete immediatamente il vecchio filtro e
sostituitelo con quello nuovo come descritto nella
sezione "Installazione del filtro AquaClean". Quando
attivate un nuovo filtro, sul display viene visualizzata la
parola NEW (Nuovo). Premete il pulsante OK per
confermare l'attivazione.
Il simbolo 0% scompare dal display Prima di inserire e attivare il nuovo filtro, è necessario
rimuovere il calcare dalla macchina.
Dopo avere sostituito 8 filtri, è necessario rimuovere il calcare dalla
macchina; capitolo "Rimozione del calcare", sezione "Procedura di
rimozione del calcare".
54
Italiano
Page 55

Modalità d'uso della macchina
Preparazione del caffè con caffè in grani
1 Regolate il beccuccio di erogazione del caffè in base alle dimensioni
della tazza.
2 Premete il pulsante AROMA STRENGTH (Intensità aroma) per selezionare
l'intensità del caffè desiderata da 1 a 5 chicchi.
3 Premete il pulsante ESPRESSO per preparare un espresso o il pulsante
ESPRESSO LUNGO per preparare un caffè.
Regolazione della quantità di caffè
1 Tenete premuto il pulsante ESPRESSO o ESPRESSO LUNGO finché il
display visualizza la parola MEMO.
2 Quando la tazza contiene la quantità di caffè desiderata, premete il
pulsante OK per salvare la quantità selezionata.
Adjusting the grind setting
Nota: potete regolare le impostazioni di macinatura solo quando la
macchina macina i chicchi di caffè.
1 Aprite il coperchio del contenitore del caffè in grani.
2 Posizionate una tazza sotto il beccuccio di erogazione del caffè.
3 Premete il pulsante ESPRESSO.
4 While the machine grinds the coffee, place the end of the measuring
spoon handle on the grinder adjustment knob in the coffee bean hopper.
Use the spoon to press and turn the knob to the left or to the right one
notch a time.
5 There are 10 different grinding degree settings you can choose from. The
smaller the dot, the stronger the coffee.
-
Coarse grind: lighter taste, for dark roasted coffee blends.
-
Fine grind: bolder taste, for light roasted coffee blends.
6 Brew 2-3 coffees to taste the difference.
Come montare il latte
Avvertenza: Pericolo di ustioni. Toccate l'erogatore di vapore solo
utilizzando l'impugnatura protettiva. All'inizio dell'erogazione
possono verificarsi brevi spruzzi di acqua calda.
1 Riempite una caraffa con latte freddo per 1/3.
2 Immergete il pannarello classico nel latte. Premete il pulsante STEAM.
3 Montate il latte spostando delicatamente la caraffa con movimenti
circolari e verso l'alto e il basso.
4 Premete il pulsante OK per interrompere l'erogazione della schiuma di
latte.
55
Italiano
Page 56

Acqua calda
Avvertenza: Pericolo di ustioni. Toccate l'erogatore di vapore solo
utilizzando l'impugnatura protettiva. All'inizio dell'erogazione
possono verificarsi brevi spruzzi di acqua calda.
1 Posizionate un recipiente sotto il pannarello classico.
2 Premete il pulsante HOT WATER. La macchina inizia a erogare acqua
calda automaticamente.
3 Per interrompere l'erogazione di acqua calda, premete il pulsante OK.
Rimuovete il recipiente.
Pulizia e manutenzione
Pulizia settimanale del gruppo infusore
Pulite il gruppo infusore una volta a settimana.
1 Rimuovete il recipiente dei fondi di caffè e aprite lo sportello di servizio.
2 Rimuovete il cassetto dei residui di caffè.
1
2
3 Per rimuovere il gruppo infusore, premete la leva ed estraete il gruppo
infusore dalla macchina.
4 Sciacquate il gruppo infusore sotto l'acqua e lasciatelo asciugare.
5 Per reinserire il gruppo infusore nella macchina, assicuratevi che la leva
sia a contatto con la base del gruppo infusore.
Nota: se non è a contatto con la base, premetela verso il basso.
56
Italiano
Page 57

6 Assicuratevi che il gancio di bloccaggio del gruppo infusore sia nella
posizione corretta. Per posizionare il gancio correttamente, spingetelo
verso l'alto fino alla posizione più alta raggiungibile.
7 Se il gancio è ancora in posizione inferiore significa che non è
posizionato correttamente.
8 Fate scorrere nuovamente il gruppo infusore nella macchina tramite le
guide sui lati fino a che non scatta in posizione. Quindi, riposizionate il
cassetto dei residui di caffè nella macchina.
Lubrificazione
Lubrificate il gruppo infusore dopo la preparazione all'incirca di 500 tazze di
caffè o una volta al mese.
1 Applicate del lubrificante intorno al perno di inserimento nella parte
inferiore del gruppo infusore.
2 Applicate del lubrificante alle guide su entrambi i lati, come mostrato
nell'illustrazione.
3 Fate scorrere nuovamente il gruppo infusore nella macchina tramite le
guide sui lati fino a che non scatta in posizione. Quindi, riposizionate il
cassetto dei residui di caffè nella macchina.
Pulizia del pannarello classico (quotidiana)
Rimuovete la parte esterna del pannarello classico e sciacquatelo con
acqua corrente.
57
Italiano
Page 58

Pulizia del pannarello classico e dell'erogatore di vapore
(settimanale)
1 Rimuovete la parte esterna del pannarello classico e sciacquatelo con
acqua corrente.
2 Rimuovete la parte superiore del pannarello classico dall'erogatore di
vapore e sciacquatelo con acqua corrente.
3 Pulite l'erogatore di vapore con un panno umido.
4 Riassemblate le parti del pannarello classico.
Rimozione del calcare
È necessario eseguire la procedura di rimozione del calcare quando il
display mostra l'icona CALC CLEAN o dopo 8 sostituzioni del filtro
AquaClean.
START
CALC
CLEAN
Se non eseguite la procedura quando il display mostra l'icona CALC CLEAN
o dopo 8 sostituzioni del filtro AquaClean, la macchina non funzionerà
correttamente. In tal caso le eventuali riparazioni non sono coperte da
garanzia).
Non bevete l'acqua con la miscela anticalcare che versate nel
serbatoio dell'acqua o altri residui di acqua che dovessero
fuoriuscire durante la procedura di rimozione del calcare.
La procedura anticalcare richiede circa 30 minuti.
Utilizzate solo la soluzione anticalcare Gaggia per rimuovere il calcare dalla
macchina. La soluzione anticalcare Gaggia è stata progettata per garantire le
prestazioni ottimali della macchina. L'uso di altri prodotti potrebbe
danneggiare la macchina e lasciare residui nell'acqua. Potete acquistare la
soluzione anticalcare Gaggia dal vostro rivenditore locale o dai centri
assistenza autorizzati. I recapiti sono riportati nell'opuscolo della garanzia
fornito a parte; in alternativa visitate il sito Web www.gaggia.com/n-m-
co/espresso/world-wide o www.gaggia.it/n-m-co/espresso/contact.
58
Italiano
Page 59

Procedura di rimozione del calcare
CA LC
CL EA N
Potete mettere in pausa il ciclo di pulizia anticalcare o di risciacquo
premendo il pulsante ESC. Il display mostrerà la seguente icona. Per
continuare il ciclo di pulizia anticalcare o di risciacquo premete il pulsante
OK.
1 Rimuovete e svuotate il vassoio antigoccia. Riposizionate il vassoio
antigoccia nella macchina.
Nota: Rimuovete il filtro AquaClean dal serbatoio dell'acqua (se
presente).
2 Rimuovete il pannarello classico dall'erogatore di vapore.
3 Premete il pulsante OK.
4 Il display mostra l'icona seguente per indicare che la macchina ha avviato
il ciclo di pulizia anticalcare. Per interrompere il ciclo, premere il pulsante
ESC.
5 Versate l'intero contenuto della soluzione anticalcare Gaggia (250 ml) nel
serbatoio dell'acqua.
6 Aggiungete l'acqua alla soluzione anticalcare nel serbatoio dell'acqua
fino all'indicazione CALC CLEAN.
7 Posizionate un recipiente grande (1,5 l) sotto l'erogatore di vapore e il
beccuccio di erogazione.
8 Per avviare il ciclo di pulizia anticalcare, premete il pulsante OK.
-
La macchina eroga l'intera soluzione anticalcare a intervalli regolari
tramite l'erogatore di vapore e il beccuccio di erogazione (questa
operazione richiede circa 25 minuti).
9 Attendete il completamento dell'erogazione di tutta soluzione
anticalcare. Rimuovete il recipiente e svuotatelo.
10 Rimuovete e svuotate il vassoio antigoccia. Riposizionate il vassoio
antigoccia nella macchina.
11 Sciacquate il serbatoio dell'acqua e riempitelo con acqua pulita fino
all'indicazione CALC CLEAN. Fate scorrere il serbatoio dell'acqua nella
macchina.
12 Riposizionate il vassoio antigoccia nella macchina.
13 Premete il pulsante OK per avviare il ciclo di risciacquo (questa
operazione richiede circa 4 minuti).
CALC
CLEAN
-
Il display mostra l'icona seguente per indicare che il ciclo di risciacquo è
terminato.
14 Il display mostra un segno di spunta.
15 Sciacquate il serbatoio dell'acqua e riempitelo con acqua pulita fino al
livello MAX. Fate scorrere il serbatoio dell'acqua nella macchina.
16 Per terminare il ciclo di pulizia anticalcare, premete il pulsante OK.
17 Posizionate un recipiente sotto l'erogatore di vapore e il beccuccio di
erogazione.
59
Italiano
Page 60

18 Il display mostra l'icona seguente per indicare che la macchina si sta
riscaldando.
-
La macchina esegue un ciclo di risciacquo automatico.
19 Rimuovete il recipiente. Rimuovete e svuotate il vassoio antigoccia.
Riposizionate il vassoio antigoccia nella macchina.
20Reinserite il filtro AquaClean nel serbatoio dell'acqua. Reinserite il
pannarello classico.
21 Rimuovete e sciacquate il gruppo infusore; consultate il capitolo "Pulizia
e manutenzione", sezione "Pulizia del gruppo infusore".
La macchina ora è pronta all'uso.
Interruzione del ciclo di pulizia anticalcare
Una volta avviato, il ciclo di rimozione del calcare deve essere portato a
termine senza spegnere la macchina. In caso di blocco della macchina,
interruzione della corrente elettrica o accidentale disinserimento del cavo
durante il ciclo, potete uscire dalla procedura premendo il pulsante Standby. In tal caso, sciacquate accuratamente il serbatoio dell'acqua e riempitelo
fino al livello CALC CLEAN. Prima di preparate qualsiasi bevanda, seguite le
istruzioni nel capitolo "Prima installazione", sezione "Ciclo di risciacquo
manuale". Se il ciclo non è stato portato a termine, la macchina indicherà di
eseguire un altro ciclo di rimozione del calcare non appena possibile.
Icone di avvertenza e codici di errore
Il display visualizza i segnali di avvertenza in rosso. Di seguito sono elencate
le avvertenze che il display può visualizzare e il loro significato.
-
Riempite il serbatoio di acqua fresca fino all'indicazione del livello MAX.
-
Il contenitore del caffè in grani è vuoto. Inserite chicchi di caffè nel
contenitore del caffè in grani.
60
Italiano
Page 61

-
Il gruppo infusore non è nella macchina. Inserite il gruppo.
-
Chiudete lo sportello di servizio.
-
Rimuovete il recipiente dei fondi di caffè e svuotatelo.
-
Il gruppo infusore contiene una quantità eccessiva di polvere. Pulite il
gruppo infusore.
-
Se si attiva un codice di errore, consultate la sezione "Significato dei
codici di errore" per verificare cosa indica il codice visualizzato e come
procedere. Non potete utilizzare la macchina quando il display visualizza
questa icona.
-
Avete dimenticato di mettere il coperchio sullo scomparto del caffè premacinato. Se non lo riposizionate entro 30 secondi, il display torna al
menu principale e il ciclo di preparazione si interrompe.
Significato dei codici di errore
Codice di errore
Problema Causa Possibile soluzione
61
Italiano
Page 62

1 Macinacaffè bloccato Condotto di uscita del
caffè ostruito
Pulite a fondo il
condotto di uscita del
caffè con l'impugnatura
dell'utensile
multifunzione o con il
manico di un cucchiaio.
3 - 4 Impossibile rimuovere il
gruppo infusore.
Il gruppo infusore non è
posizionato
correttamente.
Chiudete lo sportello di
manutenzione.
Spegnete e riaccendete
nuovamente la
macchina. Attendete
che il display visualizzi
l'icona di macchina
pronta, quindi
rimuovete il gruppo
infusore.
5 Problema al circuito
dell'acqua
È presente aria nel
circuito dell'acqua.
Rimuovete e reinserite il
serbatoio nella
macchina un paio di
volte. Assicuratevi di
inserirlo correttamente
nella macchina.
Controllate che il vano
del serbatoio dell'acqua
sia pulito.
Altri codici di errore Spegnete la macchina e
riaccendetela dopo 30
secondi. Effettuate
questa operazione 2 o 3
volte.
Se le soluzioni indicate risultano inefficaci in quanto il display continua a
visualizzare l'icona del codice di errore e la macchina non torna a funzionare
correttamente, contattate il numero Gaggia. I recapiti sono riportati
nell'opuscolo della garanzia; in alternativa visitate il sito Web
www.gaggia.com/n-m-co/espresso/world-wide o www.gaggia.it/n-mco/espresso/contact.
Ordinazione degli accessori
Per la pulizia della macchina e la rimozione del calcare, utilizzate solo
prodotti per la manutenzione Gaggia. Potete acquistare questi prodotti dal
vostro rivenditore locale o dai centri assistenza autorizzati.
Prodotti per la manutenzione:
-
Soluzione anticalcare
-
Filtro AquaClean
-
Lubrificante gruppo infusore
-
Pastiglie sgrassanti
62
Italiano
Page 63

Garanzia e assistenza
Per assistenza o informazioni, visitate il sito Web www.gaggia.com/n-mco/espresso/world-wide o www.gaggia.it/n-m-co/espresso/contact o
leggete l'opuscolo della garanzia fornito a parte.
Riciclaggio
-
Questo simbolo indica che il prodotto non può essere smaltito con i
normali rifiuti domestici (2012/19/UE).
-
Ci sono due situazioni in cui potete restituire gratuitamente il prodotto
vecchio a un rivenditore:
1 Quando acquistate un prodotto nuovo, potete restituire un prodotto
simile al rivenditore.
2 Se non acquistate un prodotto nuovo, potete restituire prodotti con
dimensioni inferiori a 25 cm (lunghezza, altezza e larghezza) ai rivenditori
con superficie dedicata alla vendita di prodotti elettrici ed elettronici
superiore ai 400 m2.
-
In tutti gli altri casi, attenetevi alle normative di raccolta differenziata dei
prodotti elettrici ed elettronici in vigore nel vostro paese: un corretto
smaltimento consente di evitare conseguenze negative per l'ambiente e
per la salute.
Risoluzione dei problemi
Problema
Causa Soluzione
La macchina non si
accende
La macchina non è collegata o
l'interruttore principale è in
posizione OFF.
Verificate che il cavo di alimentazione
sia inserito correttamente
Assicuratevi che l'interruttore
principale sia in posizione ON.
La macchina è in modalità
DEMO.
Il pulsante Stand-by è stato
premuto per più di 8 secondi.
Spegnete e riaccendete la macchina
con l'interruttore principale sulla parte
posteriore della macchina stessa.
Il vassoio antigoccia si
riempie velocemente.
Si tratta di un fenomeno del tutto
normale. La macchina utilizza
acqua per sciacquare il circuito
interno e il gruppo infusore. Una
parte dell'acqua fluisce
attraverso il sistema interno
direttamente nel vassoio
antigoccia.
Svuotate il vassoio antigoccia quando
l'apposito indicatore scatta attraverso
il coperchio del vassoio.
Posizionate una tazza sotto l'erogatore
per raccogliere l'acqua di risciacquo.
63
Italiano
Page 64

Il display visualizza
costantemente l'icona di
recipiente dei fondi di
caffè pieno.
Il recipiente dei fondi di caffè è
stato svuotato a macchina
spenta.
Svuotate sempre il recipiente dei fondi
di caffè a macchina accesa. Se il
recipiente dei fondi di caffè viene
svuotato a macchina spenta, il
contatore dei cicli di caffè non si
azzera. In questo caso il display
visualizza il messaggio "Empty coffee
grounds container" (Svuotare
recipiente fondi caffè) anche se il
recipiente non è pieno.
Il recipiente dei fondi di caffè è
stato riposizionato troppo
rapidamente.
Non riposizionate il recipiente dei
fondi di caffè prima che il display
visualizzi il messaggio che vi indica di
farlo
Impossibile rimuovere il
gruppo infusore.
Il gruppo infusore non è
posizionato correttamente.
Chiudete lo sportello di manutenzione.
Spegnete e riaccendete nuovamente
la macchina. Attendete che il display
visualizzi il messaggio di macchina
pronta, quindi rimuovete il gruppo
infusore.
Il recipiente dei fondi di caffè
non è stato rimosso.
Rimuovete il recipiente dei fondi di
caffè prima di rimuovere il gruppo
infusore.
Il processo di rimozione del
calcare è ancora in corso.
Quando è attivo il processo di
rimozione del calcare non potete
rimuovere il gruppo infusore.
Attendete che il processo di rimozione
del calcare termini, quindi rimuovete il
gruppo infusore.
Impossibile inserire il
gruppo infusore.
Il gruppo infusore non è nella
posizione corretta.
Il gruppo infusore non è stato messo in
posizione di riposo prima di essere
riposizionato. Assicuratevi che la leva
sia a contatto con la base del gruppo
infusore e che il gancio del gruppo
infusore sia nella posizione corretta.
Reimpostate la macchina
accendendola e spegnendola.
Riposizionate il vassoio antigoccia e il
recipiente dei fondi di caffè. Non
inserite il gruppo infusore. Chiudete lo
sportello di manutenzione e
accendete e spegnete la macchina.
Quindi provate a reinserire il gruppo
infusore.
Il caffè ha poca crema o è
acquoso.
Il macinacaffè è impostato su
una macinatura grossolana.
Regolate il macinacaffè su una
macinatura più fine.
64
Italiano
Page 65

Il gruppo infusore è sporco. Pulite il gruppo infusore. Per una
pulizia accurata, seguite la procedura
di pulizia mensile con una pastiglia
sgrassante.
Il condotto di uscita del caffè è
sporco.
Pulite a fondo il condotto di uscita del
caffè con l'impugnatura dell'utensile
multifunzione o con il manico di un
cucchiaio.
La miscela di caffè utilizzata non
è adatta.
Provate un'altra miscela di caffè.
La macchina sta effettuando
l'autoregolazione.
Preparate alcune tazze di caffè.
Il caffè non è abbastanza
caldo.
Le tazze utilizzate sono fredde. Preriscaldate le tazze passandole
sotto l'acqua calda.
La temperatura impostata è
troppo bassa. Verificate le
impostazioni del menu.
Impostate la temperatura del menu su
Alta.
Avete aggiunto latte. L'aggiunta di latte, caldo o freddo,
abbassa sempre in una certa misura la
temperatura del caffè.
La macchina macina il
caffè in grani, ma il caffè
non viene erogato.
La macinatura impostata è
troppo fine.
Regolate il macinacaffè su una
macinatura più grossolana.
Il gruppo infusore è sporco. Pulite il gruppo infusore.
Il beccuccio di erogazione del
caffè è sporco.
Pulite il beccuccio di erogazione del
caffè e i relativi fori con uno scovolino.
Il condotto di uscita del caffè è
bloccato.
Pulite il condotto di uscita del caffè
con l'impugnatura dell'utensile
multifunzione o con il manico di un
cucchiaio.
Il caffè fuoriesce
lentamente.
La macinatura è troppo fine. Regolate il macinacaffè su una
macinatura più grossolana.
Il gruppo infusore è sporco. Pulite il gruppo infusore.
Il condotto di uscita del caffè è
bloccato.
Pulite il condotto di uscita del caffè
con l'impugnatura dell'utensile
multifunzione o con il manico di un
cucchiaio.
Il circuito della macchina è
bloccato dal calcare.
Eseguite la pulizia anticalcare.
Il latte non fa schiuma. Il pannarello automatico è
sporco o non è assemblato o
installato correttamente.
Pulite il pannarello automatico e
verificate che sia assemblato o
installato correttamente.
65
Italiano
Page 66

Il tipo di latte utilizzato non è
adatto a produrre schiuma.
Secondo il tipo di latte, la quantità e la
qualità di schiuma prodotte sono
diverse. Il latte vaccino parzialmente
scremato o intero offre risultati
soddisfacenti.
Impossibile attivare il filtro
AquaClean in quanto il
display non visualizza il
segno di spunta.
È già stato attivato un filtro. Dovete preparare almeno 10 tazze da
100 ml ciascuna prima di poter attivare
un nuovo filtro. Fate attenzione
quando attivate un nuovo filtro, il
contatore dei filtri si incrementerà
automaticamente.
Impossibile attivare il filtro
e la macchina chiede di
eseguire la pulizia
anticalcare.
Avete già sostituito 8 filtri
AquaClean. Dopo 8 sostituzioni
del filtro dovete eseguire la
pulizia anticalcare.
Eseguite la pulizia, quindi installate il
filtro.
Il filtro non è stato sostituito in
tempo utile dopo che il segnale
del filtro dell'acqua AquaClean
ha iniziato a lampeggiare.
Eseguite la pulizia, quindi installate il
filtro.
Il filtro non è stato installato
durante la prima installazione,
ma dopo aver preparato circa 50
tazze di caffè (da 100 ml
ciascuna). Prima di installare il
filtro AquaClean la macchina
deve essere del tutto priva di
calcare.
Eseguite la pulizia anticalcare, quindi
installate un nuovo filtro AquaClean.
Dopo la pulizia anticalcare, il contatore
dei filtri si reimposta su 0/8.
Confermate sempre l'attivazione del
filtro nel menu della macchina, anche
dopo la sostituzione del filtro.
Il filtro AquaClean non è stato
attivato correttamente durante la
prima installazione.
Seguite le istruzioni sul display fino a
quando ricevete conferma
dell'attivazione del filtro.
Il filtro AquaClean è
installato, ma il display
visualizza il messaggio di
richiesta di pulizia
anticalcare.
Dopo 8 sostituzioni del filtro
dovete eseguire la pulizia
anticalcare.
Eseguite la pulizia anticalcare, quindi
installate un nuovo filtro AquaClean. In
tal modo il contatore dei filtri si
reimposta su 0/8. Confermate sempre
l'attivazione del filtro nel menu della
macchina, anche dopo la sostituzione
del filtro.
Il display visualizza il
messaggio di richiesta di
pulizia anticalcare prima
della sostituzione degli 8
filtri.
Non avete attivato il filtro
AquaClean correttamente
durante la prima installazione.
Eseguite la pulizia anticalcare, quindi
installate un nuovo filtro AquaClean.
Attivate sempre il filtro nel menu della
macchina.
Avete inserito il filtro AquaClean
dopo aver usato la macchina per
qualche tempo.
66
Italiano
Page 67

Non avete attivato il filtro
sostitutivo nel menu della
macchina.
Non avete sostituito il filtro
quando il simbolo del filtro ha
iniziato a lampeggiare.
Il filtro non si inserisce. Dovete far uscire l'aria dal filtro. Lasciate fuoriuscire le bolle d'aria dal
filtro.
Il serbatoio contiene ancora
acqua.
Svuotate il serbatoio dell'acqua prima
di installare il filtro.
Avete cercato di installare un
filtro diverso dal filtro AquaClean.
Solo il filtro AquaClean si adatta.
Sotto la macchina è
presente acqua.
Il vassoio antigoccia è troppo
pieno e ha traboccato.
Svuotate il vassoio antigoccia quando
l'apposito indicatore scatta attraverso
il vassoio. Svuotate sempre il vassoio
antigoccia prima di avviare la
procedura di rimozione del calcare.
La macchina non è stata
collocata su una superficie
orizzontale.
Posizionate la macchina su una
superficie orizzontale in modo che
l'indicatore di vassoio antigoccia pieno
funzioni correttamente.
Nota: se non riuscite a risolvere il problema con l'aiuto di questa tabella,
contattate il vostro rivenditore locale o un centro assistenza autorizzato. I
recapiti sono riportati nell'opuscolo della garanzia fornito a parte; in
alternativa visitate il sito Web www.gaggia.com/n-m-co/espresso/worldwide o www.gaggia.it/n-m-co/espresso/contact.
67
Italiano
Page 68

GAGGIA S.p.A. reserves the right to make any necessary modifi cation.
GAGGIA S.p.A.
Sede Legale/Registered O ce
Piazza Eleonora Duse, 2
20122 MILANO
Sede Amministrativa/Administrative O ce
Via Tor retta, 240
40041 Gaggio Montano (BO)
+39 0534 771111
www.gaggia.com
 Loading...