

Page 1
Operating and assembly instructions
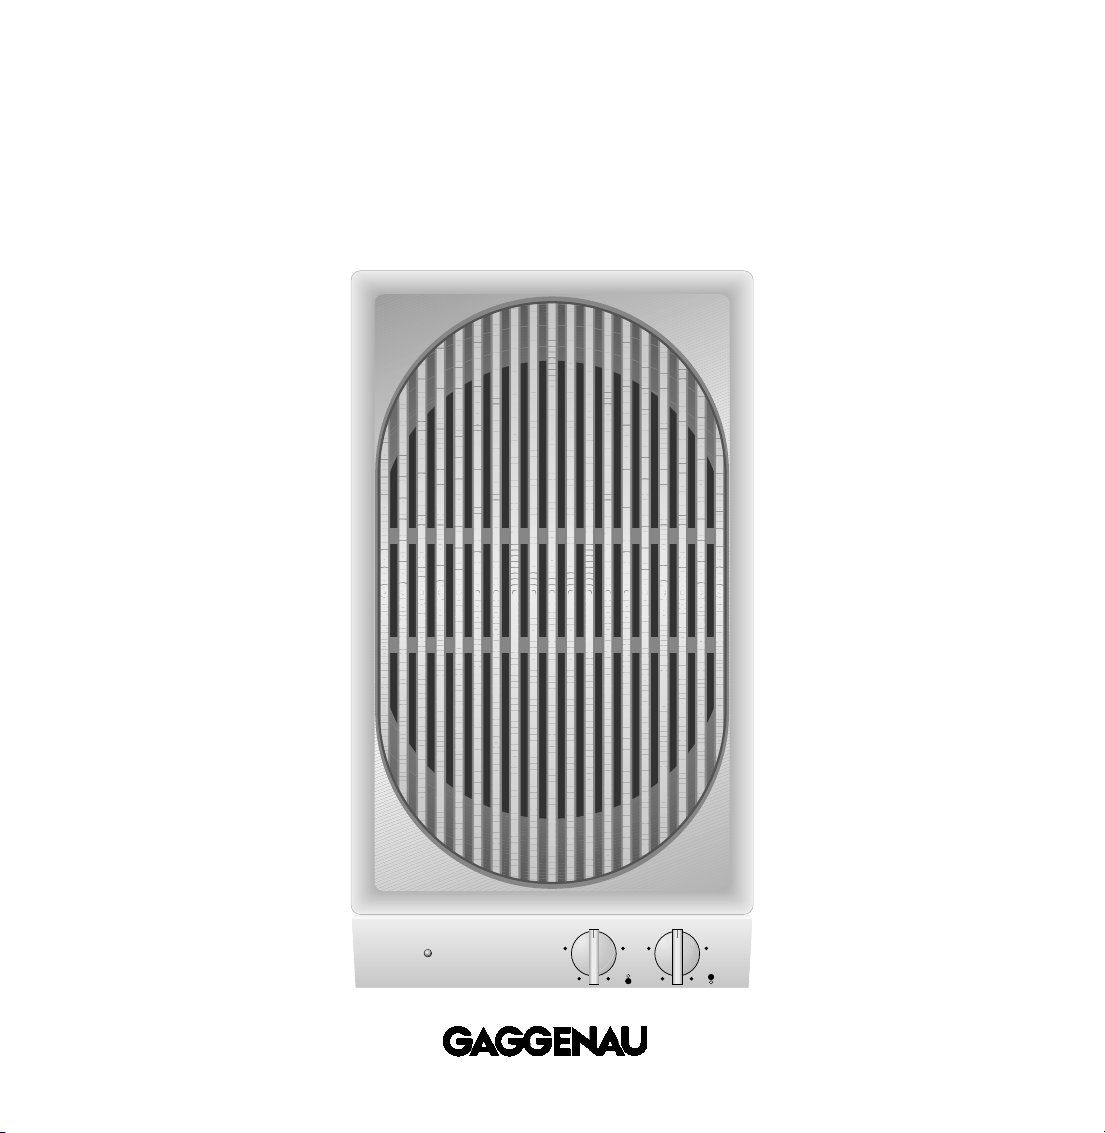
VR 230
Built-in grill
0
1 9
37
0
1 9
37
Page 2

VR 230
1
Preface
1. Important notes Page 3
1.1 For your safety Page 3
1.2 Operating for the first time Page 3
1.3 About use Page 3
2. Structure and operating principle Page 4
2.1 Structure of the appliance Page 4
2.2 Accessories Page 4
2.3 Operating principle Page 4
3. Operation Page 5
3.1 Switching on Page 5
3.2 Switching off Page 5
3.3 Operation with griddle plate Page 6
4. Cleaning and care Page 7
5. Maintenance Page 8
6. Practical tips Page 9-12
6.1 Table of settings Page 9
6.2 Recipes Page 10
6.3 Tips and tricks Page 11-12
Page 3
2
Preface
Grilling will now be even more fun with this
appliance!
Among other things, the appliance offers you the
following advantages:
– two separately switchable grill heating elements
– thanks to the novel installation method
implemented, installation is child's play!
To ensure that you will be able to use this
appliance in all its diversity, read through
the operating and assembly instructions
conscientiously before operating it for the first
time. The instructions contain important notes
on use, installation and maintenance of the
appliance.
You will find notes on Page 3 that you ought to
observe before operating the appliance for
the first time.
The chapters entitled “Structure and operating
principle" and “Operation" will tell you all the
things your grill is capable of doing and how the
appliance is operated.
“Cleaning and care" makes sure that your
appliance will stay beautiful for a long time.
Consult “Tips and tricks" if you cannot set the
function you require. Please contact Gaggenau
after-sales service if these tips are not enough.
And now we wish you lots of fun with your
grill!
Fig. 1
Page 4

3
1. Important notes
1.1 For your safety
– Damaged appliances must not be operated.
– The appliance must only be connected by an
authorised specialist, paying attention to the
relevant regulations of the power supply
companies and the regional construction
regulations.
Observe the assembly instructions!
– When connecting electrical appliances in the
proximity of the grill, make sure that connecting
cables do not come into contact with hot cooking
surfaces.
– The user is responsible for expert use and the
perfect condition of the appliance.
– Only ever operate the appliance under
supervision.
– Caution! The appliance gets hot during
operation. Keep it out of the reach of children!
– Observe caution with oils and fats. They may
overheat and burn easily.
– Do not clean the appliance with a steam
cleaning apparatus or with water pressure
because this poses a risk of short-circuits.
– Isolate the appliance from the mains during every
maintenance operation. To do this, remove the
mains plug or actuate the corresponding fuse.
– Repairs must be carried out by authorised
specialists, thus ensuring electrical safety.
– No warranty claims can be lodged in the event
of damage caused by failure to observe these
instructions.
– Do not store any substances that are sensitive to
high temperatures, or which pose a fire hazard
(e.g. cleaning agents or spray cans), in drawers
or cupboards under the appliance.
Technical modifications reserved!
1.2 Operating for the first time
Before operating the appliance for the first time,
please pay attention to the following notes:
– Conscientiously read through the operating
and assembly instructions before operating the
appliance for the first time.
– The rating plate for this appliance is included
with the instructions on a separate sheet. Store
the rating plate in the same location as your
operating and assembly instructions.
– Remove the packaging from the appliance and
dispose of it properly. The packaging consists of
foil and cardboard.
– Pay attention to the fact that there are
accessories in the base of the packaging.
Keep packaging elements away from children.
– Thoroughly clean the appliance and
accessories before using them for the first time.
This will eliminate any 'newness' smells and
soiling (see chapter entitled Cleaning and care).
– The appliance must be installed and connected
by a specialist before it is operated for the first
time. Before operating the appliance for the first
time, make sure that the mains connection is in
proper working order.
– Take the lava stones out of the foil and pour
them into the lava stone box.
1.3 About use
– The appliance is intended solely for use in
the household and must not be put to any other
uses.
Use the appliance to prepare meals only. It must
not be used to heat up the room in which it is
installed.
– In the event of malfunctions, first of all check
the household fuses. If the problem has nothing
to do with the power supply, please contact your
specialist dealer or your local Gaggenau aftersales service.
– A built-in temperature protection facility
prevents overheating of the appliance.
– Return the control knob to 0 after grilling.
Page 5
4
2. Structure and operating principle
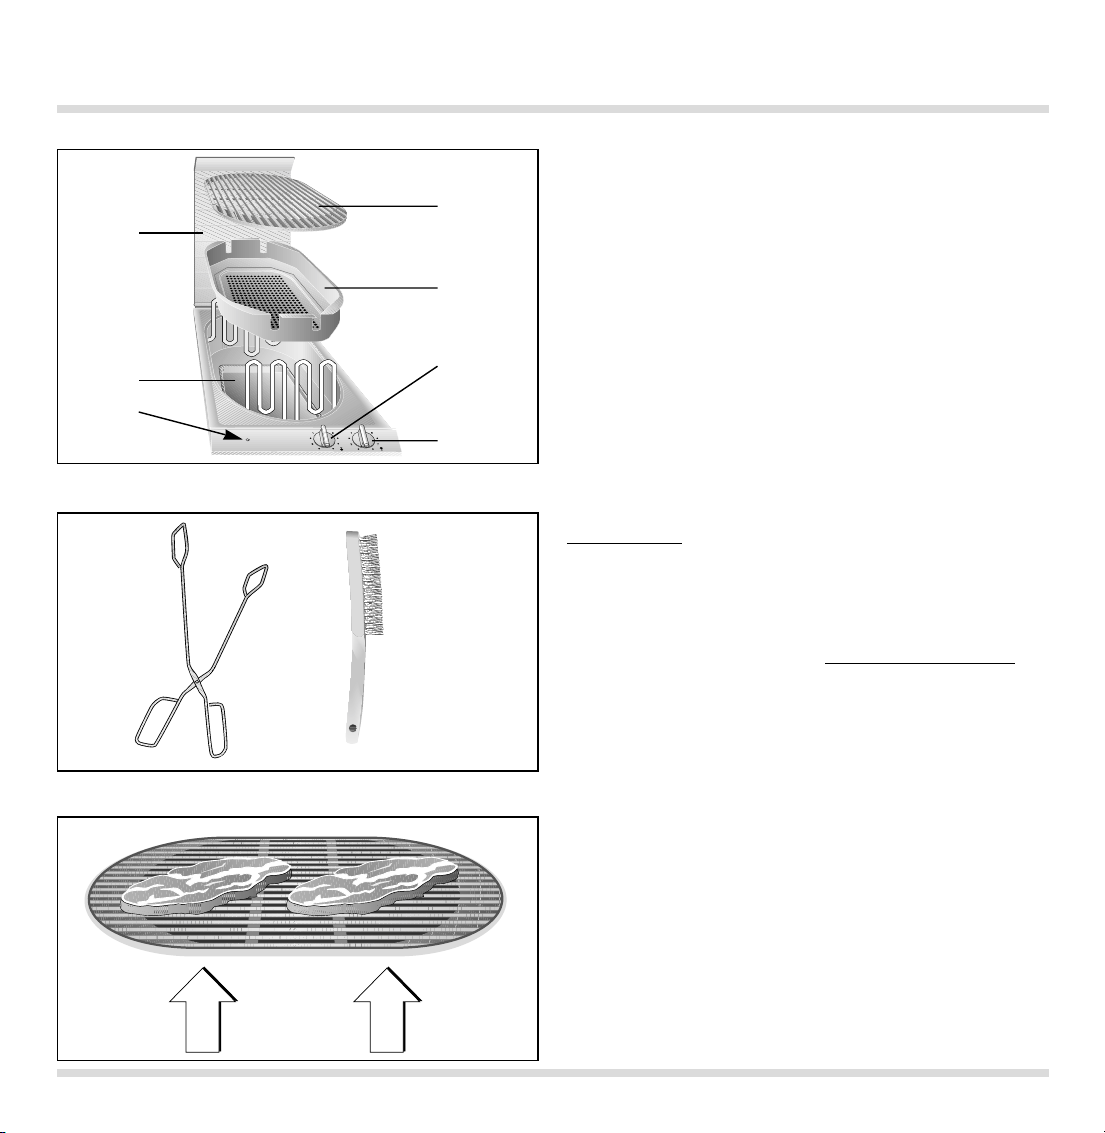
2.1 Structure of the appliance
2.2 Accessories
2.3 Operating principle
1 Pilot light
2 Grease tray (dishwasher-proof)
3 Appliance cover
4 Cast gridiron (detachable)
5 Lava stone box (underneath the cast gridiron)
to accommodate the lava stones
6 Control knob for the front grilling element
7 Control knob for the rear grilling element
As standard,
your grill comes with the following
accessories (fig. 3):
– Lava stones
– Grilling tongs
– Cleaning brush
You can order the following special accessories:
– Griddle plate AM 060-000
Grilling involves browning and cooking through
intensive heat radiation or conduction without or
with only a small amount of fat. Grilling involves a
temperature between 250 and 270 °C. The heat
radiation is absorbed by the food.
The following foodstuffs are suitable for grilling:
Fish, meat, poultry, fruit, vegetables and special
cakes and biscuits.
The unit features two separately switchable
grilling elements. So, you have a possibility
of grilling separate foodstuffs with differing
temperature requirements at the same time. You
can also save energy with smaller or small numbers
of grilled pieces.
Fig. 3
Fig. 4
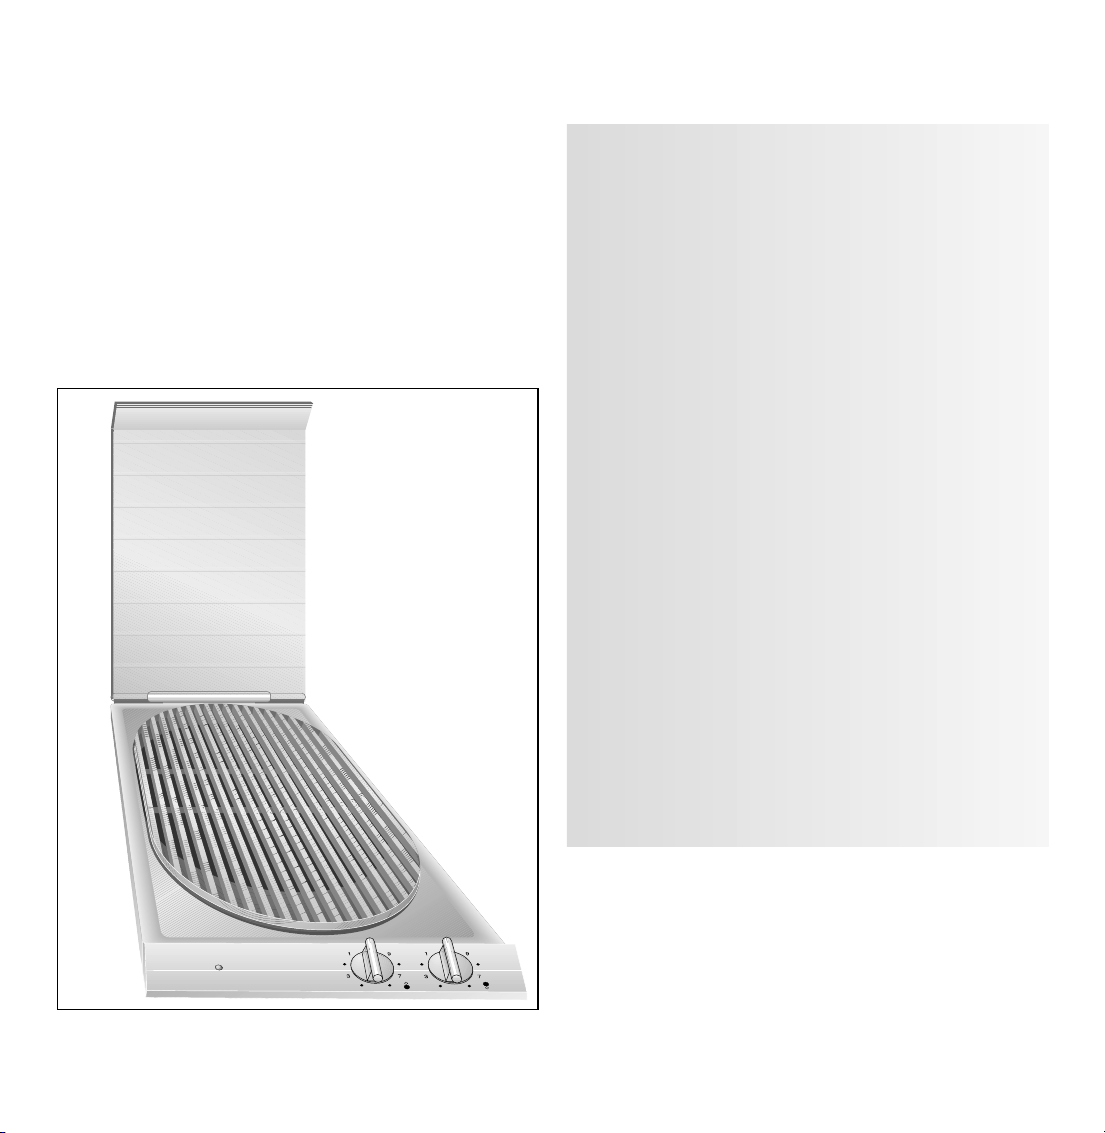
Fig. 2
4
5
6
7
1
2
3
Page 6

5
3.1 Switching on
3.2 Switching off
Switching on:
Turn the two control knobs to the required stage
(1-9).
You can turn on only one of the two heating elements
or you can choose different switch settings.
The pilot light lights up red.
Switching off:
Turn both control knobs to the 0 position.
The pilot light goes off.
And this is how to grill:
– Switch on the appliance as described above.
– Heat up the grill at level 9 for about 7-8 minutes.
– Switch back to a lower level after preheating.
Put on the food you wish to grill.
Notes:
– Dry moist food well.
– The moister the food is, the more smoke may be
produced!
– During grilling, dripping fat may flare up briefly.
3. Operation
0
1
9
37
0
1
9
37
Caution! The appliance must not be touched for
at least 15-20 minutes! Risk of burns!
Do not replace the cover until the appliance has
cooled down completely!
Caution:
Grilling produces very high temperatures. Keep
the appliance out of the reach of children!
Make sure when unpacking that there are lava
stones in the appliance. Take the lava stones out
of the foil and pour them into the lava stone box.
(The contents of the bag are sufficient.)
Please observe our “tips and tricks"!
Fig. 5
Fig. 6
0
1
37
9
0
1
9
37
Page 7

3.3 Operation with griddle plate
– Detach the gridiron
– Place the grille plate AM 060-000 (special
accessory) on the Vario grill (Fig. 7).
– Switch on the appliance as described on Page 5.
– Heat up the grill at level 9 for about 5 minutes.
– Switch back to a lower level (between 5 and 7)
after preheating. Put on the food you wish to
grill.
The griddle plate is particularly suitable for
preparing fish, vegetables, sweets (e.g. shredded
pancake with sugar and raisins), but also meat.
6
Fig. 7
Page 8

Please thoroughly clean the appliance before
operating it for the first time. Heat up the
appliance at level 9 for a few minutes.
Allow the appliance to cool down. Swivel up the
two heating elements and remove the inner tub
containing the lava stones.
Clean the grill after every use. By doing so, you
avoid baking in of residues. After residues have
baked in several times, they are then difficult to
remove. Wait until the appliance has cooled down
completely before cleaning it.
Clean the grease collecting tray in a dishwasher.
Clean the gridiron with the grill brush or with
dishwashing detergent and a dishwashing brush.
The lava stones must be replaced when they are
black. In this case, the lava stones have become
saturated with grease. You can order lava stones by
quoting the order number LV 020-000.
Wash the lava stones thoroughly with rinsing
detergent and dry them. Pour the lava stones back
into the lava stone tub and tilt down the grilling
elements. The grilling elements must lie flat. Heat
up both grilling elements to level 9 for a few
minutes and then turn the control knob to 0.
Wipe out the stainless steel tub with rinsing
detergent. Soak stubborn stains.
Do not scrape off baked in food remainders.
Soften them with a moist cloth and detergent
instead.
You can clean the tub (not the control panel!) with
stainless steel cleaner and then with a stainless
steel care product.
The control panel must not be cleaned with
stainless steel cleaner as this may be aggressive to
the inscriptions. Use a moist cloth and light rinsing
detergent to clean it and wipe it dry with a soft dry
cloth.
Do not use any abrasive or caustic cleaners
(abrasive and nitro cleaning agents).
Do not use any abrasive sponges!
To clean the griddle plate AM 060-000 (special
accessory), sprinkle coarse salt onto the grilling
surface after use. Mix the salt with the grease until
it has become saturated with the grease. Remove
the salt and wipe it away with a dry cloth.
It is advisable to spray or rub the griddle plate with
oil if it is not in use for a prolonged length of time.
4. Cleaning and care
7
Note:
The appliance must not be cleaned with a highpressure cleaner or with water pressure!
Page 9

8
First disconnect the appliance from the mains
before carrying out any repairs.
In the event of malfunctions, first of all check
the household fuses. Contact your responsible
Gaggenau after-sales service if the power
supply is in proper working order, but your
appliance is nevertheless not functioning. Specify
the appliance type (see rating plate).
Repairs must only be carried out by authorised
specialists, thus ensuring the safety of the
appliance.
Improper tampering will render all warranty claims
null and void.
5. Maintenance
Page 10

6.1 Table of settings
The specified grilling times serve as guide values
only.
Setting table for VR 230
9
6. Practical tips
Item Level* Grilling time* Remarks
Meats
Rumpsteak 9 2 - 3 min. each side 2 min. each side at level 9 for thick pieces, the another
2 minutes each at level 8 (lozenge pattern).
Veal chop 7 2 x 3 min. each side Notch chops several times on the bone and in the fat layer
(lozenge pattern) so they do not curve during grilling.
Kebab (skewers) 7 to 8 10 - 15 min., Marinate or oil skewers; coat them carefully with spiced oil
turn several times while grilling.
Lamb chop 7 2 x 3 min. each side Marinate or oil chops. Notch them several times on the bone
(lozenge pattern) and in the fat layer so they do not curve during grilling.
Back of pork steak 8 2 - 3 min. each side
Pork belly slices 7 6 -8 min. each side Oiled pork belly slices are easily ignitable.
Grilled sausage 6 to 7 8 to 12 min. Cut into sausages so they do not burst.
Beefburger 7 8 to 10 min.
Poultry
Turkey breast 8 4 to 6 min.
Poultry skewers 6 to 7 10 - 15 min., Skewer poultry alternately with fruits, for example, and
turn several times marinate it in a sweet-sour marinade; carefully coat with
marinade while grilling.
Fish and seafoods
Shrimp skewers 6 to 7 8 - 10 min., Marinate shrimps with garlic, olive oil and spices, for
turn several times example, and coat carefully with marinade while grilling.
Filled squid 7 10 - 12 min., Boil squid beforehand and carefully coat with oil several
turn several times times while grilling.
Tuna fish cutlet 6 8 min. each side Marinate cutlets beforehand.
Trout, whole 7 and 6 1st side 5 min. Coat trout with oil to make sure the skin does not stick to
at level 7, turn, the gridiron.
2nd side 8 - 10 min.
at level 6
Side dishes
Fruits (e.g. banans, apple slices 7 to 8 1 -2 min. each side
or pear halves)
Mushrooms (e.g. mushroom 7 1 - 2 min. each side If necessary, marinate mushrooms or coat them lightly with
slices or oyster mushrooms) oil.
* Rough values
Page 11

6.2 Recipes
Vegetable kebaps
What you need
– 8 shallots
– 1 green pepper
– 8 firm cocktail tomatoes
– 8 small mushrooms
– 1 cooked corn cob
– 8 barbecue onions
– 1 clove of garlic
– 2 dried red chili peppers
– 1 teaspoon of salt
– 1 teaspoon of dried thyme
– 4 tablespoons of olive oil
Proceed as follows:
– Cut the base of the root off the shallots.
– Bring abundant amounts of water to the boil and
blanch the onions for 2 minutes. Then, they can
be removed easily from their skins and are
slightly precooked. Rinse the pepper and the
cocktail tomatoes, cut the pepper in quarters and
remove the pips. Rub the mushrooms clean and
remove the stems.
– Cut the pepper into bite-size portions and cut the
corn cob into about 2 cm thick slices.
– Peel the clove of garlic and crush it in a mortar
together with the chili pepper and the salt.
– Add thyme and stir in the olive oil.
– Stick the vegetables in colourful order on 4 spits,
coat them with herbal oil and allow the oil to
absorb for 15 minutes.
– Grill the vegetable kebaby for 10-15 minutes at
level 6-7, turning them several times.
Broschetta
What you need
– 8 small, not too thin, pieces of Italian white bread
– 12 tablespoons of olive oil
– 4 cloves of garlic
– Salt
Y
ou also need the following for broschetta with
tomato
– 16 ripe cocktail tomatoes
– 1/2 bunch basil
– Freshly ground pepper
Proceed as follows:
– Coat each side of the bread slices with a little
olive oil and roast them on the grill at level 7 for
1-2 minutes. Turn once.
– Peel the garlic, cut it into half and vigorously rub
the freshly roasted bread slices with it. Drip olive
oil over them and season with salt.
Broschetta with tomato
– Briefly blanch the cocktail tomatoes in boiling
water, peel them and cut out the stem bases.
Chop the tomatoes into large pieces.
– Peel the cloves of garlic and chop them into fine
pieces. Place 8 good leaves of the basil aside,
rinse the rest, dab it dry and cut it into strips.
– Mix the tomatoes with garlic, chopped basil and
a little salt and pile them onto the roated slices of
bread. Trickle the rest of the olive oil over them,
pepper lightly and garnish with the basil leaves.
10
Page 12

6.3 Tips and tricks
– The grilled result depends on the nature and
quality of the meat and on your personal taste.
– As far as possible, grilled pieces should be
equally thick. In this way, they will brown evenly
and they will stay nice and juicy.
– Always preheat the grill. In this way, the
intensive heat radiation will seal the surface of
the grilled food and juice cannot leak.
– Place grilled pieces directly on the gridiron.
If there is only piece for grilling, place it on the
gridiron, as far as possible in the middle, over the
switched-on heating elemen. That is the best to
do it. Turn grilled pieces over as soon as they can
be removed easily from the gridiron. The pores
have now been sealed.
– Always grill steaks unsalted. Otherwise, water and
soluble nutrients might leak and be lost.
– Avoid pickled foods such as boiled ham and
smoked pork etc. as otherwise a compound may
be produced that is harmful to health.
– To avoid drying out of the surface and to improve
the taste, lightly brush grilled food with heatresistant oil (e.g. peanut oil). Make sure you do
not use too much oil as otherwise there will be a
risk of fire.
– You might notice that the grilling element
switches on and off automatically during the
grilling time. This is normal.
– Poultry becomes particularly crispy brown if
you coat it with butter, salty water or orange juice
towards the end of the cooking time.
– Serve grilled food hot.
– Grilled food will go tough if you keep it warm.
– Meat is medium if juice leaks out of the surface
of a steak (pink inside and crispy brown on the
outside).
– Do not pierce the meat while grilling it. It may
lose its juice. Turn the meat when small drips can
be seen on its surface.
– Do not remove the fatty layer (e.g. on a cutlet)
until after grilling as otherwise the meat will lose
juice and aroma.
Would you have known?
Advantages of grilling
No or little fat is used when grilling. Therefore, it
is a low-fat preparation method.
Grilling is a gentle cooking method in which
nutrients, taste and aroma substances are largely
retained. Grilled foodstuffs are easy on the stomach
because they are prepared without fat and sauces.
During grilling, intensive browning appears on
the surface of foodstuffs, but no crust, with the
result that grilled foods are easy to digest and are
suitable for diets.
11
Page 13

Beef
– Well-hung pieces are particularly suitable. If you
have not gathered much grilling experience, you
should practice with pieces of meat such as rump
steak or high rib, after which you can try your
hand at entrecote or fillet steak. For smaller
pieces of meat, the gridiron must be very hot as
otherwise the meat will dry out.
Veal
– Veal very quickly becomes dry, also in foil. To
protect the meat, you can wrap bacon around it.
This will sacrifice its fine intrinsic taste, but the
meat will remain juicy. Veal steaks taste good if
cut from the back and grilled for such a short time
that the meat is not too well-done. Then leave the
meat to rest at 80° in the oven.
Pork
– Nicely streaky pork does not need a marinade or
oil. With the exception of roast pork and neck of
pork, pieces of fillet, chops and hocks can be
grilled well. Pork takes slightly longer to cook
than other kinds of meat.
Lamb
– Lamb is ideally suitable for grilling. It is more
tender than beef, but not as tender as veal. Chops
and pieces of shoulder are ideal. Lemon butter
goes well with these. Preheat the plate and serve
the piece of meat as hot as possible because the
fat is difficult to digest when cold.
Poultry
– All kinds of poultry can be cooked on the grill. In
the case of guinea fowl, small pigeons and quail,
we brush a little fat onto the skin. Do not brush
chicken with oil because they have enough fat
under their skin. Poultry is seasoned inside and
out before grilling.
Fish
– Salt water fish are no problem at all, whereas
fresh water fish require a gentle approach
because they fall apart in most cases. They are
best prepared in aluminium foil or brushed
generously with olive oil or lumps of butter.
Vegetables / potatoes
– Firm types of vegetables such as celery, chili,
aubergines, corn cobs, fennel or onions are
outstandingly suitable for grilling.
Fruit
– Apples, bananas, pears, pineapples and peaches
grill lends themselves excellently to grilling.
12
Page 14

GAGGENAU HAUSGERÄTE GMBH
P.O. BOX 10 02 50 · D-80076 MÜNCHEN
Y (01801)11 22 11
FAX (018 01) 33 53 01
www.gaggenau.com
 Loading...