

Gaggenau BSP220111/05 Installation Instruction

Gaggenau
en User manual and installation instructions
BSP2201.1,
BSP2211.1
Steamer

en Safety
Table of contents
USER MANUAL
1 Safety....................................................................2
2 Preventing material damage ...............................4
3 Environmental protection and saving en-
ergy .......................................................................5
4 Familiarising yourself with your appliance ........6
5 Accessories..........................................................9
6 Before using for the first time ...........................10
7 Basic operation ..................................................11
8 Timer functions ..................................................12
9 Childproof lock...................................................14
10 HomeConnect ...................................................14
11 Basic settings.....................................................16
12 Cleaning and servicing......................................18
13 Troubleshooting.................................................21
14 Disposal..............................................................23
15 How it works.......................................................24
16 Customer Service...............................................39
17 Declaration of Conformity .................................40
18 INSTALLATION INSTRUCTIONS .......................40
18.1 General installation instructions....................
...40
1 Safety
Observe the following safety instructions.
1.1 General information
¡ Read this instruction manual carefully.
¡ Keep the instruction manual and the
product information safe for future reference or for the next owner.
¡ Do not connect the appliance if it has been
damaged in transit.
1.2 Intended use
This appliance is designed only to be built
into kitchen units. Read the special installation
instructions.
Only a licensed professional may connect appliances without plugs. Damage caused by incorrect connection is not covered under the
warranty.
Only use this appliance:
¡ To prepare meals and drinks.
¡ In private households and in enclosed
spaces in a domestic environment.
¡ Up to an altitude of max. 4000m above
sea level.
1.3 Restriction on user group
This appliance may be used by children aged
8 or over and by people who have reduced
physical, sensory or mental abilities or inadequate experience and/or knowledge,
provided that they are supervised or have
been instructed on how to use the appliance
safely and have understood the resulting
dangers.
Do not let children play with the appliance.
Children must not perform cleaning or user
maintenance unless they are at least 15 years
old and are being supervised.
Keep children under the age of 8 years away
from the appliance and power cable.
1.4 Safe use
Follow these instructions when using a steam
function.
Always place accessories in the cooking compartment the right way round.
→"Accessories", Page9
WARNING‒Risk of burns!
The appliance and its parts that can be
touched become hot during use.
▶ Caution should be exercised here in order
to avoid touching heating elements.
▶ Young children under 8 years of age must
be kept away from the appliance.
▶ Never touch the ventilation openings.
Accessories and cookware get very hot.
▶ Always use oven gloves to remove ac-
cessories or cookware from the cooking
compartment.
2

Safety en
WARNING‒Risk of scalding!
The accessible parts of the appliance become
hot during operation.
▶ Never touch these hot parts.
▶ Keep children at a safe distance.
Hot steam may escape when you open the
appliance door. Steam may not be visible, depending on the temperature.
▶ When opening the door, do not stand too
close to the appliance.
▶ Open the appliance door carefully.
▶ Keep children at a safe distance.
If there is water in the cooking compartment
when it is hot, this may create hot steam.
▶ Never pour water into the cooking compart-
ment when the cooking compartment is
hot.
Hot liquid may spill over the sides of the accessory when it is removed from the cooking
compartment.
▶ Remove hot accessories with care and al-
ways wear oven gloves.
WARNING‒Risk of injury!
Scratched glass in the appliance door may
develop into a crack.
▶ Do not use any harsh or abrasive cleaners
or sharp metal scrapers to clean the glass
on the appliance door, as they may scratch
the surface.
The light emitted by LED lights is very
dazzling, and can damage the eyes (risk
group 1).
▶ Do not look directly into the switched on
LED lights for longer than 100 seconds.
WARNING‒Risk of fire!
Due to the hot surfaces, vapours from flammable liquids may catch fire in the cooking
compartment (explosion). The appliance door
may spring open. Hot steam and jets of flame
may escape.
▶ Do not pour flammable liquids (e.g. alco-
holic drinks) into the water tank.
▶ Only fill the water tank with water or with
the descaling solution we have recommen-
ded.
WARNING‒Risk of electric shock!
Incorrect repairs are dangerous.
▶ Repairs to the appliance should only be
carried out by trained specialist staff.
▶ Only use genuine spare parts when repair-
ing the appliance.
If the insulation of the power cord is damaged, this is dangerous.
▶ Never let the power cord come into contact
with hot appliance parts or heat sources.
▶ Never let the power cord come into contact
with sharp points or edges.
▶ Never kink, crush or modify the power
cord.
An ingress of moisture can cause an electric
shock.
▶ Do not use steam- or high-pressure clean-
ers to clean the appliance.
If the appliance or the power cord is damaged, this is dangerous.
▶ Never operate a damaged appliance.
▶ Never pull on the power cord to unplug the
appliance. Always unplug the appliance at
the mains.
▶ If the appliance or the power cord is dam-
aged, immediately unplug the power cord
or switch off the fuse in the fuse box.
▶ Call customer services. →Page39
WARNING‒Risk of suffocation!
Children may put packaging material over
their heads or wrap themselves up in it and
suffocate.
▶ Keep packaging material away from chil-
dren.
▶ Do not let children play with packaging ma-
terial.
Children may breathe in or swallow small
parts, causing them to suffocate.
▶ Keep small parts away from children.
▶ Do not let children play with small parts.
1.5 Cleaning
Follow these safety instructions when cleaning
the appliance.
WARNING‒Risk of scalding!
The descaling tablets may cause chemical
burns in the mouth, throat, eyes and on the
skin.
▶ Follow the safety instructions on the pack-
aging of the descaling tablets.
▶ Avoid the skin coming into contact with the
descaling tablets.
▶ Keep children away from the descaling tab-
lets.
3

en Preventing material damage
The descaling solution may cause chemical
burns in the mouth, throat and eyes or on the
skin.
▶ Avoid the skin coming into contact with the
descaling solution.
▶ Keep children away from the descaling
solution.
2 Preventing material damage
2.1 General
ATTENTION!
A build-up of heat may damage the appliance.
▶ Do not place anything directly on the cooking com-
partment floor.
▶ Do not line the cooking compartment floor with alu-
minium foil.
▶ Always place cookware in a perforated cooking con-
tainer or on a wire rack.
Chlorinated tap water (>40mg/l) may damage the appliance.
▶ Use low-chloride non-carbonated mineral water.
▶ You can obtain information about your tap water
from your water supplier.
Chloride and acids may damage the stainless steel surface.
▶ Remove any residues of salt, hot sauces, e.g.
ketchup or mustard, salted food, e.g. salted roasts,
or other foods containing chloride or acid immedi-
ately.
Aluminium foil can cause permanent discolouration on
the door pane.
▶ Ensure that the aluminium foil does not come into
contact with the door pane.
Fruit juice can cause permanent stains in the cooking
compartment.
▶ Always remove fruit juice immediately.
▶ Wipe with a damp cloth, followed by a dry cloth.
The prolonged presence of moisture in the cooking
compartment leads to corrosion.
▶ Do not keep moist food in the cooking compartment
for a long time with the door closed.
▶ Do not store food in the cooking compartment.
Rusting material may lead to corrosion in the cooking
compartment.
▶ Only use original accessories in the cooking com-
partment.
▶ Do not use any enamelled baking trays or grill trays.
▶ Never use serving plates or cutlery that may rust.
Small parts that are not original may damage the appliance.
▶ Only use original small parts, e.g. knurled nuts.
▶ If necessary, order small parts from our spare parts
service.
Heat can damage stainless steel cooking containers.
▶ Only heat stainless steel cooking containers up to
230°C.
▶ Do not use stainless steel cooking containers in the
oven.
▶ Do not drink the descaling solution.
▶ The descaling solution must not come into
contact with food.
▶ Clean the water tank in the dishwasher or
thoroughly by hand before you next use the
appliance.
Leaving the appliance to cool down with the door open
will damage the front of adjacent units over time.
▶ Always allow the cooking compartment to cool
down with the door closed after cooking at high
temperatures.
▶ Take care not to trap anything in the appliance
door.
If the seal is very dirty, the appliance door will no
longer close properly during operation. This may damage the front of adjacent kitchen units.
▶ Keep the seal clean at all times.
▶ Never operate the appliance if the seal is damaged
or missing.
Sitting or placing objects on the appliance door may
damage it.
▶ Do not place, hang or support objects on the appli-
ance door.
▶ Do not place cookware or accessories on the appli-
ance door.
Carrying the appliance by the door handle could break
it. The door handle cannot support the weight of the
appliance.
▶ Do not carry or hold the appliance by the door
handle.
2.2 Steam
ATTENTION!
Dripping liquids may damage the cooking compartment.
▶ To catch any dripping liquids, when steaming using
a perforated cooking container, always insert the un-
perforated cooking container underneath.
Silicone bakeware is not suitable for combined operation with steam.
▶ Cookware must be heat- and steam-resistant.
Using cookware with rust spots may cause corrosion in
the cooking compartment. Even the smallest spots of
rust can cause corrosion.
▶ Do not use cookware with rust spots.
Hot water in the water tank may damage the steam
system.
▶ Only fill the water tank with cold water.
If descaling solution comes into contact with the control
panel or other delicate surfaces, it will damage them.
▶ Remove descaling solution immediately with water.
2.3 Cleaning
ATTENTION!
Limescale may damage the appliance.
▶ Descale the appliance regularly.
4

Environmental protection and saving energy en
Using the wrong descaler may damage the appliance.
▶ Only use the specified descaling tablets.
Improper care of the appliance can lead to corrosion in
the cooking compartment.
▶ Follow the care and cleaning instructions for the ap-
pliance.
→"Cleaning and servicing", Page18
▶ Clean the cooking compartment each time you use
it as soon as the appliance has cooled down.
▶ Dry the cooking compartment after cleaning.
The descaling tablet may damage the cooking compartment.
▶ Use the descaling tablet for the descaling pro-
gramme only.
▶ Place the descaling tablet into the water tank.
▶ Never place the descaling tablet in the cooking
compartment or heat it up in the cooking compartment.
Heat damages the water tank.
▶ Do not dry the water tank in the hot cooking com-
partment.
3 Environmental protection and saving energy
3.1 Disposing of packaging
The packaging materials are environmentally compatible and can be recycled.
▶
Sort the individual components by type and dispose
of them separately.
3.2 Saving energy
If you follow these instructions, your appliance will use
less power.
When steaming, you can cook on several levels at the
same time.
With steam, various dishes can be prepared at the
¡
same time without the different flavours mixing.
When preparing dishes with different cooking times,
those with the longest cooking time should be
placed in the oven first.
When cooking multiple dishes, do so in succession or
in parallel.
The cooking compartment is heated after cooking
¡
the first dish. This reduces the cooking time for the
following dishes.
If the cooking time is relatively long, you can switch
the appliance off 10minutes before the cooking time
ends.
There will be enough residual heat to finish cooking
¡
the dish.
Open the appliance door as little as possible during
operation.
This maintains the temperature in the cooking com-
¡
partment and eliminates the need for the appliance
to reheat.
Remove any accessories that are not being used from
the cooking compartment.
Accessories that are not being used do not need to
¡
be heated.
Allow frozen food to defrost before cooking.
This saves the energy that would otherwise be re-
¡
quired to defrost it.
5

en Familiarising yourself with your appliance
1 2 3
4
1
2
3
4
1 12
34
1
2
3
4
4 Familiarising yourself with your appliance
4.1 Appliance
You can find an overview of the parts of your appliance
here.
Steam outlet
Ventilation slots
Door seal
Always open the appliance door as far as it will go. In
this position, the open appliance door does not swing
back.
Controls
You can use the control panel to configure all functions
of your appliance and to obtain information about the
operating status.
On certain models, specific details such as colour and
shape may differ from those pictured.
All appliance types are operated in an identical manner.
Water tank
Cooking compartment
The cooking compartment has three shelf levels. Count
the shelf levels from the bottom up.
ATTENTION!
A build-up of heat may damage the appliance.
▶ Ensure that the cooking compartment floor always
remains clear.
▶ Do not place anything directly on the cooking com-
partment floor.
▶ Do not line the cooking compartment floor with alu-
minium foil.
▶ Always place cookware in the perforated cooking
container or on the wire rack.
The accessories may tip.
▶ Do not push the accessories between the shelf posi-
tions.
The bottom shelf level has two shelf positions. This
means that, when defrosting, for example, you can
slide the unperforated cooking container in below the
perforated cooking container in order to collect excess
liquid.
You can use up to three shelf levels at the same time.
Touch
fields
Display The display shows current settings
Rotary selector
Function
selector
These areas are touch-sensitive.
Touch a symbol to select the corresponding function.
and selection options, for example.
Use the rotary selector to select
the temperature and change additional settings.
Use the function selector to select
the type of heating, cleaning or
the basic settings.
Symbols
Use the symbols to start or stop functions, or to navigate in the menu.
6

Familiarising yourself with your appliance en
Symbol Function
Start
Stop
Pause or end
Cancel
Delete
Confirm or save settings
Selection arrow
Call up additional information
Rapid heating with status display
Edit settings
Childproof lock
Call up the timer menu
Demo mode
Network connection (HomeConnect)
Colours
The different colours are used to guide the user in the
relevant setting situations.
Orange ¡ Initial settings
¡ Main functions
Blue ¡ Basic settings
¡ Cleaning
White Adjustable values
Appearance
Depending on the situation, the appearance of symbols, values or the entire display changes.
Zoom The appliance zooms in
on the setting that you
have just changed.
If you have set a time and
it is about to run out, it
will appear larger on the
display just before it runs
out, e.g. if you have set
the timer.
Pared-down display After a short while, the ap-
pliance reduces the
amount of information
shown on the display and
only the most important
information remains. This
function is preset. You
can change the setting in
the basic settings.
Position of the function selector
Use the function selector to select the functions or types of heating.
Position Function/type of heating Temperature Application
Zero setting
Light Switching on the interior lighting
Hot air + 100% humidity
Sous-vide cooking
30-100°C
Default temperature
100°C
50-95°C
Default temperature 60°C
Steaming at 70°C to 100°C:
For vegetables, fish and side
dishes
The food is completely enveloped by steam.
Cooking food in a vacuum at low
temperatures between 50-95°C
and with 100% steam: Suitable
for meat, fish, vegetables and
desserts
A vacuum-sealing machine uses
heat to hermetically seal the food
in a special heat-resistant cooking bag. The protective envelope
retains the nutrients and flavours.
7

en Familiarising yourself with your appliance
Position Function/type of heating Temperature Application
Dough proving
Defrosting
Reheating
Low-temperature steaming
Basic settings Adapt the appliance to individual
Cleaning aid
Descaling programme Use the descaling programme
30-50°C
Default temperature 38°C
40-60°C
Default temperature 45°C
60-100°C
Default temperature
100°C
70-90°C
Default temperature 70°C
Proving: For yeast dough and
sour dough
The dough rises considerably
more quickly than at room temperature. Hot air and steam are
combined so that the surface of
the dough does not dry out.
The optimal temperature setting
for yeast dough is 38°C.
For vegetables, meat, fish and
fruit
The appliance uses the moisture
to gently transfer the heat to the
food. The food does not dry out
or lose its shape.
For cooked food and baked
goods
For gently reheating cooked
food. The steam ensures that the
food does not dry out.
Low-temperature cooking for
meat
Gentle slow cooking for a particularly tender result
requirements in the basic settings →Page16
Use the cleaning aid →Page19
to remove stubborn dirt in the
cooking compartment with steam
→Page19 to remove limescale
from the appliance
4.2 Standby
The appliance switches to standby mode if no function
is set or the childproof lock is activated. The standby
screen appears if you do not implement any settings
for a long time.
Different displays can be shown in standby mode. The
GAGGENAU logo and the time are preset.
In standby mode, the brightness of the control panel is
reduced. The brightness of the display depends on the
vertical viewing angle. You can change the display and
the brightness at any time in the basic settings
→Page16.
When "Off" is selected for the standby display in the
basic settings, you must turn the function selector to
exit standby mode.
When the door is open, the interior lighting switches off
after a short time.
4.3 Additional information
Press to display additional information, e.g. information about the type of heating that is set or the current
cooking compartment temperature.
During continuous operation after heating up, slight
temperature fluctuations are normal.
The appliance displays the symbol for important information and indicates that an action is required. The
appliance also occasionally displays important informa-
8

Accessories en
tion about safety and the operating status automatically. These messages disappear automatically after a
few seconds, or press to confirm the message.
For messages about HomeConnect, the appliance
also displays the HomeConnect status in the symbol.
4.4 Cooling fan
The cooling fan switches on when the appliance is in
operation. The hot air escapes above the door.
After removing your food from the appliance, keep the
door closed until the appliance has cooled down. The
appliance door must not be left half open as this may
damage adjacent kitchen units. The cooling fan continues running for a certain period of time after the appliance has stopped heating and then it switches itself off
automatically.
Do not cover the ventilation slots. Otherwise, the appliance will overheat.
5 Accessories
Use original accessories. These have been made especially for your appliance.
Note:Accessories may become deformed if they get
hot. Deformation has no effect on function. As the accessory cools down, it will regain its original shape.
4.5 Fan run-on
After operation, the cooking compartment is damp. The
fan run-on removes moisture from the appliance and
protects the appliance electronics.
The cooling fan continues running after the appliance is
switched off. The appliance switches the cooling fan off
automatically. This may take up to 4hours depending
on the operating mode and temperature that are used.
When the appliance has switched off the cooling fan,
remove any remaining residual water from the cooking
compartment floor and dry the cooking compartment
with a soft cloth.
4.6 Safety switch-off function
For your safety, the appliance has a safety switch-off
function. The appliance switches off any heating process after 12hours if the appliance controls are not
used during this time. The display shows a message.
The accessories supplied may differ depending on the
appliance model.
Accessories Use
Wire rack ¡ Cookware
¡ Cake tins
¡ Ovenproof dishes
¡ Frying
Cooking containers made
of stainless steel, unperforated, 40 mm deep
Stainless steel cooking
container, perforated,
40mm deep
5.1 Other accessories
You can purchase other accessories from our aftersales service, specialist retailers or online.
You will find a comprehensive range of products for
your appliance in our brochures and online:
www.gaggenau.com
Accessories vary from one appliance to another. When
purchasing accessories, always quote the exact
product number (E no.) of your appliance.
You can find out which accessories are available for
your appliance in our online shop or from our aftersales service.
Other accessories Order number
Stainless steel cooking
container, unperforated,
40mm deep, 5l
Stainless steel cooking
container, perforated,
40mm deep, 5l
Cooking container, nonstick, unperforated,
40mm deep, 5l
Cooking container, nonstick, perforated, 40mm
deep, 5l
Set with 4 descaling tablets
¡ Cooking rice
¡ Cooking pulses
¡ Cooking cereals
¡ Baking tray bakes
¡ For catching dripping liquid during steam-
ing
¡ Steaming vegetables
¡ Steaming fish
¡ Extracting juice from berries
¡ Defrosting
BA220360
BA220370
BA020380
BA020390
17002490
9

en Before using for the first time
Other accessories Order number
GN adapter, for use with
GN cooking inserts and
roasters
Stainless steel cooking
container, GN 1/3, unperforated, 40mm deep,
1.5l
Stainless steel cooking
container, GN 2/3, unperforated, 40mm deep, 3l
Stainless steel cooking
container, GN 1/3, perforated, 40mm deep, 1.5l
Stainless steel cooking
container, GN 2/3, perforated, 40mm deep, 3l
GN010330
GN114130
GN114230
GN124130
GN124230
5.2 Locking function
The locking function prevents the accessories from tilting when they are pulled out.
You can pull out the accessories approximately halfway
without them tipping. The accessories must be inserted
into the cooking compartment correctly for the tilt protection to work correctly.
1.
When inserting the wire rack, ensure that the lug
is at the rear and is facing downwards.
2.
Ensure that the safety bracket on the wire rack is
located at the rear and is facing upwards.
3.
When inserting the perforated cooking container, en-
sure that the lug is at the rear.
5.3 Sliding accessories into the cooking compartment
The wire rack and the perforated cooking container are
fitted with a locking function. For the tilt protection to
work correctly, always insert the wire rack and the perforated cooking container into the cooking compartment the right way round.
ATTENTION!
The accessories may tip.
▶ Do not push the accessories between the shelf posi-
tions.
6 Before using for the first time
Configure the settings for initial start-up. Clean the appliance and accessories.
6.1 Initial use
Implement the settings for initial use before using your
appliance.
First read the information under safety →Page2.
The appliance must be installed and connected.
After connecting the appliance to the power supply, the
GAGGENAU logo appears for approx. 30seconds and
then the appliance displays the "Initial settings" menu.
You can configure your new appliance for initial use.
The "Initial settings" menu appears only after the appliance has been connected to a power supply and
switched on for the first time, or if the appliance has
not been connected to a power supply for a number of
days.
You can change all of the settings in the basic settings
→Page16.
a The tilt protection is working.
Note:To pull out the accessories, lift them slightly.
Remove any accessories that you do not require from
the cooking compartment.
Setting the language
Requirement:The display shows the preset language.
1.
Use the rotary selector to select the required display
language.
2.
Press to confirm.
Setting the time format
Requirement:The display shows the possible formats
24h and AM/PM. 24h is preset.
1.
Use the rotary selector to set the required format.
2.
Press to confirm.
Set the time
Requirement:The display shows the time.
1.
Use the rotary selector to set the required time.
2.
Press to confirm.
Setting the date format
Requirement:The display shows the possible formats
D.M.Y, D/M/Y and M/D/Y. D.M.Y is preset.
10

1.
M
A
X
M
a
x
.
Use the rotary selector to set the required format.
2.
Press to confirm.
Setting the date
Requirement:The display shows the preset date. The
daily setting is already active.
1.
Use the rotary selector to set the required day.
2.
Press to switch to the month setting.
3.
Use the rotary selector to set the month.
4.
Press to switch to the year setting.
5.
Turn the rotary selector to set the year.
6.
Press to confirm.
Setting the temperature unit
Requirement:The display shows the possible units °C
and °F. The unit °C is preset.
1.
Turn the rotary selector to set the required unit.
2.
Press to confirm.
7 Basic operation
Basic operation en
Ending the initial use
Requirement:The display shows "Initial set-up com-
plete".
▶
Press .
a The appliance switches to standby mode.
a The display shows the standby screen.
a The appliance is ready to use.
Cleaning the door pane
Note:To ensure tightness, the door seal is lubricated
at the factory. Residue may remain on the door pane.
▶
Before using for the first time, clean the door pane
with glass cleaner and a window cloth or a microfibre cloth.
Do not use a glass scraper.
Cleaning accessories
▶
Before first use, clean the accessories thoroughly
using hot soapy water and a soft cloth.
7.1 Activating the appliance
1.
To exit standby mode, open the door and turn the
function selector or touch a touch field.
2.
Set the required function.
7.2 Opening the appliance door
▶
Always open the appliance door as far as it will go.
In this position the appliance door does not swing
back.
7.3 Fill the water tank
WARNING‒Risk of fire!
Due to the hot surfaces, vapours from flammable liquids may catch fire in the cooking compartment and
cause an explosion. The appliance door may spring
open. Hot steam and jets of flame may escape.
▶ Only fill the water tank with water or with the descal-
ing solution that is recommended by us.
WARNING‒Risk of burns!
The front edge of the cooking compartment becomes
very hot during operation.
▶ When removing the water tank, only touch its
handle.
3.
Pull the water tank out of the appliance until the fill
level indicator is visible, or completely remove the
water tank from the appliance.
4.
Open the valve on the water tank.
5.
Fill the water tank with cold water up to the "Max."
mark.
ATTENTION!
The use of unsuitable liquids may damage the appliance.
▶ Only use fresh tap water, softened water or uncar-
bonated mineral water.
▶ If the tap water is very hard, we recommend using
softened water.
▶ Do not use distilled water, highly chlorinated tap wa-
ter (above 40mg/l) or other liquids.
1.
Before using the appliance, always fill the water
tank.
2.
Open the appliance door.
6.
Close the flap on the water tank.
7.
Slide the water tank back in as far as it will go.
8.
If you use the appliance multiple times back to
back, empty the remaining water from the water
tank after each use and refill it with fresh water.
11

en Timer functions
7.4 Switching on the appliance
1.
Use the function selector to set the required type of
heating.
a The display shows the selected type of heating and
the suggested temperature.
2.
If required, use the rotary selector to set the desired
temperature.
a The display shows the heating symbol .
a The bar displays the current heating status.
a Once the appliance reaches the set temperature, a
signal tone sounds and the heating symbol goes
out .
3.
Refill the water tank if necessary.
→"Fill the water tank", Page11
During operation, the water tank is locked in the appliance. Only if the appliance shows that the water
tank is empty can you remove the water tank.
7.5 Switching off the appliance
▶
Turn the function selector to .
Depending on the type of heating, you may hear an
automatic rinse cycle running.
7.6 After each use
After using the steam type of heating, dry the cooking
compartment to ensure that no moisture remains in the
appliance and to prevent odour from building up.
WARNING‒Risk of scalding!
Hot steam may escape when you open the appliance
door. Steam may not be visible, depending on the temperature.
▶ When opening the door, do not stand too close to
the appliance.
▶ Open the appliance door carefully.
▶ Keep children at a safe distance.
Emptying the water tank
ATTENTION!
Heat damages the water tank.
▶ Do not dry the water tank in the hot cooking com-
partment.
1.
Open the appliance door carefully.
Hot steam escapes.
2.
Remove and empty the water tank.
Drying the cooking compartment
1.
Remove food residues and/or dirt from the cooking
compartment as soon as the appliance has cooled
down.
Burnt-on food residue and/or dirt will be much
harder to remove later.
2.
Use a sponge to wipe away any residual water from
the cooking compartment once it has cooled down.
3.
Wipe out and polish the cooking compartment with
a soft cloth.
4.
If necessary, wipe dry any condensation on units or
handles.
7.7 Switching on the appliance after a safety switch-off
Requirement:After prolonged operation, the safety
switch-off function →Page9 switches off the appliance.
1.
Turn the function selector to .
2.
Switch theappliance back on again.
8 Timer functions
Your appliance has different timer functions, with which
you can control its operation.
8.1 Overview of the timer functions
Use to select the different timer functions.
Timer function Use
Short-term timer
Cooking time
Cooking time end
Stopwatch
1
Not available in standby mode
8.2 Calling up the timer menu
Note:You can call up the timer menu from any operat-
ing mode. The timer menu is not available if you turn
the function selector to in the basic settings.
▶
Press .
a The display shows the timer menu.
1
1
8.3 Exiting the timer menu
▶
Press .
a The timer menu is closed.
a Any settings that are not saved are lost.
Note:You can exit the timer menu at any time.
8.4 Short-term timer
The short-term timer runs independently of the other
appliance settings. You can enter a maximum of
90minutes.
Setting the short-term timer
1.
Press .
a The display shows the "Short-term timer" function.
2.
Use the rotary selector to set the required cooking
time.
3.
Press to start.
a The appliance closes the timer menu.
a The time counts down.
a The display shows and the time that has elapsed.
a A signal tone sounds once the time has elapsed.
4.
Press .
a The signal tone stops.
12

Timer functions en
Stopping the short-term timer
1.
Press .
a The display shows the "Short-term timer" function.
2.
Press .
a The short-term timer stops.
a The display shows .
3.
To allow the timer to continue counting down, touch
.
Switching off the timer early
1.
Press .
a The display shows the "Short-term timer" function.
2.
Press .
8.5 Stopwatch
The stopwatch runs independently of the other appliance settings. The stopwatch counts from 0seconds
up to 90minutes.
The stopwatch has a pause function. This allows you to
stop the stopwatch from time to time.
Starting the stopwatch
1.
Press .
2.
Use to select the "Stopwatch" " function.
3.
Press to start.
a The appliance closes the timer menu.
a The time counts down.
a The display shows and the time that has elapsed.
Stopping the stopwatch
1.
Press .
2.
Use to select the "Stopwatch" " function.
3.
Press .
a The time stops.
a The display shows .
4.
To continue to run the stopwatch, press .
a The time continues to run.
a Once it has reached 90 minutes, the display flashes
and a signal tone sounds.
5.
Press .
a The signal tone stops.
Switching off the stopwatch
1.
Press .
2.
Use to select the "Stopwatch" " function.
3.
Press .
8.6 Cooking time
When you set the cooking time for your food, the appliance automatically switches off after this time. You can
set a cooking time of between 1minute and
23:59hours.
You can change the type of heating and temperature
while the cooking time counts down.
Setting the cooking time
Requirement:The food is in the cooking compartment.
You have set the type of heating and the temperature.
1.
Press .
2.
Use to select the "Cooking time" function.
3.
Use the rotary selector to set the required cooking
time.
4.
Press to start.
a The appliance starts the cooking time.
a The appliance closes the timer menu.
a The display shows the temperature, the operating
mode, the remaining cooking time and the cooking
time end.
a One minute before the end of the cooking time, the
display zooms in on the cooking time.
a Once the cooking time has elapsed, the appliance
switches off.
a flashes and a signal tone sounds.
5.
Press , open the appliance door or set the function selector to .
a The signal tone stops.
Changing the cooking time
1.
Press .
2.
Use to select the "Cooking time" function.
3.
Use the rotary selector to change the cooking time.
4.
Press to start.
Deleting the cooking time
1.
Press .
2.
Use to select the "Cooking time" function.
3.
Use to cancel the cooking time.
4.
Use to return to normal operation.
Cancelling the entire procedure
▶
Turn the function selector to .
8.7 Cooking time end
You can move the cooking time end to a later time.
Example: It is 14:00. The dish requires a cooking time
of 40minutes. You want the meal to be ready at 15:30.
Enter the cooking time of 40minutes and delay the
cooking-time end until 15:30. The electronics system
calculates the start time. The appliance starts automatically at 14:50 and switches off at 15:30.
Bear in mind that food which spoils easily should not
be left in the appliance for too long.
Delaying the cooking time end
Requirement:The food is in the cooking compartment.
You have set the type of heating, temperature and
cooking time.
1.
Press .
2.
Use to select the "Cooking time end" function.
3.
Use the rotary selector to set the required cookingtime end.
If flashes, set the cooking time first.
4.
Press to start.
a The appliance switches to standby.
a The display shows the operating mode, temperat-
ure, cooking time and cooking time end.
a The appliance starts at the calculated time and auto-
matically switches off once the cooking time has
elapsed.
a After the cooking time has elapsed, flashes and a
signal tone sounds.
5.
Press , open the appliance door or set the function selector to .
a The signal tone stops.
Changing the cooking time end
1.
Press .
2.
Use to select the "Cooking time end" function.
13
en Childproof lock
3.
Use the rotary selector to set the required cookingtime end.
4.
Press to start.
9 Childproof lock
Cancelling the entire procedure
▶
Turn the function selector to .
Activate the childproof lock so that children cannot accidentally switch the appliance on or change the settings.
If the childproof lock is switched on and the power
fails, the childproof lock can be deactivated when the
power comes back on.
9.1 Activating the childproof lock
Requirements
¡ You can set the childproof lock to "available" in the
basic settings →Page16.
¡ The function selector is set to .
10 HomeConnect
This appliance is network-capable. Connecting your appliance to a mobile device lets you control its functions
via the HomeConnect app, adjust its basic settings
and monitor its operating status.
The HomeConnect services are not available in every
country. The availability of the HomeConnect function
depends on the availability of HomeConnect services
in your country. You can find information about this at:
www.home-connect.com.
The HomeConnect app guides you through the entire
login process. Follow the instructions in the HomeConnect app to configure the settings.
Tips
¡ Please consult the documents supplied by
HomeConnect.
¡ Please also follow the instructions in the HomeCon-
nect app.
Notes
¡ Please note the safety precautions in this instruction
manual and make sure that they are also observed
when operating the appliance via the HomeConnect app.
→"Safety", Page2
¡ If you want to operate the appliance via the
HomeConnectapp, you must activate the remote
control function in the HomeConnectsettings first.
This function is for your own safety. Turn the function selector on the appliance to the light position
to enable the remote control function.
¡ Operating the appliance on the appliance itself al-
ways takes priority. During this time it is not possible
to operate the appliance using the HomeConnect
app.
▶
Press and hold for approx. 6seconds.
a The display shows the standby screen and .
a The childproof lock is activated.
9.2 Deactivating the childproof lock
Requirement:The function selector is set to .
1.
Press and hold for approx. 6seconds.
a The childproof lock is deactivated.
2.
Set the appliance as normal.
¡ In networked standby mode, the appliance requires
a maximum of2W.
10.1 Setting up HomeConnect
Requirements
¡ The appliance is connected to the power supply and
is switched on.
¡ You have a mobile device with a current version of
the iOS or Android operating system, e.g. a smartphone.
¡ The mobile device and the appliance are within
range of your home network's Wi-Fi signal.
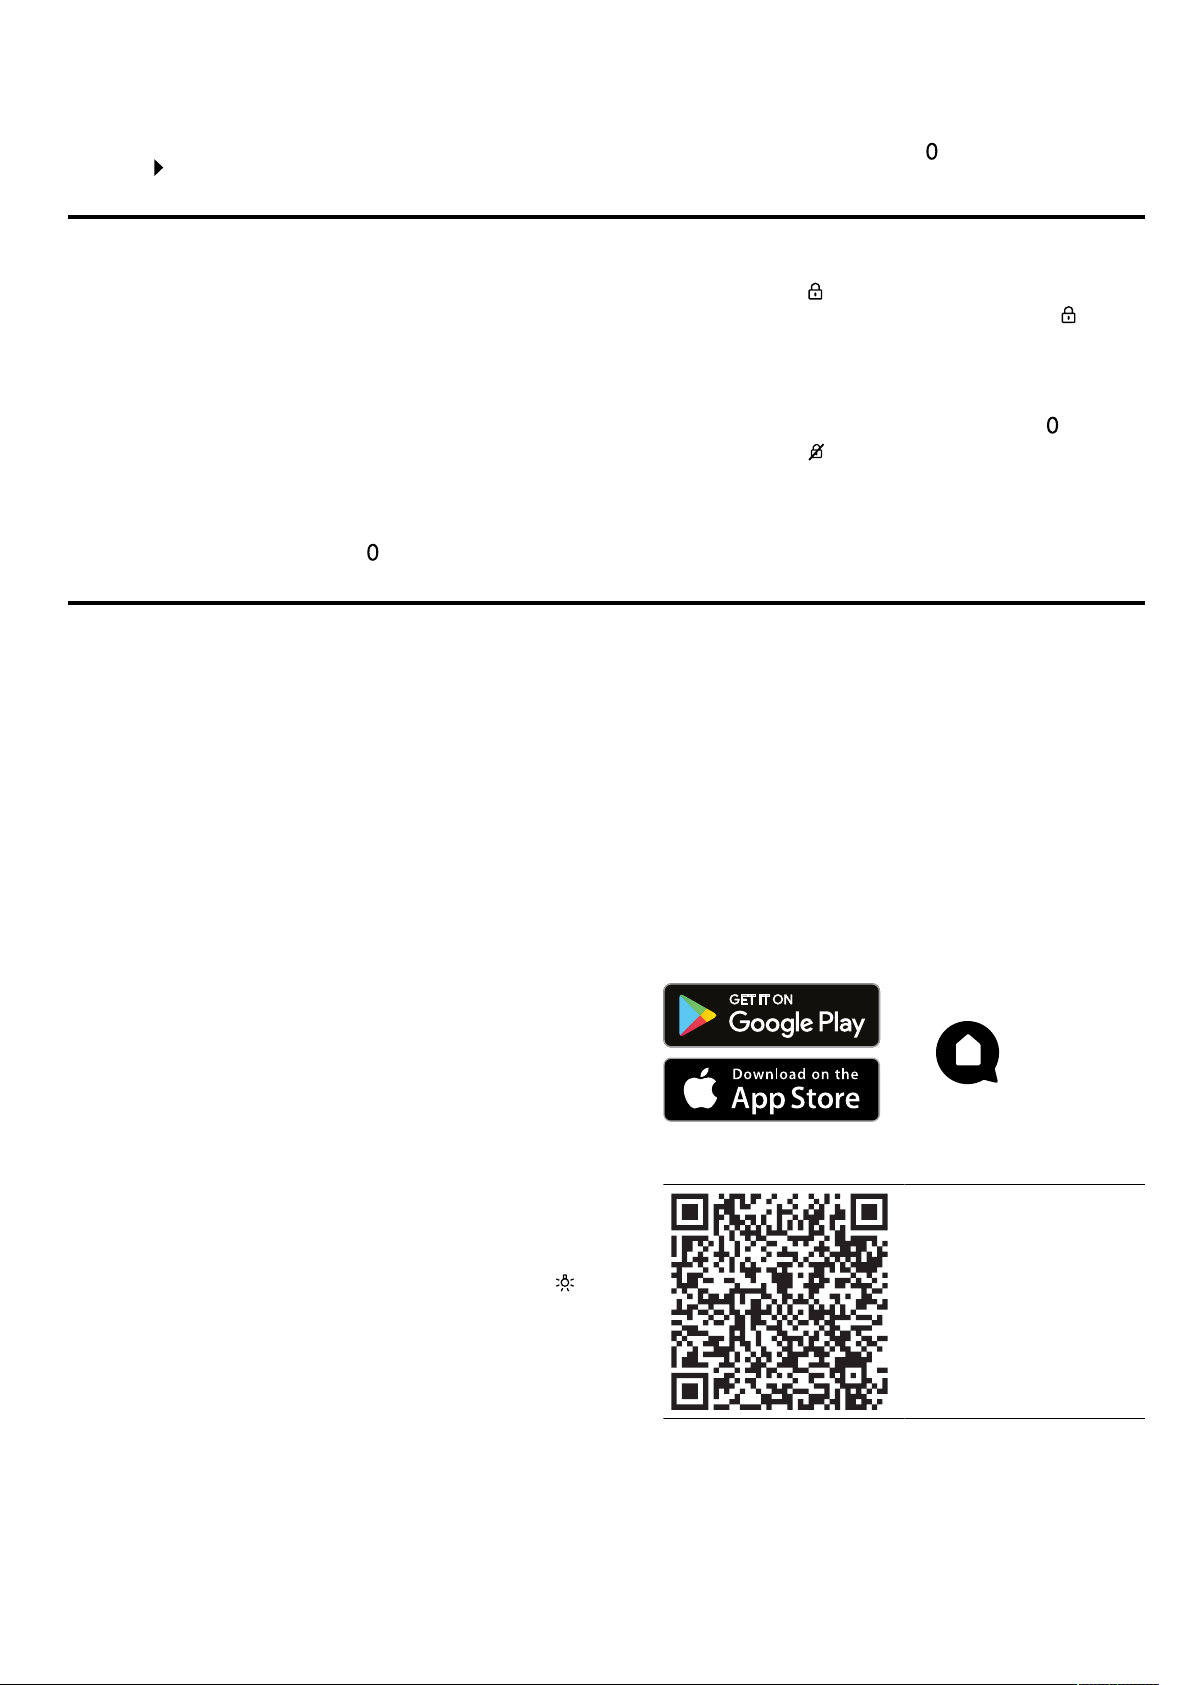
1.
Download the HomeConnect app.
2.
Open the HomeConnect app and scan the follow-
ing QR code.
14
3.
Follow the instructions in the HomeConnect app.

HomeConnect en
10.2 HomeConnect settings
You can adjust the HomeConnect settings and network settings in your appliance's basic settings.
Which settings the display shows will depend on whether HomeConnect has been set up and whether the appliance
is connected to your home network.
Symbol Basic setting Possible settings Explanation
Connection type LAN
Wi-Fi
Connection Connect
Disconnect
Connect to app Start the connection process between the app and the
Software update As soon as a new software version is available, a mes-
Remote control Activate
Deactivate
Permanent remote
start
Delete network set-
tings
Appliance information The display shows:
Activate
Deactivate
You can switch between connection types (LAN cable
and Wi-Fi). Follow the instructions for setting up the relevant connection type.
You can switch the network connection on or off as required. The network information is retained after the appliance is switched off. After switching on the appliance,
wait for a few seconds until it reconnects to the network.
Note:In networked standby mode, the appliance requires a maximum of 2W.
appliance.
sage appears on the display. In the HomeConnect
menu, you can install the new software using .
You can use the HomeConnect app to access the appliance's functions. If the remote control has been deactivated, only the appliance's operating statuses are displayed in the app.
The remote control is only available if you set the rotary
selector to light position .
The light goes out after a few minutes.
When permanent remote start is activated, you can start
and operate your appliance at any time without prior approval on the appliance.
Permanent remote start is only available if you set the
rotary selector to light position .
The light goes out after a few minutes.
You can delete all network settings from the appliance at
any time.
¡ MAC address COM module
¡ Appliance serial number
¡ Software version
Depending on the connection type, you can view more
information, such as the SSID network name, by touching the arrow button.
10.3 Data protection
Please see the information on data protection.
The first time your appliance is registered on a home
network connected to the Internet, your appliance will
transmit the following types of data to the
HomeConnect server (initial registration):
¡ Unique appliance identification (consisting of appli-
ance codes as well as the MAC address of the Wi-Fi
communication module installed).
¡ Security certificate of the Wi-Fi communication mod-
ule (to ensure a secure data connection).
¡ The current software and hardware version of your
appliance.
¡ Status of any previous reset to factory settings.
This initial registration prepares the HomeConnect
functions for use and is only required when you want to
use the HomeConnect functions for the first time.
Note:Please note that the HomeConnect functions
can only be utilised with the HomeConnect app. Information on data protection can be retrieved in the
HomeConnect app.
15
 Loading...