

Page 1

Gaggenau
Instruction manual
BOP 220/221
Oven
Page 2

Table of contents
Instruction manual
Important safety information 3
Causes of damage 5
Environmental protection 5
Environmentally-friendly disposal 5
Tips for saving energy 5
Getting to know the appliance 6
Oven 6
Display and operating controls 7
Symbols 7
Colours and display 8
Additional information ( and ) 8
Cooling fan 8
Function selector positions 9
Accessories 10
Special accessories 10
Before using for the first time 10
Setting the language 10
Setting the time format 11
Setting the clock 11
Setting the date format 11
Setting the date 11
Setting the temperature format 11
Ending initial set-up 11
Heating up the oven 12
Cleaning accessories 12
Activating the appliance 12
Standby 12
Activating the appliance 12
Operating the appliance 13
Cooking compartment 13
Inserting accessories 13
Switching on 13
Rapid heating 13
Safety shut-off 13
Child lock 19
Activate the child lock 19
Deactivating the child lock 19
Basic settings 20
Cleaning and maintenance 22
Cleaning agents 22
Removing slide-in racks 23
Pyrolytic cleaning (self-cleaning) 23
Preparing pyrolytic self-cleaning 23
Starting pyrolytic self-cleaning 24
Cleaning accessories with pyrolytic self-cleaning 24
Trouble shooting 25
Power cut 25
Demo mode 25
Replacing the oven light bulb 26
Aftersales service 26
E number and FD number 26
Settings table and tips 27
Vegetables 27
Side dishes and meals 28
Fish 31
Meat 31
Poultry 34
Grilling and roasting/baking 35
Baking 36
Desserts 40
Preserving 41
Disinfecting 41
Drying 42
Baking stone 42
Acrylamide in foodstuffs 43
Timer functions 14
Calling up the timer menu 14
Timer 14
Stopwatch 14
Cooking time 15
End of cooking time 16
Long-term timer 16
Setting the long-term timer 16
Individual recipes 17
Recording a recipe 17
Programming a recipe 18
Entering names 18
Starting recipes 18
Change recipe 19
Deleting recipes 19
2
: Additional information on products, accessories,
replacement parts and services can be found at
www.gaggenau.com and in the online shop
www.gaggenau.com/zz/store
Page 3

m Important safety information
Read these instructions carefully. Only then will you be able to operate your appliance safely and correctly. Retain the instruction manual and installation instructions for future use or for subsequent owners.
This appliance is only intended to be fully fitted in a kitchen. Observe the special installation instructions.
Check the appliance for damage after unpacking it. Do not connect the appliance if it has been damaged in transport.
Only a licensed professional may connect appliances without plugs. Damage caused by incorrect connection is not covered under warranty.
This appliance is intended for domestic use only. The appliance must only be used for the preparation of food and drink. The appliance must be supervised during operation. Only use this appliance indoors.
This appliance is intended for use up to a maximum height of 2000 metres above sea level.
This appliance may be used by children over the
age of 8 years old and by persons with reduced
physical, sensory or mental capabilities or by
persons with a lack of experience or knowledge
if they are supervised or are instructed by a
person responsible for their safety how to use
the appliance safely and have understood the
associated hazards.
Children must not play with, on, or around the appliance. Children must not clean the appliance or carry out general maintenance unless they are at least 8 years old and are being supervised.
Keep children below the age of 8 years old at a safe distance from the appliance and power cable.
Always slide accessories into the cooking compartment correctly. See description of accessories in the instruction manual.
Risk of fire!
▯ Combustible items stored in the cooking
compartment may catch fire. Never store
combustible items in the cooking
compartment. Never open the appliance
door if there is smoke inside. Switch off the
appliance and unplug it from the mains or
switch off the circuit breaker in the fuse box.
Risk of fire!
▯ A draught is created when the appliance
door is opened. Greaseproof paper may
come into contact with the heating element
and catch fire. Do not place greaseproof
paper loosely over accessories during
preheating. Always weight down the
greaseproof paper with a dish or a baking
tin. Only cover the surface required with
greaseproof paper. Greaseproof paper must
not protrude over the accessories.
Risk of burns!
▯ The appliance becomes very hot. Never
touch the interior surfaces of the cooking
compartment or the heating elements.
Always allow the appliance to cool down.
Keep children at a safe distance.
Risk of serious burns!
▯ Accessories and ovenware become very hot.
Always use oven gloves to remove
accessories or ovenware from the cooking
compartment.
Risk of burns!
▯ Alcoholic vapours may catch fire in the hot
cooking compartment. Never prepare food
containing large quantities of drinks with a
high alcohol content. Only use small
quantities of drinks with a high alcohol
content. Open the appliance door with care.
Risk of scalding!
▯ The accessible parts become hot during
operation. Never touch the hot parts. Keep
children at a safe distance.
Risk of scalding!
▯ When you open the appliance door, hot
steam may escape. Open the appliance door
with care. Keep children at a safe distance.
Risk of scalding!
▯ Water in a hot cooking compartment may
create hot steam. Never pour water into the
hot cooking compartment.
3
Page 4

Risk of injury!
Scratched glass in the appliance door may develop into a crack. Do not use a glass scraper, sharp or abrasive cleaning aids or detergents.
Risk of electric shock!
▯ Incorrect repairs are dangerous. Repairs
may only be carried out and damaged power
cables replaced by one of our trained aftersales technicians. If the appliance is
defective, unplug the appliance from the
mains or switch off the circuit breaker in the
fuse box. Contact the after-sales service.
Risk of electric shock and serious injury!
▯ The cable insulation on electrical appliances
may melt when touching hot parts of the
appliance. Never bring electrical appliance
cables into contact with hot parts of the
appliance.
Risk of electric shock!
▯ Do not use any high-pressure cleaners or
steam cleaners, which can result in an
electric shock.
Risk of electric shock!
▯ When replacing the cooking compartment
bulb, the bulb socket contacts are live.
Before replacing the bulb, unplug the
appliance from the mains or switch off the
circuit breaker in the fuse box.
Risk of electric shock!
▯ A defective appliance may cause electric
shock. Never switch on a defective
appliance. Unplug the appliance from the
mains or switch off the circuit breaker in the
fuse box. Contact the after-sales service.
Risk of burns!
▯ The cooking compartment will become very
hot during the pyrolytic cleaning cycle. Never
open the appliance door or move the locking
latch by hand. Allow the appliance to cool
down. Keep children at a safe distance.
Risk of burns!
▯ ; The appliance will become very hot on
the outside during the Self-cleaning cycle.
Never touch the appliance door. Allow the
appliance to cool down. Keep children at a
safe distance.
Risk of serious damage to health!
The appliance will become very hot during the
pyrolytic cleaning cycle. The non-stick coating
on baking trays and tins is destroyed and
noxious gases are released. Never let non-stick
baking trays and tins go through the pyrolytic
cleaning cycle. Only enamelled accessories may
be cleaned at the same time.
Risk of fire!
▯ Loose food residues, grease and meat
juices may catch fire during pyrolytic
cleaning. Remove coarse dirt from the
cooking compartment and from the
accessories before every pyrolytic cleaning
cycle.
Risk of fire!
▯ The appliance will become very hot on the
outside during the pyrolytic cleaning cycle.
Never hang combustible objects, e.g. tea
towels, on the door handle. Do not place
anything against the front of the oven. Keep
children at a safe distance.
4
Page 5

Causes of damage
Caution!
– Accessories, foil, greaseproof paper or ovenware
on the cooking compartment floor: do not place
accessories on the cooking compartment floor. Do
not cover the cooking compartment floor with any
sort of foil or greaseproof paper. Do not place
ovenware on the cooking compartment floor if a
temperature of over 50 ºC has been set. This will
cause heat to accumulate. The baking and roasting
times will no longer be correct and the enamel will
be damaged.
– Water in a hot cooking compartment: do not pour
water into the cooking compartment when it is hot.
This will cause steam. The temperature change can
cause damage to the enamel.
– Moist food: do not store moist food in the cooking
compartment when it is closed for prolonged
periods This will damage the enamel.
– Fruit juice: when baking particularly juicy fruit pies,
do not pack the baking tray too generously. Fruit
juice dripping from the baking tray leaves stains
that cannot be removed. If possible, use the deeper
universal pan.
– Cooling with the appliance door open: only allow
the cooking compartment to cool when it is closed.
Even if the appliance door is only open a little, front
panels of adjacent units could be damaged over
time.
– Very dirty door seal: If the door seal is very dirty, the
appliance door will no longer close properly when
the appliance is in use. The fronts of adjacent units
could be damaged.Always keep the door seal clean.
– Appliance door as a seat, shelf or worktop: Do not
sit on the appliance door, or place or hang anything
on it. Do not place any cookware or accessories on
the appliance door.
– Inserting accessories: depending on the appliance
model, accessories can scratch the door panel
when closing the appliance door. Always insert the
accessories into the cooking compartment as far as
they will go.
– Carrying the appliance: do not carry or hold the
appliance by the door handle. The door handle
cannot support the weight of the appliance and
could break.
Environmental protection
Environmentally-friendly disposal
Dispose of packaging in an environmentally-friendly
manner.
This appliance is labelled in accordance with
European Directive 2012/19/EU concerning
used electrical and electronic appliances
(waste electrical and electronic equipment WEEE). The guideline determines the
framework for the return and recycling of used
appliances as applicable throughout the EU.
Tips for saving energy
▯ Open the appliance door as little as possible while
cooking, baking or roasting.
▯ Use dark, black lacquered or enamelled baking tins
for baking. They absorb the heat particularly well.
▯ It is best to bake several cakes one after the other.
The oven will still be hot. This reduces the baking
time for the second cake. You can also place two
loaf tins next to each other.
▯ In the hot air mode, you can bake on several levels
at the same time.
▯ If the cooking time is relatively long, you can switch
off the oven 10 minutes before the end of the
cooking time and use the oven's residual heat to
complete the cooking process.
5
Page 6
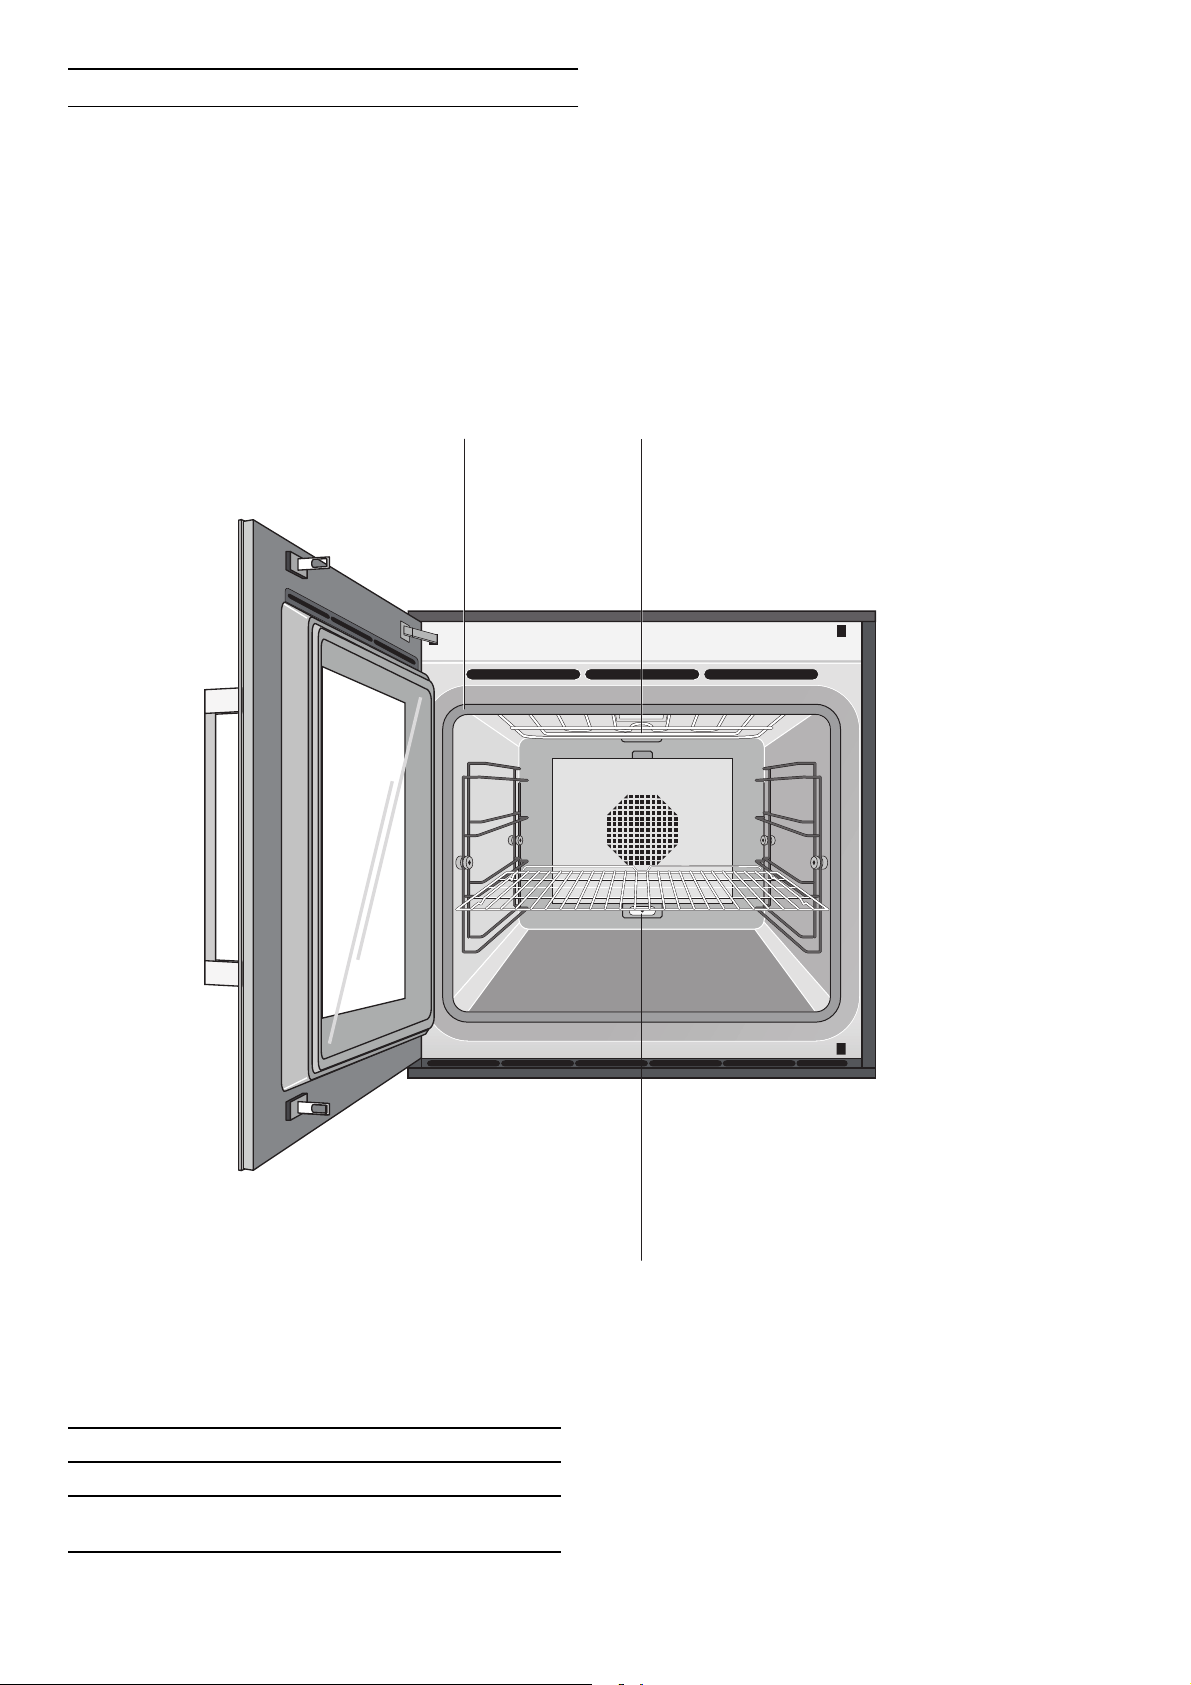
Getting to know the appliance
Use this section to familiarise yourself with your new
appliance. The control panel and the individual
operating controls are explained. You will find
information on the cooking compartment and the
accessories.
Oven
1 Door seal
2 Grill heating element
3 Socket for additional heating element
(special accessory for baking stone)
6
Page 7

Display and operating controls
Symbols
These instructions are valid for different versions of the
appliance. There may be minor differences depending
on the appliance model.
All versions of the appliance are operated in an identical
manner.
Symbol Function
I
Ø
H
' Cancel
Ž Delete
™ Confirm/save settings
C
( Call up additional information
’ Rapid heating with status indicator
i Call up individual recipes
g Record menu
% Edit settings
4 Enter name
l Delete letters
0 Child lock
M
Start
Stop
Pause/End
Selection arrow
Call up timer menu
1 Control panel These areas are touch sensitive.
Touch a symbol to select the
corresponding function.
2 Display The display shows, for example,
current settings and options.
3 Rotary selector You can use the rotary selector to
set the temperature and to make
further settings.
4 Function selector The function selector is used to
select the type of heating, the
cleaning function or the basic
settings.
--------
/ Call up long-term timer
°
Demo mode
--------
7
Page 8
Colours and display
Cooling fan
Colours
The different colours are used to guide the user in the
relevant setting situations.
Orange Initial settings
Main functions
Blue Basic settings
Cleaning
White Values which can be set
Display
The appearance of the symbols, values or the entire
display changes depending on the situation.
Zoom The setting which is currently being
changed is displayed in an enlarged
format.
A cooking time that is coming to an end
is shown in an enlarged format shortly
before running out (e.g. the last
60 seconds of the timer).
Your appliance has a cooling fan. The cooling fan
switches on during operation. Depending on the
appliance version, the hot air escapes above or under
the door.
After removing cooked food, keep the door closed until
the appliance cools down. The appliance door must not
be left ajar, as adjoining kitchen furniture may be
damaged. The cooling fan continues to run for a certain
time after operation and then switches off automatically.
Caution!
Do not cover the ventilation slots. Otherwise, the
appliance will overheat.
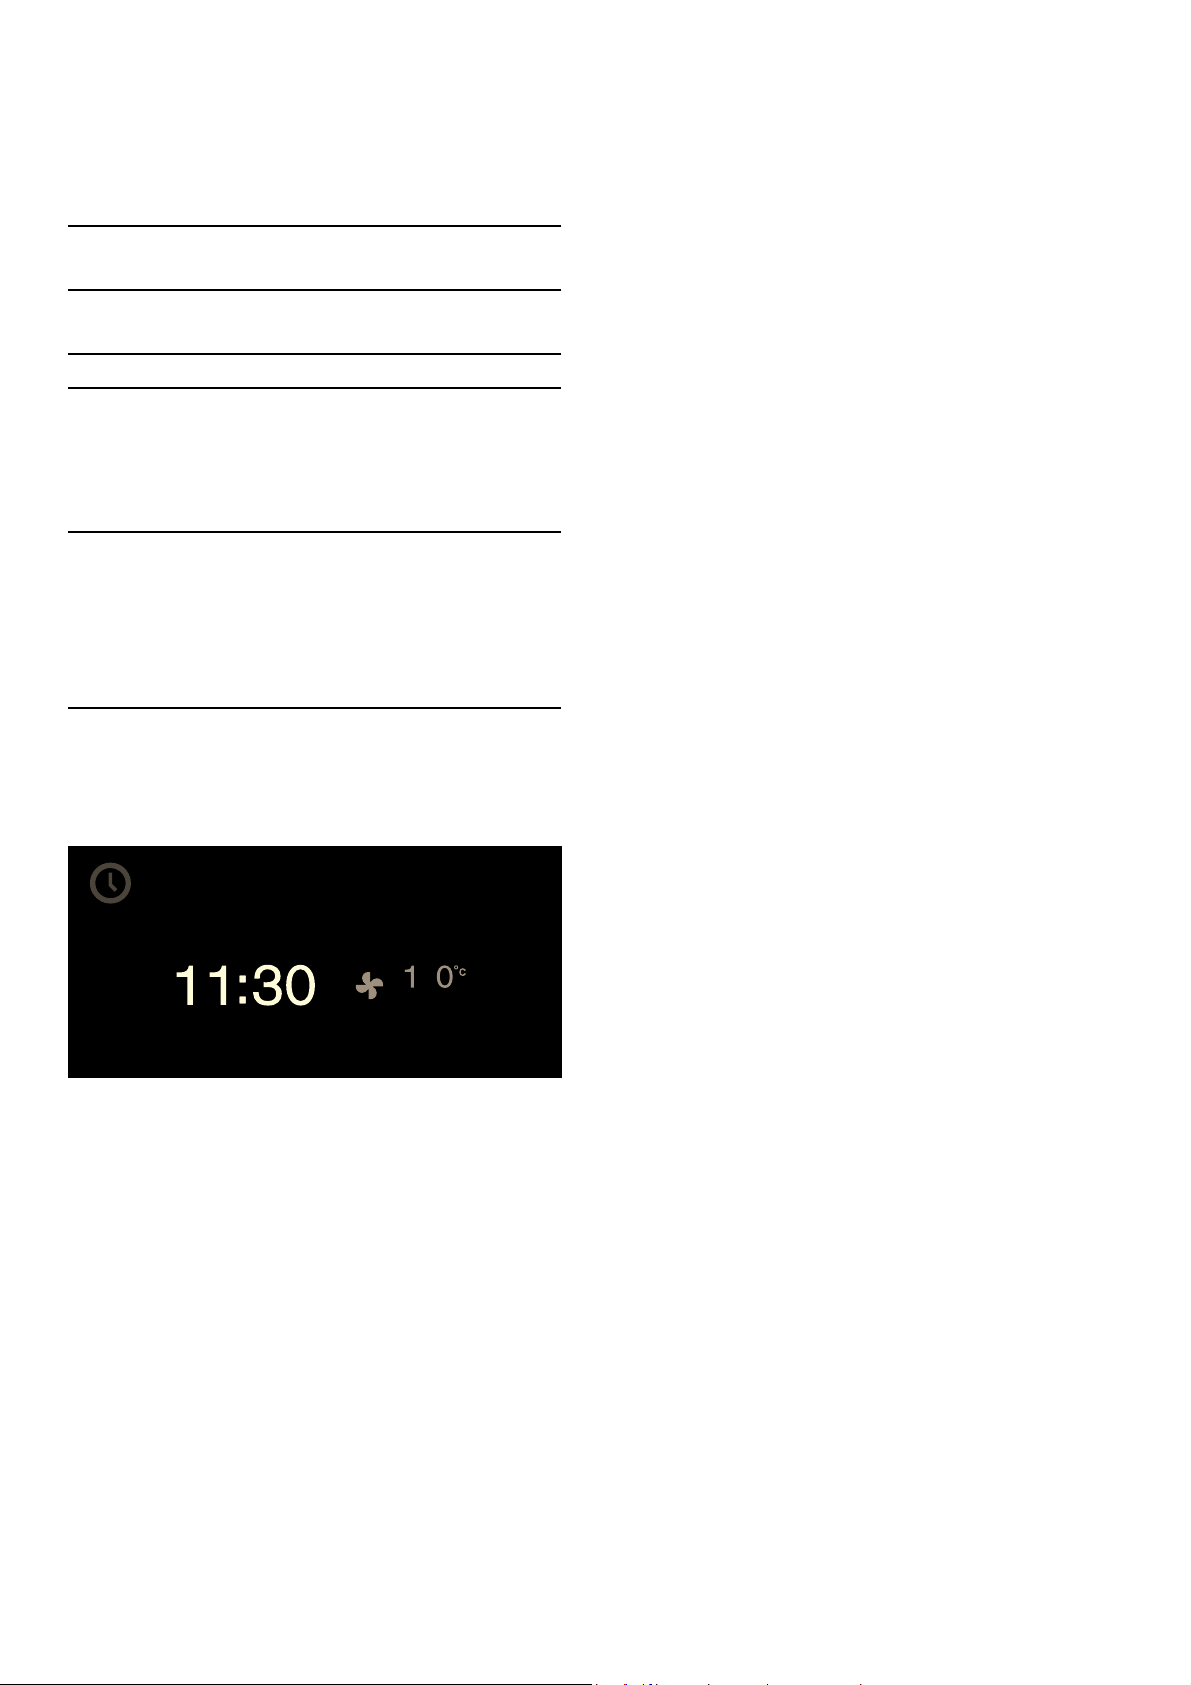
Reduced display After a short time, the display is reduced
and only the most important information
is displayed. This function is preset and
can be changed in the basic settings.
Additional information ( and )
By touching the ( symbol, you can call up additional
information. For example, information on the heating
function set or on the current temperature of the
cooking compartment.
Note: During continuous operation, small fluctuations in
temperature are normal after the oven has heated up.
The ) symbol is displayed for important information
and action prompts.Important information on safety and
operation mode are occasionally shown automatically.
These messages either disappear automatically after a
few seconds or must be confirmed with ™.
8
Page 9

Function selector positions
Position Function/type of heating Temperature Use
0 Off position
ž Light
2 H
Hot air
50 - 300 °C
Default temperature 170 °C
Hot air: For cakes, biscuits and bakes on several
levels.
The fan in the back wall of the oven distributes
the heat evenly throughout the cooking compartment.
3 I
Eco hot air*
4 N
Top + bottom heat
5 P
Top heating
6 L
Bottom heating
7 K
Hot air + bottom heat
8 Z
Full surface grill +
50 - 300 °C
Default temperature 170 °C
50 - 300 °C
Default temperature 170 °C
50 - 300 °C
Default temperature 170 °C
50 - 300 °C
Default temperature 170 °C
50 - 300 °C
Default temperature 170 °C
50 - 300 °C
Default temperature 220 °C
Energy-saving hot air mode for cakes, biscuits,
bakes and gratins. The oven lighting remains off.
For cakes in tins or on a baking tray, bakes,
roasting.
Targeted heat from above, for example grilling
fruitcake with meringue.
For the final baking stage (such as for moist fruitcakes), for preserving, for dishes in a bain marie.
Additional heat from below for moist cakes, such
as fruitcake.
Even, all-round heating for meat, poultry and
whole fish.
circulated air
9 Q
Full surface grill
10 T
Baking stone function
50 - 300 °C
Default temperature 220 °C
50 - 300 °C
Default temperature 250 °C
To grill flat pieces of meat, sausages or fillets of
fish. Grilling and gratinating.
Baking stone only available as a special accessory
Baking stone heated from below for crisp stonebaked pizza, bread or bread rolls.
S
t Basic settings
You can customise your appliance in the basic
settings.
œ Pyrolytic cleaning 485 °C Self-cleaning
* Type of heating used to determine the energy efficiency class according to EN60350-1.
9
Page 10

Accessories
Use only the accessories supplied with the product or
available from the after-sales service. They are specially
designed for your appliance. Ensure that you always
insert the accessories into the cooking compartment
the right way round.
Your appliance is equipped with the following
accessories:
Baking tray, enamelled
Before using for the first time
In this section, you can find out what you must do before
using your appliance to prepare food for the first time.
Read the section entitled 'Important safety information'
beforehand.
The appliance must be fully installed and connected to
the mains.
After connection to the mains, the "Initial settings" menu
appears in the display. You can now make settings for
your new appliance.
Wire rack
Glass tray
Special accessories
You can order the following special accessories from
your specialist dealer:
BA 016 105 Pull-out system
Fully extendable telescopic pull-out
rack and cast-iron frame which can
withstand pyrolytic cleaning
BA 026 115 Baking tray, enamelled 15 mm deep
BA 036 105 Wire rack, chrome-plated, without
opening, with feet
BA 226 105 Grill tray, enamelled 30 mm deep
BA 046 115 Glass dish, 24 mm deep
BA 056 115 Heating element for baking stone
(230 V)
▯ Language
▯ Time format
▯ Time
▯ Date format
▯ Date
▯ Temperature format
Notes
‒ The "Initial settings" menu will appear only after the
appliance has been connected to a power supply
and switched on for the first time, or if the
appliance has not been connected to a power
supply for a number of days.
Once the appliance has been connected to a power
supply, the GAGGENAU logo will appear first for
approximately 30 seconds. The "Initial settings"
menu will then appear automatically.
‒ You can change the settings at any time (see
section entitled 'Basic settings').
Setting the language
The preset language appears in the display.
1 Turn the rotary selector to select the required
display language.
2 Confirm with ™.
BA 056 133 Baking stone
Including baking stone support and
pizza paddle (order heating element
separately)
BS 020 002 Pizza paddle, set of 2
GN 340 230 Cast aluminium roaster GN 2/3,
165 mm high, non-stick coated
Only use the accessories as specified. The
manufacturer accepts no liability if these accessories
are used incorrectly.
10
'HXWVFK
6SUDFKH
Note: If the language is changed, the system restarts.
This takes a few seconds.
Page 11

Setting the time format
Setting the date
The two possible formats 24h and AM/PM appear in the
display. The default is the 24h format.
1 Use the rotary selector to select the desired format. 2 Confirm with ™.
7LPHIRUPDW
Setting the clock
The time is shown in the display.
1 Set the desired time using the rotary selector. 2 Confirm with ™.
The preset date appears in the display. The day setting
is already active.
1 Set the day using the rotary selector. 2 Touch the C symbol to switch to the month setting.
3 Set the month using the rotary selector. 4 Touch the C symbol to switch to the year setting.
5 Set the year using the rotary selector. 6 Confirm with ™.
'DWH
Setting the temperature format
7LPH
Setting the date format
The three possible formats D.M.Y, D/M/Y and M/D/Y
appear in the display. The default is the D.M.Y format.
1 Use the rotary selector to select the desired format. 2 Confirm with ™.
The two possible formats °C and °F appear in the
display. The default setting is °C.
1 Use the rotary selector to select the desired format. 2 Confirm with ™.
7HPSHUDWXUHIRUPDW
Ending initial set-up
"Initial set-up complete" appears in the display.
Confirm with ™.
'DWHIRUPDW
,QLWLDOVHWXS
FRPSOHWH
The appliance enters standby mode and the standby
screen appears. The appliance is now ready for
operation.
11
Page 12

Heating up the oven
Ensure that no packaging remnants have been left in the
cooking compartment.
Activating the appliance
To remove the new cooker smell, heat up the oven when
it is empty and closed. One hour with H Hot air at
200°C is ideal. For instructions on how to set this type
of heating, refer to the Operating the appliance section.
Cleaning accessories
Before using the accessories for the first time, clean
them thoroughly using hot detergent solution and a soft
cloth.
Standby
The appliance goes into standby mode if no function
has been set or the child lock is activated.
The brightness of the control panel is dimmed in
standby mode.
Notes
‒ Different displays are available for standby mode.
The default setting is the GAGGENAU logo and the
clock. To change the display, refer to the Basic
settings
section.
‒ The brightness of the display depends on the
vertical viewing angle. You can adjust the display
using the "Brightness" setting in the basic settings.
Activating the appliance
To exit standby mode, you can either
▯ Turn the function selector,
▯ Touch a control panel,
▯ Open or close the door.
You can now set the desired function. You can read
about how to set functions in the respective chapters.
Notes
‒ When "Standby screen = off" is selected in the
basic settings, you must turn the function selector
to exit standby mode.
‒ The appliance returns to the standby screen if you
have not made any settings for a long time after
activation.
‒ When the door is open, the interior lighting
switches off after a short time.
12
Page 13

Operating the appliance
Cooking compartment
The cooking compartment has four shelf positions. The
shelf positions are counted from the bottom up.
Switching on
1 Set the required heating mode using the function
selector. The chosen heating mode and the default
temperature are displayed.
2 If you want to change the default temperature:
set the required temperature with the rotary
selector.
The preheating symbol ’ appears on the display. The
bar continuously shows the preheating status. When the
set temperature is reached, a signal sounds and the
preheating symbol ’ goes off.
Caution!
– Do not place anything on the cooking compartment
floor. Do not cover it with aluminium foil. A build-up
of heat could damage the appliance.
– Do not slide any accessories between the shelf
positions, or they may tip.
Always fully open the appliance door to the stop. In this
position, the open door will not swing back by itself.
Inserting accessories
The accessories are equipped with a locking function.
The locking function prevents the accessories from
tilting when they are pulled out. The accessories must
be inserted into the cooking compartment correctly for
the tilt protection to work properly.
When inserting the wire rack, check
▯ that the lug (a) is pointing downwards
▯ that the safety bar on the wire rack is at the back
and facing upwards.
Note: The oven interior lighting stays switched off at a
temperature setting below 70°C
Switching off:
Turn the function selector to 0.
Rapid heating
With the "Rapid heat-up" function, your appliance
reaches the desired temperature particularly quickly in
the top heating, bottom heating and top/bottom heating
types of heating.
To ensure an even cooking result, do not place your
food in the cooking compartment until "Rapid heat-up"
is complete and the ’ heat-up symbol goes out.
Note: The "Rapid heat-up" function is preset in the
factory settings. In the basic settings, you can select ’
Rapid heat-up or “ Heat-up.
Safety shut-off
For your protection, the appliance is equipped with an
automatic safety shut-off. Any heating process is
switched off after 12 hours if the oven is not operated in
this time. A message appears in the display.
Exception:
The long-term timer has been programmed.
Set the function selector to 0, then the appliance can be
operated again as usual.
D
D
13
Page 14

Timer functions
You use the timer menu to make the following settings:
Š Short-term timer
p Stopwatch
The timer menu closes and the time begins to count
down. The
display.
Š symbol and the countdown appear in the
6 Cooking time (not in standby mode)
5 Cooking time end (not in standby mode)
Calling up the timer menu
You can call up the timer menu from any mode. Only
from the basic settings, function selector is set to S, the
timer menu is not available.
Touch the M symbol.
The timer menu is displayed.
A signal sounds once the time has elapsed. Touch
the ™ symbol to silence.
You can exit the timer menu at any time by pressing
the ' symbol. This erases the settings.
To stop the timer:
Call up timer menu. Touch
function and touch the H symbol. To allow the timer to
continue counting down, touch the symbol I.
Switching off the timer early:
Call up timer menu. Touch C to select the "Timer" Š
function and touch the Ž symbol.
Stopwatch
The stopwatch runs independently of the other
appliance functions.
C to select the "Timer" Š
Timer
The timer runs independently of the other appliance
functions. You can enter a maximum of 90 minutes.
Setting the timer
1 Call up timer menu.
The "Timer" Š function is displayed.
2 Turn the rotary selector to set the required cooking
time.
7LPHU
3 Start with I.
The stopwatch counts from 0 seconds up to 90 minutes.
It also has a pause function, which enables you to
temporarily stop the clock.
Starting the stopwatch
1 Call up the timer menu. 2 Touch C to select the p "Stopwatch" function.
6WRSZDWFK
3 Touch I to start.
14
Page 15

The timer menu is closed and the timing begins. The p
symbol and the elapsed time are shown in the display.
3 Set the desired cooking time using the rotary
selector.
&RRNLQJWLPH
Pausing and restarting the stopwatch
1 Call up the timer menu. 2 Touch C to select the p "Stopwatch" function. 3 Touch the H symbol.
6WRSZDWFK
The time stops. The symbol changes to I Start.
4 Touch I to start.
The time continues to run. When 90 minutes is reached,
the display pulsates and signal sounds. The signal stops
when you touch the ™ symbol. The p symbol on the
display goes out. The process has finished.
4 Press I to start.
The appliance starts. The timer menu is closed. The
settings for temperature, heating mode, elapsing time
and cooking time end are shown in the display.
During the last minute of the cooking time the remaining
time is displayed in an enlarged format.
To switch off the stopwatch:
Call up the timer menu. Touch C to select the p
"Stopwatch" function and touch the Ž symbol.
Cooking time
If you set a cooking time for your meal, the appliance
switches off heating automatically after the selected
time.
You can set a cooking time from 1 minute to 23 hours
59 minutes.
Setting a cooking time
You have set the heating mode and temperature and you
have placed your dish in the oven.
1 Touch the M symbol. 2 Use C to select the 6 "Cooking time" function.
The appliance switches off after the cooking time has
elapsed. The 6 symbol flashes and a signal sounds.
The signal stops when you touch the ™ symbol, open
the appliance door, or switch the function selector to 0.
Changing the cooking time:
Call up the timer menu. Use C to select the 6
"Cooking time" function. Change the cooking time using
the rotary selector. Press I to start.
Clearing the cooking time:
Call up the timer menu. Use C to select the 6 "Cooking
time" function. Clear the cooking time with Ž. Return to
normal operation with '.
Cancelling the entire operation:
Set the function selector to 0.
Note: You can also change the heating mode and
temperature during the cooking time.
15
Page 16

End of cooking time
You can delay the cooking time end to a later time.
Example: it is 14:00. The dish requires a cooking time of
40 minutes. You want it to be ready at 15:30.
Enter the cooking time and delay the cooking time end
until 15:30. The electronics system calculates the start
time. The appliance starts automatically at 14:50 and
switches off at 15:30.
Bear in mind that food which spoils easily should not be
left in the cooking compartment for too long.
Delaying the cooking time end
You have set the heating mode, temperature and
cooking time.
1 Touch the M symbol. 2 Use C to select the 5 "Cooking time end"
function.
To change the cooking time end:
Call up the timer menu. Use
"Cooking time end" function. Set the desired cooking
time end using the rotary selector. Press
To terminate the whole procedure:
Set the function selector to 0.
C to select the 5
I to start.
Long-term timer
With this function, the appliance maintains a
temperature between 50 und 230°C with the "Hot air"
heating function.
You can keep food warm for up to 74 hours without
having to switch the appliance on or off.
Bear in mind that food which spoils easily should not be
left in the oven for too long.
Note: You must set the long-term timer to "available" in
the basic settings (refer to the Basic settings section).
&RRNLQJWLPHHQG
3 Set the desired cooking time end using the rotary
selector.
4 Press I to start.
The appliance switches to standby. The heating mode,
temperature, cooking time and cooking time end appear
in the display. The appliance starts at the calculated
time and switches off automatically when the cooking
time has elapsed.
Note: If the 6 symbol flashes: You have not set the
cooking time. Always set the cooking time first.
Once the cooking time has elapsed, the appliance
switches off. The 5 symbol flashes and an audible
signal sounds. The signal stops early if you touch the ™
symbol, open the appliance door, or set the function
selector to 0.
Setting the long-term timer
1 Set the function selector to ž. 2 Touch the / symbol.
The default value 24 hrs at 85 °C appears in the
display. Press I to start
–or–
Change the cooking time, the cooking time end, the
switch-off date and the temperature.
/RQJWHUPWLPHU
3 Changing the cooking time 6:
Touch the $ symbol. Set the required cooking
time using the rotary selector.
4 Changing the cooking time end 5:
Touch the C symbol. Set the required cooking
time end using the rotary selector.
5 Changing the switch-off date q:
Touch the C symbol. Set the required switch-off
date with the rotary selector. Confirm with ™.
6 Changing the temperature:
Set the required temperature with the rotary
selector.
7 Press I to start.
16
Page 17

The appliance starts. / and the temperature appear in
the display.
The oven and display lighting are switched off. The
control panel is locked; no key tone sounds when you
touch the touch keys.
Once the set time has elapsed, the appliance stops
heating. Turn the function selector to 0.
Switching off:
To end the process, turn the function selector to 0.
Individual recipes
It is possible to save up to 50 individual recipes. You
can record a recipe. These recipes can be given a name
so that they can be called up quickly and conveniently
when required.
Recording a recipe
It is possible to consecutively set up to 5 phases and to
record at the same time.
1 Select the required heating mode using the
function selector.
The i symbol is displayed.
2 Touch the i symbol.
3 Select a free memory location by turning the rotary
selector.
4 Touch the g symbol.
5 Select the required temperature using the rotary
selector.
6 The cooking time is recorded.
7 To record another phase:
Select the required heating mode using the
function selector. Set the temperature using the
rotary selector. This begins a new phase.
8 If the dish has achieved the desired cooking result,
touch the & symbol to finish the recipe.
9 Enter the name in "ABC" (refer to the Entering names
section).
Notes
‒ Recording of a phase starts only once the selected
temperature has been reached.
‒ The minimum duration of each phase is 1 minute.
‒ During the first minute of a new phase it is possible
to change the heating mode or the temperature.
17
Page 18

Programming a recipe
Entering names
You can programme and save up to 5 preparation
phases.
1 Turn the function selector to the desired type of
heating. Turn the rotary selector to set the desired
temperature.
The i symbol is displayed.
2 Touch the i symbol.
3 Use the rotary selector to select a free memory
location.
4 Touch the % symbol.
5 Enter the name in "ABC" (see chapter Entering
names
).
6 Use the C symbol to select the first phase.
The initial type of heating and temperature is
displayed. You can change the type of heating and
the temperature by using the rotary selectors.
1 Enter the name of the recipe in "ABC".
$B
Rotary selector
4 Press briefly: moves the cursor right
5 Press briefly: moves the cursor right
l Deletes letters
Select letters
A new word always begins with a capital letter.
Press and hold: shifts to umlauts and special characters
Press twice: accepts the change
Press and hold: shift to normal characters
Press twice: accepts the change
7 Use the C symbol to select the time allocation.
8 Turn the rotary selector to set the required cooking
time.
9 Use the C symbol to select the next phase.
- or If preparation is complete, finish making entries.
10 Save with ™.
- or Cancel with ' and exit the menu.
2 Save with ™.
- or Cancel with ' and exit the menu.
Note: For entering a name, Latin characters, certain
special characters and numbers are available.
Starting recipes
1 Set the function selector to any heating mode.
The i symbol is displayed.
2 Touch the i symbol. Use the rotary selector to
select the required recipe.
3 Press I to start.
Operation starts. The cooking time starts counting
down in the display.
The settings for each phase are shown in the
display.
18
Page 19

Notes
‒ The cooking time does not start counting down until
the appliance has reached the set temperature.
‒ You can use the rotary selector to change the
temperature while the recipe is in progress. This
does not change the saved recipe.
Change recipe
You can change the settings of a recorded or
programmed recipe.
1 Turn the function selector to the any type of heating.
The i symbol is displayed.
2 Touch the i symbol.
3 Use the rotary selector to select the desired recipe. 4 Touch the % symbol. 5 Use the C symbol to select the desired phase.
The programmed type of heating, temperature and
cooking time are displayed. You can use the rotary
selector or function selector to change the settings.
6 Save with ™.
- or Cancel with ' and exit the menu.
Child lock
The appliance has a childproof lock to prevent children
operating it accidentally.
Notes
‒ You need to set the childproof lock to "available" in
the basic settings (see section entitled 'Basic
settings').
‒ If there is a power cut after the childproof lock has
been activated, the childproof lock may be off when
the power comes back on again.
Activate the child lock
Prerequisite:
The function selector is set to 0.
Touch and hold the 0 symbol for at least 6 seconds.
Deleting recipes
1 Set the function selector to any type of heating.
The i symbol is displayed.
2 Touch the i symbol.
3 Use the rotary selector to select the desired recipe. 4 Delete the recipe with Ž. 5 Confirm with ™.
The child lock is activated. The standby screen appears.
The 0 symbol is shown at the top of the display.
Deactivating the child lock
Prerequisite:
The function selector is set to 0.
Touch and hold the 1 symbol for at least 6 seconds.
The child lock is deactivated. You can set the appliance
as usual.
19
Page 20

Basic settings
Your appliance can be individually adjusted in the basic
settings.
1 Turn the function selector to S.
2 Select "Basic settings" using the rotary selector. 3 Touch the ™ symbol.
4 Turn the rotary selector to select the required basic
setting.
Basic setting Permitted settings Explanation
Brightness Level 1, 2, 3, 4, 5*, 6, 7, 8 Sets the display brightness
Standby screen On*/Off
- Clock
- Clock + GAGGENAU logo*
- Date
- Date + GAGGENAU logo
- Clock + date
- Clock + date + GAGGENAU logo
Display Reduced*/Standard If the 'Reduced' setting has been selected,
Touch field colour Grey* / White Selects the colour of the symbols on the
5 Touch the % symbol.
6 Set the basic setting using the rotary selector. 7 Save with ™ or cancel with ' and exit the current
basic setting.
8 Turn the function selector to 0 to exit the basic
settings menu.
The changes are saved.
Appearance of the standby screen.
Off: No display. Use this setting to reduce
the standby consumption of your appliance.
On: Several displays can be set, confirm
"On" with ™ and use the rotary selector to
select the desired display.
The selection is displayed.
only the most important information will be
shown on the display after a short time.
touch fields
Touch field tone Tone 1* / Tone 2 / Off Selects an audible signal for when a touch
field is touched
Touch field tone volume
Heating-up time/audible signal
Signal volume Level 1, 2, 3, 4, 5*, 6, 7, 8 Sets the volume of the audible signal
Time format AM/PM / 24 h* Display the clock in 24 or 12hour format
Time Current time Setting the clock
Clock change Manual* / Automatic Automatically changes the clock to
Level 1, 2, 3, 4, 5*, 6, 7, 8 Sets the volume of the touch field tone
Heating up with audible signal
Rapid heat-up with audible signal*
Heating up without audible signal
Rapid heat-up without audible signal
With the heating-up function, the audible
signal sounds when the desired
temperature is reached. With the "Rapid
heat-up" function, the desired temperature
is reached particularly quickly.
daylight-savings time. If automatic: Setting
the month, day and week for when the time
should be changed over. To be set for both
summer and winter time.
20
Date format D.M.Y*
D/M/Y
M/D/Y
Sets the date format
Page 21

Date Current date Sets the date. You can switch between
year/month/day using the symbol C.
Temperature format °C* / °F Sets the temperature unit
Language German* / French / Italian / Spanish /
Portuguese / Dutch / Danish /
Swedish / Norwegian / Finnish /
Greek / Turkish / Russian / Polish /
Czech / Slovenian / Slovakian / Arabic /
Hebrew / Japanese / Korean / Thai /
Chinese / English US / English
Factory settings Restore appliance to factory settings Confirm the question "Delete all individual
Demo mode On / Off* Only for presentation purposes. The
Long-term timer Not available*/Available Available: The long-term timer can be set;
Select language for text display
Note: If the language is changed, the system
restarts. This takes a few seconds.
The basic settings menu is also closed.
settings made and reset to factory
settings?" by pressing ™ or cancel by
pressing '.
Note: Individual recipes will also be deleted
if the appliance is restored to factory
settings.
After restoring factory settings, the "Initial
settings" menu is displayed.
appliance does not heat up in demo mode,
all other functions are available.
The "Off" setting must be activated for
normal operation. The setting is only possible in the first 3 minutes after connecting
the appliance to the mains.
see section entitled 'Long-term timer'.
* Factory setting
--------
Childproof lock Not available*/Available Available: The childproof lock can be acti-
vated (see section entitled 'Childproof
lock').
21
Page 22

Cleaning and maintenance
With thorough care and cleaning your appliance will
retain its looks and remain in good order. We will
explain here how you should care for and clean your
appliance correctly.
m Risk of burns!
The appliance becomes very hot. Never touch the
interior surfaces of the cooking compartment or the
heating elements. Always allow the appliance to cool
down. Keep children at a safe distance.
m Risk of electric shock!
Do not use any high-pressure cleaners or steam
cleaners, which can result in an electric shock.
m Risk of injury!
Scratched glass in the appliance door may develop into
a crack. Do not use a glass scraper, sharp or abrasive
cleaning aids or detergents.
Cleaning agents
Pay attention to the information in the table to avoid
damaging the various surfaces by incorrect cleaning
agents.
Do not use
▯ harsh or abrasive cleaning agents
▯ metal or glass scrapers to clean the glass on the
appliance door
▯ metal or glass scrapers to clean the door seal
▯ hard abrasive pads or cleaning sponges
Thoroughly rinse out new sponge cloths before use.
Area Cleaning agent
Door panels Glass cleaner: Clean with a soft cloth or
a microfibre cloth. Do not use a glass
scraper.
Display Wipe down using a microfibre cloth or a
slightly damp cloth. Do not wipe with a
wet cloth.
Stainless steel Hot soapy water: Clean using a dish cloth
and then dry with a soft cloth. Remove
flecks of limescale, grease, starch and
albumin (e.g. egg white) immediately.
Corrosion can form under these patches
or splashes. Special stainless-steel
cleaning agents are available from the
after-sales service or from specialist
retailers.
Aluminium Clean with a mild window cleaning agent.
Using a window cloth or a non-fluffing
microfibre cloth, wipe over the surfaces
lightly in a horizontal direction.
Area Cleaning agent
Cooking compartment
Very dirty cooking
compartment
Hot soapy water:
Clean with a dish cloth and then dry with
a soft cloth.
Oven cleaner gel (order number
00463582 from the after-sales service or
from the online shop).
Please note:
▯ Must not come into contact with the
door seal.
▯ Maximum application time is
12 hours.
▯ Do not use on warm surfaces.
▯ Always rinse using water.
▯ Follow the manufacturer’s instruc-
tions.
Glass cover for the
cooking
compartment light
Door seal
Do not remove.
Accessories Hot soapy water:
Slide-in racks Dishwasher, see section "Removing
Telescopic shelf
(optional
accessory)
Baking stone
(optional
accessory)
Microfibre cloth
The honeycomb microfibre cloth is particularly suitable
for cleaning sensitive surfaces such as glass, glass
ceramic, stainless steel or aluminium (part number
00460770 from our after-sales service or from our
online shop). It removes liquid and greasy deposits in
one go.
Hot soapy water: Clean with a dish cloth.
Hot soapy water: Clean with a dish cloth,
do not scrub. Do not use a metal or glass
scraper for cleaning.
Soak and clean with a dish cloth or
brush.
slide-in racks"
Hot soapy water:
Clean with a dish cloth or a brush. Do not
soak or clean in the dishwasher.
Remove burnt-on residues with a brush.
Never clean the baking stone when it is
wet.
22
Page 23

Removing slide-in racks
You can remove the slide-in racks for cleaning.
Pyrolytic cleaning (self-cleaning)
Removing slide-in racks
1 Place a dish cloth in the oven interior to protect the
enamel against scratches.
2 Undo the knurled nuts (Figure A).
3 Detach the slide-in racks (Fig. B).
$
You can clean the slide-in racks in a dishwasher.
Hooking in slide-in racks
1 Fit slide-in racks the right way round: with the
longer side pointing up. The left and right-hand
racks are identical.
2 Tighten the knurled nuts.
%
During self-cleaning, the oven heats up to 485°C. Thus,
remainders from roasting, grilling or baking are burnt up
and all you have to do is wipe the ash out of the interior.
Pyrolytic cleaning takes three hours. You can move the
pyrolytic cleaning switch-off time (for example, if you
would like it to run at night).
m Risk of fire!
Loose food residues, grease and meat juices may catch
fire during pyrolytic cleaning. Remove coarse dirt from
the cooking compartment and from the accessories
before every pyrolytic cleaning cycle.
m Risk of fire!
The appliance will become very hot on the outside
during the pyrolytic cleaning cycle. Never hang
combustible objects, e.g. tea towels, on the door
handle. Do not place anything against the front of the
oven. Keep children at a safe distance.
m Risk of serious damage to health!
The appliance will become very hot during the pyrolytic
cleaning cycle. The non-stick coating on baking trays
and tins is destroyed and noxious gases are released.
Never let non-stick baking trays and tins go through the
pyrolytic cleaning cycle. Only enamelled accessories
may be cleaned at the same time.
Preparing pyrolytic self-cleaning
Caution!
Fire risk! Loose food remainders, fat and roast juice can
catch fire. Wipe out the oven interior with a moist cloth.
▯ Remove coarse soiling and food remainders from
the oven.
▯ Clean the door seals manually, the inside of the
door and the glass pane because the pyrolytic
cleaning process does not clean these parts.
▯ Remove all loose interior parts from the oven
interior. The slide-in racks are pyrolysis-proof. There
must be no objects left in the interior.
▯ Close the oven door.
23
Page 24

Starting pyrolytic self-cleaning
Cleaning accessories with pyrolytic
1 Set the function selector to S. 2 The œ symbol is displayed. Confirm with ™.
3 The switch-off time, when pyrolytic self-cleaning will
be finished, is displayed. If required, move the
switch-off time with the rotary selector. Confirm
with ™.
4 Remove all accessories and coarse soiling from the
oven interior. Confirm with ™.
5 Press I to start. The cleaning time elapses on the
display. If the switch-off time has been shifted, the
time up to the start of pyrolytic self-cleaning
elapses in the display. The lamp in the oven interior
stays off.
_
3\URO\WLFVHOIFOHDQLQJ
self-cleaning
Gaggenau baking trays and grill trays are coated with
pyrolysis-proof enamel. To arrive at an optimum cleaning
result, you are nevertheless advised to remove all
accessories from the oven before the pyrolytic cleaning
process. Only this will ensure optimum heat distribution.
If you would like to remove burnt-in residues from your
baking tray or your grill tray with pyrolytic self-cleaning,
it is imperative that you observe the following notes:
Notes
‒ Remove extreme soiling, roast juice and food
remainders before pyrolytic self-cleaning. Food
remainders, grease or roast juice can catch fire
during pyrolytic self-cleaning.
‒ Only ever insert one baking tray or one grill tray in
the lowest shelf in the oven.
‒ Insert the baking tray or the grill tray fully.
‒ The wire rack, rotisserie spit, cast roaster, baking
stone, core temperature probe or other accessories
must not be cleaned by pyrolytic self-cleaning.
A signal sounds after 3 hours. A message appears in
the display. Once the appliance has cooled down, wipe
the remaining ash out of the interior with a moist cloth.
Note: For your safety, the oven door is locked. When
cooling down, the door lock is released when the
temperature drops below 200°C.
24
Page 25

Trouble shooting
Malfunctions often have simple explanations. Please
read the following notes before calling the after-sales
service.
Disruption Possible cause Solution
Appliance not working, no display Plug not inserted Connect the appliance to the electricity
Power failure Check whether other kitchen appliances
Fuse defective Check in the fuse box whether the fuse
Operating error Switch off the fuse for the appliance in
Appliance cannot be started Appliance door is not quite closed Close appliance door
The appliance is not working and the
display does not respond. 0 appears
on the display
Appliance switches off on its own Safety shut-off: the appliance has not
Appliance does not heat up, ° appears
in the display
Error message "Exxx" If an error message is displayed, turn the
Childproof lock activated Deactivate the childproof lock (see
been operated for longer than 12 hours
Appliance is in demo mode Deactivate the demo mode in the basic
m Risk of electric shock!
Incorrect repairs are dangerous. Repairs may only be
carried out and damaged power cables replaced by one
of our trained after-sales technicians. If the appliance is
defective, unplug the appliance from the mains or switch
off the circuit breaker in the fuse box. Contact the aftersales service.
mains
are working
for the appliance is in working order
the fuse box and switch it on again after
about 60 seconds
section entitled 'Childproof lock')
Confirm the message with ™, switch off
the appliance and set it again.
settings
function selector to 0; if the display goes
out, there was a non-recurring problem.
If the error occurs repeatedly or the
display remains on, please contact the
after-sales service and inform them of
the error code.
--------
Power cut
Your appliance can bridge a power cut of a few
seconds. Operation continues.
If the power cut was for a longer period and the
appliance was in operation, a message appears in the
display. Operation is interrupted.
Set the function selector to 0, then the appliance can be
operated again as usual.
Demo mode
The ° symbol appears on the display when the
appliance is in demo mode. The appliance will not heat
up.
Briefly disconnect the appliance from the mains (switch
off the household fuse or the circuit breaker in the fuse
box). Then deactivate demo mode in the basic settings
within 3 minutes (see section entitled 'Basic settings').
25
Page 26

Replacing the oven light bulb
It is possible to replace the oven light. Heat-resistant
halogen bulbs (60 W/230 V/G9) can be obtained from
the after-sales service or from a specialist retailer. Only
use halogen bulbs of the same type.
m Risk of electric shock!
When replacing the cooking compartment bulb, the
bulb socket contacts are live. Before replacing the bulb,
unplug the appliance from the mains or switch off the
circuit breaker in the fuse box.
Note: Always remove the new halogen bulb from the
packaging using a dry cloth. This increases the service
life of the bulb.
Proceed as follows
Aftersales service
Our after-sales service is there for you if your appliance
needs to be repaired. We will always find an appropriate
solution, also in order to avoid after-sales personnel
having to make unnecessary visits.
E number and FD number
When calling us, please give the full product number (E
no.) and the production number (FD no.) so that we can
provide you with the correct advice. The rating plate
bearing these numbers can be found when you open the
appliance door.
1 Loosen the screw on the lamp cover. Tilt down the
lamp cover.
2 Pull out the bulb. Insert the new bulb.
3 Tilt the lamp cover up and screw it back on.
4 Switch the circuit breaker back on.
Replacing the glass cover
If the glass cover in the oven is damaged, it must be
replaced. You can obtain covers from the after-sales
service. Please supply your appliance's E number and
FD number.
=1U)'(1U
7\SH
To save time, you can make a note of the number of your
appliance and the telephone number of the after-sales
service in the space below, should it be required.
E no.
After-sales service O
Please note that a visit from an after-sales service
engineer is not free of charge, even during the warranty
period.
Please find the contact data of all countries in the
enclosed customer service list.
To book an engineer visit and product advice
GB 0344 892 8988
Calls charged at local or mobile rate.
FD no.
26
IE 01450 2655
0.03 € per minute at peak.
Off peak 0.0088 € per minute.
AU 1300 368 339
NZ 09 477 0492
Trust the expertise of the manufacturer, and rest
assured that the repair will be carried out by trained
service technicians using original spare parts for your
domestic appliance.
Page 27

Settings table and tips
Notes
‒ Always preheat the appliance.
This will provide the best cooking results. The
cooking times specified refer to a pre-heated
appliance.
‒ The values specified are intended as a guide. The
actual cooking time depends on the quality and
temperature of the food before cooking, the weight
and thickness of the food to be cooked.
‒ Temperature ranges are given in the tables. Start
with the lowest temperature. A higher temperature
can be selected next time, if required. A lower
temperature results in more even browning.
‒ The values given refer to average quantities for four
people. If you would like to prepare more food, you
should allow for a longer cooking time.
‒ Use the cookware specified. If you use other
cookware, cooking times may be longer or shorter.
‒ You can use any heat-resistant cookware. Place the
cookware in the centre of the wire rack. For large
roasts, you can also use the grill tray or glass dish.
‒ Do not place too many items close together on wire
racks or baking trays. This is the only way to ensure
optimal heat circulation.
‒ To prepare bulky food items, you can remove the
side slide-in rack. Place the wire rack directly onto
the bottom of the cooking compartment and place
the food or roasting dish onto the wire rack. Do not
place the food or roasting dish directly onto the
enamel bottom of the cooking compartment.
‒ Open the door of the preheated oven for a short
time only when placing food inside the cooking
compartment.
‒ The values given for the level refer to the rack level
(counting from the bottom) in appliances with four
rack levels. The values in brackets refer to
appliances with five rack levels.
‒ Once you have taken glass cookware out of the
oven, set it down on a dry trivet or heat-proof mat;
never set it down on a cold or wet surface.
Otherwise, the glass may crack.
‒ Some operating modes are not available on all oven
models or are only available as an optional
accessory.
Vegetables
▯ Oven-roasted or oven-baked vegetables are a good
alternative to pan-fried vegetables. The different
flavours become more concentrated and, because
the vegetables are roasted, they have a very
distinctive taste. In addition, very little fat is
required to prepare the vegetables.
▯ Clean and prepare the vegetables and mix them
with a little oil in a bowl. Place them in a heatresistant baking dish or tin or in the glass dish/grill
tray and spread them out evenly.
Dish Accessories Level Temperature
in °C
Vegetable kebabs Wire rack +
grill tray
Green asparagus,
grilled
Root vegetables Glass dish/
* Turn food after half the cooking time has elapsed.
Glass dish/
grill tray
grill tray
3 (4) 220 Q 24* Shorten the wooden skewers or leave
3 (4) 300 Q 6 - 10* Recipe tip: Season with onions, oil, vine-
3 (4) 200 H / I 30* Recipe tip: Season carrots, celery,
3 (4) 250 Q 15 - 20*
▯ Mix them thoroughly at least once during the
cooking process. Once they are cooked, season
them and sprinkle them with fresh herbs to taste.
▯ Vegetables are good as a hot or cold starter or
vegetarian main course, or as an accompaniment to
meat and fish.
▯ Use an ovenproof dish for small portions (for 2 - 3
people) and place it on the wire rack. If you use the
glass dish/grill tray, the food will start to burn or dry
out.
▯ In addition, always follow the manufacturer's
instructions for pre-cooked and frozen products.
Heating
function
Cooking
time
in min.
Comments
them to soak in water overnight to prevent them from charring.
Recipe tip: Peppers, onions, sweetcorn
(pre-cooked), cherry tomatoes, courgette
gar, salt and pepper.
swede and beetroot with oil, garlic, salt
and pepper.
27
Page 28

Dish Accessories Level Temperature
in °C
Heating
function
Cooking
time
in min.
Comments
Sliced pumpkin Glass dish/
grill tray
Antipasti Glass dish/
grill tray
Escalivada
(Mediterranean
oven-grilled
vegetables)
Ratatouille Glass dish/
Oven-roasted
tomatoes
Chicory Ovenproof
Stuffed peppers,
vegetarian
Stuffed courgettes,
vegetarian
Vegetable bake Ovenproof
Veggie burgers,
frozen
* Turn food after half the cooking time has elapsed.
Ovenproof
dish
grill tray
Ovenproof
dish
dish
Ovenproof
dish/roasting dish
Glass dish/
grill tray
dish
Baking tray
+ greaseproof paper
3 (4) 200 H 30* Recipe tip: Season with oil, garlic,
3 (4) 200 H 30* Recipe tip: Drizzle balsamic vinegar
3 (4) 250 Q 15 - 20*
4 (5) 250 Q 15* Recipe tip: Aubergines, onions,
3 (4) 200 N 30 - 40* Recipe tip: Sprinkle with parmesan just
2 (3) 120 H / I 60 Recipe tip: Place cherry tomatoes or
2 (3) 180 H / I 25 - 30 Recipe tip: Halve, season, wrap in
2 (3) 200 N 25 - 30
2 (3) 200 N 30 - 34 Recipe tip: Stuff with boiled rice, soft
2 (3) 180 H 25 Recipe tip: Stuff with grated carrot,
2 (3) 200 N 20 - 30 Pre-cooking/blanching vegetables and
2 (3) 220 H / I 12 - 15*
ginger, cumin, salt and pepper.
over the vegetables whilst they are still
hot, and season them.
tomatoes, peppers, oil. Delicious hot or
cold.
before serving.
sliced tomatoes, rosemary and garlic
into the baking dish and drizzle with oil
and a little honey.
If you wish, you can blanch the tomatoes
and skin them before roasting them in
the oven.
boiled ham, pour cream and béchamel
sauce over the top and sprinkle with
cheese.
wheat or lentils and onions, cheese,
herbs and seasoning/spices.
spring onion, goats' cheese, garlic,
thyme, salt and pepper and sprinkle with
parmesan.
other ingredients.
Side dishes and meals
▯ The best known oven-cooked side dishes are
potato-based, such as potato gratin. However, you
can also obtain excellent results when oven-cooking
side dishes that are normally pan-fried, e.g. potato
fritters and fried potatoes. The advantages of this
preparation method: You can prepare relatively
large quantities of food at the same time, the
cooking smells do not spread so far in the room,
and the food can be prepared using less fat.
▯ Another highly versatile oven-cooked side dish is
cheese. It is a very good addition to vegetarian
dishes in particular; depending on the preparation
method, you can also serve cheese as a starter or
finger food.
28
▯ Grilled dishes such as bakes and gratins are
particularly well suited to being prepared in the
oven. Dishes with a dough or pastry base, e.g. pizza
and savoury flan, and egg dishes with a filling, e.g.
tortilla, are also suitable.
▯ Use a heat-resistant baking dish or tin for small
portions (2 - 3 people) and place it on the wire rack.
If you use the glass dish/grill tray, small portions
will start to burn or dry out.
▯ In addition, always follow the manufacturer's
instructions for pre-cooked and frozen products.
Page 29

Dish Accessories Level Temperature
in °C
Side dishes
Potatoes on a bed of
salt
Potato pieces Baking tray
Chips,
fresh
Chips,
frozen
Potato gratin Ovenproof
Potato fritter Baking tray 2 (3) 175 H 20 - 30* Oil the baking tray liberally, squeeze out
Roast potatoes Grill tray 2 (3) 180 H 30 - 45* Low-fat preparation. Spread evenly
Goats' cheese in a
bacon blanket
Goats' cheese with
honey
Baked camembert,
coated with
breadcrumbs, fresh
Ovenproof
dish
+ greaseproof paper
Baking tray
+ greaseproof paper
Baking tray
+ greaseproof paper
dish
Glass dish/
baking tray
Glass dish/
baking tray
Baking tray
+ greaseproof paper
2 (3) 200 N 40 - 60* Fill the ovenproof dish with 2 cm of sea
2 (3) 200 H 15* Recipe tip: Chop the potatoes and
3 (4) 200 H 15 - 20* Recipe tip: Cover with a little oil, and
3 (4) 220 H 14*
2 (3) 160 H 45 - 50
2 (3) 200 N 20 - 30*
2 (3) 220 H 8 - 10 Either goats' cheese or goats' camem3 (4) 220 Q 8 - 10
2 (3) 200 H 8 Recipe tip: Drizzle lavender honey over
3 (4) 200 Q 8
2 (3) 180 H / I 15 - 20 Bake until the breadcrumb coating rises
Heating
function
Cooking
time
in min.
Comments
salt. Place small potatoes into the dish
with their skins on and brush them with
olive oil.
season them with olive oil, paprika and
salt.
after cooking, season with salt and
paprika or curry powder.
the excess liquid from the potato fritter
mixture and brush with a little oil. Turn
once.
across the grill tray and mix thoroughly
several times.
bert can be used.
the goats' cheese or goats' camembert
and sprinkle with pine nuts.
in the centre.
Baked camembert,
coated with breadcrumbs, frozen
Mozzarella sticks,
frozen
Feta cheese Baking tray 2 (3) 250 Z 12 Recipe tip: Place in a baking dish with
Oven-baked cheese,
fresh
Dishes
Tortilla Ovenproof
Farmers' omelette Ovenproof
* Turn food after half the cooking time has elapsed.
Baking tray
+ greaseproof paper
Baking tray
+ greaseproof paper
Baking tray 2 (3) 180 H 20 After 10 minutes, cut a cross into the
dish
dish
2 (3) 180 H / I 15 - 20 Bake until the breadcrumb coating rises
2 (3) 200 N 15
2 (3) 180 H / I 10
2 (3) 160 H 40 Recipe tip: With paprika, olives, onion,
2 (3) 160 H 40 Recipe tip: With green and white
in the centre.
oil, tomatoes, onions, garlic and
rosemary and season with salt and
pepper.
soft cheese and break open. If possible,
the baking dish should be not much
larger than the cheese so that the
cheese does not run.
Serrano ham and Manchego cheese.
asparagus; also with gravlax.
29
Page 30

Dish Accessories Level Temperature
in °C
Heating
function
Cooking
time
in min.
Comments
Frittata Ovenproof
dish
Enchiladas,
grilled
Lasagne Ovenproof
Macaroni cheese Ovenproof
Cheese spätzle
(Swabian noodle
dish)
Spring rolls,
frozen
Mini spring rolls,
frozen
Pizza, fresh Baking tray 2 (3) 230 - 250 N 10 - 15 Lightly oil the baking tray.
Pizza, pre-baked Baking tray
Pizza, frozen Wire rack 2 (3) 200 H 11 - 13
American pizza
(thick base), frozen
Glass dish/
grill tray
dish
dish
Ovenproof
dish
Baking tray
+ greaseproof paper
Baking tray
+ greaseproof paper
+ greaseproof paper
Baking tray 2 (3) 200 N 20 - 24 No need to pre-heat.
2 (3) 190 N 45 - 50 Recipe tip: With spinach, onion and
prawns.
2 (3) 200 N 15 - 20
2 (3) 175 H 40 Recipe tip: Traditional or vegetarian with
grilled vegetables and buffalo
mozzarella.
2 (3) 180 / 220 H 10 - 20 To obtain a crust on the cheese,
increase the temperature to 220 °C
after 10 minutes and leave to brown for
a further 10 minutes.
2 (3) 180 / 220 H 30 Gradually layer the freshly cooked
spätzle in the baking dish, sprinkling
each layer with cheese.
Once you have done this, top the dish
with cheese and roasted onion, raise the
temperature to 220 °C and cook for
5 minutes.
2 (3) 225 H 18 - 20*
2 (3) 225 H 10*
2 (3) 230 H 6 - 8
2 (3) 230 N 6 - 8
2 (3) 220 N 11 - 13
Savoury flan,
fresh
Savoury flan,
pre-baked
Savoury flan,
frozen
Quiche Tart tin or
Onion tart Baking tray 2 (3) 200 N 30 - 40
* Turn food after half the cooking time has elapsed.
Baking tray 2 (3) 250 N 8 - 10 Recipe tip: Traditional or with goats'
Baking tray
+ greaseproof paper
Wire rack 2 (3) 200 H 10 - 12
dish
2 (3) 250 H 7
2 (3) 230 N 8 - 10
2 (3) 200 N 20 + 20 Pre-bake the base for 20 minutes, pour
cheese, Parma ham, figs and spring
onion.
the mixture onto the base and then bake
for a further 20 minutes.
30
Page 31

Fish
▯ For food hygiene reasons, fish should have a core
temperature of at least 62 - 70 °C after cooking.
This is also the ideal cooking temperature.
▯ Do not season the fish with salt until it is fully
cooked. This ensures that the natural flavour is
maintained and that less water is drawn out of the
fish.
▯ Use a small amount of oil to grease the wire rack or
baking tray so that the fish does not stick to it.
Dish Accessories Level Temperature
in °C
Prawn kebabs,
fresh
Prawn kebabs,
frozen
Fish kebabs Wire rack +
Trout, whole Baking tray 3 (4) 200 - 220 Q 16* Recipe tip: Stuff with lemon, garlic and
Sea bream, whole Wire rack +
Salmon steak Wire rack +
Tuna steak Baking tray 3 (4) 250 Z 8 - 10 Recipe tip: Season Asian-style with soy
Fish fingers,
frozen
Squid rings,
frozen
* Turn food after half the cooking time has elapsed.
Wire rack +
grill tray
Wire rack +
grill tray
grill tray
grill tray
Baking tray 3 (4) 175 H 20 - 25*
grill tray
Baking tray 2 (3) 200 H 10 - 12
Baking tray
+ greaseproof paper
Baking tray
+ greaseproof paper
3 (4) 180 Q 10*
3 (4) 180 Q 12*
3 (4) 200 Q 12* Use firm types of fish, e.g. salmon,
3 (4) 200 - 220 Q 20 - 25* Recipe tip: Stuff with lemon, garlic and
3 (4) 250 Z 10 - 12 Recipe tip: Marinate in a mixture of
2 (3) 220 H 15 - 17*
2 (3) 220 N 8 - 12
▯ For fillets with skin: Place the fish on the rack or
tray with the skin side up – this helps to hold the
fish together and maintain its flavour.
▯ Shorten the wooden skewers or, before skewering
the ingredients, leave the skewers to soak in water
overnight to prevent them from charring.
▯ In addition, always follow the manufacturer's
instructions for pre-cooked and frozen products.
Heating
function
Cooking
time
in min.
Comments
pollack, ocean perch and cod.
parsley.
thyme, or use mint for a summery touch.
Make a diagonal incision into the skin of
the sea bream.
sweet lime, salt, pepper and garlic.
sauce, sesame oil, ginger, honey, garlic,
chilli and coriander seeds.
Meat
▯ Leaving meat to rest: Leave the meat to rest for a
further 10-15 minutes after cooking. This gives the
meat a chance to "relax". The meat juices begin to
circulate less, and when the meat is cut, less juice
is lost. Large pieces of meat, e.g. joints, can be left
to rest in the oven. Smaller pieces of meat, e.g.
steaks, should be wrapped in aluminium foil and left
to rest outside the oven.
▯ For small portions (two to three people), it is a good
idea to use a heat-resistant baking dish or tin so
that the food does not begin to burn or dry out.
▯ Use the grill tray or roasting dish for a large joint of
meat and for preparation methods that involve
adding a lot of liquid to the joint.
▯ For best results, leave meat to marinate overnight
and remove the marinade before roasting or grilling,
e.g. using the back of a knife or a spoon.
Otherwise, the herbs and spices will burn.
▯ If the joint of meat has become too dark in colour
and the skin is burnt in places, reduce the set
temperature the next time you cook a joint and
check the rack level.
▯ If the joint is cooked but the sauce is slightly burnt,
use a smaller roasting dish the next time you cook a
joint and add more liquid. If the sauce is too watery,
use a larger roasting dish and add less liquid.
31
Page 32

Meal Accessories Level Tempera-
ture
in °C
Beef
Joint of beef
(1.5 kg)
Roast beef/sirloin
steak (1 kg)
– rare
– medium rare Glass dish/
– well done Glass dish/
Pork
Fillet of pork, whole Glass dish/
Pork medallions Glass dish/
Joint of pork – leg
(1 kg)
Joint of pork – neck
(1.5 kg)
Joint of pork with
crispy skin/roast
pork with crackling
(1.5 kg)
Knuckle of pork Wire rack +
Smoked pork (1 kg) Glass dish/
Rolled roasting joint Glass dish/
Glass dish/
grill tray
Glass dish/
grill tray
grill tray
grill tray
grill tray
grill tray
Glass dish/
grill tray
Glass dish/
grill tray
Wire rack +
Grill tray
Grill tray
grill tray
grill tray
Wire rack +
Grill tray
2 (3) 180 H 90-120*
2 (3) 230/180 H 25-35** Recipe tip: Delicious with Béarnaise sauce
2 (3) 230/180 H 30-40**
2 (3) 230/180 H 50-60**
2 (3) 230/180 H 20-25** Recipe tip: Marinate in a mixture of oil, garlic
2 (3) 180 H 12-15* Recipe tip: Just before you take them out of
2 (3) 230/180 H/I 45-50**
2 (3) 230/180 H/I 85-95**
2 (3) 230/180 Z 70-80**
2 (3) 180/200 Z 60-70***
2 (3) 150/200 Z 40-45*** Score the skin diagonally in both directions
2 (3) 180/160 H/I 50-60**
2 (3) 230/180 H/I 65-70***
2 (3) 230/180 Z 75-80***
Type of
heating
Cooking
timer
in min.
Comments
or cold cut with remoulade and roast
potatoes.
and parsley.
the oven, add a knob of butter and a sprig of
rosemary to the glass dish/grill tray and
cook it all together for a little longer in the
oven.
so that it is cross-hatched. This makes it nice
and crispy.
Veal
Joint of veal (1.5 kg) Glass dish/
grill tray,
roasting dish
Knuckle of veal Glass dish/
grill tray,
roasting dish
Veal loin Glass dish/
grill tray,
roasting dish
Stuffed breast of
veal
* First, sear on all sides in a frying pan/roasting dish on the hob.
** Sear the meat at a high temperature; after 15-20 minutes, set the lower temperature.
*** Cook the meat at a low temperature; set it to cook at the higher temperature for the last 15-20 minutes.
32
Glass dish/
grill tray,
roasting dish
2 (3) 180 H/I 50-60*
2 (3) 150/180 Z 50-60***
2 (3) 160-170 H 20
2 (3) 120-130 H/I 120
Page 33

Meal Accessories Level Tempera-
ture
in °C
Game
Wild boar joint Glass dish/
grill tray,
roasting dish
Leg of roe venison Glass dish/
grill tray,
roasting dish
Saddle of venison Glass dish/
grill tray,
roasting dish
Saddle of rabbit Glass dish/
grill tray,
roasting dish
Leg of lamb
– medium rare
– well done Glass dish/
Lamb knuckle Glass dish/
Glass dish/
grill tray,
roasting dish
grill tray,
roasting dish
grill tray,
roasting dish
2 (3) 170 H/I 60-90* Recipe tip: Marinate overnight in a mixture
2 (3) 170-180 H 60-80
2 (3) 165-175 H 20
2 (3) 165-175 N 20-25
2 (3) 180 H 15-25* Recipe tip: Marinate in a mixture of garlic,
2 (3) 180-190 H 100* Recipe tip: Marinate overnight in a mixture
2 (3) 180-190 H 120*
2 (3) 180-200 H 35-45
Type of
heating
Cooking
timer
in min.
Comments
of oil, garlic, mustard and herbes de
Provence.
rosemary, olive oil and high-quality balsamic
vinegar.
of olive oil, garlic, rosemary and sliced
lemon.
Miscellaneous
Meatballs (80 g per
ball)
Meatballs, lightly
fried (80 g per ball)
Meatballs (25 g per
ball)
Meatballs, lightly
fried (25 g per ball)
Meat loaf, fresh
(700 g)
Bacon slices
(Fried bacon), thin
Bacon slices
(Fried bacon), thick
Stuffed peppers with
minced meat
* First, sear on all sides in a frying pan/roasting dish on the hob.
** Sear the meat at a high temperature; after 15-20 minutes, set the lower temperature.
*** Cook the meat at a low temperature; set it to cook at the higher temperature for the last 15-20 minutes.
Baking tray
+ greaseproof paper
Baking tray
+ greaseproof paper
Baking tray
+
Greaseproof paper
Baking tray
+
Greaseproof paper
Wire rack +
Grill tray
Baking tray
+
Greaseproof paper
Baking tray
+
Greaseproof paper
Ovenproof
dish/roasting dish
2 (3) 200 H/I 30-35 The flatter the meatballs, the faster they
cook. Easy to make in large quantities.
2 (3) 200 H/I 20 Nicely browned yet juicy meatballs: First, fry
them lightly in the frying pan, then put them
in the oven.
2 (3) 200 H/I 25-30 Recipe tip: Easy to make into a meal, e.g.
meatballs with tomato sauce, Swedish
meatballs and Königsberger Klopse
(Prussian meatballs in a white sauce with
capers).
2 (3) 200 H/I 15 Recipe tip: Place meatballs made from
minced lamb or rabbit on skewers and serve
with mint yoghurt or fig mustard.
2 (3) 160 H/I 60
3 (4) 180 H 8-10 Once you have taken the bacon out of the
oven, place it on some kitchen towel to soak
up the fat.
3 (4) 190 H 8-12
2 (3) 175 H/I 55-60 Recipe tip: Stuff with minced meat and cook
in tomato sauce.
33
Page 34

Poultry
▯ Poultry will turn out particularly crispy and brown if
you baste it towards the end of the roasting time
with butter, salted water, drained fat or orange
juice.
▯ When cooking duck or goose, pierce the skin
underneath the wings to allow the fat to run out.
Meal Accessories Level Tempera-
ture
in °C
Duck, whole
(1.5-2 kg)
Duck breast Roasting
Goose, whole (5 kg) Wire rack +
Turkey, whole Wire rack +
Chicken, whole
(1 kg)
Chicken drumstick Wire rack +
Chicken leg Wire rack +
Wire rack +
Grill tray/
roasting dish
dish/ovenproof dish
Grill tray/
roasting dish
Grill tray/
roasting dish
Wire rack +
Grill tray
Grill tray
Grill tray
2 (3) 160/180 N 75* Recipe tip: Stuff with oranges, apples or
2 (3) 160 H 25-35 Score the skin diagonally in both directions
2 (3) 160/190 H/I 110-130* Recipe tip: Stuff with apples, onions and
2 (3) 160/190 N 110-130*
2 (3) 160/190 H/I 120-180*
2 (3) 160/190 N 120-180*
2 (3) 180 H 45-60 Baste with oil, salt, pepper, paprika and curry
2 (3) 180 Z 45-50
3 (4) 220 Q 30** Recipe tip: Asian marinade with soy sauce,
3 (4) 220 Z 30**
3 (4) 220 Q 30** After the leg is turned, the side with more
3 (4) 220 Z 30**
▯ Use a roasting dish or another heat-resistant baking
dish or tin for dishes that involve adding a lot of
liquid to the roast. The same applies if a lot of fat is
likely to drain from the food, e.g. for roast goose.
Type of
heating
Cooking
time
in min.
Comments
dried fruit.
so that it is cross-hatched.
marjoram, and pin the opening closed with a
cocktail stick or similar sharp item.
powder. Preheating.
honey, chilli, garlic, ginger, cumin, sweet lime
zest and coriander.
skin should be at the top. This makes it nice
and crispy.
Marinate in a mixture of oil, rosemary, sliced
lemon and garlic
Chicken breast Wire rack +
Grill tray
Chicken nuggets,
frozen
Quail breast Baking tray 3 (4) 220 Z 10-12 Baste with oil and seasoning/spices, e.g.
Quail, whole
(150 g per bird)
* Cook the meat at a low temperature; set it to cook at the higher temperature for the last 15-20 minutes.
** Turn food after half the cooking time has elapsed.
Baking tray
+
Greaseproof paper
Wire rack +
Grill tray
2 (3) 200 H 20-25 Recipe tip: Rub with tandoori paste before
cooking.
2 (3) 200 H/I 15**
paprika, thyme, juniper and garlic.
3 (4) 200 Z 20-25 Baste with oil and seasoning/spices, e.g.
paprika, thyme, juniper and garlic.
34
Page 35

Grilling and roasting/baking
▯ Do not grill food with the oven door open.
▯ For grilling, use the grill tray with the wire insert
(depending on the model, this may be an accessory
or an optional accessory). Pour approximately 100
ml water into the grill tray; this will catch the meat
juices so that the oven stays clean. If you pour in
too much water, this may alter the cooking result
because too much steam will be produced.
▯ If you use wooden skewers, they may char. To
prevent this, shorten them as far as possible, leave
them to soak in water overnight before skewering
the ingredients or use metal skewers.
▯ For small quantities, use the energy-saving
"Compact grill" heating function. With this heating
function, only the centre part of the grill is heated.
▯ The pieces of food to be grilled should be of
roughly the same thickness (at least 2 to 3 cm). This
will allow them to brown evenly and remain
succulent and juicy. Never add salt to steaks before
grilling them. Place the food to be grilled directly on
the wire rack.
Meal Accessories Level Tempera-
ture
in °C
Pork belly,
sliced
Shish kebab Wire rack +
Bratwurst (German
sausage)
Merguez sausage Wire rack +
Spare ribs,
pre-cooked
Spare ribs,
raw
Saté chicken Wire rack +
Halloumi cheese
(grilled cheese)
Toasting bread Wire rack 3 (4) 200 Q 1-2* Preheat for maximum five minutes. Stay by
Hawaii toast Baking tray
Croque monsieur Baking tray
Croutons Baking tray 2 (3) 180 H 15* Recipe tip: Mix fresh white bread with olive
* Turn food after half the cooking time has elapsed.
** Brown to the level you require.
Wire rack +
Grill tray
Grill tray
Wire rack +
Grill tray
Grill tray
Wire rack +
Grill tray
Wire rack +
Grill tray
Grill tray
Wire rack +
Grill tray
+ greaseproof paper
+ greaseproof paper
2 (3) 230 Q 18-20*
2 (3) 230 Z 18-20*
3 (4) 190 Z 16*
3 (4) 270 Q 10*
3 (4) 250 Z 12*
3 (4) 200-220 Q 24*
3 (4) 200-220 Z 24*
3 (4) 220 Q 40* Recipe tip: Place in a mixture of oil, mustard,
3 (4) 220 Z 30*
3 (4) 250 Z 10-14* Serve with saté sauce.
3 (4) 250 Z 5-8 Halloumi is a semi-hard cheese used in
3 (4) 190 Z 8-10**
3 (4) 190 Z 8-11**
Type of
heating
Cooking
time
in min.
Comments
balsamic vinegar, honey, garlic, Worcester
sauce, tomato purée and tabasco sauce.
Turkish and Greek cooking. It is excellent
grilled.
the appliance so that the toast does not
brown too much.
oil, garlic and rosemary leaves.
Avoid using too much oil and wait until you
are ready to serve before pouring it on;
otherwise, the bread cubes will become
saturated. Turn several times.
35
Page 36

Meal Accessories Level Tempera-
ture
in °C
Type of
heating
Cooking
time
in min.
Comments
Browning meringue Springform
cake tin
Prunes in a bacon
blanket
* Turn food after half the cooking time has elapsed.
** Brown to the level you require.
Baking tray
+ greaseproof paper
2 (3) 220-250 Q 4-5** Stay by the appliance so that the meringue
3 (4) 200 Q 8-10 Equally delicious with dates or apricots.
Baking
▯ We recommend using dark-coloured metal baking
tins as these absorb heat more effectively. Place
the baking tin in the centre of the wire rack.
▯ If you are baking tray bakes without greaseproof
paper, lightly grease the baking tray beforehand.
▯ Small baked items, e.g. cream puffs, biscuits and
puff pastry parcels, can be baked on two levels, 1+3
or 2+4.
▯ If you are baking on more than one level, it is normal
for food on baking trays placed in the oven at the
same time to be ready at different times. Leave the
food on the baking trays lower down in the oven to
cook for a little longer, or place them in the
appliance earlier next time.
▯ Before cutting the baked items, leave them to cool
on a wire rack.
▯ If the baked items are too dark on the bottom, place
them a level up and select a lower temperature.
If the baked items are too dark on the top, place
them a level down, select a lower temperature and
extend the baking time a little.
▯ If the cake is too dry, set the temperature a little
higher. If the cake remains uncooked in the middle,
set a lower temperature.
Baking times cannot be reduced by setting a higher
temperature; it is better to set the temperature a
little lower.
▯ If the cake collapses, use less liquid or set the
temperature 10 °C lower. Do not open the oven
door too soon.
does not brown too much.
▯ If the cake only rises in the middle, grease the sides
of the baking tin.
▯ Do not remove the biscuits from the baking tray;
place the baking tray back into the hot oven for a
short period and remove the biscuits whilst they are
still hot.
▯ If the cake does not come away from the tin when
you are trying to turn it out, carefully slide a knife
around the sides to loosen it. Turn the cake tin
upside down again and cover it several times with a
cold, wet cloth. Next time, grease the tin well and
sprinkle some bread crumbs into it.
▯ In addition, always follow the manufacturer's
instructions for pre-baked and frozen products.
36
Page 37

Meal Accessories Level Tempera-
ture
in °C
Cake
Cheesecake Springform
cake tin
Sponge cake Springform
cake tin
Loaf cake Cake tin 2 (3) 160-170 H/I 60-65 To ensure even browning, place the tin
Bundt cake,
Ring cake
Tray bakes Baking tray 2 (3) 165-170 H/I 40-45 Lightly grease the baking tray.
Swiss roll Baking tray
Sponge base Springform
Bundt pan 1 (2) 165-170 H/I 40-50 Recipe tip: Traditional ring cake or with
+
Greaseproof paper
cake tin
1 (2) 160-165 H 70-75
1 (2) 160-165 N 70-75
1 (2) 160-165 K 85-90
1 (2) 160-165 M 80-90
1 (2) 160-165 J 40-45 Low-cheese cheesecake with 50% quark
2 (3) 160-170 H/I 50-60
2 (3) 160-170 N 50-60
2 (3) 160-170 N 55-60
1 (2) 165-170 N 40-50
1 (2) 160-165 M 45-50
2 (3) 165-170 N 40-50
2 (3) 190 H 6 Whilst still hot, turn out onto a piece of
2 (3) 165-175 H 30-35 Line a springform cake tin with greaseproof
Type of
heating
Cooking
time
in min.
Comments
mixture.
lengthways in the cooking compartment.
bacon and walnuts.
greaseproof paper sprinkled with sugar,
then roll up.
paper.
Yeast tray bakes Baking tray 2 (3) 165 H 30-35 Recipe tip: Top with plums, figs or onion and
2 (3) 165 N 30-35
Fruit flan with shortcrust pastry
Tart Tart tin or
Strudel made from
puff pastry
Apple pie
(in accordance with
EN 60350-1)
* Preheat the appliance to the specified temperature. Turn the temperature down to the second specified temperature when
placing the food in the oven.
** Deactivate the "Rapid heating" function in the basic settings
(see section Basic settings: Basic settings > Preheating speed/signal > Heating with signal)
Tart tin or
dish
dish
Baking tray
+ greaseproof paper
Springform
cake tin,
diameter 20
cm
Springform
cake tin,
diameter 20
cm
2 (3) 165 H/I 40-50 Recipe tip: Top with strawberries or apricots
2 (3) 170 N 40-50
2 (3) 165 K 45-55
2 (3) 190 H/I 30-40 French flan with a shortcrust pastry base,
2 (3) 190 N 30-40
2 (3) 190 K 40-45
2 (3) 190 M 45-50 For light-coloured tart tins or dishes.
2 (3) 200 H/I 20-25 Recipe tip: Fill with custard and cherries or
2 (3) 160** H 85-105 Preheat
1 (2) 180** N 80-95 Preheat
ham.
and marzipan.
e.g. tarte aux pommes, tarte tatin, tarte au
chocolat and tarte au citron.
apples.
37
Page 38

Meal Accessories Level Tempera-
ture
in °C
Type of
heating
Cooking
time
in min.
Comments
Water sponge torte
(in accordance with
EN 60350-1)
Small baked items
Cream puffs, eclairs Baking tray
Biscuits,
Viennese whirls
Small baked
puff-pastry items
Puff pastry parcels,
filled
Puff pastry Baking tray
Puff pastry sticks Baking tray
Small pastries Baking tray
Waffle biscuits Baking tray
Breadsticks Baking tray
Cookies (20 g per
cookie)
Brownies Baking tray
* Preheat the appliance to the specified temperature. Turn the temperature down to the second specified temperature when
placing the food in the oven.
** Deactivate the "Rapid heating" function in the basic settings
(see section Basic settings: Basic settings > Preheating speed/signal > Heating with signal)
Springform
cake tin,
diameter 26
cm
Springform
cake tin,
diameter 26
cm
+ greaseproof paper
Baking tray 2 (3) 160-170 H/I 15
Baking tray
+
Greaseproof paper
Baking tray
+
Greaseproof paper
+
Greaseproof paper
+
Greaseproof paper
+
Greaseproof paper
+
Greaseproof paper
+
Greaseproof paper
Baking tray
+
Greaseproof paper
+
Greaseproof paper
2 (3) 160** H 22-30 Preheat
2 (3) 160** N 20-45 Preheat
2 (3) 180 H/I 35 Recipe tip: Fill with vanilla custard, chocolate
2 (3) 180 N 40
2 (3) 180 K 35
2 (3) 160-170 N 18
2 (3) 200 H/I 15-20
3 (4) 200 H/I 15 Recipe tip: Fill with ham and cheese or
3 (4) 200 H/I 15 Recipe tip: With sesame seeds, poppy
3 (4) 200 H/I 15 Recipe tip: With cheese, ham, nuts.
2 (3) 200 H/I 15-20 Recipe tip: With custard, fruit.
2 (3) 140 H 8-10 Shape the waffle biscuits whilst they are still
2 (3) 160 H 30 Sprinkle with sea salt, rosemary, curry pow-
2 (3) 175 H 12-14 With chocolate, raisins, nuts or lemon.
2 (3) 120 H/I 60-65 After baking, cut into squares. Typically,
mousse or fruit or mocha cream.
apples and raisins.
seeds, icing.
hot, e.g. into ice cream cones or small rolls
for dessert.
der, sesame seeds or caraway seeds.
brownies retain a slightly sticky consistency
in the middle.
38
Page 39

Meal Accessories Level Tempera-
ture
in °C
Type of
heating
Cooking
time
in min.
Comments
Muffins Muffin tray/
Paper
baking
cases
Small cakes
(in accordance with
EN 60350-1)
Viennese whirls
(in accordance with
EN 60350-1)
Bread, bread rolls
Multigr. bread Baking tray
Sourdough bread Baking tray 2 (3) 200/180* N 50-60
Olive and tomato
bread
Bread in a loaf tin Cake tin 2 (3) 175 N 40-45
Baguette,
pre-baked
Ciabatta,
pre-baked
Glass dish 2 (3) 150** I 25-40 Preheat
Baking tray
Glass dish
Glass dish 3 (4) 160** N 20-30 Preheat
Baking tray 2 (3) 140** H 30-40 Preheat
Baking tray
Glass dish
Baking tray 2 (3) 160** N 15-33 Preheat
+
Greaseproof paper
Baking tray 2 (3) 200/170* N 40-50
Baking tray
+
Greaseproof paper
Baking tray
+
Greaseproof paper
2 (3) 160 H/I 25-30 With chocolate, nuts or raisins.
2 (3) 175 N 25-30
2 (3) 160-165 O 25-30
3 (4)
1 (2)
3 (4)
1 (2)
2 (3) 200/170* H/I 40-50
2 (3) 200/170* N 40-50
2 (3) 200/165* O 45-50
2 (3) 220 N 10-12
2 (3) 190 N 12-14
2 (3) 180 H/I 12-14
150** I 25-40 Preheat
140** H 30-45 Preheat
Applies to baking on two levels
Applies to baking on two levels
Flatbread Baking tray
+
Greaseproof paper
Foccacia Baking tray
+
Greaseproof paper
Garlic/herb
baguette
Strudel made from
puff pastry
Plaited loaf Baking tray
* Preheat the appliance to the specified temperature. Turn the temperature down to the second specified temperature when
placing the food in the oven.
** Deactivate the "Rapid heating" function in the basic settings
(see section Basic settings: Basic settings > Preheating speed/signal > Heating with signal)
Baking tray
+
Greaseproof paper
Baking tray
+
Greaseproof paper
+
Greaseproof paper
2 (3) 200 H/I 15-20 The cooking time depends on the size and
2 (3) 210 N 15-20
2 (3) 210 N 15-20 Top with various ingredients, e.g. herbs, sea
2 (3) 200 N 8-10
2 (3) 200 H/I 20-25 Recipe tip: Fill with sheep's cheese and feta
2 (3) 165 H/I 30
2 (3) 160-165 O 30-35
thickness of the flatbread.
salt, olives, anchovies, onion, ham, tomatoes
or cheese.
cheese.
39
Page 40

Meal Accessories Level Tempera-
ture
in °C
Type of
heating
Cooking
time
in min.
Comments
Bread rolls,
pre-baked
Bread rolls,
frozen
Bread rolls,
fresh (50 g per roll)
Baked items made
from lye-dipped
yeast dough,
frozen
Croissants,
frozen
* Preheat the appliance to the specified temperature. Turn the temperature down to the second specified temperature when
placing the food in the oven.
** Deactivate the "Rapid heating" function in the basic settings
(see section Basic settings: Basic settings > Preheating speed/signal > Heating with signal)
Baking tray
+
Greaseproof paper
Baking tray
+
Greaseproof paper
Baking tray
+
Greaseproof paper
Baking tray
+
Greaseproof paper
Baking tray
+
Greaseproof paper
2 (3) 210 N 8-10
2 (3) 200 H/I 8-10
2 (3) 180 H/I 10-12
2 (3) 200 N 10-12
2 (3) 250/200* N 15-20
2 (3) 200 H/I 10-12
2 (3) 170 N 15-25
Desserts
▯ Oven-cooked desserts are very easy to prepare – all
that remains is to put them in the oven. This
preparation method is useful for relatively large
quantities, for example if you have guests.
Dish Accessories Level Temperature
in °C
Apple crumble Ovenproof
dish
Baked apple Ovenproof
dish
Compote Glass dish/
grill tray
Clafoutis Ovenproof
dish
Sweet bake Ovenproof
dish
2 (3) 200 H / I 35 - 40 Apple bake with a crumble topping;
2 (3) 200 O 25 - 30 For soft apple varieties.
2 (3) 200 M 25 - 30 For firm apple varieties.
2 (3) 190 - 200 H / I 20 - 30 Recommendation: Use cooking apples,
2 (3) 160 - 180 H / I 30 - 40 e.g. apricots or a variety of berries
2 (3) 200 N 30 - 40
2 (3) 190 - 200 H 30 - 35 French dessert: Traditionally made with
2 (3) 160 - 180 H / I 30 - 40 e.g. semolina, quark or rice pudding
▯ Oven-cooked desserts are generally eaten hot, and
are very enjoyable particularly during the colder
months.
Heating
function
Cooking
time
in min.
Comments
equally delicious with berries or
mirabelles.
e.g. Boskop. These are particularly well
suited for cooking and baking.
Summer version: Stuff with ricotta
cheese, lemon, honey, cardamom,
vanilla and pine nuts.
Do not add any liquid; stir thoroughly
several times. Refine with honey, fresh
vanilla or cinnamon.
cherries; equally delicious with
mirabelles or berries.
40
Page 41

Dish Accessories Level Temperature
in °C
Heating
function
Cooking
time
in min.
Comments
Bread and butter
pudding,
Kirschenmichel
(German bread and
butter pudding with
sour cherries)
Topfenpalatschinken (baked
sweet pancakes with
a quark filling)
Meringue Baking tray
Ovenproof
dish
Ovenproof
dish
+ greaseproof paper
2 (3) 150 H / I 50 - 55 e.g. with cherries or apricots
2 (3) 180 - 190 H / I 8 - 10 Austrian speciality: Pancakes filled with
2 (3) 100 H 150 When dividing up the mixture, make
Preserving
▯ Cook food as soon as possible after purchase or
after it has been harvested/picked/dug up.
Prolonged storage reduces the vitamin content and
means that food is on the verge of fermenting.
▯ Only use fruit and vegetables that are in good
condition.
▯ The oven is not suitable for preserving meat.
▯ Carefully check and clean the preserving jars,
rubber sealing rings, clips and springs.
quark and raisins, topped with cream
and grilled.
sure that the portions are spread as
thinly as possible so that the mixture
dries out well.
▯ Place the preserving jars in a heat-resistant vessel
containing water. Make sure that they do not touch.
The water level must reach at least three quarters of
the way up to the top of the contents of the jars.
▯ Once the cooking time has elapsed, open the oven
door. Do not remove the preserving jars from the
cooking compartment until they have completely
cooled down.
▯ Store the preserves in a cool, dark and dry place,
e.g. in a pantry. Once the jars have been opened,
consume the contents quickly and store in the
refrigerator.
Dish Accessories Level Temperature
in °C
Fruit Wire rack 1 (2) 150 - 160 N 35 - 40 In sealed jars
Vegetables Wire rack 1 (2) 190 - 200 N 60 - 120 In sealed jars
Heating
function
Cooking
time
in min.
Comments
Disinfecting
▯ Before you begin preserving the food, the glasses
should be disinfected in the oven to prevent the
food from spoiling. This is the only way to ensure
that preserves keep for a relatively long time and
can be stored outside of the refrigerator.
Dish Accessories Level Temperature
in °C
Disinfecting Wire rack 2 (3) 100 H / I 20 - 25 Preserving jars, baby bottles
▯ Disinfect the empty jars at 100 °C for at least
20 minutes in the "Hot air" (fan-oven) setting. The
lids and rubber preserving seals for the jars can be
disinfected at the same time in boiling water to
avoid them drying out in the dry heat of the oven.
Heating
function
Cooking
time
in min.
Comments
41
Page 42

Drying
▯ Drying is a method of preserving food in which up
to 50% of the liquid contained in the food is
removed by exposing it to dry heat. This also makes
the flavour more intense.
▯ The thicker the food, the longer the drying process
lasts. The quickest way to dry food – which is also
the method that saves the most energy – is to cut it
into slices.
Dish Accessories Level Temperature
in °C
Sliced mushrooms Wire rack +
greaseproof
paper
Apple rings Wire rack +
greaseproof
paper
Quartered tomatoes Wire rack +
greaseproof
paper
Herbs Wire rack +
greaseproof
paper
2 (3) 50 - 60 H / I 3 - 4
2 (3) 50 - 70 H / I 5 - 8
2 (3) 60 - 70 H / I 7 - 8 Core the tomatoes to avoid an extended
2 (3) 50 - 60 H / I 1½ - 2 e.g. chives, parsley and sage
▯ Place the prepared food onto a wire rack or baking
tray covered with greaseproof paper. Turn the food
from time to time during the drying process.
▯ The duration depends on the thickness of the food
and on the natural level of moisture in the food, i.e.
tomatoes take longer to dry out than mushrooms.
▯ If you want to dry food in the oven on two levels at
the same time, use levels 1 and 3 (or 2 and 4).
Heating
function
Cooking
time in
hours
Comments
drying time.
Baking stone
▯ You will need a baking stone and heating element –
these are optional accessories.
▯ Whether you are baking crispy pizza or fresh bread,
with the baking stone, you will achieve results that
are comparable to, or even exceed, those that you
would get from a massive stone oven because you
are able to precisely control the baking
temperature.
▯ Depending on the size, you can place several
pizzas, bread rolls or other baked items on the
baking stone at once.
Dish Accessories Level Temperature
in °C
Bread rolls, fresh
(50 g per roll)
Flatbread Baking
Foccacia Baking
Multigrain bread Baking
Sourdough bread Baking
* Preheat the appliance to the specified temperature. Turn the temperature down when placing the food in the oven.
Baking
stone
stone
stone
stone
stone
1 250 / 200* T 15 - 20
1 210 T 15 The cooking time depends on the size
1 210 T 15 Top with various ingredients, e.g. herbs,
1 175 T 45
1 250 / 200* T 50 - 60
▯ You can bake several pizzas in succession. This may
increase the baking time per pizza by approx. one to
three minutes.
▯ When dough is baked, it needs to be able to expand
without the surface breaking apart. This can be
achieved by pricking it several times with a fork or
by making a cut with a knife.
▯ The temperatures and times specified in the
cooking table are average values. In addition,
always follow the manufacturer's instructions for
pre-cooked and frozen products.
Heating
function
Cooking
time
in min.
Comments
and thickness of the flatbread
sea salt, olives, anchovies, onion, ham,
tomatoes or cheese.
42
Page 43

Dish Accessories Level Temperature
in °C
Heating
function
Cooking
time
in min.
Comments
Olive and tomato
bread
Pizza, fresh Baking
Pizza, frozen Baking
Savoury flan,
fresh
Savoury flan,
frozen
* Preheat the appliance to the specified temperature. Turn the temperature down when placing the food in the oven.
Baking
stone
stone
stone
Baking
stone
Baking
stone
1 175 T 45
1 275 T 5 - 8 The cooking time varies depending on
the type and thickness of the dough and
topping.
1 230 T 8 - 10 The cooking time varies depending on
the thickness of the dough. Follow the
manufacturer's instructions.
1 300 T 3 - 4 Recipe tip: Traditional or with goats'
cheese, Parma ham, figs and spring
onion.
1 250 T 4 - 5
Acrylamide in foodstuffs
Which foods are affected?
Acrylamide is mainly produced in grain and potato
products that are heated to high temperatures, such as
crisps, chips, toast, bread rolls, bread, fine baked goods
(biscuits, gingerbread, cookies).
Tips for keeping acrylamide to a minimum when preparing
food
General Keep cooking times as short as possible.
Cook food until it is golden brown, but not
too dark. Large, thick pieces of food contain less acrylamide.
Baking With hot air at max. 180 °C.
Biscuits Egg or egg yolk reduces the production of
acrylamide. Spread out a single layer
evenly on the baking tray.
Oven
Chips
Cook at least 400 g at once on a baking
tray so that the chips do not dry out.
43
Page 44

Gaggenau Hausgeräte GmbH
Carl-Wery-Straße 34
81739 München
GERMANY
www.gaggenau.com
9000914261 en (960301)
*9000914261*
 Loading...