

Page 1
Page 2

Contents
1 Introduction 4
2 Browsing for sounds 17
3 Using BFD3's sounds 32
................................................................................................................................... 5Using BFD31.1
................................................................................................................................... 9Global controls1.2
................................................................................................................................... 12BFD3 Core Library tracking notes1.3
................................................................................................................................... 14Setting up additional content1.4
................................................................................................................................... 22Browser reference2.1
................................................................................................................................... 28BFD3 File menu2.2
................................................................................................................................... 30Importing Samples into BFD32.3
................................................................................................................................... 38Kit display3.1
................................................................................................................................... 42Drum editor3.2
................................................................................................................................... 48Mixer controls3.3
.......................................................................................................................................................... 52Faders mode
.......................................................................................................................................................... 56Tweaks mode
.......................................................................................................................................................... 58Effects/Sends modes
.......................................................................................................................................................... 59Other mixer controls
................................................................................................................................... 61Effects and Sends3.4
.......................................................................................................................................................... 67Dynamics
.......................................................................................................................................................... 72Filters
.......................................................................................................................................................... 75Spatial
.......................................................................................................................................................... 80Effects
.......................................................................................................................................................... 83Legacy
.......................................................................................................................................................... 84Utility
................................................................................................................................... 86Exporting audio from BFD33.5
4 Using the Groove engine 88
................................................................................................................................... 91Grooves Browser4.1
................................................................................................................................... 97Palette4.2
................................................................................................................................... 102Groove Editor4.3
.......................................................................................................................................................... 108Editor Tools
.......................................................................................................................................................... 113Saving and Exporting Grooves
................................................................................................................................... 117Groove FX4.4
................................................................................................................................... 119Drum Track4.5
................................................................................................................................... 125Recording Grooves with MIDI4.6
................................................................................................................................... 127Importing MIDI files and BFD 1.5 Grooves4.7
© 2017 FXpansion
Page 3

5 MIDI key and automation mapping 129
................................................................................................................................... 131MIDI Key Maps5.1
................................................................................................................................... 140Using Electronic Drumkits5.2
................................................................................................................................... 147Automation Maps5.3
................................................................................................................................... 150Program Change playlist5.4
6 BFD3 Preferences 152
................................................................................................................................... 153Data Preferences6.1
................................................................................................................................... 154Grooves Preferences6.2
................................................................................................................................... 156Session Preferences6.3
................................................................................................................................... 158MIDI Preferences6.4
................................................................................................................................... 159Engine Preferences6.5
................................................................................................................................... 162GUI Preferences6.6
7 BFD3 Key Map Reference 164
8 Using the BFD3 standalone application 165
9 DemoPacks 166
10 Jukebox player 169
11 NFUZD Export features 170
12 BFDLACTool 173
© 2017 FXpansion
3
Page 4
BFD3 Operation Manual4
1 Introduction
Welcome to BFD3!
Thank you for purchasing BFD3!
Please take time to study this manual in order to get the most out of BFD3's deep and powerful functionality.
For an overview of how to operate BFD3, please read chapter 1 and the opening sections of chapters 2 and 3.
BFD3's Groove engine, mapping functions and preferences are covered in chapters 4-6.
Credits
Programming: SKoT McDonald, Steve Baker
Additional programming: Angus Hewlett, Paul Chana, Henry Lindsay-Smith, Andrew Simper
Tom resonance algorithm research: Alice Clifford
QA: Drew Vernon, Mike Bugh, Tom Meaney, Jamaine Obeng, Sam Gillies, Lawrence King
Project management: Rory Dow, Angus Hewlett, Henry Lindsay-Smith, Rhiannon McLaren
Video: Rory Dow, Ryan Sellers
Documentation: Mayur Maha
GUI design: Paul Chana, Angus Hewlett
Image design: Rus Brockman
Web development: Andreas Schnetzler, Sam Sharp, Rob Philp
Artist Relations: Clare O'Brien
Support: Alex Volmer, Ryan Sellers, Lawrence King
FXpansion USA: Terry Hardin, Leslie Crook, Brian McGovern
BFD3 Core Library audio production, recording and editing
Rail Jon Rogut and Andrew Scheps for Platinum Samples
John Emrich
Grooves
Steve Ferrone, Brooks Wackerman, Bobby Jarzombek, Peter Erskine, Stanton Moore, John Emrich (all
courtesy of Platinum Samples), Jacques Mathias
Preset design
Jacques Mathias, John Emrich, Drew Vernon, Rory Dow, Emre Ramazanoglu, Tristan Klein
Licensing and copyright
FX pansion grants the O wner of a BFD3 lic ense the right to create finished mus ic al works and performances with the s ounds and
software that compris e the BFD3 produc t, its expans ion pac k s , and any downloadable c ontent made available from
www.fxpans ion.com or its partners .
The making of s ample libraries in any form, commerc ial or otherwis e, be they either single hits, drumloops , or fully mixed audio
clips is stric tly forbidden without expres s written agreement of FXpans ion and its audio partners, and violations will be pros ec uted
to the full extent of international and local c opyright law. The owners hip of all the BF D 3 audio material and ass oc iated M I DI
performances is fully as s erted by FXpans ion and its audio partners . Pleas e feel free to contac t FX pansion for any c larific ation.
The O wner may only ins tall and us e BFD 3 on multiple c omputers stric tly under the following c onditions : where multiple computers
compris e part of a s ingle compos ition workstation for a s ingle compos er; or where the owner has two non-c onc urrent sites of work,
for example a s tudio des ktop c omputer and a laptop c omputer for liv e performances.
Multiple ins tallation is c ontrolled by a mac hine- s pecifc challenge and res pons e sys tem with a limited number of authorizations .
FX pansion may, at its own dis c retion, grant further authorizations for a partic ular lic ens e holder.
This s oftware is lic ensed, not s old. A s suc h, any re-s ale of your lic ens e will be s ubjec t to a one- time $ 50 U SD trans fer fee.
BF D and FX pansion are trademarks of FXpans ion A udio UK Ltd.
FX pansion A udio U K L td. is part of the RO LI ecosys tem.
© 201 7 RO LI L td. A ll trademarks acknowledged. 'Mac' and as sociated brands are trademarks of A pple Inc . RT A S and A A X are
trademarks of A vid T ec hnology I nc. V ST is a trademark of Steinberg GmbH . Windows is a trademark of Microsoft C orporation.
O ther trademark s mentioned are held by their res pec tive owners and are us ed for information purposes only.
Manual revis ion 6 for BFD 3 v3 .2.0.6
© 2017 FXpansion
Page 5
1.1 Using BFD3
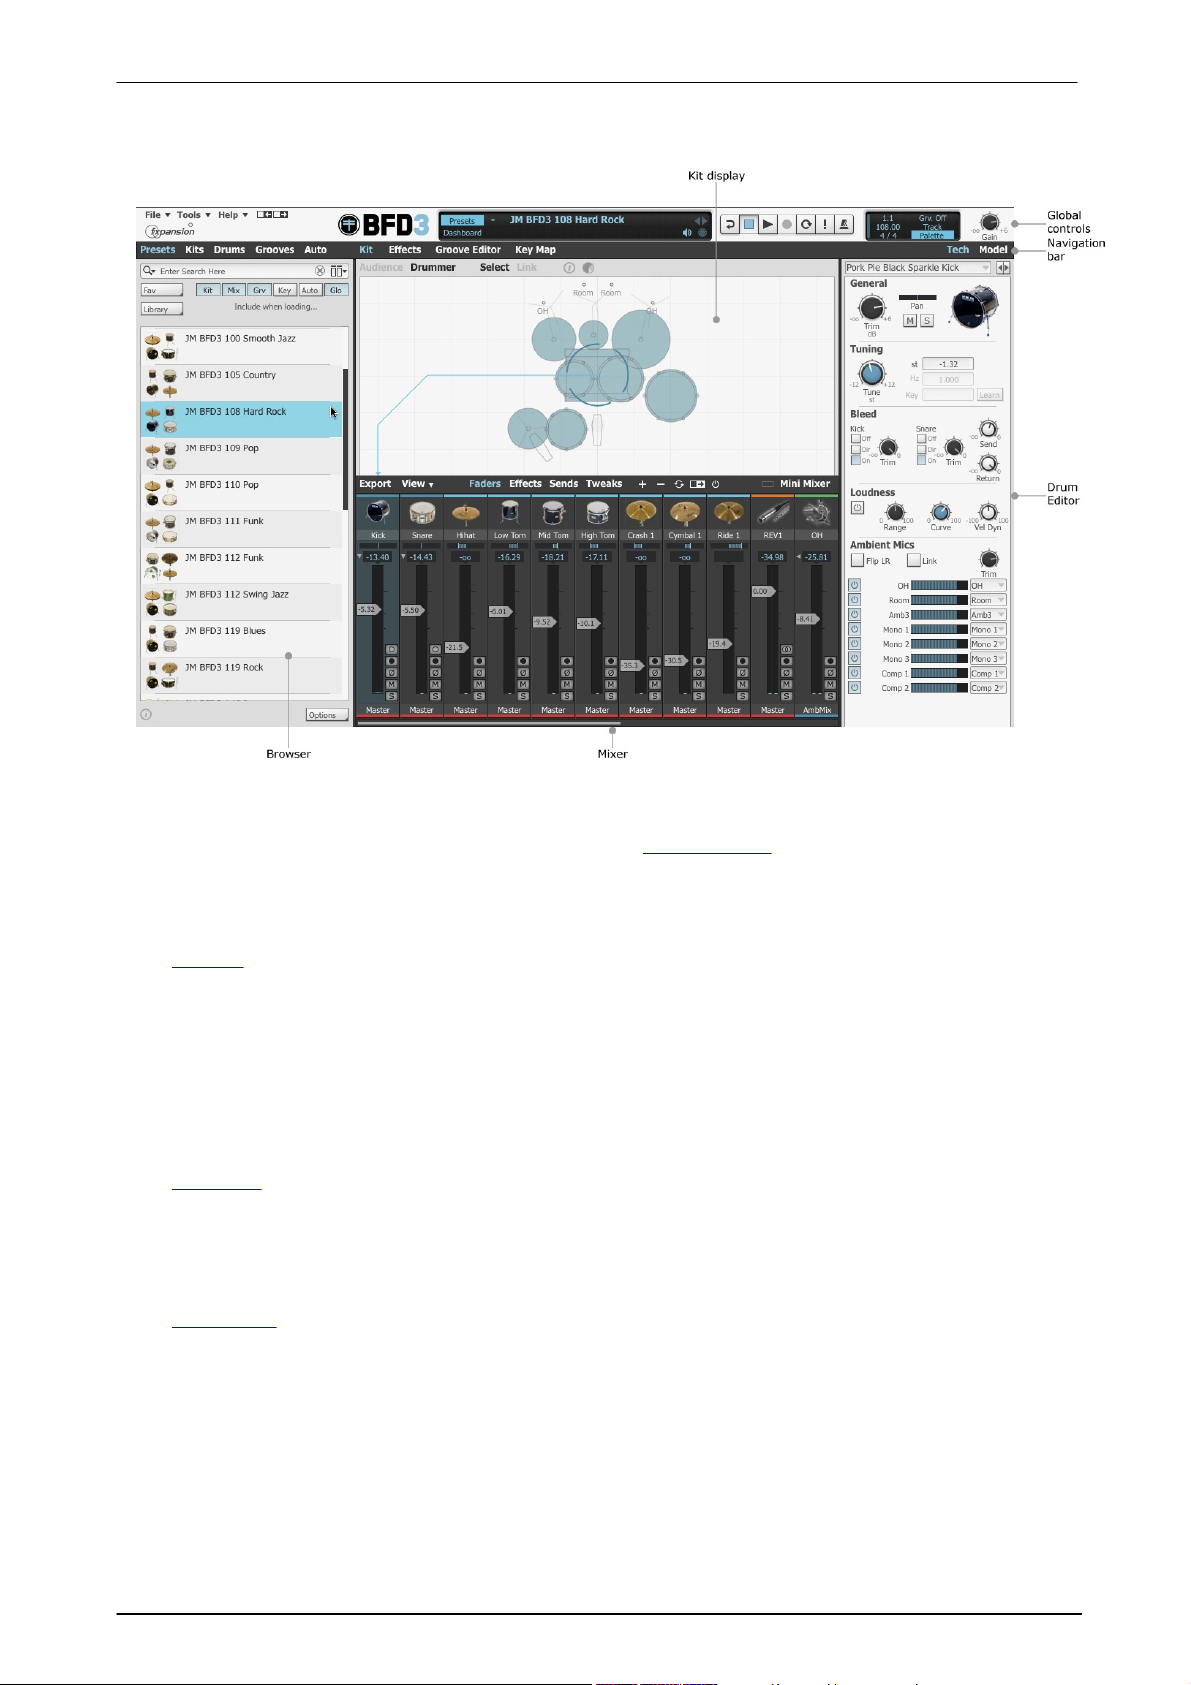
BFD3 layout
Introduction 5
Global controls and navigation bar
The upper part of the BFD3 interface features a number of Global controls that relate to working with and
managing BFD3.
The navigation bar features buttons to access various parts of BFD3, described below.
Browser
The Browser panel is used to load sounds and Grooves into BFD3. Using the tab buttons in the navigation bar at
the top of this panel, it can be switched to browse for Presets (entire BFD3 states), Kits (configurations of
Drums in slots), Drums (individual percussive instruments to load into the current kit) or Grooves (patterns or
sequences that play BFD3's sounds).
This panel is also switchable to the Automation panel using the Auto button.
The Browser panel can be hidden by clicking the currently active tab button. Click any of the buttons to make it
visible again.
To get started with BFD3, double-click any item in the Presets browser to load an entire mix-ready preset.
Kit display
The Kit display shows the physical layout of the kit, which is comprised of a number of Drum slots.
The currently selected Drum slot is highlighted - click any slot to select it and audition the Drum.
The Kit display is also used for the Link function which allows you to layer Drums together so that they are
played at the same time.
Drum Editor
The Drum Editor contains a wide array of parameters for tweaking the sound and response of the currently
selected Drum and contains 2 pages, accessed by the Tech and Model buttons in the navigation bar.
Clicking the currently active button hides the Drum Editor panel entirely. Click either button again to display it if
it is currently hidden.
© 2017 FXpansion
Page 6

BFD3 Operation Manual6
Click the Effects button to show the Effects Editor
Mixer
The mixer area represents a comprehensive mixing
engine for the audio channels within BFD3's sounds.
A Drum (or Drum slot if it is empty) can be selected
by clicking its mixer channel.
Effects Editor
The Effects Editor is shown by clicking the Effects
button in the main BFD3 navigation bar. It displays
the currently selected mixer channel's effect slots
and Send controls.
Additional pages and panels
The following pages and panels are accessed using buttons in the navigation bar:
Groove Editor
The Groove Editor is displayed by clicking the Groove Editor button. This page represents the entire Groove
engine - it shows the Groove Palette, Groove Editor and Groove FX sections.
Key Map panel
Click the Key Map button to display the Key Map page, used for creating and editing custom Key Map setups for
assigning MIDI notes to Drum articulations.
This page is also useful for checking the layout of the current Key Map.
Automation panel
Click the Auto button above the Browser to display the Automation panel in place of the Browser. This panel
provides control over assigning MIDI C C, note and host automation parameters to BFD3 controls for remote
control purposes.
Click any other Browser tab button to exit the Automation panel.
How to approach the BFD3 interface
The philosophy of BFD3 is to recreate all aspects of studio drum recording and production within your computer.
The Kit display and Drum Editor can be considered as the drumkit in a studio.
The Mixer and Effects Editor represent the control room with a mixing console and outboard processing.
The Groove engine and Key Map panel are related to the 2 ways that BFD3's sounds can be played, in
effect representing the drummer.
Working with BFD3
The basic workflow in BFD3 can be considered in the following steps:
1. Load a BFD3 Preset, a kit or assemble a kit from individual Drums using the Browser.
2. Use the Drum Editor to modify the underlying drum sounds.
3. Use the Mixer to either process the sounds internally or to route microphone audio channels (either
completely discretely or after some submixing if you require) into individual channels in your host/DAW for
further processing or recording.
4. Play the Drum sounds with MIDI notes or with the Groove engine.
5. The resulting audio can be recorded by BFD3's audio export functions or, if you've routed channels discretely
into your host, you can use its own recording functions.
Please consult the opening sections of chapter 2 and chapter 3 for a more detailed guide to the main aspects of
this workflow. See chapter 4 for a full guide to operation of the Groove engine.
© 2017 FXpansion
Page 7
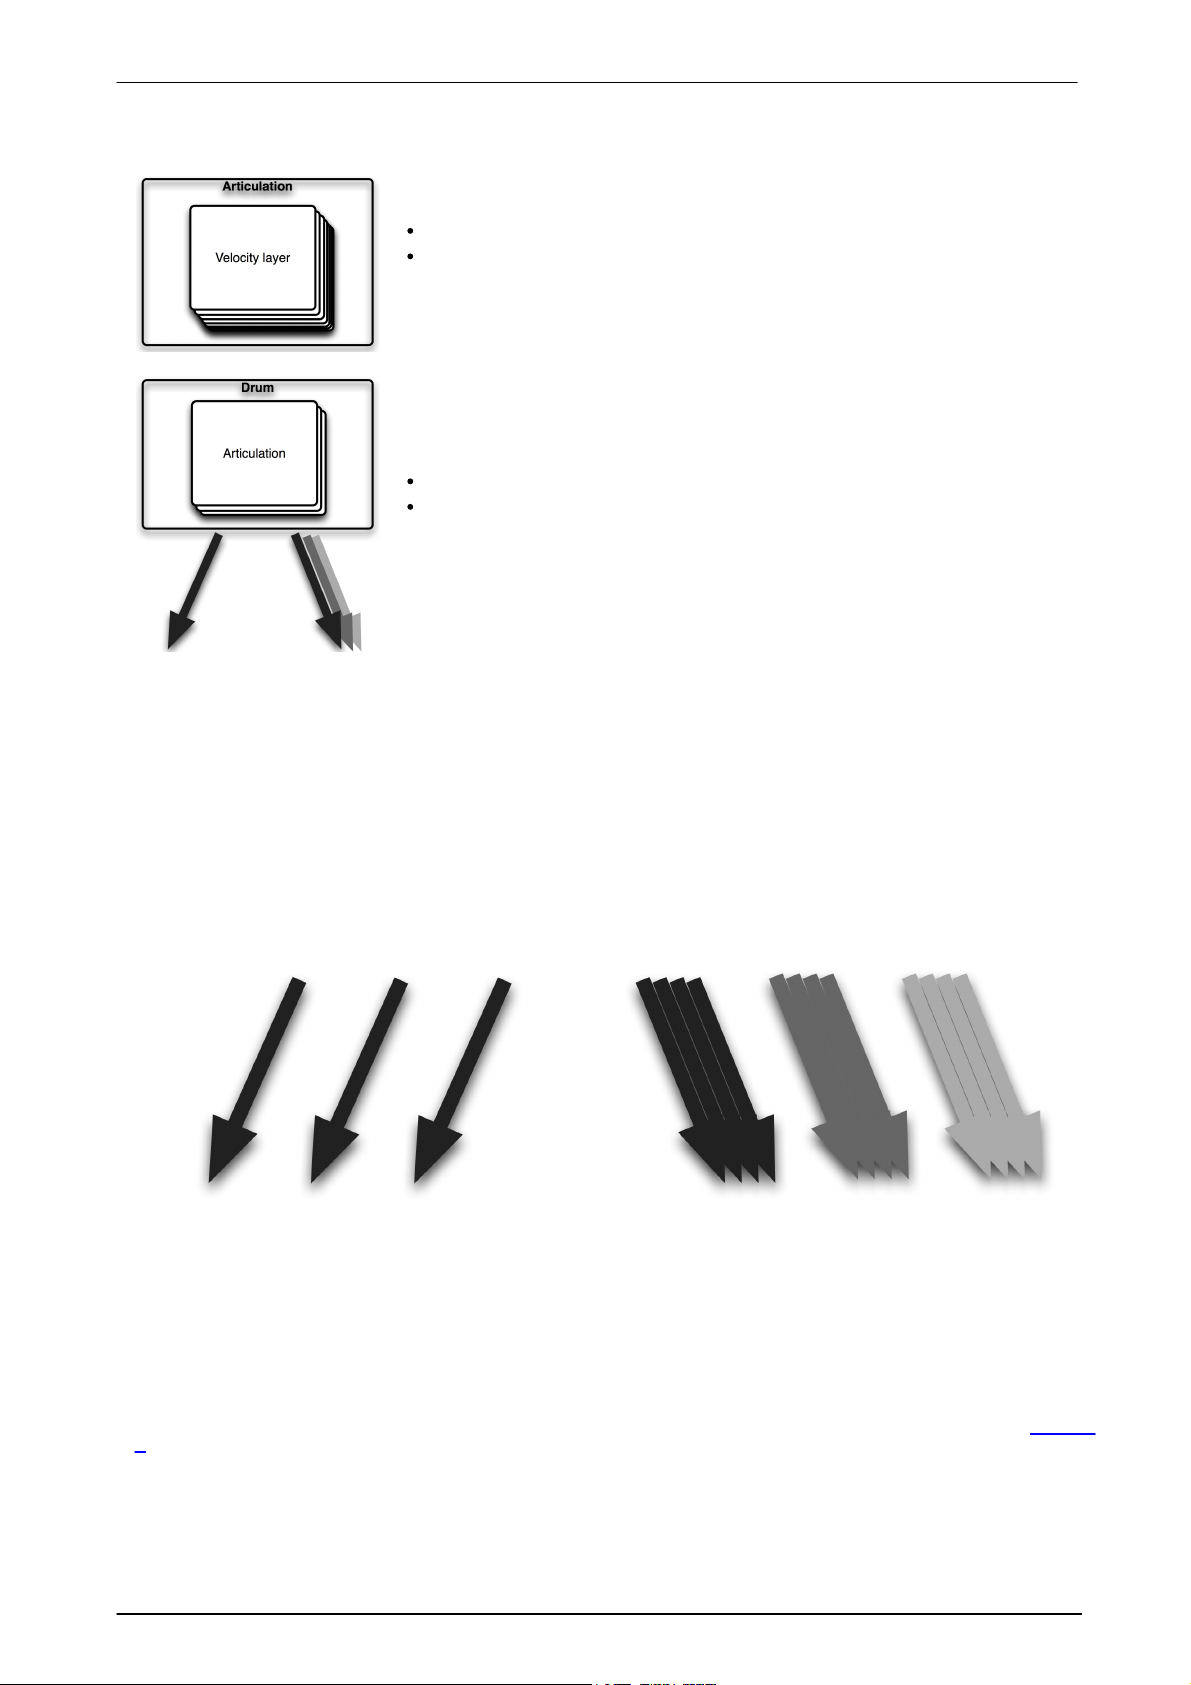
Important concepts in BFD3
Direct mic
channels
Ambient mic
channels:
OH, Room,
Amb3 etc.
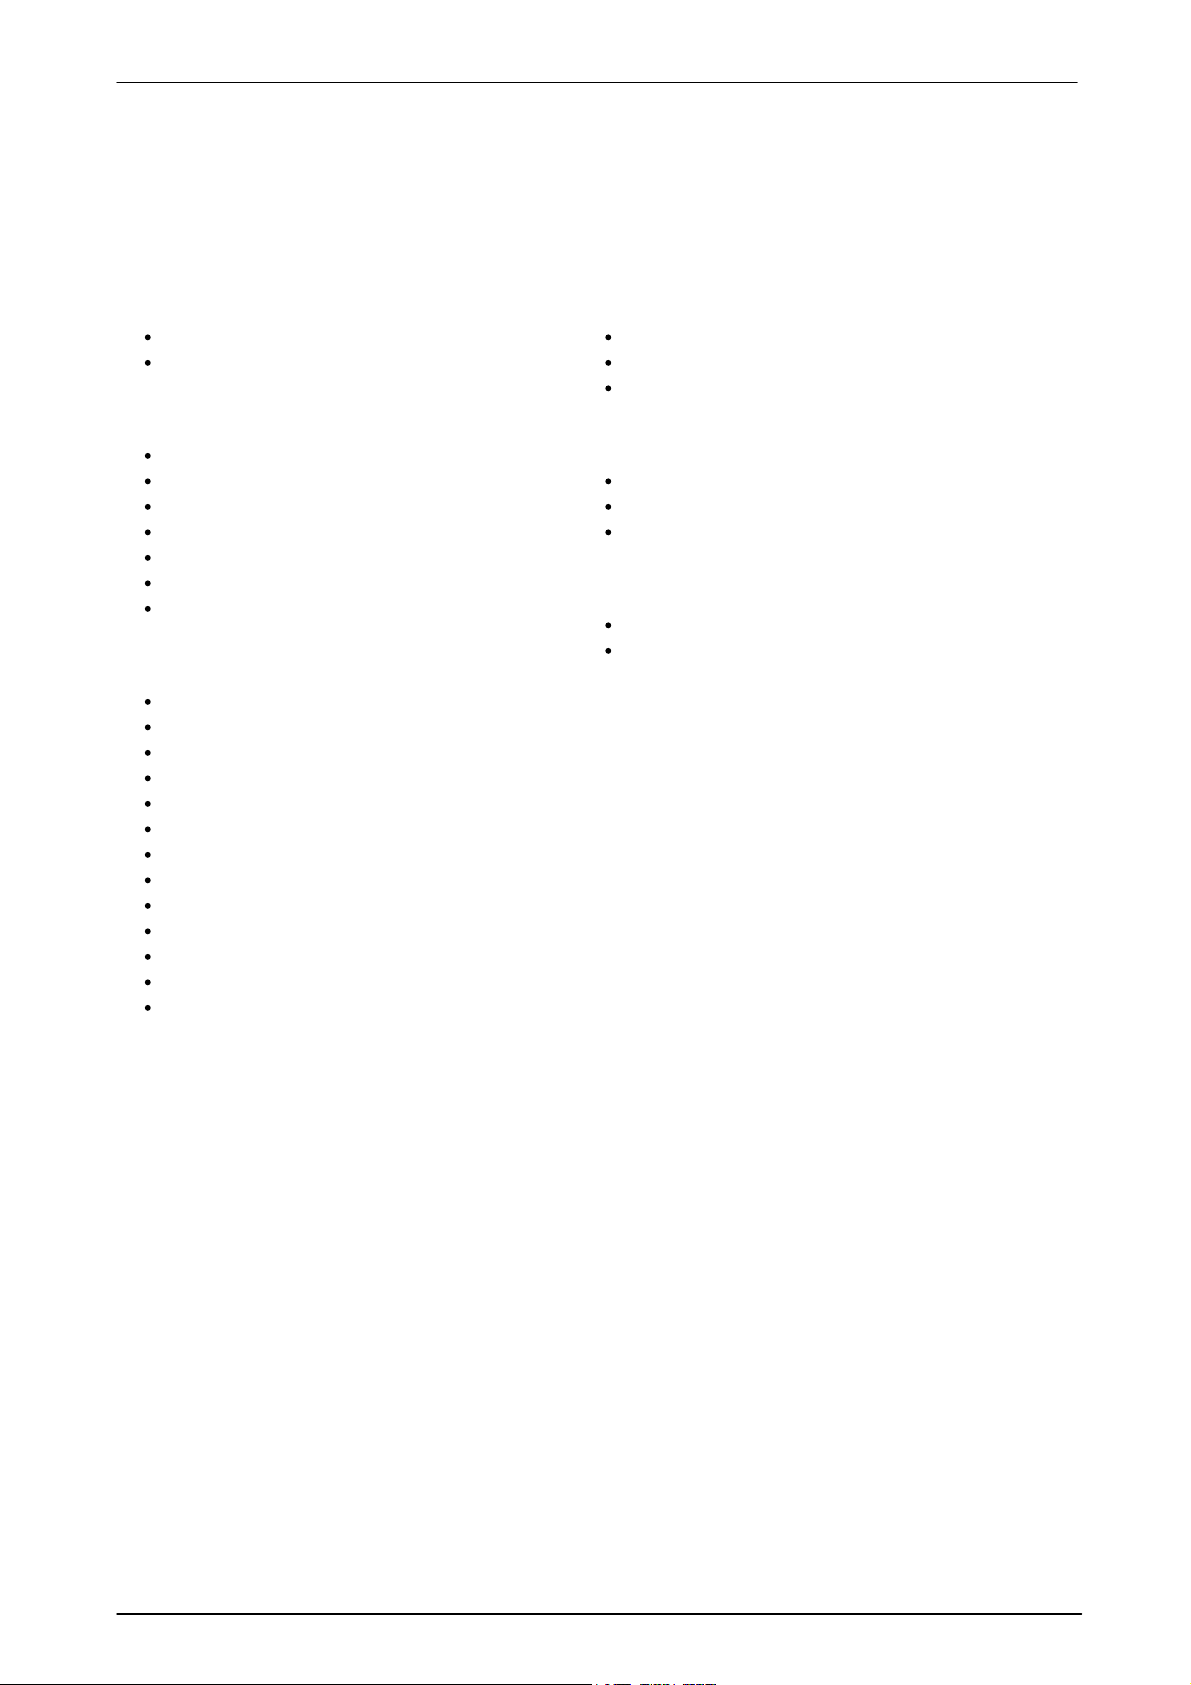
An articulation is a type of way of hitting a drum, cymbal, hihat or other
percussive instrument. The following are examples of articulations:
striking the main surface, bell or edge of a cymbal
striking the main head of a snare or playing a rim-shot or sidestick
Within BFD3, an articulation is the smallest addressable entity. It is itself
composed of a series of individual samples, called velocity layers, due to
the fact that they represent a dynamic graduation from quiet to loud,
designed to be addressable by the MIDI note velocity range of 0 (silent) to
127 (loudest possible sound).
Each velocity layer sample is actually composed of multiple direct and
ambient mic channels: audio channels captured by multiple microphones.
See below for more details on mic channels.
Articulations can be triggered in 2 ways:
MIDI notes assigned to articulations with the Key Map
Groove engine events
Articulations can also be triggered by audition previews in various parts of
BFD3 - the Drum Editor lets you preview all articulations in a Drum, for
example.
BFD3's Drums contain a variety of articulations - see the section below for a
list of available articulations.
A Drum is composed of 1 or more articulations, and is the name given to any
instrument within the kit in BFD3, whether it is a kick, snare, tom, cymbal,
hihat or percussion instrument.
Snares contain between 5 and 7 articulations and hihats contain up to 11
while other instruments such as toms may feature only 1.
Direct mic channels from each Drum are
represented by an individual Drum channel on the
BFD3 mixer.
Kicks and Snares feature multiple sub-mics which
are mixed into single Kick and Snare 'mix' channels.
These channels, along with Tom channels, can also
contain bleed and spill signals from other Drums,
depending on their Bleed settings.
Ambient mic channels of each type - OH, Room,
Amb3 etc. - from all Drums are mixed together into
the OH, Room, Amb3 etc. channels in the BFD3 mixer.
These Ambient mic channels are mixed into the
Ambient Mix channel.
Drums, articulations and velocity layers
Introduction 7
Mic channels
When Drum articulations are triggered by incoming MIDI or Groove engine events, the audio generated is fed to
BFD3's mixer in the form of Direct mic channels and Ambient mic channels. Direct mic channels contain audio
signals recorded by microphones close to the Drum, while Ambient mic channels contain audio signals recorded
by stereo mic pairs over the kit (Overhead, or OH) and at various positions in the recording room (Room, Amb3)
. BFD3's library also contains further mono room and hardware-compressed direct mic channels for increased
mixing flexibility.
For further details on mic channels, bleed and spill signals and other aspects of mixing within BFD3, see chapter
3.
© 2017 FXpansion
Page 8
BFD3 Operation Manual8
Kicks
Hit [Default]
NoSnare
Snares
Drag
Flam
HalfEdge
Hit [Default]
Rim Shot
Rim C lick
SS (SideStick)
Hihats
Bell Tip
Closed Shank
Closed Tip [Default]
Half Shank
Half Tip
Open Shank
Open Tip
Pedal
Quarter Shank
Quarter Tip
Splash
ThreeQ Shank
ThreeQ Tip
Toms
Hit [Default]
Rim
Rim C lick
Cymbals
Bow [Default]
Bell
Edge
Percussion
Hit
Alt
Note:
Some Percussion Drums are classified as Snares, due
to possessing more than 2 articulations. Drums such
as these can be loaded in the same way as any other
Percussion Drum into a Percussion slot. However, the
additional articulations are not available via MIDI
notes until they are assigned in the Key Map panel.
They are, however, always accessible in the Groove
engine.
Alternatively, these drums can be loaded into the
Snare slot if you prefer, in which case the articulations
are already mapped to MIDI notes. An additional
Snare slot can also be used, although all its
articulations would need to be mapped using the Key
Map panel.
Articulations in BFD3's Drums
Note: the following list represents all possible articulations for each Drum. Not all included Drums include all
possible articulations. Articulations also vary between different BFD-compatible libraries and expansion packs.
BFD3 is capable of supporting all articulations - any Key Map assignments use an intelligent substitution system if
a required articulation is not present in the currently loaded Drum.
© 2017 FXpansion
Page 9
Introduction 9
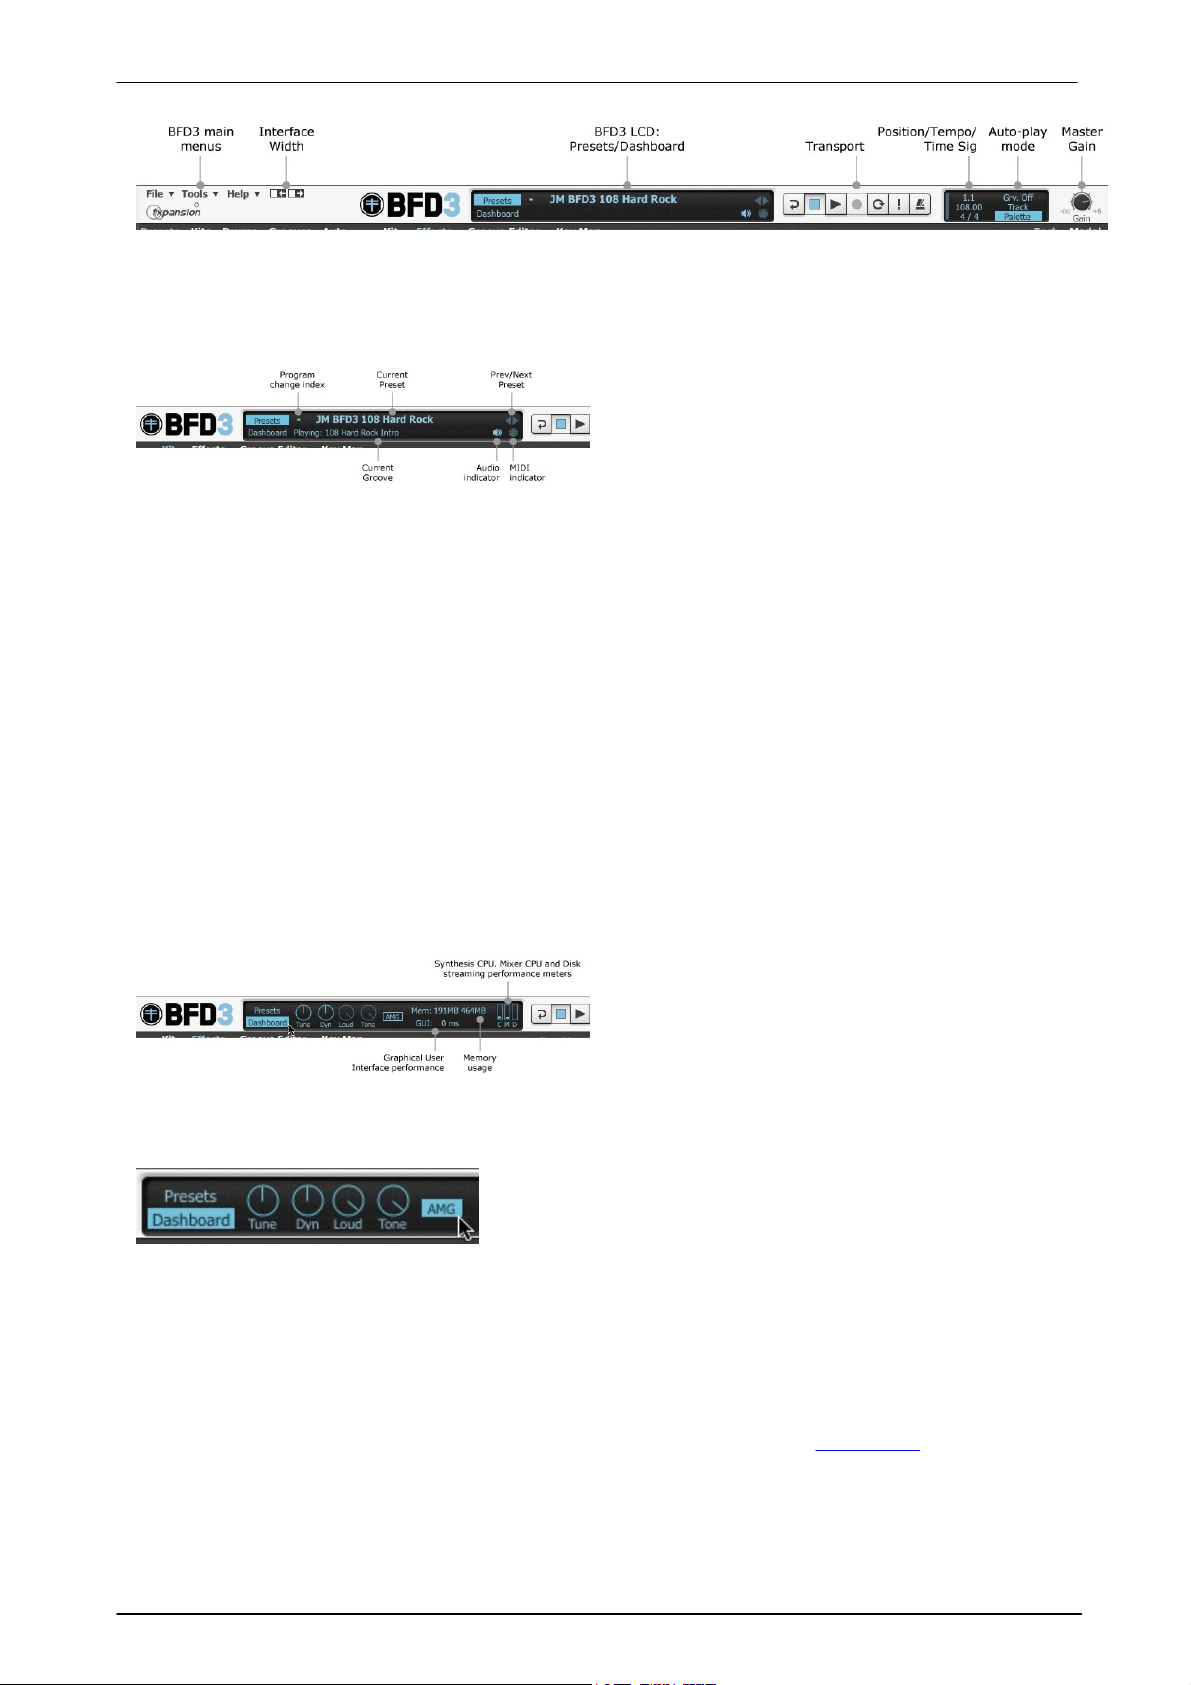
Current Preset
This indicator displays the name of the last loaded
BFD3 Preset.
Tune (Master Tune)
The Tune control adjusts the overall tuning (pitch) of
all Drums in the kit relative to their individual Tuning
settings.
AMG mode (Anti-MachineGun mode)
The AMG mode button activates or deactivates the AMG (AntiMachineGun) functions in BFD3.
1.2 Global controls
Master Gain
The Master Gain control can be considered as an overall volume level for the entire BFD3 audio engine. It
adjusts the level of all kit-piece mic channels relative to any individual settings.
BFD3 LCD: Presets view
Program change index
If a Program C hange playlist is currently active, this part of the LCD displays the index number of the current
program in the playlist.
Previous/Next Preset
These buttons browse through the available Presets sequentially.
Current Groove
If the Groove engine is currently active, the currently playing Groove is shown here.
Audio indicator
The Audio indicator is lit when the BFD3 plugin has successfully launched and been integrated into the host
audio engine or when the BFD3 standalone app has successfully established communication with the specified
audio device.
MIDI indicator
The MIDI indicator is momentarily lit whenever BFD3 receives any MIDI input.
LCD Dashboard
Click the Dashboard button in the LC D to show the Dashboard controls if they are not currently visible.
Dyn (Master Dynamics)
The Dyn control shifts the velocity range of incoming events (from MIDI notes or from the Groove engine)
across the entire kit - in effect, making the 'drummer' play the kit with more or less intensity.
If it is deactivated, there is no additional humanization applied - each incoming event velocity always triggers the
corresponding velocity layer directly.
Loud (Loudness Randomization)
The Loud control sets the overall amount of loudness randomization across all Drums while the AMG button is
activated. The degree of randomization imposed upon each Drum in the kit depends upon its individual AMG
Var. setting, found within the Articulations section of the Drum Editor's Model page - in fact, this setting can be
made for each articulation within each Drum.
Since this control scales, or multiplies, the individual AMG Var. settings (in the Drum Editor) for each Drum
articulation, if it is set to 0 then no loudness randomization will occur for any Drum articulations.
© 2017 FXpansion
Page 10
BFD3 Operation Manual10
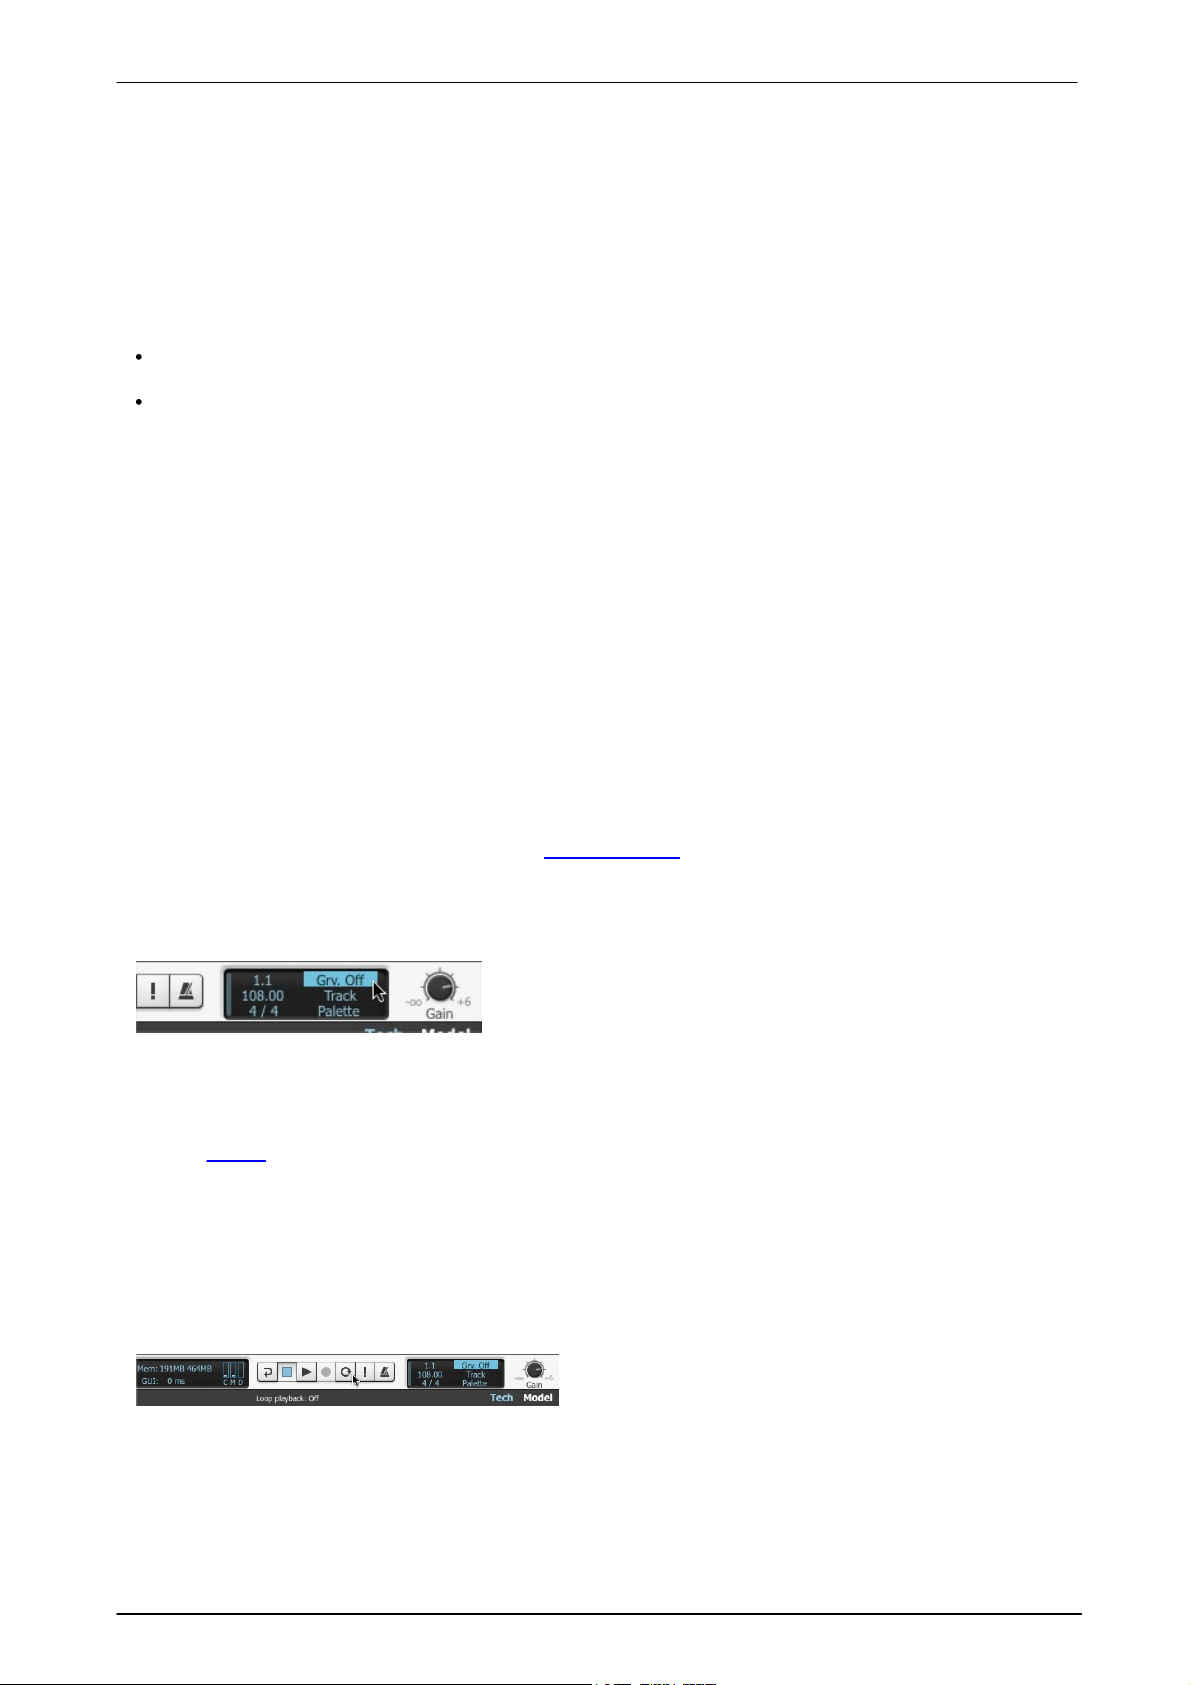
Auto-play Off
In the Off mode, Groove playback is not started automatically
when the transport is started.
The context info display, located underneath the
Transport, shows the parameter name and value for the
control currently under the mouse cursor.
Tone (Tone Randomization)
The Tone control sets the amount of velocity layer randomization across all Drums while the AMG button is
activated. The name of this control relates to the fact that velocity layer randomization predominantly imparts
timbral or tonal variation due to multiple velocity layer samples being used. As well as sounding different due to
subtle differences in drum resonances on each strike, different samples also feature subtle differences in
loudness, so a degree of subtle variation in amplitude is to be expected.
The Tone control operates in conjunction with each Drum articulation's AMG Var. setting in exactly the same
way as the Loud control described above.
Memory usage
This indicator features 2 parts:
The first part displays how much RAM is being used by BFD3 - this includes the cached start portion of each
sound, plus a small overhead for BFD3's engine.
The second part displays the entire size for the current kit - including the start portions of sounds held in RAM
and the remaining data on disk.
CPU and disk performance meters
The 3 horizontal meters in the status bar measure several aspects of BFD3's system resource usage.
Synthesis engine CPU usage
The synthesis engine is involved in receiving MIDI input or generating Groove engine events and playing back
the relevant articulations.
Mixer engine CPU usage
The mixer engine processes all routing, mixing and FX functions in BFD3.
Hard disk load
This meter indicates the intensity of hard disk resource usage. Do not be alarmed if this meter reaches high
values, as your machine may well be able to handle a large amount of disk usage. It is intended as an indicator
of the amount of hard disk activity that is occurring.
If your machine cannot handle the amount of disk usage required, the side-effects are usually clearly audible –
tails may be cut or intermittent, and audio dropouts or other artifacts may occur.
Transport, Position, Tempo & Time Signature controls
These controls are used in conjunction with the Grooves engine.
Grooves Auto-play mode
The Auto-play mode allows you to define how the BFD3 Transport affects Groove playback.
Instead, Grooves must be assigned to MIDI notes and played via MIDI. This mode should be used if you intend
to trigger BFD3's sounds with external MIDI notes rather than with its internal Groove engine.
Auto-play Palette or Track
When set to Palette or Track, Groove playback is started in the Palette or Drum Track.
See the Palette section for more details on the Auto-play mode setting.
Interface width
The Interface width buttons adjust the horizontal size of the BFD3 interface window. Increasing the width
allows larger visible areas of BFD3's panels: the size of the interface is not scaled.
Context info display
While a control is being adjusted, the context info display remains locked to the parameter until the mouse
button is released, showing the control's value as it changes.
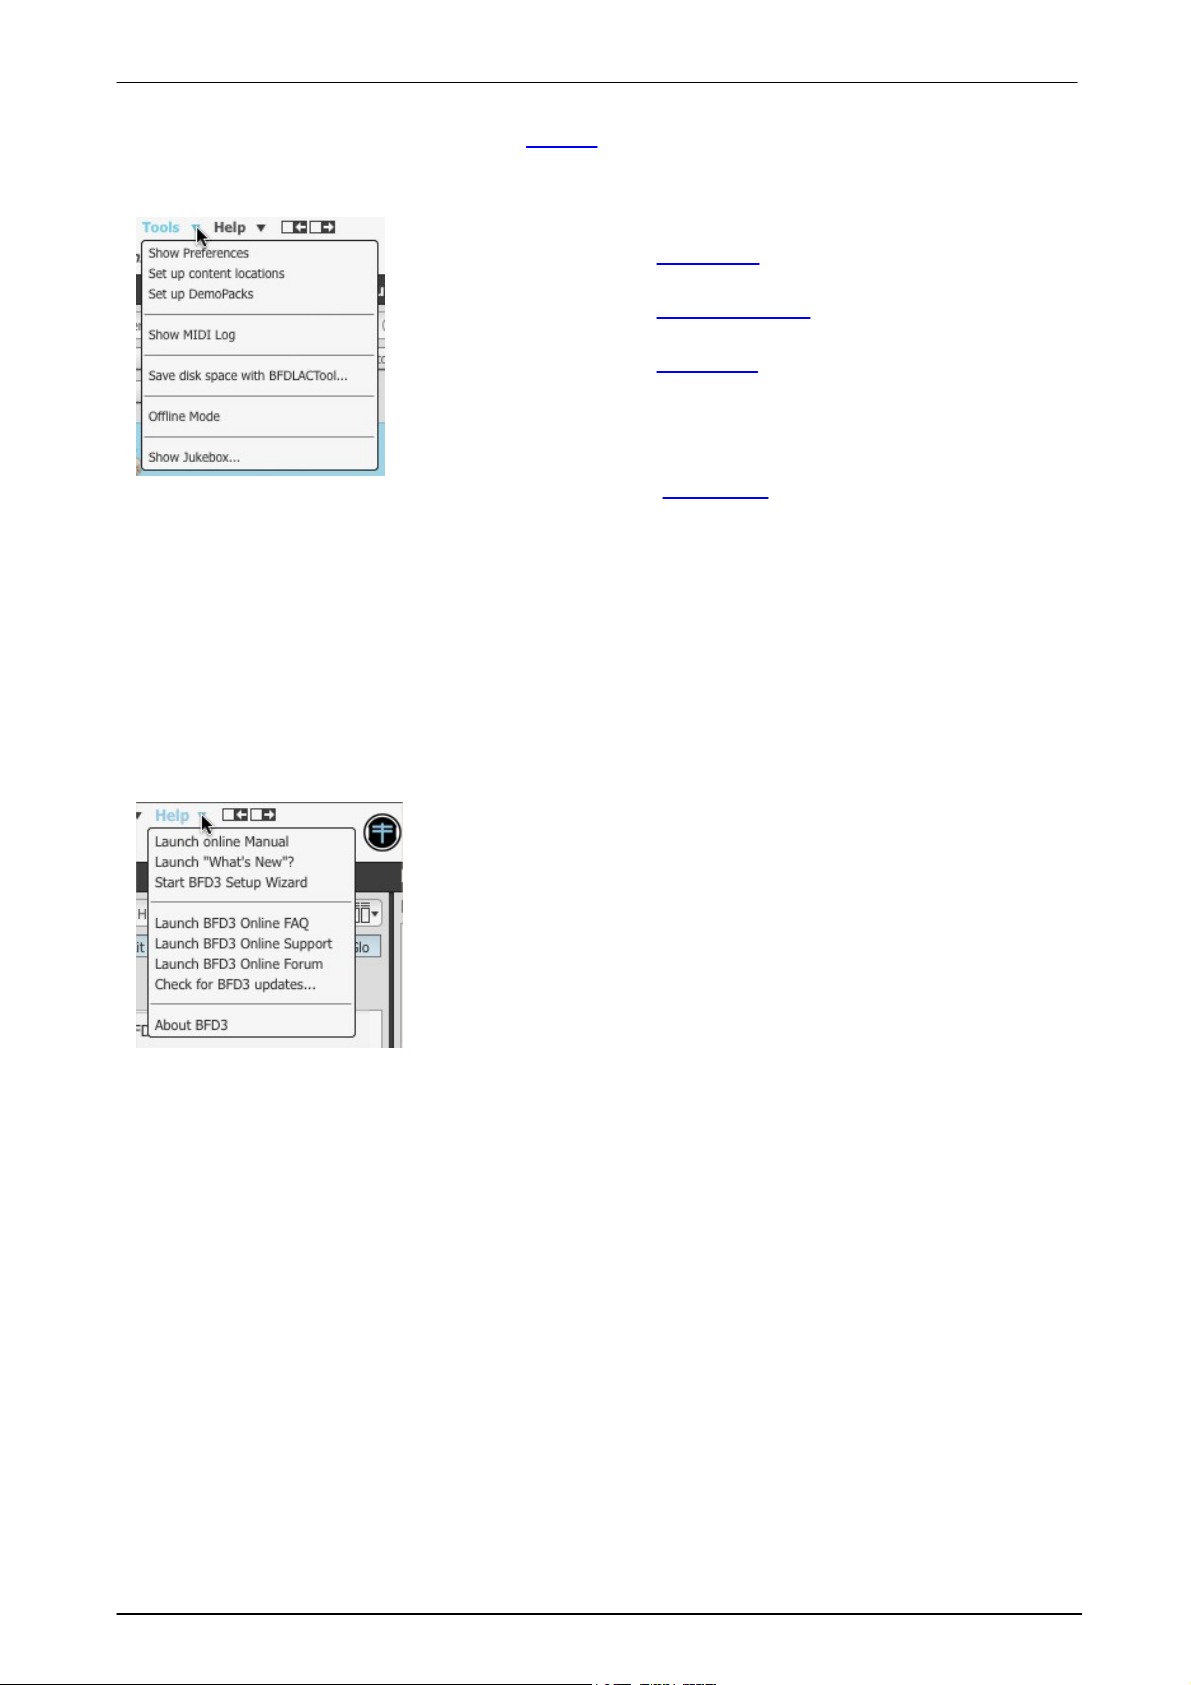
BFD3 main menus
The BFD3 menus at the upper-left of the interface provide a number of additional functions.
© 2017 FXpansion
Page 11
Introduction 11
Show Preferences
This function displays the Preferences panel.
Set up content locations
This function displays the Content Locations panel.
Set up DemoPacks
This function displays the DemoPacks panel.
Show MIDI Log
This function displays the external MIDI Log window, showing incoming
MIDI data for troubleshooting purposes.
Save disk space with BFDLACTool
This function launches the BFDLACTool application.
Launch online Manual
This function launches the online HTML operation manual. A PDF manual
can also be downloaded from FXpansion.com/BFD3
Launch "What's New?"
This function launches the What's New document which details changes
since BFD2.
Start BFD3 Setup Wizard
This function starts the BFD3 Setup Wizard, which adjusts a few
preferences, the most important of which is the Profile - this sets up
BFD3's engine preferences in a way that is best suited to the amount of
RAM you have in your machine.
File menu
The contents of this menu are covered in the Browser chapter - it mainly provides additional loading/import and
functions to those in the Browser as well as functions to save various elements in the current BFD3 session.
Tools menu
This external application allows pre-BFD3 expansion data to be compressed into BFD3's new BFDLAC lossless
compression format in order to save disk space.
Offline mode
This switch is intended for use with hosts that provide an offline (non-realtime) bounce or mixdown facility. When
the Offline switch is activated, BFD3 waits for all data to be properly delivered from the hard disk before
allowing the host to continue, ensuring that sounds are not cut off before their full decay is complete.
Please note that Offline mode is non-realtime, and should only be used during offline mixdown or rendering in
your sequencer, if it even offers this feature. Do not leave the Offline switch enabled during regular realtime
playback.
If your sequencer only provides realtime bouncing facilities, you should leave Offline mode turned off at all
times.
Help menu
Use the drop-down menu to specify the amount of RAM in your machine from the 3 available choices.
The Main host application setting simply adjusts the Octave numbering scheme setting in the BFD3
Preferences, while the MIDI controller setting specifies the current Key Map - this can also be achieved using
the Load Key Map function in the File menu.
Launch BFD3 Online FAQ/Online Support/Online Forum
These functions launch various online help resources.
Check for BFD3 updates
This function checks the FXpansion.com website for BFD3 updates.
About BFD3
This function displays the About box, containing the credits listing for BFD3. Click the About Box to return to the
main BFD3 interface.
© 2017 FXpansion
Page 12
BFD3 Operation Manual12
1.3 BFD3 Core Library tracking notes
Kits 1-4
Kits 1-4 were recorded at Ocean Studios, Burbank, C alifornia, USA and are oriented towards metal, indie, 70s
rock and pop, but they are capable of being used for all kinds of styles with the right Drum Editor tweaking and
mixer processing.
Production/engineering by Rail von Rogut and Andrew Scheps for Platinum Samples.
Kit 1 (Metal)
DW Mardi Gras Sparkle kit
2 kicks and 6 toms
Tama Tempesta snare
Zildjian cymbals
3 crashes
splash
china
ride
New Beats Mastersound hihat
Kit 2 (Indie)
Pork Pie Black Sparkle kit
Kick and 3 toms
Tama Bell Brass snare
Zildjian A-series cymbals
Crash
2 rides
Kit 3 (70s rock)
Ludwig Stainless Steel kit
Kick and 3 toms
Ludwig Hammered Supraphonic snare
Paiste cymbals
2002 crash
202 ride
2002 hihat
Giant Beat crash
Kit 4 (Pop)
Gretsch Purple kit
Kick and 4 toms
Canopus Bronze Piccolo snare
Paiste Signature cymbals
ride
2 crashes
hihat
Recording chain includes:
Neve 80 series console with 1081, 1073 and 1084 EQ modules
Neve 2254E, 33609 compressors
Fairchild 670 and 660
EL8 Distressors
ADR Vocal Stresser
DBX 160
Urei 1176
© 2017 FXpansion
Page 13
Introduction 13
Kits 5, 6, 7
These kits were recorded at Omega Studios, Maryland, USA and provide dedicated Stick, Brush and Mallet kits.
These kits offer a different room sound to kits 1-4 and a different character of sound with its own recording
chain. They are very well suited to jazz and funk projects, but with tweaking and processing can be used for a
variety of sounds for other genres.
Kit 5 (Stick) / Kit 6 (Brush) / Kit 7 (Mallet)
Mapleworks Custom kit
Kick and 6 toms
Mapleworks Custom snares
2 versions: 13" and 14"
Mapex Black Panther Blade snare
Bosphorus cymbals
6 crash/ride/splash cymbals
Hihat
Bonus Percussion
Cabasa
Tambourine
Group claps
Jam blocks
Cowbell
Recording chain includes:
UA, API, JDK ATI8MX2, Neve VR-60, Metric Halo ULN2 preamps
Yamaha SubKick mic on kicks
© 2017 FXpansion
Page 14
BFD3 Operation Manual14
If you're using BFD3 with only the BFD3 Core Library,
the location to which the audio data was installed is
already specified within BFD3 when it is launched.
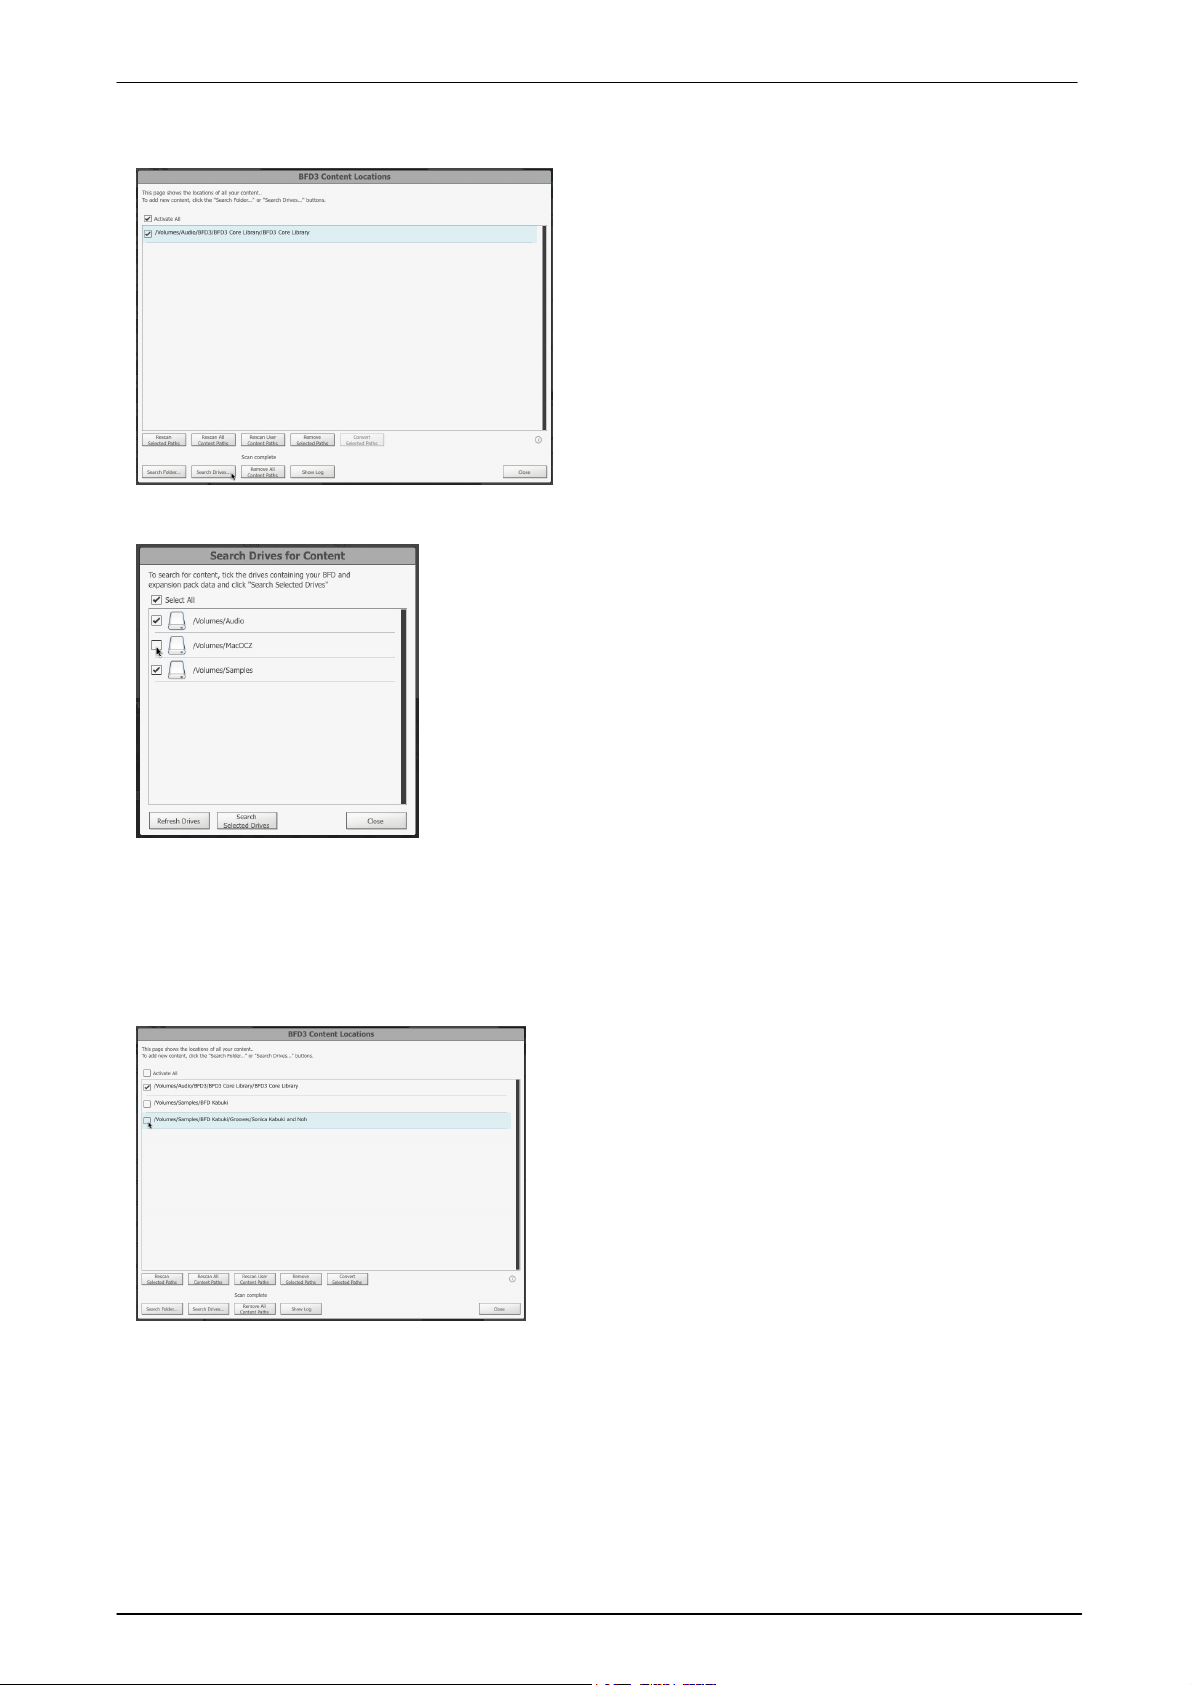
If you would like to use additional libraries or expansion
packs with BFD3, they must first be added to the BFD3
Content Locations panel and scanned.
To display the C ontent Locations panel, use the Set up
content locations function in BFD3's Tools menu.
Searching for additional content locations
Before any additional content can be specified within
BFD3, one or more content locations must be detected
on your drive(s) by performing a search using the
controls in the Search for content section of the Set up
Content Locations dialog box.
Search a hard drive or multiple hard drives
All drives on your system are shown, along with a checkbox indicating
that it will be searched. Uncheck any drive(s) if required and then click
the Search Selected Drives button. You can click the Search All
checkbox to click the checkbox for all detected drives.
Click the Refresh Drives button to refresh the list of detected hard
drives in your system - you may need to do this after connecting an
external disk, for example.
Specify a folder to search
To search within a specific folder (and sub-folders within it), click the
Search Folder... button to navigate to and select the desired folder.
The drive(s) or folder is searched for compatible data - this
process can take a while so please be patient.
Any folders which contain expansion packs usable within
BFD3 are shown in the list of content locations along with the
Core Library location. If its Activate box is checked, it is
ready to use after clicking the Close button to exit the
Content Locations panel.
To avoid using any detected content location, simply
deactivate its Activate box.
1.4 Setting up additional content
Content Locations panel
There are 3 ways to search for content locations:
Drag and drop a folder onto the Content Locations panel
To proceed, search for valid content locations using the Search Drives... or Search Folder... buttons.
Alternatively, a folder can be dragged from an OS file window onto the Content Locations panel to initiate a
search within the folder.
Completing the process
© 2017 FXpansion
Page 15
Introduction 15
Show Log
Click this button to display a separate log window containing
a detailed report of any content location scans which can be
useful for troubleshooting purposes. The log can be saved
using the Save... button or by using the Copy to
Clipboard button to paste into a separate document or
email, while the Clear button empties the contents of the
log buffer.
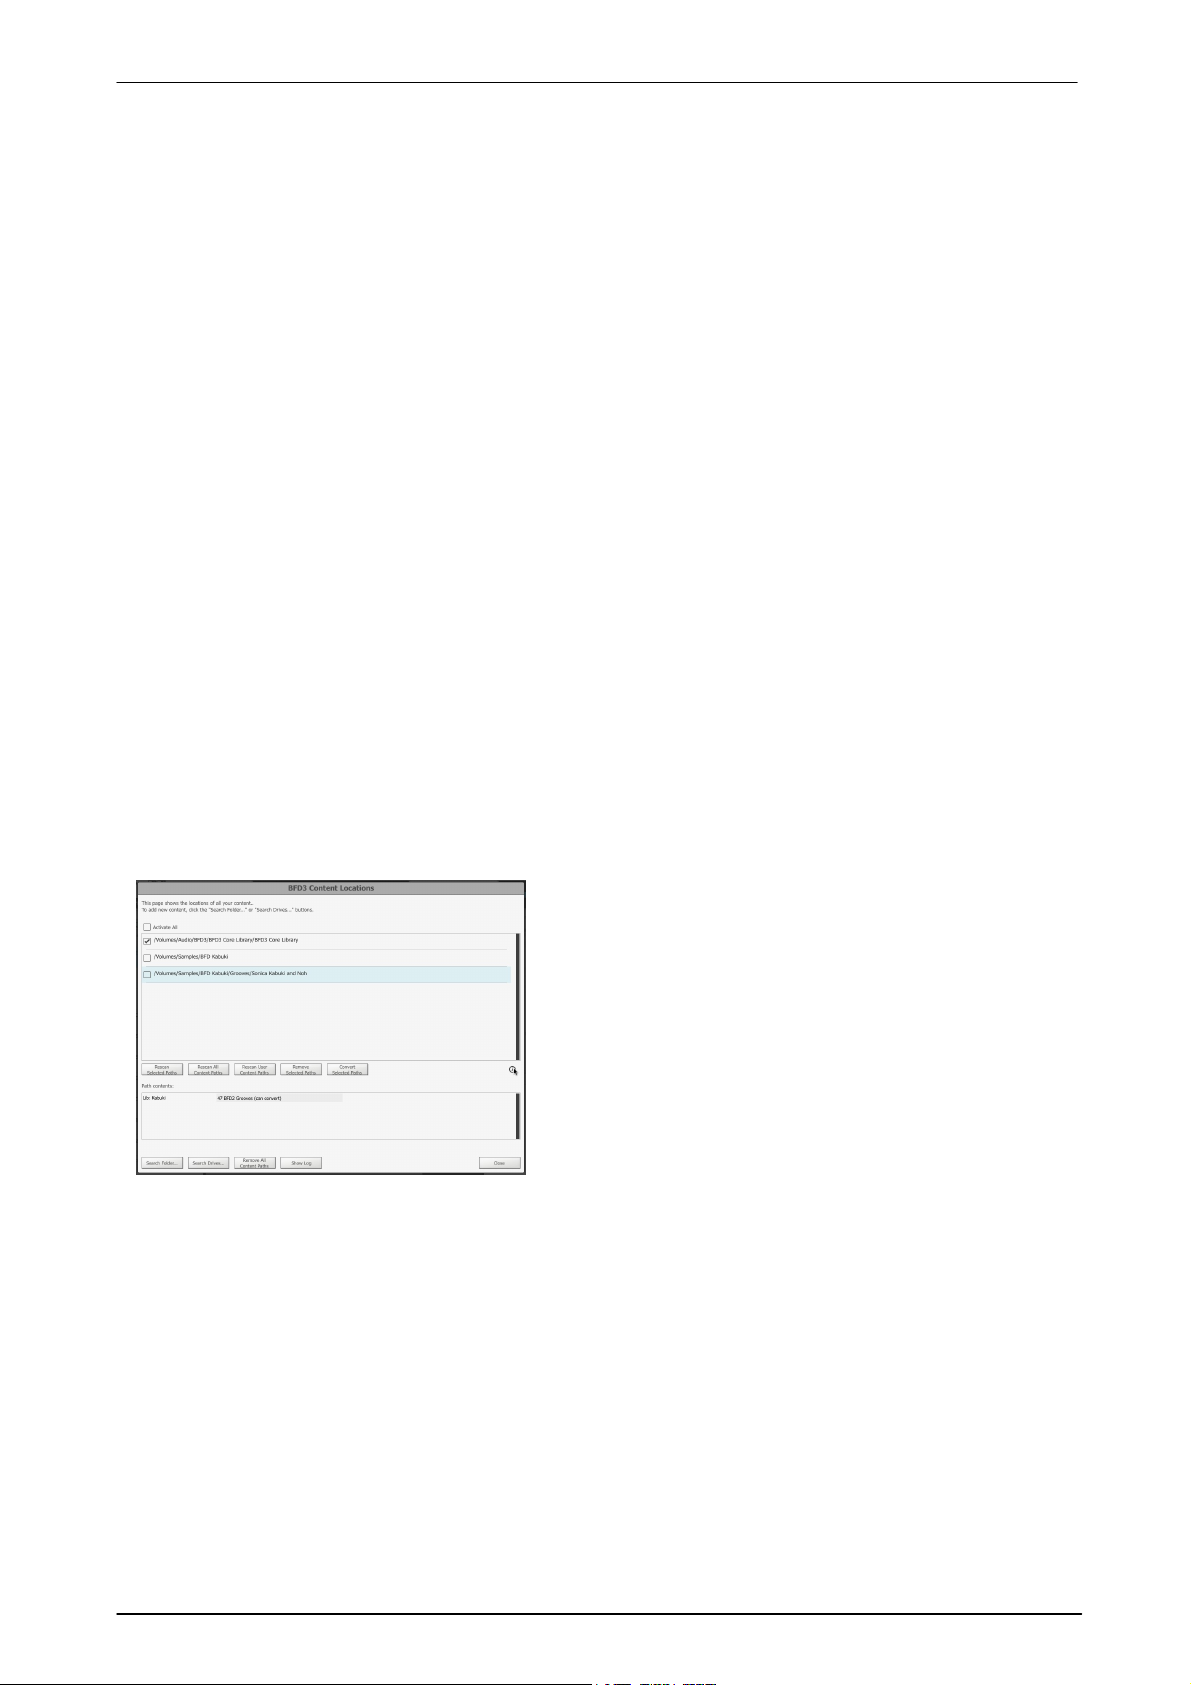
Info display
This display is hidden by default - its visibility is toggled by
clicking the Info display button. When visible, it displays a
summary of the contents of each selected path in the listing.
Additional Content Path functions
The main part of the Content Locations panel is a listing of the currently specified content locations (known as
'data paths' in previous versions of BFD).
A content location can contain 1 or more BFD-compatible libraries, presets, kits, key maps, grooves or other
files. Use the Info display button to show a summary of the contents of each content location.
Activate
Each content location features a checkbox which activates it within BFD3. Uncheck the box to deactivate any
path.
Activate All
Click the Activate All button to activate all paths currently listed.
Rescan Selected Paths
Click this button to rescan the data within the currently selected content paths. This may be required if any items
have been manually deleted or added.
Rescan All Content Paths
This function rescans the contents of all currently detected content locations in the list.
Rescan User Content Paths
This function rescans the BFD3 user content locations within your Documents/FXpansion/BFD3 folder, useful
if any Presets or other files have been added manually. Note that the BFD3 user content location is not shown in
the Content Locations panel listing.
Remove selected Path
This button removes the currently selected location in the list. The removed path does not reappear in the list
until it is encountered by one of the search operations described earlier.
Add BFD2 Paths
This function can be used if an installation of BFD2 also exists on the system - all data paths (content locations)
currently specified in BFD2's settings are read and added as BFD3 content locations. In addition, BFD2's system
and user documents locations are also added as content locations so that all Presets and Kits available within
BFD2 are also available in BFD3's Browsers.
Remove All Content Paths
This function removes all content locations currently shown in the list.
Filters
The Filters menu is provided in case it is necessary to manage a very large number of data paths, as it allows
the list to be filtered by various criteria to make management easier. By default it is set to Show all Paths - the
following additional settings are available:
• Hide Disabled paths
• Hide Groove-only paths
• Hide Drum-only paths
• Hide Preset/Kit-only paths
If any data paths are hidden as a result of the current Filters setting, an alert is shown next to the Activate All
button.
Close
Click the Close button to exit the C ontent Locations panel and return to the main BFD3 interface.
Authorizing additional expansion packs
If you are upgrading to BFD3 with BFD2 on the same system and your expansion packs are already authorized
for use within BFD2, they do not need to be re- authorized for use in BFD3.
© 2017 FXpansion
Page 16
BFD3 Operation Manual16
If they have not yet been authorized, they must be authorized in License Manager at this point. Once it has been
encountered during a BFD3 content scan, each expansion pack is inserted as a separate product into FX License
Manager.
Therefore, after scanning, launch License Manager if it is not already running and authorize the expansion packs
in the same way as you authorized BFD3.
Potential issues with content locations/data paths
If you are having problems with content not appearing within BFD3, please ensure the following:
Content location folder structure
Each content location can contain either a /Data or /Audio sub-folder - not both.
If any of your specified content locations features both a /Data and /Audio sub-folder, the easiest way to
overcome the issue is to create a new folder elsewhere, move the /Audio folder to it, then add and activate
the new folder as another content location within BFD3.
If you are continuing to use BFD2 on your system to load older sessions, the new folder should also be added
to your BFD2 data paths after which the BFD2 database must be rescanned.
Users of the BFD Big Orchestral Marching Band expansion pack should be aware that its original installer
offered a choice of installing to a BFD1 or BFD2 data path.
If in any doubt regarding the above, please contact our support team who will be happy to assist you.
Check for all installed elements
Drums
Expansion pack content often contains multiple types of files which can be loaded, such as Presets, Kits, Kitpieces (Drums) or Grooves. Not all expansion packs feature Kits and/or Presets so to conclusively verify
whether the expansion pack has been installed and authorized, please make sure that its contained Drums exist
in the Drums Browser. Use the Library Quick-filter menu in order to filter the Browser to only show the contents
of the expansion pack.
Presets and Kits
All expansion packs which were released prior to BFD3 will feature only BFD2 and/or BFD1 Presets or Kits. If any
such files exist in an activated content location, they are shown in BFD3's Presets and Kits Browsers.
© 2017 FXpansion
Page 17
Browsing for sounds 17
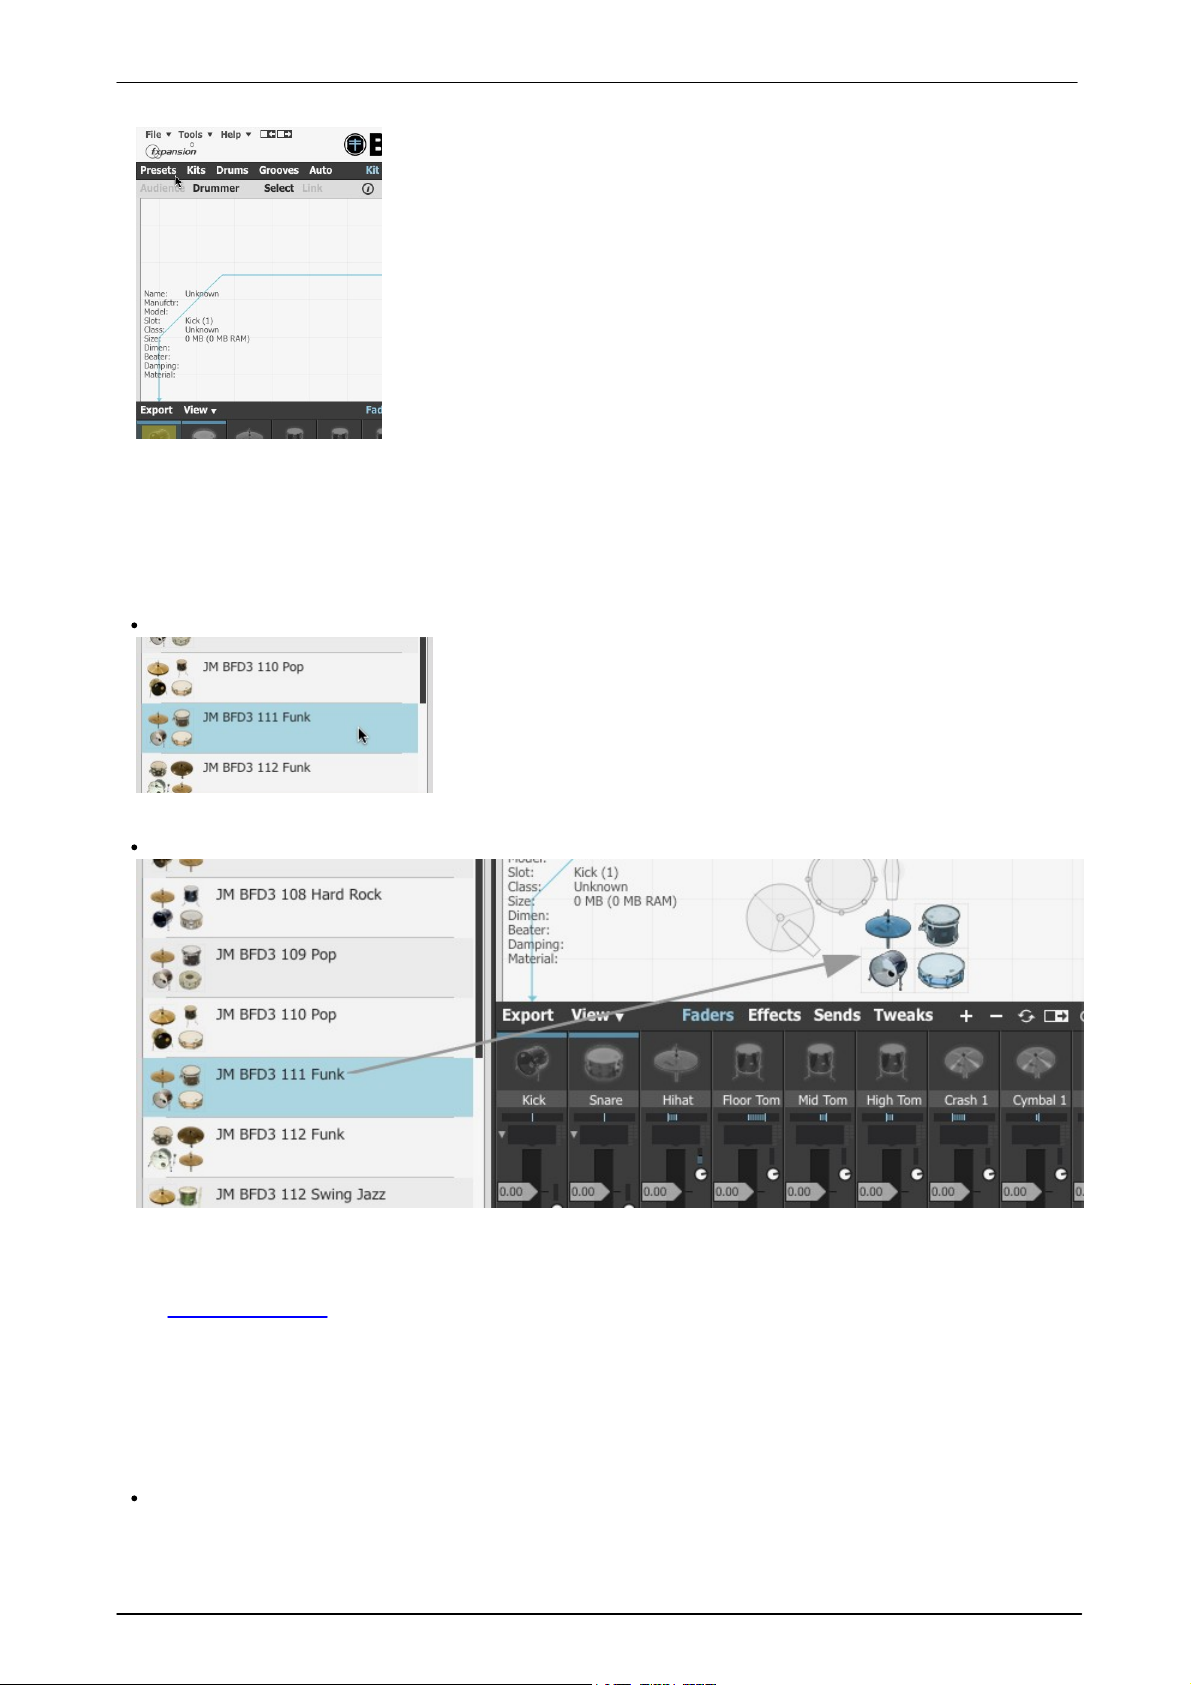
The Browser panel is actually switchable between the Browser and
Automation mapping panel. It is also capable of being hidden entirely.
If the Automation mapping mode is currently active or if the panel is
currently hidden, click any of the following Browser mode buttons - each of
which switches the Browser view to one of 4 loadable elements in BFD3:
Presets
Kits
Drums
Grooves
the entire state of BFD3
a set of Drums with additional Drum Editor settings
individual drums, cymbals or other instruments within a kit
such as kicks, snares, hihats, rides, crashes, toms,
cowbells
and other percussion
drum performance patterns
Double-click a Preset in the Browser listing to load it.
Loading a preset replaces the entire state of BFD3 including grooves,
key and automation mappings and session-specific settings. Therefore,
you are prompted for confirmation before the Preset is loaded.
This confirmation prompt can be disabled by deactivating the Confirm
Preset loading setting in the Options menu.
2 Browsing for sounds
The Browser lists only 1 of these 4 types of components at any one time - click the Presets, Kits, Drums and
Grooves tab buttons to switch between them.
Click the currently active Browser tab button to hide the Browser panel if required.
Loading a preset
By default, the Browser shows the available factory presets. Presets are loaded in either of 2 ways:
Double-click
Drag and drop
Drag and drop a Preset from the Browser listing onto the main part of the BFD3 interface. Again, you are
prompted for confirmation before the preset is loaded - the prompt can be disabled in the Options menu.
It is possible to avoid loading parts of presets by deactivating the various Include when loading buttons - see
the Browser reference section.
Try loading one of the factory presets - this loads a set of Grooves, so press Play in the BFD3 transport or in
your host/DAW to hear the sounds being played.
Loading a Kit
A Kit is loaded in the same ways as a Preset. In both cases, you are asked for confirmation when loading a Kit
by default - this prompt can be disabled by deactivating the Confirm Kit loading setting in the Options menu.
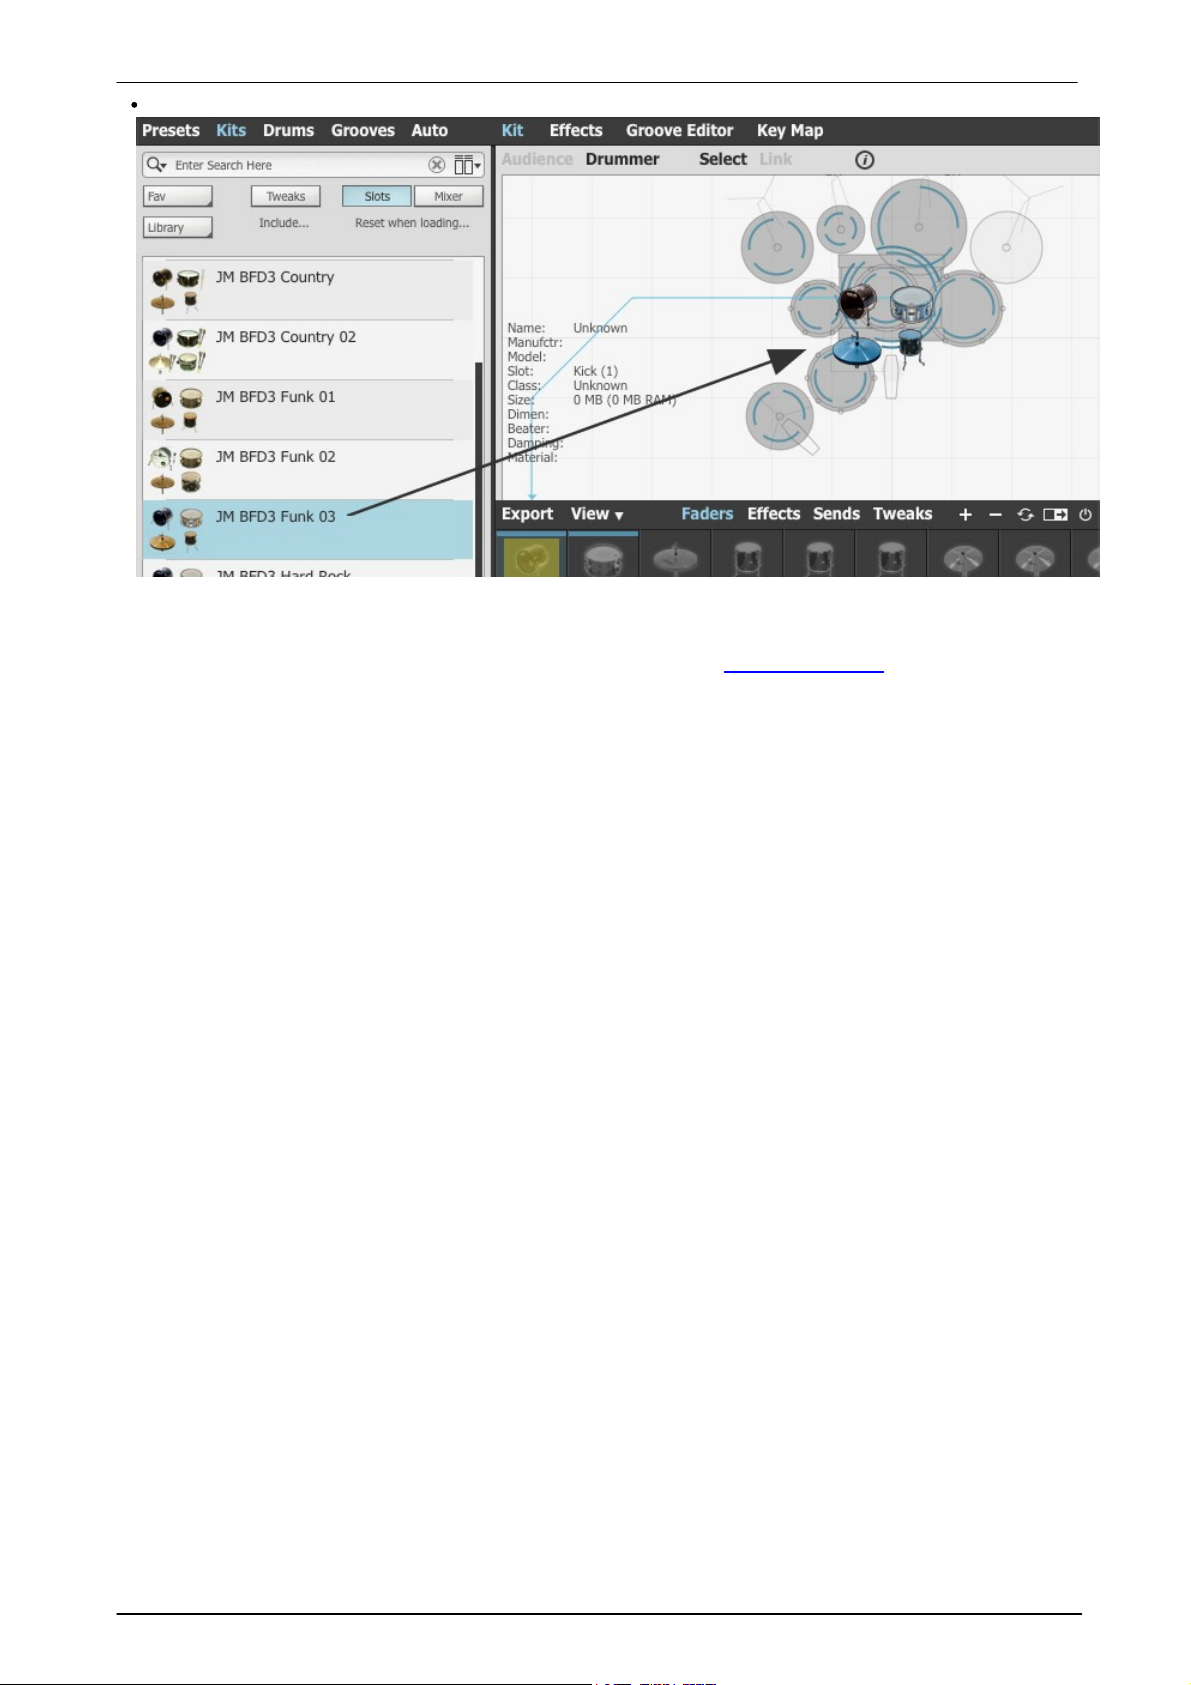
Double-click
Double-click a Kit in the Browser listing to load it.
© 2017 FXpansion
Page 18
BFD3 Operation Manual18
Drag and drop
Drag and drop a Kit from the Browser listing onto the main part of the BFD3 interface.
When loading a Kit it is possible to choose whether to Include its stored Drum Editor Tweaks and whether to
Reset the current array of Drum Slots and Mixer settings - see the Browser reference section for more details
on these controls.
© 2017 FXpansion
Page 19
Browsing for sounds 19
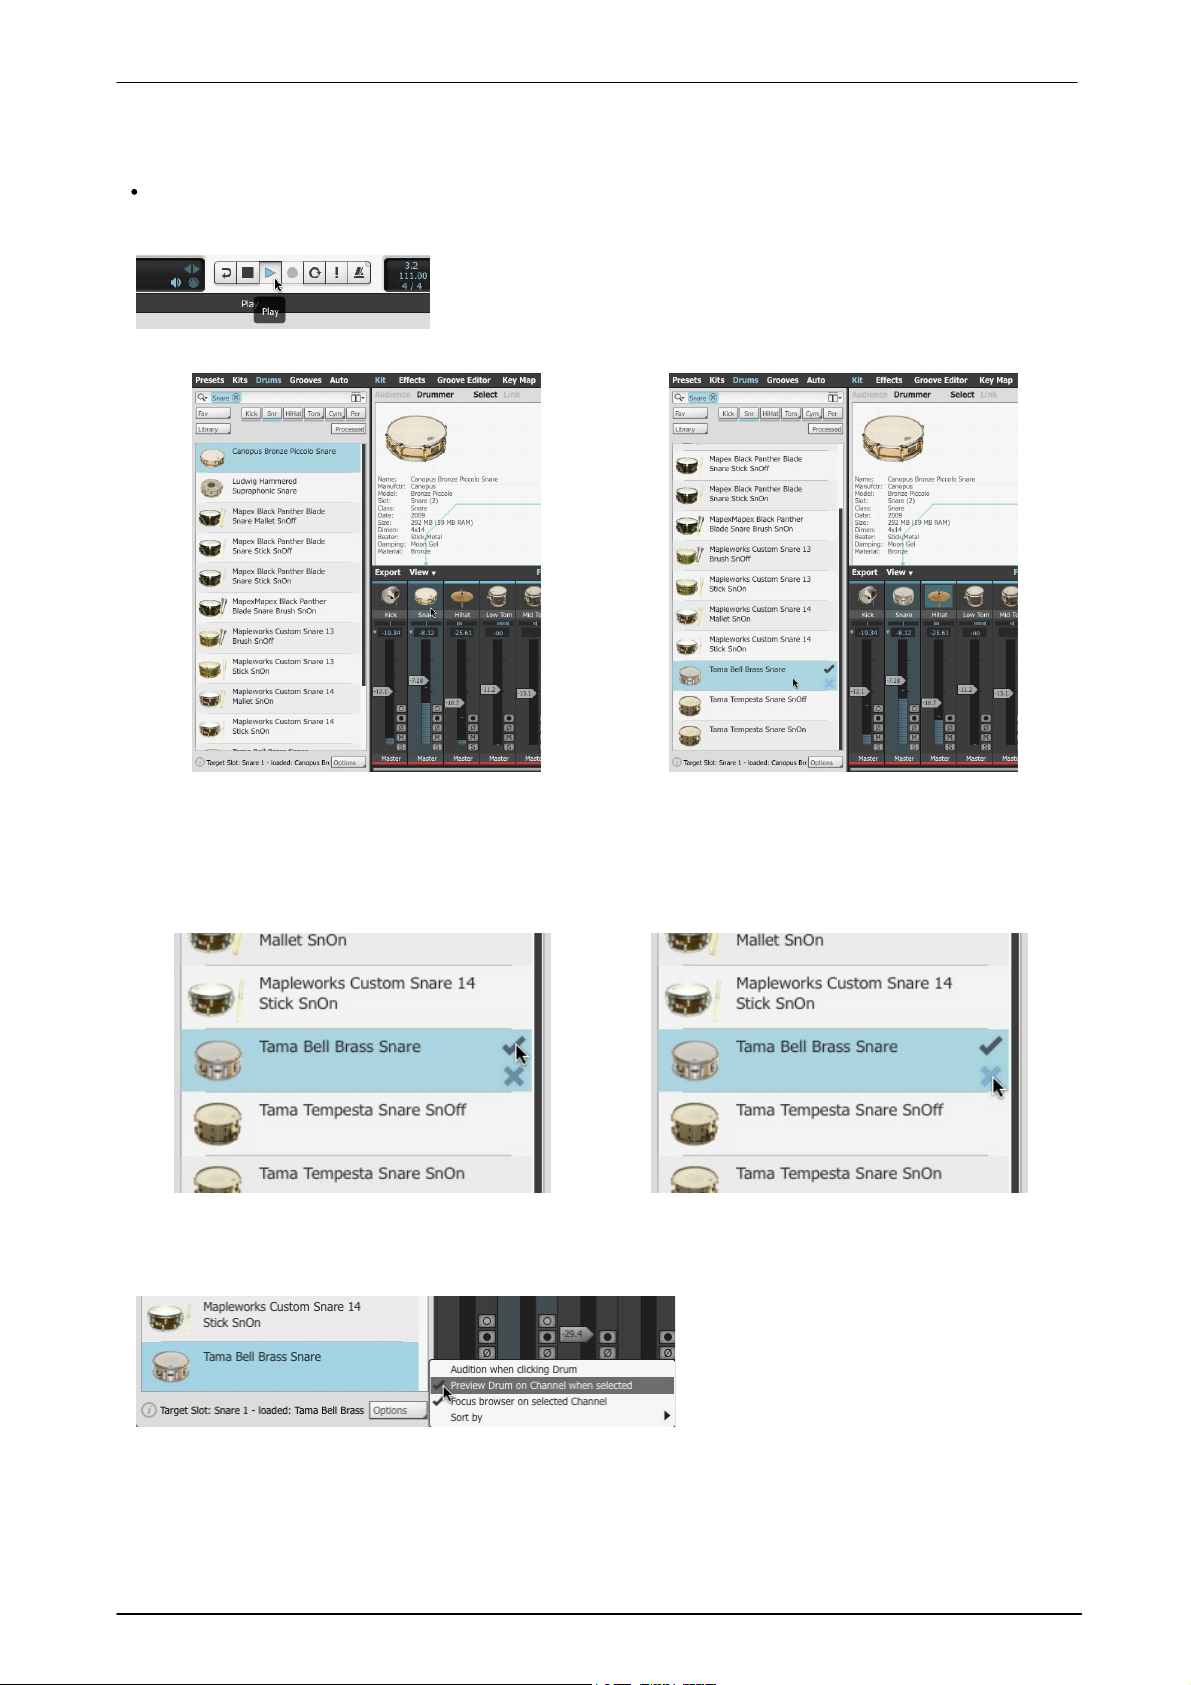
1. Press play on the BFD3 transport (or in your host/DAW) if it is not
already running.
2. Double-click the Snare channel in the mixer or
the Snare in the kit display. The snare slot is now
selected and the Browser switches to show the
available snares in your library (the Focus
Browser setting in the Drums Browser Options
menu must be enabled for this to occur).
3. Click a snare in the listing - this previews it in place
of the previous snare and will be heard whenever the
snare slot is triggered by the Groove engine (or by
incoming MIDI).
4. Try out the various snares until you find one you
want to load into the kit permanently - click the
Load button flashing at the right in order to do this.
... or click the Cancel button to return to the
previous snare without loading anything.
The preview-in-context function requires that
the Preview drum on channel when
selected setting is activated in the Drums
Browser Options menu.
Loading Drums into slots
Drums are the basic building blocks for building your own kit or for replacing parts of an existing Kit or Preset.
There are several ways of loading Drums:
Preview-in-context
Let's say you've loaded a preset as described above. Try swapping out the snare as follows:
© 2017 FXpansion
Page 20
BFD3 Operation Manual20
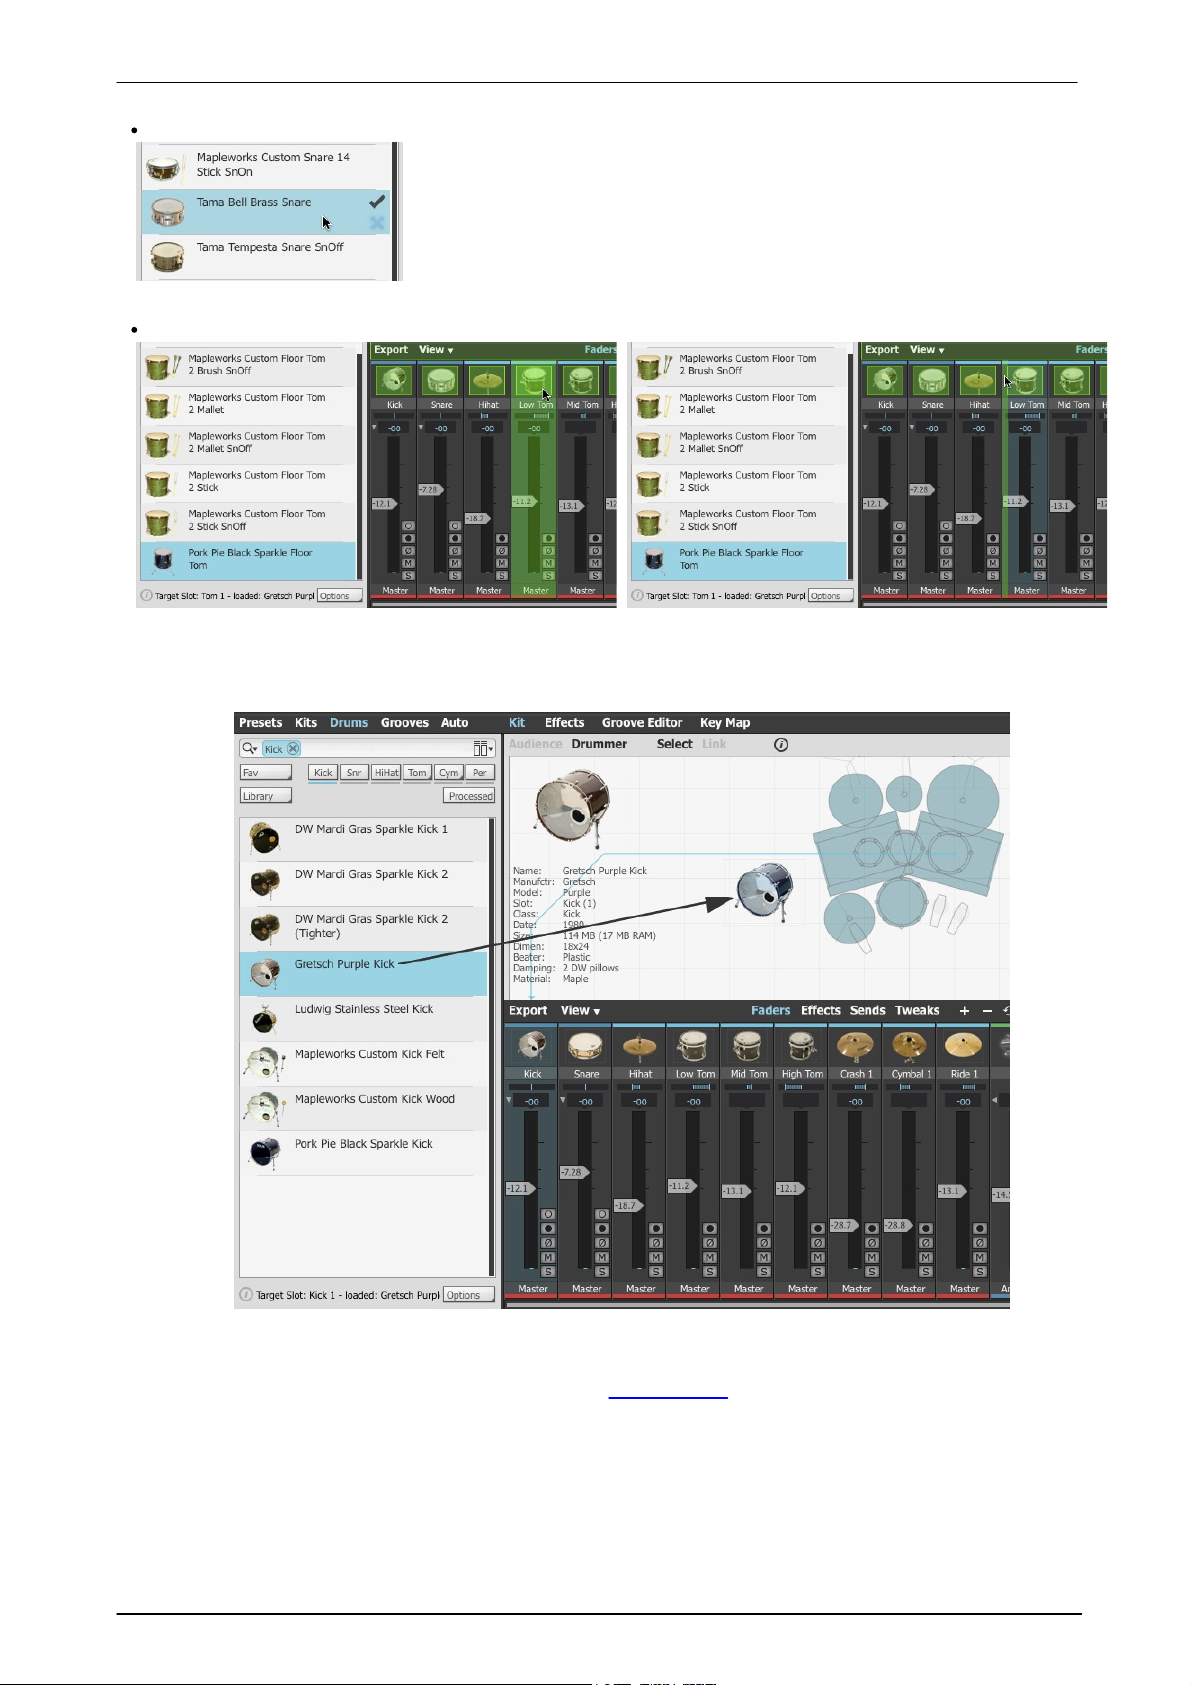
First, select the desired destination Drum slot by clicking it in the Kit display
or in the mixer.
Then double-click a Drum in the Browser listing to load it to the currently
selected Drum slot.
To load to a specific Drum slot, drag and drop from
the Drums Browser onto the desired Drum mixer
channel.
To load to a new Drum slot, drag from the Drums
Browser and drop between channels in the mixer.
Drums can also be loaded in the following ways:
Double-click
Drag and drop
Drums can also be dragged to the Kit display - into a specific slot or to an empty area in order to load the Drum
into a new slot. In the above example, a 2nd Kick is being added to the current Kit for a double-kick
configuration.
In addition, Drums can be loaded to Drum lanes in the Groove Editor page - either via drag and drop or by
double-clicking to load to the slot associated with the currently selected Drum lane.
The Target slot indicator always shows the currently selected destination slot when loading a Drum, along
with its currently loaded Drum if it exists.
© 2017 FXpansion
Page 21

Browsing for sounds 21
Audition methods
Drums can be auditioned in several ways before loading:
Preview-in-context
The preview-in-context system, enabled by the Preview drum on channel when selected setting in the
Options menu, is described above.
Hold down ALT during selection
Hold down ALT when clicking any Drum in the listing to audition its main articulation.
The preview click area is velocity-sensitive: click towards the left side of the Drum item in the Browser for lower
velocity layer previews, and towards the right for higher velocity layers.
Preview on select
If the Audition when clicking drum setting is enabled in the Options menu, the main articulation of the Drum
is played when it is selected - without the ALT key having to be held down.
Again, the preview click area for the Drum item is velocity sensitive.
Previewing articulations
The Info display panel contains functions for auditioning any articulation within the selected Drum. See the next
section for details.
Processed Drums
Many Drums in the listing feature the same underlying Drum, transformed with additional damping, tuning,
effects and other settings within BFD3. The purpose of these Processed Drums is to have an array of productionready sounds which can slot straight into a mix with little or no further adjustment. You can think of them as
'Drum channel strips'.
To show Processed Drums in the Browser, activate the Processed button. To revert to viewing only raw Drums
with no additional processing, deactivate the Processed button in the browser.
Loading files from BFD 1.5 and BFD2
Presets and Kits from BFD 1.5 and BFD2 are shown in the Browser if they are found within any data locations
scanned by BFD3's C ontent Locations panel. Their settings are recreated within BFD3 as closely as possible,
bearing in mind the differences within BFD3's audio engine and approach to dynamics and humanization.
If you have chosen not to add your BFD 1.5 and BFD2 file locations to BFD3, the Load from file and Import
functions in BFD3's File menu can be used to load files into the current session or to convert files to BFD3
format manually.
Loading Grooves
See the Grooves Browser section for information on loading Grooves.
© 2017 FXpansion
Page 22
BFD3 Operation Manual22
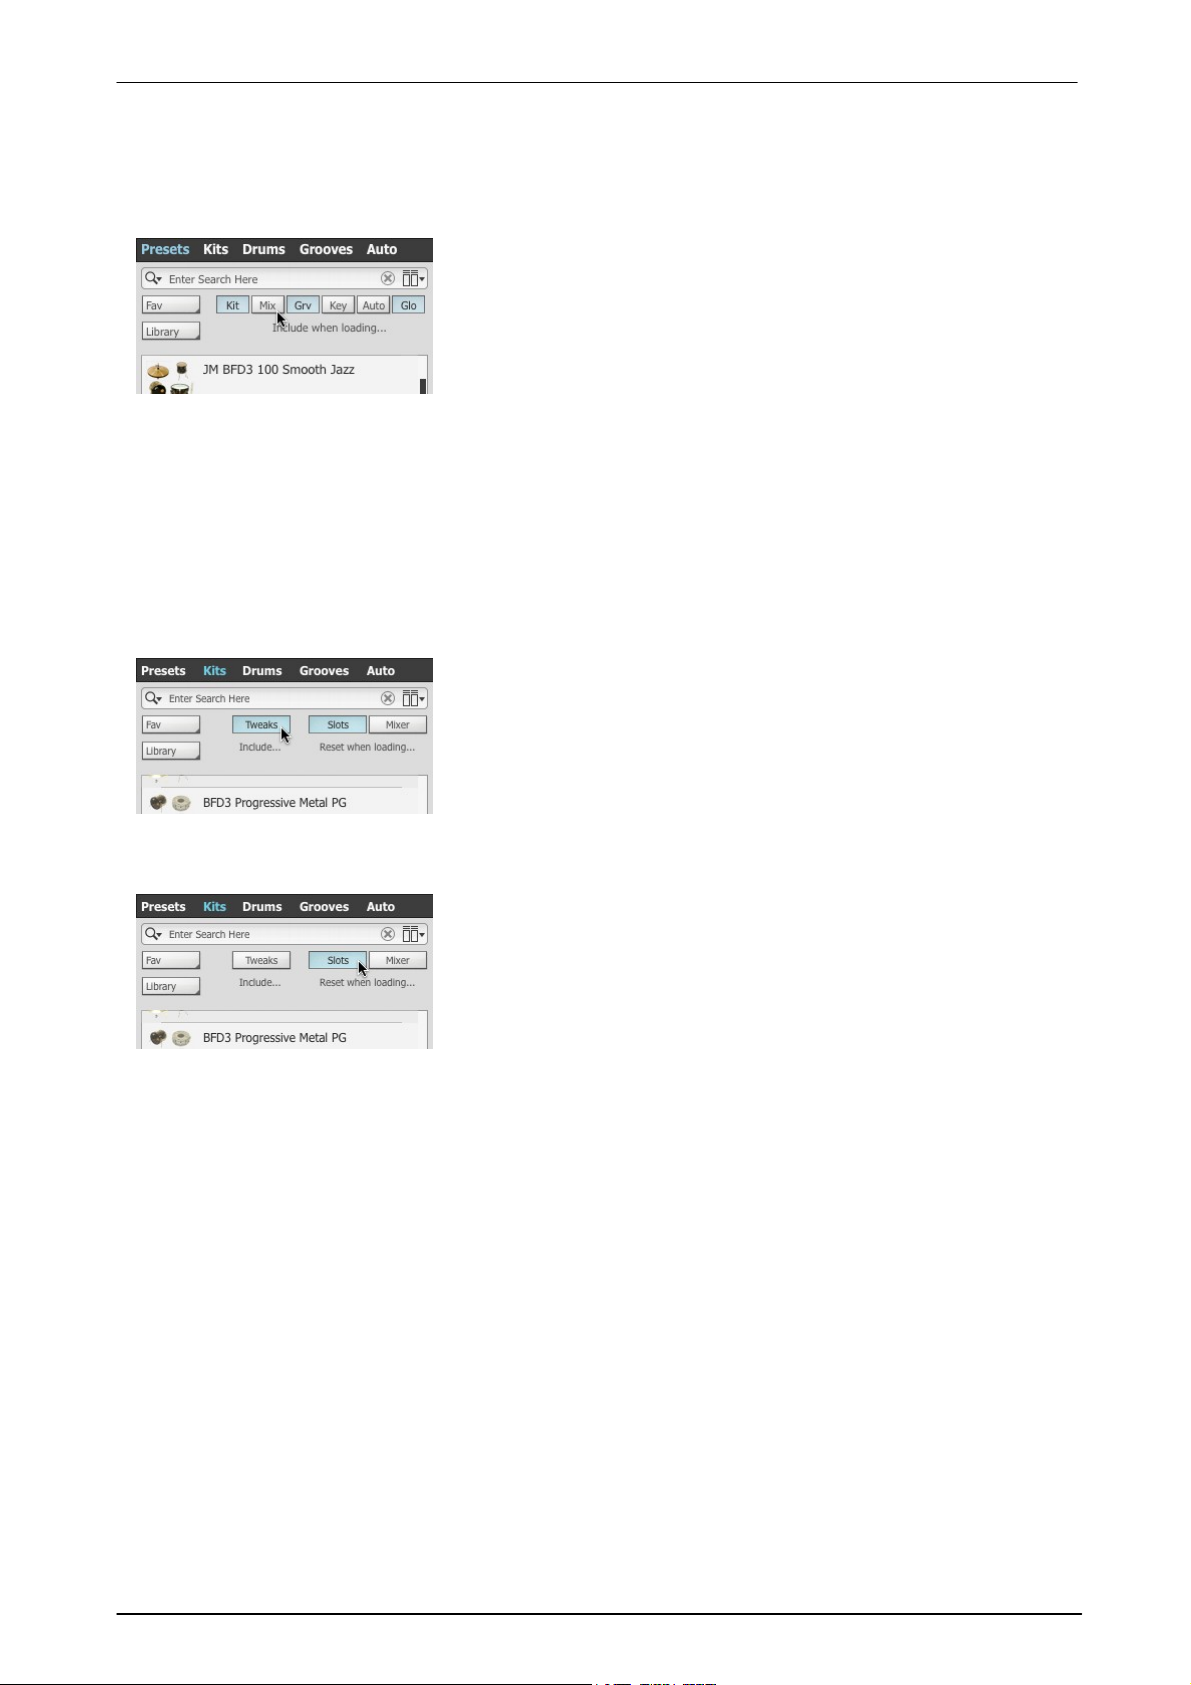
When the Preset Browser is visible, several toggle switches are shown
at the top of the Browser panel. These allow you to activate or
deactivate certain elements when loading Presets.
By default, all elements of Presets are loaded - effectively replacing the
entire previous state of BFD3.
By deactivating its switch, any of the following elements can be
prevented from loading:
In the Kit Browser, if the Include... Tweaks button is activated, the
Drum Editor settings for each Drum in the Kit are loaded.
If the button is deactivated, the Drum Editor settings are reset to
factory defaults when a Kit is loaded.
These buttons toggle whether certain elements in BFD3 are reset when
loading a new Kit.
Slots
If the Slots button is activated, any current slots not which are used in
the kit to be loaded are removed.
If the button is deactivated, only slots used by the kit are affected unused slots remain completely unaffected.
2.1 Browser reference
Loading options for Presets and Kits
Include when loading...
Presets
• Kit (Drums and Drum Editor settings)
• Mix (Mixer)
• Grv (Groove Palette, Drum Track and Groove Editor settings)
• Key (Key Map)
• Auto (Automation map – MIDI CC, note and host automation assignments)
• Glo - (Global settings, Session preferences)
By default, the Key and Auto buttons are deactivated, because typically it would not be desirable to keep
changing these settings when trying different Presets.
Kits
Reset when loading... (Kits only)
Mixer
If the Mixer button is activated, all mixer channels are reset when the kit is loaded - unused mixer channels
including Aux channels are deleted and the Drum channels used by the Kit are set to factory defaults.
If the button is deactivated, the current mixer configuration and settings remain unchanged.
Processed (Drums only)
This button toggles visibility between regular Drums and Processed Drums in the Browser listing.
Processed Drums are regular Drums saved with additional Drum Editor and mixer channel settings for a more
produced, mix-ready sound compared to that of a raw underlying Drum.
Processed Drums are shown separately to regular Drums to reinforce the fact that loading them changes the
entire contents of the Drum channel including mixer settings, which is much more difficult to overcome than
returning to the previous Drum if you decide you don't like the one you just loaded.
© 2017 FXpansion
Page 23
Browsing for sounds 23
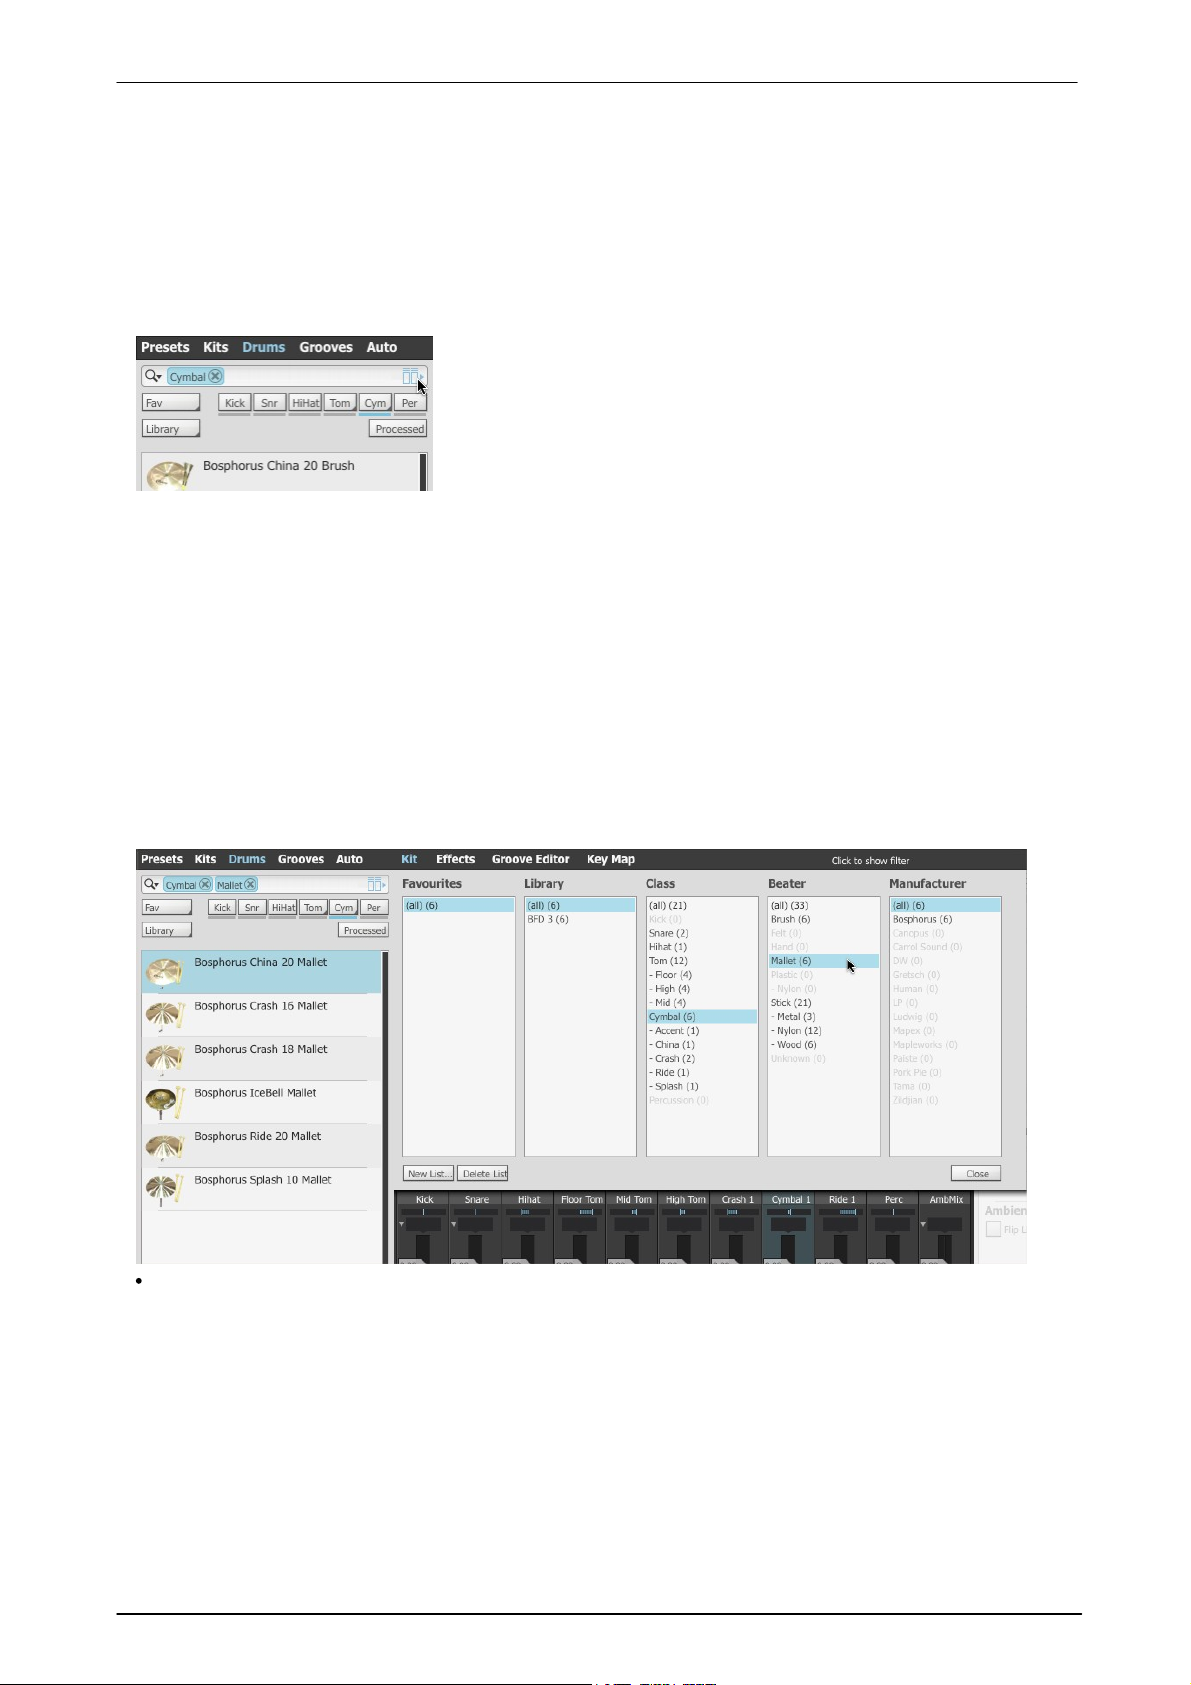
The Drums Browser offers a number of criteria with which to filter the
listing.
Favourites
Favourites are user-defined groups to which any Drums can be added working with Favourite Lists is discussed below.
Filtering the browser listing
The Browser's filtering functions allow you to narrow down the Browser listing according to various criteria.
Click the Filters button to open the Filters panel - this panel allows you to see all available filtering criteria
simultaneously.
Many filters are also available on the main Browser panel in the form of Quick-filter drop-down menus - see
below.
Filters panel: Drums
The Filters panel shows all filtering criteria simultaneously. The numbers in brackets represent the number of
items that would be available when specifying each of the filtering criteria.
Library
The Library field refers to the original library to which the Drum belongs - for example, the BFD3 C ore Library
content represents a library, as does the BFD2 factory content, or any expansion pack.
Class
The C lass field represents the Drum class or type - whether it is a kick, snare, tom, cymbal, hihat or percussion
instrument. Toms and cymbals also feature sub-classes.
By changing the C lass that is shown by default for the currently selected slot, you can load any type of Drum
into it - not just those intended for the particular slot type, but please note that certain caveats apply when doing
so. See the 'Possible loading problems' section below for usage guidelines.
Beater
The Beater type varies according to various Drum classes.
Manufacturer
This filter type lets you see all Drums by certain manufacturer(s).
Filtering the listing to display only cymbals played with mallets
Filters panel: Kits, Presets
The Kits and Presets tabs of the Browser feature only 2 filtering criteria: Favourites and Library.
© 2017 FXpansion
Page 24
BFD3 Operation Manual24
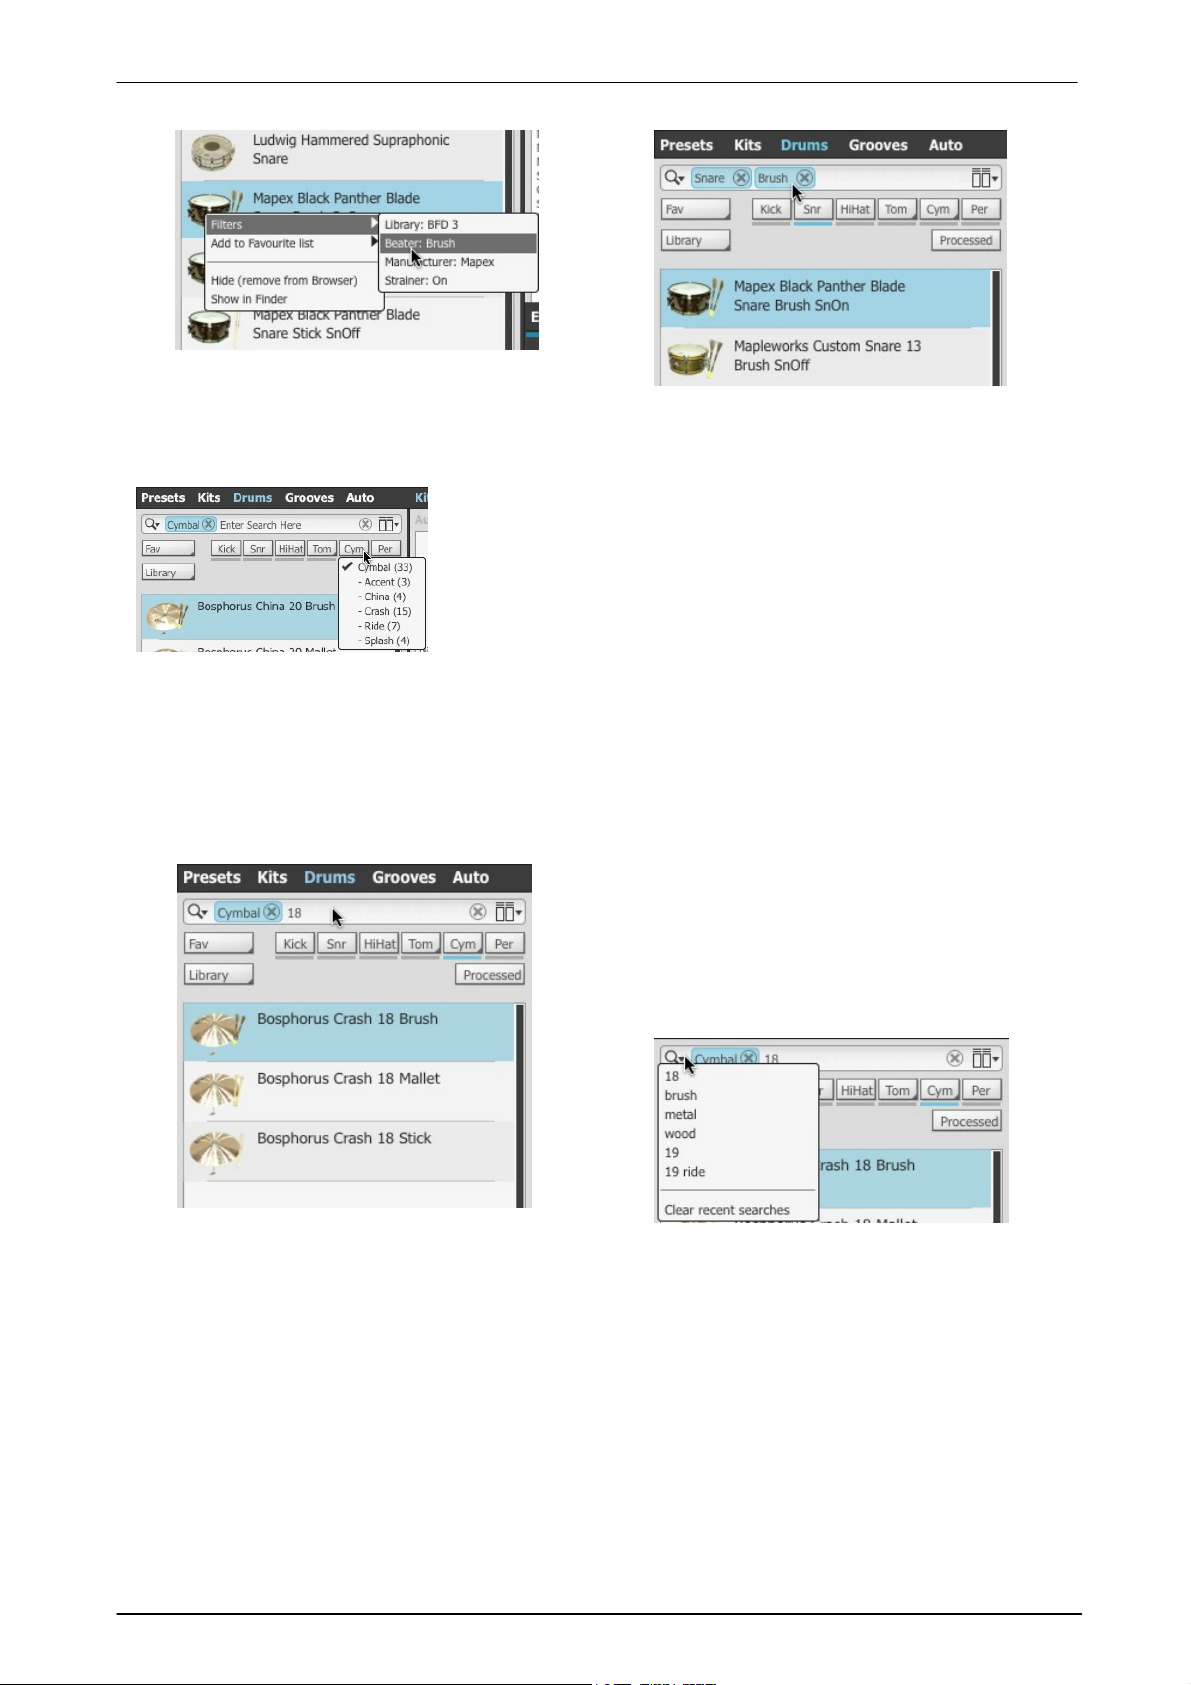
The Browser context menu contains a Filters submenu which lists the filtering criteria for an item in
the Browser listing.
Selecting the Beater type, for example, adds it to the
Search bar and filters the Browser listing accordingly.
The Drums Browser features dedicated buttons which display dropdown menus for filtering the Drum Class (and sub-class in the case of
toms and cymbals) - these achieve the same function as using the
popout Filters panel.
When the Focus browser setting is activated in the Options menu,
the corresponding Class filter button is enabled when selecting a Drum
slot if the Drums Browser is currently visible. Double-click the Drum slot
to bring the Drums Browser into view as well as enabling the relevant
Class filter.
Using the Search text-box is another way of narrowing
down the Browser listing.
Click the text-box and type a search term - the
example shows typing "18" while viewing all cymbals to
find all available 18" cymbals.
Searches operate in conjunction with the Filters
described above.
Setting filters according to Browser items
Quick-filters: Class filters (Drums only)
Quick-filters: Favourites and Library filters
The Presets, Kits and Drums Browsers all feature dedicated buttons which display drop-down menus for setting
the Favourites and Library filters. The Favourites system is described below.
Searching
The Recent searches drop-down menu lists all recent searches for the Drum type. Use the Clear recent
searches function to remove all entries from this menu.
© 2017 FXpansion
Page 25
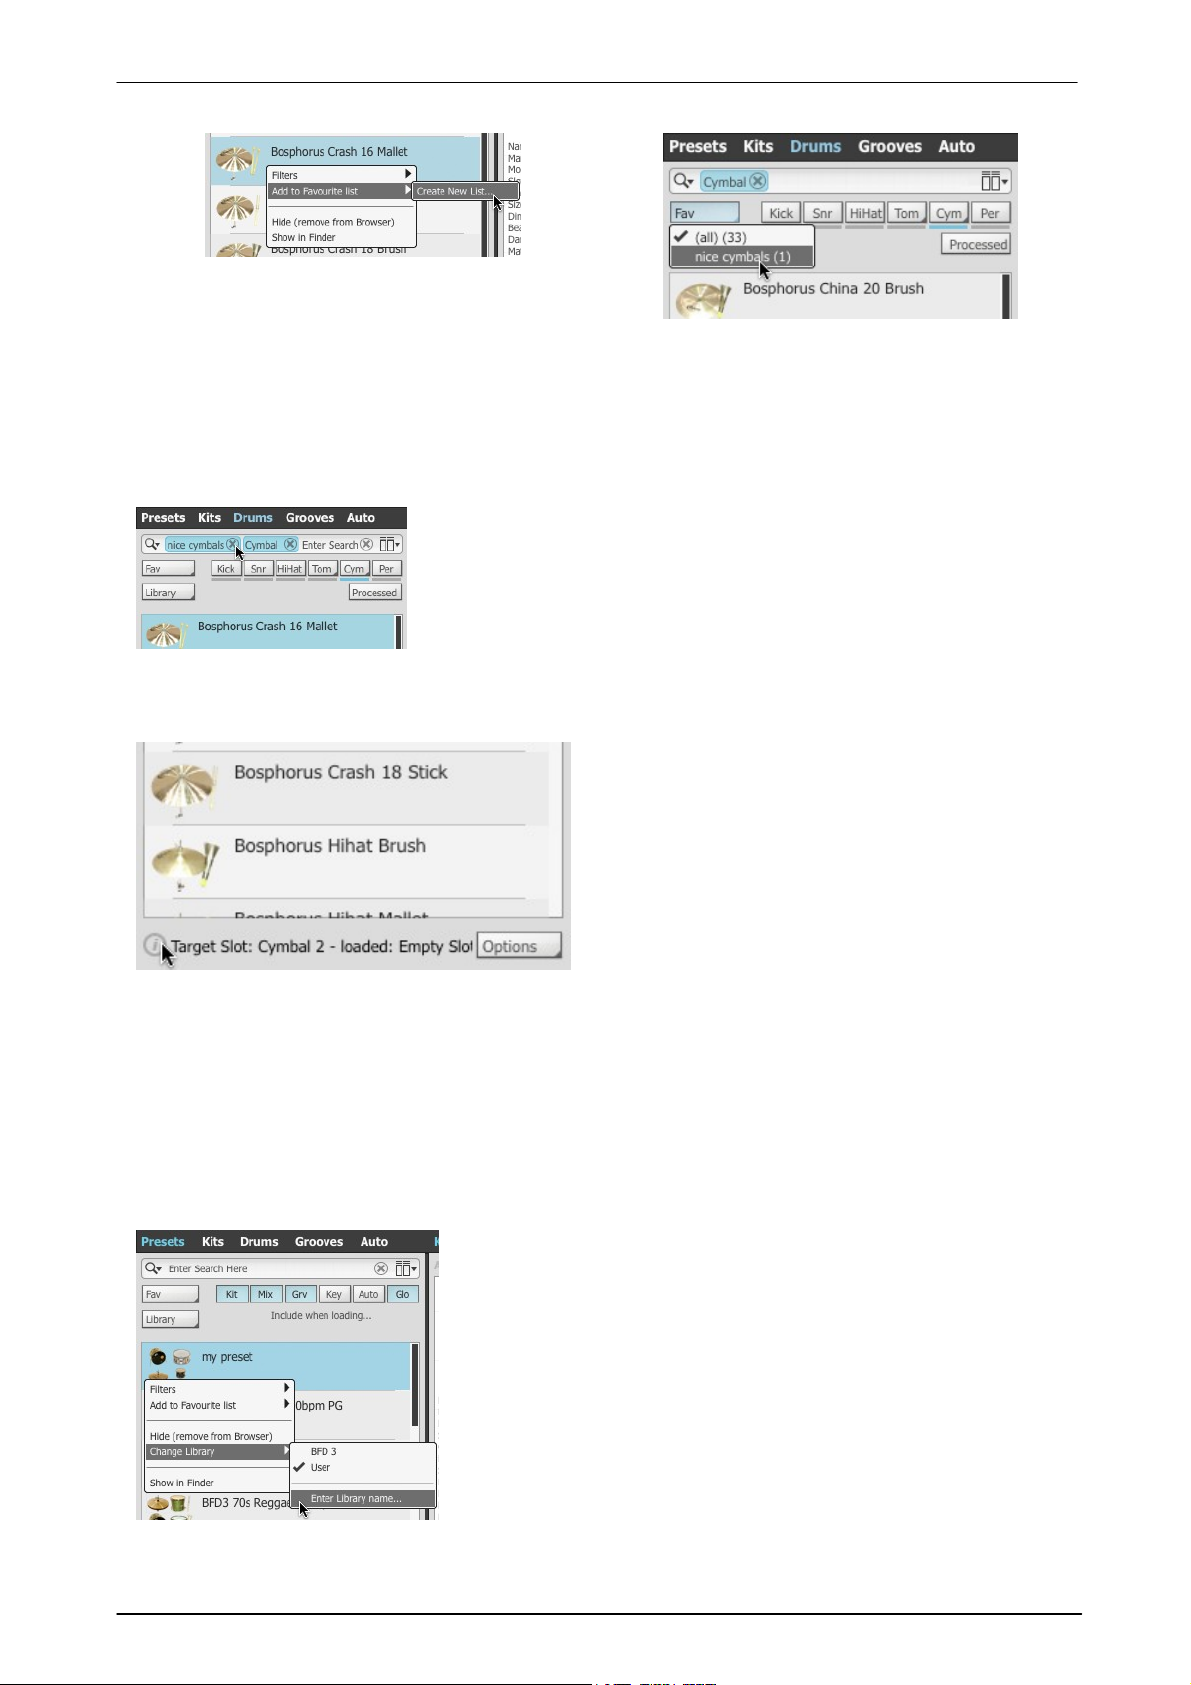
Favourites
Right-click on a Browser item in order to display
the Add to Favourite list function. This is a submenu showing all available Favourite Lists to which
to add the selected item.
In the above example, no groups have yet been
set up. C lick the Create New List... function to
display a dialog prompting you to enter a name for
the new Favourite List.
The item is added to the newly created Favourite
List, which is now shown on the Fav menu and also
in the Filters panel under the Favourites column.
When the List is activated, the Browser listing is
filtered to show the items in the List.
Each search term or filter that is active is represented within the search
bar at the top of the Browser panel.
To deactivate any item, simply click the Remove button at the right side
of each item - the item is then removed from the active searches/filters.
The Target Slot indicator displays information about
the destination Drum slot:
Target Slot
This part of the indicator shows which slot is currently
set as the destination for previewing-in-place and
loading when a Drum is selected in the listing.
Currently loaded in Slot
This part of the indicator shows the name of any Drum
already loaded into the slot.
Hide (remove from Browser)
This function removes the item from the Browser listing. No files are
deleted - instead, the item is hidden until the next time the content
location which includes them is rescanned.
To remove items permanently, their files must be deleted from disk.
The location of each file can be seen using the Info display panel (see
below) or the Show in Finder / Show in Explorer functions.
Change Library
This function is available only for user-generated Presets and Kits. It
allows the Library tag of the file to be set - an existing Library tag can
be used or a new tag can be created by using the Enter Library
name function.
Search/Filter status and removal
Browsing for sounds 25
Other controls
Target Slot indicator (Drums only)
Browser context menu
Right-click on any item in the Browser listing to display the Browser context menu.
Filters
This sub-menu provides a convenient way to set Filters according to the selected Preset/Kit/Drum. For Presets
and Kits, the sub-menu shows the Library Filter settings. For Drums, the Library, Beater and Manufacturer
Filter settings are shown. Click any of these items to filter the Browser listing according to the Filter setting.
Add to Favourite list
This function is used for the Favourites system - see above.
Show in Finder (Mac)
Show in Explorer (Windows)
This function displays the selected file within a system file window (Finder on Mac, Explorer on Windows).
© 2017 FXpansion
Page 26
BFD3 Operation Manual26
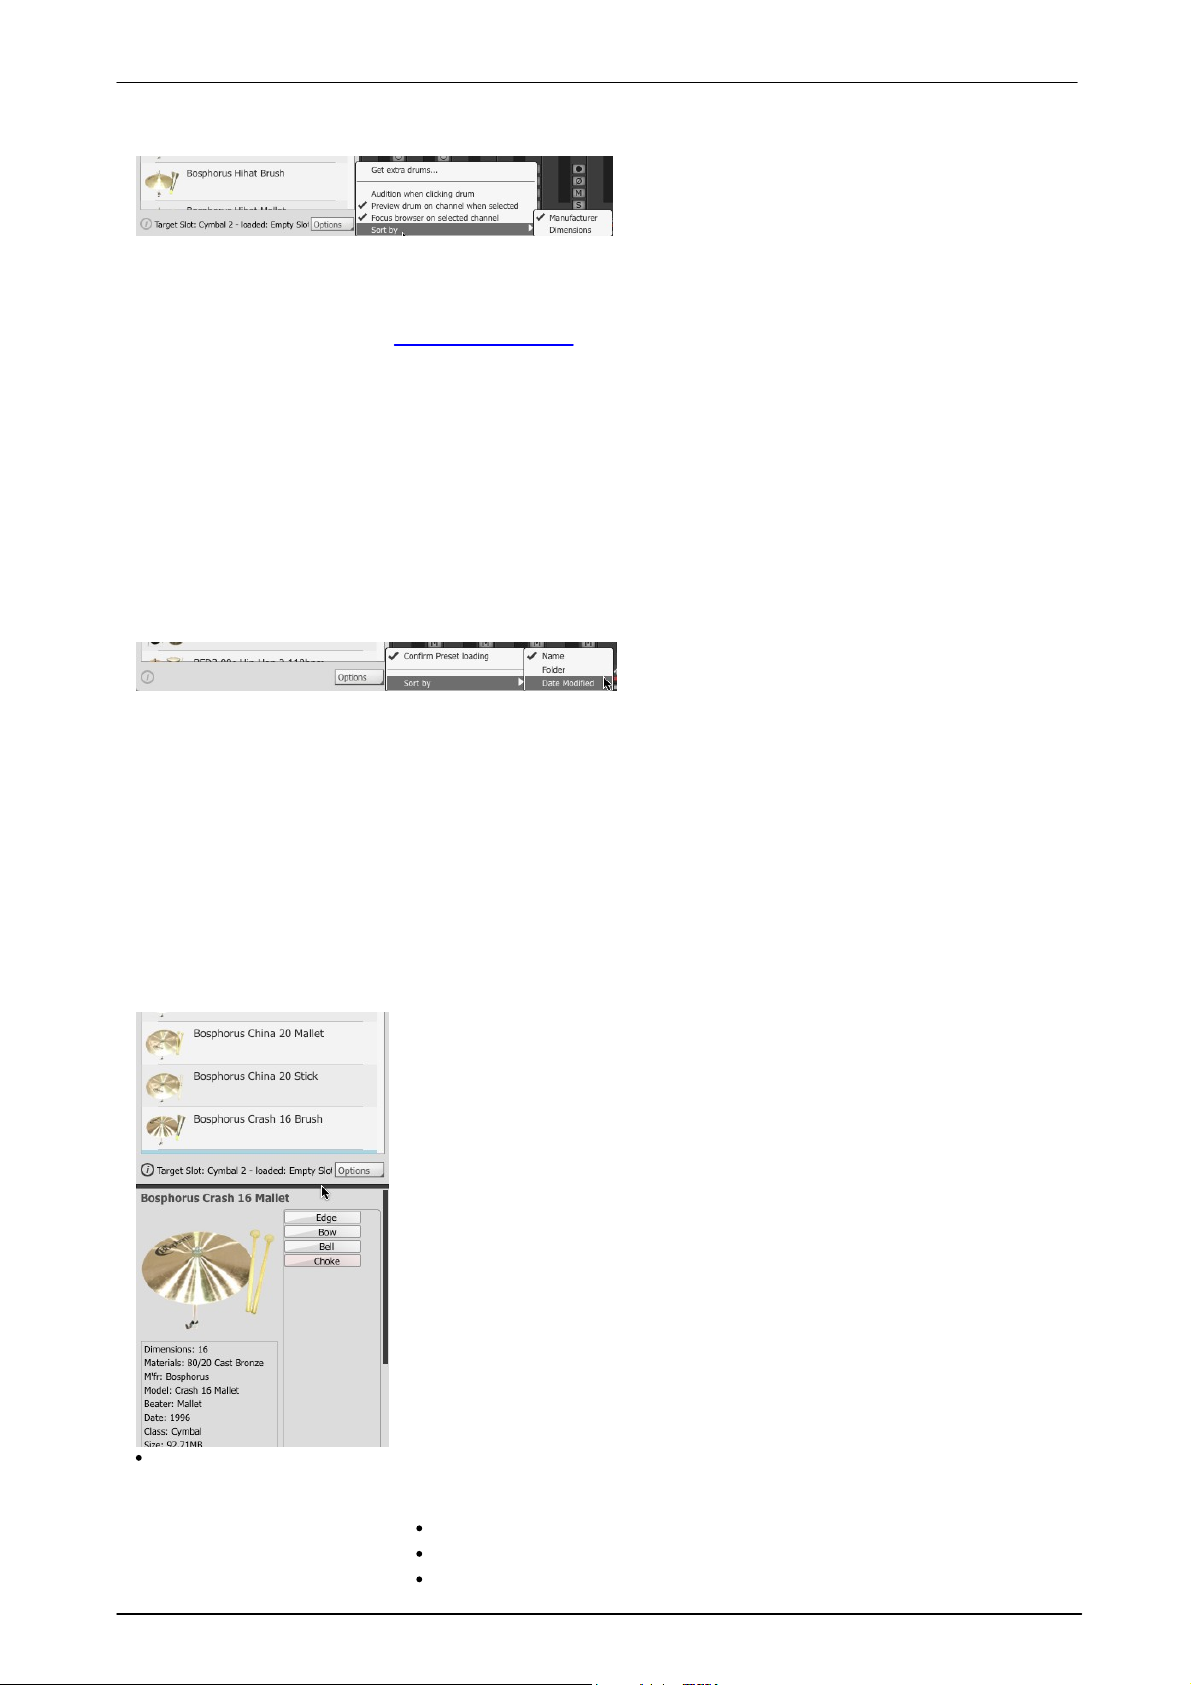
Most functions in the Options menu are available
only when the Drums Browser is currently visible.
The Sort by function offers a number of ways to
order items in the Browser.
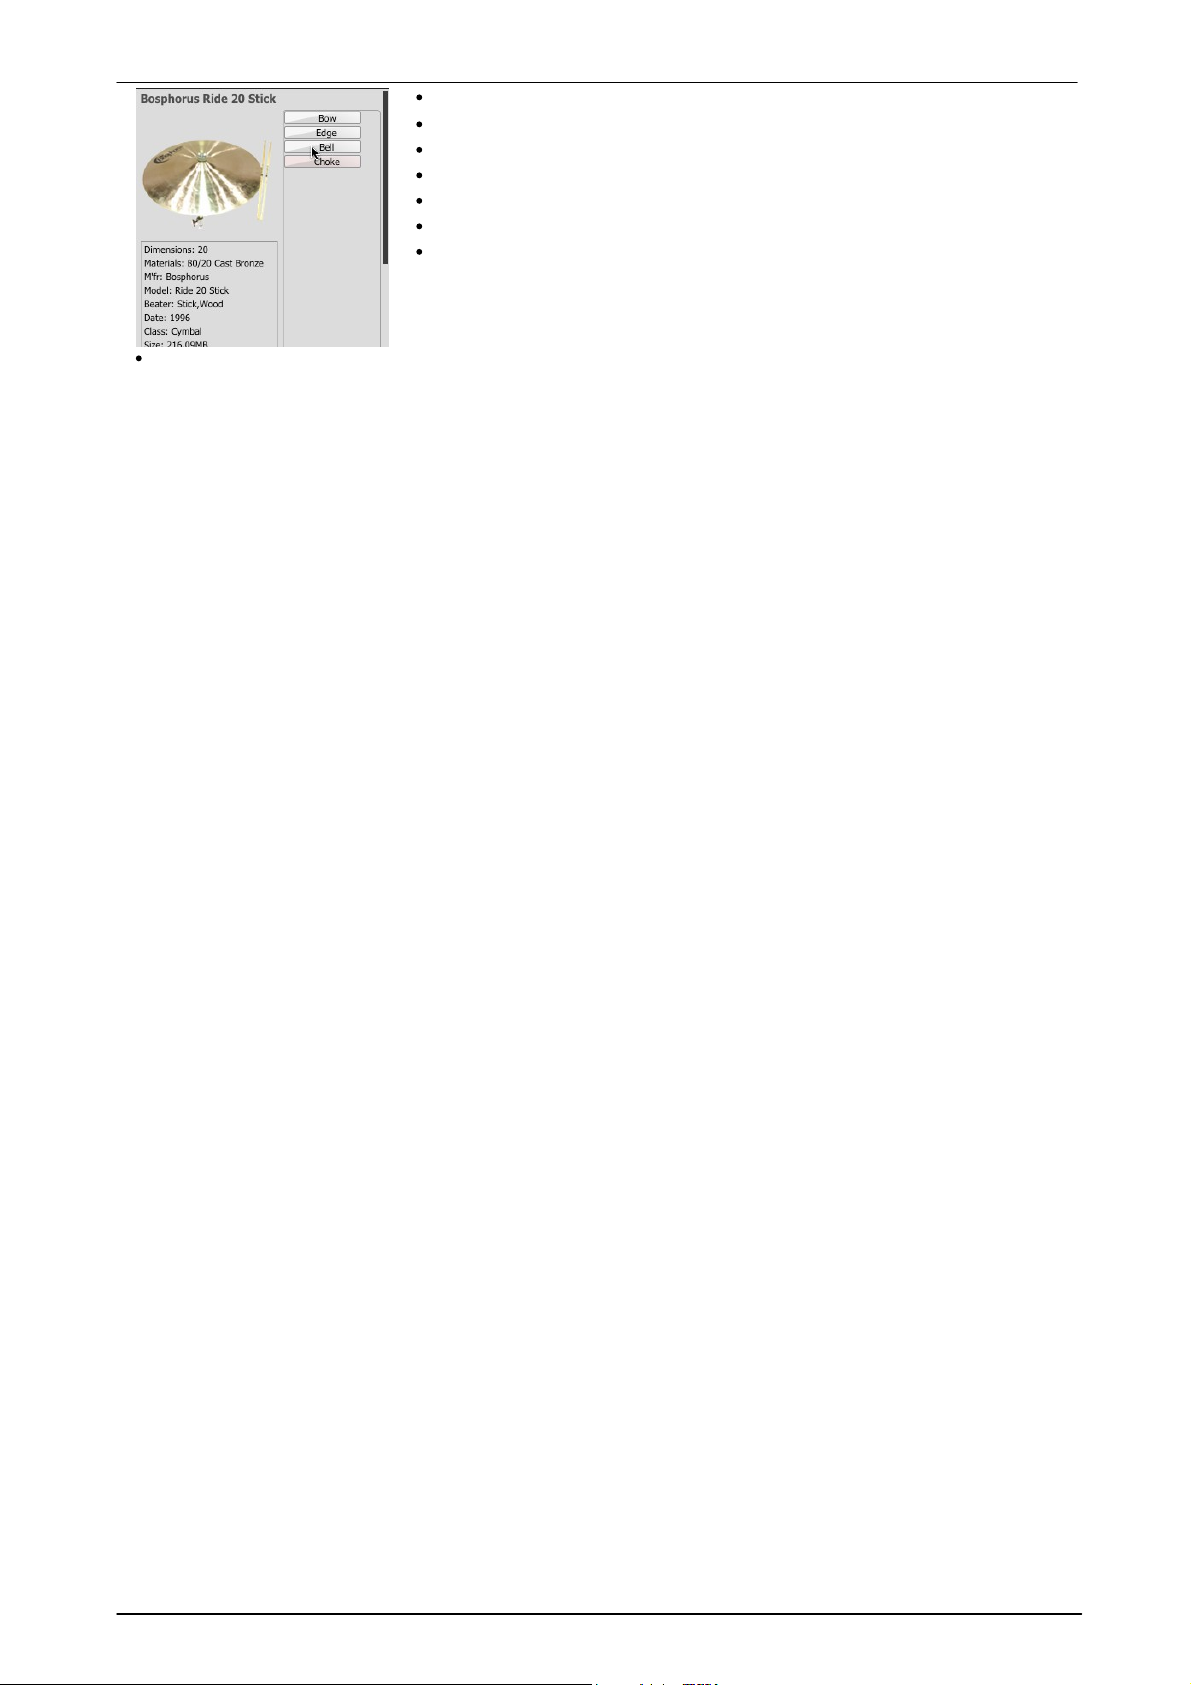
Resizing the Info display
Activating the Info display button enables the Info display at the lower part
of the Browser. This display contains information about the currently
selected item in the Browser. For Drums, it also has additional functions for
manually auditioning individual articulations.
Click and drag up/down on the separator above the Info display to resize the
area of the Browser devoted to the actual item listing and the Info display
panel at the bottom.
Presets, Kits
The info display shows information about which Drums exist in each of the
slots within a Preset or Kit. Any contained Drums which are invalid unauthorized, not present or corrupt - are listed in red.
The location of the Preset or Kit file is also shown.
Drums
The Info display shows information about the selected Drum and audition
functions for its articulations.
Articulation audition strips
Each articulation present within the selected kit-piece can be previewed by
clicking its Audition strip. C lick towards the left of the strip for lower velocity
layers, and towards the right for higher layers.
Info
The info box shows factory information about the selected kit-piece.
Dimensions
Materials
manufacturer
Options menu
Get extra drums
This function opens the FXpansion website and displays available expansion libraries for BFD3.
Import samples (Drums only)
Clicking this button opens the Sample import panel with which you can create single-articulation mono or stereo
Drums with multiple velocity layers from a set of one of more samples. These Drums can be loaded from the
Browser into any BFD3 session after they are created.
Audition when clicking Drum (Drums only)
Enabling this setting results in the main articulation of each Drum being automatically previewed as it is selected
in the Browser.
Preview drum on channel when selected (Drums only)
Activating this setting enables the preview-in-place functionality of the Browser.
Focus browser on selected channel (Drums only)
With this setting activated, selecting a Drum slot or Drum mixer channel results in the relevant Drum type being
shown in the Browser listing. This means that with a kick slot selected, the Browser shows available kicks, when
a snare slot is selected, the available snares are shown, and so on.
Sort by...
Presets and Kits can be sorted by Name, Folder or Date Modified (again, this is particularly useful for user
Presets/Kits). The Folder setting is particularly useful if user presets are arranged within sub-folders in the user
location or if factory or expansion pack Presets/Kits have been manually rearranged into sub-folders within the
factory location.
Drums can be sorted alphabetically by Manufacturer name or by their Dimensions.
Confirm Preset loading (Presets only)
Deactivate this setting to disable the confirmation prompt when loading a new Preset.
Confirm Kit loading (Kits only)
Deactivate this setting to disable the confirmation prompt when loading a new Kit (or when using the Load
random Kit function in the File menu).
Browser info display
© 2017 FXpansion
Page 27
Browsing for sounds 27
Auditioning a Bell articulation
for a ride cymbal
Model/name
Beater type
Production date
Class
Size on disk
Location in the data path
Factory Library
Possible loading problems
Even though each Drum slot in BFD3 is intended for a certain type of Drum - be it a kick, snare, hihat, cymbal or
percussion instrument - it also allows you to change the Drum C lass filter to load any Drum into any slot. When
building arbitrary kits in this way, you should be aware of the following potential issues:
1. Articulation mappings
Because different Drums have different numbers of articulations, the Key Map may not feature enough
articulation mappings for the non-standard Drum.
If you load a Snare into a Tom slot, for instance, the slot holds 6 Snare articulations although only 3 are actually
mapped. The extra snare articulations need to be mapped to MIDI notes before they can be triggered.
If, on the other hand, you load a Tom into a Snare slot, any mappings which exist for the Snare that do not have
a logical equivalent for a Tom 'fall back' to a suitable available tom articulation.
It is not recommended to load different types of Drums into the Hihat slot. This slot is specially designed to load
Hihats and there is no real reason to load any other type of Drum into this slot.
If you have an electronic drumkit, you should be aware that the Hihat slot is the only slot that supports variable
hihat control. Likewise, only the Snare1 slot supports positional sensing control.
2. Grooves
Even though Groove events do not rely on articulations being mapped, they are nevertheless usually intended
for a certain type of kit-piece articulation. In the vast majority of cases, Grooves are designed for kits that follow
suggested kit-piece slot uses.
Like articulation mappings, Groove events fall back intelligently to suitable articulations in the loaded kit-piece,
so this can be good for experimentation. Please bear in mind, however, that a Groove simply may not make
sense when played with a completely different type of kit configuration.
© 2017 FXpansion
Page 28
BFD3 Operation Manual28
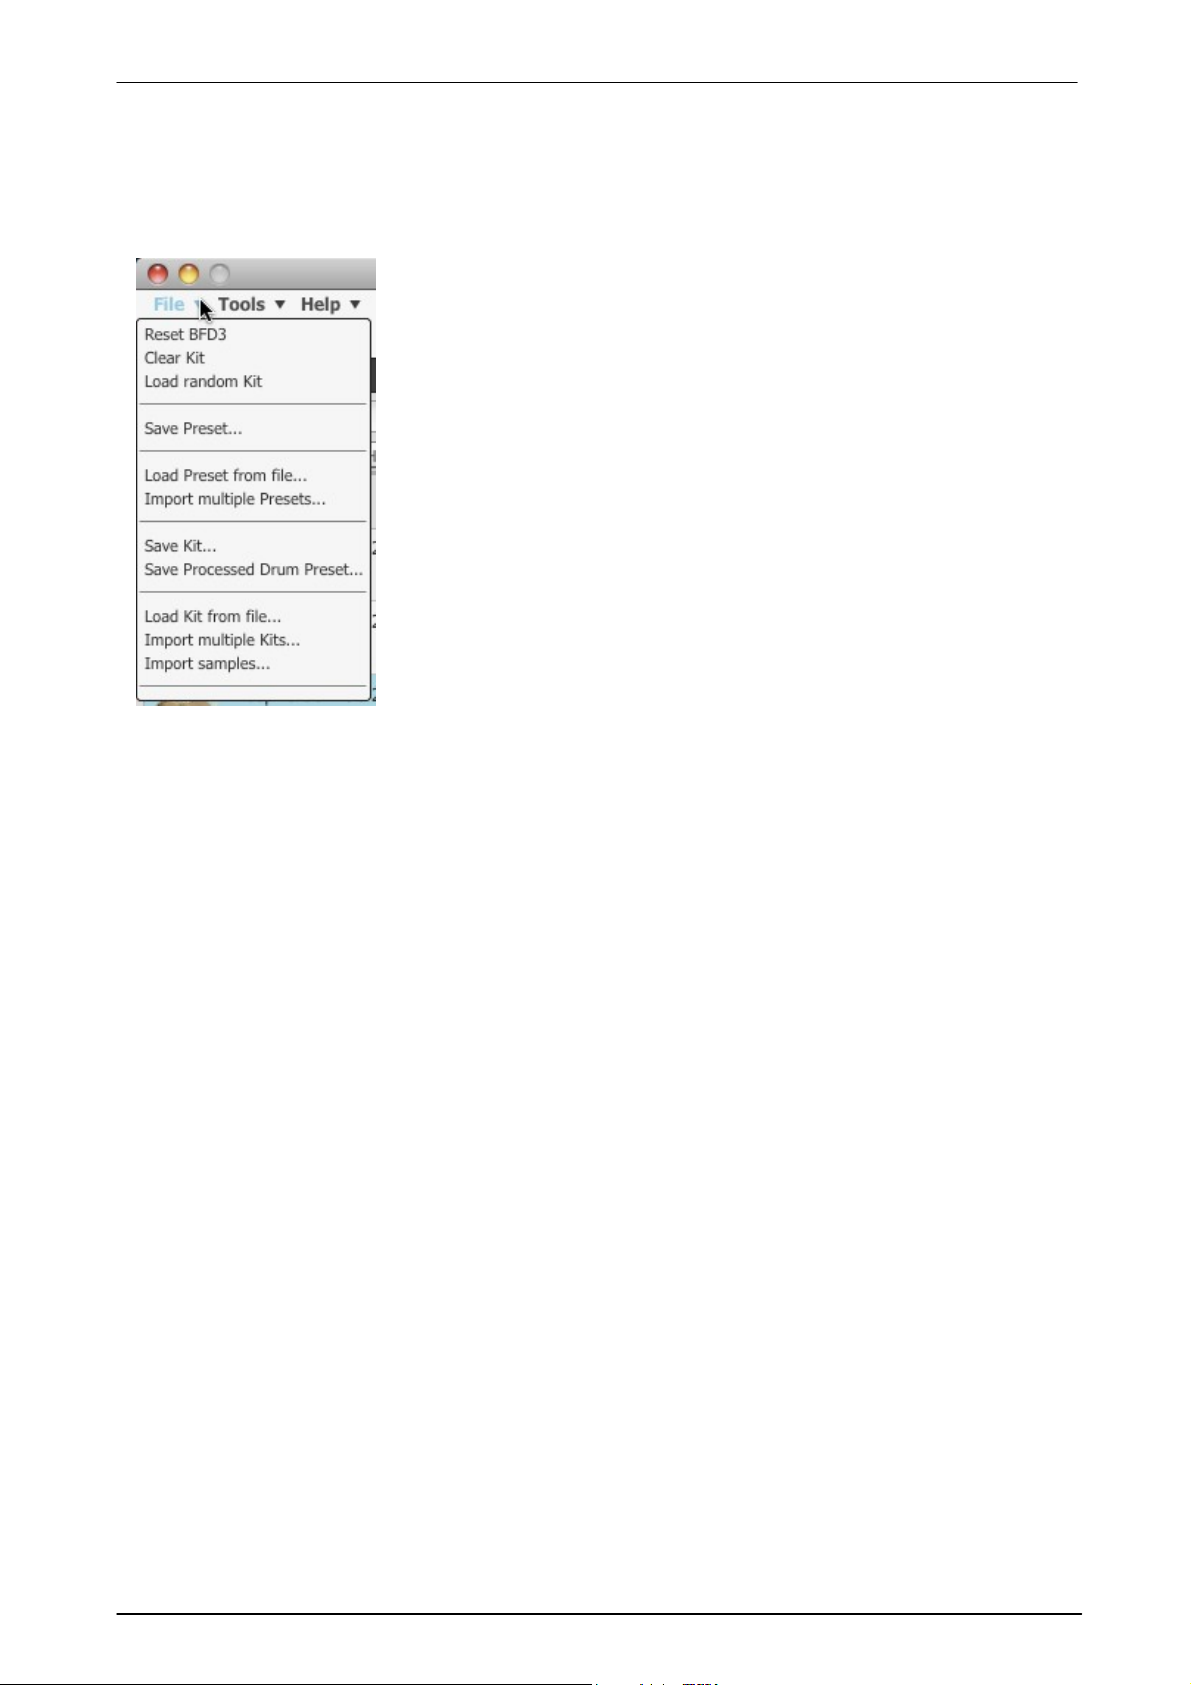
Reset BFD3
This function resets BFD3 to its factory default state.
Clear Kit
This function clears the kit within BFD3 while leaving other elements in BFD3
unchanged.
Load random Kit
This function loads a random selection from the available Drums into the
current set of Drum slots. You are prompted for confirmation in order to
continue, in the same way as when a Kit is loaded from the Browser.
Save Preset
Save Kit (not available with Groove Editor or Key Map panel visible)
These functions save a Preset (entire BFD3 state) or a Kit (Drums loaded into
Drum slots along with Drum Editor settings) from the current session.
A system file save dialog is displayed, prompting you to save the Preset or Kit
to disk. Type the desired name and hit ENTER or click the Save button.
2.2 BFD3 File menu
BFD3's File menu contains functions for managing your BFD3 session and is also used to save elements for
loading into future sessions.
Many functions on the menu are context-dependent - they vary depending on whether the Groove Editor, Key
Map panel or Automation panel are currently visible. These dependencies are specified below wherever
applicable.
The default save location is within the user folder: <user location>/Presets or <user location>/Kits
It is recommended that you use this location so that your Presets and kits are accessible from the Browser
without further adding and scanning of data locations.
Elements saved with Presets
When a Preset is saved, all the following elements are always saved with it:
• Kit (Drums and Drum Editor tweaks)
• Mixer
• Groove Palette, Drum Track and other Groove page settings
• Key Map
• Automation map – MIDI C C, note and host automation assignments
• Session Preferences
Using the Include while loading buttons in the Preset Browser, you can choose to load only certain elements
(with the exception of embedded Session preferences) when reloading Presets at a later time.
If you specifically do not want to save certain elements, for example Grooves or mixer effects, within a Preset,
you should first clear the Palette or remove the effects from mixer channels before saving the Preset.
Save Processed Drum Preset (not available with Groove Editor or Key Map panel visible)
This function saves the current slot's Drum with its Drum Editor settings as a Processed Drum preset, available
when the Processed button is activated in the Drum Browser (see the previous section for details).
Load Preset from file
Load Kit from file (not available with Groove Editor or Key Map panel visible)
Clicking this button brings up a system file open dialog that allows you to browse to and load a specific Preset or
Kit file into the current session. This may be useful after downloading a file created by another user.
When loading the file, you are prompted if you would like to save it into the BFD3 database for future use. Even
if you opt not to do so, the current session can be saved later as a Preset or Kit into your user location if you
change your mind.
These functions can load Presets and Kits in BFD 1.5 or BFD2 format - their contents are recreated within BFD3
as closely as possible.
Import Presets
Import Kits (not available with Groove Editor or Key Map panel visible)
These functions create BFD3 Presets or Kits within the database (saved into the user location) from a folder
containing these files. It may be useful to do this if downloading multiple presets or kits created by another
user.
© 2017 FXpansion
Page 29

Browsing for sounds 29
The Import Kits function can import BFD 1.5 or BFD2 format kit files - their contents are recreated within BFD3
as closely as possible.
The Import Presets function works only with BFD3 Presets - BFD 1.5 and BFD2 Presets can be loaded directly
from the Browser - simply ensure that your BFD 1.5 and/or BFD2 user locations are included within BFD3's
Content Locations panel.
Groove-related functions (only available with Groove Editor visible)
Save Groove palette
Save Groove
Export Groove MIDI
Export Groove audio
Export Drum Track MIDI
Export Drum Track audio
These functions are discussed in the Grooves section.
Key Map-related functions (only available with Key Map panel visible)
Load Key Map
Save Key Map
Save Key + Automation maps
Load Key Map from file
Import Key Maps
Save MIDI Event Log
These functions are discussed in the Key Maps section.
Automation Map-related functions (only available with Automation panel visible)
Load Automation Map
Save Automation Map
Save Key + Automation maps
Load Automation Map from file
Load Program Change Playlist
Save Program Change Playlist
Save MIDI Event Log
These functions are discussed in the Automation Maps section.
© 2017 FXpansion
Page 30
BFD3 Operation Manual30
BFD3 allows you to import mono or stereo .WAV files to create single-articulation
Drums, which can have multiple velocity layers.
The following caveats apply with the Sample Import function:
There can be only 1 articulation in the imported Drum. It can be either one
amplitude-scaled sample, or multiple velocity layers.
Imported Drums only produce sound in the direct bus. There is no facility for
multiple microphones or ambience channels. It is possible to add space to imported
sounds by using BFD3's reverb effects.
Only 1 channel is active for the imported Drum in the mixer, regardless of which
Kit-Piece slot is used, unless it is loaded into the kick1 or snare1 slots.
Samples can be mono or stereo, but you cannot use a combination of mono and
stereo samples in the same imported Drum.
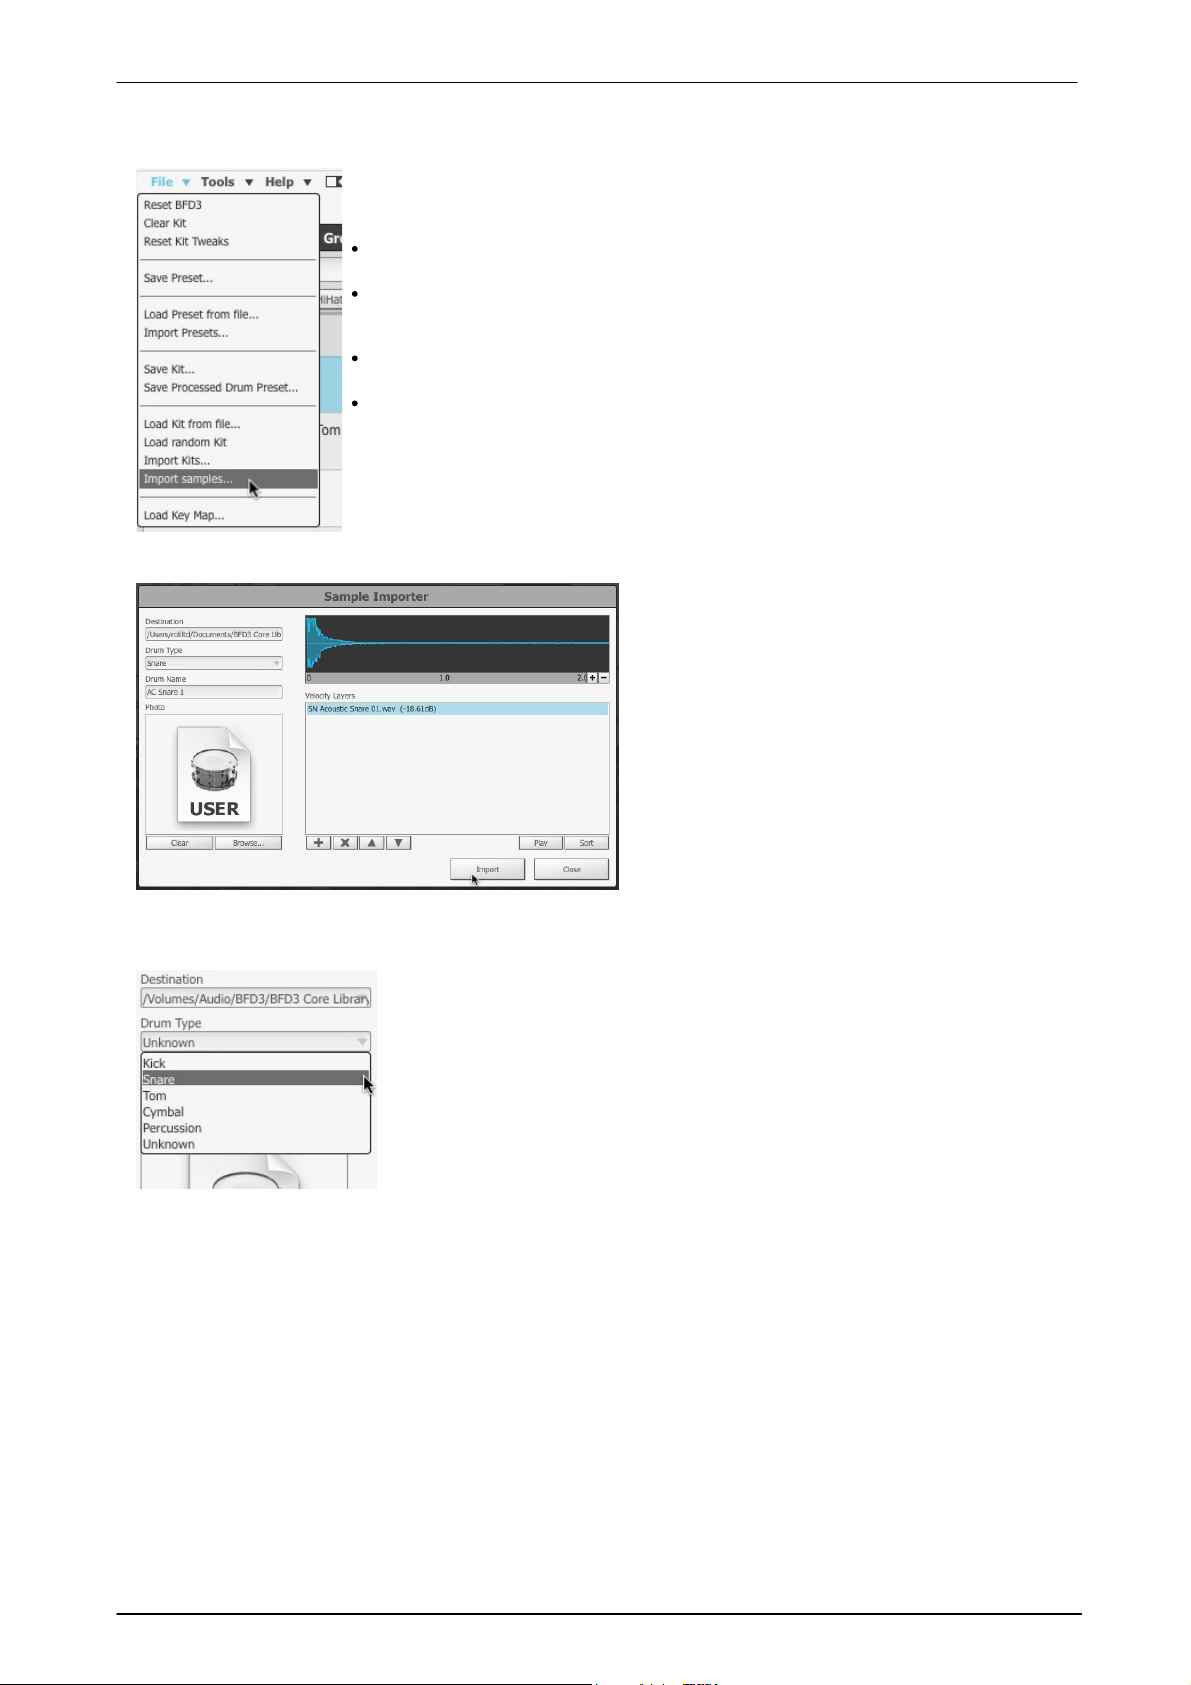
In order to create a Drum from a set of one or
more samples, you must open the Sample Import
panel using the Import samples... function in the
Drum Browser Options menu.
Import settings
Destination
Select a Content Location to which to save the
imported samples as a Drum.
Imported sounds stream in the same way as other
sounds in BFD3, so the path must be one of the
locations set up in the BFD3 C ontent Locations
panel.
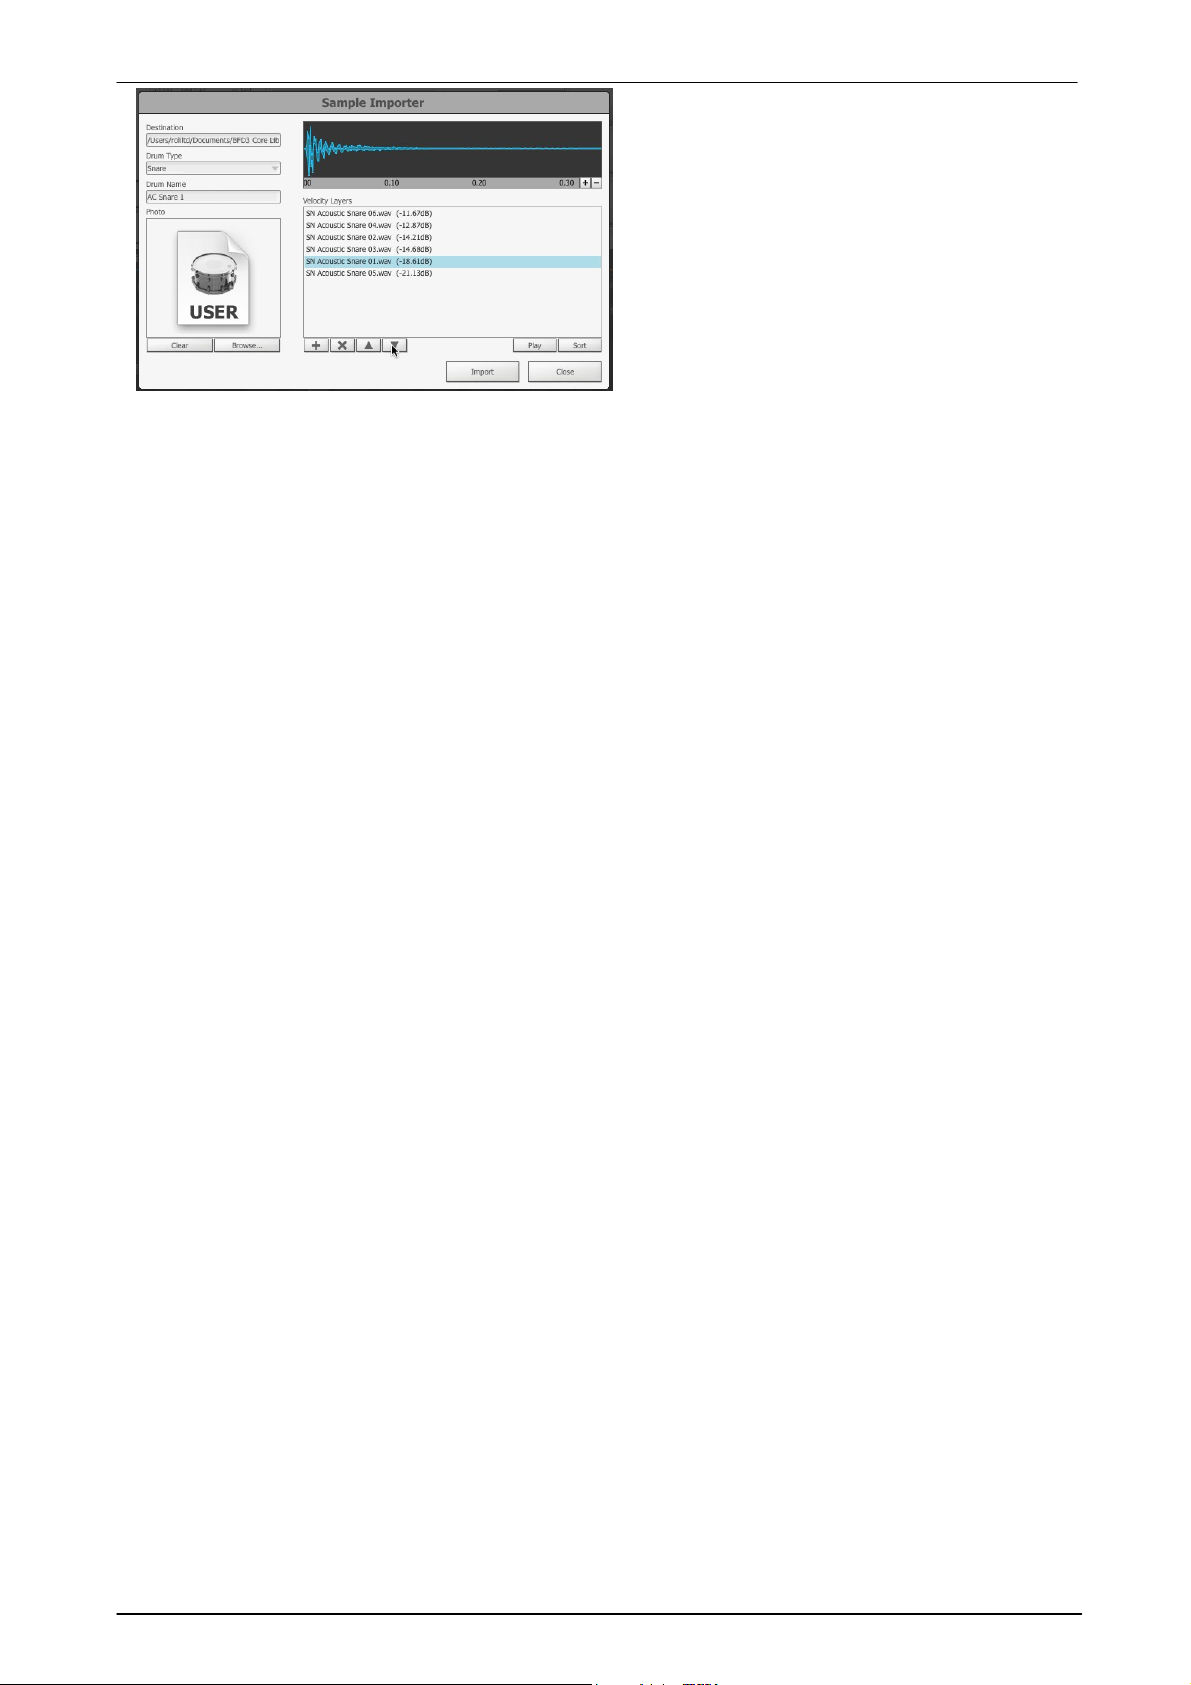
Choose the Drum type (C lass) from this drop-down menu. The Drum can be
classified as a Kick, Snare, Tom, C ymbal or Percussion Drum. Hihats are not
an available option because they would require more than one articulation.
If you require imported hihats, create separate Drums for open and closed
samples with a Percussion classification. Load each of these into Percussion
slots, then use the Key Map page to layer the relevant hihat articulations with
those of the imported Drums. It is advised to save the session as a Preset in
order to use it again in future if required.
2.3 Importing Samples into BFD3
Overview
Sample Import panel
If you receive an error when importing samples, make sure that you have adequate permissions to write to the
location, and try again.
Drum Type
Drum Name
Type a name for the created Drum. This is the name which is visible in the Drum Browser.
Photo settings
Any JPEG, PNG or TGA image file can be specified as a photo to associate with the imported Drum. If none is
specified, a default image is used.
Browse button
Clicking the Browse button opens a system file open dialog allowing you to browse to a JPEG, PNG or TGA file to
specify for the imported Drum. The file must have a resolution of 180x150 pixels.
Clear button
Clicking this button removes the photo currently specified for the imported Drum.
Velocity layer settings
This section lets you add samples, and sort them into the desired order, from the lowest velocity layer at the top
of the list, to the highest layer at the bottom.
© 2017 FXpansion
Page 31
Browsing for sounds 31
Add Layer(s)
Click this button to add a sample. Any mono or
stereo WAV file can be selected, but it must be at a
sample rate of 44.1kHz, at a bit depth of either 16
or 24 bit.
If only one sample is specified, BFD3 automatically
scales the amplitude of the imported Drum with
incoming Groove/MIDI event velocity.
If 2 or more samples are specified, they are split
proportionally across the velocity range. Any
additional mplitude scaling must be applied
manually with the Range control after the Drum
has been loaded.
Remove Layer(s)
With a sample selected, click this button to remove the sample from the list of velocity layers.
Move layer up
Click this button to move the selected sample up the list of velocity layers: it changes places with the sample
immediately above it.
Move layer down
Click this button to move the selected sample down the list of velocity layers: it changes places with the sample
immediately below it.
Import & Cancel
Click the Import button to import the Drum with the current settings - it is saved to the content location
specified and added to the current database, so once the Import operation is complete, it is now available to use
from the Drum Browser (it is not loaded automatically to the current session).
If you change your mind and decide that you don’t want to import a Drum at this time, click the Cancel button.
© 2017 FXpansion
Page 32
BFD3 Operation Manual32
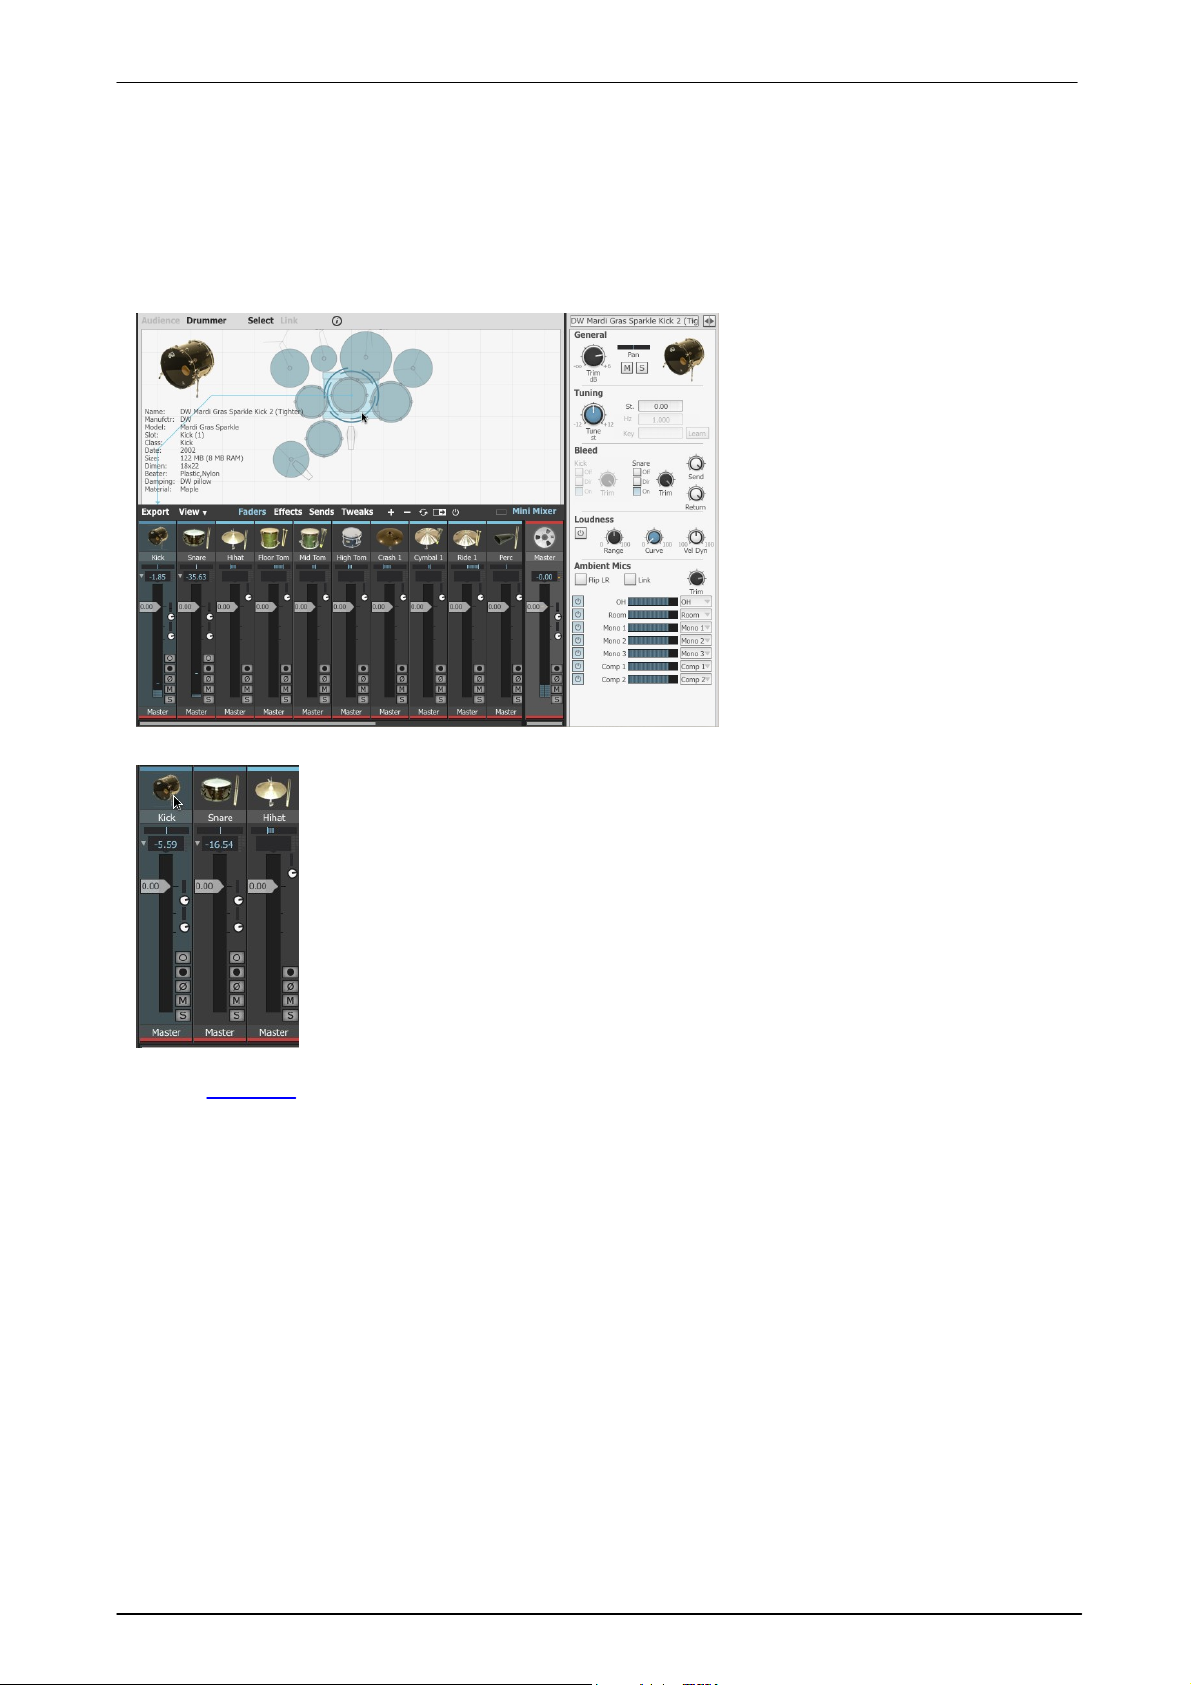
Central to BFD3 is the concept of
selection - selecting a Drum slot
results in showing its adjustable
parameters in the Drum Editor.
Selecting a Drum slot in the Kit
display
Click a Drum slot in the Kit display to
select it.
Selecting Drum slots is central to
many functions in BFD3.
As described in the previous chapter,
the selected slot is used as the target
destination slot for loading Drums
from the browser via double-click.
If the slot already contains a loaded
Drum, its contents are shown in the
Drum Editor when selected.
Selecting a mixer channel
Clicking a mixer channel to select it. If a channel is associated with a Drum - a Drum
channel or one of its mic sub-channels - it is also selected as the current Drum slot,
and its contents are displayed in the Drum Editor.
The differences between Drum slots and mixer channels
While some mixer channels represent Drum slots, this is not true of all mixer
channels, such as Ambient or Aux channels for example.
The currently selected Drum slot is effectively the last Drum slot that was selected.
3 Using BFD3's sounds
Once you've assembled a kit in BFD3 using the Browser (see the previous chapter), you're free to manipulate
the sounds using the extensive Drum modelling and mixing engine.
This section provides an overview for using BFD3's audio engine. The subsequent sections throughout this
chapter go into more detail about each part of the interface.
1. Drum slots and selection
See the Kit display section for further details on using the Kit display panel to manage slots and use the Link
function for Drum layering.
© 2017 FXpansion
Page 33
Using BFD3's sounds 33
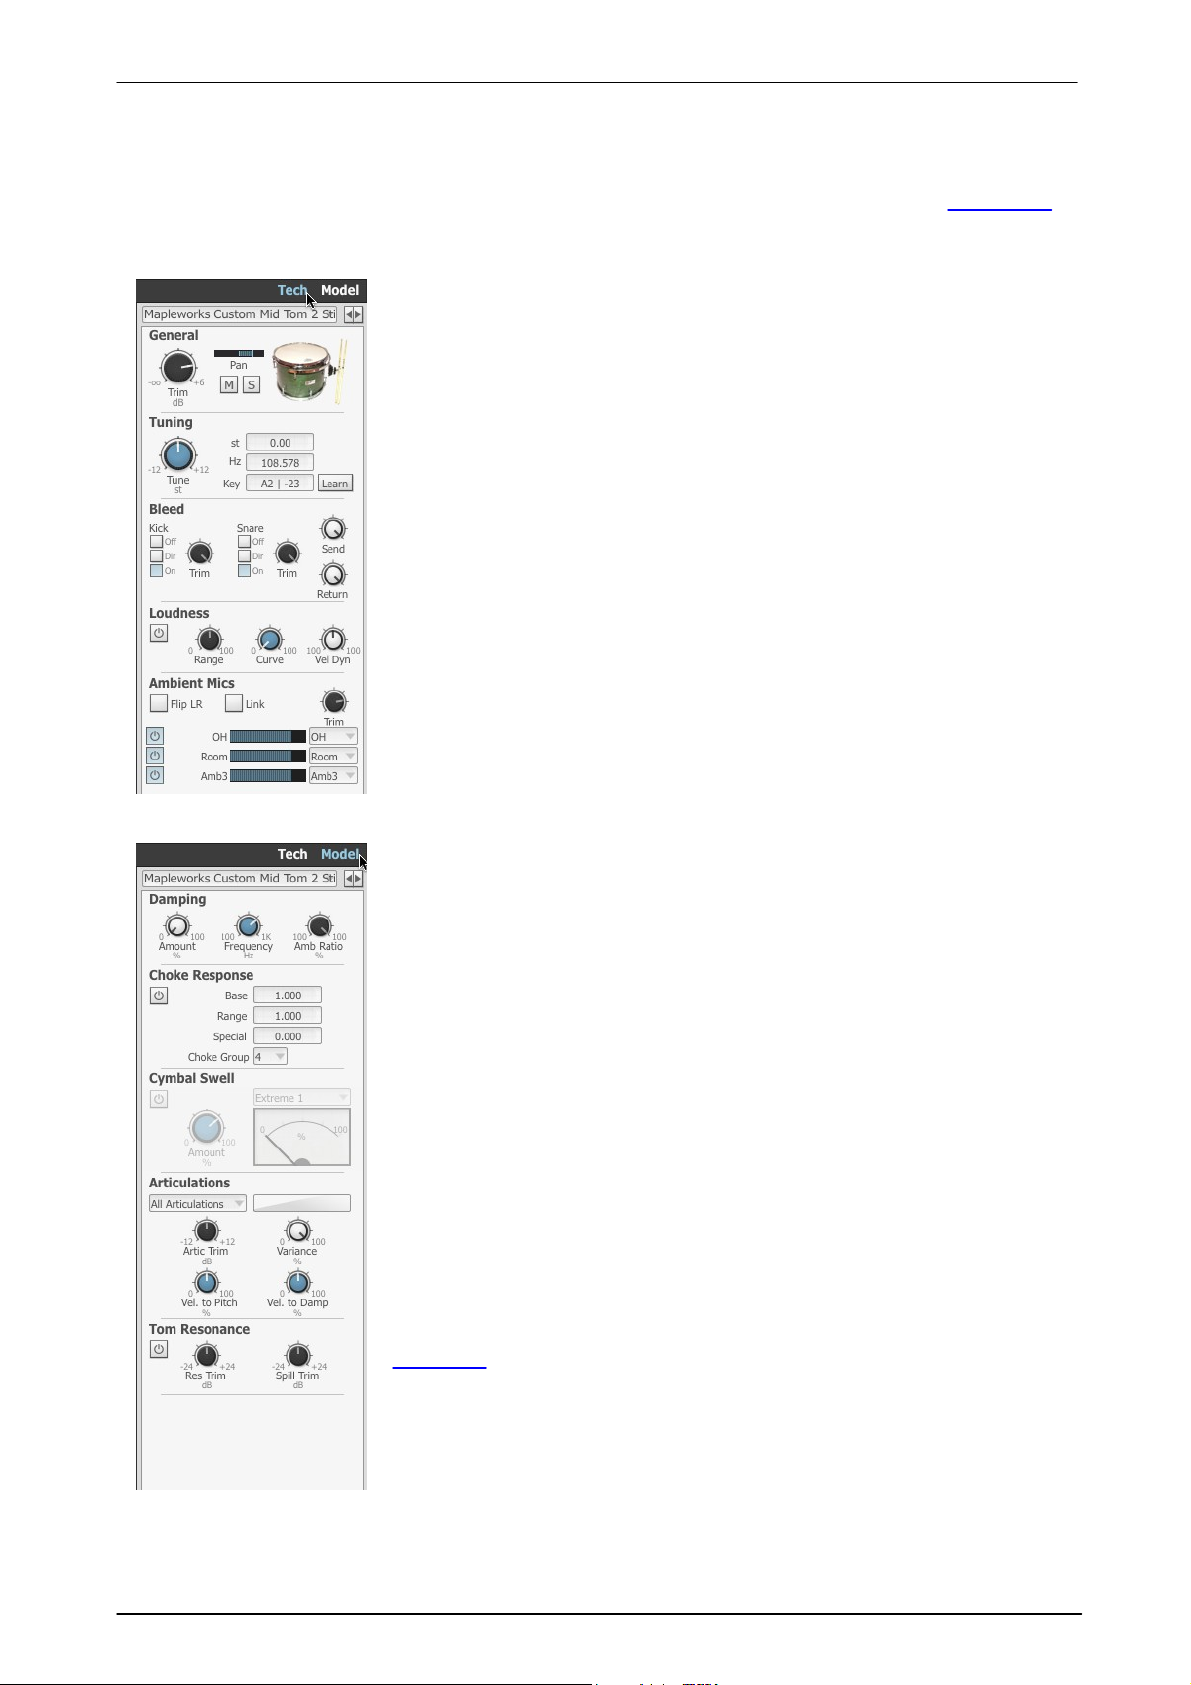
General & Tuning
The Trim and Pan controls allow you to change the overall level of the Drum
and the panning of its direct mic channels within the stereo field. Each Drum
also features Mute and Solo buttons. The Tuning function changes the pitch of
the Drum.
Bleed and Ambient Mics
These controls relate to certain mic channels for the each Drum which are
mixed with signals from other Drums before the mixer. These controls allow
you to adjust levels and other aspects of these signals - bleed can be disabled
or routed to the Drum's own mixer channel while Ambient mic signals can be
routed to discrete Aux channels if you wish.
Loudness
The Loudness functions allow you to adjust the dynamic response of the
Drum. BFD3's drum sounds are recorded at a wide variety of velocities (striking
intensity) - adjusting these settings can drastically alter the feel and sound of
drum performances.
The Velocity Dynamics control scales the velocity of incoming events (from
MIDI notes or from the Groove engine) - in effect, making the 'drummer' play
the kit with more or less intensity. The Curve control alters the velocity
response of incoming events to the Drum from the default linear 1:1 mapping.
The Dynamic Range control introduces amplitude scaling to increase or
decrease the dynamic range (the difference in level between the quietest and
loudest layers) of the Drum's velocity layer range.
Damping/Hihat Tighten
The Damping section lets you reduce the decay time of a Drum. For basic
damping, simply increase the Damping Amount control as desired.
The Hihat Tighten controls (available only for the hihat slot) achieve a similar
result, except that only the closed articulations of hihats are affected.
Choke Response
This set of controls provides adjustment over the choking behaviour of a Drum
- in other words, how a preceding event for the Drum decays when a new
event is triggered.
Tom resonance and Cymbal Swell
The modelled functions in BFD3 use dedicated synthesis in order to recreate
certain properties of a drumkit.
The Tom Resonance function creates the sympathetic resonance generated
by toms when other toms, kicks and snares are struck.
When the Cymbal Swell function is activated, additional shaping is applied to
cymbal articulations when played rapidly in succession to simulate their realworld behaviour.
Articulations
This section offers level control and more advanced velocity-related functions
for individual articulations.
It also contains the Variance control - this adjusts the degree to which
articulations are affected by the AMG (Anti-MachineGun) functions in BFD3's
Dashboard panel.
By default, these controls are applied to All Articulations - as indicated by the
drop-down menu - so the entire Drum is affected.
2. Using the Drum Editor
The Drum Editor contains a comprehensive set of tools to adjust the sound and response of the Drum in the
currently selected slot. It is divided into 2 pages - the Tech page features 'drum tech'-oriented functions, while
the Model page's functions deal with modelling real-world kit behaviour. C lick the Tech or Model buttons to
show the panel if it is currently hidden. The following controls are described in full detail in the Drum Editor
section.
Tech page
Model (Modelling) page
© 2017 FXpansion
Page 34
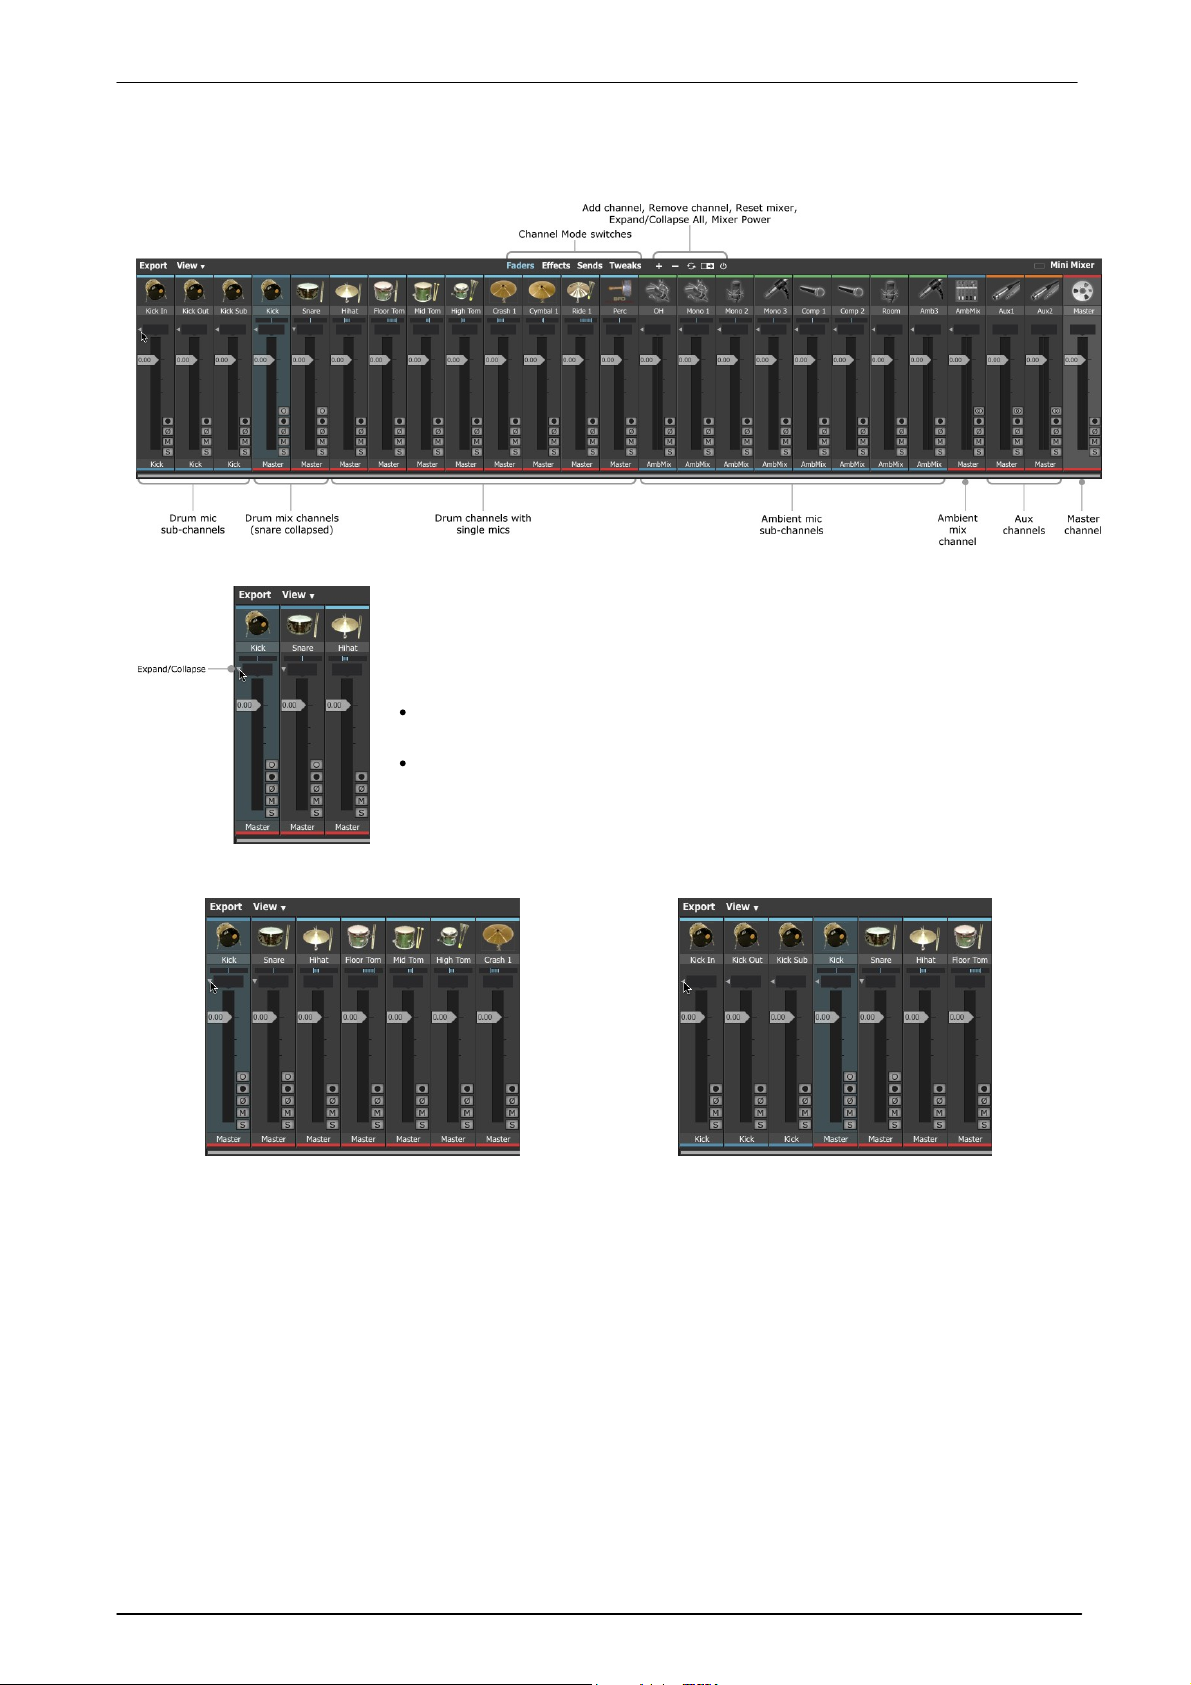
BFD3 Operation Manual34
Drum channels are the basic building blocks in BFD3's mixer - they can be
considered in the same way as recorded drum tracks.
A Drum channel represents a Drum slot and its direct microphone channel(s)
and can take the following forms:
A Drum Mix channel fed by a mix of Drum mic sub-channels
The first Kick and Snare slots exist in this form.
A single direct microphone channel
Hihat, Tom, Cymbal, Percussion and further Kick/Snare slots
Click the Expand/Collapse button to show the
mic channels within the Kick or Snare channel.
Click the Expand/Collapse button again on any
of the mic sub-channels or the parent Mix channel
to return it to a single mixer channel.
3. Using the Mixer and Effects
Channel types
BFD3's mixer contains a number of different types of channels.
Drum channels
Using the Kick 1 and Snare 1 channels
Each mic sub-channel can be treated individually, from basic adjustment of the level and pan controls to using
effects and sends for processing. If you prefer, these channels can be routed to other Aux channels instead of
their parent Kick or Snare channel.
Auditioning Drum channels
Drum channels feature an audition function for auditioning the main articulation of the Drum loaded within them ALT-click the image at the top of the channel to preview its main articulation.
Ambient channels
Ambient mic channels appear in the mixer in a similar way to Kick and Snare mic channels - they are comprised
of an Ambient Mix channel fed by a mix of Ambient mic sub-channels.
© 2017 FXpansion
Page 35
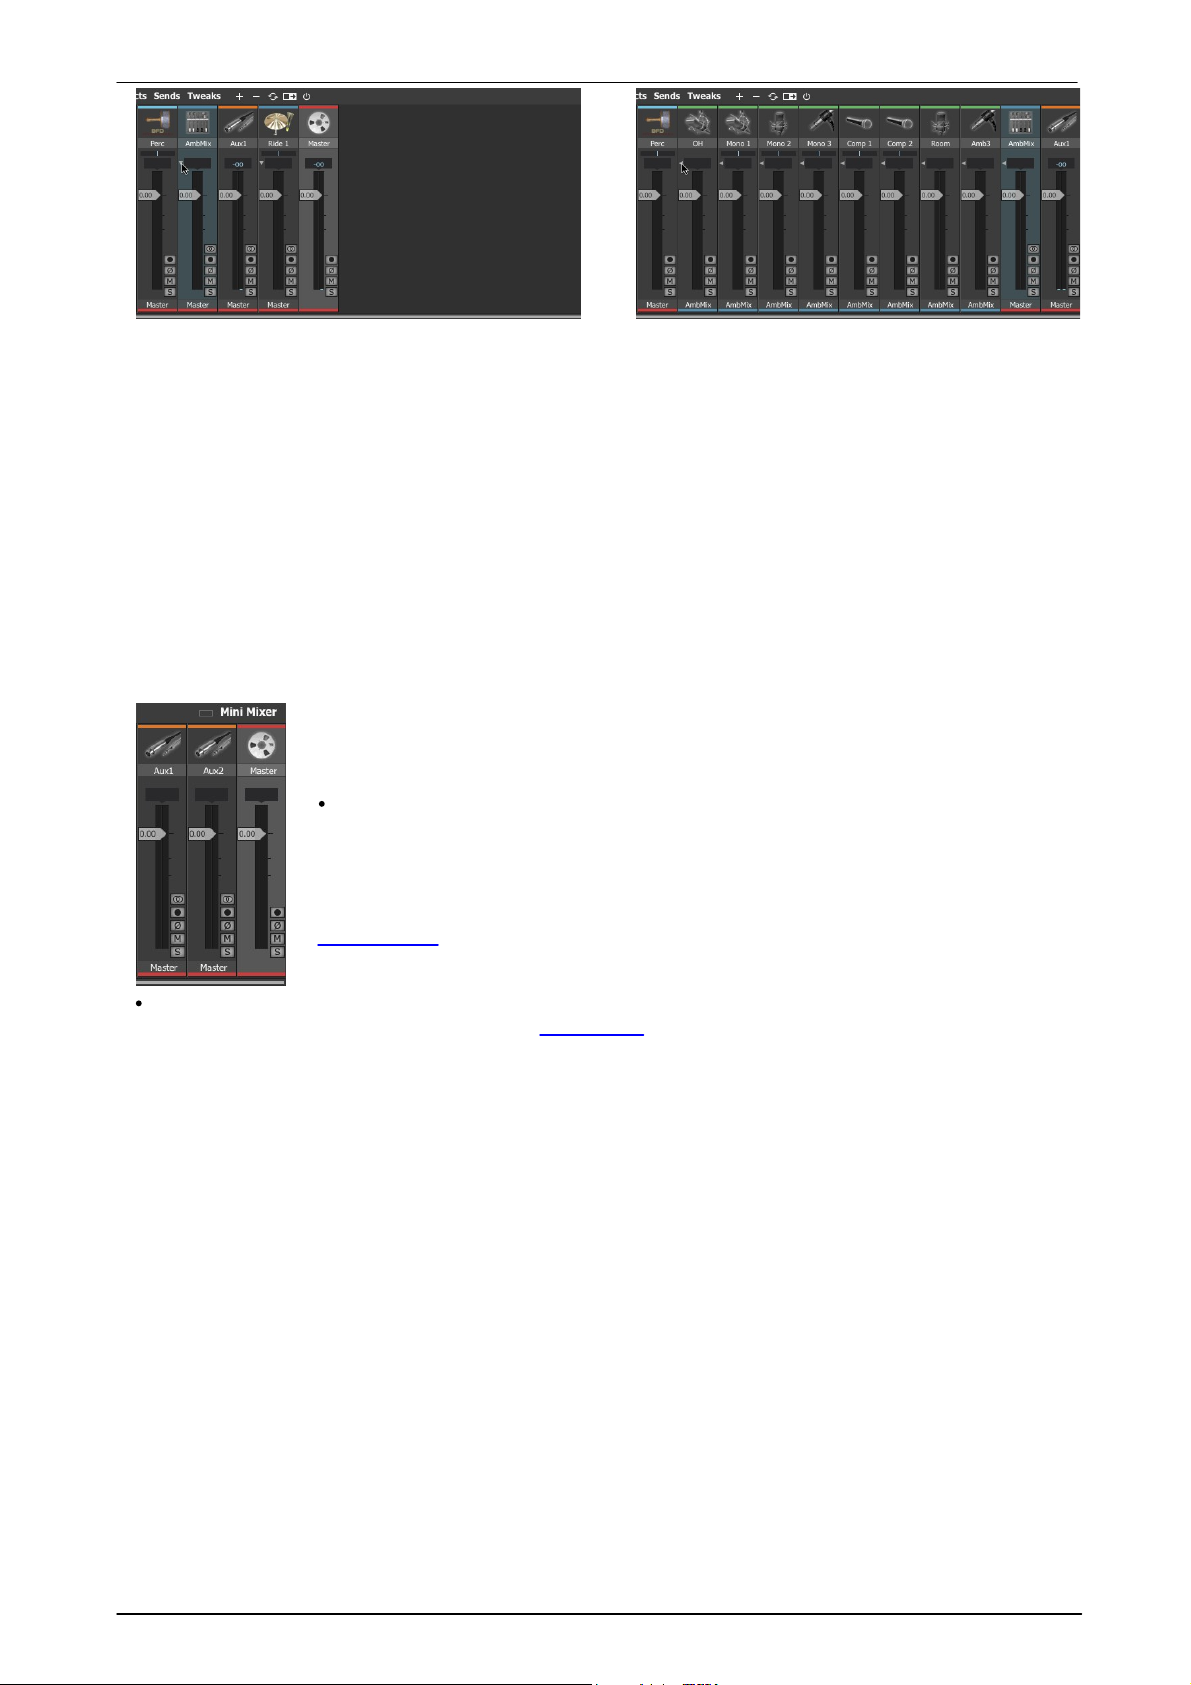
Using BFD3's sounds 35
Click the Expand/Collapse button to show the
ambient mic channels within the Ambient Mix
channel. The Ambient Mix channel is selected in this
example.
Click the Expand/Collapse button again on any
of the Ambient mic sub-channels or the parent
Ambient Mix channel to return it to a single mixer
channel.
Aux channels, 2 of which exist in the default BFD3 mixer layout, can be considered in
the same way as a 'buss' or a 'group' on a mixing console. Any number of signals can
be routed to an Aux channel, from the following sources:
Drum and Ambience mixer channels
The entire output of one or more mixer channels can be routed to an Aux channel using
their Output selector controls for sub-mixing before further routing afterwards.
Alternatively, a variable amount of one or more mixer channels can be routed to an Aux
channel in parallel using the Send controls.
The Output selector and other mixer channel controls are discussed in detail in the
Mixer controls section later in this chapter.
Each Ambient mic sub-channel is a mix of the Ambient mic channels of that type from all Drums in the current
kit: for example, the OH channel is a mix of all Drums' Overhead mic channels.
All sounds compatible with BFD3 contain at least 3 sets of stereo ambient mics - OH (OverHead), Room and
Amb3 (usually a set of PZM boundary mics or a room mic set further back than the Room set). Some Drums
feature additional mono room and compressed direct channels which appear as numbered Mono and Comp
channels.
Adjusting the Ambience Mix channel's level effectively sets the 'wet' level of the overall mix.
Note that the Drum Editor's Ambient Mics section allows powerful control over each Drum's Ambient mic
channels - it is possible to independently set levels and also to route Ambient mic channels to Aux channel
destinations rather than the default routing to the corresponding Ambient channel in the mixer.
Aux channels
Drum Editor
The controls in the Ambient Mics section of the Drum Editor allow individual Drums' Ambient mic channels to be
sent to Aux channels for discrete processing.
In actual fact, the Kick, Snare and Ambient mix channels are special Aux channels to which the Kick, Snare and
Ambient sub-mics are routed via their Output selector controls. However, even if their sub-mics are routed to
other destination channels or outputs, the Expand/Collapse buttons still toggle their visibility in the mixer.
Master channel
The Master channel is, by default, the eventual Output destination for all channels in BFD3. It is effectively a
special Aux channel that is hard-wired to the primary stereo output of the BFD3 plugin.
As mentioned above, channels can be sub-mixed into other Aux channel 'stems'. Alternatively, channels can be
routed outside BFD3 using its multiple sub-outputs.
Of course, a combination of all these approaches can be used.
© 2017 FXpansion
Page 36
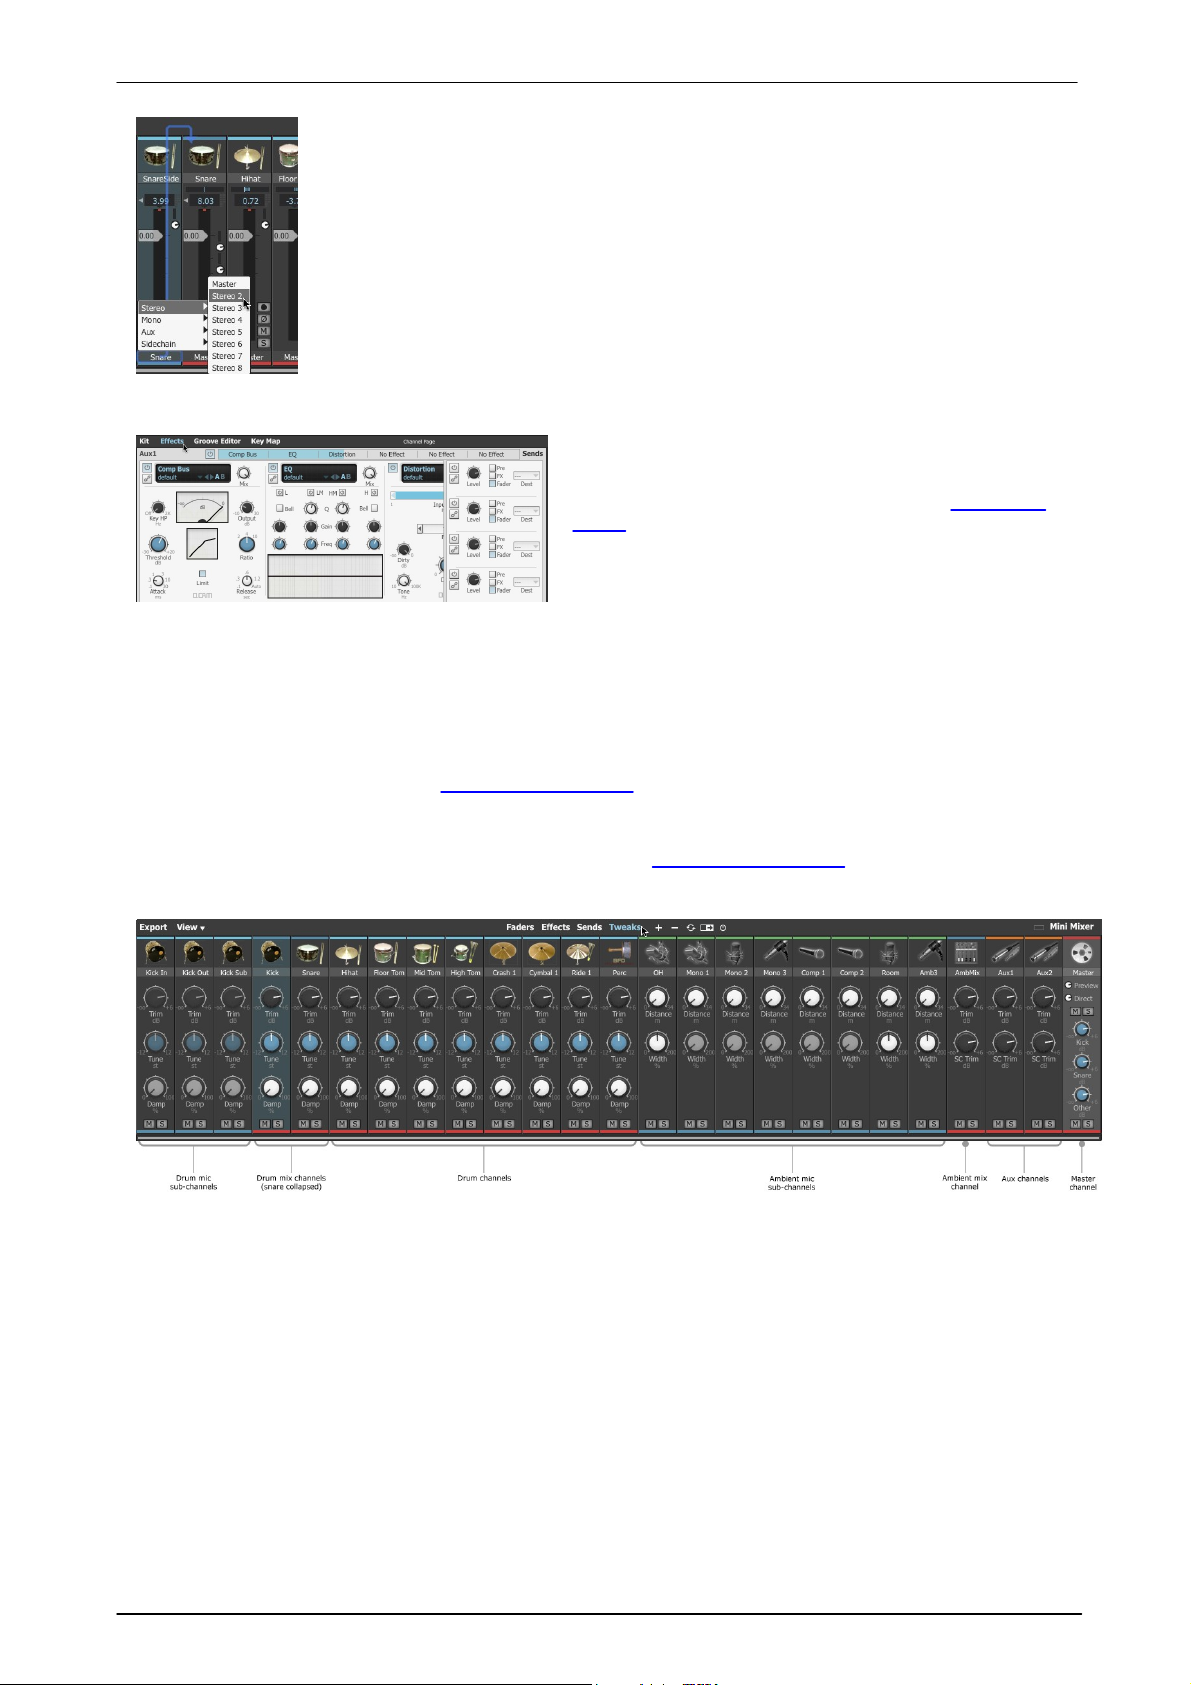
BFD3 Operation Manual36
The Output selector control at the bottom of each channel lets you route any channel
to one of BFD3's multiple sub-outputs. This routing can occur at any stage of the mix individual Drum mic channels can be routed externally to do all your mixing with
plugins in your DAW or outboard gear, or some sub-mixing using Aux channels can be
conducted first within BFD3, with the Aux channels being routed to external outputs.
Shortcuts for sequential output assignment
The mixer channel context menu, displayed by right-clicking on any channel, offers
shortcuts for simple sequential output assignment. To conduct all mixing and
processing of mic signals outside BFD3, use the Auto-Assign outputs (Direct)
function on the mixer's channel context menu. Use the Auto-Assign outputs
(Master) function to return to the default output assignments.
Selecting a Mixer channel results in showing its contents in
the Effects Editor. This panel displays the channel's 6
effect slots and 4 Sends which operate in a very similar
way to those found in most DAWs - see the Effects and
Sends section for a detailed guide.
This panel and the Kit display cannot be viewed
simultaneously. Use the Effects and Kit buttons in the
navigation bar to switch between them.
Routing channels to plugin outputs for further external processing
Using the built-in mixing functions, FX and Sends
4. Mixer channel modes
The mixer features 4 modes, activated by the Channel Mode switches: the Faders, Effects, Sends and
Tweaks buttons above the mixer. Each mode shows a different set of controls on each mixer channel.
Faders channel mode
The Faders mode is the default, and displays controls regularly found on mixer channels, most of which should
be familiar to you already. See the Mixer channel controls section for full details of all the controls.
Tweaks channel mode
The Tweaks channel mode offers varying types of controls for each channel, depending on the channel type.
The most important functions are described below - see the Mixer channel controls section for details of all
controls.
Drum channels
Drum Mix channels feature Tune, Trim and Damp (Damping amount) controls in Tweaks mode. These
parameters are also found in the Drum Editor but are provided within the mixer for convenience and and
overview of multiple channels' settings.
Ambient channels
The Distance control adjusts the distance of each pair of ambience mics from the kit. This control effectively
introduces a delay between the relevant set of ambient mics and the direct mic signals.
The Width control (available only on stereo channels such as OH (Overhead), Room and Amb3) adjusts the
stereo width of the channel between mono (especially useful for powerful, fat room sounds), stereo at the centre
position and expanded stereo at the fully clockwise position.
© 2017 FXpansion
Page 37
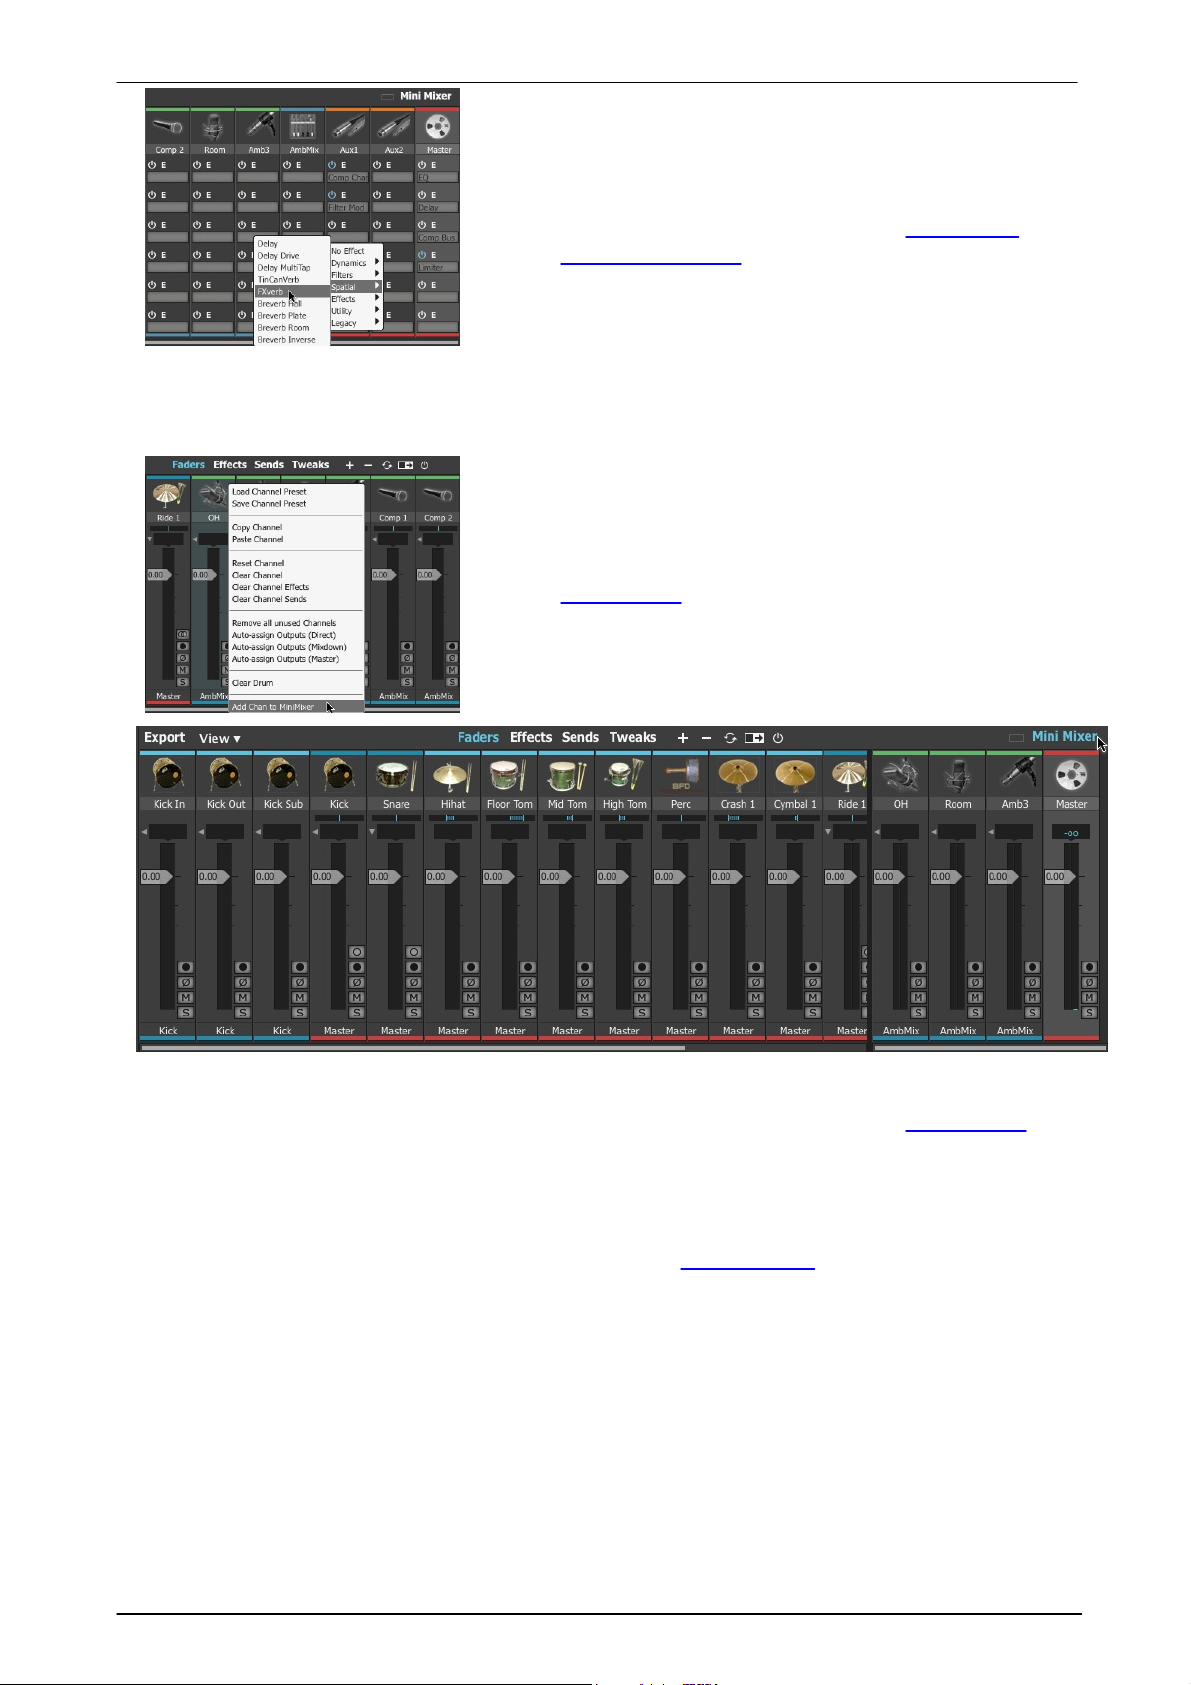
Effects and Sends channel modes
The Effects channel mode displays all channels' Effect insert slots,
allowing an overview of multiple channels' Effect slots
simultaneously.
Effect devices cannot be edited directly in this mode - devices can
be only inserted and powered on/off. Clicking the E (Edit) button for
a slot takes you directly to the device within the Effects Editor.
See the Effects/Sends modes section for more details of these
controls.
The Sends channel mode shows all controls for the channel's 4
Sends. The controls are smaller versions of all the controls in the
Sends panel in the Effects Editor.
5. Other mixing functions and exporting audio
The Mini Mixer displays any combination of often-used mixer
channels within a panel visible at the right side of the mixer. Click
the Mini Mixer button to toggle its visibility.
Any channel(s) can be added to the Mini Mixer using the channel
context menu - simply right-click on any channel and use the Add
Chan to Mini Mixer function.
See the Mixer controls section for more details on using the Mini
Mixer.
In the example below, the Overhead, Room, Amb3 and Master
channels have been added to the Mini Mixer so they are always
visible.
Minimixer
Using BFD3's sounds 37
Mixer toolbar
The toolbar above the mixer features a number of controls for managing mixes - see the Mixer controls section
for a guide to these controls.
Export panel
BFD3 allows you to export audio directly to disk using the controls in the Export panel. These functions are useful
for creating drum recordings using the BFD3 standalone application, or they may be more convenient for
creating multi-channel mixdowns than your host/DAW. See the Exporting audio section later in this chapter for
more details.
© 2017 FXpansion
Page 38
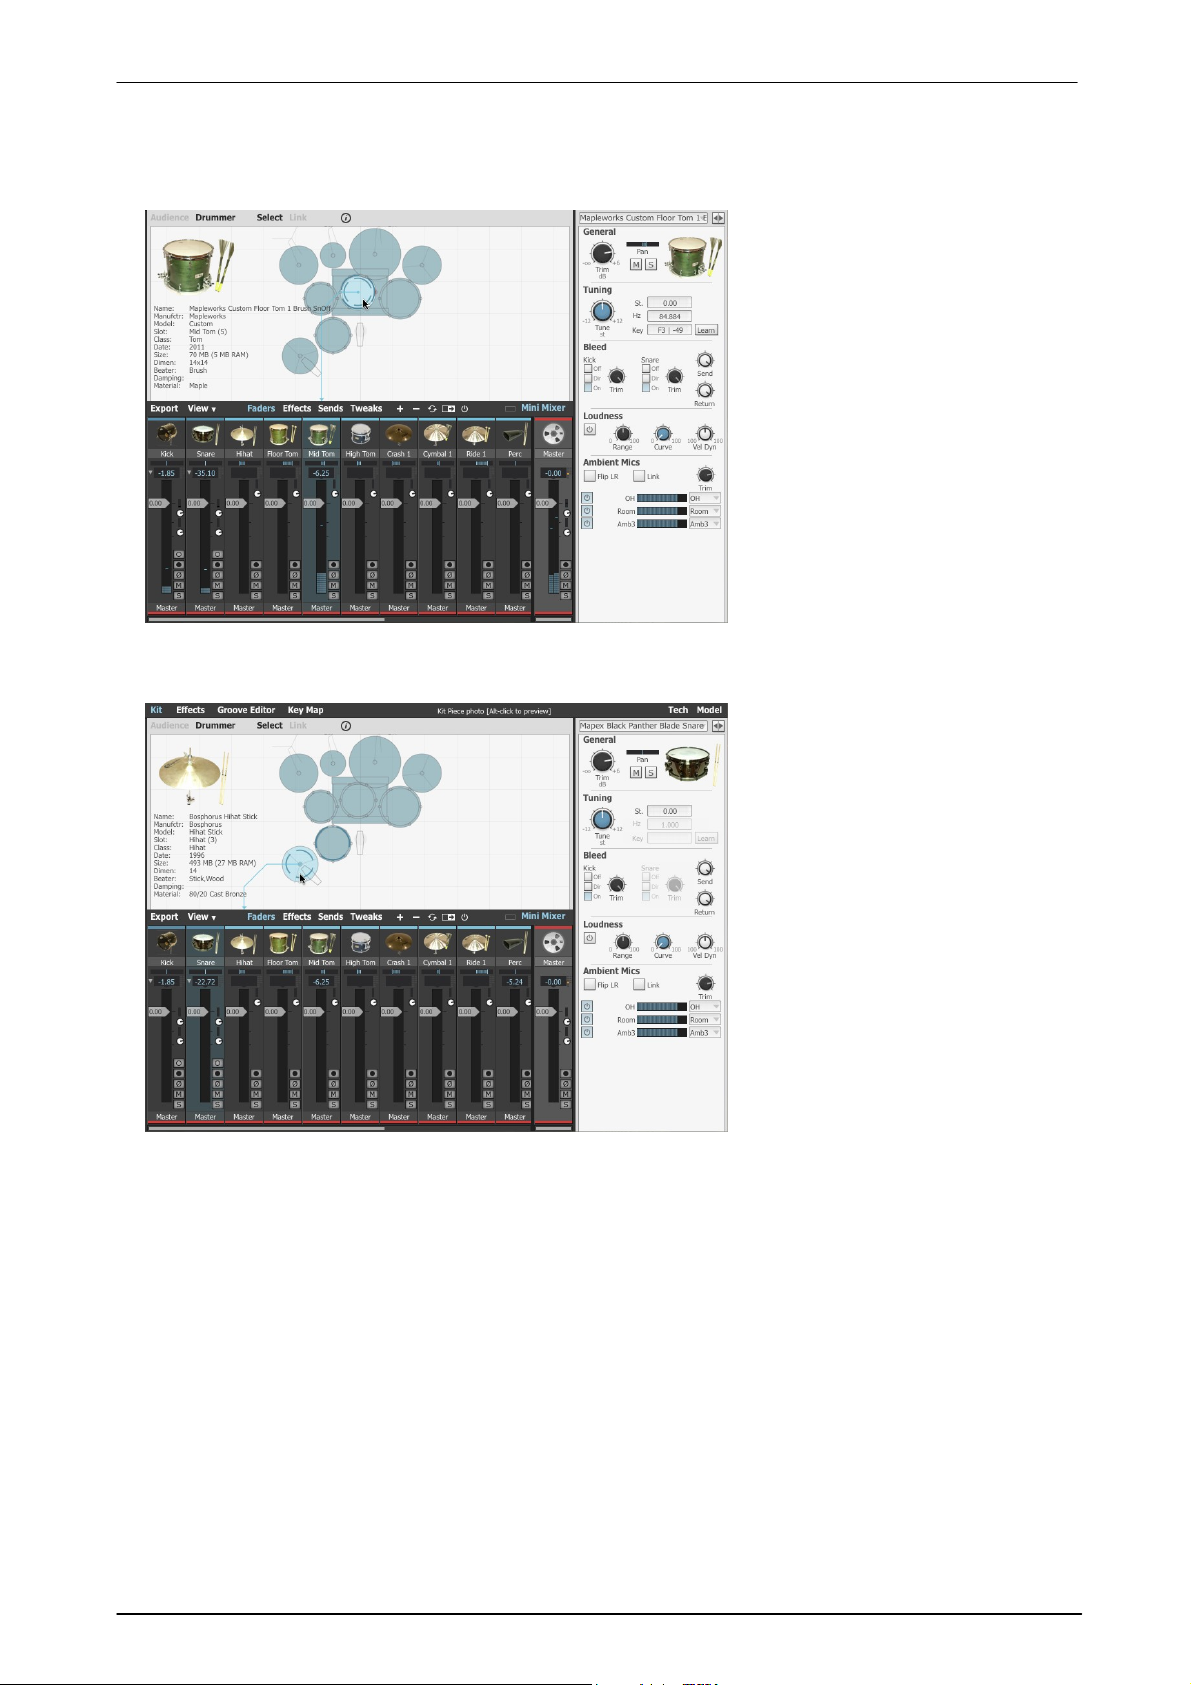
BFD3 Operation Manual38
The Kit display has 2 modes - Select
and Link - selectable via the
corresponding buttons at the top of
the panel.
With the Select function active, clcik
a Drum slot in the display to select it.
When a slot is selected in the Kit
display, it also becomes selected in
the mixer, and vice versa. Its
contents are also shown in the Drum
Editor if it is currently visible.
When the Link function is active,
slots cannot be selected. See below
for details of using Link mode.
Moving the cursor over a Drum slot
results in indicating the location of the
slot in the mixer with an arrow.
The same is true of the reverse mousing over a Drum mixer channel
highlights the corresponding slot in
the Kit display (if it is currently
displayed) using the same type of
indicator arrow.
In the screenshot, the Snare slot is
selected - shown by the selection
indicators on the Kit display and
mixer - but the cursor is hovered
above the Hihat slot - its mixer
channel is indicated by an arrow.
3.1 Kit display
The kit display offers a top-down view of the current kit, representing its physical layout. Each part of the kit that
is shown represents a Drum slot.
Selecting slots
Slot indicators
Auditioning Drums within slots
The current contents of any slot can be quickly auditioned by clicking the slot. This plays the main articulation for
the Drum - closed tip for hihats or 'Hit' for other Drum types. To audition any articulations, use the Articulations
section in the Drum Editor Model page.
Drum event indicators
When a Drum receives a MIDI, Groove or preview event, its surface flashes in the kit display to indicate that it
has been played.
© 2017 FXpansion
Page 39
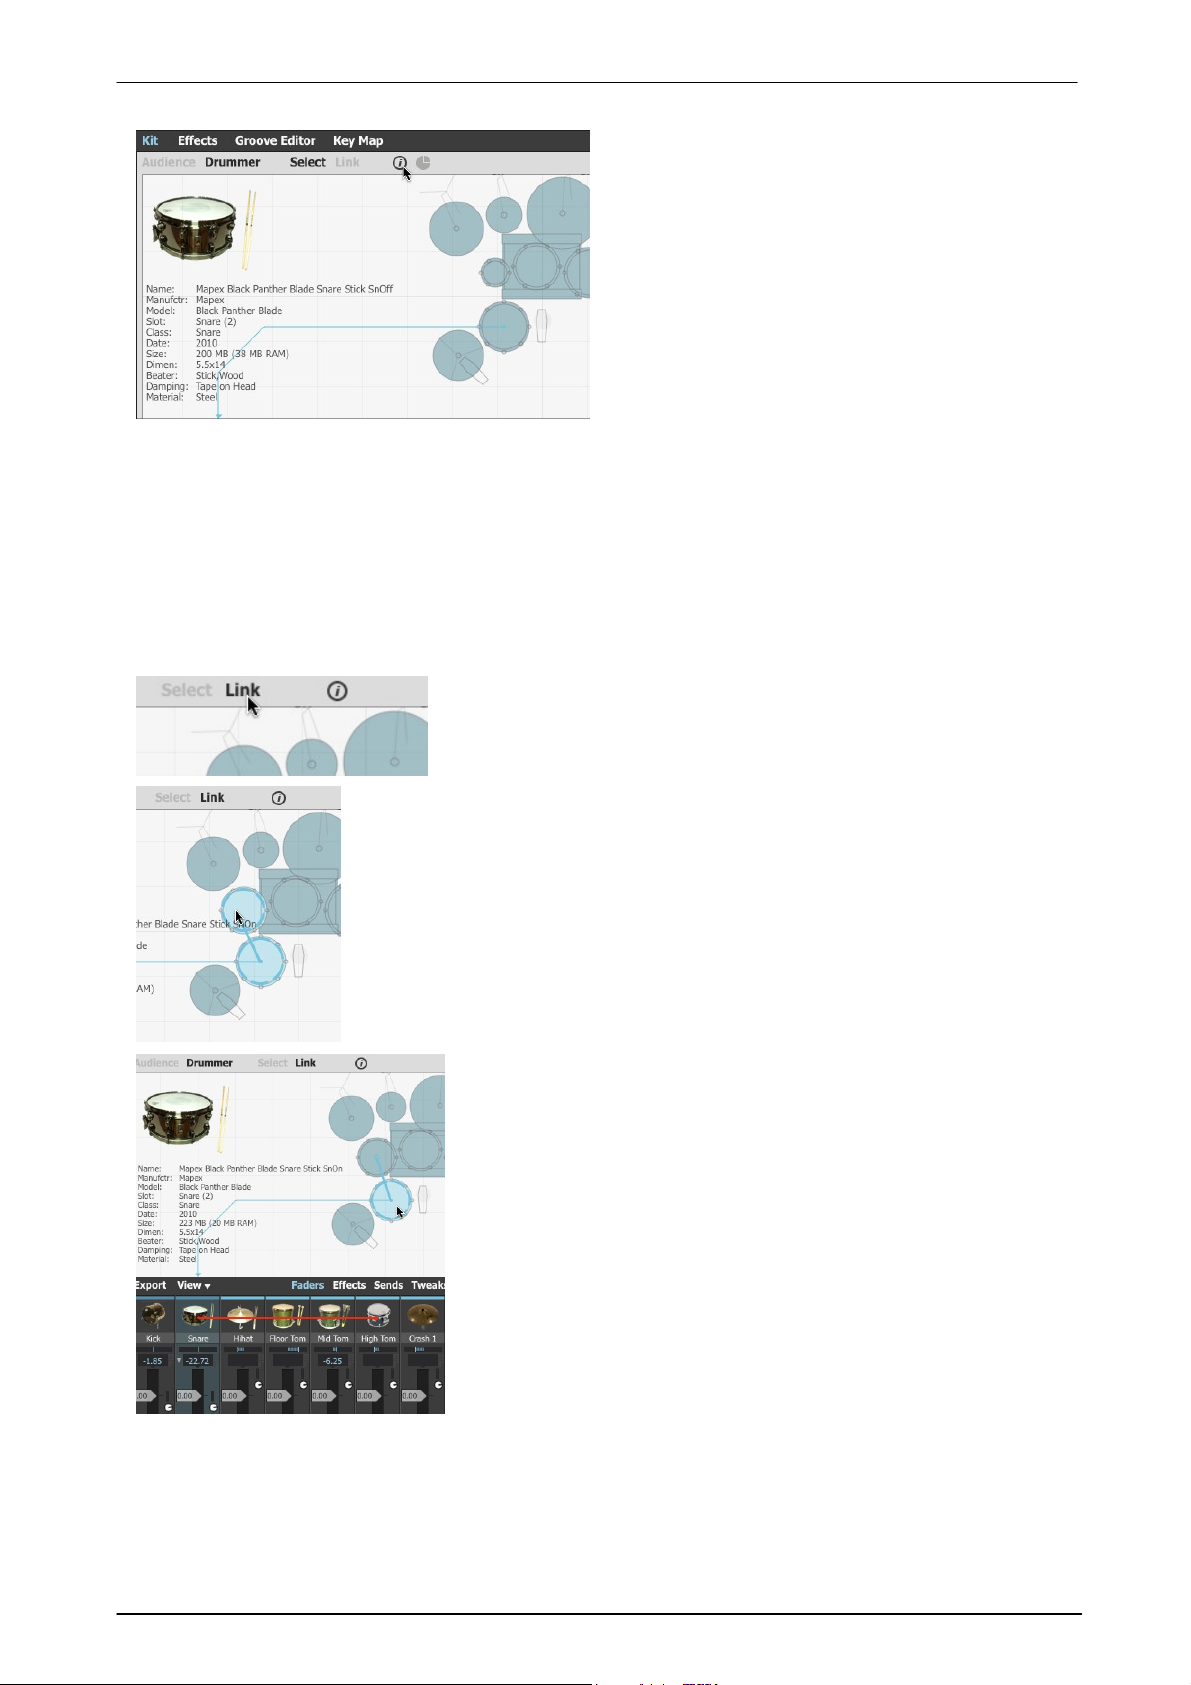
Using BFD3's sounds 39
Click the Info display button to show the Kit
display info. This shows information about the Drum
slot under the cursor. If the cursor is moved away
from any slots, information about the currently
selected slot is shown.
The display shows information such as the name,
manufacturer, model, materials and other
information about the Drum within the slot.
This display also shows the Drum Slot identifier,
the Class (type) of Drum currently loaded into it
and its Size, in MB, both on disk and currently in
RAM.
Enter Link mode by clicking the Link button at the top of the Kit display
panel. When the Link function is active, it is not possible to select Drum
slots in the Kit display. Instead, this mode is used for linking Drums
together for layering purposes.
To link two Drums while in Link mode, click and drag one of the Drums (the
source) onto the other (the destination).
When the source Drum is triggered, the linked destination Drum is also triggered.
If it is the same Drum type, the corresponding articulation is triggered. If the
destination Drum's C lass differs from that of the source Drum, an attempt is
made to trigger an articulation with the same name. If this does not exist, the
first articulation is played ('closed tip' for hihats and 'hit' for all other Drum types)
.
It is also possible to set up Links using the slot context menu - see below.
Note that to layer specific individual articulations, it is necessary to set this up in
the Key Map.
After the link has been created, it is represented on the Kit display
and in the mixer when the mouse cursor is moved over the source
slot.
Removing a link
To remove a link, right-click on the source Drum slot and use the
Unlink from... sub-menu on the slot context menu that appears.
A list of links from the Drum are shown in the context menu that
appears. Click on the link that you want to remove in order to break
the link.
Info display
Audience / Drummer perspective
By default, BFD3 is set to Drummer perspective, meaning that the panning of the kit is oriented towards the
drummer's perspective, as seated at the drumkit.
Switching to Audience perspective by clicking the Audience button inverts all mic channels within BFD3,
meaning that the kit is heard from the other side - the audience facing the drummer at the kit. Click the
Drummer button to switch back to Drummer perspective.
Link mode
© 2017 FXpansion
Page 40
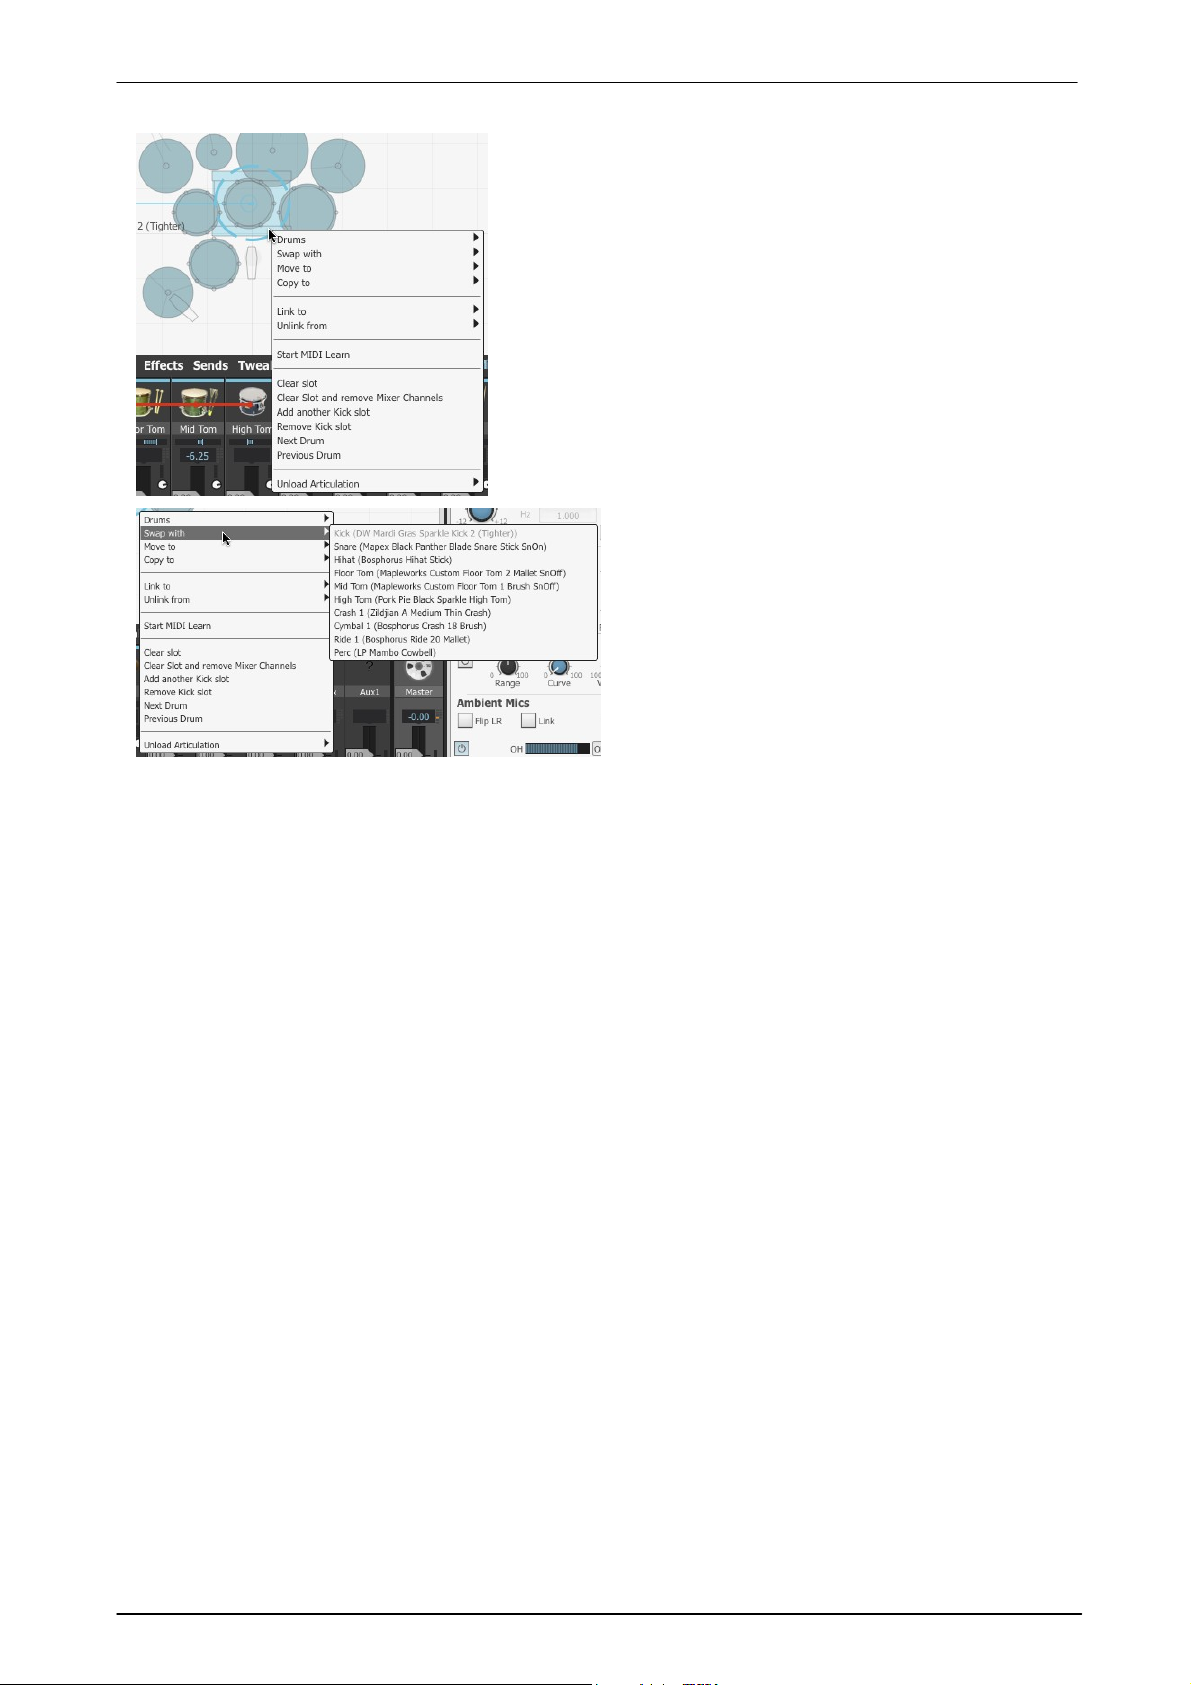
BFD3 Operation Manual40
Right-click on a slot to display the slot context menu.
Note that the channel context menu applies only to the slot on
which it appears, regardless of whether multiple slots are
currently selected. The exception is the 'Remove all unused'
function, which removes all currently unused channels in the
mixer.
The Slot context menu is also available on the mixer channel
context menu for Drum slots (within its Drum sub-menu).
Drums load menu
This menu item is used for loading Drums without using the
Browser.
The item opens a sub-menu that displays the available Drums in
the database, arranged into sub-menus according to their parent
library.
Navigate to the required Drum in the menu and click on it to load
it.
Swap with
Move to
Copy to
These menu items allow you to swap, move and
copy Drums between slots. All slots in the current kit
size are shown in a sub-menu for each function, with
details of their contents if applicable.
Navigate to the required slot in the list and click on it
to perform the swap, move or copy operation. If a
move or copy operation is attempted on an occupied
slot, a warning is shown and you are prompted for
confirmation in order to continue.
Slot context menu
Generally, during conventional kit-oriented usage, these functions should be used for rearranging kicks, toms,
cymbals and percussion. It is recommended to avoid rearranging snare and hihat slots, as these slots feature
more articulations than others - if a snare or hihat is moved to a slot with fewer articulation mappings, the
additional articulations are inaccessible via MIDI until they are assigned to keys using the Key mapping panel. All
articulations are always accessible via the Groove engine.
Link to
This context menu item performs the same function as Link mode (see above), using a list of Drum slots in a
sub-menu instead of dragging one slot over another.
Unlink from
This function allows you to unlink Drum slots that have been previously linked using the Link function.
In the context menu for the source slot, any links that exist are shown as items on the Unlink from sub-menu.
Click an item to remove the link.
Start MIDI Learn
This function starts the MIDI Learn wizard from the slot - see below for details of this function.
Clear slot
This function clears the slot of any kit-piece it contains.
Add another [Drum type] slot
This function adds another Drum slot of the same type to the kit. To add a channel for any type of kit-piece, use
the Add Channel button in the mixer.
Note that only 1 hihat slot is available in BFD3 - it is not possible to add a second.
Remove slot
This function removes the selected Drum slot.
Next Drum
Clicking this item loads the next Drum of the same type from the available Drums in the database.
Previous Drum
Clicking this item loads the previous Drum of the same type from the available Drums in the database.
Unload Articulation
This sub-menu displays all the articulations present for the Drum in the slot - click on any articulation to unload it
from the current session.
© 2017 FXpansion
Page 41
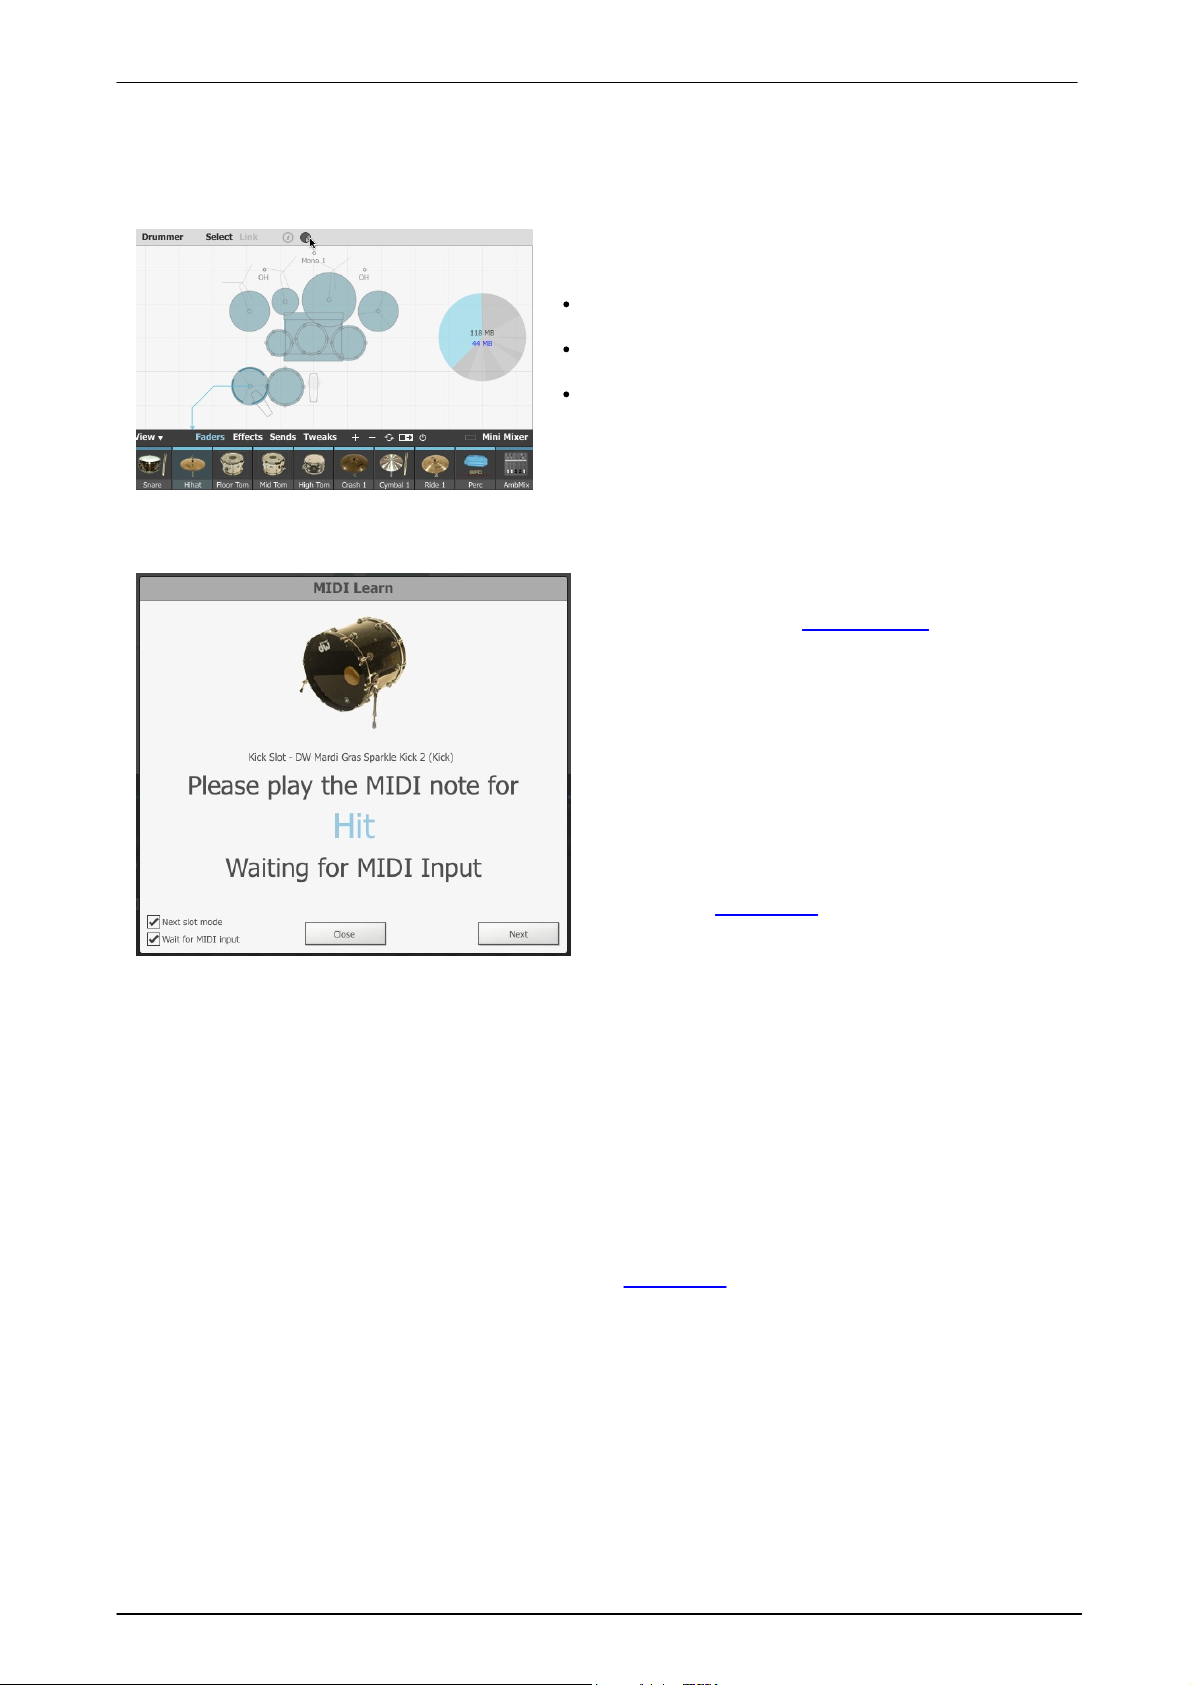
Using BFD3's sounds 41
Click the Drum memory display button to show a graphic
indicating the amount of RAM for the currently selected
Drum.
The upper figure shows the size of the entire Drum on
disk.
The lower figure shows the amount of RAM used by the
cached portions of the Drum's samples.
The circular graph represents the amount of RAM used by
the current Drum in relation to the rest of the Kit.
The MIDI Learn wizard is a simple tool for mapping
Drum articulations to MIDI notes. It is provided as an
alternative to using the Key Map panel, although for
more complex mapping operations and fine-tuning
existing mappings, it is necessary to use the functions
in the Key Map panel.
When the wizard is launched using the Start MIDI
Learn button from a Drum's slot context menu (see
above), the relevant Drum's first articulation is
presented on-screen, along with a message indicating
that BFD3 is waiting for MIDI note input - play a MIDI
note to map it to the articulation.
The wizard then allows an additional time period for a
different MIDI note to be played (in case the original
note was played in error) - this additional time period
can be defined using the MIDI learn accept time
setting in the Preferences. The default setting is 5
seconds.
Unloading any articulation(s) that you don't need frees up RAM resources, as the associated pre-cached start
portions of audio are unloaded from RAM.
Any unloaded articulations remain unavailable until another Drum is loaded into the slot.
Drum memory display
MIDI Learn wizard
The wizard then moves onto the Drum's remaining articulations until they are all assigned or until the wizard is
closed with the Close button.
Next slot mode
If this setting is activated, the wizard moves onto the Drum in the next slot after all the current Drum's
articulations have been assigned to MIDI notes.
If Next slot mode is deactivated, the wizard is closed after all of the current Drum's articulations have been
assigned.
Wait for MIDI input
When this setting is activated, the wizard waits indefinitely for a MIDI note to be played before moving onto the
next articulation in the Drum.
When Wait for MIDI input is deactivated, a set time is allowed for a MIDI note to be played for each
articulation (the default is 15 seconds). If no note is received within this time, no assignment is made for the
articulation.
The amount of time that is allowed can be defined in the Preferences using the MIDI learn skip time setting.
© 2017 FXpansion
Page 42
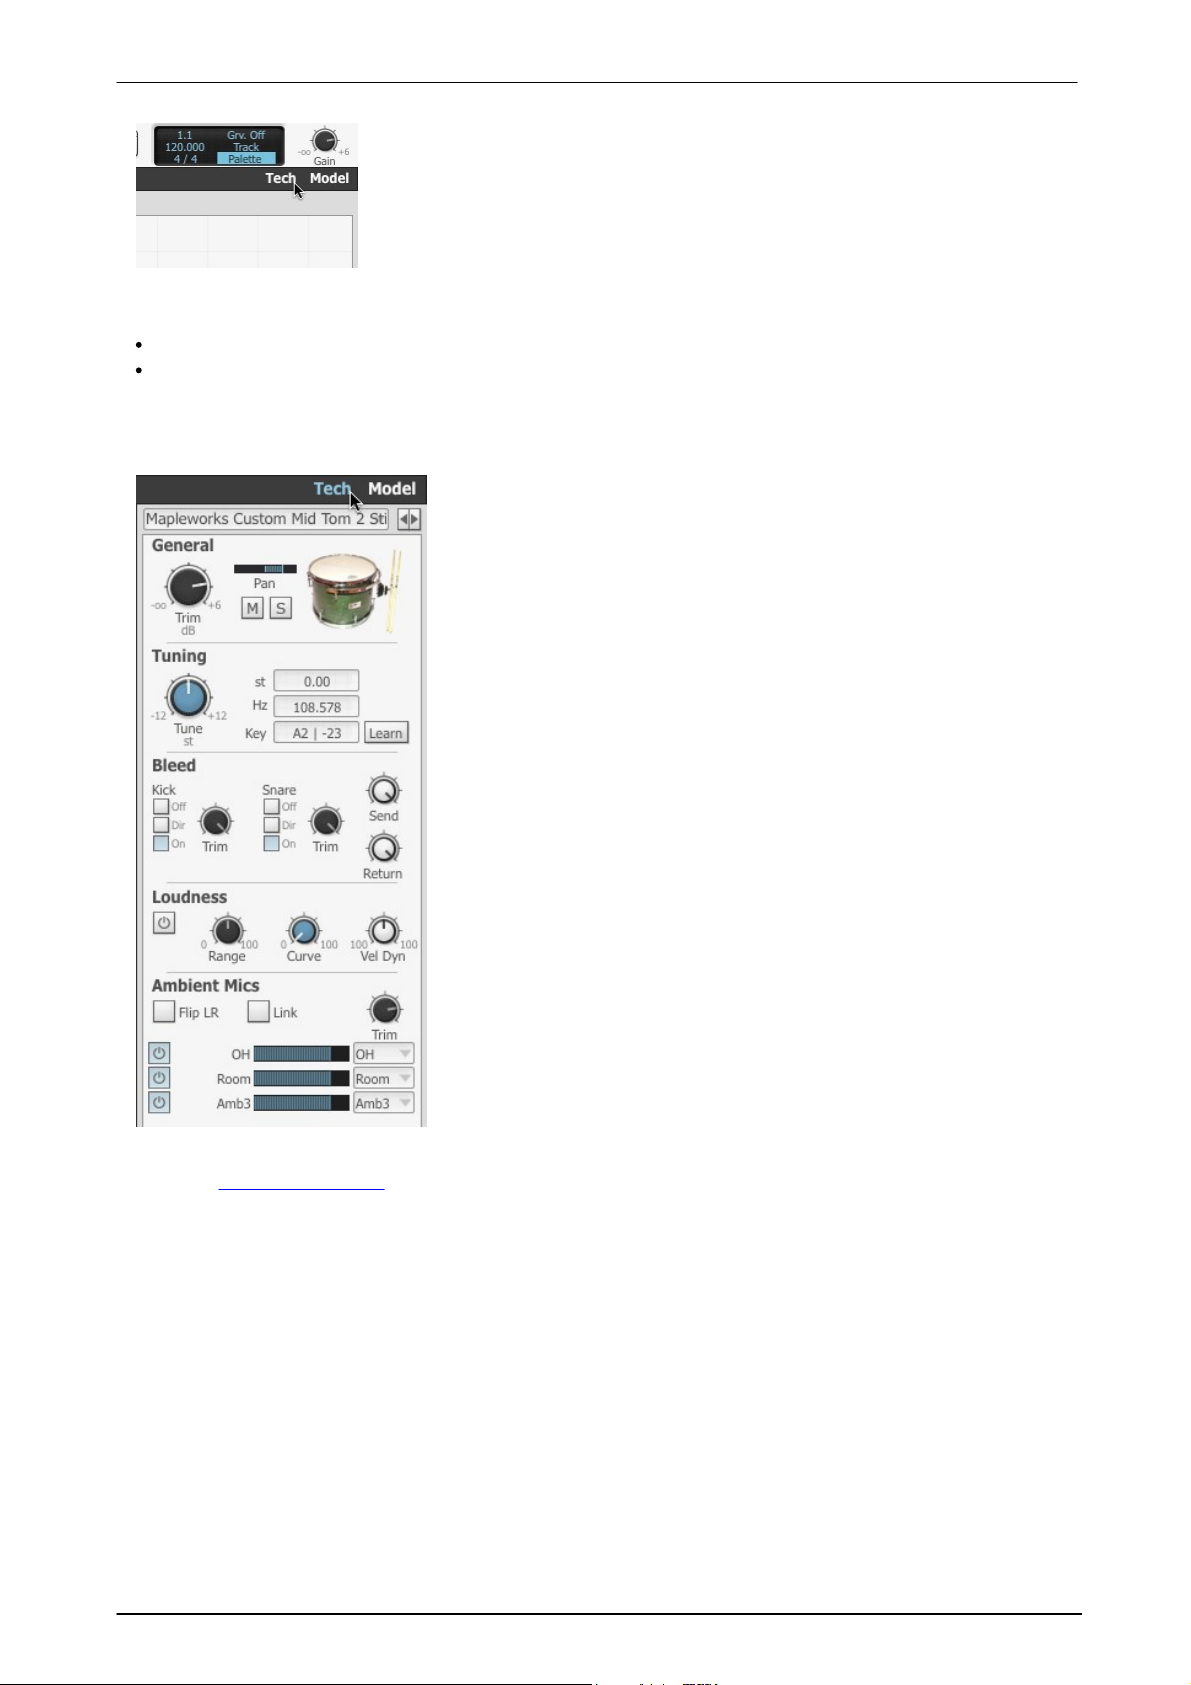
BFD3 Operation Manual42
The Drum Editor contains a comprehensive set of tools to adjust the sound and
response of the Drum in the currently selected slot. It is designed to allow you
to tweak each part of the kit just like you would in a real-world drum recording
environment.
The Drum Editor features 2 pages, each displayed with the Tech and Model
tab buttons on the main BFD3 navigation bar.
General section
Trim
The Trim control is an overall volume control for the Drum. Adjusting it
affects the level of all the Drum's mic channels equally. It can be
considered as a 'pre' volume control - it sets the level of the Drum at
the start of the signal path before any routing and mixing features are
applied.
Pan
The Drum's Pan control is identical to that on its channel in the mixer.
It sets the position in the stereo field of the Drum's Direct mics only. It
does not affect the Drum's Ambient mic channels.
The Ambient mics section features the Flip LR button to invert the
stereo image of the Drum's stereo Ambient mic channels - this can be
useful if you need to pan a Drum to the other side of the stereo field.
Mute / Solo
These buttons mute and solo all mic channels for the Drum.
Drum image
ALT-click this image to preview the Drum's main articulation.
Tuning section
Tune / st
The Tune function increases (clockwise from centre position) or
decreases (anti-clockwise from centre position) the pitch of the Drum. It
is possible to tune Drums up to an octave away from its original pitch.
The amount of tuning is shown in the st display. Click this display to
enter a tuning amount in semitones.
3.2 Drum editor
Click the Tech or Model tab buttons to make the panel visible if it is currently hidden. To hide the panel again,
click the currently active tab button.
The Tech page deals with 'drum-technician' type tasks such as tuning, control over bleed and ambient mics.
The Model page is oriented towards BFD3's drum modelling functions such as tom resonance, cymbal swells,
damping and choking response. It also features advanced control over individual Drum articulations.
Tech page
While tuning cymbals has no obvious real-world equivalent, it is still very useful to do so in the virtual domain.
With snares, the sidestick can optionally remain unaffected if the Disable sidestick tuning option is enabled in
the BFD3 Engine Preferences.
Hz / Key / Learn
These displays and controls are available only for Tom slots. When a Tom is loaded, BFD3 automatically
calculates its fundamental pitch, which is is shown in the Hz display and its equivalent MIDI note is shown in the
Key display. C lick the Learn button and play a MIDI key - the Tune setting for the Tom is set to a pitch
equivalent to that of the played key, within an octave of the tom's original pitch. The key that is played is shown
in the Key display, with the new new pitch displayed in the Hz and st displays.
© 2017 FXpansion
Page 43
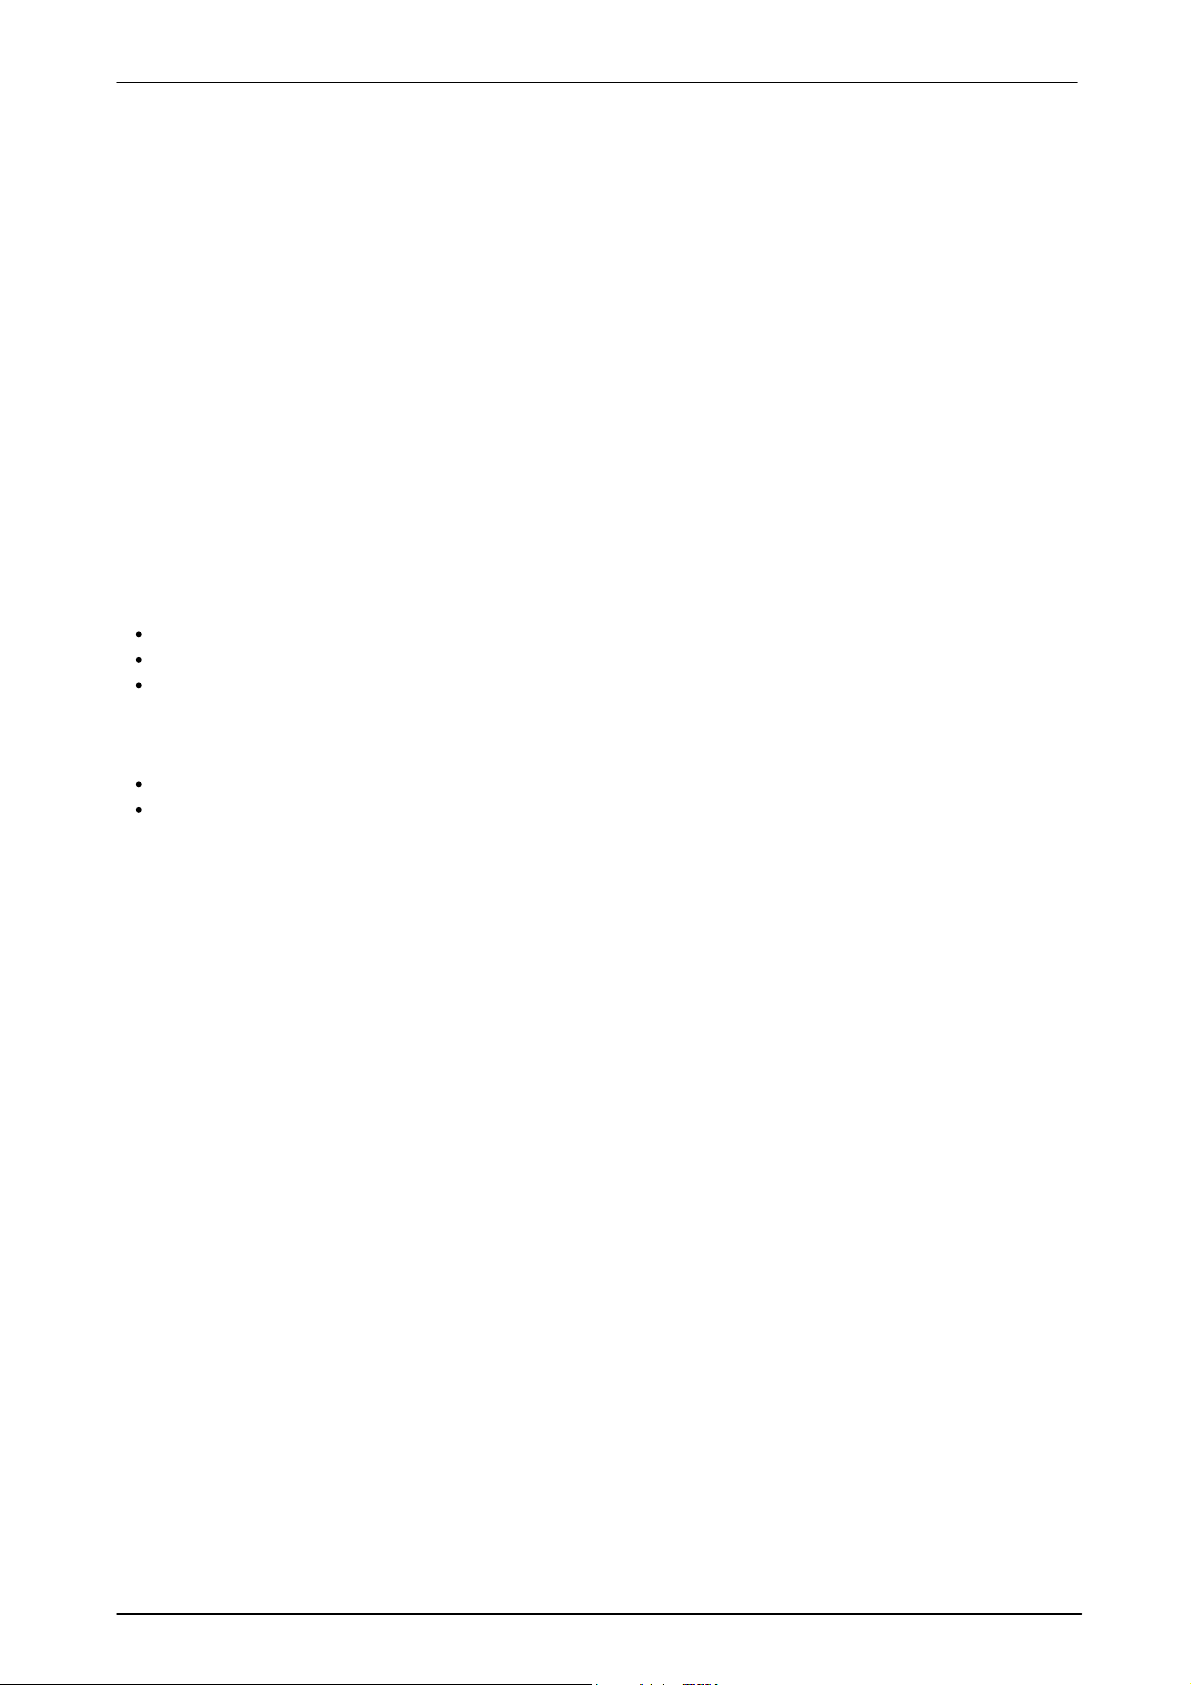
Using BFD3's sounds 43
Bleed section
The Bleed controls allow you to adjust the level and routing of a Drum's bleed and spill signals. Bleed signals in
BFD3 represent the sound of other Drums captured by the Kick and Snare mics, while spill is simulated bleed in
the Tom mics.
Bleed destination
The Bleed destination buttons allow control over the routing of the recorded bleed from the Drum within the Kick
and Snare mics. 3 routings are possible:
On
The Drum's bleed is routed as normal to the first Kick and Snare slots' mixer channels.
Direct
The Drum's bleed is routed to its primary direct mic channel. Therefore, there would be no bleed from the Drum
in the Kick and Snare mic channels.
Off
The Drum's bleed is disabled completely and not heard in the mix at all.
Trim
This control adjusts the level of the recorded Kick/Snare bleed signals.
Bleed Send
The Bleed Send control adjusts the overall level of all bleed output from the Drum - this includes recorded
bleed (the sound of the Drum recorded in the Kick/Snare mics) and simulated spill - simulated bleed signals of
the following types:
Kick in the Tom mics
Snare in the Tom mics
Toms in other Tom mics
Bleed Return
The Bleed Return control sets the input level of the mix of all bleed signals routed to the Drum's direct mic
channels. This includes the following:
Any recorded bleed or simulated spill signals from other Drums
The recorded bleed signal from the Drum itself if it is routed to its primary direct mic channel (using the
Direct Bleed destination setting described above) - this is the only possible signal for hihat/cymbal/percussion
slots.
Adjusting bleed levels globally
You can change overall bleed levels by using the Kick, Snare and Other Master bleed controls on the mixer's
Master channel, visible while the Tweaks channel mode is active (click the Tweaks button above the mixer).
Loudness section
The Loudness controls relate to the dynamics of the Drum - its playing intensity and the resulting level and
timbre.
Power
Activating this button enables the Loudness section controls. With the Power button deactivated, none of the
controls in the Loudness section have any effect on the Drum.
Vel Dyn (Velocity Dynamics)
The Velocity Dynamics control shifts the velocity range of incoming events (from MIDI notes or from the
Groove engine) - in effect, making the 'drummer' play the Drum with more or less intensity.
Curve
The Curve control allows you to alter the amplitude of the Drum in response to the incoming velocity of MIDI or
Groove trigger events.
With the Curve control at 0, there is an exact 1:1 mapping of incoming velocity to the natural recorded
amplitude of the corresponding velocity layer.
As the control is increased, the level of the resulting audio from the event is increased from its natural recording
level between the minimum and maximum velocity values. The greatest increase in gain occurs at the middle of
the velocity range.
Range (Dynamic Range)
The Range control effectively extends the range of the dynamics curve by using automatic amplitude
adjustment of the range of samples for the velocity layers. Increasing the control creates a larger difference in
amplitude between the quietest and loudest layers for each articulation.
Ambient Mics section
The Ambient Mics section's controls allow manipulation of the various Ambient mic channels for a Drum,
providing many creative opportunities that would simply not be possible in a real-world drum recording.
© 2017 FXpansion
Page 44
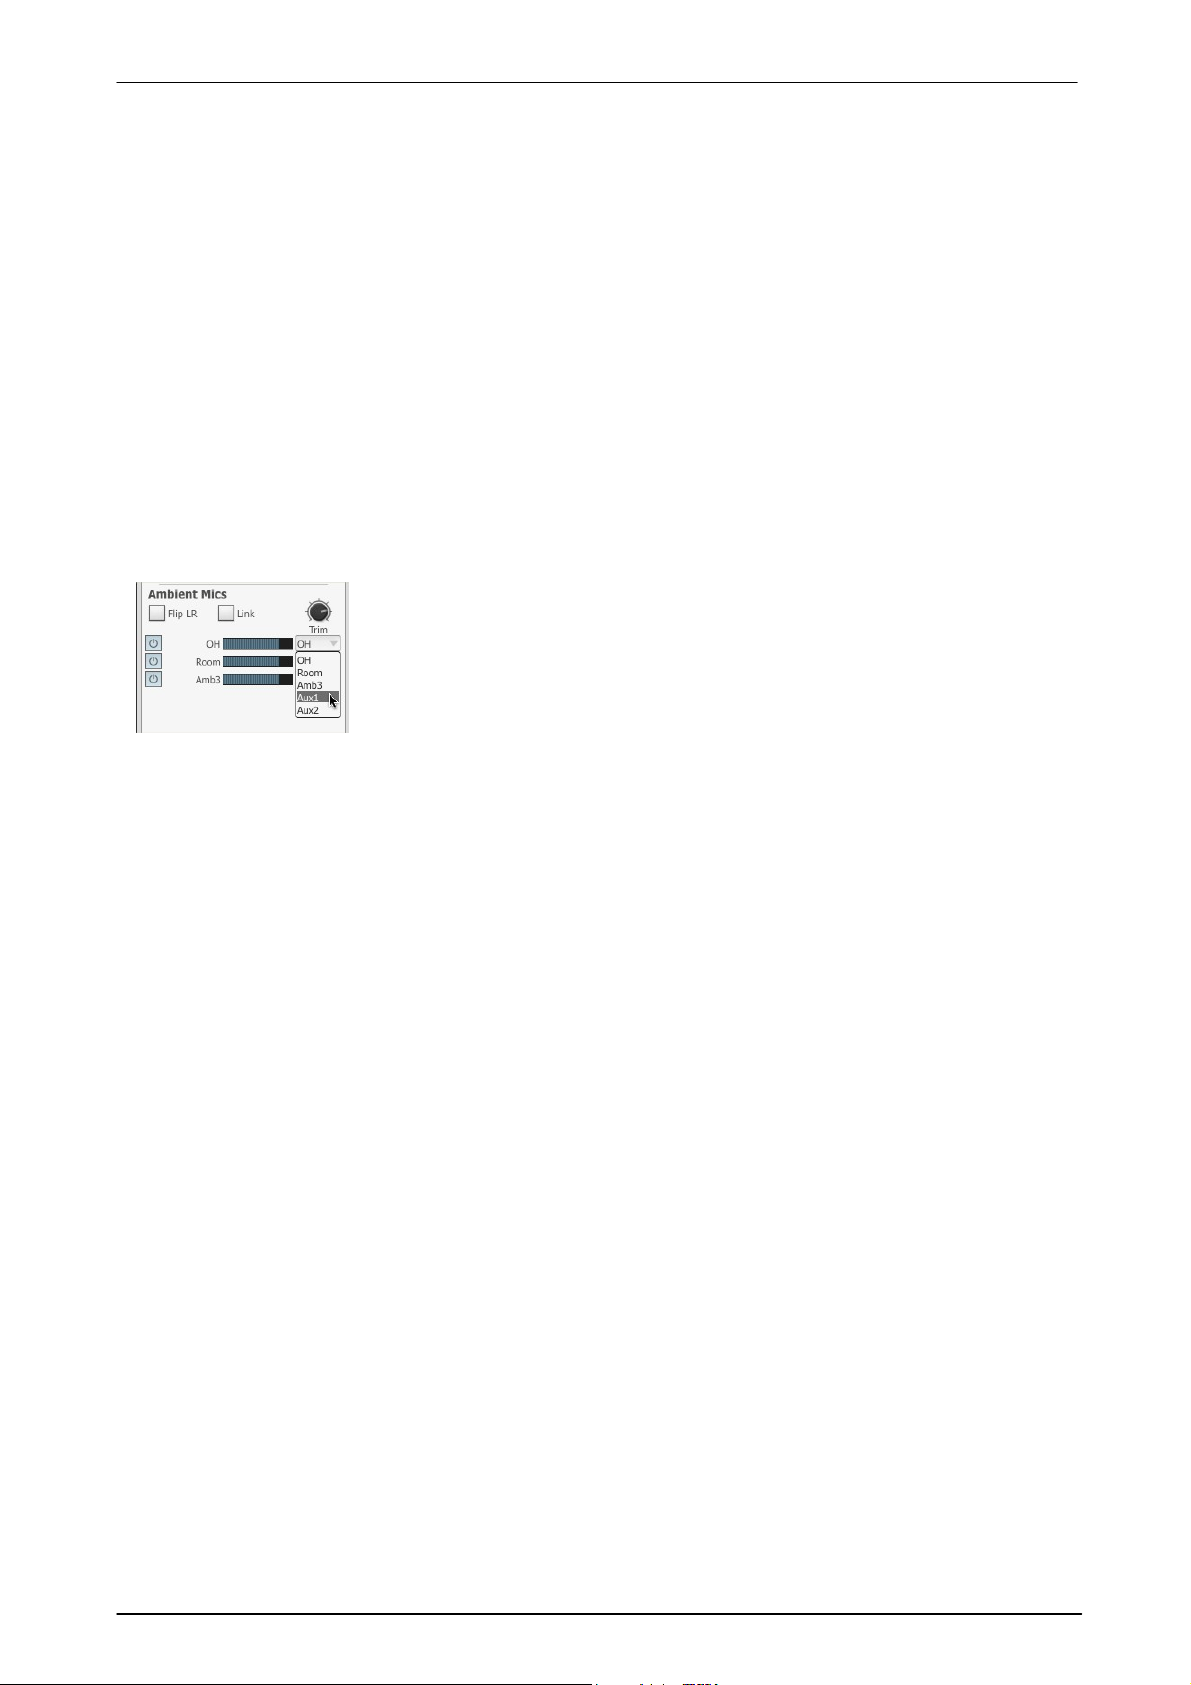
BFD3 Operation Manual44
Routing selector
By default, all Ambient mic signals for each Drum is routed to the corresponding
Ambience mic channels in the BFD3 mixer. However, the Routing selector dropdown menus override these default routings - each channel can be routed to a
discrete Aux channel for further processing or subsequent routing outside BFD3.
Flip LR
Most Ambient mic channels, such as Overhead/Room/Amb3 channles, are stereo and the sound of the Drum is
'fixed' within it - it cannot be panned within the stereo field, unlike the Drum's direct mics. This is an inherent
drawback of true stereo ambience.
The Flip LR button inverts the stereo image of any stereo ambient mic channels for the Drum which can be
useful if panning a Drum's direct mics to the other side of the stereo field.
In addition the Width controls for Ambient mic sub-channels (when the mixer is set to Tweaks channel mode by
clicking the Tweaks button) can be used to manipulate their stereo properties.
Trim
The Ambient Mics Trim control provides an overall level control for all ambient mic channels for the Drum. It
can be considered as a simple 'wet/dry' control for the Drum.
Any Ambient Mics Trim adjustments are applied in addition to the individual Level controls described below.
Link
Enabling the Ambient Mics Link button results in the Drum's main mixer channel level fader being linked to its
Ambient Mics Trim parameter. This means that adjusting the kit-piece's mixer level results in a corresponding
adjustment being applied to the Ambience Trim meaning that you can adjust the level of the Drum in the direct
and ambient mics using a single fader.
Power / Level controls
Each Ambient mic channel type contained within the Drum features its own horizontal Level fader in this section,
allowing you to independently set the level of the Drum within each set of ambient mics.
Each channel can be disabled entirely by deactivating its Power button.
© 2017 FXpansion
Page 45
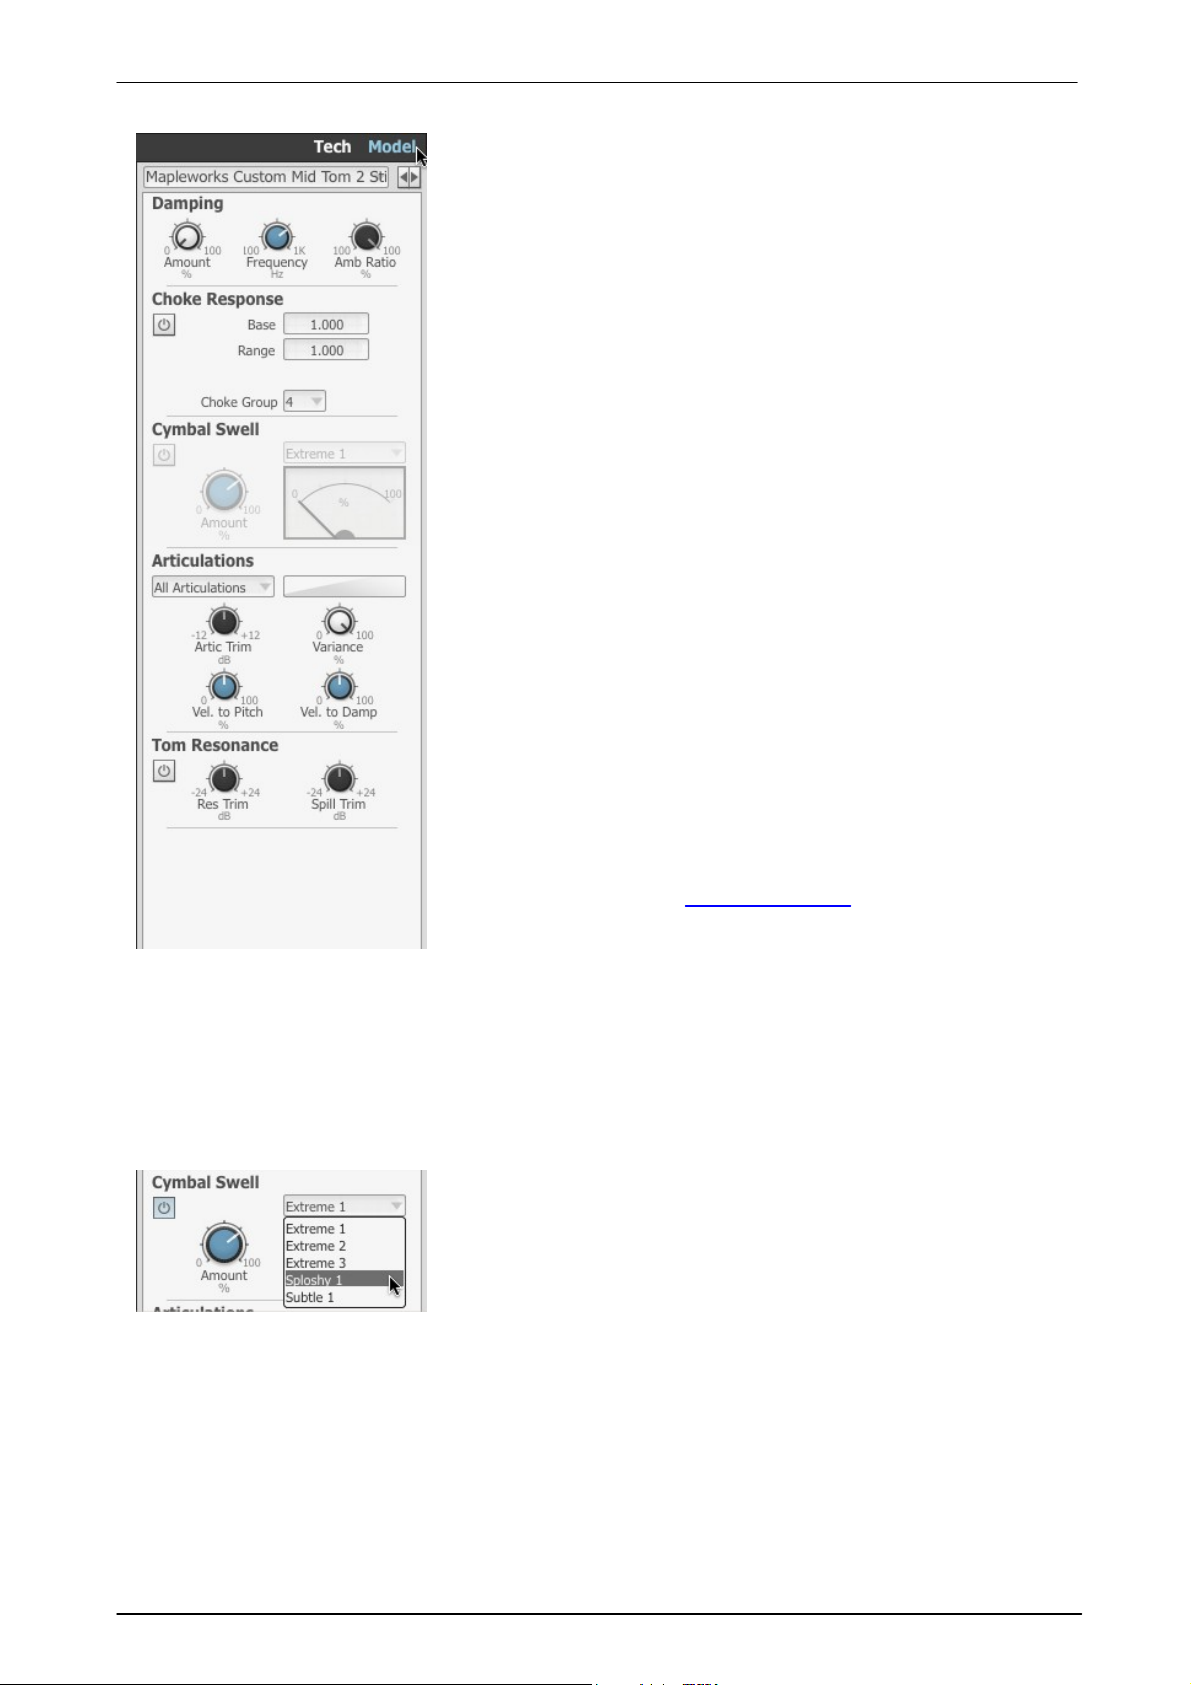
Model (Modelling) page
Damping section
The Damping controls allows you to decrease the decay of the Drum,
simulating the effect of a blanket or pillow inside a kick drum or placing
objects which absorb vibrations onto a snare or tom head.
Amount
Use the Amount control to set the amount of damping required.
Freq
The Freq control represents a crossover frequency. Below this
frequency, the decay of the Drum's ambient mic channels is shortened
according to the damping amount. Above the frequency, less damping
is required. This results in a more natural ambience sound when using
the damping functions. To damp the entire frequency range within the
ambient mics, increase the Freq control to its maximum setting.
Amb Ratio
The Amb Ratio control allows you to adjust the amount of damping in
the Ambient channels. With the control at the default maximum setting,
less damping occurs in the Ambient channels than on the direct
channels. With the control at the minimum setting, the same amount of
damping is applied in the direct and Ambient channels.
Choke Response section
The C hoke Response section provides control over the choking
behaviour of a Drum - in other words, how a preceding event for the
Drum decays when a new event is triggered.
Power button
The Power button must be activated for the settings in this section to be
applied to the current Drum. If the button is deactivated, the default
choke response settings specified in the Preferences are used.
Base/Range
All Drum types have a default choking behaviour which is defined in the
BFD3 preferences using a set of Base/Range values. The Base and
Range controls in the Drum Editor allow custom choking responses for
individual Drums. See the Engine Preferences section for more details
on setting Base/Range values.
The controls in this section are only available when a C ymbal is the
currently selected Drum. When activated with the Power button,
Cymbal articulations played in rapid succession are shaped to simulate
their real-world behaviour.
Swell algorithms
Several Swell algorithms are provided, selectable via the drop-down
menu - each provides different swell characteristics.
Using BFD3's sounds 45
Drag (Snare only)
This parameter allows the adjustment of the additional Drag C hoke fade time for Snares, and is not available for
other Drum types.
Choke Group
The Choke Group function allows you to create choking behaviour between Drums - setting 2 Drums to the
same C hoke Group means that they choke each other.
Cymbal Swell section
Amount
The Amount control adjusts the intensity of the cymbal swell emulation.
The meter displays a real-time representation of the energy within the cymbal when the Swell function is active.
© 2017 FXpansion
Page 46
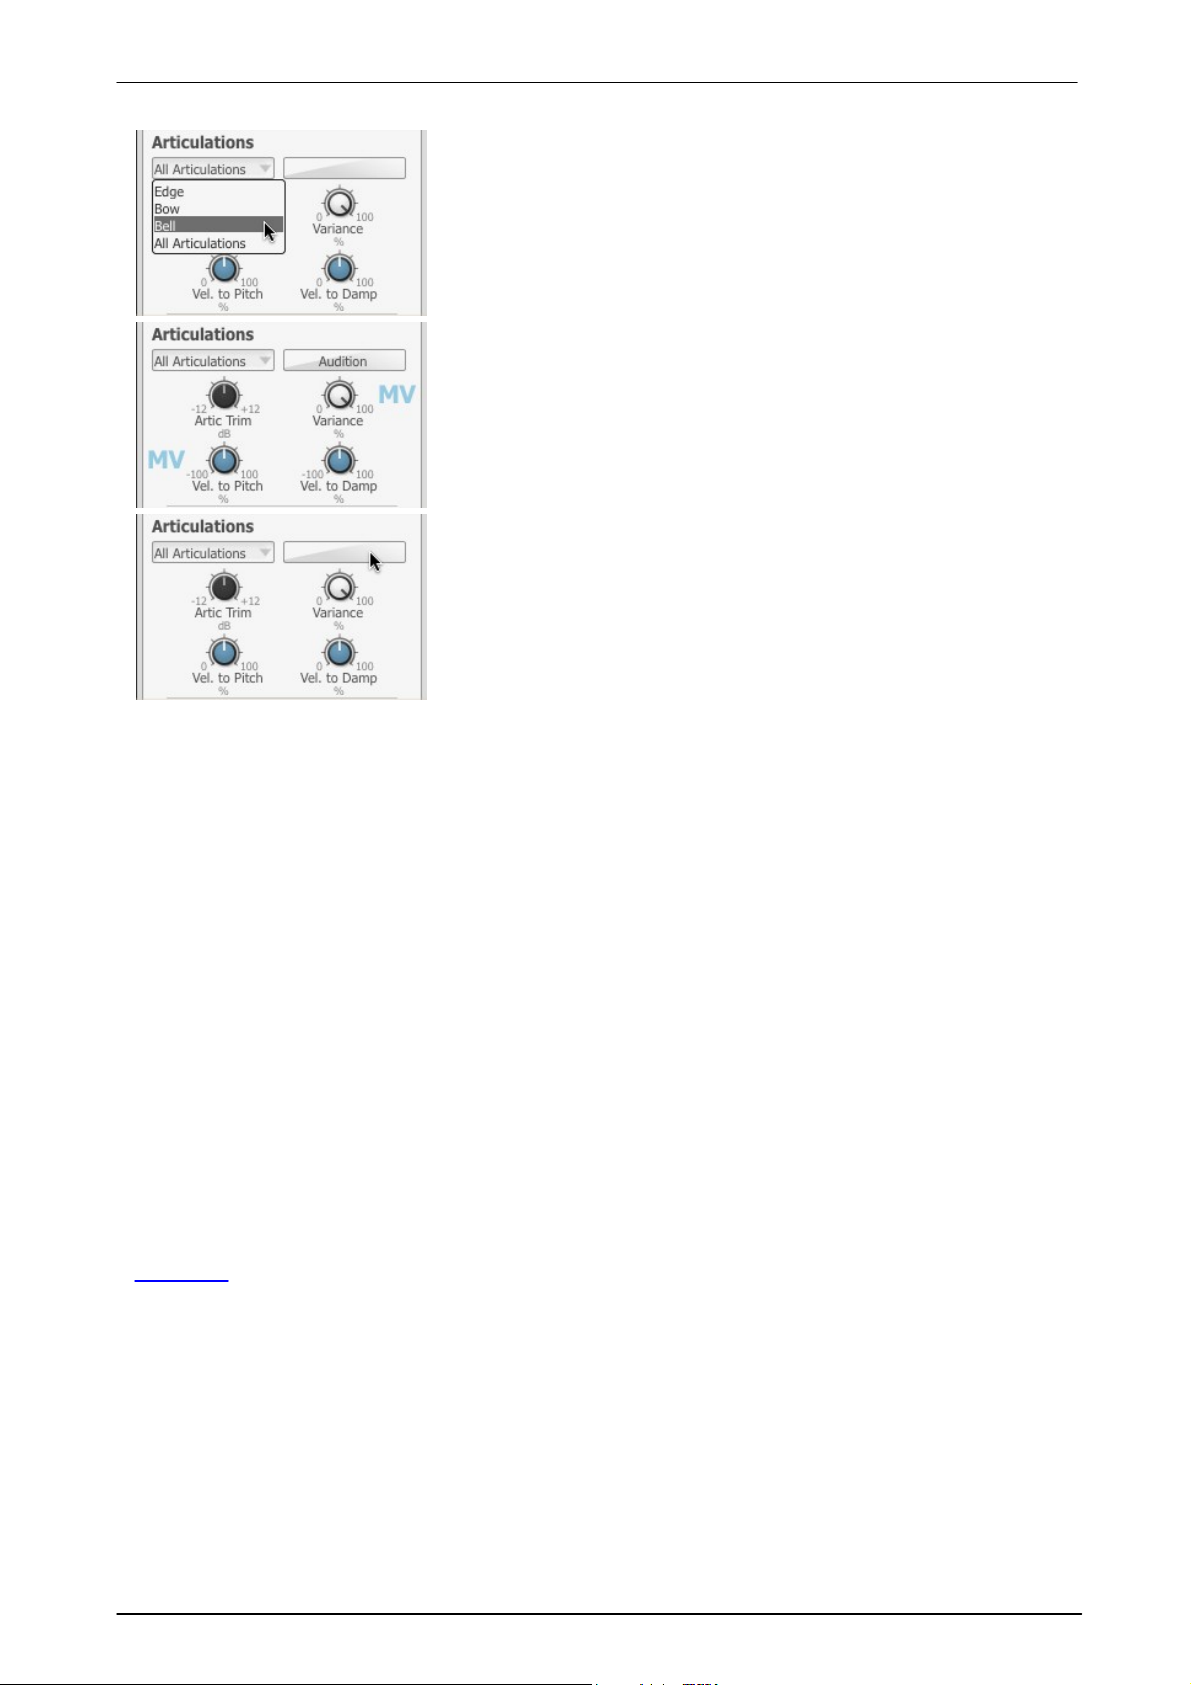
BFD3 Operation Manual46
These controls are provided for tweaking the response of individual
Drum articulations although they can be applied for all articulations if
you wish.
Articulation selector
Select the articulation to adjust using the Articulation selector dropdown menu - select All articulations in order to affect all articulations in
the Drum.
Multiple values
If any articulations feature individual settings for any of the controls in
the Articulations section, a Multiple Value indicator is shown beside it
when All Articulations is currently selected for editing. Note that
adjusting any control with All Articulations selected results in overwriting
the individual settings for any articulations.
Audition strip
The Audition strip plays a preview the selected articulation when
clicked. The velocity of the audition depends on where the strip is
clicked – the lowest velocity layer is at the left side of the strip and the
highest later is at the right.
With All articulations specified in the selector, a preview of the Drum's
main articulation is played.
Articulations section
Artic Trim
The Artic Trim control adjusts the level of articulations between -inf and +12dB.
One of the most common examples for using this control would be to change the level of closed hihat
articulations in relation to open ones. With the Hihat slot selected, select the C losed Tip articulation and adjust
the Artic Trim control, repeating the process for the Closed Shank articulation.
The default setting for this control is 0 dB, meaning that all articulations are played at their natural recorded
levels.
Vel to Pitch
The Vel to Pitch control allows the tuning of each articulation to vary depending on incoming trigger event
velocity. Uses of this control range from extreme creative effects to very subtle changes which can give some
extra character to the sound of the kit.
Settings range from -100% to 100%. Positive values result in increasing pitch with higher velocities, while
negative values result in decreasing pitch with higher velocities.
Vel to Damp
The Vel to Damp control allows the amount of damping applied to the articulation to be varied according to the
velocity of incoming trigger events. It effectively allows you to control the decay of articulations with velocity and
can offer very interesting approaches to dynamics and space within your drum tracks.
Any changes in the damping applied to each articulation as a result of this parameter are applied relative to the
Drum's overall Damping Amount setting.
Settings range from -100% to 100%. Positive values result in increased damping with higher velocities, while
negative values result in reduced damping with higher velocities.
Variance (Anti-machinegun variation)
This control adjusts the maximum amount of loudness or tonal humanization that is possible for the articulation.
BFD3 features 2 controls to adjust the global amount of 'Anti-MachineGun' humanization, located in the
Dashboard - click the Dashboard button in the LCD display in the top-centre of the interface. The Loud
(Loudness humanize) control adjusts the amount of volume randomization applied across the kit, while the Tone
(Tone humanize) adjusts the amount of randomization between velocity layers, leading to tonal variation due to
the Drum being struck at a different intensity. The maximum amount of variation for each Drum in the kit is
dictated using the Drum Editor's Variance control. The AMG button in the Dashboard must be activated to
enable these functions.
These functions serve to make drum parts sound less 'robotic' or 'machinegun-like' by adding natural-sounding
dynamic and tonal variations that are inherent in a human drummer's performance.
Setting the Variance control to zero can be useful for avoiding humanization of certain parts of the kit.
Tom Resonance
The Tom Resonance functions create the sympathetic resonance generated by Toms when other Drums are
played. These functions are available only for the Kick, Snare and Tom slots.
© 2017 FXpansion
Page 47
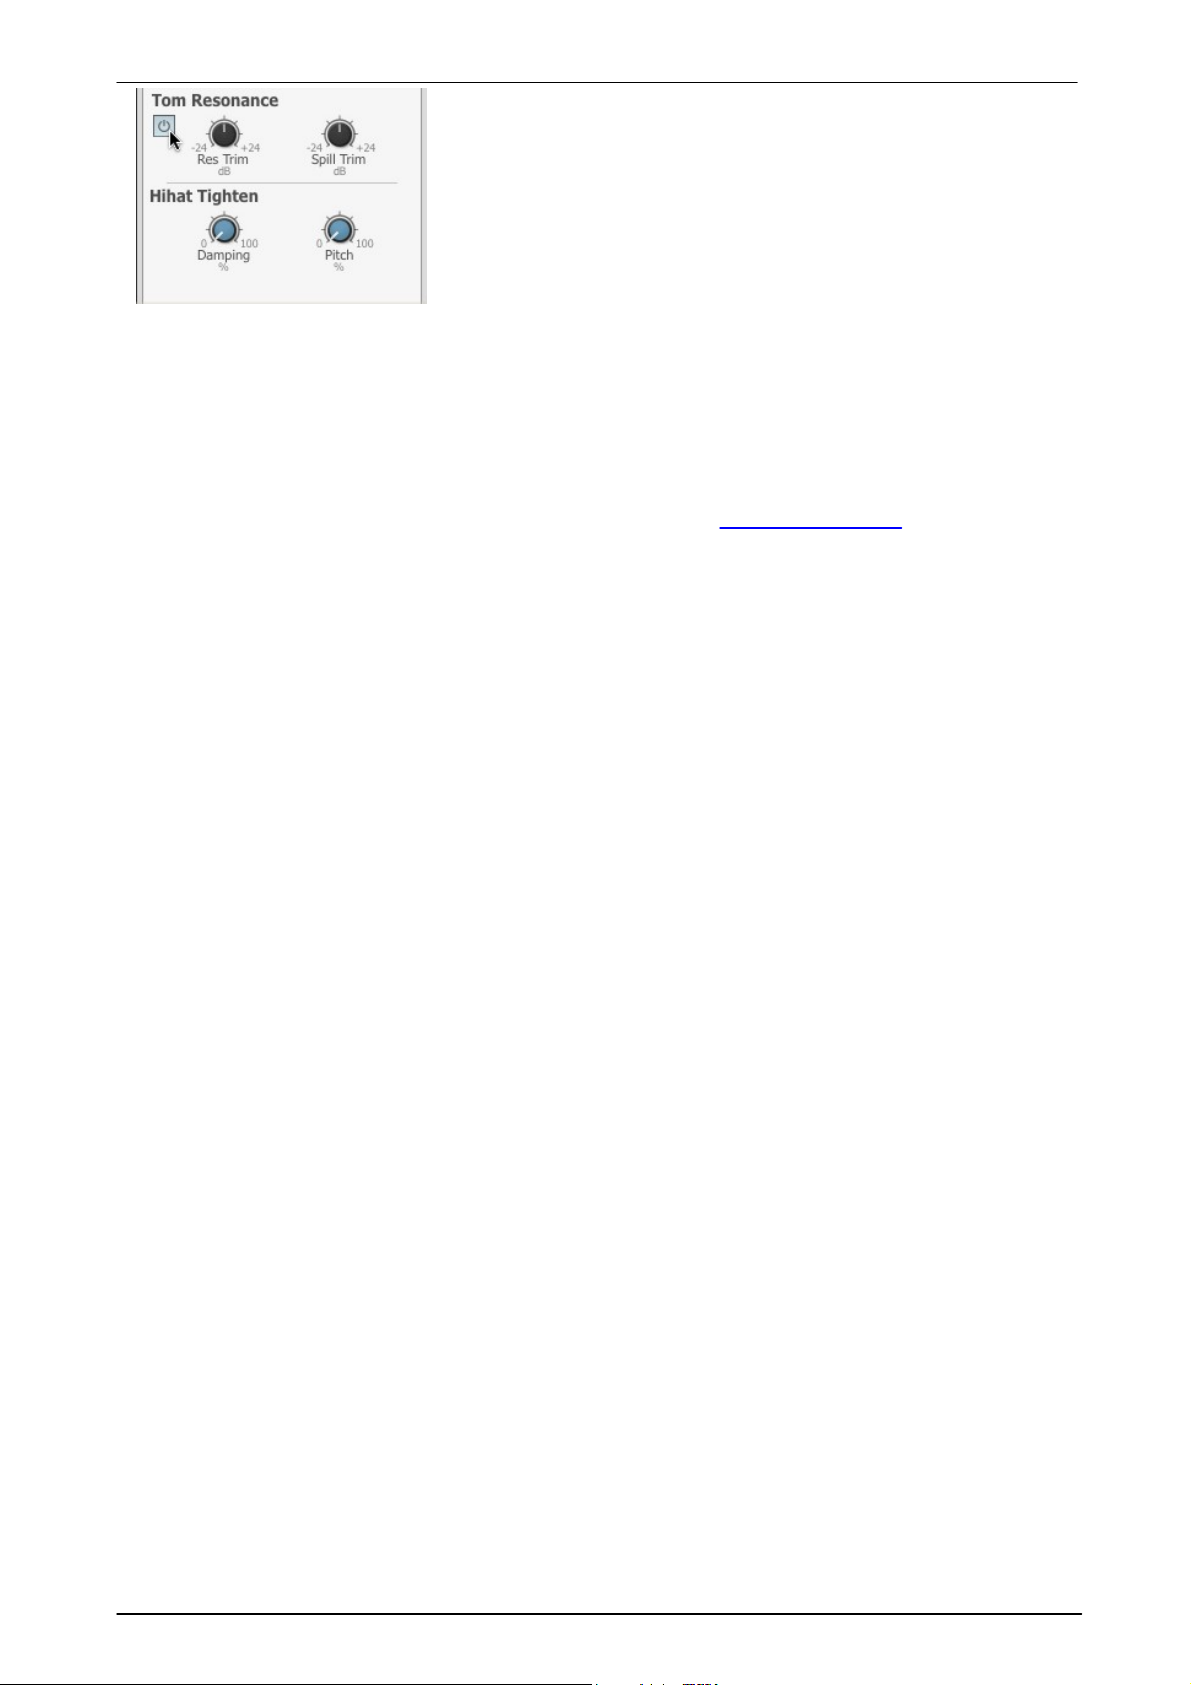
Using BFD3's sounds 47
Power
This button enables or disables the resonance function for the Drum.
When it is active, the Drum triggers the tom resonance algorithm in the
Tom slots.
Res Trim
This control adjusts the level of the resonance generated by the Drum
in the Tom slots.
Spill Trim
This control adjusts the level of the Drum's bleed or spill signals (if they
exist) in the Tom slots.
Hihat tighten (Hihat slot only)
This function allows you to adjust the closed Hihat sound to sound tighter and more snappy. It achieves a similar
result to the regular Damping functions at the top of the Modelling page, except that only the closed Hihat
articulations (Closed Tip and Closed Shank) are affected.
The Damping control adjusts the amount of tightening that is applied to closed tip articulations. The Pitch
control adjusts the amount of subtle pitch increase that occurs as the hihat is tightened.
The Hihat Tighten function varies within the closed zone when using variable hihat control so that the amount
specified with the controls is applied at the maximum closed pedal position (when the pedal MIDI CC # value is
127).
© 2017 FXpansion
Page 48
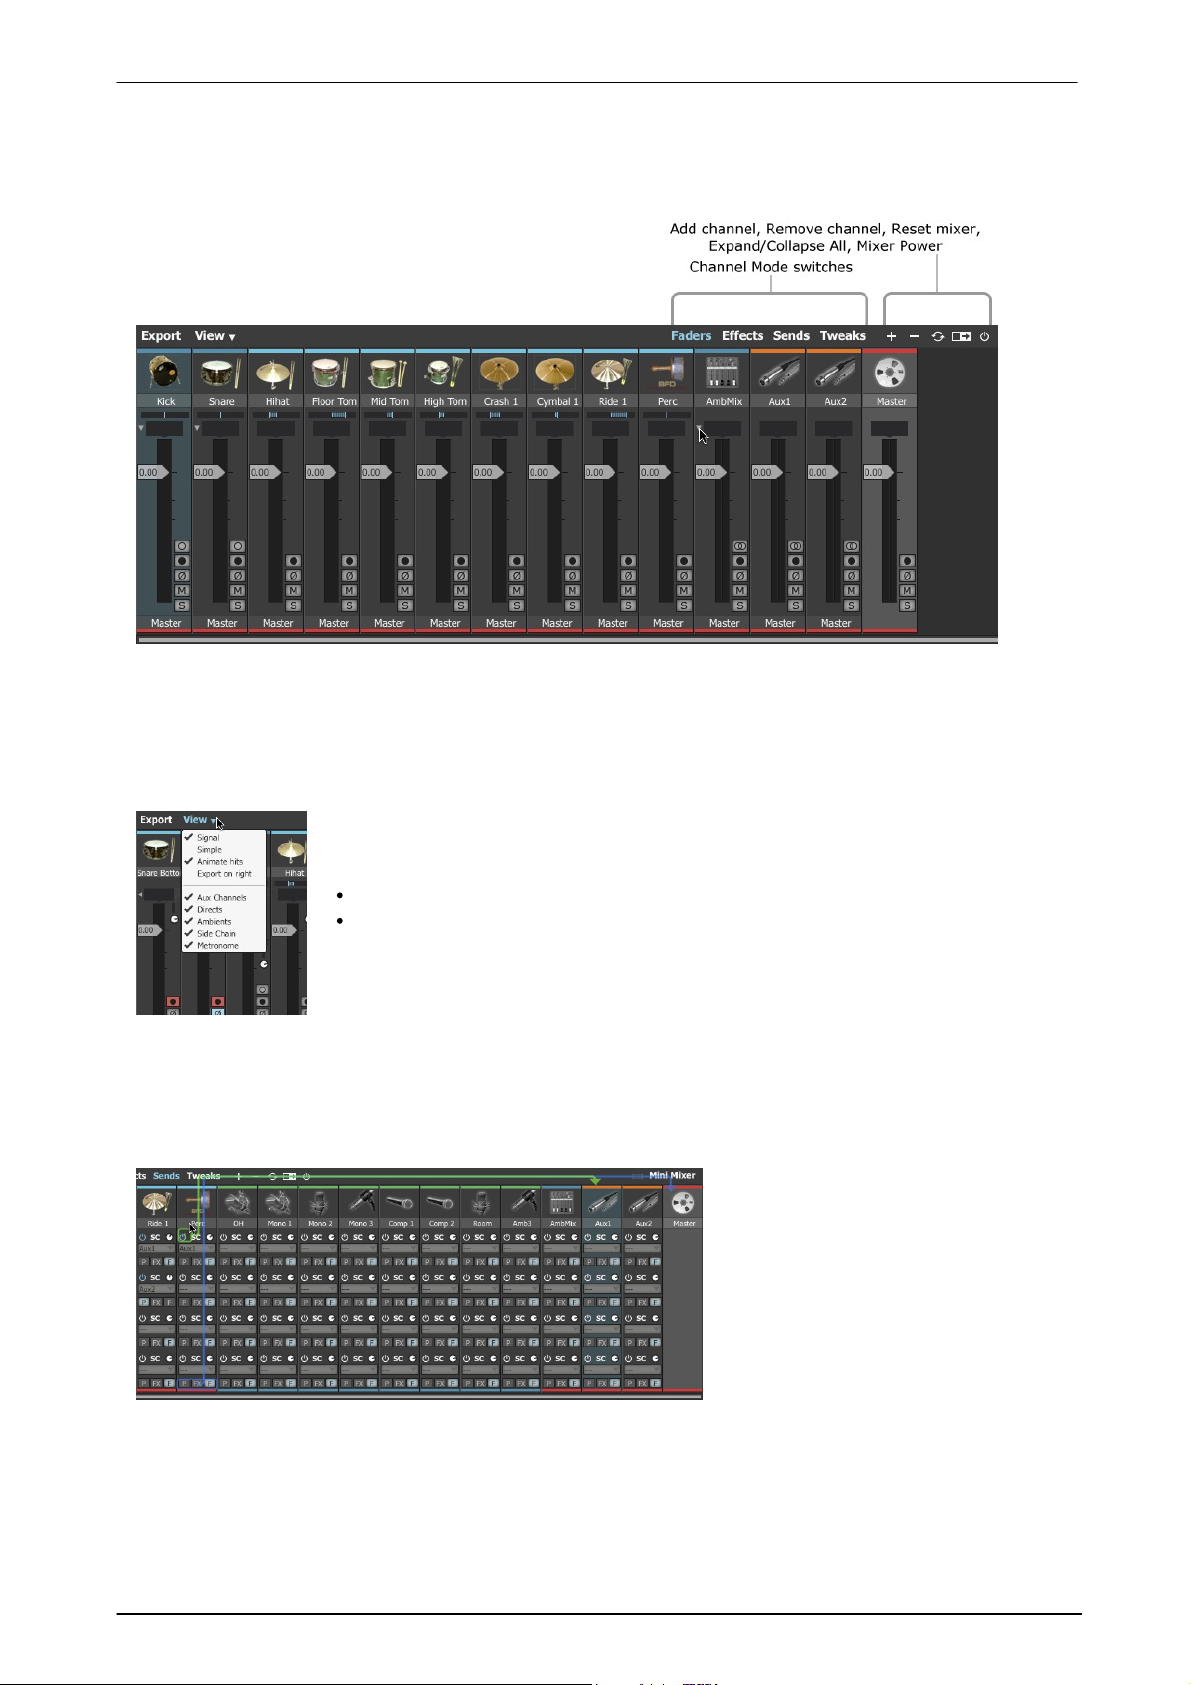
BFD3 Operation Manual48
Simple
When this setting is enabled, certain advanced controls are omitted from being
displayed on BFD3's mixer channels:
Input trim controls (Input, Bleed, Sidechain)
Effect/Send slot indicators
Animate Hits
When this setting is enabled, Drum channels are animated to indicate that an
incoming trigger for one of its articulations has been received.
Signal
The Signal setting toggles the overlaid
signal routing indicators which visually
indicate output, send and sidechain
routings for the channel underneath the
cursor.
3.3 Mixer controls
Mixer Toolbar
The toolbar at the top of the mixer channels provides several useful functions for managing your mixes.
Export
This button toggles visibility of the Export panel, containing settings relating to exporting audio from BFD3.
View menu
The View menu features several settings to customize the current view of the mixer.
Export on Right
Enabling the Export on Right setting results in the Export panel appearing on the right side of the mixer when
opened, rather than the left.
Visibility toggle settings
The relevant settings toggle the visibility of Aux Channels, Direct channels, Ambient channels, SideChain
and Metronome channels in the mixer.
© 2017 FXpansion
Page 49
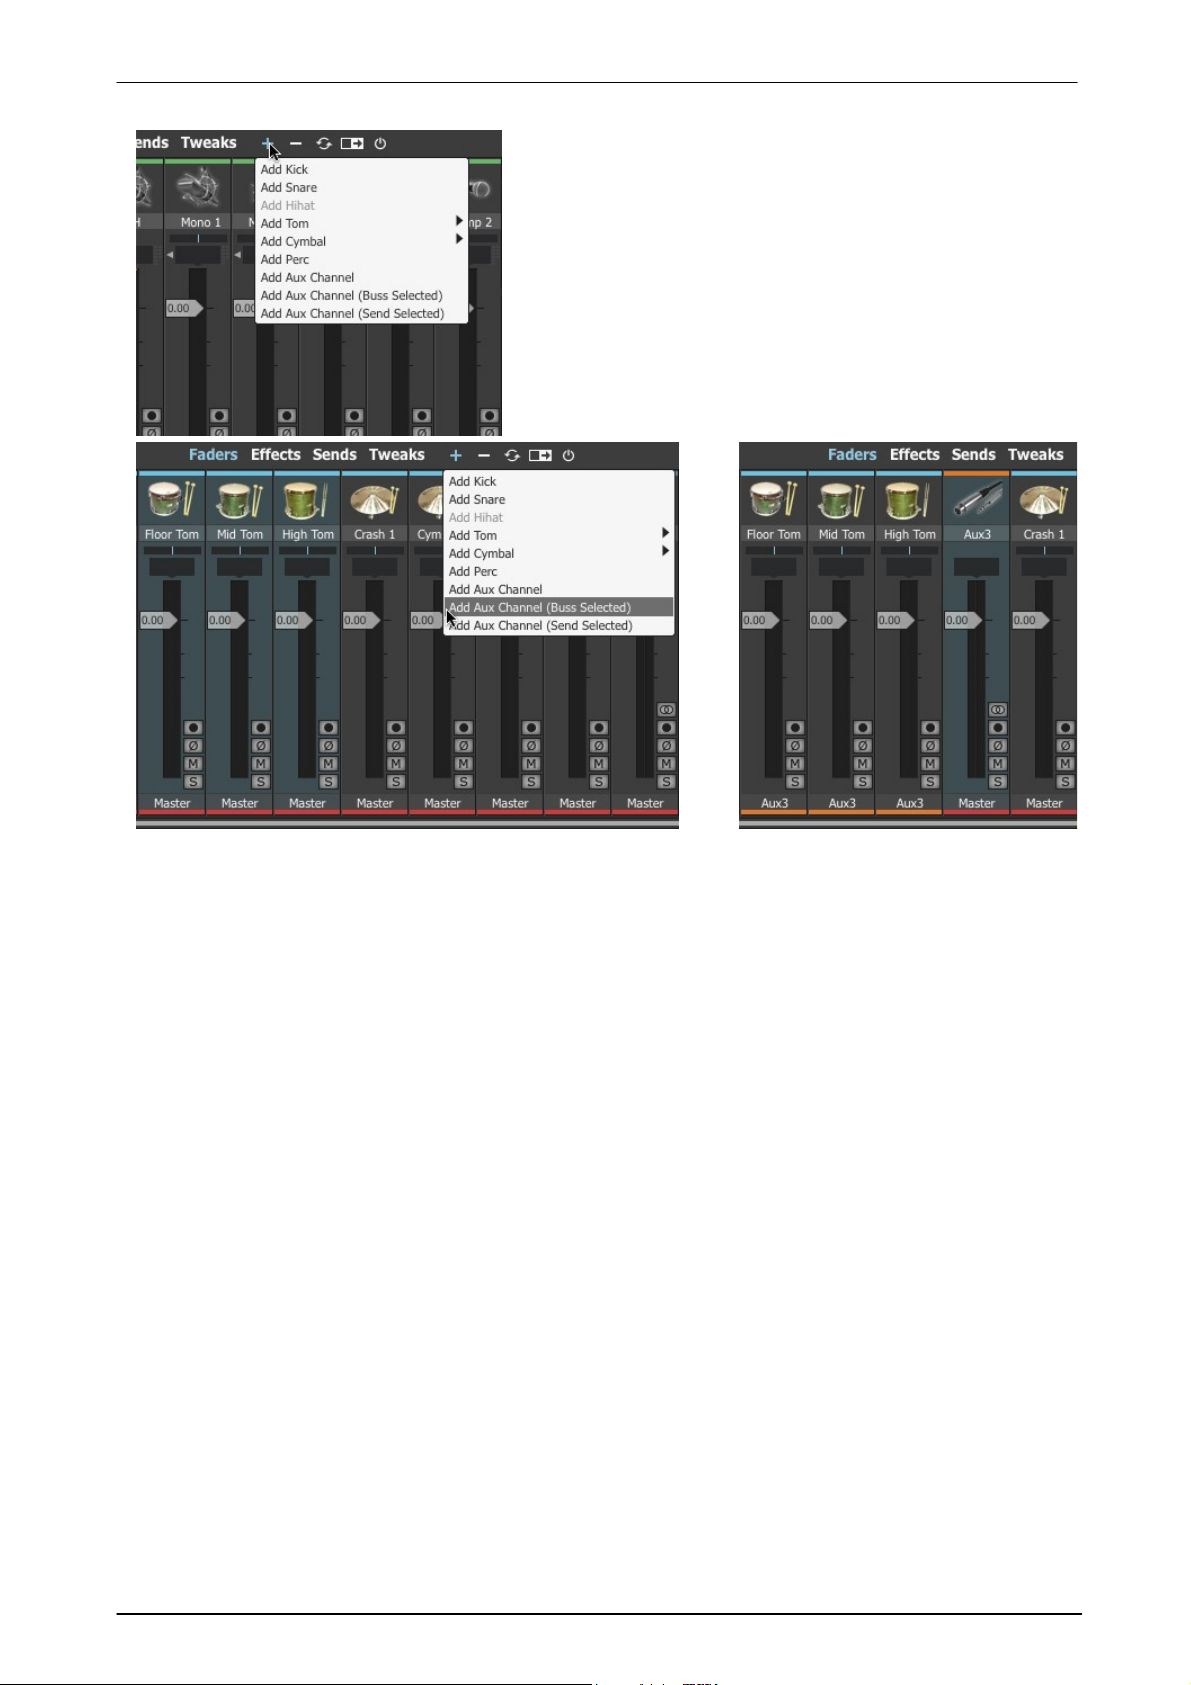
Add channel
Clicking the Add channel button displays a menu of the types
of channels that can be added: Aux channels and kit-piece
channels/slots.
There are also 2 additional functions for automatic routing to
newly created Aux channel(s).
Add Aux channel (Buss Selected)
If one or more mixer channels are currently selected, using this
function creates a new Aux channel and sets their Output
selectors to route the channels' audio to the new aux channel.
Add Aux channel (Send Selected)
If one or more mixer channels are currently selected, using this
function creates a new Aux channel, creating Send routings to it
from each of the selected channels.
In this example, the Floor Tom, Mid Tom and High Tom
channels are selected before using the Add Aux Channel
(Buss Selected) function.
The new Aux channel is added to the right
of the selected channels. The Output
selector of all 3 channels is set to the new
Aux channel.
Using BFD3's sounds 49
Remove channel
The Remove channel button removes the currently selected channel(s) from the mixer.
Reset Mixer
The Reset Mixer button resets the current mixer to the default settings for the currently loaded set of Drums.
Clicking the Reset mixer button resets all channel settings to their defaults, as well as removing any FX and
Sends settings entirely. You are prompted for confirmation before this is performed.
If there are any unused channels in the current mixer, you are also prompted to remove them. Unused channels
are typically Drum channels that are empty or do not have any signals routed to them from other Drums.
Expand/Collapse all
As described earlier in this chapter, this button expands or collapses the sub-mic channels within Kick, Snare and
Ambient Mix channels.
Mixer Power
The Mixer Power button is a global power button for all effects currently loaded into the mixer. It operates in
addition to the Power buttons on each effect slot. Therefore, after turning the Mixer Power off and on again,
any Power settings that existed previously still apply.
© 2017 FXpansion
Page 50
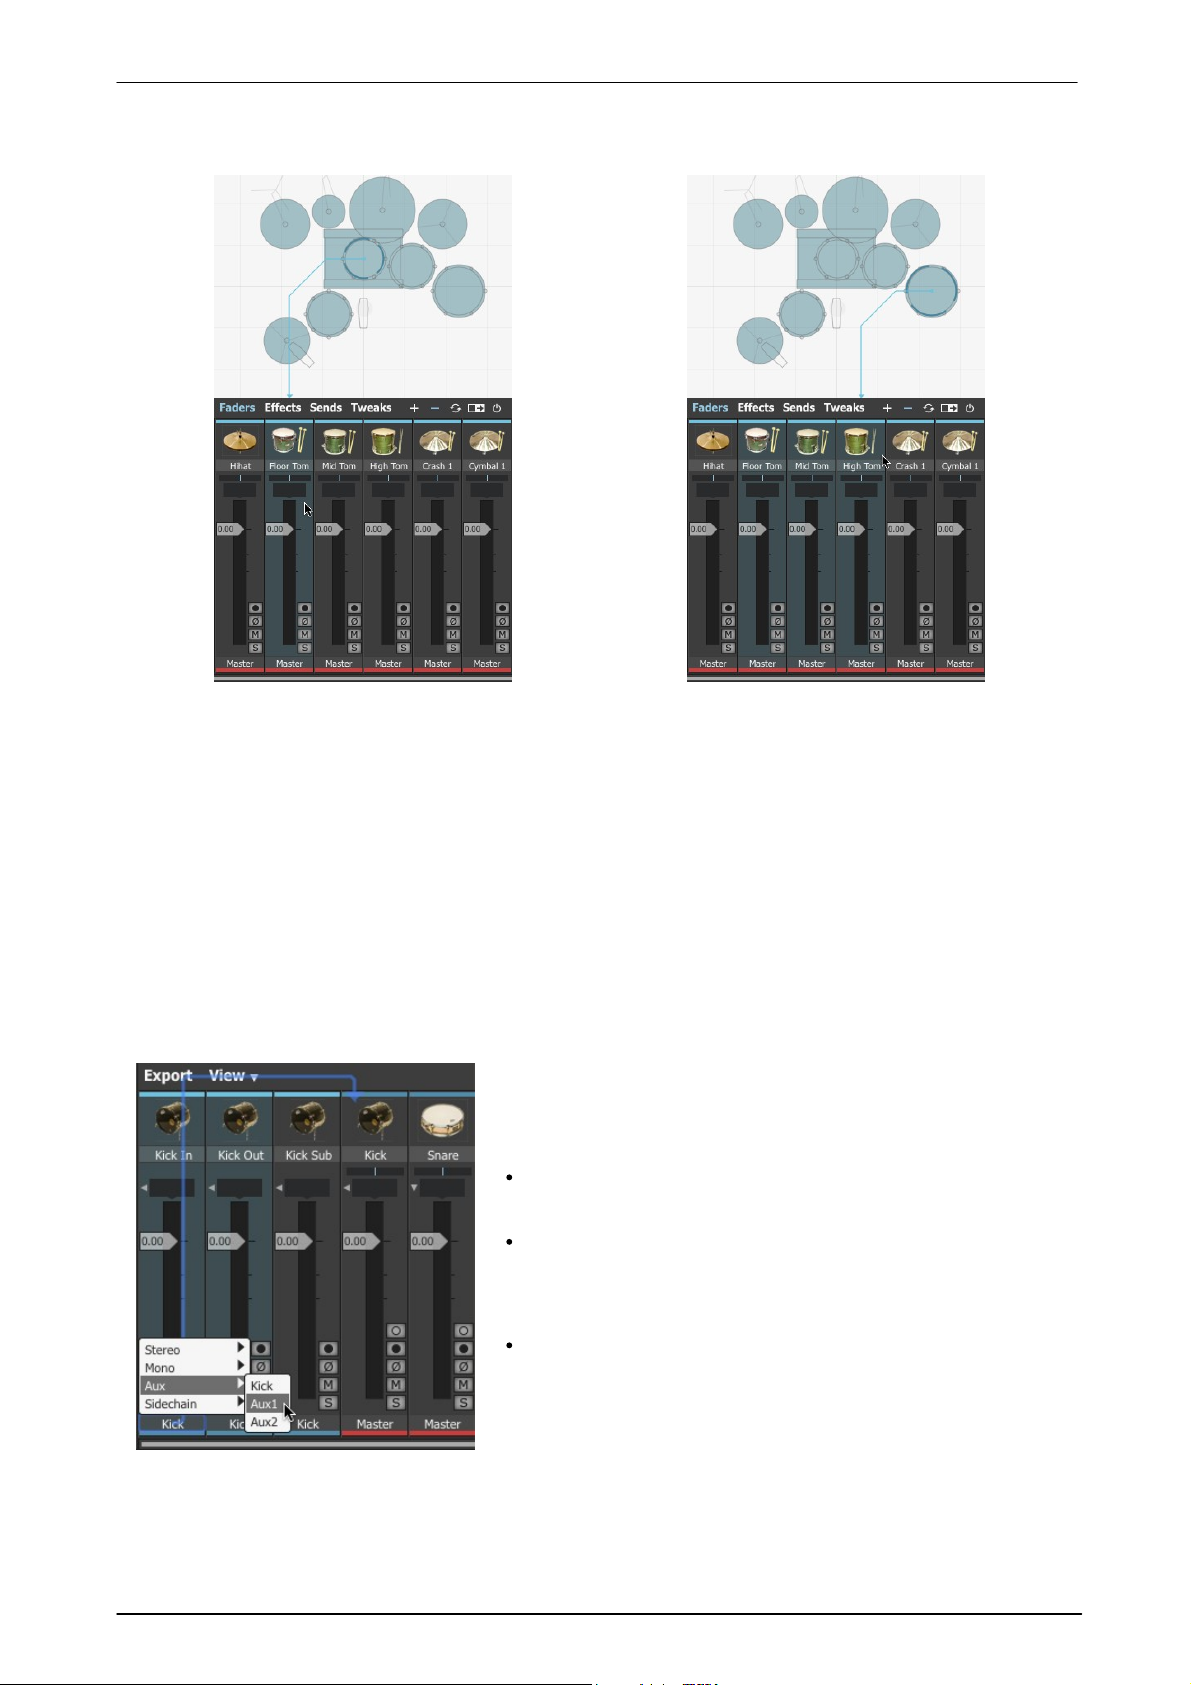
BFD3 Operation Manual50
Click anywhere on a channel in order to select it.
The selected channel is highlighted.
The last selected Drum channel is shown in the
Drum Editor.
You can select multiple channels in order to manipulate
their controls simultaneously.
All selected channels are highlighted.
Click any selected channel to select it as the current
channel - this can be useful with Drum channels in
order to show their settings in the Drum Editor.
When multiple channels are selected, their main controls can be
adjusted together: the level, Pan, mute/solo functions, Record
enable, Phase flip and Ouput selector controls can all be
adjusted in this way.
Adjusting a control on one of the selected channels results in
the control being changed for all selected channels.
Holding down ALT while adjusting a control on one of the
selected channels results in the control being inversely affected
on all the other selected channels. This functionality does not
include the channel output routing selector.
Holding down the ALT and SHIFT keys while setting the channel
output routing results in the selected channels being set to
ascending destinations of the same type (i.e. either outputs or
aux channels).
Working with the Mixer
Selecting channels
To select multiple channels:
• CTRL-click on a channel (Windows)
• CMD-click on a channel (Mac)
Adds the channel to the current selection.
• SHIFT-click
Selects all channels between the SHIFT-clicked channel and the existing selection.
Manipulating multiple channels
© 2017 FXpansion
Page 51
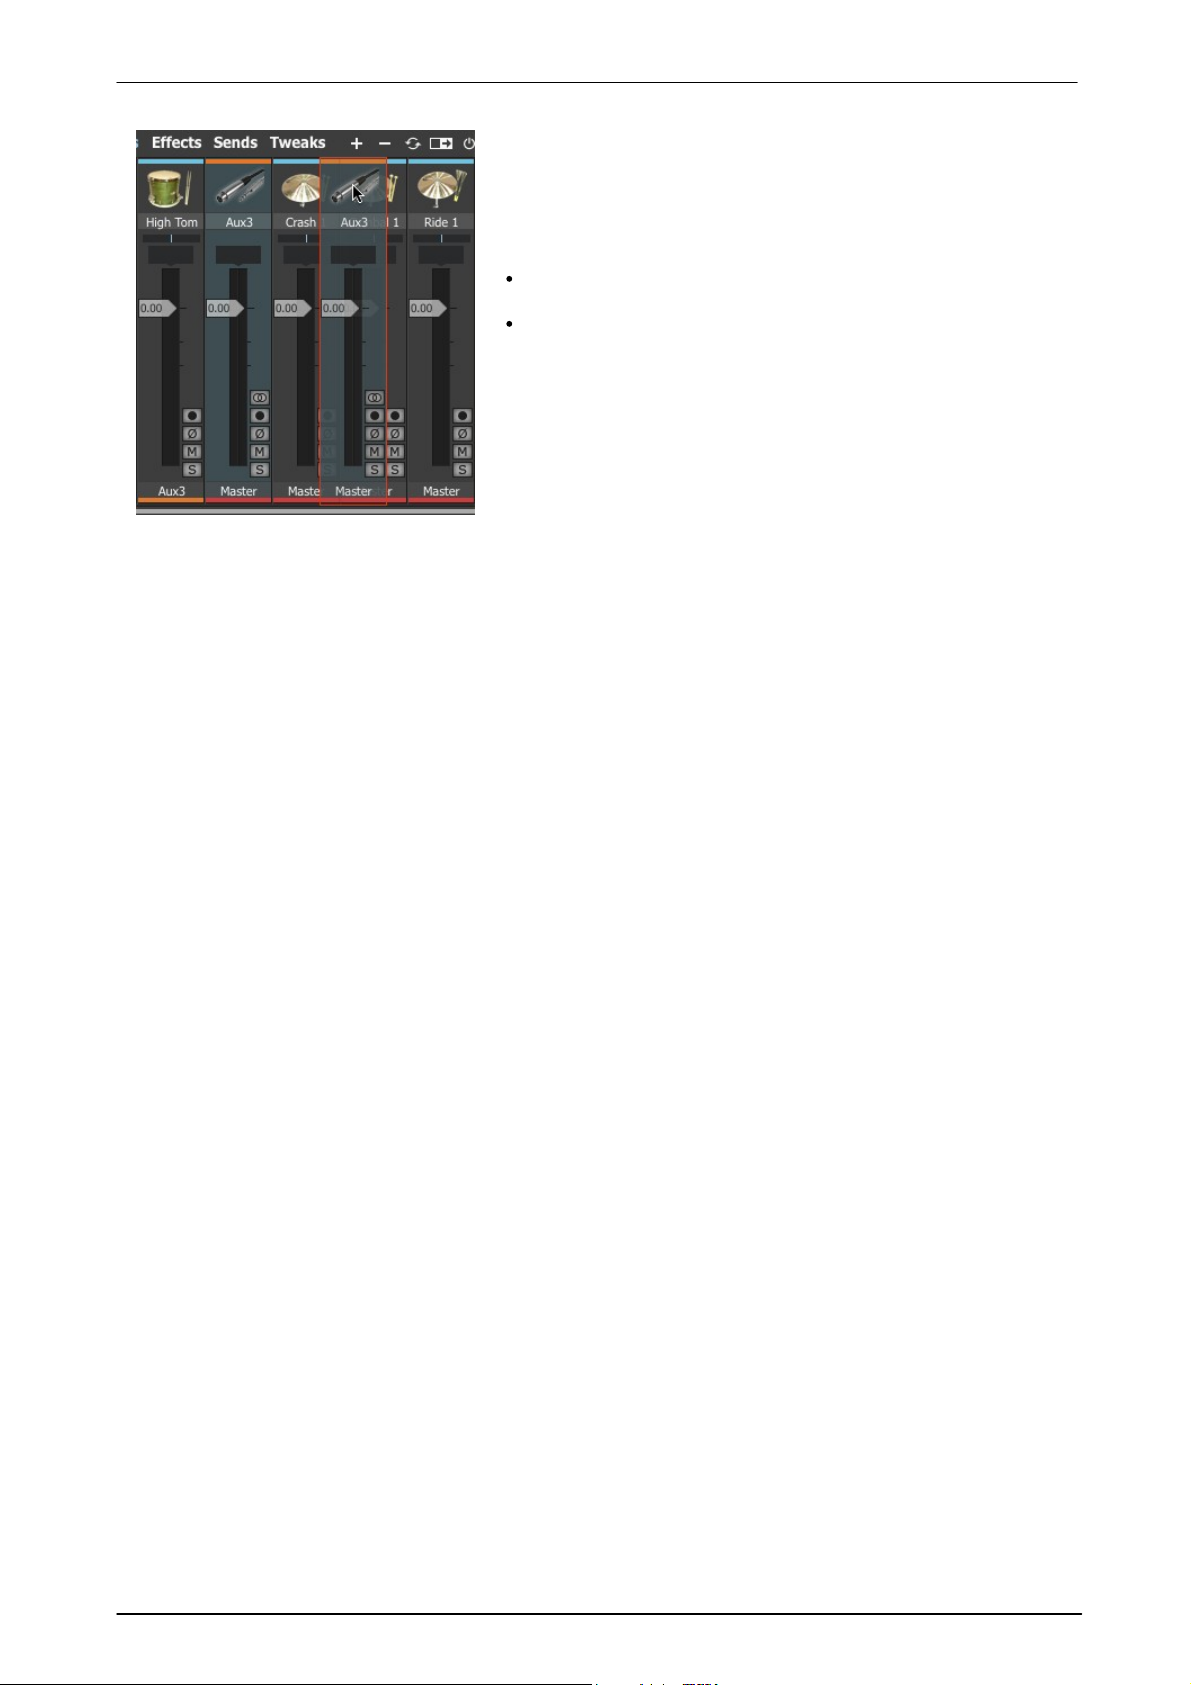
Rearranging channels on the mixer
You may want to move channels around in the mixer in order to
suit personal preference. In order to do this, click on a channel’s
selection bar and drag it left or right as desired.
Channel processing order
There is one important caveat when rearranging channels. The
processing order in the mixer is defined from left to right.
A channel's Output selector or Send Destination can only be
routed to another channel to its right.
BFD3 does not allow you to move any channel that contains a
valid routing to a position in the mixer that would break this
rule.
The Master channel must always be at the extreme right of the
mixer, and cannot be moved to any other position.
Using BFD3's sounds 51
© 2017 FXpansion
Page 52
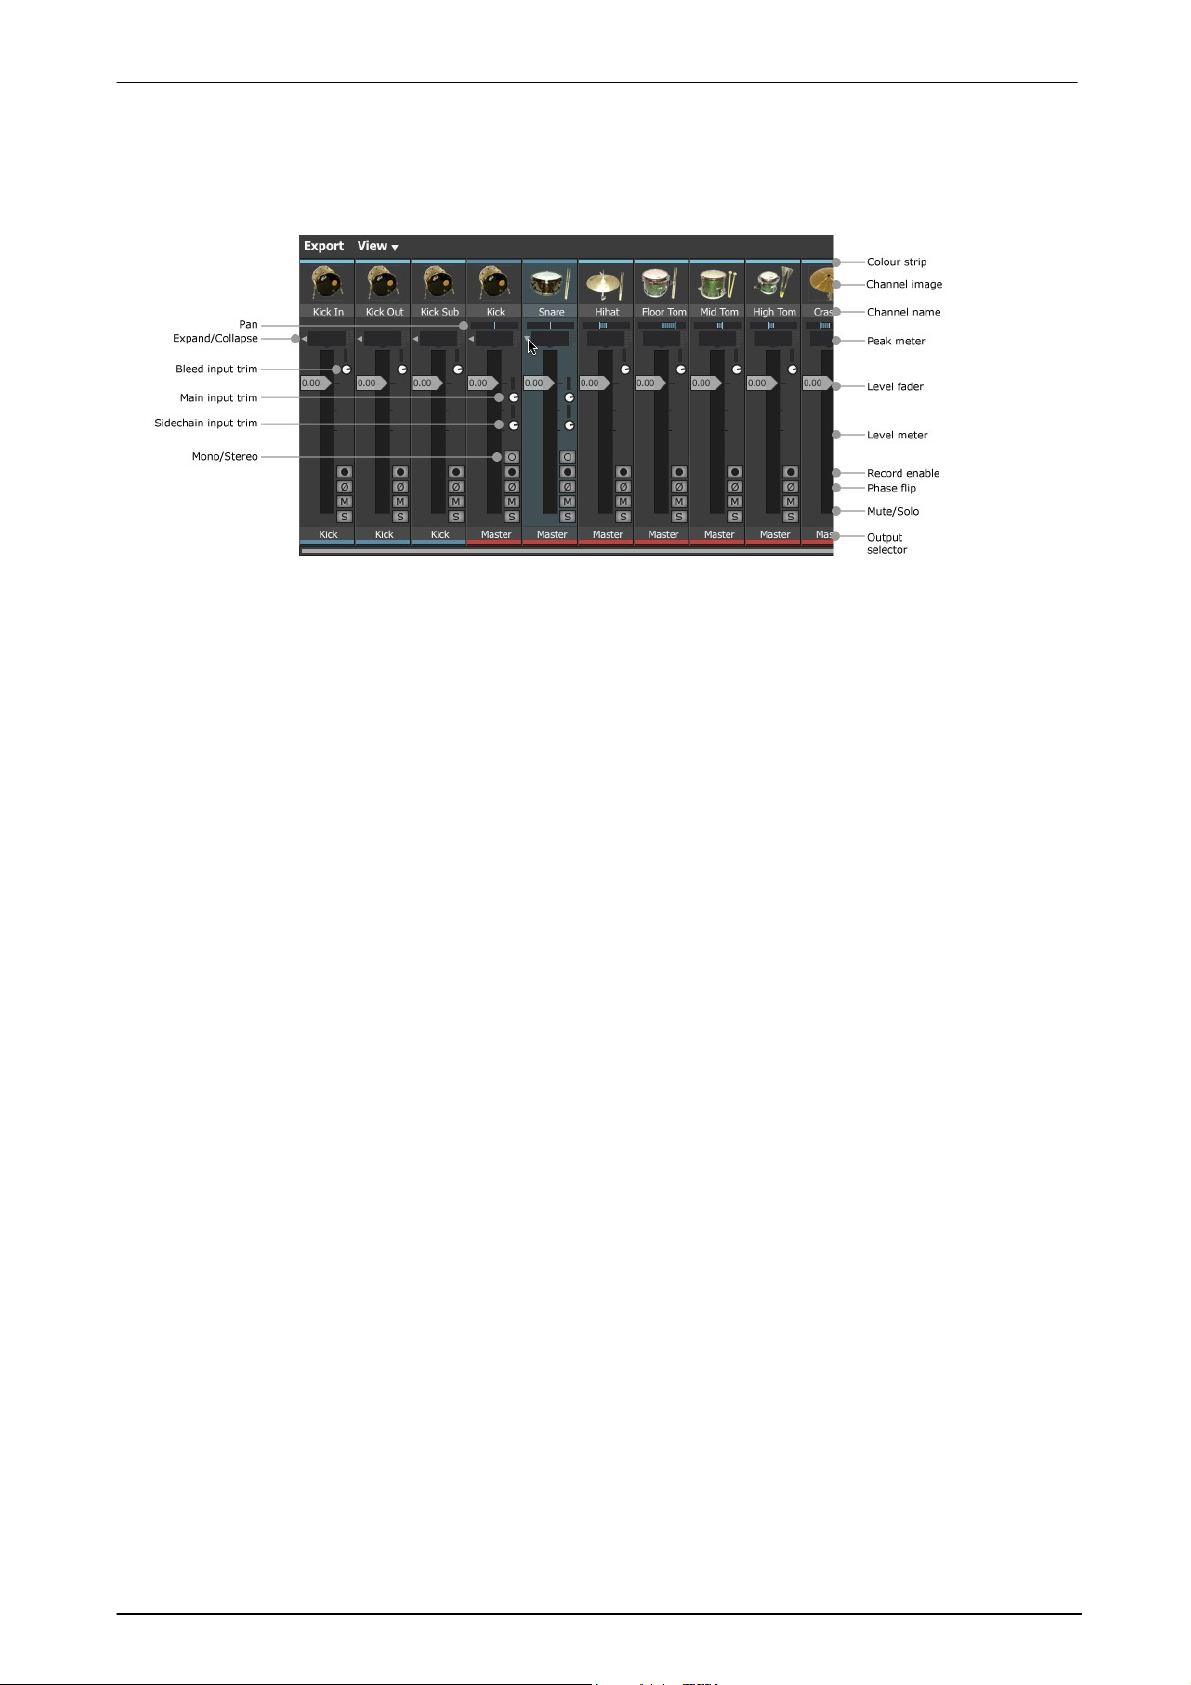
BFD3 Operation Manual52
3.3.1 Faders mode
Channel controls: Faders mode
This is the default channel mode featuring controls that are typically found in most mixing consoles or host/DAW
mixing environments.
Channel colour
The coloured strip at the top of each channel is indicative of the channel type. Drum channels are light-blue,
Ambience channels are green, the Ambience Mix channel is dark blue, Aux channels are orange and the Master
channel is red.
Channel Image
The channel image serves as a visual indicator of the mixer channel type.
Drum channels
Drum channels display an image of the Drum loaded into them and also feature an audition function - ALT-click
the channel image on any Drum channel to audition its main articulation (if the Drum slot is not empty).
Label strip and coloured tab
The label strip allows you to change the default labelling for each channel. Double-click the label strip to edit its
contents, and press ENTER to finish.
It is recommended to keep names short, as only a small number of characters are visible on the strip!
Level fader
The Level fader sets the final level of the channel.
Level meter
The Level meter provides a visual guide of the channel's level. It includes momentary peak level indicators as
well as red clip indicators – click these to reset their state.
Pan
For Drum channels, a Pan control exists on the main Drum channel (but not on its mic sub-channels), which
allows you to set the pan position of the Drum's direct mic channels.
Drum channel Pan controls are duplicated within the Drum Editor (in the Tech page).
On stereo channels, the Pan control actually functions as a balance control.
Expand/Collapse (Kick/Snare Drum and Ambience channels only)
The Expand/Collapse button is only available for Kick and Snare Drum channels and Ambience channels. It
toggles the visibility of the parent Mix channel's mic sub-channels.
The Expand/Collapse All button above the mixer can be used to fold out all Drum and Ambience mic subchannels.
© 2017 FXpansion
Page 53
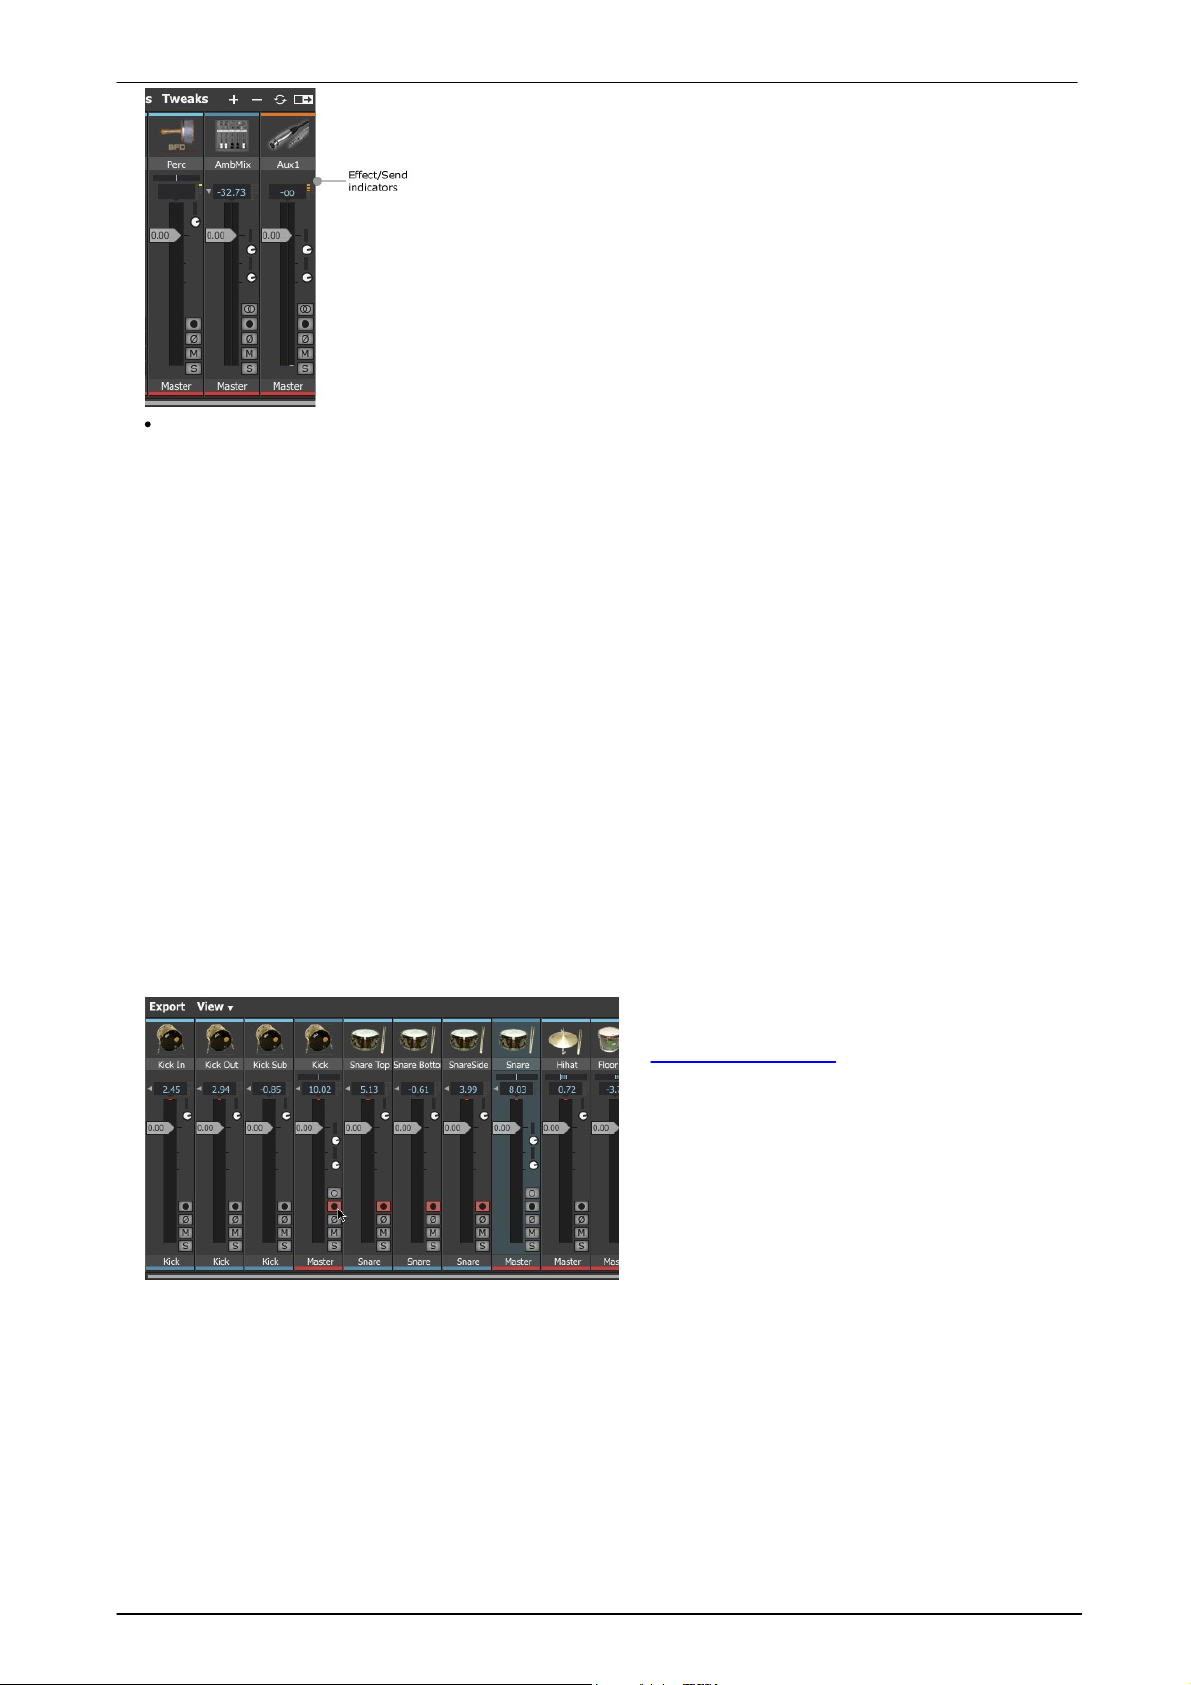
Using BFD3's sounds 53
In this example, the indicators
show that Send 1 is active on
the Perc channel and effects
1-3 are active on the Aux 1
channel.
Effect and Send indicators
All channels feature a set of 6 orange LEDs to represent active Effect
slots on the channel.
Additionally, they also feature a set of 4 yellow LEDs to represent
active Sends on the channel.
Input trim controls (only available when Simple view
disabled)
The following input trim controls are not visible by default - to enable
them, disable the Simple option within the View Options menu.
Bleed input trim (Drum mic channels only)
This control is available on Kick, Snare and Tom Drum mic channels
and adjusts the level of all recorded bleed and simulated spill signals
arriving at the channel.
This control is not available for Hihat, C ymbal and Percussion
channels.
Record enable
This button is used in conjunction with BFD3's
audio export features. Enabling this button for a
channel means that the channel is exported as a
discrete audio file when performing any audio
export.
Click the button to record enable a mixer
channel; click it again to record disable it.
The Export panel contains several other features
allowing you to record enable and disable
multiple mixer channels.
Input trim (Drum Mix channels, Ambience Mix channel, Aux channels and Master channel only)
This control adjusts the level of the channel's main input signal. This input can receive signals as a result of
routing one or more channels' outputs to it, and/or by creating one or more sends to the channel’s main input:
the Input trim adjusts the level of the mix of all signals routed to it.
The current input signal's level is represented on the small LED meter above the control.
SideChain trim (Drum Mix channels, Ambience Mix channel, Aux channels and Master channel only)
Certain channels feature a sidechain input, for which the Sidechain trim control provides an overall level
control. Sidechains can receive signals from more than one source: this control adjusts the level of the overall
mix of these signals.
The current sidechain input signal's level is represented on the small LED meter above the control.
Mono/Stereo (Aux channels, Drum Mix and Ambience Mix channels only)
By default, Aux channels (and similar channels such as Drum Mix and Ambience Mix channels) are added to the
mixer as stereo channels. The Mono/Stereo button toggles the channel between stereo and mono operation.
If any FX devices exist on an aux channel before it is changed from stereo to mono status, they are switched for
mono versions automatically with their settings intact, and vice versa.
Phase flip
This button allows you to invert the phase of any channel.
Please note that all BFD3's mic channels are provided in phase with each other (including for Drums which
feature multiple out of phase mics, such as kicks and snares).
© 2017 FXpansion
Page 54
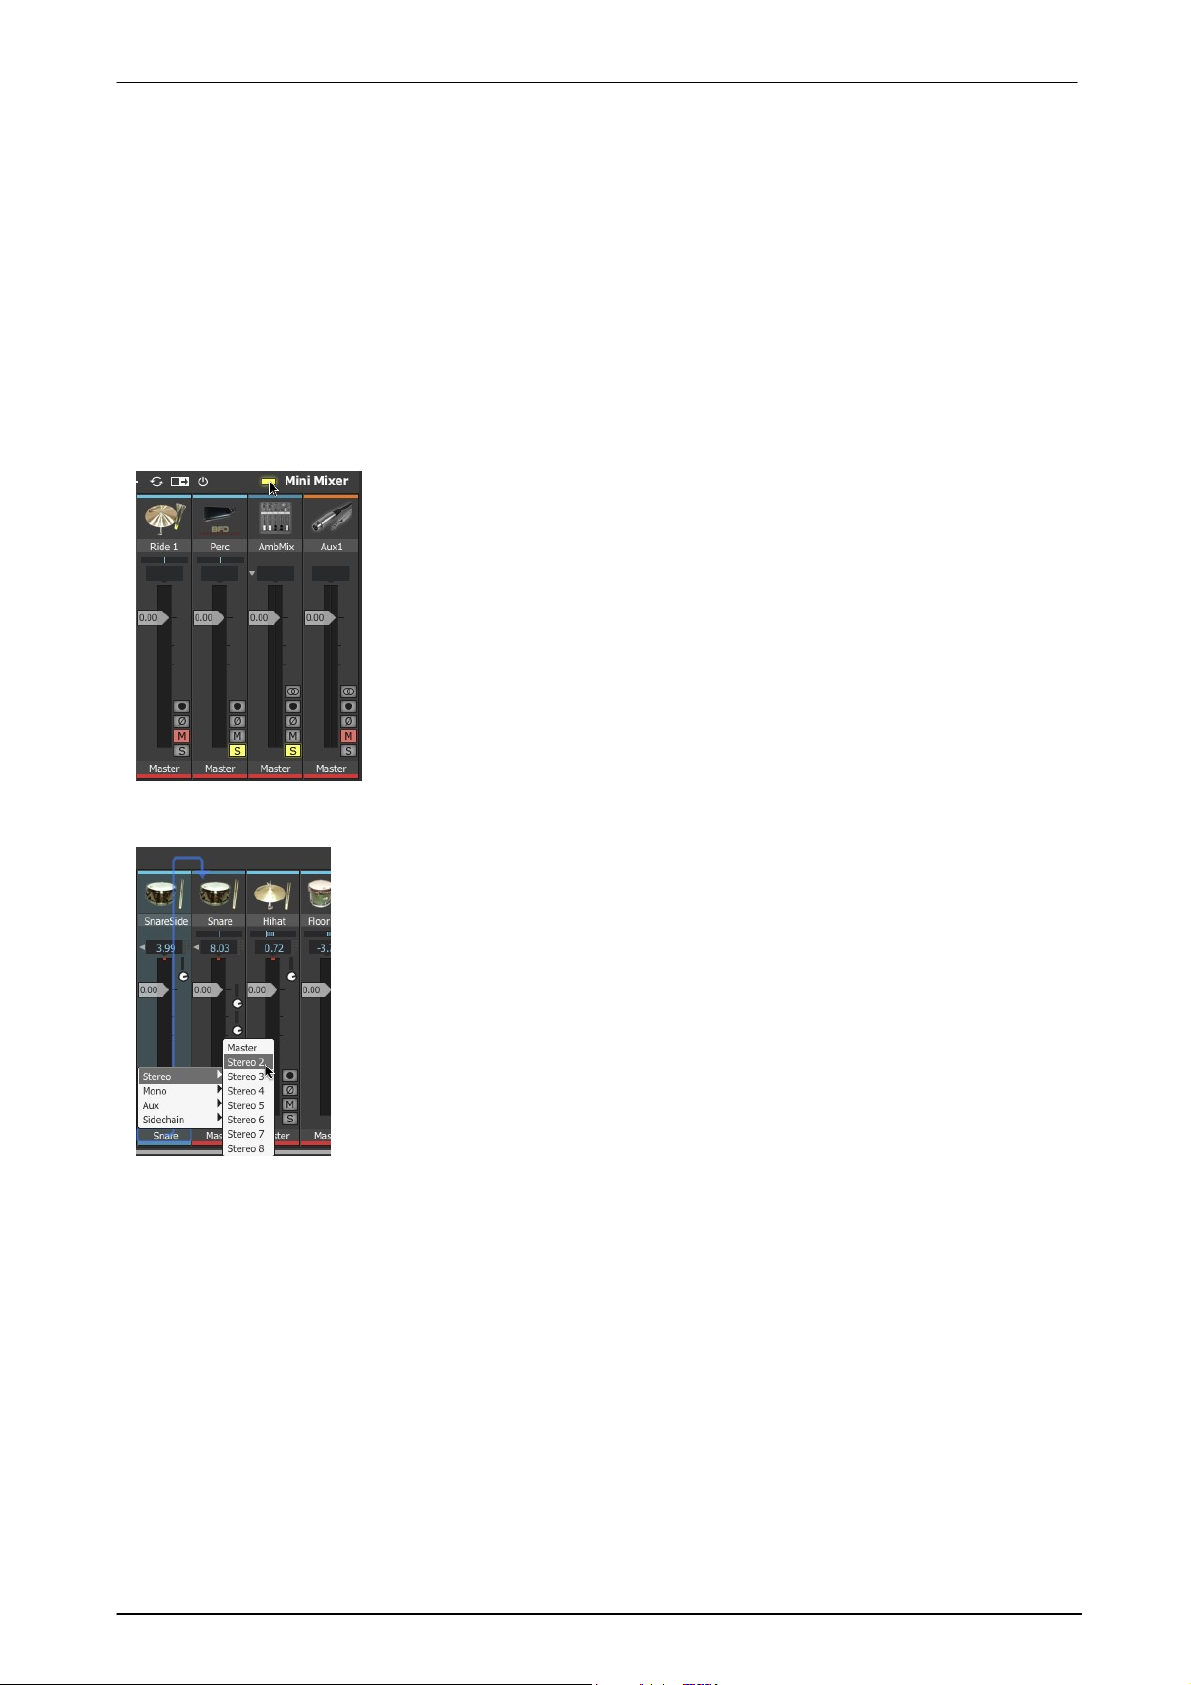
BFD3 Operation Manual54
Solo Isolate function
Channels can be set to solo isolate mode, which means that they are always
heard when soloing any other channel.
To put a channel into solo isolate mode, click its solo button while holding down
the SHIFT key. The solo button becomes 'half-lit', and is always heard along
with any other soloed channel.
Rude Solo indicator
The mixer toolbar contains a Rude Solo indicator, as shown in the image to
the left. It is always lit whenever 1 or more channels are currently soloed.
This indicator can be ALT-clicked to un-solo all channels currently in a hard solo
state.
Using the Output selector control, each mixer channel can be routed to any
available output or any available Aux channel as long as it is positioned to the
right of the source channel in the mixer layout (see the 'Channel processing order'
section below).
Any number of channels may be routed to the same output or Aux channel - they
are summed before the output or before the input of the destination Aux channel.
The output routing selector does not exist on the master channel, as it is
hardwired to the first set of BFD3 outputs.
Mute & Solo
All channels have a mute and solo button.
The mixer features very flexible mute and solo behaviour. It features two types of mute and solo states: implied
and hard.
• Engaging only the solo button on a channel results in implied mutes on all other channels: mutes are shown
elsewhere, but the mute state of those channels is only implied. When the solo button is disengaged, the implied
mutes on the other non-soloed channels are also disengaged.
• Implied solos are generated on channels contributing signals to the soloed channel, or in its subsequent signal
path. They are shown in a 'half-lit' state.
• Engaging only the mute button on a channel results in only that channel being hard muted (it is in an actual
muted state).
• Engaging both mute and solo buttons on a channel results in the mute overriding the solo. Both buttons are lit
to show that the hard solo and mute states are engaged. While in this state, unmuting the channel results in it
reverting to a hard-soloed state. If the channel is instead unsoloed, it will be left in a hard-muted state – it is not
an implied mute.
• Hard-muting an 'auto-soloed' channel (in implied solo state) overrides the implied solo and the channel is
muted.
Output selector
© 2017 FXpansion
Page 55
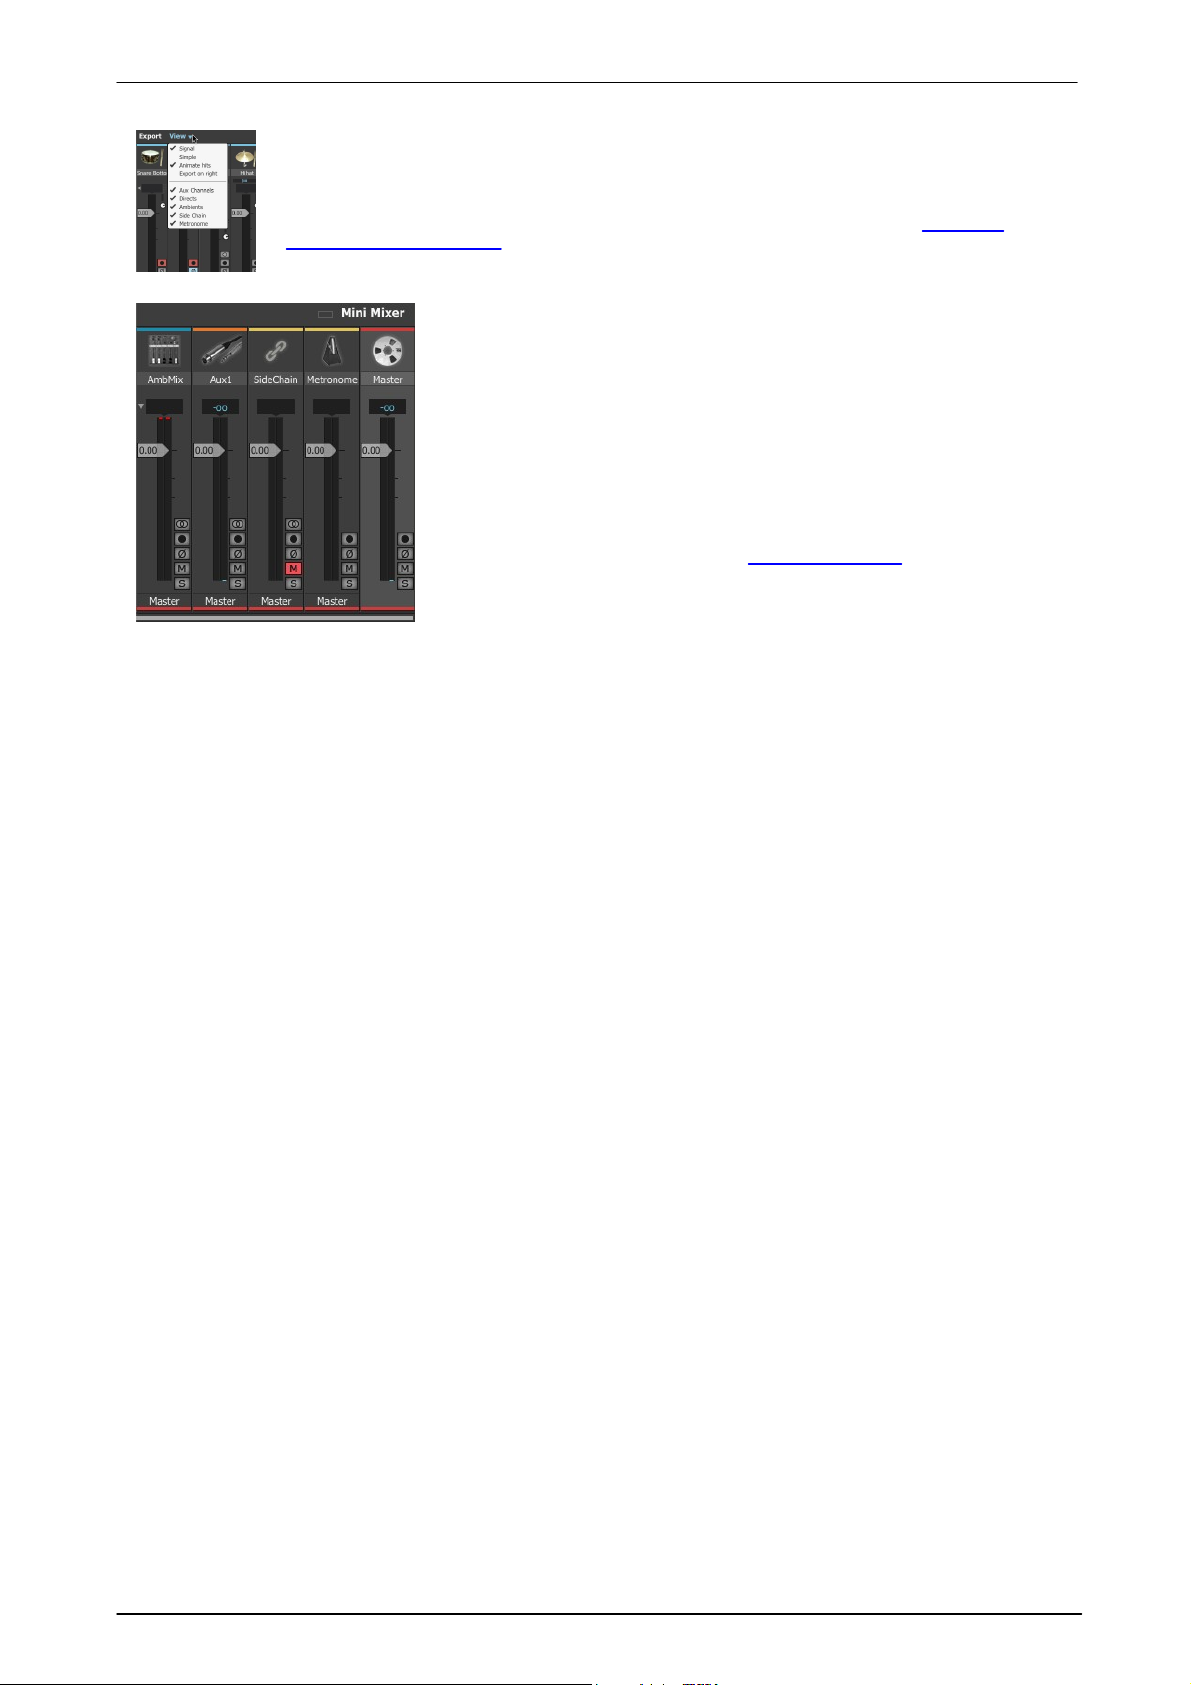
Special channel types
There are 2 other types of channel within BFD3, which are enabled using the View menu in
the mixer toolbar.
Metronome channel
The Metronome channel lets you adjust the BFD3 metronome, used when recording
Grooves from MIDI input. Its level can be set using the channel's fader and, using the
Output selector, it can be routed to a discrete output if required. The level can also be
quickly set to one of 4 settings by right-clicking on the Metronome button in the Transport.
SideChain channel
BFD3 features an external SideChain input, allowing you to drive
compression effects within BFD3's mixer The Sidechain channel allows
you to process the Sidechain input discretely.
To use the SideChain input, a suitable signal (such as a bass track)
should first be routed to BFD3's external SideC hain input - please set this
accordingly in the standalone application's menus or consult your host/
DAW's documentation for details on how to accomplish this when using
BFD3 as a plugin.
The output of the SideC hain channel (as specified by its Output
selector) is always routed to the destination channel's SideC hain input
rather than its main input. See the Effects and Sends section later in this
chapter for details on using the SideChain input on a channel to drive
suitable effects.
Using BFD3's sounds 55
© 2017 FXpansion
Page 56
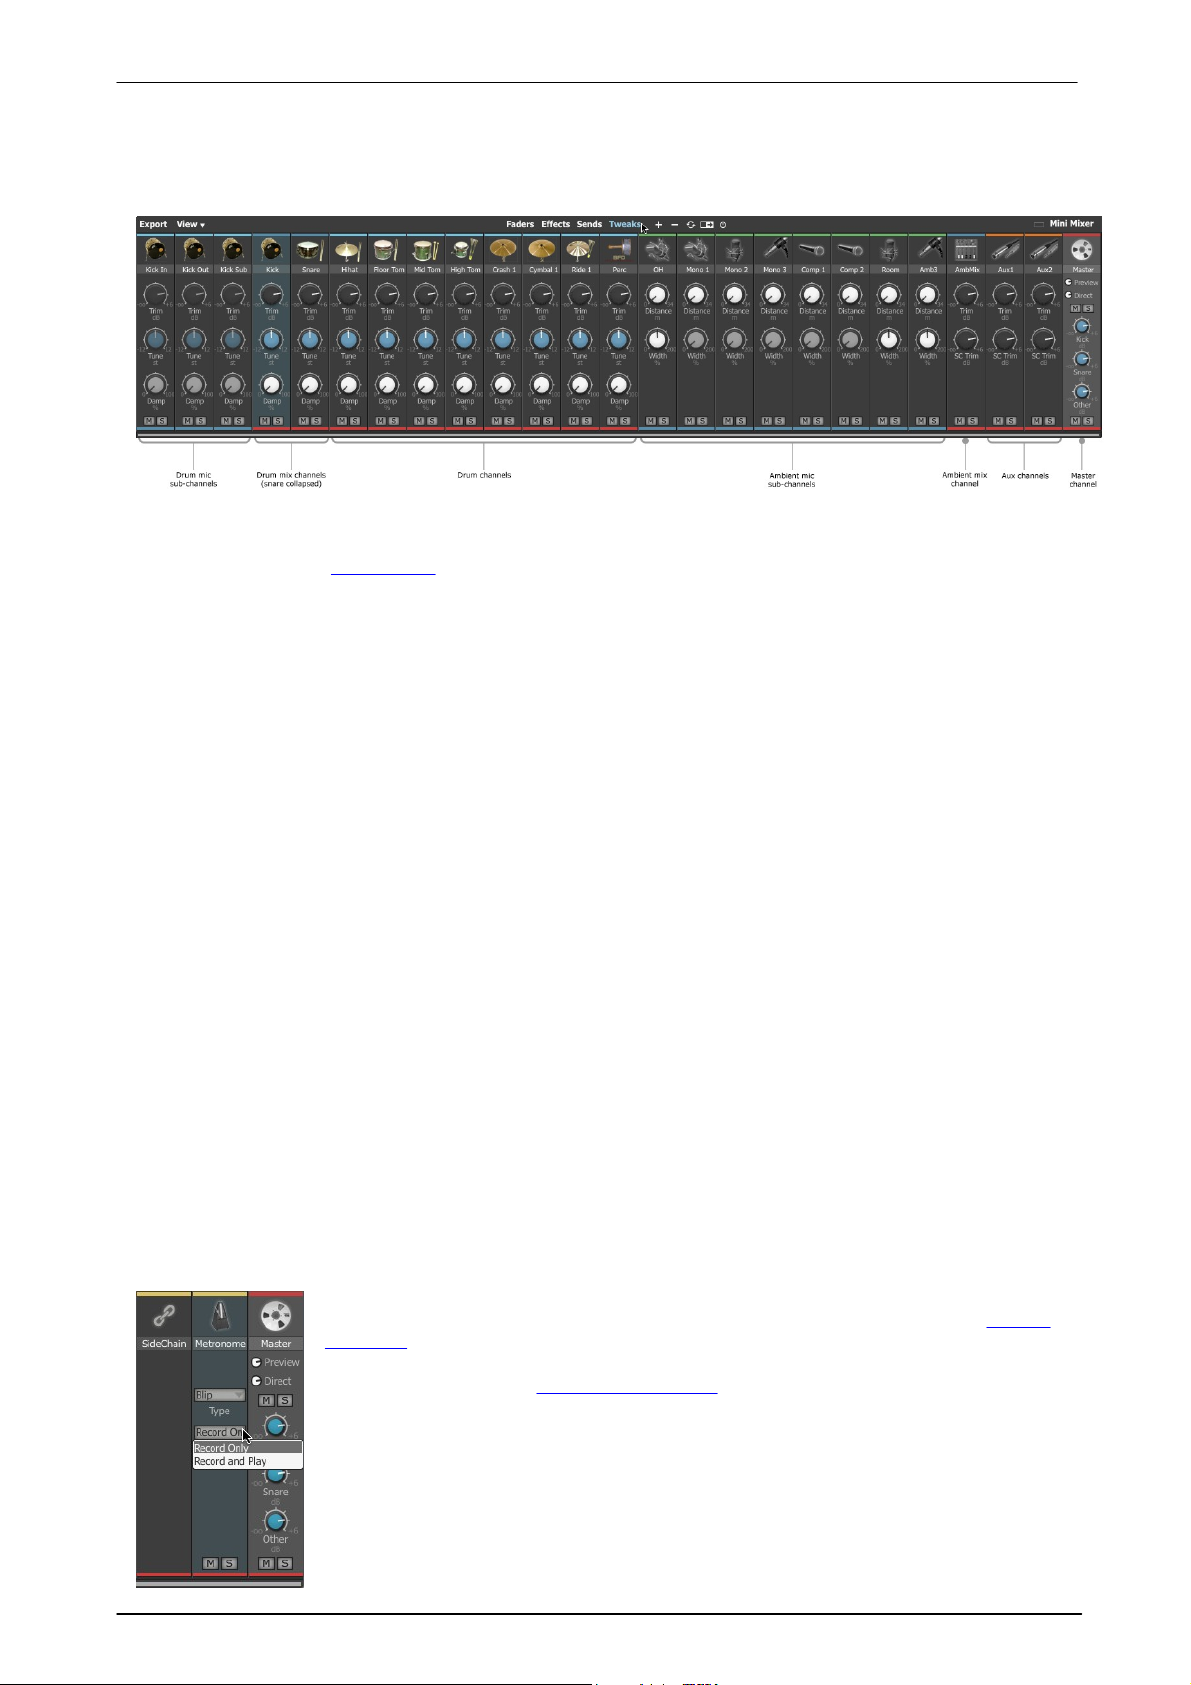
BFD3 Operation Manual56
In Faders mode, This channel is used for level control and setting the Output routing
of the Transport's Metronome function, which is intended to be used during Groove
recording.
Tweaks mode allows access to additional options for the Metronome. These settings
can also be found in the Grooves Preferences.
Type
Click the Type setting to display a drop-down menu allowing you to select between a
number of available metronome sounds.
Mode
The Mode setting can be switched so that the metronome is heard in either of the
following transport situations: Record only and Record and Play. This function can also
be accessed by right-clicking on the Metronome button.
3.3.2 Tweaks mode
Channel controls: Tweaks mode
The controls in this mode vary depending on the channel type.
Drum channels
For Drum channels, controls for Tune, Trim and Damp (Damping amount) are available. These controls are
also located within the Drum Editor.
Note that these controls are disabled for Drum mic sub-channels.
Ambient channels
The following controls exist for Ambient mic channels - like Aux channels, the Ambient Mix channel features
Trim and SC Trim controls - see below for details of these controls.
Distance (Ambient mic channels)
The Distance control offers a virtual control over the distance of each set of ambient mic channels from the kit.
Effectively it puts a short delay between the ambience channels and the direct mics. It has a similar effect to the
ambience as a 'pre-delay' control has over the wet signal on an artificial reverb unit.
If custom routing of ambience signals has been set up using the Drum Editor, the Distance control has no effect
on these signals with altered routings. It is possible to achieve the same effects using the Delay FX device on the
relevant destination Aux channel(s).
Width (stereo channels only)
Using the Width control, you can change the width of Ambient mic channels' stereo field. Settings range from
mono to fully enhanced stereo.
This setting is available only for stereo ambient mic channels. It applies to ambient mic signals of the relevant
type even if they have been routed to custom Aux channel destinations using the Drum Editor
Aux channels
The following controls adjust the levels of the signals entering the the Aux channel's input. If the input is clipping,
it may be more convenient to decrease these controls instead of reducing the levels of all signals routed to it.
Trim
This control adjusts the level of the main input to the Aux channel.
SC Trim
This control adjusts the level of the Aux channel's SideC hain input.
Metronome channel
© 2017 FXpansion
Page 57
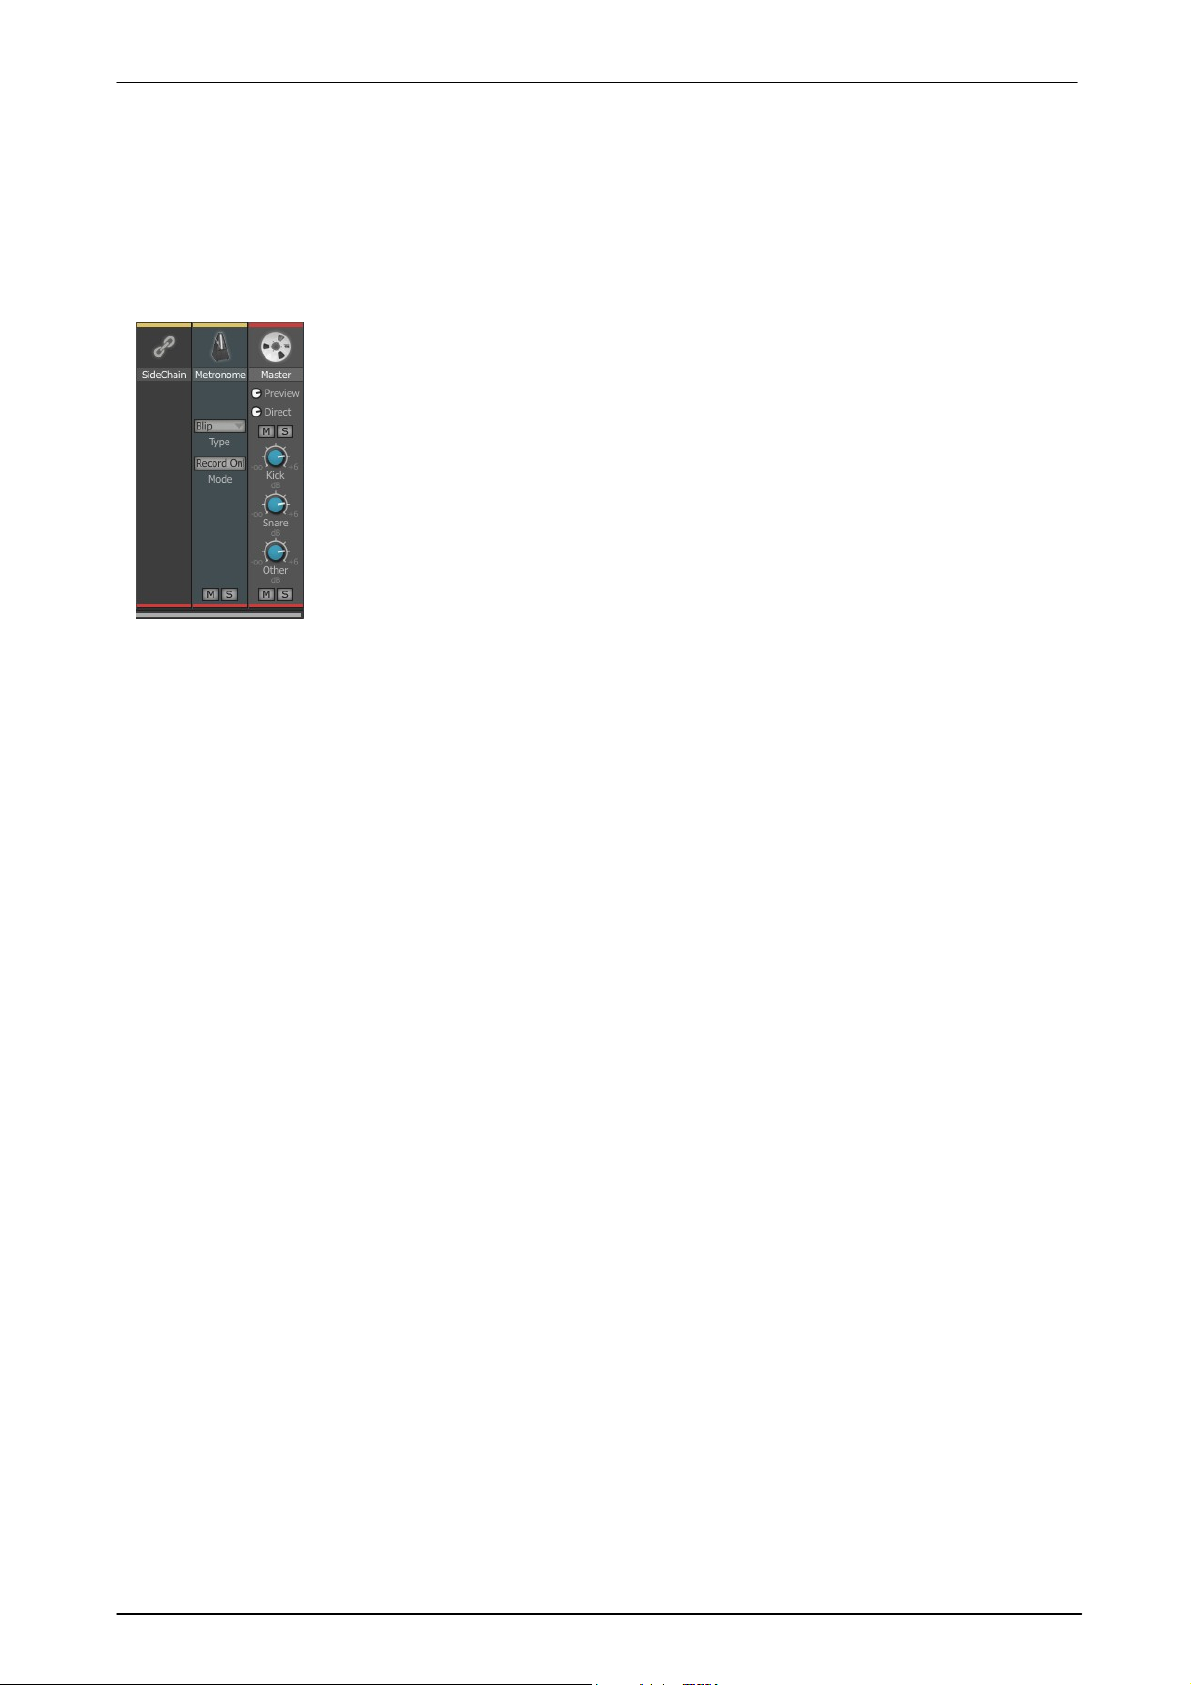
Master channel
Preview (Preview level)
The Preview Level fader sets the level of all Drum slot and Browser audition
previews.
Direct (Direct level)
This fader controls the level of all direct channels together. It is a pre-mixer control – it
alters the level of all mic channels before they enter their direct channels on the mixer.
Mute & Solo
These buttons allow you to mute and solo all direct mic channels in the mixer.
Kick (Master Kick bleed level)
This control adjusts the overall level of bleed signals in the Kick mic channels, relative
to the individual bleed levels set for each Drum in the Drum Editor.
Snare (Master Snare bleed level)
This control operates similarly to the Kick bleed level control except it acts on the
overall level of Snare mic bleed.
Using BFD3's sounds 57
Other (Other mic bleed level)
Some expansion pack libraries contain bleed in direct channels other than the kick and snare channels. For
example, some BFD XFL kicks and snares possess an additional bleed signal in the hihat direct mic channel. This
bleed appears in the hihat slot direct mic channel if one of these kit-pieces is used.
The Other control sets the bleed levels in all other direct mics except kicks and snares. If you are not using any
such kit-pieces, this control does not have any effect.
© 2017 FXpansion
Page 58
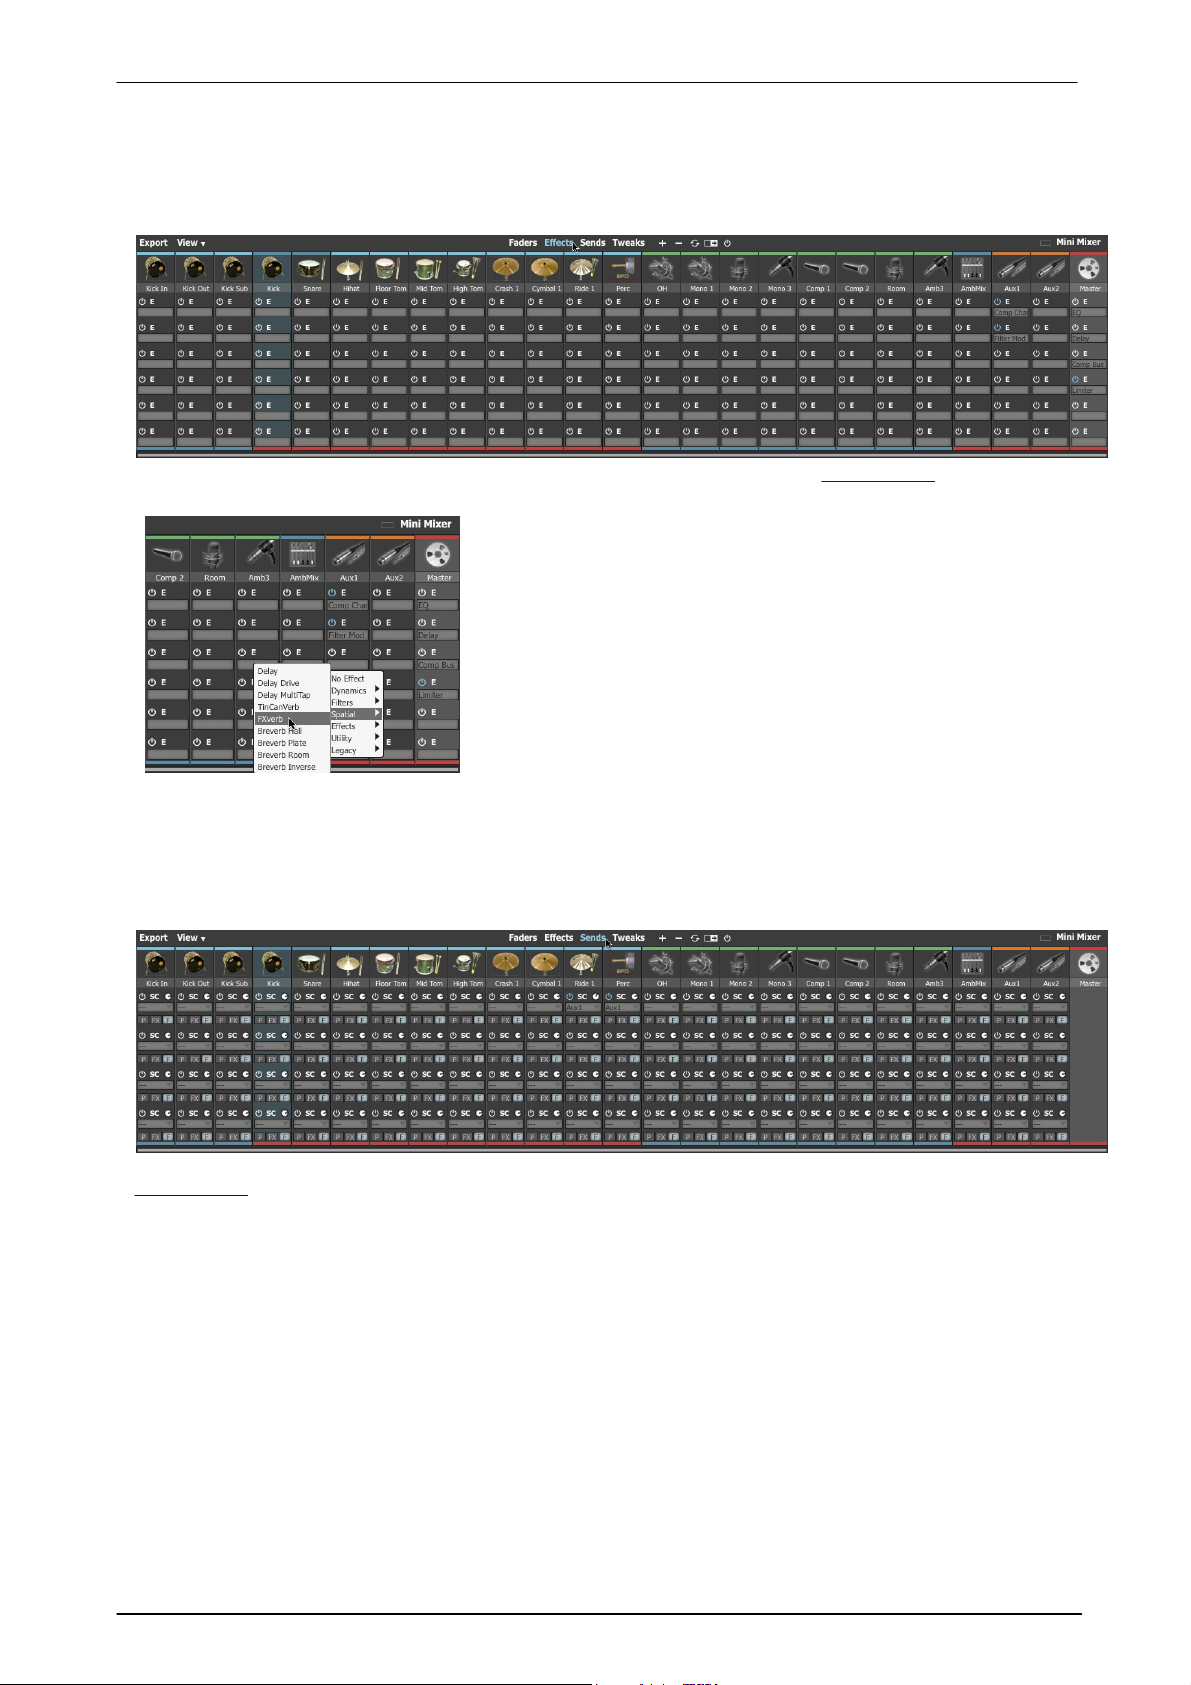
BFD3 Operation Manual58
Effect slot Power
Each effect slot features a Power button to activate or deactivate
it. Deactivate the Power button to bypass the effect.
ALT-click any Power button to activate or deactivate all effect slots
in the channel.
Effect device selector
Click the Effect device selector to display a drop-down menu of
available effects.
To remove a device from the slot, select No Effect from the menu.
3.3.3 Effects/Sends modes
Channel controls: Effects mode
The Effects channel mode displays effect selection and power controls for each channel simultaneously, allowing
an overview for multiple channels.
Full control of the effect devices loaded into each slot is only possible within the Effects Editor.
E (Edit)
Clicking the Edit button for any of the 6 effect slots displays the contained device's interface within the Effects
Editor (this panel replaces the Kit display if it is not already visible).
Channel controls: Sends mode
This mode displays the Send controls for all channels. The controls in this mode are fully editable (see the
Effects Editor section for details about the controls).
© 2017 FXpansion
Page 59
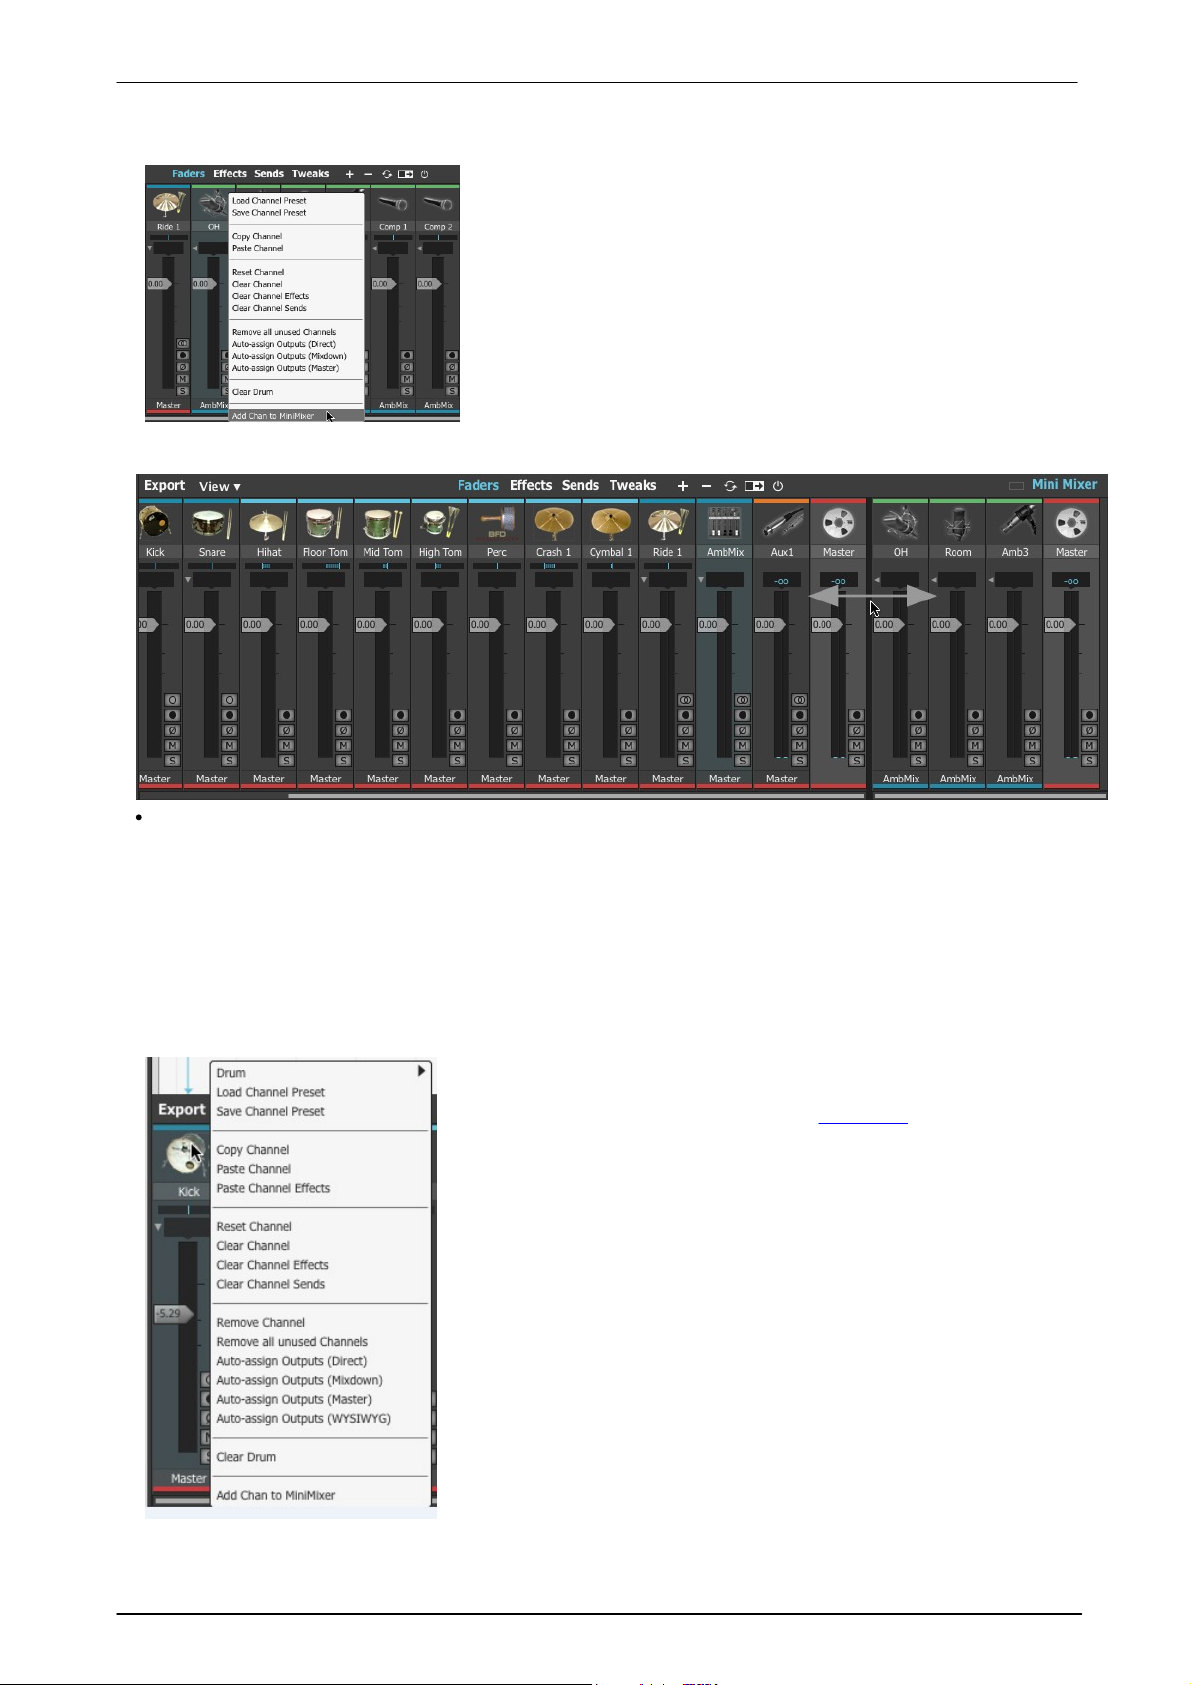
3.3.4 Other mixer controls
The Mini Mixer allows you to add any combination of often-used
mixer channels to an additional panel which is always visible at the
right side of the mixer when the Mini Mixer button at the top-right
of the mixer is activated.
This can be useful for viewing certain channels regardless of the
current scroll position in the mixer, or whether the required Drum or
Ambient Mix channel is expanded.
Any channel(s) can be added to the Mini Mixer using the channel
context menu - simply right-click on any channel and use the Add
Chan to Mini Mixer function.
Once the required channels have been added, click the Mini Mixer
button. Click and drag left/right on the border between the Mini
Mixer and the rest of the mixer to adjust the space devoted to each.
Drum sub-menu
This sub-menu, available only on Drum channels, offers the same
functions as the slot context menu in the Kit display.
Load channel preset
This function brings up a system file load dialog which allows you to
load a previously saved channel strip preset. Any applicable settings
are loaded – if the preset contains settings that are inappropriate for
the destination channel, they are ignored.
Save channel preset
Using this function, you can save the contents of a channel strip to a
preset for future use via a system file save dialog box.
Copy channel
This function copies the settings of the channel strip to the clipboard.
Paste channel
This function pastes the channel strip settings stored in the clipboard to
the current channel. Any applicable settings are applied – if the
clipboard preset contains settings that are inappropriate for the
destination channel, they are ignored.
Paste channel effects
This function pastes only the effects stored the clipboard without
pasting any other channel strip settings.
Mini Mixer
Using BFD3's sounds 59
The above example shows a Mini Mixer configuration of Overhead, Room, Amb3 and Master channels
Channel context menu
BFD3's mixer features a comprehensive system of managing channel settings, including loading and saving
channel settings as presets. This is achieved by using the channel context menu.
This context menu is displayed by right-clicking anywhere on a channel (in Faders mode) or on the channel
image in Effects/Sends/Tweaks modes.
Note that the channel context menu applies only to the channel on which it appears, regardless of whether
multiple channels are currently selected. The exceptions are the Remove all unused channels and Auto-
Assign outputs functions.
© 2017 FXpansion
Page 60

BFD3 Operation Manual60
Reset channel
This function resets the channel’s parameters to their initialized state (default settings), although effects and
sends are not affected.
Clear channel Effects
This function removes all devices from the channel's effect slots.
Clear channel sends
This function removes any send settings on the channel. It does not appear on the master channel’s context
menu, as it does not possess any sends.
Remove channel
This function appears only when applicable. It allows you to remove aux channels and direct or ambience
channels that are not being used by loaded kit-pieces or by bleed signals from other kit-pieces.
Remove all unused channels
Unlike the other functions on the channel context menu, Remove all unused channels does not apply only to
the current channel. It removes all currently unused channels in the mixer – this includes direct and ambience
channels that are not being used by loaded Drums or by bleed signals from other Drums, as well as aux
channels that are not output or send destinations from any channels.
Auto-Assign outputs functions
These functions set the Output selector parameter for all channels simultaneously for 3 common routing
scenarios. These functions can radically alter your mix configuration so please proceed with caution. You are
prompted for confirmation before proceeding.
Auto-Assign outputs (Direct)
This function assigns the Output selector for all individual microphones to discrete outputs - this includes Drum
mic/sub-mic channels and Ambient mic channels.
When this function is used, any existing Output selector assignments to Aux channels and 'parent' Mix
channels (Kick/Snare/Ambient Mix channels) are lost.
This feature is designed to allow you to easily transmit all Drum and Ambient mic channels to your host/DAW for
further mixing, processing or to bounce the signals as audio tracks.
Auto-Assign outputs (Mixdown)
This feature is intended to be used with Aux channel sub-mixes of Drums. It assigns the Output selector for all
Aux channels and Mix channels (Kick/Snare/Ambient Mix channels) to discrete outputs.
This means that, for example, the default routing setup would be altered so that the Kick, Snare and Ambient
Mix are set to discrete stereo outputs, with the Master channel containing all other Drums (and hard-wired to the
first stereo output). The 2 Aux channels in the default mixer setup are also routed to discrete stereo outputs.
If Aux channel sub-mixes of the other Drums have been created (for example, if the Toms and C ymbals have
each been mixed down to a single Aux channel), these Aux channels are also routed to discrete stereo outputs.
Auto-Assign outputs (Master)
This function assigns all channels to their default Output selector routing assignments, effectively sending all
signals to the Master channel.
Kick/Snare Drum sub-mics are routed to their parent Drum Mix channels
Ambient mics are routed to the Ambient Mix channel
Drum Mix, Ambient Mix and all other Drum and Aux channels are routed to the Master channel.
Auto-Assign outputs (WYSIWYG)
Standing for 'What You See Is What You Get', this function sequentially assigns the output of each direct channel
to a mono output, and any Bus, Aux or Ambient mic channel to a stereo output.
© 2017 FXpansion
Page 61
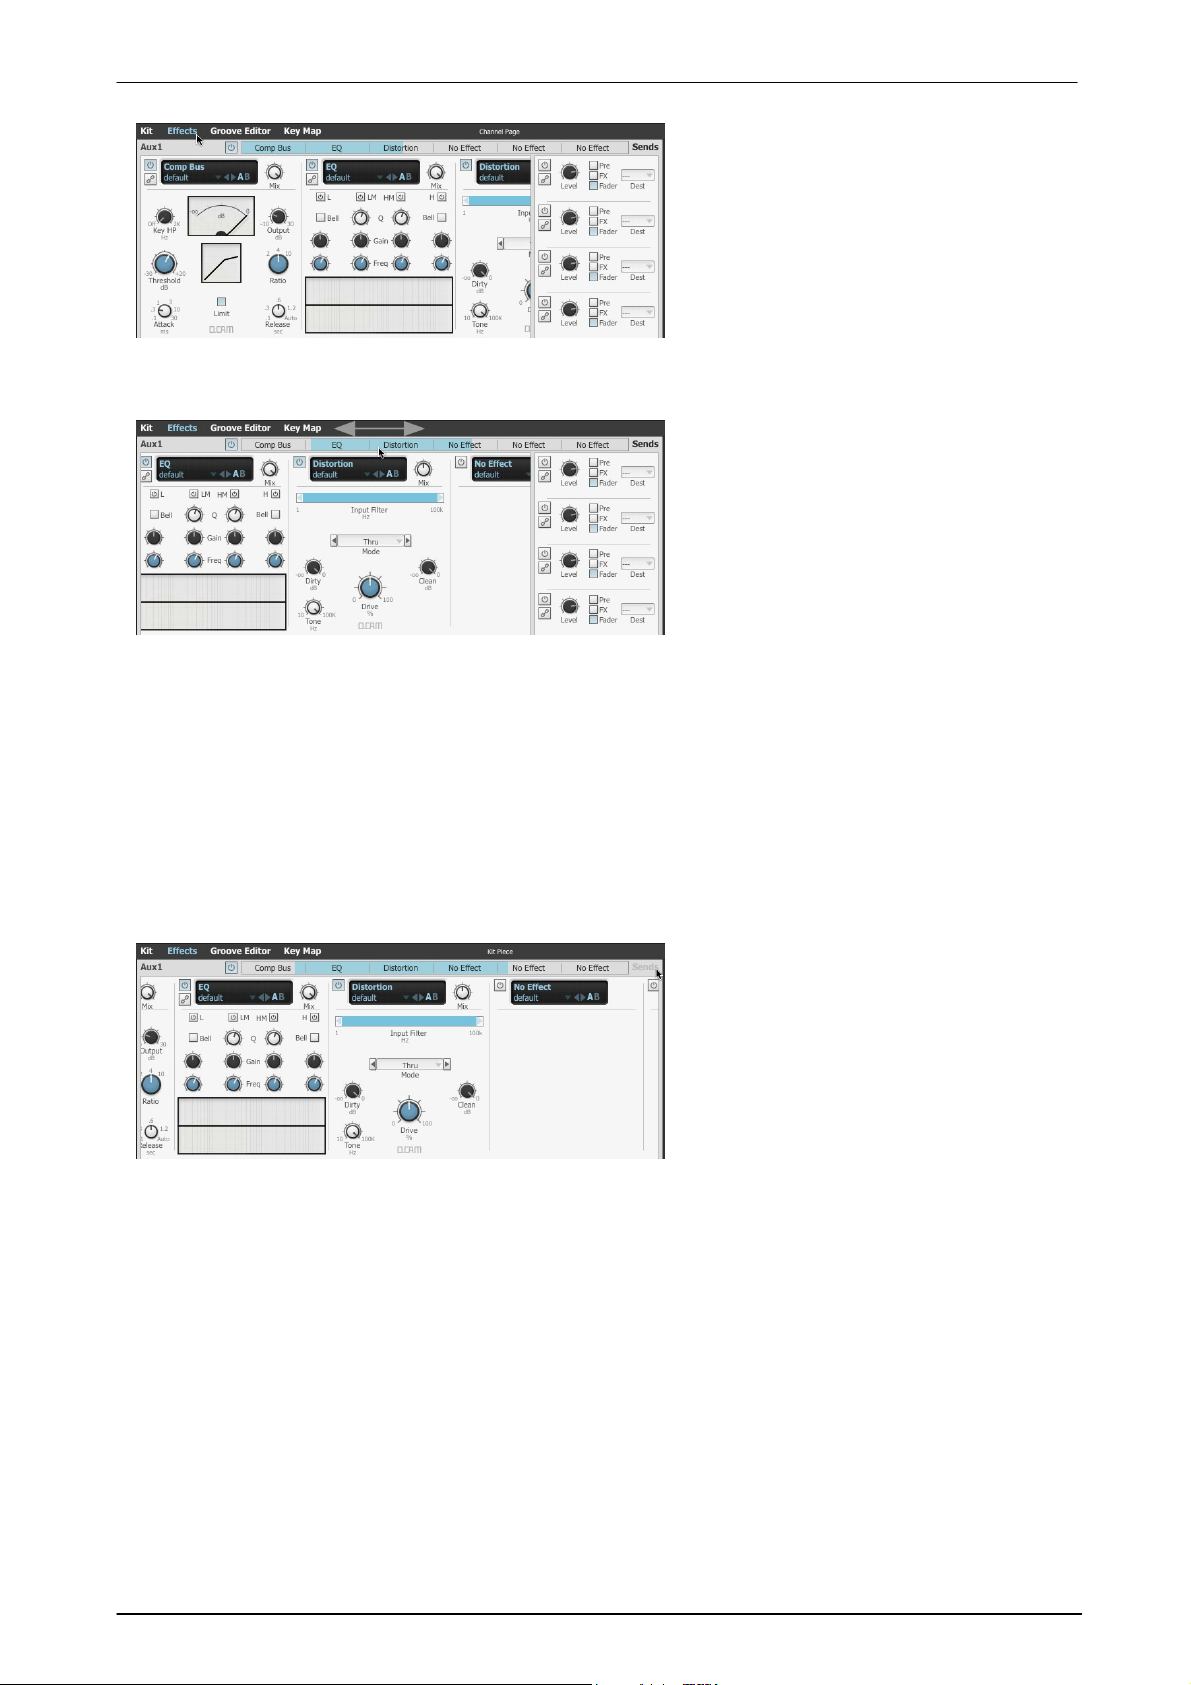
3.4 Effects and Sends
The Effects Editor allows full control over the
currently selected channel's 6 insert effect
slots and its 4 Sends. This panel and the Kit
display cannot be viewed simultaneously.
Click the Effects button to show the Effects
Editor in place of the Kit display.
The Effects rack
Effects are BFD3's built-in DSP audio
processors. The Effects rack shows the
contents of the 6 effect slots on the currently
selected mixer channel.
Effect slots
Each of the 6 available effect slots can host
any of the internal BFD3 DSP effect devices.
Sends can also be routed to other channels
for SideChain processing purposes.
Click the Sends button at the top-right of the
Effects Editor panel to show the Send
controls if they are not currently visible.
Click the Sends button again to hide the
controls.
Sends are discussed later in this section.
Overview
Using BFD3's sounds 61
Effect scroller
The Effect scroller is a representation of the selected channel's 6 available effect slots, with the highlighted
area indicating which slots are currently visible. The size of the visible area depends upon the current width
setting of the BFD3 window.
To change the visible area, click and drag the highlighted area or simply click the part of the scroller
representing the desired effect slots.
Sends
The Send controls represent the 4 Send routings available from the selected mixer channel, usually to
destination Aux channels, allowing you to set up parallel processing routings suitable for reverbs and parallel
compression: like any other mixer channel, destination Aux channels feature 6 effect slots for these purposes.
© 2017 FXpansion
Page 62
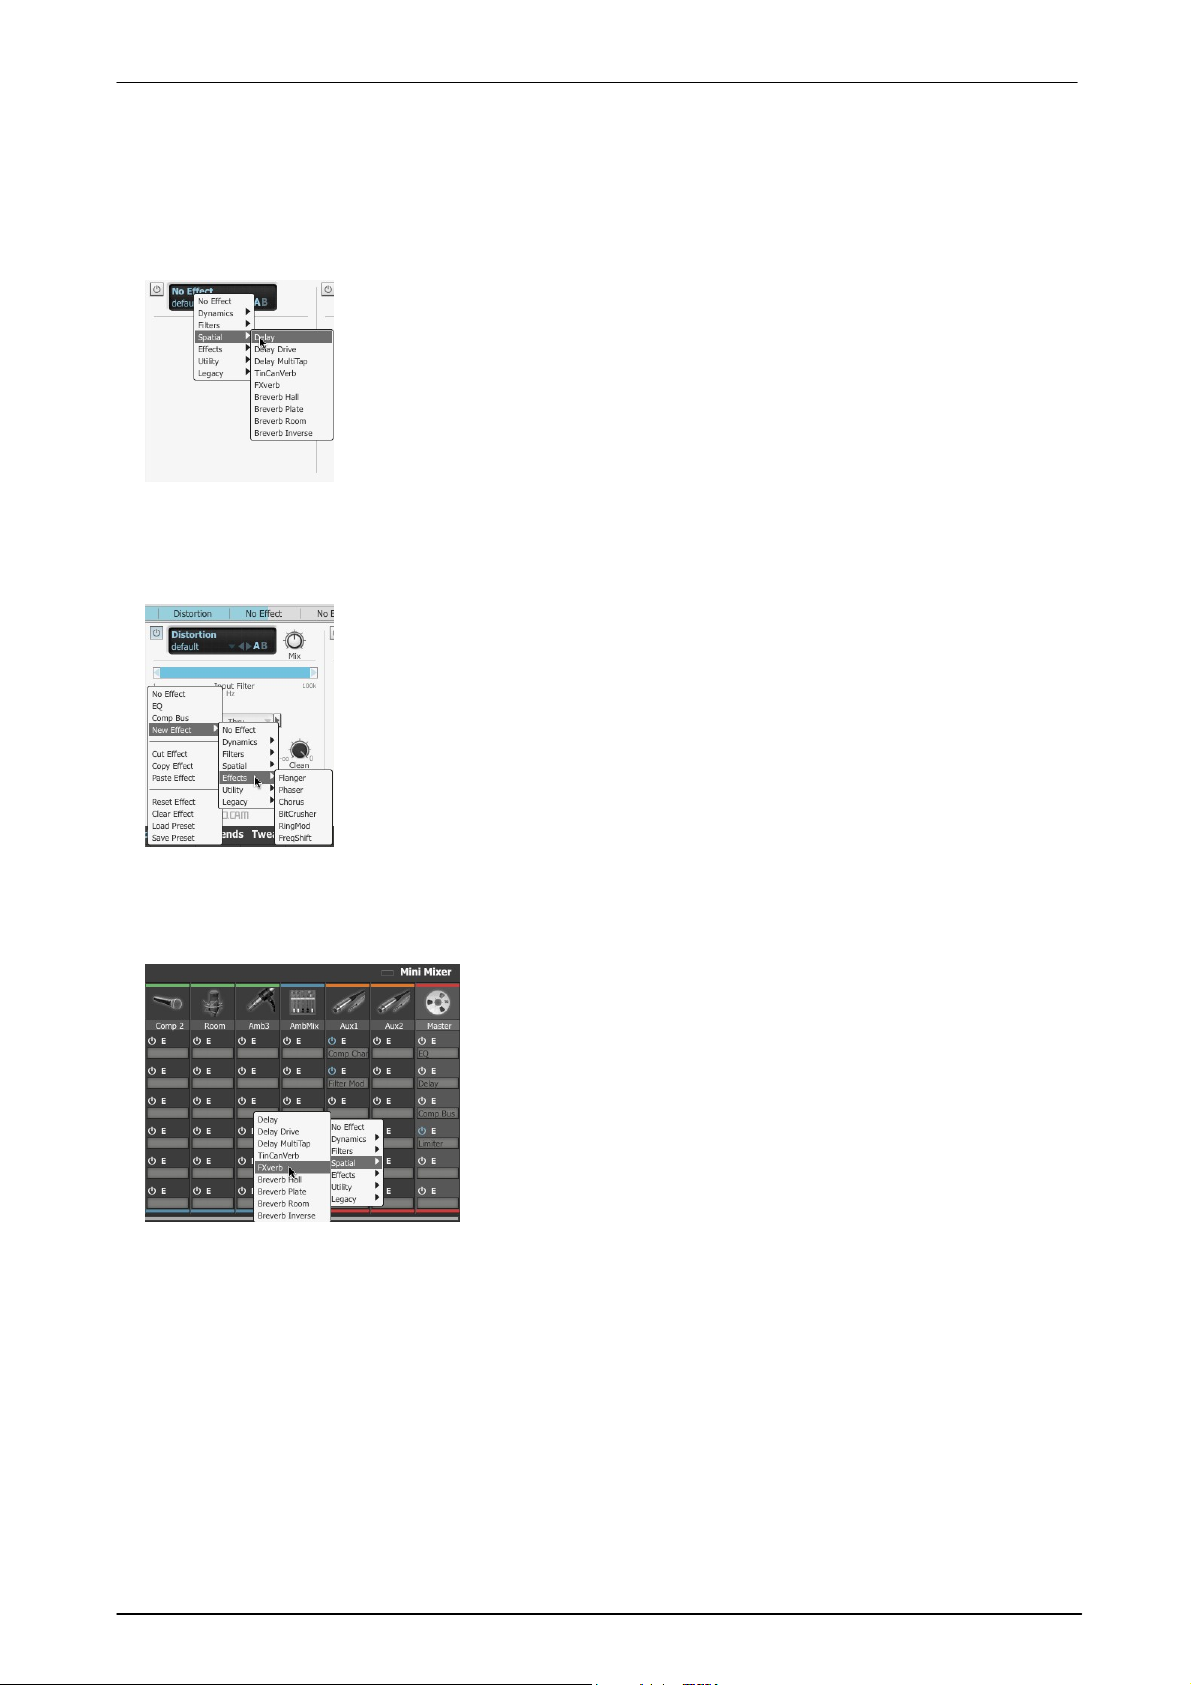
BFD3 Operation Manual62
Each of the 6 effect slots for a channel features a main header section which
features an Effect device selector drop-down menu with a number of other
controls.
Firstly, select the desired channel in the mixer by clicking it. Then, display the
Effects Editor by clicking the Effects button in BFD3's main navigation bar.
Click the part of the desired effect slot header that shows No Effect - if the slot is
empty - or the name of the effect already loaded into the slot. This displays a
menu of available effects arranged within sub-menus according to effect type.
Navigate to the desired effect device and click it to load it into the slot. The
previous contents of the effect slot are discarded.
Display the Effects Editor for a mixer channel as described above.
Right-click on any effect slot to display the effect context menu. The Effect
device selector menu is located within the New Effect sub-menu, again
providing all available effects arranged within sub-menus according to effect type.
Navigate to the desired effect device and click it to load it into the slot. The
previous contents of the effect slot are discarded.
Switching the mixer to Effects channel mode (with the Effects
channel mode switch) shows basic controls for all channels' 6 effect
slots simultaneously.
The Effect device selector allows you to load an effect device
into each slot. Each slot's Power button is also available, as is an
Edit button to quickly switch to viewing the effect in the C hannel
Editor if it is not already visible.
Initializing and using Effects
Initializing an effect device within a channel's effect slot
There are 3 ways to load a device into an effect slot:
Effect slot's Effect device selector
Effect context menu
Effects channel mode in the mixer
© 2017 FXpansion
Page 63
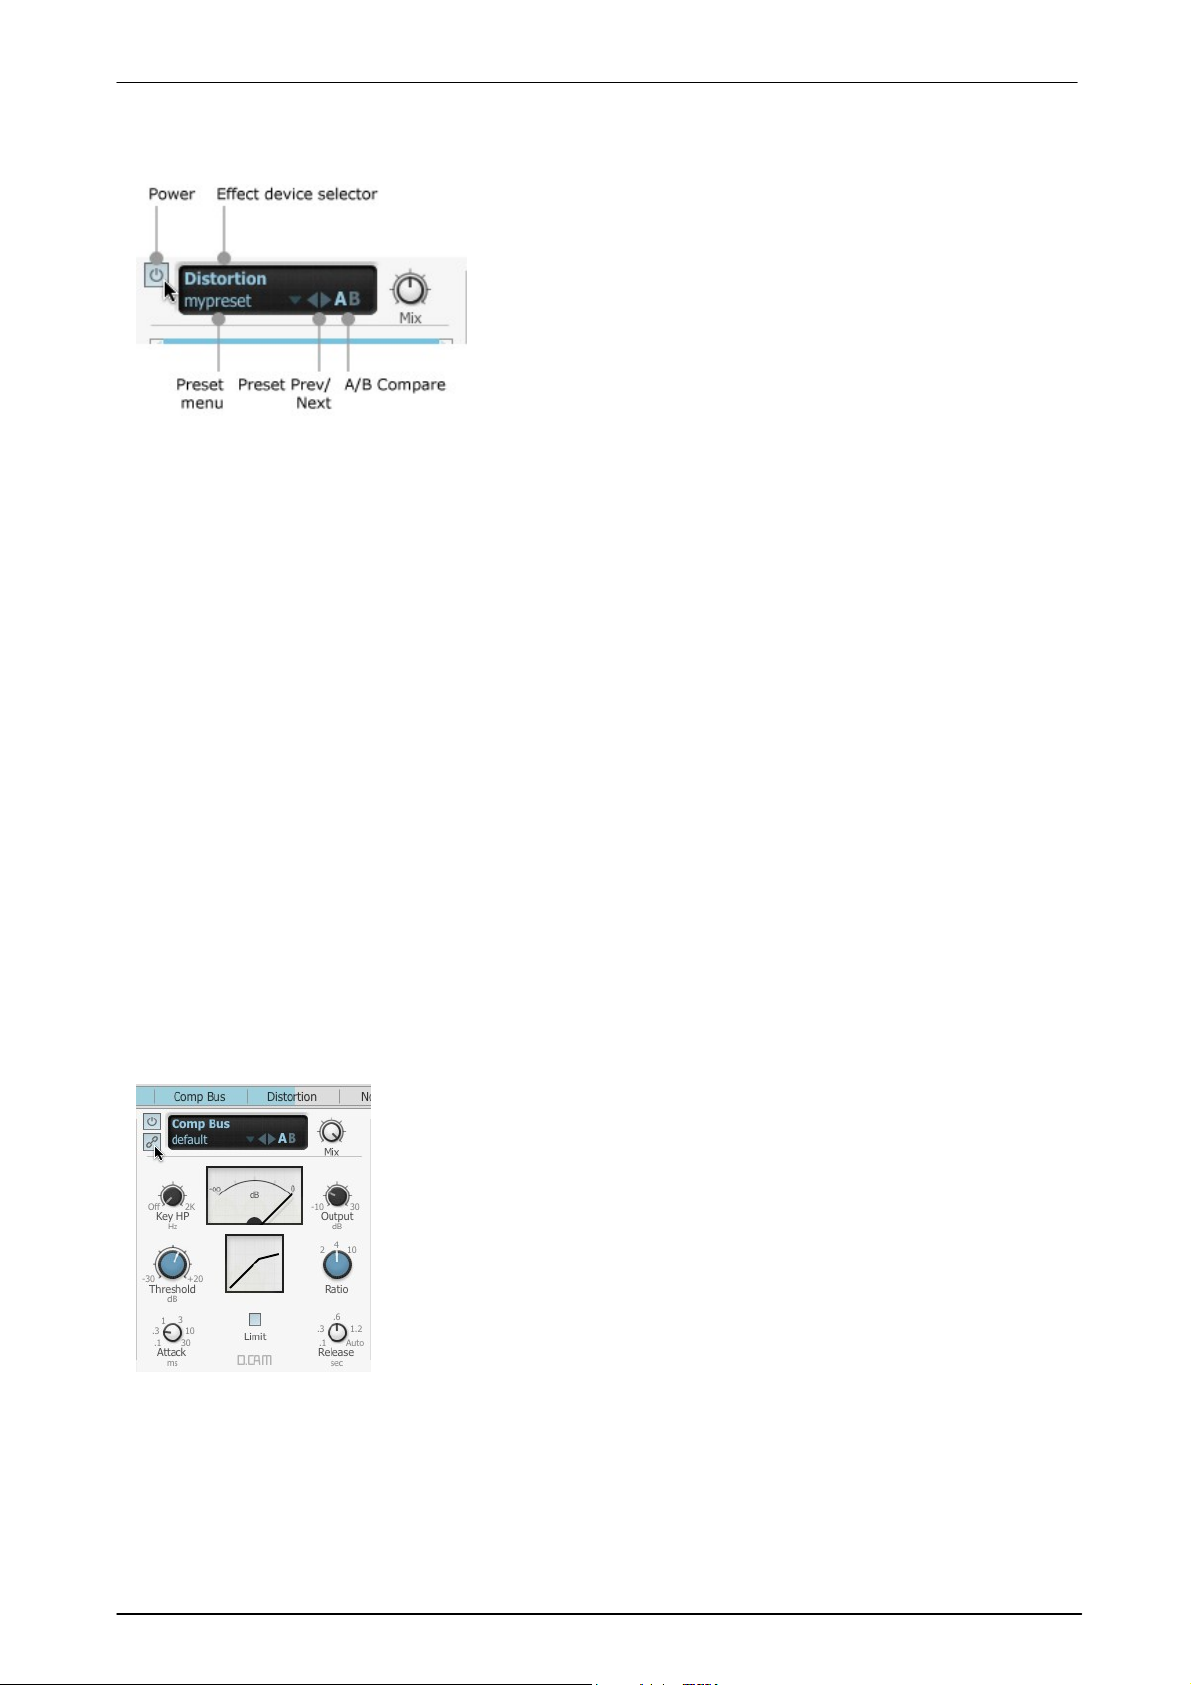
Using BFD3's sounds 63
Power button
The Power button enables or disables the effect device loaded into
the slot. With the button deactivated, the device is disabled and
bypassed.
This control is also available in the mixer's Effects channel mode.
You can also turn all currently loaded effect devices on and off using
the main Effect Power button above the mixer.
SideChain mode
The SideChain mode button is only available on certain SideC hain-enabled
effects when used on on Aux channels and the Master channel.
When the button is activated on the Comp Bus as in this example, the effect
uses the SideC hain input for driving the peak detection circuit, meaning that
the amplitude characteristics of a separate signal are used to treat the
amplitude of the actual signal entering the compressor's main input.
When the EQ or EQ8 devices are used, activating the SideChain mode button
results in the device processing the SideChain signal before it reaches a
SideChain-enabled effect further on in the channel's signal path.
This function is provided for situations when greater tonal control of the
SideChain input signal is required than that offered by the Key HP control on
the Comp Bus effect, for example.
Main effect slot controls
All effect slots share the following common controls on their interfaces:
Effect device selector
This drop-down menu provides a menu of available effects. C lick any effect in the menu to load it into the slot
and replace its previous contents.
Preset menu
The Preset menu features a drop-down menu showing all available presets for the effect device in the slot.
Preset Prev / Next
The Preset Prev / Next cycle through the effect's available presets.
A/B Compare
These buttons toggle between two distinct states for the effect, each with its own settings and preset-loading.
By default, the 'A state' is in operation and highlighted in blue. To try completely different settings without having
to save the current settings as a preset first, click the B button - this switches to the 'B state' and all further
adjustments are now made to the B state. Presets can be loaded and any effect settings can be changed as
desired.
To return to the A state, click the A button again - the original settings reappear. Of course, any adjustments
previously made to the B state are recalled should you decide to return to it by clicking the B button again.
Mix
The Mix control, which allows blending between the processed (wet) and unprocessed (dry) signals, exists on all
BFD3 effect devices.
Note that this control only appears when an effect device is loaded into the slot.
By default, all effects are set to 100% wet, but this control allows you to adjust this as required.
This control is useful on compressor devices for creating parallel compression effects for a single channel without
needing to set up an additional aux channel.
BFD3's SideChain features are discussed in more detail later in this chapter.
© 2017 FXpansion
Page 64
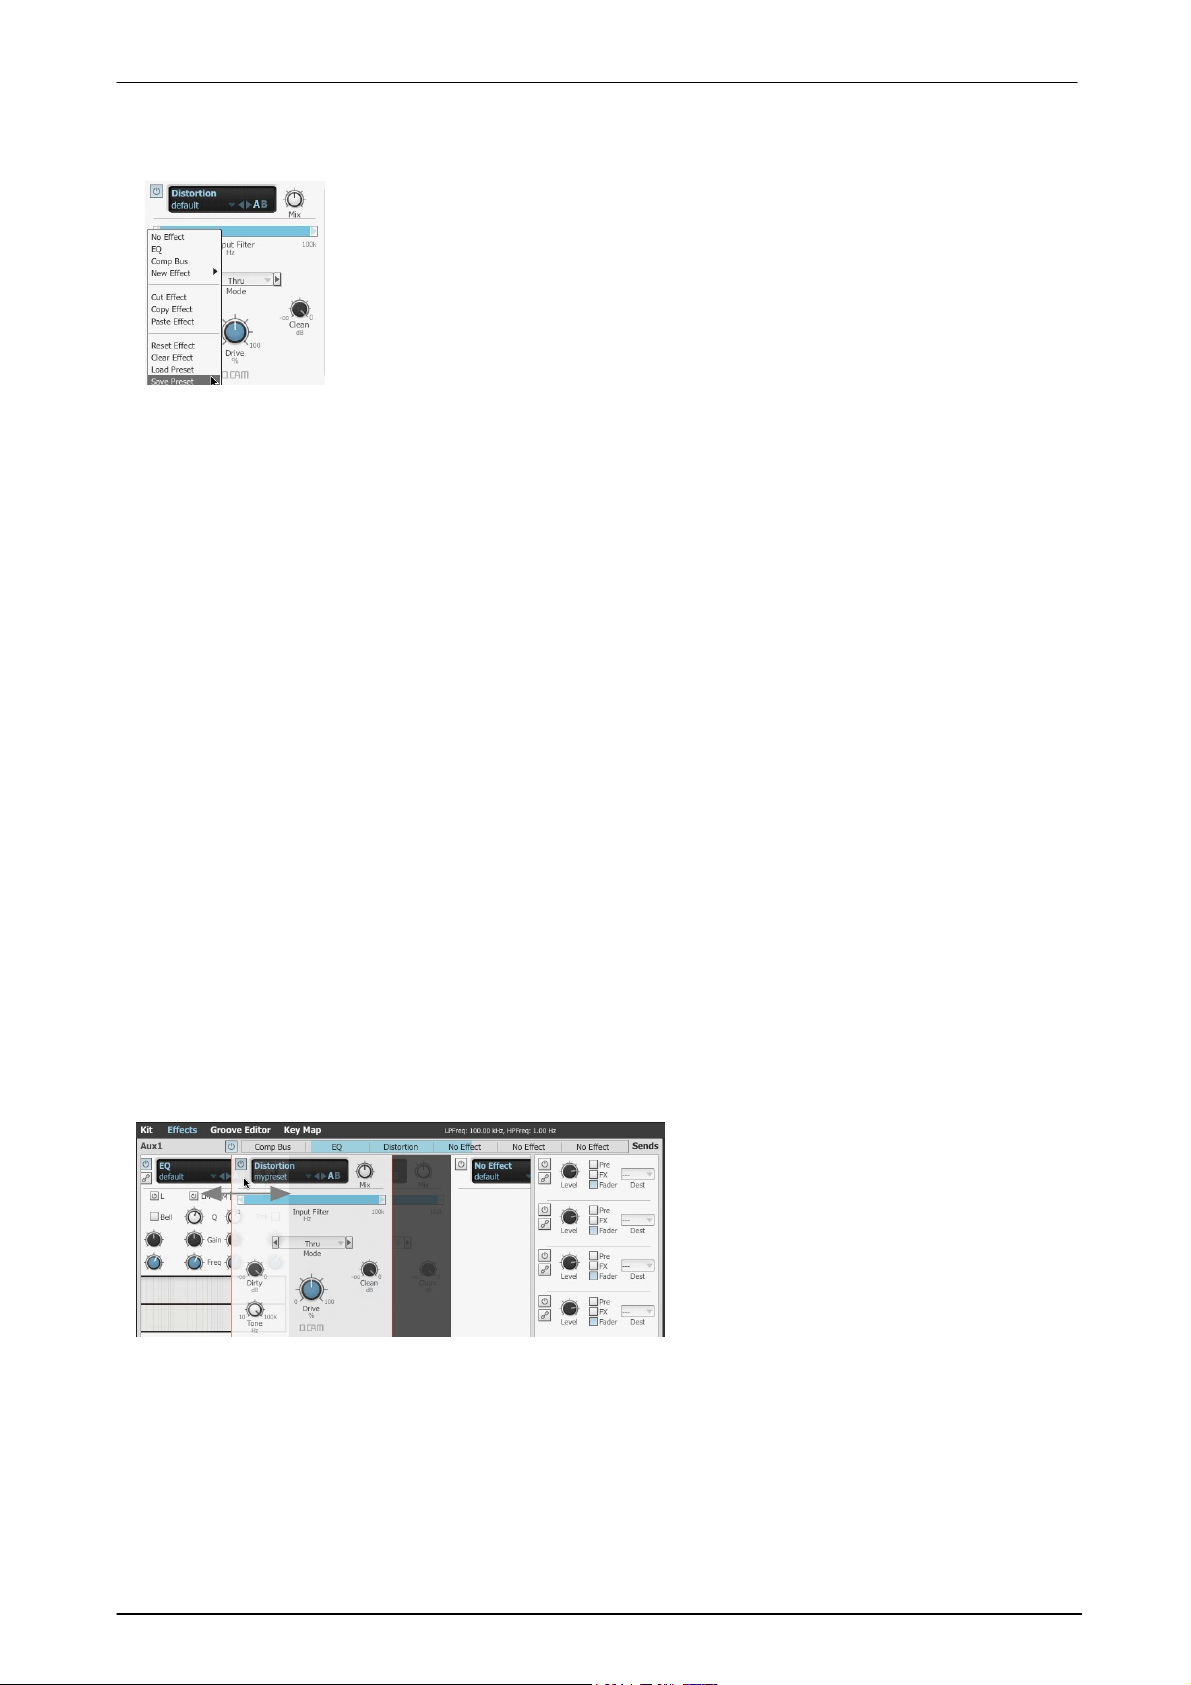
BFD3 Operation Manual64
EQ / Comp Bus
These items represent shortcuts for loading the EQ or Bus Compressor into the
effect slot, as these are likely to be the most commonly used processors in a mix.
New effect
This sub-menu performs the same function as the slot's Effect device selector it provides a menu of available effects. Click any effect in the menu to load it into
the slot and replace its previous contents.
Swapping effects between slots
Simply click an effect device's interface, drag
it to the left or right and drop it into another
slot.
Any effect device already loaded within the
destination is swapped into the original slot
that was moved over it.
Managing Effects with the Effect context menu
Right-click on an effect interface to display the effect context menu.
Cut / Copy / Paste Effect
These functions allow you to cut/copy/paste effect devices between effect slots and mixer channels.
Reset effect
This function resets the current effect to its default settings.
Clear effect
This function removes the effect from the slot.
Load preset
Clicking this item displays a system file open dialog which allows you to load previously saved preset files for the
effect.
You can also use the Preset selector in order to quickly browse through available presets saved in the default
preset folder for the effect.
Save preset
Clicking this item brings up a system file save dialog, allowing you to save the effect’s current settings as a
preset - it is recommended to use the default location so that presets become available on the effect's Preset
menu.
Swapping and copying effect devices between slots using drag and drop
Effects can be re-ordered and copied between a channel's effect slots using drag and drop. This offers a quicker
way of performing these tasks compared to using the Copy/Paste and Clear functions on the effect context
menu.
Copying an effect from one slot to another
Hold down the ALT key while performing a drag and drop operation as described above to copy the original
effect onto the destination slot.
Any effect device previously in the destination slot is discarded.
© 2017 FXpansion
Page 65

Using BFD3's sounds 65
Sends panel in Effects Editor
Firstly, select the desired channel in the mixer by
clicking it. Then, display the Effects Editor by clicking
the Effects button in BFD3's main navigation bar.
If the Sends panel is not currently displayed within
the Effects Editor, click the Sends button to make it
visible.
Sends channel mode in the mixer
Switching the mixer to Sends channel mode shows
smaller versions of the Send controls for all channels
simultaneously.
Power
The Power button activates or deactivates the Send. This button is activated
automatically when the Dest control is used to set a Send destination.
Dest (Destination)
The Send destination is selected using the Dest drop-down menu.
Level
This control sets the Send level - the amount of the signal that is sent to the
destination.
Routing mode
Using this set of buttons, each Send can be routed from any of 3 source points
in the channel signal path:
Pre (Pre FX, pre-fader)
The Send signal is tapped before the channel's effect slots. This point is also
pre-fader. Therefore, the signal reaches the Send destination without being
processed by the channel's effects, and is not affected by any level adjustment
via the channel's level fader.
Using Sends and Sidechains
4 Sends are available per channel for parallel processing and sidechaining purposes. Sends can be routed to any
available Aux channel as long as the destination channel is to the right of the source channel. They can also be
routed to the Master channel and other channels such as Drum and Ambient Mix channels (these are effectively
Aux channels with Drum sub-mic or Ambient mic channels' outputs routed to them) for sidechain applications.
Sends can be routed into the main input or to the sidechain input of the destination channel. Sidechaining is used
for certain effects which allow you to process the main input while reacting to properties of the sidechain input
signal.
Displaying Send controls
Controls for Sends can be displayed in 2 ways:
Send controls
The following controls are available for all 4 Sends from the currently selected channel, and can be accessed
using the Sends panel in the Effects Editor or using the Sends channel mode in the mixer.
FX (Post-FX, pre-fader)
The Send signal is tapped after the channel's effects but before the fader. Therefore, the signal reaches the
Send destination after being processed by the channel's effects, but is not affected by any level adjustment via
the channel's level fader.
Fader (Post-fader)
The Send signal is tapped after the channel's level fader. Therefore, the signal reaches the Send destination
after being processed by the entire channel including its effect slots and level fader.
This is the default setting for the Routing mode parameter.
Sidechain mode
The send signal can be routed to either the main input for the destination channel or, with the SideChain mode
button activated, to its SideChain input.
© 2017 FXpansion
Page 66
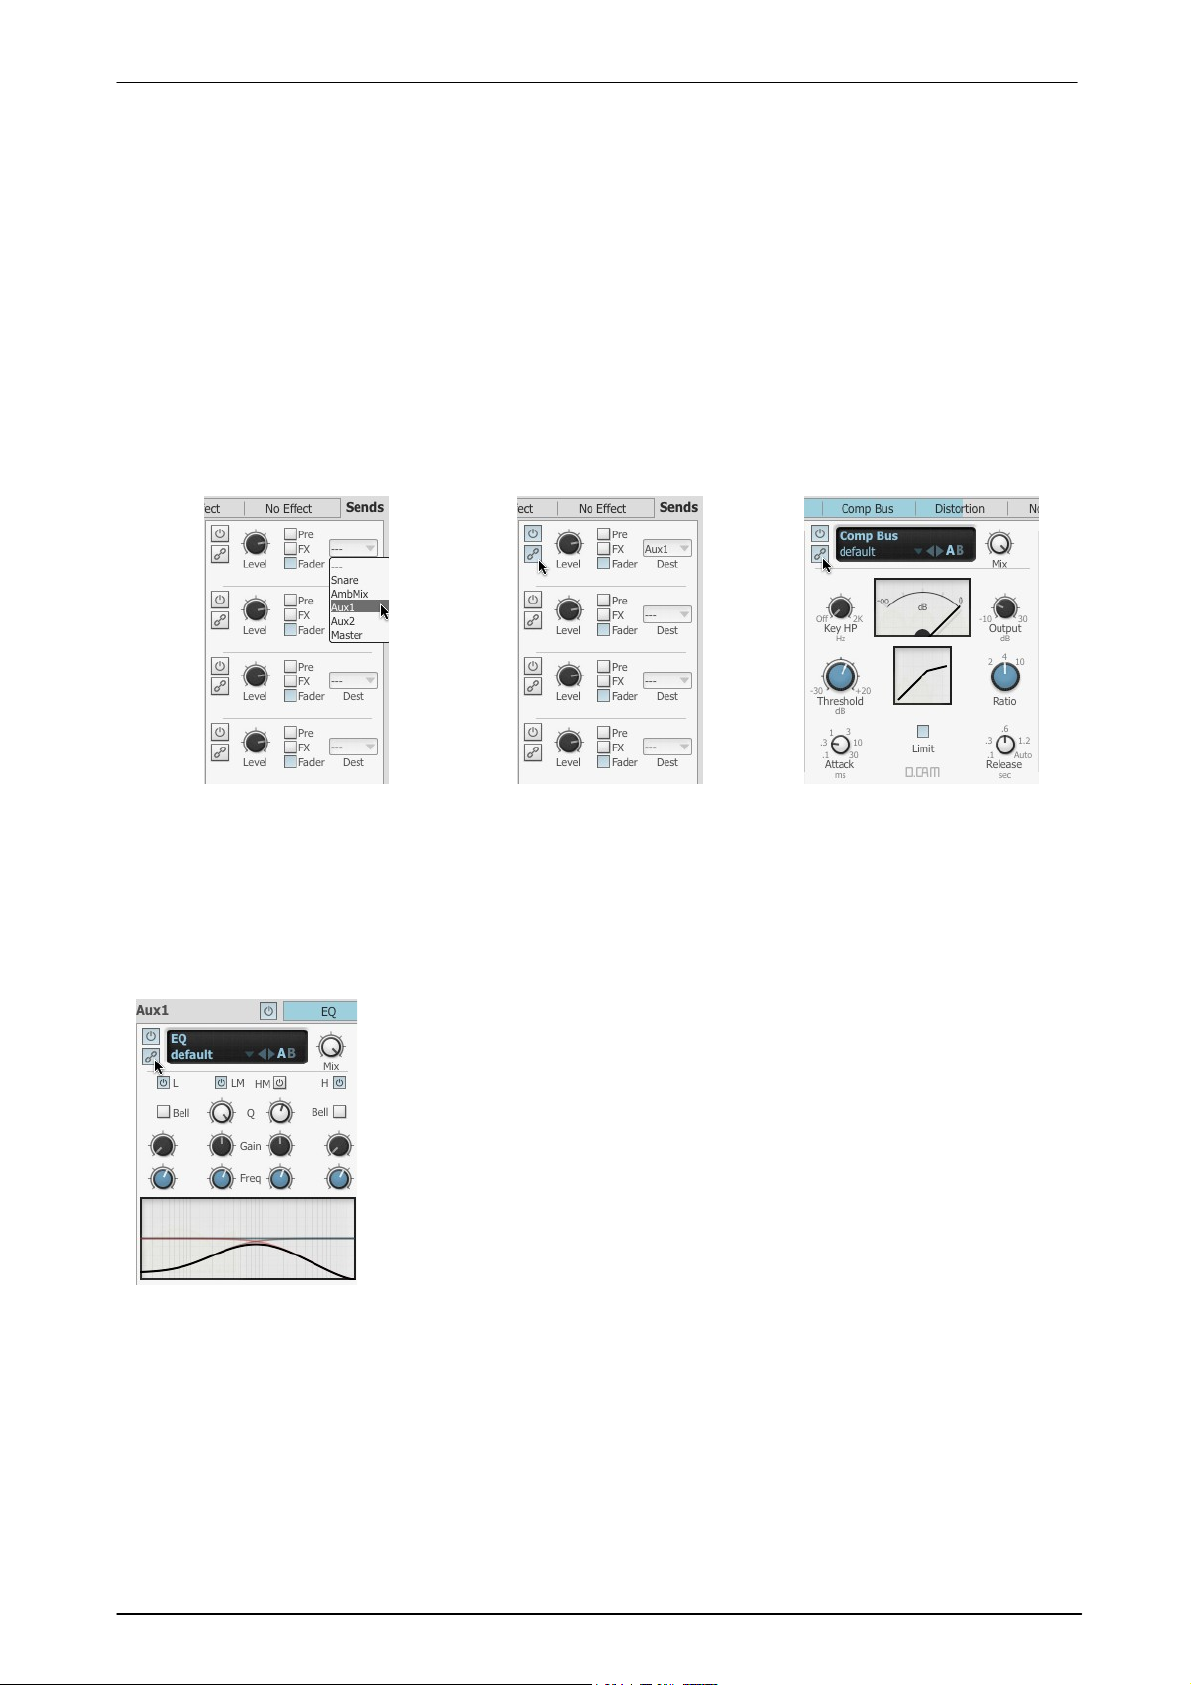
BFD3 Operation Manual66
To set up a channel as a SideChain
source for a compressor on another
channel, first set up a Send to a
destination channel with the
compressor, and turn up the level
of the Send.
Then, click the Sidechain button
for the Send source setting in
the Sends panel.
This Send is now routed to the
SideChain input of the destination
channel.
Click the SideChain mode button
on a compressor loaded into a slot
on the destination channel. It now
reacts to the SideChain signal with
the resulting gain reduction applied
to the main input signal.
A common problem when compressing is the existence of excessive low-end
frequencies in a sidechain signal causing a compressor to react more than desired.
BFD3's compressors include a high-pass filter to quickly filter out the low end from
the signal used by the peak detection process.
However, you may need to apply a more complex EQ process to a SideChain signal
in order to isolate a particular band of frequencies such as the mid 'crack' of a
snare sound. In such cases, proceed as described above, but insert an EQ on the
destination channel, ensuring that it is inserted before the compressor.
Now, click the SC button on the EQ's interface: the channel's SideC hain input signal
is processed by the EQ rather than the channel's main input signal. The processed
SideChain signal is then used by the compressor as the source for its peak
detection circuit (after the compressor's SC button has also been enabled).
If the signal is sent to the SideChain input, the signal is not processed through the channel and its effects, but
instead is used for sidechain-enabled effects with their SideChain mode button enabled. There is one exception
- the EQ is capable of processing a channel's SideC hain signal for reasons which are discussed in the 'Using
sidechaining' section below.
Using Sidechaining
Sidechaining is the use of one signal to control the behaviour of a processor that acts on another signal.
Generally, the amplitude of the sidechained signal is used to determine the dynamic output of the processed
signal and it is not directly heard in the output of the processor at all. It is a common feature in compressors, in
order to compress one signal according to the amplitude of another for a variety of dynamic effects.
In BFD3, any mixer channel can be used as a SideC hain source for a compressor or gate inserted on an Aux
channel or the Master channel.
In addition, the SideC hain can also be used as the FM source when the filter FM function is used in the Filter Mod
device.
Setting up sidechains
EQ-ing the sidechain
© 2017 FXpansion
Page 67
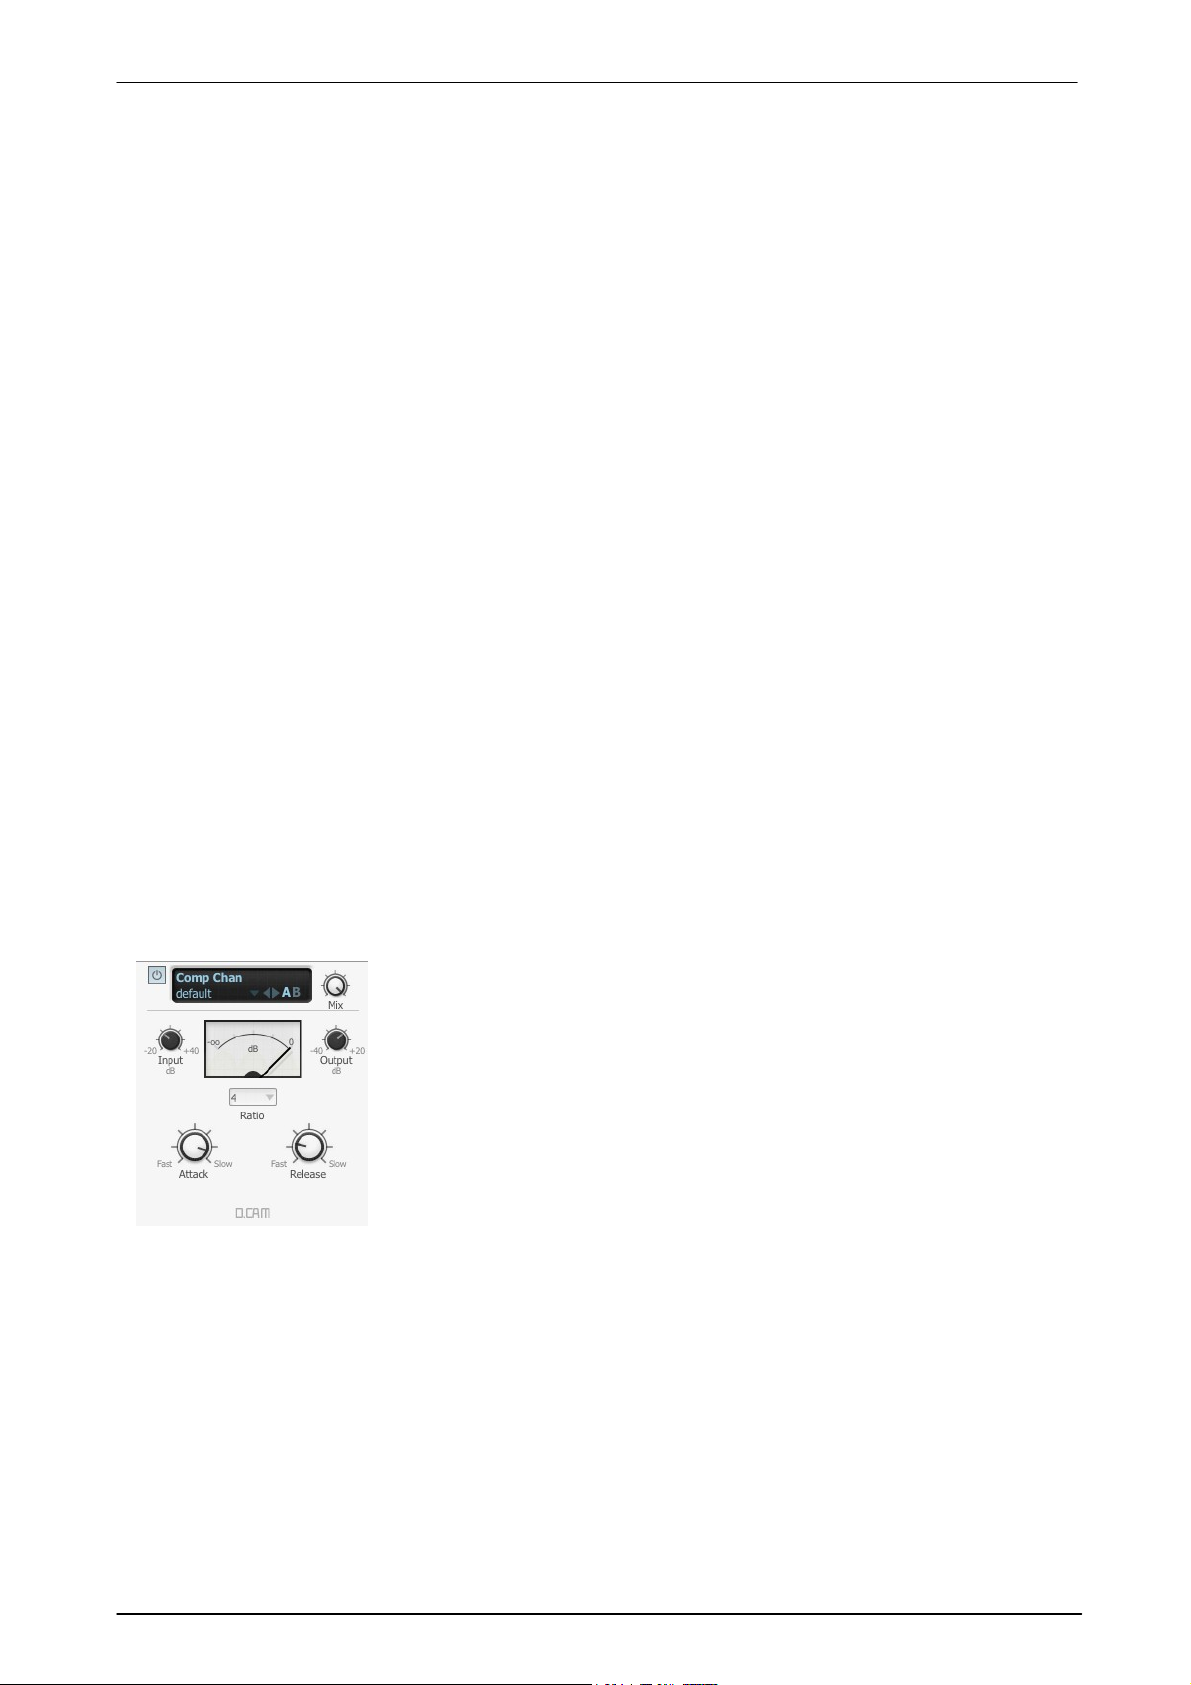
Using BFD3's sounds 67
Comp Chan (channel compressor) is derived from a classic 'feedback-based
FET limiting amplifier' design.
It features a 'fixed-threshold' design – the threshold at which compression
starts is not adjustable. In practice, this means you may need to adjust the
Input and Output levels when changing ratios.
Input & Output
This control adjusts the level of the signal entering the compressor. Once the
input level has reached the internal threshold, compression begins. When this
happens, use the Output control to turn down the increased input. The Input
control ranges from -20 tp +40 dB, while the Output control ranges from -40
dB to +20 dB.
3.4.1 Dynamics
Common compression parameters
The following definitions apply to most of BFD3's dynamics processors. However, please note that the DC AM
EnvShaper device has a very different approach to its time-related parameters (Attack and Sustain).
Attack
The Attack control on a compressor represents the speed at which the gain is reduced when transients pass
through it.
This control is often misunderstood - the Attack time does NOT indicate the amount of time taken before the
compressor starts to compress.
Release
The Release control on a compressor sets the speed at which the gain level returns to normal after a transient
has passed.
Ratio
The Ratio specifies the gain reduction applied by the compressor. The numbers in the ratio represent the
change in gain before and after compression.
For example, assuming that the threshold level has been breached, then a ratio of 2:1 would mean that for
every 2 dB of increased signal level coming into the compressor, the output level rises by 1dB.
Advanced features in BFD3's dynamics processors
SideChain button
The BFD3 C omp Bus, NoiseGate and DCAM EnvShaper feature the ability to process a signal using the transient
characteristics of another. By enabling the SideChain button, the device's peak detection circuit reacts to the
channel's SideC hain input rather than the main input but still applies the processing to the main input signal. This
allows you to control the dynamics of the main input signal with another signal entirely.
The Filter Mod device also features a SideChain button for driving its envelope follower and FM functions while
the EQ and EQ8 devices also have a SideChain button for EQ-ing the channel's SideChain signal.
Parallel compression and the Mix control
Parallel compression involves mixing a compressed signal (usually fairly heavily compressed) with the original
dry signal, in order to achieve the 'huge' sound of a compressed drum mix while keeping the transients of the
original drums intact.
While it is uncommon to see a wet/dry mix control on a compressor, the Mix control on BFD3's compressors is
very useful for applying parallel compression to a single mono or stereo channel without needing to create
additional Aux channels. If you need to apply parallel compression to more than one channel at once, you must
first create a sub-mix on an Aux channel.
Comp Chan
Attack
The Attack control has a range between 0.02 ms and 0.8 ms.
Release
The Release control has a range between 50ms and 1.1 seconds.
Ratio
This control sets the compression Ratio to 4:1 , 8:1 , 12:1, 20:1 or 'Nuke', which is an emulation of the 'all
buttons' mode on a classic limiting amplifier design. It results in a particularly brutal type of compression with
accompanying distortion artifacts.
© 2017 FXpansion
Page 68
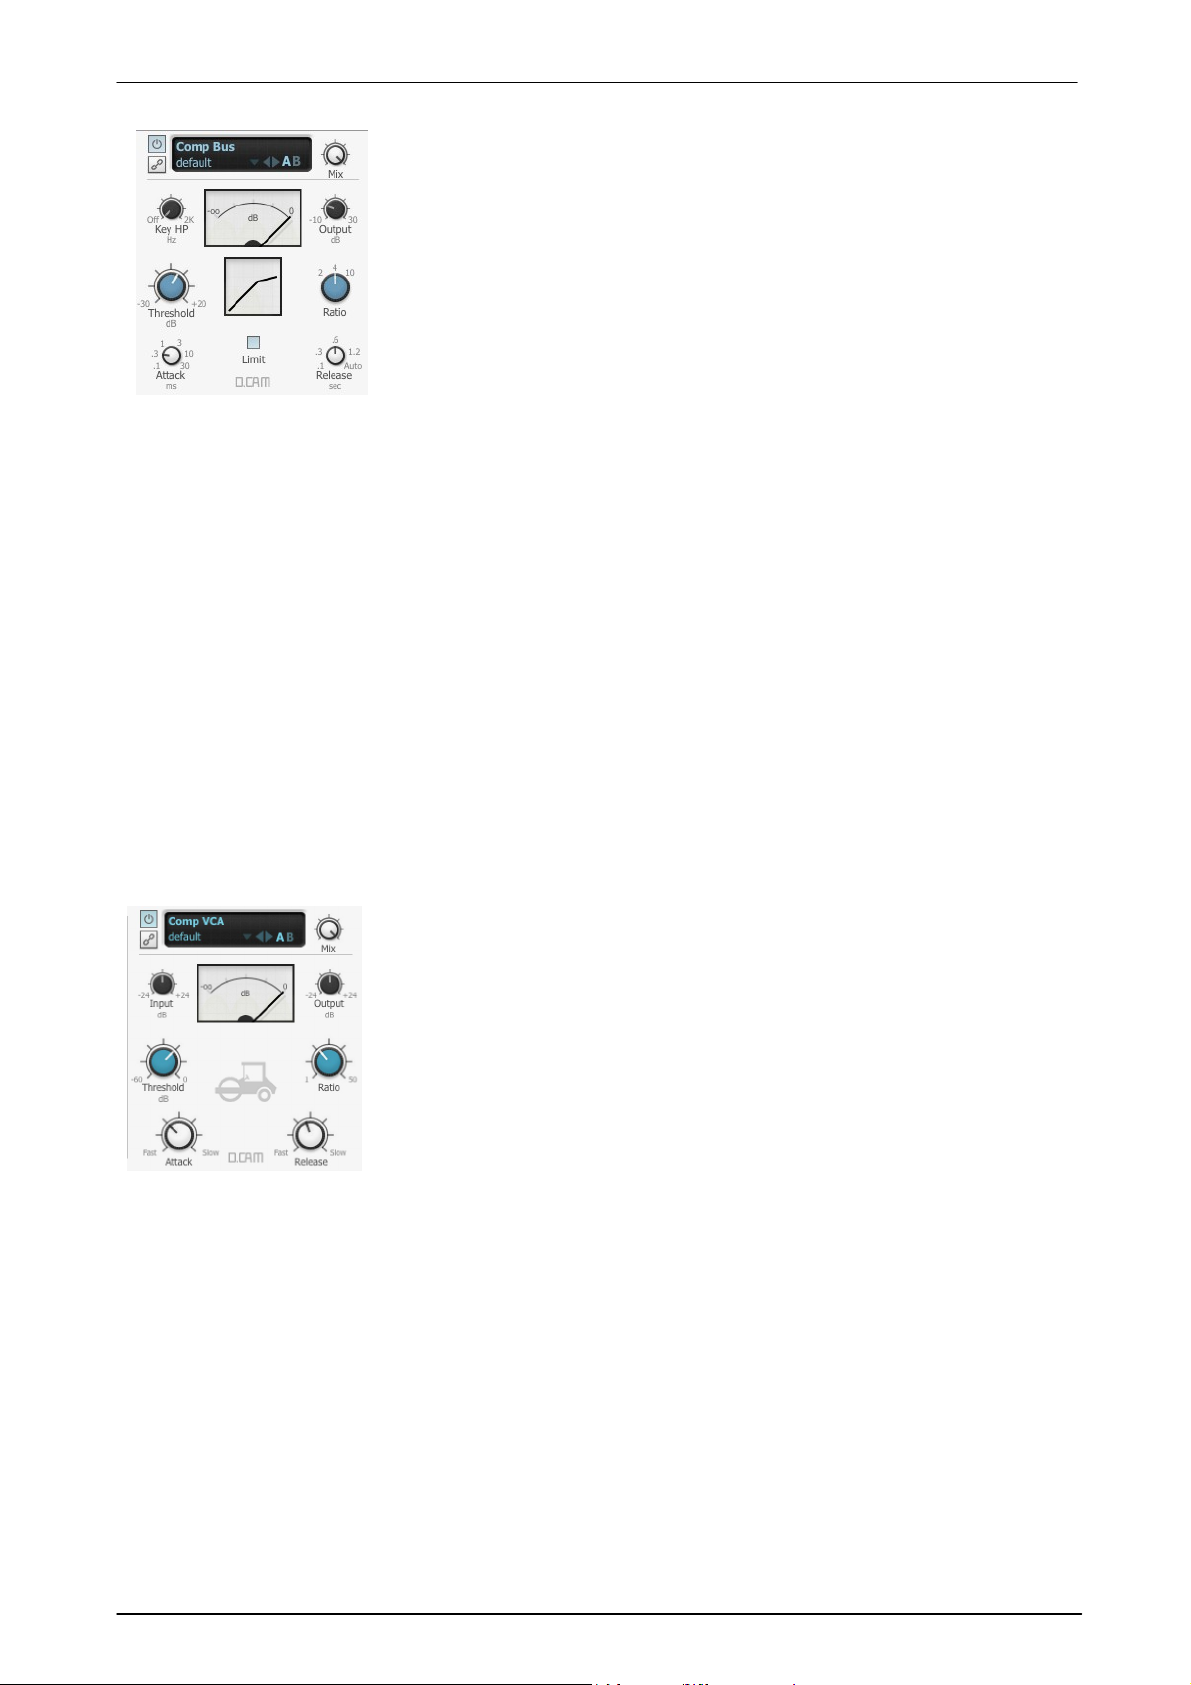
BFD3 Operation Manual68
This device is based on a classic bus compressor design from the centre
section of a well-known British large-format mixing console.
It is most commonly used to add 'glue' and power to a drum bus. However, it
also works very well as a channel compressor in its own right, offering a
different flavour of compression compared to the Comp Chan.
Key HP (Key signal High-pass)
The Key HP control adjusts a variable high pass filter on the key signal that is
used for the compressor's amplitude detection. It is applied whether the main
input or the SideChain input is being used to drive the compressor. No filtering
is applied to the audible signal - only to that being used to drive the peak
detection circuit.
This control is useful when there is too much low-end in the sidechain signal,
resulting in the compressor reacting more heavily than desired.
The C omp VC A device is a modelled emulation of a VC A-based compressor
circuit with a fast and clean compression characteristic.
Input
The Input control adjusts the signal level entering the compressor circuit.
Higher levels result in the compressor circuit reacting more heavily.
Attack
The Attack time can be set between 100µs (microseconds) and 100ms
(milliseconds).
Release
The Release time can be set between 10ms and 2s.
Ratio
The Ratio can be set between 1:1 and 50:1.
Threshold
The Threshold represents the signal level at which the compressor begins to
react.
Output
The Output control allows you to increase the overall output level after the
compressor circuit has applied gain reduction to the input signal.
Comp Bus
Attack
Six Attack times are available: 0.1 ms, 0.3 ms, 1 ms, 3 ms, 10 ms, 30 ms.
Release
Five Release settings are available: 0.1 ms, 0.3 ms, 0.6 ms, 1.2 ms and Auto.
Ratio
Three Ratio settings are available: 2:1, 4:1 and 10:1.
Threshold
Unlike the Comp C han, the Comp Bus device allows you to adjust the Threshold, which represents the signal
level at which the compressor begins to react.
Output
The Output control allows you to increase the overall output level after the compressor circuit has applied gain
reduction to the input signal.
Limit
The Limit button applies analog non-linearities to the input to the compressor's amplitude detection circuit (while
not affecting the input signal itself). This results in a more transparent character to the compression effect,
especially on attack phases of transients.
Comp VCA
© 2017 FXpansion
Page 69
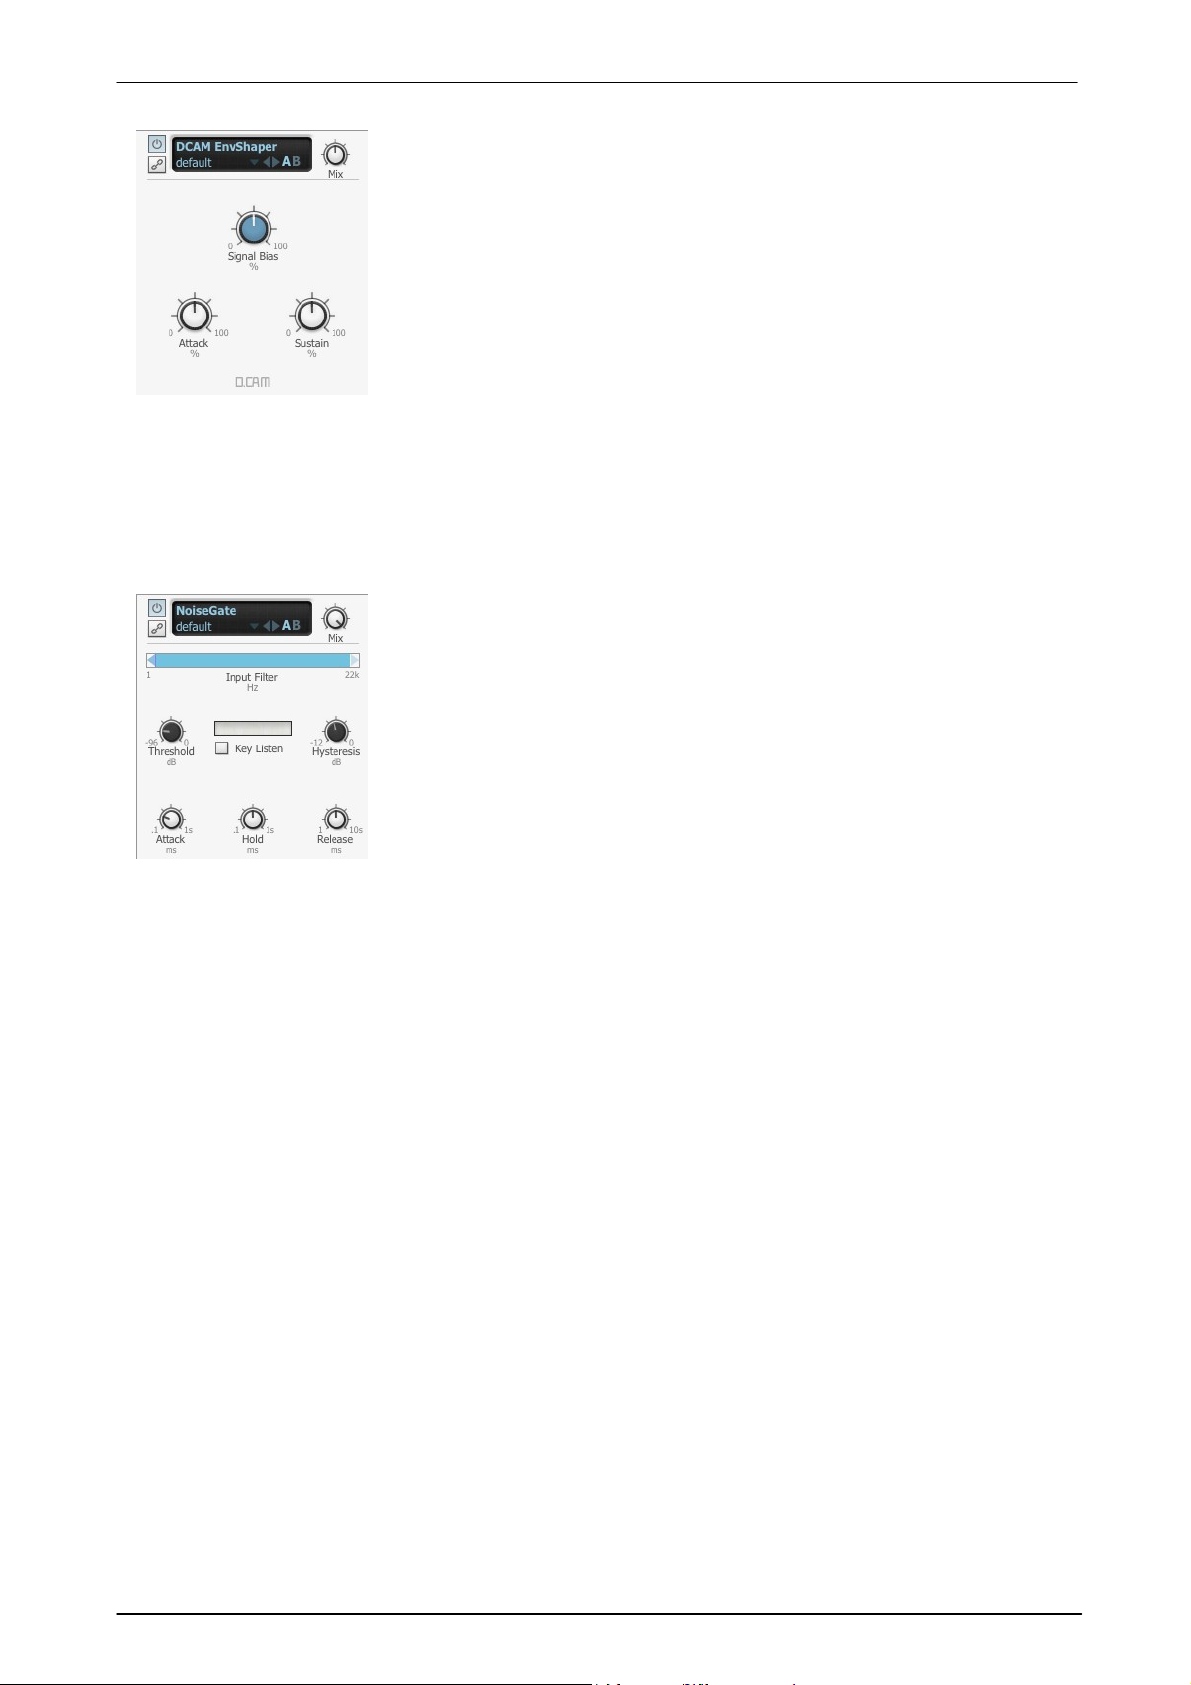
Using BFD3's sounds 69
DCAM EnvShaper offers an alternative approach to dynamics processing by
allowing you to adjust the intensity of the attack and sustain portions of
transients.
Attack
The Attack control adjusts the intensity of the attack phase of detected peaks
in the audio signal. Increase the control to intensify attack transients, and
decrease it to soften transients.
Sustain
The Sustain control adjusts the intensity of release portions of detected
peaks in the audio signal, which increases or decreases the apparent sustain
of sounds in the signal.
A noise gate is a type of dynamics processor that attenuates the input signal
until its amplitude exceeds an adjustable threshold level, at which time the
gate 'opens' to allow audio through at its actual level.
They are often used during drum mixing in order to isolate drums within
signals containing bleed or spill from other drums. Another common use is to
reduce the decay of toms and kicks. Noise gates are often referred to simply
as 'gates'.
While BFD3 contains bleed channels, these can be turned down or off
completely rather than having to use gates to minimize bleed. Likewise, the
decay of kit-pieces can be adjusted using the Damping controls in the Drum
Editor. However, using gates can be good for creative effects, or simply for
recreating the types of techniques used in real drum mixing sessions.
DCAM EnvShaper
Increase this control for more sustain, and decrease it for less sustain. This control is useful for adjusting the
perceived level of ambience in a channel. Negative settings can produce damping effects for drum sounds.
Signal Bias
The Signal Bias control adjusts the sensitivity and release characteristics of DC AM EnvShaper. At low settings it
is more sensitive to short transients while at higher settings it is more sensitive to longer transients.
NoiseGate
BFD3's NoiseGate has a SideChain function which allows you to create triggered 'chopping' effects very easily.
For example, route any channel such as a hihat or a user sample direct channel to the master channel's
sidechain input and insert a noise gate in one of the master channel's effect slots. Enable the sidechain button for
the gate and adjust the threshold until the sidechain input triggers the audio on the channel.
When setting very fast Attack and Release times, it is common to hear 'clicks' in the audio when the gate
opens and closes, especially with sounds predominantly comprised of low frequencies such as kicks and toms.
This behaviour is completely normal - these times simply need to be increased slightly to overcome the problem.
Attack
The Attack control adjusts the speed at which the gate opens once the Threshold has been exceeded by the
input signal's amplitude.
Hold
The Hold parameter controls the amount of time the gate remains open after the input signal has dropped below
the Threshold level.
Release
The Release control adjusts the speed at which the gate closes at the end of the hold time.
Threshold
The Threshold control allows you to set the level at which the gate starts to open. When the input signal
amplitude exceeds the level specified by the Threshold control, the gate starts to open to allow audio through.
Input Filter
This control provides high-pass and low-pass filters to process the input signal used to trigger the gate (whether
it is the main input signal or the SideChain input signal) while leaving the actual processed signal unfiltered. This
allows you to isolate certain frequencies in the input to improve the gating response – for example, excessive
low frequencies in the input can make the gate react more sensitively than required.
To adjust this control, click and drag the light blue arrows at the left and right of the blue active frequency band
the light-blue arrows represent the cutoff frequencies of the high-pass and low-pass filters.
Key Listen
Enabling the Key Listen button lets you hear the key input being used to trigger the NoiseGate's amplitude
detection circuit instead of the processed input signal. The key signal can be either the main input or the
sidechain input.
It is very useful when using the Input Filter and/or the SideC hain input.
© 2017 FXpansion
Page 70
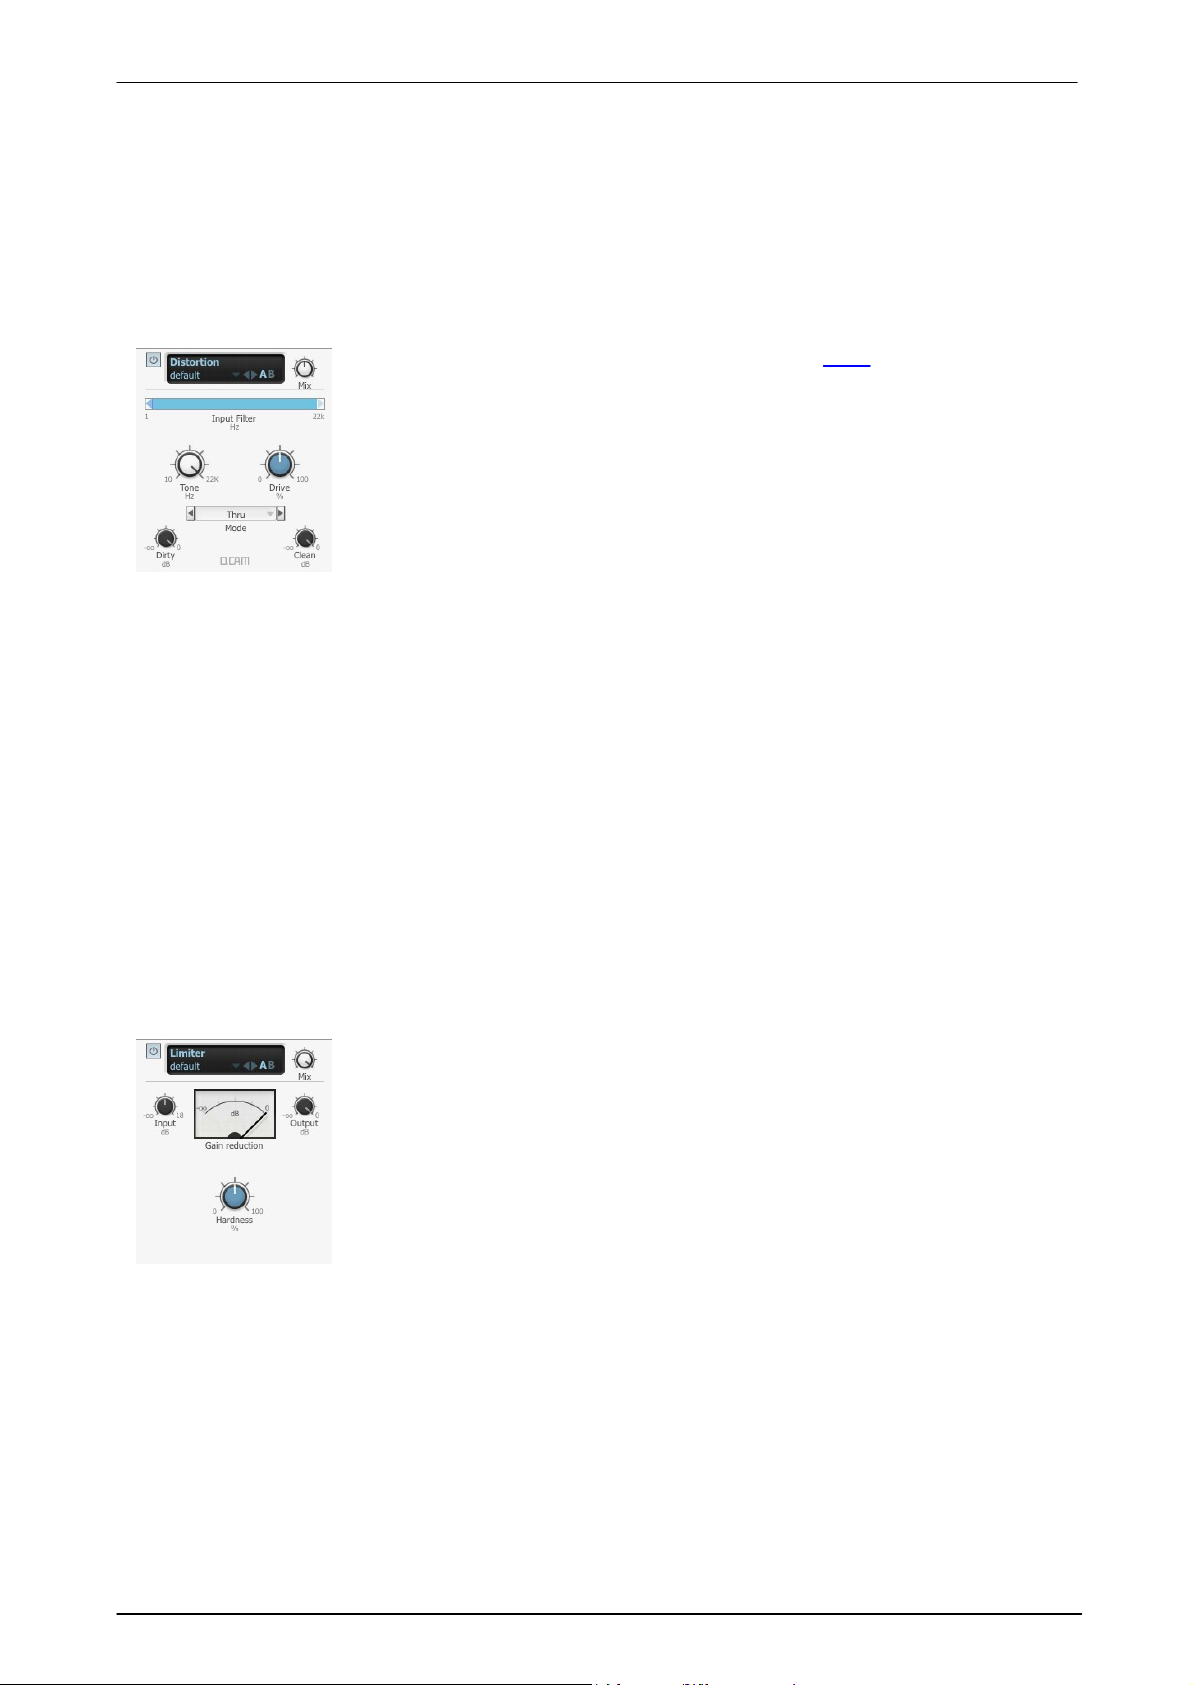
BFD3 Operation Manual70
The Distortion device is an updated version of BFD2's Drive processor which is now
available within the Legacy sub-menu.
Mode
The Mode drop-down menu selects between a wide variety of distortion types.
Drive
The Drive control sets the amount of distortion that takes place.
Input Filter
This control provides high-pass and low-pass filters before the distortion stage to
enable you to shape the tonal characteristics of the signal going into the drive
circuit.
A limiter is effectively a compressor with a very fast attack time and a high ratio
for signals that exceed the maximum level.
Input
The Input control adjusts the level of the signal going into the Limiter algorithm.
Higher input levels lead to more pronounced and 'brutal' limiting.
Hardness
The Hardness control adjusts the strength of the Limiter's 'knee'. At high settings,
peaks are clipped with a 'brick-wall' limiting effect. At lower settings, gain reduction
occurs more slowly (with slower attack and release settings), leading to a more
natural effect with less 'pumping'.
Hysteresis
Noise gates have a tendency to open and close very quickly when the input signal's amplitude remains close to
the threshold level for longer periods, something that can result in 'gate chatter'.
Increasing the Hysteresis control smooths out the gate response to reduce this problem, although the gate
becomes less sensitive to small changes around the threshold level.
Mix
With the Mix control at 100%, the NoiseGate mutes the signal completely when closed. If you want to let the
signal through at a low level, decrease the Mix control to allow more of the dry signal through.
Distortion
For example, you may want to distort the high end of a kick drum while leaving the deep low end unchanged.
To adjust this control, click and drag the light blue arrows at the left and right of the blue active frequency band
the light-blue arrows represent the cutoff frequencies of the high-pass and low-pass filters.
These filters are crossover filters – the active frequency band is processed by the distortion circuit with its level
adjustable via the Dirty control. The frequencies that are filtered out before the distortion stage are accessible
via the Clean control.
Dirty & Clean
The Dirty control sets the amount of post-distortion signal that is heard at the output.
The Clean control sets the amount of the clean signal, which is comprised of the signals filtered out by Input
Filter control.
Please note that these are not 'wet' and 'dry' controls – use the standard Mix control at the top of the effect
interface in order to mix between the pre- and post-effect signals.
Tone
The Tone control provides a simple -6 dB/oct low-pass filter for the processed signal after the distortion stage.
It allows you to roll off unwanted high frequencies that may have been generated in the signal as part of the
distortion effect.
Limiter
Output
The Output control allows you to attenuate the processed output signal from the Limiter.
© 2017 FXpansion
Page 71
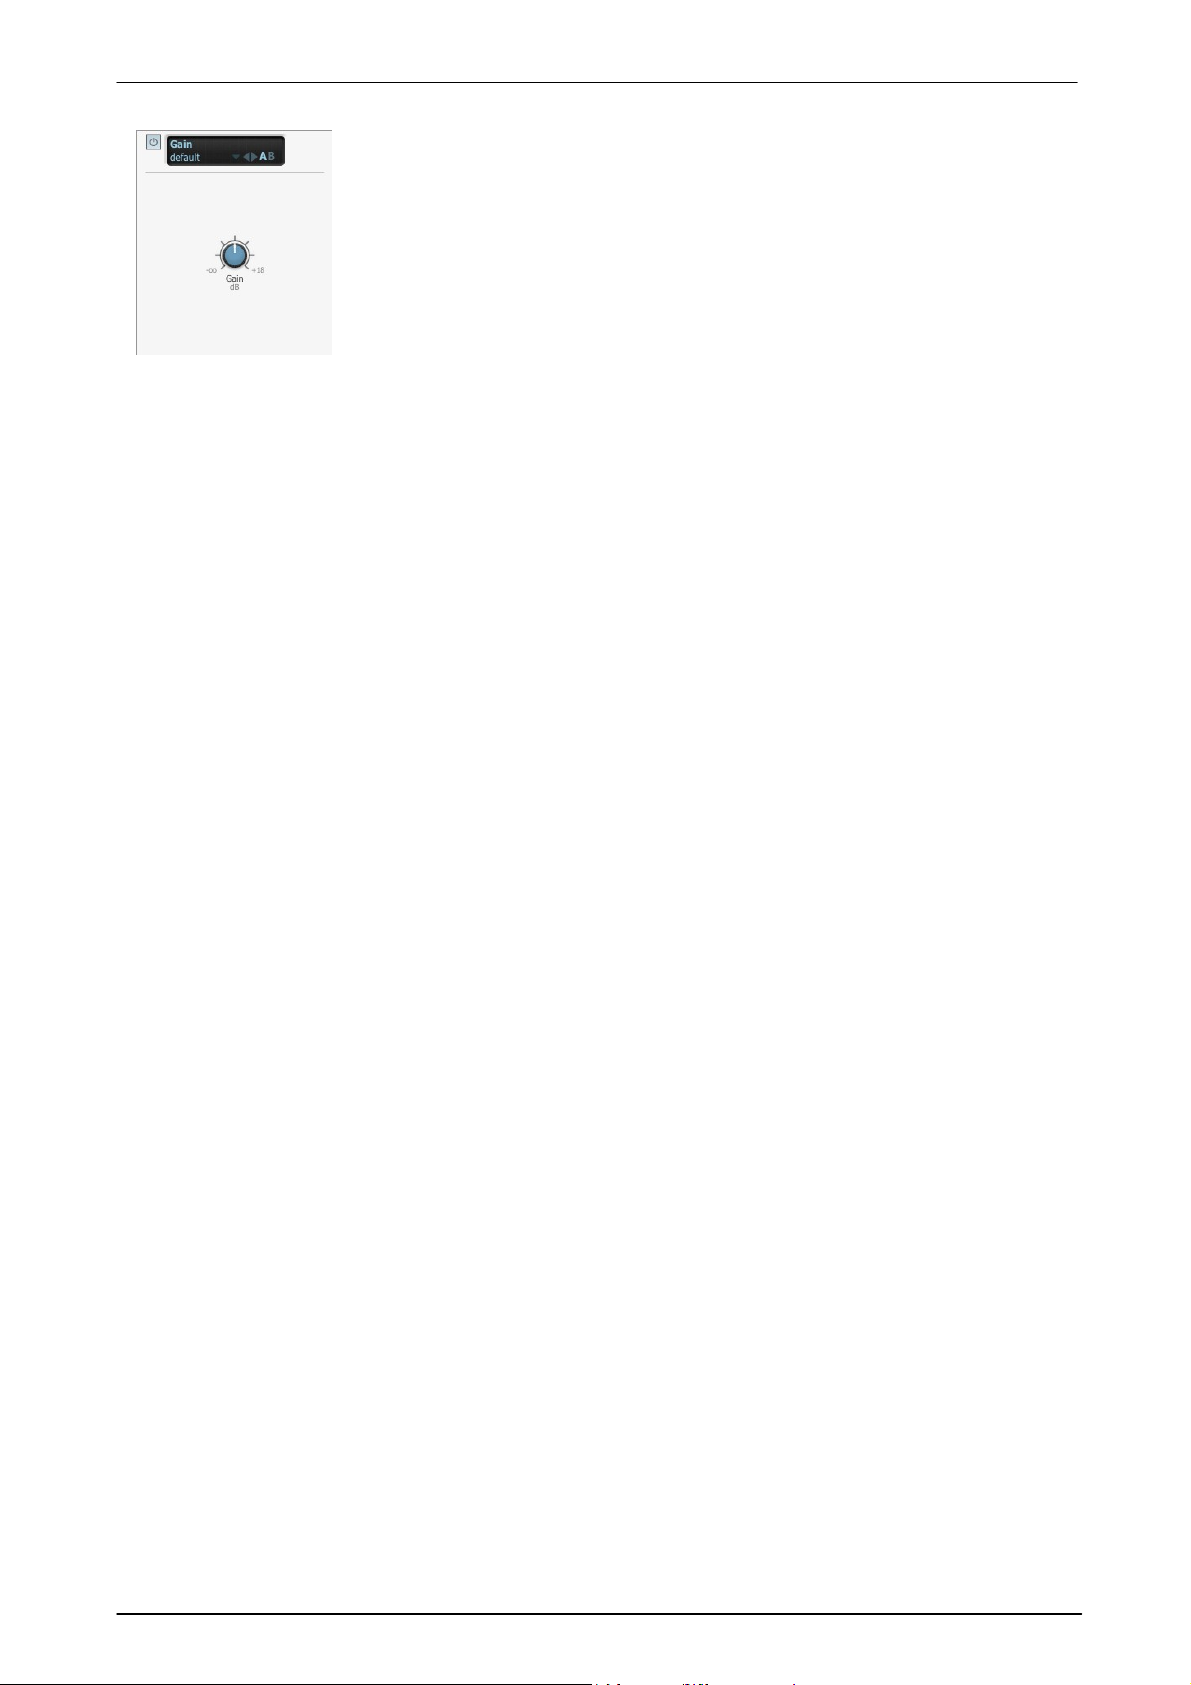
Gain
The Gain effect is a simple tool for increasing or decreasing a channel's level.
Gain
The Gain control lets you increase the channel's gain up to 18 dB, or decrease it
up to -inf dB.
Using BFD3's sounds 71
© 2017 FXpansion
Page 72
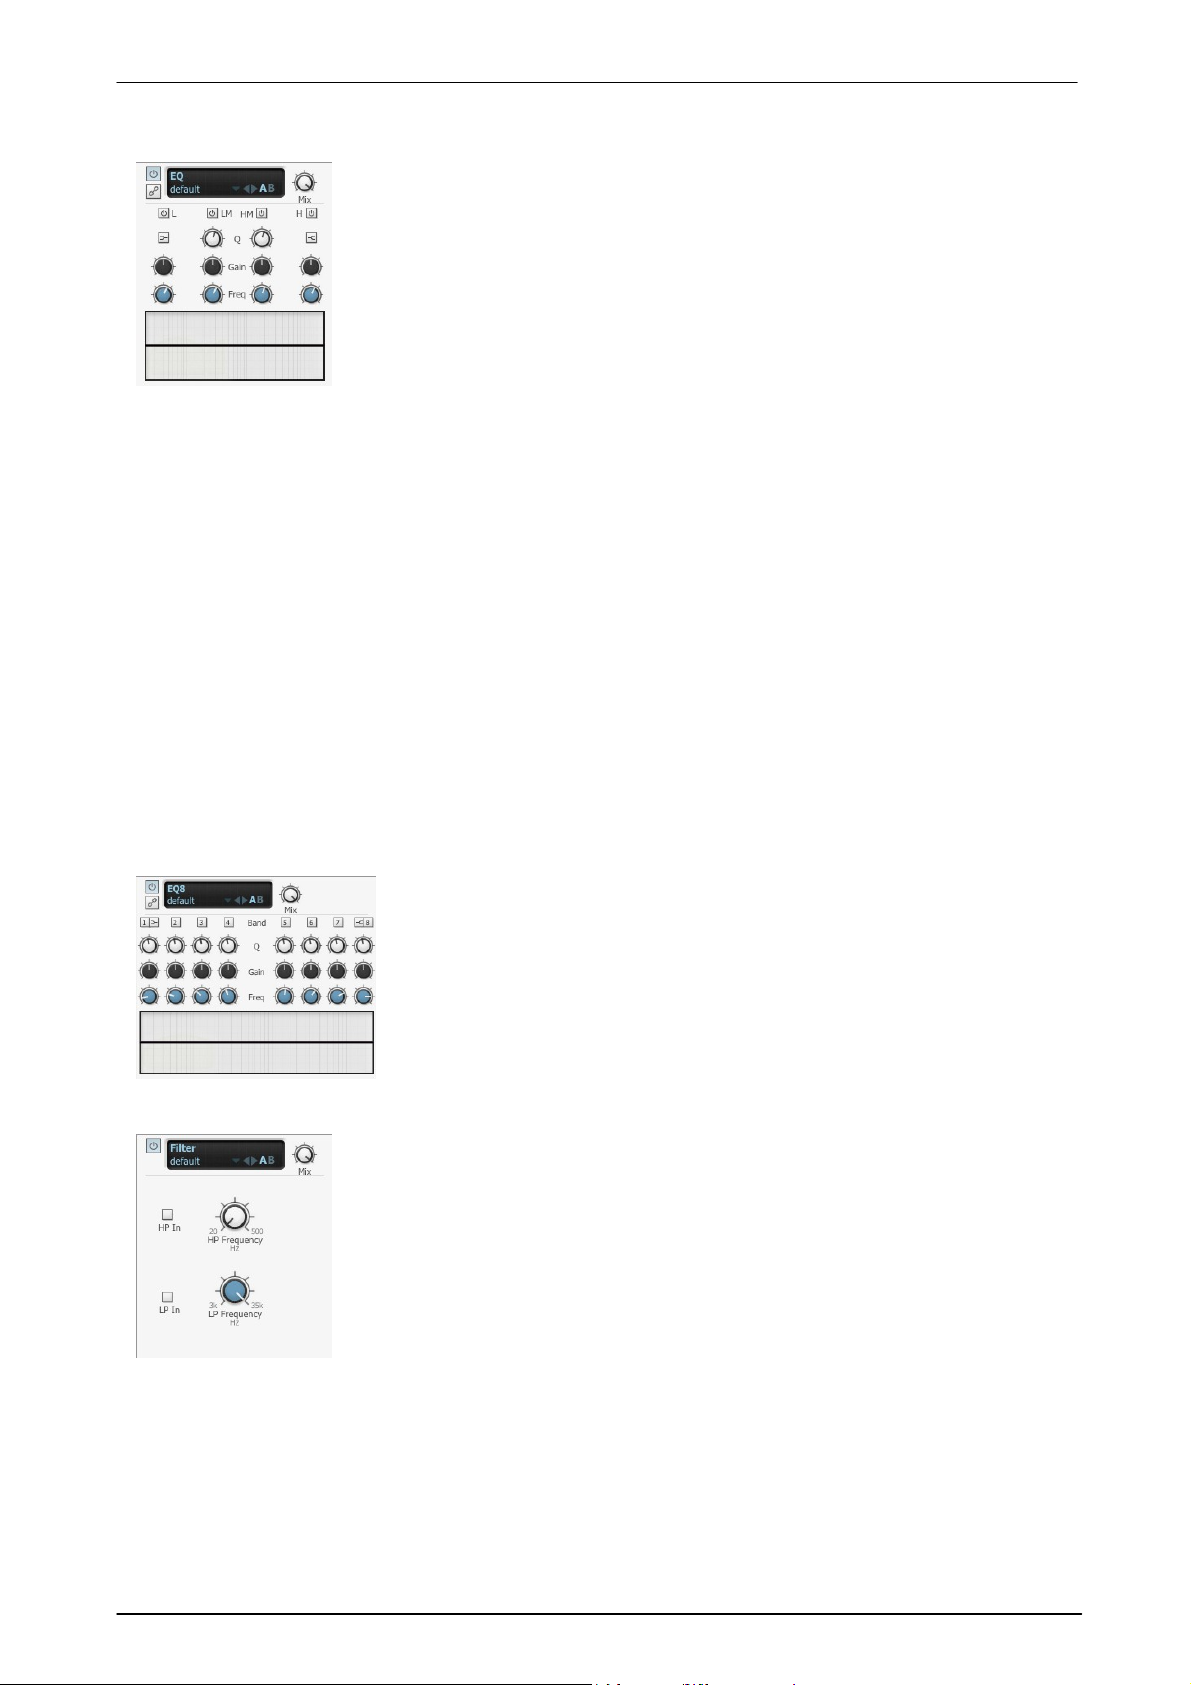
BFD3 Operation Manual72
BFD3's EQ provides 4 bands of EQ, including two parametric mid bands.
L (Low) and H (High) bands
The Low and High bands are switchable between a bell with a fixed Q of 2.5 octave
(with the Bell button activated) and a shelving response with a fixed rolloff of 12
dB per octave (with the Bell button deactivated).
• Low band Freq range: 40 to 600hz
• Low band Gain range: +/- 16.5 dB
• High band Freq range: 600 to 14khz
• High band Gain range: +/- 20 dB
The EQ8 device is an 8-band version of the EQ - it features the same controls
but for 8 bands (numbered 1-8) instead of the 4 bands in the standard EQ
device.
Bands 1 and 8 behave in the same way as the Low and High bands in the
standard EQ device, while all other bands behave in the same way as the EQ's
parametric Low Mid and High Mid bands.
The Filter effect provides non-resonant high-pass and low-pass filters for broad
tonal shaping of signals.
It can be used to roll off the low end in Overhead and Room buses, or to remove
ultra-low frequencies from kick drums, espcially when low-shelving EQ is applied.
HP Frequency
The -18dB/Oct high-pass filter removes frequencies below the specified frequency
which can be set within a range between 20hz and 500hz.
LP Frequency
The -12 dB/Oct low-pass filter removes frequencies above the specified frequency,
which can be set within a range of 35 Hz to 3 kHz.
3.4.2 Filters
EQ
LM (Low Mid) and HM (High Mid) parametric bands
The Mid bands feature bell curves with adjustable Q.
• Low Mid Band Freq range: 200hz to 2Khz
• High Mid band Freq range: 800hz to 7khz
• Q range: 0.5 octave to 2.5 octave
Band Power
Each band has its own Power button allowing you to save CPU by only using the bands you need.
SideChain
Enabling the EQ's SideChain button allows you to EQ the channel's sidechain input. It can be very useful to EQ a
SideChain input before it enters a compressor as it may feature excessive energy in a part of the frequency
spectrum leading to an undesired compression response. Note that the EQ must be placed before the SideChainenabled processor in the channel's effect chain.
Frequency Display control
The EQ curve can be adjusted by clicking and dragging the graphical display in the EQ effect interface. To edit a
band in this way, move the mouse cursor over the display. The display is divided into 4 zones for each band,
each highlighted in a different colour corresponding to that of each band's controls on the interface.
With a band highlighted, click and drag up/down to adjust the band's Gain, and left/right to adjust its Freq. For
the two Mid bands, click and drag up/down while holding down the ALT key to adjust the band's Q.
EQ8
Filter
Power buttons
The HP In and LP In buttons are power buttons for each filter – when activated, the filter is enabled, and when
deactivated, the filter is bypassed.
© 2017 FXpansion
Page 73
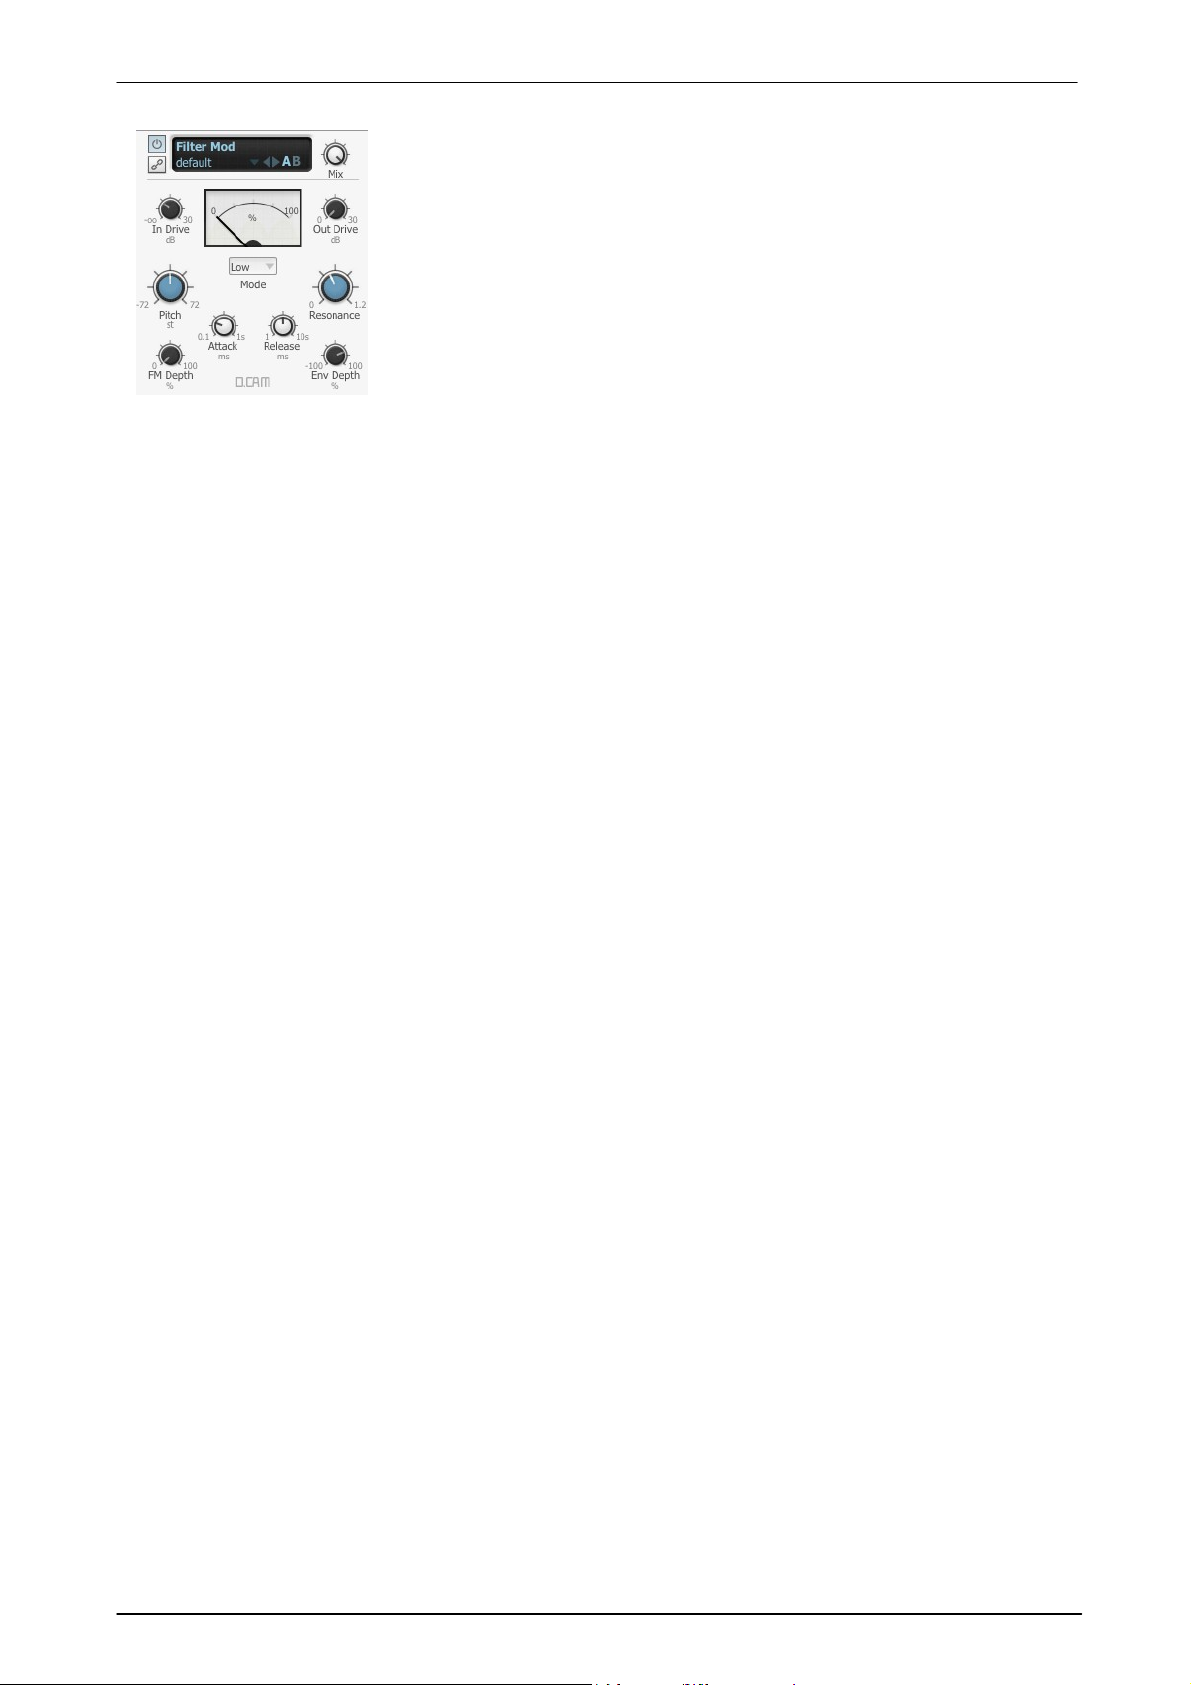
Using BFD3's sounds 73
This device features a state-variable multimode filter with a response of 12 db
per octave, capable of self-oscillation and featuring input and output drive
stages.
It has a built-in envelope follower to modulate the filter's cutoff frequency
relative to the input's amplitude. This function is modelled on an analogue fullwave rectified envelope follower. Additionally, the filter frequency can be
modulated at audio rate by the input signal.
Alternatively, the channel's SideC hain input can be used as the audio source
for the envelope follower and audio-rate FM functions. For example you could
use a bass drum tuned very low as a rough and ready LFO to modulate the
filter.
Filter Mod
Mode
4 filter Mode settings are available, each offering different filtering functions relative to the cutoff frequency.
Low (Low-pass)
Low-pass mode allows through only frequencies below the cutoff frequency.
High (High-pass)
High-pass mode allows through only frequencies above the cutoff frequency.
Band (Band-pass)
Band-pass mode allows through only a band of frequencies around the cutoff frequency.
Notch
This is the opposite of a band pass - it allows through all other frequencies except a band of frequencies around
the cutoff frequency.
Modulating a notch filter can give phaser-like results.
In Drive
The In Drive control sets the amount of signal gain before the filtering stage. As well as increasing the gain,
using more drive results in a rich and complex interaction with the filter's resonance due to modelled nonlinearities within it.
Out Drive
The Out Drive control adjusts the gain of an OTA-type non-linear amp function at the output, in order to boost
and colour the filtered signal.
Pitch
The Pitch control adjusts the cutoff frequency of the filter. It is measured in semitones.
Resonance
This control adjusts the resonance of the filter, accentuating the frequencies around the cutoff frequency set by
the Pitch control.
High Resonance settings cause the filter to self-oscillate – please exercise caution with your speaker levels
when using resonant self-oscillation.
Attack
This control changes how quickly the envelope follower section responds to transients in the input signal. Longer
Attack times mean that the filter takes a longer time to respond to amplitude changes.
Release
The Release control changes how quickly the envelope follower causes the filter to return to its original position
when the input signal decreases after a transient.
Env Depth
The Env Depth control adjusts the amount of modulation of the filter's cutoff frequency by the built-in envelope
follower.
FM Depth
The FM Depth control sets the amount of audio-rate modulation of the cutoff frequency by the input.
© 2017 FXpansion
Page 74
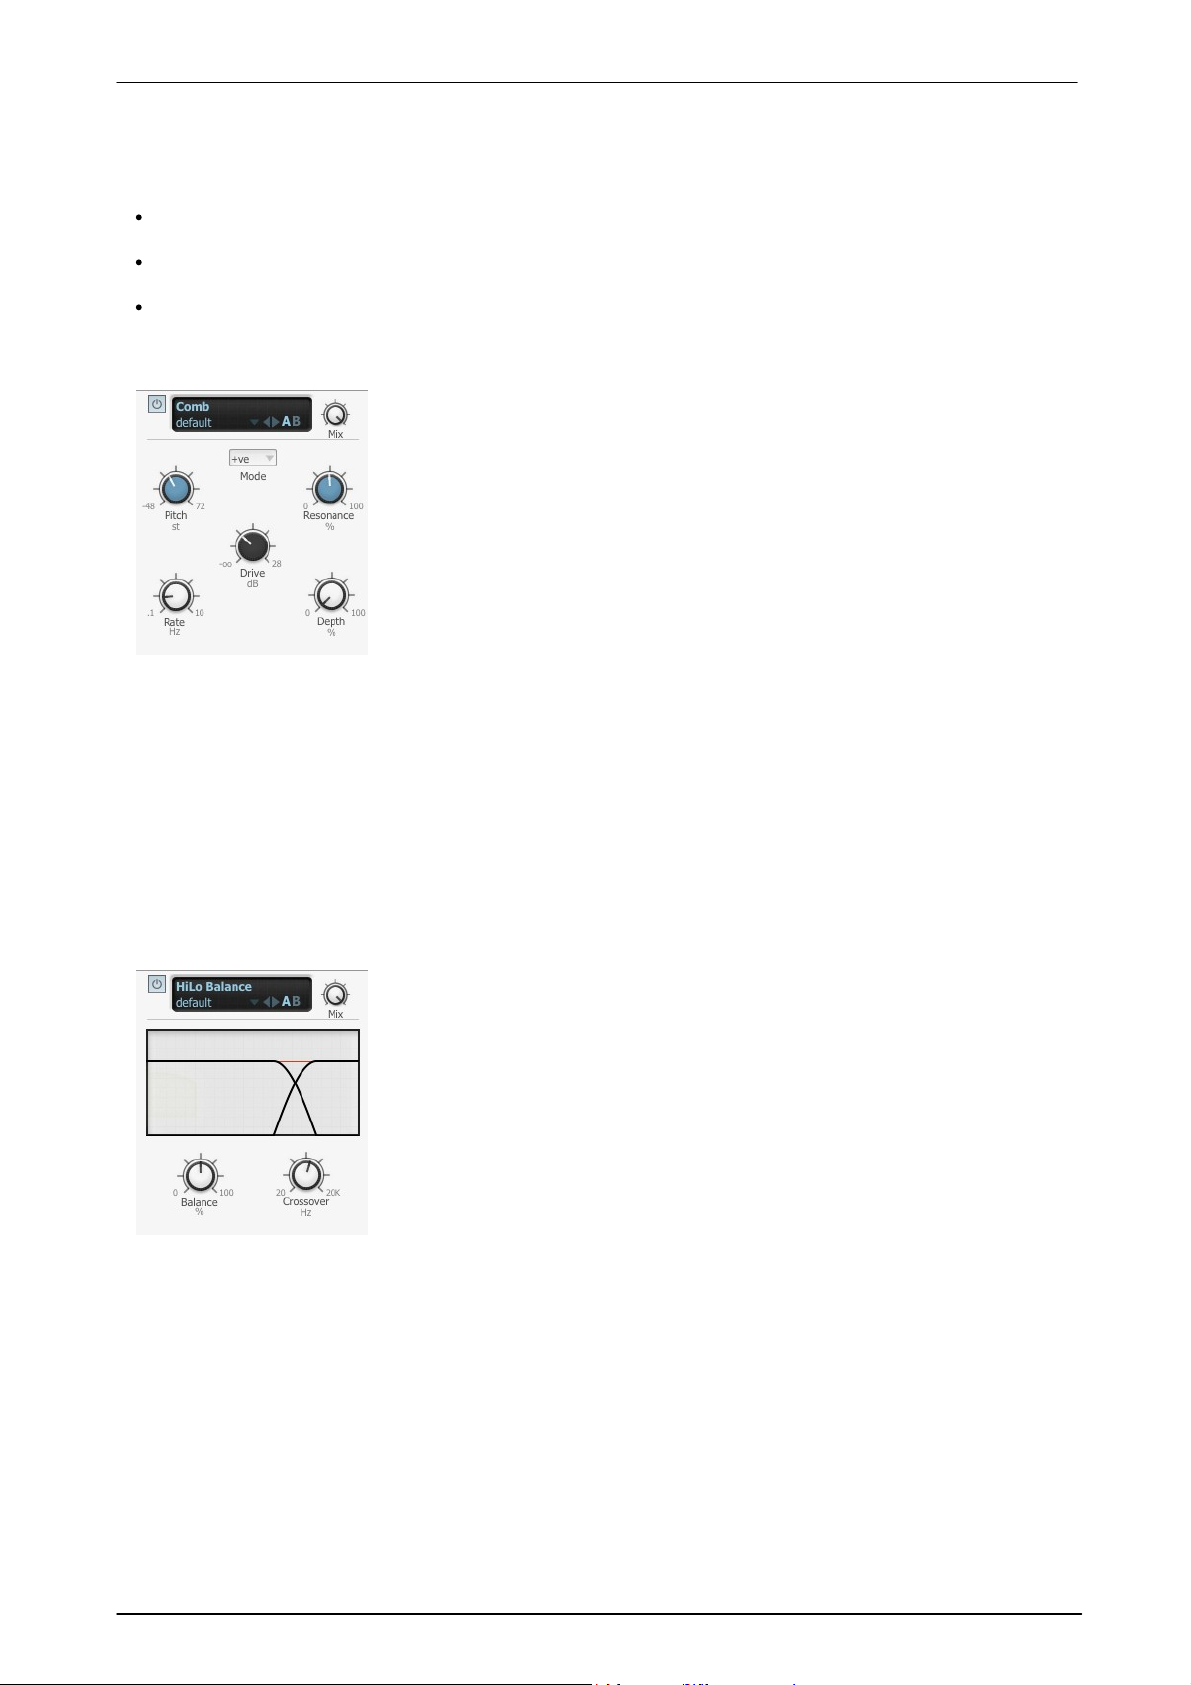
BFD3 Operation Manual74
The C omb device is useful for psychedelic chorus and phaser-style effects.
Comb filters use technique of feeding a delayed version of the signal back into
itself to create a series of harmonically related notches across the frequency
spectrum reminiscent of the teeth of a comb. Changing the amount of delay
affects the position of these notches and creates the effect of 'sweeping' the
resultant frequency bands.
Pitch
The Pitch control adjusts the centre frequency of the comb filter, changing
the position of the comb frequency bands.
Resonance
The Resonance control adjusts the amount of feedback used for the comb
filter.
The HiLo Balance device is a 'tilt'-style EQ which cuts high frequencies when
boosting low frequencies, and vice versa.
Balance
The Balance control sets the degree of 'tilt' between low and high
frequencies. At the centre position no effect is applied to the incoming audio.
At values higher than the centre position, high frequencies are boosted while
low frequencies are attenuated by the same amount.
At values lower than the centre position, low frequencies are boosted while
high frequencies are attenuated by the same amount.
Crossover
This control sets the point between the low and high frequency bands.
SideChain
Enabling the SideChain button results in the channel's SideC hain input being used as the source for the
FilterMod device's envelope follower and audio-rate FM features. This means other channels can be used to
modulate the filter cutoff.
This function allows you to be very creative with the filter – here's a few ideas to try out:
for quick and dirty LFOs, try tuning a kick down really low and using it as the filter FM source, perhaps after
some additional processing such as low-pass filtering
load arbitrary sounds as user samples using BFD3's sample import functions, and use them as the filter FM
source
try using the TestTone or TestPulse devices as filter FM sources
Comb
Mode
The Mode control sets the feedback polarity between positive and negative settings.
Drive
The Drive control increases the level of the signal entering the comb filter circuit, adding saturation and
overdrive.
Rate
The Rate control adjusts the speed of the Comb device's built-in sine LFO for modulating the Pitch.
Depth
The Depth control adjusts the amount of modulation of the Pitch control with the internal sine LFO.
HiLo Balance
© 2017 FXpansion
Page 75
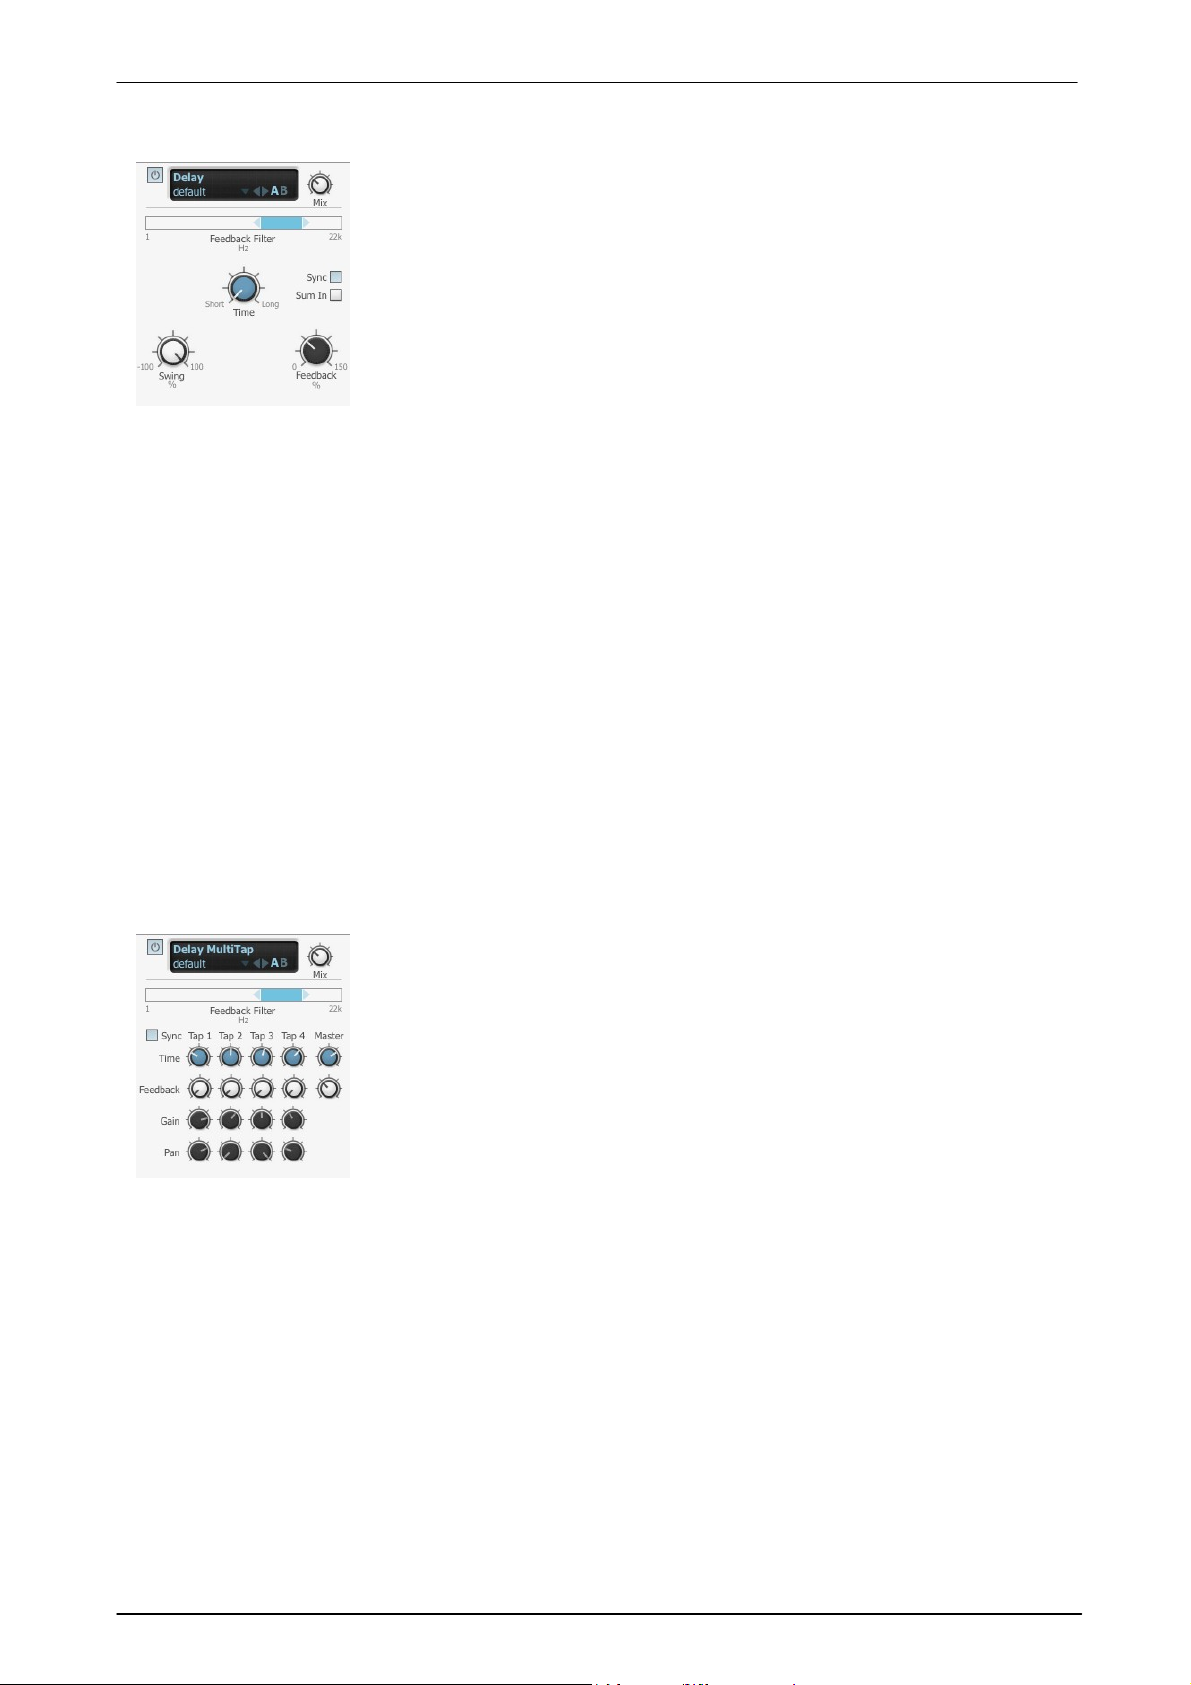
Using BFD3's sounds 75
The Delay effect can operate as a stereo or mono delay line, depending on
whether it is used on a stereo or mono channel.
Time
The delay Time can be set either in absolute time values in seconds or in
tempo-based values (selectable using the Sync control).
Sync
When the Sync button is set to BPM, the delay time is set in tempo-based values
relative to BFD3's current tempo. Possible values range from 64th note to 2 bars,
including dotted and triplet variations, the latter being especially useful for classic
shuffle grooves using simple ¼-note input. In Seconds mode, the delay time is
set as an absolute time value, ranging from 31 ms to 4 seconds.
This device provides 4 separate delay taps.
Time
The 4 Time controls set the delay time for each of the 4 delay taps.
Sync
When the Sync parameter is set to BPM, the delay time is set in tempo-based
values relative to BFD3's current tempo. Possible values range from 64th note to
2 bars, including dotted and triplet variations, the latter being especially useful
for classic shuffle grooves using simple ¼-note input. In Seconds mode, the
delay time is set as an absolute time value, ranging from 31ms to 4 seconds.
Gain
The 4 Gain controls allow you to set the level of each of the 4 delay taps.
3.4.3 Spatial
Delay
Feedback
The Feedback control sets the amount of delay regenerations, caused by feeding the delayed signal back into
the input. Higher values feed the delayed signal back in at a higher amplitude, leading to more regenerations of
the input signal. Settings of 100% lead to indefinite regenerations until the value is reduced, and with good use
of the built-in filtering can result in classic psychedelic, dubby analog delay effects.
Swing
The delay features 2 taps, which are played at the same time with the swing control at the centre position.
By turning down the Swing control, you can move the left tap before the right tap, up to a distance of half the
delay time. By turning up the Swing control, the right tap is moved up to a distance of half the delay time before
the left tap.
This control opens up a wide variety of swung delay grooves.
Feedback Filter
This control consists of a high-pass and low-pass filter allowing you to apply tonal shaping to each delay
regeneration.
To adjust this control, click and drag the light blue arrows at the left and right of the blue active frequency band the light-blue arrows represent the cutoff frequencies of the high-pass and low-pass filters.
Sum In (stereo only)
When the Delay is used on a stereo channel, activating this button sums the left and right inputs to a single
mono signal and feeds one delay line instead of two.
Delay Multi Tap
Feedback
The 4 Feed controls set the amount of feedback for each of the 4 delay taps.
Pan (Stereo only)
When the device is used on a stereo channel, the Pan control allows each of the 4 taps can be positioned within
the stereo field.
Feedback Filter
This control consists of a high-pass and low-pass filter allowing you to apply tonal shaping to each delay
regeneration - the same filtering settings are applied to all 4 delay taps.
To adjust this control, click and drag the light blue arrows at the left and right of the blue active frequency band the light-blue arrows represent the cutoff frequencies of the high-pass and low-pass filters.
Time (Master)
This control offers a master control for the delay time of all 4 delay taps. It applies an offset to the Time
settings for all 4 taps.
Feedback (Master)
This control offers a master control for the feedback of all 4 delay taps. It applies an offset to the Feedback
settings for all 4 taps.
© 2017 FXpansion
Page 76
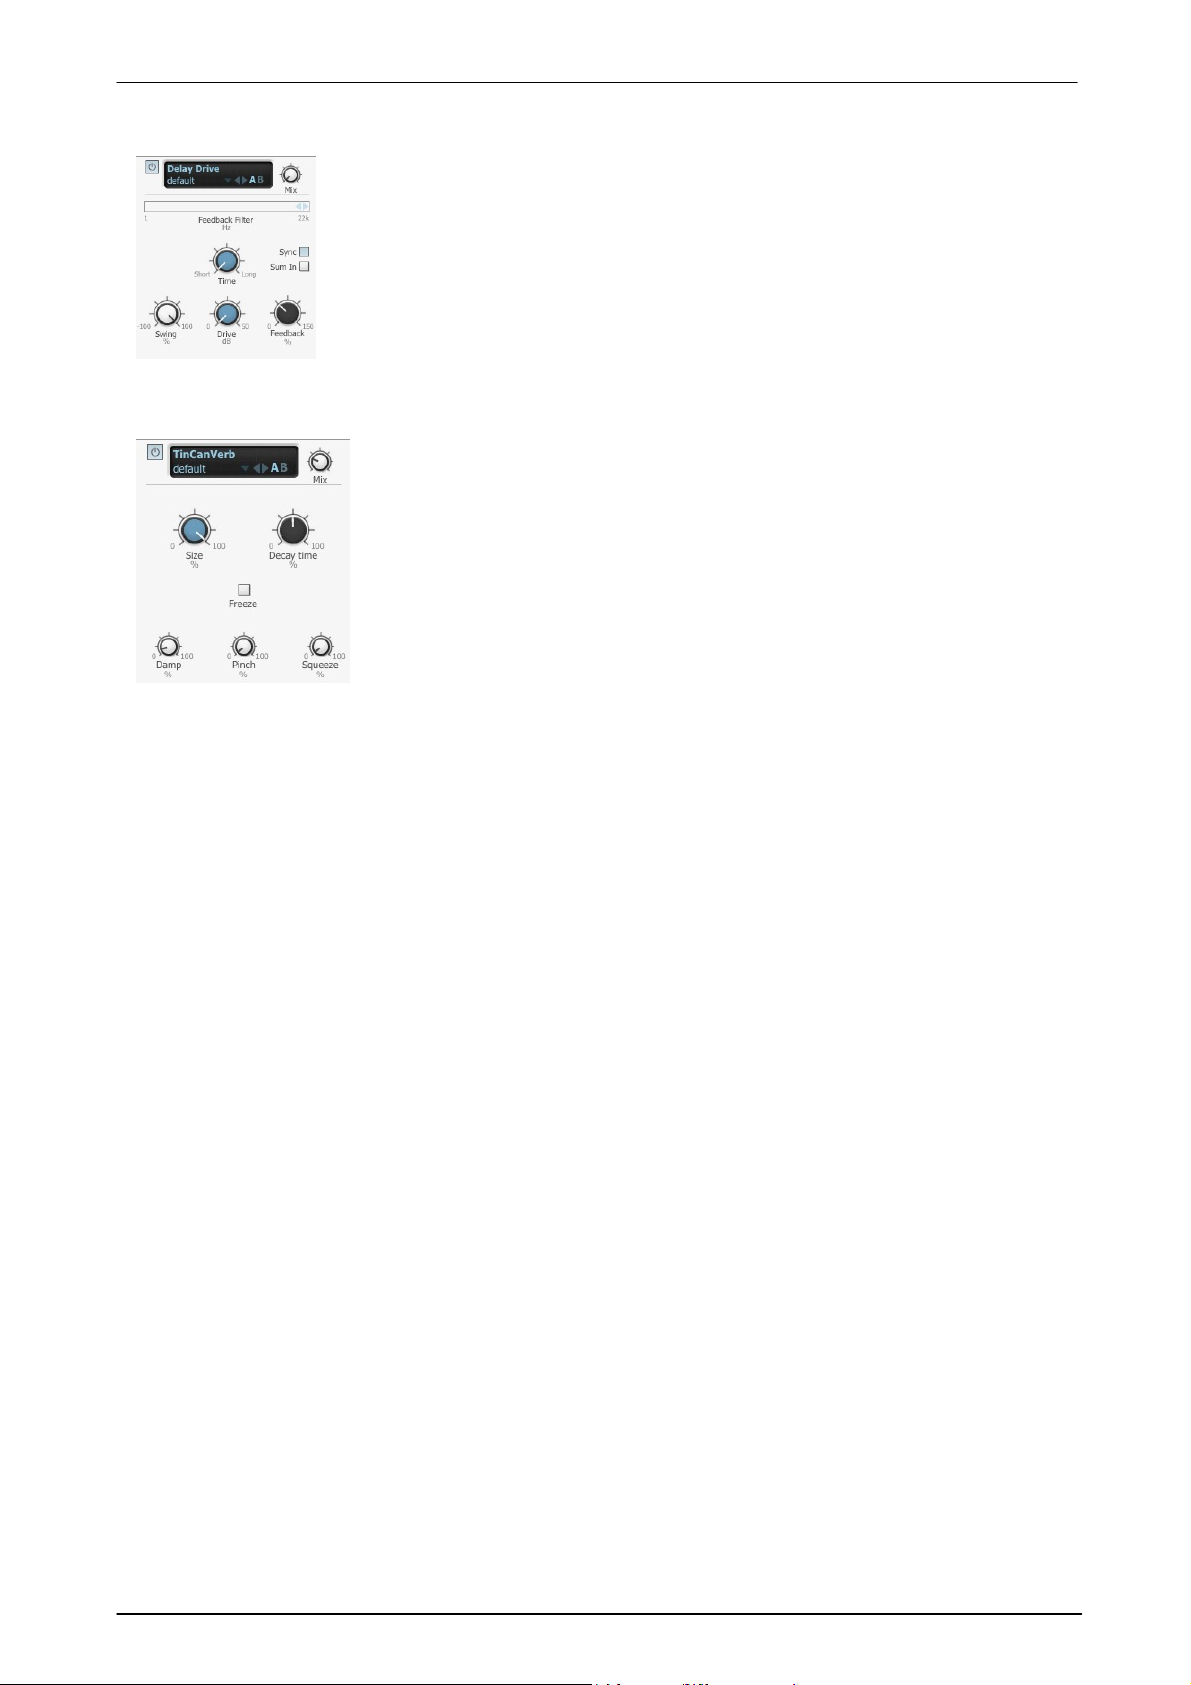
Delay Drive
This device is a version of the Delay with an additional circuit-modelled overdrive
stage. The Drive parameter adjusts the amount of overdrive.
This effect is a recreation of a cheap-sounding room reverb unit, perfect for
trashy sounding drum mixes and an antidote to the lush, real ambience in
BFD3's recordings. It is not intended to serve the function of a premium quality
digital reverb – for this purpose, it's best to use a good quality external reverb
plugin or hardware unit.
Size
The Size control lets you adjust the size of the virtual reverberation room.
Smaller rooms offer subtle ambience, while large rooms result in a more
'cavernous' and reflective effect.
Decay time
This control adjusts the Decay time of the reverb effect. Use shorter settings
for subtle small room effects and longer times for special effects.
TinCanVerb
BFD3 Operation Manual76
Damp
Increasing the Damp control results in less high frequencies in the effected signal, leading to a darker reverb
sound. At least some damping is essential to avoid overly tinny and fatiguing results.
Pinch & Squeeze
These controls manipulate the shape of the virtual reverb room, leading to a variety of resulting effects. They
make the reverb sound a lot more artificial and are useful for special effects.
Freeze
As the name suggests, this button 'freezes' the current reverb buffer and loops it indefinitely until the button is
disabled. Automating this effect is excellent for dubby special effects.
© 2017 FXpansion
Page 77
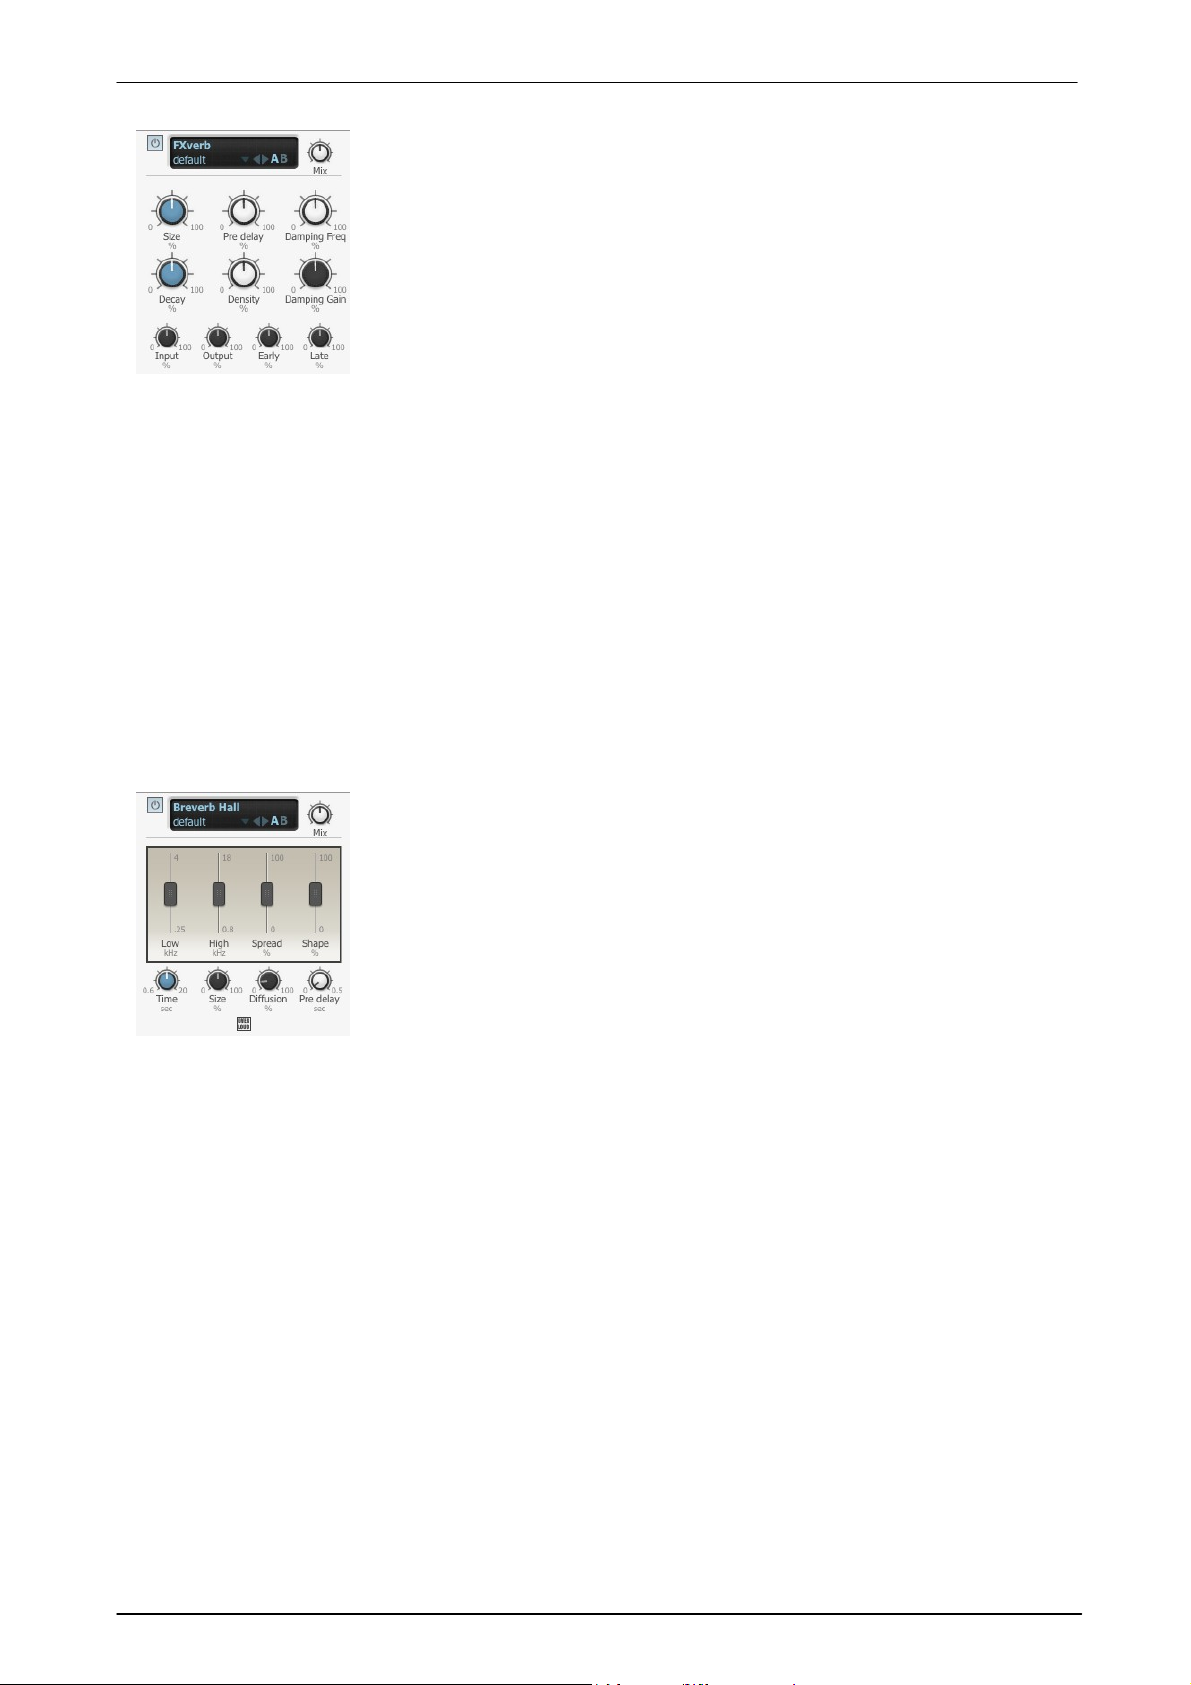
Using BFD3's sounds 77
FXverb is a high-end algorithmic reverb device.
Input & Output
These controls adjust the level of the Input signal into the device and the Output
signal from the device.
Room Size
This control adjusts the size of the virtual reverberation chamber. Increasing the
Room Size leads to a more pronounced and longer reverberation effect.
Decay
This control adjusts the length of the reverberation tail (which is also affected by
the Room Size control).
Time (Sec)
The Time control sets the duration of the reverberation tail (which is also
influenced by the Size parameter).
Size
The Size control sets the rate of build-up diffusion after the initial period (the
amount of diffusion is is controlled by the Diffusion parameter). The Size
control also acts as a master control for the amount of Time and Spread. The
apparent size of the space created by Breverb Hall is actually a combination of
the settings of the Size, Shape and Spread controls.
Diffusion
The Diffusion control sets the degree to which the initial echo density increases
over time.
FXverb
Pre delay
The Predelay control introduces a delay between the dry sound and the reverberated output, creating a sense
of space and distance.
Density
The Density control adjusts the density of reflections in the generated reverberation.
Early
The Early control adjusts the level of early reflections within the reverb output signal.
Late
The Late control adjusts the level of late reflections within the reverb output signal.
Damping Gain
The Damping Gain control adjusts the amount of damping applied by the Damping EQ before the output of the
FXverb device. Increasing this control leads to more attenuation at the Damping Freq.
Damping Freq
The Damping Freq control adjusts the centre frequency of the Damping EQ positioned before the final output.
Breverb Hall
Shape
The Shape control works together with the Spread parameter to control the overall ambience of the
reverberation created by Breverb Room. It specifically determines the contour of the reverberation envelope.
With the Shape control fully turned down, reverberation builds explosively and decays very quickly. As the
control is is increased, reverberation builds up more slowly and sustains for the time set by the Spread
parameter.
Spread
The Spread control sets the duration of the initial contour of the reverberation envelope. Low settings result in a
rapid onset of reverberation at the beginning of the envelope, with little or no sustain, while higher settings
spread out both the build-up and sustain.
Pre delay (Sec)
The Pre delay control sets the time that elapses between the original signal and the onset of reverberation. It
can be used to create a sense of distance and volume within an acoustic space.
Low, High
The Low and High parameters can be used to adjust the frequency response of the reverb.
Low (kHz): Sets the frequency under which the reverberation is attenuated.
High (kHz): Sets the frequency over which the reverberation is attenuated.
© 2017 FXpansion
Page 78
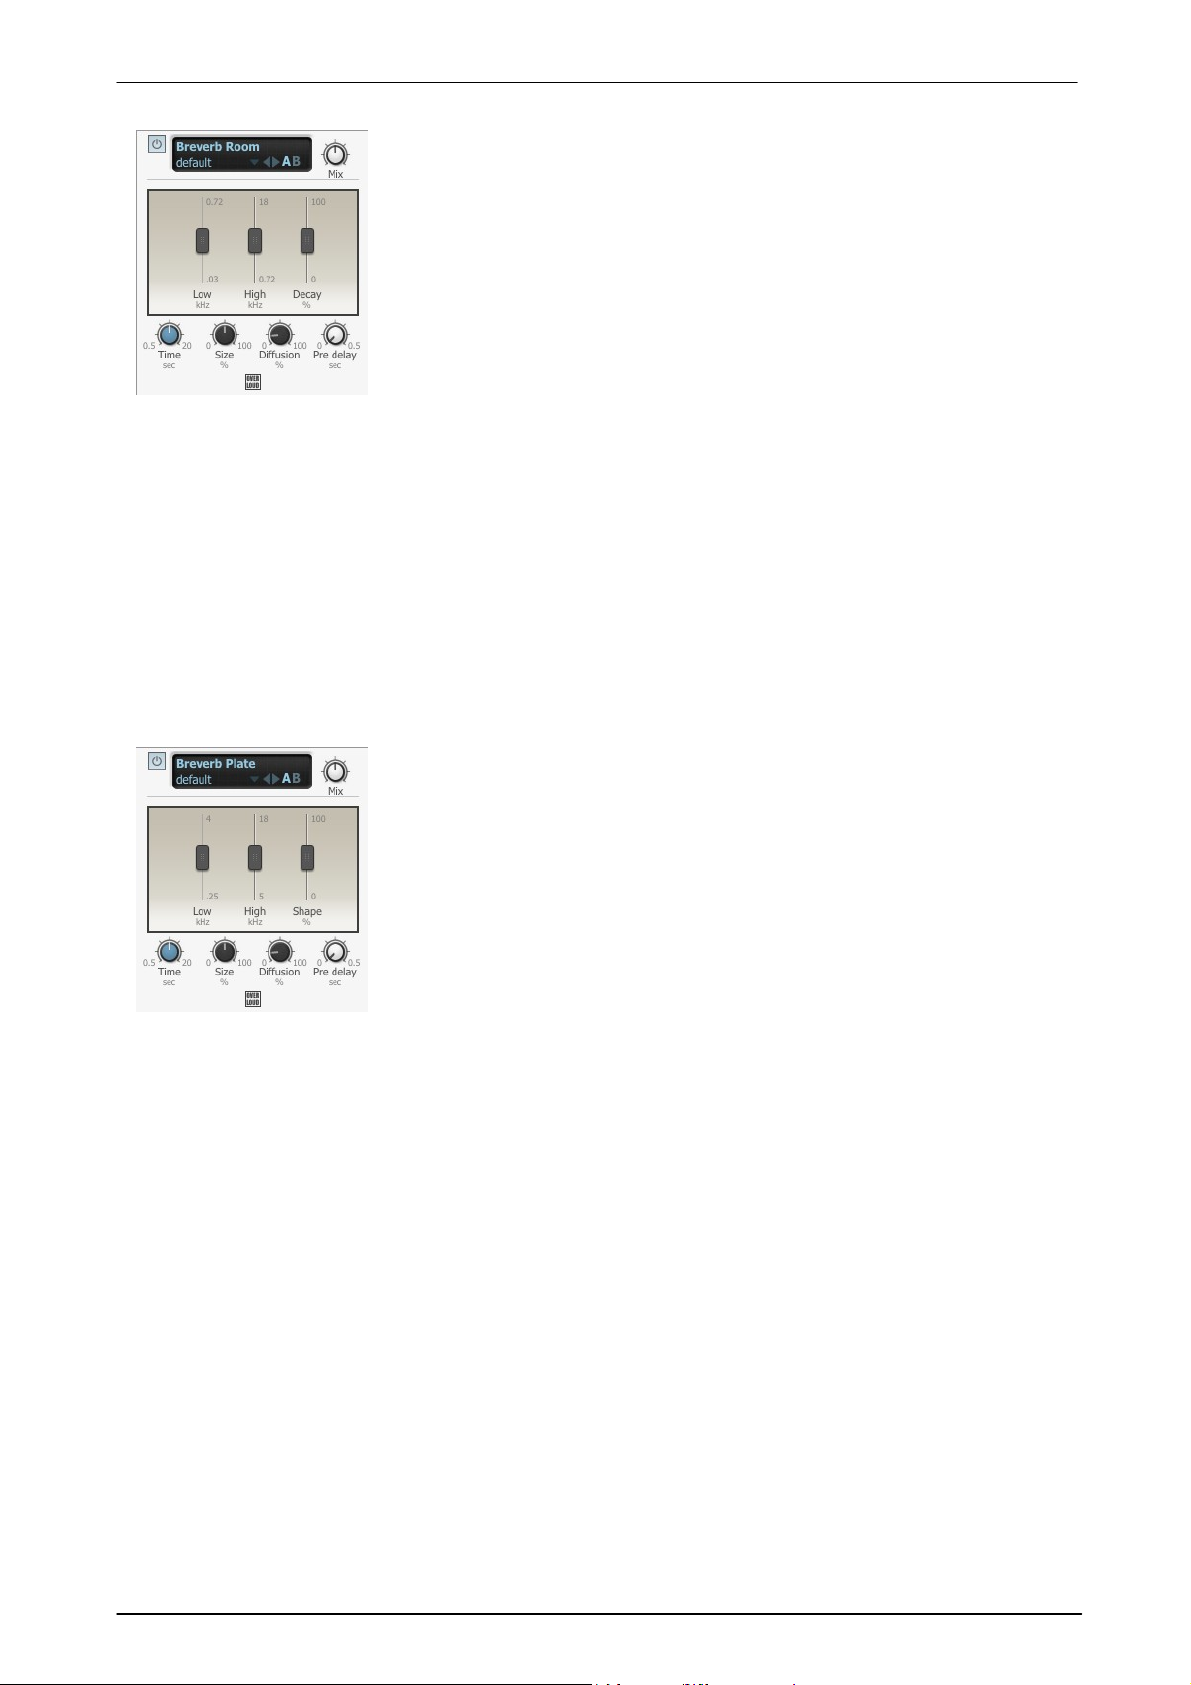
BFD3 Operation Manual78
Time (Sec)
The Time control sets the duration of the reverberation tail (which is also
influenced by the Size parameter).
Size
The Size control sets the apparent size of the acoustic space being emulated
by the algorithm. Values from minimum to 50% are typical of the ambience of
a typical recording room.
Diffusion
The Diffusion control sets the degree to which the initial echo density
increases over time.
Time (Sec)
The Time control sets the duration of the reverberation tail (which is also
influenced by the Size parameter).
Size
The Size control sets the apparent size of the metal plate emulated by the
Breverb Plate algorithm.
Diffusion
The Diffusion control sets the degree to which the initial echo density
increases over time.
Breverb Room
Decay
The Decay control sets the balance between late reverberation and early reflections. When the control is fully
turned down, only the early reflections are present. As it is increased, late reverberations are introduced to the
signal.
Pre delay (Sec)
The Pre delay control sets the time that elapses between the original signal and the onset of reverberation. It
can be used to create a sense of distance and volume within an acoustic space.
Low, High
The Low and High parameters can be used to adjust the frequency response of the reverb.
Low (kHz): Sets the frequency under which the reverberation is attenuated.
High (kHz): Sets the frequency over which the reverberation is attenuated.
Breverb Plate
Pre delay (Sec)
The Pre delay control sets the time that elapses between the original signal and the onset of reverberation. It
can be used to create a sense of distance and volume within an acoustic space.
Shape
The Shape control determines the contour of the reverberation envelope. With the control fully turned down,
reverberation builds explosively and decays very quickly. As the control is increased, reverberation builds up
more gradually and sustains for longer.
Low, High
The Low and High parameters can be used to adjust the frequency response of the reverb.
Low (kHz): Sets the frequency under which the reverberation is attenuated.
High (kHz): Sets the frequency over which the reverberation is attenuated.
© 2017 FXpansion
Page 79

Using BFD3's sounds 79
Time (Sec)
The Time control sets the duration of the reverberation tail. This time, added
to the Pre delay time, is the time that elapses from the original signal to the
end of the reverberation process.
Diffusion
The Diffusion control sets the degree to which the initial echo density
increases over time.
Pre delay (Sec)
The Pre delay control sets the amount of time that elapses between the
original signal and the onset of reverberation. It can be used to create a
sense of distance and volume within an acoustic space.
Breverb Inverse
Low, High
The Low and High parameters can be used to adjust the frequency response of the reverb.
Low (kHz): Sets the frequency under which the reverberation is attenuated.
High (kHz): Sets the frequency over which the reverberation is attenuated.
© 2017 FXpansion
Page 80
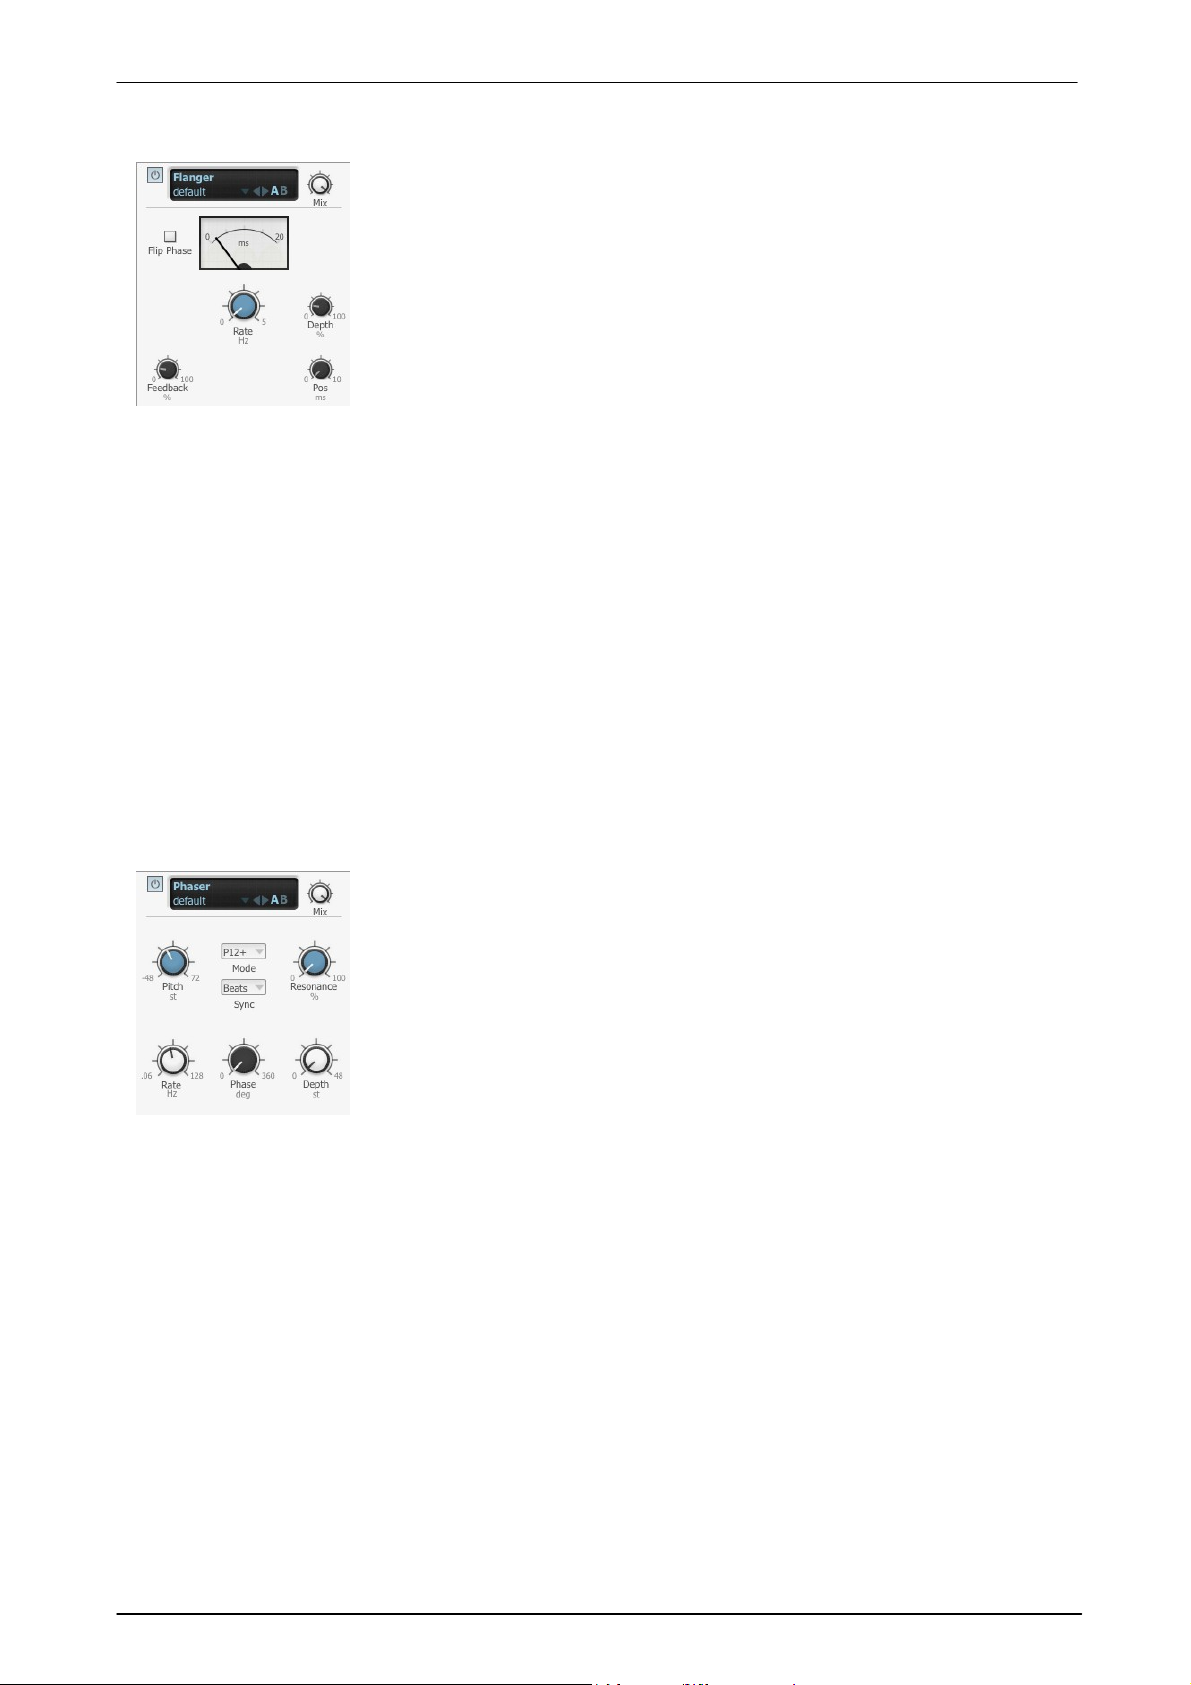
BFD3 Operation Manual80
The Flanger effect is a short modulated delay line with feedback to the input. It is
used for a sense of movement and for psychedelic effects from the subtle to the
extreme. It features a built-in sine LFO for modulating the flanging delay line.
Rate
The Rate control affects the speed of modulation of the flanger delay time.
Depth
The Depth control adjusts the amount of modulation of the delay time.
Display
The VU-style display represents the current flanging delay time.
The Phaser uses phase cancelling techniques (with the use of all-pass filtering) to
create a series of peaks across the frequency spectrum. When these peaks are
swept, a psychedelic sweeping effect is created.
Mode
The Mode control selects between a number of phaser responses. 4, 6, 8 and 12
stage phaser types are available, with positive or negative feedback. The number
of stages refers to the number of all-pass filters within the algorithm.
Pitch
The Pitch control adjusts the centre frequency of the all-pass filters used in the
Phaser algorithm.
3.4.4 Effects
Flanger
Pos (Position)
This control introduces an additional fixed delay time to the Flanger's delay line. It is a very short delay, ranging
from 0 ms to 15 ms.
Feedback
This control adjusts the amount of the flanged signal that is fed back into the input.
Higher Feedback settings result in a more pronounced flanging effect. Settings over 50% lead to extreme comb
filter type effects.
Spread (stereo only)
This control allows you to adjust the panning of the left and right channel processed signals.
Phase (stereo only)
The Phase control offsets the phase of the internal LFOs for the left and right channels.
Flip Phase
By default (with the Flip Phase button deactivated), the flanged signal is in positive phase with the input signal.
Activating the Flip Phase button inverts the flanged signal's phase in relation to the input signal.
A positive phase setting tends to lead to a more obvious flanging effect.
Phaser
Resonance
The Resonance control adjusts the amount of resonance (feedback) in the all-pass filters.
Phase
The Phase control adjusts the phase between the dry signal and the all-pass filtered signal.
Depth
The Depth control adjusts the amount of Pitch modulation from the Phaser device's internal LFO that modulates
the Pitch parameter for classic phaser effect sounds.
Rate
The Rate control adjusts the speed of the internal LFO.
Sync
When the Sync parameter is set to BPM, the Rate control is set in tempo-based values relative to BFD3's
current tempo. Possible values range from 64th note to 2 bars, including dotted and triplet variations.
In Seconds mode, the Rate control is set as an absolute time value, ranging from 31ms to 4 seconds.
© 2017 FXpansion
Page 81
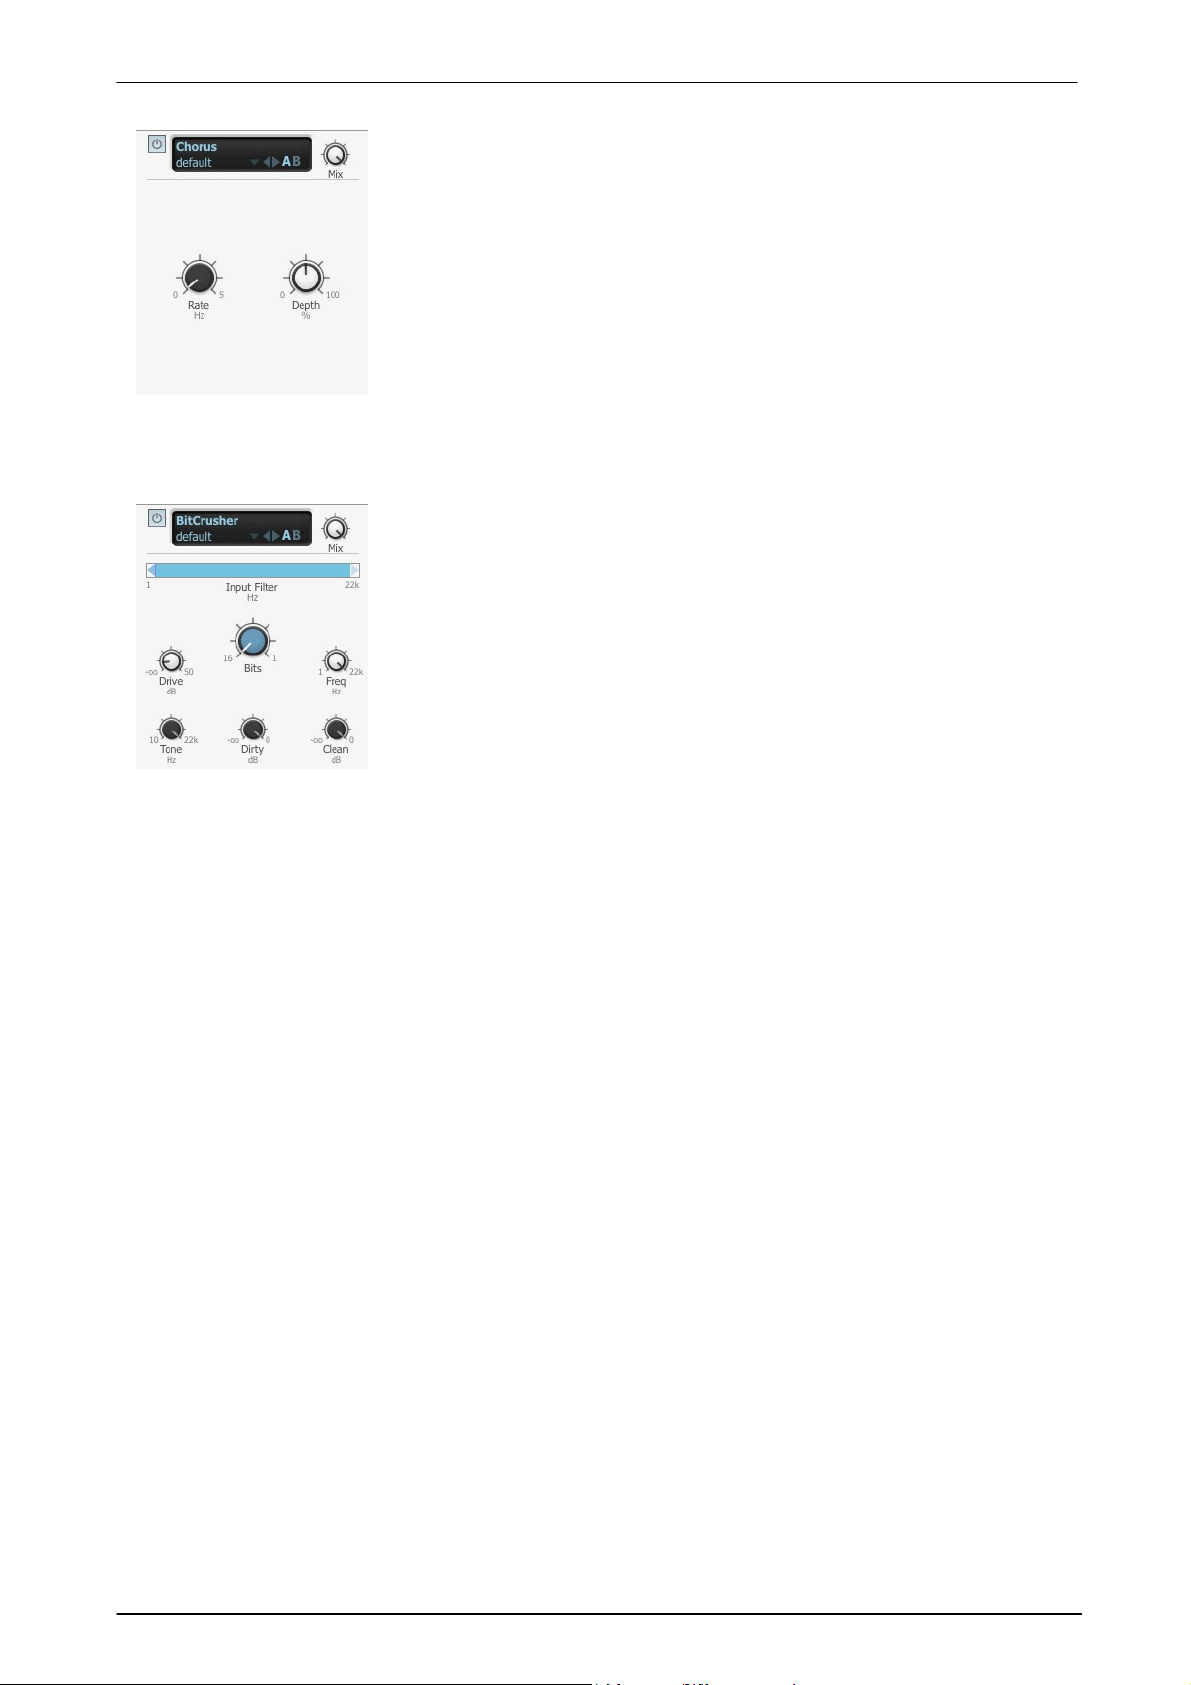
Chorus
The C horus effect is a modulation effect that is pitch-based. It is used for
thickening up sounds.
Rate
The Rate control adjusts the speed of pitch modulation.
Depth
The Depth control adjusts the amount of modulation away from the input
signal's original pitch.
Spread (stereo only)
This control varies the panning of the left and right pitch-modulated signals.
The Bitcrusher effect provides a type of digital distortion that occurs when the
sample-rate and bit-depth of the audio is reduced. It allows you to simulate
the sound of early samplers, useful for underground hip-hop and other 'lo-fi'
styles.
Bits
The Bits control reduces the bit depth from a maximum of 16 bits to a
minimum of 1 bit, which is effectively digital noise. The digital noise generated
by the bit-reduction process is referred to as quantisation noise.
Early digtal drum machines and samplers tended to have 8 or 12 bit
resolution.
Bit Crusher
Using BFD3's sounds 81
Freq
The Freq control adjusts the sample rate frequency of the audio processed by the effect and ranges from a
maximum of 100 kHz to a minimum of 1 Hz.
Lower sample rates result in an aliasing effect on the processed audio.
Drive
The Drive control adjusts the amount of drive in an OTA-type distortion stage after the crossover filters. This
allows gain and colour to be added to the signal before it is processed by the Bit and Freq processes.
Input Filter
This control provides high-pass and low-pass filters for isolating a part of the signal before the sample-rate and
bit-depth reduction stages.
To adjust this control, click and drag the light blue arrows at the left and right of the blue active frequency band
the light-blue arrows represent the cutoff frequencies of the high-pass and low-pass filters.
These filters are crossover filters – the active frequency band is processed by the bitcrushing circuit with its level
adjustable via the Dirty control. The frequencies that are filtered out before the bitcrushing stage are accessible
via the Clean control.
Dirty & Clean
The Dirty control sets the amount of processed signal that is heard at the output.
The Clean control sets the amount of the clean signal, which is comprised of the signals filtered out by the
Input Filter before processing.
Please note that these are not 'wet' and 'dry' controls – use the Mix control at the top of the effect interface in
order to mix between the pre- and post-effect signals.
Tone
The Tone control provides a simple -6 dB/oct low-pass filter for the Dirty signal after the bitcrushing process. It
allows you to roll off unwanted high frequencies that may have been generated in the signal as part of the
distortion effect.
© 2017 FXpansion
Page 82

BFD3 Operation Manual82
A ring modulator multiplies two signals together, giving you the sum and the
difference between them and the output.
BFD3's RingMod device contains an internal oscillator that provides one of the
signals, the other being the drum sound passing through it.
This effect is useful for radical, inharmonic timbral changes for more
experimental-sounding mixes.
Mode
The Mode control adjusts the waveshape of the internal oscillator which is
multiplied with the audio input to the effect. Sine, Triangle, Saw, Square and
Parabolic oscillator shapes a re available, as well as white or pink noise.
A frequency shifter changes the frequency of the sound passing through it - all
frequencies in the signal are adjusted by a fixed amount. This differs from a
pitch-shifter which adjusts the frequencies of fundamental frequencies and
their harmonics by a proportional amount to preserve the harmonic series of
the original signal. Therefore, a frequency shifter usually results in inharmonic
and clangorous sounds.
Pitch
The Pitch control adjusts the amount of frequency shifting, and is represented
in semitones. You can shift the input signal's frequencies up or down by up to
36 semitones (3 octaves).
Gain
The Gain control adjusts the level of the output signal.
RingMod
Pitch
The Pitch control tunes the internal oscillator within a range of an octave.
Drive
The Drive control introduces an adjustable amount of distortion on the input signal. Overdriving the signal in this
way changes the waveshape of the input, leading to further variations in the resulting effect.
Frequency shifter
© 2017 FXpansion
Page 83
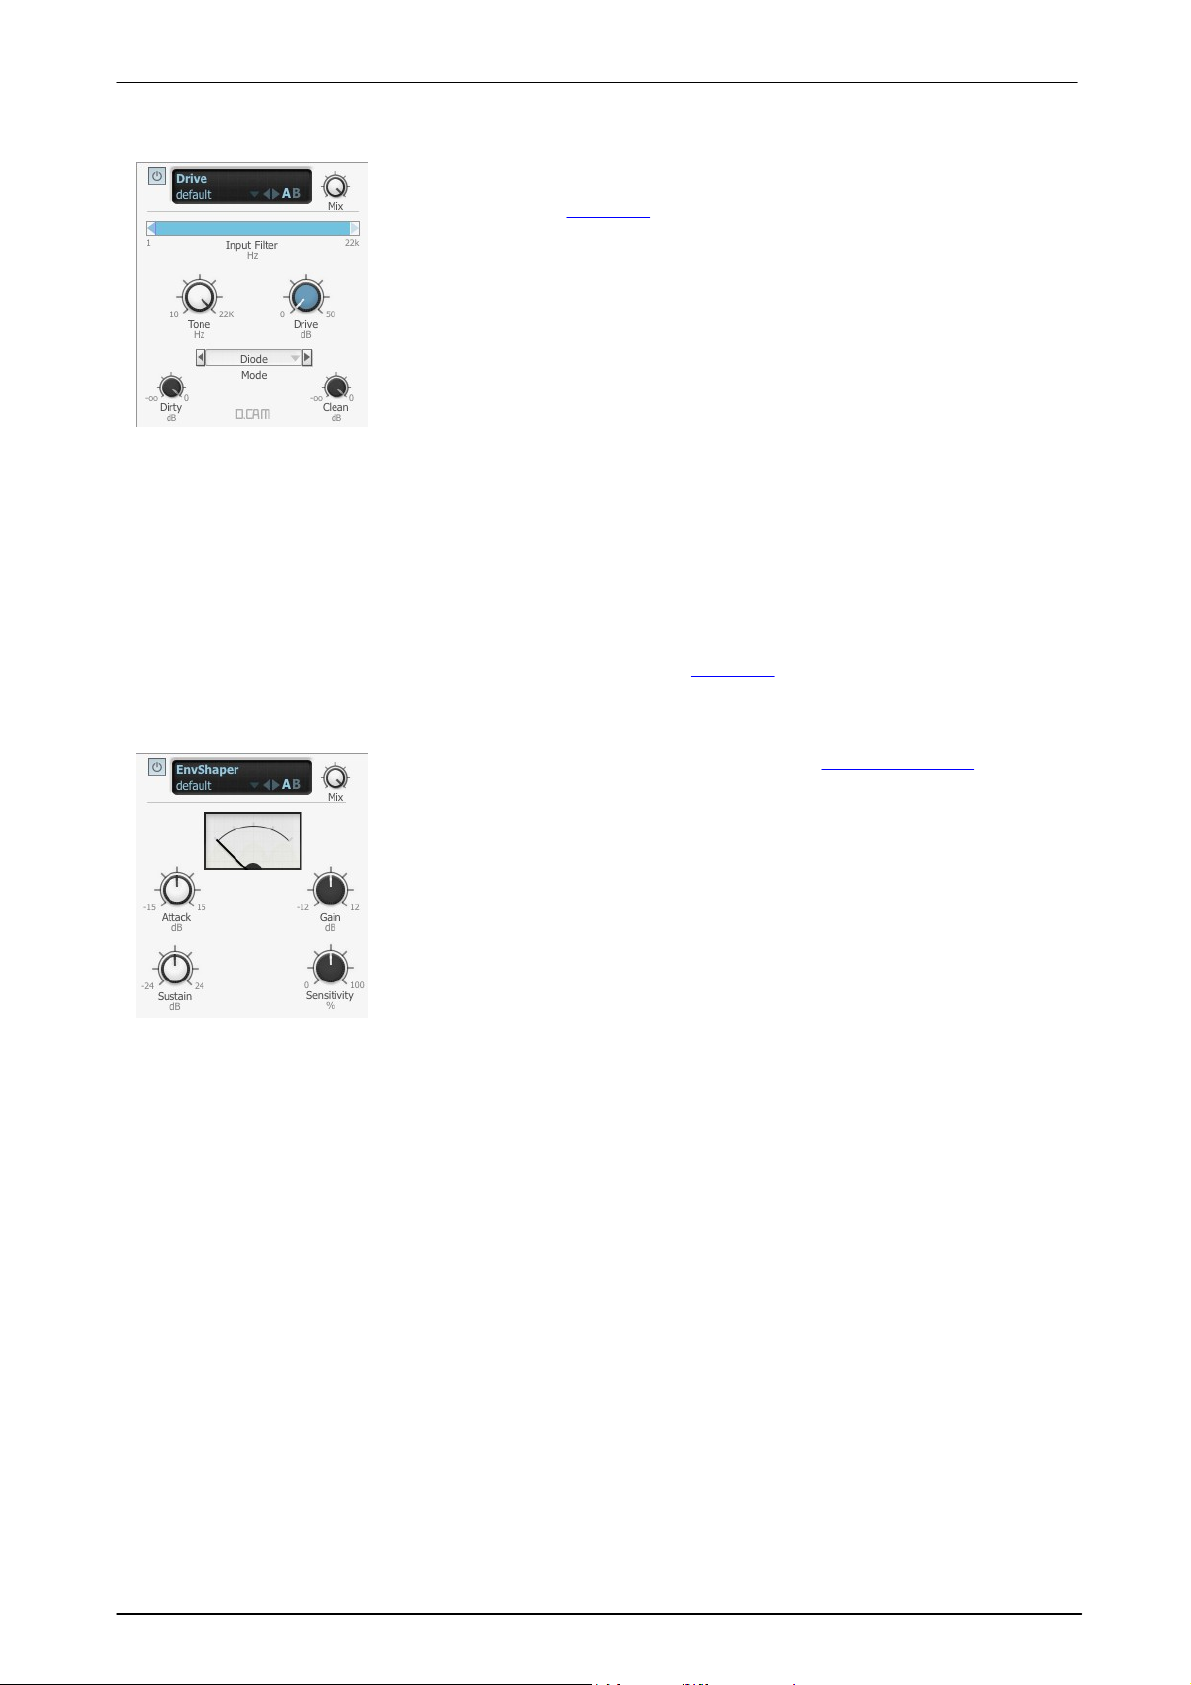
3.4.5 Legacy
The Drive device offers 4 distortion circuit models, useful for adding colour, grit
or more extreme distortion to your drum sounds. This device has been
superceded by the Distortion device, but the older version from BFD2 is provided
as a legacy device for compatibility with older projects.
Mode
The Mode control selects between 4 available distortion types:
Diode
Diode clip circuits are found in countless guitar pedals and other distortion units.
It gradually drives the input throughout the amplitude range.
OTA (Operational Transconductance Amplifier)
This mode models the behaviour of an overdriven OTA chip.
The Env Shaper device has been superceded by DCAM EnvShaper. It is
provided in the Legacy section for compatibility with older projects.
It allows you to adjust transients and change the dynamic shape of a signal in
a different way to using a compressor.
Sensitivity
The Sensitivity control adjusts the response of Env Shaper's peak detection
circuit to transients with higher values leading to more detected peaks.
Attack
The Attack control adjusts the intensity of the attack phase of detected
transients in the audio.
Drive
OpAmp (Operational amplifier)
This mode models the behaviour of an overdriven OpAmp chip.
HalfRect (Half Rectifier)
This type of distortion allows through only the top half of the input signal's waveform.
Drive
The Drive control adjusts the amount of distortion applied to the signal.
Input Filter, Dirty, Clean, Tone
These controls function in exactly the same way as those on the Distortion effect device.
Using BFD3's sounds 83
Env Shaper
Increase the control to intensify attack transients and to make drum sounds punch through the mix harder.
Decrease the control to soften transients. This can be particularly useful on percussion sounds and on one of two
linked Drums.
Sustain
The Sustain control adjusts the intensity of release portions of detected transients in the audio. This effectively
increases or decreases the apparent sustain of sounds in the signal.
Increasing the control results in more sustain - useful for intensifying the natural reverb in BFD3's sounds. It is
particularly suited to making room ambience sound huge.
Decrease the control for less sustain and making ambience appear more 'dry'. At higher settings it can produce
damping effects for drum sounds.
Gain
Use the Gain control to adjust the level of the signal as needed after the Env Shaper's dynamic processing.
© 2017 FXpansion
Page 84
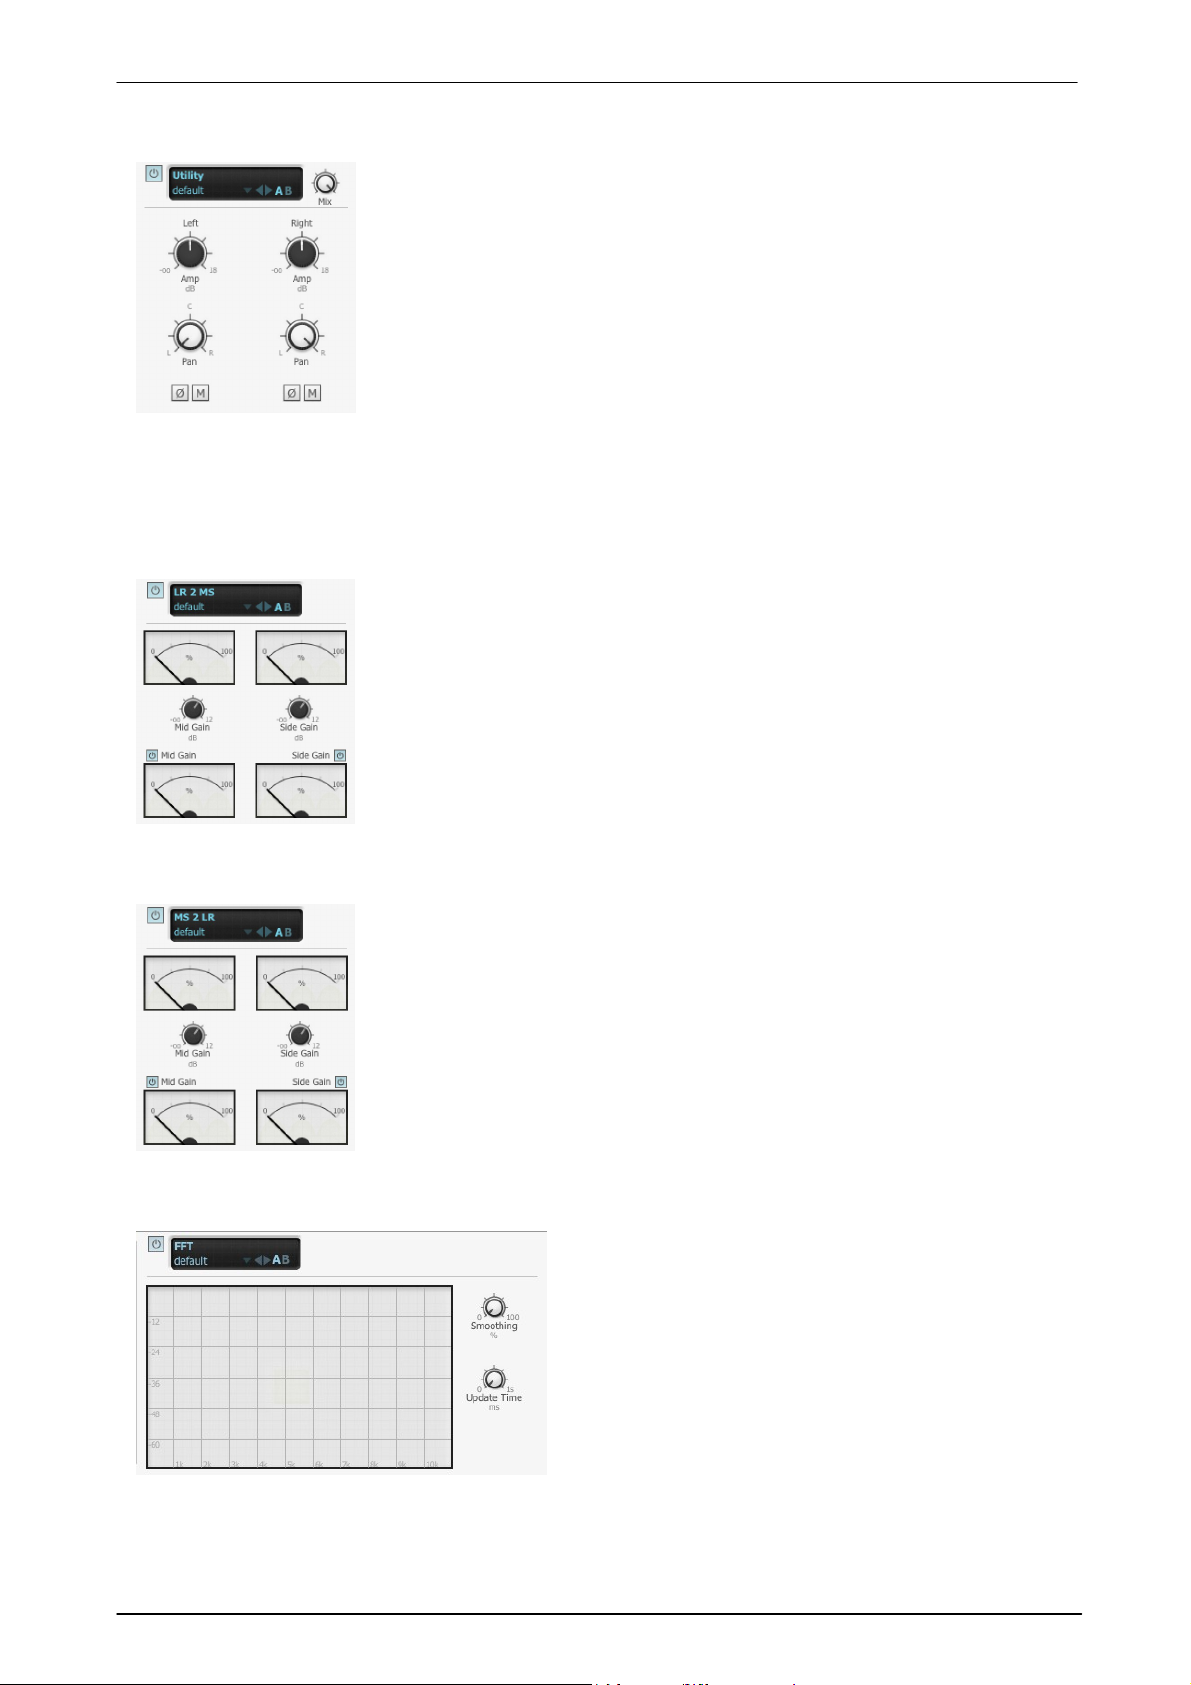
BFD3 Operation Manual84
The Utility device is a stereo gain and pan adjustment tool.
It allows for individual gain and pan levels to be set for both left and right
channels of the signal independently.
Please note that the Utility device can only be used on a stereo mixer channel.
Amp
This control adjusts the independent left and right gain levels of the signal.
Pan
This control adjusts the independent left and right pan levels of the signal.
Phase
When enabled, this control inverts the phase of either the left or right channel of
the signal.
The LR 2 MS device is used to encode a left/right stereo signal into a Mid-Side
stereo signal, which can be used to create a wider or narrower stereo mix and
allows for a more precise adjustment of stereo width that pan controls.
Mid Gain
This control adjusts the amount of gain applied to the Mid element of the signal.
Side Gain
This control adjust the amount of gain applied to the Side element of the signal.
Both the Mid and Side elements of the signal can be independently disabled
using the Mid Gain and Side Gain buttons.
The MS 2 LR device is the reverse of the LR 2 MS device, and is used to decode
a Mid-Side signal into a left/right stereo signal.
Mid Gain
This control adjusts the amount of gain applied to the Mid element of the signal.
Side Gain
This control adjust the amount of gain applied to the Side element of the signal.
As with this LR 2 MS device, both the Mid and Side elements of the signal can
be independently disabled using the Mid Gain and Side Gain buttons.
The FFT device is a spectrum analysis tool.
It shows a representation of the output signal from the
effect device immediately to its left. It is useful for tracking
down causes of problematic frequency output that may be
generated by some effect settings.
Please note that FFT processing consumes substantial
amounts of C PU power.
Smoothing
This control adjusts the amount of smoothing used to
reduce jitter in the display. Increasing the Smoothing
control results in a more stable display although accuracy
may be compromised.
3.4.6 Utility
Utility
Mute
This control allows either the left or right channels of the signal to be muted independently.
LR 2 MS
MS 2 LR
FFT
Update Time
This control adjusts the frequency at which the audio signal is analysed and displayed. Shorter Update Time
settings consume more CPU cycles (FFT analysis is a substantially CPU-hungry process).
© 2017 FXpansion
Page 85
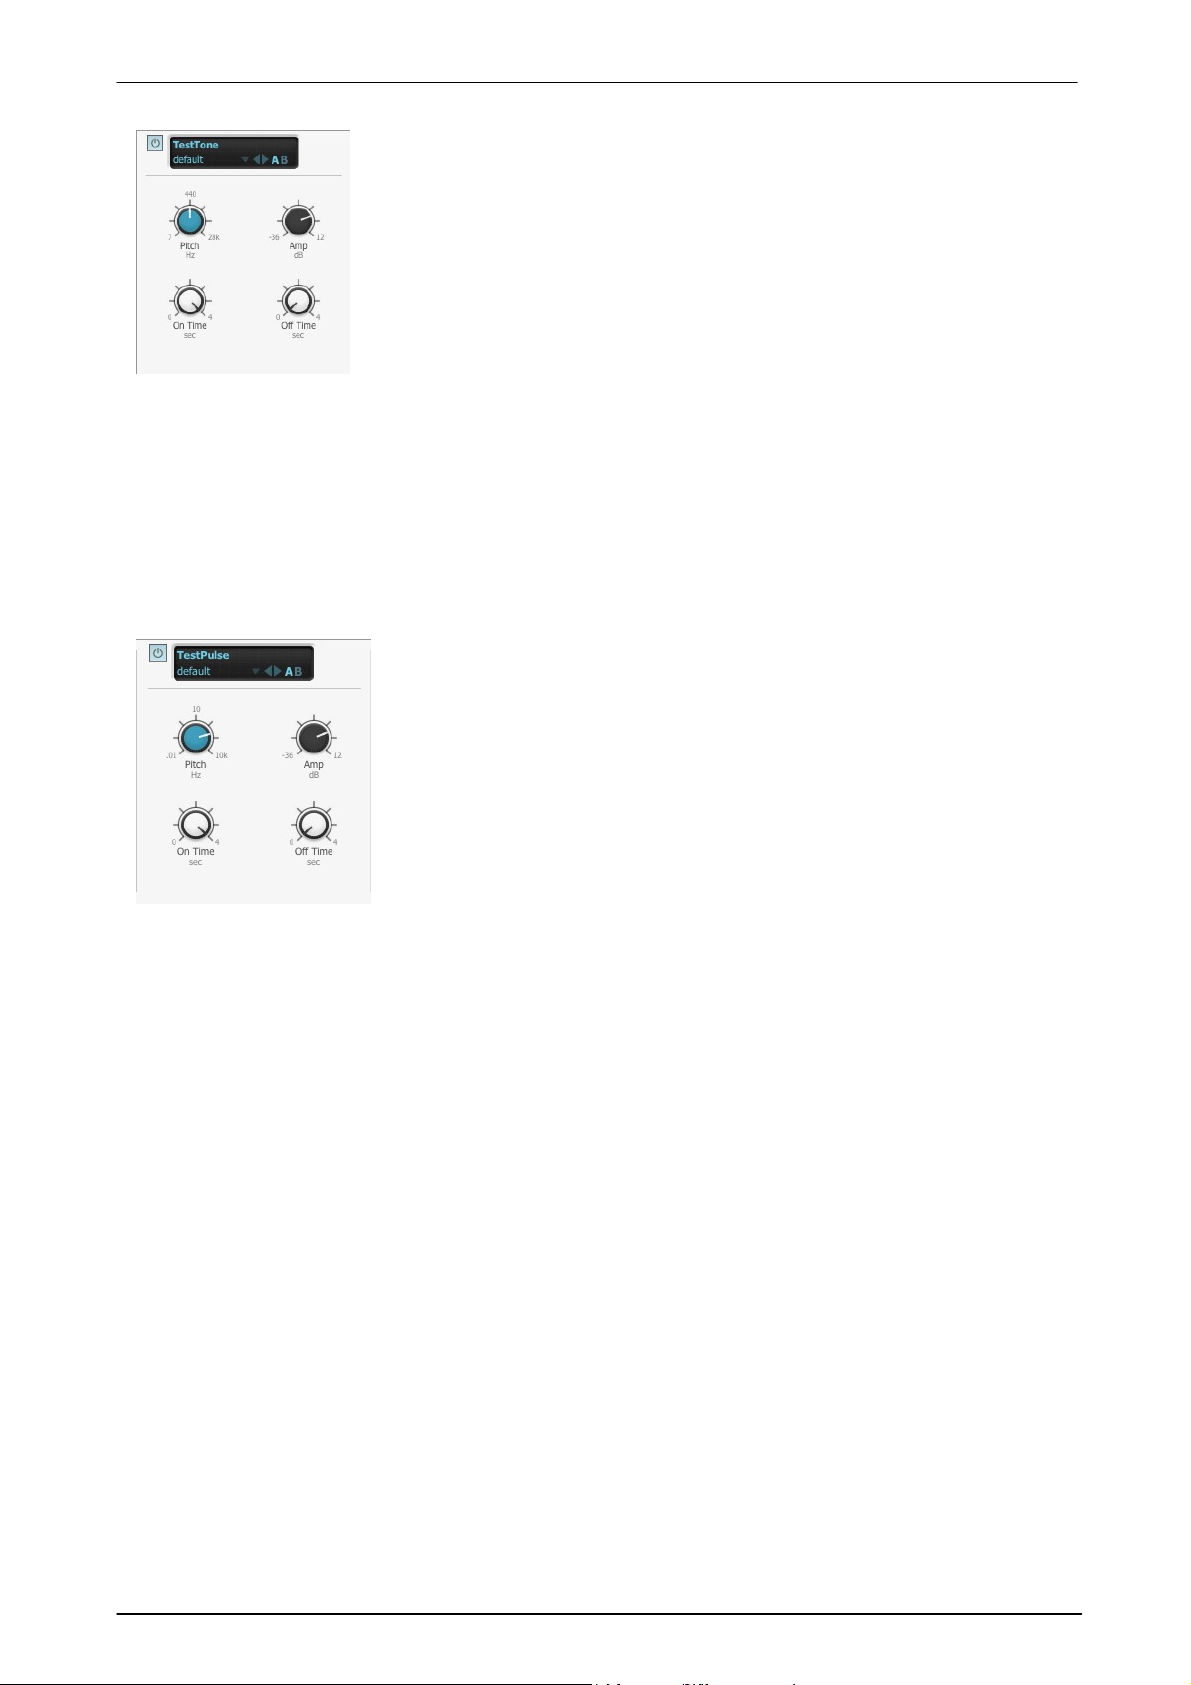
Using BFD3's sounds 85
The TestTone device is a sine wave generator which can be used for checking the
frequency and transient response of effects further down the signal path.
The On Time and Off Time controls allow the device to cycle on and off for
testing the responses of dynamics processors and other transient-sensitive
effects. This device may also be used as an audio-rate FM modulation source for
use with suitable devices such as the FilterMod effect.
Pitch
This control adjusts the frequency of the sine tone generated by the device
between 7 Hz and 28 kHz.
Amp
This control adjusts the level of the test tone between -36 and +12 dB.
The TestPulse device generates a pulse wave with a minimal PWM setting so
that its value is 1 for a single sample with silence for the rest of the duty cycle.
This creates even and odd harmonics, useful for checking the response of
spectral effects such as filters further down the channel's signal path.
Like the TestTone device, the pulse tone can cycle on and off for testing
dynamics and other transient-sensitive devices and it can also be used as an
audio-rate modulation source for suitable devices.
Pitch
This control adjusts the frequency of the pulse tone generated by the device
between 0.1 Hz and 10 kHz.
Amp
This control adjusts the level of the test tone between -36 and +12 dB.
TestTone
On Time
This control sets the time for the test tone to be active if the Off Time control is set to a value greater than 0.
A continuous tone is generated with the On Time and Off Time controls set to 0. If the On Time control is set
to 0 and the Off Time control is set to a value greater than 0, the device produces silence.
Off Time
This control sets the period of silence before the tone is produced again for the duration set by the On Time
control.
TestPulse
On Time, Off Time
These controls behave identically to the On Time and Off Time controls in the TestTone device (see above).
© 2017 FXpansion
Page 86
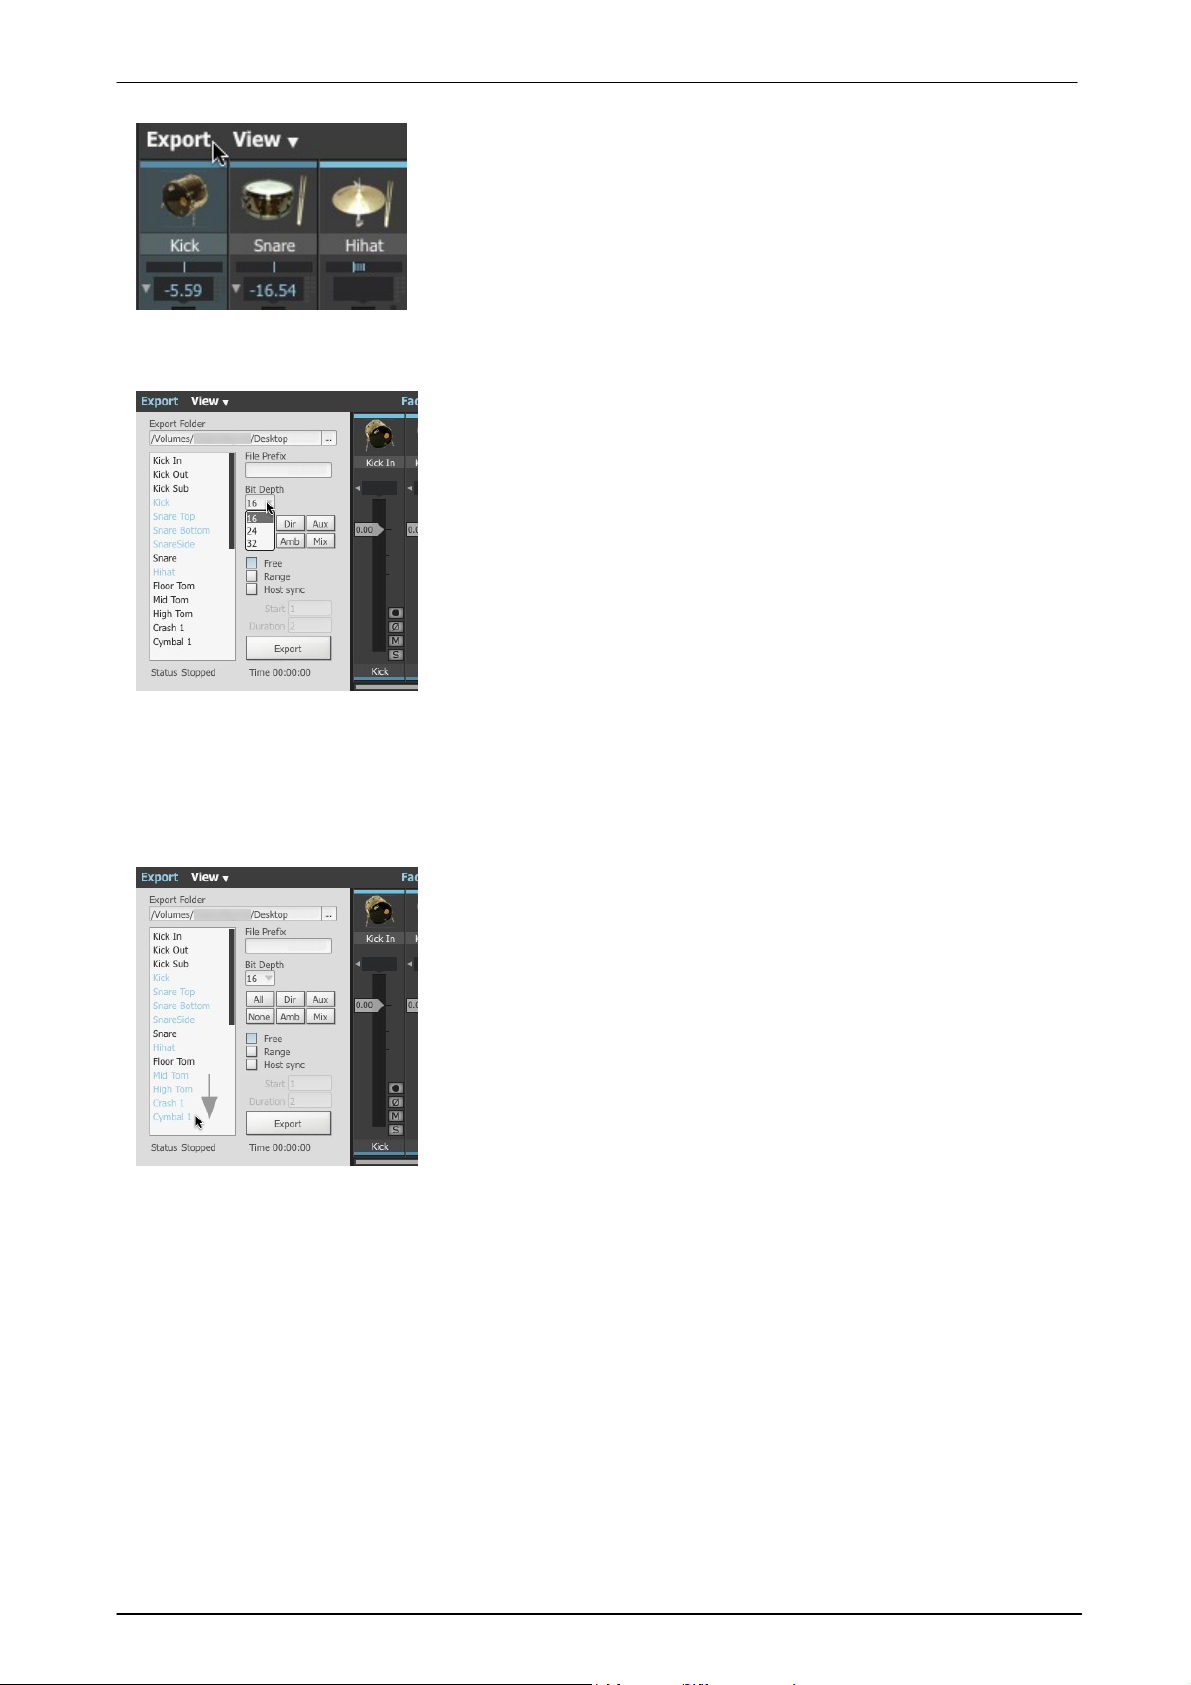
BFD3 Operation Manual86
Click the Export button to display the Export panel if it is not currently
visible. This panel allows you to export multi-channel mixdowns directly to
disk from BFD3.
BFD3's export functions operate in conjunction with the mixer's Record
enable buttons - activate the Record enable button for any channel that
you desire to export as a discrete audio file, or use the functions for
record enabling channels within the Export panel as described below.
Exporting is also possible from the Groove engine - individual Grooves or
the Drum Track can be exported using BFD3's File menu when the
Groove Editor is visible.
Export folder
This control shows the path (folder location) to which to write exported
audio files. Click the Browse button at the right to specify any location on
your system.
It is recommended to use a drive that is not used for BFD3's audio data,
as it may not be possible to properly stream samples for playback while
recording to the same drive.
File Prefix
The filename of each exported audio file contains the name of each mixer
channel (editable in the label strip) enabled for export, along with the
optional File Prefix. Resulting files are named in the following format:
FilePrefix_MixerC hannel.WAV
All current mixer channels are displayed in the channel list at the left of
the Export panel. C lick any channel to toggle its Record enable status.
Alternatively, click any channel and drag up or down to toggle the Record
enable status of multiple adjacent channels. The Arm Group buttons can
also be used to quickly Record enable various channel types:
All
Click this button to activate the Record enable function on all mixer
channels.
None
Click this button to deactivate the Record enable function on all mixer
channels.
3.5 Exporting audio from BFD3
Groove engine export operations follow the settings specified in the Export panel where applicable.
Bit depth
This setting dictates the resolution of the exported audio files. 16, 24 and 32 bit resolutions are available.
Functions for record enabling channels
Export channel list
Dir
Click this button to toggle the Record enable function on all Direct mic mixer channels.
Amb
Click this button to toggle the Record enable function on all Ambient mic mixer channels.
Aux
Click this button to toggle the Record enable function on all Aux mixer channels.
Mix
Click this button to toggle the Record enable function on the Kick/Snare/Ambient Mix channels.
© 2017 FXpansion
Page 87
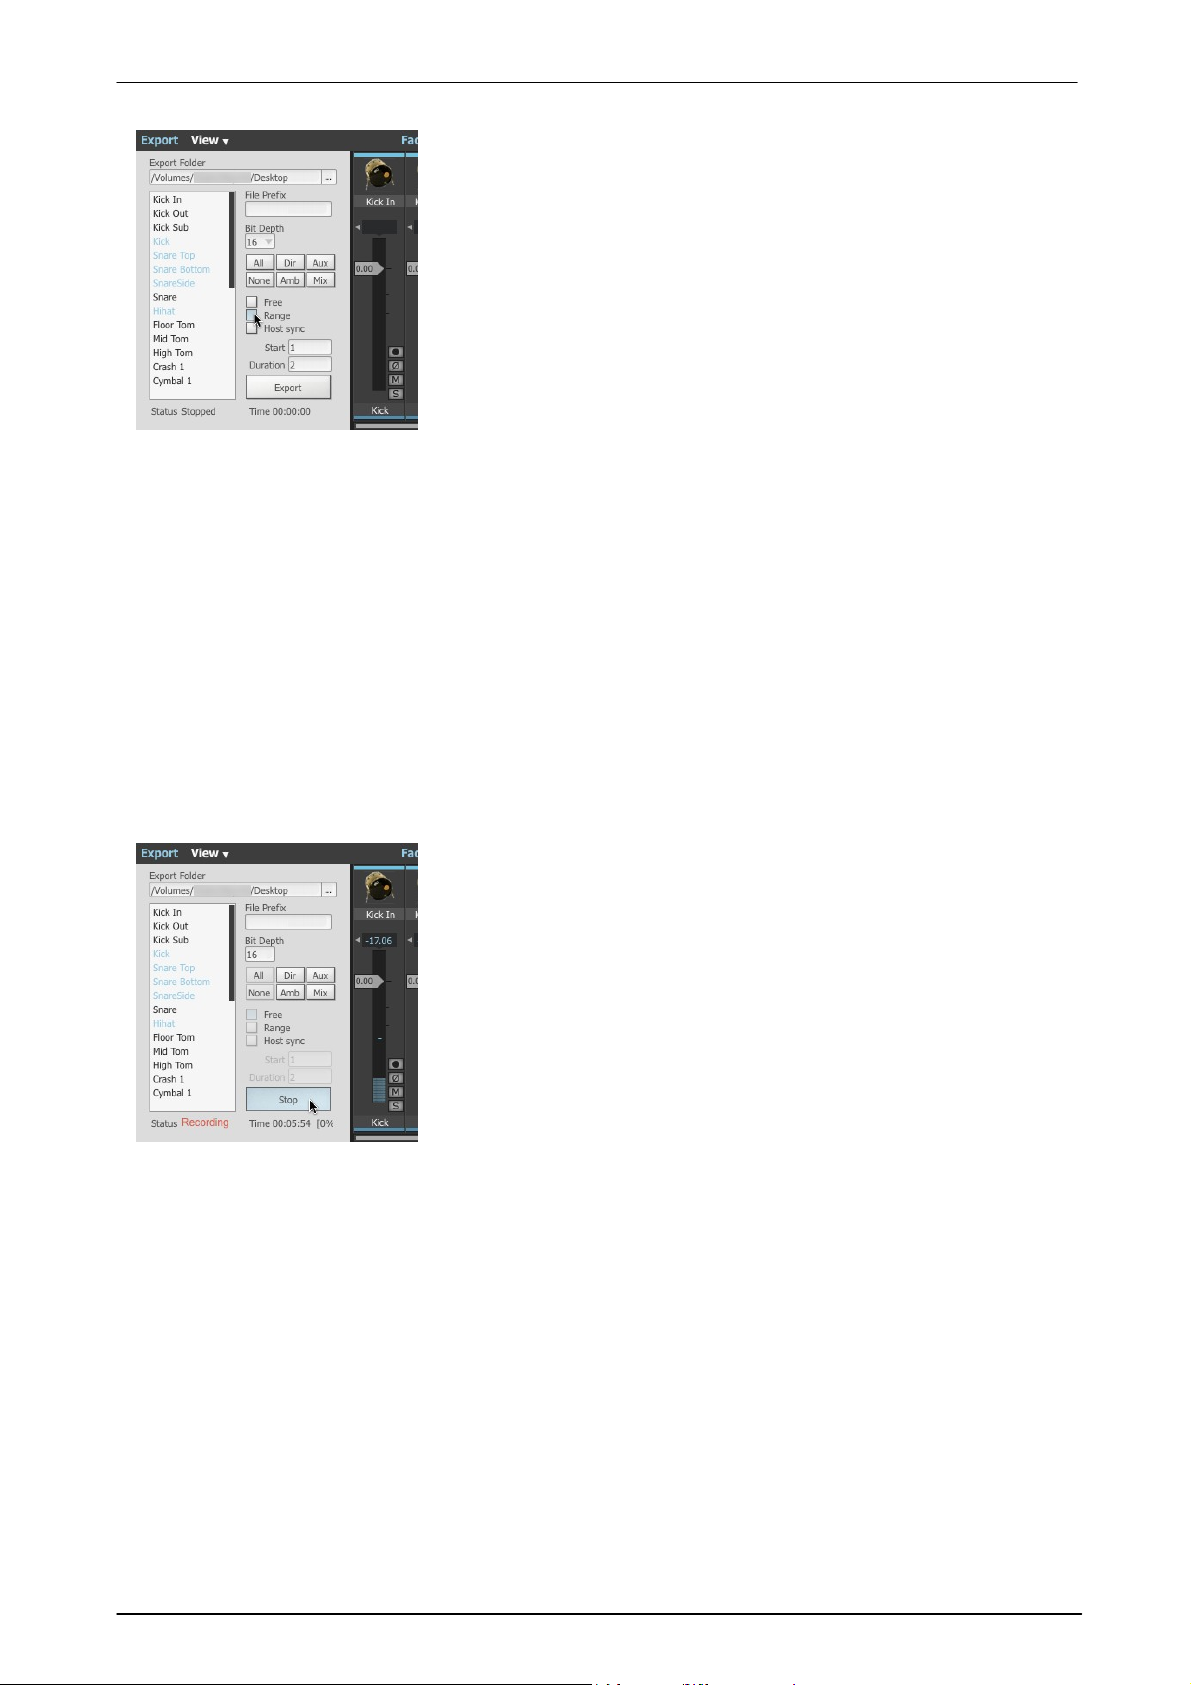
Using BFD3's sounds 87
Free
The Free mode lets you manually start and stop the export by clicking
the Export button. Audio is written in real time as BFD3 is used, until
the Export button is clicked again.
This is the only mode that is available when using BFD3 as a standalone
application, since there is no host timeline to which to synchronize.
The Groove engine's functions (in BFD3's File menu) can also be used
when in standalone mode.
Range
This mode starts and stops exporting within a definable Start point and
Duration. This mode is intended to be used when using BFD3 as a
plugin in a host.
Export button
The functionality of this button changes depending upon the state of the
Export Sync mode setting.
When the Export Sync mode is set to Range or Host, clicking this
button 'arms' the export function, meaning that the export commences
when certain conditions are reached.
Click the Export button again to disarm the Export function.
When using the Host sync mode, the export commences when the host
or BFD3 transport is started and stops when the host or BFD3 Transport
is stopped.
In Range mode, exporting commences when playback in the host or
the BFD3 Drum Track reaches the Start point, and stops when the
Duration has been completed.
Export Sync mode (Free/Range/Host sync buttons)
Before performing the export, you must first 'arm' the Export function by clicking the Export button.
This mode is not available when using BFD3 as a standalone application.
Host
When Host mode is selected, the Export function commences when the host transport is started, and stops
recording when the host transport is stopped.
Before performing the export, you must first 'arm' the Export function by clicking the Export button.
This mode is not available when using BFD3 as a standalone application.
Start
This value defines the start time (in bars) to commence the export when the Export Sync mode is set to Range.
This setting is disabled when any other Export Sync mode is selected.
Duration
This value defines the length of the export (in bars) when the Export Sync mode is set to Range. This setting is
disabled when any other Export Sync mode is selected.
When the Export Sync mode is set to Free, clicking the Export button starts exporting immediately, and clicking
it again stops it.
Time
During an export, this display shows the time, in minutes and seconds, that has elapsed since the export began.
© 2017 FXpansion
Page 88
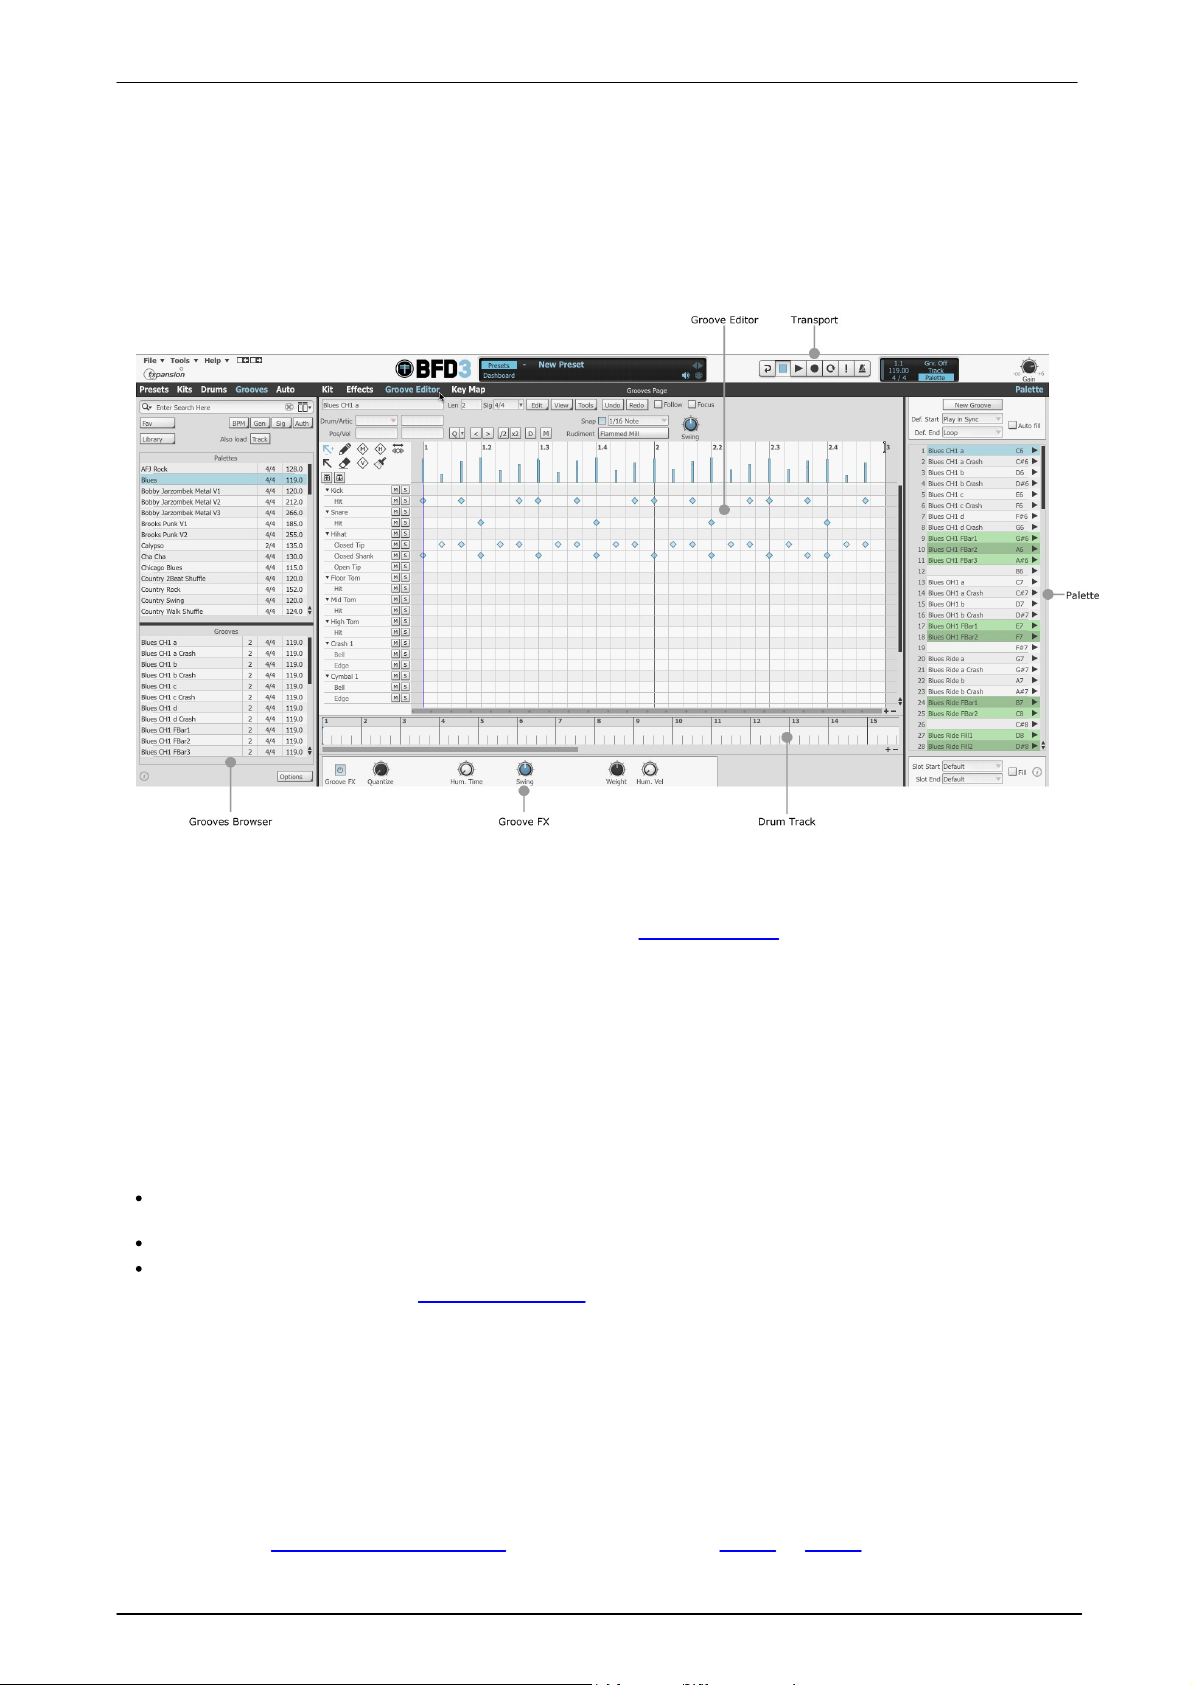
BFD3 Operation Manual88
4 Using the Groove engine
Groove engine overview
The Groove engine is BFD3's sequencer or 'virtual drummer': it provides access to a large library of drum
performances as well as providing the ability to edit these performances or create your own.
If you simply intend to use BFD3 as a sound module triggered by external MIDI notes, it is possible to ignore the
Grooves page completely.
To use the Groove engine, click the Groove Editor button in BFD3's main navigation bar.
Groove Browser
BFD3's Browser, on the left side of its interface, is used to preview and load Groove and Palette files - click the
Grooves button at the top of the Browser to switch to the Groove Browser from any other Browser tab or if the
Browser is currently hidden.
Previewing is synchronized to the BFD3 transport (which is synchronized to the host/DAW when running as a
plugin) so you can preview different sets of Grooves in context with your project. In fact, it is possible to jam in
a live situation using Groove and Palette previewing in the Browser. However, to create controllable, flexible
setups that can be recalled in future, Grooves must be loaded into the Palette or Drum Track.
Palette
At the right side of the Groove Editor panel is the Palette - click the Palette button to make it visible if it is not
currently displayed. The Palette is a bank of 'slots' to which Grooves are loaded.
Grooves loaded into the Palette can be used in several ways:
They can be played automatically in sync with the BFD3 transport (and that of your host/DAW when running
the BFD3 plugin) using the Auto-play settings
They can be arranged into the single-lane Drum Track, allowing you to lay out a full song's drums within BFD3
They can be assigned to MIDI notes using the Key Map panel and triggered using external MIDI notes
The Palette is discussed in detail later in this chapter.
Palette files
BFD3 also contains the concept of Palette files on disk - these represent saved states of the entire Groove
engine: a set of Grooves loaded into the Palette slots along with all other Groove engine settings.
Grooves and Groove events
The basic components used in the Groove engine are Grooves: pattern 'clips' containing sequenced events that
trigger BFD3's Drum articulations. Grooves aren't MIDI clips, but they behave in a very similar way. They are
sequences of time-stamped drum hit events but they bypass MIDI note mappings, instead triggering BFD3's
Drum articulations directly.
It is possible to record events into Grooves via MIDI note input and import or export Grooves as MIDI files or
sequences in your host/DAW. Grooves can also be triggered with MIDI notes - each Groove 'slot' within BFD3's
Palette can be assigned to a MIDI note for external triggering.
© 2017 FXpansion
Page 89
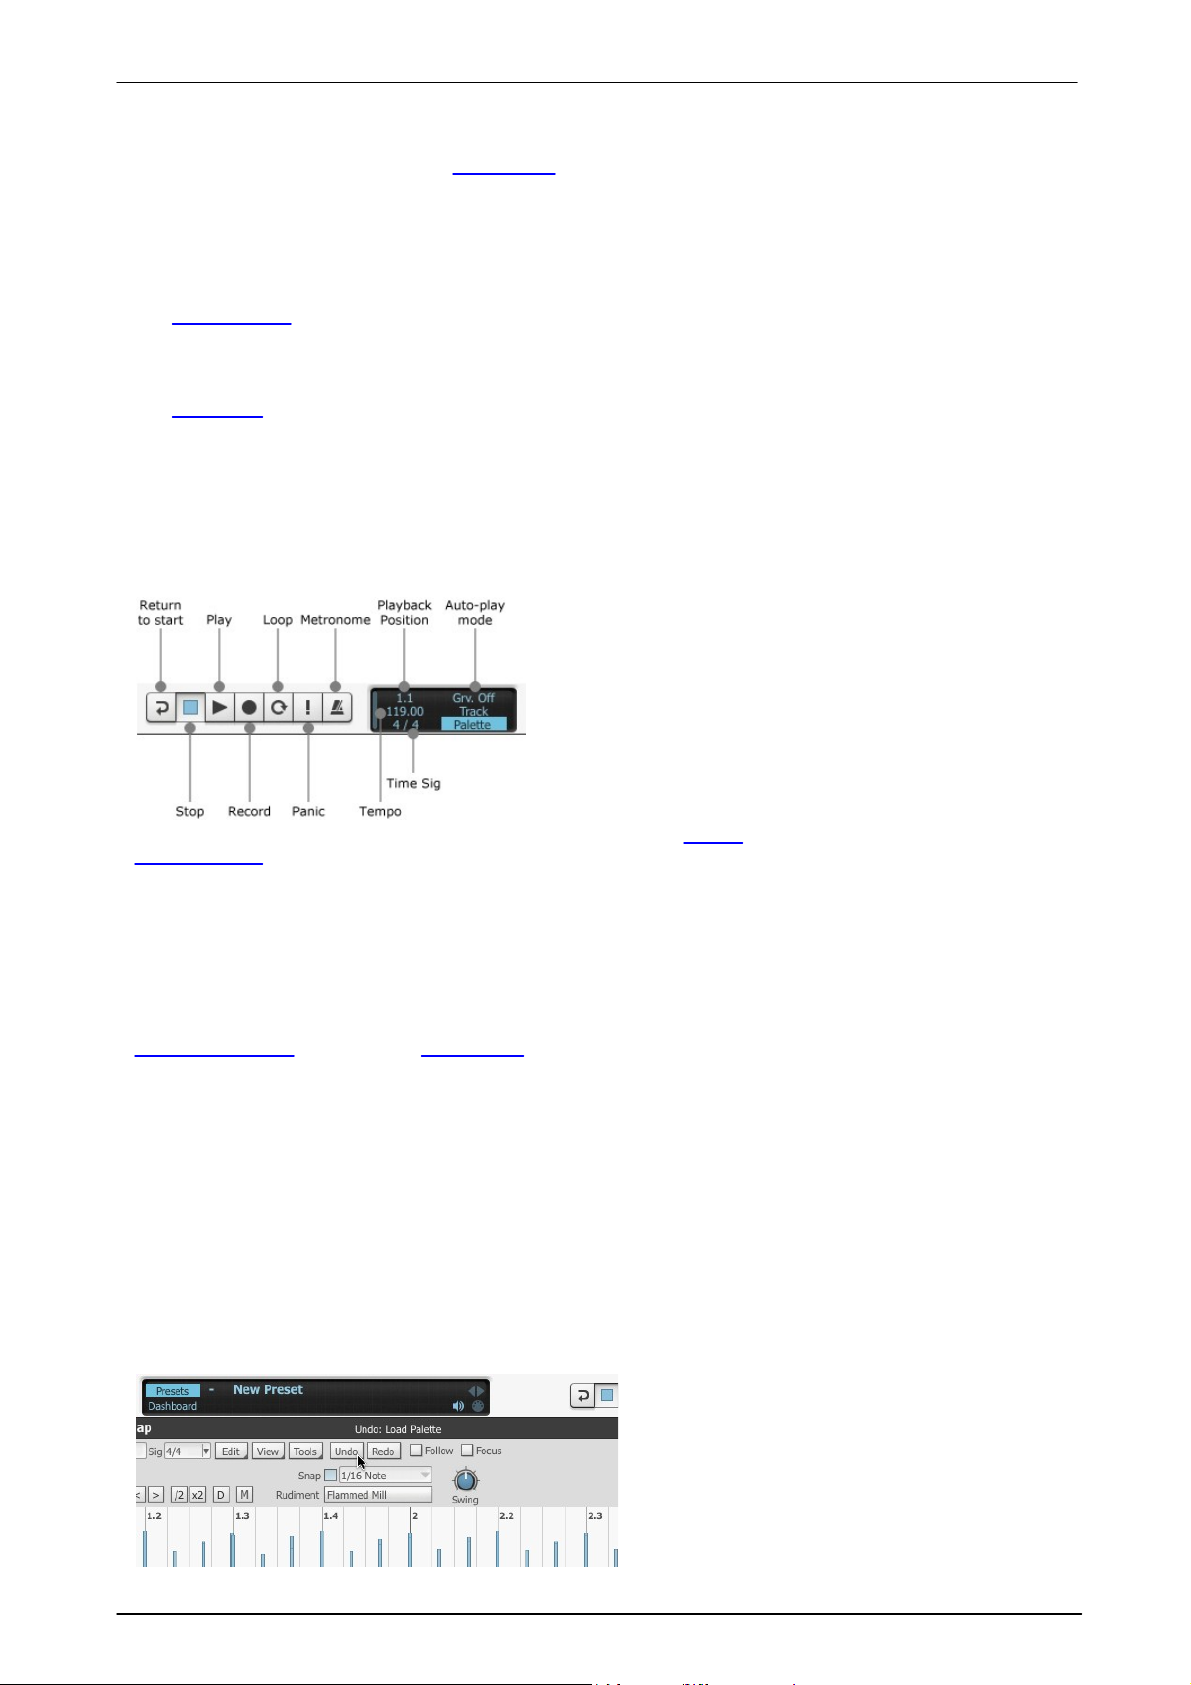
Using the Groove engine 89
When using BFD3 as a plugin in a host/DAW, the BFD3
transport is started simultaneously with that of the host. It is
also possible to start the BFD3 plugin's transport with the
Play button while the host is stopped - however,
subsequently starting the host transport results in
resynchronizing BFD3 to the host.
The transport is used in conjunction with BFD3's Auto-Play
mode which is located to its right. The Auto-play functions
dictate whether to automatically start Groove playback from
the Drum Track or the Palette when the transport is started.
Every operation performed in the Groove page can
be reversed by clicking the Undo and Redo
buttons. The multiple-level Undo function is very
useful as many functions which can drastically
change your work are only a click away. C licking
the Redo button reverses the last Undo operation.
To view the action that would be undone by clicking
the Undo button, move the mouse over the button
– the last action is shown in the context info display.
Drum Track
Grooves can be arranged on the the Drum Track - a simple, single-lane sequencer for Grooves by dragging
them from the Palette or directly from the Groove Browser. The Drum Track is activated by setting the Auto-
play mode accordingly - when active, the Drum Track is automatically synchronized to the BFD3 transport or
that of your host/DAW when using the BFD3 plugin.
Groove Editor
The Groove Editor provides comprehensive tools for creating and editing Groove events.
Groove FX
The Groove FX section can apply several non-destructive real-time processes to change the feel of the Groove
engine's output in a number of different ways. It is possible to make Grooves sound more 'humanized' or more
quantized and 'robotic' while the dynamics, complexity and amount of swing-style syncopation that is applied to
Grooves can also be adjusted.
Transport and Auto-play mode
The BFD3 transport is central to most aspects of Groove engine operations. The transport is started by activating
the Play button.
The Auto-play mode setting is discussed in more detail in the Palette section later in this chapter and in the
Global controls section in the opening chapter.
The Stop button stops the transport. This is possible even when the BFD3 plugin is playing in sync with the host
– Groove playback stops while the host keeps playing. If the host is stopped and restarted, Groove playback
restarts in sync with the host position. After playback has been stopped in this way when using the Drum Track,
if BFD3 is restarted without host sync, playback commences from the position at which playback was previously
stopped.
The Panic button stops playback of any Grooves that may be currently playing (it also stops any drum sounds
and effect tails that may be currently playing).
The Record, Loop, Metronome and Return to start buttons are used for certain features involved with
recording Grooves and using the Drum Track.
The Tempo and Time signature indicators display the current tempo and time signature. When running BFD3
as a plugin in a host/DAW that provides tempo and time signature information, these controls are not editable
and BFD3 is locked to the host. In other situations, these displays can be manually adjusted: double-click and
type a new value. The Tempo can also be adjusted via click/drag up/down.
The Beat light indicator flashes on every beat when the Groove engine is playing.
The Playback position indicator displays the current playback position in bars and beats while the transport is
started. When using BFD3 in a host, this indicator shows the current song position of the host. When using the
standalone application, this indicator can show any of the following:
• The current position in the current Groove when using any Auto-Play mode except Track
• The current position in the Drum Track when using the Track Auto-play mode
• The current position in the Groove when recording events in real time via MIDI
Undo/Redo function
© 2017 FXpansion
Page 90

BFD3 Operation Manual90
Virtually any action can be undone, even loading an entirely new Palette.
While you can set up any number of levels for the multiple-level Undo/Redo in the Grooves Preferences, note
that more undo levels use more RAM.
MIDI Out function
In compatible hosts, the output of the BFD3 plugin's Groove engine is available as a MIDI output stream for
triggering other instruments on entirely different MIDI tracks.
The only plugin format that supports this feature is VST although not all hosts support MIDI output from plugins.
To use the MIDI output, the Send MIDI out setting must be activated in the Session Preferences. By default,
MIDI channel 1 is used for transmitted note events. This can be changed using the MIDI Out channel setting.
© 2017 FXpansion
Page 91

Using the Groove engine 91
To fully utilize Grooves within BFD3, they must be loaded into Palette
slots or directly to the Drum Track from the Browser.
While it is possible to preview Grooves in sync with the transport and
even to export them as MIDI or audio using only the Browser, they
must be loaded into the Palette to fully control them, trigger them via
MIDI or arrange them within the Drum Track.
The Palette and Drum Track are shown on the same page as the
Groove Editor - click the Groove Editor button in BFD3's navigation
bar to display it. It replaces the Key Map panel or mixer/Kit display/
Effects Editor/Drum Editor if they were previously visible.
There are 2 main areas in the Grooves Browser. The upper area
displays a listing of all available Palettes. C lick a Palette in the listing to
display its constituent Grooves in the lower part of the Browser.
Grooves shown in the lower section can be selected in the same way as
Palettes.
Information about each Palette or Groove can be seen by clicking the
Info display button at the lower-left corner of the Grooves Browser.
Previewing Grooves
Each Palette and Groove displays an Audition preview button with the
mouse cursor hovered above it. C lick the button to start previewing the
Palette or Groove; click it again to stop the preview. If any Grooves are
already being previewed (or if there are Grooves already loaded and
playing in the Palette), they are muted when using the Audition
preview function.
When previewing a Palette, playback steps through each of its
contained Grooves sequentially.
You can also click another Palette or Groove's Audition preview
button to preview it instead.
Auditioned grooves play at the current tempo through the Drums
currently loaded into BFD3. Note that if the previewed Groove contains
events for currently empty Drum slots, they do not produce any sound.
If no Drums are loaded at all, previewing the Groove results in silence.
The Hold mouse button to preview setting in the Options menu
results in auditions only playing back while the mouse button is held
down on the audition preview buttons.
Automatic previews on selection
Using the Preview when clicking groove function in the
Options menu, Grooves are automatically previewed
when selected in the Groove Browser, without having to
click its Audition preview button.
4.1 Grooves Browser
The Grooves Browser is part of the main BFD3 Browser - it is accessed by clicking the Grooves tab button at
the top of the Browser panel.
If the Palette is empty or no Groove is selected, a button is also shown in the middle of the screen which opens
the Grooves Browser.
Selecting and previewing Palettes and Grooves
When Palettes are selected, playback steps through each of its constituent Grooves sequentially.
Previewed Grooves are looped and synchronized to your host tempo and transport.
© 2017 FXpansion
Page 92

BFD3 Operation Manual92
To load a Palette, drag it from the Browser to the Palette at the right of the Groove Editor page.
Any previous contents in the Palette and Drum Track are replaced.
To load a single Groove, drag it to the desired slot in the Palette. This can also be achieved
with multiple selections: the Grooves are assigned to sequential slots starting from the
destination. Any previous contents in destination slots are replaced.
The loaded
Groove
Loading by drag & drop to the Palette
To load Palettes and Grooves into the Palette via drag & drop, the Palette panel at the right of the Groove Editor
page must be visible. Click the Palette button at the top-right of the Groove Editor page to display it if it is
currently hidden.
Palettes
Grooves
Using drag and drop to export Grooves directly from the Browser
This method can be used to export Grooves or a Palette as MIDI or audio directly to your host/DAW or to an
operating system file window or desktop. This function is described later in this chapter.
© 2017 FXpansion
Page 93
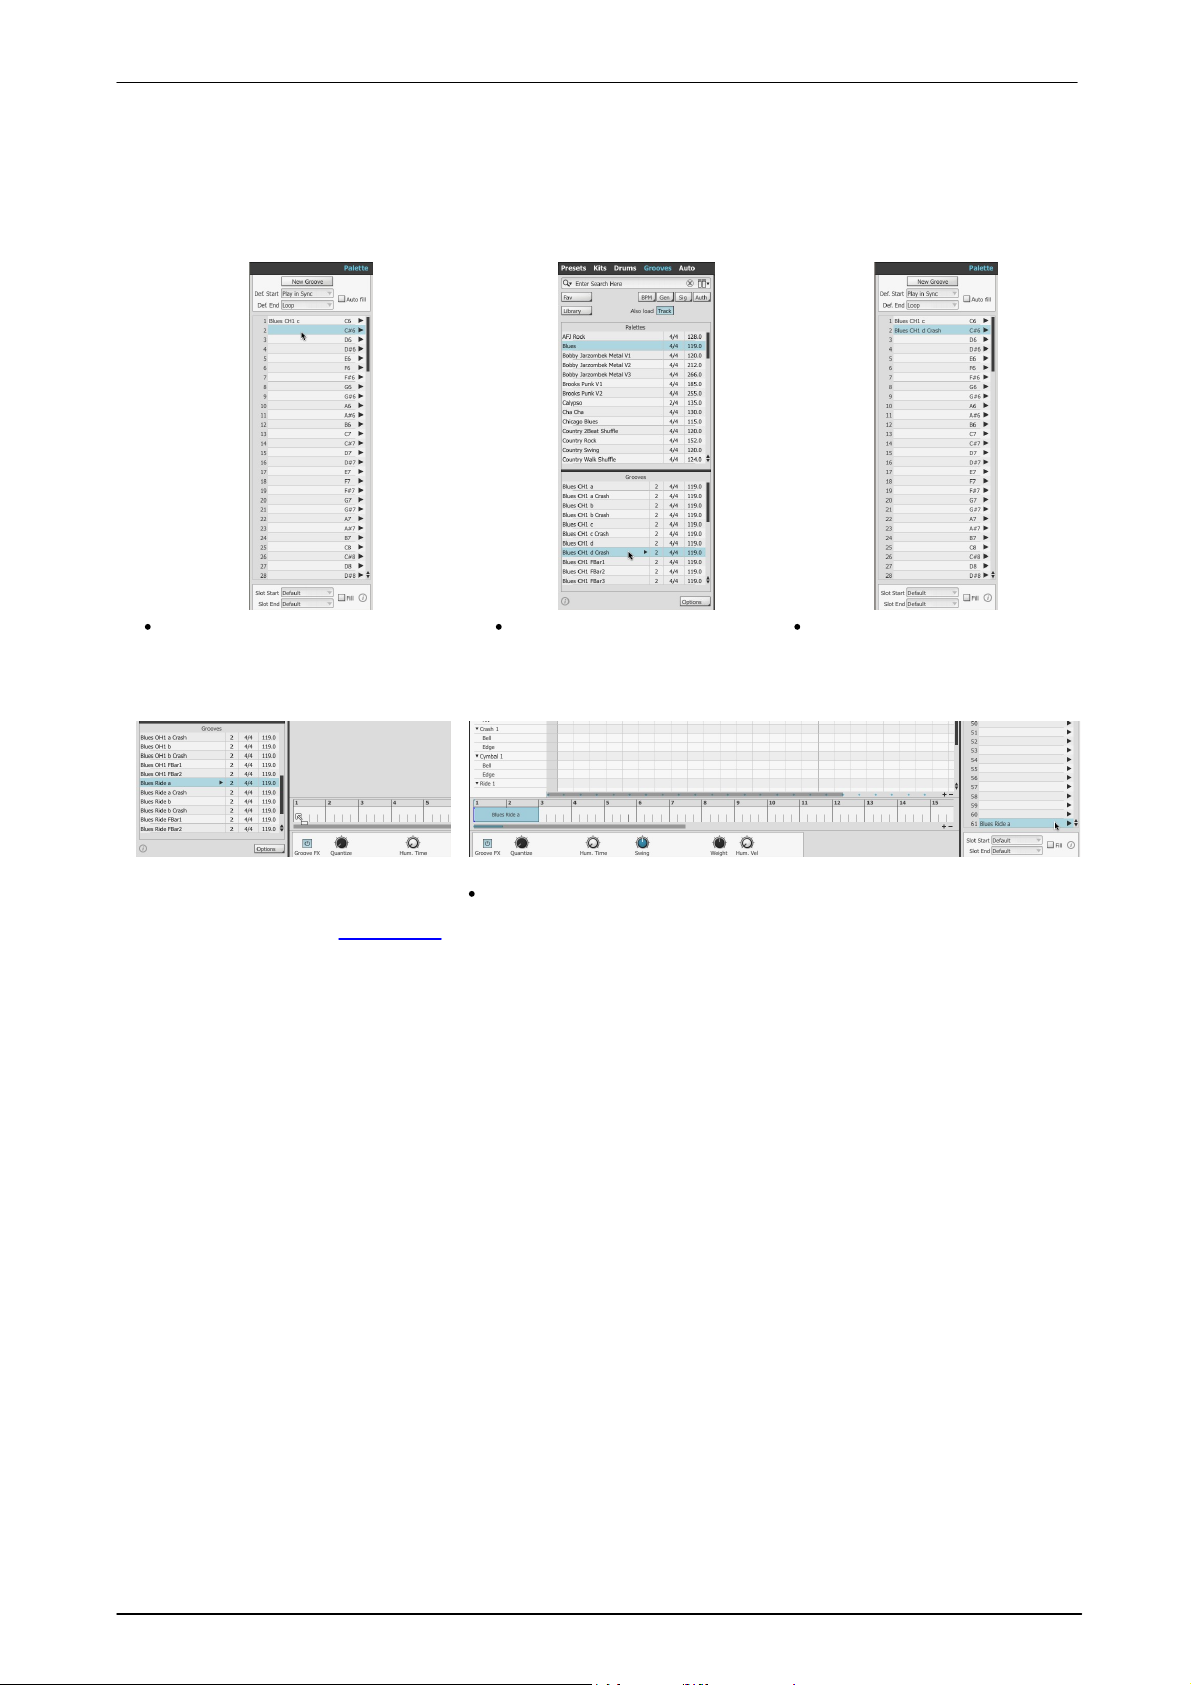
Using the Groove engine 93
First, click the desired destination
Groove slot in the Palette to select it.
Then, double-click the required
Groove in the Browser.
The Groove is loaded to the
selected slot in the Palette.
Grooves or Palettes can be dropped
directly from the Browser onto the
desired position in the Drum Track.
The Groove(s)/Palette is also loaded to the next free slot(s) starting
from slot 60 in the Palette.
Loading using double-click
Palettes
Double-click any Palette to load it (replacing all currently loaded Grooves). Any previous contents within the
destination are replaced.
Grooves
Loading using drag & drop to the Drum Track
When dragging an entire Palette (or a multiple selection of Grooves) in this way, the Grooves within it are
arranged sequentially in the Drum Track.
Loading multiple Grooves
To select multiple Grooves in the listing:
• CTRL-click on a Groove (Windows)
• COMMAND-click (Mac)
Adds the Groove to the current selection. If the Groove is already selected, it is de-selected.
• SHIFT-click
Selects all Grooves between the currently selected Groove and the lowest or highest selected Groove (a
contiguous selection).
With the desired Grooves selected, click and drag the selection to the required destination slot in the Palette. The
Grooves are loaded into sequential slots starting from the destination slot, overwriting any previous contents of
these slots.
A warning is displayed if the end of the Palette is reached and it is not possible to load all the selected Grooves.
© 2017 FXpansion
Page 94
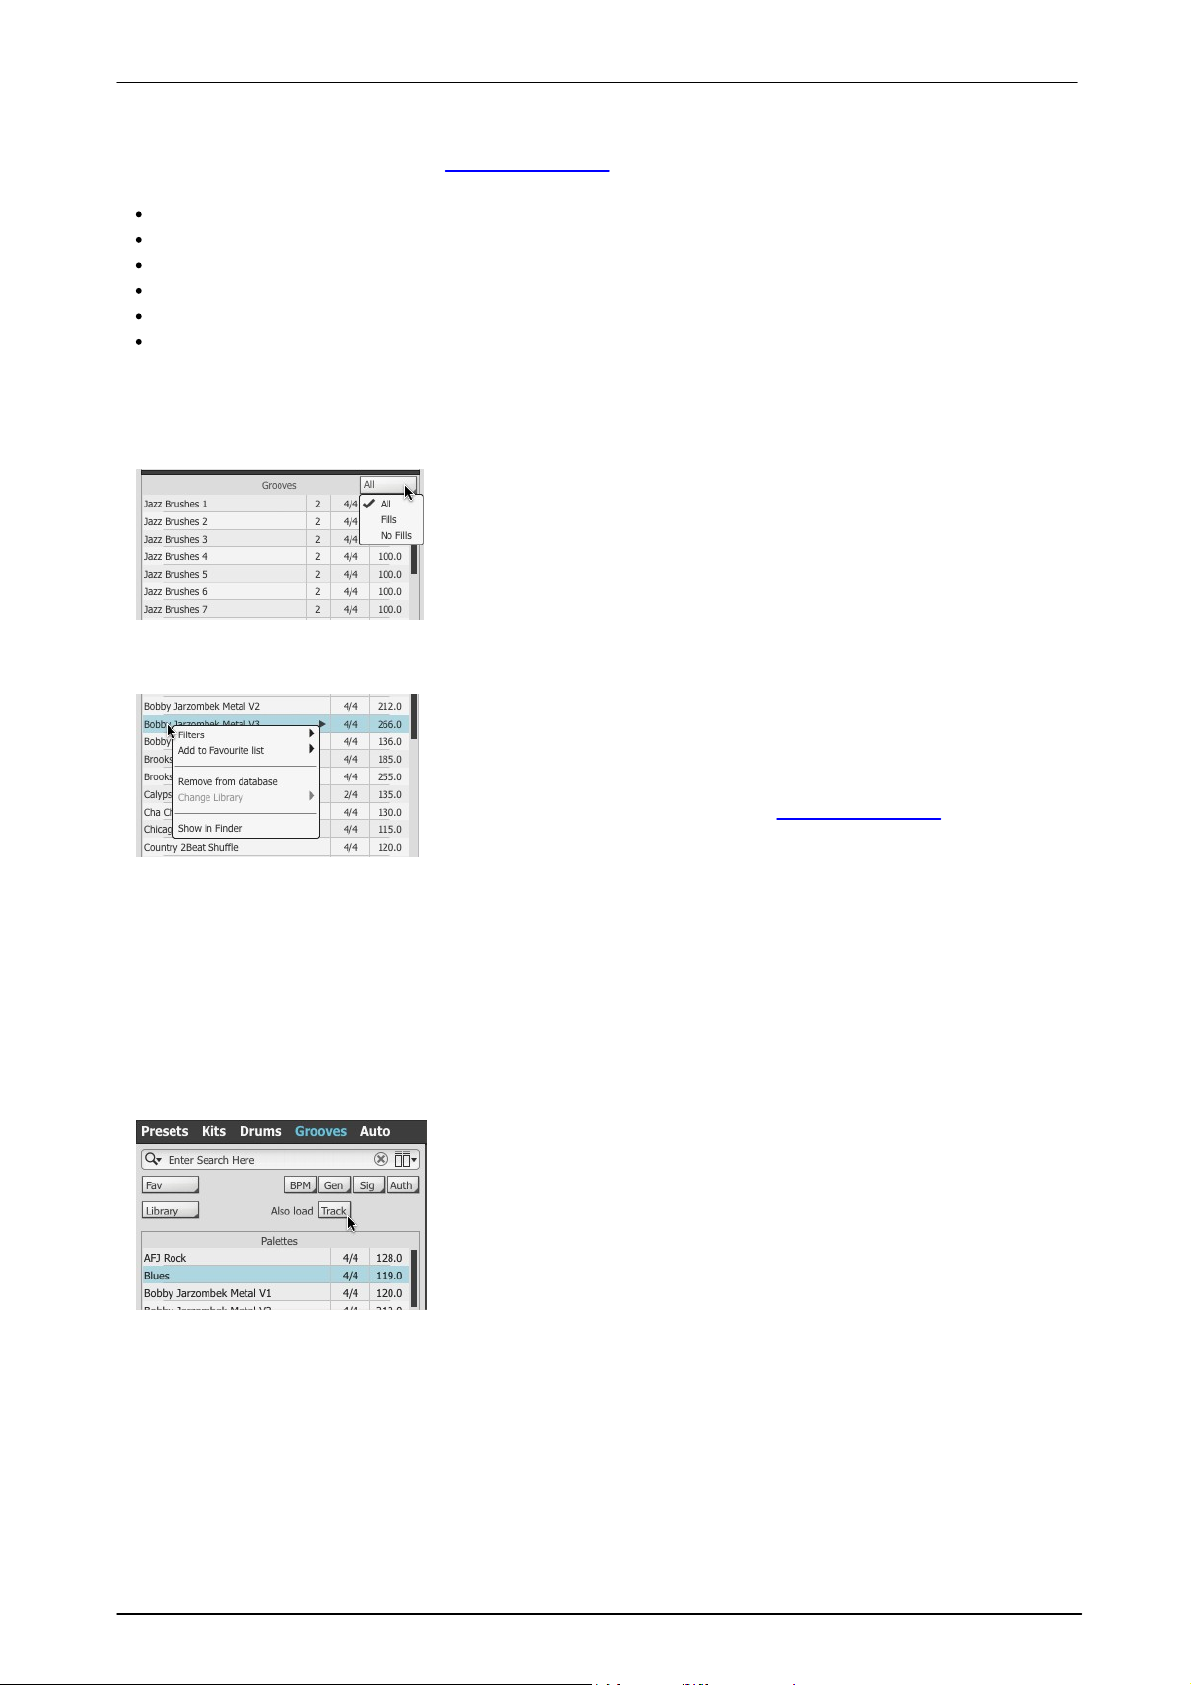
BFD3 Operation Manual94
An additional filtering function exists for the lower part of the Groove
Browser which shows a Palette's constituent Grooves. Using the
Groove/Fill Filter menu, this part of the Browser can be set to show
All (Grooves and Fills), Fills (only Fills) or No Fills (only Grooves).
Filters
Add to Favourite list
Show in Finder (Mac)
Show in Explorer (Windows)
Change Library
These functions are described in the Browser Reference section.
Palette files also store a Drum Track if it existed when the Palette was
originally saved. If the Also load Track button is deactivated, when a
Palette is loaded, the Drum Track is initialized to an empty state.
Searching and filtering the Groove library
Using the Search, Filters and Favourites functions in the Grooves Browser involves exactly the same processes
as the other Browser tabs - see the Browser Reference section for a guide to using these functions.
The following Filter categories are available in the Grooves Browser:
Favourites: show only specific Favourites groups
Library: show BFD1, BFD2, BFD3 or other libraries
Genre: filter Grooves by musical genres
BPM: filter Grooves by original tempo range
Time signature: filter Grooves by specific time signatures
Author: filter Grooves by specific authors
Other Groove Browser functions
Groove/Fill Filter
Groove Browser context menu
Right-click on any Palette or Groove in the Browser listing to display the Groove Browser context menu.
In the Grooves Browser, the Filters sub-menu shows the Library, Genre, BPM, Time Sig and Author fields
for the Palette or Groove.
The Change Library function is only usable with user-generated Grooves and Palettes.
Remove from database
This function removes the Groove/Palette from the listing. No files are deleted - instead, the item is hidden until
the next time the content location which includes them is rescanned.
To remove items permanently, their files must be deleted from disk. The location of each file can be seen using
the Info display panel (see below) or the Show in Finder / Show in Explorer functions.
Also load: Associated Track
© 2017 FXpansion
Page 95
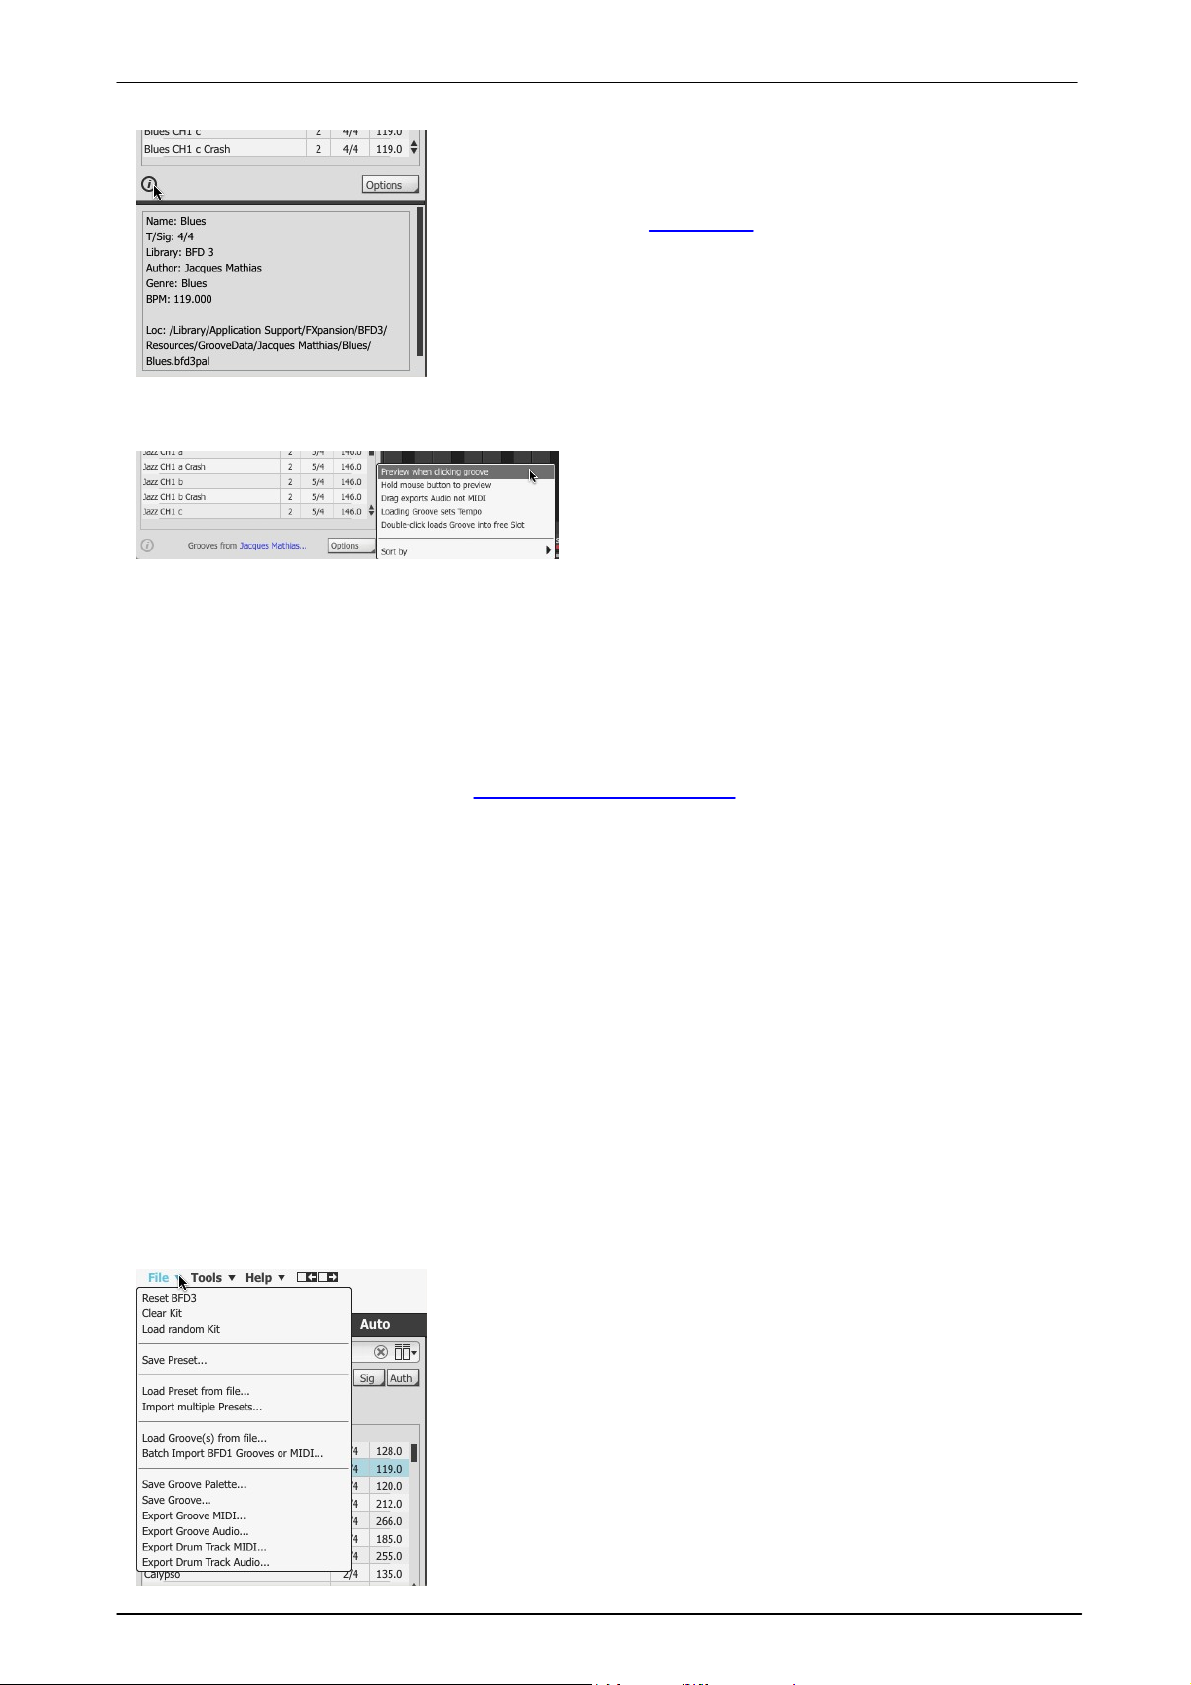
Using the Groove engine 95
Click the Info display button at the lower-left of the Grooves Browser
to show a panel displaying information about the currently selected
Palette or Groove.
The fields that are shown are identical to those in the Palette panel's
Info display - see the next section for details of each field.
The border between the Info display and the Palette/Groove listing can
be clicked and dragged up/down to adjust the visible area of each
section.
The Info display panel can be hidden again by clicking the Info
display button.
Preview when clicking Groove
If this setting is activated, Grooves are automatically
previewed when selected in the Groove Browser, without
its Audition preview button needing to be clicked.
Previewed Grooves are looped and synchronized to your
host tempo and transport.
Load Groove(s) from file
This function displays a system file open dialog allowing you to browse
to and load Palettes or Groove(s) from any location that may not
already exist in the database. This may be useful after downloading a
Palette made by another user.
For the loaded Palette(s) or Groove(s) to be accessible in the Groove
Browser in future, they must be saved after it is loaded into the current
session.
If the file type extension is changed to *.MID in the open dialog, this
function imports a MIDI file instead, as when using the Import functions
described below.
Batch Import BFD1 Grooves or MIDI...
This function is used for converting MIDI files or BFD 1.x Grooves into
BFD3 Grooves - see below.
Info display
Options menu
Hold mouse button to preview
This setting changes the behaviour of preview buttons in the Grooves Browser and Palette. With the setting
activated, Groove previews play while the mouse button is held down on its preview button. When the setting is
deactivated, clicking a preview button starts playing the Groove, and clicking it again stops it.
Drag exports Audio not MIDI
This function relates to exporting Palettes and Grooves directly from the Browser and is identical to that in the
Groove Editor's Tools menu - see the Saving and Exporting Grooves section for more details.
Loading Groove sets Tempo
When running BFD3 in standalone mode, activate this setting to set the current tempo to that of a Groove or
Palette when it is loaded.
When the setting is disabled, Grooves are always auditioned and loaded at the current tempo.
Double-click loads Groove into free Slot
This setting is provided in order to make it easier to compile Palettes from individual Grooves. With the setting
activated, double-clicking a Groove in the Browser listing results in loading it to the next free Slot in the Palette.
With the setting deactivated, double-clicking a Groove loads it in to the currently selected Slot, overwriting the
Slot's previous contents.
Sort by
This sub-menu offers various sorting options for the Groove Browser display: items can be sorted by Name,
Folder, BPM (tempo), Time Signature or Date Modified. The Folder setting is particularly useful if user
Grooves are arranged within sub-folders in the user location or if factory or expansion pack Grooves have been
manually rearranged into sub-folders in the factory location.
Additional Groove functions in the BFD3 File menu
© 2017 FXpansion
Page 96

BFD3 Operation Manual96
Importing MIDI files and BFD 1.x Grooves
The Groove Browser displays BFD 1.x format Grooves in the Browser if they are found in the scanned content
locations. There are several other ways of getting BFD 1.x format Grooves and other MIDI files into BFD3 such
using the File menu while the Groove Browser is visible.
When they are imported, a Key Map needs to be consulted in order to determine which MIDI notes to assign to
which BFD3 Drum articulations - this is specified using the Import MIDI Key Map setting in the Preferences (it
can also be set in the MIDI Import panel which appears when using the File menu import functions).
See the Importing MIDI section later in this chapter for more detailed information on these functions.
© 2017 FXpansion
Page 97
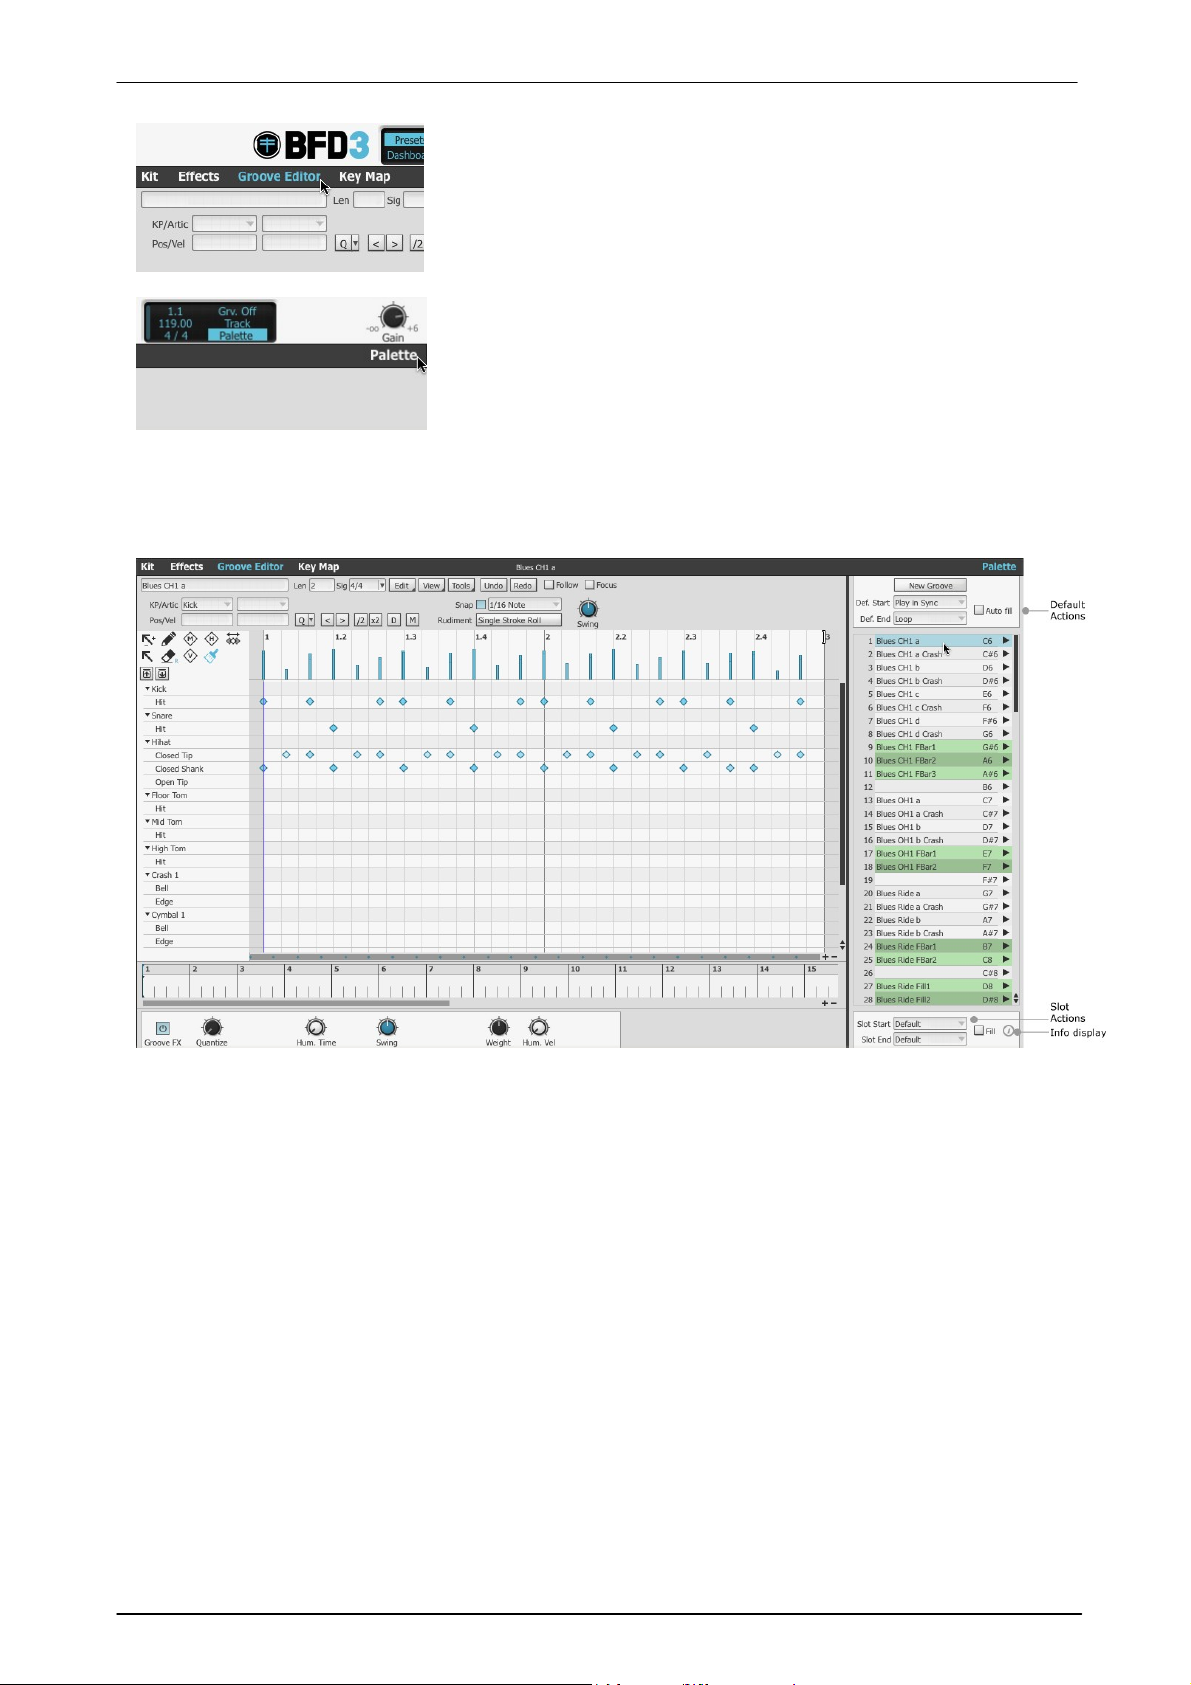
Using the Groove engine 97
The Palette is central to the Groove engine in BFD3. It represents a
'pool' of the Grooves stored in memory and is composed of 128
individual slots.
To show the Palette, the Groove Editor must be visible - click the
Groove Editor button in BFD3's navigation bar.
To show the Palette if it is currently hidden, click the Palette button near the upper-right corner of the BFD3 interface.
Click the Palette button again to hide the Palette when required.
4.2 Palette
Any Groove used in BFD3 must be assigned to a slot in the Palette, regardless of which of the various playback
methods are to be used.
Use the scrollbar or mousewheel to access the full range of the 128 slots in the Palette.
Selecting slots
Click a Groove slot to select it. If the slot contains a Groove, it is now shown in the Groove Editor (if visible) and
its Slot Actions settings are shown below the Palette.
© 2017 FXpansion
Page 98
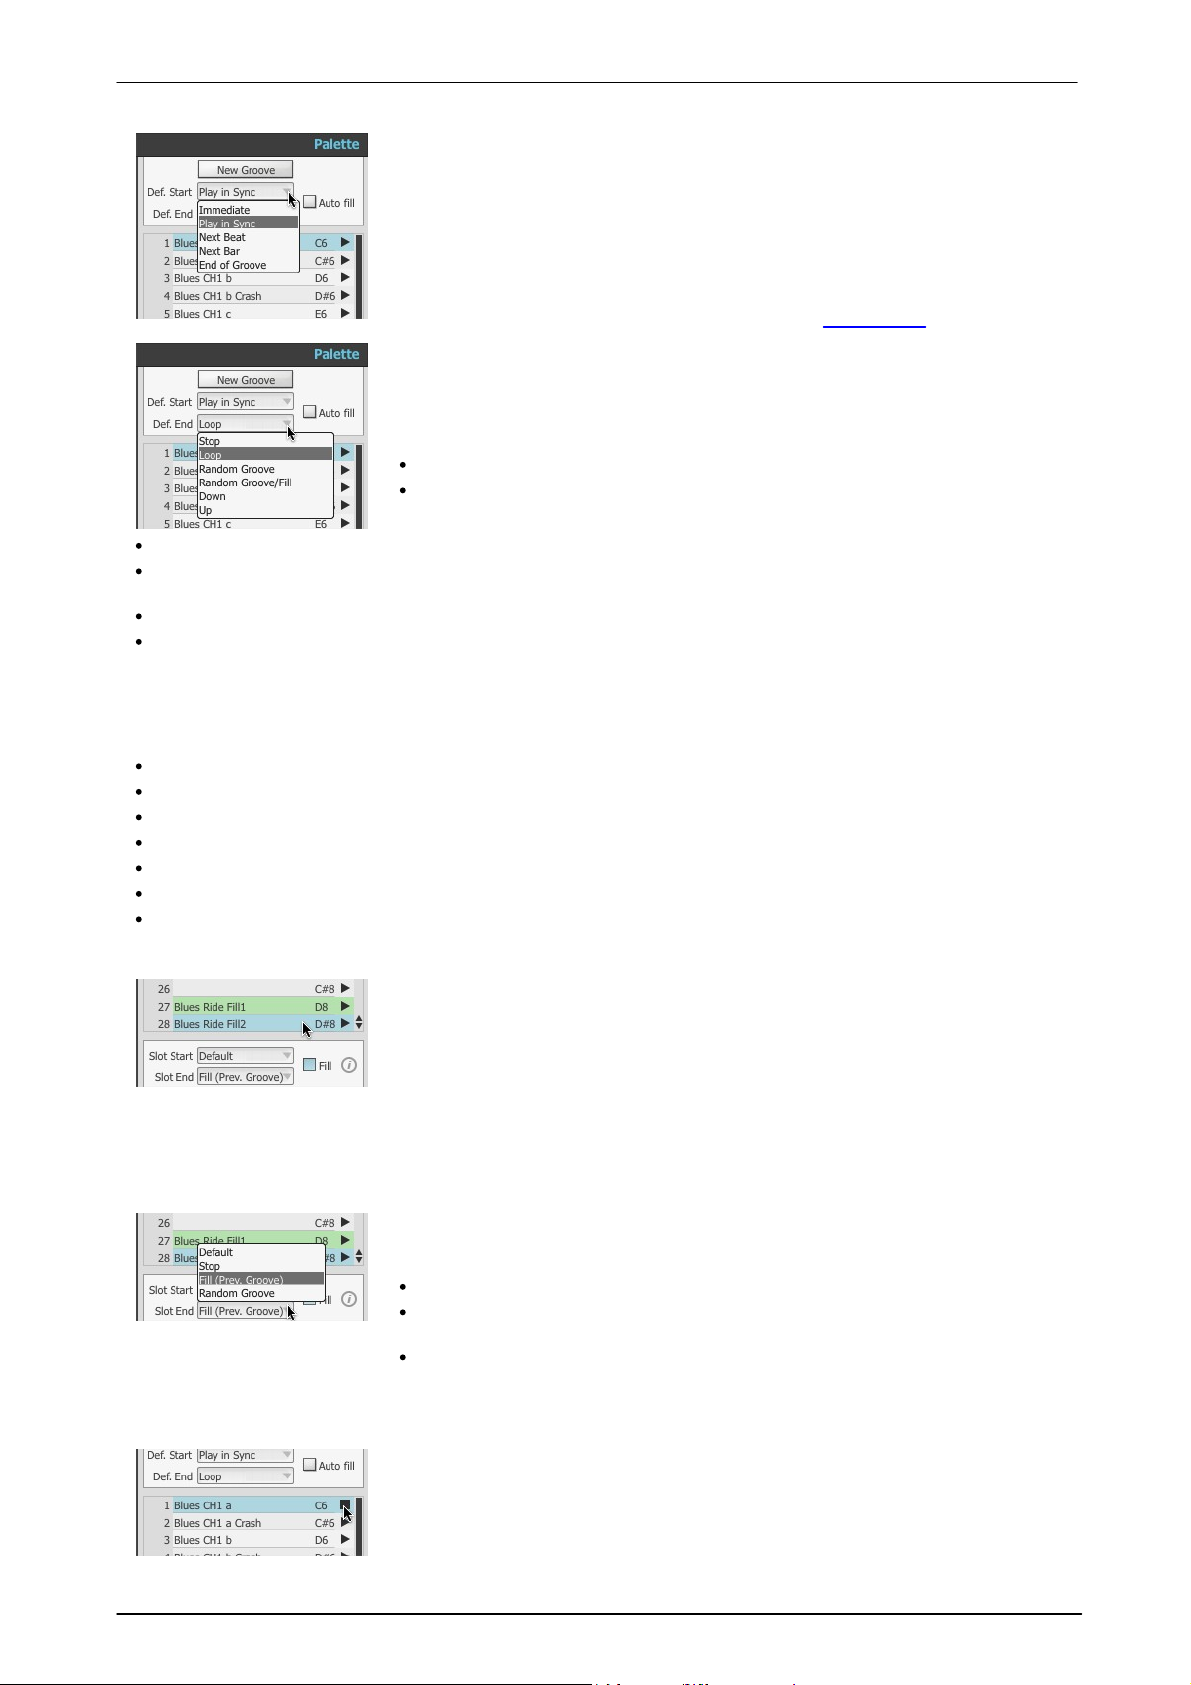
BFD3 Operation Manual98
Actions
The Palette area contains 2 sets of controls above and below the list of slots,
which let you define Actions, or playback characteristics.
The section above the Groove slots forms the Default Action controls while
the section below shows the Slot Actions for the currently selected slot.
Unless Slot Actions are specified for individual slots, the behaviour of the
Grooves in each slot follows the Default Action settings.
Note that Actions do not apply to Grooves on the Drum Track. Any structuring
of Groove playback over time in the Drum Track must be created in the Drum
Track itself by arranging Parts within it using drag and drop.
Start Actions
The Start Action defines how a Groove should start playing when triggered.
Next Beat: the new Groove starts on the next beat.
Next Bar: the new Groove starts at the beginning of the next bar.
Fill slots and Actions
The Slot Actions section contains the Fill setting. If this button is activated, the
current Groove slot is designated as a Fill slot and highlighted in green.
Designating a slot as a Fill means that it can be triggered if the Random
Groove/Fill End Action is specified on another slot (the Slot End Action of the
Fill slot should typically be set to Random Groove), or by the Auto-Fill button
located in the Default Actions section.
Fill Slot End Actions
Fill slots feature the following Slot End Actions:
Stop: Groove playback is stopped.
Fill (Prev Groove): the Groove that was previously playing before the Fill is
played again.
Random Groove: a random Groove in the Palette is played.
The playback indicators on the right of each slot in the Palette double as
Preview buttons. C lick the button to play the Groove contained within the slot.
Once playback of a Groove has been started, it then follows the behaviour
defined by its Slot Actions settings. C lick another slot's Preview button in
order to start playing the Groove within it instead. The method of transition is
dictated by the Slot Start Action setting.
Actions and Fills
End of Groove: the new Groove starts at the end of the current Groove.
Play in Sync: the new Groove starts immediately from the position within it that corresponds to the current
play position.
Immediate: the new Groove starts immediately from its beginning regardless of the current play position.
Default: this is available for the Slot Start Action only and specifies that the slot follows the Default Start
Action.
End Actions
The End Action specifies what happens after a Groove completes playback.
Stop: the Groove stops (in effect, stopping Groove playback entirely).
Loop: the Groove repeats.
Random Groove: a random Groove in the Palette is played.
Random Groove/Fill: a random Groove or Fill in the Palette is played.
Down: the Groove in the next slot in the Palette is played.
Up: the Groove in the previous slot in the Palette is played.
Default: this is available for the Slot End Action only and specifies that the slot follows the Default End
Action.
When activated, the Auto-Fill function plays a Fill slot at random at a definable period (a number of bars
defined in the Preferences) during Groove playback.
Previewing Grooves
© 2017 FXpansion
Page 99
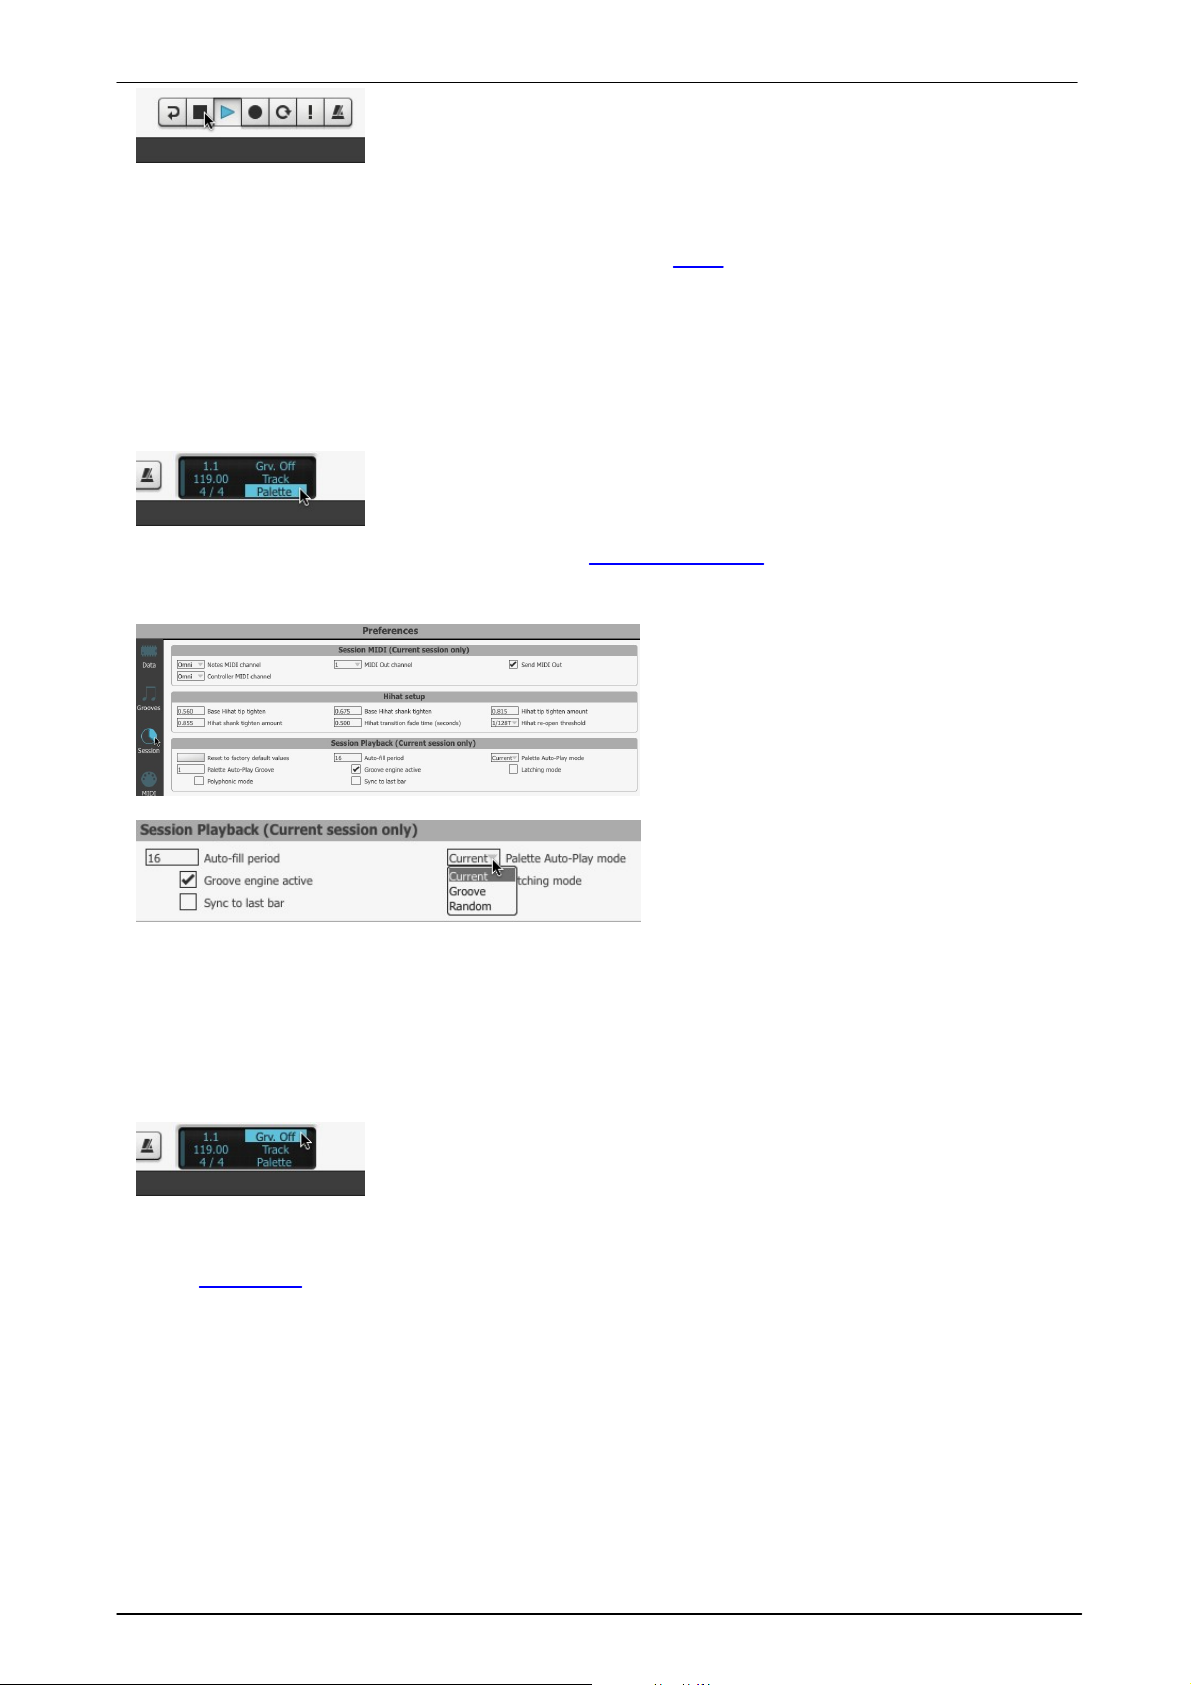
Using the Groove engine 99
Stopping previews
Each Groove can be stopped by clicking its respective Preview button again.
You can also use the Stop or Panic buttons in the Transport to stop playback
of all currently playing Grooves.
1. Palette
By default, BFD3 is in the Palette Auto-play mode. In this mode, BFD3 plays
back Grooves in the Palette when the transport is started.
Current
When playback is started the currently selected
Groove in the Palette is played according to the
behaviour defined by Slot Actions.
This is the default sub-mode for the Palette
Auto-Play mode.
Since the currently selected Groove is also
shown in the Groove Editor, this mode is very
useful when editing a Groove. Set the
Groove's Slot End Action to Loop so that it
keeps looping while you edit.
Clicking on another Palette slot that contains a
Groove causes it to start playing and stops the
original Groove.
2. Grv. Off
When the Auto-Play mode is set to Grv. Off, Grooves are only heard when
they are played via MIDI notes, or when the Preview buttons are used to
start playback.
Preview mouse behaviour
Activating the Hold mouse button to preview setting in the Editor Tools menu results in previews being
active only while the mouse button is held down on a Preview button. When the mouse button is released,
playback stops.
Playing Grooves
Playing Grooves using Auto-play modes
The Auto-play mode function is crucial in determining how the Groove engine is used. It has 3 modes:
3 sub-modes exist for this mode, configurable in the Session Preferences with the Palette Auto-Play Mode
setting:
Groove
In this sub-mode, you can specify a specific Groove to play when the transport is started. The desired Groove
slot is specified via the Palette Auto-Play Groove setting in the Session Preferences.
Random
In this sub-mode, a random Groove from the Palette is played when the transport is started.
3. Track
Choosing the Track Auto-Play mode allows you to arrange a sequence of Grooves from the Palette within
BFD3's Drum Track.
© 2017 FXpansion
Page 100
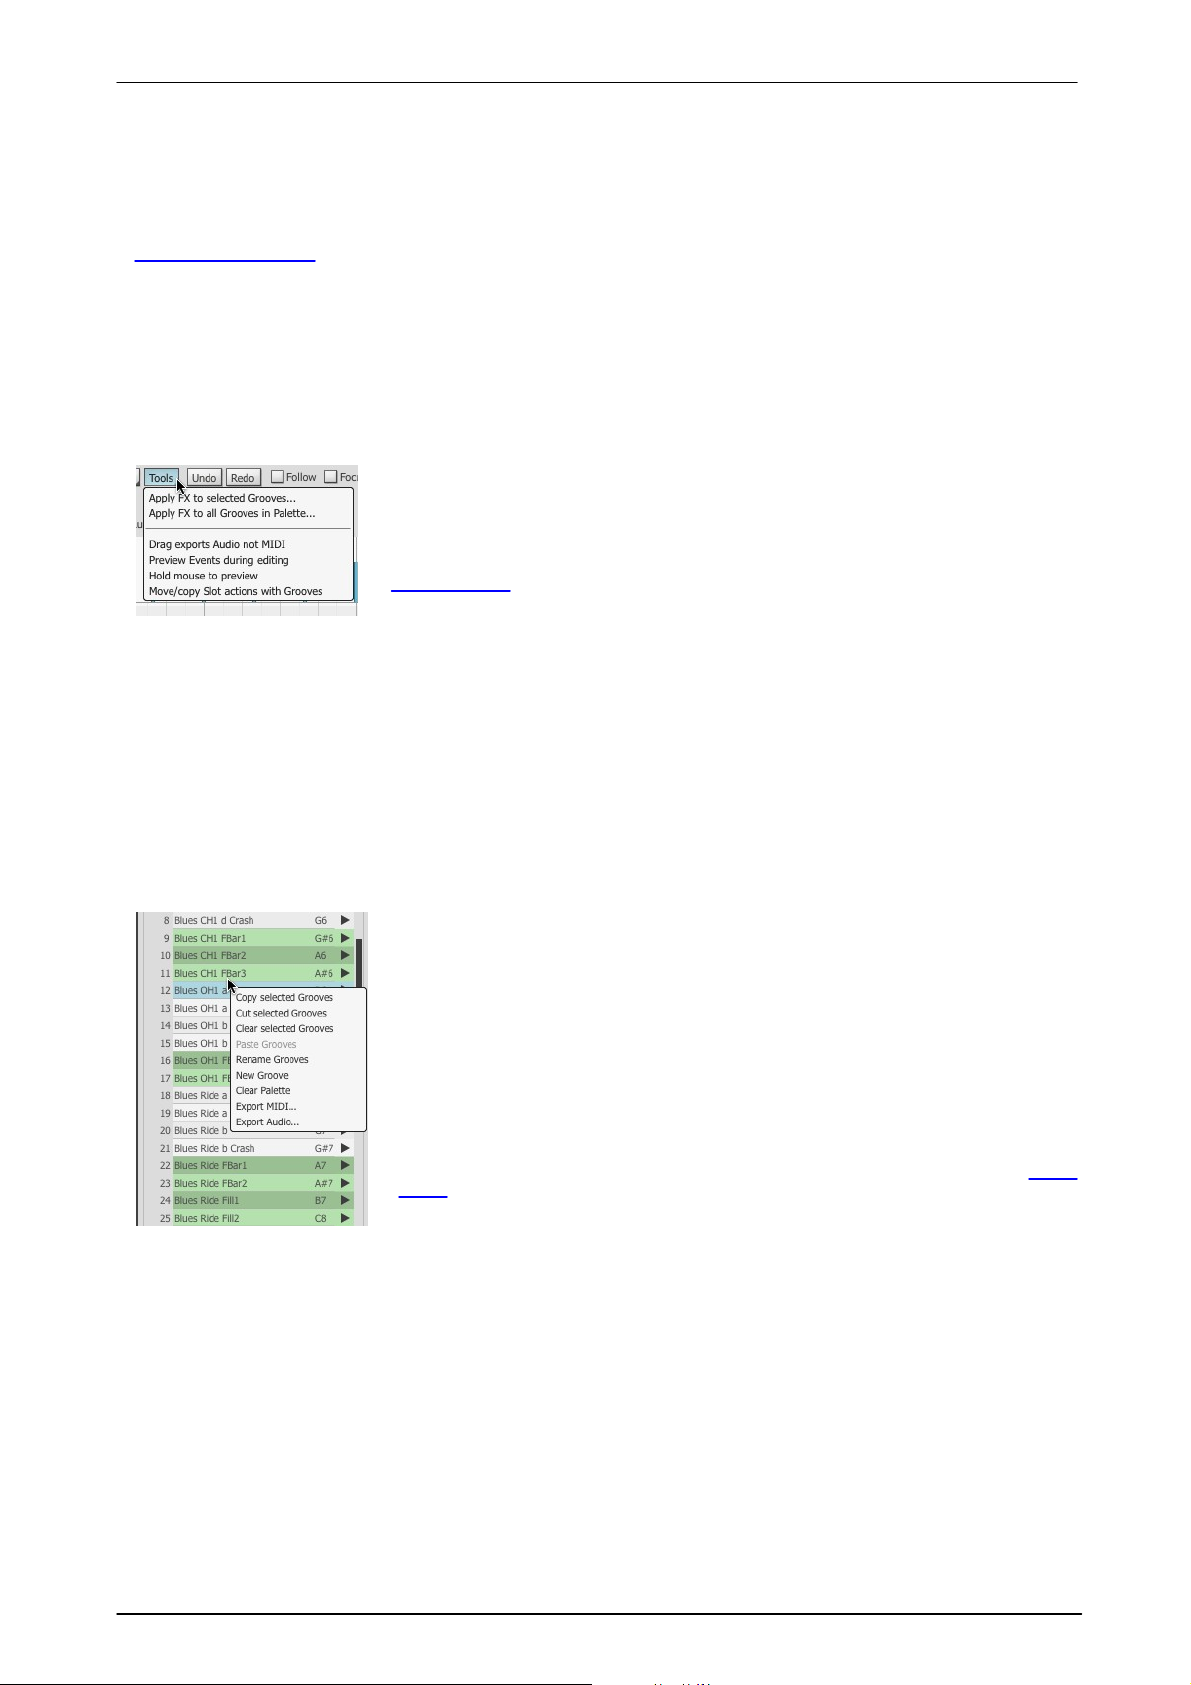
BFD3 Operation Manual100
Grooves can be moved and copied around slots using drag and drop - hold
down the ALT key while dragging in order to copy a Groove.
When the destination slot which already contains a Groove, the contents of both
slots are swapped. When copying, any destination content is overwritten.
If the Move/copy slot actions with grooves setting is enabled in the
Groove Editor Tools menu, a Groove slot's Fill status and other Slot Actions
settings are transferred with its contained Groove when it is swapped with or
moved/copied to another Palette slot.
Slot context menu
Right-clicking on any selected Groove slot displays the Slot context menu
containing a number of further Groove-based operations. The Slot context
menu features a number of functions for managing Grooves in the Palette such
as the Cut, Copy, Clear, Paste and Rename functions for selected Grooves.
When the Rename Grooves function is used on a multiple selection, a
numerical suffix is used for the second Groove onwards.
There are also functions to create a New Groove (if you want to write or
record a Groove from scratch in the Editor) to clear the contents of the
Palette entirely (Clear Palette) and to export selected Grooves as MIDI or
audio (Export MIDI.../Export Audio...).
The Cut and Copy functions can also be used to insert Grooves onto the Drum
Track using the Paste functions on the Part context menu.
Playing Grooves via MIDI
BFD3's Groove slots can also be mapped to MIDI notes so that they can be played with a keyboard or other
controller that sends MIDI notes. Groove slots must be assigned to MIDI keys in BFD3's Key Map panel. The
default BFD3 Key Map features MIDI assignments for the first 41 Groove slots.
Latching mode
By default, Grooves play while the MIDI note is held down. If the Latching mode setting is enabled in the
Grooves Preferences, playback of a Groove is toggled on and off when its MIDI note is played. In other words,
play a Groove's MIDI note once to start playback - playback then continues as normal according to End Actions.
Play the same note to stop playback, or use the Stop or Panic buttons in the Transport.
Whichever mode is used, the behaviour when the Groove starts depends on its Start Action. In most
circumstances you would typically set this to Play in Sync, Next Bar or End of Groove.
Managing Grooves in the Palette
Moving and copying Grooves
Multiple selections
The above processes can be conducted on multiple selections - hold down the CTRL or SHIFT keys when clicking
to select slots to create arbitrary or contiguous selections.
When multiple Grooves are moved, they are placed on sequential Groove slots ascending from the slot on which
they were dropped. If any other Grooves already exist within this sequence of slots, they are swapped into the
original slot of the Groove which replaces it.
Even if an arbitrary multiple selection is moved or copied (in other words, the selected Grooves are not all in
neighbouring slots to each other), the moved or copied Grooves are placed on sequential, neighbouring available
slots.
© 2017 FXpansion
 Loading...