

Page 1
INSULATION KIT FOR HIGH HUMIDITY
(PART No. 9379022057-02)
Kit components
The following parts are included in the kit.
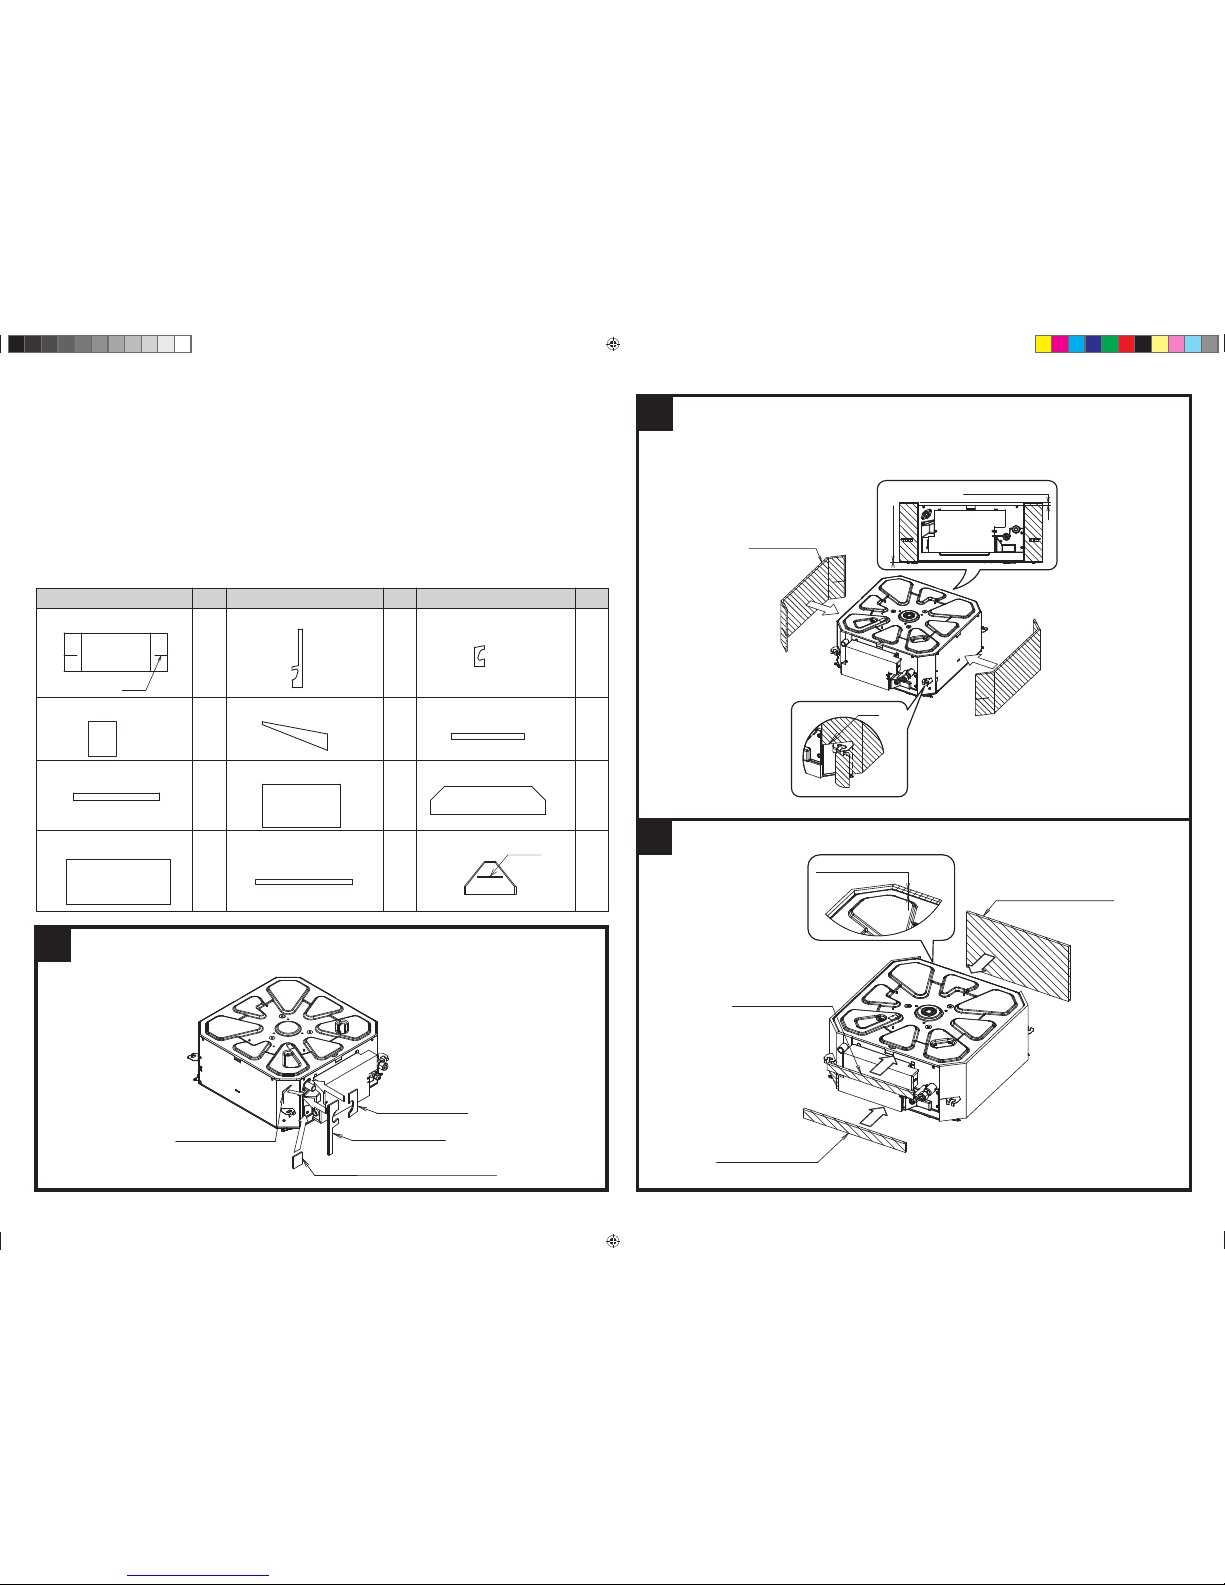
Attach the Ins cabinet B,C onto the outside of indoor unit.
Attach the Ins cabinet D,E onto the wire cover.
Attach the Ins cabinet F,G,H onto the outside of indoor unit.
INSTALLATION MANUAL
1
3
2
UTZ-KXGC
●Before installation, be sure to read this Installation manual and follow its instructions.
●Be sure to read and use together with the Installation manual of main units included with indoor units.
●To guarantee the safety of operation, when attaching the Insulation or installing the Decoration panel or connecting the connector, be
sure to cut off the power supply.
Align the slits of Ins cabinet A to the reated hooks, and then attach onto the outside of the indoor unit.
At this time, make sure, that there is no gap among the surrounding heat insulator.
10 mm (13/32 in.)
Ins cabinet H
440 x 245 mm
(17-5/16 x 9-21/32 in.)
Ins cabinet F
370 x 29 mm
(14-9/16 x 1-5/32 in.)
Ins cabinet G
440 x 38 mm
(17-5/16 x 1-1/2 in.)
Ins cabinet H (440 x 245 mm
(17-5/16 x 9-21/32 in.))
Ins cabinet C
Ins cabinet F (370 x 29 mm
(14-9/16 x 1-5/32 in.))
1
1
1
Ins cabinet A
Ins cabinet D (58 x 47 mm
(2-9/32 x 1-27/32 in.))
Ins cabinet G (440 x 38 mm
(17-5/16 x 1-1/2 in.))
Ins cabinet B
Ins cabinet E
2
1
1
1
1
Ins top plate A
Ins panel (497 x 25 mm
(19-9/16 x 31/32 in.))
Ins top plate B (590 x 200 mm
(23-7/32 x 7-7/8 in.))
Ins hook
2
41 4
Name and Shape Name and Shape
Name and Shape
Q'ty Q'ty Q'ty
Slit
Slit
Ins cabinet E
Ins cabinet B
Ins cabinet C
Ins cabinet D
58 x 47 mm (2-9/32 x 1-27/32 in.)
Ins cabinet A x2
Slit
4 places
10mm (13/32 in.)
Reference
9379022057-02_IM_EN.indd 19379022057-02_IM_EN.indd 1 11/22/2011 10:08:06 AM11/22/2011 10:08:06 AM
Page 2
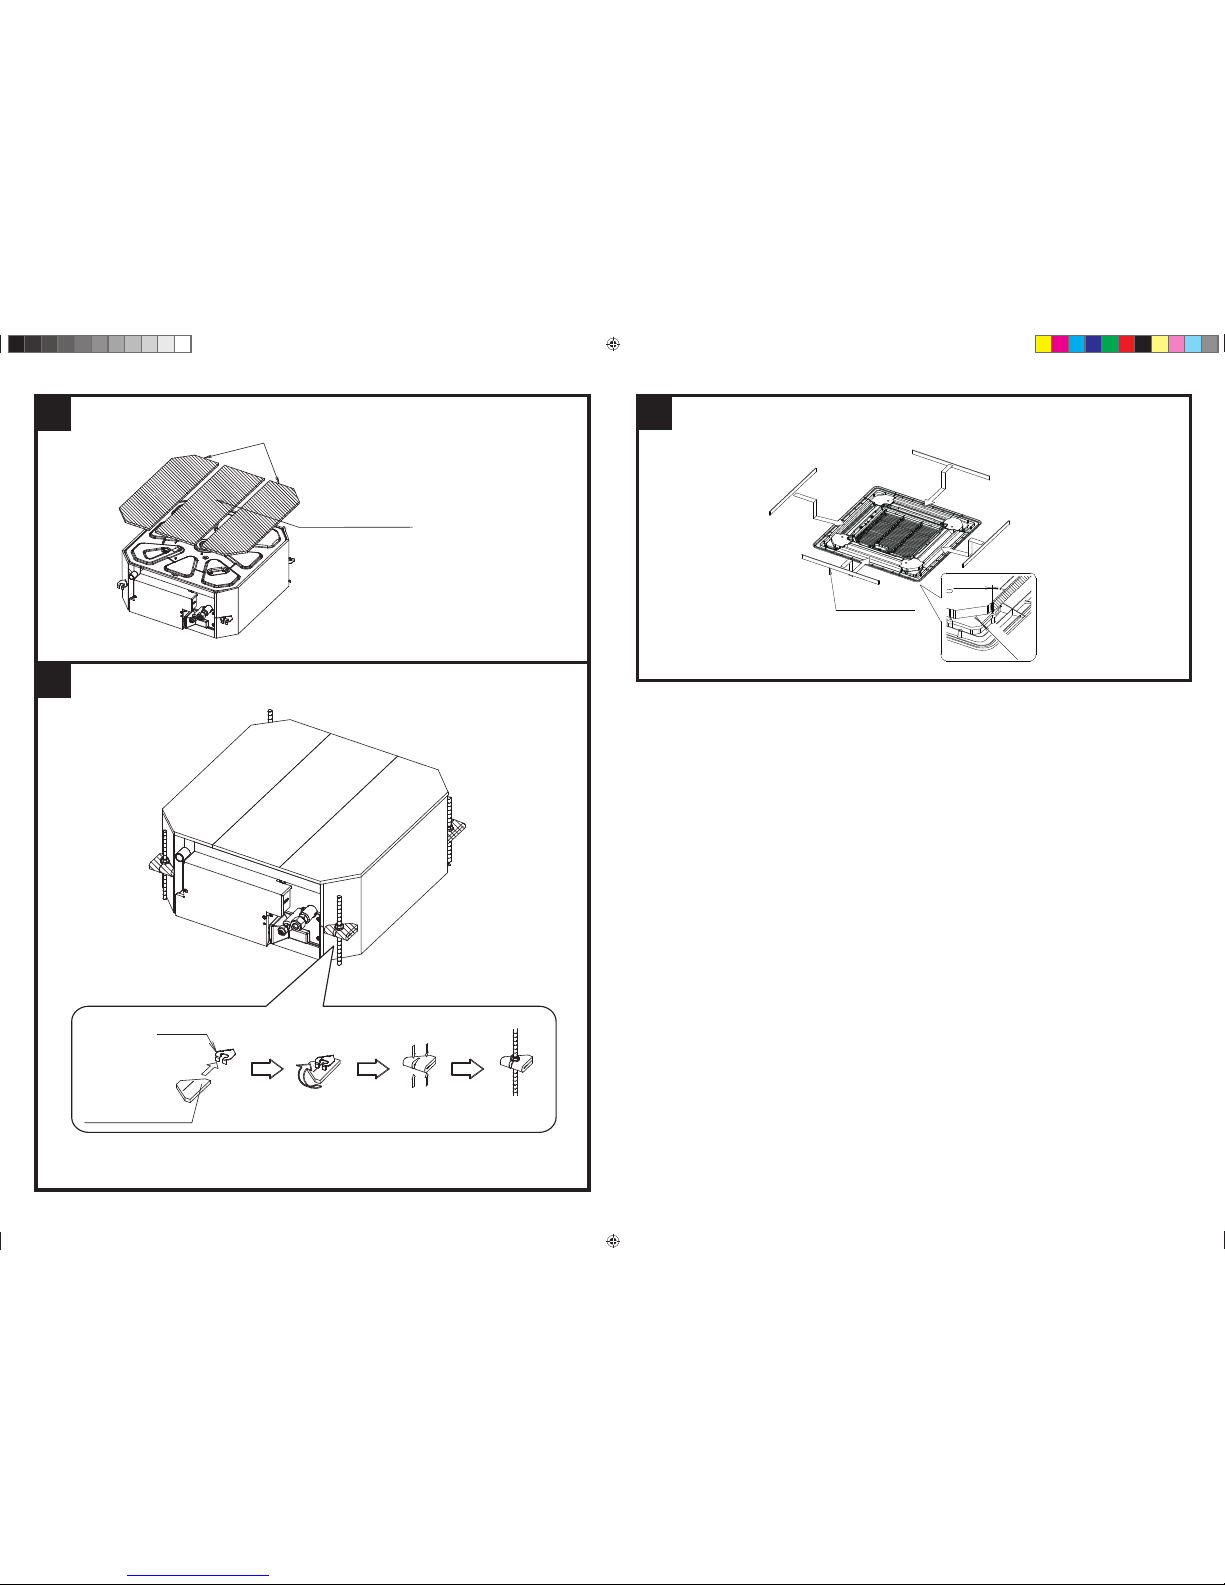
Attach the Ins top plate A,B without any gap onto Top plate.
After fi xing the indoor unit, attach the Ins hook onto hook (4 places).
5
4
Ins top plate A
Ins top plate B
590
x 200 mm
(23-7/32
x 7-7/8 in.)
Insert
Hook
Ins hook x 4
Push
Push
4 places
Attach the Ins panel onto the Decoration panel.
At this time, make sure, that there is no gap among the surrounding heat insulator.
6
Ins panel X 4
497 x 25 mm
(19-9/16 x 31/32 in.)
Reference
Reference
9379022057-02_IM_EN.indd 29379022057-02_IM_EN.indd 2 11/22/2011 10:08:41 AM11/22/2011 10:08:41 AM
 Loading...