

Page 1
ScanSnap S510M Quick Installation Guide
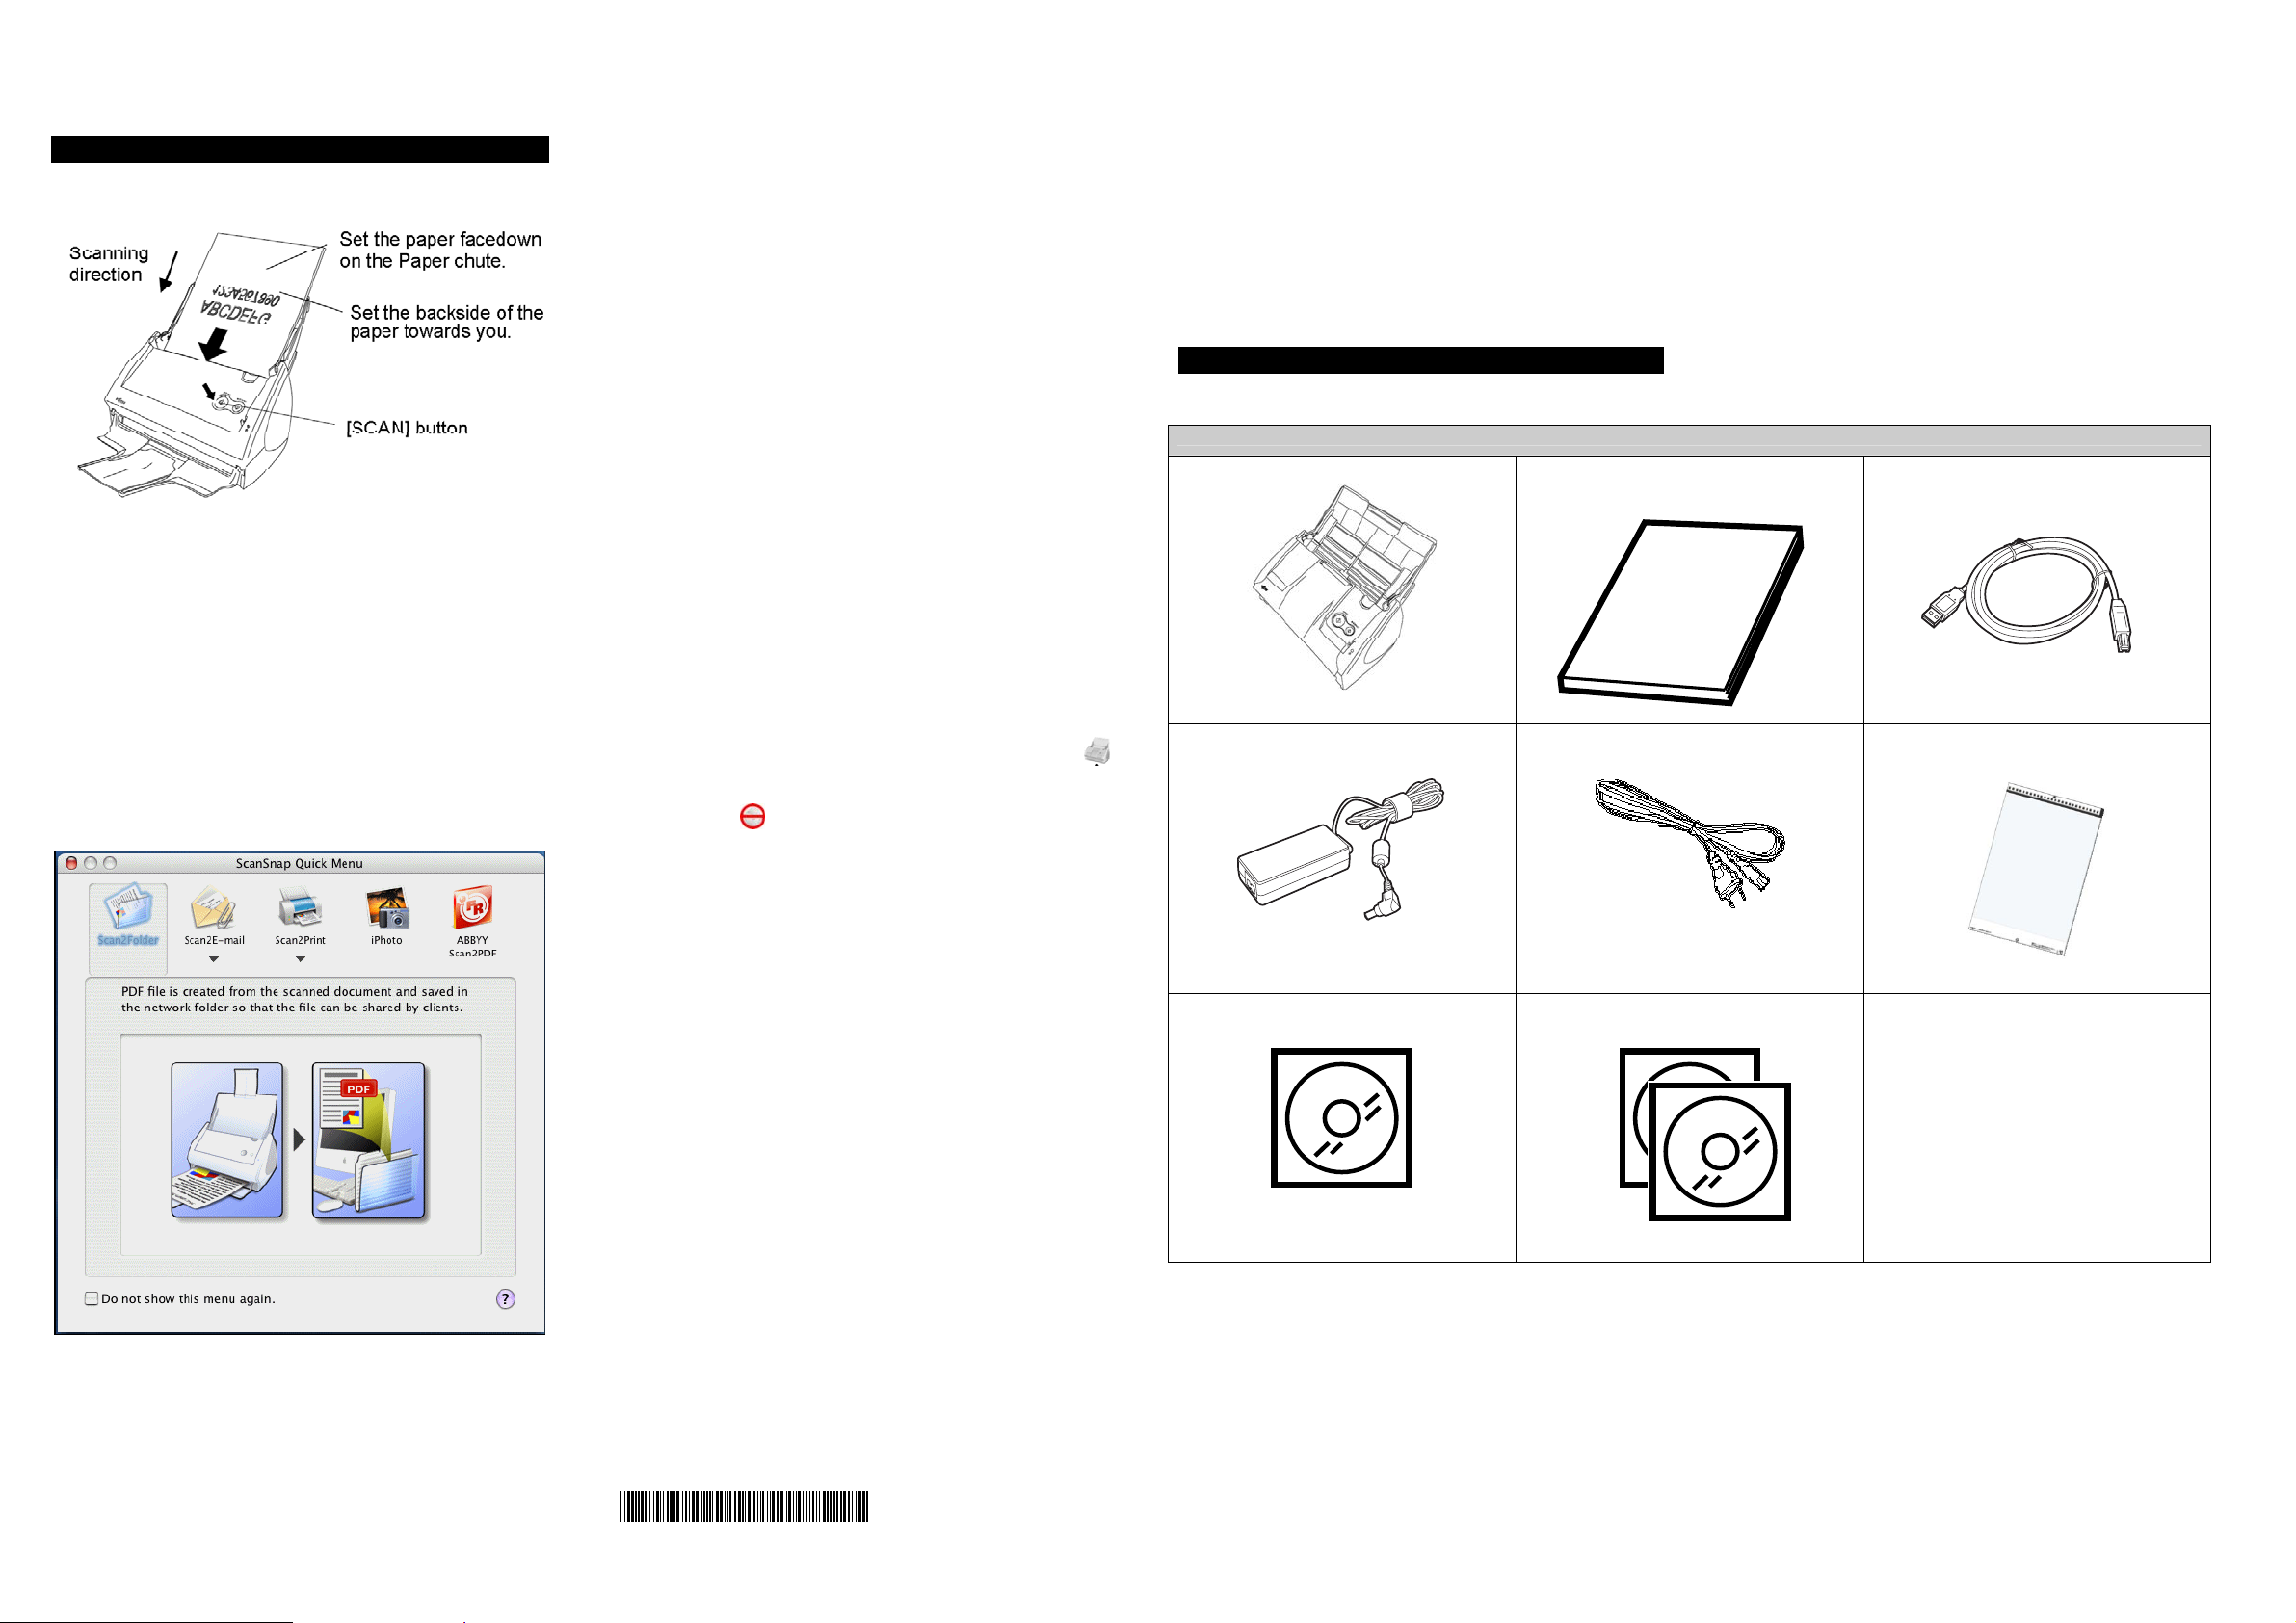
4. Scanning documents with ScanSnap
1. Load the documents onto the scanner.
2. Press the [SCAN] button.
Scanning starts.
When the scanning is completed, the ScanSnap
Quick Menu appears.
(Note: If ScanSnap Quick Menu does not appear Click and
hold down the mouse button over the ScanSnap Manager icon
in the Dock menu, and confirm that the "Use Quick Menu" is
checked. If it is unchecked, click "Use Quick Menu" to check
it.)
3. Select an action you want to perform in the Action
List.
Scan2Folder:
The scanned images are saved in the specified folder in
the network.
Scan2E-mail:
An e-mail program is started with the PDF files attached
to e-mail.
Scan2Print:
The scanned images are printed with a printer.
iPhoto:
The scanned images are saved in iPhoto.
ABBYY Scan2PDF:
The scanned images are processed by ABBYY
FineReader for ScanSnap to create searchable PDFs.
(This button is displayed when ABBYY FineReader for
ScanSnap is installed.)
An application corresponding the selected action starts up
to perform the selected action
Notes:
The ScanSnap scanner is able to scan various sizes of
documents and in different modes. Refer to the
“ScanSnap Operator’s Guide” (Manual.pdf) on the
ScanSnap Setup CD-ROM to learn more about scanning
documents.
• Install “ScanSnap Manager and Adobe Acrobat,
before connecting the scanner to Mac.
Do not use cables other than the ones supplied with
•
this product. Us e only the spe cifie d AC ca bles and AC
adapter.
Once the scanner software is loaded the "ScanSnap
Manager" icon will be present in the dock displayed as .
When the scanner power is of f or the scanner is asleep the
icon shows as . To restart the scanner open the cover or
press the [POWER] button on the scanner if the cover is
open.
FUJITSU COMPUTER PRODUCTS OF AMERICA, INC.
1255 East Arques A venue, Sunnyvale, CA 940 85-4701
Phone: (800) 626-4686 Or (408) 746-7000
Web site: http://us.fujitsu.com/fcpa
E-mail: info@fcpa.fujitsu.com
* P A 9 3 0 0 6 - Y 1 4 7 *
Please read this Installation Guide completely before installation. Please install software components
prior to installation of product hardware.
Detailed installation instructions are available in the Getting Started Guide
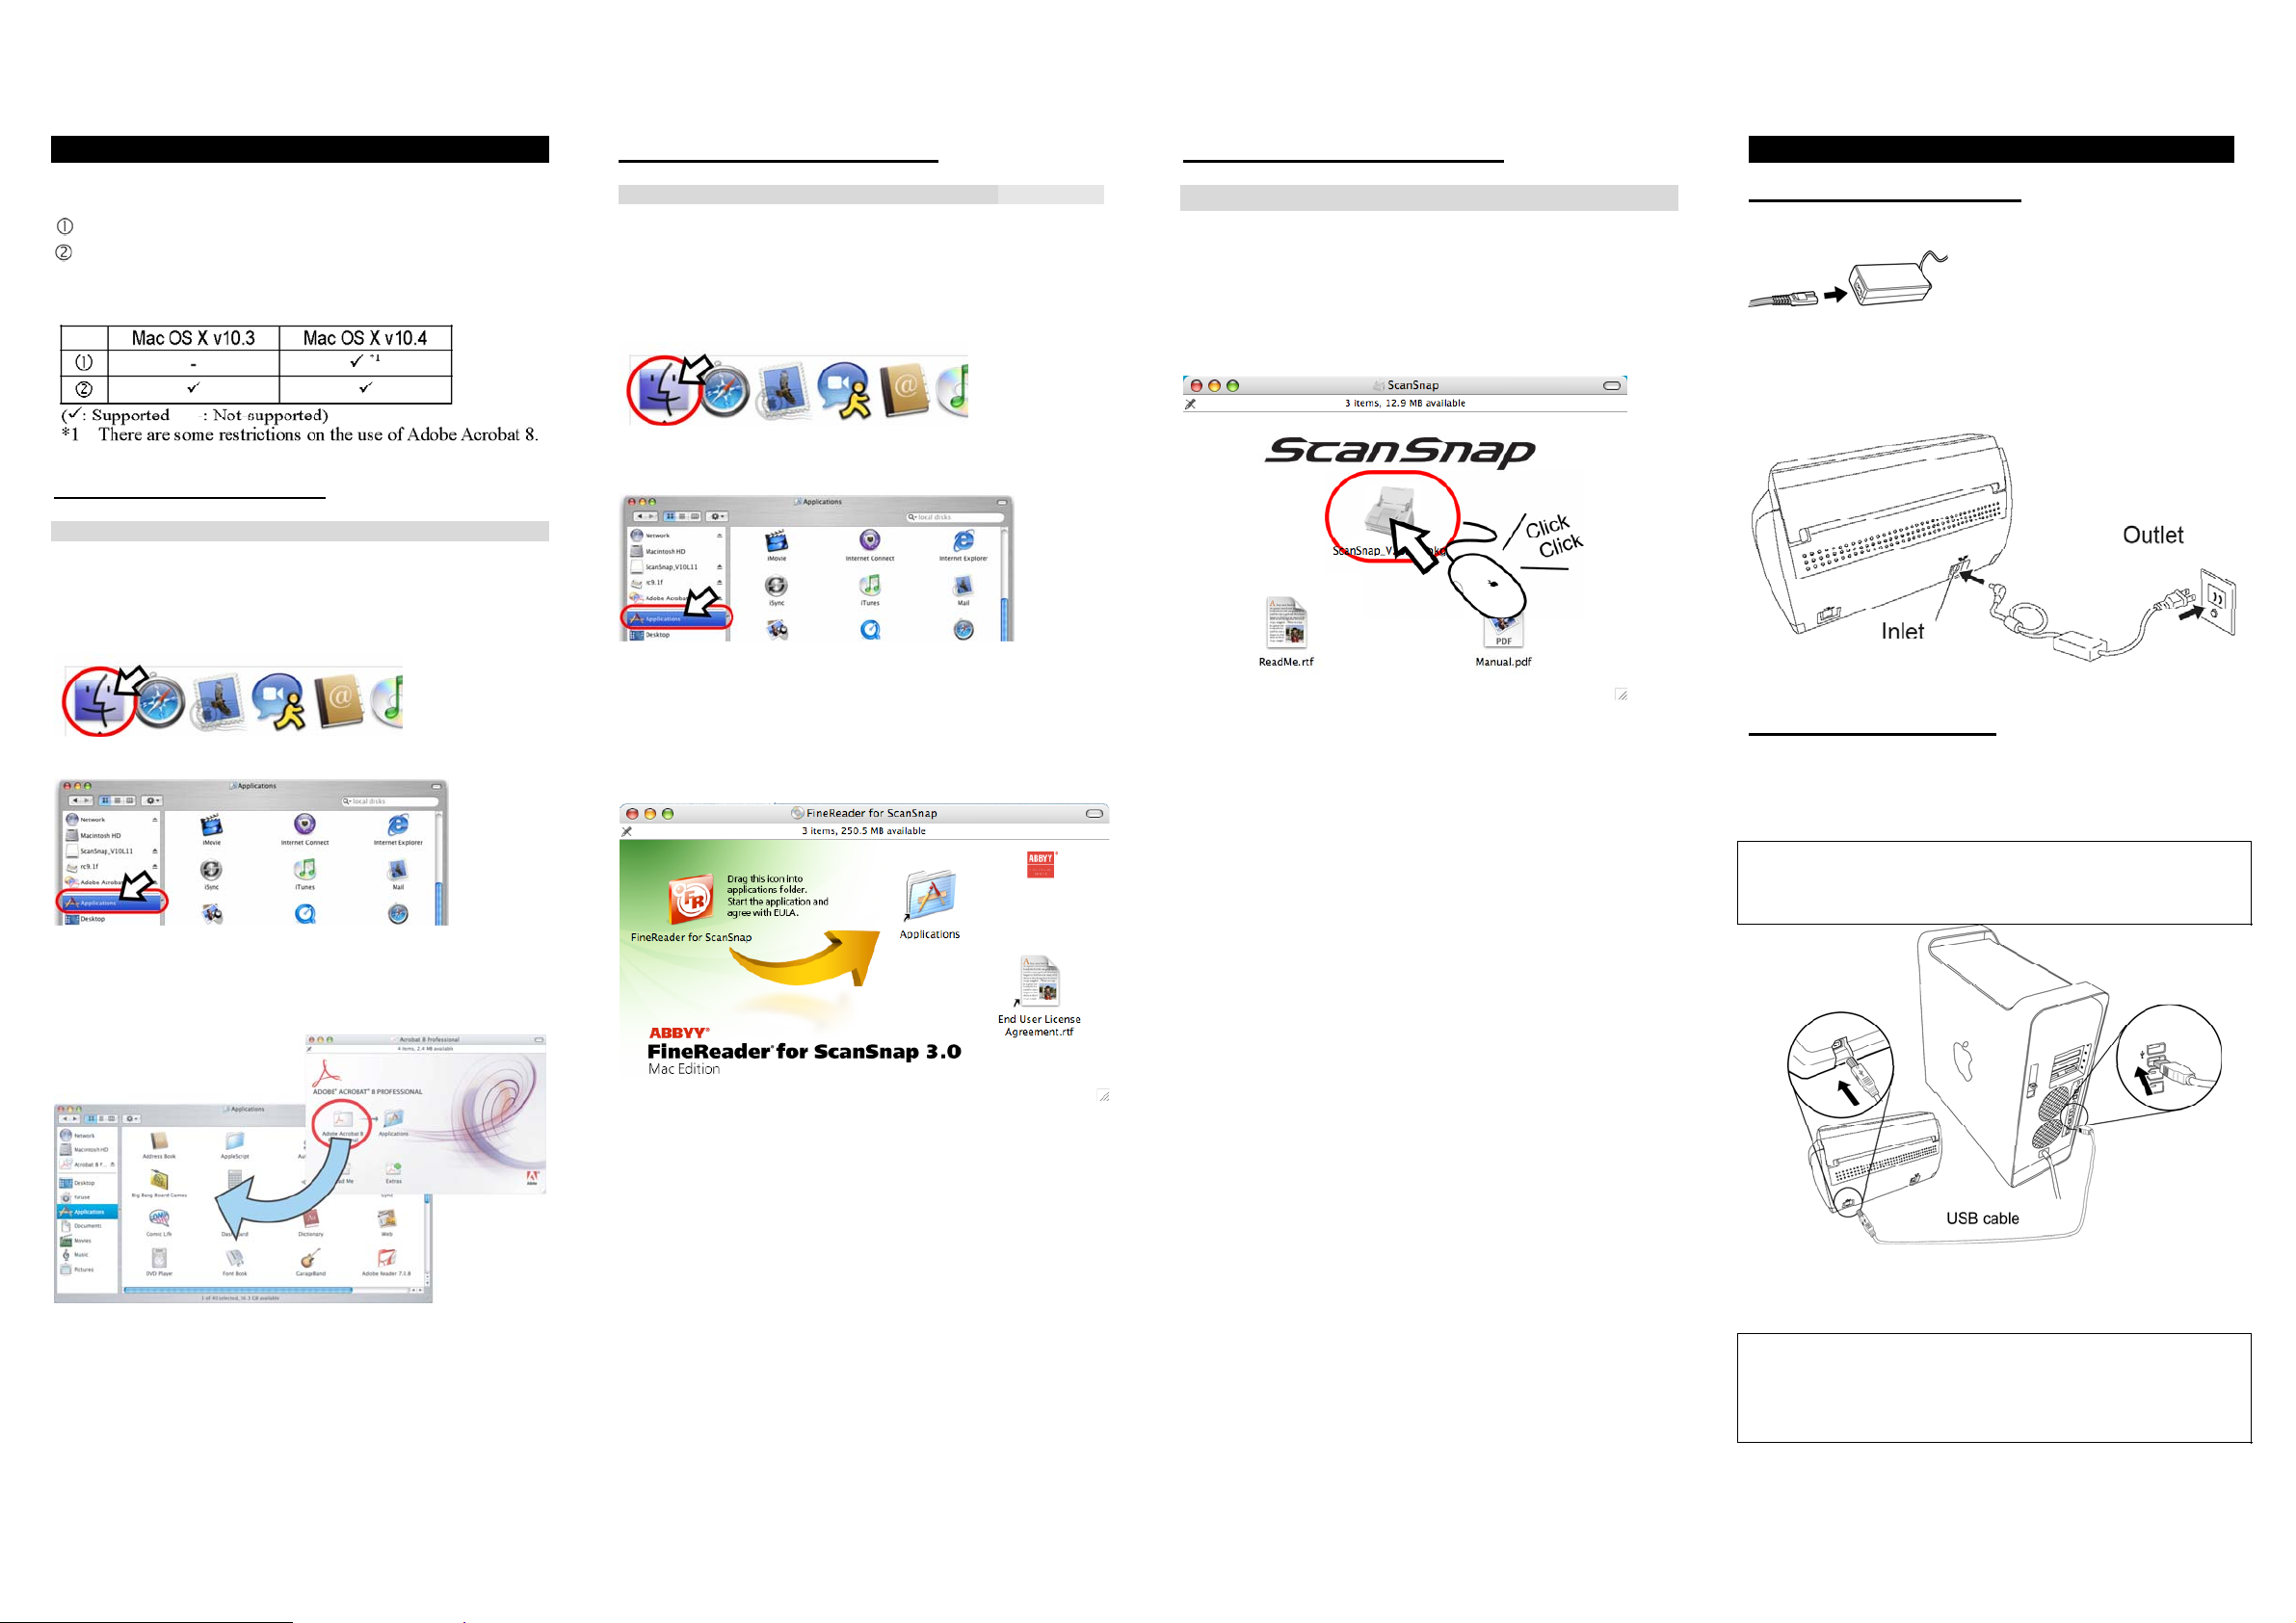
1. Check the contents of the Package
While unpacking the scanner, check for the following items.
Scanner and Accessories
Scanner
Getting Started
USB cable
AC adapter
AC cable
Carrier Sheet
ScanSnap Setup CD-ROM
ABBYY FineReader CD-ROM
Adobe Acrobat
DVD-ROM
Warranty Registration Card
Warranty Summary Card
For your records please note:
Model # ScanSnap S510M Part# PA03360-________________ Serial#_______________________
Acrobat Serial#______________ Date purchased_________________ Price_________________________
Page 2
2. Software Installation
Before connecting the scanner to your computer, please
install the following software on your PC.
Adobe Acrobat Pro (Application)
ScanSnap Manager (Driver)
The table below shows the OS support required by the
different components
Installing Adobe Acrobat
Please prepare the Adobe Acrobat Setup DVD-ROM.
1. Insert the “Adobe Acrobat 8 Professional” into the
DVD-ROM drive. The Adobe Acrobat window appears.
2. Click the Finder icon in the Dock menu
3. Select the [Applications] folder at Finder.
4. Select the icon pointed to by the arrow and drag the
[Adobe Acrobat 8 Professional] folder to the
[Applications] folder where the software will be
installed.
Installing ABBYY FineReader
Please prepare the ABBYY FineReader CD-ROM.
1. Insert the “ABBYY FineReader CD-ROM” into the
CD-ROM drive. The ABBYY FineReader window
appears.
2. Click the Finder icon in the Dock menu
Installing ScanSnap Manager
Please prepare the ScanSnap Setup CD-ROM.
1. Insert the “ScanSnap Setup CD-ROM” into the
CD-ROM drive. The “ScanSnap” window appears.
Click the Finder icon in the Dock menu
2. Double-click the ScanSnap icon.
3. Connecting the Scanner
Connecting the AC cable
1. Connect the AC cable to the AC adapter.
2. Insert the connectors of the AC adapter to the scanner
inlet and power outlet.
3. Select the [Applications] folder at Finder.
4. Select the icon pointed to by the arrow and drag the
[FineReader for ScanSnap] folder to the
[Applications] folder where the software will be
installed.
The installation of ScanSnap Manager starts up, and the
“Welcome to the ScanSnap Manager Installer” window
appears.
3. Follow the instructions to install the software.
4. Refer to the “ScanSnap Operator’s Guide”
(Manual.pdf) on the ScanSnap Setup CD-ROM to
learn more about ScanSnap Manager.
Connecting USB cable
1. Remove the seal from the USB connector.
2. Connect the scanner to your computer with the USB
cable.
3. Open the Paper chute cover of scanner.
ATTENTION:
If the scanner does not automatically turn on, press the [POWER] button on the
scanner.
5. After finishing copying, eject DVD-ROM, open
[Adobe Acrobat 8 Professional] folder and, double-click
Acrobat application and follow the instructions.
5. After finishing copying, eject CD-ROM,
Open the [FineReader for ScanSnap] folder and
double-click the FineReader for ScanSnap application
and follow the instructions.
4. The scanner will be detected automatically.
5. The inst allation of your ScanSnap is complete!
ATTENTION:
When connecting to a USB hub, be sure to connect the scanner to the hub n earest
to your computer (first stage). If you connect to a USB hub, which is daisy-chained
to a second USB Hub (second stage), the ScanSnap may not operate correctly.
 Loading...