

FujiFilm BIG VIEWFINDER DATE 35, BIG VIEWFINDER AUTO 35, CLEAR SHOT 20 DATE, CLEAR SHOT 20 AUTO Owner's Manual

OWNER,S MANUAL
ENGLISH

2
PART NAMES ........................................................................... 3
1. FIRST STEPS
ATTACHING THE STRAP ........................................................ 6
LOADING THE BATTERIES .................................................... 7
TURNING ON YOUR CAMERA ............................................... 9
SETTING THE DATE
(YEAR-MONTH-DAY/HOUR-MINUTE)
(for BIG VIEWFINDER DATE 35/CLEAR SHOT 20 DATE only) ..
10
SELECTING THE DATE MODE
(for BIG VIEWFINDER DATE 35/CLEAR SHOT 20 DATE only)
.. 12
2. USING YOUR CAMERA
LOADING THE CAMERA ....................................................... 13
USING YOUR FINDER ........................................................... 18
USING YOUR CAMERA ......................................................... 19
UNLOADING THE FILM OR REMOVING FILM IN MID-ROLL .......
24
TROUBLE SHOOTING ........................................................... 26
COMMON SENSE CAMERA CARE ...................................... 28
SPECIFICATIONS .................................................................. 29
YOUR NEW FUJIFILM CAMERA
Welcome to the world of FUJIFILM photograph y . Your new FUJIFILM
BIG VIEWFINDER DATE 35/BIG VIEWFINDER AUTO 35/CLEAR
SHOT 20 DATE/CLEAR SHOT 20 AUTO will open a new world of
photographic fun as you take pictures to record memorable events
or to express yourself. Some of the features which make taking
successful pictures easier than ever include:
• Autofocus – To assure sharp, clear pictures
• A utomatic Flash – To provide lighting at any time for bright, well-
exposed pictures
• Easy Film Loading – F ool-proof operation to minimiz e handling
mistakes
• Auto Film Advance – Permits you to concentrate on your sub-
ject, not on camera handling
• Date/Time Imprinting – For a timely, permanent record to add
value to your pictures (for BIG VIEWFINDER DATE 35/CLEAR
SHOT 20 DATE only)
• Bright, Clear Viewfinder – Gives you a clear view of what your
camera sees
• Red Eye Reduction – For better pictures of people
CONTENTS
The “CE” mark certifies that this product satisfies the
requirements of the EU (European Union) regarding
safety, public health, environment and consumer
protection.(“CE” is the abbreviation of Conformité
Européenne.)
This product is in conformity with Directive 89/336/EEC.
3
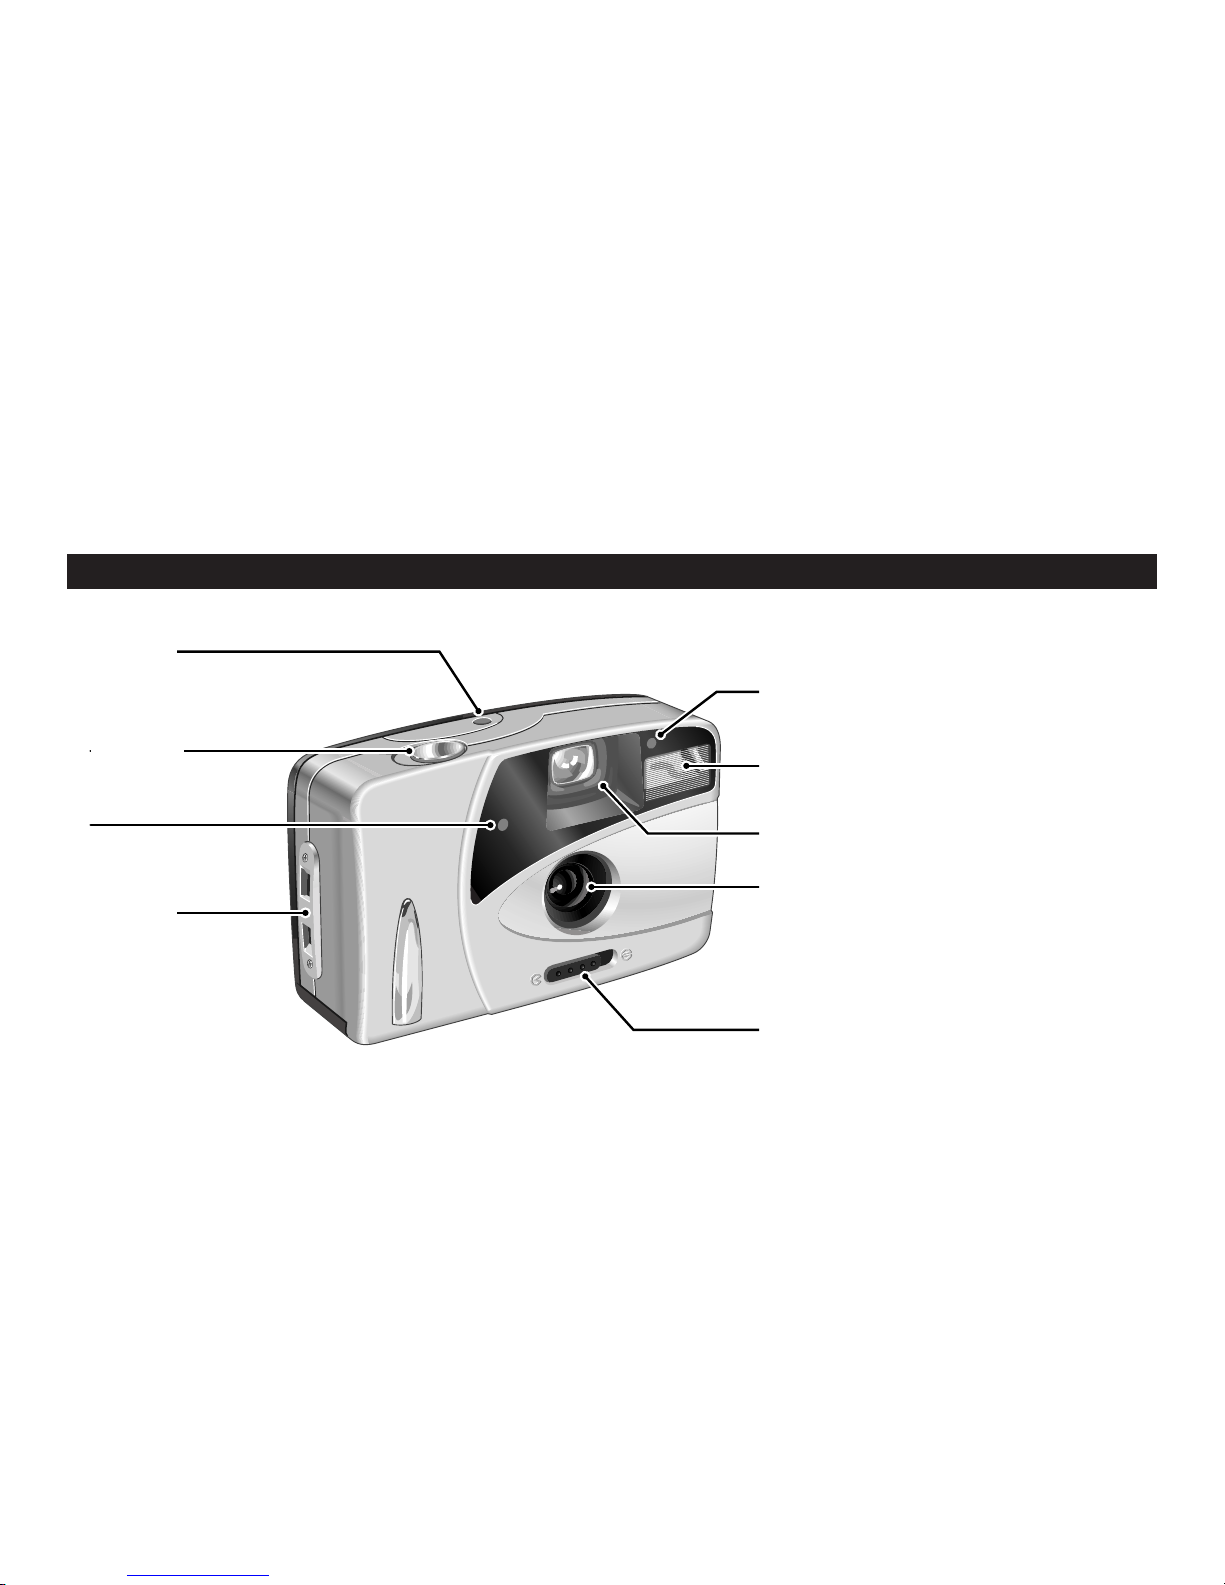
1 Exposure Counter
2 Shutter Release Button
3 AE Light Sensor
4 Strap Lug
5 Red-eye Reduction Lamp
6 Flash
7 Viewfinder Window
8 Fujinon Lens/ Lens Cover
9 Lens Cover Tab
PART NAMES
4 (→p.6)
2 (→p.21)
1 (→p.17)
3
8
(→p.9)
5 (→p.21)
9 (→p.9)
6 (→p.22)
7
4
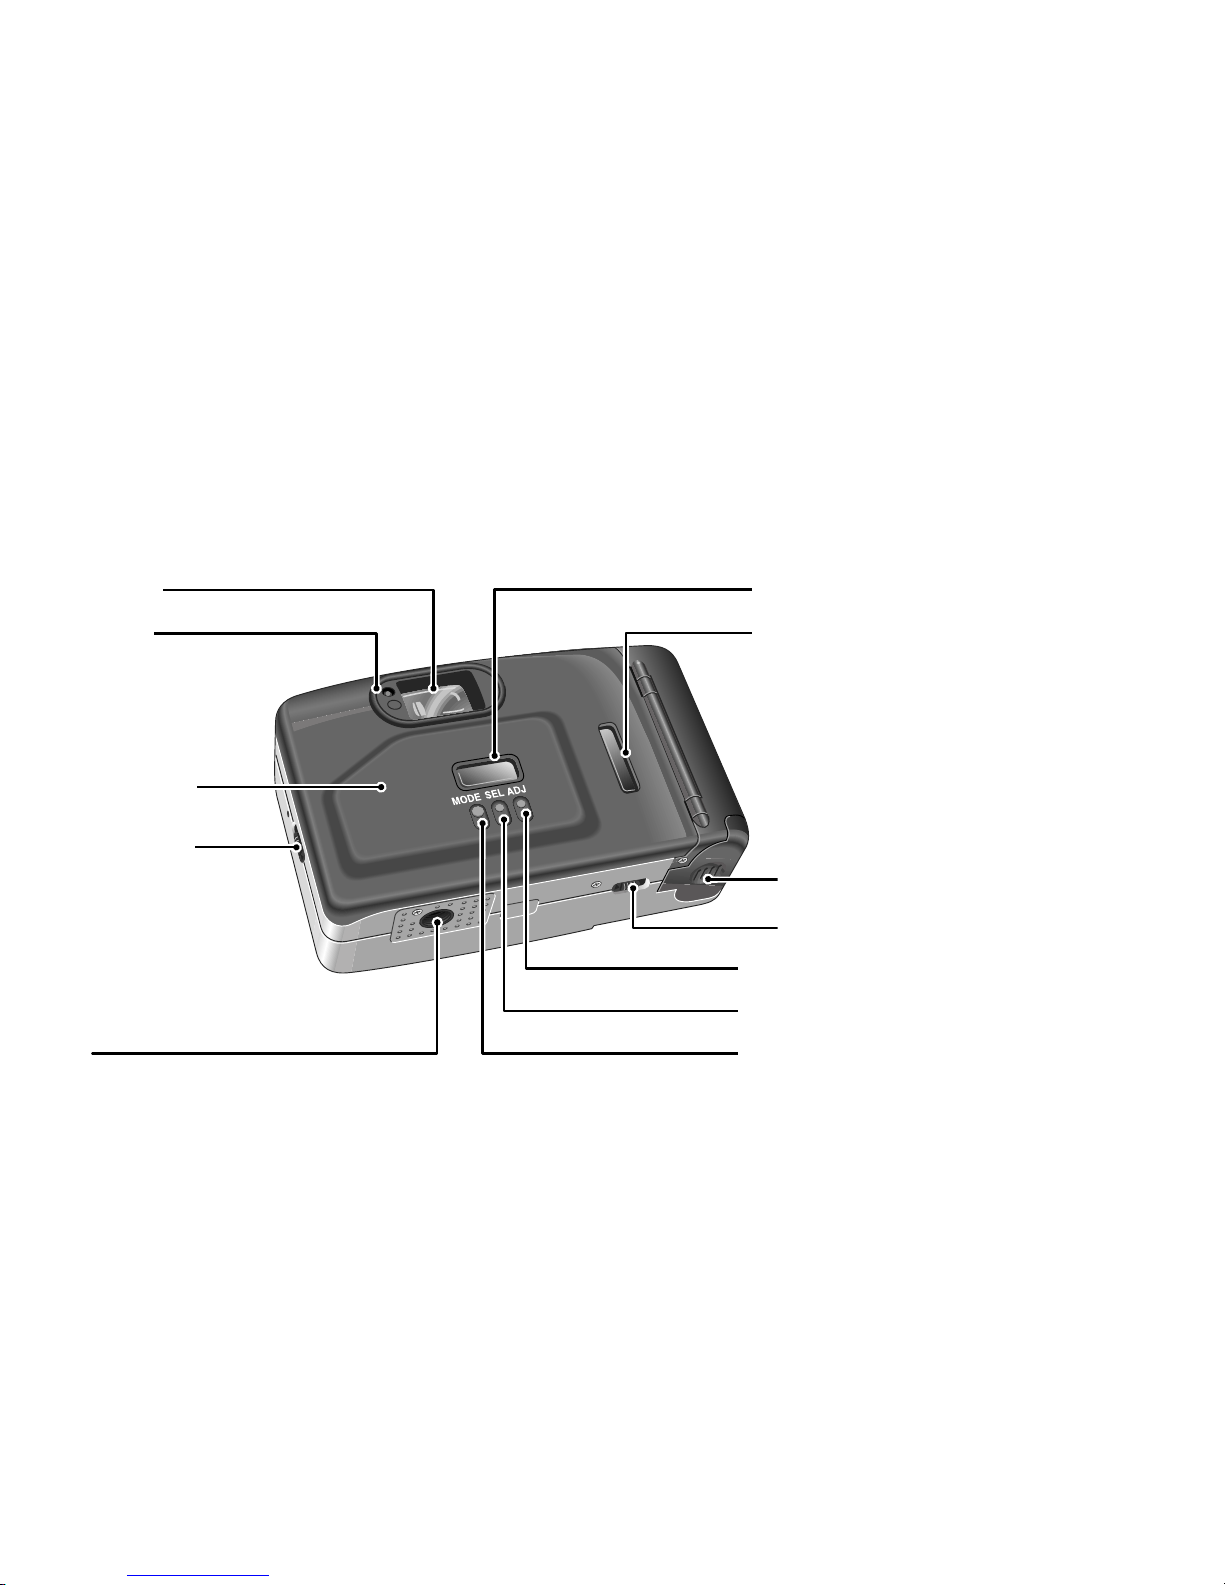
0 Viewfinder Eye-piece
A Flash Ready Lamp
B Camera Back
C Camera Back Lock
D Tripod Socket
E Date Display
∗
F Film Confirmation Window
G Mid-Roll Rewind Switch
H Battery Compartment
Cover
I ADJ Button
∗
J SEL Button
∗
K MODE Button
∗
∗: for BIG VIEWFINDER
DATE 35/CLEAR SHOT
20 DATE only
D
0
(→p.18)
K (→p.10, 12)
J (→p.10)
I (→p.11)
H (→p.7)
E
(→p.10, 12)
F
(→p.14)
G
(→p.24)
A
(→p.9)
B
(→p.14, 25)
C
(→p.14, 25)

5
L Month Display
M Date/Time Imprinting
N Date Display
Liquid Crystal Display
(for BIG VIEWFINDER DATE 35/CLEAR SHOT 20 DATE only)
N (→p.10, 12)
M (→p.12)
L (→p.10, 12)
6
1.
FIRST STEPS
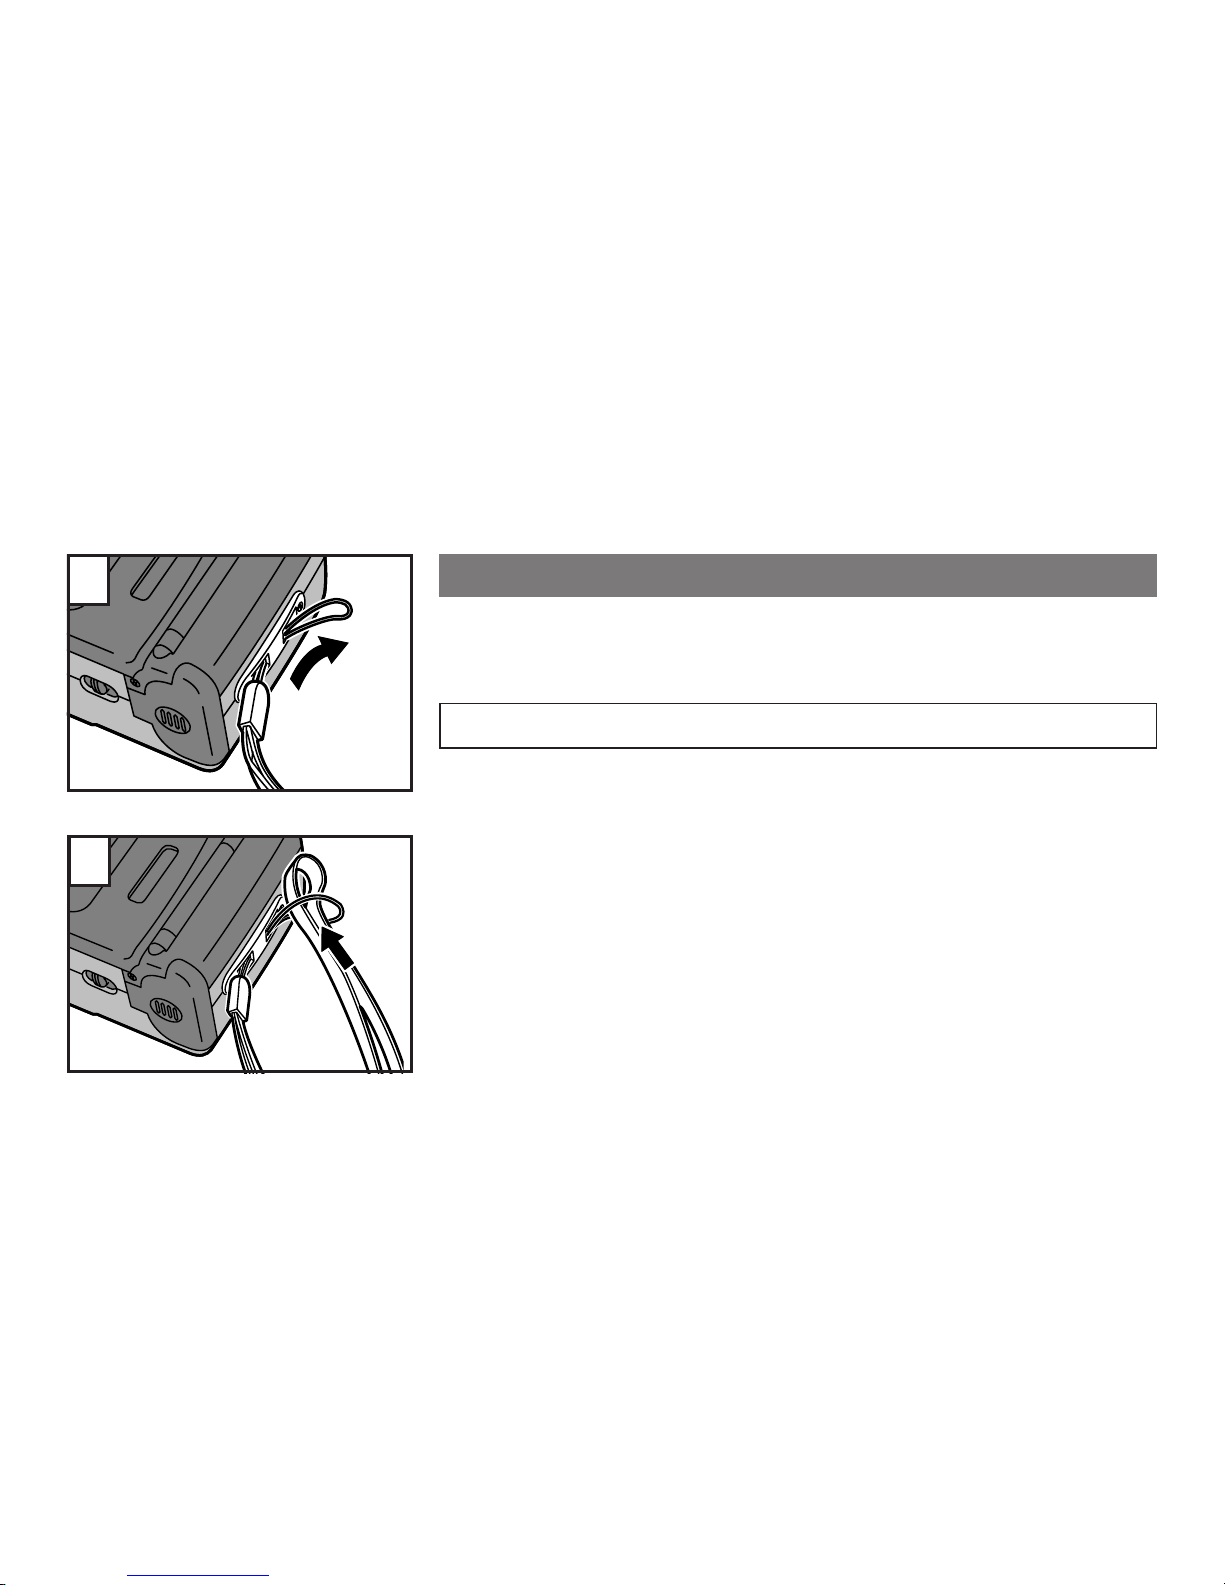
A TT ACHING THE STRAP
Slip the thin cord on the carrying strap through the strap lug on the side of the
camera leaving a loop. Slide the thick part of the strap through this loop and pull
tight. Take up any slack to make sure the strap is securely attached to the camera.
Do not use a strap made for cellular phones or similar electronic products. These straps are
usually too light to hold your camera securely. Use straps designed for cameras for safety.
1
2
7
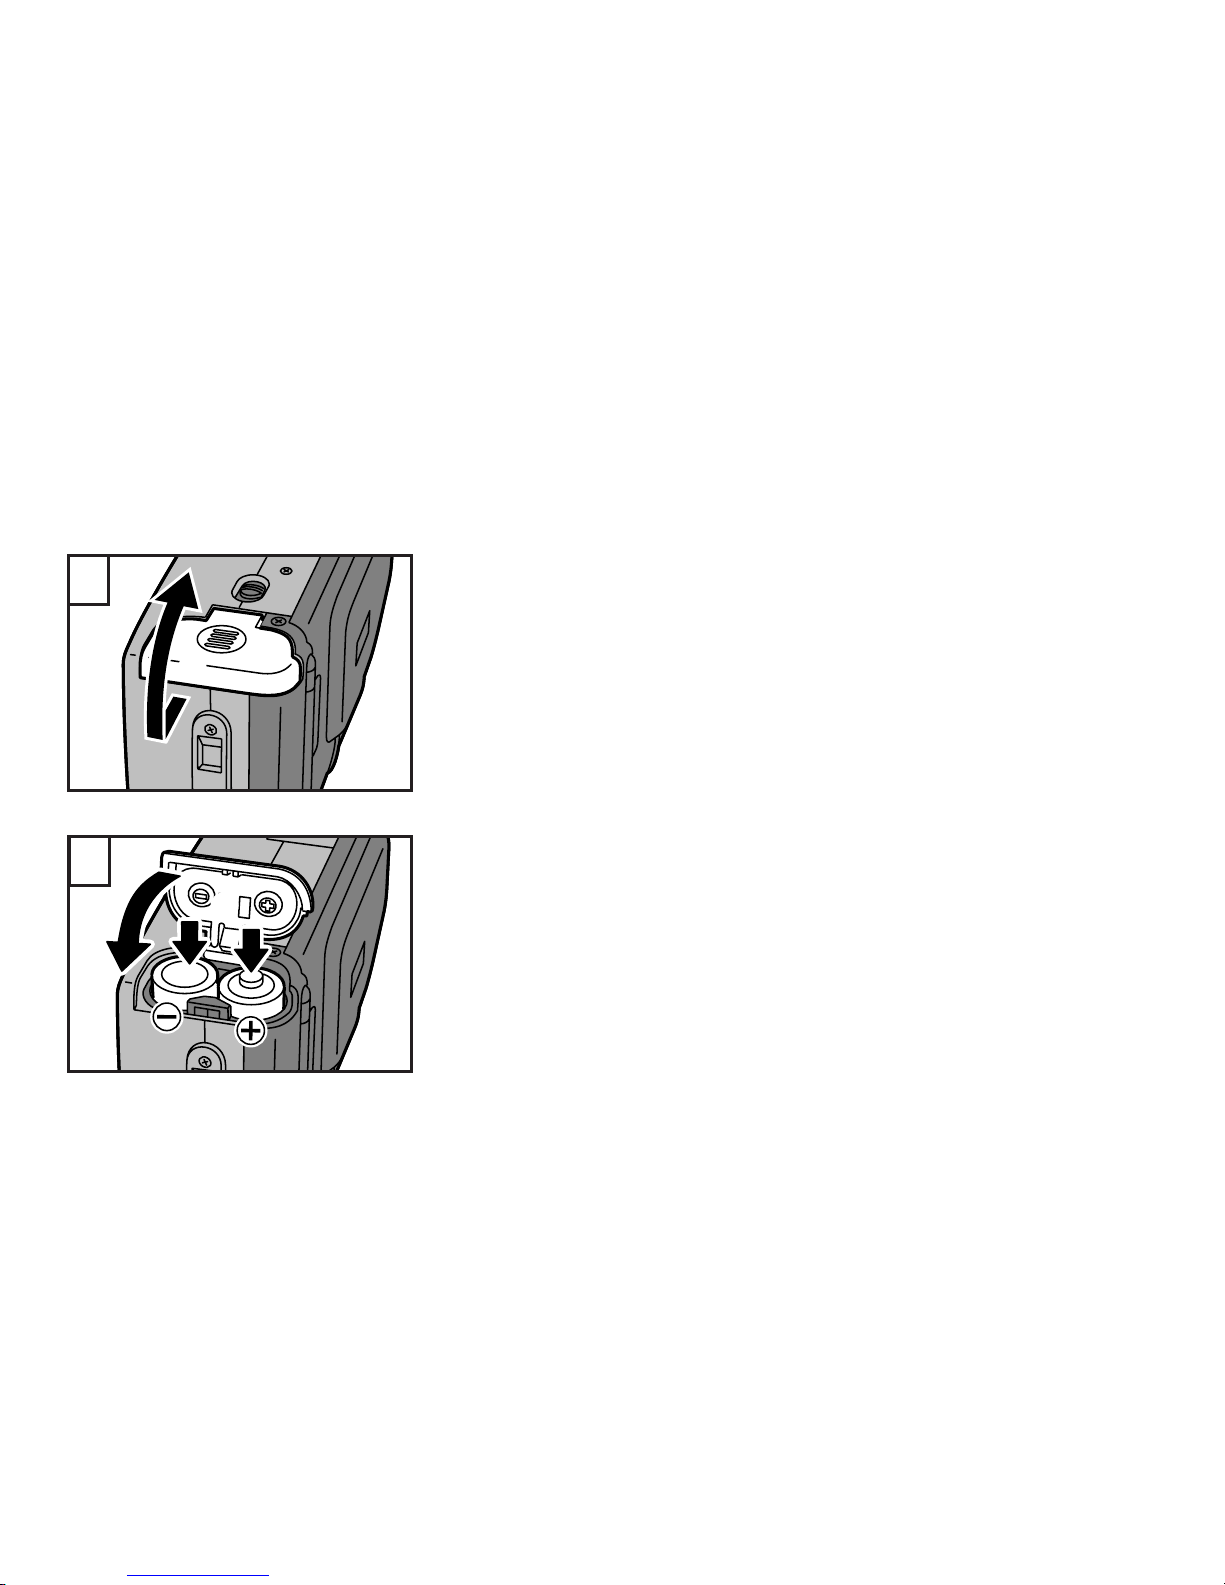
LOADING THE BA TTERIES
Make sure you have the correct batteries for your camera. The BIG VIEWFINDER
DATE 35/BIG VIEWFINDER AUTO 35/CLEAR SHOT 20 DATE/CLEAR SHOT 20 AUTO
uses two alkaline batteries (size AA/LR6) for reliable service. Do not use other types
of batteries.
To load batteries ...
Open the battery compartment cover by pressing against the finger rest and sliding
the cover in the direction of the arrow.
1 Insert the batteries following the instructions in the diagram on the inside of the
battery cover. It is important to pay attention to the position of the , and - poles
of the batteries. If the batteries are not inserted correctly, the camera will not
operate.
2 Once the batteries are correctly inser ted, close the batter y compar tment cover
by snapping it into place. When the cover is closed properly, it fits flush against
the bottom of the camera.
1
2
1
2

8
∗
Do not apply excessive force when opening the battery cover.
∗
Make sure that the new batteries are both the same brand and type.
∗
Do not use Ni-Cd batteries.
∗
Two alkaline batteries should be sufficient for approximately 600 exposures (based on our test
conditions).
∗
When traveling, tak e extra batteries to provide po wer for e xtra e xposures, particularly important
if you visit areas where fresh batteries may be difficult to obtain.
∗
At low temperatures, battery capacity is reduced. W arm the batteries, e.g. in y our pocket, bef ore
using them.
∗
After changing batteries, reset the date to assure accurate date/time recording. (f or BIG VIEWFINDER DATE 35/CLEAR SHOT 20 DATE only →p.10)
∗
Do not load film before inserting the batteries into the camera.
9
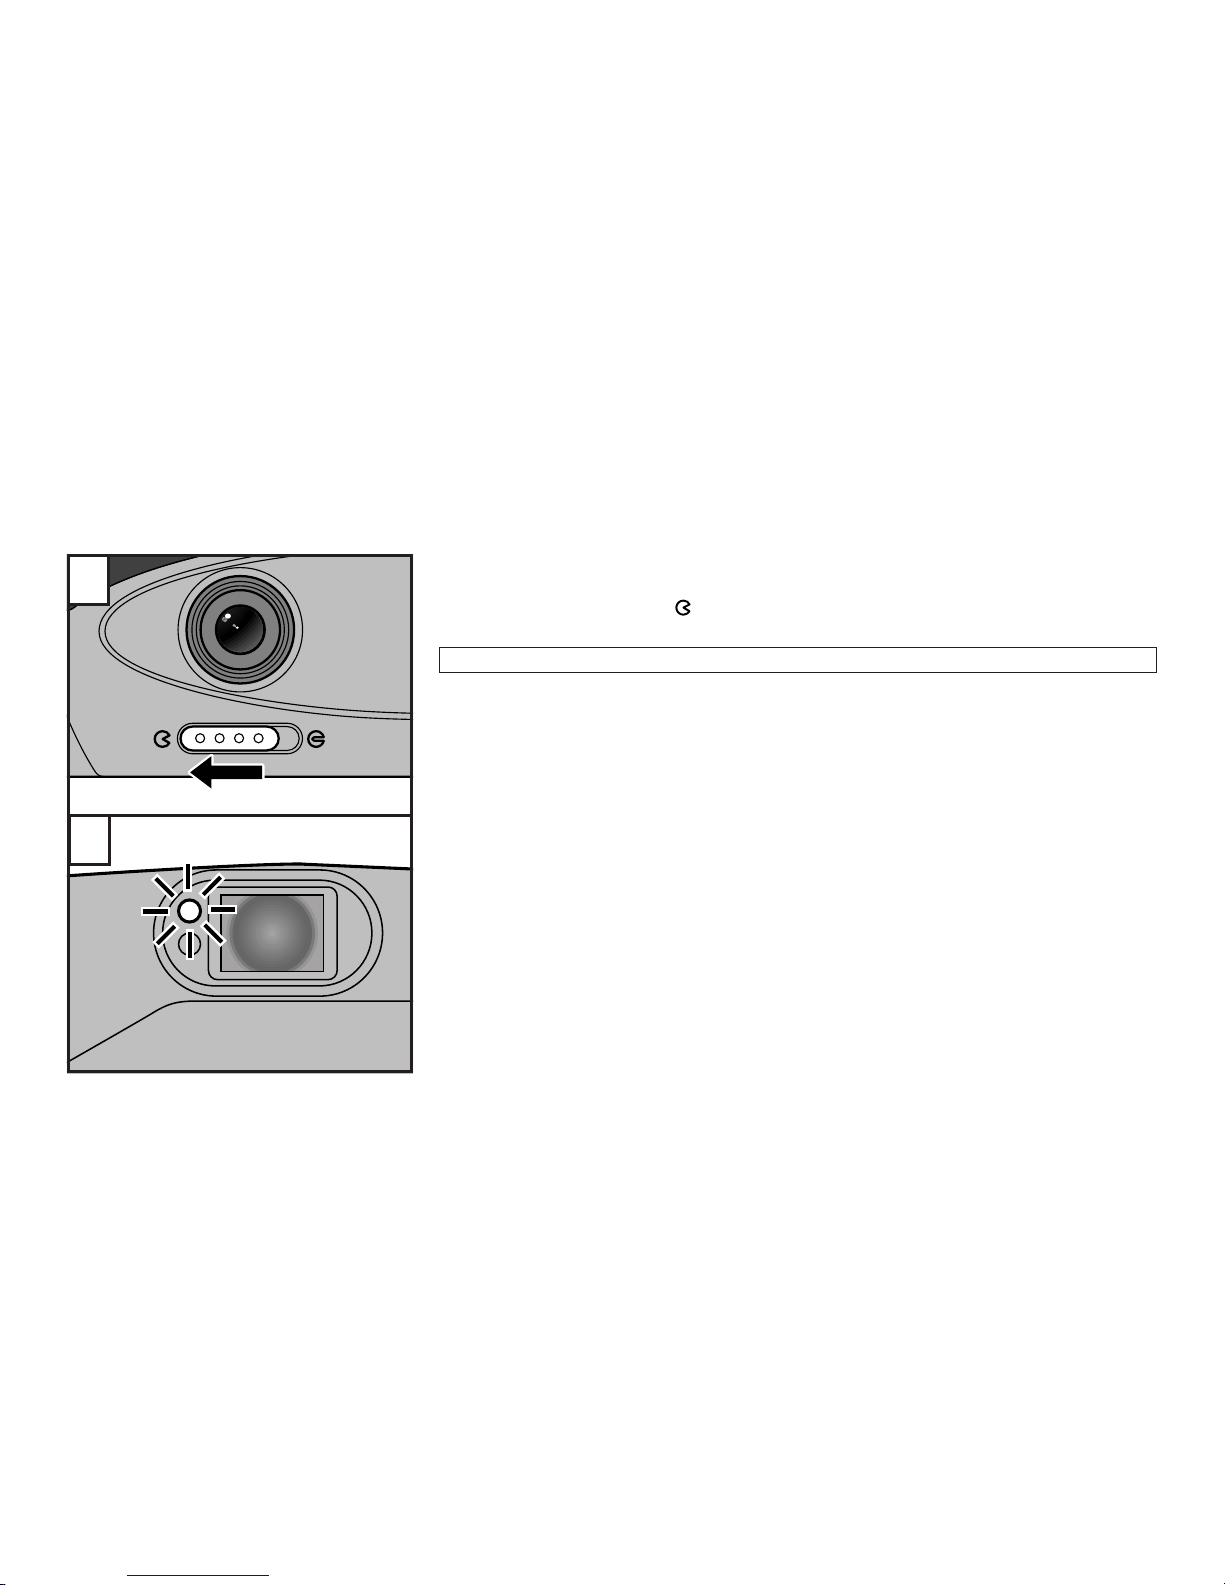
TURNING ON YOUR CAMERA
Before you can starting taking pictures, you must turn on your camera. To do this,
slide the lens cover in the “ ” direction so that the lens is uncovered.
☞When the camera is turned on the flash ready lamp will light up.
When turning the camera on, do not touch the lens area.
● Flash ready lamp
∗
The flash ready lamp will light up once the flash has been recharged.
∗
If it takes longer than 20 seconds for the flash ready lamp to light up, replace the batteries.
∗
If you leave the camera alone for about 1-3 minutes, the flash ready lamp will turn off.
• Nevertheless, since the flash has been recharged you can still take a picture.
• If you press the shutter release button halfway, the flash ready lamp will light up again. You
can then confirm that the flash has been recharged.
1
2
 Loading...