

iiiiiiiiiiiiiiiiiiiiiiiiiiiiiiiiiiiiiiiiiiiiiiiiiiiiiiiiii
iiiiiiiiiiiiiiiiiiiiiiiiiiiiiiiiiiiiiiiiiiiiiiiiiiiiiiiiii
""" iiiiiiiiiiiiiiiiiiiiiiiiiiiiiiiiiiiiiiiiiiiiiiiiiiiiiiiiii
e= iiiiiiiiiiiiiiiiiiiiiiiiiiii
iiiiiiiiiiiiiiiiiiiiiiiiiiii
iiiiiiiiiiiiiiiiiiiiiiiiiiii
FRIEDRICH
e=iiiiiiiiiiiiiiiiiiiiiiiii
iiiiiiiiiiiiiiiiiiiiiiiiiiiiiiiiiiiiiiiiiiiiiiiiiiiiiiiiii
iiiiiiiiiiiiiiiiiiiiiiiiiiiiiiiiiiiiiiiiiiiiiiiiiiiiiiiiii
iiiiiiiiiiiiiiiiiiiiiiiiiiii
o iiiiiiiiiiiiiiiiiiiiiiiii
• "" iiiiiiiiiiiiiiiiiiiiiiiiiiiiiiiiiiiiiiiiiiiiiiiiiiiiiiiiii
-I1=1 iiiiiiiiiiiiiiiiiiiiiiiiiiiiiiiiiiiiiiiiiiiiiiiiiiiiiiiiii
iiiiiiiiiiiiiiiiiiiiiiiiiiiiiiiiiiiiiiiiiiiiiiiiiiiiiiiiii
_- iiiiiiiiiiiiiiiiiiiiiiiiiiiiiiiiiiiiiiiiiiiiiiiiiiiiiiiiii
iiiiiiiiiiiiiiiiiiiiiiiiiiii
l:_-iiiiiiiiiiiiiiiiiiiiiiiiiiiiiiiiiiiiiiiiiiiiiiiiiiiiiiiiii
oiiiiiiiiiiiiiiiiiiiiiiiiiiiii
"o iiiiiiiiiiiiiiiiiiiiiiiiiiii
iiiiiiiiiiiiiiiiiiiiiiiiiiii
o=iiiiiiiiiiiiiiiiiiiiiiiii
"--"- iiiiiiiiiiiiiiiiiiiiiiiiiiiiiiiiiiiiiiiiiiiiiiiiiiiiiiiiiiiiiii
"'" iiiiiiiiiiiiiiiiiiiiiiiiiiiiiiiiiiiiiiiiiiiiiiiiiiiiiiiiiiiiiii
1!_ iiiiiiiiiiiiiiiiiiiiiiiiiiiiiiiiiiiiiiiiiiiiiiiiiiiiiiiiiiiiiii
iiiiiiiiiiiiiiiiiiiiiiiiiiiiiiiiiiiiiiiiiiiiiiiiiiiiiiiiiiiiii_
l/) iiiiiiiiiiiiiiiiiiiiiiiiiiiiiiiiiiiiiiiiiiiiiiiiiiiiiiiiiiiiii_
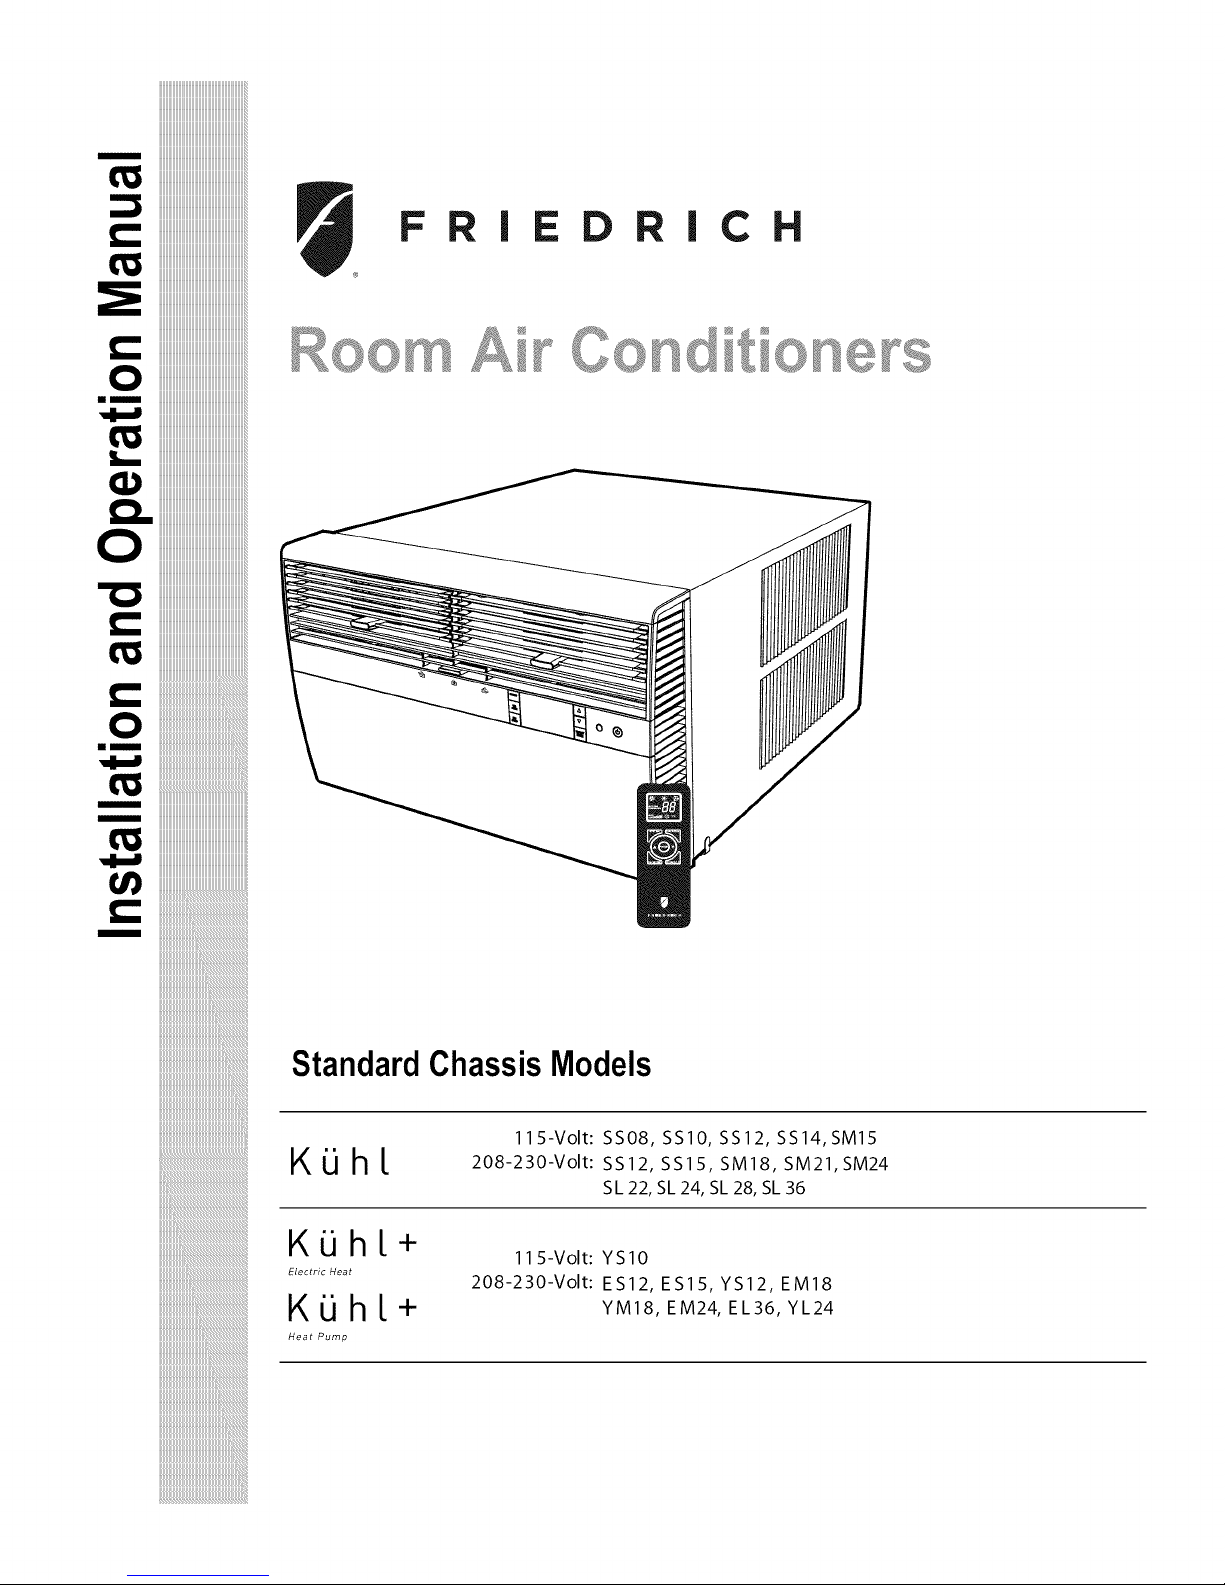
StandardChassisModels
iiiiiiiiiiiiiiiiiiiiiiiiiiiiiiiiiiiiiiiiiiiiiiiiiiiiiiiiiiiii_
K_hL
KiJhL+
Electric Heat
'_iii
11S-Volt: SS08, SSIO, SS12, SS14, SM15
208-230-Volt: SS12, SS15, SM18, SM21,SM24
115-Volt: YSIO
208-230-Volt: ES12, ES15, YS12, EM18
KLih[+
Heat Pump
SL 22, SL 24, SL 28, SL 36
YM18, EM24, EL36, YL24
iiiiiiiiiiiiiiiiiiiiiiiiiiiiiiiiiiiiiiiiiiiiiiiiiiiiiiiiii

ThankyouforyourdecisiontopurchasetheFriedrichHighEfficiencyAirConditioner.YournewFriedrichhasbeencarefullyengineeredandmanufacturedto
giveyoumanyyearsofdependable,efficientoperation,maintainingacomfortabletemperatureandhumiditylevel.Manyextrafeatureshavebeenbuiltinto
yourunittoassurequietoperation,thegreatestcirculationofcool,dryair,andthemosteconomicoperation.
YOU,on ofourentirecompany,
formakingsuchawisepurchase.
_r
@ @
g_
iV ®
Registeryourairconditioner
Modelinformationcan befoundon thename
platebehindthefrontcover.
Please complete and mail the owner
registrationcardfurnishedwith this product,
or registeronlineatwww.friedrich.com.
Foryourfutureconvenience,recordthe
modelinformationhere.
MODEL NUMBER
SERIAL NUMBER
PURCHASE DATE

TableofContents
SafetyPrecautions...................................................................................................................................................................................................................4
UnpackingInstructions.............................................................................................................................................................................................................5
WARNING:BeforeOperatingYourUnit..................................................................................................................................................................................6
StandardFilterCleaning/ InstallationInstructions..................................................................................................................................................................7
PremiumCarbonFilterInstallationInstructions.......................................................................................................................................................................8
ControlPanelOperation.........................................................................................................................................................................................................9
NewK_hlControlOptions......................................................................................................................................................................................................10
ControlPanelOperationInstructions...................................................................................................................................................................................11
RemoteControlOperation.....................................................................................................................................................................................................20
RemoteEffectiveness............................................................................................................................................................................................................20
AirflowSelectionandAdjustment..........................................................................................................................................................................................22
RemoteThermostat...............................................................................................................................................................................................................22
InstallationInstructions..........................................................................................................................................................................................................23
StandardWindowInstallation................................................................................................................................................................................................25
CordRoutingChange............................................................................................................................................................................................................34
Through-the-WallInstallation.................................................................................................................................................................................................36
Finalinspection& Start-upChecklist.....................................................................................................................................................................................40
RoutineMaintenance.............................................................................................................................................................................................................41
ServiceandAssistance.........................................................................................................................................................................................................41
AvailableAccessories............................................................................................................................................................................................................41
TroubleshootingTips..............................................................................................................................................................................................................42
Addendum1...........................................................................................................................................................................................................................44
Warranty...............................................................................................................................................................................................................................45

SafetyPrecautions
We have provided many important safety messages in this manual and on your appliance. Always read and obey all
safety messages.
All safety messages will tell you what the potential hazard is, tell you how to reduce the chance of injury, and tell you
what will happen if the instructions are not followed.
Your safety and the safety of others are very important.
This is a safety Alert symbol.
This symbol alerts you to potential hazards that can kill or hurt you and others.
All safety messages will follow the safety alert symbol with the word "WARNING"
or "CAUTION". These words mean:
Indicates a hazard which, if not avoided, can result in severe personal injury or
death and damage to product or other property.
Indicates a hazard which, if not avoided, can result in personal injuryand
damage to product or other property.
Indicates property damage can occur if instructions are not followed.
Refrigeration system
under high pressure
Do not puncture, heat, expose to flame or
incinerate.
Only certified refrigeration technicians should
service this equipment.
R410A systems operate at higher pressures
than R22 equipment. Appropriate safe
service and handling practices must be used.
Only use gauge sets designed for use with
R410A. Do not use standard R22 gauge sets.

Unpackinginstructions
STEP5.
Slidethe foamfrontsupportforward
STEP1.
STEP2.
STEP3.
STEP4.
Cutall4 packingstraps.
Removewoodenshippingbardividers.
Removetopfoampads.
Slowlyremoveouterbox,carefulnotto loosendecorativefront.
STEP6.
STEP7.
Carefullyliftdecorativefront boxfromfoamfrontsupport
Removedecorativefrontandsetsafelyaside
3
STEP 4_
STEP 6_
STEP 7........\
STEP S.........

WARNING:
BeforeOperatingYourUnit
Electrical Shock Hazard
Make sure your electrical receptacle has the
same configuration as your air conditioner's
plug. If different, consult a Licensed Electrician.
Do not use plug adapters.
Do not use an extension cord.
Do not remove ground prong.
Always plug into a grounded 3 prong oulet.
Failure to follow these instructions can result in
death, fire, or electrical shock.
Makesure the wiring isadequate for your unit.
Ifyouhavefuses,theyshouldbeofthetimedelaytype. Beforeyouinstall
or relocatethisunit,besurethattheamperageratingofthecircuitbreaker
or timedelayfusedoes notexceedtheamp ratinglistedinTable1.
DO NOT use an extensioncord.
Thecordprovidedwillcarrytheproperamountof electricalpowertothe
unit;anextensioncord maynot.
Make sure that the receptacle is compatible with
the air conditioner cord plug provided.
Propergroundingmustbemaintainedatalltimes.Twoprongreceptacles
mustbe replacedwith a groundedreceptacleby a certifiedelectrician,
Thegroundedreceptacleshouldmeetall nationalandlocalcodes and
ordinances. Youmustuse the three prongplug furnishedwiththe air
conditioner. Under no circumstancesshouldyou remove the ground
prongfromthe plug.
Test the power cord
All Friedrichroomair conditionersareshippedfrom the factory with a
LeakageCurrentDetectionInterrupter(LCDI)equippedpowercord. The
LCDIdeviceon theendof the cordmeetstheULandNECrequirements
forcord connectedairconditioners.
Totest your powersupplycord:
1. Plugpowersupplycordintoagrounded3prongoutlet.
2. PressRESET(SeeFigure1).
3. PressTEST,listenforclick;the RESETbuttontripsandpopsout.
4. PressandreleaseRESET(Listenfor click;RESETbuttonlatches
andremainsin). Thepowercord is readyfor use.
Do not use the LCDI device as an ON/OFF switch.
Failureto adhere to this precaution may cause
premature equipment malfunction.
Oncepluggedin,the unitwill operatenormallywithoutthe need to reset
theLCDIdevice.IftheLCDIdevicefailstotripwhentestedorifthepower
supplycordisdamaged,itmustbereplacedwitha newpowersupplycord
from themanufacturer.Contactour TechnicalAssistance Lineat(800)
541-6645.Toexpediteservice,pleasehaveyourmodelnumberavailable.
Table 1.
CIRCUIT RATING
OR TIME DELAY
MODEL
SS12, SS14 15 125 5-15R
SS08, SSlO (z_al)
YSIO, SM15
SM18, SM21 15 250 6-15R
SS12, SS15 (_
SL22, SL24
SM24, SL28
ES12, ES15 20 250 6-20R
YS12
SL36, EM18
EM24, EL36 30 250 6-30R
YM18, YL24
Figure 1
FUSE
AMP VOLT
WARNING:
rEST BEF ORE EACH USE
i PRESSRESTBretON
2 PLUG LODI [NIO POWER
RECEPTACLE
3 PRESS TEST BUTTON
RESET BU_ ;ON SHOULD
POP UP
4 PRESS RESET BU_;ON
OR USE
DO NOT USE I_ ABOVE TEST
ir ISWOR_NG
AILS/i)_EN GREENUGH_ISON
ROPERL_
REQUIRED
WALL
RECEPTACLE
NEMA
NO.
FRR072

StandardFilter Cleaning/ InstallationInstructions
STEP1. Swing the door open andremovethe filter by graspingthe
filtergripand pushingthefilter holderupwardandoutwar&
Figure 2
FRR071
STEP2. Slidethefilter gripout fromthefilterasshownin Figure4.
NOTE: Makesurethefrontframewiththe meshfilter is facingyou.
Figure 4
FILTER
FILTER
GRIP
Figure 3
J
FILTER
GRIP
HAN DLE
FRR052
FRR047
STEP& Swingthefrontframeopen.Cleanthefrontframebywashing
the dirt fromthefilter. Usea mildsoapsolutionifnecessary.
Allowfilterto dry.
Figure 5
TOP TAB
FRONT
FRAME WITH
STANDARD
MESH FILTER
FRR048
STEP4. Installthefiltergripbackintothefilterbyslidingitintothefilter.
NOTE:
The filter handleslides intotheframein onlyonedirection. If
the tab in the framestopsthe handlefromslidingin,slidethe
handlefromtheotherdirection. Do notforce the handle into
the frame.
STEP5. Install thefilter backintotheunit. Followthe Instructionson
the insideof thefront door.

PremiumCarbonFilterInstallationInstructions
STEP1. Removethefilterfromtheunitaspertheinstructionsonthe STEP4.
STEP2.
STEP3.
NOTE:
insideofthefilterdoor.
Holdthefilter atthetop andslidethefiltergrip outas shown
in Figure4.
Ifyoualreadyhavea carbonfilterinstalledremovethedirty
filterbylayingthefilterdownandswingingopenthefrontframe
asshowninFigure6.
Makesuretheframewiththe meshisfacing towardsyou.
NOTE:
STEP5.
NOTE:
Placethe newcarbonfilteronthetopofthebackfilterframe.
Thecarbonfilter hasbeencutto thecorrect dimensionand
shouldfit withinthe frameas showninfigure7
Thecarbonfilterisnotare-usablefilter,andneedstobereplaced
everythreemonthsfor optimumefficiency,
Slidethe filter handleback on to hold the frames together
and slide the assemblyinto the unit as per the instructions
on thedoor.
Thefilter handleslidesintothe framein only one direction. If
thetab in theframe stopsthe handlefrom slidingin, slidethe
handlefromthe otherdirection.Do not force the handleinto
the frame.
Figure 6
Figure 7
FRONTFRAMEWITH
MESHFILTER
/
//
Inl
Jtl
//
=
FRR050
FRR051

ControlPanelOperation
Let'scheckouthowtocontrolyourairconditioner.Onthecontrolpanel,justabovethePOWER,isaliquidcrystaldisplay(LCD).Allof thecontrolpanelfunction
buttonsandmodeiconscan beviewedinFigure8.
PowerOn - Pressthe buttonto turnon theair conditioner.The powerbuttonilluminatesto indicatethatthe powerison.Thebacklightonthe powerswitch
willautomaticallydimto20% intensityafter15secondsofinactivity.Theremotecontrolcanalsobeusedto turn powerON/ OFF(SeeRemoteControl).
Display- Thedisplayis a highefficiencyLCDwith abuilt-inwhitebacklight.The backlighthasan automatictwo (2)stepdimfunction.After 15secondsof
inactivity,thedisplaydimsto 20%intensity.Afteranadditional120seconds,the displayswitchesoff.Touchinganybuttonautomaticallychangesthedisplay
tofull brightness.
Therearethreecontrolpush buttonsoneachsideofthe display.
Figure 8
SYSTEM FAN MODE FAN SPEED TEMPERATURE
Cycles between Sets fan to either: Sets fan speed: Increment UP
AUTO, HEAT, - Cycle automatically LOW, MED,
COOL, or FAN - Run continuously HIGH orAUTO TEMPERATURE:
ONLY (if equipped) Increment DOWN
(if equipped)
COOL HEAT FAN CONTROL
ONLY LOCKED
AUTO
Automatically switches
between cool &
TIMER / SCHEDULE
Turns ON or OFF
IR WINDOW ON I OFF
Do not block Turns unit onloff
MAINTENANCE
REQUIRED
WI-FI
)PERATING
(if equipped)
WAIT
2 DIGIT DISPLAY
Shows Setting for:
- Set Point (Temperature)
- Room Temperature
- Clock (AM/PM)
FAN SPEED
Selectedfan speed
AUTO SPEED FILTER
Automatically Check / Clean
selects best fan
cooling speed
SCHEDULE ON
SMART OPERATING
(if equipped)

Ki.ihlControlOptions
The K_Jhlgivesyoua varietyofoptionsforcontrol,programming,and
schedulingincludingwirelesscapabilities
WirelessProgrammingandControl:
• ThenewFriedrichLinkTM Adapter(soldseperately)allowsyoutoconviently
control,programandmonitoryourairconditioningunitremotelyfroma
smartphoneorcomputer•
FriedrichLinkTM AdapteraccessoryavailablethroughFriedrichauthorized
retailersorwww.friedrich.com.See FriedrichLinkTM Adaptersectionon
www.friedrich.comforcompletedetails.
Pre-ProgrammedScheduling Options:
Yourunit'sdigitalcontrolcomesequippedwitha24-hourtimerandtwopre-
programmed7-dayenergymanagementoptions•
24-HourTimer
The24-hourtimerallowsyouto turnthe unitoffandonat pre-settimesby
settinganonandofftimeontheunitcontrolpanel.(Seepage12fordetailson
timerset-up.)
Pre-programmedEnergyManagement
Yourunit comes from the factory with two (2) Pre-programmedEnergy
ManagementsettingsareshowninAddendum1(Residential& Commercial
ScheduleTable).
EnergyManagementScheduleOptionsare:
1. ResidentialSchedule-40 Hr.WorkWeek
The"Residential"(40Hr.WorkWeek)Schedulehasfour(4)timeperiods:06:00,
08:00,18:00,and22:00.ThisoptionwillcauseyourK_JhlQunittoraisetheroom
temperaturetemporarilyto85°Fduringthehourswhenmostpeopleareaway
atwork,lowerthemagainto78°Fpriortothetimewhenmostpeoplewillreturn
home,andthen raiseslightlyto82°Fto maintaina comfortabletemperature
overnight.
The"Commercial"(5-DayBusinessWeek)Schedulehastwo(2)timeperiods:
07:00and18:00.Thisoptionwillcauseyourairconditionertoraisetemperatures
to84°Faftertypicalworkinghoursandonweekendswhencommercialspaces
aretypicallyunoccupied•
(SeeControlPanelOperationInstructionsSection)
CustomizableProgrammingOptions:
Customizableschedules,withuptofourtemperatureadjustmentsperday,can
eitherbeuploadedtotheunitviatheairconditioner'sbuiMnmicroUSBinterface
or convenientlytransmittedwirelesslyusingthenewFriedrichLinkTM Adapter
accessory,greatlysimplifyingtheprogrammingd oneormultipleunits.
SeeFigure9.
See www.friedrich.com for complete Customizable
Programming instructions.
2. CommercialSchedule-5-DayBusinessWeek
Figure 9
l
FriedrichLink Adapter
TM
10

ControlPanelOperationinstructions
SYSTEM-The_ buttonallowsyoutosequentiallyselect uptofour
modesof operation:
AUTO - AUTO - Not availableonsomemodels
COOL_
HEAT _ Notavailableonsome models
FANONLY []
AUTO MODE
FRR204
COOLMODE
FANONLYMODE
FRRI05
Whenin the -AUTO-, COOL_ or HEATD orFANONLYI_ mode,
_,_ucanalso select FANMODE,FANSPEED,TIMER SCHEDULE,
andk--_.TheSYSTEMMODEdoesnotchange.
FAN MODE- TheJ_Jbutton allowsyouto selectbetweenl_'tr_and
r_'l_t_lmodes.
AUTOFAN(No Cooling Demand)
FRR112
Whenin the_ mode,thefanonly[] operateswhenthesystemhas
ademandtocoolor heattheroom.Note:thefan isoff(nofanspeedicon),
FRRI03
HEATMODE
FRRI04
indicatingnocommandforcoolingorheating.
AUTOFAN(Cooling Demand)
FRRI06
System has a demand for cooling.Thefan isoperating at a mediumspeed.
FANSPEED- Depending on yourmodel, the B button allowsyouto toggle betweenfour orfive modes of operation: LOW,MEDIUM, HIGHandAUTO.
WhenfanspeedAUTOFANmode(SYSTEMmodeAUTO, COOLor HEAT)is selected,fan speedautomaticallyvariesdependingonthe differencebetween
the unit'ssetpointon thecontrolpanelandtheactualroomtemperature.Whenthesystemdetectsa widedifferencebetweentheset pointand the actual
roomtemperaturethefanspeedincreasesto HIGHfor a periodof time.Thefanspeed decreases,instep,as thetemperaturedifferencedecreases.Whenthe
roomtemperaturematchesthesystem'ssetpoint,fanspeedreturnstotheoriginalsetting.
11

CONTINUOUS
FRR113
In the _ fan mode, the fan operatesall the time. The system
periodicallycoolsorheatsthefan'sairflowbuttheflowof air doesnotstop.
UPP_landDOWN_"_- arrows- Pressingeitherr_l orL'-_buttonchanges
thesystem'ssetpoint(desiredroomtemperature).Thesebuttonsarealso
usedto makesystemparameterchangeslatterinthis manual.
The_ buttonselectedduringa definedONwindow.
FRR123
The[] iconilluminates.
TheTIMERfunction(option1,systemdefault)allowsyoutodefineadaily
systemON and OFFtimewindow.Forexample,youcan commandthe
systemto turnONat 8:15amandturnOFFat 1:30 pmeveryday.
TheSCHEDULEfunctionallowsyoutochooseeitherResidential(option
2)orCommercial(option3).TheResidentialandCommercialoptionsare
describedlaterinthismanual.
OTHERFUNCTIONS
FRRIO0
FRR101
Onepressequals1degree of change.Holdingthebuttondownformore
than0.6 secondsstarts thefast increment/decrementchangeoftheset
point.
TIMERSCHEDULE- The_ buttonallowsyouto selecttheTIMER
[] or_ function.
The_ buttonselectedduring adefinedOFFwindow.
Figure 10
SETTIME-Toadjusttheunit'stimepressandholdthe HOURandtheMIN
buttonsforthreeseconds(Referto Figure10).
The _ icon illuminates.
FRR122
FRR128
The unit'scurrenthourdisplays.Usethe[] or [] buttonstoadjustthe
hour.TochangefromAM to PMcontinueto increment(roll)the display.
PressTIMERSET (Referto Figure10)buttonto displaythe unit'scurrent
minutes.
12

1"oswath f_om degrees F_enhel (F) lo geisius (Q press _ er []
butlons forlh_ee secc-_ds
_,RRi29
Use lhe _ or Q butter,s to adjusi lhe minutes_ Th_ e!eek is now set
for ii:25 AM R'ess TIM ER SET (Refer to Fi#ure 10}bunionte display lhe
uni% day selting,
_:RR'3
A"F' wili _h fr.,,r5 _,n_ _ _ _vett _ a a_l d_: To _,ge
#ore Fle C, press _e _ _ _ 5uflen wifhin 5 secorlds,
_RR_
Use the_orl_;t butions to adiust %e d_y (I to 7), The day salting is up
to the you lhe use:E,_1you sei _ne current day = i_ aed l_ay is TUesday
then Day I = fueeday;
eRR13
FR_I s<{
A'C" _1 flash for5 _ ar_ _e_ _,_ to a rforraaf d_,
Press T!_4ER SET (Refer to Rgura t0) b_oe te esit and save _e SET
T{MEfunefion, The T]MER SET bu!tcn mus_be pressed within 15secured.
Sutton r_actMly for more _han 15 sece_ds causes lhe display 1o1freeout
ar_ refum to the normal operating display,
_F-_C Select
_RRIS
The eF icon goes away and _he_C icen illuminates onlhe nermat display.
DI_ Functieri
There are three sepa_-aiegisplay briefness levels, AUTO 20% a_g full
(!gO%}, To chaege the Ob_ selfing_ press the Power buflen for #eee
secoeds
_Pt_l 2
The I ir'_diealesa DIM salting of Aufs (factory defauff} Use fhe _ or _[_
butiens lo change the eetling,

FRR193
The2indicatesaDIMsettingof 20%.PresstheTIMERSETbuttonwithin
15secondstosave thesetting.Buttoninactivityformorethan 15seconds
causesthedisplaytotimeoutand returntothe normaloperatingdisplay.
FRR194
The3indicatesa DIMsettingof 100%(fullbrightness).PresstheTIMER
SET (Referto Figure 10) buttonwithin 15 secondsto save the setting.
Buttoninactivityfor morethan15secondscausesthedisplayto timeout
andreturn to the normaloperatingdisplay.
Alerts
Whenthefilter needsto becleanedor replaced,the_ icondisplays.
FRR120
This meansthere is a compressordemandbut thesystemis not ready
for the compressorto operate.For examplea short poweroutage,the
compressorwill not restartuntil the internalpressuresofthecompressor
areatthe properlevel.
FRR179
Iftheroomfreezeprotectionisactive,thedisplayindicatesthis byshowing
"F".Oncetheconditionissatisfied,the"F"displayisremoved.PressTIMER
SET(Figure10)buttonoverridesthefreeze protectionalert for5minutes.
This alert appearswhenthe room is too cold for the air conditionerto
operateproperly.Anothercauseofalertoccurswhen tomuchicebuilds
upontheunit'scondenser.
Lock Control Panel
Tolockthefrontpanelcontrols,pressand holdthe_ +_ buttons
for3 seconds.The lockiconEl illuminatestoindicatethelockedstatus.
Thealertcanbedismissedbypressingthe_ and_for 3seconds.
Whenmaintenanceis required,aserviceiconD appearson screen.
FRR118
FRR1
Tounlock,pressesandholdthem +_ buttonsfor 3 seconds.
FRR117
ThelockiconE! disappearsto indicateunlockedstatus.
14
 Loading...