

Franke SD6000, SD7000 Installation Manual
KITCHEN
SYSTEMS
INSTALLATION GUIDE
Soap Dispenser - SD6000, SD7000
Rev 1 - 12/11/2015
MAKE IT WONDERFUL
INSTALLATION INSTRUCTIONS
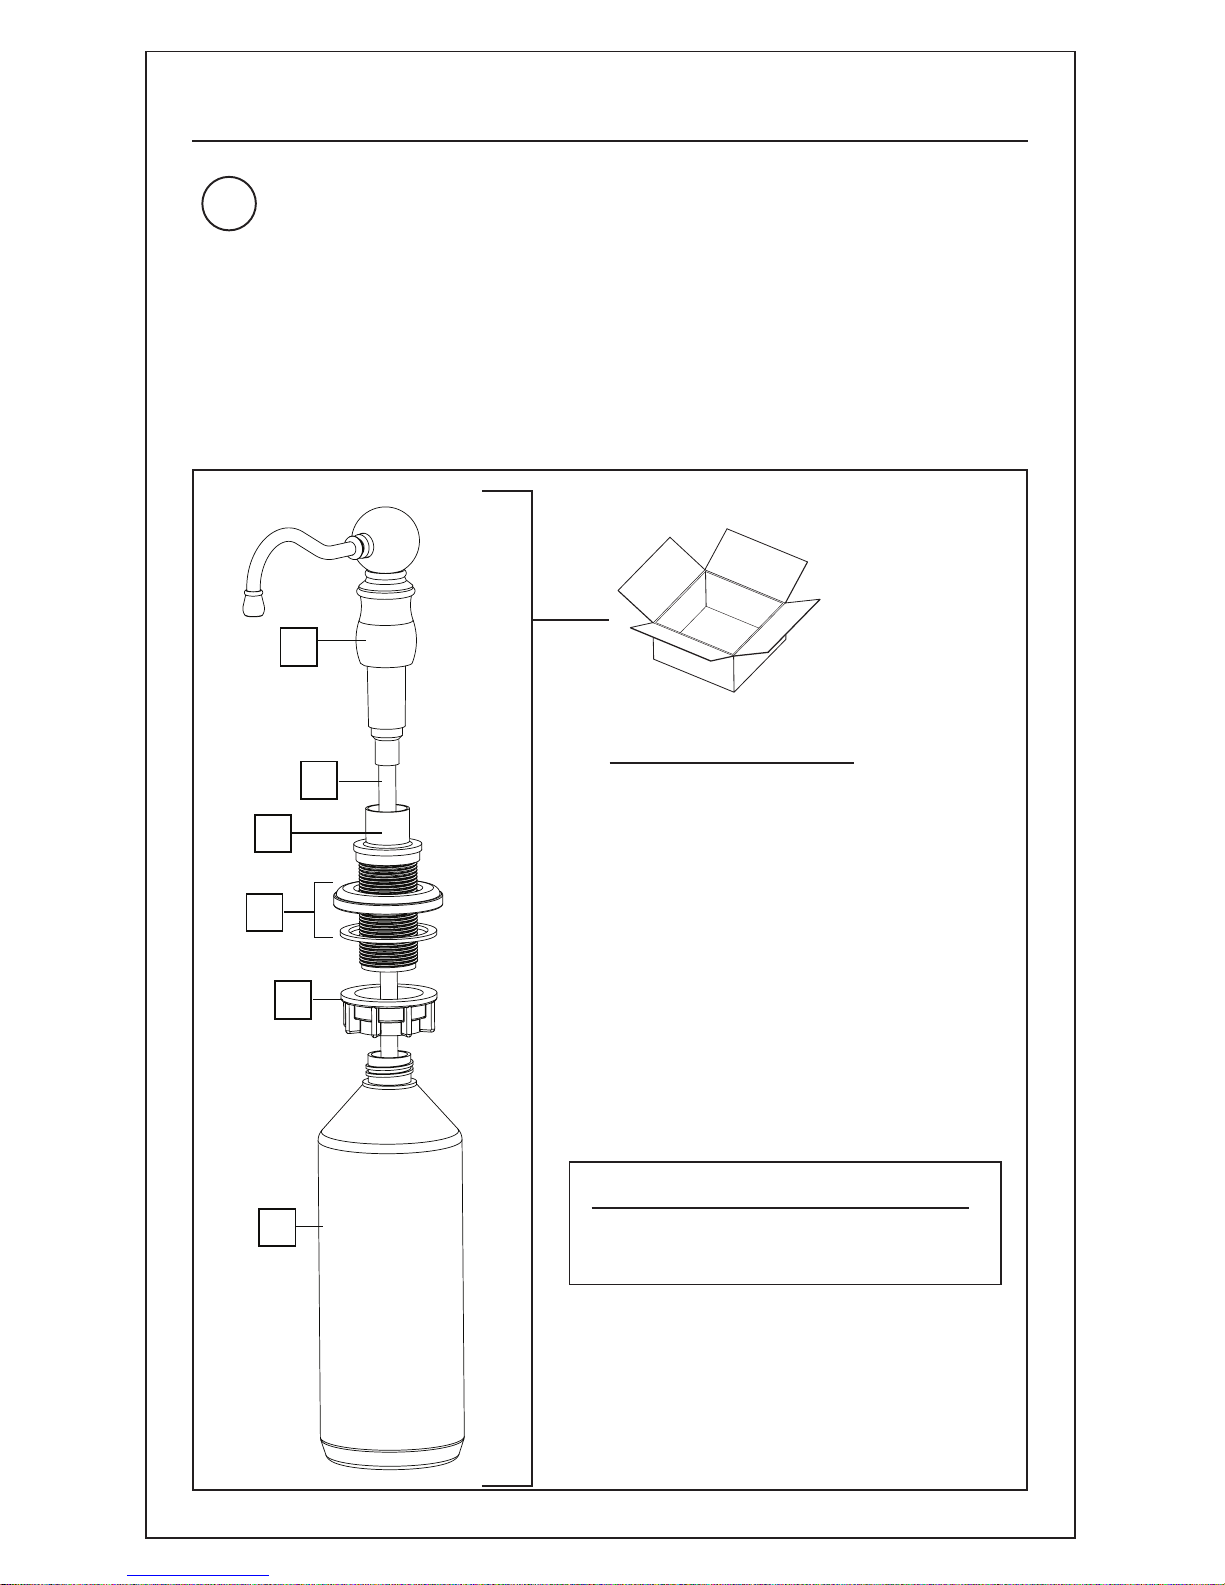
Remove all contents from the package and check for completeness.
1
NOTE:
Call immediately if you see inconsistencies.
(1-800-626-5771)
or visit
www.frankeksd.com
Package Contents:
1 - Dispensing Head
(Pre assembled with pump)
2 - Fill Tube
3 - Mounting Shank Assembly
4 - Base Flange with Washer
5 - Mounting Nut
6 - Bottle
Installation Tools:
None
1
6
1
2
3
4
5
2
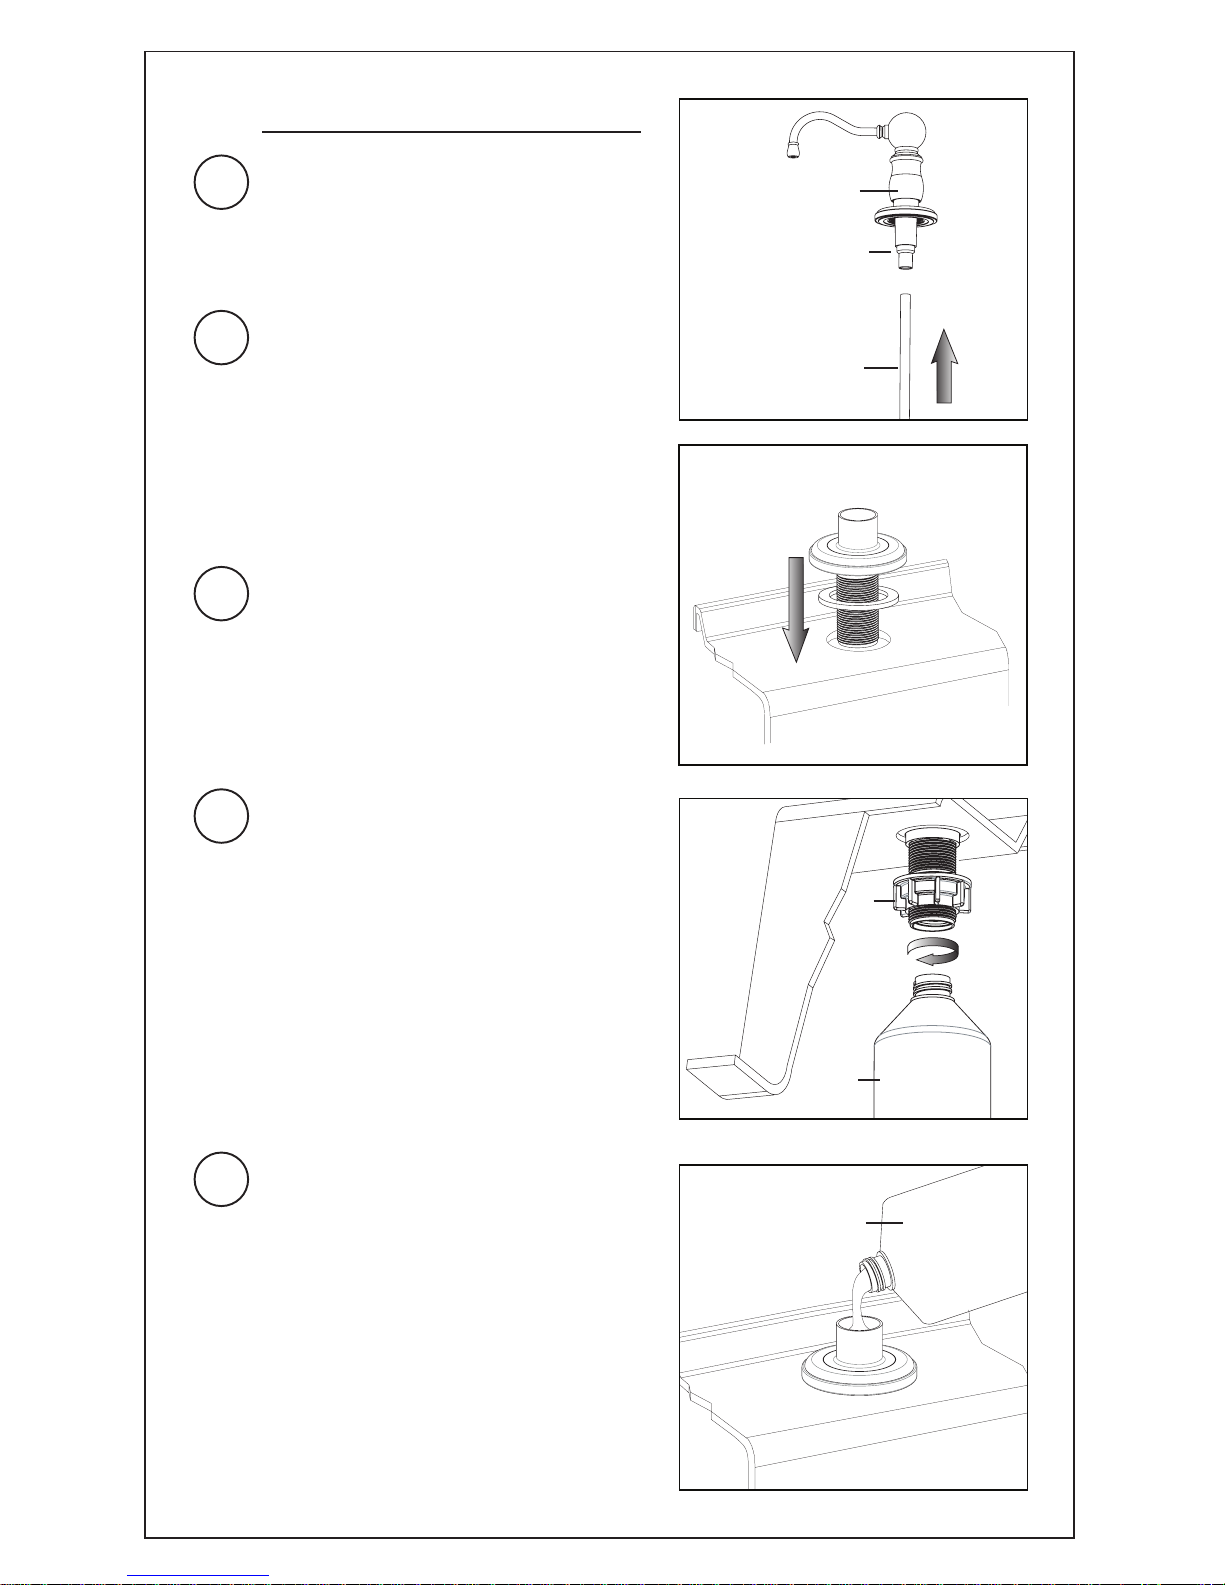
Installation
Ensure proper hole is in place for the
Dispenser. This Dispenser is designed
to mount into a 1-3/8” (35mm)
mounting hole.
3
Product will arrive with dispensing
head already mounted in base flange.
Remove the dispensing head
assembly from the base flange
assembly. Insert the fill tube into the
pump at the bottom of the dispensing
head assembly and set this aside.
4
Unscrew the mounting nut from the
base flange assembly. Insert the
base flange into the mounting hole.
Be sure the mounting washer is in
place between the flange and
mounting surface.
2
5
From underneath the mounting
surface, install the mounting nut
onto the base flange firmly by hand
and install the bottle into the base
flange hand tight.
Dispensing
head
Pump
Fill tube
6
Fill bottle with soap or lotion.
Note: For Most efficient use
with soaps, it is recommended
to fill the bottle 1/3 with water
and 2/3 with soap and mix well
using the fill tube to minimize
clogging.
Soap or lotion
Mounting
nut
Bottle
 Loading...