

Page 1

Foxit Reader
User Manual
I
Page 2

Foxit Reader
User Manual
Copyright © 2004-2019 Foxit Software Incorporated. All Rights Reserved.
No part of this document can be reproduced, transferred, distributed or stored in any format without the prior
written permission of Foxit.
Anti-Grain Geometry - Version 2.4
Copyright (C) 2002-2004 Maxim Shemanarev (http://www.antigrain.com)
Portions of this product Copyright [2001-2019] Solid Documents
Permission to copy, use, modify, sell and distribute this software is granted provided this copyright notice appears
in all copies. This software is provided "as is" without express or implied warranty, and with no claim as to its
suitability for any purpose.
II
Page 3

Foxit Reader
Contents User Manual
Contents
Contents ......................................................................................................... III
Chapter 1 – Introduction ......................................................................... 1
Foxit Reader Overview ........................................................................................... 1
Foxit Reader Add-ons ............................................................................................. 1
Foxit Plug-In Platform ............................................................................................ 3
Chapter 2 – Getting Started ................................................................... 6
Installing Foxit Reader ........................................................................................... 6
Updating Foxit Reader Add-ons ........................................................................ 12
Uninstalling Foxit Reader .................................................................................... 13
Online Help ................................................................................................................ 14
Work Area .................................................................................................................. 14
Setting Preferences & Viewing Properties ................................................... 23
Chapter 3 – Viewing PDFs ...................................................................... 44
Opening Documents .............................................................................................. 44
Saving Documents .................................................................................................. 48
Closing Documents ................................................................................................ 48
Exiting Foxit Reader .............................................................................................. 49
Viewing Documents ............................................................................................... 49
View 3D Content in PDFs ..................................................................................... 66
Finding Text .............................................................................................................. 67
Playing a Movie or a Sound Clip ....................................................................... 71
Thumbnails Preview in Windows ..................................................................... 71
Chapter 4 – Working on PDFs ............................................................... 72
Select & Copy ........................................................................................................... 72
Word Count ............................................................................................................... 73
Working with Layers ............................................................................................. 73
Measuring the Objects .......................................................................................... 75
Switching between Basic Commands ............................................................. 81
Using Rulers & Guides .......................................................................................... 81
Undoing and Redoing ............................................................................................ 83
Sharing Documents ................................................................................................ 83
Creating PDFs ........................................................................................................... 93
Signing PDFs ............................................................................................................. 99
Stamping PDFs ....................................................................................................... 119
Enable Fast Web View in a PDF ...................................................................... 125
Managing Security ................................................................................................ 126
Chapter 5 – Comment ............................................................................ 153
About the Commenting Commands............................................................... 153
Selecting Commands to Add Comments ..................................................... 153
About pop-up notes ............................................................................................. 167
III
Page 4

Foxit Reader
Contents User Manual
Managing Comments ........................................................................................... 168
PDF Review ............................................................................................................. 178
Chapter 6 – Form ...................................................................................... 181
Filling in PDF Forms ............................................................................................. 182
Commenting on Forms ....................................................................................... 184
Importing & Exporting Form Data ................................................................. 184
Chapter 7 – Data Import & Export ................................................... 185
Importing & Exporting Comments Data ...................................................... 185
Importing & Exporting Form Data ................................................................. 186
Generate 2D Barcode .......................................................................................... 190
Verify Signatures on XFA Forms ..................................................................... 191
Chapter 8 – Advanced Editing on PDFs .......................................... 192
Creating Bookmarks ............................................................................................ 192
Adding Links ........................................................................................................... 197
Attaching Files ....................................................................................................... 200
Adding Images ....................................................................................................... 205
Adding Audio & Video ......................................................................................... 211
Chapter 9 – ConnectedPDF .................................................................. 216
Chapter 10 – Printing ............................................................................. 217
Printing PDF Documents .................................................................................... 217
Print Dialog ............................................................................................................. 220
Setting Foxit Reader PDF Printer Properties ............................................ 223
Chapter 11 – Appendices ...................................................................... 226
Keyboard Shortcuts ............................................................................................. 226
Single-key Accelerators ..................................................................................... 228
Command Lines ..................................................................................................... 232
Contact Us ................................................................................................... 234
IV
Page 5

Foxit Reader
Name
Function Description
Size
Remark
JPEG2000/JBIG
Decoder
This add-on module is for decoding images in JPEG2000
or JBIG2 formats. If you don't install this module,
images in those formats cannot be displayed.
169KB
Download
Free
GDI+ Module
This is a redistributable module from Microsoft which
provides better display quality for graphics. You can still
view the PDF file without this module in lower graphic
quality. Installing this module will not affect any other
764KB
Download
Free
Chapter 1: Introduction User Manual
Chapter 1 – Introduction
Foxit Reader Overview
Welcome to Foxit Reader-- the right choice to view and print PDF documents!
Foxit offers two packages of Foxit Reader (EXE and MSI). Foxit Reader (EXE) is a free PDF document
viewer and creator. Foxit Reader (MSI) is developed on the basis of Foxit Reader (EXE), but it
extends the usability and performance. Foxit Reader (MSI) provides advanced tools equipped with
proactive security features, and is fully featured with solutions such as RMS Protection, GPO
Control, XML Control, and other PDF viewing needs of enterprises and governments. This User
Manual explains more in depth on the capabilities and functions of Foxit Reader, but for more
information on the deployment of Foxit Reader (MSI), please refer to the attached “Foxit Reader
Deployment and Configuration”.
Foxit Reader (EXE) is a free PDF document viewer and printer. It launches quickly and is easy to
install. Just run “Foxit Reader Setup” and then follow the installation guides to complete installation.
In addition to the basic PDF viewing functions, Foxit Reader also includes various advanced features,
such as adding annotations, saving a PDF document as a text file, copying text from the text viewer,
and digital signature validation.
Foxit Reader Add-ons
Foxit Reader provides separate add-ons for you to download on demand. These critical and
advanced add-ons can be updated by the Update Manager, or they can also be downloaded from
our website (https://www.foxitsoftware.com/products/addons.php?product=reader).
Critical Add-ons
Critical add-ons are essential components for proper display and execution of our software.
Free Critical Add-ons in Foxit Reader
1
Page 6
Foxit Reader
applications on your system.
JavaScript
Support
This add-on is used to execute JavaScript in many
interactive forms. If you don't install this add-on, you
still can fill in such forms, but you wouldn't be able to
perform some automated tasks like field value
verification and recalculation.
1.05MB
Download
Free
Name
Function Description
Size
Remark
Foxit Toolbar
for Browser
This add-on is a free toolbar for IE or
Firefox that delivers up-to-date Foxit
news and upgrades straight to your
Internet browser, enabling the user to
search the web anytime anywhere,
giving easy access to various useful
goodies and gadgets.
1.01MB
Download
Free
Spell Checker
When you fill out an English form or use
typewriter to insert any English text, this
tool will try to find any spelling errors and
highlight them with squiggly lines. If you
right click on the misspelled words, you
will see a list of suggested words. Click
here to download the dictionary.
4.2MB
Download
Free
RMS Plug-in
RMS Plug-in provides seamless
integration with Microsoft Windows
Server environment to protect PDF
documents and manage policy
templates. With this plug-in, you can
restrict user’s access to documents to
safeguard digital information from
unauthorized use.
2.53MB
Integrated in the
package.
Foxit Reader (EXE):
Feature is free, with
watermark displayed
in PDFs.
Foxit Reader(MSI):
Free trial for 14 days,
without watermark
displayed in PDFs.
Chapter 1: Introduction User Manual
NOTE: To manually install a critical add-on, please extract it to the same directory where you
installed Foxit Reader.
See also “Updating Foxit Reader”.
Advanced Add-ons
Advanced add-ons have many specific capabilities.
Advanced Add-ons in Foxit Reader
2
Page 7
Foxit Reader
Chapter 1: Introduction User Manual
Tips:
1. Instructions on installation of .fzip package below
To manually install a critical or an advanced add-on, please run Foxit Reader, and then go to Help > Install Update >
browse and choose the related downloaded package, and then click the Open button. When you're done, click Done
to finish the installation.
2. How to install the dictionary for Foxit Spell Checker?
After you download the dictionary and unzip it, please save the unzipped folder named “lex” to the same installation
folder of Foxit Reader, which could be placed in “C:\Program Files\Foxit Software\Foxit Reader”.
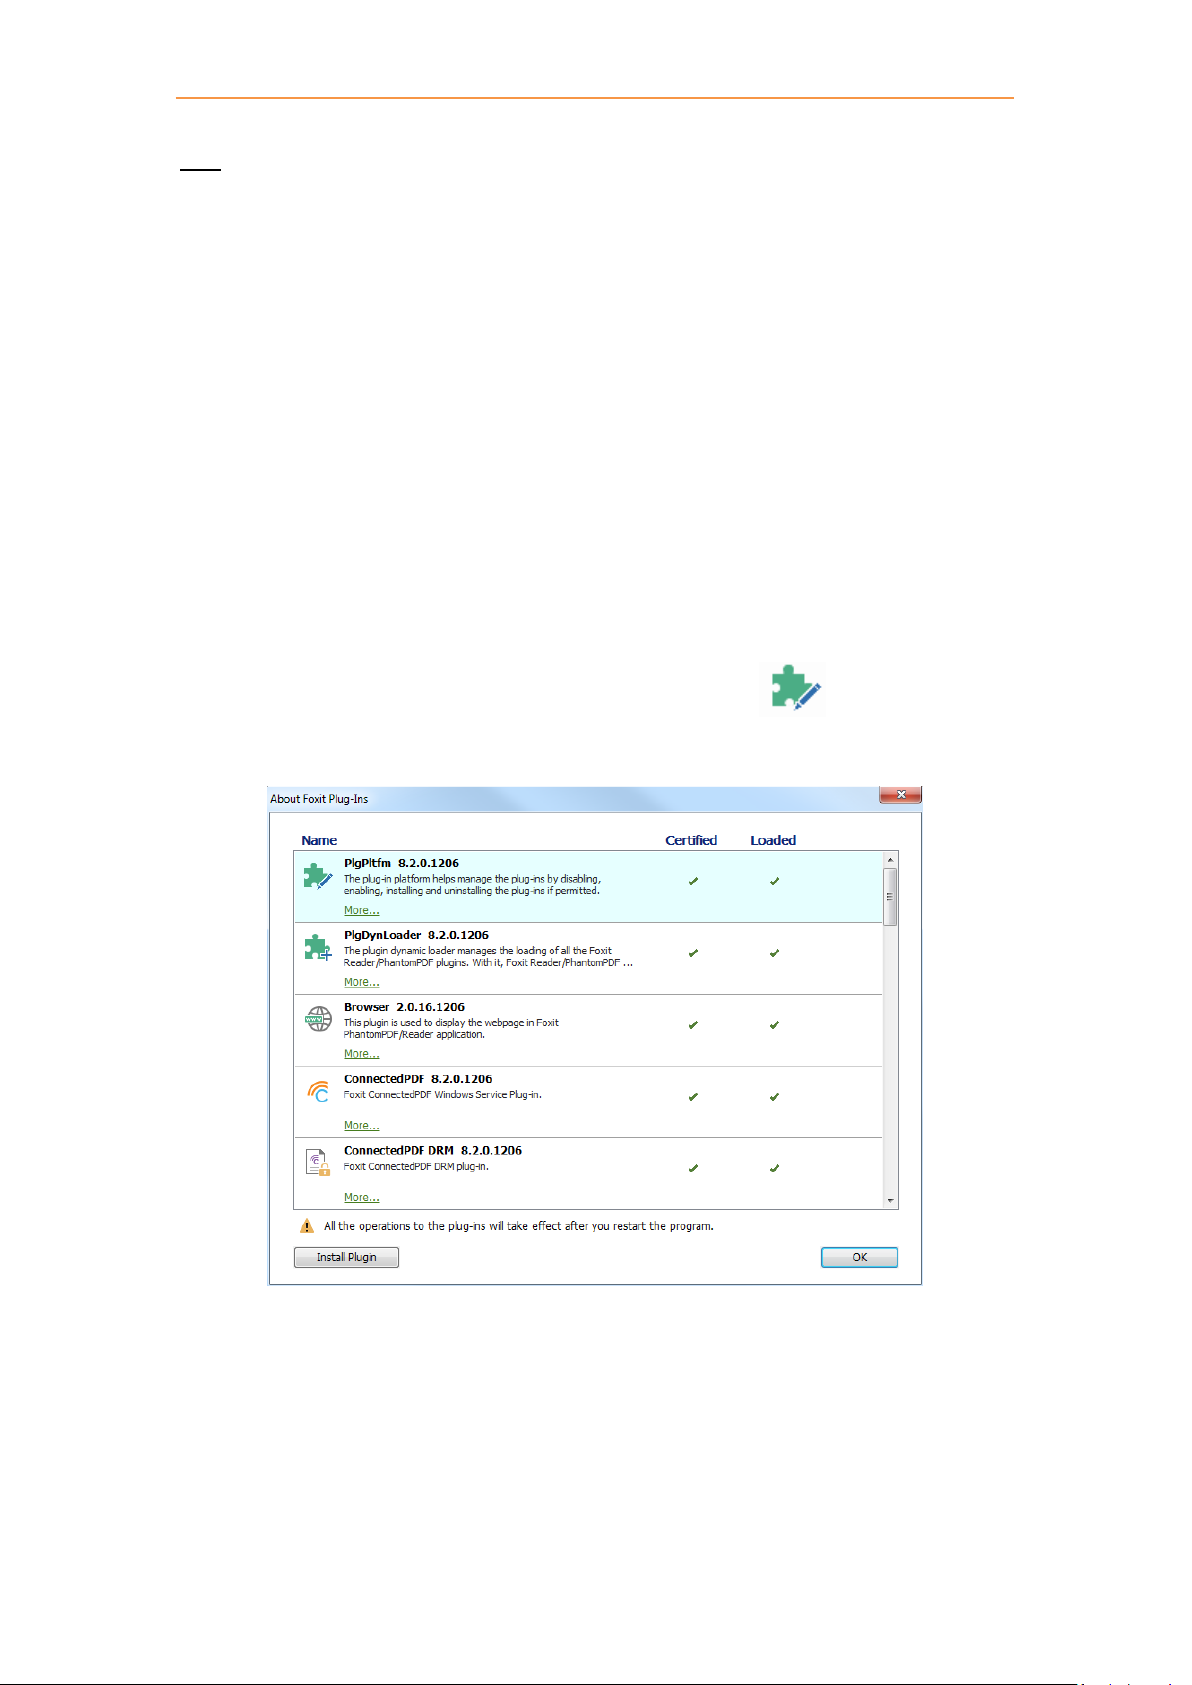
Foxit Plug-In Platform
For flexible and convenient management of plugins, Foxit Reader offers a Plug-in Platform that
allows you to view the plug-in status, learn the information about the plugins installed, as well as
manage the plug-ins needed.
To open Foxit Plug-in Platform, please choose Help > Foxit Plug-Ins , and the window will
show up as below.
Foxit Plug-in Platform
Plug-in Status
Foxit Reader lists the plug-ins that have been installed in the About Foxit Plug-Ins windows. Some
plug-ins will be loaded the first time you use the related features. When the plug-in is successfully
3
Page 8
Foxit Reader
Chapter 1: Introduction User Manual
loaded, a checkmark will be displayed in the Loaded column. You can view the plug-in status in the
following two columns:
Certified: Shows whether the signature of the plug-in is valid or not.
Loaded: Shows whether the plug-in has been loaded successfully or not.
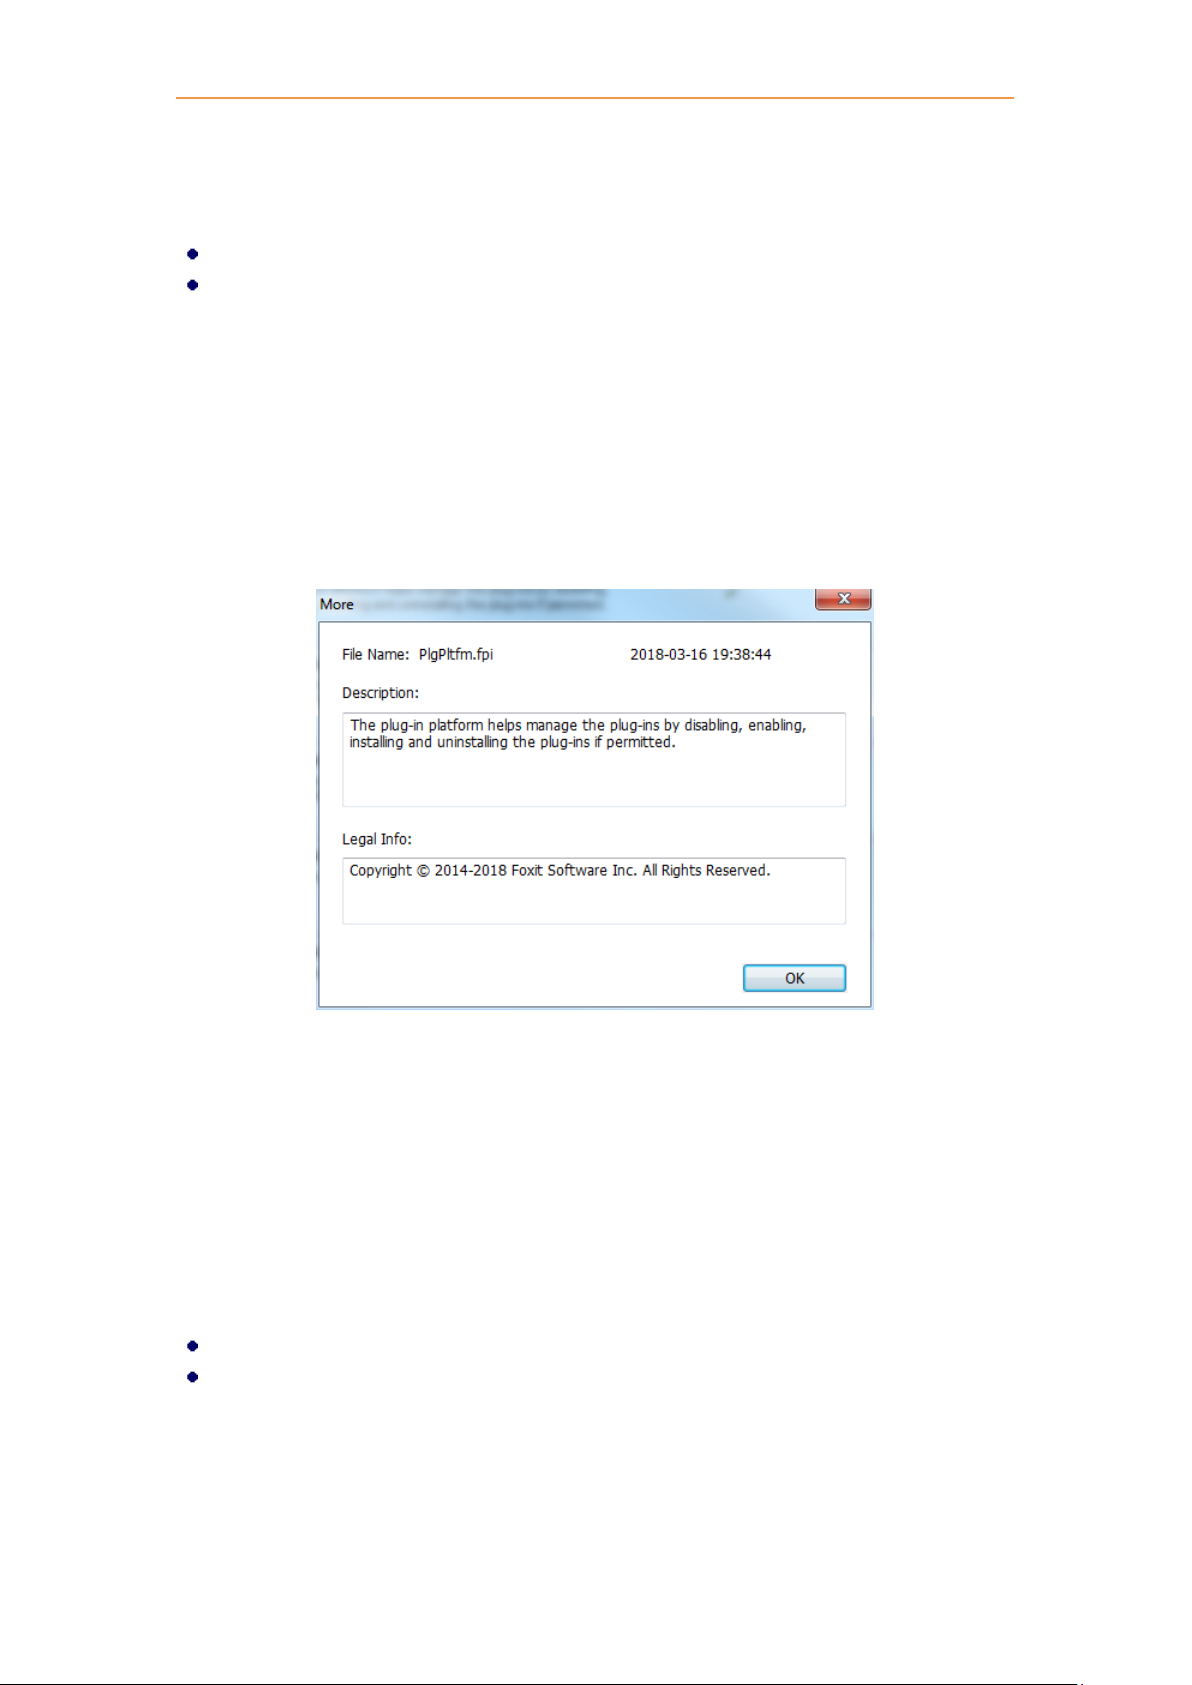
Plug-in Information
In addition to plug-in status, you can learn more information about the plug-in installed; including
the name, date, description and legal copyright.
To learn the details of a plug-in, please click More under the general description of the plug-in
shown in the Foxit Plug-in Platform. Then a dialog box showing the details of the plug-in will pop
up (as shown below).
Plug-in Management
With Foxit Plug-in Platform, you can manage the plug-ins as needed; including installing, enabling,
disabling, and uninstalling plug-ins.
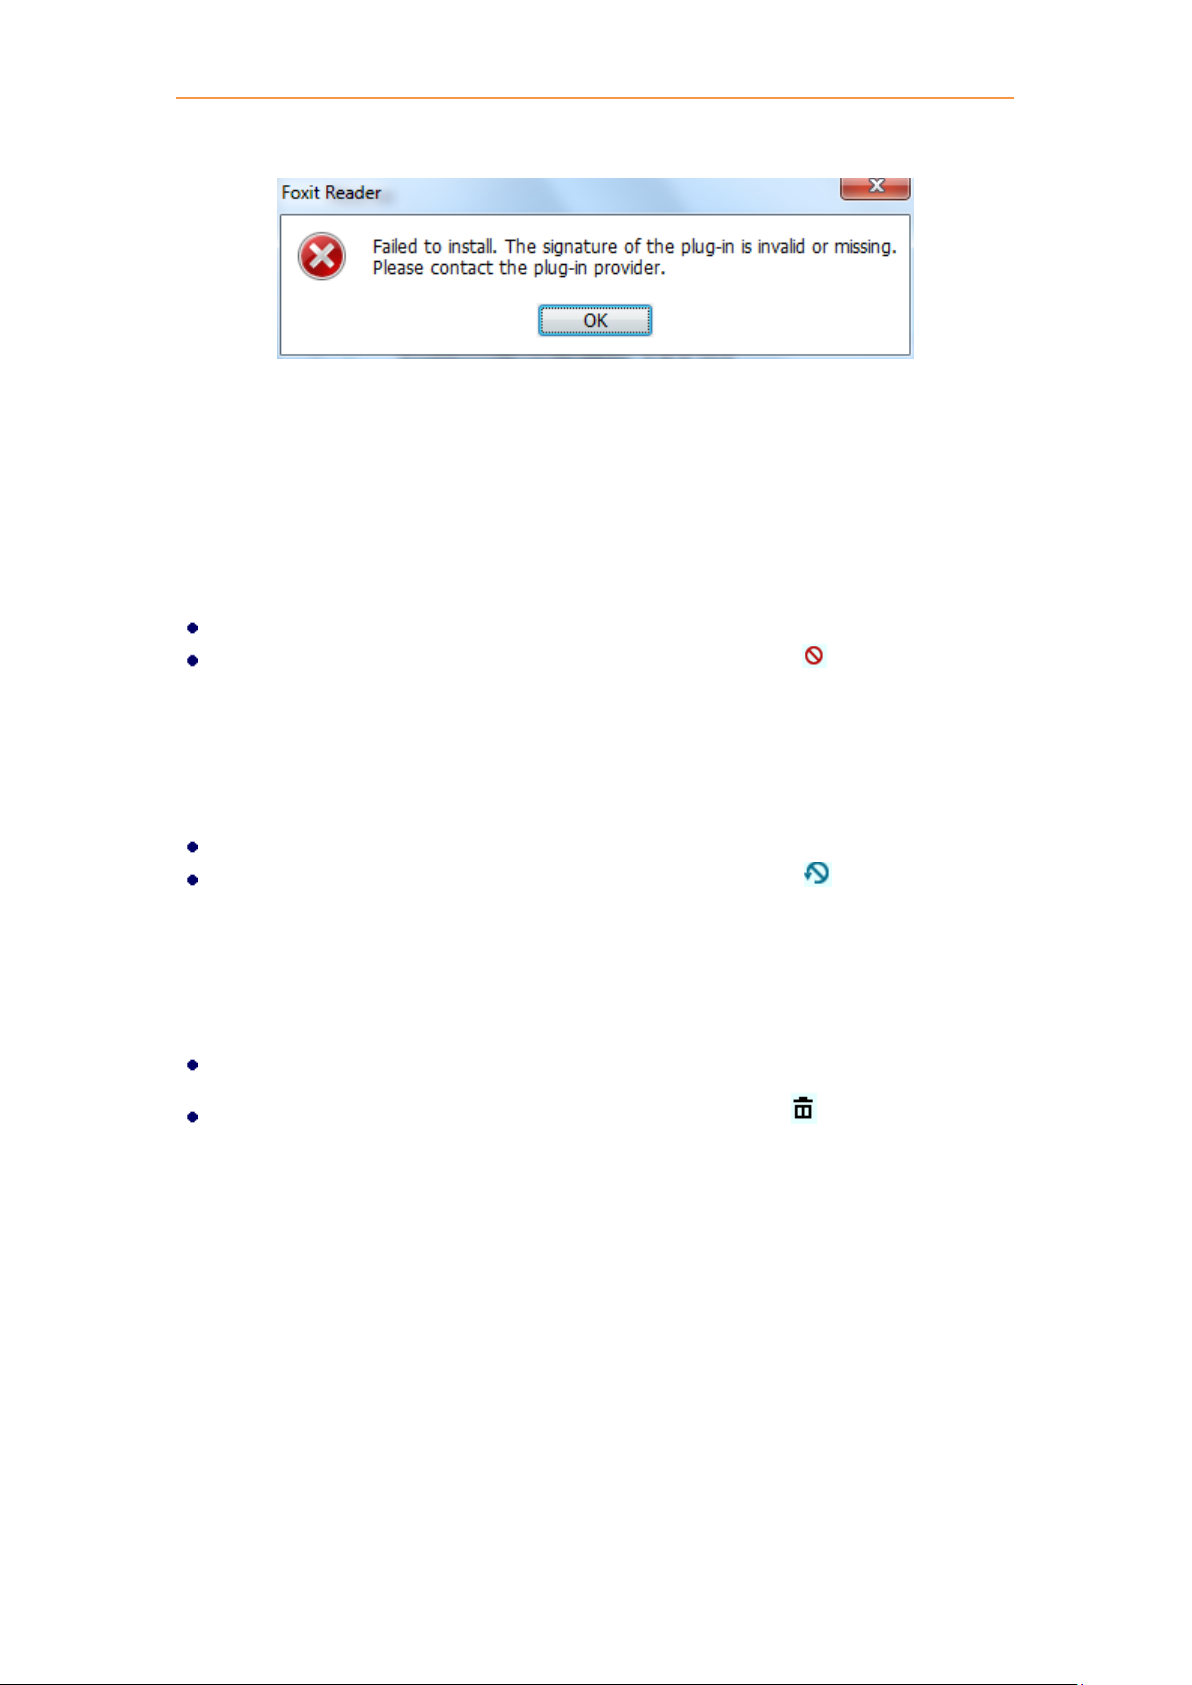
Installing a Plug-in
To install a plug-in, please follow the steps below:
Select Help > Foxit Plug-Ins to open Foxit Plug-In Platform;
Click Install Plugin > choose the plug-in file (in .xml format) > click Open.
Then Foxit Reader will verify whether the signature of the plug-in to be installed is valid or not. If
it is valid, Foxit Reader will load the plug-in directly; if not, a prompt message will pop up (as shown
below), and the installation will be terminated.
4
Page 9
Foxit Reader
Chapter 1: Introduction User Manual
Note: The .xml and .fpi files of a plug-in to be installed should be placed in the same folder to avoid
an installation failure.
Disabling a Plug-in
To disable a plug-in, please follow the steps below:
Select Help > Foxit Plug-Ins to open Foxit Plug-in Platform.
Select the plug-in you want to disable, and click the Disable button to disable it.
Enabling a Plug-in
To enable a plug-in, please follow the steps below:
Select Help > Foxit Plug-Ins to open Foxit Plug-in Platform.
Select the plug-in to be enabled, and click the Undo Disable button to enable it.
Uninstalling a Custom Plug-in
To uninstall a custom plug-in (not built by Foxit), please follow the steps below:
Select Help > Foxit Plug-Ins to open Foxit Plug-in Platform.
Select the plug-in to be uninstalled, and click the Uninstall button to uninstall it.
Note:
1. All the operations to the plug-ins will take effect after you restart Foxit Reader.
2. Foxit Reader includes plug-ins that are required for the use of its functions, as well as for
maintenance. To ensure regular performance of the software, you are not allowed to disable or
uninstall the plug-ins (such as Foxit Updater plugin, Foxit Plug-in Platform plugin, and more.)
5
Page 10

Foxit Reader
Chapter 2: Getting Started User Manual
Chapter 2 – Getting Started
This section gives you an overview of Foxit Reader and how to install or uninstall, upgrade, as well
as customize work area and toolbar.
Installing Foxit Reader
Windows System Requirements
Foxit Reader runs successfully on the operating systems listed below. (If your computer does not
meet these requirements, you may not be able to use Foxit Reader.)
Operating Systems
Windows 7
Windows 8
Windows 10
Microsoft Office® 2007 or later version (required for some PDF creation features)
Verified as Citrix Ready® with Citrix XenApp® 7.13
Recommended Minimum Hardware for Better Performance
1.3 GHz or faster processor
512 MB RAM (Recommended: 1 GB RAM or greater)
1 GB of available hard drive space
1024x768 screen resolution
How to Install?
Please visit Foxit’s website (https://www.foxitsoftware.com/downloads/) to download the latest
version of Foxit Reader for free.
If you download the “FoxitReader_setup.exe” file to your computer, please do the following:
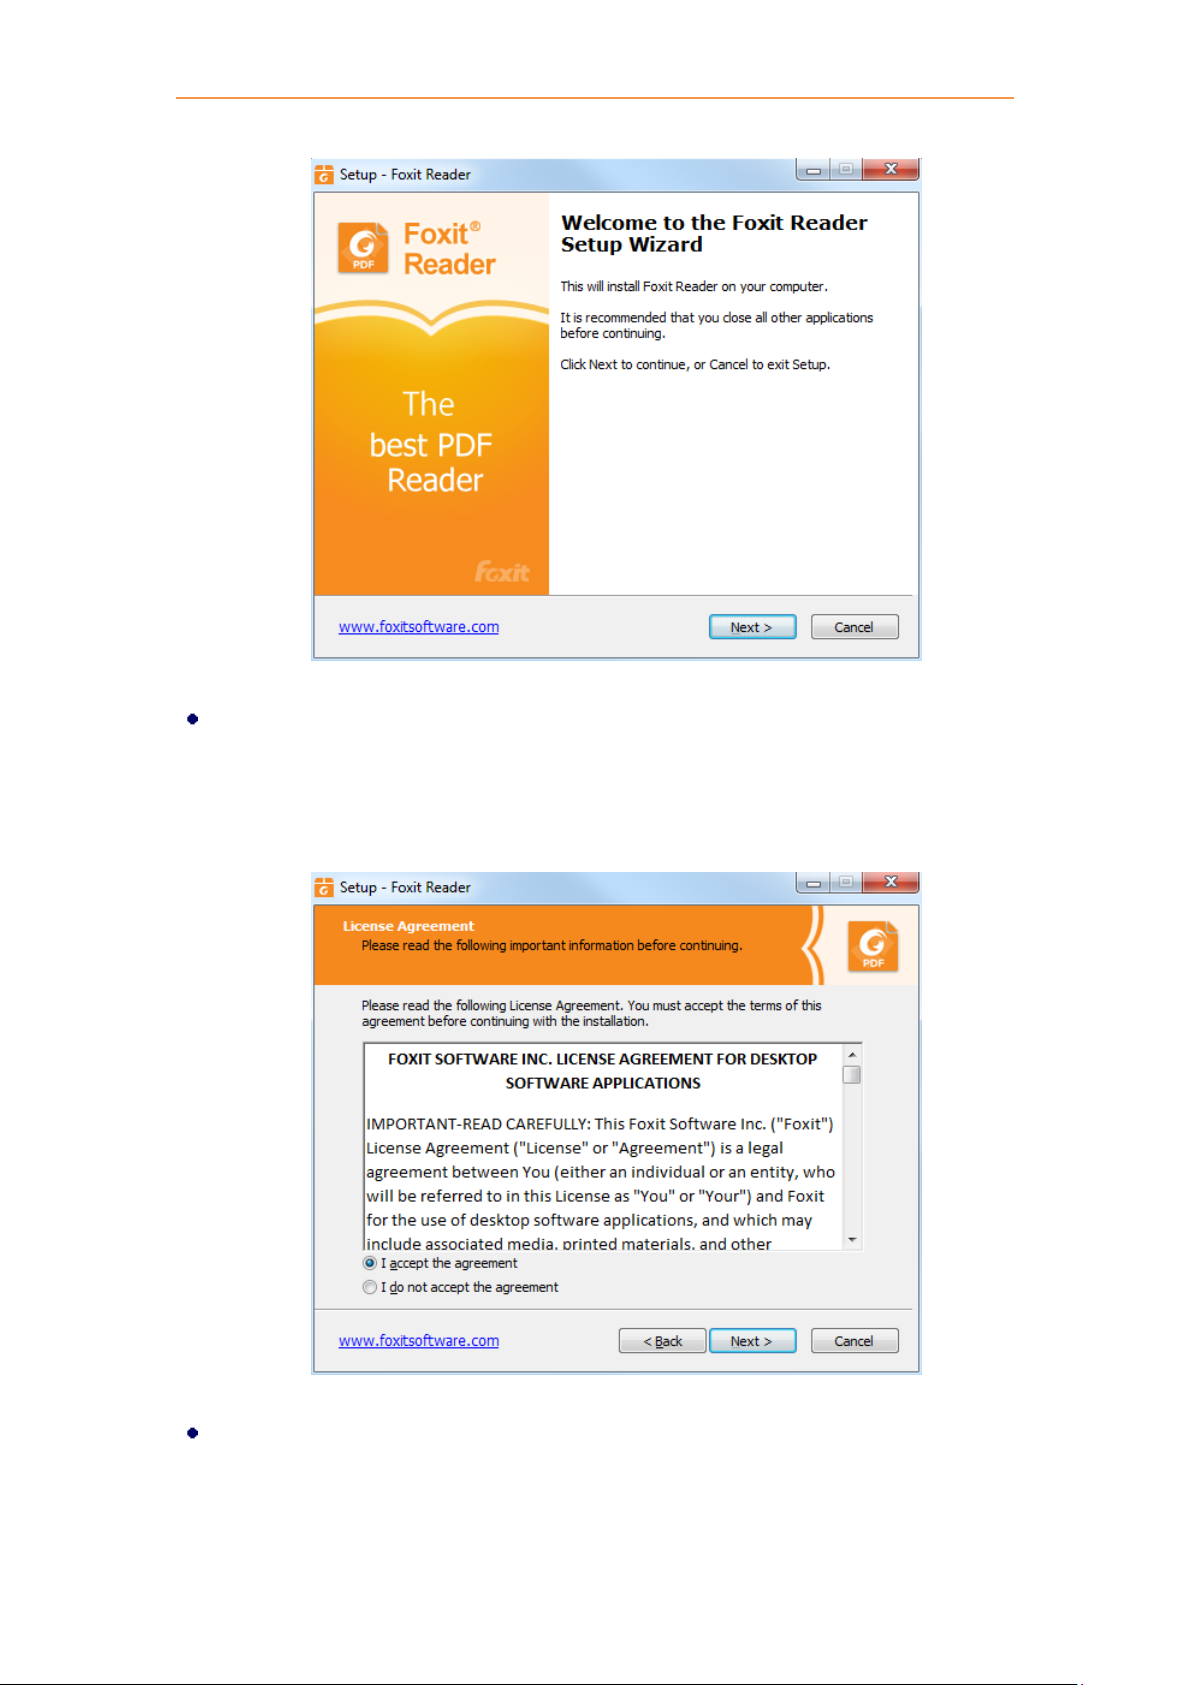
Double-click the installation file and you will see the Install Wizard pop up. Click Next to
continue.
6
Page 11
Foxit Reader
Chapter 2: Getting Started User Manual
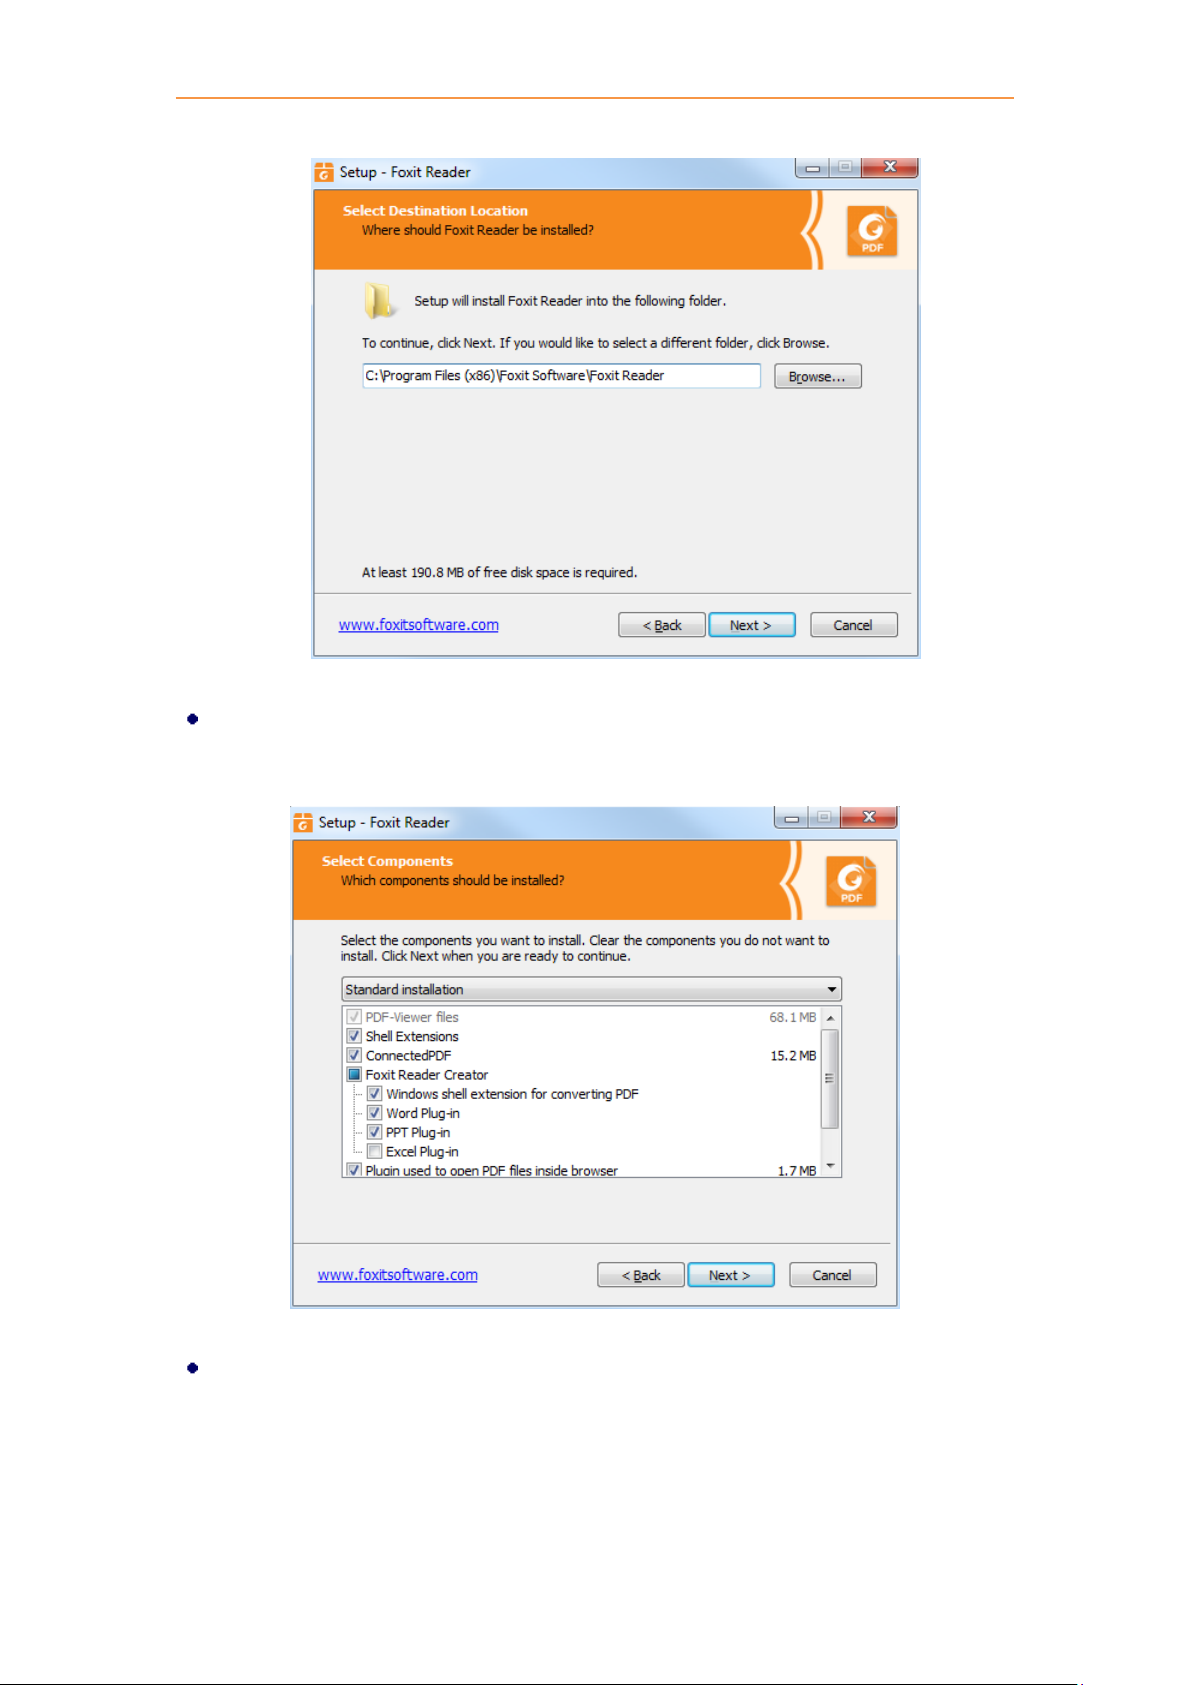
In order to install Foxit Reader on your system, you are required to accept the terms and
conditions of Foxit’s License Agreement. Please read the agreement carefully and then check
I accept the agreement and click Next to continue. If you cannot accept the agreement,
please click Cancel to exit the installation.
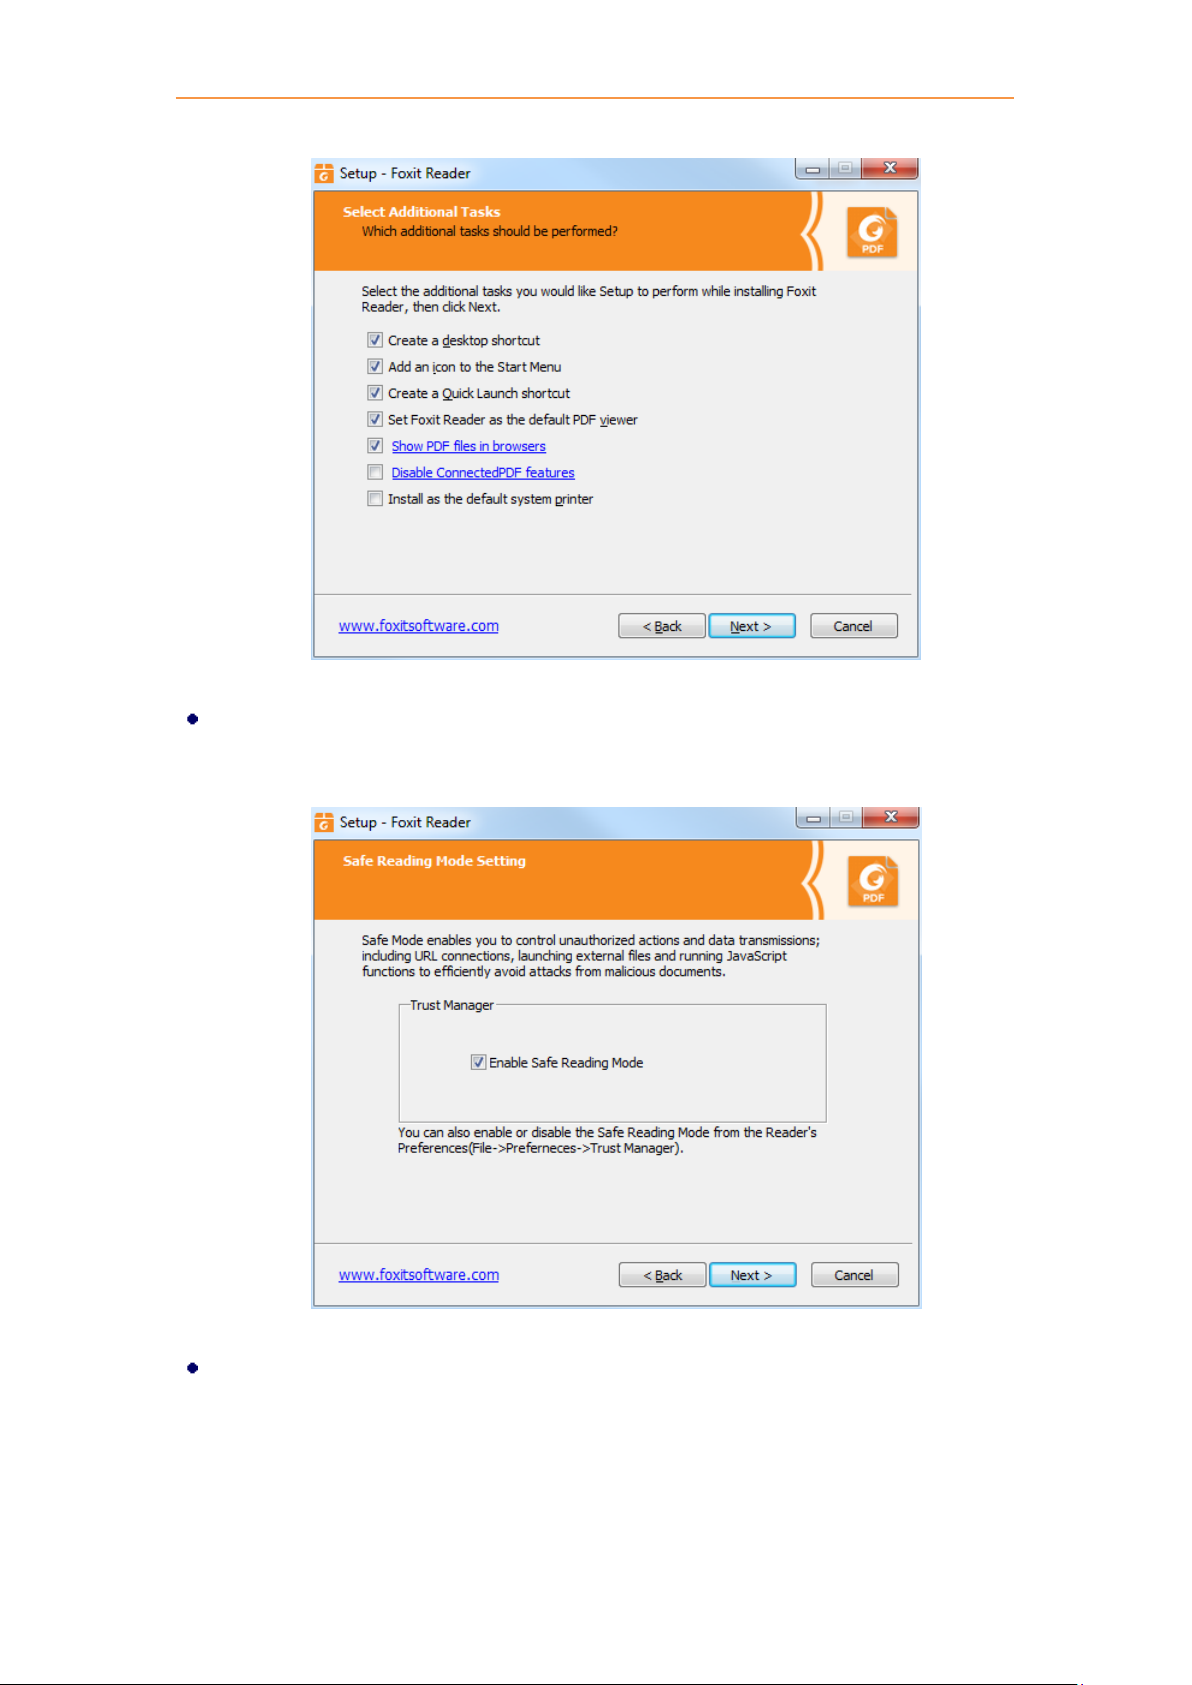
Foxit Reader will be installed under the default path: C:\Program Files \Foxit Software\Foxit
Reader. If you want to change the location, please click Browse and set the installation path.
7
Page 12
Foxit Reader
Chapter 2: Getting Started User Manual
Choose to select standard or custom installation. You may also select the additional
components.
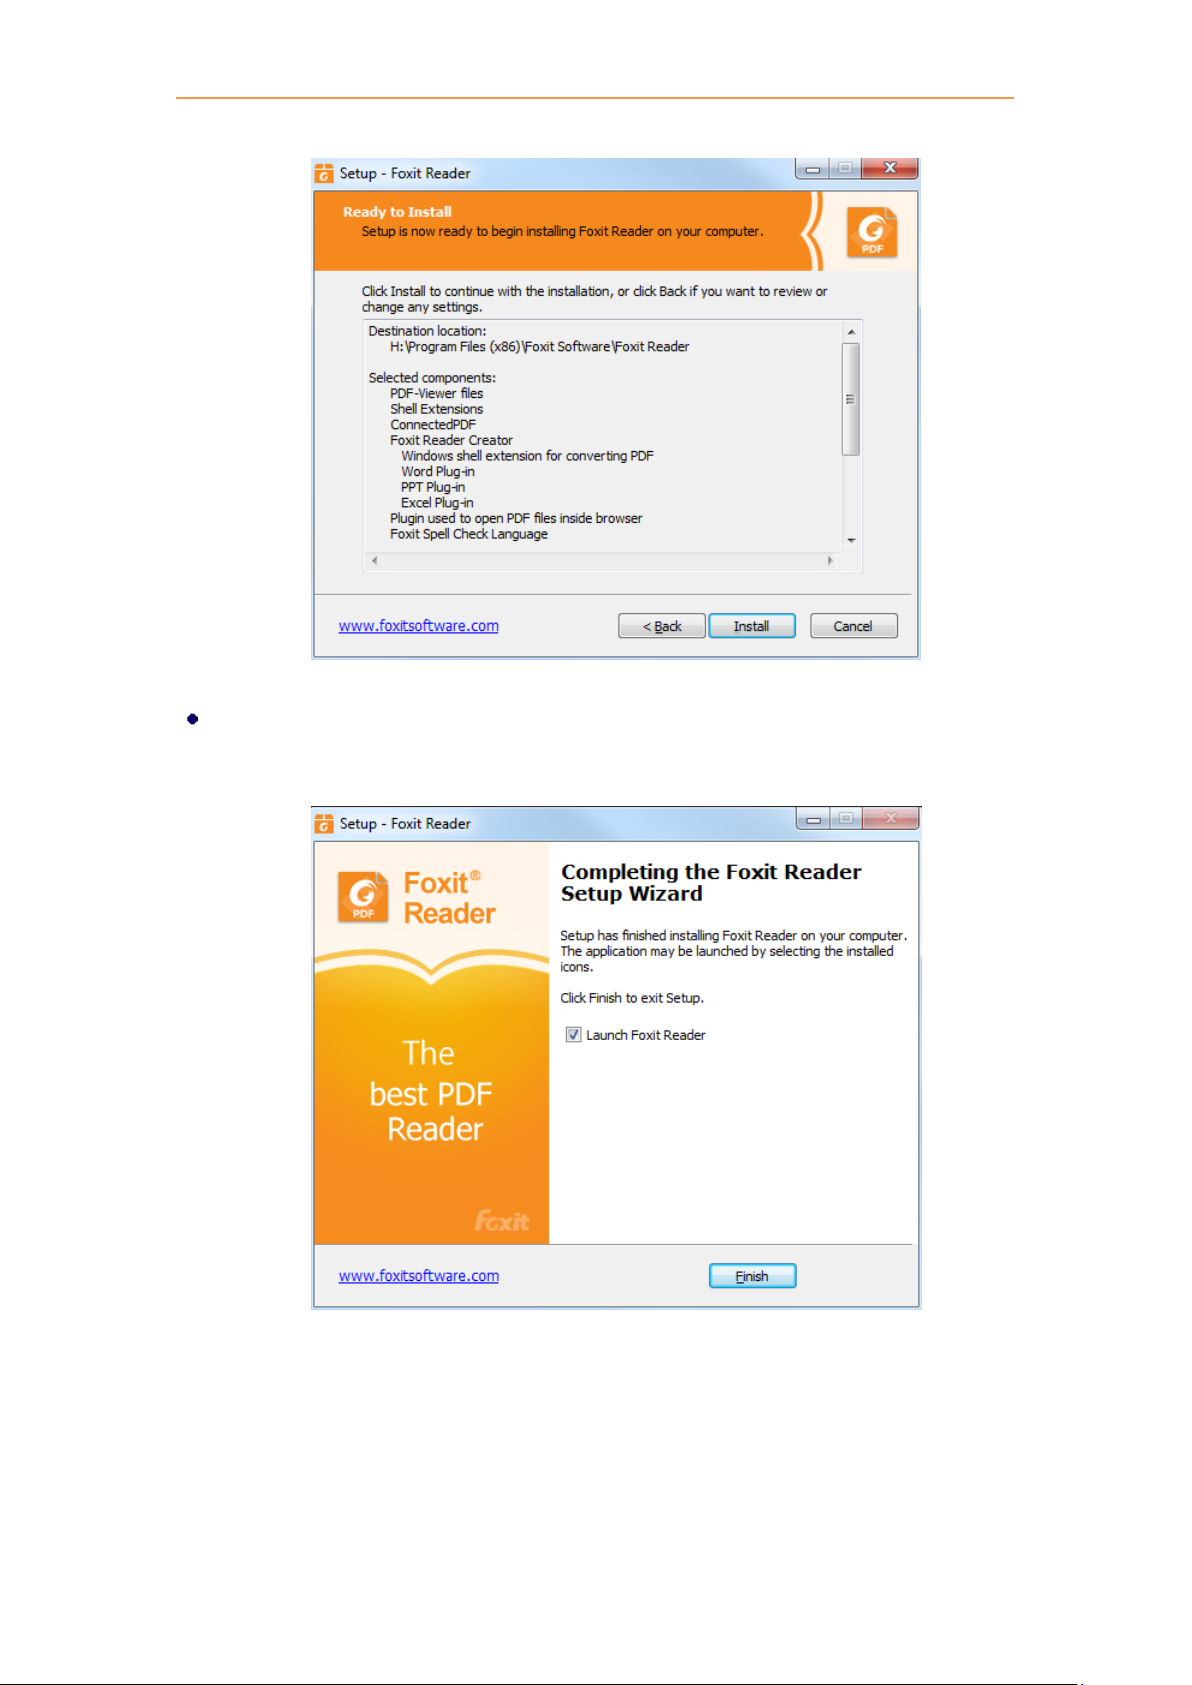
If you choose custom installation, you will be given a chance to select the additional tasks that
you would like to perform while installing Foxit Reader.
8
Page 13
Foxit Reader
Chapter 2: Getting Started User Manual
If you want to set Safe Reading Mode during installation, please check the Enable Safe
Reading Mode.
Check the choices you made and click Install.
9
Page 14
Foxit Reader
Chapter 2: Getting Started User Manual
Finally, a message will appear to inform you the successful installation. Click Finish to
complete the installation.
Command-line Installation
The Foxit Reader properties are:
---------------------------------------------------------------------------------------------------------------
/COMPONENTS <list of features> The value of the /COMPONENTS property is a comma delimited
list of features which the installation of Foxit Reader will make
10
Page 15

Foxit Reader
Chapter 2: Getting Started User Manual
available locally. Foxit Reader installer defines the following
features:
pdfviewer - Foxit PDF Viewer and its components.
ffaddin - Plugin which is used for opening PDF files in Mozilla
Firefox, Opera, Safari, and Chrome browsers. This feature
requires pdfviewer to be installed.
ffSpellCheck - Spell check tool which is used for searching any
misspelled words in typewriter or form filler mode and
suggesting the correct spellings. This feature requires pdfviewer
to be installed.
InstallPrint - Foxit Reader Creator installs a virtual printer on
your system. You can use Creator to convert any printable
documents into high-quality PDFs conveniently and efficiently.
This feature requires pdfviewer to be installed.
InstallPrint\WordAddin - MS word toolbar add-in to create PDFs
by just one click. This feature requires InstallPrint to be installed.
InstallPrint\ExcelAddin - MS Excel toolbar add-in to create PDFs
by just one click. This feature requires InstallPrint to be installed.
InstallPrint\PPTAddin - MS PPT toolbar add-in to create PDFs by
just one click. This feature requires InstallPrint to be installed.
ffse - Plugins for Windows Explorer and Windows shell. These
extensions allow viewing PDF thumbnails in Windows Explorer,
previewing PDF files in Windows 7 and Office 2007. This feature
requires pdfviewer feature to be installed.
ConnectedPDF - ConnectedPDF plugin which is used to create,
share, protect, and track ConnectedPDF documents.
/DIR Specifies the folder where products will be installed.
/TASKS <list of features> The value of the /TASKS property is a comma delimited list of
features which the installation of Foxit Reader will make available
locally. Foxit Reader installer defines the following features:
desktopicon - Installer will place a shortcut for the installed
application on Desktop.
startmenufolder - Installer will create program menu group for
installed application and its components.
Quicklaunchicon - Installer will place a shortcut for the installed
application on the Quick Launch Toolbar.
setDefaultReader - Foxit Reader will be set as the default PDF
reader.
DisplayInBrowser - Foxit Reader will be configured to open PDF
files inside browsers.
11
Page 16

Foxit Reader
Chapter 2: Getting Started User Manual
setDefaultCreator - Installer will install Foxit Reader Creator and
set it as the system’s default printer.
/force Forces to install Foxit Reader.
/clean Removes all of Reader’s registry data and related files.
/DisableInternet Disables all features that require Internet connection.
/displayadobeindoc Opens embedded PDF files in Microsoft Office with Foxit Reader if
Acrobat and Foxit PhantomPDF is not installed.
CPDF_DISABLE Disables the ConnectedPDF features by setting the value to “1”.
READ_MODE Opens PDF file in Read Mode by default in web browsers by setting
the value to “1”.
DISABLE_UNINSTALL_SURVEY Stops the Uninstall Survey after uninstallation by setting the
value to “1”.
Command-line Examples:
1. Silently install the application (no user interaction) to folder "C:\Program Files\Foxit Software",
install ffse component and create desktop icon only:
"Foxit Reader" /COMPONENTS="ffse" /TASKS=" desktopicon" /DIR=” C:\Program Files\Foxit
Software” /verysilent
Updating Foxit Reader Add-ons
Foxit Reader and add-ons can be updated in several ways. Some updates are available if you open
a PDF document that triggers the updating process. Other updates are available only from the Help
tab, where you have to manually install them. However, all updates can be downloaded directly
from Foxit website.
Updating from the Help Tab
1. Choose Help > Check for Updates.
2. Select updates from the column on the left, and click Add to move them to the right column.
Or click Add All Add-ons to select all the available updates. Only the updates and components
appropriate for your product will be listed.
3. Click Next. Foxit Reader will download and install the update automatically. When finished,
click OK to exit Foxit Reader Updater.
12
Page 17

Foxit Reader
Chapter 2: Getting Started User Manual
Use Foxit Updater
1. Choose File > Preferences > Updater.
2. Check the appropriate option according to your requirements.
Automatically install updates: the system will automatically download and replace the
original files in the installation folder when there is a new version.
Automatically download updates, but let me choose when to install them (recommended):
the system will automatically download and display a message informing you of the
upgrade and allowing you to choose to upgrade to the new version. This option is checked
by default.
Do not download or install updates automatically: never download or install updates
automatically.
3. Click OK.
Updating From Foxit Website
1. Click to visit https://www.foxitsoftware.com/products/addons.php.
2. Select and download the add-ons you want to update.
3. Extract them to the same directory where you install Foxit Reader.
4. Re-run the Foxit Reader program to implement the update files.
Note: You can save the customization and settings and apply them in the new version after
upgrading.
Uninstalling Foxit Reader
How to Uninstall?
Please do one of the following:
Click Start > All Programs > Foxit Reader > Uninstall Foxit Reader.
For Windows 8 and 10, click Start > Windows System > Control Panel > Programs > Programs
and Features > Select Foxit Reader and click Uninstall. For Windows 7, Click Start > Control
Panel > Programs > Uninstall a program, select Foxit Reader and click Uninstall/Change.
Double click the Uninstall shortcut under the Foxit Reader installation directory drive.
Note: A short survey window will pop up when Foxit Reader is uninstalled, in order to collect
suggestions for improvement.
13
Page 18

Foxit Reader
Chapter 2: Getting Started User Manual
Online Help
You can get online help about how to read and work with PDF files from within Foxit Reader using
the Help Center and Content-sensitive Help features.
Help Center
Help Center helps you navigate top help topics and get help online. To access the Help Center,
please click Help > Help Center. In the Help Center, you can input a keyword in the Search box to
search for any desired topic. While reading the help contents, you can click to move back
to the previous view, or click to return to the Home Page of the Help Center.
Content-sensitive Help
Content-sensitive Help assists users by providing help based on a specific task they perform. This
enables users to get specific information about whatever feature of the application they are using
at the given moment.
To access Content-sensitive Help:
Hover your mouse over a button, and you will see the tip which gives you the basic instruction of
the feature. If Foxit Reader contains additional help about the feature, you can click Tell me more
to learn more about it in the Help Center.
Work Area
Work Area Overview
Foxit Reader opens in two different ways: on its own (as a standalone application) and in a web
browser. The associated work areas slightly differ.
The Foxit Reader work area includes a document pane that displays PDFs and a navigation pane
on the left side that helps you browse through the current PDF. Toolbars near the top and bottom
of the window provide other controls that you can use to work with PDFs, including toolbar pane,
tab bar and status bar.
The Work Area for PDFs Open in the Application
You can double-click the Foxit Reader icon on the desktop to start the program, and choose File >
14
Page 19
Foxit Reader
A
B
Chapter 2: Getting Started User Manual
Open to open a PDF file from local disks or cloud services. For more information about the work
area, please refer to Toolbar and Commands.
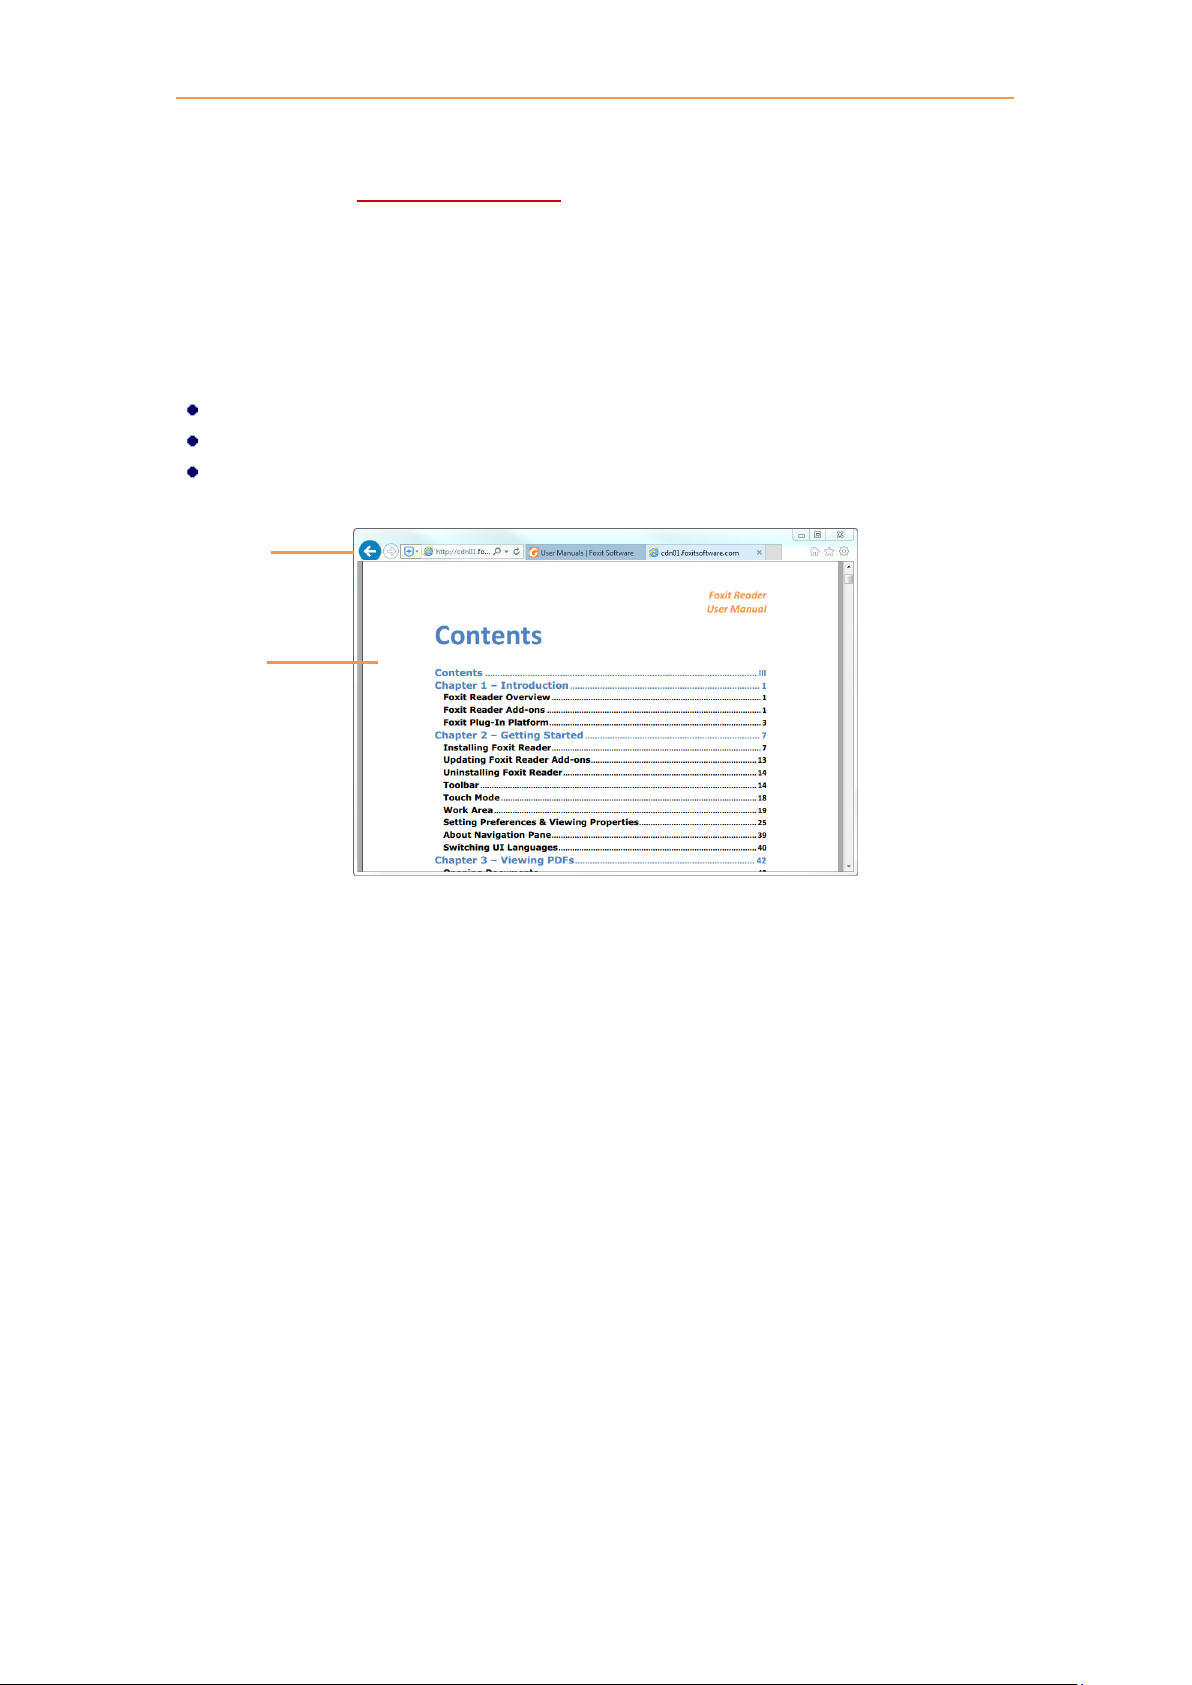
The Work Area for PDFs Open in a Web Browser
You can open and view PDFs in web browser with Foxit Reader if you have set Foxit Reader as the
default PDF viewer.
Open a web browser application.
Select a PDF anywhere on the Internet and click the link.
The PDF will be opened by Foxit Reader directly in the web browser.
PDF Open in a Web Browser
A. Web browser application menu bar and buttons
B. Document pane
Tip: In a web browser, Foxit Reader will display PDFs in Read Mode by default, hiding the toolbars
to maximize the document pane. You can right click the document pane and uncheck Read Mode
to show the toolbars and work on PDFs as desired.
Toolbar and Commands
Toolbar Overview
Foxit has integrated the collective commands in the ribbon interface and created a new way of
working, namely Ribbon Mode. Ribbon Mode is developed based on Microsoft Office 2013 (Office
15) to provide you with a familiar and intuitive user experience. In this mode, commands are
arranged by groups and tasks. Below are some of the highlights of the new interface.
15
Page 20

Foxit Reader
A
B
C
D
E
F
Chapter 2: Getting Started User Manual
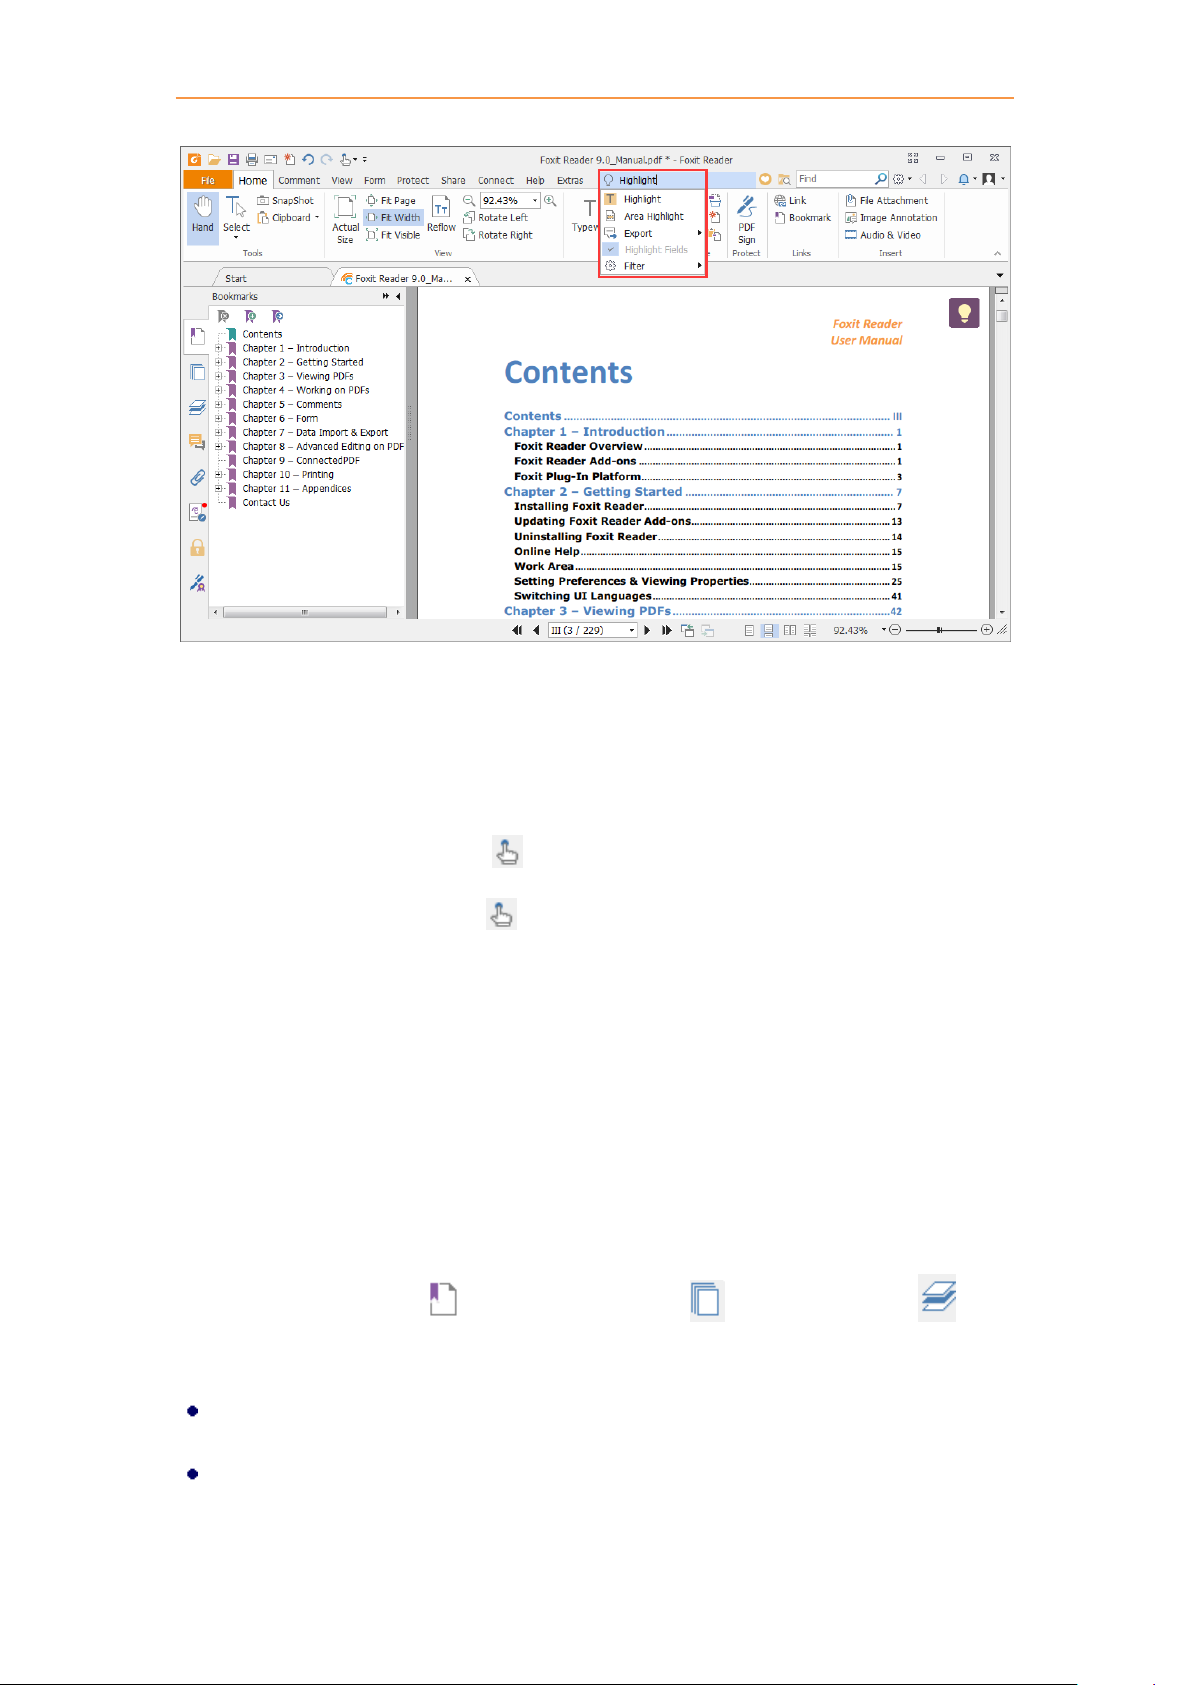
User Interface
A. Quick Access Toolbar B. Tab C. Group and Command D. Navigation Pane (Bookmark Panel
displayed) E. Status bar F. Document Pane
As shown above, Foxit Reader generally contains three toolbars, i.e. Quick Access Toolbar, Tab Bar
and Group and Command Bar.
Quick Access Toolbar: shows the basic commands, such as Open, Save, and Print. You can add
or replace the commands so as to ensure that the commonly used ones are close at hand.
Tab Bar: shows the major tabs of Foxit Reader, being classified as File, Home, Comment, View,
Form, Protect, Share, Connect, and Help.
Group and Command Bar: categorizes the commands by groups according to the function.
Search and Find Commands
You can type the command name in the Tell Me field to find a command and bring the feature to
your fingertips with ease. For example, if you want to highlight text in a PDF file, put your cursor in
the Tell Me box (or press Alt + Q) and input “highlight”. Then Foxit Reader will display a list of
matching commands from which you can select and activate the desired feature.
16
Page 21
Foxit Reader
Chapter 2: Getting Started User Manual
Touch Mode
Touch mode makes it easier to use Foxit Reader on touch devices. In touch mode, the toolbar
buttons, commands, and panels are slightly shifted apart for easier selection with your fingers. To
switch to touch mode, please click on the Quick Access Toolbar, and choose Touch Mode.
While in touch mode, you can click and choose Mouse Mode to return to the mouse mode.
About Navigation Pane
The navigation pane, located next to the document pane, can display different navigation panels,
including Layer panel, Attachments panel, Pages panel, Comments panel, Bookmarks panel,
Security Settings panel, Articles panel, Digital Signatures panel, and ConnectedPDF panel. Please
note that the navigation pane is unavailable when Foxit is open but empty (no PDF is open).
The buttons on the left side of the navigation pane provides easy access to various panels, such as
the Bookmarks panel button , the Pages panel button , and the Layers panel . After
right-clicking the navigation pane, you can select and open more panels.
To show the navigation pane, choose View > Navigation Panels > Show Navigation Panels, or
use keyboard shortcut F4.
To open a navigation panel, you can either click its button on the left side of the navigation
pane, or choose View > Navigation Panels > [navigation panel name].
17
Page 22

Foxit Reader
Chapter 2: Getting Started User Manual
To close the navigation pane, choose View > Navigation Panels > Hide Navigation Panels, or
use keyboard shortcut F4, or right click on title of the navigation panel and select Hide
Navigation Panels.
Tip: To show or hide the navigation pane, you can also click on the button at the top right
corner of the navigation pane.
Adjusting the Navigation Pane
The navigation panels can be docked in the navigation pane or they can float anywhere in the work
area of Foxit Reader. You can choose to hide or close the panels that you don't need and open the
ones you do. What’s more, you can also adjust the width of the navigation pane easily.
1. Viewing a Panel in the Navigation Pane
By default, all the panels dock in the navigation pane with a set of panel buttons appearing on the
left side of the work area.
Do one of the following:
Select the button for the panel on the left side of the navigation pane.
Choose View > Navigation Panels > [panel name].
2. Changing the Display Area for Navigation Pane
To change the view area of the navigation pane, drag its right border to adjust the width.
To minimize the navigation pane, click on the button at the top right corner of the
navigation pane.
To expand the navigation pane, click at its top right corner and the navigation pane will be
expanded to occupy the whole pane of Foxit Reader.
3. Docking or Floating a Navigation Panel
To float a navigation panel, drag the panel button into the document pane.
To move a panel, drag it by its panel button to another location.
To dock a floating panel, double-click its title bar.
To group two floating panels, drag the title bar of one panel into the other floating panel.
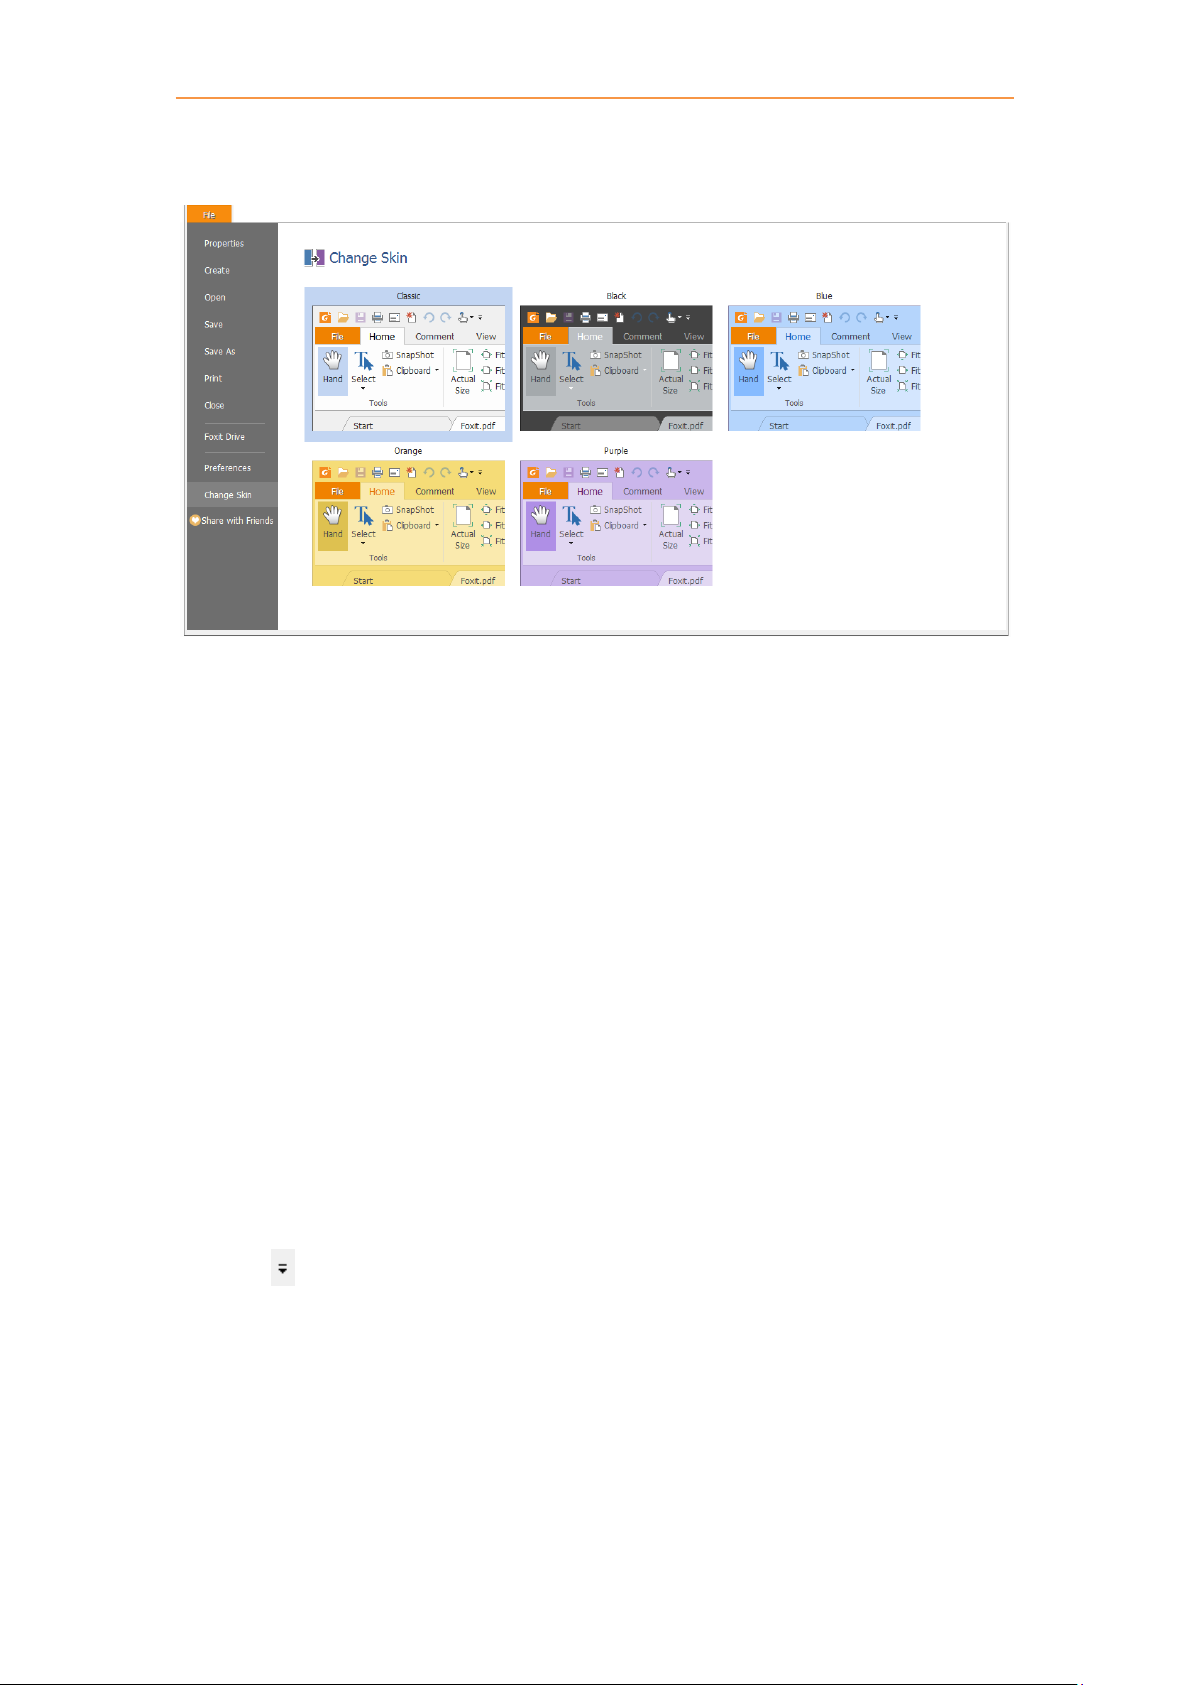
Setting the Skin
This feature offers five skins so that you could change the appearance of the software.
18
Page 23
Foxit Reader
Chapter 2: Getting Started User Manual
To change the appearance of Foxit Reader, select File > Change Skin > choose the skin as desired.
Customizing the Work Area
As you get acquainted with Foxit Reader, you can set up your Reader work environment. The more
you learn about its potential, the more you can take advantage of its features, commands, and
options.
There is much more to the application than you see at first glance. Foxit Reader has hidden
commands and preferences that can enhance your experience and give you greater control over
how your work area is arranged and displayed.
Customizing Quick Access Toolbar
Quick Access Toolbar displays all your bookmarked commands. You can add commands that will
let you view and search content easily to your Quick Access Toolbar. This is another way for you to
arrange and manage all the commands.
To add a command to quick access toolbar, please follow the steps bellow:
Click on the Quick Access Toolbar, and select More Commands. Or right-click the ribbon
area and choose Quick Access Toolbar.
In the Customize Tools dialog box, choose the Customize Quick Access Toolbar tab.
Select the commands or separators you preferred to be shown on Quick Access Toolbar and
add them to the Quick Access Toolbar list. Click Up or Down to arrange the command order
and then click OK.
19
Page 24

Foxit Reader
Chapter 2: Getting Started User Manual
To return toolbars to default configuration, please click on the Quick Access Toolbar, choose
More Commands and click Reset on the pop-up context or press Alt+F8.
Tips: You can also right-click a command in the ribbon and choose Add to Quick Access Toolbar to
add the command to Quick Access Toolbar.
Show Quick Access Toolbar below/above the Ribbon
To show Quick Access Toolbar below/above the ribbon area, do any of the following:
Click on Quick Access Toolbar, and select Show Below the Ribbon or Show Above the
Ribbon.
Right-click the ribbon area and choose Show Quick Access Toolbar Below the Ribbon or Show
Quick Access Toolbar Above the Ribbon.
Open the Customize Tools dialog box. In the Customize Quick Access Toolbar tab, select the
Show Quick Access Toolbar below the Ribbon option.
Working with the Ribbon
To collapse the Ribbon, click at the bottom-right corner of the Ribbon.
If you want to use a command after collapsing the Ribbon, you can click the tab and then
choose the desired command. The Ribbon will be collapsed, but the command will remain
selected.
If you want to keep the Ribbon visible after collapsing it, click a Ribbon tab to display the
Ribbon, then click at the bottom right corner of the Ribbon.
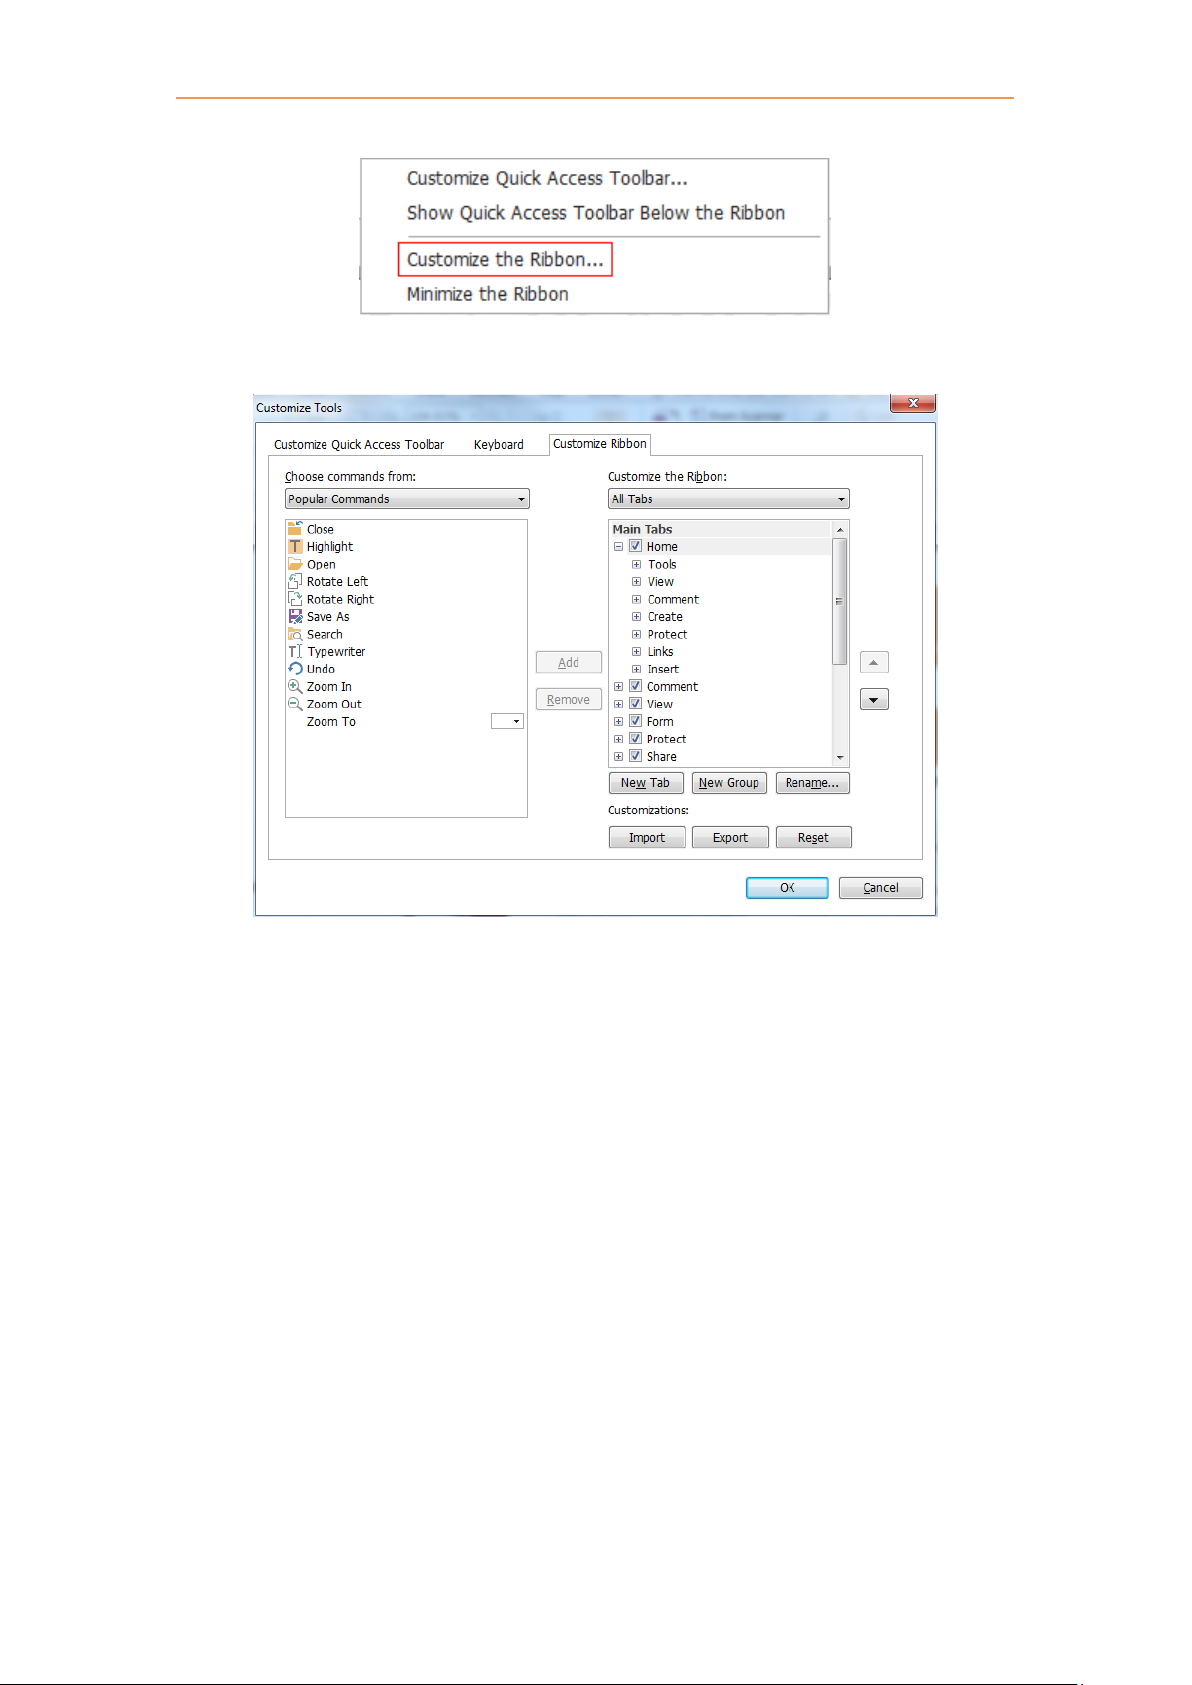
Customizing the Ribbon
The Ribbon is designed to help you find the commands in an easy and convenient way. From
Version 7.0 and on, Foxit Reader give you the capability to personalize and customize the Ribbon
in the way you want. With this feature, you can customize the default Ribbon, and create custom
tabs or groups with your preferred commands.
To customize the Ribbon, right click the Ribbon, choose Customize the Ribbon from the context
menu to bring out the Customize Tools dialog box, and then follow the steps below.
20
Page 25
Foxit Reader
Chapter 2: Getting Started User Manual
Context Menu
Customize Tools Dialog Box
Create a new tab
To create a new tab, please do one of the following:
Select the tab which you want to add the new tab after, and then click New Tab.
(Alternatively) Right click the tab which you want to add the new tab after, and then choose
New Tab from the context menu.
Add a new group to a tab
To add a new group to a tab, please do one of the following:
Select the tab which you want to add the group to, and then click New Group.
(Alternatively) Right click the tab which you want to add the group to, and then choose New
Group from the context menu.
Rename a tab or group
21
Page 26

Foxit Reader
Chapter 2: Getting Started User Manual
Select the tab or group that you want to rename, and then click Rename.
(Alternatively) Right click the tab or group to be renamed, and choose Rename from the
context menu.
In the Rename dialog box, input the new name and click OK.
Add commands to a group
Select the group which you want to add a command under.
Choose the category that the command is under and then the desired command from the
Choose command from list.
Click Add to add the selected command to the desired group.
Remove a tab, group or command
To remove a tab, group or command, please do one of the following:
Select the tab, group or command to be removed, and click Remove.
(Alternatively) Right click the tab, group, or command to be removed, and select Delete from
the context menu.
Reorder the tabs or groups
To reorder the tabs or groups, please do one of the following:
Select the tab or group you want to reorder, then click the Up or Down arrow
to move accordingly.
(Alternatively) Right click the tab or group you want to reorder, and then select Move Item
Up or Move Item Down to move accordingly.
Reset the Ribbon
Click Reset in the Customize Tools dialog box to reset the Ribbon to the default settings.
Import a customized Ribbon
Click Import.
In the Open dialog box, select the Ribbon customization file (.xml file), and click Open.
Note: After importing a Ribbon customization file, you will lose all the arrangements you
customized previously. If you want to revert to the previously customized Ribbon, it is
recommended to export the customized Ribbon before importing a new one.
Export a customized Ribbon
22
Page 27

Foxit Reader
Chapter 2: Getting Started User Manual
Click Export.
In the Save As dialog box, specify the file name and path, and then click Save.
Note:
1. After customization, you need to click OK in the Customize Ribbon tab to save and apply your
changes to the Ribbon.
2. To help you distinguish a default tab or group from the customized selections, the custom tabs
or groups in the Customize the Ribbon list are tabbed with “(Custom)” after the name (like this:
), but without the word “(Custom)” on the Ribbon.
3. The commands in the default group under a default tab are displayed in grey, and they cannot
be renamed, reordered, or removed.
4. You cannot remove default tabs in Foxit Reader.
Customizing Shortcut Keys
People’s habits using the keyboard are different and the familiarity to the buttons on a keyboard
is distinct. The intellectualized Foxit Reader allows you to customize the shortcut keys for both
commands and subcommands on the Ribbon according to your habit, which enables you to use
the shortcuts more conveniently than before.
To customize shortcut keys, please follow the steps below:
Click on Quick Access Toolbar > select More Commands. In the pop-up Customize Tools
dialog box, select Keyboard tab.
Choose the command’s category in the Categories list and the action in the Command list.
Input the appropriate shortcut with your keyboard. Click Assign to apply the shortcut. If you
want to change the shortcut, just input the new one to replace it directly. The Reset All button
can recover the default setting.
Note: The shortcut keys that have already being used cannot be reassigned. A message under the
input tab will show you whether the shortcut key has been used by another command.
Setting Preferences & Viewing Properties
Setting Preferences
23
Page 28

Foxit Reader
Chapter 2: Getting Started User Manual
Although Foxit Reader is customizable, some of the customizable features may be difficult to find.
After reading this section, you will find out how useful having your own preferences can be, and
how simple it is to set up your own preferences.
To set preferences in Foxit Reader, please choose File > Preferences.
Note: You can use the arrow keys or Tab key to switch between different preference settings.
Accessibility
Document Colors Options
Replace document colors: Check to activate other options to change the document colors.
A. Use Windows color scheme: Sets document colors according to the color scheme of
your Windows preferences.
B. Use High-Contrast colors: Choose the high-contrast color combination for page
background and document text to improve readability.
C. Custom color: Changes the color of Page Background and Document Text.
D. Only change the color of black text: Change only the black text and leave the colored
text unchanged when you replace document colors.
E. Change the color of text or black line art: Change the color of text or black line arts
when you replace document colors.
Override Page Display
A. Always use Page Layout Style: Set a page layout as default for all PDF documents and
override other page display settings.
B. Always use Zoom Setting: Specify a default zoom setting for all PDF documents and
override other page display settings.
Other Accessibility Options
A. Use document structure for tab order when no explicit tab order is specified: Improve the
navigation of form fields and links that don’t specify a tab order.
B. Always display the keyboard selection cursor: Specify whether to display the keyboard
selection cursor or not when reading a document. Please check this option if you are using
a screen magnifier.
C. Always use the system selection color: Override the default selection color (blue) with a
color that the system specified.
D. Show Portfolios in Files mode: Display PDF Portfolio component files and file details in a
list.
Commenting
Viewing Comments
24
Page 29

Foxit Reader
Chapter 2: Getting Started User Manual
A. Pop-up opacity: Sets the opacity of pop-up notes for annotation commands.
B. Print notes and pop-ups: Specify whether or not to print sticky notes and pop-up notes
associated with comments in PDF as they appear on the page. Please note that if you
want to print the pop-up notes associated with comments, you should open the pop-up
notes that you want to print in the PDF file, and adjust their placement on the page before
printing to ensure that they don’t overlap or spill off the page. While printing, make sure
that you select the Document and markups option in Print What group in the Print dialog
box.
C. Ensure that pop-ups are visible as the document is scrolled: Ensure that the pop-up boxes
float along with the page as the document is scrolled. This option is checked by default.
Making Comments
A. Always use User Name of the log-in account for Author name: Use the user name of the
log-in account as the author name while making comments. If a user does not set the
user name for the Foxit log-in account, the prefix of the email address will be used as the
author name instead.
B. Copy selected text into Highlight, Squiggly Underline, Underline, and Strikeout comment
pop-ups: Check this option to copy and paste the selected text to comment pop-up notes
automatically when you highlight, squiggly underline, underline, or strikeout annotation
in PDF documents.
Pencil Setting:
A. Enable to select pencil annotation when drawing: When the Pencil command is selected,
the cursor changes into a pencil . If this option is selected, the pencil changes into
an arrow when you put it over a pencil annotation, and you can click the annotation
to select it. If the option is not selected, the pencil will not change into an arrow.
B. Click to create annotations: If selected, you start to draw with the pencil when you click
on the page, and in other words, only one click creates a pencil annotation; if not selected,
you do not start to draw until you click and drag the pencil.
C. Set Timeout: Specifies a period of time within which all of the drawings/plans completed
is one pencil annotation, after which what you draw is another pencil annotation.
Editing: Sets the text direction for text comments, including left to right and right to left.
ConnectedPDF (This tab is only available when the ConnectedPDF features are enabled)
Data Collection
25
Page 30

Foxit Reader
Chapter 2: Getting Started User Manual
Allow usage data to be used in ConnectedPDF features: If this option is checked, the document
usage data will be shared with Foxit servers when you are using ConnectedPDF features. This data
will be used for development purposes and enhancing user experience only. You can click here to
learn about the privacy policy.
Use ConnectedPDF Format
1. Automatically save PDF files in ConnectedPDF format (including those created from plugins)
only when signed in: If you check this option and have signed into Foxit Account, Foxit Reader
will automatically convert the files into ConnectedPDF format when creating or saving PDF files.
2. Automatically convert Office files to Connected when converting to PDF via Office add-in: If
this option is checked, after converting the Office document to ConnectedPDF format, the
Office document will become connected, and you will then be able to view the document
homepage of the converted ConnectedPDF by clicking the Document Homepage button under
the FOXIT READER PDF tab in Microsoft Office.
How to show web pages
When using ConnectedPDF, Foxit Reader will display ConnectedPDF-related information (such as
the Document Homepage and Personal Homepage) in web pages. You can choose to display the
web pages in the tabs within the application, or in your default browser.
Default Permissions
Users can configure the default settings for whether to allow or disallow users of ConnectedPDF
documents to register new versions or start Connected Reviews on ConnectedPDF documents they
create.
Create PDF
Create PDF feature allows users to set the Page Size of PDF to be created.
A. Fixed size: Sets the size and direction of PDF through drop-down list.
B. Custom: Customizes the Page Size of PDF to be created. You can select the units first and then
set the width and height of page as needed.
C. Allow pop up alert when creating PDF: Check this option to show message when converting
PDFs in Microsoft Office by the Foxit Reader PDF add-in.
Documents
The Document of the Preferences dialog provides several ways to browse PDF documents.
Open Settings
26
Page 31

Foxit Reader
Chapter 2: Getting Started User Manual
1. Allow multiple instances: Creates a new Foxit Reader window when double-clicked to open a
PDF file.
2. Alert user when documents request Full Screen: A message box will pop up to confirm the
operation when opening a PDF which has been defined to be opened in full screen mode.
3. In web browser, display PDF in Read Mode by default: Opens a PDF in Read Mode
automatically in web browser.
4. In Foxit Reader, please choose the mode for Display PDF Mode: Display the PDFs in Read Mode
or Full Screen Mode or normal way automatically when opening PDFs with Foxit Reader.
Prompt Messages
1. Display a prompt before closing all tabs: When you close a window with multiple tabs, Foxit
Reader will ask you to confirm your choice. This prevents you from accidentally closing the
whole window when you intend to close only the current tab.
2. Automatically save document as e-mail attachment: Automatically save the changes you
made to a document and attach the modified document to your email system for sending.
PDF/A View mode
Sets to view documents in PDF/A view mode (i.e. read-only mode) to prevent modifications
to the documents.
1. Never: Never open documents in PDF/A view mode.
2. Only for PDF/A documents: Switch to read-only mode automatically when a PDF/A
document is opened.
Save Setting
1. Automatically save file every _ minutes: Configure the time intervals for when the
document will be automatically saved.
2. Save as optimizes for fast web view: Checking this option can enable Fast Web View when
you save a PDF files as a copy, which will restructure a PDF file for page-at-a-time
downloading from web servers for faster access.
Preferred Save As Location
If you have configured a preferred save as location, when prompted to specify a location to
save a document, the configured location will be automatically chosen in the Save As dialog
box. To add a preferred save as location, click Browse to select the location, or input the
location in the Preferred Save As Location field. If you need to remove the configured output
location, just delete the directory path in the Preferred Save As Location field.
ECM Integration
SharePoint
27
Page 32

Foxit Reader
Chapter 2: Getting Started User Manual
Choose the default way to open the document from SharePoint server.
Open only: Open the document directly without checking out.
Check out and Open: Check out and open the document so that other users cannot modify
the document at the same time.
Allow you to choose when opening the document: Let you choose the way to open the
document from SharePoint server. If you check this option, a dialog box will pop up when you
open the document. In the dialog box, you can choose to open or check out and open the
document as desired.
File Associations
This option allows you to set the default PDF Viewer.
Make Foxit Reader the default PDF viewer:
Advanced
1. Include browser when setting default PDF viewer: check this option to set Foxit Reader as
the default PDF viewer in browser.
2. Include preview when setting default PDF viewer: check this option to set Foxit Reader as the
default PDF viewer in preview.
3. Include thumbnail when setting default PDF viewer: check this option to set Foxit Reader as
the default PDF viewer in thumbnail view.
4. Use Foxit Reader to open embedded Acrobat files and embedded Foxit PhantomPDF PDF files
in Microsoft Office if Acrobat and Foxit PhantomPDF is not installed: check this option to set
Foxit Reader as the default PDF viewer in Microsoft Office for opening embedded Acrobat files
and Foxit PhantomPDF PDF files.
Make default PDF viewer: Makes Foxit Reader as default PDF viewer. Foxit Reader will be set
as the default PDF viewer according to your setting in Advanced item. For example, if you
check “Include browser when setting default PDF viewer” in Advanced item, and click Make
default PDF viewer to activate the setting, then PDF files will be displayed by default with
Foxit Reader in your Windows system as well as your browser.
Restore file associations: Restores settings in File Associations.
Always perform check when starting Foxit Reader: If the default PDF viewer is not Foxit
Reader, a message box will appear for the options to set it as your default viewer every time
you run Foxit Reader.
Forms
The form tab enables you to set the preferences of the interactive form display.
28
Page 33

Foxit Reader
Chapter 2: Getting Started User Manual
Always hide document message bar: You can decide whether to show or hide the notification
message when opening an interactive PDF form.
Highlight all fields: Checking this option allows you to highlight all form fields in the PDF
document. You can click the color palette to change the highlight color for ordinary fields as
well as required fields.
Enable autocomplete: If you enable the autocomplete feature, the entries you type into an
interactive form filed will be stored. When filling an interactive PDF form, this feature will
suggest keywords that match your typing in the field.
Email: You can edit the default subject and contents which will be sent with the PDF form.
Full Screen
Full Screen Navigation
A. Select to show Scroll bar, Status bar, Tab bar or Navigation Panels in Full Screen mode.
B. Show Exit button – Check or uncheck this option to show or hide Exit button in Full Screen
mode.
C. One page at a time – Displays a single page at a time in Full Screen mode.
D. Left click to go forward one page; right click to go back one page -- Lets you page through
a PDF document by clicking the mouse. You can also page through a document by pressing
Space, Shift + Space, or the arrow keys.
Full Screen Appearance
Background – Click the color pane and choose the color you like to be the background color
in Full Screen mode.
Full Screen Transitions
Foxit Reader supports page transition in Full Screen mode. There are 11 transition types: Split,
Blinds, Box, Wipe, Dissolve, Glitter, Fly, Push, Cover, Uncover and Fade. Also, you could set the
direction for the transition.
A. Ignore all transitions: Check to ignore page transition in Full Screen mode.
B. Default transition –Choose page transition for one document in the drop-down window.
C. Direction - Set the direction for the transition.
D. Navigation control direction: If selected, the direction of page transition will be based on
your navigation direction in the document. For instance, if you turn to the next page, the
page will transition from top to bottom; to the previous page, the page will transition
from bottom to top. For some transitions without directions, the option is not available.
General
The General Preferences provide options on Basic Tools, Tab Bar, Status Bar, Notification Messages,
Application Startup settings, etc.
29
Page 34

Foxit Reader
Chapter 2: Getting Started User Manual
Basic Tools
A. Use single-key accelerators to access tools: Enable single-key accelerators to select some
commands and perform some actions with single-key shortcuts. Please refer to Single-
Key Accelerators for more details.
B. Use fixed resolution for snapshots - Sets the resolution used to copy the image captured
with the Snapshot command. Automatically uses 72 pixels as default resolution.
C. Create links from URLs - Detects the text links in PDF documents and change the non-
clickable links into clickable ones.
D. Minimize to system tray - You can save space on your task bar by minimizing the Foxit
Reader to system tray. Check it to minimize Foxit Reader to system tray when you click
the Minimize button.
E. Screen word-capturing - Check it to turn on this function that enables you to use your
mouse to capture words inside a PDF file and have it translated if you are using dictionary
software.
F. Make Hand Tool select text - Check it to enable hand command to become text selection
command when moving it to the selectable content.
G. Make Hand Tool read articles – Check it to enable the navigation of an article with the
help of the pointer. After you start the article viewing mode, with the Hand tool selected,
the pointer will automatically change to a Hand tool with an arrow in it when hovering
over an article thread. Then the clicks with the pointer will follow the article thread,
making the article navigation effective. See also Navigating with Article Thread. The
option is checked by default.
Tab Bar
A. Max tab size – Allows you to specify a maximum tab size.
B. Double-click to close tab: Checking this option allows you to close tabs by double-clicking.
C. Use recent order when switching tabs with Ctrl + Tab: In multi-tab reading, use Ctrl + Tab
to switch through open tabs in recent order you viewed them. With the option unselected,
using Ctrl + Tab to switch the tabs in the order they appear in the application window.
D. Quickly switch between tabs by using mouse wheel: In multi-tab reading, switch through
open tabs by scrolling the mouse in the tab bar. Scroll up to the previous tab, and down
to the next tab.
Status Bar
A. Auto-hide status bar – Hides the status bar when opening a PDF, and enables it to float at
the bottom of the page only when the cursor is moved to the bottom.
B. Show scroll lock button: Enable scroll lock and display the scroll lock icons in the status
bar.
Notification Messages
30
Page 35

Foxit Reader
Chapter 2: Getting Started User Manual
Notification messages appear at the top right corner of the document pane when you work
with interactive PDF forms, PDF/A files, or PDF files under shared review or email review, etc.
You can configure the notification message settings as required:
A. Show the message which affects the next step: Specify whether or not to show the
procedure-related notification messages which usually contain action buttons for you to
move forward to the next step. This option is checked by default. And it is recommended
to keep the option checked so that you can work on documents during Shared Review or
Email Review normally.
B. Show the notification related message: Specify whether or not to show the notification
related messages which inform you that a PDF file contains such elements as interactive
form fields, 3D contents, etc.
C. Show PDF/A message again: Specify whether or not to show the message when opening
a PDF/A document.
Tip: You can also change the notification message settings by clicking the gear icon on
the message shown on the document pane. The changes of settings you made in the
notification message will be applied accordingly in the Notification Message preferences.
User Experience Improvement
Turn on or off data collection. The collected data will be used to improve the user experience
only.
Features which Required Internet Connection:
Specify whether to disable all features that require Internet connection. The setting will take
effect after you restart the application.
Application Startup
A. Show Start page: Check it to show the start page when running Foxit Reader.
B. Show Advertisement: Check it to show advertisement on the start page.
C. Disable ConnectedPDF features: Check this to disable all of the ConnectedPDF features.
D. Show floating promotion page: Check it to show the floating promotion page if the
program becomes idle. Only applicable during a free trial.
D. Launch in debug mode: This option is unchecked by default. Checking this option will
enable Foxit Reader to be launched in debug mode and log file will be generated during
your operation. Log file will be saved in “%userprofile%\AppData\Local\Foxit
Reader\glog”. When you encounter issues while using Foxit Reader, you can send the log
file to Foxit and the log file will be used for checking and solving your issues only.
31
Page 36

Foxit Reader
Chapter 2: Getting Started User Manual
History
History
A. Restore last session when application starts: Determines whether documents start
automatically with the last viewed session.
B. Restore last view settings when reopening: Determines whether documents open
automatically with the last viewed settings.
C. Maximum number of documents in history list: Sets the maximum number of PDF
documents you read in history list. The default is 50 PDF documents.
D. Maximum number of documents in Recent Documents list: Sets the maximum number of
PDF documents you have viewed recently in the File page. The default setting is 10 PDF
documents.
E. Show this number of unpinned Recent Folders: Set the number of unpinned recent folders
listed in File > Open > Computer or SharePoint/OneDrive/Google Drive/Dropbox. The
default setting is 10 folders.
Note: Foxit Reader allows users to set “maximum number of documents in history list”, “maximum
number of documents in Recent Documents list”, and the “number of unpinned Recent Folders”
to 0.
Identity
Shows the identity of your application, including Login Name, Name, Title, Organization Name,
Organization Unit, and Email Address. The identify information is quite useful in PDF reviews. It will
help other review participants recognize your comments easily. The Login Name is set by default
(using the username of the current operation system) and cannot be changed. Except for Login
Name, you can change or complete your identity information in Identify Preferences.
Indexing
Enable embedded index: Select this option to enable the search with the embedded index in the
document.
Languages
Change the application language and default reading direction.
Languages
Foxit Reader provides the commonly used languages to meet customers’ needs to the upmost.
Usually, Foxit Reader will automatically choose the language applied to your OS as its default during
your installation. But changing languages after installation is supportable. To change the UI
language of Foxit Reader, please go to File > Preferences > Languages, and select an option from
the following:
32
Page 37

Foxit Reader
Chapter 2: Getting Started User Manual
Use system locale language—Makes the system locale language the UI language.
Choose custom language—Selects your desired UI language from the list. (Tip: Foxit Reader
has been localized in German, Spanish, French, Italian, Dutch, Polish, Portuguese, Russian,
Danish, Finnish, Norwegian, and Swedish. You can click here to download the official
multilingual version from Foxit website.)
Choose languages provided by the community—Selects the language translated by volunteers
on Foxit multi-language translation system. A prompt message will pop up giving you a notice
that you can get the UI language package on our website. In addition, you can also help us to
do some translation so that we can localize Foxit Reader into your own language. To visit our
multi-language translation system, please click here.
Default Reading Direction
Choose a default reading direction when you’re reading a document in Facing or Continuous Facing
mode. With Left to Right or Right to Left selected in Default Reading Direction, the reading
direction is based on the setting here in Preferences; with Infer direction from document selected,
then the binding direction in File > Properties > Advanced prevails.
Measuring
Measurement Units
Sets unit of page dimensions given in the status bar and print dialog.
Measurement Label
Choose to use the default measurement label or specify your own label.
Measurement Markup
Use Default Leader for Distance Measurement: Specify whether to show the line leader on both
sides of the measurement points or not while measuring the distance.
Use Scale and Units From Document (When present)
Select the option to use the scale and units embedded in the document, if any. Deselect the option
to specify the scale and units manually. The option is unselected by default.
Multimedia (legacy)
Do not use QuickTime Player for multimedia items: This option is checked by default. As Apple does
not provide security updates for its legacy QuickTime for Windows software any more, it is
recommended to keep this option checked for security purpose. When checked, Foxit Reader will
33
Page 38

Foxit Reader
Chapter 2: Getting Started User Manual
invoke a multimedia player other than QuickTime Player in your Windows system to run the
multimedia inserted in PDF files, but will not play the video if it has been specified to use QuickTime
as the required player.
Page Display
The Page Display panel of the Preferences dialog box includes the following options:
Default Layout and Zoom
A. Navigation tab: specifies the panel to be displayed in the opening view.
a) Use Initial View: minimizes the Navigation panel and hides all panels.
b) Page Only: displays Pages panel by default in opening view.
c) Bookmarks Panel and Page: displays Bookmarks panel by default in opening view.
d) Pages Panel and Page: displays Pages panel by default in opening view.
e) Attachments Panel and Page: displays Attachments panel by default in opening view.
f) Layers Panel and Page: displays Layers panel by default in opening view.
B. Default page layout: You can view PDFs in following layouts:
a) Automatic: With this option selected, in multi-page document, displays pages in
Continuous mode, or in Single mode if the page width is larger than the page height.
If you change the page display in the View tab, the document will display in the page
layout the last time you set.
b) Single Page -- Displays one page at a time, with no portion on other pages visible.
c) Continuous -- Displays pages in a continuous vertical column that is one page wide.
d) Facing -- Displays each two-page spread with no portion of other pages visible.
e) Continuous Facing -- Displays facing pages side by side in a continuous vertical
column.
See also “Changing the Page layout”.
C. Zoom: Sets the magnification level for PDF documents when they are first opened. This
value overrides document settings. The default uses the settings of the PDF document.
D. Custom facing: The Default Facing for page layout is 2 pages. You can check the Custom
Facing box and set the facing layout to your own preference.
E. Custom margin: Sets the margins between different pages with Facing or Continuous
Facing page layout. The default is a margin of 8 pixels.
Rendering
A. Smooth text: Optimally adjusts text display that best suits your monitor.
B. Smooth line art: Removes the abrupt angles in lines to make them smoother.
Page Content
A. Display transparency grid: Displays a grid behind transparent objects.
B. Use logical page numbers: Open PDFs with the logical page numbers. This option is
34
Page 39

Foxit Reader
Chapter 2: Getting Started User Manual
selected by default. It is used to match the position (or the physical page number) of the
page in the PDF to the printed page number of the document. For instance, for a document
with 100 pages, when you turn to the second page, the page number displayed in the
status bar will be 2/100 (the physical page number) theoretically. However, if the PDF
contains four-page front matter (such as the cover page and the copyright page) which is
numbered in lowercase Roman numbers (i-iv) while the main content is numbered in
Arabic numbers starting from 1 (1-96). Foxit Reader will display the logical page number,
followed by the physical page number in parentheses, i.e. 2(6/100) when you turn to the
sixth page of the PDF. With this option unselected, only the physical page number is
displayed in the status bar, i.e. 6/100 for the sixth page.
C. Forbid the change of the current Zoom factor during execution of ‘Go to Destination’
actions (these actions can be launched from bookmarks): Check to forbid user to change
the current Zoom factor during execution of ‘Go to Destination’.
See also “Changing the Magnification Level of a Document”.
PDF Sign
Flatten the document when applying all signatures: Flattening the document when applying all
signatures will make all the signatures, forms, and annotations become one whole object of the
PDF page.
Printer
Print text as graphics (ignore font substitution) – Sets the text font as graphics and printout
fonts are exactly the same as the text fonts. Automatically allows quick print where Printer
Font is substituted.
Use GDI + Output for all types of printer: Specify whether to use GDI + output or not for PS
driver printers (excluding PCL driver printer) during printing.
Batch Print
A. Show print settings before printing document: Check it to show the Print dialog box
before printing a document.
B. Require confirmation when printing multiple documents: Check it to show the
confirmation message before starting batch printing.
Prompt Foxit Reader when printing in silent print mode
Specify whether to close Foxit Reader instance or not when finishing silent printing using the
command line.
35
Page 40

Foxit Reader
Chapter 2: Getting Started User Manual
Reading
Page vs Document
This preference determines how much of a document is delivered to a screen reader at a time.
If a PDF isn’t tagged, Foxit Reader may analyze the document and attempt to infer its structure,
which can take a long time for a long document. You may want to set Foxit Reader to deliver
only the currently visible page so that it analyzes only a small piece of the document at a time.
This consideration will vary depending on the size and complexity of the document and on
the features of the screen reader.
A. Only read the currently visible pages - This option is usually best when using a screen
magnifier. It improves performance by eliminating the need for the software to process
parts of the document that aren’t visible. When Foxit Reader sends only the currently
visible pages of a PDF to the memory buffer, the assistive technology has access to those
pages only. It cannot go to another page until the next page is visible and Foxit Reader
has sent the page information to the memory buffer. Therefore, if this option is selected,
you must use the navigation features of Foxit Reader, not those of the assistive
technology, to navigate from page to page in the document. You should also set the
Default Page Display option in preferences to Single Page if you choose to have Reader
send only the currently visible pages to the assistive technology.
B. Read the entire document - This option can be best if you use a screen reader that has
its own navigation and search tools and that is more familiar to you than the tools in Foxit
Reader.
C. For large documents, only read the currently visible pages - This option is selected by
default and is usually best if you use a screen reader with long or complex PDFs. It allows
Foxit Reader to deliver an entire small document but revert to page-by-page delivery for
large documents.
Minimum number of pages in a large document
When the “For large documents, only read the currently visible pages” option is selected, it
allows you to set this minimum value.
Enable assistive technology support: Check this option to allow assistive technology products,
such as screen readers, to provide information about the UI and document to end users.
Confirm before preparing untagged PDF for reading with assistive technology: Select the
option, and if any assistive technology detected in your system, a dialog box pops up when
you opens an untagged PDF to ask you whether to set the reading order options for the PDF
for reading with assistive technology.
Reading Order
36
Page 41

Foxit Reader
Chapter 2: Getting Started User Manual
Set reading order as appropriate for your assistive software and devices.
A. Infer reading order from document (recommended): Interpret the reading order of
untagged documents by using an advanced method of structure-inference layout
analysis.
B. Left-to-right, top-to-bottom reading order: Deliver the text according to its placement
on the page, reading from left to right and then top to bottom. This method is faster than
“Infer reading order from document”. This method analyzes text only; form fields are
ignored and tables aren’t recognized as such.
C. Use reading order in raw print stream: Deliver text in the order in which it was recorded
in the print stream. This method is faster than “Infer reading order from document”. This
method analyzes text only; form fields are ignored and tables aren’t recognized as such.
Override the reading order in tagged documents: Use the reading order specified in the
Reading preferences instead of what the tag structure of the document specifies. Use this
preference only when you encounter problems in poorly tagged PDFs.
Reviewing
Automatically check for new comments:
Set the time interval to automatically check for new comments during shared review. By default,
Foxit Reader will check for new comments every five minutes during shared review.
Shared Review Options
A. Show welcome dialog when opening file: Check it to show the welcome dialog when opening
a shared review. In the welcome dialog, you can view the general information for the shared
review, including the initiator, deadline, review server and so on.
B. Show server connection warning when opening file: Check it to show the server connection
warning when opening a shared review.
C. Remind before review expiration: If you check this option, a prompt message will pop up
before the shared review expires.
Review Options
A. Show prompt messages for Shared Review: Determines whether to show prompt message for
Shared Review when publishing comments in a shared review that contains several comments
from other reviewers that have not yet been published to the command server. You can take
ownership of these comments and publish them on behalf of the reviewers.
B. Show prompt messages for Email Review: Check this option to show prompt messages during
email review.
Send Messages
37
Page 42

Foxit Reader
Chapter 2: Getting Started User Manual
A. Use Auto-Complete List to suggest names when typing in the “To ” and “Cc” fields: Checking
this option will enable Auto-Complete feature, which recognizes and suggests contacts based
on the previously entered email addresses when you send back your comments during a
shared review by email.
B. Empty auto-complete list: Click this option to remove all the email address entries from the
Auto-Complete memory.
Search
Show document title in search results: Check this option to display document titles in search
results. However, if a document does not contain a title, its file path will be displayed in search
results. If this option is unchecked, Foxit Reader will display file paths in search results.
Maximum number of documents returned in Results: Specify the number of documents to be
displayed in the search results. You can input any integer between 1 and 10,000.
Security
Protected View
To protect your computer from files originated from the Internet or other potentially unsafe
locations, turn on Protected View to open these files to reduce risks. In Protected View, files are
read only and most editing actions are not allowed.
Privileged Locations
Specify privileged locations for trusted content to exempt viewers from security restrictions in Safe
Reading Mode. You can refer to “Bypass Security Restrictions in Safe Reading Mode” for more
details.
Signature
Default Signing Format: Choose a default signing format based on PKCS#7 or CAdES standard.
PKCS #7 - Detached is selected by default.
Appearance Styles: Manage the signature appearance templates.
Signing & Verifications
A. Sign the document immediately after the signature is placed: Check this option to sign
the document immediately when you place the signature on the document. When it is
unchecked, you will need to click Sign Document to apply the signature after placing it on
the document. You can still modify the document before applying the signature.
B. Control how and when signatures are verified: click Change Settings to choose options.
Verify signatures when the document is opened: If this option is checked, Foxit
38
Page 43

Foxit Reader
Chapter 2: Getting Started User Manual
Reader will verify the signatures when the document is opened, and will display the
signature verification results in the Digital Signatures panel.
When document has valid but untrusted signatures, prompt to review and trust
signers: With the option selected, if the signature (not including certified signatures)
is verified as valid but is applied by an untrusted signer with a certificate that doesn’t
chain up to a trust anchor, a message box appears in the top-right corner of the
application window to inform you the document includes signatures from signers
that you haven’t trusted yet. You can click Manage Trust in the message box to trust
the signer. More information, please refer to Trusted Certificates. To make sure that
the notification message is displayed successfully, please check the Show the
message which affects the next step option in the preferences about Notification
Messages.
Verification Behavior
Require certificate revocation checking to succeed whenever possible during
signature verification: Specify whether or not to check the revocation status of
certificates while verifying signatures.
Use expired timestamps: Uses the secure time provided by the document
timestamp or the timestamp embedded in the signature, even if the
timestamp’s certificate has expired. The option is selected by default. With the
option unselected, the time provided by the expired timestamps will be
discarded and the verification time will be the time at which signature was
applied or the current time in the system based on your setting on Verification
Time.
Ignore document validation information: Specify whether to ignore the related
certificate revocation information embedded in the document when validating
signatures.
Verification Time
Verify Signature Using: You can check the digital signature for validity based on the
time when the signature was created, the time provided by the timestamp
embedded in the signature, or the current time in your system.
Verification Information: Select an option to specify whether to add verification
information to the signed PDF. Ask when verification information is too big is
selected by default.
Windows Integration
Specify whether to trust all root certificates in the Windows Certificate Store when
validating signatures and certified documents. Checking these options may
compromise security. Please make sure that you trust all the root certificates before
enabling these features.
Save signed file as a copy named ‘filename_signed.pdf’: Check this option to save the signed
file as a copy named ‘filename_signed.pdf’ after applying the digital signature. When you sign
39
Page 44

Foxit Reader
Chapter 2: Getting Started User Manual
multiple PDF files, you can also specify the file name in Output Options. The file name you
specified in Output Options during signing will take precedence over the settings in Signature
preferences.
Speech
Volume: Sets the reading volume of Read out Loud.
Use default voice: Check it to read content with default language, or you can select the
required one from the combo box.
Use default speech attribute: Check it to read with default pitch and rate, or you can uncheck
it and then set pitch and rate in the combo box as needed.
Read comments: Check it to enable the application to read out the comments when executing
Read out Loud.
Read form fields: Check it to enable the application to read out the form fields when executing
Read out Loud. Please refer to Read PDF Form Fields Out Loud for details.
Spelling
Enable spell check: Check Enable spell check to avoid spelling error.
Dictionaries for Spell Check: Add, remove, or reorder the dictionaries for spell check.
Tablet
Enable pressure sensitive: Enable pressure sensitive so that you can add free-form
annotations with PSI in PDFs by supported touchscreen devices.
Time Stamp Servers
Configure the default Time Stamp Server to embed a trusted time stamp while signing.
Trust Manager
Please refer to “Managing Security”.
Updater
Automatically install updates: The system will automatically download and replace the
original files in the installation folder when there is a new version.
Automatically download updates, but let me choose when to install them (recommended):
The system will automatically download and display a message informing you of the upgrade
and allow you to choose to upgrade to the new version. This option is checked by default.
Do not download or install updates automatically: Never download or install updates
automatically.
40
Page 45

Foxit Reader
Chapter 2: Getting Started User Manual
Viewing Properties
The Properties window provides information about the document, including the document’s
location, title, subject, author, fonts used, and security settings. This window also displays
attributes set by other programs.
To view the PDF properties, please choose File > Properties. You can acquire all relevant
information as follows:
Description Tab of Properties Window
Description
This tab shows some basic information about the document. The title, author, subject, and
keywords may have been set by the person who created the document in the source application.
General
File—The location of the document.
Fast Web View — Show whether the PDF file is enabled for Fast Web View.
PDF Version—The standard version of the document.
PDF Size—The size of the document.
Pages—Total number of pages of the document.
Title — A general or descriptive heading of the document.
Subject— The principal idea and point of the document.
Author— The writer of the document.
Creator— The application that produced the original document.
41
Page 46

Foxit Reader
Chapter 2: Getting Started User Manual
Producer—The application or driver that converted the original document into a PDF
document.
Keywords—The words that are used to reveal the internal structure of an author's
reasoning.
Custom
View the custom properties of the PDF file, which may include metadata, company
information, and other document properties.
Related Dates
Last Modified -- The date and time the document was last modified.
Created -- The date and time the document was created.
Show More Description
This option will show you more details about the document properties, which includes general
information, security, and the backup files from the Windows backups.
Security
The Security tab describes what changes and functionality are allowed within the PDF. If a
password, certificate, or security policy has been applied to the document, the method is listed
here. Changing security setting is not allowed in Foxit Reader.
Security Tab of Properties Window
42
Page 47
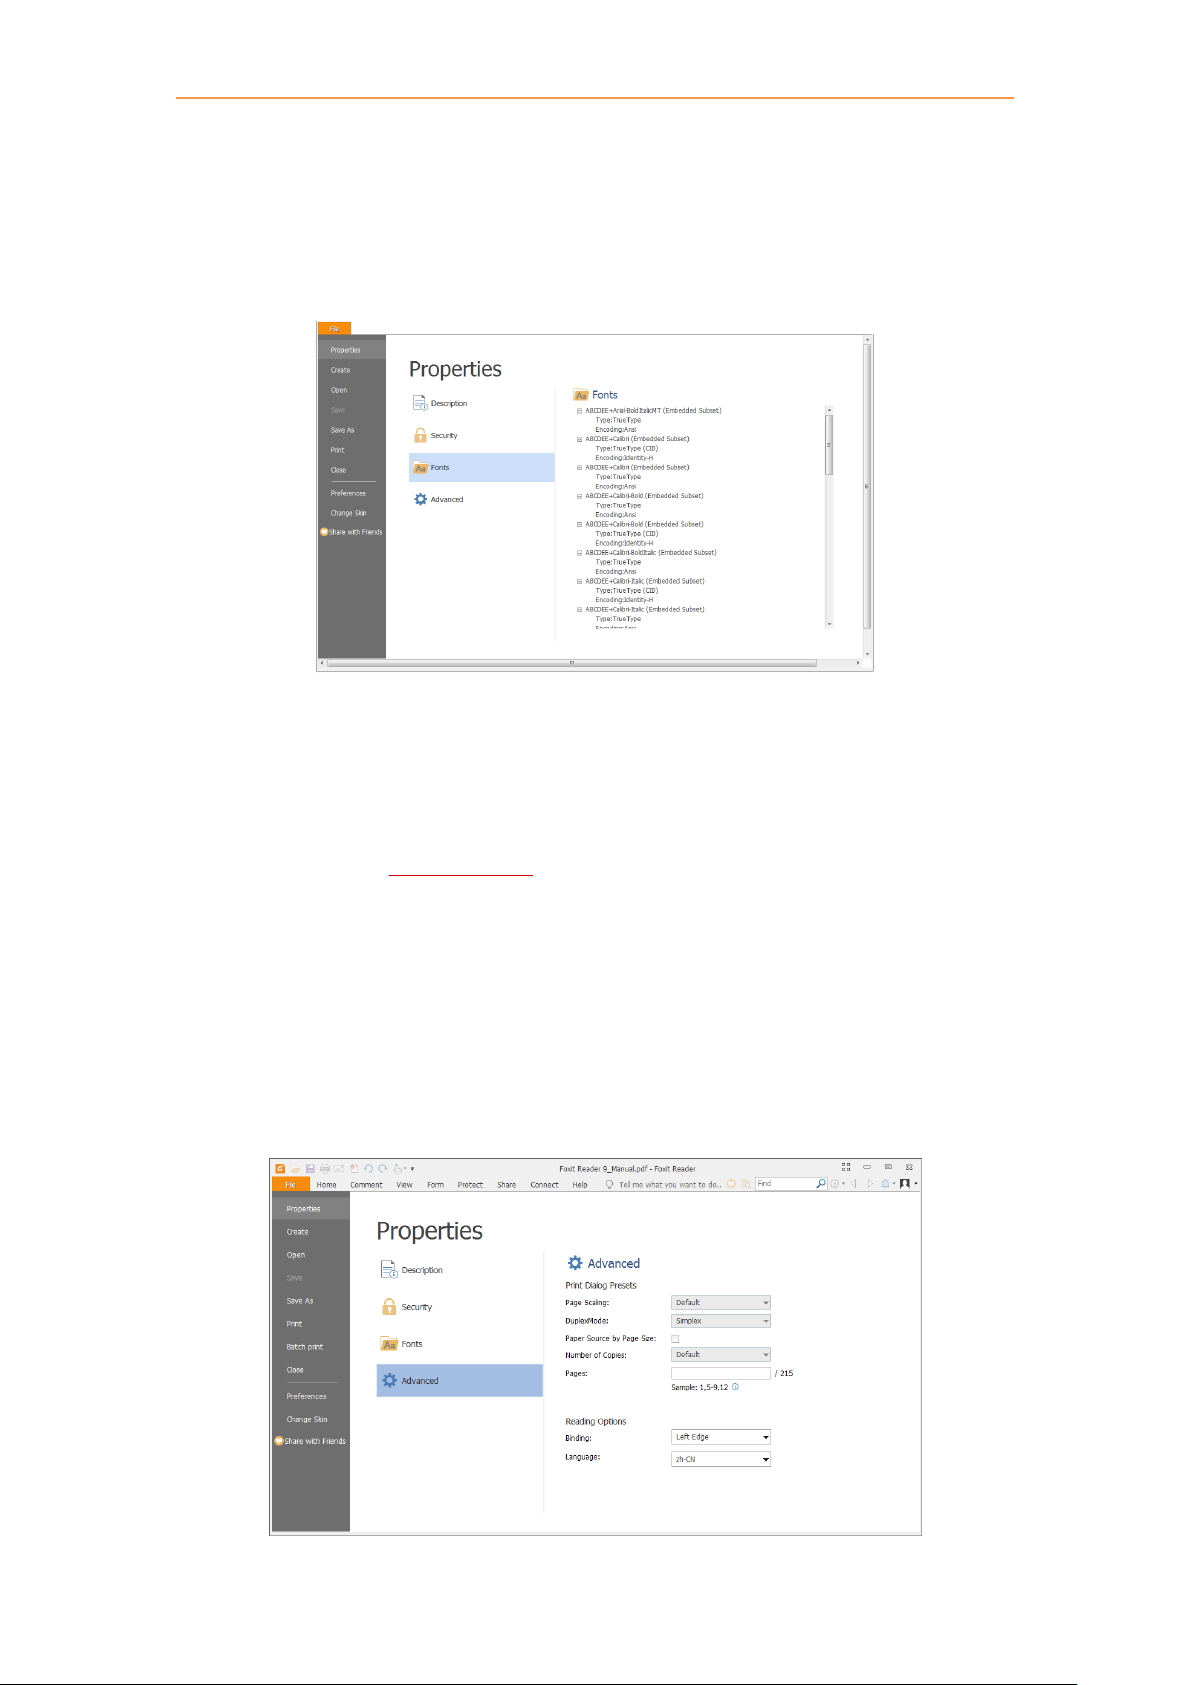
Foxit Reader
Chapter 2: Getting Started User Manual
Fonts
The Fonts tab lists the fonts and the font types used in the original document, as well as the
encoding used to display the original fonts.
Fonts Tab of Properties Window
Advanced
The Print Dialog Presets group lists the Print Dialog Presets for the document, which will be applied
automatically when you print the PDF file with Foxit Reader.
The Reading Options group allows you to specify the reading direction and language for the
document. These enable screen readers or other assistive technology to read the document using
the appropriate language in the proper direction.
Tip: The binding direction setting for the document specified in Advanced tab will prevail over the
reading direction setting in the application’s preferences.
43
Page 48

Foxit Reader
Chapter 3: Viewing PDFs User Manual
Chapter 3 – Viewing PDFs
Once the Foxit Reader is properly installed, you can open and view PDF files easily. When you have
a PDF open, you can also adjust the view of the document, find text in it, and email to others.
Opening Documents
You can open and view PDFs in Foxit Reader from the desktop, or in a web browser.
Opening a PDF document in Foxit Reader
Start in the Start Page to Foxit Reader Window
When you open Foxit Reader, a Start Page will be opened by default, which introduces some
product information of Foxit.
If you do not want to show the start page, please go to File > Preferences > General > Application
Startup > uncheck Show Start page.
Opening a PDF Document in Foxit Reader
Do one of the following:
Drag and drop the PDF file into the Foxit Reader window.
Click the Open button on the Quick Access toolbar. In the Open dialog box, select the
file name, and click Open. PDF documents are usually identified with a .pdf extension.
Click File > Open. To open a recent document or a document stored in the local drive, click
Recent Documents/Computer. To open PDFs in SharePoint, Epona DMSforLegal, Alfresco,
OneDrive, Google Drive, Dropbox, or Box, select Add a place, sign into your account, and you
can then open your PDF files. The connected Cloud account will be listed in the File > Open
and the PDF file will be in the Recent Documents list, which will help you open files quickly in
the future. To remove an account, just click the Delete icon that appears when you place
your cursor over the account name.
Note:
1. You can open more than one PDF document within the same Foxit Reader application. When
you open more than one file at a time, you can navigate the PDF files easily by clicking the
corresponding tabs. If you only open one PDF, the tab will not be shown. While reading PDF
documents, you can right-click the corresponding tab and choose Open Containing Folder or
Copy Path to Clipboard to open, copy and share the directory where the current PDF document
is saved.
44
Page 49

Foxit Reader
Chapter 3: Viewing PDFs User Manual
2. In Recent Documents tab, Computer tab, or cloud service tab (like Google Drive tab), you can
right-click any file or folder, and then choose the corresponding option from the context menu
to open the file/folder, pin the file/folder to list, remove the file/folder from the list, or copy the
path of the file/folder to clipboard. To pin or unpin a file or folder, you can also hover the cursor
over a file or folder and click the Pin icon or Unpin icon alternatively.
3. To customize the number of documents or folders in the recently used list, please navigate to
File > Preferences > History.
Opening a PDF Document from Desktop or within Other Applications
If you set Foxit Reader as your default viewer for PDF files, you are able to launch and open PDF
files in the following applications:
Email Application: In most email applications, you can double-click the attachment icon to
open the document.
Web Application: You can open a PDF document by clicking on the PDF file link in your web
browser. For security purposes, if you try to open a RMS-protected PDF file in your web
browser, the file will be opened in the stand-alone Foxit Reader (desktop application) outside
the browser.
File System: Double-click the PDF file icon in your file system.
Note: You can see the size of the opened document at the bottom right corner of the window. For
example . To set the unit of page dimensions, please refer to “Measurement Units”.
Opening a Secured PDF Document
If you receive a PDF that is protected by security features, you may need a password to open the
document. Some protected documents have other restrictions that prevent you from printing,
editing, or copying.
When opening a protected PDF, you will be prompted to enter the password. Foxit Reader
allows you to input Unicode password in the password input box when you open a document
protected by Unicode password.
When trying to copy or edit a secured PDF, you will find that the related functions or
commands are disabled and grayed out.
Opening a PDF/A-, PDF/E-, PDF/X-, or PDF/UA-Compliant File
When you open a file that conforms to PDF/A, PDF/E, PDF/X, or PDF/UA standard, Standards panel
will be available in the navigation panel for you to check the conformance and output intent
information. You can choose View > Navigation Panels > Standards or click in the
navigation panel to open the Standards panel. In the Standards panel, you will find the following
45
Page 50

Foxit Reader
Chapter 3: Viewing PDFs User Manual
information:
Conformance: Indicate the standard that is used to create the file, the ISO name, verification
status, and trapped state.
OutputIntent: Indicate the color settings associated with the file.
For PDF/A files, Foxit Reader adds a PDF/A identification system, and supports to disable editing
such files.
When opening a PDF/A file, Foxit Reader will switch to PDF/A view mode by default, with a
message showing PDF/A file notification (as shown below). Under such mode, you can only
read the file, and modification is not allowed.
You may need to edit a PDF/A file for any reason. To enable editing PDF/A files, please do one
of the following:
Click the Enable Editing button on the notification message, and then click Yes to
confirm your operation in the prompt message popping up afterwards.
(Alternatively) Choose File > Preferences > Documents, under PDF/A View mode,
46
Page 51

Foxit Reader
Chapter 3: Viewing PDFs User Manual
choose Never from the drop-down list, click OK and restart Foxit Reader.
Retrieving Recently Opened Documents from within Foxit Reader
In File page, you will be able to instantly retrieve recently opened documents. Foxit Reader
provides a list of recently opened PDF documents. Just choose File > Open > Recent Documents,
and you can see the recently opened documents in Recent Documents list. In the Recent
Documents list, you can right-click any file and choose corresponding option from the context
menu to open the selected file, pin the file to Recent Documents list, remove the file from the
Recent Document list, or copy the file path to clipboard.
47
Page 52

Foxit Reader
Chapter 3: Viewing PDFs User Manual
Note: To customize the number of document in recently used list, please refer to “Maximum number
of documents in recently used list”.
Saving Documents
Foxit Reader provides you with the power to do more when saving PDF documents. You can save
a PDF document without additional usage rights in many different ways. If the file permissions
allow, you can also save comments, form fields that you have added to a document, as well as save
PDF contents in text format.
Saving a Copy of a PDF
Choose File > Save As > Computer.
Choose a folder (current folder or recent folder) or click Browse to select desired location.
In the Save As dialog box, enter the filename and click Save.
Saving a PDF as a Text File
Choose File > Save As > Computer.
Choose a folder (current folder or recent folder) or click Browse to select a desired location.
Choose TXT Files (*.txt) from the Save as type field in the Save As dialog box.
Click Setting to choose the content range:
A. All Pages – save the whole document as a text file.
B. Current page – only save the current page you are reading as a text file.
C. From Page – enables you to select pages as a text file.
Enter the filename and click Save.
Save PDFs in SharePoint, Alfresco, Epona DMSforLegal, OneDrive, Google Drive, Dropbox, or Box
Click File > Save As > Add a place > SharePoint/Alfresco/DMSforLegal/OneDrive/Google
Drive/Dropbox/Box, then sign in your account and choose a folder to save to. The account will be
listed in the Save-as history for your convenience. Click the Delete icon near the account name
to remove the account from the list.
Closing Documents
To close a PDF document, please do one of the following:
Choose File > Close.
Press shortcut key Ctrl + W.
48
Page 53

Foxit Reader
Chapter 3: Viewing PDFs User Manual
Exiting Foxit Reader
To exit Foxit Reader, please do one of the following:
Click the big Close button on Foxit Reader application window.
Press shortcut key Ctrl + Q.
Viewing Documents
Multi-tab Reading & Single Document Reading
Foxit Reader provides two different ways for you to read PDF files: multi-tab reading and single
document reading.
Multi-Tab Browsing
The multi-tab browsing feature enables you to open multiple files in a single instance. Newly
opened PDFs will be displayed in tabs by default.
In multi-tab reading mode, you can drag and drop a file tab outside of the existing window to create
a new instance and view the PDF file in that individual window. To recombine the file tab to the
main interface, click on the file tab and then drag and drop it in reverse to the main interface.
To switch between open tabs in multi-tab reading, do one of the following:
Switch between open tabs in the most recently viewed order by using Ctrl + Tab. Before this,
make sure you have selected the option Use recent order when switching tabs with Ctrl + Tab
in File > Preferences > General.
Scroll the mouse in the tab bar up to the previous tab and down to the next tab. Before this,
make sure you have selected the option Quickly switch between tabs by using mouse wheel
in File > Preferences > General.
By default, use Ctrl + Shift + Page Up to switch to the previous tab and Ctrl + Shift + Page Down
to the next tab. You can also change the shortcut keys. See also Customizing Shortcut Keys.
Opening a New Tab
To open a new tab, you can double-click a PDF file, select File > Open, or click the Open button
on the toolbar.
Closing a tab
49
Page 54

Foxit Reader
Chapter 3: Viewing PDFs User Manual
To close the current tab, you can do one of the following:
Click the Close Tab button at the top right corner of the Tab Bar.
Double click on the Tab Bar if you have checked “Double-click to close tab” in File >
Preferences > General > Tab Bar.
Click the middle button of the mouse on the Tab Bar.
Right-click on a tab and choose Close Tab /Close Others/Close Left/Close Right.
Select File > Close.
To close all tabs at the same time, click the Close button at the top right corner of Foxit Reader
window, or right-click on a tab and choose Close All.
Single Document Reading
The single document interface mode enables you to open multiple instances of Foxit Reader. Foxit
Reader will create a new window when you double-click to open a new PDF file, which is very
useful for viewing different files side by side.
To enable single document interface mode, please go to File > Preferences > Documents >
Open Settings > check Allow multiple instances option.
To disable single document interface mode, please go to File > Preferences > Documents >
Open Settings > uncheck Allow multiple instances option.
Text Mode, Read Mode, Reflow Mode, Night Mode
Text Mode
With Foxit Text Viewer, you can work on all PDF documents in pure text view mode. It allows you
to easily reuse the texts scattered among images and tables, and acts like Notepad. Also, you can
adjust some settings to meet your needs.
Entering Text Mode
Do one of the following:
Choose View > Text Viewer .
Press the shortcut key Ctrl+6.
Customizing Text Viewer
As soon as Text Viewer is activated, you can use the Text Viewer Toolbar to customize your own
work area. This Toolbar is set to be invisible by default.
50
Page 55

Foxit Reader
Chapter 3: Viewing PDFs User Manual
1. Changing text font when reading with Text Viewer
Right-click on the text, choose Font Settings from the Context Menu, and then select the Font
option.
Choose Font name, Font Style, Font Size, Effects, Color and Script from respective fields in Font
dialog box. The suggested font for best screen display is Courier New.
Note: You can change all aspects pertaining to text view font in the Font dialog box, or you can
also use individual options on Context Menu to change font color and toggle between regular style
and Bold or Italic styles.
2. Toggling between regular style and Bold style
Select the text and right click on it. Choose Font Settings from the Context Menu, and then select
the Bold option.
3. Toggling between regular style and Italic style
Select the text and right click on it. Choose Font Settings from the Context Menu, and then select
the Italic option.
4. Changing Text Viewer settings
Right-click the text, and choose Settings from the Context menu.
The Text Viewer Settings dialog box pops up.
51
Page 56

Foxit Reader
Chapter 3: Viewing PDFs User Manual
Below are the text viewer settings:
A. Set page width at three different levels: Current page width, Current document width
and System default width.
B. Minimal width – The valid value for this field is 0-1024. It is set to 78 by default.
C. Keep Column – For PDF tables or text columns, you can check Keep Column to retain
appropriate column in text viewer mode. It is checked by default.
D. Auto Width – For PDF tables or text columns, you can check Auto Width to keep proper
width between texts automatically. It is checked by default.
E. Auto Rotate – You can check Auto Rotate to ensure consistent orientation with that of
the printer. It is checked by default.
Finding text in Text Viewer Mode
In Text Viewer mode, you can search and find text in the main body of a PDF file in case-insensitive
manner.
To find text you are looking for, follow the steps below:
Press Ctrl + F.
Type the text in the Find What field.
Press Enter repeatedly or shortcut key F3 to continue searching the next instances of the
search term.
Read Mode
In Read Mode, the PDF will be displayed in a way that hides much of the interface, including
navigation pane, toolbar, and status bar, to maximize the document display area. It enlarges the
document pane, keeping you from wasting reading space, leaving the tab bar with you for
necessary operations.
To read a document in Read Mode, please choose one of the following:
52
Page 57

Foxit Reader
Chapter 3: Viewing PDFs User Manual
Choose View > Read Mode .
Press the shortcut key “Ctrl + H” on the keyboard.
Right-click the document pane > choose Read Mode.
In Read Mode, a basic toolbar floats at the bottom of the page. It offers some basic commands,
such as save, print, and zoom in/out. Please move the cursor to the bottom to activate the floating
box.
If you open more than one PDFs, please press “Ctrl + Tab” on the keyboard to switch through them
in Read Mode.
Reflow Mode
In Reflow Mode, PDF files are temporarily presented as a single column that is the width of the
document pane. It allows you to easily read PDF a document when it is magnified on a standard
monitor, without scrolling horizontally to read the text.
To read a document in Reflow Mode, please do one of the following:
Choose Home > Reflow or View > Reflow.
Press the shortcut key Ctrl + 4 on the keyboard.
In Reflow Mode, only readable text appears, and comments and form fields will not be displayed.
If the Page Display is set as Facing or Continuous Facing before you choose Reflow Mode, it will
automatically become Continuous when the PDF document is reflowed. To exit the Reflow Mode,
please redo the actions mentioned above.
Night Mode
The Night Mode in Foxit Reader allows you to invert black and white to reduce eye strain in low
light conditions. In the Document Views group under the View tab, click Night Mode to enable or
disable the Night Mode.
Read Out Loud
Read Out Loud is a Text-to-Speech (TTS) tool. It reads the text in a PDF aloud, including the text in
comments and alternate text descriptions for images and fillable fields. Text is read based on the
order of the page content. With this feature, you can obtain information without viewing the pages,
helping to effectively relief eyestrain. It also enables you to view other materials while listening to
the content.
Read Out Loud uses the available voices installed on your system. If you have SAPI 5 voices installed
from text-to-speech or language applications, you can choose them to read your PDFs.
53
Page 58

Foxit Reader
Chapter 3: Viewing PDFs User Manual
Note: Read Out Loud isn’t a screen reader, it may not be available in some operating systems.
Set Reading and Speech Preferences
Please go to File > Preferences > Reading or Speech. For more information, please refer to Reading
preferences and Speech preferences.
Activate or deactivate Read Out Loud
You need to activate Read Out Loud before using it.
To activate Read Out Loud: select View > Read > Activate Read.
To deactivate Read Out Loud: select View > Read > Deactivate Read.
Tip: You can press the shortcut key Ctrl + Shift + Y to activate or deactivate Read Out Loud, based
on the current status of the feature. After activating Read Out Loud, you can read a PDF file and
PDF form field out loud.
Read a PDF Out Loud
Navigate to the page that you want to read out.
Choose View > Read > Read Current Page or Read from Current Page.
Tip: If you need to read the text in the comments while reading a PDF out loud, please make sure
you have checked Read comments option in the Speech preferences.
Read PDF Form Fields Out Loud
Go to File > Preferences > Speech, and check Read form fields option.
In the PDF form, press Tab to select the first form field that you want to read out loud, and
then press Tab to move to the next form field. Foxit Reader will read out the form field as well
as the state of selected check boxes and radio buttons.
Control Reading
While reading a PDF file or form field, you can interrupt the reading and adjust reading volume and
speed as needed.
To adjust the reading speed: choose View > Rate command > drag the slider.
To adjust the reading volume: choose View > Volume command > drag the slider.
To pause reading: choose View > Pause command .
To stop reading: choose View > Read > Stop.
54
Page 59

Foxit Reader
Chapter 3: Viewing PDFs User Manual
Read and Interact with PDF with Screen Reader
Foxit Reader enables visually impaired users to read and interact with PDF using NVDA (NonVisual
Desktop Access) and JAWS (Job Access with Speech). You can change the reading setting in Reading
Preferences. While reading a PDF, use the shortcut keys for screen reader to interact with PDF.
Contact the vendor for more information about the instructions for using the screen reader with
Foxit Reader.
Split View
Using Split View, you can view a PDF with the document pane divided into two panes (Vertically
Split or Horizontally Split) or four panes (Spreadsheet Split).
With the Split View, you can scroll, change the magnification level, or turn to a different page
in the active pane without affecting the other pane(s).
To change to Split View, choose View > Split command > Vertically Split or Horizontal Split.
Horizontal Split View
55
Page 60

Foxit Reader
Chapter 3: Viewing PDFs User Manual
Vertical Split View
The Spreadsheet Split view is useful if you want to keep the vertical or horizontal headings
visible while scrolling through a large spreadsheet or table of the current page. In this mode,
changing the magnification in one pane can make the magnification in all panes be changed
in the same time. Also, scrolling is coordinated among the panes.
Note: If you stay in the same page when scrolling horizontally, the above two spans which
show the headings will not be scrolled. But if you scroll to the next page, the above spans will
also skip to show the headings of the next one’s. When scrolling vertically, the two panes in
the same queue will be scrolled, while the panes next to them will not.
To change to Spreadsheet Split View, you should choose View > Split command >
Spreadsheet Split.
Spreadsheet Split View
56
Page 61

Foxit Reader
Chapter 3: Viewing PDFs User Manual
Line Weights View
PDF in Line Weights View
PDF in Non-Line Weights View
In Line Weights View, the lines will be displayed with the weights defined in the PDF file. When Line
Weights View is turned off, the lines will be displayed with the constant stroke width (1 pixel),
regardless of zoom. The following screenshots show the comparison of the PDF file displayed in
Line Weights View and Non-Line Weights View.
To enter Line Weights View, please choose View, and then check Line Weights option.
To exist Line Weights View, please choose View, and then uncheck Line Weights option.
Full Screen Mode & Fit the Window Mode
Full Screen Mode
57
Page 62

Foxit Reader
Chapter 3: Viewing PDFs User Manual
In Full Screen mode, Foxit Reader Document Pane fills the entire screen, with Tab Bar, Toolbar,
Status bar, and Bookmarks pane hidden behind. The mouse pointer remains active in Full Screen
mode so that you can click links.
1. To set Full Screen preferences, please refer to “Setting Full Screen Preferences” .
2. To enter Full Screen mode, please do one of the following:
Click the Full Screen button on the right of the Toolbar.
Press the shortcut key F11.
Right-click the Document Pane and select Full Screen.
3. To adjust the view in Full Screen mode, right-click the document and work with the Context
Menu.
Note: This feature will not be available unless you clear Left click to go forward one page; right click to
go back one page check box in the Preferences dialog.
4. To exit full screen mode:
Press Esc key or the shortcut key F11.
Fit the Window Mode
There are four types for you to choose:
To resize the page to fit entirely in the document pane, choose View > Zoom > Fit Page, or
right-click the Document Pane and choose Fit Page.
To resize the page to fit the width of the window, choose View > Zoom > Fit Width, or right-
click the Document Pane and choose Fit Width. Part of the page may be out of view.
To resize the page to its actual size, choose View > Zoom > Actual Size, or right-click the
Document Pane and choose Actual Size.
To resize the Document Pane to fit page by visible area, choose View > Zoom > Fit Visible.
Adjusting the View of Documents
Foxit Reader provides multiple commands that help you adjust the view of your PDF documents.
It includes simple commands such as Zoom In and Zoom Out, as well as more advanced features
like setting the page layout and orientation. As for some settings, please refer to “Setting
Preferences”.
Changing the Orientation of a Document
58
Page 63

Foxit Reader
Chapter 3: Viewing PDFs User Manual
You can change the orientation of the document from portrait to landscape view by using the
Rotate commands.
Choose View > Rotate View > Rotate Left or Rotate Right.
Note: You can change the page view in 90-degree increments, but the change only affects screen
display instead of its actual orientation. You cannot save the changes in page view.
Changing the Magnification Level of a Document
Do one of the following procedures:
1. Go to View > Zoom > Zoom Out or Zoom In.
2. Adjust a magnification percentage in the Magnification Percentage Area
on the Status Bar.
3. Go to View > Zoom > choose a magnification percentage.
4. Right-click the Document Pane > choose Zoom In or Zoom Out.
5. Using the Marquee Command
The Marquee command allows you to zoom in on a particular area of your document for a clear
view. To use the Marquee command, please follow the steps below:
Choose View > Marquee .
The cursor changes into , drag a rectangle on the page or just click on the page to increase
the magnification by one preset level, centering on the point where you clicked.
Choose the Marquee command, the cursor changes to as Ctrl-click on the page. Drag a
rectangle on the page or just click on the page to decrease the magnification.
6. Using the Loupe Command
The Loupe command allows you to easily change the magnification of a PDF file. It is best used
when you want to keep a PDF file at a standard zoom level (like 100%), but magnify certain areas.
To use the Loupe command, please follow the steps below:
Choose View > Loupe .
Move the loupe tool to the places you want to view, you will see the amplificatory or
decreased objects in the Loupe Tool dialog box.
(Optional) Select the Lock option in the Loupe Tool dialog box. Click the area of the document
59
Page 64

Foxit Reader
Chapter 3: Viewing PDFs User Manual
you want to view in closer detail. A red rectangle appears in the document, corresponding to
the area shown in the Loupe Tool window. You can drag or resize the rectangle to change
the Loupe command view.
To change the scale ratio of the Loupe Tool, you can either enter a value in the zoom text box,
or drag the slider in the Loupe Tool dialog box.
7. Using the Magnifier
You can easily magnify areas of the PDF files as you work on Foxit Reader with the Magnifier. It
is especially useful for visually impaired people with some functional vision.
Magnifier Fisheye Magnifier
Choose View > Magnifier .
Move the Magnifier to the places you want to view.
To switch between Magnifier and Fisheye Magnifier, press the left mouse button.
To change the size of magnifier window, press the right mouse button.
To turn off the Magnifier, choose any other commands or press ESC Key to directly return
to Hand command.
Changing the Page Layout
Changing page layout is especially useful when you want to zoom out to get an overview of the
document layout. Foxit Reader provides the following page layouts:
Single Page – Displays one page in the document pane at a time.
Continuous – Arranges the pages in the document pane in a continuous vertical column.
Facing – Arranges the pages side by side, displaying only two pages at a time.
Continuous Facing – Arranges the pages side by side in a continuous vertical column.
Separate Cover Page–Show Cover Page During Facing.
If a document has more than two pages, the first page can be displayed alone on the right side of
the document pane in Facing and Continuous Facing views.
To display the cover page as the first page on the right followed by two facing pages, please choose
60
Page 65

Foxit Reader
Chapter 3: Viewing PDFs User Manual
the Facing or Continuous Facing mode, and then select View > Separate Cover Page button .
To set page layout, please do one of the following:
Choose View and choose one of the modes to your needs.
Click the Single Page button , the Continuous button , the Continuous Facing button
, or the Facing button on toolbar or the Status Bar.
Tip: By default, Foxit Reader will display the pages from left to right in facing and continuous facing
mode. If you want to change the reading direction, please choose File > Preferences > Languages >
Default Reading Direction > Right to Left.
Navigating in Documents
Foxit Reader provides user-friendly controls to navigate through PDF documents. You can navigate
in PDF documents by paging through or by using navigational commands.
Scrolling through Documents
1. Navigating around Documents
Do one of the following:
Using mouse actions or keystrokes
To navigate around the documents vertically, scroll the mouse wheel or press the Down
or Up Arrows on the keyboard.
To navigate around the document horizontally, press Shift and scroll the mouse wheel.
While scrolling in a document, you can lock the scroll direction to prevent the document from
being scrolled out of place, especially when the document is zoomed in and scrolled within
tablets. The steps are as follows:
Choose File > Preferences > General, and check the Show scroll lock button option under
the Status Bar to enable scroll lock. Once enabled, the scroll lock icons will be displayed
in the Status Bar.
Click on the Status Bar to lock the scroll horizontally.
61
Page 66

Foxit Reader
Chapter 3: Viewing PDFs User Manual
Click on the Status Bar to lock the scroll vertically.
Click both and on the Status Bar to freeze the screen so that you can read the
current view of the document.
Scroll automatically
Automatic scrolling allows users to view documents without using mouse actions or
keystrokes. Foxit Reader also enables you to change the scrolling speed with ease.
A. Choose View > AutoScroll .
B. Do one of the following:
To increase or decrease the scrolling speed, press the Up Arrow or Down Arrow key,
depending on the direction of scrolling. To change the scrolling speed to a specific
speed, press a number key (9 for the fastest, 0 for the slowest).
To reverse the direction of scrolling, press the minus sign (-) key.
To jump to the next or previous page, press the Right Arrow key or Left Arrow key
respectively.
To stop automatic scrolling and go back to Hand command mode, click AutoScroll
again or press the Esc key.
To pause automatic scrolling, press Space key.
Tip: To perform auto-scrolling, you can also click the Hand command , hold the middle
mouse button/wheel mouse button down, and then move the mouse to scroll the pages. You
can press the middle mouse button/wheel mouse button again to exit AutoScroll mode.
2. Going to the next or previous page
Do one of the following:
Click the Previous Page button or the Next Page button on Go To group under
View tab or / on the Status Bar.
Put the cursor in the Document Pane, press the Page Up or Page Down keys to turn the
pages.
Put the cursor in the Document Pane, press the Left or Right Arrows on the keyboard to
move the pages up or down.
Press Space to scroll the page down or press Shift + Space to scroll the page up.
3. Going to the first or last page
62
Page 67

Foxit Reader
Chapter 3: Viewing PDFs User Manual
Do one of the following:
Click the First Page button or the Last Page button on Go To group under View
tab or / on the Status Bar.
Press the Home or End keys.
4. Going to a specific page
Do one of the following:
Choose View and input the specific page number on the Current Page Number Box
and press Enter.
Input or select the specific page number on the Current Page Number Box
on the Status Bar, and press Enter.
Note: If your PDF contains formatted page numbers, and the Use logical page numbers option
is enabled in File > Preferences > Page Display, you should input the numbers that match the
numbering on the pages rather than the physical page numbers. For instance, if you want to
view the second page of your document which is numbered ii, you should enter ii to go to the
page. See also the preference setting on logical page numbers.
5. Retracing your steps
To go back or forward one page, click the Previous View button or Next View button
on the Toolbar under View tab or Status Bar.
(Alternatively) Choose View and click Previous View or Next View in Go To group.
Navigating With Bookmarks
Bookmark displays the list of bookmarks that the document contains. Generally speaking, it is a
visual table of contents that represents the chapters, main headings, and other organizational
elements in a document.
1. To show or hide bookmarks, do one of the following:
Choose View > Navigation Panels > Bookmarks.
Click the Bookmark button on the Navigation pane.
Click the button at the top right corner of the Navigation pane to minimize or maximize
bookmarks.
2. To jump to a topic, click the bookmark or right-click the bookmark and then choose Go to
63
Page 68

Foxit Reader
Chapter 3: Viewing PDFs User Manual
Bookmark. Click the plus (+) or minus (-) sign to expand or collapse the bookmark contents.
Tip:
a) When you navigate through the PDF document, the highlighted bookmark icon will
automatically be kept in sync with the current page being displayed.
b) If a bookmark is too long to be displayed in the Bookmarks panel, you can right click the
bookmark and choose Wrap Long Bookmarks to wrap it to multiple lines for a better view.
To unwrap the long bookmarks, you can right click a bookmark and choose Don’t Wrap Long
Bookmarks.
3. To expand the current bookmark
To select the bookmark for the displayed page of the PDF document, click the Expand Current
Bookmark button at the top of the Bookmarks panel.
If the bookmark was hidden in a collapsed parent bookmark, the parent bookmark will be opened,
and the corresponding bookmark which is nearest to the current page’s location will be highlighted,
so that users can see the selected bookmark and locate the related item on the current page.
Navigating with Page Thumbnails
Page thumbnails are reduced-size versions of PDF pages. It provides miniature previews of
document pages and makes it easier to view and recognize them. The red box on the page
thumbnail indicates which area of the page appears.
A. To show or hide page thumbnails, do one of the following:
Choose View > Navigation Panels > Pages.
Click the Page button on the Navigation pane.
Click the button at the top right corner of the Navigation pane to minimize or maximize
Pages panel.
B. To navigate with page thumbnails, do one of the following:
To jump to another page, click its thumbnail.
To move to another location of the current page, drag and move the red box in its
thumbnail.
To resize the visible area of the current page, drag the resize handle on the bottom right
corner of the red box.
To resize page thumbnails, do any of the following:
Right-click on a thumbnail, and then choose Enlarge Page Thumbnails or Reduce Page
Thumbnails.
64
Page 69

Foxit Reader
Chapter 3: Viewing PDFs User Manual
Click or on the top of Pages panel to enlarge or reduce page thumbnails
separately.
Use CTRL + mouse wheel scroll.
C. In the Single Page Displaying Mode, the page thumbnails will show up when dragging the
scrollbar to view the page.
Tips:
1. To add an action to a page thumbnails, please refer to “Adding an Action to a Bookmark”.
2. Press Ctrl/Shift + click/arrow key to select multiple page thumbnails at one time. If you need
to select all the page thumbnails, select one page thumbnail first, and then press Ctrl + A.
Navigating with Links
Links take you to another location in the current document, or to locations in other documents or
websites. Clicking a link on PDF documents is just the same as in other applications. You can follow
a link by doing the following:
Select the Hand command .
Position the pointer over the link until the pointer changes to the hand with a pointing finger
.
Navigating with Article Thread
PDF articles are optional electronic threads defined by the PDF author, which lead readers through
the PDF contents presented in multiple columns and across a series of pages. If you are reading a
PDF file that contains articles, you can show the article names and navigate through them easily.
1. To view the articles in the document, open the Articles panel in the navigation pane and do
any of the following to start viewing:
Double-click the article you want to view.
Right-click the article you want to view and choose Read Article from the context menu.
Select the article you want to view and choose Read Article from the options menu in the
upper right corner of the Articles panel.
2. The pointer will change into and you will be switched to the beginning of the article
(the area of the first defined article box). The page view may zoom in or out automatically so
that the current part of the article fills the screen, with the first line appearing in the upper left
corner.
3. During the article viewing, do any of the following:
Click in the article or press Enter to navigate to the area of next article box.
Shift-click in the article or press Shift + Enter to navigate to the area of previous article box.
65
Page 70

Foxit Reader
Chapter 3: Viewing PDFs User Manual
Ctrl-click within the article to go to the beginning of the article.
4. At the end of the article (the area of the last defined article box), the pointer will change into
and clicking in the article will return to the beginning of the article.
Note:
1. Before viewing an article, make sure you have selected the Hand tool and the option Make
Hand Tool read articles in the File > Preferences > General.
2. You can select Hide After Use in the options menu in the upper right corner of the Articles
panel to hide the panel after the article viewing starts.
View 3D Content in PDFs
Foxit Reader lets you view, navigate, and comment on 3D content in PDF documents. Before using
these features, you need to download the plugin from Foxit Sever and install it in Foxit Reader. The
3D Content Navigation panel, allows you to show/hide parts of a 3D model and add 3D comments
to the 3D model, including text, linear, angular, and radial. You can also rotate/pan/zoom a 3D
model in different views.
Show/hide parts of a 3D model
From the 3D Content Navigation pane, you can view the 3D scene structure and the preset views.
Check/uncheck the appropriate checkbox to show/hide the corresponding part of the 3D content.
Click on the Default view button to go to the initial view. Select the desired view name in the list
to switch between preset named views.
Add a 3D comment/measurement to a 3D model
You can add a 3D comment/measurement to any part of a 3D model with the options on the 3D
Content Navigation pane.
1. Select Add Comment on the 3D Content Navigation pane, and then put the cursor over the
desired position and click to add a note comment. Then you’ll be prompted to enter a
comment string in the pop-up dialog box.
2. (Optional) select Add Linear/Add Angular/Add Radial on the 3D Content Navigation pane,
and then put the cursor over the desired position and click to add a measurement.
3. In the Default View, a new view will be created after you add a 3D comment/measurement,
either called 3DCommentView1 or MeasurementView1, respectively. If added to other
preset views, the 3D comments/measurements will be listed under that view.
66
Page 71

Foxit Reader
Chapter 3: Viewing PDFs User Manual
Rotate, pan, and zoom a 3D model
You can directly use the mouse to rotate, pan, and zoom in/out a 3D model.
Rotate – click the model, hold the left mouse button, and move the mouse.
Pan – click the model, hold the left mouse button, and CTRL button, and move the mouse.
Zoom – click the model, hold the right mouse button, and move the mouse. Or click the model,
hold the left mouse button and SHIFT button, and move the mouse.
Finding Text
Foxit Reader provides handy commands to find text. You can not only search text in a PDFs, folders,
or disks, but also in portfolios. Also, you can limit your search by choosing the options offered on
the Find Text dialog box to find specific items.
Finding Text in the Current PDF
To find text you are looking for, follow the steps below:
Type the text in the Find box at the upper right corner of the document.
Click Find Previous or Find Next to locate to relevant match.
(Advanced Searching) Select a search option on the drop-down menu of Filter next to
Find box to limit your search and specify the highlight properties for search results:
A. Whole Words Only -- Limits the search to match only whole words. For example, if you
search for the word Read, the word Reader will not be found.
B. Case-Sensitive -- Makes the search case-sensitive. For example, if you search for the word
text, the words Text and TEXT will not be found.
C. Include Bookmarks -- Enables you to search the text in bookmarks.
D. Include Comments -- Enables you to search the text in comments.
E. Highlight All Text – Highlight all the text search results in PDF file.
F. Ignore Diacritics and Accents: Ignore the diacritics and accents to find items with any
variation of the alphabetical characters. For example, if you type “resume”, both “resume”
and “résumé” will be found.
G. Properties -- Choose the color and opacity for the highlighting of the search results.
Press Enter to start searching. If you have checked Highlight All Text option, all the text search
results will be highlighted in the PDF file, and you can scroll through the document to find
them easily. If you do not check that option, press Enter (or shortcut key F3) repeatedly to
continue searching and finding the next instances of the search term.
67
Page 72

Foxit Reader
Chapter 3: Viewing PDFs User Manual
Doing Advanced Search
The search function enables you to search for a string of characters or patterns according to the
type of search option you choose; either in a single PDF file or in multiple PDF files under a specified
folder. When the search is finished, all occurrences will be listed in a tree view, allowing you to
quickly preview the contexts and jump to specific locations. You can also save the search results as
a CSV or PDF file for further reference.
1. Searching Text and Patterns
To search text you are looking for, follow the steps below:
Click Search command next to Find box.
Below “Where would you like to search?” check one of the following to define the search field.
A. To search the text in the current PDF document, select “In the current PDF document”.
This option will be grayed out if no document is open.
B. To search the text in all PDF documents in specific folder or disk, select All PDF
Documents in > choose one of the disks or user-selected search paths. Foxit Reader will
show the path of the currently opened document for easier location.
C. To search the text in selected documents in PDF portfolio, please select Selected PDFs in
portfolio. This option is only available when a PDF portfolio is opened.
D. To search text in the PDF portfolio, please select All PDFs in portfolio. This option is only
available when a PDF portfolio is opened.
E. To search PDF indexes, please choose Select Index. This option helps you search the index
of the entire set of documents quickly if your PDF document or document collections
include a full-text index created by Foxit PhantomPDF. If you have added indexes in Foxit
Reader before, you can also choose Currently Selected Indexes option directly to search
your currently selected indexes. For more information, please refer to “Searching PDF
Indexes”.
Select one of the following search criteria from the dropdown list under the file location box:
A. Match exact word or phrase: Search for instances that match the entire word or phrase
(including the spaces) you specified in the text search box.
B. Match any of the words: Search for any instances that match at least one of the words.
C. Looks like search pattern: Search for patterns like phone number, social security number,
or email address in the PDF file. This option is not available when you search PDF indexes.
D. Match All of the words: Search for any instances that match at least one of the words,
but not necessarily in the order you type the words. If the document does not contain all
of the words you type, no matched results will be found. This option is available only for
searching a full-text PDF index.
For text search, input the word you would like to search in “What word or phrase would you
68
Page 73

Foxit Reader
Chapter 3: Viewing PDFs User Manual
like to search for” box. For pattern search, select the pattern you want to search from the
Select your pattern dropdown list, and choose the specific county and region from the
Country/Region dropdown list.
(Optional) Check any of the following options to specify the additional search criteria, if
needed.
a) To limit the search to match only whole words, check Whole Words Only. For example,
if you search for the word Read, the word Reader will not be found. This criterion is only
available for text search.
b) To make the search case-sensitive, check Case-Sensitive. For example, if you search for
the word text, the words Text and TEXT will not be found. This criterion is only available
for text search.
c) To search words in comments, please check Include Comments.
d) To search words in bookmarks, please check Include Bookmarks. This criterion is only
available for text search.
e) To search words in attachments, please check Include Attachments.
f) To highlight all the text search results, please check Highlight All Text.
g) To ignore the diacritics and accents and find items with any variation of the alphabetical
characters, please check Ignore Diacritics and Accents.
h) To limit search in order to match criteria such as document properties and metadata,
check the option in Use these additional criteria group, and specify the additional criteria,
including Author, Date Created, Subject, etc. These options are only available when you
execute advanced text search in multiple PDF files.
Tip: The additional search criteria options are collapsed by default. You can click More to
show all the options.
Click Search button.
Each item listed includes a few words of context and an icon that indicates the type of
occurrence. Check the search results with the following steps:
If necessary, click the plus sign (+) to expand the search results.
(Optional) For advanced search in multiple documents or portfolios, you can select an
option from the Sort By drop-down list near the bottom of the Search panel to sort the
search results by date modified, filename, or location.
To collapse the file path and have a quick view about the file name, check Collapse File
Path option at the bottom of the Search panel.
Click a search result directly to view it in the PDF file.
(Optional) Click the save button in the Search panel, and choose Save results to PDF
or Save results to CSV to save the search results.
(Optional) Click New Search button to start a new search task.
69
Page 74

Foxit Reader
Chapter 3: Viewing PDFs User Manual
Note: For each search, layers, form fields, and digital signatures in the document will also be
searched automatically. If some of the search results occurs on a hidden layer, when selecting the
results in the Search panel you will be prompted whether to make that layer visible.
2. Searching PDF Indexes
If your PDF document or document collections include a full-text index created by Foxit
PhantomPDF, you can improve your search efficiency by simply searching the index for target words
rather than each document separately. Steps are as follows:
Click Search command next to the Find box to open the Search panel.
To search a PDF document with embedded index, please enable embed index in Indexing
preferences, and then follow the steps in “Searching Text and Patterns”.
To search document collections which include a full-text index, please follow the steps below:
From the Where would you like to search dropdown list, choose Select Index to add
indexes.
In the pop-up Index selection dialog box, click Add to add an index. All the indexes you
added will be displayed in the index list in Index selection dialog box. You can select an
index, and click Info to get its file information, or click Remove to remove it from the list,
if necessary. Once added, the index files will be marked as checked for you to execute
index search by default. Before application, review the indexes in the list, and uncheck
any unnecessary ones. Upon completion, click OK to close the Index selection dialog box.
When you have successfully added the indexes, the Currently Selected Indexes option
will be selected by default. If you want to search the currently selected indexes next time,
you can also choose this option from the Where would you like to search dropdown list
directly.
Follow the steps in “Searching Text and Patterns” to proceed with your search.
Tip: An index created by Foxit PhantomPDF for document collections usually includes an XML file,
log file, and support folder. To ensure successful search, all the index files should be available when
you search an index in Foxit Reader.
3. Moving and Resizing Search Box
The advanced search box can float or be docked. You can also resize the box easily.
To float the docked search box, please drag it by its title bar to another location in the work
area.
To move the floating search box, drag it by its title bar to another location in the work area.
To resize the floating search box, drag any corner point to adjust.
To dock the floating search box, double-click the title bar or drag it by the title bar to its
original location.
70
Page 75

Foxit Reader
Chapter 3: Viewing PDFs User Manual
Playing a Movie or a Sound Clip
PDF has extended itself to interactive multimedia support and media playing capabilities. Some
PDF files may be layered with multimedia; which could include sound, music and video clips. Each
movie and sound file usually includes a play area from which the media can be activated. The play
area typically appears on the PDF page as an image or a blank rectangle, but can also be invisible.
To play the media files, please make sure you have the necessary media player installed on your
computer.
To play a movie or a sound, please do the following:
Select the Hand command , and click the play area of the movie or sound file. When the
pointer is positioned over the play area, it changes to the play mode icon.
Note: To protect your computer from viruses, Foxit Reader will pop up a dialog box soliciting your
approval before playing multimedia files.
For more information, please refer to “Adding Video & Audio” for details.
Thumbnails Preview in Windows
If Foxit Reader is set as the default PDF viewer, all the thumbnails of PDF files will be displayed in
Windows Explorer when opening a specific folder. The status bar of Foxit Reader will be displayed
at the bottom of the Preview pane, which provides the basic viewing commands for easy reading;
this includes Go To commands, Zoom commands, and Rotate command.
71
Page 76

Foxit Reader
Chapter 4: Working on PDFs User Manual
Chapter 4 – Working on PDFs
Foxit Reader allows you to copy text and images to other applications, and stamp PDFs. To learn
more about this, please read the following explanations.
Select & Copy
With Foxit Reader 7.0 and newer versions, you can copy and paste text with styles; which include
font, font size, font style, font color, and other text editing features.
Selecting and Copying Text and Image
The Select Text and Image command lets you select horizontal and vertical text or columns of text,
and image in a PDF. To copy text, click the Select Text and Image command in the Tools
group under the Home tab and do the following:
Selecting text and image
To select an image, please click on the image in a PDF file directly. To select text, please do any of
the following:
Select a line of text: Move the cursor toward a line of text you want to select.
Select a column of text: Place the cursor between the lines, move towards a column of text,
and draw a rectangle over it.
Select a word: Double-click the word you want to select.
Select multiple paragraphs through pages: Start dragging from the beginning of the selection
and scroll to the end of the selection without releasing your mouse.
Select all the text: Press Ctrl + A, or select some text, right-click it and then choose Select All.
Deselect all the text: Click anywhere outside of the text selected.
Copying text and image
Once you have selected the text or image, do one of the following:
Right-click the selected text > choose Copy.
Right-click the selected image, and choose Copy.
Press shortcut key Ctrl + C.
Pasting text and image
To paste the selected text on Clipboard to PDF file in Foxit Reader, please select the Hand
72
Page 77

Foxit Reader
Chapter 4: Working on PDFs User Manual
command in Foxit Reader, use the shortcut key Ctrl + V, or right-click on the document where
you want to paste the text and select Paste.
To paste the selected image on Clipboard to PDF file in Foxit Reader, please select the Hand
command in Foxit Reader, use the shortcut key Ctrl + V or right-click on the document and
select Paste. You will see the image preview as you hover your mouse over the document. Then
click on the document where you want to add the image to add it in the PDF file.
To paste the selected text or image on Clipboard to another application, please follow the paste
command of that specific application.
Copying a Combination of Text and Images as an Image
You can use the SnapShot command to copy all selected content (text, images, or both) to the
clipboard or other applications. Text and images will be copied as an image.
To copy a combination of text and images as a single image, do the following:
Select the SnapShot command by choosing Home > SnapShot.
Drag a rectangle around the text and images.
You will be prompted that the selected area has been copied to the clipboard.
(Optional) Right-click the selected area, and then choose Copy Selected Graphic.
Paste the selected image to other applications.
Tip: To paste images or a combination of text and image on clipboard from another application to
PDF file in Foxit Reader, please select the Hand command in Foxit Reader, use the shortcut
key Ctrl + V, or right-click on the document where you want to paste the object and select Paste.
Word Count
Similar to Microsoft Word, Foxit Reader counts words, characters, pages, lines and other
information in all or part of your document. With no text selected, click View > Word Count, and
you will see a pop-up Word Count box for the statistics of the entire document. For a partial word
count, just select the text you want to count, and then click View > Word Count; or right click the
selected text and choose Word Count from the context menu.
Working with Layers
About PDF Layers
73
Page 78

Foxit Reader
A
B
Chapter 4: Working on PDFs User Manual
A layer or as it is more formally known Optional Content Groups (OCG) is a dictionary representing
a collection of graphics that can be made visible or invisible dynamically by users of viewer
applications. In a PDF file, each layer may hold any portion of the document's objects, and layers
may be made visible or invisible, showing or hiding their contained objects, in any combination.
With Foxit Reader, you can control the display of PDF layers with the Layer panel. For example,
you may divide background imagery, main content areas, and advertisements amongst their own
top-level layers, and easily hide the layers that you don't want others to view.
Show or Hide PDF Layers
In a PDF, information can be stored on different layers. To show or hide related content stored in
a variable number of separate layers, you can simply refer to the Layer panel on the left side of
the work area. Please note that you cannot create or edit layers in Foxit Reader; however, you can
view layers and choose to show or hide the content associated with each layer.
Layer Panel
A. A checkmark indicates a displayed layer B. Hidden layer
1. Open the Layer panel, and then do one of the following:
To hide a layer, uncheck the layer.
To show a hidden layer, click the empty box and a checkmark will appear.
To check the properties of a layer, right-click the layer and select Properties.
2. From at the top right corner of the Layer panel, choose one of the following:
List Layers for All Pages - Shows every layer across every page of the document.
List Layers for Visible Pages - Shows layers only on the currently visible pages.
Reset to Initial Visibility - Resets layers to their default state.
Expand All - Expands all layers.
Collapse All - Collapses all of the current layers in the view.
Apply Print Overrides – Displays layers according to the Print settings in the Layer Properties
74
Page 79

Foxit Reader
Chapter 4: Working on PDFs User Manual
dialog box.
Apply Export Overrides – Displays layers according to the Export settings in the Layer
Properties dialog box.
Apply Layer Overrides – Displays all layers, which is applicable to all optional content in the
PDF, even layers that are not listed in the Layers panel. If you check this option, all the layers
will be visible, regardless of the settings in the Layer Properties dialog box.
Layer Properties – Displays layer properties including Layer Name, Default State, Initial State,
etc.
Measuring the Objects
The Measure commands enable you to measure distances and areas of objects in PDF documents.
The measure commands are especially useful when you need to know the distances or areas
associated with objects in a form or computer-aided design (CAD) drawing, or when you want to
measure certain areas of a document before sending to a professional printer. The measure
commands are available to Reader users only if the PDF creator enables measuring functionality.
When you use a measure command, the command dialog box displays the measurements of the
line segments you draw.
Measuring the Objects
Choose Comment.
Select the Distance command to measure the distance between two points. While
measuring the distance, you can specify whether to show the default leader on both side of
the measurement points or not in Measuring Preferences. Click the first point, move the
pointer to the second point, and click again. If you choose to use the default leader, move
your mouse to determine the leader length, and then click on the document again to finish
measuring. The measurements will appear on the page.
Select the Perimeter command to measure a set of distance between multiple points.
Click the first point to start, and then click each point you want to measure. Double-click the
last point to end measuring.
Select the Area command to measure the area within the line segments that you draw.
Click the first point to start, and then click each point you want to measure. After you have
clicked at least two points, click the first point or double-click the last point to complete the
area measurement.
Notes:
1. When measuring, you can hold down SHIFT to snap the two points horizontally, vertically, or
diagonally (in 45 degrees).
75
Page 80

Foxit Reader
Chapter 4: Working on PDFs User Manual
2. You can also choose to complete or cancel measurement by right-clicking and choosing options
from the context menu.
After you select the measuring tool, the Comment Format context tab appears, which allow you
to calibrate the scale ratio, snap measurement, export measurement markup, etc.
If your PDF file includes embedded scale ratio, you can measure distance/perimeter/area
using the embedded scale ratio. Before that, you need to select the Use Scale and Units From
Document (When present) option in File > Preferences > Measuring. Then all the following
measuring will use the embedded scale ratio. To calibrate the scale ratio for your document
for an accurate result, choose either method of the following:
With the Use Scale and Units From Document (When present) option selected:
1) Click Calibrate in the Scale Ratio group and then click the two points of the line
whose actual length has already been known. (Tips: When drawing, you can hold
down SHIFT to snap the two points horizontally, vertically, or diagonally. You can
also click Snap to Paths in the Snap group to capture the path in the page.)
2) When the second point is selected, the Calibration dialog box pops up.
3) Type the actual length that the line represents and choose the appropriate unit,
which will set a new scale ratio.
4) (Optional) If you already have the correct scale ratio, directly define the
measurement value and choose the appropriate unit in the Scale Ratio group.
5) Then in the Scale Ratio group or the pop-up Calibration dialog box, click Store
Scale in Page to apply the new scale ratio to the current page, or click Apply to All
Pages to apply it to all pages. The new scale ratio will be embedded into the page
or all pages respectively, replacing the original embedded scale ratio.
6) As the scale ratio is embedded into the document, the measurements in the
document change accordingly.
With the Use Scale and Units From Document (When present) option unselected,
directly define a custom scale ratio in the Scale Ratio group, or click Calibrate in the
Scale Ratio group to define a new scale ratio. The defined scale ratio will only be applied
to the current page.
By default, the measurement results, measurement markups, and rulers will be shown in Foxit
Reader. To hide this information, please uncheck the relevant option(s) under the Setting
group.
Show result information: shows the measurement results (including current measurement,
delta values, and scale ratio) on a small panel in Foxit Reader.
76
Page 81

Foxit Reader
Chapter 4: Working on PDFs User Manual
Measurement markup: shows the line you draw as a comment. When this option is checked,
you can add a label to measurement markups either by using the one specified in measuring
preferences or inputting a new one in the Add Label box. The label for Distance markup will
be shown in the distance measurement line, while the label for Perimeter and Area markups
will be shown in their pop-up notes. When you put the pointer over the measurement
markups with the Hand command selected, you can also view the measurement result and
label.
Rulers: shows the rulers on the page.
Snap: While measuring objects, you can choose any of the options to snap to a particular point
along an object for more accurate measurements.
Snap to Endpoints : snap the measurement to the endpoint of a line.
Snap to Midpoints : snap the measurement to the midpoint of a line.
Snap to Paths : snap the measurement to the nearest point on the path.
Snap to Intersections : snap the measurement to the intersection point of two paths.
Choose Export to Excel to save all the measurement information in your PDF to a CSV file.
Working on the Measurement Markup
After you complete the measurement, you are able to do further operations; such as move, resize,
flip, and even work on it the way you work on comments.
Moving the Measurement Markup
With the Hand command or Select Annotation command selected, click the
measurement markup you want to move.
Place the cursor over the object when the pointer changes into , hold and drag the mouse
to move it to the intended place.
Changing the Length and Orientation of the Line Segment
With the Hand command or Select Annotation command selected, choose one of
the resize corners , and you will see the pointer change into .
Hold and drag the mouse to change the length and orientation of the line segment.
Flipping the Measurement and Annotation
You can reverse measurement and annotation of the object you draw.
77
Page 82

Foxit Reader
Chapter 4: Working on PDFs User Manual
Before flipping After flipping
To flip the measurement and annotation of the object, do the following:
Select the Hand command or Select Annotation command .
Right-click the object you draw > select Flip.
Adding, editing, moving, or deleting the measurement label
Measurement labels will be added and shown in the measurement markups as you specified in
Measuring Preferences or as what you set while adding a measurement markup. If a measurement
markup does not contain a label, you can easily add a label to it with Foxit Reader. For existing
labels, you can also edit, move, or delete them. Steps are as follow:
Select the Hand command or the Select Annotation command .
To add a label to a measurement markup without label: right-click the measurement markup >
select Add Label > input the label > click OK.
To edit an existing label: right-click the measurement markup > select Edit Label > input the
label as desired > click OK.
(For distance measurement markup only) To move the label as well as the measurement result
shown on the distance measurement markup: click on the text shown on the markup to
activate the text cursor > drag the label directly to a desired position.
To delete a label: right click the measurement markup > select Delete Label.
Working on Measurement Markups as Comments
The measurement markups can also be used as comments. You can set the status, open pop-up
notes, delete them, reply to the markups, change the properties, and set the current properties as
default.
Note: To show measurement markup and the measurement results, right-click on the object you
draw, and choose Properties > Appearance > then check Show text in line.
For information on how to work on the objects as comments, please refer to the corresponding
section of “Chapter 5 – Comments”.
78
Page 83

Foxit Reader
Chapter 4: Working on PDFs User Manual
Change the appearance of measurement markups
Foxit Reader provides two ways to change the appearance of measurement markups: through the
Comment Format context tab and via the Properties dialog box. If you change the appearance
through the Comment Format context tab, Foxit Reader will save the properties and apply them
to any new measurement markups as well. If you change the appearance via the Properties dialog
box and do not check Set Current Properties as Default option in the dialog, Foxit Reader will only
apply the properties to your currently selected markup.
Change the appearance through the Comment Format context tab
Select the Hand command or Select Annotation command .
Click the measurement markup that you want to change the appearance, and then the
Comment Format context tab will appear on the ribbon.
Do any of the following as needed:
Change the line color: Select one of the preset colors from the box, or click Line Color and
then choose a desired color from the color palette.
Change the opacity: Click Opacity, and then drag the slider to change the opacity.
Set the fill color: Click the fill color button , then choose a desired color from the color
palette.
Change the line width: Click the line width button , and then select a desired value.
Change the dash type: Click the dash type button , and then select a dash type as needed.
Change the shape for the start/end of the line: Click Start of line or End of line, and then
select a desired shape.
Change the appearance via Properties dialog box
Select the Hand command or Select Annotation command .
Right click the measurement markup that you want to set the appearance, and then select
Properties from the context menu.
79
Page 84

Foxit Reader
Chapter 4: Working on PDFs User Manual
Follow the steps specified in “Changing the Appearance for Drawing Markups”.
Arrange the measurement markups
You can arrange the measurement markups by two methods: through the Arrange context tab or
via the context menu.
Arrange the measurement markups through the Arrange context tab
Select the Hand command or Select Annotation command .
Click the measurement markup that you want to arrange, and then the Arrange context tab
will be called out.
To center the measurement markups:
Select the measurement markup to be centered.
(If needed) Press Ctrl (or Shift) and click the measurement markups to select multiple
measurement markups.
Choose Page Center > Vertically/Horizontally/Both to center the objects vertically,
horizontally, or both on the page.
To align the measurement markups:
80
Page 85

Foxit Reader
Chapter 4: Working on PDFs User Manual
Select two or more measurement markups that you want to align.
Choose Alignment > Left/Right/Vertical to align a column of measurement markups.
Choose Alignment > Top/Bottom/Horizontally to align a row of measurement markups.
Note: When you select the measurement markups, the solid border handles will show up for the
anchor markup, which is the last measurement markup you selected. The selected measurement
markups will be lined up with the edges of the anchor measurement markup.
To distribute the measurement markups:
Select three or more measurement markups you want to distribute.
Choose Distribute > Vertically or Horizontally.
Arrange the measurement markups via the context menu
Select the Hand command or Select Annotation command .
Right click the measurement markups, and then do one of the following:
Choose Align > Left/Right/Vertically to align a column of measurement markups, or Align >
Top/Bottom/Horizontally to align a row of measurement markups. The Align options are
available when you select two or more objects.
Choose Center > Vertically/Horizontally/Both to center the measurement markup(s) on a
page.
Choose Distribute > Vertically/Horizontally to distribute them. This function is available
when you select three or more objects.
Note: When you right click one of the selected measurement markups, the solid border handles
will show up, indicating that it is the anchor markup. The selected measurement markups will be
lined up with the edges of the anchor measurement markup.
You can also refer to “Working with Multiple Images” for more details.
Switching between Basic Commands
The Foxit Reader Basic Toolbar consists of the Search, Hand, Select Text and Image, Snapshot,
Typewriter, and other editing commands. You can switch between these basic modes by choosing
commands on the tab bar or clicking the individual icons on the toolbar. Only one mode can be
chosen each time, and they cannot be used simultaneously.
Using Rulers & Guides
81
Page 86

Foxit Reader
Chapter 4: Working on PDFs User Manual
Foxit Reader provides horizontal and vertical ruler guides to help you align and position text,
graphics, or other objects on the page. They can also be used to check the size and the margins in
a document.
Rulers & Guides
A. Rulers B. Guides
Displaying Rulers
Please choose View > check Rulers.
Hiding Rulers
Please choose View > uncheck Rulers; or right-click the horizontal or vertical ruler, and then choose
Hide Rulers.
Creating Ruler Guides
Do one of the following:
Drag down from the horizontal ruler to create a horizontal guide, or drag to the right of the
vertical ruler to create a vertical guide.
Double-click a location on the horizontal ruler to create a vertical guide, or double-click a
location on the vertical ruler to create a horizontal guide.
82
Page 87

Foxit Reader
Chapter 4: Working on PDFs User Manual
Moving Ruler Guides
Click and hold the guide, and then drag it to a new location.
Changing Unit of Measurement
Right-click the horizontal or vertical ruler and select a measurement system for the rulers.
Deleting Ruler Guides
To delete a guide, click the guide to select it, and then press the Delete key.
To delete all guides on a certain page, scroll to the page, right-click in the ruler area and
choose Clear Guides on Page.
To delete all guides, right-click in the ruler area and choose Clear All Guides.
Undoing and Redoing
Foxit Reader allows you to undo and redo previous actions. These features allow you to easily
correct mistakes by cancelling the last action made or filling back in the previous actions with Undo.
You can undo as well as redo any editing applied in the PDF documents, which includes
commenting, advanced editing, and changes made to the document.
Note: You cannot undo or redo actions of bookmark editing.
To undo previous actions, do one of the following:
Select the Undo button on the Toolbar.
Press shortcut key Ctrl + Z.
To redo previous actions, do one of the following:
Select the Redo button on the Toolbar.
Press shortcut key Ctrl + Y.
Sharing Documents
E-mailing Documents
E-mailing and sharing documents is a common business practice. Foxit Reader allows users to
collaborate (through powerful annotation capabilities) and share PDF documents with co-works
83
Page 88

Foxit Reader
Chapter 4: Working on PDFs User Manual
and friends. You may save and e-mail straight from the application. To e-mail a PDF file, please do
the followings:
Choose Share > Email > Email Current Tab (Email the PDF file that you are currently reading)
or Email All Open Tabs (Email all the PDF files that have been opened in Foxit Reader).
System default e-mail application runs.
The PDF(s) will be attached in the e-mail automatically, and the current PDF file name will be
the email subject.
Type the subject and e-mail address > click Send.
By default, while emailing PDF files, Foxit Reader will automatically save the changes you made to
the file and attach the modified PDF file to your email system. You can change this default setting
and choose to email an unsaved or saved file.
To change the default email setting, please go to File > Preferences > Documents, and uncheck the
Automatically save document as e-mail attachment option under Prompt Messages.
Preview in the Outlook
Foxit Reader enables you to preview a PDF attachment in Outlook. When an e-mail in Outlook has
a PDF document, it will be displayed in the e-mail pane. The status bar of Foxit Reader will be
displayed at the bottom of the e-mail pane, which provides the basic viewing commands for easy
reading; this includes Go To commands, Zoom commands and the Rotate command.
Sending Documents to Evernote
Directly send PDF documents to Evernote as an attachment.
Prerequisites – You will need to set up an Evernote account from
84
Page 89

Foxit Reader
Chapter 4: Working on PDFs User Manual
https://www.evernote.com/Registration.action.
Download and install – https://evernote.com/intl/en/download.
Open a PDF file.
Choose Share > Evernote .
You will see that the current PDF document is attached in Evernote.
Sending Documents to OneNote
You can send your PDF document to OneNote quickly within Foxit Reader after edits.
Open and edit the document with Foxit Reader.
Save the changes and then click Share > OneNote.
Select a section/page in your notebooks, and click OK.
In the pop-up dialog box, choose Attach File or Insert Printout to insert your document to the
selected section/page in OneNote.
SharePoint Integration
Foxit Reader is integrated with Microsoft SharePoint, which helps you better manage and share
PDFs. You can access PDFs in a SharePoint repository by doing any of the following:
Open a PDF file in the SharePoint mapped drive by the Open dialog box within Foxit Reader.
You can open and check out a PDF, modify it; and then check in and save it to the SharePoint
network drive.
You can also use Foxit Reader’s Open or Save As dialog box to manage your PDFs in your
SharePoint repository, depending on whether the SharePoint repository is online or on-
premise. For more details, please refer to Open and Save As PDFs with Foxit Reader.
Directly check out and check in PDFs in your SharePoint repository on SharePoint on-premise)
using SharePoint’s web interface in a browser after configuring your server. Please double click
the attached SharePoint Configuration to configure your server first. More details
please refer to Open and Save As PDFs with a Browser.
Tip: You can open and view non-PDF files from SharePoint server in Foxit Reader. When a non-PDF
file is opened, Foxit Reader will convert it to PDF. If needed, you can save the converted PDF files
to SharePoint server to work with it in the future.
85
Page 90

Foxit Reader
Chapter 4: Working on PDFs User Manual
Open and Save As PDFs with Foxit Reader
Open PDF files in a SharePoint repository
To open PDF files in a SharePoint repository, please do the following: (Take opening PDFs in a
SharePoint repository on SharePoint online for example)
Run Foxit Reader and choose File > Open > Add a place > SharePoint . In the Add
dialog box, type the SharePoint URL to sign in and click Next to continue.
In the pop-up dialog box, enter the email address and the password to sign in.
In the Open dialog box, select the Shared Documents folder and click Open.
86
Page 91

Foxit Reader
Chapter 4: Working on PDFs User Manual
Choose the PDF file you want to open and click Open.
In the Foxit Reader dialog box, if you choose Check out and Open, other users cannot edit the
PDF at the same time; if you only choose Open, others can modify the PDF as well when you
are editing. If needed, you can check Don’t ask me again so that Foxit Reader will remember
your selection and save it as the default way to open a file from the SharePoint server. Once
checked and applied, Foxit Reader dialog box will not show up the next time you open a file
from the SharePoint server. To change the default way, please refer to “SharePoint”.
87
Page 92

Foxit Reader
Chapter 4: Working on PDFs User Manual
(Optional) If you want to cancel the Check out status, please go to Share > Discard Check Out
.
Edit the PDF according to your requirements.
To check and set the PDF properties, please do as the following steps:
1. Please go to Share > Document Properties .
2. In the Document Properties dialogue, you will find the file path and document properties.
You can select the file path to copy and paste it, if necessary. To edit a document property,
double-click the column name, and edit the value in the Edit text box. For example,
double-click Title, the Edit text box will pop up, type the content you want and click OK
to finish the editing.
88
Page 93

Foxit Reader
Chapter 4: Working on PDFs User Manual
Go to SharePoint > Check In.
In the Check In dialogue box, select a version number for the modified document along with
the appropriate version comments. To not allow other people to modify the document, you
can check Keep the document checked out after check in this version.
Click OK, the modified PDF will be loaded to the server automatically.
Save as PDF files to a SharePoint repository
To save as PDF files to a SharePoint repository, please do the following: (Take saving as PDFs to a
SharePoint repository on SharePoint online for example)
Choose File > Save As > Add a place > SharePoint . In the Add dialog box, type the
SharePoint URL to sign in and click Next to continue.
89
Page 94

Foxit Reader
Chapter 4: Working on PDFs User Manual
In the pop-up dialog box enter the email address and the password to sign in.
In the Save As dialog box, select the Shared Documents folder and click Save.
90
Page 95

Foxit Reader
Chapter 4: Working on PDFs User Manual
Open and Save As PDFs with a Browser
To work on PDFs in your SharePoint repository on SharePoint on-premise with a browser, you just
need to log on to your SharePoint web portal, navigate to a PDF and click it. You will be prompted
whether to check out and open the PDF. See also Check Out and Open. Then you can check in to
save it back to your SharePoint repository.
Tip: If you need to save to your local folder, after editing the PDF you can click File > Save As >
Computer and choose a local foder to save.
Alfresco Integration
Alfresco is a popular ECM (Enterprise Content Management) platform, providing robust document
management capabilities. Foxit Reader users can seamlessly connect to their Alfresco accounts to
open, edit and save PDF documents.
Open and save documents in Alfresco
Run Foxit Reader and choose File > Open > Add a place > Alfresco. In the Alfresco Login dialog
box, sign in your Alfresco account.
In the Open dialog box, select a document from a repository.
Click Open or Check Out and Open to open the document. If you choose Check out and Open,
other users cannot edit the PDF at the same time; if you only choose Open, others are able to
modify the PDF at the same time when you are editing.
When you open a document, the Alfresco context tab appears on the ribbon. You can click
Check Out to check out the open document, or click Discard Checkout to cancel the Check
Out status. If you check out the document, after editing it, you can click File > Save to save
the changes to your Alfresco account, or click Check In to save the document as a new version
back to your Alfresco account.
If opening a document without checking out, you are allowed to modify the description of the
document in the Document Properties dialog box which pops up when you click Document
Properties in the Alfresco context tab.
Epona DMSforLegal Integration
Within Foxit Reader, you can open, modify, and save PDF documents on Epona DMSforLegal.
Open PDFs on Epona DMSforLegal
1. Click File > Open > Add a place > DMSforLegal. Before using Foxit Reader to open PDFs on
Epona DMSforLegal, you are required to install Epona DMSforLegal client in your system if you
91
Page 96

Foxit Reader
Chapter 4: Working on PDFs User Manual
haven’t.
2. (Optional) If you have added Epona DMSforLegal in Foxit Reader before, the DMSforLegal item
will be listed under the Open menu, and the DMSforLegal context tab will be displayed. You
can click File > Open > DMSforLegal > Browse to open a file from Epona DMSforLegal.
3. In the DMSforLegal Open dialog box, select the document you want to open, and click OK.
4. Choose how you want to open the PDF document:
Check Out and Open: Open the PDF file and check it out so that others cannot modify the
PDF when you are working on it.
Open: Open the PDF file without checking out.
(Optional) If necessary, check Don’t ask me again so that Foxit Reader will remember your
selection and save it as the default way to open a file from the Epona DMSforLegal. Once
checked and applied, Foxit Reader dialog box will not show up the next time you open a
file from the Epona DMSforLegal.
Check In, Check Out, and Discard Check Out a PDF File on Epona DMSforLegal
To change the status of a PDF file opened from Epona DMSforLegal, please select the DMSforLegal
context tab, and choose any of the following option as desired:
Check In: Check in the PDF document that you have currently checked out, and save it on Epona
DMSforLegal. While checking in the PDF document, select a version number for the modified
document and type the appropriate version comment in the Check In dialog box. To prevent
other users from modifying the document, check Keep the document checked out after
checking in this version option in the Check In dialog box.
Check Out: Check out the PDF document from Epona DMSforLegal library. A checked-out PDF
document cannot be edited by other users.
Discard Check Out: Check in the PDF document that you have currently checked out, discarding
any changes you have made to the document.
Check and Edit the Document Properties
To check the document properties of a PDF file opened from Epona DMSforLegal, go to
DMSforLegal context menu, and choose Document Properties. The Document properties dialog
box will pop up for you to view and edit the document properties.
Save a PDF File on Epona DMSforLegal
Click File > Save to save and replace the original document on Epona DMSforLegal.
Go to File > Save As > DMSforLegal > Browse, and follow the DMSforLegal onscreen
instructions to save it as a new document on DMSforLegal.
92
Page 97

Foxit Reader
Chapter 4: Working on PDFs User Manual
Creating PDFs
Creating PDF is easy to use with Foxit Reader. Users can easily and quickly create PDFs from
Microsoft® Word®, PowerPoint®, and Excel® through the Foxit Reader plug-in or export existing
PDF file to text with one click. Just follow the steps below, and you can easily experience this new
feature to the utmost.
One-click PDF Creation from Any File
Foxit Reader can create any kind of printable files to PDF simply by dragging the file into the
program window; alternatively, you can use Foxit Reader to quickly convert files to PDF directly
from within Windows® Explorer.
To create a PDF with one click:
Drag the document you want to convert on to the Foxit Reader desktop icon.
If the Foxit Reader is open, drag the file directly into the application window.
Right-click the document icon you want to convert, and choose Convert to PDF in Foxit Reader.
Creating PDFs in Foxit Reader
Creating from File
Choose Home > From File .
In the Open dialog box, navigate through your local disk to select a local file, or click Open from
ECM to select a file from your ECM server or cloud service after login. Then click Open to
continue.
The converted PDF file will be opened in Foxit Reader automatically. Click the Save button
or choose File > Save to save the PDF file.
(Alternatively) You can simply drag the file to be created to Foxit Reader, or right-click the file and
choose Convert to PDF in Foxit Reader.
Creating from Scanner
Choose Home > From Scanner, or File > Create > From Scanner.
In the Scan dialog box, select a scanner and related options. You must have the manufacturer’s
scanning software installed on your computer.
93
Page 98

Foxit Reader
Chapter 4: Working on PDFs User Manual
Advanced Options (Windows only): click to open the Scanner Options dialog box.
(Available only after you select a scanner.)
Transfer Mechanism: Native mode transfers data by default in your scanner. Buffered
memory mode scans in resolutions of 600DPI and above.
Configure scanner:
Configure scanner using scanner interface: Check this option to directly use the
scanner interface to scan. The following items (i.e. Source, Color Mode, Paper Size
and Resolution) will not be available.
Prompt to scan more pages: Selects this option, a dialog box will pop up to ask you
whether to scan more pages whenever the scanning completes. If the option is
unselected, for single-sided printing, you’ll not be prompted once the scanning
completes.
Sides: Specify single or double-sided scanning. If you select Both Sides but the
settings of the scanner are for only one side, the scanner setting overrides the Foxit
settings.
94
Page 99

Foxit Reader
Chapter 4: Working on PDFs User Manual
Source: select the input source for scanning, including Auto Detect, Feeder, and
Flatbed. If you select Auto Detect, Foxit Reader will detect the input source for
scanning automatically. If documents are placed in both feeder and flatbed, both of
them will be scanned, but the one in feeder will be scanned first by default.
Color Mode: select a basic color mode (Color, Black and White, Grayscale or Auto
Detect) supported by your scanner.
Paper Size: select a paper size.
Resolution: select a resolution supported by your scanner.
Output:
New PDF Document: Output the scanning results as a new PDF document.
Append: Append the converted scan to an existing PDF file. After selecting this option,
click Browse to find and select an existing PDF file from your local disk.
Save Multiple Files: Save the scanning results as multiple PDF files. After checking
this option, click Options to specify the number of pages for each file and the
filename prefix.
Click Scan. Foxit Reader will save your latest configuration of the selected scanner for your
easier operation when creating PDFs with that scanner afterwards.
(Optional) If you choose to save the scanning results as multiple files, choose the folder where
you want to save the files, and click OK.
In the pop-up scanner dialog box, click Scan to continue.
(Optional) When prompted whether to scan more pages, check the desired option in the dialog
box to continue or complete scanning, and then click OK.
If you choose to save the scanning results as a new PDF document or append the scanning
results to a selected document, Foxit Reader will open the converted PDF automatically. To
save the file, click the save button on the Quick Access Toolbar, or choose File > Save. If
you choose to save the scanning results as multiple PDF files, you can find the converted PDF
files in the specified folder when the scanning is completed.
Creating Blank PDF
Choose Home > Blank , and a blank PDF will be created.
Choose Home > Typewriter.
Double click the blank page to start typing the text you want to add to the blank page.
As needed, select other commands and options that you want to apply to the PDF.
Choose File > Save, and select a name and location for the PDF file.
Creating from Clipboard
You can create a PDF directly from your clipboard.
Choose Home > From Clipboard , and a PDF with contents from clipboard
will be created.
95
Page 100

Foxit Reader
Chapter 4: Working on PDFs User Manual
Creating PDFs from Other Applications
Foxit Reader enables you to create intelligent PDF files from other applications such as Microsoft
Office, automatically keeping bookmarks, links, hyperlinks, outline, properties and more during
creation in word files.
Creating PDFs from Microsoft Office
In Microsoft Office 2007/2010/2013, Foxit Reader appears as a tab, allowing you to quickly create
PDF files and change your conversion settings with just a few clicks.
FOXIT READER PDF Add-on in Microsoft Word
To create a PDF in Microsoft Word, Excel or PowerPoint, please follow the steps below:
Open a file in Microsoft Word, Excel or PowerPoint, click FOXIT READER PDF tab and do one of the
following:
To create a PDF using the current settings, click Create PDF . If you have checked Prompt
for File Name option, you also need to enter the file name, specify the location and click Save
in the pop-up dialog box.
To create and email a PDF using the current settings, click Create and Email . If you have
checked Prompt for File Name option, you also need to enter the file name, specify the
location and click Save in the pop-up dialog box. The created PDF file will be attached to your
mail system automatically for you to send out.
To change your PDF conversion settings, check or uncheck the desired options in General
Settings group.
View PDF Results: Opens the PDF file automatically in Foxit Reader after conversion.
Prompt for File Name: Lets you choose whether to specify the filename and save path for
the converted file or convert and save the file with the default filename in the default
location. If you check this option, a Save As dialog will pop up, then you can specify the
filename and location for the converted file. Otherwise, the converted file will be saved
in the same folder as the source file, using the same name but with a .pdf extension.
Preserve Document Properties: Keeps the document properties of the source file in the
PDF converted.
96
 Loading...