


 Loading...

Contents
Quick Start Guide |
10 |
What’s new? |
11 |
Basic text editing |
12 |
Form filling |
14 |
OCR corrections |
16 |
Activating your software |
18 |
On-line Activation |
18 |
Potential Problems |
19 |
Off-line activation |
19 |
Toolbars |
21 |
Edit toolbar |
22 |
Drawing toolbar |
23 |
Commenting toolbar |
24 |
Status bar |
25 |
Converting PDF to other formats |
26 |
Exporting a range of pages |
26 |
Exporting by article thread |
26 |
Joining multiple PDFs |
27 |
Adding files |
27 |
Re-ordering documents |
27 |
Joining |
27 |
PDF photo albums |
28 |
Editing Graphics & Images |
29 |
Selecting objects |
30 |
Stretching objects |
31 |
Scaling objects |
32 |
Rotating objects |
33 |
Changing rotation origin |
34 |
Changing colour & line width |
35 |
Swatches catalogue |
36 |
Copying colours between objects |
37 |
Aligning objects |
38 |
Replacing images |
39 |
Inserting new images |
41 |
Object borders |
42 |
Locking objects |
43 |
To Lock: |
43 |
Unlocking Individual Objects: |
43 |
Unlocking All Objects |
43 |
Hiding objects |
44 |
Hiding: |
44 |
Showing: |
44 |
Grouping objects |
45 |
Grouping: |
45 |
Ungrouping: |
45 |
Layout grid |
46 |
Grid spacing |
46 |
Layout guides |
47 |
Horizontal guides |
47 |
Vertical guides |
47 |
Line arrows |
48 |
Layers |
49 |
Moving objects between layers |
50 |
Editing Text |
51 |
On-screen display |
52 |
Creating new text boxes |
53 |
Using the Text Plus tool |
53 |
Using the Text tool |
53 |
Editing text across columns & pages |
54 |
Overset text |
55 |
Inserting special characters |
56 |
Performing a spell check |
57 |
The Spelling dialogue box |
57 |
Redacting text |
59 |
Formatting Text |
60 |
Underline |
61 |
Example underline effects |
62 |
Strike-through |
63 |
Example strike-through styles |
63 |
Margins & indents |
64 |
First-line indent |
64 |
Left margin & hanging indents |
65 |
Ruler units |
65 |
Bold, overprint & italic text |
66 |
Actual Bold |
66 |
Simulated Bold |
66 |
Italic |
67 |
Background colour |
68 |
Line Spacing |
69 |
At Least |
69 |
Exactly |
69 |
Multiple |
70 |
Paragraph spacing |
71 |
Letter spacing |
72 |
Letter space & word space |
72 |
Using letter spacing |
73 |
Using word spacing |
73 |
Tabstops |
74 |
Creating/deleting tabs |
74 |
On-screen display |
74 |
Creating centre & right tabs |
75 |
Tab leaders |
75 |
Trailing tab leaders |
76 |
Text Colours |
77 |
Advanced Editing |
78 |
Vertical text alignment |
79 |
Automatic text fitting |
80 |
Flowing text around graphics |
83 |
Rebuilding text boxes |
85 |
Merging text boxes |
86 |
Splitting text boxes |
88 |
Remapping fonts |
90 |
Editing font mappings |
91 |
Numbering pages |
92 |
Cloning objects across pages |
93 |
Deleting objects across pages |
97 |
Converting text into vector outlines |
98 |
Clipping mask creation |
99 |
Clipping mask removal |
101 |
Reducing PDF file size |
102 |
Remove all hidden image data |
102 |
Find & Replace |
103 |
Find & Replace text |
104 |
Find & Replace fonts |
105 |
Find & Replace (advanced) |
107 |
Find & Replace text styles |
108 |
Text reflow modes |
112 |
Reset Letter Spacing |
112 |
Reflow: New Text Only |
113 |
Reflow: New Text Only |
114 |
Reflow: Containing Line Only |
115 |
Potential Problems |
115 |
Find & Replace in long documents |
116 |
Find & Replace in files |
117 |
Setup Folders |
118 |
Find & Replace in hyperlinks |
120 |
Finding all hyperlinks in a document |
120 |
Page Operations |
121 |
Inserting new pages |
122 |
Reordering pages |
123 |
Resizing pages |
124 |
Inserting pages from other documents |
125 |
Placing a page from another document |
127 |
Method 1: |
127 |
Method 2: Drag & drop |
127 |
Page margins |
128 |
Watermarking pages |
129 |
Page labels |
131 |
Editing page labels |
131 |
Creating new page labels |
132 |
Document Operations |
133 |
Document properties |
134 |
Security settings |
135 |
View current settings |
135 |
Document security |
136 |
Tracking changes |
137 |
Document font catalogue |
139 |
Flight check |
140 |
Commenting |
141 |
Comments catalogue |
142 |
Sticky notes |
143 |
Anatomy of a sticky note |
143 |
Creating sticky notes |
144 |
Deleting sticky notes |
144 |
Sticky note properties |
145 |
Sticky Note Icons |
145 |
Graphical comments and notes |
146 |
Stamps and signatures |
147 |
Adding a stamp to a page |
147 |
Stamp properties |
148 |
Adding a signature to a page |
149 |
Text highlighting |
151 |
Hyperlinks |
152 |
Type: Go To View |
153 |
Type: Open File |
153 |
Type: World Wide Web Link |
154 |
Foxit Image Box & Foxit Table Box annotations |
154 |
Bookmarks |
155 |
On screen display |
155 |
Automatic bookmarks |
156 |
Bookmark font filters |
158 |
Creating bookmarks |
160 |
Renaming bookmarks |
161 |
Deleting bookmarks |
161 |
Moving bookmarks |
162 |
Moving to the top |
162 |
Nesting bookmarks |
163 |
De-nesting Bookmarks |
163 |
Article threads |
164 |
Adding article threads |
164 |
Extending existing articles |
166 |
Duplicating article boxes |
167 |
Deleting articles |
168 |
Exporting Content |
169 |
Exporting pages |
170 |
Exporting images & illustrations |
171 |
How do you tell if a picture needs marking-up? |
171 |
Markup up an image |
171 |
Exporting individual images |
173 |
Exporting tabular information |
175 |
Marking up a table |
175 |
Exporting individual tables |
176 |
Cropping for export |
177 |
Exporting article threads |
178 |
General export settings |
179 |
Text Output |
179 |
Text Format Pop-up |
179 |
Right-to-left reading order |
181 |
Image Output |
181 |
Image Format |
181 |
Convert each page into an image |
181 |
Place images in sub-folders |
182 |
Text export settings |
183 |
Identify image captions |
183 |
Try to preserve layout |
183 |
Render text in vector artwork |
183 |
Recognize Speech Marks |
184 |
Preserve line breaks |
184 |
De-hyphenate Words |
184 |
Create file for every page / article |
185 |
Hyperlinks |
185 |
Bookmarks |
185 |
Page Breaks |
185 |
HTML export settings |
186 |
Background |
186 |
Header and footer files |
186 |
Page-to-page links |
186 |
Image Borders |
187 |
Frames |
187 |
Image export settings |
188 |
Auto-identify vector artwork |
188 |
Use original OPI name if available |
189 |
Image Scaling |
189 |
Fix image resolution at: |
189 |
Advanced Scaling Pop-up |
189 |
Colour depth to use when rendering |
190 |
Preferences |
191 |
Editing preferences |
192 |
Unit of measurement |
192 |
Show changed text in: |
192 |
Insert smart quotes |
192 |
Detect bold / overprint text |
192 |
Detect tabs and Leader dots |
192 |
Detect underlined / strike-through text |
193 |
Include cropped text when editing |
193 |
Diagnostic editing mode |
193 |
Loading preferences |
194 |
Default zoom |
194 |
Ignore suggested zoom |
194 |
Initial View, Zoom & Page |
194 |
Saving preferences |
195 |
Autosave every: |
195 |
Make a backup when saving files |
195 |
Store layout info in PDF |
195 |
User name |
195 |
Spelling preferences |
196 |
Language |
196 |
Ignore words in UPPERCASE |
196 |
Ignore words with numbers |
196 |
Hyphenate words |
196 |
Appendix |
197 |
Editing non-English text |
198 |
Double byte support |
198 |
Display of double-byte Characters |
198 |
Fonts in PDF |
199 |
Font considerations |
199 |
Custom spelling dictionaries |
200 |
Locating the custom dictionary |
200 |
Format of custom dictionary |
200 |

Quick Start Guide
Activating your softwareBasic text editing
Converting PDF to other formatsForm filling
Joining multiple PDFsOCR corrections
Off-line activationOn-line ActivationPDF photo albumsToolbars
What’s new?
10
Quick Start Guide |
11 |
|
|
What’s new?
If you are familiar with Foxit Advanced PDF Editor version 2, here is a summary of the major enhancements to version 3.
•“Commenting toolbar” on page 24
•“Joining multiple PDFs” on page 27
•“PDF photo albums” on page 28
•“Reducing PDF file size” on page 102
•“Inserting new images” on page 41
•“Object borders” on page 42
•“Layout grid” on page 46
•“Layout guides” on page 47
•“Line arrows” on page 48
•“Layers” on page 49
•“Redacting text” on page 59
•“Background colour” on page 68
•“Remapping fonts” on page 90
•“Cloning objects across pages” on page 93
•“Deleting objects across pages” on page 97
•“Find & Replace in hyperlinks” on page 120
•“Page margins” on page 128
•“Watermarking pages” on page 129
•“Page labels” on page 131
•“Comments catalogue” on page 142
•“Stamps and signatures” on page 147
•“Text highlighting” on page 151
•“Bookmark font filters” on page 158
•“Article threads” on page 164
•“Exporting images & illustrations” on page 171
•“Exporting tabular information” on page 175
•“Exporting article threads” on page 178
•“ePub” on page 181
•“Preferences” on page 191

Quick Start Guide |
12 |
|
|
Basic text editing
Foxit Advanced PDF Editor enables you to edit text in a PDF document as if you were using a regular word processor.
1
2
3
Notes
Open the PDF to be edited.
In this example there is an ‘r’ missing from ‘you’.
From the toolbar select the
Text tool.
Click the mouse on the text to be edited. After a short pause, while Foxit Advanced PDF Editor prepares the page for editing, you can start editing.
Edit the text - in this example the letter “r” has been added to “your”.
The red box indicates that the text box is too small to show all the text.
In the next step the text box will be resized to reveal this hidden text.
Continued...
•The new ‘r’ is displayed in red because Show changes is enabled in the Preferences dialogue. This change highlighting is only visible in Foxit Advanced PDF Editor and not in any other PDF viewer.

Quick Start Guide |
13 |
|
|
Continued from previous page
To reveal the missing text, resize the text box.
Drag the left & right resize handles outwards to make the box slightly wider.
3
The text now fits on two lines as before.
Save the changes you have made to your
PDF.
4
|
If you have the free version of Foxit |
|
|
|
Advanced PDF Editor you will see this |
|
dialogue box. |
|
You have the option to save your PDF |
|
with a watermark added to edited pages. |
|
These watermarks can be safely removed |
|
at a later date if you decide to purchase |
|
the software. |
5 |
The second option activates your copy |
|
of Foxit Advanced PDF Editor using |
|
|
|
the activation key supplied when you |
|
purchased the product. After activation |
|
watermarks are no longer added to PDFs. |
|
To remove existing watermarks from |
|
documents edited earlier, save them |
|
again from the activated version of Foxit |
|
Advanced PDF Editor. |

Quick Start Guide |
14 |
|
|
Form filling
Foxit Advanced PDF Editor can be used to quickly fill-in basic PDF forms. These are simply PDF versions of traditional paper forms that would otherwise have to be printed out, filled-in by hand then scanned back into the computer.
Using Foxit Advanced PDF Editor you can speed up the entire process while keeping the form entirely digital and available to email to a third party.
Foxit Advanced PDF Editor Form Filler offers simplified menus and toolbars for the purpose of filling-in forms. In this mode Foxit Advanced PDF Editor does not add watermarks to edited documents.
1
2
Open a PDF to be filled-in.
If your PDF has interactive elements (not just a simple form) you will be asked if you want to remove them.
If you leave them in and fill-out the form, the interactive elements may obscure your answers when viewed in other
PDF viewers. If you only intend to view or print your document using Foxit Advanced PDF Editor, it doesn’t matter which option you choose.
Select the Text Plus tool.
As you move the mouse over the
form, Foxit Advanced PDF Editor will try to highlight the areas to be filled-in.
Click on a highlighted area to begin typing into it.
Hold the Control key when you click to ignore Foxit Advanced PDF Editor’s guess and create a small, single-line text box.
Continued...

Quick Start Guide |
15 |
|
|
Continued from previous page
If Foxit Advanced PDF Editor determines that the item under the mouse looks like a check-box, it changes the cursor to a pointing hand.
Click to mark the box with an X.
Click again to remove the X.
Hold the Control key and click to ignore the check-box and create a small, singleline text box.
Hold Control+Shift to force Foxit Advanced PDF Editor to create an X even when
it doesn’t recognise the area as being a checkbox.
Notes
•Use the Text Plus tool to create new text boxes in any kind of PDF not just form-style documents.
•The Text Plus tool does not edit existing text - only text created by the tool either during this session or from when the PDF was last edited.
•Since Foxit Advanced PDF Editor is making a guess as the shape and location of editable areas, it may sometimes arrive at an incorrect decision. In this case, hold down Control as you click to ignore the guess.
•Filled-in forms are normal PDFs that can be viewed and printed by any PDF viewing application.

Quick Start Guide |
16 |
|
|
OCR corrections
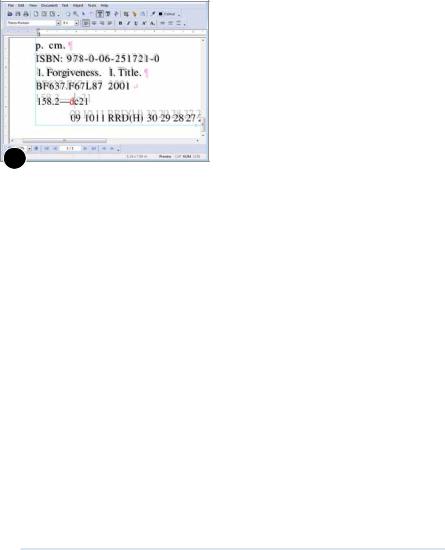
Foxit Advanced PDF Editor can be used to adjust the hidden text associated with a scanned document. This text is generated by OCR (Optical Character Recognition) software from a scanned image of a printed page.
The OCR text is hidden in the PDF so that it can be searched. Often there are errors in the hidden text that can be difficult to fix because it is hidden.
1
2
Open the PDF to be corrected then choose Document->OCR Corrections->Start
The example shows a scanned page in which the text added by the OCR process is hidden.
Since OCR mode could cause a PDF to be substantially changed, you will be asked to confirm your choice.
Always make sure you have a backup of the PDF before you start this mode.
Choose the “Start OCR mode” option to begin.
The hidden text becomes visible, the scanned image faded and locked to make editing easier.
You can now edit the text whilst making reference to the original content in the image.
3
Continued...
Quick Start Guide |
17 |
|
|
Continued from previous page
4
This example shows some corrections
(shown in red because Show Changed Text has been enabled in the Preferences dialogue box).
After all corrections have been done, choose: Document->OCR Corrections->Finish
The OCR text, including any edits you made will become invisible and the scanned image restored to its normal density.
Notes
•If your document happened to contain any non-ocr text added after the scanning process, this too will be hidden at the end of the correction process.
•Choose View->Text Boundaries to see the boundaries between different blocks of text.
•Changing the colour of the OCR text can make it easier to distinguish from the background image. This will not effect the finished PDF.
•Some OCR packages create many small text blocks that are difficult to edit. Use the “Rebuilding text boxes” on page 85 in Foxit Advanced PDF Editor to merge disjoint blocks of text into a single, editable text block.

Quick Start Guide |
18 |
|
|
Activating your software
Foxit Advanced PDF Editor adds watermarks to saved PDFs unless you activate the software using the code supplied when purchased.
Activations codes are usually provided as part of a purchase receipt email. If you cannot find your code, please contact sales@foxitsoftware.com
1
On-line Activation
2
Choose Help->Buy/Activate... from the main menu bar to display the Buy/Activate Foxit Advanced PDF Editor dialogue box.
If you have your activation key code to hand, press Activate...
If you have not yet purchased Foxit Advanced PDF Editor, press Purchase.
This will attempt to open the Foxit Advanced PDF Editor web page using your web browser.
Once you have bought a license and have an activation key, press the Activate...
button.
Your code may be a number or sequence of numbers and letters or your email address.
 On-line activation is the quickest method.
If your computer does not have an internet connection, uncheck this box.
Continued...

Quick Start Guide |
19 |
|
|
Continued from previous page
Potential Problems
If you computer is behind a fire wall or web access is blocked in some way, the activation may not succeed. If this is the case, follow the off-line activation instructions below.
Off-line activation
Uncheck the Activate on-line check box to reveal the lower part of the dialogue box.
This is the code you should send to
Foxit (your code will be different to that pictured) . The code changes every time you install Foxit Advanced PDF Editor.
Press the Copy button to copy the code to the clipboard (to avoid copying it by hand)
3
Continued...

Quick Start Guide |
20 |
|
|
Continued from previous page
Foxit will use the code you send to generate an off-line activation keynormally within 24 hours (except at weekends)
When you receive your off-line key enter it here.
4 |
|
The key will only work on the computer |
|
||
|
you used to generate the code. |
|
|
|
It will not work if you have re-installed
Foxit Advanced PDF Editor on that computer since you requested the off-line activation.
Quick Start Guide |
21 |
|
|
Toolbars
The first three toolbars and the status bar are shown by default, the others are hidden.
All of the toolbars shown below can be shown or hidden by using the View->Toolbars menu.
Edit toolbar - see page 22
Navigation toolbar
Text formatting toolbar
Drawing toolbar - see page 23
Navigation toolbar - see page 24
Alignment toolbar
Status bar - see “Status bar” on page 25

Quick Start Guide |
22 |
|
|
Edit toolbar
Hand tool - grab the document and pan around to view hidden areas.
Zoom tool - click to zoom in. Control-click to zoom out. Drag out a box to zoom into a region.
Object tool - click to select objects, move and resize by dragging the re-size handles. Drag our a box to select a group of objects. See page 30.
Rotate tool - only active when objects have been selected with the Object tool. Click to change rotation origin. Drag to rotate the selection.
See page 33.
Text tool - click to edit existing text.
Text plus tool - click to add a new text box or edit an existing box added with the tool. Drag to create a new, larger text box.
Linked text tool - click on blocks of text to link them together in order. Click again to unlink. Text will flow between linked blocks.
Crop tool - click and drag to create a crop box. Resize the crop box then press Return to perform the crop.
Hyperlink tool - drag out a box to create a new hyperlink, table or image annotation.
Article tool - drag out a new article box around text. Link article boxes together for easier reading and export.
Pipette tool - click on an object to copy its fill & stroke colours to the currently selected object(s). See page 37
Colour picker - click to change the fill or stroke colours of the selection. Also changes the line-width used for stroking. See page 35

Quick Start Guide |
23 |
|
|
Drawing toolbar
Choose View->Toolbars->Drawing to show/hide the toolbar.
Pencil (Freehand) - create freehand line drawings.
Rectangle - hold down SHIFT while dragging to create squares.
Single lines - single straight lines. Can have arrows applied to their ends.
Ovals - hold down SHIFT while dragging to create circles.
Pen - connected straight lines.
Start arrows - apply various types of arrowhead to the start of a line or group of connected lines.
End arrows - the size of the applied decoration is related to the line width.
Toggle border - place a simple border around the selected object(s). Useful for placing a border around images.

Quick Start Guide |
24 |
|
|
Commenting toolbar
ChooseView->Toolbars->Commenting to show/hide the toolbar.
Similar to the drawing tools, these tools allow you to add a comment to each annotation. Unlike the drawing tools, the annotations do not form part of the PDF page but are placed in a separate layer that floats over the page.
The annotations you create also appear summarised in the Comments catalogue.
(View->Comments).
Sticky note - Drag out a box to the size of the required sticky note.
Rectangle note - drag out a rectangle. Hold SHIFT while dragging for squares. Double click to edit the attached note.
Circle note - drag to create an oval. Hold SHIFT while dragging to create a circle.
Polygon note - create connected straight line shapes.
Scribble (Freehand) note - create freehand line drawings.
Line note - create a single line
Text highlight - toggles a highlight on the selected text. Select text with the Text tool, then press this button to highlight it.
Stamp tool - add a predefined stamp to a page such as “Confidential”, “Draft”, “Sign here”. Also add your signature to a page.
Right-click the mouse over an annotation and choose Properties... to access the
Properties dialogue from where you can change the colour and style of the annotation.

Quick Start Guide |
25 |
|
|
Status bar
The status bar (View->Status Bar) provides at-a-glance information and short cuts to commonly used functions and dialogue boxes.
Lock icon - visible only when the current document has security restrictions.
Double-click to open the
Document Security dialogue
Page label - only present if the PDF uses page labels.
Double-click to edit document’s page labels.
Dimensions of the current page
The dimensions of the currently selected object(s).
Only visible when using the
Object Select tool.
Rendering mode - shows either Preview
or Outlines depending upon the current rendering mode.
Outline is quicker to draw and makes editing quicker. It has no permanent effect on the PDF, only while viewed in Foxit Advanced PDF Editor.
Double click to toggle between modes.

Quick Start Guide |
26 |
|
|
Converting PDF to other formats
To convert a PDF into HTML, text or RTF or to export the images within a PDF, use file File->Export menu.
Foxit Advanced PDF Editor can export a document on a page-by-page basis or an article-by-article bases.
Exporting a range of pages
Exporting by article thread
Choose File->Export->Pages as...
Choose the range you wish to export.
Near the bottom of the dialogue box is a summary of the output format that will be used for the export. To change the output format, press Format...
The output options available are detailed in “General export settings” on page 179.
Choose File->Export->Articles as...
If your document contains no article threads you will need to create some. See “Adding article threads” on page 164.
Choose to export just the articles beginning on the current page, or all articles in the document. If no articles begin on the current page, only one option will be available.
Near the bottom of the dialogue box is a summary of the output format that will be used for the export. To change the output format, press Format...
The output options available are detailed in “General export settings” on page 179.

Quick Start Guide |
27 |
|
|
Joining multiple PDFs
Foxit Advanced PDF Editor can quickly join multiple PDF documents into a single document.
Drag & drop any number of PDF files onto an open but empty Foxit Advanced PDF
Editor window or choose File->Join...
Adding files
Add further files or entire folders full of files using the Add Files... and Add Folder... buttons. When adding folders, any
PDF found in the folder or its sub-folders will be added to the list. There is no limit on the number of files that can be added.
Re-ordering documents
The order of the files in the list is the order in which they will be joined together. To change the order, select a file then press Up or Down to move it higher or lower in the list.
Joining
Press Join to begin the process of merging the documents together. Foxit Advanced PDF Editor will prompt for a filename for the new merged document.
Once the process is complete,
Foxit Advanced PDF Editor will ask if you wish to open the new file.
Notes
•To add page numbers to a document after merging see “Cloning objects across pages” on page 93.
•Foxit Advanced PDF Editor will reject encrypted PDFs. Remove any passwords and encryption from all files before trying to join. See “Security settings” on page 135
Quick Start Guide |
28 |
|
|
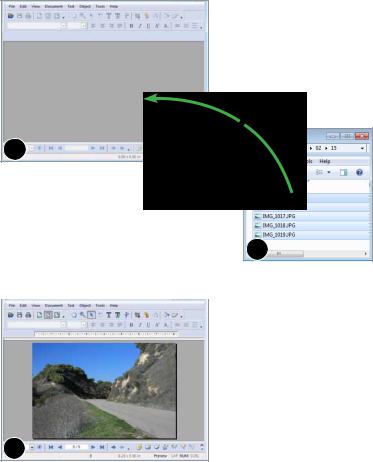
PDF photo albums
Drag & drop any number of images onto Foxit Advanced PDF Editor and the software will create a new PDF in which each page shows one of the images dropped.
1 |
Ensure no documents are open in Foxit
Advanced PDF Editor.
Drag & drop a selection of JPEG, |
|
|
|
|
|
|
|
Tiff, PNG or BMP images onto Foxit |
|
|
|
Advanced PDF Editor. |
|
2 |
|
|
Foxit Advanced PDF Editor will construct |
||
|
|||
|
a new PDF in which each page contains |
||
|
one of the dropped images. |
||
3

Editing Graphics & Images
Aligning objects
Changing colour & line width (CMYK)Copying colours between objects
Grouping objectsHiding objects
Inserting new imagesLayers
Layout gridLayout guidesLine arrows
Locking objectsObject bordersReplacing imagesRotating objectsScaling objectsSelecting objectsStretching objects
Swatches catalogue
29
Editing Graphics & Images |
30 |
|
|
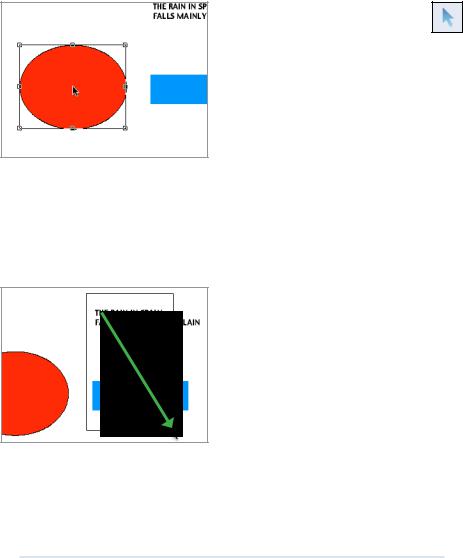
Selecting objects
Select the Object tool from the tool bar.
Click on a single object to select it.
If objects overlap, the top-most object is selected.
Ctrl+Shift to select the next object underneath the current object. Each time you Ctrl+Shift, the next object down is selected.
Some pages are littered with invisible objects making selections difficult. These objects can usually be safely removed without altering the appearance of the page.
To see invisible objects, choose View->Outlines or double-click on the Preview in the status bar at the bottom of the main Foxit Advanced PDF Editor window.
Drag out a box to select all objects touching the box.
Hold Shift to remove objects from the current selection.
Cut/Copy/Paste may be used on single objects or groups of objects.
Notes
•Press Backspace or Delete on your keyboard to delete selected objects.
•Click and drag to move the object or selection of objects to a new position.
•Use the cursor keys to move selected objects by 1 point (1/72 inch). Hold the Shift key as well to move by 10 points.
•Copy/Paste of graphics between Foxit Advanced PDF Editor & other applications is not supported.
Loading...