

Page 1

FOXIT PHANTOM
User Manual
1
Page 2

FOXIT PHANTOM PDF SUITE 2.0
User Manual
Copyright © 2010 Foxit Corporation. All Rights Reserved.
No part of this document can be reproduced, transferred, distributed or stored
in any format without the prior written permission of Foxit.
Anti-Grain Geometry -Version 2.3 Copyright (C) 2002-2005 Maxim
Shemanarev (http://www.antigrain.com) Permission to copy, use, modify, sell
and distribute this software is granted provided this copyright notice appears in
all copies. This software is provided "as is" without express or implied warranty,
and with no claim as to its suitability for any purpose.
2
Page 3

Contents
FOXIT PHANTOM PDF SUITE 2.0
User Manual
Foxit Phantom PDF Suite 2.0 End User License Agreement .. 7
Chapter 1 – Overview ......................................................... 10
Key Features.........................................................................10
Foxit Phantom Add-ons.........................................................12
Updating Foxit Phantom PDF Suite 2.0 .................................. 14
Using This Help..................................................................... 15
Chapter 2 – Version History................................................ 16
Version 2.0 ...........................................................................16
Version 1.0.2 ........................................................................17
Chapter 3 – Getting Started................................................ 18
Installing Foxit Phantom....................................................... 18
Work Area ............................................................................ 22
Customizing the Work Area...................................................25
Viewing PDF Properties.........................................................35
Uninstalling Foxit Phantom ...................................................40
Chapter 4 – Creating PDFs.................................................. 42
Creating PDFs with Foxit Phantom Printer ............................. 42
Setting Foxit Phantom Printer Properties .............................. 45
Chapter 5 – Organizing PDFs .............................................. 47
Inserting Pages ....................................................................47
Deleting Pages...................................................................... 48
Extracting Pages...................................................................48
Replacing Pages.................................................................... 49
Swapping Two Pages ............................................................50
Duplicating Pages .................................................................50
Moving Pages........................................................................ 50
Cropping Pages..................................................................... 51
Rotating Pages ..................................................................... 52
Flattening Pages ................................................................... 52
Chapter 6 – Viewing PDFs .................................................. 53
Opening Documents.............................................................. 53
Viewing Documents .............................................................. 54
Navigating in Documents ...................................................... 58
Adjusting the View of Documents..........................................61
3
Page 4

FOXIT PHANTOM PDF SUITE 2.0
User Manual
Playing a Movie or a Sound Clip............................................. 65
Working with Layers .............................................................66
Finding Text..........................................................................67
Working with Asian Languages in PDFs .................................69
E-mailing Documents ............................................................69
Comparing Documents .......................................................... 69
Saving Documents ................................................................ 70
Closing Documents ............................................................... 71
Exiting Foxit Phantom........................................................... 71
Chapter 7 – Working on PDFs ............................................. 72
Copying Text......................................................................... 72
Copying Images.................................................................... 73
Copying a Combination of Text and Images as an Image .......74
Using Rulers & Guides...........................................................74
Measuring the Objects ..........................................................75
Switching Between Basic Tools ............................................. 79
Using Foxit Text Viewer ........................................................ 79
Chapter 8 – Comments ....................................................... 86
About the Commenting Tools.................................................86
Showing or Hiding the Commenting Toolbar .......................... 87
Selecting Tools to Add Comments.......................................... 87
Using Note Comments...........................................................87
Using the Text Markup Tools ................................................. 88
Using the Select Text Tool..................................................... 90
Using the Drawing Markup Tools ........................................... 91
Using the Typewriter Tools.................................................... 93
Changing the Appearance of Markups.................................... 99
Working on Comments........................................................ 103
Sending Annotated PDFs ..................................................... 107
Chapter 9 – Stamping PDFs .............................................. 108
Stamping a PDF .................................................................. 108
Creating a custom stamp..................................................... 109
Cutting, copying and pasting a stamp.................................. 111
Undoing and redoing a stamp.............................................. 111
Managing a stamp............................................................... 111
Setting favorite stamps....................................................... 112
Chapter 10 – Forms .......................................................... 114
General Information ........................................................... 114
Filling in PDF Forms ............................................................ 115
4
Page 5

FOXIT PHANTOM PDF SUITE 2.0
User Manual
Form Designer .................................................................... 118
Overview.............................................................................118
Creating interactive forms ...................................................121
Using push button tool ........................................................121
Using radio button tool........................................................129
Using check box tool ...........................................................132
Using combo box tool..........................................................132
Using list box tool ...............................................................138
Using text field tool.............................................................140
Arranging form fields ..........................................................142
Setting form-field tab order.................................................144
Setting calculation order .....................................................144
Setting properties of multiple form fields ............................145
Running JavaScript ............................................................. 145
Chapter 11 – Data Import & Export .................................. 148
Importing & Exporting Comments Data ............................... 148
Importing & Exporting Form Data........................................ 149
Chapter 12 – Security....................................................... 150
Checking PDF Security ........................................................ 150
Adding Security to PDF Files................................................ 150
Adding password encryption ...............................................150
Adding a certificate encryption............................................153
Setting security policies ...................................................... 154
Chapter 13 – Digital Signatures........................................ 156
Digital signatures................................................................ 156
Signing a PDF ..................................................................... 159
Validating signatures .......................................................... 159
Viewing signature properties .............................................. 161
Signature panels................................................................. 162
Chapter 14 – Editing PDFs ................................................ 163
Undoing and Redoing .......................................................... 163
Cutting, Copying and Pasting............................................... 163
Creating Bookmarks............................................................ 165
Adding Links ....................................................................... 169
Attaching Files.................................................................... 173
Adding Images.................................................................... 177
Adding Multimedia .............................................................. 184
Editing Objects ................................................................... 189
Chapter 15 – Printing ....................................................... 194
How to print a PDF document.............................................. 194
5
Page 6

FOXIT PHANTOM PDF SUITE 2.0
User Manual
Printing a portion of a page................................................. 194
Printing multiple pages with page thumbnails ..................... 195
Print Setup ......................................................................... 195
Print Dialog ........................................................................ 196
Chapter 16 – Appendices.................................................. 200
Keyboard Shortcuts............................................................. 200
Command Lines .................................................................. 203
Contact Us ........................................................................ 204
6
Page 7

FOXIT PHANTOM PDF SUITE 2.0
User Manual
Foxit Phantom PDF Suite 2.0 End User License Agreement
FOR FOXIT PHANTOM
FOXIT CORPORATION ("FOXIT") LICENSES THIS FOXIT PHANTOM PDF SUITE 2.0 SOFTWARE PRODUCT
(“SOFTWARE”) TO YOU SUBJECT TO THE TERMS CONTAINED IN THIS END USER LICENSE AGREEMEN T
("EULA"). READ THE TERMS OF THIS EULA CAREFULLY. BY INSTALLING, COPYING OR OTHERWISE
USING THE SOFTWARE (AS DEFINED BELOW), YOU AGREE TO BE BOUND BY THE TERMS OF THIS EULA.
IF YOU DO NOT AGREE TO THE TERMS OF THIS EULA, DO NOT INSTALL, COPY OR USE THE SOFTWARE.
NOTICE TO CUSTOMER
If you do not agree to the terms of this EULA, do not install, or use this Software. This EULA is a contract
between you (either an individual or an entity) and Foxit that governs your use of this Foxit software
product that accompanies this EULA and related software components, which may include the associated
executable programs, explanatory materials and the supporting documentation.
LICENSE GRANT
Foxit grants your company a license to use one copy of the Software. Each License purchased allows you
to install 1 copy of the license. "Use" means storing, loading, installing and executing. You agree to use
all reasonable efforts to protect the Software from unauthorized use, reproduction, distribution or
publication. You may not modify the Software or disable any licensing or control features of the Software
in any manner without prior written permission by Foxit.
LICENSE LIMITATIONS
You may not copy the Software except for a reasonable number of machine-readable copies of the
software for backup or archival purposes and except as expressly permitted in the License Grant section
above. You may not remove any titles, trademarks or trade names, copyright notices, legends, or other
proprietary markings on the Software. You are not granted any rights to any trademarks or service
marks of Foxit. Foxit retains all rights not expressly granted to you.
PROPRIETARY RIGHTS RESERVED BY FOXIT
7
Page 8

FOXIT PHANTOM PDF SUITE 2.0
User Manual
Foxit retains all right, title, and interest in and to the Software and the Software License Key and in all
related copyrights, trade secrets, patents, trademarks, and any other intellectual and industrial property
and proprietary rights, including registrations, applications, renewals, and extensions of such rights.
RESTRICTIONS
You may not (i) sell, lease, license, sublicense, distribute or otherwise transfer in whole or in part the
Software, the Software License Key or to another party; (ii) provide, disclose, divulge or make available
to, or permit use of the Software in whole or in part by, any third party without Foxit's prior written
consent; (iii) decompile, disassemble, reverse engineer, or otherwise attempt to derive source code from
the Software, in whole or in part; (iv) modify or create derivative works based upon the Software; or (v)
use the Software on a service bureau or hosting basis to provide Remote Access Services connecting your
customers to an operating system.
TERMINATION
Foxit may terminate this EULA if you fail to comply with any term of this EULA. In the event of termination,
you must destroy all copies of the Software and Software License Key. In addition you must remove all
copies of the Software from the Server and all computers and terminals on which it is installed.
GOVERNING LAW AND GENERAL PROVISIONS
This EULA will be governed by the laws of the State of California, U.S.A., excluding the application of its
conflicts of law rules. This EULA will not be governed by the United Nations Convention on Contracts for
the International Sale of Goods, the application of which is expressly excluded. If any part of this EULA
is found void and unenforceable, it will not affect the validity of the balance of the EULA, which shall
remain valid and enforceable according to its terms. You agree that the Software will not be shipped,
transferred or exported into any country or used in any manner prohibited by the United States Export
Administration Act or any other export laws, restrictions or regulations. This EULA shall automatically
terminate upon failure by you to comply with its terms. This Agreement may only be modified in writing
signed by an authorized officer of Foxit Corporation.
NO WARRANTY
The SOFTWARE is being delivered to you AS IS and Foxit makes no warranty as to its use or performance.
FOXIT AND ITS SUPPLIERS DO NOT AND CANNOT WARRANT THE PERFORMANCE OR
RESULTS YOU MAY OBTAIN BY USING THE SOFTWARE OR DOCUMENTATION. FOXIT AND ITS
SUPPLIERS MAKE NO WARRANTIES, EXPRESS OR IMPLIED, AS TO NONINFRINGEMENT OF
THIRD PARTY RIGHTS, MERCHANTABILITY, OR FITNESS FOR ANY PARTICULAR PURPOSE. IN
NO EVENT WILL FOXIT OR ITS SUPPLIERS BE LIABLE TO YOU FOR ANY CONSEQUENTIAL,
INCIDENTAL OR SPECIAL DAMAGES, INCLUDING ANY LOST PROFITS OR LOST SAVINGS,
EVEN IF A FOXIT REPRESENTATIVE HAS BEEN ADVISED OF THE POSSIBILITY OF SUCH
DAMAGES, OR FOR ANY CLAIM BY ANY THIRD PARTY. Some states or jurisdictions do not allow the
exclusion or limitation of incidental, consequential or special damages, or the exclusion of implied
8
Page 9

FOXIT PHANTOM PDF SUITE 2.0
User Manual
warranties or limitations on how long an implied warranty may last, so the above limitations may not
apply to you.
LIMITATION OF LIABILITY
IN NO EVENT WILL FOXIT BE LIABLE FOR ANY LOST PROFITS OR BUSINESS OPPORTUNITIES, LOSS OF
USE, BUSINESS INTERRUPTION, LOSS OF DATA, OR ANY OTHER INDIRECT, SPECIAL, INCIDENTAL, OR
CONSE- QUENTIAL DAMAGES UNDER ANY THEORY OF LIABILITY, WHETHER BASED IN CONTRACT,
TORT, NEGLIGENCE, PRODUCT LIABILITY, OR OTHERWISE. THIS LIMITATION SHALL APPLY
REGARDLESS OF WHETHER FOXIT HAS BEEN ADVISED OF THE POSSIBILITY OF SUCH DAMAGES.
FOXIT'S LIABILITY UNDER THIS EULA WILL NOT, IN ANY EVENT, EXCEED THE LICENSE FEES, IF ANY,
AND PAID BY YOU TO FOXIT FOR THE SOFTWARE LICENSED BY YOU UNDER THIS EULA.FOXIT'S
LIABILITY IS LIMITED TO REPLACEMENT OR REFUND OF ONLY THE VIRUS-INFECTED SOFTWARE
DOWNLOADED FROM FOX IT WEBSITE.
CONTACT INFORMATION
If you have any questions about this EULA, or if you want to contact Foxit for any reason, please direct
E-mail to: sales@foxitsoftware.com.
9
Page 10

FOXIT PHANTOM PDF SUITE 2.0
User Manual
Chapter 1 – Overview
Welcome to Foxit Phantom PDF Suite 2.0– The Best Value PDF Tool for Business!
Foxit Phantom PDF Suite 2.0, henceforth referred to simply as Foxit Phantom, is
a business ready PDF toolkit, with everything you need to create professional
PDF documents as well as streamline business processes in a fast, easy to use,
and cost-effective manner.
From Foxit Corporation, a Microsoft Certified Partner, Foxit Phantom joins Foxit’s
award-winning PDF tools product line, including Foxit Reader, with over 90
million downloads worldwide. Foxit Phantom provides an all in one solution for
business users of PDF, and a sensible alternative to Adobe Acrobat.
Key Features
Foxit Phantom is an un-bloated professional PDF tool-kit. Foxit Phantom has
just the right features for businesses including creating, editing, organizing and
securing PDF files.
Small and fast
Up to 3 times faster PDF Creation than competitor tools saves time
Installation file is only 10.9 MB and takes 22.6 MB of hard drive space,
about 1% of competitor’s product size.
Much faster launch speed compared to the leading competitors
Create industry-standard compliant PDF files from any printable
file
Supports 100s of the most common office file types
One-Button click produces PDF from Microsoft Word documents
automatically
Scan paper to PDF directly
Streamline workflow by converting paper contracts, agreements, etc to
electronic PDF files
Edit and Modify PDF contents
Quickly edit document content and correct mistakes right in a PDF
Add text to your PDF document as you need.
10
Page 11

FOXIT PHANTOM PDF SUITE 2.0
User Manual
Compare PDF documents
Highlight the differences between two PDF documents to help you
identify what has been changed quickly and easily
Organize PDF pages
Re-order PDF pages without help from any other applications to simplify
your operations
Add, Delete, or Combine pages from multiple PDF files to create new PDF
documents
Design and Fill-out electronic forms
Convert your current forms into electronic PDF forms
Easy to use form design tools make your PDF documents more
interactive
Collect the data your company needs from customers, partners and
employees easily without the cost of re-keying
Reduce paper handling
Extend document-based processes to better engage with customers,
partners, constituents, colleagues, etc
Protect PDF documents with Passwords and Certificates
Control access to PDF documents
Protect sensitive PDF documents to prevent loss of valuable company
assets
Enhance security when sending and receiving PDF files
Control PDF document usage such as printing, changing, content
extraction
Manage PDF usage permissions for individual documents within or
without your organization
Add Digital Signatures to PDF documents
Streamline business processes typically requiring paper-based or
in-person collaboration by enabling digital signatures on your PDF
documents
Enhance security by instituting identity authentication
Automatically check for unauthorized content changes
11
Page 12

FOXIT PHANTOM PDF SUITE 2.0
User Manual
Foxit Phantom Add-ons
Foxit Phantom provides separate add-ons for you to download on demand.
These add-ons fall into critical add-ons and advanced add-ons listed below and
can be updated by the Update Manager. At the very beginning, most of add-ons
such as JPEG2000/JBIG Decoder, Eastern Asian Language Support,
OndemandCM, Spell Checker and Firefox Plugins are integrated into Foxit
Phantom package, so users don’t need to install them after the first installation
of Foxit Phantom. However when any upgrades of those add-ons are available,
users need go to Check for Updates Now to download and install the latest
add-on.
Critical Add-ons
Critical add-ons are free. They are essential components for proper display and
execution. For example, if you open a PDF document containing Chinese
characters, Foxit Phantom will ask if you want to download the Eastern Asian
Language Support. If you choose “Cancel”, you can read this file, but some
characters will not be displayed correctly.
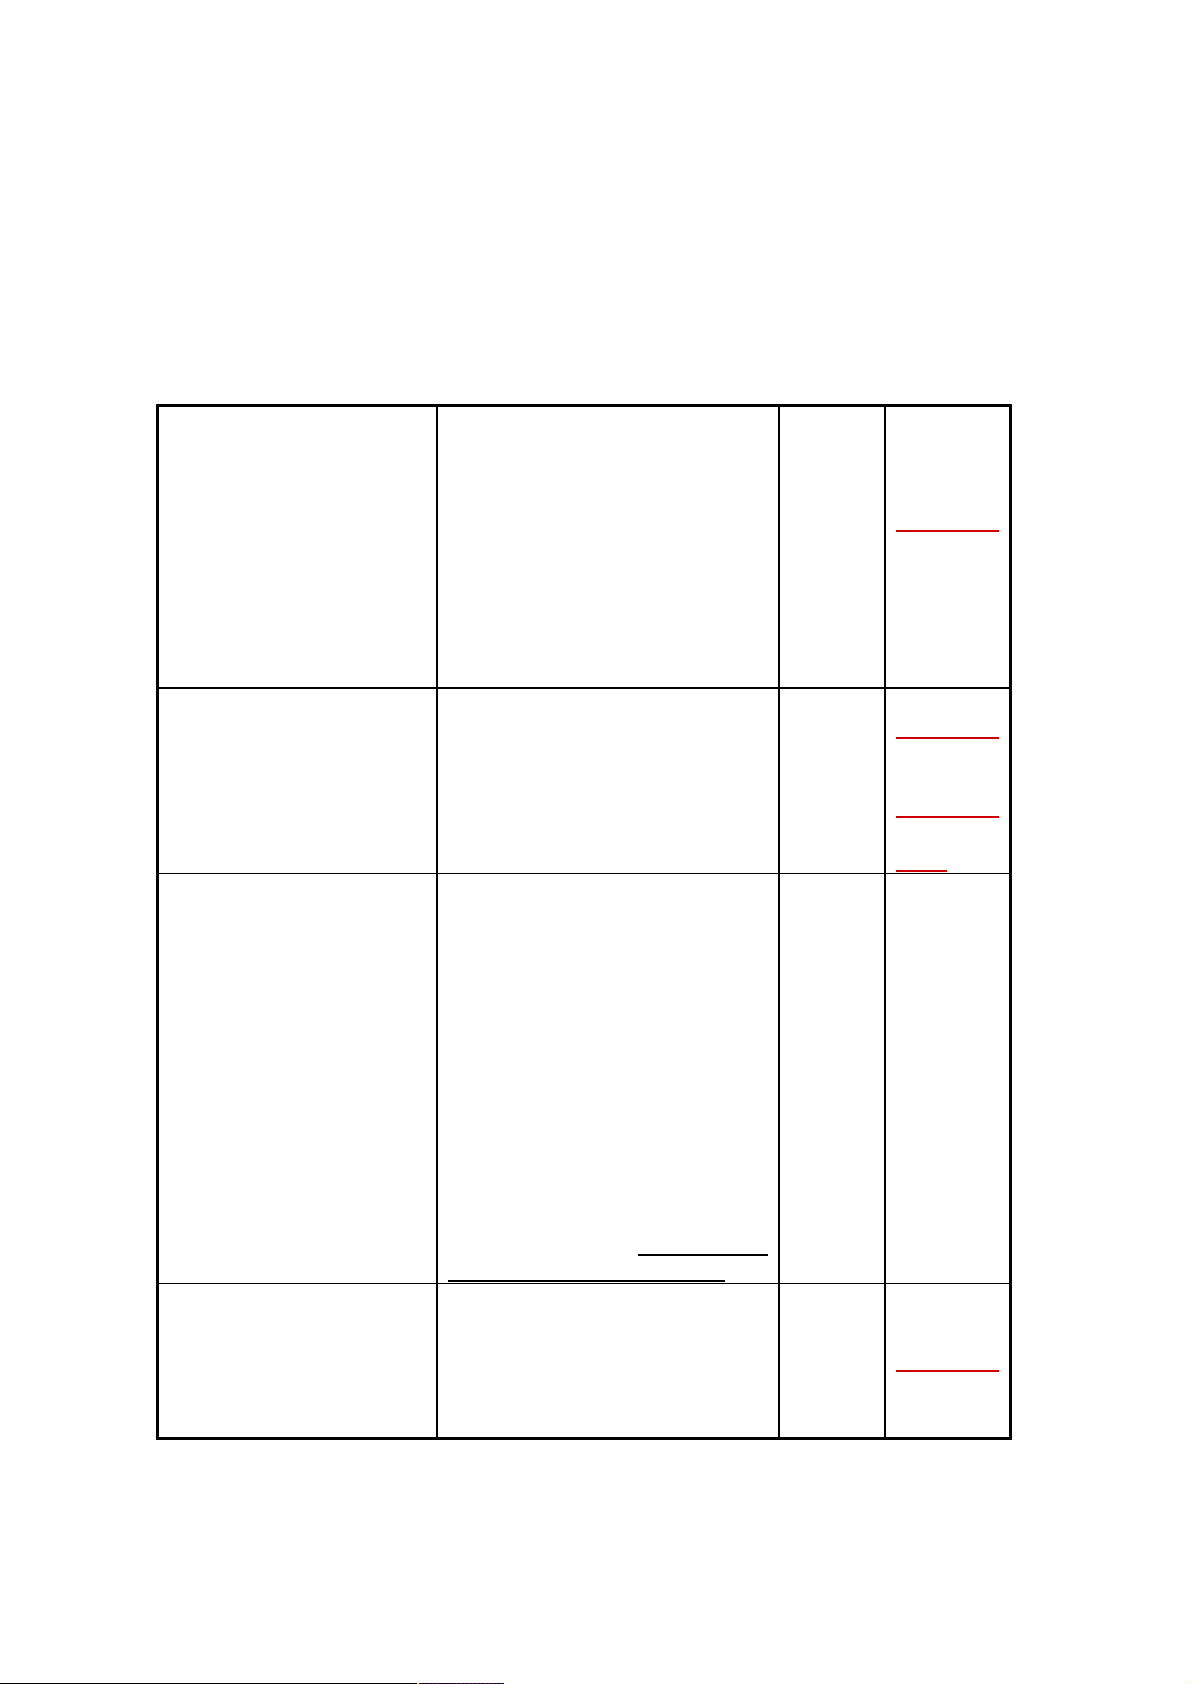
Free Critical Add-ons in Foxit Phantom
Name Function Description Size Remark
JPEG2000/JBIG
Decoder
Eastern Asian
Language Support
This add-on module is for
decoding images in JPEG2000 or
JBIG2 formats. If you don't install
this module, images in those
formats cannot be displayed.
This module is used for displaying
Eastern Asian Language in a PDF
file. Eastern Asian Language can't
be displayed properly without it.
169KB
1.12MB
Download
Free
Download
Free
NOTE: To manually install a critical add-on, please extract it to the same
directory where you install Foxit Phantom.
See also
“Updating Foxit Phantom”
.
Advanced Add-ons
Advanced add-ons have many specific capabilities and include OnDemandCM,
12
Page 13
FOXIT PHANTOM PDF SUITE 2.0
User Manual
Foxit PDF IFilter, Spell Checker, and Firefox Plugins. Most of them can be used
for free during your evaluation of Foxit Phantom. Some add-ons, such as Foxit
PDF IFilter, are not part of the evaluational version. Foxit PDF IFilter is an
application that helps users to index and search text on searchable PDF files.
Advanced Add-ons in Foxit Phantom
It enables users to
organize, share and
collaborate on documents and
OnDemandCM
(Foxit OnDemand
Content
Management)
Foxit PDF IFilter
Spell Checker
Firefox Plugins
Forms online. Upload from
Foxit Phantom or send
documents with ease.
Advanced features include
workflow driven document
sharing, revisions of
documents, CollabRoom for
group collaboration.
It is designed to help users to
index a large amount of PDF
documents and then quickly
find text within these
documents.
When you fill out an English
form or use typewriter to
insert any English text, this
tool will try to find any spelling
errors and highlight them with
squiggly lines. If you right click
on the misspelled words, you
will see a list of suggested
words. This feature is
available only to users who
purchase Foxit Phantom if the
security settings allow and
requires downloading of an
extra add-on, which is the
lexical dictionary. Click here to
download the dictionary...
It installs a simple Foxit
Reader into the Firefox web
browser, this free add-on
allows users to display, view,
edit and print PDF documents
in the browser.
Download
817KB
Free
64-bit:
64-bit:
2.47MB
32-bit:
2.10MB
Free
214KB
Download
32-bit:
Download
Price
Download
Free
13
Page 14

FOXIT PHANTOM PDF SUITE 2.0
How to Purchase Foxit Phantom PDF Suite 2.0
1. To purchase Foxit Phantom, please do one of the following:
Order online: go to Foxit website to order directly.
(https://www.foxitsoftware.com/secure/order.php
Email: write an e-mail to the Foxit sales department at
sales@foxitsoftware.com with your order information.
Purchase retail box version of Foxit Phantom from retail stores in US.
2. To know the price information, visit the Phantom webpage
sales@foxitsoftware.com
.
)
or contact Foxit at
User Manual
Updating Foxit Phantom PDF Suite 2.0
Foxit files along with add-ons can be updated in several ways. Some updates are
available if you open a PDF document that triggers the updating process. For
example, if you open a file that contains Chinese characters, Foxit Phantom will
ask if you want to download the Eastern Asian Language Support. Other
updates are available only from the Help menu, where you have to manually
install them. However, all updates can be downloaded directly from Foxit
website.
Updating from the Help Menu
1. Choose Help > Check for Updates Now…
2. Select updates from the column on the left, and click Add to move them to
the right column. Only the updates and components appropriate for your
product will be listed.
3. Click Install.
Set Updating Preferences
1. Choose Help > Check for Updates Now…
2. In Foxit Phantom Updates dialog box, click Preferences.
3. To check for updates automatically, select Automatically check for Foxit
updates, and then specify whether you want automatic checking on a weekly
or monthly basis, and click OK.
Please note that “Automatically check for Foxit updates” option is selected by
14
Page 15

FOXIT PHANTOM PDF SUITE 2.0
User Manual
default.
Updating From Foxit Website
1. Click to visit http://www.foxitsoftware.com/pdf/phantom/addons.htm
2. Select and download the add-ons you want to update.
3. Extract them to the same directory where you install Foxit Phantom.
4. Re-run the Foxit Phantom program to implement the update files.
Using This Help
User Manual
This help document is divided into major categories shown in Table of Contents.
The contents bar can be used to navigate help by clicking on a topic.
To browse the topic you are interested in, please do one of the following:
1. Move to Table of Contents, click one of the topics you are interested in, the
page about this issue will be displayed.
2. Click the item in the bookmark pane to your desired topic.
If you have trouble finding help for a particular topic or the help provided is not
sufficient, send an email to support@foxitsoftware.com
will contact you. Your feedback helps us to improve our documentation.
and our support team
Ticket Support
Visit Foxit Ticket Support System at
http://www.foxitsoftware.com/support/ticket/ to send your bug
report/suggestion/comment directly to Foxit Customer Support Center.
Foxit Corporation Forum
Visit Foxit Forum at http://forums.foxitsoftware.com// to see if you can find the
answer to your questions there immediately.
15
Page 16

FOXIT PHANTOM PDF SUITE 2.0
User Manual
Chapter 2 – Version History
Foxit is dedicated to improving the performance of Phantom PDF Suite 2.0 and
providing users with best experience in viewing, editing, creating, organizing
and securing PDF documents. This page lists recent updates and bug fixes to our
software. Click here
recommend you sign up for our newsletter to stay current with what is going on
at Foxit and take advantage of our periodic promotions.
Version 2.0
New Features in Foxit Phantom PDF Suite Version 2.0 :
to receive automatic email notifications. We also
Convert multiple files to PDFs or merge into a single PDF file
Change page order by dragging and dropping thumbnails
Select pages from thumbnails for printing
Insert blank pages or pages from a scanner
Set initial view
Edit document properties such as author
Copy, cut and paste annotations
Undo and redo
Expanded stamp library
ADBC support in JavaScript
Foxit Phantom PDF Suite Version 2.0 fixed some bugs below:
Improves underline & strikeout tools performance in vertical text layout.
Default setting for image tool.
Supports setting a minimum value of “0” for the opened file list in the
preferences dialog box.
The number of print copies is reset to 1 after each print job.
Automatically records the Author's name when setting current properties
of the annotation.
Simply double click or click the middle mouse button on the target tab to
close the document.
Fixed the issue where multiple copies of check boxes created with Foxit
Phantom could not be displayed in Adobe Reader.
Fixed the issue where Field names may not be displayed correctly.
16
Page 17

FOXIT PHANTOM PDF SUITE 2.0
User Manual
Fully supports form filling in Polish.
Version 1.0.2
Foxit Phantom PDF Suite Version 1.0.2 fixes some bugs below:
Supports opening files containing special Unicode characters in filenames in
a non-native language operating system.
When using the Commenting Tools, the color indicator will reflect your color
selection.
Supports simultaneous viewing of multiple documents.
Supports line inserting and text addition using the Touchup Object Tool.
Improves the performance of Touchup Object Tool when rotating pages.
Improves the performance of Stamp Tool when rotating pages.
17
Page 18

FOXIT PHANTOM PDF SUITE 2.0
User Manual
Chapter 3 – Getting Started
This section gives you an overview of Foxit Phantom, including installation,
registration, work area, properties and uninstallation.
Installing Foxit Phantom
Foxit Phantom PDF Suite 2.0 installation file is around 10 MB and takes 22 MB
space of hard drive after installation, which is only 1% of main competitors. And
launch speed is much faster.
System Requirements
Microsoft® Windows® XP Home, Professional, or Tablet PC Edition with
Service Pack 2 or 3 (32-bit & 64- bit)
Windows Vista® Home Basic, Home Premium, Business, Ultimate, or
Enterprise with or without Service Pack 1 (32-bit & 64- bit)
Windows 7 (32-bit & 64-bit)
Recommended Minimum Hardware for Better Performance
1.3 GHz or faster processor
64 MB RAM (Recommended: 128 MB RAM or greater)
52 MB of available hard drive space
800*600 screen resolution
How to Install
1. Online Version of Foxit Phantom
Please visit Foxit Corporation’s website
(http://www.foxitsoftware.com/downloads/
Foxit Phantom for evaluation purpose after you sign up for Phantom. There are
three versions for you to download in your email after registration.
) to download the latest version of
1) EXE Format
If you download the “Foxit Phantom_setup.exe” file to your computer, please do
the following:
18
Page 19

FOXIT PHANTOM PDF SUITE 2.0
User Manual
Double click the “Foxit Phantom_setup.exe” file, and you will see the Install
Wizard pop up. Click Next button to continue.
The new features are listed on the screen. Click Next button.
This program is protected by copyright law and you have to accept the
License Agreement to proceed. Click the I agree button to continue.
There are two setup types for you in this step:
Default setup— uses default settings for all configurations, including the
install directory, desktop shortcut, etc.
Custom setup— customizes install configurations, which allows you to
change the destination folder and desktop settings, etc.
After choosing your installation type, please follow the respective steps
listed below:
For default setup, click the Install button to complete the installation.
For custom setup, do the following:
A) Click the Browse…button to change the installation directory or keep the
default. Click Next to go on.
B) Check the options you want to install and click Next to install.
When the process is complete, a message tells you that Foxit Phantom is
installed. Click Finish to complete the installation.
2) MSI Format
Please refer to the installation steps of EXE Format
Note: For Windows Vista users, please check if User Account Control is enabled
from Control Panel. If so, do one of the following:
Turn User Account Control off and install Foxit Phantom again.
1) Right click “cmd.exe” in“c:\windows\system32\”, and choose “Run as
Administrator”.
2) Execute “msiexec /i <fxPhantom10_en.msi> “, make sure you input the
full path of your MSI package. For instance, if you save
.
19
Page 20

FOXIT PHANTOM PDF SUITE 2.0
User Manual
“fxPhantom10_en.msi” in the root of the D drive, you should input:
“msiexec /i D:\ fxPhantom10_en.msi”
3) Click Enter, then the Foxit Phantom Install Wizard will pop up, click Next
to continue.
- To register Foxit Phantom, please add “KEYPATH=fpmkey.txt full path” after
fxPhantom10_en.msi.
2. Retail Box Version of Foxit Phantom
1) Insert the Foxit Phantom CD. The Foxit Phantom “Welcome to Setup” screen
will appear.
2) Click “Next” to follow the installation
instructions.
3) After reviewing the agreement, Click “I
agree” to accept the terms of the end
user license agreements.
20
Page 21

4) Select an installation type by clicking
one of the two options. The default
installation location is:
“C:\ProgramFiles (x86)\Foxit
Software\Foxit Phantom\”.
FOXIT PHANTOM PDF SUITE 2.0
User Manual
5) After installation, input the CD key
found on the CD envelope.
6) Optional – To be a registered user,
complete the following registration
form. As a registered user you will
receive 24/7 customer support, the
latest Foxit news and benefits.
Registering Foxit Phantom
1. Online Version of Foxit Phantom
After purchasing Foxit Phantom online, please do one of the following to register
your key:
Close Foxit Phantom, save the key file into the directory where you installed
Foxit Phantom.
21
Page 22

FOXIT PHANTOM PDF SUITE 2.0
User Manual
Run Foxit Phantom > Help > Install License Key > A registration box will pop
up. Open the received key file, copy the key contents into the box
indicated > click Register the key button.
Note: To check if you have registered successfully, please click the About
button
corner.
Before registration, you can try out Foxit Phantom as a full licensed version with
a 30-day temp key. When your evaluation license expires, Foxit Phantom will
not be launched or can’t be used anymore. However if you register Foxit
Phantom successfully, you can keep using its functions.
2. Retail Box Version of Foxit Phantom
If you purchase retail box version of Foxit Phantom in US, please follow the
activation instructions below:
Install Foxit Phantom from the CD. Run the program and follow the
installation instructions.
There are two optional ways to activate.
1) Save the key file you receive from Foxit into the directory where you
installed Foxit Phantom, by default the installation folder is C:\Program
Files\Foxit Software\Foxit Phantom. Please do not change the contents of
the key file.
on the toolbar and see if your name is shown at the bottom left
2) Run Foxit Phantom, click Help > Activation and Activation procedure will
start. Follow the installation instructions, open your key file, copy the whole
key contents into the box indicated and click the "Register the Key" button.
Note: To check if you have activated successfully, please click the Help > About
Phantom button
left corner.
on the toolbar and see if your name is shown at the bottom
Work Area
Foxit Phantom opens in two different ways: on its own, as a standalone
application, and in a web browser. The associated work areas differ slightly.
22
Page 23

FOXIT PHANTOM PDF SUITE 2.0
User Manual
The Foxit Phantom work area includes a document pane that displays PDFs and
a navigation pane on the left side that helps you browse through the current PDF.
Toolbars near the top and bottom of the window provide other controls that you
can use to work with PDFs, including toolbar pane, menu bar and status bar.
The Work Area for PDFs Open in the Application
Double-click the Foxit Phantom icon on the desktop to start this program
Choose File > Open, navigate to and select any PDF on your computer, and
click Open.
A
B
C
Foxit Phantom window
A. Menu bar B. Toolbars C. Navigation Pane D. Document Pane
E. Status bar
The Work Area for PDFs Open in a Web Browser
Open a web browser application.
Select a PDF anywhere on the Internet and click the link.
The PDF will be opened by Foxit Phantom directly in the web browser.
D
E
23
Page 24

FOXIT PHANTOM PDF SUITE 2.0
A B C D E
Q
User Manual
A
B
C
D
E
PDF open in a web browser
A. Web browser application menu bar and buttons B. Foxit Phantom toolbars
C. Navigation Pane D. Status bar E. Document pane
Tools and Toolbars
F
G
H I
J
O
K
L
P
M
N
R
24
Page 25

FOXIT PHANTOM PDF SUITE 2.0
User Manual
Toolbars
A. File toolbar B. Navigation toolbar C. Rotate View toolbar D. Zoom toolbar
E. Basic toolbar F. Digital Signature Tools G. Form Tools toolbar H. Stamp Tools
toolbar I. Security Editing Tools toolbar J. Measure tools toolbar K.Typewriter
Tools toolbar L. Properties toolbar M. Drawing Markup Tools toolbar N.
Commenting Tools toolbar O. Find toolbar P. Editing Tools toolbar Q. Favorite
Tools toolbar R. Format Tools toolbar
Customizing the Work Area
As you get acquainted with Foxit Phantom, you can set up your work
environment. The more you learn about its potential, the more you can take
advantage of its features, tools, and options.
There is much more to the application than you see at first glance. Foxit
Phantom has hidden tools and preferences that can enhance your experience
and give you greater control over how your work area is arranged and
displayed.
About Menu Bar
Generally speaking, it is a good idea to keep the menu bars visible so that they
are available as you work. However, some users prefer to have as much space in
Foxit Phantom as possible. To get rid of Phantom menus temporarily, you should
click View > uncheck Menu Bar, or press F9. Of course, you can temporarily
display the Menu Bar again by right-clicking toolbar and checking Menu Bar.
Foxit Phantom has numerous context-sensitive menus. These menus appear
when you right-click an object in the work area. A context menu displays
commands that are relate to the item or area clicked.
About Toolbars
Foxit Phantom enables you to change the appearance of the tools to suit your
needs and working style. You can add and delete buttons on the existing
toolbars so that only the commands you use most often will be displayed. To
learn more about it, read the explanation below.
25
Page 26

FOXIT PHANTOM PDF SUITE 2.0
User Manual
Any toolbars can float or be docked. Docked toolbars appear in the toolbar area.
Floating toolbars appear as independent palettes that you can move anywhere
in the work area.
Each toolbar has a grabber bar, which is a vertical gray stripe at the left end of
the toolbar.
Note: Foxit Phantom will be opened with the selections of Select Text Tool or
Typewriter if you select these tools the last time Foxit Phantom was opened.
Showing or hiding toolbars
To hide all toolbars, choose View > Toolbars > Hide Toolbars, or press the
hotkey F8 on your keyboard.
To show all toolbars, choose Toolbars > Show Toolbars, or press the hotkey
F8 on your keyboard.
To open a toolbar, choose View > Toolbars > [toolbar name]. A checkmark
next to the toolbar name indicates that the toolbar is displayed.
To hide a toolbar, please do one of the following: A.
Right-click the toolbar area or choose View >Toolbars, and uncheck the
toolbar you want to hide. B.
Drag the toolbar you want to delete by its grabber bar to the document pane,
click the "Close" button at the top right corner of its title bar to hide it.
To change the visibility of several toolbars, please choose Tools > Customize
Toolbars > More Tools, and then select and deselect the toolbars. A
checkmark next to the toolbar name indicates that the toolbar is currently
visible.
Setting favorite toolbars
Choose Tools > Customize Toolbars > Favorite Toolbar.
In the Favorite Toolbar tab, please do the following:
Add - Select your preferred tools from the left “Command” pane, click Add
and see them appear in the right “Favorite Toolbar” pane. <Separator>
which will appear between two tools can be added if you like.
Remove - Select the tools you accidently added to the right “Favorite
Toolbar” pane, click Remove, and see them disappear from the right pane.
Reset - Restore the Favorite Toolbar pane to the default settings.
Click Up/Down button on the right side to adjust the position of your favorite
toolbars, and click OK.
26
Page 27

FOXIT PHANTOM PDF SUITE 2.0
User Manual
To show/hide Favorite Toolbars, you can either right-click toolbars to
check/uncheck Favorite Tools or go to View > Toolbars > check/uncheck
Favorite Tools.
Moving toolbars
To rearrange the docked toolbars, use the toolbar grabber bars to drag them
from one position to another.
To float a docked toolbar, drag it by its grabber bar from the toolbar area.
To move a floating toolbar, drag it by its title bar to another location in the
work area.
To dock a floating toolbar, double-click its title bar or drag it by its title bar to
the toolbar area.
To move all floating toolbars to the toolbar area, choose View > Toolbars >
Reset Toolbars.
Note: To move a toolbar, drag the grabber bar
Returning toolbars to their default configuration
Choose View > Toolbars > Reset Toolbars.
at the left edge of the toolbar.
About Navigation Pane
The navigation pane, located next to the document pane, can display different
navigation panels, including Layer panel, Attachments panel, Signatures panel,
Comments panel, Pages panel and Bookmarks panel. These panels act like a
table of contents, with items you click to jump to a specific place in the
document. Please note that the navigation pane is unavailable when Foxit is
open but empty (no PDF is open).
Showing or hiding the navigation pane
The buttons on the left side of the navigation pane provides easy access to
various panels, such as the Bookmarks panel button
button.
To show the navigation pane, choose View > Navigation Panels > Show
Navigation Panels, or use keyboard shortcut F4.
and the Pages panel
27
Page 28

FOXIT PHANTOM PDF SUITE 2.0
User Manual
To open a navigation panel, you can either click its button on the left side of
the navigation pane, or choose View > Navigation Panels > [navigation
panel name].
To close the navigation pane, choose View > Navigation Panels > Hide
Navigation Panels, or use keyboard shortcut F4, or click the button for the
currently open panel in the navigation pane.
Tip: To show or hide the navigation pane, you can also click on the button at
the top right corner of the navigation pane.
Adjusting the navigation pane
Like the toolbars, the navigation panels can be docked in the navigation pane or
float anywhere in the work area of Foxit Phantom. You can choose to hide or
close the panels that you don't need and open the ones you do. What’s more,
you can easily adjust the width of the navigation pane.
1. Viewing a panel in the navigation pane
By default, all the panels dock in the navigation pane with a set of panel buttons
appearing on the left side of the work area.
Do one of the following:
Select the button for the panel on the left side of the navigation pane.
Choose View > Navigation Panels > [panel name].
2. Changing the display area for navigation pane
To change the view area of the navigation pane, drag its right border to
adjust the width.
To minimize or maximize the navigation pane, click on the button
top right corner of the navigation pane.
3. Docking or floating a navigation panel
To float a navigation panel, drag the panel button into the document pane.
To move a panel, drag it by its panel button to another location.
To dock a floating panel, double-click its title bar.
To dock multiple floating panels, choose View > Navigation Panels > Dock
All Panels.
at the
28
Page 29

FOXIT PHANTOM PDF SUITE 2.0
User Manual
Setting preferences
Although Foxit Phantom is customizable, some of the customizable features
may be difficult to find. After reading this topic, you will find out how useful
having your own preferences can be, and how simple it is to set up your own
preferences.
Setting commenting preference
Pop-up opacity: determines the opacity of comment pop-up notes in values
from 1 to 100 percent, you can drag the slide bar to adjust the opacity of pop-up
notes, the lower opacity values make the notes more transparent.
Setting document layout, colors and measurement units
The Document Layout and Colors of the Preferences dialog provides 3 ways to
browse PDF documents, and different color schemes to replace document colors.
Automatically, Foxit Phantom uses the color settings of the PDF document.
Documents Layout
A. Tabbed documents: Opens multiple PDFs in one instance of Foxit
Phantom.
B. Allow Multiple Instances: Creates a new Foxit Phantom window when
double-clicking to open a PDF file.
C. Show prompt message before closing all tabs: When you close a window
with multiple tabs, Foxit Phantom will ask you to confirm your choice.
This prevents you from accidentally closing the whole window when you
intended to only close the current tab. Uncheck this option preference to
disable this message and have Foxit Phantom automatically close the
window.
Document Colors Options
A. Replace Document Colors: Select to activate other options to change
the document colors.
B. Use Windows Color Scheme: Sets document colors according to the
color scheme of your Windows preferences.
C. Custom Color: Changes the color of Page Background and Document
Text.
D. Change Only the Color of Black/White Content: Changes only the
Black/White text and leaves the colored text unchanged.
Measurement Units
29
Page 30

FOXIT PHANTOM PDF SUITE 2.0
User Manual
Set unit of page dimensions given in the status bar and print dialog box.
Setting form display preferences
The form tab enables you to set the preferences of the interactive form display.
Always hide document message bar: Permanently hide document message
bar on every open form in Foxit Phantom. Uncheck this option preference to
have Foxit Phantom automatically show document message bar.
Use initial highlight mode form fields when opening document: Select to
highlight required form fields with default yellow background.
Highlight all fields: You can either check Highlight all fields or choose to
highlight the specific fields to your needs. This option classifies all the fields
into Combo Box, List Box, Radio Button, Check Box, Push Button and Text
Field.
Change highlight colors: Click the color panes next to the field names to
choose any color you like.
Opacity: Adjust the opacity of the fields highlighted.
Set highlight layer:
A. At default position: the highlight layer is set to stack below the text input
by default.
B. Below field: the highlight layer is stacked below the text input.
C. Above field: the highlight layer is stacked on top of the text input.
Setting full screen preferences
Full Screen Navigation
A. Select to show Scroll bar, Bookmark, Status bar or Menu bar in Full
Screen mode.
B. Show Exit Button – check or uncheck this option to show or hide Exit
Button in Full Screen mode.
C. One page at a time – displays a single page at a time in Full Screen
mode.
D. Left click to go forward one page; right click to go back one page -- lets
you page through a PDF document by clicking the mouse. You can also
page through a document by pressing Space, Shift + Space, or the
arrow keys.
Full Screen Appearance
Background – click the color pane and choose the color you like to be the
background color in Full Screen mode.
30
Page 31

FOXIT PHANTOM PDF SUITE 2.0
User Manual
Setting general preferences
The General Preferences setting provides options on Toolbar Settings, Snapshot
Selection, Printer Font, Text Link, etc.
Basic Tools
A. Use Fixed Resolution for Snapshots -- sets the resolution used to copy
the image captured with the Snapshot tool. Automatically uses 72 pixels
as default resolution.
B. Create links from URLs -- detect the text links in PDF documents and
change the non-clickable links into clickable ones.
C. Minimize to system tray -- You can save space on your task bar by
minimizing the Foxit Phantom to system tray. Check it to minimize Foxit
Phantom to system tray when you click the Minimize button.
D. Screen word-capturing – Check it to turn on this function which enables
you to use your mouse to capture words inside a PDF file and have it
translated if you are using dictionary software.
Printer
Print Texts as Graphics (Ignore Font Substitution) – sets the text font as
graphics and printout fonts are exactly the same as the text fonts.
Automatically allows quick print where Printer Font is substituted.
Tab Bar
A. Always show close button – permanently shows close button on every
tab. If deselecting this option, the close button will only appear on the
current tab.
B. Max tab size – allows you to specify a maximum tab size.
Setting history preference
History
A. Restore last view settings when reopening: determines whether
documents open automatically to the last viewed page within a work
session.
B. Maximum number of documents in history list: sets the maximum
number of PDF documents you read in history list. The default is 50 PDF
documents.
C. Maximum number of documents in recently used list: sets the maximum
number of PDF documents you read recently in “File” pull-down menu.
The default is 4 PDF documents.
Navigation Panel
31
Page 32

FOXIT PHANTOM PDF SUITE 2.0
User Manual
Restore last used panel state when reopening – determines whether open
last used panel automatically.
Setting Internet preference
Web Browser Options: if you do not want PDF documents opened in your web
browser directly, please check the option of “Show file download dialog” so that
a message box will pop up to give you options to open or download the PDF file
when clicking a PDF link.
Setting JavaScript preference
Enable JavaScript Actions: enables any actions in a PDF that uses JavaScript.
Setting languages preference
Use default language: Foxit Phantom supports dynamic UI language switch.
English is the default UI language.
Choose custom language: You can select a localized language from the
Language list. When switching UI language, you may meet one of the
following cases:
If the UI language file exists on your computer, the UI will be switched in
a flash into the language you selected.
If you don’t have the UI language file on your computer but available on
Foxit server, a prompt message will pop up asking you whether or not to
download the language kits.
If the UI language file is unavailable on Foxit server, a prompt message
will pop up giving you a notice that you can get the UI language package
on our website. In addition, you can also help us to translate the UI
language package so that we can localize Foxit Phantom into your own
language shortly. To visit our multi-language translation system, please
click here
.
Setting page display preferences
The Page Display panel of the Preferences dialog box includes the following
options:
Page Display
A. Default Page Layout: you can use the following page layouts when
32
Page 33

FOXIT PHANTOM PDF SUITE 2.0
User Manual
viewing PDF documents:
a) Single Page -- Displays one page at a time, with no portion on other
pages visible.
b) Continuous -- Displays pages in a continuous vertical column that is
one page wide.
c) Facing -- Displays each two-page spread with no portion of other
pages visible.
d) Continuous Facing -- Displays facing pages side by side in a
continuous vertical column.
See also
“Changing the page layout”
B. Display Transparency Grid: displays a grid behind transparent objects.
C. Custom Facing: the Default Facing for page layout is 2 pages. You can
check the Custom Facing box and set the facing layout to your own
preference.
D. Custom Margin: sets the margins between different pages with Facing or
Continuous Facing page layout. The default is a margin of 8 pixels.
E. Display Texts Optimized for LCD Screen: optimally adjusts text display
that best suits your monitor.
Magnification
Default Zoom: sets the magnification level for PDF documents when they are
first opened. This value overrides document settings. The default uses the
settings of the PDF document.
See also
“Changing the magnification level of a document”
.
.
Setting reading preference
Page Vs Document: This preference determines how much of a document is
delivered to a screen reader at a time. When opening a PDF document,
Phantom may analyze the document and attempt to infer its structure,
which can take a long time for a long document. You may want to set
Phantom to deliver only the currently visible page so that it analyzes only a
small piece of the document at a time. This consideration will vary
depending on the size and complexity of the document and on the features
of the screen reader.
A. Only read the currently visible pages - This option is usually best when
using a screen magnifier. It improves performance by eliminating the
33
Page 34

FOXIT PHANTOM PDF SUITE 2.0
User Manual
need for the software to process parts of the document that aren’t visible.
When Phantom sends only the currently visible pages of a PDF to the
memory buffer, the assistive technology has access to those pages only.
It cannot go to another page until the next page is visible and Phantom
has sent the page information to the memory buffer. So, if this option is
selected, you must use the navigation features of Phantom, not those of
the assistive technology, to navigate from page to page in the document.
You should also set the Default Page Display option in preferences to
Single Page if you choose to have Phantom send only the currently
visible pages to the assistive technology. For instructions on setting the
default page display to Singe Page, see “Setting page display
preference”.
B. Read the entire document - This option can be best if you use a screen
reader that has its own navigation and search tools and that is more
familiar to you than the tools in Phantom.
C. For large documents, only read the currently visible pages - This option
is selected by default and is usually best if you use a screen reader with
long or complex PDFs. It allows Phantom to deliver an entire small
document but revert to page-by-page delivery for large documents.
D. Minimum number of pages in a large document – When the For large
documents, only read the currently visible pages option is selected, it
allows you to set this minimum value.
Setting signature preference
Digital Signatures
A. Verify signatures when the document is opened –determines when to
verify signatures. Checking the option will automatically validate all
signatures when you open the document.
B. Sign the document after signature is placed immediately - After
checking the option, the document will be signed after signature is
placed immediately; the signature will not be moved or changed when
the document is signed.
Image settings
Make the image transparent when loading – After the option is selected, you
can change the image transparency of image signature.
Filter color – sets the color that will be filtered with RGB. The image filtered
will become transparent.
Tolerance – defines how similar in color a pixel must be to be filtered.
Values can range from 0 to 255. A low tolerance filters pixels within a range
of color values very similar to the pixel you set. A high tolerance filters pixels
within a broader range.
34
Page 35

FOXIT PHANTOM PDF SUITE 2.0
User Manual
Setting typewriter preference
This option allows you to customize your own Textbox and Callout tool.
Border Color when editing – Allows you to set border color when typing text.
It’s mainly used to indicate the position where you’re typing text within a
document.
Text box – Input the width and height values to customize textboxes. The
default value is 100 wide and 20 high.
Callout – Input the width, height and length values to customize callout tool.
The default value is 100 wide and 100 high. The default length 1 is 100, the
length 2 20.
Viewing PDF Properties
The Properties dialog box provides information about the document, including
the document’s location, title, subject, author, security settings, fonts used, etc.
This dialog box also displays attributes set by other programs.
To view the PDF properties, please choose File > Properties. You can acquire all
relevant information as follows:
35
Page 36

FOXIT PHANTOM PDF SUITE 2.0
User Manual
Description tab of the Document Properties dialog box
Description
This tab shows some basic information about the document. The title, author,
subject, and keywords may have been set by the person who created the
document in the source application. You can easily edit those document
information within the PDF document, a useful way for searching and indexing
files.
Title -- A general or descriptive heading of the document.
Subject -- The principal idea and point of the document.
Author -- The writer of the document.
Creator -- The application that produced the original document.
Producer -- The application or driver that converted the original document
into a PDF document.
Keywords -- The words that are used to reveal the internal structure of an
author's reasoning.
Created -- The date and time the document was created.
Modified -- The date and time the document was last modified.
Advanced -- This area shows the PDF version, the page size, and number of
pages.
36
Page 37

FOXIT PHANTOM PDF SUITE 2.0
User Manual
Initial View tab of the Document Properties dialog box
Initial View
When a user opens your PDF document, they see the initial view of the PDF. You
can set the initial view to the magnification level, page and page layout that you
want to have appear. If your PDF is a presentation, you may want to set the
initial view to Full Screen Mode. After you define the initial view of the PDF, you
can add page transitions to selected pages of the entire document.
Define the initial view
1. Choose File > Properties.
2. In the Document Properties dialog box, click Initial View.
3. Select the options you want, and then click OK. You have to save and reopen
the file to see the effects.
Initial View options for document properties
The Initial View options in the Document Properties are organized into three
areas: Layout and Magnification, Window Options, and User Interface Options.
37
Page 38

FOXIT PHANTOM PDF SUITE 2.0
User Manual
Layout and Destination - Determines the appearance of the document.
Navigation tab - Determines which panels are displayed in the navigation
pane.
Page layout - Determines how document pages are arranged.
Open to page - Specifies the page that appears when the document opens.
Note: Setting Default for the Magnification and Page layout options uses the
individual users’ settings in the Page Display preferences.
Magnification - Sets the zoom level the document will appear at when
opened. Default uses the magnification set by the user.
Window Options - Determine how the window adjusts in the screen area
when a user opens the document. These options apply to the document
window itself in relationship to the screen area of the user’s monitor.
Resize window to initial page - Adjusts the document window to fit
snugly around the opening page, according to the options that you selected
under Document Options.
Center window on screen - Positions the window in the center of the
screen area.
Open in Full Screen mode - Maximizes the document window and displays
the document without the menu bar, toolbar, or window controls.
Display document title - Shows the document title in the title bar of the
window. The document title is obtained from the Description panel of the
Document Properties dialog box.
User Interface Options - Determine which parts of the interface—the
menu bar, the toolbars, and the window controls—are hidden.
Note: If you hide the menu bar and toolbars, users cannot apply commands
and select tools unless they know the keyboard shortcuts. You may want to
set up page actions that temporarily hide interface controls while the page is
in view.
Define the initial view as Full Screen mode
When setting the initial view of a PDF to Full Screen mode, you must define how
the document opens.
1. Choose File > Properties.
2. In the Document Properties dialog box, select Initial View.
38
Page 39

FOXIT PHANTOM PDF SUITE 2.0
User Manual
3. For best results, do the following:
o
Choose Page Only from the Navigation tab menu.
Choose Single Page from the Page layout menu.
o
o Set Open to page to the page on which you want to start the
presentation.
4. Select Open in Full Screen mode to open the document without the menu bar,
toolbar, or window controls displayed. Click OK. (You have to save and
reopen the file to see the effects.)
Note: Users can exit Full Screen mode by pressing Esc if their preferences are
set this way. However, in Full Screen mode, users cannot apply commands and
select tools unless they know the keyboard shortcuts. You may want to set up
page actions in the document to provide this functionality.
Security tab of the Document Properties dialog box
Security
This tab describes security permissions and what functionality is allowed within
a PDF. All the security information is listed here if a password has been applied
to the PDF.
39
Page 40

See also
“Checking PDF security“
FOXIT PHANTOM PDF SUITE 2.0
User Manual
Fonts tab of the Document Properties dialog box
Fonts
The Fonts tab lists the fonts and the font types used in the original document, as
well as the encoding used to display the original fonts.
Uninstalling Foxit Phantom
How to Uninstall
Please do one of the following:
Click Start > Programs > Foxit Phantom > Uninstall.
Click Start > Programs > Foxit Phantom > Uninstall. Click Start >
Settings > Control Panel > Add or Remove Program and select Foxit
40
Page 41

FOXIT PHANTOM PDF SUITE 2.0
User Manual
Phantom to uninstall.
Double click the file uninstall.exe under Foxit Phantom installation directory
Drive name:\...\Foxit Software\Foxit Phantom\.
41
Page 42

FOXIT PHANTOM PDF SUITE 2.0
User Manual
Chapter 4 – Creating PDFs
Once Foxit Phantom is properly installed, Foxit Phantom Printer will have been
installed onto your system as well and its icon will appear on Microsoft Word
toolbar. Up to 3 times faster than other PDF tools, Foxit Phantom is the total
solution for creating PDFs from any printable file or document that is in a format
that can be scanned. A single click will create PDFs from Microsoft Word.
Creating PDFs with Foxit Phantom Printer
Creating a PDF from a file
You can create a PDF from Office, email, a web site, or from any file that prints.
1. Choose File > Create PDF > From File.
2. In the Open dialog box, select a file. You can browse all file types when you
select All Files (**) from the File type menu.
3. Click Open to convert the file to a PDF.
4. Type a filename and specify a location in pop-up Save dialog box.
Note: Depending on the type of file being converted, the converting application
opens automatically and a progress dialog box appears.
Creating a PDF from a scanner
You can create a PDF directly from a paper document using Phantom and your
scanner.
1. Choose File > Create PDF > From Scanner.
2. Select the input, output, and documents options in the Foxit Scanner dialog
box, and then click Scan.
Input
Scanner: select an installed scanner. You must have the manufacturer’s
scanning software installed on your computer.
Scanner Options (Windows only): click to open the Scanner Options
dialog box. (Available only after you select a scanner.)
User Interface: the hide scanner’s interface option bypasses the
windows and dialog boxes provided by the scanner manufacturer.
Instead, scanning from Foxit opens the Foxit Scanner dialog box.
42
Page 43

FOXIT PHANTOM PDF SUITE 2.0
User Manual
Paper Size: the menu lists available standard page sizes.
Color Mode (Windows only): select a basic color mode (Color, Black and
White, or Grayscale) supported by your scanner. This option is enabled if
your Scanner Options are set to use the Foxit scanning dialog box instead of
the scanner application.
Resolution (Windows only): select a resolution supported by your
scanner. This option is enabled if your Scanner Options are set to use the
Foxit scanning dialog box instead of the scanner application.
Note: If you select a Color Mode or Resolution option not supported by your
scanner, a message appears and your scanner’s application window opens,
where you can select different options.
Output
New PDF Document: select this to create a new PDF; deselect it if you
want to append the scanned page to an existing PDF.
Append: select this if you want to add the converted scan to an existing PDF.
Use the pop-up menu to select an open PDF or click Browse to find and
select another PDF.
Documents
Optimization: drag the slider to set the balance point between file size and
quality. Click the Options button if you want to customize optimization with
specific settings for file compression.
The Optimization Options dialog box for image settings controls how
scanned images are compressed for the PDF. Default settings are suitable
for a wide range of document pages, but you may want to customize
settings for higher quality images and smaller file sizes.
Automatic: applies default settings to balance the file size and quality at
a moderate level.
Custom Settings: makes additional settings available under
Compression. When Custom Settings is selected, the Color/Gray or
Monochrome settings are available.
Color/Gray settings: when scanning color or gray pages, select one
of the following:
Lossless: does not apply compression to scanned pages.
JPEG: applies JPEG compression to the entire gray or RGB input
page.
Monochrome: when scanning black-and-white or monotone images,
select one of the following:
43
Page 44

FOXIT PHANTOM PDF SUITE 2.0
User Manual
Lossless: does not apply compression to scanned pages.
CCITT Group 4: applies CCITT Group 4 compression to
black-and-white input page images.
3. If creating a new PDF, specify a filename and location, and click Save.
4. Select “Continue Scan (put next paper)” to scan next paper if you like.
5. Select “Finish Scanning” and click OK to exit.
Creating a PDF from multiple files
You can easily merge files of different types into a single PDF.
1. Choose File > Create PDF > From Multiple Files
2. In the Convert Multiple Files dialog box, click Add Files to select the files you
want to combine, click Add Folder to add all files under this specific folder.
3. Adjust the order of files as desired by using Move Up/Down.
4. Select Merge multiple files into a single PDF file, and click Convert.
5. Select a file name and location for the combined PDF, click Save.
Creating a PDF from a blank page
You can create a PDF from a blank page rather than beginning with a file, a
clipboard image, or scanning.
1. Choose File > Create PDF > From Blank Page.
2. Begin typing the text you want to add to the blank page.
3. As needed, select other tools and options that you want to apply to the PDF.
4. Choose File > Save, and select a name and location for the PDF file.
Dragging and dropping to create PDFs
The method is very useful for documents that are small-sized files, plain text
files, or small images.
1. Drag the file icons onto the open Foxit Phantom window.
2. Type the file name and location to save the PDF.
Creating a PDF using the Print command
Foxit PDF Printer works like a standard printer, so you can use it to print your
files from any windows applications as if you would print to a real printer.
1. Open the file in its authoring application.
2. Choose File > Print.
3. Select the printer named Foxit Phantom Printer, and click OK button to start
printing.
44
Page 45

FOXIT PHANTOM PDF SUITE 2.0
User Manual
4. You will be prompted to specify the name of the PDF file and where to store,
simply assign the PDF filename and select a folder location.
5. Click Save.
6. You will see a creating status bar, when it is done, the PDF will be
automatically opened.
Setting Foxit Phantom Printer Properties
Before you create a PDF file, you may wish to access PDF Printing Preferences to
set up options for your PDF files, there are two ways to access PDF Preferences.
1. Accessing the PDF printing Preferences from Control Panel
Go to Start > Settings > Control Panel > Printers and Faxes.
Right-click on the Foxit Phantom Printer and then select Printing
Preferences.
2. Accessing the PDF Printing Preferences from the Print dialog box.
When you print a file and open the Print dialog box, simply click on the
Properties button, you can bring up the PDF Printing Preferences.
General tab
Default Folder for Generated PDF File - allows you to assign a
destination folder to place the PDF files after generations.
Overwrite existing PDF file without confirmation - By default, this
option is checked. If you don’t hope your file is overwritten without any
prompt, you should uncheck this option.
Use default filename and save to default folder – If you don’t want to
change the original filename, just check this option and the generated PDF
file will be automatically saved to the default folder you have assigned.
Open the file after converting – By default, this option is checked; the
generated PDF file will automatically open after conversion.
Compress images using lossy algorithm - allows you to reduce the
image size but with lower quality during generating PDF files. By default, it’s
checked.
Image Resolution - allows you to input a DPI (dot per inch) level for image
resolution. The valid level value is between 72 -300.
Support PDF/A – 1b Standard – allows you to archive PDF files.
Save As Default - If you want all of your settings to be applied to all
documents, you must keep the option checked. If you uncheck it, your
settings will be effective for the current document only.
45
Page 46

FOXIT PHANTOM PDF SUITE 2.0
User Manual
Layout tab
Page Form - This option allows you to choose paper type, or click
Custom-size form and then enter the Paper Size dimensions in the Width
and Height boxes.
Layout Preview - You can see how your document layout will look with the
selected options from Page Form.
Paper Size - When you click Custom-size Form from the Page Form, this
option is activated, and you can enter dimensions in the Width and Height
boxes.
Unit of Metrics - Allows you to change the unit of measurement, including
inches, centimeter and millimeters.
Orientation - Allows you to change the page orientation.
46
Page 47

FOXIT PHANTOM
User Manual
Chapter 5 – Organizing PDFs
Foxit Phantom comes with a built in functionality to combine various PDF files &
split one PDF into various small single & multiple page PDF files according to
page numbers as well as page range. Organize PDF files by re-arranging pages,
composing page outlines, etc. Foxit Phantom displays an overview page without
any additional software so you can easily know what you are working on. It
allows you to split, merge, and reorganize pages in your PDF document.
Inserting Pages
Inserting pages from a file
Foxit Phantom allows you to insert one PDF into another.
1. Open the PDF that you want to serve as the basis of the combined file, and
choose Organize > Insert Pages > From File.
2. Select a PDF that you want to insert into the target document, and click
Open.
3. In the Insert Pages dialog box, specify where you want to insert the
document (before or after the first, last, or a designated page of the open
PDF), and page range (all or specific pages) of the PDF document that you
want to insert, and click OK.
4. To leave the original PDF intact as a separate file, choose Save As, and type
a new name for the merged PDF.
Inserting pages from a scanner
You can insert pages from a paper document using Phantom and your scanner.
1. Open the PDF that you want to serve as the basis of the combined file, and
choose Organize > Insert Pages > From Scanner.
2. Select the input and documents options in the Foxit Scanner dialog box, and
then click Scan.
See also
“Create a PDF from a scanner”
47
Page 48

FOXIT PHANTOM PDF SUITE 2.0
User Manual
Inserting pages from a blank page
1. Open the PDF that you want to serve as the basis of the combined file, and
choose Organize > Insert Pages > From Blank Page.
2. In the Insert blank pages dialog box, specify where you want to insert the
blank page (before or after the first, last, or a designated page of the open
PDF), and page count (how many blank pages you want to insert), and click
OK.
3. To leave the original PDF intact as a separate file, choose Save As, and type
a new name for the merged PDF.
Deleting Pages
After combining PDF files, you can delete unwanted or blank pages.
Deleting Pages using the Delete command
1. Open the PDF document where you want to delete pages.
2. (Optional) Click the Pages button
pages you want to delete.
3. Choose Organize > Delete Pages.
4. Click OK to delete selected pages or click From and specify a range.
Note: If you want to retain a copy of the original PDF, make sure that you save
the new document using Save As rather than Save.
Deleting Pages using page thumbnails
1. In the Pages panel, select a page or group of pages:
o
Select the page number box of the thumbnail or the page thumbnail
itself.
Shift-click or Ctrl- click to select a range of page thumbnails.
o
2. Choose Delete Pages from the Pages panel Options menu, and click OK.
in the navigation pane and select the
Extracting Pages
Extraction is the process of reusing selected pages of one PDF in a different PDF.
Extracted pages contain not only the content but also all form fields, comments,
and links associated with the original page content.
48
Page 49

FOXIT PHANTOM PDF SUITE 2.0
User Manual
You can leave the extracted pages in the original document and create a new
PDF that includes all of the extracted pages during the extraction
process—comparable to the familiar processes of cutting-and-pasting or
copying-and-pasting, but on the page level.
Note: Any bookmarks or article threading associated with pages are not
extracted.
1. Open the PDF in Foxit Phantom and choose Organize > Extract Pages.
2. In the Extract Pages dialog box, under Extract Range, do any of the
following:
To extract only every other page, select either Odd Pages only or
Even Pages only.
To extract only one page or a range of pages, select From, and
enter page numbers in the From and To options.
3. In the Extract Pages dialog box, to leave the original pages in the document
and create a single PDF that includes all of the extracted pages, select
Extract Pages As A Single File, click OK.
4. A Save As dialog box automatically appears asking you to enter a filename
and click Save. The saved file is not currently open in Foxit Phantom.
5. If the “Extract Pages As A Single File” option is deselected, the single PDF
that includes all of the extracted pages is currently open without being
saved. You have to manually save the single file if you like.
The extracted pages are placed in a new document named Extract Pages From
[original document name].pdf.
Note: The creator of a PDF document can set the security to prevent the
extraction of pages. To view the security settings for a document, choose File >
Properties, and select Security.
Replacing Pages
You can replace an entire PDF page with another PDF page. Only the text and
images on the original page are replaced. Any interactive elements associated
with the original page, such as links and bookmarks, are not affected. Likewise,
bookmarks and links that may have been previously associated with the
replacement page do not carry over. Comments, however, are carried over and
are combined with any existing comments in the document.
49
Page 50

FOXIT PHANTOM PDF SUITE 2.0
User Manual
To quickly update a PDF, you can replace individual pages.
1. Open the PDF that contains the pages you want to replace.
2. Choose Organize > Replace Pages.
3. Select the document containing the replacement pages, and click Open.
4. Under Original, enter the pages to be replaced in the original document.
5. Under Replacement, enter the first page of the replacement page range.
The last page is calculated based on the number of pages to be replaced in
the original document.
6. Click OK.
Swapping Two Pages
The Swap feature is useful sometimes if you want to swap two different pages
within a PDF document.
1. Open the PDF document within which you want to swap pages.
2. Choose Organize > Swap Two Pages.
3. In the Swap Two Pages dialog box, enter two different page numbers in the
Swap and For options.
4. Click OK.
Duplicating Pages
The Duplicate Pages feature allows you to copy pages within a PDF document.
1. Open the PDF document within which you want to copy pages.
2. Choose Organize > Duplicate Pages.
3. In the Duplicate Pages dialog box, specify where you want to copy pages
within the document (before or after a designated page of the open PDF),
and enter page numbers in the Form and To options that you want to copy.
4. Click OK.
Moving Pages
The Move Pages feature allows you to move pages within a PDF document.
Moving one or more pages within a PDF document
50
Page 51

FOXIT PHANTOM PDF SUITE 2.0
User Manual
1. Open the PDF document within which you want to move pages.
2. Choose Organize > Move Pages.
3. In the Move Pages dialog box, specify where you want to move pages within
the document (before or after a designated page of the open PDF), and
enter page numbers in the From and To options that you want to move.
4. Click OK.
Note: Tagged bookmarks affect the order that reading devices follow, such as
devices for the visually impaired. Tagged bookmarks do not change the
sequence of pages in a PDF.
Moving one or more pages within a PDF, using page thumbnails
1. Click the Pages button to open the Pages panel, and select one or more page
thumbnails.
2. To move a page, drag the page number box of the corresponding page
thumbnail or the page thumbnail itself to the new location. A bar appears to
show the new position of the page thumbnail. The pages are renumbered.
Cropping Pages
The Crop Pages dialog box is where you can adjust the visible page area. This
can help you create consistency within a PDF composed of pages of different
sizes.
Cropping one or more pages
1. Open the PDF document within which you want to crop pages.
2. Open the Crop Pages dialog box using one of the following methods:
Choose Organize > Crop Pages.
From the right click context menu on the Pages thumbnails,
choose Crop Pages.
3. In the Crop Pages dialog box, adjust values for the Margin Controls:
Top, Bottom, Left, and Right. A black rectangle in the thumbnail page
display shows the adjusted boundaries of the cropped page.
4. Under Page Range, do any of the following:
To crop all pages in the PDF, select All.
To crop only one page or a range of pages, select From, and enter
page numbers in the From and To options.
5. Click OK.
51
Page 52

FOXIT PHANTOM PDF SUITE 2.0
User Manual
Rotating Pages
You can rotate all or selected pages in a document. Rotation is based on 90°
increments.
1. Open the PDF document within which you want to rotate pages.
2. Open the Rotate Pages dialog box using one of the following methods:
Choose Organize > Rotate Pages.
From the right click context menu on the Pages thumbnails,
choose Rotate Pages.
3. For Direction, select the amount and direction of the rotations:
Counterclockwise 90 degrees, Clockwise 90 degrees, or 180 degrees.
4. For Pages, specify whether all pages, a selection of pages, or a range
of pages are to be rotated.
5. Click OK.
Note: To temporarily change your view of the page, choose View > Rotate
View > Clockwise or Counterclockwise. The original page orientation is
restored the next time you open the PDF.
Flattening Pages
The Flatten Pages feature can discard interactive annotations in the PDF file and
make them become part of objects of the PDF pages.
1. Open the PDF document where you want to flatten pages.
2. Choose Organize > Flatten Pages.
3. In the Flatten Pages dialog box, specify the page range (current page, all
pages, a range of pages), and click OK.
Note: If you want to retain a copy of the original PDF, make sure that you save
the new document using Save As rather than Save.
52
Page 53

FOXIT PHANTOM PDF SUITE 2.0
User Manual
Chapter 6 – Viewing PDFs
Once the Foxit Phantom is properly installed, you can open and view PDF files
easily. When you have a PDF open, you can also adjust the view of the
document, find text in it, email to others, etc.
Opening Documents
You can open and view PDFs in Foxit Phantom from the desktop, or in a web
browser.
Opening a PDF document in Foxit Phantom
Opening a PDF document in Foxit Phantom
Do one of the following:
Choose File > Open, or click the Open button on File Toolbar. In the
Open dialog box, select the file name, and click Open. PDF documents are
usually identified with .pdf extension.
Drag and drop the PDF file into the Foxit Phantom window.
Note: You can open more than one PDF document within the same Foxit
Phantom application. When you open more than one file at a time, you
can navigate the PDF files easily by clicking the corresponding tabs or file
names under the Window menu.
Opening a PDF document from desktop or within other applications
If you set Foxit Phantom as your default viewer for PDF files, you are able to
launch and open PDF files in the following applications:
Email Application: in most email applications, you can double-click the
attachment icon to open the document.
Web Application: you can open a PDF document by clicking on the PDF file
link in your web browser.
53
Page 54

FOXIT PHANTOM PDF SUITE 2.0
User Manual
File System: double-click the PDF file icon in your file system.
Note: You can see the size of the opened document at the bottom right corner
of the window. For example . To sets unit of page
dimensions, please refer to “Measurement Units”.
Opening a secured PDF document
If you receive a PDF that is protected by security features, you may need a
password to open the document. Some protected documents have other
restrictions that prevent you from printing, editing, copying, etc.
When opening a protected PDF, you will be prompted to enter the password.
When trying to copy or edit a secured PDF, you will be informed that you are
prohibited to do so without the owner’s permission.
Retrieving recently opened documents from within Foxit Phantom
In “File” pull-down menu, you will be able to instantly retrieve recently opened
documents. Foxit Phantom provides a list of recently opened PDF documents.
Choose File > a previously opened PDF.
Note: To customize the number of document in recently used list, please refer
to “Setting history preference”
.
Viewing Documents
Foxit Phantom provides three different ways for you to read PDF files: multi-tab
browsing, single document interface mode, and multiple document interface
mode.
Multi-tab browsing
The multi-tab browsing feature enables you to open multiple files in a single
instance. If you already have a PDF open and then when you double-click
another pdf file, it'll be opened in the same window. However, you don’t need to
use tabbed browsing. But if you do, you will find tabbed browsing is a faster and
easier way to read PDF files.
54
Page 55

FOXIT PHANTOM PDF SUITE 2.0
Tab bar
User Manual
To enable tabbed browsing, please go to Tools > Preference > Documents >
Documents Layout > check the option of “Tabbed documents”.
To disable tabbed browsing, please go to Tools > Preference > Documents >
Documents Layout > uncheck the option of “Tabbed documents”.
Opening a new tab
To open a new tab, you can double-click a PDF file, select File > Open, or click
the Open button on the toolbar.
Closing a tab
To close the current tab, you can do one of the following:
Double click the Close Tab button at the top right corner of the Tab Bar.
Right-click on a tab and choose Close.
Select File > Close.
To close all tabs at the same time, click the Close button at the top right
corner of Foxit Phantom window, right-click on a tab and choose Close All, or
select File > Exit.
Single document interface mode
The single document interface mode enables you to open multiple instances of
Foxit Phantom. Foxit Phantom will create a new window when you double-click
to open a new PDF file, which is very useful for viewing different files side by
side.
To enable single document interface mode, please go to Tools >
Preference > Documents > Documents Layout > check “Allow Multiple
Instances”.
To disable single document interface mode, please go to Tools >
Preference > Documents > Documents Layout > uncheck “Allow Multiple
55
Page 56

FOXIT PHANTOM PDF SUITE 2.0
User Manual
Instances”.
Multiple document interface mode
The multiple document interface mode sets multiple documents under a
single parent window, as opposed to all windows being separated from each
other (single document interface). In order to view a list of windows open in
Foxit Phantom, the user typically has to select the Window menu.
To enable multiple document interface mode, please go to Tools >
Preference > Documents > Documents Layout > uncheck the options of
“Tabbed documents” and “Allow Multiple Instances”.
To disable single document interface mode, please go to Tools >
Preference > Documents > Documents Layout > either check the option of
“Tabbed documents” or “Allow Multiple Instances”.
Arranging child windows
When you have more than two PDF files open, you may want to arrange these
documents on the screen. You can implement the features such as "Tile" and
"Cascade" for the child windows.
1. Cascading windows
When you have multiple documents open, you may want to arrange them so
that you can see all or part of each document. Cascading the windows stacks
them so that each window title bar is visible.
56
Page 57

FOXIT PHANTOM PDF SUITE 2.0
User Manual
To cascade multiple windows, please click Cascade on the View menu.
2. Tiling windows
This command is useful for displaying a series of images or maps across your
screen from top to bottom. You can either open each file in a new window, tile
the windows, and then re-draw each window, or open a series of new windows,
tile them and then retrieve the files into the windows.
To tile multiple windows horizontally or vertically, please choose View > Tile >
Horizontally or Vertically.
3. Arrange icons
This command arranges the icons for minimized windows at the bottom of the
main window. Please note that if there is an open window at the bottom of the
main window, then some or all of the icons may not be visible because they will
be underneath this window.
57
Page 58

FOXIT PHANTOM PDF SUITE 2.0
To arrange the icons, please click Arrange Icons on the View menu.
Closing windows
To close the current PDF file, click Close on the File menu.
To close all PDF files, click Close All on the File menu.
User Manual
Navigating in Documents
Foxit Phantom provides user-friendly controls to navigate through PDF
documents. You can navigate in PDF documents by paging through or by using
navigational tools.
Scrolling through documents
1. Navigating around documents
Do one of the following:
Using mouse actions or keystrokes
Scroll the mouse wheel or press the Down or Up Arrows on the keyboard
to navigate around the documents.
Scroll automatically
Automatic scrolling allows users to view documents without using mouse
actions or keystrokes. Foxit Phantom also enables you to change the
scrolling speed with ease.
A. Choose “View” > “AutoScroll”.
B. Do one of the following:
To increase or decrease the scrolling speed, press the Up Arrow or
Down Arrow key, depending on the direction of scrolling.
58
Page 59

FOXIT PHANTOM PDF SUITE 2.0
User Manual
To reverse the direction of scrolling, press the minus sign (-) key.
To jump to the next or previous page, press the Space Bar or Shift +
Space.
To stop automatic scrolling, choose View > AutoScroll again.
2. Going to the next or previous page
Do one of the following:
Choose View > Go To > Previous Page or Next Page on Menu Bar.
Click the Previous Page icon or the Next Page icon on Toolbar or
Status Bar.
Put the cursor in the Document Pane, press the Page Up or Page Down
keys to turn the pages.
Put the cursor in the Document Pane, press the Left or Right Arrows on the
keyboard to move the pages up or down.
3. Going to the first or last page
Do one of the following:
Choose View > Go To > First Page or Last Page on Menu Bar.
Click the First Page icon
Bar.
Press the Home or End keys.
4. Going to a specific page
Do one of the following:
Choose View > Go To > Pages… > input the specific page number > OK.
Input or select the specific page number on the Current Page Number Box
on the Status Bar, and press Enter.
5. Retracing your steps
or the Last Page icon on Toolbar or Status
To go back or forward one page, click the Previous View button or Next
View button on the Toolbar or Status Bar.
Navigating with bookmarks
59
Page 60

FOXIT PHANTOM PDF SUITE 2.0
User Manual
Bookmark displays the list of bookmarks that the document contains. Generally
speaking, it is a visual table of contents that represents the chapters, main
headings, and other organizational elements in a document.
1. To show or hide bookmarks, do one of the following:
Choose View > Navigation Panels > Bookmarks.
Click the Bookmark button on the Navigation pane.
Click the button at the top right corner of the Navigation pane to
minimize or maximize bookmarks.
To jump to a topic, click the bookmark or right-click the bookmark and then
choose “Go to Bookmark”. Click the plus (+) or minus (-) sign to expand or
collapse the bookmark contents.
Navigating with page thumbnails
Page thumbnails are reduced-size versions of PDF pages. It provides miniature
previews of document pages and makes it easier to view and recognize them.
The red box in the page thumbnail indicates which area of the page appears.
1. To show or hide page thumbnails, do one of the following:
Choose View > Navigation Panels > Pages.
Click the Bookmark button
Click the button at the top right corner of the Navigation pane to
minimize or maximize Pages panel.
2. To navigate with page thumbnails, do one of the following:
To jump to another page, click its thumbnail.
To move to another location of the current page, drag and move the red
box in its thumbnail.
To resize page thumbnails, right-click on a thumbnail, and then choose
“Enlarge Page Thumbnails” or “Reduce Page Thumbnails”.
on the Navigation pane.
Navigating with links
Links take you to another location in the current document, or to locations in
other documents or websites. Clicking a link on PDF documents is just the same
as in other applications. You can follow a link by doing the following:
60
Page 61

FOXIT PHANTOM PDF SUITE 2.0
User Manual
Select the Hand tool on Basic Toolbar.
Position the pointer over the link until the pointer changes to the hand with
a pointing finger .
Adjusting the View of Documents
Foxit Phantom provides multiple tools that help you adjust the view of your PDF
documents. It includes simple tools as Zoom In and Zoom Out, as well as more
advanced tools like setting the page layout and orientation. As for some settings,
please refer to “Setting Preferences”
.
Changing the orientation of a document
You can change the orientation of the document from portrait to landscape view
by using the Rotate tools.
Choose View > Rotate View > Clockwise or Counterclockwise.
Click the Rotate Clockwise button or Rotate Counterclockwise button
on Rotate View Toolbar.
Note: You can change the page view in 90-degree increments, but the change
only affects screen display instead of its actual orientation. You cannot save the
changes in page view.
Changing the magnification level of a document
Do one of the following procedures:
1. Click the Zoom In or Zoom Out tools on the Toolbar or View >
Zoom > Zoom Out/In Tool on Menu Bar.
Note: If you click on a page, then the tool will zoom in/out on the page, trying
to keep the clicked point as the center of the window. If you drag a rectangle on
the page and then release the mouse, then the tool will zoom in/out on the page,
trying to keep the rectangle as the center of the window. If you press the Ctrl
key while scrolling the mouse wheel, then the tool will zoom in/out on the page
61
Page 62

based on the scrolling direction.
FOXIT PHANTOM PDF SUITE 2.0
User Manual
2. Click the Zoom Out button
or the Zoom In button on the Zoom
Toolbar or View > Zoom > Zoom Out or Zoom In on Menu Bar. Also, you may
select a magnification percentage from these two icons.
3. Select or input a magnification percentage in the Magnification Percentage
Area on the Status Bar.
4. Right-click the Document Pane > Zoom In or Zoom Out. Or you can select
Zoom To… > choose or input a magnification percentage > OK.
5. Using the Loupe Tool
Choose the Loupe Tool on the Toolbar or by clicking View > Zoom >
Loupe Tool.
Move the loupe tool to the places you want to view, you will see the
amplificatory or decreased objects in the Loupe Tool dialog box.
(Optional) Select the Lock option in the Loupe Tool dialog box. Click the
area of the document you want to view in closer detail. A red rectangle
appears in the document, corresponding to the area shown in the Loupe
Tool window. You can drag or resize the rectangle to change the Loupe tool
view.
To change the scale ratio of the Loupe Tool, you can either enter a value in
the zoom text box, or drag the slider in the Loupe Tool dialog box.
6. Using the Magnifier
You can easily magnify areas of the PDF files as you work on Foxit Phantom
with this free tool.
It is especially useful for visually impaired people with
some functional vision.
Magnifier Fisheye Magnifier
62
Page 63

FOXIT PHANTOM PDF SUITE 2.0
User Manual
Choose the Magnifier on the Toolbar or by clicking View > Zoom >
Magnifier.
Move the Magnifier to the places you want to view.
To switch between Magnifier and Fisheye Magnifier, press the left mouse
button.
To change the size of magnifier window, press the right mouse button.
To turn off the Magnifier, choose any other tools.
Resizing a page to fit the window
There are three types for you to choose:
To resize the page to fit entirely in the document pane, choose View >
Zoom > Fit Page, or click Fit Page button
Document Pane and choose Fit Page.
To resize the page to fit the width of the window, choose View > Zoom > Fit
Width, or click the Fit Width button
Document Pane and choose Fit Width. Part of the page may be out of view.
To resize the page to its actual size, choose View > Zoom > Actual Size, or
click the Actual Size button
and choose Actual Size.
Changing the page display
Changing page display is especially useful when you want to zoom out to get an
overview of the document layout. Foxit Phantom provides the following page
layouts:
Single Page – Displays one page in the document pane at a time.
Continuous – Arranges the pages in the document pane in a continuous
vertical column.
Facing – Arranges the pages side by side, displaying only two pages at a
time.
Continuous Facing – Arranges the pages side by side in a continuous vertical
column.
Show Cover Page During Facing
on Toolbar, or right-click the Document Pane
on Toolbar, or right-click the
on Toolbar, or right-click the
If a document has more than two pages, the first page can be displayed
63
Page 64

FOXIT PHANTOM PDF SUITE 2.0
User Manual
alone on the right side of the document pane in Facing and Continuous
Facing views.
To display the cover page as the first page on the right followed by two
facing pages, please choose the Facing or Continuous Facing mode, and
then select View > Page Layout > Show Cover Page During Facing.
To set page display, please do one of the following:
Choose View > Page Display, and choose one of the mode to your needs.
Reading a document in Full Screen mode
In Full Screen mode, Foxit Phantom Document Pane fills the entire screen, with
Menu Bar, Toolbar, Status bar, and Bookmarks pane hidden behind. The mouse
pointer remains active in Full Screen mode so that you can click links.
1. To set Full Screen preferences, please refer to “Setting full screen
preferences” .
2. To enter Full Screen mode, please do one of the following:
Choose View > Full Screen.
Click the Full Screen button
Press the shortcut key F11.
Right-click the Document Pane and select Full Screen.
3. To adjust the view in Full Screen mode, right-click the document and work
with the Context Menu.
Note: This feature will not be available unless you clear
one page; right click to go back one page
4. To exit Full Screen mode:
Press Esc key.
Click the Exit Full Screen button
on Toolbar.
Left click to go forward
check box in the Preference dialog.
on the screen.
Reading a document in Reverse View
To read documents in a backward order, please do one of the following:
Choose View > Reverse View.
64
Page 65

FOXIT PHANTOM PDF SUITE 2.0
User Manual
Right-click the Document Pane > select Reverse View.
Playing a Movie or a Sound Clip
PDF has extended itself to the richness of multimedia support and playing
capabilities. Some PDF files may be enriched with multimedia, including sound,
music and video clips. Each movie and sound file usually includes a play area
from which the media can be activated. The play area typically appears on the
PDF page as an image or a blank rectangle, but can also be invisible. To play the
media files, please make sure you have the necessary media player installed on
your computer.
To play a movie or a sound, please do the following:
Select the Hand tool , and click the play area of the movie or sound file.
When the pointer is positioned over the play area, it changes to the play
mode icon.
Note: To protect your computer from viruses, Foxit Phantom pops up a dialog
box soliciting your approval before playing multimedia files. To change the
default behavior, you can set other options in the pop-up dialog box.
In the Multimedia Content dialog box, select one of the options listed
below:
Play the multimedia this one time – plays the multimedia content. The
dialog box will keep popping up when you try to open this multimedia file.
65
Page 66

FOXIT PHANTOM PDF SUITE 2.0
User Manual
Play the multimedia content and add this document to my list of
trusted documents -- plays the multimedia content. It will be opened
automatically next time without asking you for permission.
Use current settings as default – applies this setting to all media contents
in this PDF file and save the current option setting as default.
Working with Layers
About PDF layers
A layer or as it is more formally known Optional Content Groups (OCG) is a
dictionary representing a collection of graphics that can be made visible or
invisible dynamically by users of viewer applications. In a PDF file, each layer
may hold any portion of the document's objects, and layers may be made visible
or invisible, showing or hiding their contained objects, in any combination.
With Foxit Phantom, you can control the display of PDF layers with the Layer
panel. For example, you may divide background imagery, main content areas,
and advertisements amongst their own top-level layers, and easily hide the
layers that you don't want others to view.
Showing or hiding PDF layers
In a PDF, information can be stored on different layers. To show or hide related
content stored in a variable number of separate layers, you can simply refer to
the Layer panel on the left side of the work area. Please note that you cannot
create or edit layers in Foxit Phantom; however, you can view layers and choose
to show or hide the content associated with each layer.
A
B
Layer Panel
A. A checkmark indicates a displayed layer B. Hidden layer
66
Page 67

FOXIT PHANTOM PDF SUITE 2.0
User Manual
1. Open the Layer panel, and then do one of the following:
To hide a layer, uncheck the layer.
To show a hidden layer, click the empty box and a checkmark will appear.
2. From the Option menu at the top right corner of the Layer panel, choose one
of the following:
List Layers for All Pages - Shows every layer across every page of the
document.
List Layers for Visible Pages - Shows layers only on the currently visible
pages.
Reset to Initial Visibility - Resets layers to their default state.
Expand All – Expands all layers.
Collapse All - Collapses all of the currently layers in the view.
Finding Text
Foxit Phantom provides handy tools to find text. You can search text in a PDF,
and also in certain files or disks. Also, you can limit your search by choosing the
options offered on the Find Text dialog box to find specific items.
Finding text
To find text you are looking for, follow the steps below:
Choose Tools > Find Text… or
Type the text in the Find What field.
Click the drop-down button next to Find
options to limit your search:
A. Whole words only -- limits the search to match only whole words. For
example, if you search for the word Read, the word Reader will not be
found.
B. Case-Sensitive -- makes the search case-sensitive. For example, if you
search for the word text, the words Text and TEXT will not be found.
Press the Find Next button, Find Previous button, or Enter.
Foxit Phantom jumps to the first instance of the search term, which appears
highlighted.
Press Enter repeatedly or Tools > Find Next, or Find Next shortcut key F3 to
continue searching the next instances of the search term.
, and select the search
Doing advanced search
67
Page 68

FOXIT PHANTOM PDF SUITE 2.0
User Manual
The search function enables you to search a string either in a single PDF file or
in multiple PDF files under a specified folder. When the search finishes, all
occurrences will be listed in a tree view, allowing you to quickly preview the
contexts and jump to specific locations.
1. Searching text
To search text you are looking for, follow the steps below:
Click the Search button
on toolbar, or select Open Full Foxit Search from
the Find drop-down menu.
In the Search window, type the text you want to search for, and do any of
the following:
A. To search the text in the current PDF document, select In the current
PDF document.
B. To search the text in all PDF documents in specific files or disk, select All
PDF Documents in > choose one of the disks or User-selected search
paths.
C. To limit the search to match only whole words, check whole words only.
For example, if you search for the word Read, the word Reader will not
be found.
D. To make the search case-sensitive, check Case-Sensitive. For example,
if you search for the word text, the words Text and TEXT will not be
found.
Click Search button.
The results appear in the page order. Each item listed includes a few words
of context and an icon that indicates the type of occurrence. If necessary,
click the plus sign (+) to expand the search results. Then select an instance
in the results to view that instance in the PDF.
(Optional) Click the New Search button to start a new search task.
2. Moving and resizing search box
The advanced search box can float or be docked. You can also resize the box
with ease.
To float the docked search box, please double-click the title bar or drag it by
its title bar to another location in the work area.
To move the floating search box, drag it by its title bar to another location in
the work area.
68
Page 69

FOXIT PHANTOM PDF SUITE 2.0
User Manual
To resize the search box, drag any corner point to adjust.
To dock the floating search box, double-click the title bar or drag it by the
title bar to its original location.
Working with Asian Languages in PDFs
If you are working PDF files that contain Eastern Asian Languages such as
Traditional and simplified Chinese, Japanese, and Korean, you can open them
with Foxit Phantom directly. The Eastern Asian Language add-on has been
integrated into Foxit Phantom package, so you won’t be prompted to download
and install the required language font kits. Foxit Phantom lets you view, search,
and print PDF documents with Asian language text.
Asian Languages
Note: To update the Eastern Asian Language font kits, users still have to go to
Help > Check for Updates Now to download and install the updated version.
E-mailing Documents
E-mailing documents is a useful feature. You may need to send a PDF file you
are reading to the customers to speed up your daily work, or an interesting
story that you want to share with your friends.
To e-mail a PDF file, please do the following:
Choose File > Email… or click the Email button on the Toolbar.
System default e-mail application runs.
The PDF will be attached in the e-mail automatically.
Type the subject and e-mail address, and click Send.
Comparing Documents
The Document Compare feature lets you see the difference in two versions of a
PDF, as well as select the type of differences you’re looking for to verify that the
appropriate changes have been made. The Document Compare feature does
not compare comments in the PDF.
69
Page 70

FOXIT PHANTOM PDF SUITE 2.0
User Manual
Comparing a revised PDF to an earlier version
Choose File > Compare PDF Files.
Specify the two documents to be compared. If necessary, click Choose,
select the file, and then click Open.
Under Type of Comparison, select one of the following:
Page by page visual differences – Finds any textual or graphic
differences between the documents.
Textual difference – Shows which text has been inserted, deleted, or
moved.
Include font information – Compares formatting.
Under Compare Range, select one of the following:
All – Select all pages from the newer/older document to compare.
Pages - Select equal page numbers from the newer and older document for
comparison.
Click OK.
Saving Documents
Foxit Phantom provides you with the power to do more when saving PDF
documents. You can save a PDF document without additional usage rights in
many different ways. If the file permissions allow, you can also save comments,
form fields that you have added to a document, as well as save PDF contents in
text format.
Saving a copy of a PDF
Choose File > Save As…
In the Save As dialog box, enter the filename and location, and click Save.
Saving comments and form field entries
Do one of the following:
Choose File > Save
Choose File > Save As… > enter the filename and location > Choose
Document and Annotations in Save What field > click Save.
Saving a PDF as a text file
Choose File > Save As…
70
Page 71

FOXIT PHANTOM PDF SUITE 2.0
User Manual
Choose TXT Files (*.txt) from the Files of Type Option in the Save As dialog
box.
Choose the content range:
A. Save whole document – save the whole document as a text file.
B. Save current page – only save the current page you are reading as a text
file.
C. Save page in range – enables you to select pages as a text file.
Enter the filename and location, and click Save.
Saving a PDF as other file types
Choose File > Save As…
Choose All Files (*.*) from the Files of Type Option in the Save As dialog box.
Select to save Document and Annotations or Document without changes in
Save What field.
Enter the filename and location, and click Save.
Note: This function allows PDF documents to appear, for confidential purposes;
in different file types as if they were created on a different platform other than
PDF.
Closing Documents
To close a PDF document, please do one of the following:
Choose File > Close.
Press shortcut key Ctrl + W.
Exiting Foxit Phantom
To exit Foxit Phantom, please do one of the following:
Choose File > Exit.
Click the big Close button
Press shortcut key Ctrl + Q.
(Optional) Right-click Foxit Phantom icon in the system tray and select Exit.
on Foxit Phantom application window.
71
Page 72

FOXIT PHANTOM PDF SUITE 2.0
User Manual
Chapter 7 – Working on PDFs
With Foxit Phantom, you can copy text and images to other applications, and
view PDF contents in a text mode. To learn more about this, please read the
following explanations.
Copying Text
The Select Text tool lets you select horizontal and vertical text or columns of
text in a PDF. To copy text, click Select Text Tool on Toolbar or choose
Tool > Select Text on Menu Bar and do the following:
Selecting text
Select a line of text: Move the cursor toward a line of text you want to
select.
Select a column of text: Put the cursor between the lines, move toward a
column of text and draw a rectangle over it.
Select a word: Double-click the word you want to select.
Select multiple paragraphs through pages: Click at the start of the selection,
scroll to the end of the selection without releasing your mouse.
Select all the text: Press Ctrl + A, or select some text, right-click it and then
choose Select All.
Deselect all the text: Right-click the selected text, and choose Deselect All.
Copying text
Once you have selected the text, do one of the following:
Right-click the selected text > choose Copy.
Press shortcut key Ctrl + C.
Pasting text
To paste the selected text on Clipboard to another application, please follow the
paste command of the specific application.
72
Page 73

FOXIT PHANTOM PDF SUITE 2.0
User Manual
Copying Images
You can copy and paste individual images from a PDF to the clipboard, to other
applications, or to other files.
Taking a snapshot of an image
To copy an image, please switch to the Snapshot tool :
Choose Tools > Snapshot or click the snapshot tool on Basic Toolbar,
and the pointer changes into a Cross automatically.
Hold the pointer over the image and drag a rectangle around it.
You will be prompted that the selected area has been copied to the
clipboard.
(Optional) Right-click the selected area, and then choose Copy Select
Graphic.
Paste the selected image to other applications.
Taking a snapshot of a page
You can use the snapshot tool
to copy the entire page. Both text and
images will be copied as an image.
Select the Snapshot tool by choosing Tools > Snapshot or click the snapshot
tool on Basic Toolbar.
Drag on the page to select content, click anywhere in the page, or right-click
anywhere in the page and choose “Select All” to copy the entire page.
To deselect it, please right-click anywhere in the page and choose “Deselect All”.
You will be prompted that the selected area has been copied to the
clipboard.
(Optional) Right-click the selected area, and then choose Copy Select
Graphic.
Paste the selected image to other applications.
Note: The selected area will be highlighted in blue.
73
Page 74

FOXIT PHANTOM PDF SUITE 2.0
User Manual
Copying a Combination of Text and Images as an
Image
You can use the snapshot tool to copy the all selected content (text, images, or
both) to the clipboard or other applications. Text and images will be copied as
an image.
To copy a combination of text and images as an image, do the following:
Select the Snapshot tool by choosing Tools > Snapshot or click the snapshot
tool on Basic Toolbar.
Drag a rectangle around the text and images.
You will be prompted that the selected area has been copied to the
clipboard.
(Optional) Right-click the selected area, and then choose Copy Select
Graphic.
Paste the selected image to other applications.
Using Rulers & Guides
Foxit Phantom provides horizontal and vertical ruler guides to help you align and
position text, graphics or other objects on the page. They can also be used to
check their size and the margins in your documents.
A
B
Rulers & Guides
A. Rulers B. Guides
74
Page 75

FOXIT PHANTOM PDF SUITE 2.0
User Manual
Showing or hiding rulers
To show rulers, please choose View > Rulers.
To hide rulers, please choose View > Rulers, or right-click the horizontal
ruler or the vertical ruler and then choose Hide Rulers.
Creating ruler guides
Do one of the following:
Drag down from the horizontal ruler to create a horizontal guide, or drag to
the right of the vertical ruler to create a vertical guide.
Double-click a location on the horizontal ruler to create a vertical guide, or
double-click a location on the vertical ruler to create a horizontal guide.
Moving ruler guides
Select the Hand tool, click and hold the guide, and then drag it to a new location.
Changing unit of measurement
Right-click the horizontal ruler or the vertical ruler, and select a measurement
system for the rulers.
Deleting ruler guides
To delete a guide, click the guide to select it, and then press the Delete key.
To delete all guides on a certain page, scroll to the page, right-click in the
ruler area and choose Clear Guides on Page.
To delete all guides, right-click in the ruler area and choose Clear All Guides.
Measuring the Objects
The Measure Tools enable you to measure distances and areas of objects in PDF
documents. The measure tools are especially useful when you need to know the
distances or areas associated with objects in a form or computer-aided design
(CAD) drawing or when you want to measure certain areas of a document
before sending to a professional printer. The measure tools are available to
75
Page 76

FOXIT PHANTOM PDF SUITE 2.0
User Manual
Reader users only if the PDFs are measurable.
When you use a measure tool, the tool dialog box displays the measurements of
the line segments you draw.
Measuring the objects
Choose Tools > Measure Tools > [measure tool name], or click the measure
tools on toolbar, and do any of the following:
Select the Distance Tool
Click the first point, move the pointer to the second point, and click again.
The measurements will appear on the page.
Select the Perimeter Tool to measure a set of distance between multiple
points. Click the first point to start, and then click each point you want to
measure. Double-click the last point to end measuring.
Select the Area Tool
you draw. Click the first point to start, and then click each point you want to
measure. After you have clicked at least two points, click the first point or
double-click the last point to complete the area measurement.
Note: You can also choose to complete or cancel measurement by right-clicking
and choosing options from the context menu.
After selecting the measuring tool, do any of the following in the pop-up dialog
box:
to measure the distance between two points.
to measure the area within the line segments that
To change the scaling ratio (such as 1:2) on the drawing areas, specify the
appropriate numbers in the tool dialog box. If necessary, change the unit of
measurement next to this ratio.
Check Measurement Markup in the tool dialog box if you want the lines you
draw to appear as a comment. You can put the pointer over the
measurement with the Hand tool selected so that you can view the
measurement and annotation you have drawn.
Note: The object you draw will disappear when the Measurement Markup is
deselected in the tool dialog box.
76
Page 77

Take a look at the following example:
1 inch =
2 inch
FOXIT PHANTOM PDF SUITE 2.0
User Manual
A. Select Distance Tool, and
set the scale ratio as 1 inch
= 2 inch in the pop-up
Distance Tool dialog box.
B. After you have completed
the measurement, the
object with distance and
the annotation appears in
the page.
77
Page 78

FOXIT PHANTOM PDF SUITE 2.0
1 inch
1 inch
=1 inch
User Manual
C. You will see the actual
distance between these
two points is 1 inch. But
with the scale ratio (1 inch
= 2 inch), the distance
displaying on the screen is
shown as 2 inch.
Working on the measurement object
After you complete the measurement, you are able to do further operations on
it, such as move, resize, flip, and even work on it the way you work on
comments.
Moving the measurement object
With the Hand Tool or Annotation Selection Tool selected, click the
measurement object you want to move.
Place the cursor over the object when the pointer changes into , hold and
drag the mouse to move it to the intended place.
Changing the length and orientation of the line segment
With the Hand Tool
or Annotation Selection Tool selected, select one
of the resize corners , you will see the pointer change into .
Hold and drag the mouse to change the length and orientation of the line
segment.
Flipping the measurement and annotation
You can reverse measurement and annotation of the object you draw.
78
Page 79

FOXIT PHANTOM PDF SUITE 2.0
User Manual
Before flipping After flipping
To flip the measurement and annotation of the object, do the following:
Select the Hand Tool
Right-click the object you draw > select Flip.
Working on measurement objects as comments
The measurement objects can also be used as comments, as a result of which,
you cannot only set status, open popup note, delete, reply to the objects, but
you can also set properties, and set current properties as default for them.
For the information of how to work on the objects as comments, please refer to
the corresponding section of “Chapter 8 – Comments”.
or Annotation Selection Tool .
Switching Between Basic Tools
The Foxit Phantom Basic Toolbar consists of the Search Tool, Hand Tool, Select
Text Tool, Snapshot Tool, Annotation Selection Tool, and Text Viewer. You can
switch between these basic modes by choosing commands on the Menu Bar or
clicking the individual icons on Toolbar. Only one mode can be chosen each time,
and they cannot be obtained simultaneously.
Using Foxit Text Viewer
With Foxit Text Viewer, you can work on all PDF documents in pure text view
mode. It allows you to easily reuse the texts scattered among images and tables,
and acts like Notepad. Also, you can adjust some settings to meet your needs.
Entering Text View mode
Do one of the following:
79
Page 80

FOXIT PHANTOM PDF SUITE 2.0
User Manual
Choose View > Text Viewer.
Click the Text Viewer icon on the Basic Toolbar
Press the shortcut key Alt + 9.
Customizing Text Viewer
As soon as Text Viewer is activated, you can use the Font Setting Tools to
customize your own work area. Right click the text area to select Font Setting.
1. To show or hide the Font Setting Tools, please do one of the following:
Choose View > Toolbars > check or uncheck Text Viewer. A check mark
indicates that Text Viewer is displayed.
Right-click the text area > check or uncheck Text Viewer.
2. Changing text font when reading with Text Viewer
Choose Font Setting > Font….
Choose Font name, Font Style, Font Size, Effects, Color and Script from
respective fields in Font dialog box. The suggested font for best screen
display is Courier New.
Note: You can change all aspects pertaining to text view font in the Font dialog
box, or you can also use individual buttons on the Text Viewer Toolbar to change
80
Page 81

FOXIT PHANTOM PDF SUITE 2.0
User Manual
font color and toggle between regular style and Bold or Italic styles.
3. Toggling between regular style and Bold style, choose Font Setting > Bold.
4. Toggling between regular style and Italic style, choose Font Setting > Italic..
5. Changing the text color
Choose Font Setting > Color…
Text Viewer Colors dialog box pops up.
Drag respective sliders or type the value to change the Foreground (Font)
Color and Background (page) Color. You can preview the changes in the box
with a word “Sample”.
Click OK to complete the procedure, or click Cancel to abandon the changes.
6. Changing Text Viewer settings
Right click the text area > select Setting…
The text Viewer Settings dialog box pops up.
81
Page 82

FOXIT PHANTOM PDF SUITE 2.0
User Manual
Below are the text viewer settings:
A. Set page width at three different levels: Current page width, Current
document width and System default width.
B. Minimal width – the valid value for this field is 0-1024. It is set to 78 by
default.
C. Keep Column – for PDF tables or text columns, you can check Keep
Column to retain appropriate column in text viewer mode. It is
checked by default.
D. Auto Width – for PDF tables or text columns, you can check Auto Width
to keep proper width between text automatically. It is checked by
default.
E. Auto Rotate – you can check Auto Rotate to ensure consistent
orientation with that of the printer. It is checked by default.
Navigating in text viewer mode
1. Going to the next or previous page
Do one of the following:
Choose View > Go To > Previous Page or Next Page on Menu Bar.
Click the Previous Page icon
Status Bar.
Put the cursor in the Document Pane, press the Left or Right Arrow on
or Next Page icon on the Toolbar or
82
Page 83

FOXIT PHANTOM PDF SUITE 2.0
User Manual
keyboard to move the pages up or down.
Press the Space Bar or Shift + Space to move the pages up or down.
2. Going to the first or last page
Do one of the following:
Choose View > Go To > First Page or Last Page on Menu Bar.
Click the First Page icon or the Last Page icon on the Toolbar or
Status Bar.
Press the Home or End keys.
3. Going to a specific page
Do one of the following:
Choose View > Go To > Pages… > input the specific page number > OK.
Input or select the specific page number on the Current Page Number Box
on Status Bar, and press Enter.
Changing the magnification level of a document
Do one of the following procedures:
1. Click the Zoom Out button
Toolbar. Also, you may select a magnification percentage from these two
icons.
2. Choose View > Zoom > Zoom In or Zoom Out. Or you can select Zoom
To… > choose or input a magnification percentage > OK.
Finding text in Text Viewer mode
or the Zoom In button on the Zoom
To find text you are looking for, follow the steps below:
Press Ctrl + F.
Type the text in the Find What field.
Select the search options to limit your search:
A. Match whole word only -- limits the search to match only whole words.
For example, if you search for the word Read, the word Reader will not
be found.
B. Match case -- makes the search case-sensitive. For example, if you
83
Page 84

FOXIT PHANTOM PDF SUITE 2.0
User Manual
search for the word text, the words Text and TEXT will not be found.
C. Direction Up or Down -- sets the search order from the beginning to the
end or from the end to beginning.
Press the Find Next button or Enter.
Foxit Phantom jumps to the first instance of the search term, which appears
highlighted.
Press Enter repeatedly or Tools > Find Next, or Find Next shortcut key F3 to
continue searching the next instances of the search term.
Note: The Find field
To read text in Full Screen mode
1. To set Full Screen preferences, please refer to “Setting full screen
preferences” .
2. To enter Full Screen mode, please do one of the following:
Choose View > Full Screen.
Click the Full Screen button
3. To exit Full Screen mode:
Press Esc key or
Click the Exit Full Screen button
is unavailable in Text Viewer mode.
on Toolbar.
on the screen.
Copying text in Text Viewer mode
1. Select text
Select a word: Double-click the word you want to select.
Select a line of text: Move the cursor toward a line of text you want to select.
Select all the text: Press Ctrl + A or right-click the Document Pane > choose
Select All.
Copying text
Do one of the following:
Right-click the selected text > choose Copy.
84
Page 85

FOXIT PHANTOM PDF SUITE 2.0
User Manual
Press shortcut key Ctrl + C.
Pasting text
To paste the selected text on Clipboard to another application, please follow the
paste command of the specific application.
85
Page 86

FOXIT PHANTOM PDF SUITE 2.0
User Manual
Chapter 8 – Comments
A comment is a written note intended as an explanation, an illustration, or a
statement of fact or opinion, especially a remark that expresses a personal
reaction or attitude. You can type a text message or add a line, circle, or other
shape to make comments on PDFs you are reading with Foxit Phantom
commenting tools. Most types of comments contain a pop-up window displaying
your name; date and time you created the comments, and a text message. You
can also edit, reply, delete, and move the comments with ease. This function is
quite helpful to your studies and work if you have to make some notes on PDF
documents.
About the Commenting Tools
Annotation tools make adding annotations on PDFs possible. There are various
annotation tools with different functions for you to choose: Typewriter Tools,
Drawing Markup Tools, Measure Tools, Stamp Tools, and Commenting Tools.
These tools that are used to add or create comments to PDF documents are
placed on the Commenting, Drawing and Markup toolbars. You can also find
these tools on the Menu Bar.
Types of comments in a PDF
Text Markup
Drawing Markup
Note
86
Page 87

FOXIT PHANTOM PDF SUITE 2.0
User Manual
Showing or Hiding the Commenting Toolbar
The Commenting toolbar appears by default. To show or hide some certain tools
according to your preferences, please refer to “Showing or hiding toolbar”
.
Selecting Tools to Add Comments
Do one of the following:
Select a type of tool from the Commenting Toolbar.
Select Comments > Note Tool or Drawing Markup Tools from the menu
bar > select a type of tool you want to use.
Using Note Comments
The most common type of comments is the note comments. A note comment
has a note icon that appears on the page and a pop-up note for text message.
The message box could be resized and will wrap when you enter much more text.
Read below to learn how to add a note comment anywhere on the page or in the
document.
Note icon
Close button
Text message
Resize corner
To add a note comment
Click the Note Tool on the toolbar or choose Comments > Note Tools on
Menu Bar.
Click where you want to place the note, or drag to create a custom-sized
87
Page 88

FOXIT PHANTOM PDF SUITE 2.0
User Manual
note.
Type text in the pop-up note. You can also use the Select Text tool to
copy and paste text from a PDF into the note, or copy the note with Ctrl + C
to other applications.
Editing a note comment
Click the text message.
Make changes as needed.
Drag its lower right corner to resize the pop-up note.
Click and drag the title of the pop-up note to move its position.
When you are finished, click the title of the pop-up note, or click outside the
pop-up note.
(Optional) Do one of the following to close the pop-up note.
A. Click the close button in the pop-up note.
B. Double-click the markup.
C. Right-click the markup, and choose Close Popup Note.
D. Choose Close Popup Note from the Options menu of the pop-up note.
Deleting a note comment
Choose the Note Tool
Do one of the following:
A. Click the note icon, and press the Delete key.
B. Right-click the note icon, and choose Delete from the pop-up context
menu.
C. Choose Delete from the Options menu of the pop-up note.
, Hand Tool or Annotation Selection Tool .
Using the Text Markup Tools
You can use Text Markup tools to indicate where text should be edited or noticed.
Text Markups do not change the actual text in the PDF. Instead, they indicate
which text should be deleted, inserted, highlighted or underlined. Text Markup
tools include Highlight Tool, Underline Tool, Strikeout Tool, Squiggly Tool,
Replace Tool, and Insert Tool.
Text Markup Tools
Button Tool Description
88
Page 89

FOXIT PHANTOM PDF SUITE 2.0
User Manual
Name
Highlight
Using highlight, underline, strikeout, squiggly, replace and insert tool
Tool
Underline
Tool
Strikeout
Tool
Squiggly
Tool
Replace
Tool
Insert Tool
To mark important passages of text with a fluorescent
(usually) marker as a means of memory retention or for
later reference.
To draw a line under to indicate emphasis.
To draw a line to cross out text, making others know the
text is deleted.
To draw a squiggly line under. Similar to Underline Tool.
To draw a line to cross out text and provide a substitute
for it.
A proofreading symbol (^) used to indicate where
something is to be inserted in a line.
1. Highlighting, underlining, strikeouting, squiggling, replacing or inserting text
Choose Comments > select the Highlight, Underline, Strikeout, Squiggly,
Replace or Insert Text Tool. Or click the respective button on toolbar.
Click and drag from the beginning of the text you want to mark up.
2. Adding text message to highlight, underline, strikeout, or squiggly markups
Select the Hand Tool
corresponding Text Markup Tool > right-click the markup > choose Open
Popup Note.
Type text in the pop-up note. You can also use the Select Text tool to
copy and paste text from a PDF into the note, or copy the note with Ctrl +
C to other applications.
(Optional) Do one of the following to close the pop-up note. A note icon
appears to the right of the markup to indicate the presence of text in the
pop-up note.
A. Click the close button in the pop-up note.
B. Double-click the markup.
C. Right-click the markup, and choose Close Popup Note.
D. Choose Close Popup Note from the Options menu of the pop-up note.
, Annotation Selection Tool or the
3. Deleting a highlight, underline, strikeout, squiggly or replaced markup
Do one of the following:
89
Page 90

FOXIT PHANTOM PDF SUITE 2.0
User Manual
Select the Hand Tool , Annotation Selection Tool or the
corresponding Text Markup Tool > click the markup > press Delete key.
Select the Hand Tool
corresponding Text Markup Tool > right-click the markup > choose Delete
from the pop-up Context Menu.
Choose Delete from the Options menu of the pop-up note.
Using the Insert Text Tool
1. Indicating where to insert
Click the Insert Text Tool
Insert Text Tool.
Click the text where you want to insert this markup.
Type text in the pop-up note to indicate the text you want to insert.
(Optional) Do one of the following to close the pop-up note.
A. Click the close button in the pop-up note.
B. Double-click the markup.
C. Right-click the markup, and choose Close Popup Note.
D. Choose Close Popup Note from the Options menu of the pop-up note.
, Annotation Selection Tool or the
on the toolbar, or choose Comments >
2. Deleting the inserted markup
Do one of the following:
Select the Insert Text Tool
Tool > click the caret markup > press the Delete key.
Select the Insert Text Tool , Hand Tool or the Annotation Selection
Tool
Context Menu.
Choose Delete from the Options menu of the pop-up note.
> right-click the caret markup > choose Delete from the pop-up
, Hand Tool or the Annotation Selection
Using the Select Text Tool
Select Text Tool enables you to add most types of text edits, including highlight,
90
Page 91

FOXIT PHANTOM PDF SUITE 2.0
User Manual
strikeout, underline, squiggly and replacement. It has integrated the select text
function with Text Markup Tools. When you select text with the Select Text Tool,
a menu of text editing options will appear on the right click context menu. Also,
you can also use the Select Text Tool to add bookmarks for PDF files.
Marking up text with edits
Choose Tools > Select Text, or click the Select Text Tool on the toolbar.
Select the text you want to mark up > right-click the selected text, and then
refer to “Using the Text Markup Tools”.
Using the Drawing Markup Tools
Drawing Markup tools help you to make annotations with drawings, shapes, and
text messages. You can use the Drawing Markup tools to mark up a document
with arrows, lines, squares, rectangles, circles, ellipses, polygons, polygon lines,
clouds, etc. Drawing Markup tools provide another kind of comment. It is quite
useful when you have to make some shapes to mark the text or image. The
table below describes exactly what Drawing Markup tools do.
Drawing Markup Tools
Button Tool Name Description
Cloudy Tool To draw cloudy shapes.
Arrow Tool
Line Tool To mark with a line.
Rectangle
Tool
Oval Tool
Polygon
Tool
PolyLine
Tool
To draw something, such as a directional symbol, that
is similar to an arrow in form or function.
To draw a four-sided plane figure with four right angles.
Press Shift key to draw a square.
To draw an oval shape or a circle with pressing Shift
key.
To draw a closed plane figure bounded by three or
more line segments.
To draw an open plan figure with three or more line
segments.
Pencil Tool To draw free-form shapes.
Rubber Tool
Adding drawing markup
An implement, acts as a piece of rubber, used for
erasing the pencil markups.
91
Page 92

FOXIT PHANTOM PDF SUITE 2.0
User Manual
Consider the effect you want before selecting a drawing tool.
Choose Comments > Drawing Markup Tools, and select a drawing tool, or
click a drawing tool button on the toolbar.
To draw a line, arrow, drag across the area where you want the markup to
appear.
To draw a rectangle, or ellipse, drag across the area where you want the
markup to appear.
To create a polygon, polygon line, or cloud shape, click to create the start
point, move the pointer, and click to create each segment. To finish drawing
the shape, click the start point or double-click to end it. For polygon line,
you can end the drawing only by double-clicking.
To draw free-form lines using the Pencil Tool
make any shapes you want. You can release the mouse button, move the
pointer to a new location, and continue the drawing.
To erase parts of the pencil drawings, select the Pencil Rubber Tool ,
click the pencil drawings, and click them again when an eraser appears on
the drawings.
Note: If you draw a cloud shape in a counterclockwise direction, the cloud
comes out inward . If you draw the lines forming the shape in a clockwise
direction, the cloud is created with the points outward .
Tips:
To draw a line that is horizontal, vertical, or at a 45 degree angle, press Shift
while you draw.
To draw a square or circle with Ellipse Tool or Rectangle Tool, press Shift
while you draw.
, drag across the area to
Editing, resizing or moving the markup
Select the Hand Tool , Annotation Selection Tool or the corresponding
Drawing Markup Tool.
To edit or resize the drawing markup, select it, put the cursor on one of the
green points, and drag one of the handles to make your adjustments.
To move the drawing markup, select it and put the cursor on one of the
segments to drag.
To add a pop-up note to the markup, select it and double-click the markup
or right-click it and choose Open Popup Note.
92
Page 93

Deleting the markup
Do one of the following:
FOXIT PHANTOM PDF SUITE 2.0
User Manual
Select the Hand Tool
Drawing Markup Tool > press the Delete key.
Select the Hand Tool , Annotation Selection Tool or the corresponding
Drawing Markup Tool > right-click the drawing markup > choose Delete
from the Context Menu.
Choose Delete from the Options menu of the pop-up note.
Grouping the markups
Grouping drawing markups enables you to combine them so that you can work
with them as though they were a single object. You can move or delete the
group, set its status, change its appearance, etc.
Select the Hand Tool
following:
, Annotation Selection Tool or the corresponding
or Annotation Selection Tool , and do one of the
To group the markups, select the markups you want to group by pressing
Ctrl > right-click on one of the selected markups, and choose Group.
To work with a group, select one of the markups and then work with the
group as other comments.
To ungroup the markups, select the group > right-click on it, and choose
Ungroup.
Using the Typewriter Tools
The Typewriter Tools include Typewriter Tool, Callout Tool, and Textbox Tool.
Using the Typewriter Tool
Typewriter Tool acts as a machine to produce text on PDFs as a result of a user
manually pressing keys consecutively on a keyboard. You can use the
Typewriter Tool to add comments anywhere on a PDF, which doesn’t appear as
annotations.
93
Page 94

FOXIT PHANTOM PDF SUITE 2.0
User Manual
Note: The Typewriter Tool can be used to fill forms.
See also
“Filling non-interactive forms”.
Typewriter comment
Adding comments with typewriter
Choose Comments > Typewriter Tools > Typewriter Tool, or click the
Typewriter Tool
Put the pointer on the area to type any text you want.
Press Enter if you want to start a new line.
To finish typing, click anywhere outside the text you have inputted.
Editing the typewriter comment
Choose Comments > Typewriter Tools > Typewriter, or click the Typewriter
Tool
Put the pointer between the letters to activate the typewriter text field.
Do any changes to the text you have inputted. Use Backspace or Delete
keys to delete the characters before or after the pointer.
To finish editing, click anywhere outside the text field.
Tips: You can use the Arrow Keys to move the pointer right and left or up and
down.
on the toolbar.
on toolbar. The Typewriter Toolbar appears.
Using the Spell Checker
You are able to use the Spell Checker if the security settings allow. The Spell
Checker component has been integrated into Foxit Phantom; you don’t need to
install it during the first installation of Foxit Phantom. However in the future
when an update of this component is available on the Foxit server, you have to
manually download the component by going to Check for Updates in the Help
menu of Foxit Phantom.
94
Page 95

FOXIT PHANTOM PDF SUITE 2.0
User Manual
To download this component from the Foxit Website, see also “Spell Checker” .
If you have installed Spell Checker, when you use typewriter to insert any
English text, this tool will try to find any spelling errors and highlight them with
squiggly lines.
Right click on the misspelled words, and you will see a list of suggested
words.
Choose one of the suggested words to correct your input or ignore the
squiggly line.
Moving the typewriter comment
Do one of the following:
Choose Comments > Typewriter Tools > Typewriter, or click the Typewriter
Tool
A. Put the pointer between the letters to activate the typewriter text field.
B. Move the pointer to the leftmost or rightmost side of the text field.
C. When the cursor turns to be a squad arrow (need update symbol),
Tips:
You can use Home, End or Arrow Key to move the cursor among
When moving the typewriter comment, a rectangle appears.
Select Hand Tool
comment, and move it to the intended place.
Deleting the typewriter comment
on the toolbar, and follow the steps below:
hold down the mouse and drag the typewriter comment to the intended
place.
characters.
or Annotation Selection Tool , click the typewriter
Do one of the following:
Choose Comments > Typewriter Tools > Typewriter, or click the Typewriter
Tool on toolbar. Position the cursor to the ending or beginning of the
text, drag the cursor to select them all, and press the Delete key.
95
Page 96

FOXIT PHANTOM PDF SUITE 2.0
User Manual
(Recommended method) Click the Annotation Selection Tool or Hand Tool
, right-click the text field, and choose Delete.
Note: You can also add a pop-up note to the Typewriter Comment with the
following steps:
Select the Annotation Selection Tool or Hand Tool .
Right-click the typewriter comment.
Select Open Popup Note, and add any text message.
To close the Popup Note, click the Close button at the top right corner of
the message box, or right-click the typewriter comment and choose
Close Popup Note, or Choose Delete from the Options menu of the
pop-up note.
Setting typewriter preferences
To set the typewriter preferences, please refer to the Format Tools. To show the
Format Tools, you can go to View > Toolbars > Format Tools.
1. Modifying current font style, size and color of the typewriter
To modify font style, drop down the Font list box, and select the font you
want.
To modify font size, drop down the Font Size list box on the Typewriter
toolbar, and select an ideal size for your text.
To change the color of the current typewriter font, click the Color button
on the Typewriter toolbar, and select a kind of color you want to apply
to.
To set the border color or the fill color for the text in callout and text box,
please click on the Border Color button or the Fill Color button
on the Format Toolbar and change the colors.
To apply the bold formatting to the current typewriter font, click the Bold
button
on the Typewriter toolbar.
96
Page 97

FOXIT PHANTOM PDF SUITE 2.0
User Manual
To apply the Italic formatting to the current typewriter font, click the Italic
button on the Typewriter toolbar.
2. Aligning text
You can set the alignment of any inputted text using the text-align buttons.
These buttons can be used to set the alignment for text in multiple lines.
To align text to the left, click the Align Left button on the Typewriter
toolbar.
To center text, click the Center button on the Typewriter toolbar.
To align text to the right, click the Align Right button on the
Typewriter toolbar.
3. Changing current character space and scaling
To change the character space of the current typewriter text, click the
Character Spacing button
Spacing dialog box appears.
To change character space, enter the intended value in the Point box, and
click Ok to change.
Note: The Expanded radio button is chosen by default, which can’t be
unchecked. And the value inputted should be >= 0.
To change horizontally the font scale of the current typewriter text, click
the Character Scaling button
percentage from the drop-down menu, or click More options to manually
enter a customized percentage.
To set the line leading of the current typewriter text, click the Line Leading
on the Typewriter toolbar. The Character
on the Typewriter toolbar, select a
button
the line leading of the selected typewriter text to the original condition by
resetting the current value to zero.
on the Typewriter toolbar to set a current value. Restore
Adding comments in a textbox or callout
97
Page 98

FOXIT PHANTOM PDF SUITE 2.0
User Manual
Callout Tool and Textbox Tool are designed for users to create comments in a
callout text box or a box.
Callout text boxes are especially useful when you want to single out (but not
obscure) a particular area of a document. Callout text boxes include three parts:
a text box, a keen line, and an end-point line.
A textbox is a rectangle of any size, possibly with a border that separates the
text box from the rest of the interface, allowing the user to input text
information. A text box usually remains visible on the document page. It doesn’t
close like a pop-up note.
Note: You can add comments to Japanese, Chinese, and Korean text with the
Callout Tool or Textbox Tool, but you must have the Eastern Asian Language
module installed. Callout text boxes and Text boxes allow for horizontal text
only.
Adding a callout or textbox
Choose Comments > Typewriter Tools > Callout/Textbox, or click the
Callout Tool or Textbox Tool on the toolbar.
Click the place where you want to insert the callout or text box.
Type the text. Text wraps automatically when it reaches the right edge of
the box.
98
Page 99

FOXIT PHANTOM PDF SUITE 2.0
User Manual
Resizing, moving, editing or deleting a callout or textbox
Select the Hand Tool or Annotation Selection Tool , and do one of the
following:
To resize the callout or textbox, select it and drag any of the handles to
resize it.
To move the callout or textbox, select it and drag to the intended place.
To add a pop-up note to the callout or textbox, double-click it or right-click
it and choose Open Popup Note.
To delete the callout or textbox, select it and press Delete, or right-click it
and then choose Delete or Choose Delete from the Options menu of the
pop-up note.
Setting callout or textbox preferences
Please refer to “Setting typewriter preferences
”.
Changing the Appearance of Markups
You can change the color and appearances of comments or markups before or
after you create them. Also, you can set the new look as the default appearance
for that tool.
Changing the appearance of Note Comments
1. After you create a note comment, right-click the note icon and choose Open
Properties…, or choose Open Properties from the Options Menu of the popup
note to display the Note Properties dialog box.
99
Page 100

FOXIT PHANTOM PDF SUITE 2.0
User Manual
2. In the Note Properties dialog box, do any of the following, and then click
Close:
Click the Appearance tab to change the color and opacity of the comment.
Click the Note Type tab to the type of icon used.
Click the General tab to change the author’s name and subject of the
comment.
Click the Review History tab to see the history of changes people have made
to the status of a comment during a review.
See also
“Setting a status”
Select Locked at the bottom of the Note Properties dialog box to prevent the
comment from being altered or deleted.
Use the button at the top right corner of the Properties dialog box to
choose any tabs.
Changing the appearance of Text Markups
.
100
 Loading...