

Fostex P800-E, P1000-E Owner's Manual
Speaker Box
P800-E/P1000-E
Main Features
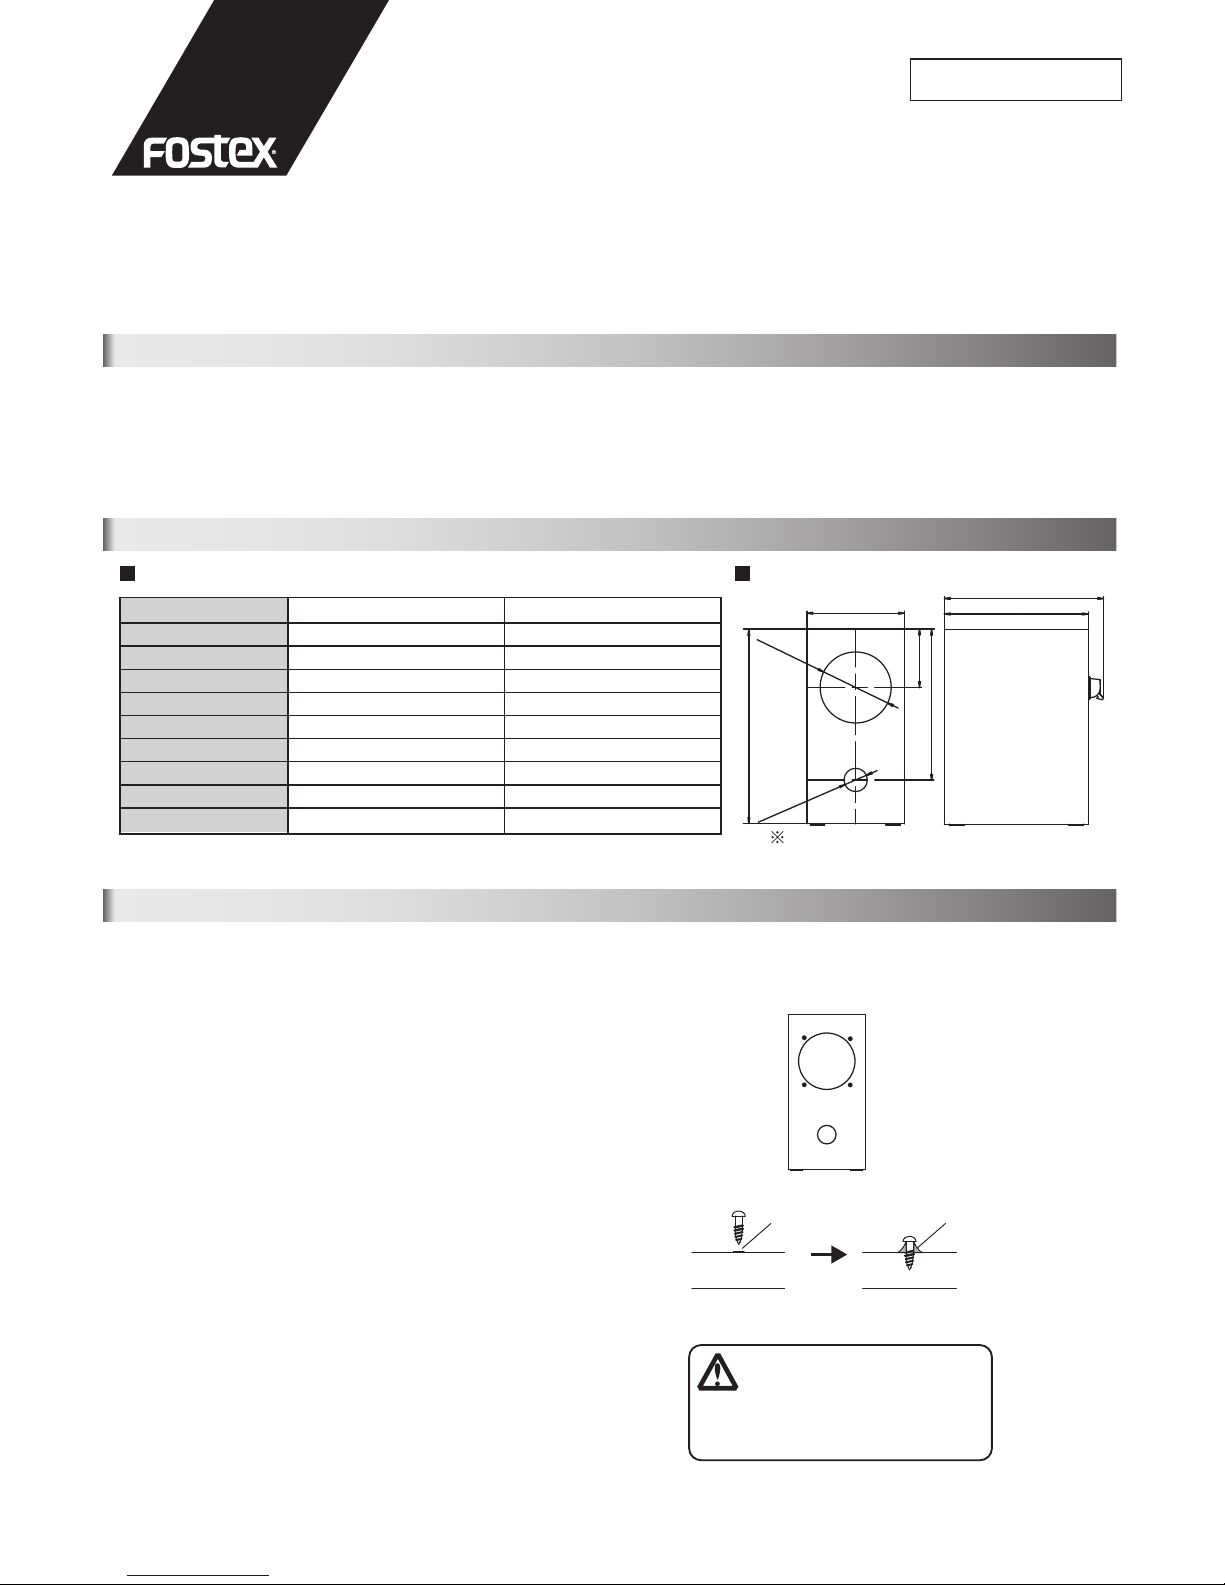
200 (243)
ø73 (ø94)
ø24 (ø35)
60 (75)
155 (193)
100 (121)
162 (193)
148 (179)
Thank you for purchasing the Fostex P800-E /
P1000-E speaker enclosure kit.
Please read this manual thoroughly and use the
product in the correct way.
Owner’s Manual
The P800-E/P1000-E is a bass reflex speaker enclosure kit that you can readily enjoy the beauty of full-range speaker system. The
kit comes with "terminals, internal wirings and sound absorption material already built in." The assembly process is so simple that
all what you do is connecting the internal wirings to the speaker driver and fitting the driver to the enclosure with the screws
included.
Type
Dimensions
Internal Volume
Tuned Frequency
Board thickness/Material
Finish
Total weight
Baffle hole diameter
Suitable speaker driver
P800-E
Bass reflex
100 (W) x 200 (H) x 148 (D) mm
1.86 L
101 Hz
t9 / Particle board
Rose wood
About 0.80 kg
ø73 mm
P800K, FF85WK, FE83En
P1000-E
Bass reflex
121 (W) x 243 (H) x 179 (D) mm
3.60 L
82 Hz
t9 / Particle board
Rose wood
About 1.15 kg
ø94 mm
P1000K, FF105WK, FE103En
Specifications
Specifications
Dimensions
Figures in parentheses indicate the ones of P1000-E.
Assembly
1. Before starting
The following items are necessary besides the speaker enclosure.
• Speaker drivers (sold separately)
• Accessories (The kit includes 4 x wood screws and 4 x washers.)
• Philips type screw driver (No. 2 size)
[Note]: Only use the wood screws that come with the kit. Problem
may occur when fitting the speaker driver if over sized screws are
used.
2. Screw hole preparation
First, place the speaker driver to the baffle hole and mark 4 screw
positions with a marker pen as shown in the Fig. 1.
Remove the speaker driver once. Then, tighten the screws half
way at the marked positions. You may use a thin awl to open screw
holes for ease of mounting screws.
By doing so will make the baffle surface slightly protruded.
Grind down the burr as shown in the Fig. 2.
Since the baffle wood is quite hard, we highly recommend you
first prepare the screw holes before fitting the speaker driver.
3. Fitting the speaker driver
Remove the half way tighten screws.
Connect the internal wirings to the speaker driver.
Place the speaker driver to the baffle hole and tighten the screws.
Assembly is now completed.
Fig. 1
Mark 4 screw positions with a marker pen.
[Caution] Be very careful not to
damage the speaker driver cone
and surrounding by misuse of
screw driver.
Fig. 2
Marking Grind down the burr with a knife.

+ ー
Cable Connection
If the speaker enclosures get some dirt, wipe gently using dry soft cloth. If there is a splash of water by accident, quickly wipe off
with dry cloth.
Placing the Speakers
Connect speaker cables between the enclosure terminals and
an amplifier according to the terminal color (Red: + and
Black: -).
It is recommended to use high grade speaker cables.
(-) Black
(+) Red
Terminal Section
on the rear side
Amplifier
Place the speakers on the firm and
secure surface.
Angle the speakers approx. 15
degree towards the listening
position.
It is good to place the speakers at
the height of listeners' ears.
Speakers
Wall surface
Maintenance
© PRINTED IN CHINA JUL. 2013
567770
FOSTEX CO.
3-2-35 Musashino, Akishima-shi, Tokyo, Japan, 196-0021
 Loading...