

Fortinet FortiWiFi 60CX-ADSL-A Quick Start Manual

FortiWiFi 60CX-ADSL-A
QuickStart Guide

June 23, 2014
19-430-227781-20140623
Copyright© 2014 Fortinet, Inc. All rights reserved. Fortinet®, FortiGate®, and
FortiGuard®, are registered trademarks of Fortinet, Inc., and other Fortinet
names herein may also be trademarks of Fortinet. All other product or company
names may be trademarks of their respective owners. Performance metrics
contained herein were attained in internal lab tests under ideal conditions, and
performance may vary. Network variables, different network environments and
other conditions may affect performance results. Nothing herein represents any
binding commitment by Fortinet, and Fortinet disclaims all warranties, whether
express or implied, except to the extent Fortinet enters a binding written contract,
signed by Fortinet’s General Counsel, with a purchaser that expressly warrants
that the identified product will perform according to the performance metrics
herein. For absolute clarity, any such warranty will be limited to performance in
the same ideal conditions as in Fortinet’s internal lab tests. Fortinet disclaims
in full any guarantees. Fortinet reserves the right to change, modify, transfer, or
otherwise revise this publication without notice, and the most current version of
the publication shall be applicable.
Table of Contents
Package Contents 1
Connect Devices 2
FortiExplorer 3
Configuring Your FortiWiFi Unit 5
Technical Specifications 7
LED Specifications 8
Documentation and Links 9
Cautions and Warnings 10
Regulatory Notices 12
Register Your Product 15
Product License Agreement 16
Connect Devices
Page 2
Caution: To reduce the risk of fire, use only No. 26 AWG or larger (e.g., 24 AWG)
UL Listed or CSA Certified Telecommunication Line Cord
Caution: Electrostatic discharge (ESD) can damage your Fortinet equipment.
Caution: Do not place heavy objects on the unit.
To attach the antennae to the back of the FortiWiFi unit, insert the antenna base
firmly into the appropriate antenna mount, and then tighten the fastening collar
securely.
To attach your unit to an equipment rack, attach the supplied rack-mount brackets
and securely affix the unit to your equipment rack.
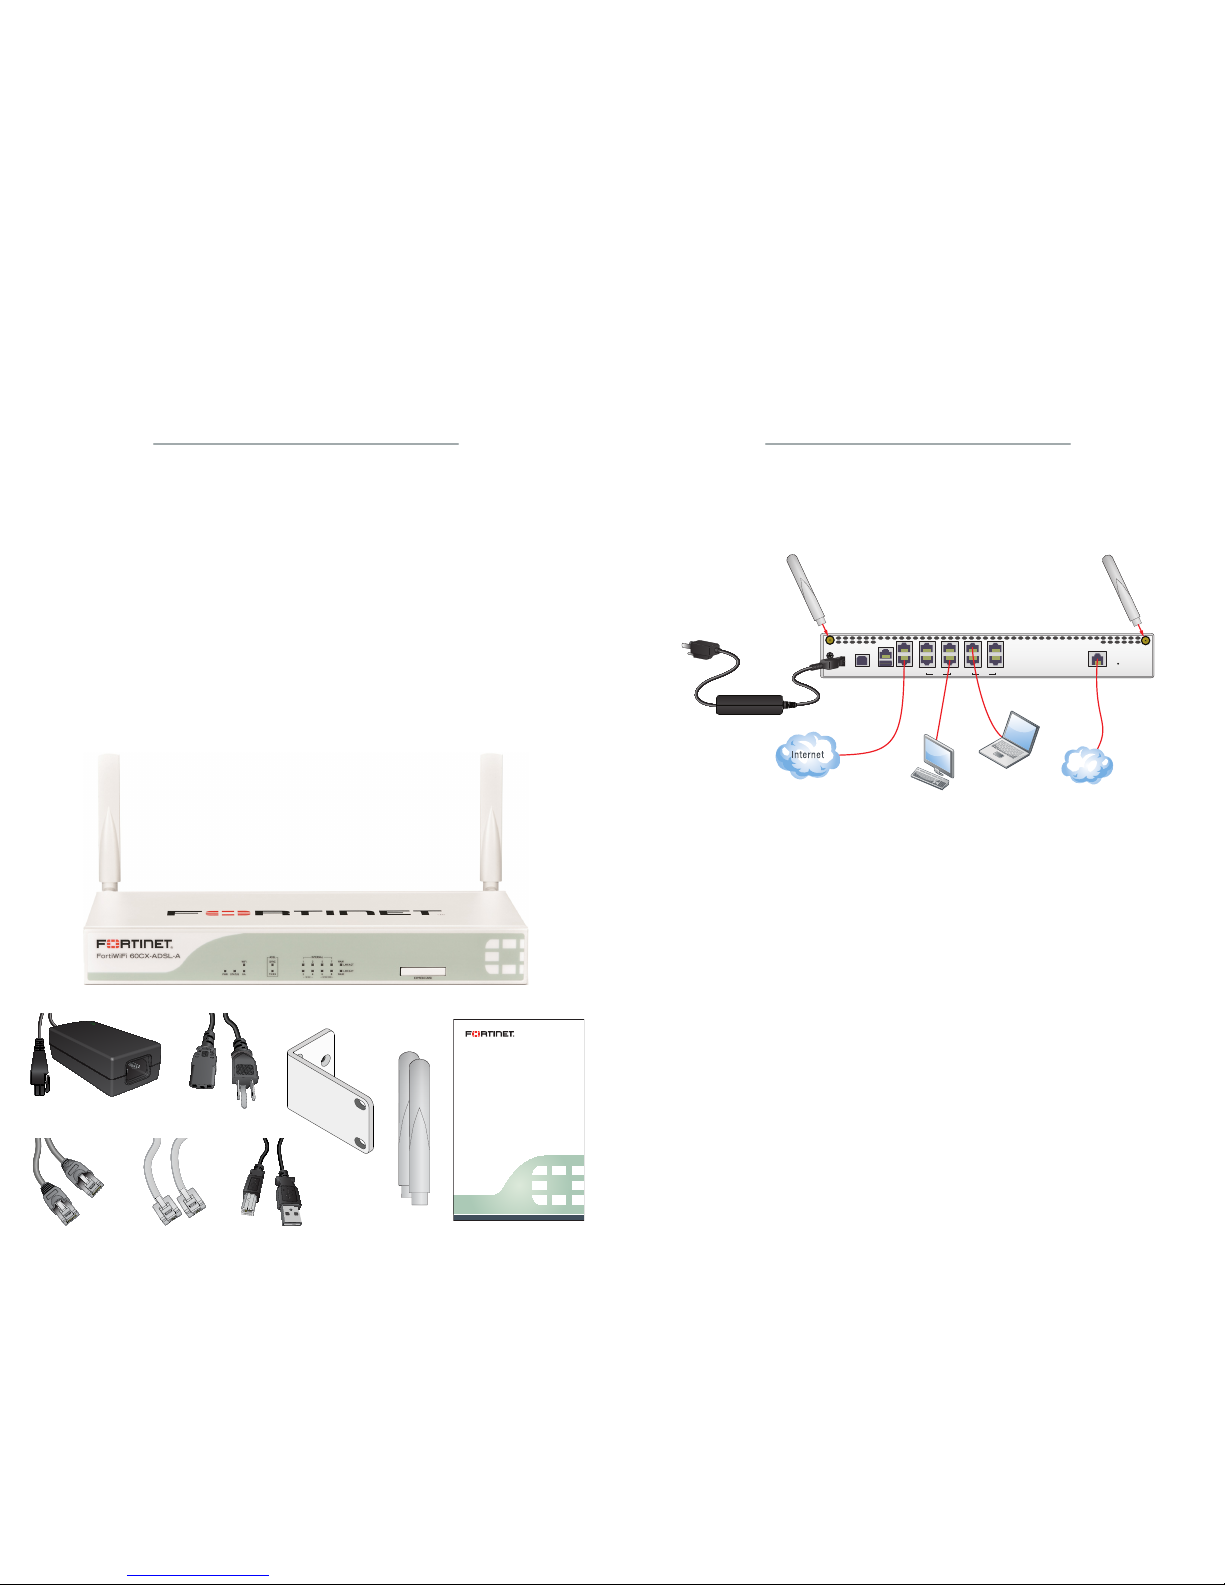
Ensure the FortiWiFi unit is placed on a stable surface. Connect the following to the
FortiWiFi unit:
1. Connect an Ethernet cable into the port labeled WAN1.
2. Connect the other end of your Ethernet cable to your Internet connection.
3. Connect an Ethernet cable to each workstation or laptop PC you wish to connect
to the FortiWiFi unit.
4. Connect an RJ-11 telephone cable to the MODEM port.
5. Connect the power adapter to the FortiWiFi unit and plug the cable into an
appropriate electrical outlet.
ExpressCard Slot
Optionally, you may also insert a wireless Internet modem into the ExpressCard slot
for wireless connectivity to the Internet.
Note: You may need to use an appropriate line-filtering device or splitter if you are
sharing this phone line. Your Internet Service Provider will be able to assist you.
CONSOLE
USBDC+12V
WAN1 / WAN2
USB MGMT
10/10010/100/1000
7 / 8
5 / 6 3 / 4 1 / 2 ADSL
2
1
33
5
4
Package Contents
Thank you for purchasing the FortiWiFi 60CX-ADSL-A. The FortiWiFi 60CXADSL-A multi-threat security appliance offers you unmatched performance,
flexibility, and security for your remote, branch, or small office network. The
appliance combines high performance hardware with wireless broadband
support, and provides simplified protection for your network with Fortinet’s
unmatched depth and breadth of security services.
Your box contains the following:
FortiWiFi 60CX-ADSL-A Telephone Cable
QuickStart Guide USB Cable
Power Adapter 2 Rack-Mount Brackets
Power Cable 2 Wireless Antennae
Ethernet Cable
Page 1
Power Adapter Power Cable
Ethernet Cable
Telephone Cable USB Cable
2 Rack-Mount
Brackets
2 Wireless
Antennae
FortiWiFi 60CX-ADSL-A
QuickStart Guide
QuickStart Guide
Note: Accessories may not be exactly as shown.
FortiExplorer
FortiExplorer provides a user-friendly tool that you can use to
configure a FortiWiFi unit over a standard USB connection, rather
than using a console cable or Ethernet connection.
Caution: Do not connect the USB cable until after FortiExplorer
has been installed.
Note: When using FortiExplorer for the first time, ensure the FortiWiFi
unit is using its factory default settings.
Installing FortiExplorer
FortiExplorer is available for Microsoft Windows XP, Vista, 7, and 8. It
is also available for Mac OS X v10.6 Snow Leopard and higher.
Microsoft Windows Install
1. Double-click the .msi, or .exe file and follow the instructions on-
screen. If loading from the CD, select the appropriate version for
your operating system.
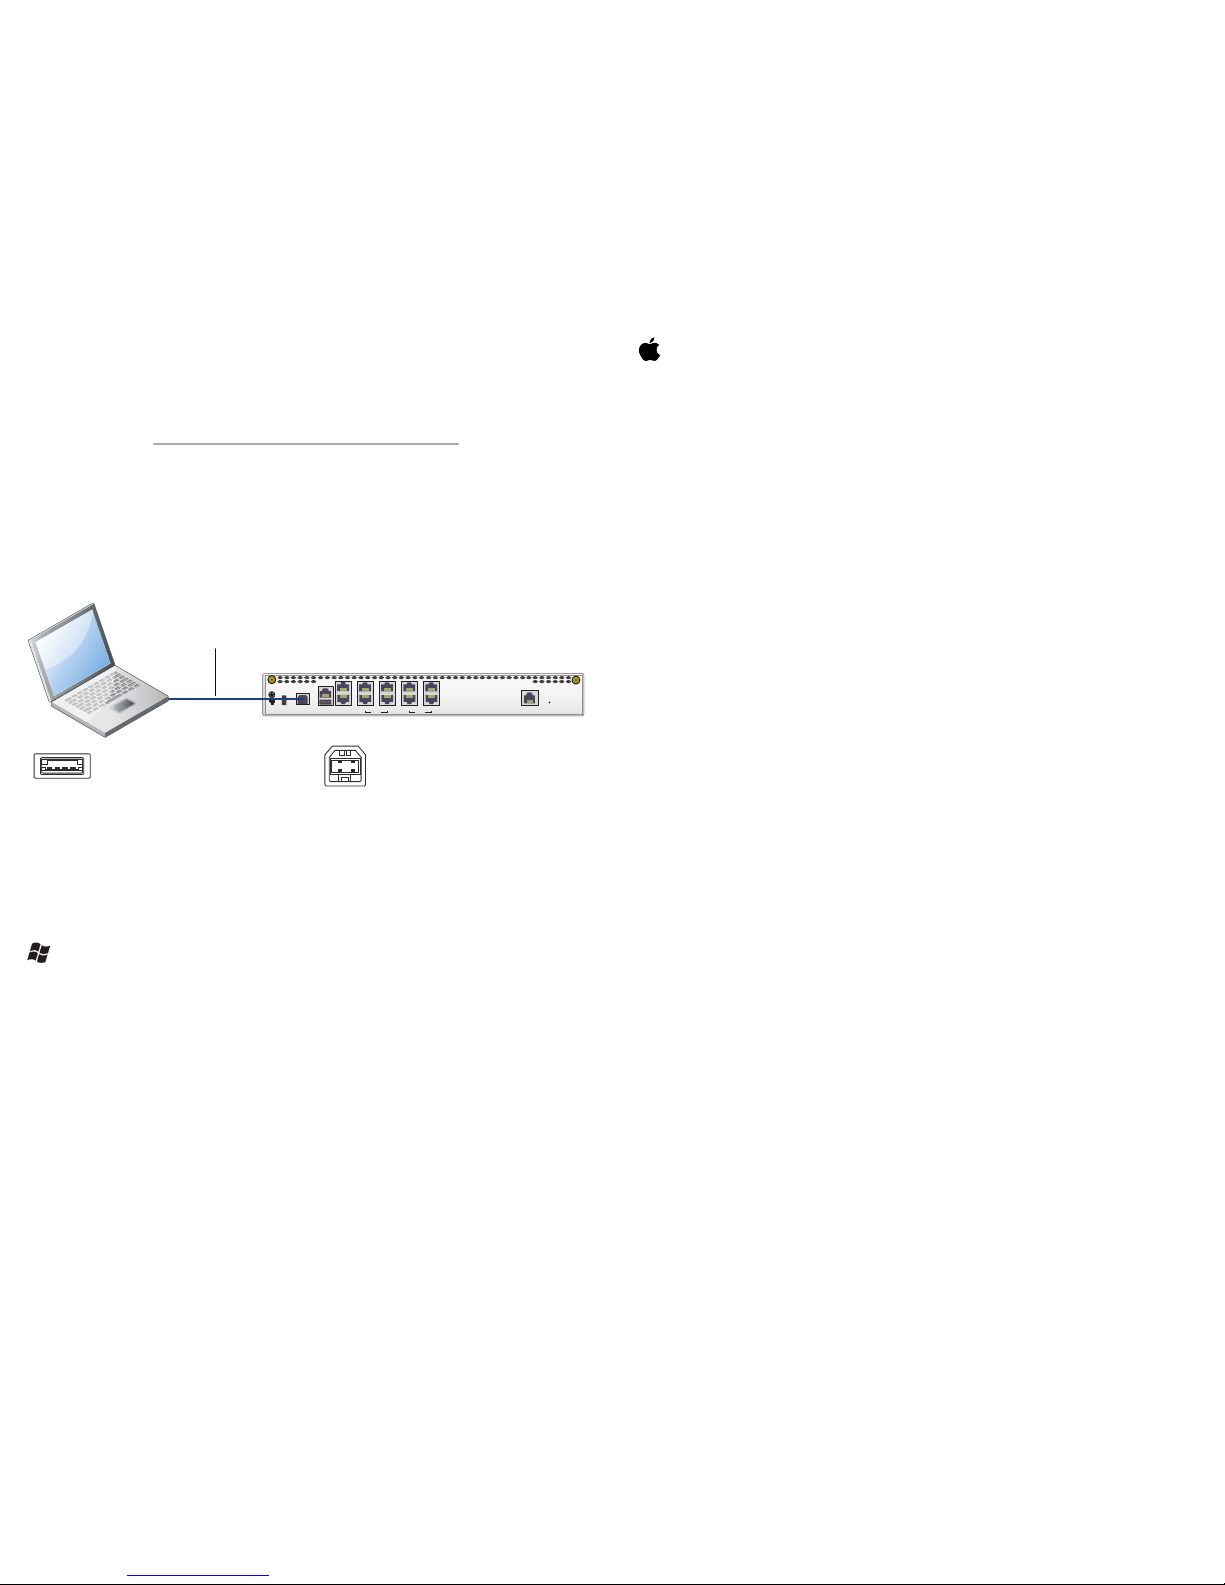
2. Connect the USB cable to the FortiGate unit and then to the
management computer.
3. The FortiExplorer Easy Configuration Utility opens when the USB
cable is connected. Select Install the hardware automatically and
select Next.
4. After a moment, FortiExplorer will launch.
CONSOLE
USBDC+12V
WAN1 / WAN2
USB MGMT
10/10010/100/1000
7 / 8
5 / 6 3 / 4 1 / 2 ADSL
USB A to
USB B Cable
USB B cable end into
FortiGate unit
USB A cable end into
Management Computer
Page 3
Mac OS Install
1. Double-click the .dmg file and drag the FortiExplorer program file
into the Applications folder.
2. Connect the USB cable to the FortiWiFi unit and then to the
management computer.
3. Double-click the FortiExplorer icon to launch the application.
Configuration Options
With FortiExplorer, you are provided a number of options on how to
configure the FortiWiFi unit, depending on your level of comfort with
various interfaces.
Updating FortiExplorer and Firmware
FortiExplorer may be automatically updated from time to time.
You can also use FortiExplorer to check for new firmware for a
FortiWiFi unit. To check for new firmware, select the FortiWiFi unit
from the device list and select Check for New Firmware. FortiExplorer
will also monitor firmware updates for your devices and provide an
alert when one is available.
Page 4
 Loading...