

Fortinet FortiVoice 200D, FortiVoice 200D-T, FortiVoice 300E-T, FortiVoice Enterprise 500E-T2, Gate 60D Quick Start Manual
...
FortiVoice™ 200D & 200D-T
QuickStart Guide

September 17, 2013
3rd Edition
Copyright© 2013 Fortinet, Inc. All rights reserved. Fortinet®, FortiGate® and
FortiGuard® are registered trademarks of Fortinet, Inc., and other Fortinet names
herein may also be trademarks of Fortinet. All other product or company names may
be trademarks of their respective owners. Performance metrics contained herein were
attained in internal lab tests under ideal conditions, and performance may vary. Network
variables, different network environments and other conditions may affect performance
results. Nothing herein represents any binding commitment by Fortinet, and Fortinet
disclaims all warranties, whether express or implied, except to the extent Fortinet enters
a binding written contract, signed by Fortinet’s General Counsel, with a purchaser that
expressly warrants that the identified product will perform according to the performance
metrics herein. For absolute clarity, any such warranty will be limited to performance in
the same ideal conditions as in Fortinet’s internal lab tests. Fortinet disclaims in full any
guarantees. Fortinet reserves the right to change, modify, transfer, or otherwise revise
this publication without notice, and the most current version of the publication shall be
applicable.
Technical Documentation http://docs.fortinet.com
Knowledge Base http://kb.fortinet.com
Forums https://support.fortinet.com/forum
Customer Service & Support https://support.fortinet.com
Training Services http://training.fortinet.com
FortiGuard Threat Research and Response http://www.fortiguard.com
Document Feedback Email: techdocs@fortinet.com

Table of Contents
Package Contents 1
Connecting to FortiVoice 2
Configuring FortiVoice 3
Registering Your Product 4
Technical Specifications 5
LED Specifications 6
Safety Warnings 7
Compliance 9
Product License Agreement 11
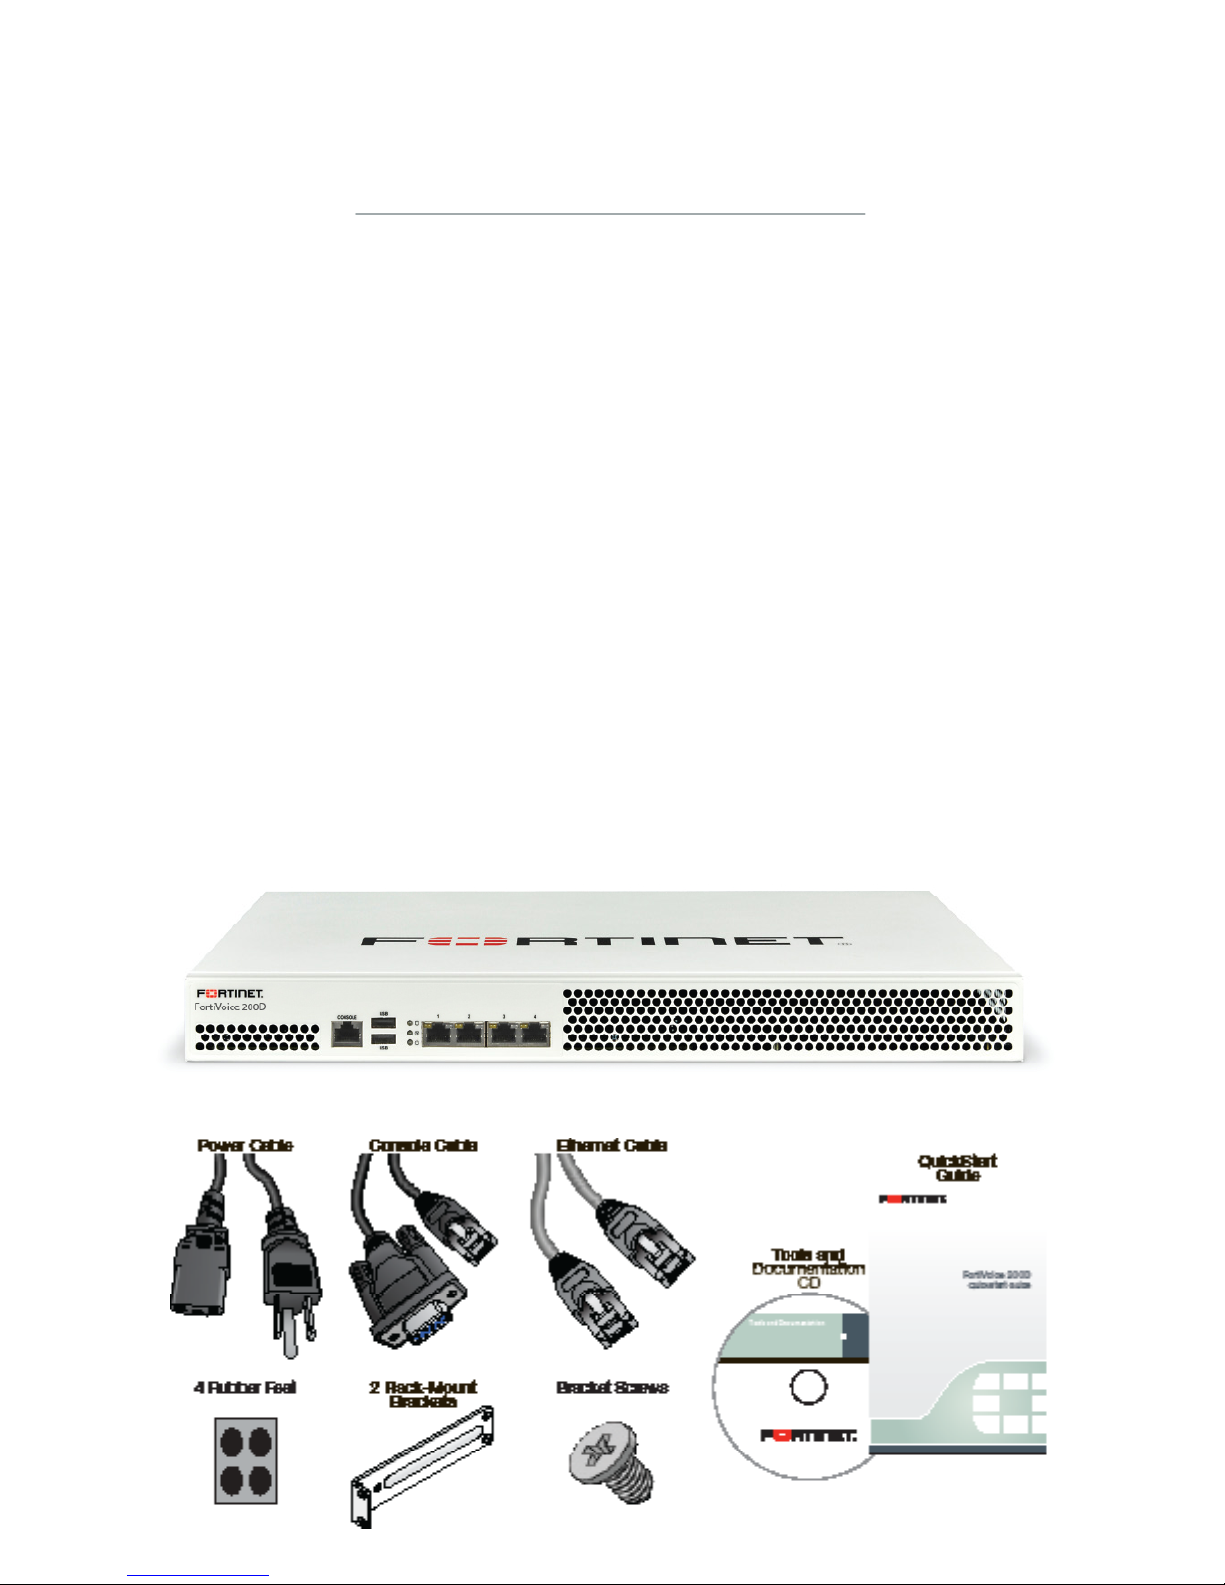
Package Contents
Thank you for choosing Fortinet FortiVoice phone system.
Your box should contain the following. Note that the picture only shows the 200D
model.
FortiVoice 200D (or 200D-T) PBX appliance
QuickStart Guide
Tools and Documentation CD
Power cable
Ethernet cable
Console cable
Bracket screws
4 Rubber feet
2 Rack-mount brackets
1 RJ11 cable (200D-T model only)
2 RJ11 Y-cable port splitters (200D-T model only)
1 RJ-45 PRI cable (200D-T model only)
Page 1

Connecting to FortiVoice
You can configure your FortiVoice appliance using either its web pages (the web UI)
or the command line interface (CLI). After connecting, follow the setup instructions
in the FortiVoice 200D and 200D-T Administration Guide.
To connect to the FortiVoice web UI
Browser requirements: Internet Explorer 8, Firefox 3.5, Safari 4, and Adobe Flash
Player 9 or greater.
1. Connect the FortiVoice appliance’s port1 to your computer using the provided
Ethernet cable.
2. On your computer, configure it to match the appliance’s default port1 subnet.
For example, on Windows 7, click the Start (Windows logo) menu to open it, then
click Control Panel. Click Networkand Sharing Center, Local Area Connection,
then the Properties button. Select Internet Protocol Version 4 (TCP/IPv4) then
click its Properties button. Select Use the following IP address, then change your
computer’s settings to:
• IP address: 192.168.1.2
• Subnet mask: 255.255.255.0
3. To access the FortiVoice web UI, start a browser and browse to
https://192.168.1.99/admin (remember to include the “s” in https:// and “/admin”
at the end of the URL).
4. Type admin in the Name field, leave the Password field blank, and click Login.
To connect to the FortiVoice CLI
1. Connect the FortiVoice console port to your computer using the console cable.
2. On the management computer, start a terminal emulation program (such as
PuTTY). Use these settings:
• Baud Rate: 9600
• Data bits: 8
• Parity: None
• Stop bits: 1
• Flow Control: None
3. Press Enter on your keyboard to connect to the CLI.
4. Type admin in the Name field, leave the Password field blank, then press Enter.
Page 2

After connecting to the FortiVoice appliance, run the quick start wizard to set up
the basic network and PBX settings.
For detailed instructions, see the FortiVoice Administration Guide.
Shutting down the FortiVoice appliance
Always properly shut down the FortiVoice appliance’s operating system before
turning off the power switch or unplugging it. This causes it to finish writing any
buffered data, and to correctly spin down and park the hard disks.
Do not unplug or switch off the FortiVoice appliance without first halting
the operating system. Failure to do so could cause data loss and hardware
problems.
To power off the appliance via the web UI
1. Connect to the web UI.
2. Go to System > Status.
3. In the System Command widget, click the Shut Down button.
You may be able to hear the appliance become more quiet when the appliance
halts its hardware and operating system, indicating that power can be safely
disconnected.
4. Disconnect the power cable from the power supply.
To power off the appliance via the CLI
1. Connect to the CLI.
2. Enter the following command:
execute shutdown
You may be able to hear the appliance become more quiet when the appliance
halts its hardware and operating system, indicating that power can be safely
disconnected.
3. Disconnect the power cable from the power supply.
Page 3
Configuring FortiVoice
 Loading...