

Page 1

FD 1200 / FE 1200
AutoSeal
®
8/2010
OPERATOR MANUAL
FIRST EDITION
Page 2

Page 3
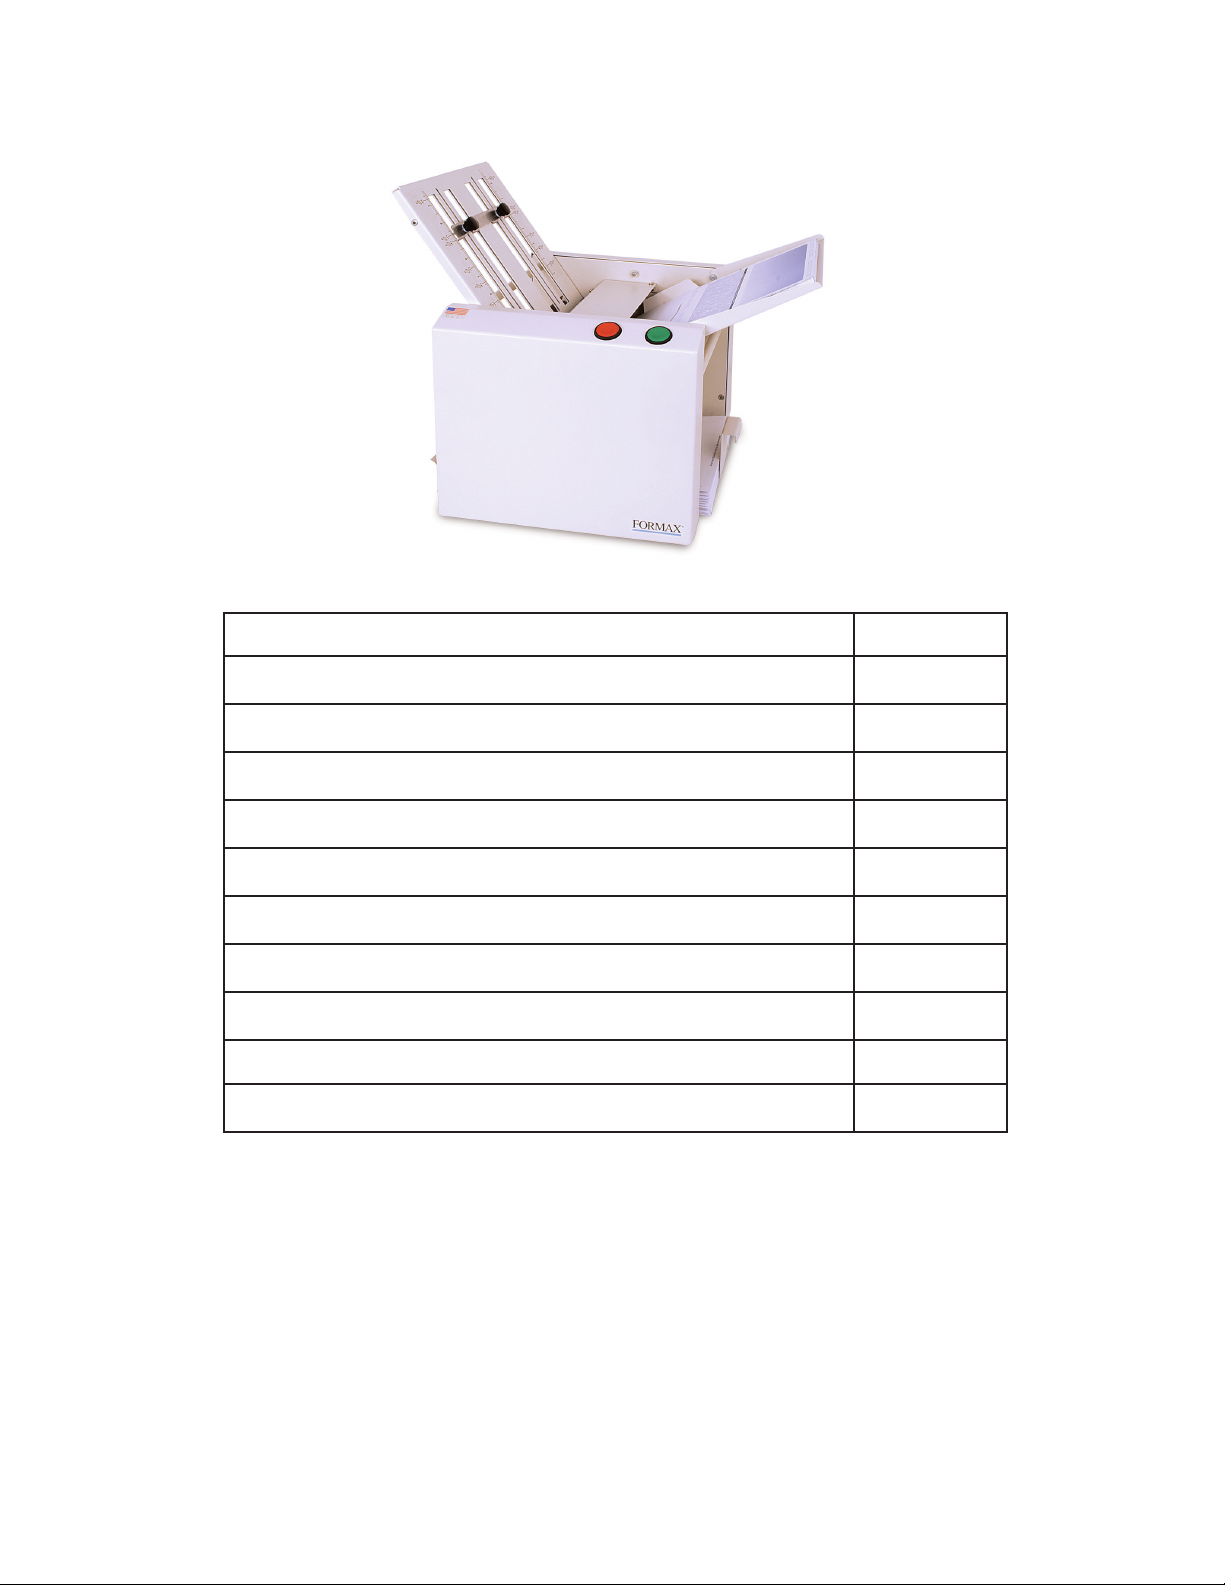
TABLE OF CONTENTS
TOPIC PAGE
SPECIFICATIONS 1
UNPACKING, COMPONENTS 2
SET-UP 3
OPERATION 5
DETERMINING FOLD TYPE 6
ADJUSTING FOLDS 7
SETTING CUSTOM FOLDS 8
CLEARING PAPER PATH, ADJUSTING INFEED TENSION 9
RECOMMENDED MONTHLY MAINTENANCE 10
TROUBLE-SHOOTING 11
Page 4

Page 5
SPECIFICATIONS
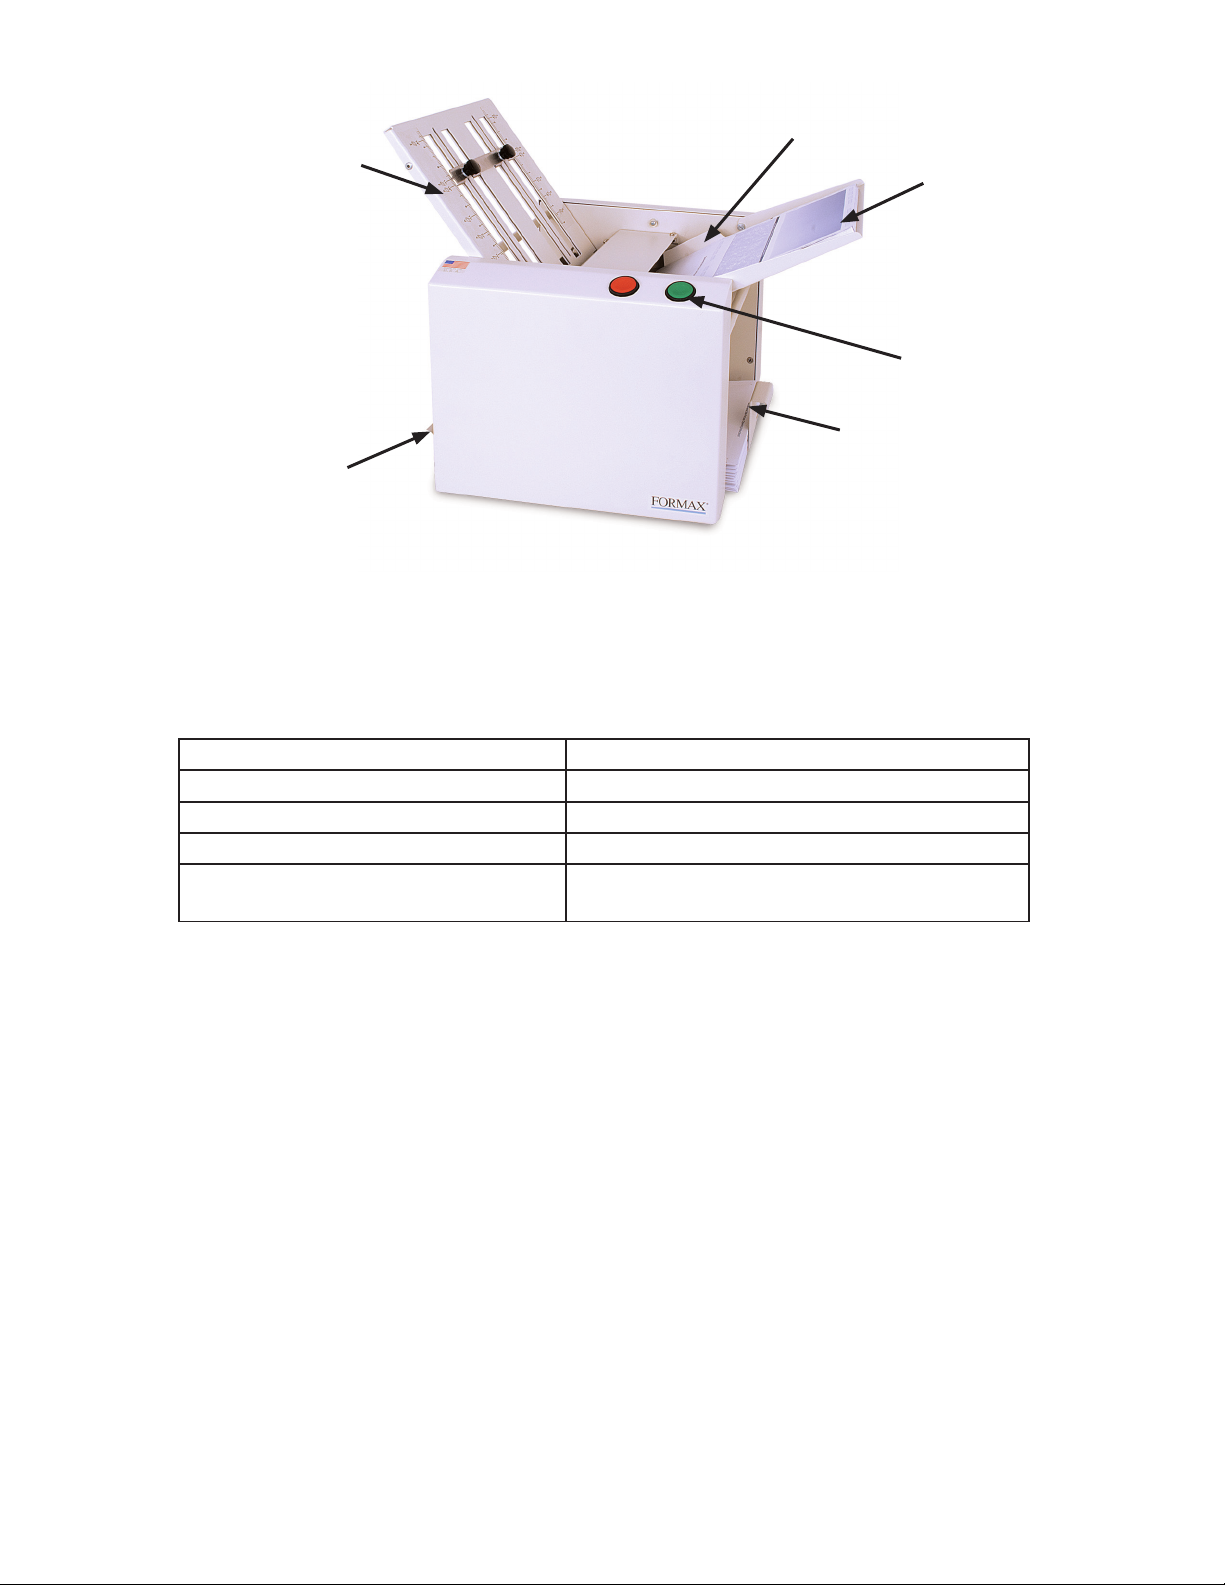
Paper side guides
Upper Fold Plate
In-feed tray
Start & Stop Buttons
Catch Tray
Lower Fold Plate
FUNCTION:
The low volume 1200 pressure sealer folds and seals one-piece pressure sensitive mailers. It can fold many
different congurations including Standard C, V, Z, Uneven C & V and custom folds. It can also process several
different sizes of forms up to 14” in length. For conguration and/or paper sizes, see listing below.
Maximum foldable paper size: 8.5” W x 14” L (216 W x 356 L mm)
Fold styles: C, Z, Half, Uneven C & Z and custom folds
Paper loading capacity: Up to 75 sheets 24# (90 gsm)
Machine weight: 55 lbs. (25 kg)
Power supply: FD model: 120V, 50/60 Hz
FE model: 220V, 50/60 Hz
1
Page 6

UNPACKING
1. Check package for shipping damage. If there is shipping damage, do not discard the box.
2. CAUTION: Two people are required to lift the machine out of the box.
3. Set the 1200 on a sturdy level surface.
4. Refer to set-up instructions on page 3 & 4 after reviewing components for proper installation.
COMPONENTS
1
1 1200 3 Lower Fold Plate
2 Upper fold Plate 4 Jam Clearing Bar
2
3
4
5 Red Stop Button Press to stop operation
6 Green Start Button Press to start operation
5
6
2
Page 7

SET-UP
1. Open the in-feed tray
2. Insert Fold Plates
Upper Fold Plate
Upper Fold Plate
Lower Fold Plate
Fold stop
Lower Fold Plate
Half fold diverter
Throat
Thumbscrews
Throat
3
Page 8

To install fold plates, slide the plate into position with thumbscrews facing up and the throat toward the inside of
the machine. Line up the notches on the underside of the plate with the four pins on the machine and set into
place (gure 1a upper fold plate & 1b lower fold plate).
Upper Fold Plate
Notches
Figure 1a
Lower Fold Plate
Fold plate pins
Notches
Figure 1b
Fold plate pins
4
Page 9

OPERATION
1. Setting the fold type
Note: The fold plates are pre-marked for standard 11” and 14” Z, C & Half folds and 14” Uneven Z & C folds for
quick setup (refer to page 6 to help determine fold type and pg 8 to measure for custom folds.).
Adjust fold plates to the correct fold type and paper size. Leaving the fold plates in position, loosen the two
thumbscrews (Fig 2a & 2b) that hold the fold stop in place. Align the arrows at each end of the fold stop with the
marks on the fold plate, be sure each side matches up (Fig 2c) and tighten the thumbscrews. Note: For “Half”
folds remove the lower fold plate, turn it around 180° and reinstall with diverter edge leading.
Adjusting upper fold plate Adjusting lower fold plate Setting fold stopFig. 2a Fig. 2b Fig. 2c
2. Test fold settings and catch tray adjustment
Test fold settings: Turn the power on (Fig 3) push the paper feed lever (Fig 4) down, place one form onto the
in-feed tray and press the start button. Examine document and adjust fold plates if necessary.
Catch tray adjustment: Set the test fold into the catch tray (Fig 5) and slide the catch tray in or out so that the
folded form lies at in the tray. The catch tray can be further adjusted as forms are running, for best stacking
results.
Power switch
Fig. 4 Paper feed leverFig. 3
Fig. 5 Catch tray
3. Loading Forms
To load forms, push the paper feed lever down and load paper neatly stacked and squared onto the in-feed tray.
Paper can be stacked up to 75 sheets (24# bond).
Note: Standard “Z” fold forms can be loaded face up or down with the glue edge trailing. All “C” fold forms must
be loaded face up with glue edge trailing.
Tip: It is recommended to let forms cool for one-half hour, from the laser printer, before folding and sealing.
This allows toner to set on the forms, and static electricity to discharge.
5
Page 10

DETERMINING FOLD TYPE
Fold types can be determined by fold and glue patterns, a “Z” fold looks like the letter “Z” and a “C” fold looks
like the letter “C”. The panel lengths are equal for standard folds, uneven folds have two panels that are the
same size and the third panel is short. Half folds simply fold in half. Below are samples of a standard 11” “Z”
and “C” style forms.
Trailing glue edge
11” “Z” Fold
Glue
Glue
Leading edge
Trailing glue edge
11” “C” Fold
Glue
Glue
Leading edge
6
Page 11

ADJUSTING FOLDS
The fold plate stops may need to be adjusted up or down to ne tune the fold. Note: The 1st and 2nd folds are
different for “Z” and “C” folded forms, see the diagrams to determine the fold sequence.
1st fold adjustment, Upper fold plate
To adjust the rst fold loosen the two thumbscrews on the
upper fold plate. If the fold is too long slide the bar down to
decrease the fold length. If the fold is too short slide the bar
up to increase the fold length.
2nd fold adjustment, Lower fold plate
To adjust the second fold loosen the two thumbscrews on
the lower fold plate. If the fold is too long slide the bar up to
decrease the fold length. If the fold is too short slide the bar
down to increase the fold length.
“Z” Fold
Leading edge
2nd fold
1st fold
Glue Line edge
“C” Fold
Leading edge
1st fold
2nd fold
Glue Line edge
7
Page 12

SETTING CUSTOM FOLDS
“Z” Type folds
1. Measure the length of panel “A” & “B”.
2. Adjust the upper fold plate so that the bar lines up with the measurements of
panel “A” & “B”, for example: if panel “A” + “B” is 8 1/2” long move the bar up
or down so that it lines up with the 8 1/2” mark on the fold plate.
3. Measure the length of panel “B”.
4. Adjust the lower fold plate so that the bar lines up with the measurements of
panel “B”.
5. Load forms and press start (refer to OPERATION on page 5).
“C” Type Folds
1. Measure the length of panel “A”.
Panel A
Panel B
Panel A
2. Adjust the upper fold plate so that the bar lines up with the measurements
of panel “A”, for example: if panel “A” is 3 1/2” long move the bar up or down
so that it lines up with the 3 1/2” mark on the fold plate.
3. Measure the length of panel “B”.
4. Adjust the lower fold plate so that the bar lines up with the measurements of
panel “B”.
5. Load forms and press start (refer to OPERATION on page 5).
Panel B
8
Page 13

CLEARING THE PAPER PATH
WARNING: Turn machine off and unplug cord from its receptacle.
1. If a jam occurs in the fold plates, remove fold plate and remove paper.
2. Reinstall fold plate.
1. If a jam occurs between the rollers remove any
remaining forms from the hopper.
2. Remove the lower fold plate.
3. Take the jam clearing handle and insert it into one of
the holes in the lower metal roller (Fig 6) and turn until
the paper jam is clear.
4. Remove the damaged form and reinstall the lower fold
plate.
Fig. 6
ADJUSTING THE GATE TIP IN-FEED TENSION
If misfeeding occurs, the gate tip (Fig 7a) in-feed tension may need to be increased or decreased for proper
feeding. If forms are hesitating at the infeed, the tension may need to be decreased. If multiple sheets are
being pulled, the tension may need to be increased. A gate tip adjustment dial (Fig 7b) is located beneath the
infeed tray. To increase the tension on the gate tip turn the dial toward the “+” symbol, to decrease the tension
turn the dial toward the “-” symbol. Turn the dial no more than 1/4 turn and test. Continue process until forms
are feeding correctly.
Fig. 7a
Gate tip
Fig. 7b
9
Gate tip adjustment dial
Page 14

RECOMMENDED MONTHLY MAINTENANCE
WARNING: Turn machine off and unplug cord from its receptacle.
1. If toner builds up on the metal sealer rollers, clean the rollers with a lint-free cloth dampened sparingly with
a mild household cleaner. To access the rollers remove the upper and lower fold plates and top and rear
covers, a Phillips head screwdriver is needed to remove covers (Fig 8).
2. Clean in-feed tire and fold rollers with Formax-recommended roller cleaner & rejuvenator (Formax part #
Cleaner Kit) to remove paper dust and toner. A damp cloth with water is the best alternative. CAUTION:
Do not use any chemicals other than the roller cleaner & rejuvenator or water. To access the feed tire and
fold rollers remove the upper and lower fold plates and top and rear covers, a Phillips head screwdriver
is needed to remove covers.
Top cover
Rear cover
Fig. 8
10
Page 15

TROUBLESHOOTING
TROUBLE POSSIBLE CAUSE REMEDY
Machine plugged in,
no power
Machine is off.
Fold plate sensors are not engaged
No power to the machine inlet.
Internal electrical failure.
Turn machine on
Reset the fold plates into position
Check the wall outlet
Check power cord for frayed/broken wires.
Check the fuse below the lower fold plate.
Check all electrical connections
Call for service
Black marks on the folded
paper
Fold is skewed Forms are not set squarely on the
Documents are wrinkled or
crunched
In-feed tray lever does not
work
Double feeding forms Documents stuck together
In-feed tires, separator, and/or fold
rollers are dirty.
Sealer rollers are dirty.
in-feed tray.
Forms are not centered on the in-feed
tray.
Fold plate stops are not square.
Fold plates are not inserted correctly.
Piece of paper or other material is stuck
in the fold plate.
Broken spring Replace spring
Clean the parts with approved roller cleaner
and rejuvenator.
Clean the rollers with approved cleaner
Reset the forms on the in-feed tray.
Adjust side guides so that forms are centered
on the feed tire
Adjust fold stops to square
Remove and reinstall fold plates. Be sure
they’re properly positioned.
Remove object from the fold plate.
Jog forms to remove static electricity.
Feed tire or separator pad worn
Documents not feeding Feed tire dirty
Feed tire or separator worn
Adjust infeed separator
Replace feed tire and/or separator pad
Clean feed tire
Adjust infeed separator
Replace feed tire and/or separator pad
11
 Loading...