

Ford Rear Seat Entertainment System Quick Start Manual
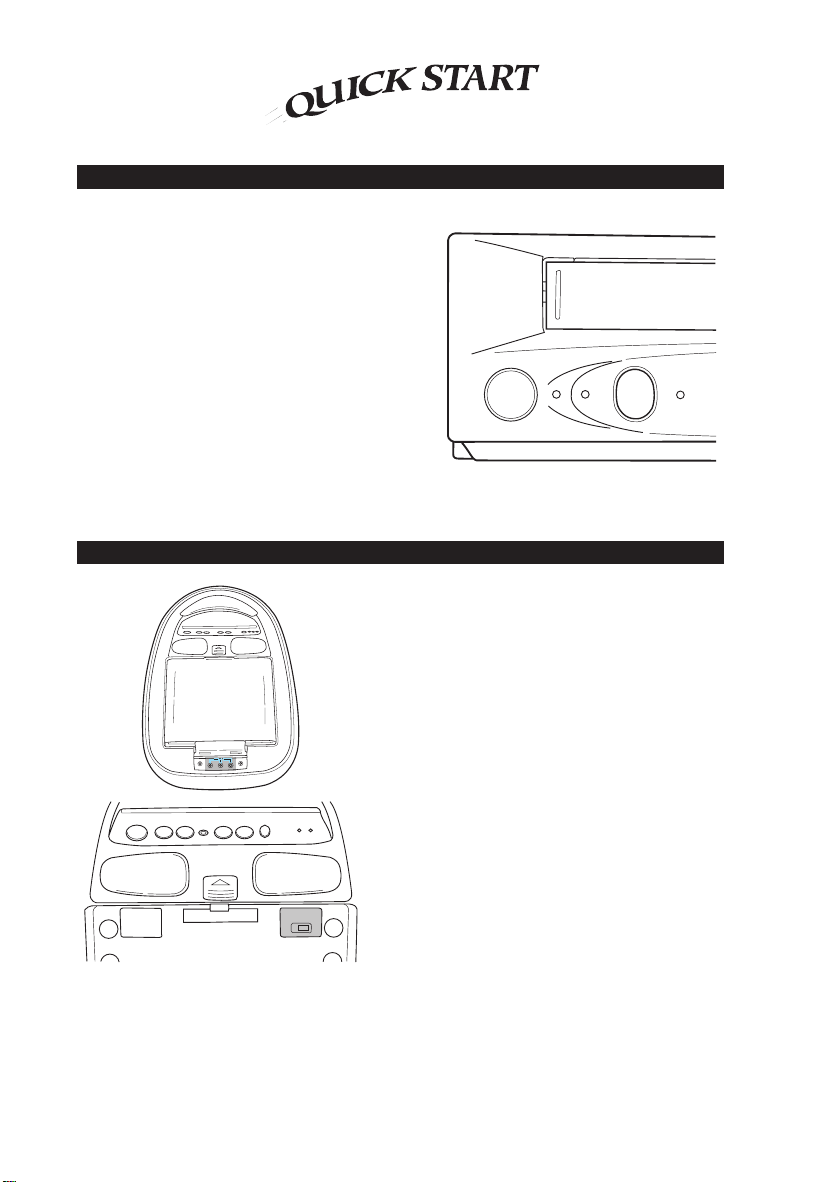
How To Get Going
To Operate
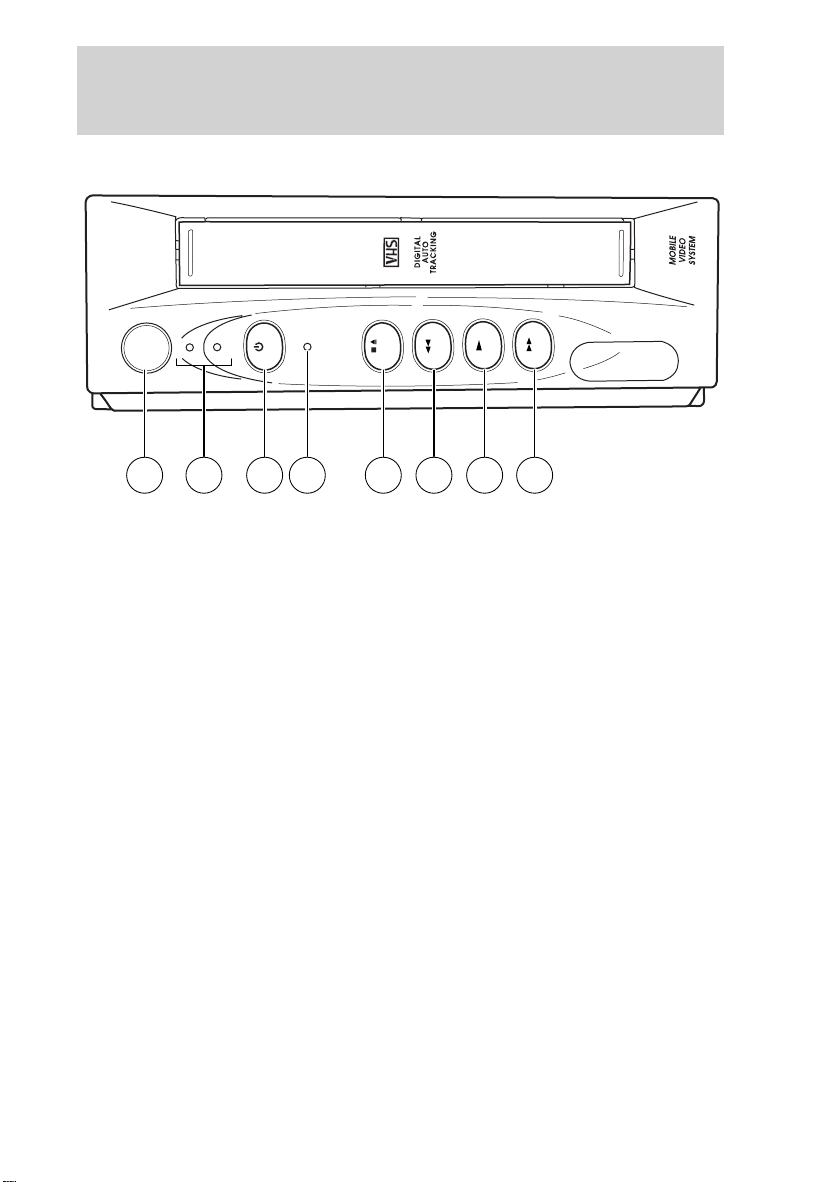
How to Play a Video Cassette Tape
Your system audio defaults to wireless
headphones. To play the system audio over
your vehicle’s speakers:
1. Slide the frequency switch from the OFF
position to position 1 (88.7 MHz) or
position 2 (89.1 MHz).
2. Turn the audio system ON and tune the
radio to 88.7 or 89.1 depending on where
you set the frequency switch in step 1.
REMOTE
SENSOR
3. Press the POWER control on the video
display unit.
4. Insert a VHS videocassette into the VCP,
and the video should start playing.
Do not force the tape into the VCP while the ignition is OFF.
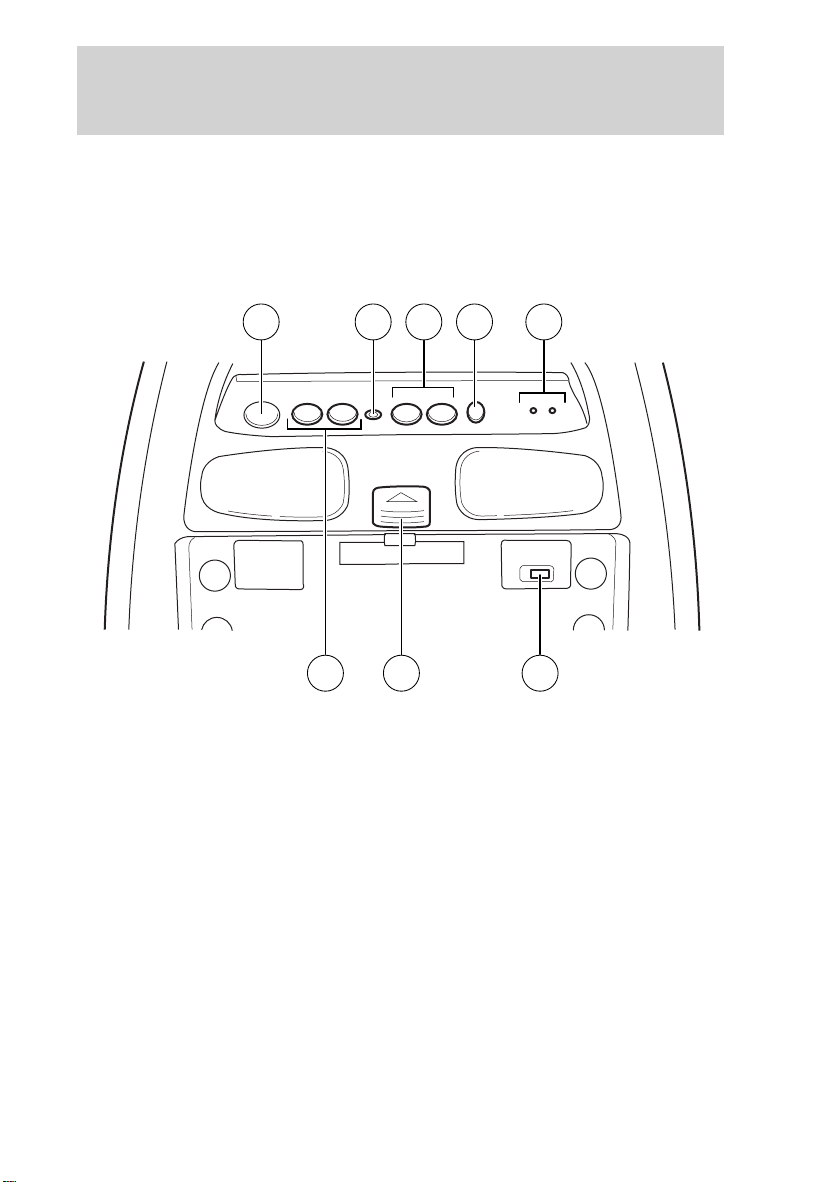
To Play a Video Game
How to Use Auxiliary Inputs
Your system is capable of accepting other
auxiliary inputs such as video games or
camcorders. These may require a
12-volt DC to 120-volt AC power inverter.
• Remove the black plastic cover at the
back of the overhead video display unit.
• Connect the video line from your video
game device to the YELLOW jack on the
overhead video display unit.
POWER
BRIGHTNESS VOLUME
SELECT
SENSOR
AV1 AV2
• Connect the left and right audio cables
to the WHITE and RED jacks
respectively on the overhead video
display unit.
• Press the select switch on the video
FREQUENCY
OFF 1 2
display unit. The AV2 indicator will
illuminate.
• Turn on the game.
CST IN
DEW
After Using your Rear Seat Entertainment system:
• To resume normal AM/FM radio operation, slide the frequency switch to the
off position. Rotate the flip-down screen up into the housing for storage when
not in use.


Table of contents
Introduction 2
Description 6
Operating Instructions 16
Troubleshooting 22
All rights reserved. Reproduction by any means, electronic or mechanical
including photocopying, recording or by any information storage and retrieval
system or translation in whole or part is not permitted without written
authorization from Ford Motor Company. Ford may change the contents without
notice and without incurring obligation.
Copyright © 2000 Ford Motor Company
1
Introduction
Your Rear Seat Entertainment System (RSES) allows you to watch movie
rentals and your favorite home videocassettes. It also allows you to plug
in and play a variety of standard video games. Please review this user
manual to become familiar with the RSES features and controls as well
as the very important safety information.
SAFETY INFORMATION
Read all of the safety and operating instructions before operating the
system and retain for future reference.
Do not attempt to service, repair or modify the rear seat entertainment
system. See your Ford or Lincoln-Mercury dealer.
Do not insert foreign objects into the video cassette player (VCP) tape
cassette compartment.
The front glass on the liquid crystal display may break when hit
with a hard surface. If the glass breaks, do not touch the liquid
crystalline material. In case of contact with skin, wash immediately
with soap and water.
Do not expose the liquid crystal display to direct sunlight or
intensive ultraviolet rays for extensive periods of time.
Ultraviolet rays deteriorate the liquid crystal.
Driver should never operate any function of the VCP mounted in
the Floor Console when the vehicle is moving. Give full attention
to driving and the road. Pull off the road and park in a safe place to
insert or remove video tapes from the VCP. A remote control is
included in the system to allow rear seat occupants to operate the VCP
functions without distracting the driver.
2

Introduction
Be sure to review User Manuals for video games and video game
equipment when used as auxiliary inputs for your Rear Seat
Entertainment System (RSES).
Do not operate video games or video equipment if the power cords
and/or cables are broken, split, or damaged. Carefully place cords and/or
cables where they will not be stepped on and where they will not
interfere with the operation of seats and/or compartments.
Disconnect video games and video equipment power cords and/or cables
when not in use.
Avoid touching auxiliary input jacks with your fingers. Do not blow on
them or allow them to get wet or dirty.
Do not clean any part of the RSES with benzene, paint thinner or any
other solvent.
FEDERAL COMMUNICATION COMMISSION (FCC) COMPLIANCE
Changes or modifications not approved by Ford Lincoln-Mercury could
void user’s authority to operate the equipment. This equipment has been
tested and found to comply with the limits for a Class B digital device,
pursuant to Part 15 of the FCC Rules. These limits are designed to
provide reasonable protection against harmful interference in a
residential installation. This equipment generates, uses and can radiate
radio frequency energy and, if not installed and used in accordance with
the instructions, may cause harmful interference and radio
communications.
However, there is no guarantee that interference will not occur in a
particular installation. If this equipment does cause harmful interference
to radio or television reception, which can be determined by turning the
equipment off and on, the user is encouraged to consult the dealer or an
experienced radio/TV technician for help.
3

Introduction
CARE OF THE VIDEOCASSETTE PLAYER (VCP)
Environmental extremes
Videocassette players subjected to harsh environmental conditions may
be damaged or perform at less than maximum capability. To avoid these
outcomes, avoid leaving your video cassette player:
• in extremely hot or cold temperatures.
• in direct sunlight.
• in high humidity.
• in a dusty environment.
• in locations where strong magnetic fields are generated.
• on a surface that is instable or subject to vibrations.
Temperature extremes
When the vehicle is parked under direct sunlight or in an extremely cold
place for a long period of time, wait until the cabin temperature of the
vehicle is at normal temperature before operating the system.
Humidity and moisture condensation
Moisture in the air will condense in the VCP under extremely humid
conditions or when moving from a cold place to a warm one. Moisture
condensation on the tape playback head drum may damage the
videocassette and/or drum. If moisture condensation occurs, the dew
sensor LED on the VCP will blink. Do not insert a videocassette into the
player. If a videocassette is already in the player, remove it. Turn the
VCP power ON to dry the moisture before inserting a videocassette. This
could take an hour or more.
4

Introduction
Cleaning video heads
Magnetic video heads convert the videocassette into pictures on the
screen during playback. Over a period of time, particles rub off the tape
and are left on the heads. Using an old or poor quality tape together with
dust and air particles, high temperature and humidity cause dirty heads.
Dirty heads generally cause “snowy” pictures and, in some severe cases,
blurred or interrupted pictures. A variety of products are available at
video stores to clean tape heads. Use these products sparingly, because
some are abrasive to the video heads. If normal head cleaning
procedures do not resolve the problem, have the system checked by a
qualified service technician.
Foreign substances
Exercise care to prevent dirt and foreign objects from entering the VCP
compartment. Be especially careful not to spill liquids of any kind onto
the media controls or into the videocassette player. If liquid is
accidentally spilled onto the system, immediately turn the system OFF
and consult a qualified service technician.
5

Description
REAR SEAT ENTERTAINMENT SYSTEM (RSES)
Features
• 2–head mono videocassette player
• High performance 6.8” flip-down LCD screen with brightness control
• Control panel with push-button controls
• Standard headphone jacks (1/8”)
• Wireless headphones (2 sets)
• Remote control unit
• Video and audio jacks for connecting video games and video
equipment*
* Auxiliary video or game equipment may require a 12–volt DC to
120–volt AC power inverter.
Playback and format
• The videocassette player of your Rear Seat Entertainment System is a
playback-only system and cannot record.
• The system plays standard videocassettes marked “VHS” (or “S-VHS”).
Audio system
• A Frequency OFF/1/2 switch on the overhead unit allows the rear seat
passengers to listen to audio from a videocassette over the vehicle’s
speakers.
• The Rear Seat Entertainment System can be set to two FM
frequencies (88.7 or 89.1 MHz).
6

Description
VCP PROTECTION CIRCUITS
Dew sensor circuit
• Under high moisture (dewed) conditions, the VCP will not operate.
• When the vehicle’s cabin temperature is very low and then is heated
quickly, or the humidity is very high within the vehicle, the inside of
the windows most likely will be fogged. Under these conditions, the
inside of the VCP most likely is dewed.
• When a dewed condition exists, the dew sensor circuit stops machine
operation and the DEW indicator lamp on the VCP flashes. The lamp
will remain flashing until the system is dry enough to operate safely.
7
Description
VIDEO CASSETTE PLAYER (VCP) CONTROLS
REMOTE
SENSOR
CST IN
DEW
POWER
AUTO
REPEAT
STOP/
EJECT
REW
PLAY
FF
2 3 1 5 6 4 73
1. POWER button
Press to turn the VCP ON or OFF.
2. REMOTE CONTROL (Remote Sensor)
To operate the VCP with the remote control unit, aim the remote control
toward the pod control panel or the VCP.
3. INDICATOR LAMPS
Each lamp is ON when its related function is operating.
CST IN The cassette is in the player.
DEW (Red) Flashes when dew is present in the VCP
AUTO REPEAT The LED is on when the auto repeat function is
engaged.
4. PLAY button (Auto repeat)
Press to playback a videocassette tape.
If the auto repeat feature is included, press and hold for two seconds to
engage the auto repeat function. When the tape reaches the end, it will
rewind and play again. Other buttons will not operate in Auto Repeat
mode. To release the Auto Repeat mode, press the play button for two
seconds again.
8

Description
5. STOP/EJECT button
Press to stop playback operation.
Press twice to eject the videocassette tape from the VCP.
6. REW (Rewind) button
Press to rewind the tape.
7. FF (Fast Forward) button
Press to fast-forward the tape.
9
Description
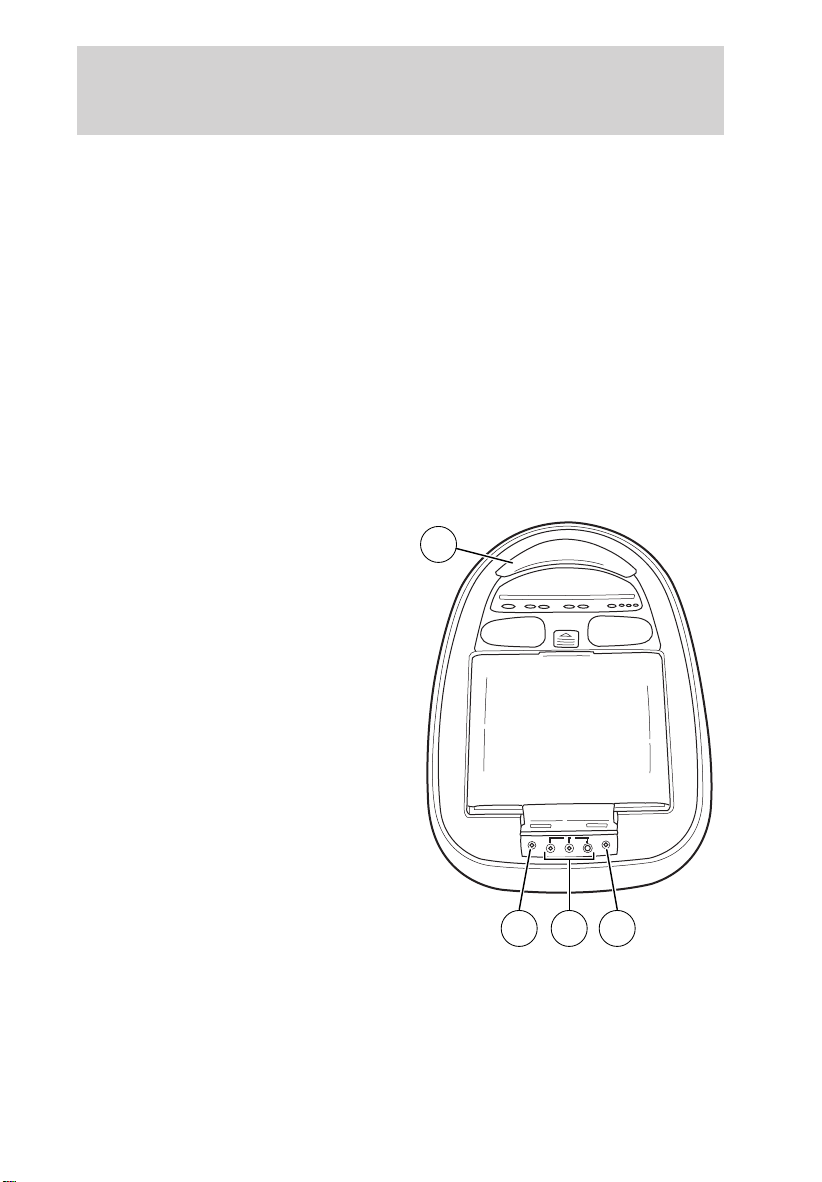
VIDEO DISPLAY UNIT
The roof-mounted Video Display Unit is the most visible component of
your RSES. In essence, it is the “nerve center” of your system. In
addition to containing the flip-down LCD video screen, it contains many
of the system’s main control buttons, important indicator lights, and
facilities to support both the wireless and optional wired headphones.
54321
POWER
BRIGHTNESS VOLUME
SENSOR
SELECT
AV1 AV2
FREQUENCY
OFF 1 2
876
1. POWER button
Press this button to turn the RSES system On and Off alternately.
2. REMOTE CONTROL SENSOR
To operate the VCP with the remote control, aim it toward this location.
3. VOLUME buttons
Press (+) or (−) button to decrease or increase audio volume through
the wired headphones.
Wired headphones are not supplied. Any headphones for portable
cassette and compact disc units can be used.
4. SELECT button
Press to select between AV1 and AV2.
10
Description
5. INDICATOR LAMPS
AV1 (VCP) illuminates when select button selects video play.
AV2 (Auxiliary) illuminates when select button selects auxiliary (game)
mode.
6. BRIGHTNESS buttons
The up arrow increases screen brightness.
The down arrow decreases screen brightness.
7. SCREEN RELEASE
Slide in the direction of arrow to release the flip-down LCD screen.
8. FREQUENCY OFF/1/2 Switch
To access this switch, release the flip-down LCD screen.
Slide to activate/deactivate audio over vehicle speakers. Slide to 1, and
set the radio to 88.7 MHz. Slide to 2 and set the radio to 89.1 MHZ.
9. INFRARED EMITTER ARRAY
for wireless headphones.
The audio signal which operates the
wireless headphones is sent from
this black lens area. If you block or
cover this lens, the wireless infrared
headphones will not operate.
10. HEADPHONE terminals
Standard 1/8” stereo headphone
jacks. You can connect wired stereo
headphones to these two headphone
jacks.
11. AUX input jacks
You can connect a camcorder or
video game to these jacks.
YELLOW: Video
WHITE: Left Audio
RED: Right Audio
1191010
11

Description
REMOTE CONTROL
1. REW (Rewind) button
Press to rewind videotape.
2. PLAY button
Press to playback a tape.
3. FWD (Fast-Forward) button
7
6
POWER
1
REPLAY
VIDEO
or GAME
+
WIRED HEADPHONE
VOLUME CONTROL
–
REW
FWD
Press to fast-forward tape.
PLAY
4. STOP button
2
STOP
Press to stop tape playback.
5. REPLAY button
Press to rewind tape and play again.
6. POWER Button
Press to turn the pod on or off.
7. VIDEO or GAME
Press to choose between playing the
videocassette player or playing a
game.
8. WIRED HEADPHONE VOLUME CONTROL
Press + (plus) to increase the volume and press - (minus) to decrease
the volume. This does not affect the wireless headphones.
5
8
3
4
12
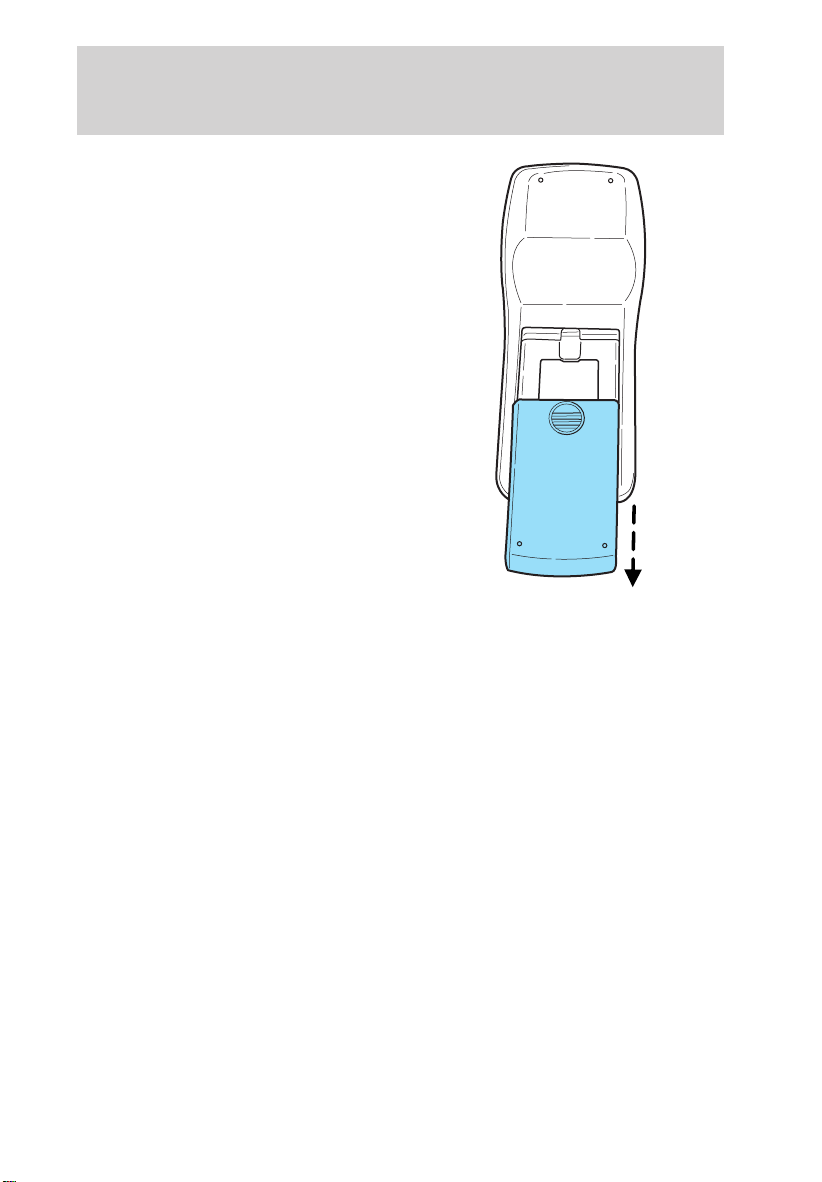
BATTERY REPLACEMENT
Slide battery cover off as shown on
remote control to access the
batteries.
The remote control unit uses two
AAA batteries.
The need for battery replacement is
usually indicated if the remote
control only functions at extremely
close distances to the entertainment
center or not at all.
When replacing batteries, use two
new batteries (alkaline
recommended) and install with
correct orientation (+ and −
polarities).
Description
13

Description
FLIP-DOWN SCREEN
The screen rotates down to view
and up into housing to store when
not in use. Be sure the screen is
latched into the housing when being
stored. For the best viewing angle,
move the screen all the way back
and adjust the brightness.
1. 6.8” (diagonal) color liquid crystal
display (LCD) screen.
2. Screen housing.
14
1
2

WIRELESS HEADPHONES
Your rear entertainment system is
equipped with 2 sets of wireless
headphones. Two AAA batteries are
needed to operate the headphones.
To install the batteries, lightly press
down on the top of the left earpiece
and slide the cover off.
When replacing the batteries, use
two new batteries (alkaline
recommended) and install them
with the correct + and —
orientation.
Description
ON OFF
15

Operating Instructions
GENERAL OPERATION
• When the engine is not running, use the system sparingly otherwise it
will run the battery down.
• When the ignition is turned to OFF, the Rear Seat Entertainment
System is also turned OFF. When the ignition is turned ON, the RSES
is in the VCP mode. To play a videotape, insert a tape into the VCP..
• Do not leave the videocassette in the VCP overnight or for long
periods of time.
• When using the VCP, ensure that your audio system is set to 88.7 or
89.1 FM.
• When the ignition is turned ON, audio is through the wireless
headphones. If you are using wired headphones, press the (+) control
to increase volume. To listen through the vehicle’s speaker system,
switch the external radio switch to F1 or F2.
16
Operating Instructions
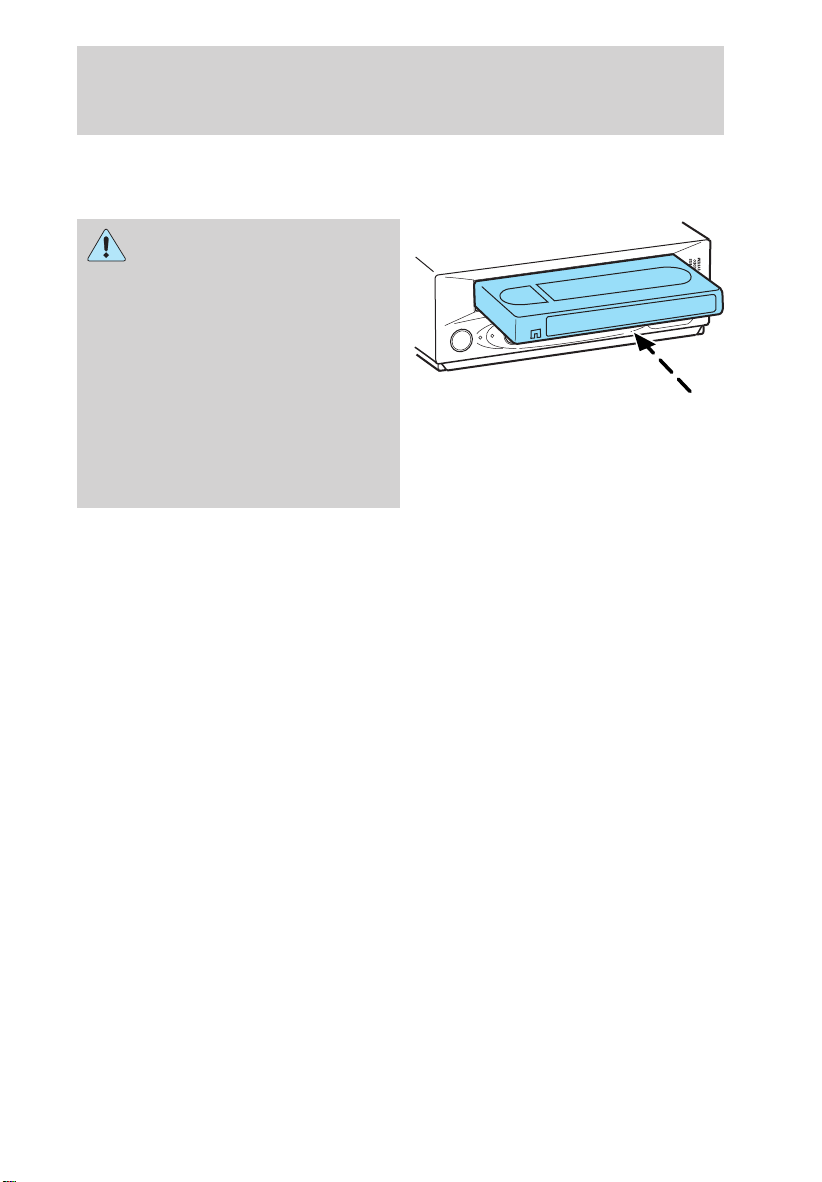
Inserting/removing cassette
Inserting cassette
Driver should never operate
any function of the VCP
mounted in the Floor Console
when the vehicle is moving. Give
full attention to driving and the
road. Pull off the road and park in
DEW
CST IN
SENSOR
REMOTE
EJECT
STOP/
POWER
a safe place to insert or remove
video tapes from the VCP. A
remote control is included in the
system to allow rear seat
occupants to operate the VCP
functions without distracting the
driver.
• Open the RSES floor console cover, and slide a videocassette into the
cassette compartment.
Inserting a videocassette into the VCP automatically turns the power ON
(the RED power indicator lamp will illuminate) and the tape will begin
playback.
If the vehicle is traveling over rough terrain, it may be difficult to insert
the cassette because the machine attempts to hold the cassette firmly to
prevent vibration. If this condition is encountered, the passenger should
either press firmly or remove the cassette and insert it again. If a
cassette is inserted in the wrong position, the protection circuit will
automatically eject the cassette. If this occurs, the passenger should wait
a few seconds and insert the cassette again in the correct position.
• Once the cassette is completely inserted, close the console cover.
FF
PLAY
REW
17

Operating Instructions
Removing cassette
1. Open the console cover, and
press the STOP/EJECT button once.
2. Press the STOP/EJECT button
again. The tape will eject.
EJECT
DEW
CST IN
SENSOR
REMOTE
STOP/
POWER
Playback operation
1. Press the power button on the pod.
2. Insert videocassette into the VCP.
3. Video should automatically begin playback.
• If video is not shown on the screen, press the SELECT button on the
RSES control panel to switch from AV2 to AV1 mode.
4. Tracking is automatically adjusted.
• If excessive video “noise” (picture fluctuates up and down) occurs,
press the PLAY button on the remote control or on the VCP.
5. Press the STOP/EJECT button to discontinue playback. Press
STOP/EJECT again to remove the cassette.
FF
PLAY
REW
18

Operating Instructions
Fast-forward or rewind (no picture)
1. With the tape stopped, press the FF or REW button.
2. Fast-forwarding or rewinding stops when the tape reaches its end or
beginning, or when the play button or stop button is pressed.
Fast-forward or rewind (with picture)
1. While the tape is playing, momentarily press the FF button or REW
button.
2. The VCP starts search playback in the normal (FF button) or reverse
(REW button) direction at a speed seven times as fast as normal.
3. To play the tape normally, press the PLAY button.
Auto tracking playback
If video “noise” (picture fluctuates up and down) occurs, press the PLAY
button on the remote control to switch automatic tracking on.
Tracking adjustment occasionally may be difficult with poorly recorded
videotapes.
Repeated playback
1. Press the REPLAY on the remote.
2. The tape will rewind and be played from beginning to end.
19

Operating Instructions
Wireless Headphone Operation
To operate the headphones, do the following:
1. On the left-hand earpiece press
the On/Off button to turn the
headphones on.
• Press the On/Off button again to
turn the headphones off.
2. Adjust the headphones to comfortably fit your head.
3. Adjust the volume control to a
comfortable listening level.
ON OFF
POWER
VOL
4. When not using the headphones, shut them off to preserve battery
power. The headphones will automatically turn off after three minutes if
they have not received an infrared audio signal from the overhead pod.
20

Operating Instructions
AUXILIARY INPUT DEVICE CONNECTION
Connecting auxiliary video equipment
The Rear Seat Entertainment System accepts video and audio RCA type
connectors for all standard video games and video equipment (such as
camcorders) at the auxiliary input jacks of the flip down POD.
Playing video games
• Remove the black plastic cap which covers the jacks.
• Connect the video line to the YELLOW jack.
• Connect left and right audio cables to the WHITE and RED jacks
respectively.
• Connect headphones to the headphone jacks (if desired)..
• Press the POWER button.
• Press the SELECT button. The AV2 (auxiliary) indicator lamp will be
lit.
• For wired headphones, adjust the VOLUME control buttons as desired
and view the game on the LCD flip-down screen. Adjust screen
brightness with the Brightness Up/Down button..
Using auxiliary video equipment
• Connect the video line to the YELLOW jack.
• Connect the left and right audio wires to the WHITE and RED jacks
respectively.
• Follow operating instructions for the video equipment.
Auxiliary video equipment can be powered by the power point and may
require a 12–volt DC to 120–volt AC power inverter.
21
 Loading...