

Page 1

Ansur QA-ES plug-in
Version 1.4.4
User Manual
1
Page 2

Table of Contents
1 Getting Started........................ ..... .. ... .. ..... .. .. ... ..... .. .. ... .... ... .. .. ..... .. ... .. ..... .. .. ... .... ... .. .. ..... ..................................... 3
1.1 Introduction.................................... ..............................................................................................................3
1.2 System requirements............................. ... .. ..... .. ... .. ..... .. .. ..... .. ... .. ..... .. .. ... ..... .. .. ... .... .. ... .... ... . ........................3
1.3 About your manual ............................... ... .. ..... .. .. ... ..... .. .. ... .... ... .. .. ..... .. ... .. ..... .. .. ... ..... .. .. ... .. ......................... 3
2 Introducing the QA-ES plug-in.................................................... ............................ .......................................... 4
2.1 Test elements................................ .. ..... .. ... .. ..... .. .. ... ..... .. .. ... .... ... .. .. ..... .. ... .. .. ..... .. ... .. ..... .. ... ...........................4
2.2 Test Element Definition.................................................. ... .. ..... .. .. ... .. ..... .. .. ... ..... .. .. ... .. ..... .. .. ... .................... 4
2.2.1 Custom Setup Dialog Box ................................................................................................................. 4
2.2.2 Expected Results Dialog Box ......................................... ................................................................... 4
3 Power Distribution Test Element.......................................................................................................................5
3.1 Introduction.................................... ..............................................................................................................5
3.2 Custom setup....................... .. .. ... .... ... .. ..... .. .. ... .... ... .. ... .... ... .. .. ..... .. ... .... ... .. .. ..... .. ... .. ..... .. ..............................5
3.2.1 Software Settings ............................................................ ............................ .............................. ......... 5
3.2.2 Hardware Settings..................................................................................................... .........................5
3.3 Expected Results................................... ... .. .. ..... .. ... .. ..... .. ... .... ... .. .. ..... .. ... .. ..... .. .. ... .... ... .. ..............................6
4 Output Test Element........................................................................................................................................... 8
4.1 Introduction.................................... ..............................................................................................................8
4.2 Custom setup....................... .. .. ... .... ... .. ..... .. .. ... .... ... .. ... .... ... .. .. ..... .. ... .... ... .. .. ..... .. ... .. ..... .. ..............................8
4.2.1 Software Settings ............................................................ ............................ .............................. ......... 8
4.2.2 Hardware Settings..................................................................................................... .........................8
4.3 Expected Results................................... ... .. .. ..... .. ... .. ..... .. ... .... ... .. .. ..... .. ... .. ..... .. .. ... .... ... .. ..............................9
5 H.F. Leakage Test Element....................................... ... .. ..... .. ... .. .. ..... .. ... .. ..... .. .. ... .. ..... .. .. ... ..... ... ......................11
5.1 Introduction.................................... ............................................................................................................11
5.2 Custom setup....................... .. .. ... .... ... .. ..... .. .. ... .... ... .. ... .... ... .. .. ..... .. ... .... ... .. .. ..... .. ... .. ..... .. ............................11
5.2.1 Software Settings ............................................................ ............................ ..................................... 11
5.2.2 Hardware Settings..................................................................................................... .......................11
5.3 Expected Results................................... ... .. .. ..... .. ... .. ..... .. ... .... ... .. .. ..... .. ... .. ..... .. .. ... .... ... .. ............................12
6 RECM Alarm Test Element............................................................................................................................. 13
6.1 Introduction.................................... ............................................................................................................13
6.2 Custom setup....................... .. .. ... .... ... .. ..... .. .. ... .... ... .. ... .... ... .. .. ..... .. ... .... ... .. .. ..... .. ... .. ..... .. ............................13
6.2.1 Software Settings ............................................................ ............................ ..................................... 13
6.2.2 Hardware Settings..................................................................................................... .......................13
6.3 Expected Results................................... ... .. .. ..... .. ... .. ..... .. ... .... ... .. .. ..... .. ... .. ..... .. .. ... .... ... .. ............................13
7 Test Guide......................................................................................................................................................... 14
7.1 Toolbar buttons......... ................................................................................................................................. 15
Appendix A. QA-ES Performance Tests ................................................................................................................. 16
Appendix B. Retrieving updates ..................... .. ..... .. .. ... .... ... .. ... .. ..... .. .. ... .... ... .. .. ... .... ... .. .. ..... .. ... ..............................17
Appendix C. References.................................................. ....................................................................................... ..18
2
Page 3

1 Getting Started
1.1 Introduction
Ansur Test Automation Software is the evolution of the PRO-Soft software family and will become the
backbone of all Fluke Biomedical test systems in the future. Ansur is a test executive that handles all steps of
your test procedures by allowing a mixture of manual/visual tests and automated test sequences. The software is
designed to work hand-in-hand with Fluke Biomedical analyzers and simulators as an application where visual
inspections, preventative maintenance procedures, performance tests, and safety tests for any device can be
performed and stored from one file. The test procedures are stored in Test Template or Test Sequence files
(XML format) and the results are stored in Test Result files (also in XML format), which may be viewed and
printed with three different detail levels.
The Ansur QA-ES plug-in, supported on the Ansur software, provides remote access to all functionality of the
QA-ES Electrical Electrosurgical Analyzer. There is a unique Ansur QA-ES test element for each of the
measurements available at the QA-ES Electrical Electrosurgical Analyzer. The capabilities and use of the QAES Electrical Electrosurgical Analyzer are fully explained by its user manual (see reference 1).
This manual is designed to assist the reader in the basic procedures for using the Ansur QA-ES plug-in within
the Ansur executive. It covers all features specific to the full QA-ES plug-in. Familiarity with the Ansur
software is assumed (see reference 2) as is familiarity w ith Microsoft Windows (see reference 3) and its features
1.2 System requirements
The following are recommended min im um requirements for installation:
• IBM PC/XT-compatible Pentium II 350MHz or faster processor
• 128Mb ram
• 50Mb of unoccupied hard drive for software
• Har d drive space for result and template files
• 32 bit Microsoft Windows operating system (98SE/Me/NT/2000/XP/VISTA)
1.3 About your manual
This manual is designed to assist you in the basic procedures for using the QA -ES plug-in.
Familiarity with Microsoft Windows and its features is assumed. If you are unfamiliar with it, we recommend
that you use your Microsoft Windows User’s Guide along with this manual.
This manual contains the foll owing conventions:
This Represents
B
old title case Menu items and control buttons that can be selected to perform operations. The underline (
_ ) represents the shortcut key. For example, “Select File, Save” instructs you to press
”F
ile”, then press “Save”. The comma (,) between selections indicate s that both selections
are to be made in sequence.
(Key 1 + Key 2)
or
“F < >”
< braces > Text information that must be specified a nd entered manually by the operator.
CAPITALS File names and paths. For example, “DUTINF O.IN I”.
Shortcut keys. The plus (+) sign indicates that both keys are to be pressed simultaneously.
For example, “(CTRL + P)” instructs you to press “Control” and hold it down while
pressing “P”.
3
Page 4

2 Introducing the QA-ES plug-in
2.1 Test elements
After installing the QA-ES plug-in the QA-ES Performance tests
will be added to Ansur’s Test Explorer as shown below. Appendix
A lists all performance tests available in the QA-ES plug-in.
Each performance test is indicated with a light blue icon. Each
performance test element utilizes measurements available at the
QA-ES Electrosurgical Analyzer.
2.2 Test Element Definition.
Each test element is defined by the usual Ansur method. Custom Setup and Expected Results dialog boxes join
the familiar General Setup and Apply When dialog boxes.
2.2.1 Custom Setup Dialog Box
This dialog box enables th e user to pl ace limitations on how the t est element is performed b oth on the h ardware
and software configurations.
2.2.2 Expected Results Dialog Box
This dialog box contains the acceptable range that the test element must adhere to in order for it to pass. No
international standards are inclu ded with the plug-in and there is no facility for referenced limits.
The following chapters will detail the definition an d use of each of the four perform ance test element s.
4
Page 5
3 Power Distribution Test Element
3.1 Introduction
Within this test the user has the opportunity to determine the power performance of an ESU over a desired range
of loads across its electrodes.
The user must define a desired power value with a specific load for every power measurement to be made. This
is achieved through the custom setup dialog.
The user must also define the acceptable deviation to the desired power performance, facilitated on the expected
results dialog.
If one measurement fails to meet these limits then the test will fail.
3.2 Custom setup
3.2.1 Software Settings
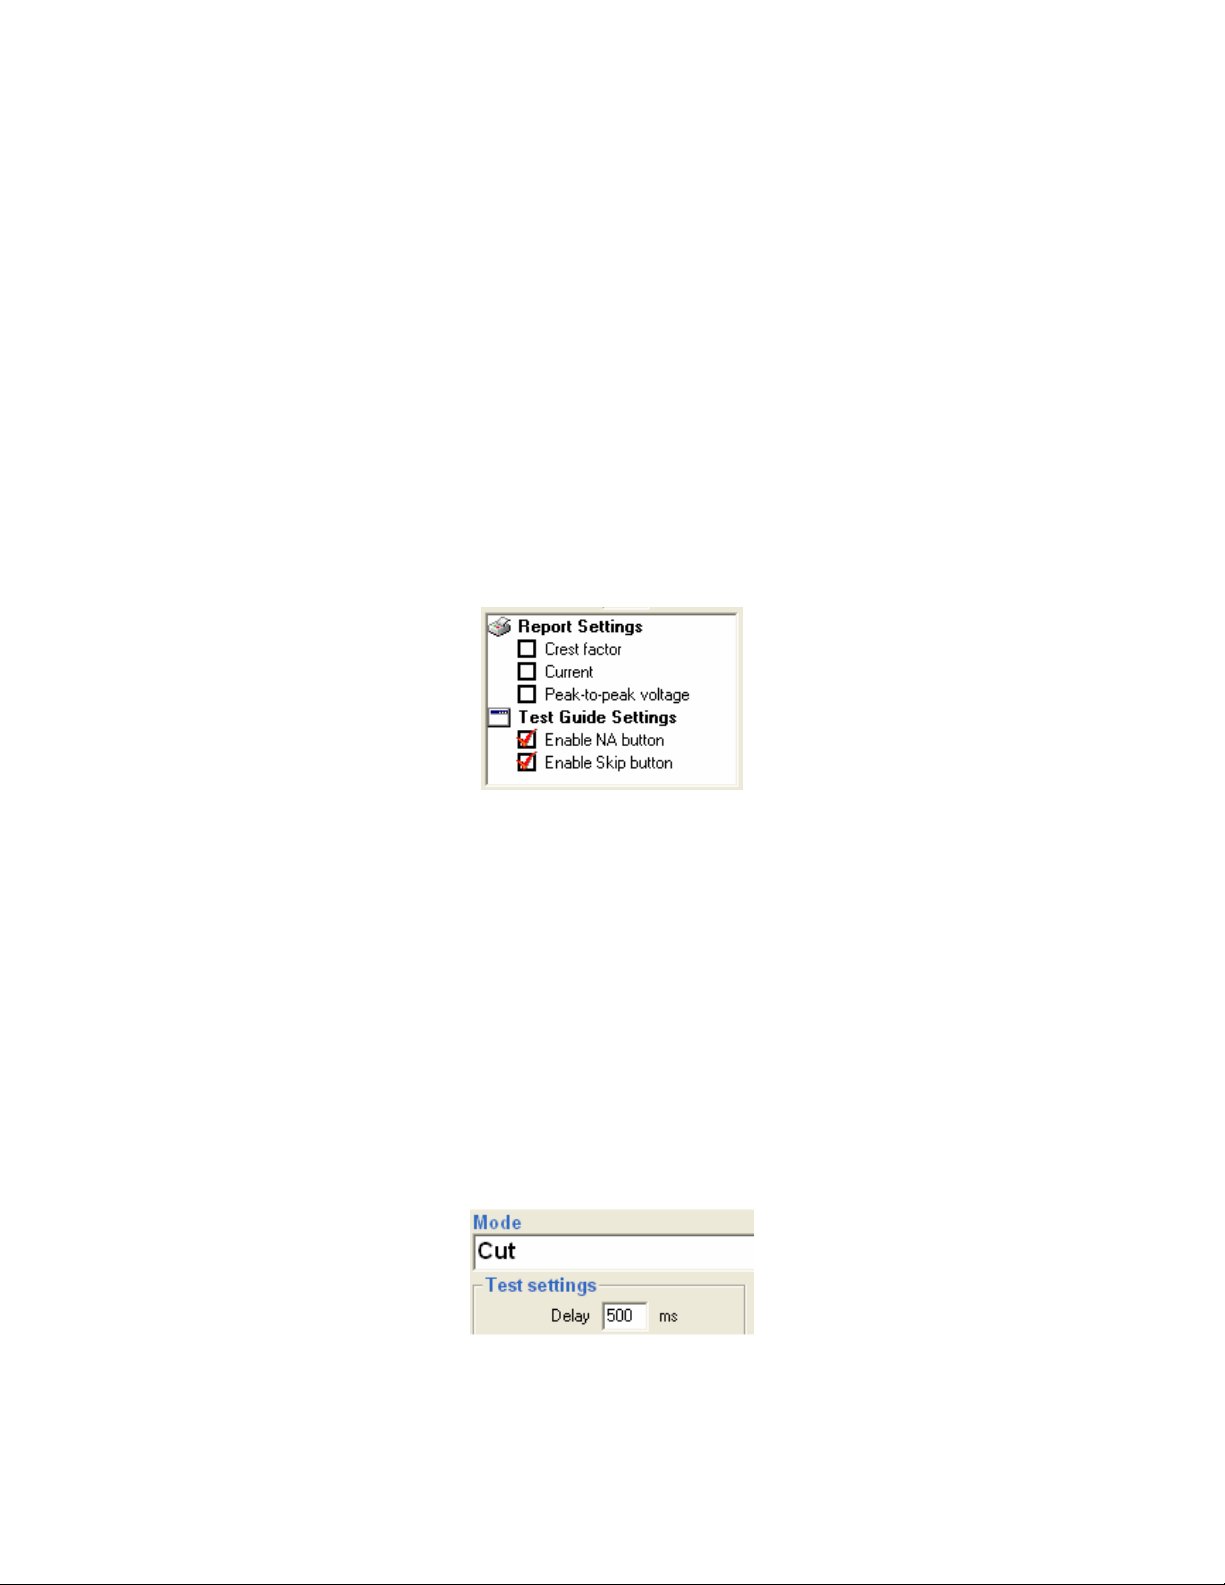
The software settings are displayed in the left of the custom setup dialog.
Enable Skip Button
Enable NA Button
Report Crest Factor
Report Current
Report Peak-to-peak
voltage
If set to False (check box clicked so that no checkmark is displayed) the Skip
button in the Test Guide (see section 7.1) for this test will be disabled.
If set to False (check box clicked so that no checkmark is displayed) the NA
button in the Test Guide (see section 7.1) for this test will be disabled.
The measured crest factor to be shown in the final report.
The measured current to be shown in the final report.
The measured Peak-to-peak voltage
to be shown in the final report.
3.2.2 Hardware Settings
The hardware settings are defined in two distinct parts. The first of these is found on the left of the custom setup
dialog within the test settings box.
Delay
Mode
This is the delay between the chang ing of the loads and taking a power measurement.
Defines the mode that the ESU is to be in. The mode determines the type of waveform applied
to the electrodes.
5
Page 6
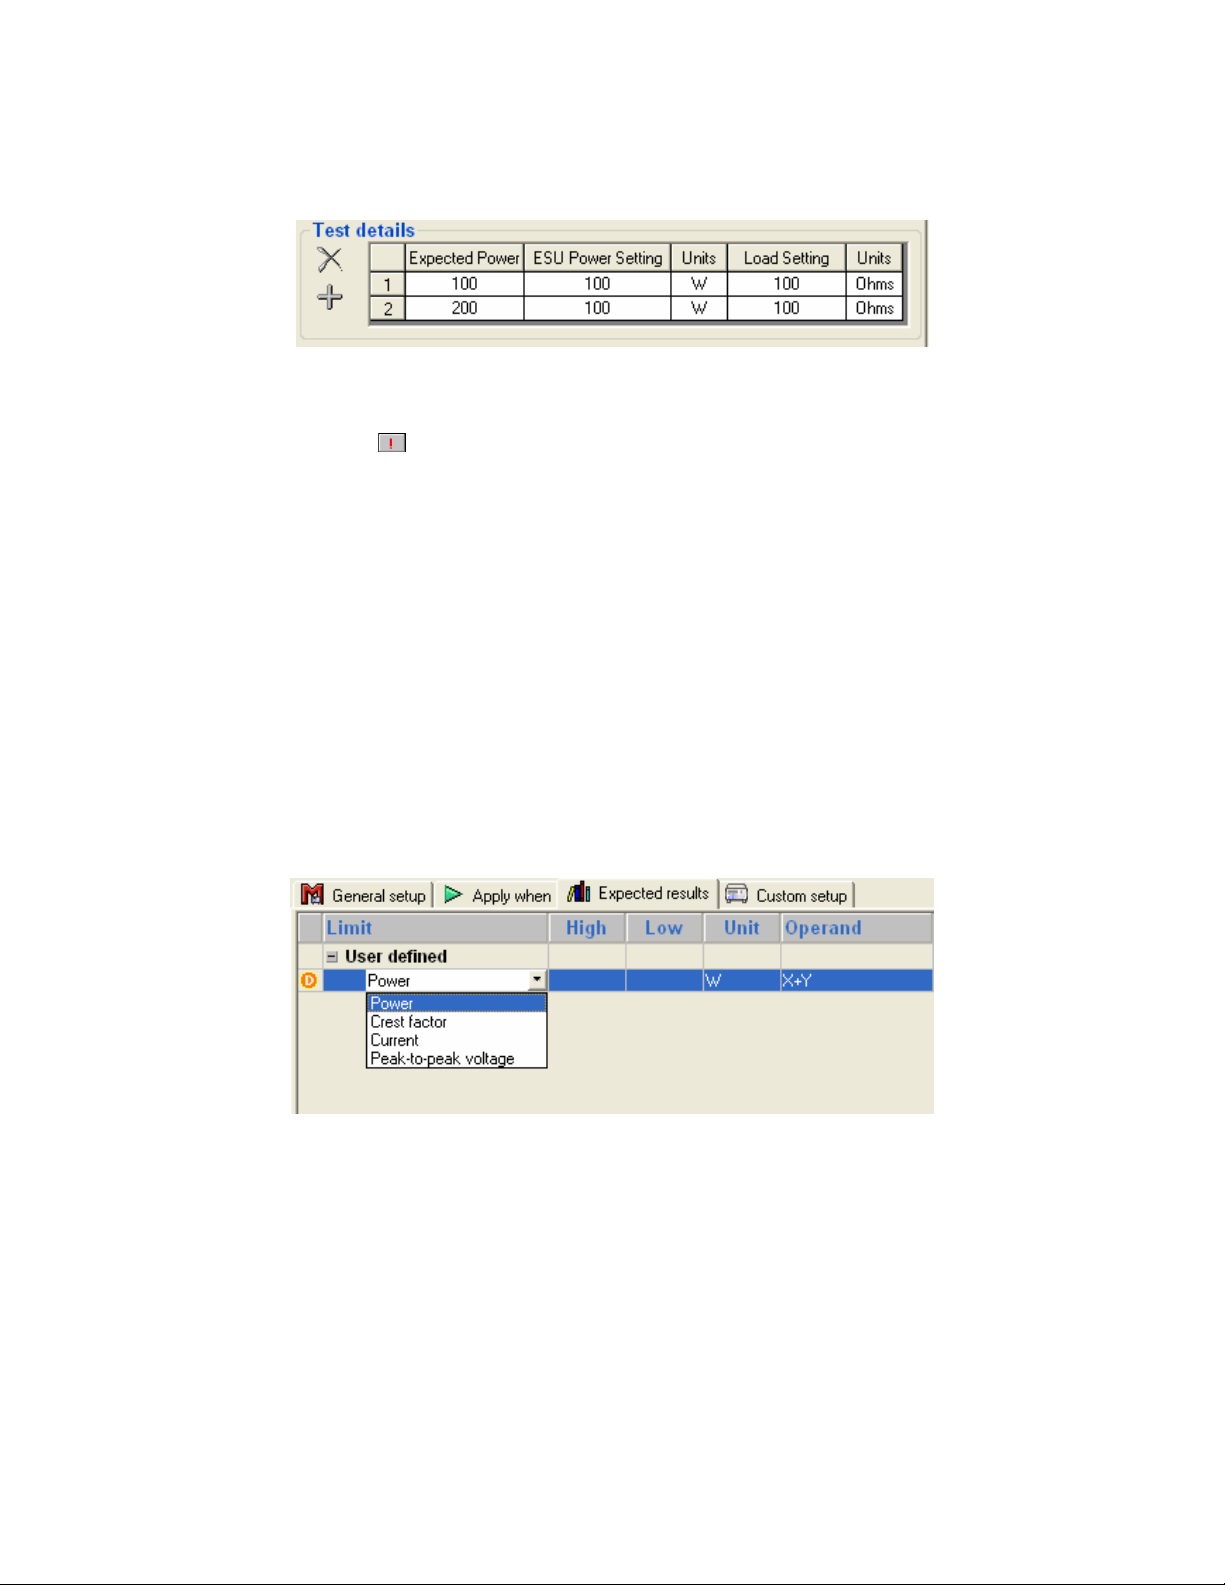
The second part is found on the right of the custom setup dialog within the test details box.
This determines the number and range of load measurements to be taken. Each line defines each individual load
setting and its desired power for a single performance measurement. The toolbar allows addition and deletion of
individual settings. If the
Expected
Power
ESU Power
Setting
Load Setting
This is the power value on the ESU required for the test. Each load setting will have a unique
power value. Naturally this is the expected power measurement.
An optional entry that gives the dial setting appropriate to the power value.
This is the load value for when taking a si ngle power output measurement.
symbol appears then that particular measurement setting is invalid.
3.3 Expected Results
Every measurement returns a power, current, crest factor and voltage peak-to-peak value and so limits can be
placed against any of them. A drop down list enables the user to choose the value for which the limit applies
(see below). Limits can be added or deleted against a standard by right clicking the mouse control when the
pointer is over a limit. The returned value must always be within the upper and lower limit, where stipulated, for
the complete test.
The exception is the power value. The user defined power value in the test details box against each
measurement is the desired value, naturally. The limits define the acceptable range around this desired power
value.
Use the Operand menu to select how Ansur shall calculate the limit given according to the power values defined
in the test details. The operand can be set to:
• Y – absolute value,
• X + Y – limit calculated as defined power value + specified limit, or
• X + (X * Y%) – limit calculated as a percentage deviance from the defined power value.
6
Page 7

So for the example below, each power performance measurement must be +/-20 W of its defined power value.
7
Page 8

4 Output Test Element
4.1 Introduction
Within this test the user has the opportunity to determine the power performance of an ESU over a desired range
of power values with a constant load across its electrodes.
The user must define a desired power value for every power measurement to be made. This is achieved through
the custom setup dialog.
The user must also define the acceptable deviation to the desired power performance, facilitated on the expected
results dialog. If one measurement fails to meet these limits then the test will fail.
4.2 Custom setup
4.2.1 Software Settings
The software settings are displayed in the left of the custom setup dialog.
Enable Skip Button
Enable NA Button
Report Crest Factor
Report Current
Report Peak-topeak voltage
If set to False (check box clicked so that no checkmark is displayed) the Skip button in
the Test Guide (see section 7.1) for this test will be di sabled.
If set to False (check box clicked so that no checkmark is displayed) the NA button in the
Test Guide (see section 7.1) for this test will be disabled.
The measured crest factor to be shown in the final report.
The measured current to be shown in the final report.
The measured Peak-to-peak voltage
to be shown in the final report.
4.2.2 Hardware Settings
The hardware settings are defined in two distinct parts. The first of these is found on the left of the custom setup
dialog within the test settings box.
8
Page 9

Delay
Mode
Load Setting
This is the delay between the changing of the loads and taking a power measurement.
Defines the mode that the ESU is to be in. The mode determines the type of waveform applied
to the electrodes.
This is the constant load value for when taking every power output me asurem e nt. User can
enter the load values or can select a valid load value from the pop up help list box which
appears next to the edit box.
The second part is found on the right of the custom setup dialog within the test details box.
This determines the number and range of power measurements to be taken. Each line defines a desired power
value for a single performance measurement. The toolbar allows addition and deletion of individual settings. If
the
symbol appears then that particular measurement setting is invalid.
Expected
Power
ESU Power
Setting
This is the power value on the ESU required for the test. Each load setting will have a unique
power value. Naturally this is the expected power measurement.
An optional entry that gives the dial setting appropriate to the power value.
4.3 Expected Results
Every measurement returns a power, current, crest factor and voltage peak-to-peak value and so limits can be
placed against any of them. A drop down list enables the user to choose the value for which the limit applies (see
below). Limits can be added or deleted against a standard by right clicking the mouse control when the pointer is
over a limit. The returned value must always be within the upper and lower limit, where stipulated, for the
complete test.
The exception is the power value. The user defined power value in the test details box against each
measurement is the desired value, naturally. The limits define the acceptable range around this desired power
value.
9
Page 10

Use the Operand menu to select how Ansur shall calculate the limit given according to the power values defined
in the test details. The operand can be set to:
• Y – absolute value,
• X + Y – limit calculated as defined power value + specified limit, or
• X + (X * Y%) – limit calculated as a percentage deviance from the defined power value.
So for the example below, each power performance measurement must be +/-20 W of its defined power value.
10
Page 11

5 H.F. Leakage Test Element
5.1 Introduction
This test checks to see whether all electrodes on an ESU have leakage currents within acceptable limits over a
range of power and load settings.
To complete this test measurements are taken, one for each electrode, each with a different set-up. These set-ups
will depend on whether the ESU is grounded or isolated (see reference 1 for details). All H.F. leakage current
measurements within the Ansur test element will be taken for one electrode prior to be ing run on the next.
The user must define a power value with a dedicated load and with a dedicated mode for every leakage
measurement to be made. This is achieved through the custom setup dialog.
The user must also define the acceptable leakage range for each electrode type, facilitated on the expected
results dialog.
If one measurement fails to meet these limits then the test will fail.
5.2 Custom setup
5.2.1 Software Settings
The software settings are displayed in the left of the custom setup dialog.
Enable Skip Button
Enable NA Button
If set to False (check box clicked so that no checkmark is displayed) the Skip butt on in
the Test Guide (see section 7.1) for this test will be di sabled.
If set to False (check box clicked so that no checkmark is displayed) the NA button in the
Test Guide (see section 7.1) for this test will be disabled.
5.2.2 Hardware Settings
The hardware settings are defined in two distinct parts. The first of these is found on the left of the custom setup
dialog within the test settings box.
Delay
ESU Type
This is the delay between the chang ing of the loads and taking a power measurement.
This is the type of ESU under test.
11
Page 12

Active
Neutral
The second part is found on the right of the custom setup dialog within the test details box.
This determines the number of leakage measurements to be taken. Each line defines a power value, load across
the electrodes and mode for a single HF leakage measurement. The toolbar allows addition and deletion of
individual settings. If the
Mode
Expected
Power
ESU Power
Setting
Load Setting
The number of active electrodes at the ESU.
The number of neutral electrodes at the ESU.
symbol appears then that particular measurement setting is invalid.
Defines the mode that the ESU is to be in. The mode determines the type of waveform applied
to the electrodes. This is never
This is the power value on the ESU required for the test.
An optional entry that gives the dial setting appropriate to the power value.
This is the load used when measuring the leakage current.
set remotely.
5.3 Expected Results
ESU devices that have BF or Monopolar electrodes will require two limits for each standard as demonstrated
below.
ESU devices that have bipolar electr odes need just one set of limits for each standard.
The values are the absolute values that all leakage measurements must adhere to in order to pass. If one
measurement fails so the whole test is deemed to have failed.
It is also possible to specify the limits as a percentage of the Power defined in the test details dialog box. The
limit will then be calculate as I = √((Y% * P) / R), where Y is the value entered in Expected Results, and P and
R are the Power and Load defined in test details. Use the Operand menu to select this limit.
12
Page 13

6 RECM Alarm Test Element
6.1 Introduction
This test ensures that the ESU will sound an alarm if the resistance between the two electrodes exceeds a
specified limit. The QA-ES will gradually increase the resistance, starting at 10 Ohm and increasing through all
available load settings. At a certain value, the ESU should sound an alarm. It is this value that wil l be returned.
The user must define th e ac cep tabl e al ar m l evel th rough t h e expected results dialog. On th is comparis on th e test
will either pass or fail.
6.2 Custom setup
6.2.1 Software Settings
The software settings are as section 5.2.
6.2.2 Hardware Settings
The hardware settings are found on the left of the custom setup dia lo g w ithin the test settings box.
Delay
This is the time between the loads bei ng applied to the ESU.
6.3 Expected Results
This performance test will contain the acceptable upper limit for the alarm to trigger.
13
Page 14

7 Test Guide
The test guide is the users interface with the QA-ES d uring the running of the test template.
Click on User comment tab
Click on DUT info tab
Click on
to see the connection diagram between QA-ES, ESU and PC.
tab to see the procedure to run the test. Click on or link
to enter any comments/ remarks in the window displayed.
to enter Device Under Test information.
14
Page 15

Prior to each measurement within a test the software will display a prompt for the user to set the power, set the
mode and set up the next electrode as desired by the particular test.
If the setup is identical between two measurements, or when running an RECM Alarm test, this prompt will not
be displayed.
7.1 Toolbar buttons
Abort
Previous
Next
Start
Stop
Not applicable
Skip
Additional
features
Abort the test template.
Go to previous dialog screen.
Go to next dialog screen.
Perform test.
Stop test.
Flag test as not applicable.
Skip test and go to next.
Allows access to standards and customize t oolbar menu.
15
Page 16

Appendix A.
QA-ES Performance Tests
The following table lists all performance tests provided by the QA-ES plug-in.
Performance test Unit
Power Distribution Test W
Output Test W
H.F. Leakage Test mA
RECM Alarm Test Ohms
16
Page 17

Appendix B.
Retrieving updates
Updates for Ansur are published from Fluke Biomedical’s web pages
- http://www.flukebiomedical.com
17
Page 18

Appendix C.
References
Ref. Title Author Version
1 QA-ES User & Service Manual Fluke Biomedical.
2 Ansur Test Executive User Manual Fluke Biomedical
3 Microsoft Windows User’s Guide. Microsoft
1.30-2
2.6.0
18
 Loading...