

Page 1

MPS450
Multiparameter Simulator
Operators Manual
PN 2243350
June 2010, Rev. 2, 3/11
© 2010-2011 Fluke Corporation. All rights reserved. Printed in USA. Specifications are subject to change without notice.
All product names are trademarks of their respective companies.
Page 2

Warranty and Product Support
Fluke Biomedical warrants this instrument against defects in materials and workmanship
for one year from the date of original purchase OR two years if at the end of your first
year you send the instrument to a Fluke Biomedical service center for calibration. You
will be charged our customary fee for such calibration. During the warranty period, we
will repair or at our option replace, at no charge, a product that proves to be defective,
provided you return the product, shipping prepaid, to Fluke Biomedical. This warranty
covers the original purchaser only and is not transferable. The warranty does not apply if
the product has been damaged by accident or misuse or has been serviced or modified by
anyone other than an authorized Fluke Biomedical service facility. NO OTHER
WARRANTIES, SUCH AS FITNESS FOR A PARTICULAR PURPOSE, ARE
EXPRESSED OR IMPLIED. FLUKE SHALL NOT BE LIABLE FOR ANY SPECIAL,
INDIRECT, INCIDENTAL OR CONSEQUENTIAL DAMAGES OR LOSSES,
INCLUDING LOSS OF DATA, ARISING FROM ANY CAUSE OR THEORY.
This warranty covers only serialized products and their accessory items that bear a
distinct serial number tag. Recalibration of instruments is not covered under the warranty.
This warranty gives you specific legal rights and you may also have other rights that vary
in different jurisdictions. Since some jurisdictions do not allow the exclusion or limitation
of an implied warranty or of incidental or consequential damages, this limitation of
liability may not apply to you. If any provision of this warranty is held invalid or
unenforceable by a court or other decision-maker of competent jurisdiction, such holding
will not affect the validity or enforceability of any other provision.
07/07
Page 3

Contents (continued)
Notices
All Rights Reserved
© Copyright 2010, Fluke Biomedical. No part of this publication may be reproduced, transmitted, transcribed, stored in a retrieval
system, or translated into any language without the written permission of Fluke Biomedical.
Copyright Release
Fluke Biomedical agrees to a limited copyright release that allows you to reproduce manuals and other printed materials for use in
service training programs and other technical publications. If you would like other reproductions or distributions, submit a written
request to Fluke Biomedical.
Unpacking and Inspection
Follow standard receiving practices upon receipt of the instrument. Check the shipping carton for damage. If damage is found, stop
unpacking the instrument. Notify the carrier and ask for an agent to be present while the instrument is unpacked. There are no special
unpacking instructions, but be careful not to damage the instrument when unpacking it. Inspect the instrument for physical damage such
as bent or broken parts, dents, or scratches.
Technical Support
For application support or answers to technical questions, either email techservices@flukebiomedical.com or call 1-800- 850-4608 ext
2560 or 1-440-498-2560.
Claims
Our routine method of shipment is via common carrier, FOB origin. Upon delivery, if physical damage is found, retain all packing
materials in their original condition and contact the carrier immediately to file a claim. If the instrument is delivered in good physical
condition but does not operate within specifications, or if there are any other problems not caused by shipping damage, please contact
Fluke Biomedical or your local sales representative.
Standard Terms and Conditions
Refunds and Credits
Please note that only serialized products and their accessory items (i.e., products and items bearing a distinct serial number
tag) are eligible for partial refund and/or credit. Nonserialized parts and accessory items (e.g., cables, carrying cases,
auxiliary modules, etc.) are not eligible for return or refund. Only products returned within 90 days from the date of original
purchase are eligible for refund/credit. In order to receive a partial refund/credit of a product purchase price on a serialized product, the
product must not have been damaged by the customer or by the carrier chosen by the customer to return the goods, and the product
must be returned complete (meaning with all manuals, cables, accessories, etc.) and in “as new” and resalable condition. Products not
returned within 90 days of purchase, or products which are not in “as new” and resalable condition, are not eligible for credit return and
will be returned to the customer. The Return Procedure (see below) must be followed to assure prompt refund/credit.
Restocking Charges
Products returned within 30 days of original purchase are subject to a minimum restocking fee of 15 %. Products returned in excess of
30 days after purchase, but prior to 90 days, are subject to a minimum restocking fee of 20 %. Additional charges for damage and/or
missing parts and accessories will be applied to all returns.
Return Procedure
All items being returned (including all warranty-claim shipments) must be sent freight-prepaid to our factory location. When you return
an instrument to Fluke Biomedical, we recommend using United Parcel Service, Federal Express, or Air Parcel Post. We also
recommend that you insure your shipment for its actual replacement cost. Fluke Biomedical will not be responsible for lost shipments
or instruments that are received in damaged condition due to improper packaging or handling.
Use the original carton and packaging material for shipment. If they are not available, we recommend the following guide for
repackaging:
Use a double-walled carton of sufficient strength for the weight being shipped.
Use heavy paper or cardboard to protect all instrument surfaces. Use nonabrasive material around all projecting parts.
Use at least four inches of tightly packed, industry-approved, shock-absorbent material around the instrument.
Returns for partial refund/credit:
Every product returned for refund/credit must be accompanied by a Return Material Authorization (RMA) number, obtained from our
Order Entry Group at 1-800- 850-4608 ext 2560 or 1-440-498-2560.
Page 4

Repair and calibration:
To find the nearest service center, go to www.flukebiomedical.com/service
In the U.S.A.:
Cleveland Calibration Lab
Tel: 1-800-850-4606
Email: globalcal@flukebiomedical.com
Everett Calibration Lab
Tel: 1-888-993-5853
Email: service.status@fluke.com
In Europe, Middle East, and Africa:
Eindhoven Calibration Lab
Tel: +31-402-675300
Email: ServiceDesk@fluke.com
In Asia:
Everett Calibration Lab
Tel: +425-446-6945
Email: mailto:service.international@fluke.com
, or
Certification
This instrument was thoroughly tested and inspected. It was found to meet Fluke Biomedical’s manufacturing specifications
when it was shipped from the factory. Calibration measurements are traceable to the National Institute of Standards and
Technology (NIST). Devices for which there are no NIST calibration standards are measured against in-house performance
standards using accepted test procedures.
WARNING
Unauthorized user modifications or application beyond the published specifications may result in electrical shock hazards or
improper operation. Fluke Biomedical will not be responsible for any injuries sustained due to unauthorized equipment
modifications.
Restrictions and Liabilities
Information in this document is subject to change and does not represent a commitment by Fluke Biomedical. Changes made
to the information in this document will be incorporated in new editions of the publication. No responsibility is assumed by
Fluke Biomedical for the use or reliability of software or equipment that is not supplied by Fluke Biomedical, or by its
affiliated dealers.
Manufacturing Location
The MPS450 Multiparameter Simulator is manufactured at Fluke Biomedical, 6920 Seaway Blvd., Everett, WA, U.S.A.
Applicable Testing Standards
Fluke Biomedical’s MPS450™ Multiparameter Simulator (hereafter referred to as the
MPS450) has been tested by an independent laboratory and meets the requirements listed
here.
Safety Requirements
nd
USA UL 61010-1 (2
Canada CAN/CSA C22.2 No. 61010 (2
Edition). General requirements.
nd
Edition), Safety
requirements for electrical equipment for measurement,
control and laboratory use.
EC Directive 2006/95/EC IEC/EN 61010-1:2001 (2
nd
Edition), safety requirement for
electrical equipment for measurement, control, and
laboratory use.
Electromagnetic Interference and Susceptibility
EN 61326-1:2006 Emissions Class A and Immunity
FCC Class A
Warning: Changes of modifications to this unit not expressly approved by the
Page 5

Contents (continued)
manufacturer could void the user’s authority to operate the equipment.
This equipment has been tested and found to comply with the limits for a Class A digital
device.
These limits are designed to provide reasonable protection against harmful interference
when the equipment is operated in a commercial environment. Like all similar
equipment, this equipment generates, uses, and can radiate radio frequency energy, and,
if not installed and used in accordance with the instruction manual, may cause harmful
interference to radio communications. Operation of this equipment in a residential area is
likely to cause interference, in which case the user will be required to correct the
interference at his/her own expense.
Canadian Department of Communications Class A
This digital apparatus does not exceed Class A limits for radio emissions from digital
apparatus set out in the Radio Interference Regulations of the Canadian Department of
Communications.
Le présent appareil numérique n’excède pas des bruits radioélectriques dépassant les
limites applicables des appareils numériques de la Class A prescrites dans le Règlement
sur le brouillage radioélectrique édicté par le ministère des Communications du Canada.
Based on the testing standards below,
this device bears the
EC Directive 2004/108/EC Electromagnetic Compatibility
Emissions – Class A
The system has been type tested by an independent, accredited testing laboratory and
found to meet the requirements of EN 61326-1:2006 for Radiated Emissions and Line
Conducted Emissions.
EN 61000-3-2 Harmonics Current Emissions
EN 61000-3-3 Voltage Fluctuations and Flicker
Immunity
The system has been type tested by an independent, accredited testing laboratory and
found to meet the requirements of EN 61326-1:2006 for immunity.
EN 61000-4-2 Electrostatic Discharge
EN 61000-4-3 RF Electromagnetic Fields
EN 61000-4-4 Fast Transient/Burst
EN 61000-4-5 Surge Immunity
EN 61000-4-6 RF Common Mode Disturbance
EN 61000-4-11 Voltage Dips, Short interruptions and AC Variations
EC Directive 2006/95/EC Low Voltage
mark.
User Safety
The system has been type tested by an independent testing laboratory and found to meet
the requirements of EC Directive 2006/95/EC for Low Voltage. Verification of
compliance was conducted to the limits and methods of the following
EN 61010-1 (2001)
Safety Requirements for Electrical Equipment for Measurement Control and Laboratory
Use, Part 1:General requirements” (IEC 61010-1:2001, Mod).
Page 6

Page 7

Table of Contents
Chapter Title Page
1 Introduction and Specifications......................................................... 1-1
Introduction........................................................................................................ 1-3
MPS450 Features............................................................................................... 1-3
MPS450 Package Contents................................................................................ 1-5
Standard Equipment ...................................................................................... 1-5
Standard Accessories..................................................................................... 1-5
Optional Accessories ..................................................................................... 1-5
Date of Manufacture .......................................................................................... 1-6
Unpacking the MPS450 ..................................................................................... 1-6
Storage and Maintenance................................................................................... 1-6
Powering Up the MPS450 ................................................................................. 1-7
Connection the MPS450 .................................................................................... 1-8
Using the MPS450 ............................................................................................. 1-9
Viewing Current MPS450 Parameters............................................................... 1-10
Setting the MPS450 View Angle....................................................................... 1-12
Adjusting the MPS450 Beeper........................................................................... 1-12
Navigation in the MPS450................................................................................. 1-13
General Specifications ....................................................................................... 1-15
Detailed Specifications ...................................................................................... 1-15
Normal-Sinus-Rhythm Waveform ................................................................ 1-15
Pacemaker Waveform ................................................................................... 1-15
Arrhythmia .................................................................................................... 1-15
ECG-Performance-Testing ............................................................................ 1-16
Respiration..................................................................................................... 1-16
Blood Pressure............................................................................................... 1-16
Temperature................................................................................................... 1-17
Cardiac Output............................................................................................... 1-17
Fetal / Maternal-ECG .................................................................................... 1-17
Computer Setup ............................................................................................. 1-17
2 Cardiac Functions ............................................................................... 2-1
Introduction........................................................................................................ 2-3
ECG Functions................................................................................................... 2-3
Normal Sinus Rhythm (NSR)........................................................................ 2-3
i
Page 8

MPS450
Operators Manual
Adjusting the ECG Heart Rate ...................................................................... 2-3
Adjusting the ECG Amplitude ...................................................................... 2-4
Adult and Pediatric ECG ............................................................................... 2-5
Adjusting the ST Segment............................................................................. 2-6
Simulating ECG Artifact ............................................................................... 2-7
Pacemaker Waveforms.................................................................................. 2-8
Adjusting Pacemaker–Spike Amplitude........................................................ 2-9
Adjusting Pacemaker–Spike Width............................................................... 2-9
Arrhythmia Functions ........................................................................................ 2-10
Atrial Fibrillation........................................................................................... 2-10
Atrial Flutter .................................................................................................. 2-11
Sinus Arrhythmia........................................................................................... 2-11
Missed Beat ................................................................................................... 2-12
Atrial Tachycardia (AT) ................................................................................ 2-12
Paroxysmal Atrial Tachycardia (PAT) .......................................................... 2-13
Nodal Rhythm ............................................................................................... 2-13
Supraventricular Tachycardia........................................................................ 2-13
Premature Atrial Contraction (PAC) ............................................................. 2-14
Premature Nodal Contraction (PNC)............................................................. 2-14
Premature Ventricular Contractions .............................................................. 2-15
Multifocal PVCS ........................................................................................... 2-16
PVCS: 6, 12, or 24 Per Minute...................................................................... 2-16
Frequent Multifocal PVCS ............................................................................ 2-17
Bigeminy and Trigeminy............................................................................... 2-17
Multiple PVCS: Paired PVCS; Run 5 PVCS; Run 11 PVCS........................ 2-18
Ventricular Tachycardia ................................................................................ 2-19
Ventricular Fibrillation.................................................................................. 2-19
Asystole (Cardiac Standstill)......................................................................... 2-20
Heart Block: First, Second, and Third Degree .............................................. 2-20
Bundle-Branch Block .................................................................................... 2-21
ECG Testing ...................................................................................................... 2-22
Running a Performance Wave....................................................................... 2-22
Adjusting Performance-Wave Amplitude ..................................................... 2-23
R-Wave Detection ......................................................................................... 2-24
Setting R-Wave Rate ..................................................................................... 2-24
Setting R-Wave Width .................................................................................. 2-25
Setting R-Wave Amplitude ........................................................................... 2-26
Blood Pressure Function.................................................................................... 2-27
Setting BP Sensitivity.................................................................................... 2-27
Zeroing BP Channels..................................................................................... 2-28
Setting Static-Pressure Levels ....................................................................... 2-29
Running a Dynamic Waveform..................................................................... 2-31
Adding Respiration Artifact to the BP Signal ............................................... 2-32
Simulating the Swan-Ganz Procedure........................................................... 2-34
Cardiac Output................................................................................................... 2-36
Setting Up For a Cardiac-Output Test........................................................... 2-36
Simulating a Cardiac-Output Test ................................................................. 2-37
Injectate Failure and Left-To-Right Shunt .................................................... 2-37
Simulating Output From a Calibrated Pulse Signal....................................... 2-38
Fetal / Maternal ECG (Option) .......................................................................... 2-39
Simulating a Fixed Fetal Heart Rate (Fhr) .................................................... 2-39
Simulating a Periodic FHR With Intrauterine Pressure (IUP)....................... 2-40
3 Other Functions................................................................................... 3-1
Introduction........................................................................................................ 3-3
ii
Page 9

Contents (continued)
Respiration ......................................................................................................... 3-3
Setting the Respiration Lead and Baseline .................................................... 3-3
Adjusting the Respiration Rate...................................................................... 3-4
Adjusting the Respiration Amplitude (Impedance Variation)....................... 3-5
Simulating Apnea (Respiration Standstill).................................................... 3-6
Temperature (Adjusting Body Temperature)..................................................... 3-6
4 Remote Operations ............................................................................. 4-1
Introduction........................................................................................................ 4-3
Remote Connection............................................................................................ 4-3
Entering Remote Commands ............................................................................. 4-3
Using Remote Entry to Operate In Numeric-Control Mode.............................. 4-4
General Remote Commands .............................................................................. 4-4
Error Messages .................................................................................................. 4-4
Codes and Actions ............................................................................................. 4-4
ECG Functions .............................................................................................. 4-5
Normal-Sinus ECG ................................................................................... 4-5
ECG Amplitude......................................................................................... 4-5
Adult / Pediatric ........................................................................................ 4-6
STE Elevation ........................................................................................... 4-6
ECG Artifact Stimulation.......................................................................... 4-7
Pacemaker Waveform ............................................................................... 4-8
Pacemaker Amplitude ............................................................................... 4-8
Pacemaker Width ...................................................................................... 4-8
Arrhythmia Functions.................................................................................... 4-9
Supraventricular Arrhythmia .................................................................... 4-9
Premature Arrhythmia............................................................................... 4-9
Ventricular Arrhythmia............................................................................. 4-10
Conduction Defect .................................................................................... 4-10
ECG Testing .................................................................................................. 4-10
Performance Waves .................................................................................. 4-11
Performance Wave Amplitude.................................................................. 4-11
R-Wave Rate ............................................................................................. 4-12
R-Wave Width .......................................................................................... 4-12
R-Wave Amplitude ................................................................................... 4-13
Respiration Functions.................................................................................... 4-14
Respiration Lead ....................................................................................... 4-14
Respiration Baseline (Impedance) ............................................................ 4-14
Respiration Rate ........................................................................................ 4-15
Respiration Amplitude .............................................................................. 4-15
Apnea Simulation...................................................................................... 4-16
Blood Pressure Functions .............................................................................. 4-16
Blood-Pressure Sensitivity ........................................................................ 4-16
Blood Pressure Zeroing............................................................................. 4-16
BP Channel 1: Static-Pressure Levels....................................................... 4-16
BP Channel 2: Static-Pressure Levels....................................................... 4-17
BP Channel 3: Static-Pressure Levels....................................................... 4-17
BP Channel 4: Static-Pressure Levels....................................................... 4-18
BP Channel 1: Dynamic Waveforms ........................................................ 4-18
BP Channel 2: Dynamic Waveforms ........................................................ 4-18
BP Channel 3: Dynamic Waveforms ........................................................ 4-19
BP Channel 4: Dynamic Waveforms ........................................................ 4-20
BP Channel 1: Respiration Artifact........................................................... 4-20
BP Channel 2: Respiration Artifact........................................................... 4-21
BP Channel 3: Respiration Artifact........................................................... 4-21
iii
Page 10

MPS450
Operators Manual
BP Channel 4: Respiration Artifact........................................................... 4-21
Other Functions ............................................................................................. 4-21
Temperature .............................................................................................. 4-21
Cardiac-Output Wave / Injectate............................................................... 4-22
FHR Rate (Fixed)...................................................................................... 4-22
Intrauterine-Pressure (-) Wave .................................................................. 4-23
Intrauterine-Pressure (IUP) Period............................................................ 4-23
View Angle ............................................................................................... 4-23
Beeper ....................................................................................................... 4-24
Appendices
A Troubleshooting .......................................................................................... A-1
B Remote Commands ..................................................................................... B-1
C Glossary....................................................................................................... C-1
iv
Page 11

List of Tables
Table Title Page
1-1. MPS450 Functions ................................................................................................. 1-4
1-2. ECG Jack Labeling ................................................................................................ 1-8
1-3. MPS450 Button Description .................................................................................. 1-9
1-4. Parameter Viewing List.......................................................................................... 1-11
2-1. Numeric Codes for BPM Settings.......................................................................... 2-4
2-2. Numeric Codes for ECG Amplitude Settings ........................................................ 2-5
2-3. Numeric Codes for Patient-Type Settings.............................................................. 2-6
2-4. Numeric Code for ST-Segment Settings................................................................ 2-6
2-5. Numeric Code for ECG Artifact Settings .............................................................. 2-8
2-6. Numeric Code for Pacemaker-Waveform Settings ................................................ 2-9
2-7. Numeric Codes for Pacemaker-Amplitude Settings .............................................. 2-9
2-8. Numeric Codes for Pacemaker-Width Settings...................................................... 2-10
2-9. Numeric Codes for Atrial-Fibrillation-Amplitude Settings ................................... 2-11
2-10. Numeric Codes for PVC-Waveform Settings ........................................................ 2-16
2-11. Numeric Codes for PVCs-Per-Minute Settings...................................................... 2-17
2-12. Numeric Codes for PVC-Sequence Settings.......................................................... 2-18
2-13. Numeric Codes for Multiple-PVC Settings ........................................................... 2-19
2-14. Numeric Codes for Ventricular-Fibrillation-Amplitude Settings........................... 2-20
2-15. Numeric Code for Heart-Block Settings ................................................................ 2-21
2-16. Numeric Code for Bundle Branch-Block Settings................................................. 2-22
2-17. Numeric Codes for Wave/Rate Settings................................................................. 2-23
2-18. Numeric Code for Wave Amplitude Settings......................................................... 2-23
2-19. Numeric Codes for R-Wave-Rate Settings ............................................................ 2-25
2-20. Numeric Code R-Wave Width Settings ................................................................. 2-25
2-21. Numeric Codes for R-Wave-Amplitude Settings................................................... 2-26
2-22. Numeric Codes for BP-Sensitivity Settings ........................................................... 2-28
2-23. Numeric Codes for Static-Pressure-Level Settings ................................................ 2-30
2-24. Dynamic Waveform Availability by BP Channel.................................................. 2-31
2-25. Numeric Codes for Dynamic-Wave Settings ......................................................... 2-32
2-26. Numeric Codes for Respiration-Artifact Settings .................................................. 2-33
2-27. Numeric Codes for Swan-Ganz-Simulation Settings............................................. 2-35
2-28. Cardiac-Output Monitor Settings ........................................................................... 2-36
2-29. Numeric Codes for Temperature/Flow Settings..................................................... 2-37
2-30. Numeric Code for Condition/Temperature Setting................................................ 2-38
2-31. Numeric Code for Calibration Setting ................................................................... 2-39
v
Page 12

MPS450
Operators Manual
2-32. Numeric Codes for Heart-Rate Settings................................................................. 2-40
2-33. Numeric Codes for IUP Wave Settings.................................................................. 2-41
2-34. Numeric Codes for IUP Contraction Period Settings............................................. 2-41
3-1. Numeric Codes for Respiration-Lead Settings....................................................... 3-4
3-2. Numeric Codes for Respiration-Baseline Settings................................................. 3-4
3-3. Numeric Codes for Respiration-Rate Settings ....................................................... 3-5
3-4. Numeric Codes for Respiration-Amplitude Settings.............................................. 3-5
3-5. Numeric Codes for Apnea Simulation Settings ..................................................... 3-6
3-6. Numeric Codes for Temperature-Celsius Settings................................................. 3-7
4-1. Remote Connector Signal Pin-Out......................................................................... 4-3
4-2. General Remote Commands................................................................................... 4-4
4-3. Numeric Codes for Normal Sinus ECG Actions.................................................... 4-5
4-4. Numeric Codes for ECG Amplitude Actions......................................................... 4-5
4-5. Numeric Codes for Adult / Pediatric Actions ........................................................ 4-6
4-6. Numeric Codes for STE Elevation Actions ........................................................... 4-6
4-7. Numeric Codes for ECG Artifact Stimulation Actions.......................................... 4-7
4-8. Numeric Codes for Pacemaker Waveform Actions ............................................... 4-8
4-9. Numeric Codes for Pacemaker Amplitude Actions ............................................... 4-8
4-10. Numeric Codes for Pacemaker Width Actions ...................................................... 4-8
4-11. Numeric Codes for Supraventricular Arrhythmia Actions..................................... 4-9
4-12. Numeric Codes for Premature Arrhythmia Actions............................................... 4-9
4-13. Numeric Codes for Ventricular Arrhythmia Actions ............................................. 4-10
4-14. Numeric Codes for Conduction Defect Actions..................................................... 4-10
4-15. Numeric Codes for Performance Waves Actions................................................... 4-11
4-16. Numeric Codes for Performance Wave Amplitude Actions .................................. 4-11
4-17. Numeric Codes for R-Wave Rate Actions ............................................................. 4-12
4-18. Numeric Codes for R-Wave Width Actions .......................................................... 4-12
4-19. Numeric Codes for R-Wave Amplitude Actions ................................................... 4-13
4-20. Numeric Codes for Respiration Lead Actions ....................................................... 4-14
4-21. Numeric Codes for Respiration Baseline (Impedance) Actions............................. 4-14
4-22. Numeric Codes for Respiration Rate Actions ........................................................ 4-15
4-23. Numeric Codes for Respiration Amplitude Actions .............................................. 4-15
4-24. Numeric Codes for Apnea Simulation Actions...................................................... 4-16
4-25. Numeric Codes for Blood-Pressure Sensitivity Actions ........................................ 4-16
4-26. Numeric Codes for Blood-Pressure Zeroing Actions............................................. 4-16
4-27. Numeric Codes for BP Channel 1: Static-Pressure Levels Actions....................... 4-17
4-28. Numeric Codes for BP Channel 2: Static-Pressure Levels Actions....................... 4-17
4-29. Numeric Codes for BP Channel 3: Static-Pressure Levels Actions....................... 4-17
4-30. Numeric Codes for BP Channel 4: Static-Pressure Levels Actions....................... 4-18
4-31. Numeric Codes for BP Channel 1: Dynamic Waveforms Actions ........................ 4-18
4-32. Numeric Codes for BP Channel 2: Dynamic Waveforms Actions ........................ 4-19
4-33. Numeric Codes for BP Channel 3: Dynamic Waveforms Actions ........................ 4-19
4-34. Numeric Codes for BP Channel 4: Dynamic Waveforms Actions ........................ 4-20
4-35. Numeric Codes for BP Channel 1: Respiration Artifact Actions........................... 4-20
4-36. Numeric Codes for BP Channel 2: Respiration Artifact Actions........................... 4-21
4-37. Numeric Codes for BP Channel 3: Respiration Artifact Actions........................... 4-21
4-38. Numeric Codes for BP Channel 4: Respiration Artifact Actions........................... 4-21
4-39. Numeric Codes for Temperature Actions .............................................................. 4-21
4-40. Numeric Codes for Cardiac-Output Wave / Injectate Actions............................... 4-22
4-41. Numeric Codes for FHR Rate (Fixed) Actions...................................................... 4-22
4-42. Numeric Codes for Intrauterine-Pressure (-) Wave Actions .................................. 4-23
4-43. Numeric Codes for Intrauterine-Pressure (IUP) Period Actions............................ 4-23
4-44. Numeric Codes for View Angle Actions ............................................................... 4-23
4-45. Numeric Codes for Beeper Actions ....................................................................... 4-24
vi
Page 13

List of Figures
Figure Title Page
1-1. MPS450 Patient Simulator..................................................................................... 1-8
vii
Page 14

MPS450
Operators Manual
viii
Page 15

Chapter 1
Introduction and Specifications
Title Page
Introduction.......................................................................................................... 1-3
MPS450 Features................................................................................................. 1-3
MPS450 Package Contents.................................................................................. 1-5
Standard Equipment ........................................................................................ 1-5
Standard Accessories....................................................................................... 1-5
Optional Accessories ....................................................................................... 1-5
Date of Manufacture ............................................................................................ 1-6
Unpacking the MPS450 ....................................................................................... 1-6
Storage and Maintenance..................................................................................... 1-6
Powering Up the MPS450 ................................................................................... 1-7
Connection the MPS450 ...................................................................................... 1-8
Using the MPS450 ............................................................................................... 1-9
Viewing Current MPS450 Parameters................................................................. 1-10
Setting the MPS450 View Angle......................................................................... 1-12
Adjusting the MPS450 Beeper............................................................................. 1-12
Navigation in the MPS450................................................................................... 1-13
General Specifications ......................................................................................... 1-15
Detailed Specifications ........................................................................................ 1-15
Normal-Sinus-Rhythm Waveform .................................................................. 1-15
Pacemaker Waveform ..................................................................................... 1-15
Arrhythmia ...................................................................................................... 1-15
ECG-Performance-Testing .............................................................................. 1-16
Respiration....................................................................................................... 1-16
Blood Pressure................................................................................................. 1-16
Temperature..................................................................................................... 1-17
Cardiac Output................................................................................................. 1-17
Fetal / Maternal-ECG ...................................................................................... 1-17
Computer Setup ............................................................................................... 1-17
1-1
Page 16

MPS450
Operators Manual
1-2
Page 17

Introduction and Specifications
Introduction 1
Introduction
When the term “simulation” is used in connection with ECG, Respiration, Temperature,
IBP or Cardiac Output, the simulation is electrical.
The MPS450 Multiparameter Simulator (the MPS450) is an electronic signal source for
determining if patient monitors are performing within their operating specifications. The
MPS450 provides the following function categories:
• ECG Functions
• Arrhythmia Functions
• ECG-Performance Testing
• Respiration
• Blood Pressure
• Temperature
• Cardiac Output (Optional)
• Fetal/Maternal ECG and IUP (Optional)
The MPS450 is a lightweight, battery-powered unit that is portable enough to test a
patient monitor anywhere the monitor is being used. This device is not to replace clinical
testing of waveform detecting devices such as patient monitors.
The microprocessor control of the MPS450, combined with extensive digital memory,
assures rapid test and verification of cardiac-monitoring medical equipment. All
simulation settings are read easily on the clear, built-in LCD (liquid crystal display), with
adjustable viewing “angle” (contrast). Tests and simulations can be selected quickly and
easily, by choosing menu selections, by using front-panel keys to enter numeric codes for
actions, or by using computer control.
A cross-referenced listing of MPS450 actions, numeric codes, and remote-entry
commands is available in Chapter 4: “Remote Operations.”
MPS450 Features
The MPS450 provides control over the widest array of testing parameters, while also
providing simplicity in design and user interface. A keypad enables the easy entry of
functions, parameters, and codes; easy-access jacks simplify quick connection to
monitoring devices.
The wide variety of abnormal ECG waveforms replicated by the MPS450 can be used not
only for testing arrhythmia-detection systems, but also for training medical personnel,
hospital administrators, and staff. The MPS450 can be used to teach techniques for
recognizing normal and abnormal conditions in the heart, lungs, and circulatory system,
as well as techniques for CPR and defibrillation/cardioversion. Cardiac physiologists can
learn how to interpret ECG waveforms; respiratory physiologists can learn
pulmonary/respiratory analysis techniques.
The groupings in Table 1-1 list the main categories of MPS450 functions. Each of these
function groupings is explained in a corresponding section.
1-3
Page 18

MPS450
Operators Manual
Table 1-1. MPS450 Functions
Function Category Function Description
ECG Functions
Arrhythmia Functions
ECG-Performance Testing
Normal sinus rhythm
ECG rate and amplitude
Adult / pediatric QRS
ST-segment elevation
ECG-artifact simulation
Pacemaker waveforms
Pacer amplitude and
width
Supraventricular
arrhythmia
Premature arrhythmia
Missed beat
Ventricular arrhythmia
Conduction defect
Square/pulse/triangle/sine
R waveforms
Wave amplitude
The MPS450 provides complete 3-, 5-, and
12-lead ECG simulation that includes seven
artificial pacemaker conditions. Normal sinus
rhythm is output over a range of heart rates
and voltage amplitudes.
ST-segment elevation is adjustable.
The MPS450 simulates 36 types of
arrhythmias, such as PVCs, tachycardia,
fibrillation, flutter, and asystole. Simulated
conduction defects include first-, second-, and
third-degree heart block; and left- and rightbundle-branch block.
The MPS450 generates square, pulse,
triangle, sine, and R waveforms for
performance testing. Wave amplitude is
adjustable, as well as R-wave rate and width.
R-wave rate and width
Respiration
Blood Pressure
Temperature Temperature settings The MPS450 provides four preset
Respiration lead
Baseline (impedance)
Respiration rate
Respiration amplitude
Apnea simulation
BP sensitivity
BP zeroing
Static-pressure levels
Dynamic BP waveforms
BP respiration artifact
Swan-Ganz simulation
Calibrated respiration rates are generated
from 15 to 120 BrPM (breaths per minute),
including four respiration-impedance
selections, with two different lead selections
(LA or LL). The output-impedance level is
adjustable to 500, 1000, 1500, or 2000 ohms.
The MPS450 generates apnea pauses (0
BrPM) of 12, 22, and 32 seconds, as well as a
continuous-apnea condition.
The MPS450 simulates static and dynamic
invasive pressures, providing complete bloodpressure simulation. The MPS450 also
provides calibrated static pressures and
dynamic waveforms to simulate signals such
as pulmonary-artery, left- and right-ventricle
and Swan Ganz (RA-RV-PA-PAW) pressures.
temperature simulations: 0 °C, 24 °C, 37 °C,
and 40 °C. All temperature simulations are
compatible with Yellow Springs, Inc. (YSI)
Series 400 and 700 thermistors.
1-4
Page 19

Introduction and Specifications
MPS450 Package Contents 1
Table 1-1. MPS450 Functions (cont.)
Function Category Function Description
Cardiac Output
Thermodilution method,
(Option)
(Option)
Injectate temperature
Injectate flow
Faulty-injectate curve
Left-to-right-shunt curve
Calibrated pulse
Fixed/periodic FHR Fetal / Maternal ECG
IUP simulation
RS-232 serial port Remote Operations
RS-232 serial port
The MPS450 simulates cardiac-output
waveforms for testing the accuracy and
sensitivity of cardiac-output computational
devices equipped with Baxter-Edwards-type
catheters. Injectate temperature can be set
either to “iced” or room-temperature
conditions, with adjustable flow rate (in liters
per minute). The MPS450 also simulates a
faulty-injectate curve, as well as a left-to-rightshunt curve which is a function of temperature
(Y-axis) and time (X-axis) curve, instead of a
pressure curve.
The MPS450 simulates a combined fetal and
maternal ECG occurring during labor, as well
as a selection of pressure waveforms
produced by uterine contractions. The
contraction period is adjustable and includes a
manually generated waveform.
MPS450 features include a built-in RS-232
serial port that, when connected to a
computer, enables instrument control through
remote commands. In addition, a special
command can be used to operate the
MPS450 remotely in the numeric-control
mode.
WWarning
To prevent personal injury, use the Simulator in the manner
specified in this manual or the protection provided by the
Simulator may be impaired.
MPS450 Package Contents
Standard Equipment
• MPS450 Multiparameter Simulator
Standard Accessories
• MPS450 Operators Manual (P/N 2243350)
• Registration card
• Two 9-volt alkaline batteries (minimum 8 hours continuous use)
• Cardiac-output adapter box (P/N 2226608, standard with Cardiac-Output Option)
Optional Accessories
• Carrying case (P/N 2248623)
• Blood-pressure cables (See your local Fluke Biomedical Representative for
availability)
• Temperature cables (YSI 400 Series: P/N 2391976; 700 Series: P/N 2391983)
• High-level-output cable (P/N 2226958)
1-5
Page 20

MPS450
Operators Manual
Date of Manufacture
Unpacking the MPS450
• Universal injectate-temperature adapter (P/N 2226800)
• RS-232 cable (P/N 2238659)
• Service Manual (P/N 2243361)
• Battery eliminator (P/N 2720054)
• Contains universal power supply, 9 - 264V, USA, AUS, DEN, IND, ISR,
ITAL, SHK, SWZ and UK
• For power cord order 284174 (USA), 658641 (AUS), 2200218 (DEN),
2200229 (IND), 2200241 (ISR), 2198785 (ITAL), 769422 (SHK), 769448
(SWZ) and 769455 (UK)
The date of manufacture of the MPS450 unit appears on a label on the back of the
instrument, for example, JAN-03.
Unpack the MPS450 and accessories from the shipping carton and insert the batteries.
Inspect the unit carefully for damage, such as cracks, dents, scratches, or bent parts. If
any physical damage is apparent, please call Fluke Biomedical for assistance, and notify
the carrier if the damage appears to be the result of a shipping mishap.
Storage and Maintenance
As with most electronic equipment, the MPS450 should be operated in a dry area within
normal temperature limits (10 °C to 40 °C).
There are no unique storage requirements. However, when storing the unit, maintain the
storage temperature between -25 °C and 50 °C. Remove the batteries if the unit will be
stored for a long period.
The MPS450 should be recalibrated once a year by a qualified technician. For safety
reasons, although the power output from the MPS450 is not potentially dangerous, only
an experienced technician should open the unit to access the inner electronics.
The MPS450 operates continuously for 8 or more hours on two 9-volt alkaline batteries,
which should be replaced regularly. The message “Low Battery” displays on the LCD
whenever the batteries need to be replaced.
When the LCD screen displays a message warning that batteries are low,
replace the two batteries immediately. The battery compartment is located
at the back of the unit, toward the bottom. Use only two new 9-volt
batteries.
Note
1-6
Page 21
Introduction and Specifications
Powering Up the MPS450 1
Powering Up the MPS450
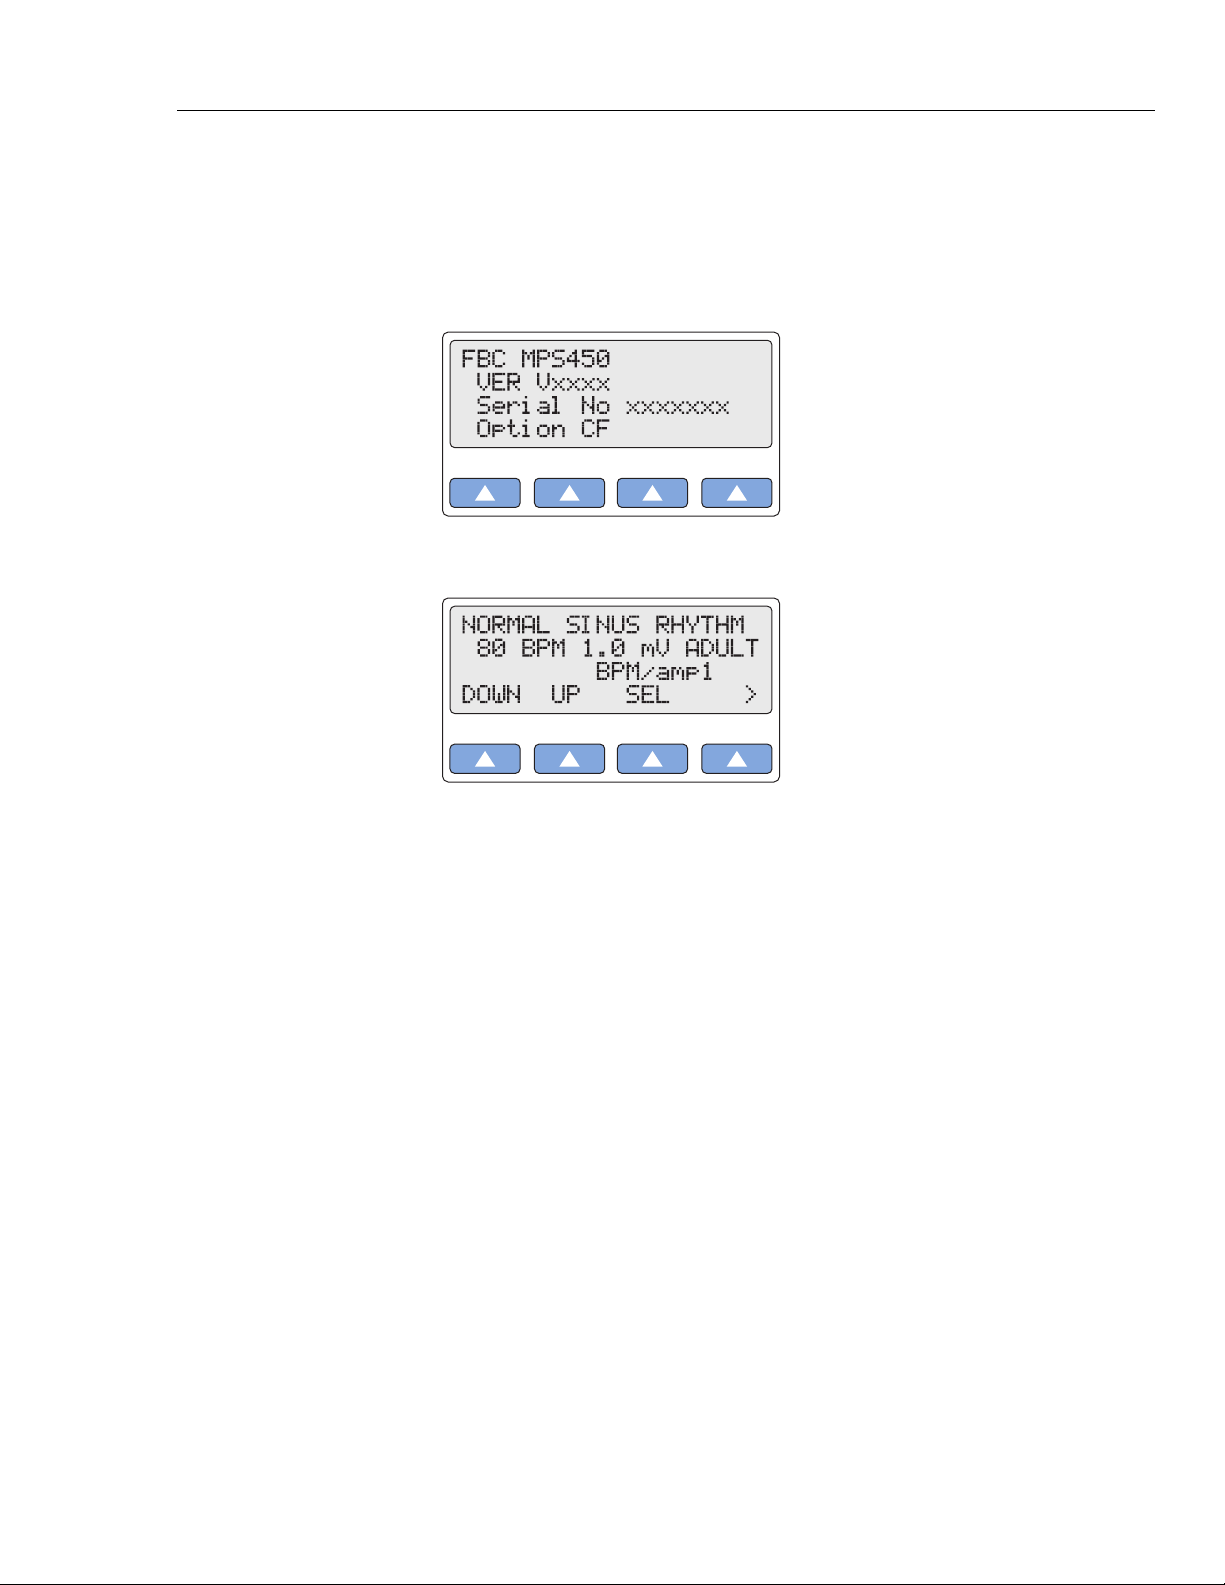
1. Power up the system by pressing the power-on/off key (the green key located on the
keypad of the unit, bottom/right). After one short beep, the LCD screen displays the
following startup message:
2. After a three-second display test, the following top menu displays:
Note
Once you have the MPS450 up and running, please fill out the Registration
Card and mail it to Fluke Biomedical.
gje001.eps
gje002.eps
1-7
Page 22

MPS450
Operators Manual
Connection the MPS450
Figure 1-1. MPS450 Patient Simulator
The right side of the MPS450 features connections for linking to blood-pressure, cardiacoutput, and temperature monitors. In addition, there is an auxiliary connection for future
expansion. The bottom of the MPS450 features an RS-232 serial port and a connection
for a battery eliminator. Prewired cables compatible with all major manufacturers’
monitors are available for simulating functions related to blood pressure, temperature,
and cardiac-output injectate. (Call your sales representative for a complete list.)
The left side of the MPS450 features a full set of universal ECG jacks, enabling the
connection of any 3-, 5-, or 12-lead ECG device. AHA and IEC color-coded dots run
along the left side of the face of the unit as an aid in connecting the corresponding U.S.
and international patient leads to the proper universal ECG jacks on the MPS450:
Table 1-2. ECG Jack Labeling
Label Meaning
RA or R Right arm
LA or L Left arm
RL or N Right leg (reference or ground)
LL or F Left led
gje041.eps
1-8
V1, V2, V3, V4, V5, and V6 V Leads (U.S. and Canada). Also referred to as
pericardial, precordial, or unipolar chest leads.
C1, C2, C3, C4, C5, and C6 Chest leads (International)
Page 23
Introduction and Specifications
Using the MPS450 1
Using the MPS450
The MPS450 offers a wide array of simulations, functions, and adjustments that are easy
to use. During operation, press the MODE key (the yellow key located on the keypad
near the bottom of the unit) to enable either the menu-control or numeric-control mode.
In menu mode, simply press the top-menu key for a function group (labeled in yellow just
above the corresponding number key as shown in the Table 1-3), and then press one of
the four function keys (the blue keys located on the keypad just beneath the LCD) to
select from options displayed on the screen. In numeric mode, simply press the number
keys to enter the three-digit numeric code for the desired function, and select RUN.
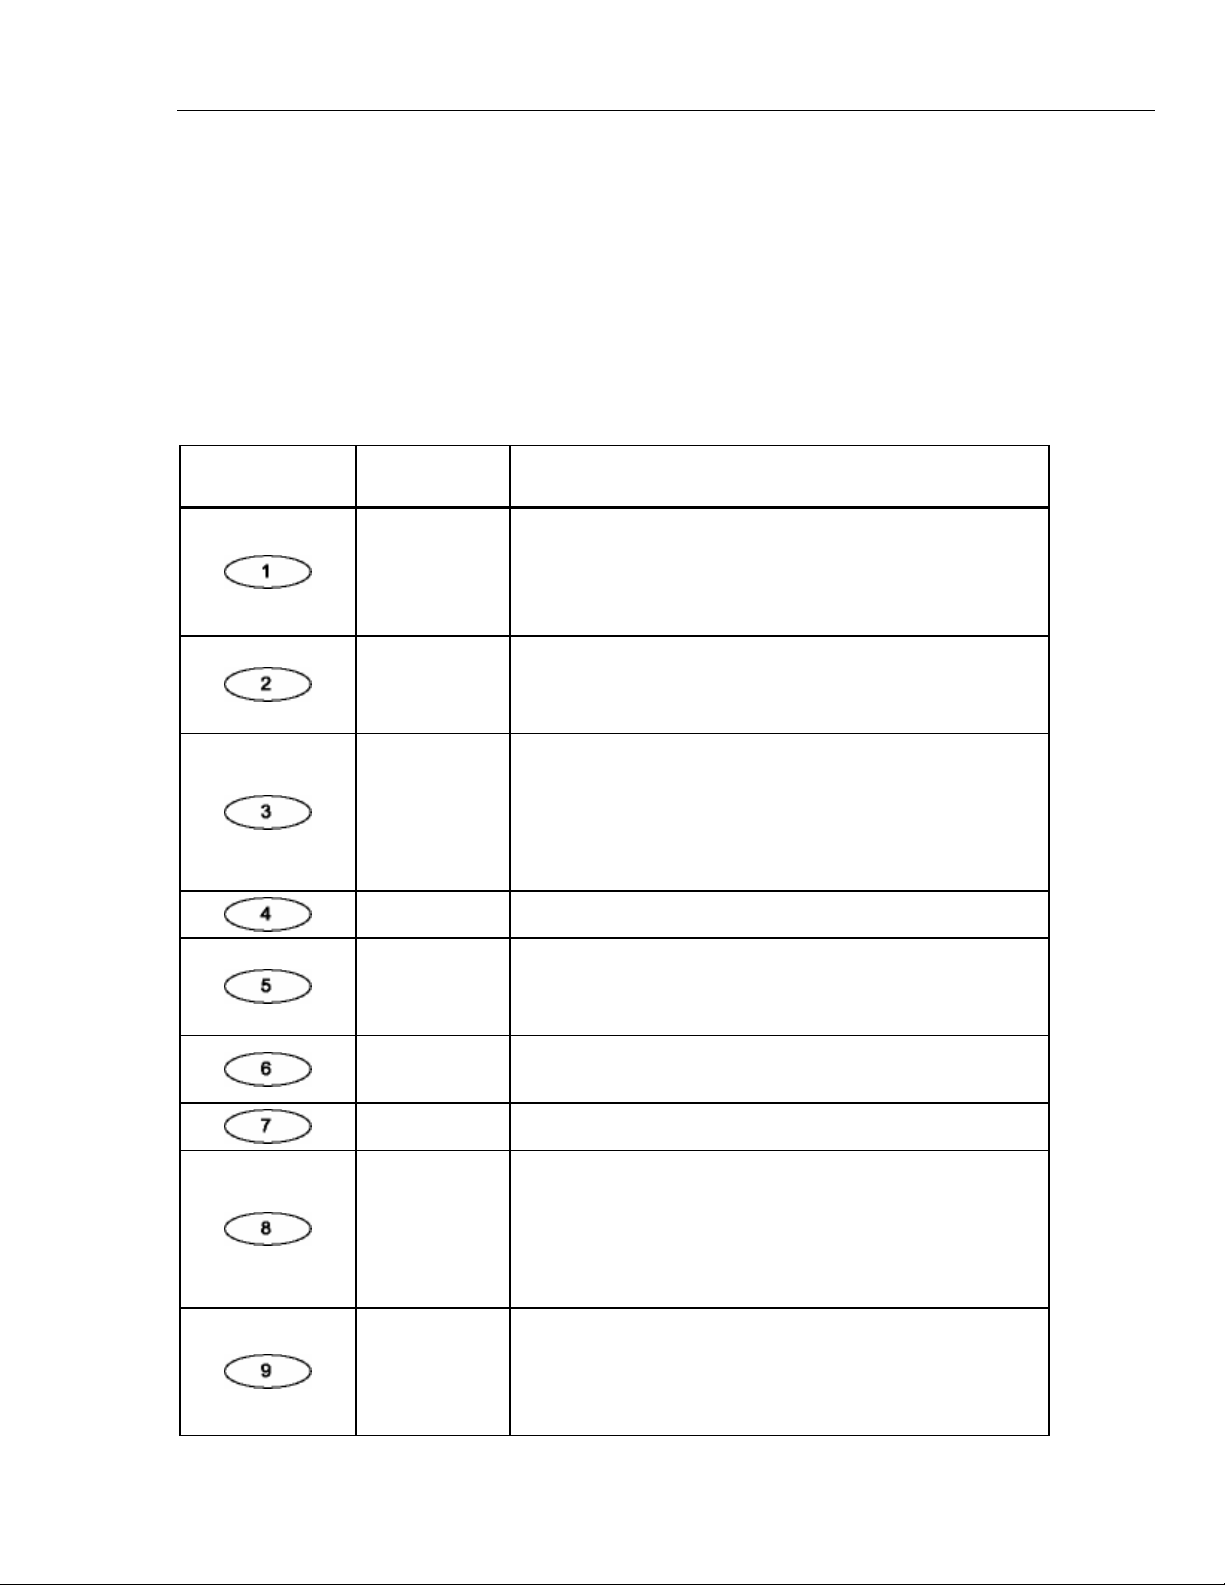
Table 1-3. MPS450 Button Description
Number Key /
Key
Menu Label Menu Functions
Adjust ECG heart rate.
NSR
RESP
BP
ARRHY
PERF
Adjust ECG amplitude.
Set patient type (age).
Adjust ST-segment elevation.
Adjust respiration rate.
Adjust respiration amplitude (impedance variation).
Simulate apnea.
Zero all blood-pressure channels.
Set static-pressure levels for BP channels.
Run dynamic BP waveforms.
Simulate Swan-Ganz procedure.
Add respiration artifact to BP signal.
Run arrhythmia simulations (36).
Run ECG-performance waves.
Adjust performance-wave amplitude.
Adjust R-wave rate, width, and amplitude.
PACE
TEMP
CO
MORE
Run pacemaker waveform.
Adjust pacemaker-spike amplitude and width.
Adjust body temperature.
Simulate cardiac-output test.
Adjust injectate temperature and flow for CO test.
Simulate injectate failure.
Simulate left-to-right shunt.
Simulate output from a calibrated pulse signal.
Simulate ECG artifact.
Set fixed fetal heart rate.
Simulate intrauterine-pressure (IUP) wave.
Adjust IUP-wave period.
1-9
Page 24
MPS450
Operators Manual
Table 1-3. MPS450 Button Description (cont.)
Number Key /
Key
Select option displayed on LCD screen.
Menu Label Menu Functions
Set respiration lead and baseline (impedance).
SETUP
Switch between menu control and numeric control.
View current parameters.
Return to previous or top menu.
Set blood-pressure sensitivity.
Adjust viewing angle (contrast) for LCD screen.
Set beeper mode.
Viewing Current MPS450 Parameters
The current settings for adjustable parameters—such as heart rate and BP static-pressure
levels—are available for display at any time on a series of LCD screens that are accessed
by pressing the VIEW key.
(When the MPS450 is turned off, the parameters reset to defaults, with the exception of
settings that can be stored, i.e., respiration lead and baseline, BP sensitivity, view angle,
and beeper mode. Power-on default settings for functions are listed in the
“Specifications” section later in this chapter.)
Action in the Menu-Control Mode
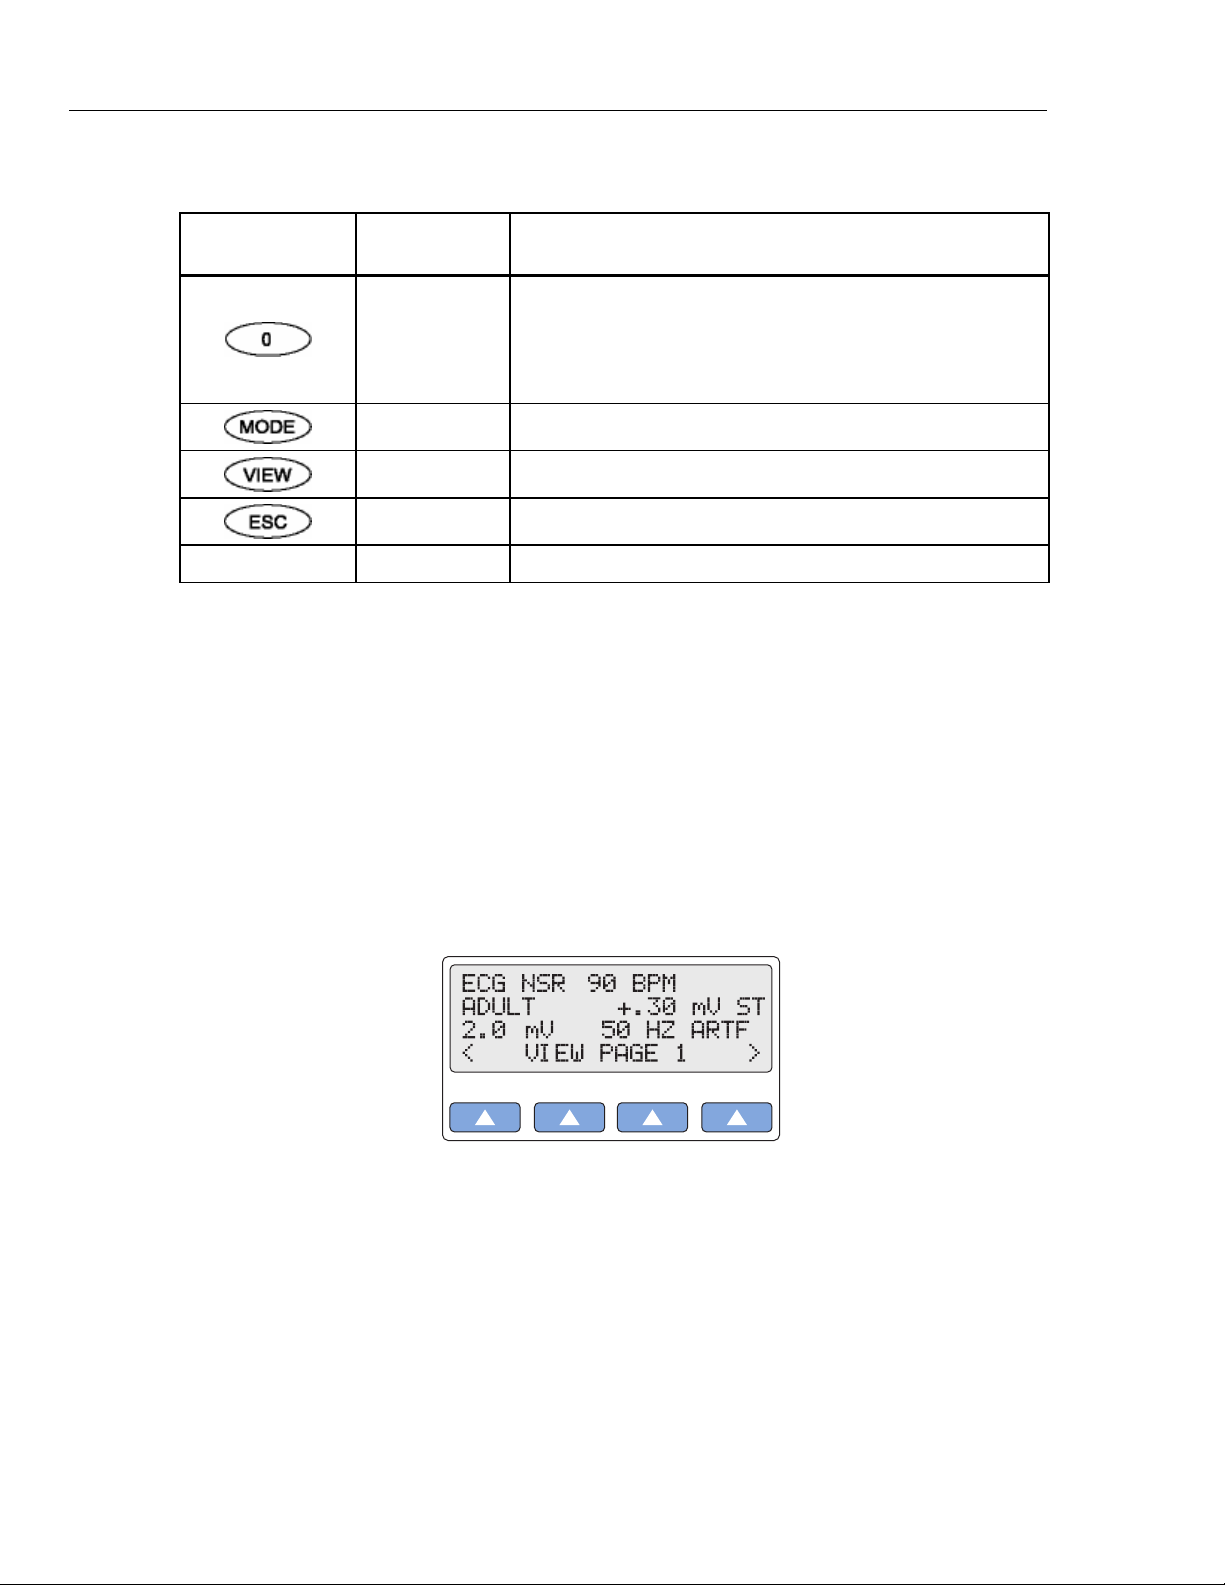
1. Press the white key labeled VIEW to display the VIEW PAGE 1 screen—the ECG
page—which indicates current ECG settings:
The types of parameters displayed on VIEW PAGE 1 depend on which group of
ECG waves is running. In this example (the ECG-NSR-wave group), the settings
displayed include NSR rate (90 BPM), patient type (ADULT), ST-segment elevation
(+.30 mV), NSR amplitude (2.00 mV), and ECG artifact (50 HZ).
Four other types of ECG-wave groups display different parameter types on VIEW
PAGE 1, and three other VIEW PAGE screens display parameters for respiration,
blood-pressure, and temperature/cardiac-output functions. Table 1-4 lists the
parameters available for viewing on the four pages:
gje003.eps
1-10
Page 25

Introduction and Specifications
Viewing Current MPS450 Parameters 1
Table 1-4. Parameter Viewing List
View
Page
1
2 Respiration Respiration rate, amplitude, lead, and baseline
3 Blood Pressure BP sensitivity; and settings BP1, BP2, BP3, BP4
4
Wave/Function Current Parameters Displayed
ECG NSR NSR rate, patient type, ST-segment elevation, NSR amplitude,
and ECG artifact.
ECG performance Performance wave and amplitude
ECG R-wave detection R-wave rate, width, and amplitude
ECG Arrhythmia Arrhythmia and ECG artifact
Fetal/maternal IUP wave, IUP period, and fetal heart rate
Temperature/Cardiac Output Temperature, thermistor, cardiac-output wave, and
CO-injectate temperature and flow
2. Select < or > to cycle through the other three VIEW pages, which display as screens
similar to the following:
gje004.eps
gje005.eps
gje006.eps
3. To exit viewing, press the VIEW key again, or press the ESC key to return to the
previous control mode.
4. While viewing settings, the MODE key is inactive. Press the ESC key to exit
viewing before changing modes.
1-11
Page 26
MPS450
Operators Manual
Setting the MPS450 View Angle
Action in the Menu-Control Mode
The MPS450 offers eight preconfigured settings to customize the preferred degree of
contrast (brightness) for the angle at which the LCD screen is being viewed.
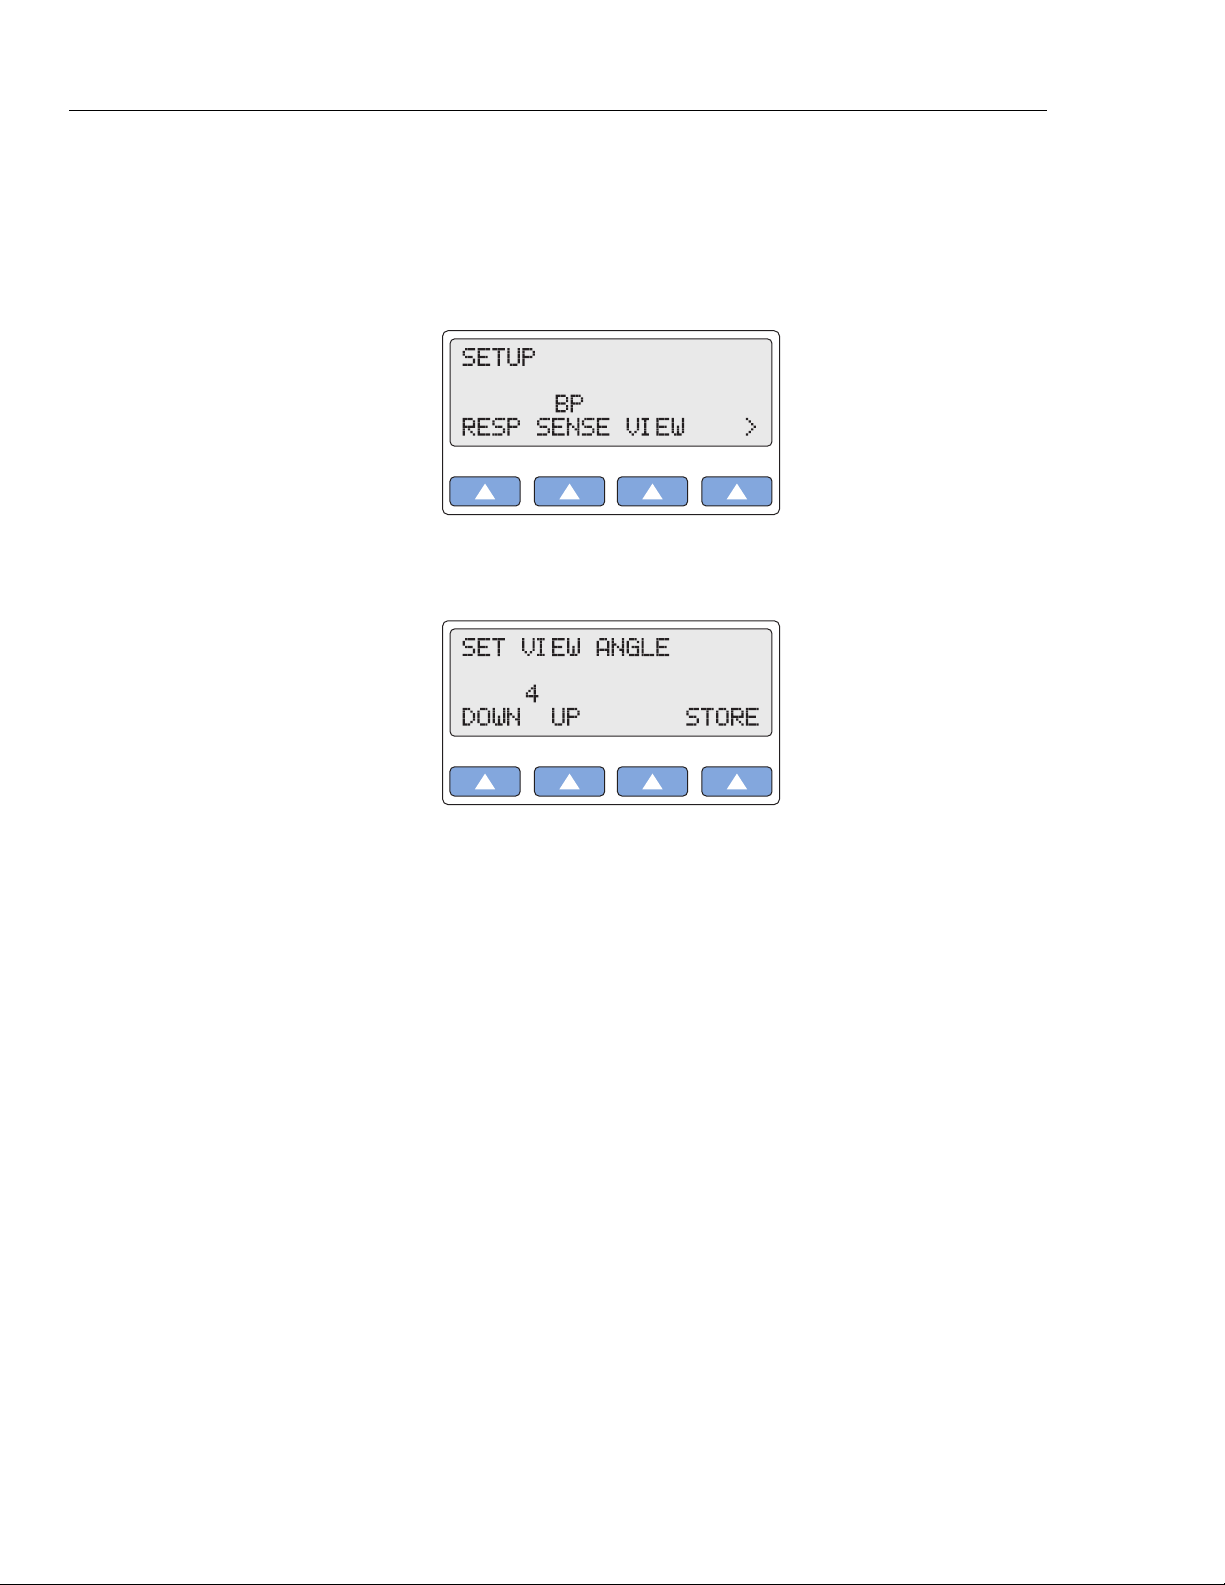
1. Press the top-menu key labeled SETUP to display the LCD screen:
2. Select VIEW to scroll to the LCD screen SET VIEW ANGLE, which displays the
current screen-contrast setting (in this example, 4):
3. To adjust the LCD screen’s contrast, scroll to the preferred setting, from 1 (lowest) to
8 (highest). The setting is active when displayed and remains active until the setting
is changed.
4. To store the contrast setting beyond the current session, select STORE. On the LCD
screen, Storing blinks on momentarily to indicate the value is being saved.
5. Press the ESC key to return to the top menu SETUP.
Adjusting the MPS450 Beeper
If not turned off, the MPS450 beeper sounds on power-up and whenever a key is pressed.
A double-beep sounds for an invalid key.
gje007.eps
gje008.eps
1-12
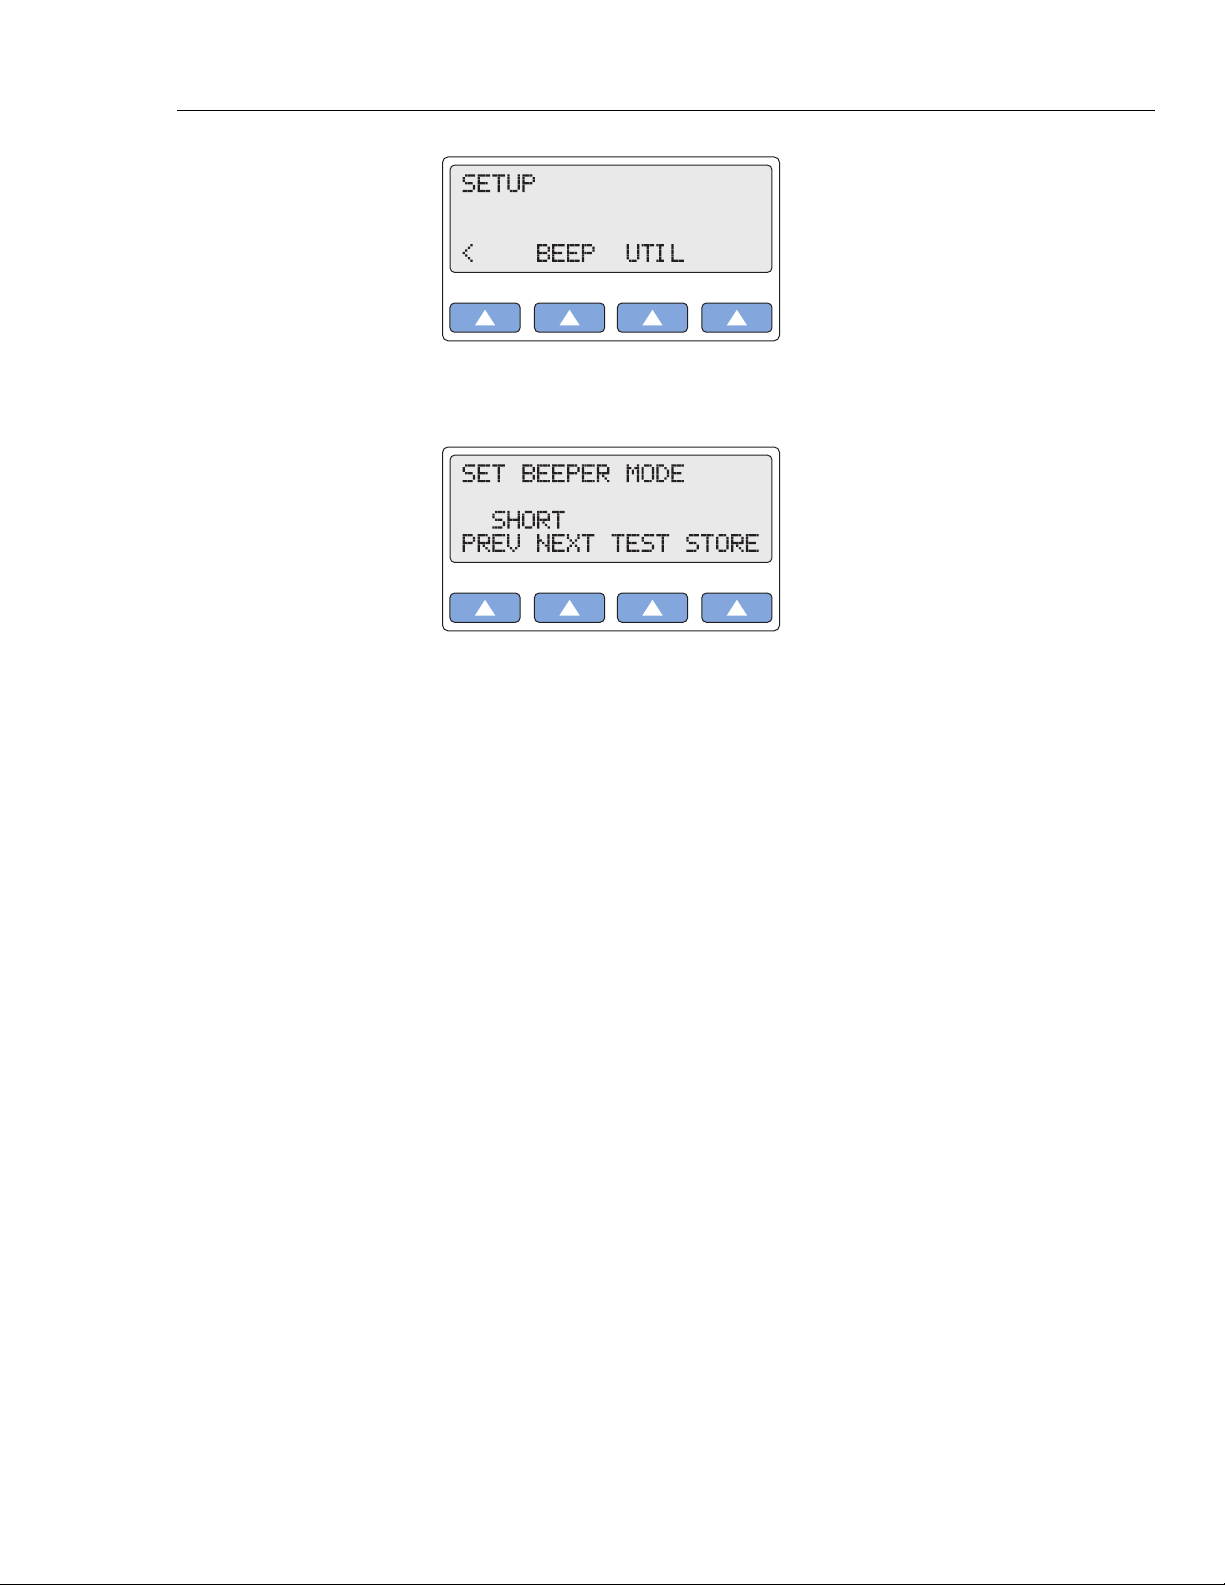
The MPS450 offers three preconfigured settings to customize the beeper sound: off,
short, or long.
Action in the Menu-Control Mode
1. Press the top-menu key labeled SETUP to display the LCD screen.
2. Select > to display the following LCD screen:
Page 27
Introduction and Specifications
Navigation in the MPS450 1
3. Select BEEP to scroll to the LCD screen SET BEEPER MODE, which displays the
current setting (in this example,
4. Scroll to the desired beeper mode. The setting is active when displayed and remains
active until the setting is changed.
5. To hear the audible beep as currently set, select TEST.
6. To store the beeper setting beyond the current session, select STORE. On the LCD
screen, Storing blinks on momentarily to indicate the value is being saved.
7. Press the ESC key to return to the top menu SETUP.
Navigation in the MPS450
Press the MODE key (the yellow key located on the keypad near the bottom of the unit)
to enable either the menu-control or numeric-control mode. The control mode can be
switched at any time, except while viewing current parameters on a VIEW page; press
the VIEW key to exit back to the mode you were in previously.
SHORT):
gje009.eps
gje010.eps
Action in the Menu-Control Mode
1. To navigate in menu-control mode, press the top-menu key for a function group,
labeled in yellow just above the corresponding number key. (Available functions in
each of the menu categories are listed in the “Using the MPS450” section earlier in
this chapter.)
2. Press one of the four function keys (the blue keys located on the keypad just beneath
the LCD) to select from options displayed on the screen.
3. To scroll through screens while in the menu mode, select PREV or NEXT. (Selecting
PREV from the first selection—or NEXT from the last selection—in a menu usually
results in a double-beep. Press the ESC key to return to the previous menu, or press
another top-menu key.)
4. To scroll through the adjustment options, select DOWN or UP.
5. Some menu selections are active when displayed. For others, RUN must be selected
to execute the option. (Instructions are provided in this manual for each function.)
When selected, RUN or RUNNING flashes on the LCD screen to indicate the
selection is active.
1-13
Page 28

MPS450
Operators Manual
Action in the Numeric-Control Mode
6. Some simulations run continuously until terminated; others run as one-time events
and must be selected again to repeat. (Again, instructions are provided for each
function.)
1. To navigate in numeric-control mode, press the number keys to enter the three-digit
numeric code for the desired function. (Numeric codes for functions are listed in each
section after the menu-control instructions. A complete list of MPS450 numeric
codes for actions, arranged by category and cross-referenced to remote-control-entry
codes, is available in the “Remote Operations” Chapter.)
2. The LCD displays a screen similar to the following:
gje011.eps
3. Select RUN. (On the LCD screen, RUN does not flash while the selection is active as
it does in the menu-control mode.)
4. To scroll through screens while in the numeric-control mode, select DOWN or UP;
screens are available in chronological numeric order. (Inactive numeric-control codes
are skipped automatically.) Alternatively, simply press the number keys for another
numeric selection.
5. The screen for a numeric entry appears only after the entire numeric code is entered.
6. As the numbers for a three-digit code are entered, each number on the screen shifts
one place to the left. This means that the function identifications for other key codes
appear briefly on the screen during the entry process.
For example, from the ASYSTOLE numeric screen (in the example shown in this
section), if you begin to enter 382 for the PAROXYSMAL ATR TACH screen,
when you press 3, the LCD displays the screen [333] R WAVE WIDTH 150 MS;
and when you press 8, the LCD displays the screen [338] R WAVE WIDTH 200
MS. The ASYSTOLE screen does not appear until the entire code 382 is entered.
1-14
Page 29

Introduction and Specifications
General Specifications 1
General Specifications
Power ..................................................................... Two 9-V alkaline batteries (minimum 8 hours continuous power).
Size......................................................................... 6 in x 7.5 in x 2 in (15.2 cm x 19 cm x 5 cm)
Weight .................................................................... 1 lb 8 oz (0.7 kg)
Temperature
Storage ............................................................... -25 °C to +50 °C
Operation ............................................................ 10 °C to 40 °C
Maximum Humidity ............................................... 80 % relative humidity
Battery Replacement ............................................ Warning for low-battery condition. The batteries must be replaced at
Optional battery eliminator: 9 Vdc, 50 mA
this time.
Detailed Specifications
Normal-Sinus-Rhythm Waveform
ECG Reference...................................................... The ECG amplitudes specified are for Lead II (calibration), from the
Normal Sinus Rhythm .......................................... 12-lead configuration with independent outputs referenced to right leg
High-Level Output................................................. 0.2 V/mV ±5 % of the ECG amplitude setting available on the BP3
Amplitude .............................................................. 0.05 mV to 0.5 mV (0.05 mV steps); 0.5 mV to 5.5 mV (0.5 mV steps)
Amplitude Accuracy ............................................. ±2 % of setting Lead II
ECG Rate ............................................................... 30, 40, 45, 60, 80, 90, 100, 120, 140, 160, 180, 200, 220, 240, 260,
Rate Accuracy ....................................................... ±1 % of setting
ECG Waveform Selection..................................... Adult (80 ms) or pediatric (40 ms) QRS duration
Superimposed Artifact ......................................... 50 and 60 Hz, muscle, baseline wander, respiration
ST-Segment Elevation .......................................... Adult mode only. -0.8 mV to +0.8 mV (0.1 mV steps) Additional steps:
Power-On Default.................................................. 80 BPM, 1.0 mV, adult QRS, ST-segment elevation of 0 mV, and a
baseline to the peak of the R wave. All other leads are proportional.
(RL). Output to 10 Universal ECG Jacks, color-coded to AHA and IEC
Standards.
connector.
280, and 300 BPM
+0.05 mV and -0.05 mV
P-R interval of 0.16 seconds
Pacemaker Waveform
Pacer-Pulse Amplitude......................................... 1, 2, 5, 10 mV ±10 %
Pacer-Pulse Width ................................................ 0.1, 0.5, 1.0, 1.5, 2.0 ms ±5 %
Pacing Rate ........................................................... 75 BPM
Waveforms
Atrial
Asynchronous 75 BPM
Demand with frequent sinus beats
Demand with occasional sinus beats
AV sequential
Noncapture (one time)
Nonfunction
Power-On Default.................................................. Amplitude 5 mV, width 1.0 ms, atrial waveform
Arrhythmia
Baseline NSR......................................................... 80 BPM
PVC Focus ............................................................. Left focus, standard timing (except where specified)
Supraventricular Arrhythmia ............................... Atrial fibrillation (coarse or fine); atrial flutter; sinus arrhythmia; missed
beat (one time); atrial tachycardia; paroxysmal atrial tachycardia; nodal
rhythm; and supraventricular tachycardia.
Premature Arrhythmia.......................................... (All one-time events) Premature atrial contraction (PAC); premature
nodal contraction (PNC); PVC1 left ventricular; PVC1 left ventricular,
early; PVC1 left ventricular, R on T; PVC2 right ventricular; PVC2 right
ventricular, early; PVC2 right ventricular, R on T; and multifocal PVCs
1-15
Page 30

MPS450
Operators Manual
Ventricular Arrhythmia......................................... PVCs 6, 12, or 24 per minute; frequent multifocal PVCs; bigeminy;
Conduction Defect ................................................ First-, second-, or third-degree heart block; and right- or left-bundle-
Power-On Default.................................................. Atrial fibrillation (coarse); PAC; PVCs 6/minute; first-degree heart block
trigeminy; multiple PVCs (one-time run of 2, 5, or 11 PVCs); ventricular
tachycardia; ventricular fibrillation (coarse or fine); and asystole
branch block
ECG-Performance-Testing
Amplitude .............................................................. 0.05 to 0.5 mV (0.05 mV steps)
Pulse Wave ............................................................ 30, 60 BPM, with 60 ms pulse width
Square Wave ......................................................... 2.0, 0.125 Hz
Triangle Wave........................................................ 2.0, 2.5 Hz
Sine Wave .............................................................. 0.5, 5, 10, 40, 50, 60, 100 Hz
R-wave-Detection Waveform ............................... Haver-Triangle
R-wave Rate........................................................... 30, 60, 80, 120, 200, and 250 BPM
R-wave Width ........................................................ 20 to 200 ms (10 ms steps)
Rate Accuracy ....................................................... ±1 %
Amplitude Accuracy ............................................. ±2 %, Lead II (Exception: ±5 % for R waves ≤20 ms)
Power-On Default ................................................. 1.0 mV, square wave 2.0 Hz, R-wave rate 60 BPM, R-wave width
0.5 to 5.5 mV (0.5 mV steps)
Additional Steps: 8, 10, and 12 ms
10 ms
Respiration
Rate ........................................................................ 0 (OFF), 15, 20, 30, 40, 60, 80, 100, 120 BrPM
Impedance Variations (Δ Ω) ................................. 0.2, 0.5, 1, or 3 Ω
Accuracy Delta ...................................................... ±10 %
Baseline ................................................................. 500, 1000, 1500, 2000 Ω, Leads I, II, III
Accuracy Baseline ................................................ ±5 %
Respiration Lead................................................... LA or LL
Apnea Selection.................................................... 12, 22, or 32 seconds (one-time events), or continuous (Apnea ON =
Power-On Default.................................................. 20 BrPM, delta 1.0 Ω, 1000-Ω baseline, left-arm lead (LA), 12-second
respiration OFF)
apnea
1-16
Blood Pressure
Input/output Impedance ....................................... 300 Ω ±10 %
Exciter Input Range ..............................................2.0 to 16.0 V rms
Exciter-Input Frequency Range ........................... DC to 5000 Hz
Transducer Sensitivity ......................................... 5 or 40 μV/V/mmHg
Pressure Accuracy ...............................................±(2 % of setting + 2 mmHg)
Static Levels, p1.................................................... -10, 0, 80, 160, 240, 320, 400 mmHg
Static Levels, p2.................................................... -10, 0, 50, 100, 150, 200, 240 mmHg
Static Levels, p3.................................................... -5, 0, 20, 40, 60, 80, 100 mmHg
Static Levels, p4.................................................... -5, 0, 20, 40, 60, 80, 100 mmHg
Dynamic Waveforms, p1 ...................................... Arterial: 120/80
Radial artery: 120/80
Left ventricle: 120/00
Right ventricle: 25/00
Dynamic Waveforms, p2 ...................................... Arterial: 120/80
Radial artery: 120/80
Left ventricle: 120/00
Right atrium (central venous or CVP): 15/10
Right ventricle: 25/00
Pulmonary artery: 25/10
Pulmonary-artery wedge: 10/2
Left atrium: 14/4
Dynamic Waveforms, p3 ...................................... Arterial: 120/80
Radial artery: 120/80
Left ventricle: 120/00
Page 31

Introduction and Specifications
Detailed Specifications 1
Right atrium (central venous or CVP): 15/10
Right ventricle: 25/00
Pulmonary artery: 25/10
Pulmonary-artery wedge: 10/2
Left atrium: 14/4
Dynamic Waveforms, p4 ...................................... Swan-Ganz sequence:
Respiration Artifact............................................... BP delta changes from 3 to 16 mmHg
BP Output ..............................................................Mini DIN 7-Pin
Power-On Default.................................................. 0 mmHg, transducer sensitivity 5 μV/V/mmHg
Right atrium (CVP)
Right ventricle RV)
Pulmonary artery (PA)
Pulmonary-artery wedge (PAW)
Temperature
Temperature .......................................................... 0 °C (42 °F), 24 °C (75.2 °F), 37 °C (98.6 °F), and 40 °C (104 °F)
Accuracy................................................................ ±0.1 °C
Compatibility .........................................................Yellow Springs, Inc. (YSI) Series 400 and 700
Output ....................................................................mini DIN 7-pin
Power-On Default.................................................. 0 °C (42 °F)
Cardiac Output
Catheter Type ........................................................ Baxter Edwards, 93a-131-7f
Calibration Coefficient.......................................... 0.542 (0 °C injectate), 0.595 (24 °C injectate)
Blood Temperature ............................................... 37 °C (98.6 °F) ±2 %
Injectate Volume ................................................... 10 cc
Injectate Temperature........................................... 0 °C or 24 °C ±2 % value
Cardiac Output ...................................................... 2.5, 5, 10 liters per minute ±5 %
Faulty-Injectate Curve .......................................... Waveform for simulation available
Left-to-Right-Shunt Curve .................................... Waveform for simulation available
Calibrated Pulse.................................................... 1.5 ° for 1 second (37 ° → 35.5 °)
Repeatability.......................................................... ±1 %
Power-On Default ................................................. 2.5 liters per minute, 0 °C injectate
Fetal / Maternal-ECG
Fetal Heart Rate (Fixed)........................................ 60, 90, 120, 140, 150, 210, and 240 BPM
Fetal Heart Rate (IUP): ..........................................140 BPM at beginning, then varies with pressure
Intrauterine-Pressure Waveforms .......................Early deceleration, late deceleration, and acceleration
Wave Duration....................................................... 90 seconds, bell-shaped pressure curve, from 0 to 90 mmHg and
returning to 0
IUP Period.............................................................. 2, 3, or 5 minutes; and manual
Power-On Default.................................................. FHR 120 BPM, late deceleration, manual
Computer Setup
Port......................................................................... Bidirectional (Data Communications Equipment) RS-232
Baud Rate .............................................................. 9600
Parity ...................................................................... None
Stop Bits ................................................................ 1
Data Bits ................................................................ 8
1-17
Page 32

MPS450
Operators Manual
1-18
Page 33

Chapter 2
Cardiac Functions
Title Page
Introduction.......................................................................................................... 2-3
ECG Functions..................................................................................................... 2-3
Normal Sinus Rhythm (NSR).......................................................................... 2-3
Adjusting the ECG Heart Rate ........................................................................ 2-3
Adjusting the ECG Amplitude ........................................................................ 2-4
Adult and Pediatric ECG ................................................................................. 2-5
Adjusting the ST Segment............................................................................... 2-6
Simulating ECG Artifact ................................................................................. 2-7
Pacemaker Waveforms.................................................................................... 2-8
Adjusting Pacemaker–Spike Amplitude.......................................................... 2-9
Adjusting Pacemaker–Spike Width................................................................. 2-9
Arrhythmia Functions .......................................................................................... 2-10
Atrial Fibrillation............................................................................................. 2-10
Atrial Flutter .................................................................................................... 2-11
Sinus Arrhythmia............................................................................................. 2-11
Missed Beat ..................................................................................................... 2-12
Atrial Tachycardia (AT) .................................................................................. 2-12
Paroxysmal Atrial Tachycardia (PAT) ............................................................ 2-13
Nodal Rhythm ................................................................................................. 2-13
Supraventricular Tachycardia.......................................................................... 2-13
Premature Atrial Contraction (PAC) ............................................................... 2-14
Premature Nodal Contraction (PNC)............................................................... 2-14
Premature Ventricular Contractions ................................................................ 2-15
Multifocal PVCS ............................................................................................. 2-16
PVCS: 6, 12, or 24 Per Minute........................................................................ 2-16
Frequent Multifocal PVCS .............................................................................. 2-17
Bigeminy and Trigeminy................................................................................. 2-17
Multiple PVCS: Paired PVCS; Run 5 PVCS; Run 11 PVCS.......................... 2-18
Ventricular Tachycardia .................................................................................. 2-19
Ventricular Fibrillation.................................................................................... 2-19
Asystole (Cardiac Standstill)........................................................................... 2-20
Heart Block: First, Second, and Third Degree ................................................ 2-20
Bundle-Branch Block ...................................................................................... 2-21
ECG Testing ........................................................................................................ 2-22
Running a Performance Wave......................................................................... 2-22
Adjusting Performance-Wave Amplitude ....................................................... 2-23
R-Wave Detection ........................................................................................... 2-24
Setting R-Wave Rate ....................................................................................... 2-24
2-1
Page 34

MPS450
Operators Manual
Setting R-Wave Width .................................................................................... 2-25
Setting R-Wave Amplitude ............................................................................. 2-26
Blood Pressure Function...................................................................................... 2-27
Setting BP Sensitivity...................................................................................... 2-27
Zeroing BP Channels....................................................................................... 2-28
Setting Static-Pressure Levels ......................................................................... 2-29
Running a Dynamic Waveform....................................................................... 2-31
Adding Respiration Artifact to the BP Signal ................................................. 2-32
Simulating the Swan-Ganz Procedure............................................................. 2-34
Cardiac Output..................................................................................................... 2-36
Setting Up For a Cardiac-Output Test............................................................. 2-36
Simulating a Cardiac-Output Test ................................................................... 2-37
Injectate Failure and Left-To-Right Shunt ...................................................... 2-37
Simulating Output From a Calibrated Pulse Signal......................................... 2-38
Fetal / Maternal ECG (Option) ............................................................................ 2-39
Simulating a Fixed Fetal Heart Rate (Fhr) ...................................................... 2-39
Simulating a Periodic FHR With Intrauterine Pressure (IUP)......................... 2-40
2-2
Page 35

Cardiac Functions
Introduction 2
Introduction
This chapter covers the MPS450 functions that are related to the heart: ECG, Arrhythmia,
ECG Testing, Blood Pressure, and Cardiac Output.
ECG Functions
An electrocardiogram (ECG) is a recording of the electrical activity of the muscles of the
heart—the depolarization and repolarization of the myocardium. Wires running from an
ECG machine are connected to small plastic or metal-terminated cables called leads, or
electrodes. Placed on the chest, on the wrists of the right and left arms, and on the left leg
at the ankle, the electrodes transmit signals to a pen that draws lines in the form of waves
onto graph paper in the ECG machine, tracing the heart's electrical activity (rate) and its
rhythm (beat). Each contraction of a normal heart causes a consistent waveform, referred
to as the P QRS T waveform, normal sinus rhythm, or NSR.
The MPS450 sets the simulated heartbeat to NSR, offering adjustable settings for heart
rate, amplitude, and ST measurement.
Normal Sinus Rhythm (NSR)
The NSR heartbeat, exhibiting the P-QRS-T wave, as defined in standard ECG textbooks:
When the heartbeat is normal, with a standard QRS waveform shape and height, it is
referred to as having a normal sinus rhythm. In normal sinus conditions, the SA
(sinoatrial) node—which lies just in front of the opening of the superior vena cava—
sends an electrical impulse through the nerves of the heart to the AV (atrioventricular)
node, through the bundle of His, down the left- and right-bundle branches, and on to the
fibers in the Purkinje network, where the impulse finally depolarizes in the ventricular
myocardium. At rest, the heart pumps an average of approximately two ounces (59 cc) of
blood per beat, or about five quarts per minute.
The MPS450 simulates NSR with a P-R interval of 0.16 seconds. Whenever the
instrument is turned on, the LCD screen displays the defaults (which remain active during
a session until the settings are changed) for heart rate (80 BPM), ECG amplitude on Lead
II (1.0 mV), and patient type (ADULT):
Beats-per-minute, ECG amplitude, and patient type are adjustable. (Adjusting the BPM
rate does not affect simulations for arrhythmias, which set their own rates.)
Adjusting the ECG Heart Rate
The MPS450 offers seventeen preprogrammed settings (BPM) for heart rate: 30, 40, 45,
60, 80, 90, 100, 120, 140, 160, 180, 200, 220, 240, 260, 280, or 300.
Action in the Menu-Control Mode
1. Press the top-menu key labeled NSR. (The top-menu screen for normal sinus rhythm
displays automatically whenever the MPS450 is turned on.)
gje012.eps
2. Select SEL to toggle to the screen for adjusting beats-per-minute (BPM/ampl), with
BPM in upper-case letters.
2-3
Page 36

MPS450
Operators Manual
30 BPM 165
40 BPM 166
45 BPM 250
60 BPM 167
80 BPM 168
90 BPM 251
100 BPM 169
3. The heart-rate setting identified on the LCD screen is active when displayed and
remains active until the setting is changed. (Adjusting the BPM rate does not affect
simulations for arrhythmias, which set their own rates.)
Alternatively, in the Numeric-Control Mode, press the number keys for a heart-rate
setting according to Table 2-1, and select RUN:
Table 2-1. Numeric Codes for BPM Settings
BPM Setting Numeric Code
120 BPM 170
140 BPM 171
160 BPM 172
180 BPM 173
200 BPM 174
220 BPM 175
240 BPM 176
260 BPM 177
280 BPM 178
300 BPM 179
Adjusting the ECG Amplitude
Most waveforms are sent to the ECG using the selected adjustment (QRS height) for
amplitude. (ECG amplitudes are used only as a reference during arrhythmia simulations.)
The MPS450 offers a selection of twenty preprogrammed amplitude settings (Lead II):
0.05 to 0.5 mV (0.05 mV steps) and 0.5 to 5.5 mV (0.5 mV steps). This amplitude setting
applies to all ECG waveforms except performance waves and R waves, each of which
has its own amplitude settings.
2-4
Action in the Menu-Control Mode
1. Press the top-menu key labeled NSR. (The top-menu screen for NSR displays
automatically whenever the MPS450 is turned on.)
2. Select SEL to toggle to the screen for adjusting ECG amplitude (bpm/AMPL), with
AMPL in upper-case letters.
3. To adjust the ECG amplitude, select DOWN or UP.
4. The ECG-amplitude setting identified on the LCD screen is active when displayed
and remains active until the setting is changed.
Page 37

Cardiac Functions
ECG Functions 2
Alternatively, in the Numeric-Control Mode, press the number keys for an ECGamplitude setting according to Table 2-2, and select RUN:
Table 2-2. Numeric Codes for ECG Amplitude Settings
Amplitude setting Numeric code
0.05 mV 252
0.10 mV 253
0.15 mV 254
0.20 mV 255
0.25 mV 256
0.30 mV 257
0.35 mV 258
0.40 mV 259
0.45 mV 260
0.50 mV 261
1.00 mV 262
1.50 mV 263
2.00 mV 264
2.50 mV 265
3.00 mV 266
3.50 mV 267
4.00 mV 268
4.50 mV 269
5.00 mV 270
5.50 mV 271
Adult and Pediatric ECG
The MPS450 simulates an adult ECG waveform with QRS duration of 80 ms, or a
pediatric waveform with QRS duration of 40 ms.
Action
1. Press the top-menu key labeled NSR. The LCD screen identifies the current patient
type either as adult (ADULT) or as pediatric (PEDS).
2. Select > to move to the LCD screen PT TYPE.
3. Select PT TYPE to toggle to the desired patient type.
4. The patient-type setting identified on the LCD screen is active when displayed and
remains active until the setting is changed.
Alternatively, in the Numeric-Control Mode, press the number keys for a patient-type
setting according to Table 2-3, and select RUN:
2-5
Page 38

MPS450
Operators Manual
ADULT 010
PEDS 011
Adjusting the ST Segment
Action in the Menu-Control Mode
Table 2-3. Numeric Codes for Patient-Type Settings
Patient-Type Setting Numeric Code
On the ECG output, the ST segment is that portion of line between the end of the QRS
complex and the T wave. The T wave is caused by the return of the ventricular mass of
the heart to a state of electrical rest (repolarization). The deviation of the ST segment is
indicative of a variety of conditions, with the baseline being set by the P-R segment.
The MPS450 adjusts (elevates or depresses) the ST segment for adult normal-sinus waves
at or below 180 BPM. The nineteen preprogrammed settings (mV) include a range from
-0.8 mV to +0.8 mV (0.1 mV steps) as well as +0.05 and -0.05. The elevation/depression
amount specified is for Lead II, per millivolt of ECG amplitude, with other leads being
proportional.
1. Press the top-menu key labeled NSR.
2. Select > to display the LCD screen NORMAL SINUS RHYTHM ST.
3. To adjust the ST segment to the desired setting, select DOWN or UP.
4. The ST-segment setting identified on the LCD screen is active when displayed and
remains active until the setting is changed.
Alternatively, in the Numeric-Control Mode, press the number keys for an ST-segment
setting according to Table 2-4, and select RUN:
Table 2-4. Numeric Code for ST-Segment Settings
ST-Segment Setting Numeric code
+0.8 mV 222
+0.7 mV 223
+0.6 mV 224
+0.5 mV 225
+0.4 mV 226
+0.3 mV 227
+0.2 mV 228
+0.1 mV 229
2-6
+0.05 mV 219
0 mV 220
-0.05 mV 221
-0.1 mV 230
-0.2 mV 231
-0.3 mV 232
Page 39

Cardiac Functions
ECG Functions 2
Table 2-4. Numeric Code for ST-Segment Settings (cont.)
ST-Segment Setting Numeric code
-0.4 mV 233
-0.5 mV 234
-0.6 mV 235
-0.7 mV 236
-0.8 mV 237
Simulating ECG Artifact
Depolarization is the process by which all muscles of the body contract, and the electrical
charges generated by any muscle (electromyographic signals) can be detected to a degree
by an electrocardiogram. Thus, the electrical charges associated specifically with
contractions of the heart will be clear only if there is no interference by auxiliary signals
from other muscles. (This is why a patient must be fully relaxed—with no skeletal
muscle movement—during ECG testing.)
Electrical signals from power lines or local (in-wall) circuitry represent another kind of
artifact (also called noise) that can be picked up by an ECG device. These sources can
cause minute electric currents through capacitive coupling or resistive contacts. On an
ECG readout, such electrical artifacts can cause a serious safety condition. Even a
relatively tiny current of 60 hertz (Hz) can be fatal. Therefore, whenever line frequency
in an electrocardiogram is noted, the cause of the signal should be determined at once.
The MPS450 simulates a number of different ECG artifacts that can affect the accuracy
of an ECG reading. ECG-artifact simulations, which can be added to any ECG wave,
include line-frequency artifacts of 60 Hz (U.S. lines) and 50 Hz (European lines), as well
as separate artifacts for muscle, wandering baseline, and respiration.
Action in the Menu-Control Mode
1. Press the top-menu key labeled MORE to display the following LCD screen:
2. Select ECG ARTF. The LCD screen displays ECG ARTIFACT OFF; RUN flashes
if the ECG-artifact option is turned off.
3. Scroll to the desired artifact: 60 HZ; 50 HZ; MUSCLE; WANDER; or
RESPIRATION.
4. Select RUN. The ECG artifact remains active until another artifact selection is made.
5. To turn off the ECG-artifact option, scroll to the LCD screen displaying ECG
ARTIFACT OFF, and select RUN.
gje013.eps
Alternatively, in the Numeric-Control Mode, press the number keys for an ECG artifact
according to Table 2-5, and select RUN:
2-7
Page 40

MPS450
Operators Manual
ECG ARTIFACT OFF 104
60 HZ 105
50 HZ 106
MUSCLE 107
WANDER 108
RESPIRATION 109
Pacemaker Waveforms
Table 2-5. Numeric Code for ECG Artifact Settings
ECG-Artifact Setting Numeric Code
When the heart beats erratically, or not at all, it may need to be stimulated by artificial
means, that is, by either an internal (permanent) or an external (temporary) artificial
pacemaker. Pacemakers may operate at a fixed preset rate, or on demand.
The MPS450 sends waveforms to simulate several artificial-pacemaker conditions:
• an atrial pacemaker wave at 80 BPM, with a pacer pulse at the start of each P
wave;
• an asynchronous pacemaker wave with continuous ventricular-paced beats (75
BPM) and no P waves;
• a “demand” pacemaker wave with frequent sinus beats (forty normal beats
followed by twenty ventricular-paced beats, repeated);
• a “demand” pacemaker wave with occasional sinus beats (twenty normal beats
followed by forty ventricular-paced beats, repeated);
• an AV-sequential-pacemaker wave with continuous paced beats, each with an
atrial pulse and a P wave followed by a ventricular-paced pulse and QRS
response;
• ventricular-paced beats, where one out of every ten beats has no heart response
(noncapture); or
• continuous pacer pulses at 75 BPM with no heart response (nonfunction).
Action in the Menu-Control Mode
1. Press the top-menu key labeled PACE to display the following LCD screen:
2-8
gje014.eps
2. Scroll to the desired pacemaker-wave type: ATRIAL 80 BPM; ASYNC 75 BPM;
DEMAND FREQ SINUS; DEMAND OCC SINUS; AV SEQUENTIAL; NONCAPTURE; or NON-FUNCTION.
3. The pacemaker wave identified on the LCD screen is active when displayed and
remains active until another wave is selected.
Page 41

Cardiac Functions
ECG Functions 2
Alternatively, in the Numeric-Control Mode, press the number keys for a pacemaker-type wave
according to Table 2-6, and select RUN:
Table 2-6. Numeric Code for Pacemaker-Waveform Settings
Pacemaker-Waveform Setting Numeric Code
ATRIAL 80 BPM 383
ASYNC 75 BPM 110
DEMAND FREQ SINUS 111
DEMAND OCC SINUS 112
AV SEQUENTIAL 113
NON-CAPTURE 114
NON-FUNCTION 115
Adjusting Pacemaker–Spike Amplitude
The MPS450 offers a selection of four preprogrammed settings (mV) for pacemaker-spike
amplitude: 1, 2, 5, or 10.
Action in the Menu-Control Mode
1. On the LCD screen for the selected pacer-type wave, select AMPL repeatedly to
scroll to the desired spike-amplitude setting.
2. The pacemaker amplitude identified on the LCD screen is active when displayed and
remains active until the setting is changed.
Alternatively, in the Numeric-Control Mode, press the number keys for pacemaker-
spike amplitude according to Table 2-7, and select RUN:
Table 2-7. Numeric Codes for Pacemaker-Amplitude Settings
Pacemaker-Amplitude Setting Numeric Code
1.0 mV 384
2.0 mV 385
5.0 mV 386
10.0 mV 387
Adjusting Pacemaker–Spike Width
The MPS450 simulates five preconfigured settings (ms) for pacemaker-spike width: 0.1,
0.5, 1.0, 1.5, or 2.0.
Action in the Menu-Control Mode
1. On the LCD screen for the selected pacer-type wave, select WIDTH repeatedly to
scroll to the desired spike-width setting.
2. The pacemaker width identified on the LCD screen is active when displayed and
remains active until the settings are changed.
Alternatively, in the Numeric-Control Mode, press the number keys for the pacemakerwidth setting according to Table 2-8, and select RUN:
2-9
Page 42

MPS450
Operators Manual
0.1 ms 243
0.5 ms 244
1.0 ms 245
1.5 ms 246
2.0 ms 247
Arrhythmia Functions
Table 2-8. Numeric Codes for Pacemaker-Width Settings
Pacemaker-Width Setting Numeric Code
Departures from the normal height, shape, or length (of time) of the PQRST-waveform
patterns suggest specific illnesses, making the ECG very valuable when used in
conjunction with other diagnostic tests. ECG patterns that divulge disturbances in the
blood supply to the heart muscle or abnormalities in the heartbeat (arrhythmias) may be
associated with coronary artery disease.
The MPS450 simulates a wide array of arrhythmias, representing heartbeats that are too
slow, too fast, or totally erratic; that have beats with abnormal timing, spacing, or
waveform shapes; or that combine abnormal and normal beats in varying proportions.
Atrial Fibrillation
A rapid, irregular atrial signal, coarse or fine, with no real P waves; an irregular
ventricular rate.
Coarse and fine atrial fibrillation occurs when the electrical signals in the atria are
chaotic, and multiple, ectopic pacemakers are firing erratically. Some impulses may
conduct through to the AV node to stimulate the ventricles, causing a quite-irregular and
often-rapid ventricular rate. On the ECG there is an absence of P waves, with an irregular
R-R interval. Atrial-fibrillation waveforms are irregularly shaped and usually rounded.
The amplitude of the atrial signal is higher for coarse, and lower for fine, fibrillation.
The MPS450 simulates irregular atrial waveforms; the amplitude of the atrial signal is
higher for coarse, and lower for fine, fibrillation.
Action in the Menu-Control Mode
1. Press the top-menu key labeled ARRHY to display the following LCD screen:
gje015.eps
2-10
2. Select SV to display the following LCD screen:
Page 43

Cardiac Functions
Arrhythmia Functions 2
3. Scroll to the LCD screen for the desired condition: ATRIAL FIB COARSE or
ATRIAL FIB FINE.
4. Select RUN. The selected simulation runs continuously (repeats) until another
arrhythmia selection is made.
Alternatively, in the Numeric-Control Mode, press the number keys for atrial-fibrillation
amplitude according to Table 2-9, and select RUN:
Table 2-9. Numeric Codes for Atrial-Fibrillation-Amplitude Settings
Atrial-Fibrillation-Amplitude Setting Numeric Code
ATRIAL FIB COARSE 012
ATRIAL FIB FINE 013
Atrial Flutter
A repeating sequence of large, irregular P waves at 300 BPM; an irregular ventricular
response.
Atrial flutter occurs when a single, ectopic, atrial pacemaker that is non-SA (usually low,
near the AV node) fires repeatedly and (usually) regularly, producing large, pointed P
waves at an approximate rate of 400 BPM (between 240 and 480 BPM). Not all of the
atrial impulses conduct through to the ventricles. On the ECG readout the waveform
generally exhibits a “saw tooth” appearance. This type of arrhythmia can reduce cardiac
output by as much as 25 %, due in many cases to the lack of an atrial “kick” and the
accompanying failure of the ventricles to fill completely with blood prior to ventricle
contraction.
gje016.eps
The MPS450 simulates atrial flutter in the following (repeating) sequence: beats at a ratio
of 5:1 (five atrial beats for every one ventricular beat) for twelve seconds, followed by
beats at a ratio of 3:1 for six seconds, followed by beats at a 2:1 ratio for six seconds.
Action in the Menu-Control Mode
1. Press the top-menu key labeled ARRHY.
2. Select SV.
3. Scroll to the LCD screen ATRIAL FLUTTER.
4. Select RUN. The atrial-flutter simulation runs continuously (repeats) until another
arrhythmia selection is made.
Alternatively, in the Numeric-Control Mode, press the number keys 014, and select
RUN.
Sinus Arrhythmia
Beats that are normal, but triggered at an irregular rate, from 60 BPM to 100 BPM.
Sinus arrhythmia occurs when the SA node paces the heart irregularly. Typically, the
heartbeat increases with each intake of breath and decreases with each exhalation (a
2-11
Page 44

MPS450
Operators Manual
Action in the Menu-Control Mode
Missed Beat
condition most commonly found in young children and the elderly).
The MPS450 simulates a sinus arrhythmia condition with normal beats triggered at an
irregular rate, from 60 to 100 BPM.
1. Press the top-menu key labeled ARRHY.
2. Select SV.
3. Scroll to the LCD screen SINUS ARRHYTHMIA.
4. Select RUN. The sinus-arrhythmia simulation runs continuously (repeats) until
another arrhythmia selection is made.
Alternatively, in the Numeric-Control Mode, press the number keys 015, and select
RUN.
A single missing beat, with the heart rate returning to normal.
Missed beats, often present in first-degree heart block, are symptomatic of other
conditions as well.
The MPS450 simulates a random missed beat occurring as a one-time event during an
otherwise normal heart rate of 80 BPM.
Action in the Menu-Control Mode
1. Press the top-menu key labeled ARRHY.
2. Select SV.
3. Scroll to the LCD screen MISSED BEAT.
4. Select RUN. On the LCD screen, RUN flashes to indicate that the missed-beat
simulation is running as a one-time event. When the simulation completes, the
command INSRT displays on the screen.
5. To send another missed-beat simulation, select INSRT.
Alternatively, in the Numeric-Control Mode, press the number keys 016, and select
RUN. (To send another missed-beat simulation, select RUN again.)
Atrial Tachycardia (AT)
Normal rhythm at a faster-than-normal rate of 160 BPM.
Atrial tachycardia occurs when an ectopic, atrial pacemaker (non-SA) fires repeatedly at
a rate between 150 and 250 BPM. AT may cause cardiac output to drop significantly (in
some cases by as much as 25 %), due to the inability of the ventricles to fill completely
during the typically short diastole. This condition may result from an atrioventricular
blockage or digitalis toxicity.
The MPS450 simulates AT at 160 BPM.
Action in the Menu-Control Mode
1. Press the top-menu key labeled ARRHY.
2-12
2. Select SV.
3. Scroll to the LCD screen ATRIAL TACH.
4. Select RUN
. The atrial-tachycardia simulation runs continuously (repeats) until
another arrhythmia selection is made.
Page 45

Cardiac Functions
Arrhythmia Functions 2
Alternatively, in the Numeric-Control Mode, press the number keys 017, and select
RUN.
Paroxysmal Atrial Tachycardia (PAT)
Normal rhythm at alternating rates.
When atrial tachycardia occurs as a seizure-like spasmodic event, it is called paroxysmal
atrial tachycardia or PAT. PATs typically start and stop suddenly, initiated by a
premature atrial contraction (PAC). PAT spasms may last for only a few seconds or for
minutes or hours. A patient may experience ATs and PATs over the course of many
years.
The MPS450 simulates PAT at alternating rates: 160 BPM for five seconds and 80 BPM
for twelve seconds.
Action in the Menu-Control Mode
1. Press the top-menu key labeled ARRHY.
2. Select SV.
3. Scroll to the LCD screen PAROXYSMAL ATR TACH.
4. Select RUN. The PAT simulation runs continuously (repeats) until another
arrhythmia selection is made.
Alternatively, in the Numeric-Control Mode, press the number keys 382, and select
RUN.
Nodal Rhythm
Normal rhythm, but with a P wave that originates in the AV node, and a P-R interval that
is very short.
Nodal rhythm, also referred to as junctional rhythm or junctional escape, is a condition
where the predominant pacemaker is the AV node rather than the SA node.
The MPS450 simulates nodal rhythm with a very short P-R interval of 90 ms.
Action in the Menu-Control Mode
1. Press the top-menu key labeled ARRHY.
2. Select SV.
3. Scroll to the LCD screen NODAL RHYTHM.
4. Select RUN. The nodal-rhythm simulation runs continuously (repeats) until another
arrhythmia selection is made.
Alternatively, in the Numeric-Control Mode, press the number keys 018, and select
RUN.
Supraventricular Tachycardia
Normal rhythm at a faster-than-normal rate of 200 BPM.
Supraventricular tachycardia is a combination of a junctional tachycardia (that is, an
atrial tachycardia occurring in the AV or junctional node) and an atrial tachycardia.
Therefore, supraventricular tachycardia encompasses multifocal, ectopic, atrial
pacemakers in and around the AV node above the bundle of His.
The MPS450 simulates a condition of supraventricular tachycardia at 200 BPM.
Action in the Menu-Control Mode
1. Press the top-menu key labeled ARRHY.
2. Select SV.
2-13
Page 46

MPS450
Operators Manual
Premature Atrial Contraction (PAC)
Action in the Menu-Control Mode
3. Scroll to the LCD screen SUPRAVENT TACH.
4. Select RUN. The supraventricular-tachycardia simulation runs continuously (repeats)
until another arrhythmia selection is made.
Alternatively, in the Numeric-Control Mode, press the number keys 019, and select
RUN.
A beat that is 25 % premature but otherwise normal.
Any part of the heart can depolarize earlier than it should; the accompanying heartbeat is
called extrasystole. This type of depolarization is called a premature contraction; a
premature contraction that originates in the SA node is referred to as a PAC. An isolated
PAC is relatively unimportant. However, frequent PACs are a concern, because they
could be the precursor of more serious and potentially life-threatening conditions,
including atrial flutter, atrial fibrillation, and atrial tachycardia.
The MPS450 simulates a PAC as a one-time event within an otherwise-normal rhythm at
80 BPM.
1. Press the top-menu key labeled ARRHY.
2. Select PREM to display the following LCD screen:
3. Select RUN. On the LCD screen, RUN flashes to indicate that the PAC simulation is
running as a one-time event. When the simulation completes, the command INSRT
displays on the screen.
4. To send another PAC simulation, select INSRT.
Alternatively, in the Numeric-Control Mode, press the number keys 035, and select
RUN. (To repeat a PAC, select RUN again.)
Premature Nodal Contraction (PNC)
A nodal beat that is 25 % premature, followed by a nodal rhythm at 80 BPM.
A premature nodal contraction—also called a premature junctional contraction, a PNC, or
a PJC—is an extra beat that occurs as a result of an electrical impulse sent from the
atrioventricular (junctional) node. The P-R interval is shorter than normal. PNCs, which
may occur in isolation or in groups, can appear sporadically for no obvious reason in an
otherwise-healthy person.
gje017.eps
2-14
The MPS450 simulates a PNC as a one-time event, followed by a normal sinus rhythm at
80 BPM.
Action in the Menu-Control Mode
1. Press the top-menu key labeled ARRHY.
2. Select PREM.
Page 47

Cardiac Functions
Arrhythmia Functions 2
3. Scroll to the LCD screen NODAL PAC.
4. Select RUN. On the LCD screen, RUN flashes to indicate that the PNC simulation is
running as a one-time event. When the simulation completes, the command INSRT
displays on the screen.
5. To send another PNC simulation, select INSRT.
Alternatively, in the Numeric-Control Mode, press the number keys 036, and select
RUN. (To repeat a PNC, select RUN again.)
Premature Ventricular Contractions
Six PVC-type selections of focus and timing:
• a left-focus premature ventricular beat with standard timing, 20 % premature;
• a left-focus premature ventricular beat with early timing, 33 % premature;
• a left-focus premature ventricular beat with very early timing, 65 % premature,
which starts during the T wave of the previous beat;
• a right-focus premature ventricular beat with standard timing, 20 % premature;
• a right-focus premature ventricular beat with early timing, 33 % premature; or
• a right-focus premature ventricular beat with very early timing, 65 % premature,
which starts during the T wave of the previous beat.
A premature ventricular contraction or PVC is an extra beat consisting of an abnormally
wide and unusual QRS complex originating in an ectopic pacemaker in the ventricles.
Early ventricular PVCs occur close to the preceding beat. Moreover, R-on-T PVCs,
which are characterized by a beat that falls on the T wave of the preceding QRS-T
complex, are especially inauspicious because of their potential to cause ventricular
tachycardia or ventricular fibrillation.
The six PVC selections offered by the MPS450, occurring as one-time events within a
normal sinus rhythm, enable the focus or type of the simulated PVC (left or right
ventricle) to be specified, as well as the timing (standard, early, or R on T). “Type 1”
refers to a PVC with a left-ventricular focus and a marked left-axis deviation, while
“type 2” refers to a PVC with a right-ventricular focus and a right-axis deviation. The
MPS450 simulates “standard” PVCs as 20 % premature, “early” PVCs as 33 %
premature, and R-on-T PVCs as 65 % premature.
Action in the Menu-Control Mode
1. Press the top-menu key labeled ARRHY.
2. Select PREM.
3. Scroll to the LCD screen for the desired PVC focus: PVC1 LEFT VENT; PVC1 LV
EARLY; PVC1 LV R ON T; PVC2 RIGHT VENT; PVC2 RV EARLY; or PVC2
RV R ON T.
4. Select RUN. On the LCD screen, RUN flashes to indicate that the selected simulation
is running as a one-time event. When the simulation completes, the command INSRT
displays on the screen.
5. To repeat a PVC with the same focus, select INSRT.
Alternatively, in the Numeric-Control Mode, press the number keys for a PVC-waveform
type according to Table 2-10, and select RUN. (To repeat the selected PVC, select RUN
again.)
2-15
Page 48

MPS450
Operators Manual
PVC1 LEFT VENT 037
PVC1 LV EARLY 038
PVC1 LV R ON T 039
RIGHT VENT 040
PVC2 RV EARLY 041
PVC2 RV R ON T 042
Multifocal PVCS
Table 2-10. Numeric Codes for PVC-Waveform Settings
PVC-Waveform Setting Numeric Code
A sequence that includes a left-focus PVC, followed by two normal beats, followed by a
right-focus PVC, followed by a normal rhythm at 80 BPM
Multifocal PVCs are premature ventricular contractions that originate in different
ectopic-pacemaker sites throughout the ventricles. These PVCs, which exhibit different
size and shape elements, are characterized by the absence of a P wave (due to the lack of
any atrial-pacemaker activity).
To simulate a multifocal-PVC condition, the MPS450 alternates the PVCs between type
1 (left focus) and type 2 (right focus), with a sequence occurring as a one-time event: a
left-focus PVC, followed by two normal beats, followed by a right-focus PVC, followed
by normal rhythm at 80 BPM.
Action in the Menu-Control Mode
1. Press the top-menu key labeled ARRHY.
2. Select PREM.
3. Scroll to the LCD screen MULTIFOCAL PVCS.
4. Select RUN. On the LCD screen, RUN flashes to indicate that the sequence for a
multifocal-PVC simulation is running as a one-time event. When the simulation
completes, the command INSRT displays on the screen.
5. To repeat the sequence, select INSRT.
Alternatively, in the Numeric-Control Mode, press the number keys 043, and select
RUN. (To repeat the sequence, select RUN again.)
PVCS: 6, 12, or 24 Per Minute
PVCs scattered among normal beats AT 80 BPM, so that PVCs take place 6, 12, or 24
times every minute.
Premature ventricular contractions may occur independently (even in healthy
individuals), as well as in groups and/or for a number of times every minute.
The MPS450 sets the number of PVCs that occur per minute during an otherwise-normal
sinus rhythm (80 BPM), to simulate conditions of six PVCs per minute, twelve PVCs per
minute, or twenty-four PVCs per minute. In this category the MPS450 simulates all
PVCs as type 1, left-ventricular focus, within a normal sinus QRS.
2-16
Action in the Menu-Control Mode
1. Press the top-menu key labeled ARRHY.
2. Select VENT to display the following LCD screen:
Page 49

Cardiac Functions
Arrhythmia Functions 2
3. Scroll to the LCD screen for the desired PVC simulation: PVCs 6/MIN; PVCs
12/MIN; or PVCs 24/MIN.
4. Select RUN. The PVCs-per-minute waveform runs continuously (repeats) until
another arrhythmia selection is made.
Alternatively, in the Numeric-Control Mode, press the number keys for a PVCs-perminute waveform according to Table 2-11, and select RUN:
Table 2-11. Numeric Codes for PVCs-Per-Minute Settings
PVCs-Per-Minute Setting Numeric Code
PVCs 6/MIN 021
PVCs 12/MIN 022
PVCs 24/MIN 023
Frequent Multifocal PVCS
A sequence that includes a left-focus PVC followed by normal beats, alternating with a
right-focus PVC followed by normal beats.
Frequent multifocal PVCs are initiated by a number of different ectopic pacemakers in
the ventricles, with events occurring at least five times per minute, and usually more
often.
gje018.eps
The MPS450 simulates a continuous, repeating waveform that alternates between a
type-1 (left-focus) PVC followed by three normal beats, and a type-2 (right-focus) PVC
followed by three normal beats.
Action in the Menu-Control Mode
1. Press the top-menu key labeled ARRHY.
2. Select VENT.
3. Scroll to the LCD screen FREQ MULTIFOCAL.
4. Select RUN. The frequent-multifocal-PVC waveform runs continuously (repeats)
until another arrhythmia selection is made.
Alternatively, in the Numeric-Control Mode, press the number keys 024, and select
RUN.
Bigeminy and Trigeminy
Two sequences: a PVC followed by a normal beat, or a PVC followed by two normal
beats.
Bigeminy—also called a fixed coupling or bigeminal rhythm—is a type of PVC in which
a beat with a normal QRS complex alternates with a PVC; in other words, every other
beat is premature. In trigeminy, which is similar to bigeminy, a PVC appears after every
two normal QRS complexes.
2-17
Page 50

MPS450
Operators Manual
Action in the Menu-Control Mode
BIGEMINY 025
TRIGEMINY 026
The MPS450 simulates either bigeminy or trigeminy incorporated within a normal sinus
rhythm (80 BPM), using type-1 (left-focus) PVCs.
1. Press the top-menu key labeled ARRHY.
2. Select VENT.
3. Scroll to the LCD screen for the desired simulation: BIGEMINY or TRIGEMINY.
4. Select RUN. The bigeminy or trigeminy waveform runs continuously (repeats) until
another arrhythmia selection is made.
Alternatively, in the Numeric-Control Mode, press the number keys for the desired
simulation according to Table 2-12, and select RUN:
Table 2-12. Numeric Codes for PVC-Sequence Settings
PVC-Sequence Setting Numeric Code
Multiple PVCS: Paired PVCS; Run 5 PVCS; Run 11 PVCS
Three series of multiple PVCs run as one-time (nonrepeating) events.
The term multiple PVCs refers to any condition where two or more PVCs occur in a row.
Standard PVCs of this type include a pair of PVCs (also known as a couplet), a run of
five PVCs in a row, and a run of eleven PVCs in a row.
The MPS450 simulates multiple-PVC waveforms with three sequences occurring as onetime events:
a paired-PVC condition, with a waveform that includes a normal beat followed by
two type-1 (left-focus) PVCs;
a run-5-PVC condition, with a waveform that includes one normal beat followed by
five type-1 (left-focus) PVCs; or
a run-11-PVC condition, with a waveform that includes one normal beat followed by
ten type-1 (left-focus) PVCs plus one type-2 (right-focus) PVC.
Action in the Menu-Control Mode
1. Press the top-menu key labeled ARRHY.
2. Select VENT.
3. Scroll to the LCD screen for the desired PVC simulation: PAIR PVCs; RUN 5 PVCs;
or RUN 11 PVCs.
4. Select RUN. On the LCD screen, RUN flashes to indicate that the selected sequence
of PVCs is running as a one-time event. When the simulation completes, the
command INSRT displays on the screen.
2-18
5. To repeat the sequence, select INSRT.
Alternatively, in the Numeric-Control Mode, press the number keys for the desired
simulation according to Table 2-13, and select RUN. (To repeat a PVC series, select
RUN again.)
Page 51

Cardiac Functions
Arrhythmia Functions 2
Table 2-13. Numeric Codes for Multiple-PVC Settings
Multiple-PVC Setting Numeric Code
PAIR PVCs 027
RUN 5 PVCs 028
RUN 11 PVCs 029
Ventricular Tachycardia
A faster-than-normal rhythm of beats (160 BPM) originating in the ventricles, similar to
type-1 (left-focus) PVCs.
Ventricular tachycardia is a life-threatening arrhythmia in which one or multiple, ectopic,
ventricular pacemakers in the bundle branches, Purkinje network, or ventricular
myocardium are firing in a heart beating more frequently than 110 times a minute. In
some cases the heart will be beating at a rate above 240 BPM. Ventricular tachycardia
usually occurs in cases of extreme cardiac disease and often initiates or degenerates into
ventricular fibrillation. This type of tachycardia can reduce cardiac output by as much as
25 % due, in many cases, to the lack of an atrial “kick” and therefore the lack of a
complete filling of the ventricles with blood prior to ventricle contraction.
The MPS450 simulates a ventricular tachycardia at 160 BPM, with beats similar to type-1
(left-focus) PVCs.
Action in the Menu-Control Mode
1. Press the top-menu key labeled ARRHY.
2. Select VENT.
3. Scroll to the LCD screen VENTRICULAR TACH.
4. Select RUN. The ventricular-tachycardia simulation runs continuously (repeats) until
another arrhythmia selection is made.
Alternatively, in the Numeric-Control Mode, press the number keys 030, and select
RUN.
Ventricular Fibrillation
An irregular ventricular waveform, coarse or fine.
Coarse and fine ventricular fibrillations occur when the electrical signals in the ventricles
are chaotic, and multiple, ectopic, ventricular pacemakers are firing erratically. There are
no real P waves and no clear R-R interval. Ventricular fibrillation waveforms are
irregularly shaped. Ventricular fibrillation is a life-threatening condition; usually in such
situations a defibrillator is applied immediately to return the heart to its normal rhythm.
The MPS450 simulates irregular ventricular waveforms; the amplitude of the ventricular
signal is higher for coarse, and lower for fine, fibrillation.
Action in the Menu-Control Mode
1. Press the top-menu key labeled ARRHY.
2. Select VENT.
3. Scroll to the LCD screen for the desired simulation: VENT FIB COARSE or VENT
FIB FINE.
4. Select RUN. The selected ventricular-fibrillation simulation runs continuously
(repeats) until another arrhythmia selection is made.
2-19
Page 52

MPS450
Operators Manual
VENT FIB COARSE 031
VENT FIB FINE 032
Asystole (Cardiac Standstill)
Action in the Menu-Control Mode
Alternatively, in the Numeric-Control Mode, press the number keys for the desired
simulation according to Table 2-14, and select RUN.
Table 2-14. Numeric Codes for Ventricular-Fibrillation-Amplitude Settings
Ventricular-Fibrillation-Amplitude Setting Numeric Code
No ECG activity whatsoever.
Ventricular asystole is a critical condition characterized by the absence of a heartbeat
either in the ventricles or in the entire heart. This condition, also referred to as cardiac
standstill, is usually accompanied by loss of consciousness, apnea, and—if not treated
immediately—death.
The MPS450 simulates a condition of asystole by sending to the ECG a flatline signal,
which is completely devoid of P waves, P-R or R-R intervals, and QRS complexes.
1. Press the top-menu key labeled ARRHY.
2. Select VENT.
3. Scroll to the LCD screen ASYSTOLE.
4. Select RUN. The asystole-condition waveform runs continuously (repeats) until
another arrhythmia selection is made.
Alternatively, in the Numeric-Control Mode, press the number keys 033, and select
RUN.
Heart Block: First, Second, and Third Degree
Three heart-block simulations, running as repeating sequences.
A heart block is a condition wherein the signal generated by the SA node is delayed or is
blocked (partially or completely) in its journey to the ventricles. Because this condition
typically occurs at the AV (atrioventicular) junction, a more precise term for heart block
is atrioventricular block. When the conduction time from the atria to the ventricles
becomes delayed (usually resulting in a P-R interval greater than 0.20 seconds), it is
referred to as a first-degree block. When impulses from the atria occasionally do not
reach the ventricles, the block is considered partial or incomplete and is referred to as a
second-degree block. Finally, when no impulses whatsoever are able to enter the
ventricles from the atria, the heart block is complete and is referred to as a third-degree
block. As a consequence of a third-degree block, the atria and the ventricles beat at their
own separate rates.
The MPS450 simulates waveforms for all three heart-block conditions:
• first-degree-block waveforms, with normal beats (80 BPM), but with a long P-R
interval of 250 ms;
2-20
• second-degree-block waveforms, with normal beats, but with a P-R interval that
increases every beat for four beats (from 160 to 220 to 400 to 470 ms), followed by a
P wave only with no QRS response (the Wenckebach phenomenon); or
• third-degree-block waveforms, with normal beats, but with a P-wave rate of 80 BPM
and a QRS rate of 30 BPM, running independently.
Page 53

Cardiac Functions
Arrhythmia Functions 2
Action in the Menu-Control Mode
1. Press the top-menu key labeled ARRHY.
2. Select COND to display the following LCDC screen:
3. Scroll to the LCD screen for the desired heart-block simulation: 1ST DEG BLOCK;
2ND DEG BLOCK; or 3RD DEG BLOCK.
4. Select RUN. The selected heart-block waveform runs continuously (repeats) until
another arrhythmia selection is made.
Alternatively, in the Numeric-Control Mode, press the number keys for the desired heartblock simulation according to Table 2-15, and select RUN:
Table 2-15. Numeric Code for Heart-Block Settings
Heart-Block Setting Numeric Code
1ST DEG BLOCK 046
2ND DEG BLOCK 047
3RD DEG BLOCK 048
Bundle-Branch Block
Blockage in the right- or left-bundle branches, with beats exhibiting a wide QRS and a PR interval of 160 ms.
Bundle-branch blockage—also referred to as intraventricular conduction defect, BBB or
IVCD—is a form of heart block in which there is a conduction delay or failure from one
of the branches of the bundle of His (which start about a centimeter below the bundle of
His) to the Purkinje network. The blockage may be complete or incomplete, transient,
intermittent, or permanent. In most cases, the electrical impulse travels through the
normal bundle branch to stimulate one ventricle and then passes through the cardiac
septum to stimulate the other, resulting in one ventricle’s depolarizing later than the
other. (Both anatomically and functionally, the septum separates the heart into its left and
right halves.)
gje019.eps
The MPS450 simulates a right- or left-bundle-branch block, with waveforms that contain
normal P waves. P-R intervals are 0.16 seconds; QRS complexes are wide.
Action in the Menu-Control Mode
1. Press the top-menu key labeled ARRHY.
2. Select COND.
3. Scroll to the LCD screen for the desired simulation: R BNDL BR BLOCK; or L
BNDL BR BLOCK.
4. Select RUN. The selected bundle-branch-block waveform runs continuously
(repeats) until another arrhythmia selection is made.
2-21
Page 54

MPS450
Operators Manual
R BNDL BR BLOCK 049
L BNDL BR BLOCK 050
ECG Testing
Alternatively, in the Numeric-Control Mode, press the number keys for the bundlebranch-block simulation according to Table 2-16, and select RUN:
Table 2-16. Numeric Code for Bundle Branch-Block Settings
Bundle Branch-Block Setting Numeric Code
The MPS450 sends a number of ECG waveforms to test and verify an ECG machine and
monitor. Performance waveforms can be used to test frequency response (both high and
low), sensitivity, gain drift, internal calibration, stylus damping, paper speed, linearity,
sweep speed, and more.
For square, pulse, sine, triangle, and R waves, both rate and amplitude are adjustable to a
wide range of preconfigured settings. R-wave width is also adjustable.
While running any performance waveform, outputs for respiration and blood pressure are
disabled; they are reactivated when a physiological waveform—such as normal sinus
rhythm—is selected.
Running a Performance Wave
The MPS450 offers a selection of preconfigured-rate settings for square, pulse, sine, and
triangle waves:
• Square waveforms—available at 2 or 0.125 Hz—are used most frequently to
test linearity, amplitude, and frequency response.
• Pulse waveforms—available at 30 or 60 BPM with a 60 ms pulse width—are
especially useful in measuring and calibrating paper speed, internal calibration
signal (as compared with the MPS450 calibration), sweep speed, stylus damping,
sensitivity, gain and drift.
• Sine waveforms—available at 0.5, 5, 10, 40, 50, 60, or 100 Hz—are used for a
variety of tests, including ECG sensitivity, frequency response (high and low),
and accuracy.
• Triangle waveforms—available at 2 or 2.5 Hz—are an important tool for
testing the linearity of an ECG unit.
Action in the Menu-Control Mode
1. Press the top-menu key labeled PERF to display the following LCD screen:
2-22
2. Select SEL to toggle to the screen for adjusting performance-wave type
(WAVE/ampl), with WAVE in upper-case letters.
3. Select PREV or NEXT to scroll to the desired performance-wave type.
gje020.eps
Page 55

Cardiac Functions
ECG Testing 2
4. The performance wave identified on the LCD screen is active when displayed and
remains active until another wave is selected.
Alternatively, in the Numeric-Control Mode, press the number keys for a performance
wave according to Table 2-17, and select RUN:
Table 2-17. Numeric Codes for Wave/Rate Settings
Wave/Rate Setting Numeric Code
2 HZ SQUARE 120
0.125 HZ SQUARE 121
2.0 HZ TRIANGLE 122
2.5 HZ TRIANGLE 123
30 BPM PULSE 124
60 BPM PULSE 125
0.5 HZ SINE 207
5 HZ SINE 208
10 HZ SINE 209
40 HZ SINE 210
50 HZ SINE 211
60 HZ SINE 212
100 HZ SINE 213
Adjusting Performance-Wave Amplitude
The MPS450 offers a selection of twenty preconfigured settings (mV) for performancewave amplitude (on Lead II): 0.05 to 0.50 (in 0.05 steps) and 0.50 to 5.50 (in 0.50 steps).
Action in the Menu-Control Mode
1. Press the top-menu key labeled PERF.
2. Select SEL to toggle to the screen for adjusting performance-wave amplitude
(wave/AMPL), with AMPL in upper-case letters.
3. Select DOWN or UP to scroll to the desired performance-wave amplitude.
4. The amplitude identified on the LCD screen is active when displayed and remains
active until the setting is changed.
Alternatively, in the Numeric-Control Mode, press the number keys for performancewave amplitude according to Table 2-18, and select RUN:
Table 2-18. Numeric Code for Wave Amplitude Settings
Wave Amplitude Setting Numeric Code
0.05 mV 272
0.10 mV 273
0.15 mV 274
0.20 mV 275
2-23
Page 56

MPS450
Operators Manual
0.25 mV 276
0.30 mV 277
0.35 mV 278
0.40 mV 279
0.45 mV 280
0.50 mV 281
1.00 mV 282
1.50 mV 283
2.00 mV 284
2.50 mV 285
3.00 mV 286
Table 2-18. Numeric Code for Wave Amplitude Settings (cont.)
Wave Amplitude Setting Numeric Code
3.50 mV 287
4.00 mV 288
4.50 mV 289
5.00 mV 290
5.50 mV 291
R-Wave Detection
In order to detect a heartbeat, a heart monitor looks for R waves; the detected beat is
annunciated and used for rate calculations and other analysis. By adjusting the R wave,
the range of settings can be determined for which a given heart monitor will detect a beat.
The MPS450 simulates an R wave that is adjustable to a wide range of preconfigured
settings for rate, width, and amplitude.
Setting R-Wave Rate
The MPS450 offers six preconfigured settings (BPM) for R-wave rate: 30, 60, 80, 120,
200, or 250.
Action in the Menu-Control Mode
1. Press the top-menu key labeled PERF.
2. Select RWDET to display the LCD screen R WAVE DETECTION:
2-24
3. Select RATE to scroll to a different R-wave rate. The rate identified on the LCD
gje021.eps
Page 57

Cardiac Functions
ECG Testing 2
screen is active when displayed and remains active until the setting is changed.
Alternatively, in the Numeric-Control Mode, press the number keys for R-wave rate
according to Table 2-19, and select RUN:
Table 2-19. Numeric Codes for R-Wave-Rate Settings
R-Wave-Rate Setting Numeric Code
30 BPM 312
60 BPM 313
80 BPM 314
120 BPM 315
200 BPM 316
250 BPM 317
Setting R-Wave Width
The MPS450 offers twenty-two preconfigured settings (ms) for R-wave width: nineteen
settings ranging from 20 to 200 ms (10 ms steps), plus three settings at 8, 10, or 12 ms.
Action in the Menu-Control Mode
1. Press the top-menu key labeled PERF.
2. Select RWDET.
3. Select SEL to toggle to the screen for adjusting R-wave width (WIDTH/ampl), with
WIDTH in upper-case letters.
4. Select DOWN or UP to scroll to the desired R-wave width.
5. The width identified on the LCD screen is active when displayed and remains active
until the setting is changed.
Alternatively, in the Numeric-Control Mode, press the number keys for R-wave width
according to Table 2-20, and select RUN:
Table 2-20. Numeric Code R-Wave Width Settings
R-Wave-Width Setting Numeric Code
8 ms 318
10 ms 319
12 ms 320
20 ms 321
30 ms 322
40 ms 323
50 ms 324
60 ms 325
70 ms 326
80 ms 327
90 ms 328
2-25
Page 58

MPS450
Operators Manual
100 ms 329
110 ms 330
120 ms 331
130 ms 332
140 ms 333
150 ms 334
160 ms 335
170 ms 336
180 ms 337
190 ms 338
200 ms 339
Table 2-20. Numeric Code R-Wave Width Settings (cont.)
R-Wave-Width Setting Numeric Code
Setting R-Wave Amplitude
The MPS450 offers twenty preconfigured settings (mV) for R-wave amplitude on Lead
II: 0.05 to 0.50 (0.05 steps) and 0.50 to 5.50 (0.50 steps).
Action in the Menu-Control Mode
1. Press the top-menu key labeled PERF.
2. Select RWDET.
3. Select SEL to toggle to the screen for adjusting R-wave amplitude (width/AMPL),
with AMPL in upper-case letters.
4. Select DOWN or UP to scroll to the desired R-wave amplitude.
5. The amplitude identified on the LCD screen is active when displayed and remains
active until another wave is selected.
Alternatively, in the Numeric-Control Mode, press the number keys for R-wave
amplitude according to Table 2-21, and select RUN:
Table 2-21. Numeric Codes for R-Wave-Amplitude Settings
R-Wave-Amplitude Setting Numeric Code
0.05 mV 292
0.10 mV 293
0.15 mV 294
2-26
0.20 mV 295
0.25 mV 296
0.30 mV 297
0.35 mV 298
0.40 mV 299
0.45 mV 300
Page 59

Cardiac Functions
Blood Pressure Function 2
Table 2-21. Numeric Codes for R-Wave-Amplitude Settings (cont.)
R-Wave-Amplitude Setting Numeric Code
0.50 mV 301
1.00 mV 302
1.50 mV 303
2.00 mV 304
2.50 mV 305
3.00 mV 306
3.50 mV 307
4.00 mV 308
4.50 mV 309
5.00 mV 310
5.50 mV 311
Blood Pressure Function
Blood pressure (BP) is the force of the blood exerted on the artery walls, as measured in
millimeters of mercury (mmHg). Contraction (referred to as systole) produces the highest
pressure, while relaxation (referred to as diastole) produces the lowest; blood pressure at
or near 120 mmHg over 80 mmHg (120/80) is considered healthy.
The MPS450 simulates dynamic BP waveforms that synchronize with all normal sinus
rhythm rates and track all arrhythmia selections. Settings are controlled independently for
the four MPS450 invasive BP channels—P1, P2, P3, and P4—each of which simulates a
bridge pressure transducer. Also, respiration artifact can be injected into any BP
waveform for each of the channels.
Cables (available from Fluke Biomedical) to attach to the BP connectors of the MPS450
are available both prewired and unterminated, for both types of monitors.
Before beginning BP simulation, the MPS450 BP-transducer sensitivity must be set to
match the monitor manufacturer's requirements. (See the section in this chapter called
“SETTING BP SENSITIVITY.”)
In addition, before testing, all BP channels should be set to zero. (See the “Zeroing BP
Channels” section later in this chapter.)
Setting BP Sensitivity
Depending on the manufacturer's requirements for the monitor being tested, set the
MPS450 blood-pressure-transducer sensitivity to either 40 μV/V/mmHg or
5 μV/V/mmHg (the default). For convenience, either value can be stored as a permanent
power-on default.
Action in the Menu-Control Mode
1. Press the top-menu key labeled SETUP to display the following LCD screen:
2-27
Page 60

MPS450
Operators Manual
gje025.eps
2. Select BP SENSE to display the BP SENSITIVITY screen. If the setting has not
been changed, the LCD screen displays the default BP-sensitivity setting (5
μV/V/mmHg):
gje026.eps
3. To change the BP-sensitivity setting, select 40. The setting identified on the LCD
screen is active when displayed and remains active until the setting is changed. (This
setting does not persist beyond the current session unless it is stored specifically.)
4. To store the displayed value as the power-on default, select STORE. On the LCD
screen Storing blinks on momentarily to indicate the value is being saved.
5. Press the ESC key to return to the top menu SETUP.
Alternatively, in the Numeric-Control Mode, press the number keys for a BP-sensitivity
setting according to Table 2-22, and select RUN:
2-28
Table 2-22. Numeric Codes for BP-Sensitivity Settings
BP-Sensitivity Setting Numeric Code
40 uV/V 068
40 uV/V STORE 133
5 uV/V 069
5 uV/V STORE 132
Zeroing BP Channels
Before testing or simulation, each of the four BP channels should be reset to zero mmHg.
Action in the Menu-Control Mode
1. To display the active pressure setting for each of the four channels, press the top-
menu key labeled BP. (In this example, the active setting for BP channel 3 has been
set to 40 mmHg.)
Page 61

Cardiac Functions
Blood Pressure Function 2
2. To display the screen for BP channel 3, select BP3:
3. To reset BP channel 3 to zero, select ZERO.
4. Press the ESC key to return to the top menu BLOOD PRESSURE.
5. For each channel, select its screen from the top menu, and then select ZERO, until
the top menu BLOOD PRESSURE displays 0 as the active setting for all four
channels.
Alternatively, in the Numeric-Control Mode, to zero all four BP channels simultaneously,
press the number keys 007, and select RUN.
Setting Static-Pressure Levels
The MPS450 offers seven preconfigured static-pressure-level settings (mmHg) for each
BP channel, with each channel controlled independently:
gje027.eps
gje028.eps
• Set BP channel 1 to -10, 0, 80, 160, 240, 320, or 400.
• Set BP channel 2 to -10, 0, 50, 100, 150, 200, or 240.
• Set each of BP channels 3 and 4 to -5, 0, 20, 40, 60, 80, or 100.
Action in the Menu-Control Mode
1. Press the top-menu key labeled BP.
2. Select BP1, BP2, BP3, or BP4 to display the channel’s screen.
3. Select STAT to display the STATIC screen for the selected channel (in this example,
BP channel 1 with an active setting of 80 mmHg):
4. On the LCD screen, RUN flashes, because the displayed setting is active.
gje029.eps
2-29
Page 62

MPS450
Operators Manual
BP1 -10 mmHg 342
BP1 Zero 343
BP1 80 mmHg 344
BP1 160 mmHg 345
BP1 240 mmHg 346
5. Select DOWN or UP to scroll to a different static-level setting.
6. Select RUN. On the LCD screen, RUN flashes to indicate the setting is active. This
value remains active until the setting is changed.
7. Press the ESC key to return to the previous screen.
8. Press the ESC key again to return to the top menu BLOOD PRESSURE.
Alternatively, in the Numeric-Control Mode, press the number keys for a static-pressurelevel setting according to Table 2-23, and select RUN:
Table 2-23. Numeric Codes for Static-Pressure-Level Settings
Static-Pressure-Level Setting Numeric Code
BP1 320 mmHg 347
BP1 400 mmHg 348
BP2 -10 mmHg 351
BP2 Zero 352
BP2 50 mmHg 353
BP2 100 mmHg 354
BP2 150 mmHg 355
BP2 200 mmHg 356
BP2 240 mmHg 357
BP3 -5 mmHg 360
BP3 Zero 361
BP3 20 mmHg 362
BP3 40 mmHg 363
BP3 60 mmHg 364
BP3 80 mmHg 365
BP3 100 mmHg 366
BP4 -5 mmHg 369
2-30
BP4 Zero 370
BP4 20 mmHg 371
BP4 40 mmHg 372
BP4 60 mmHg 373
BP4 80 mmHg 374
BP4 100 mmHg 375
Page 63

Cardiac Functions
Blood Pressure Function 2
Running a Dynamic Waveform
The MPS450 simulates dynamic waves to represent the pressures in various places in the
heart or blood vessels. Waves are specified for a normal sinus rhythm at 80 BPM, with
systolic pressure over diastolic pressure, e.g., 120/80, etc. Available dynamic waves (not
all available on all channels) are listed Table 2-24. (For information about the Swan-Ganz
simulation—a serial simulation available only on BP4, in both manual and automatic
modes—see the “Simulating the Swan-Ganz Procedure” section in this chapter.
Table 2-24. Dynamic Waveform Availability by BP Channel
DYNAMIC WAVE BP1 BP2 BP3 BP4
ARTERIAL 120/80 √ √ √
RADIAL
ARTERY
LEFT
VENTRICLE
LEFT ATRIUM 14/4 √ √
RIGHT
ATRIUM (CVP)
RIGHT
VENTRICLE
PULMONARY
ARTERY
PULMONARY
WEDGE
120/80
120/00
15/10
25/00
25/10
10/2
√ √ √
√ √ √
√ √ √
√ √ √ √
√ √ √
√ √ √
Action in the Menu-Control Mode
1. Press the top-menu key labeled BP.
2. Select BP1, BP2, BP3, or BP4 to display the screen for a specific channel.
3. Select DYNA to display the DYNAMIC WAVE screen for the selected channel (in
this example, BP3):
IN SWANZ-GANZ
PROCEDURE
gje030.eps
4. Scroll to the desired dynamic waveform, for example, PULM WEDGE 10/2.
5. Select RUN. On the LCD screen, RUN flashes to indicate the identified waveform is
running. The simulation runs continuously (repeats) until another selection is made.
6. Press the ESC key to return to the screen for the selected BP channel. The screen
identifies the selected waveform.
7. Press the ESC key again to return to the top menu BLOOD PRESSURE. The LCD
screen indicates the waveform running on the selected channel:
2-31
Page 64

MPS450
Operators Manual
Alternatively, in the Numeric-Control Mode, press the number keys for a dynamic-wave
setting according to Table 2-25, and select RUN:
Table 2-25. Numeric Codes for Dynamic-Wave Settings
Dynamic-Wave Setting NumericCode
BP1 Arterial 120/80 060
BP1 Radial Art 120/80 061
BP1 Left Vent 120/00 062
BP1 Right Vent 25/00 063
BP2 Arterial 120/80 070
BP2 Radial Art 120/80 071
BP2 Left Vent 120/00 072
BP2 Right Vent 25/00 073
BP2 Pulmonary Art 25/10 074
BP2 Pulm Art Wedge 10/2 075
gje031.eps
BP2 Left Atrium 14/4 076
BP2 Right Atrium CVP 15/10 077
BP3 Arterial 120/80 080
BP3 Radial Art 120/80 081
BP3 Left Vent 120/00 082
BP3 Right Atrium CVP 15/10 083
BP3 Pulmonary Art 25/10 084
BP3 Pulm Art Wedge 10/2 085
BP3 Left Atrium 14/4 086
BP3 Right Vent 25/00 087
Adding Respiration Artifact to the BP Signal
The MPS450 adds respiration artifact to any BP-channel dynamic wave, including the
Swan-Ganz-wave series. The artifact is turned on separately for each of the four BP
channels.
The following peak-to-peak changes (mmHg) are caused by the respiration wave, with
values independent of the programmed respiration amplitude:
2-32
Page 65

Cardiac Functions
Blood Pressure Function 2
• for BP channel 1, a delta change from 0 to 16;
• for BP channel 2, a delta change from 0 to 12;
• for BP channel 3, a delta change from 0 to 5; and
• for BP channel 4, a delta change from 0 to 3.
Action in the Menu-Control Mode
1. Press the top-menu key labeled BP.
2. Select BP1, BP2, BP3, or BP4 to display the channel’s screen.
3. Select DYNA to display the DYNAMIC WAVE screen for the selected channel.
4. Select ARTF. On the LCD screen, OFF toggles to ON.
5. Select RUN. On the LCD screen, RUN flashes to indicate the identified waveform is
running with the artifact applied.
6. Press the ESC key to return to the selected BP channel screen. The LCD screen
identifies the waveform that is running and indicates if the artifact is active (ARTF
ON):
7. Press the ESC key again to return to the top menu BLOOD PRESSURE. The LCD
screen indicates that the selected waveform (in the following example, 120/80) on the
selected channel (2) is running with a respiration artifact (A prefixed to 120/80):
Alternatively, in the Numeric-Control Mode, press the number keys for a respirationartifact setting according to Table 2-26, and select RUN:
Table 2-26. Numeric Codes for Respiration-Artifact Settings
Respiration-Artifact Setting Numeric Code
BP1 Respiration Artifact Off 349
BP1 Respiration Artifact On 350
gje032.eps
gje033.eps
BP2 Respiration Artifact Off 358
BP2 Respiration Artifact On 359
BP3 Respiration Artifact Off 367
2-33
Page 66

MPS450
Operators Manual
BP3 Respiration Artifact On 368
BP4 Respiration Artifact Off 376
BP4 Respiration Artifact On 377
Simulating the Swan-Ganz Procedure
Table 2-26. Numeric Codes for Respiration-Artifact Settings (cont.)
Respiration-Artifact Setting Numeric Code
The MPS450 reserves BP channel 4 exclusively for simulating the effect on the blood
pressure of a Swan-Ganz procedure. The Swan-Ganz simulation is available in both
automatic and manual modes.
The Swan-Ganz catheter is a soft, balloon-tipped instrument that is used for measuring
pulmonary-arterial pressure; right-atrial pressure; and reflected, left-ventricular, enddiastolic pressure. After insertion into a vein (usually the basilic vein of the forearm), the
catheter is gently guided by the flow of the blood into the pulmonary artery. A monitor
attached to the distal lumen port supplies a reading of pulmonary-artery pressure (PAP).
Pulmonary-capillary-wedge pressure (PCWP) is determined by inflating the balloon,
which becomes wedged; when this wedge blocks blood flow, it provides a reading of the
pressure in the left side of the heart.
The MPS450 simulates the full effects of the insertion of the catheter into the heart, the
inflation of the balloon tip, the deflation of the tip, and the removal of the catheter from
the heart and body. The Swan-Ganz simulation runs as a continuous, serial cycle of four
dynamic waves, with a different wave type generated every fifteen seconds: right-atrium
CVP (central venous pressure) 15/10; followed by right ventricular 25/00; followed by
pulmonary artery 25/10; followed by pulmonary-arterial wedge 10/2. The simulation then
continues by reversing through the cycle of waves.
Action in the Menu-Control Mode
1. Press the top-menu key labeled BP.
2. Select BP4 to display the channel’s screen:
3. To generate the complete Swan-Ganz cycle automatically, select AUTO. As the
automatic simulation begins, the LCD screen BP4 SWAN-GANZ AUTO displays:
gje034.eps
2-34
gje035.eps
Page 67

Cardiac Functions
Blood Pressure Function 2
4. As the automatic simulation proceeds, the LCD screen continues to indicate which
wave in the cycle is currently running: RIGHT ATR CVP 15/10; RIGHT VENT
25/00; PULM ARTERY 25/10; or PULM WEDGE 10/2.
5. To terminate the automatic Swan-Ganz simulation, press the ESC key.
6. To generate the complete Swan-Ganz cycle manually, select MAN from the screen
for the BP4 channel to display the screen for BP4 SWAN-GANZ MANUAL:
7. The manual simulation begins with a right-atrium CVP 15/10 dynamic wave. Select
INSRT to start the Swan-Ganz procedure with the simulated insertion of the catheter
into the heart.
8. To complete the Swan-Ganz procedure manually, select INSRT again. Next, select
INFL (simulating balloon inflation), then DEFL (simulating balloon inflation).
Finally, select PLBK (simulating pullback, that is, the withdrawal of the catheter),
then PLBK again.
9. At each point in the procedure, the LCD screen identifies which dynamic wave in the
cycle of four is currently running.
10. Press the ESC key to return to the BP4 screen.
11. Press the ESC key again to return to the top menu.
Alternatively, in the Numeric-Control Mode, press the number keys for a Swan-Ganz
simulation according to Table 2-27, and select RUN:
Table 2-27. Numeric Codes for Swan-Ganz-Simulation Settings
Swan-Ganz-Simulation Setting Numeric Code
Swan-Ganz Auto 088
BP4 Right Atrium CVP 15/10 378
gje036.eps
BP4 Right Vent 25/00 379
BP4 Pulmonary Art 25/10 380
BP4 Pulm Art Wedge 10/2 381
Swan-Ganz Manual 416
Insert (in Swan-Ganz Manual) 417
Inflate (in Swan-Ganz Manual) 418
Deflate (in Swan-Ganz Manual) 419
Pull Back (in Swan-Ganz Manual) 420
2-35
Page 68

MPS450
Operators Manual
Cardiac Output
Cardiac output is a term encompassing blood flow, pulse rate, and other vascular-related
elements. Of the entire circulatory system, cardiac output is arguably the most important
single factor for health since it controls the degree of blood being received by every other
tissue in the body. Diseases of the heart can cause a decrease of cardiac output, leading to
a condition of insufficient nutrition for the body cells. Cardiac output is expressed as the
measure of blood pumped out of the heart each minute, also called the heart-minute
volume (HMV).
One method of determining cardiac output is to measure the transference of heat in the
blood through a method called thermodilution. Thermodilution is the measurement of the
temperature change caused by the injection into the heart of a series of cold or roomtemperature solutions (such as a saline solution) into the heart. A thermistor (as integrated
into the distal lumen port of a Swan-Ganz catheter) measures the average change in blood
temperature. From this information, a determination can be made as to ventricular blood
volume and cardiac output.
The MPS450 simulates blood cooling, as the result of an injectate, to below-normal
temperatures. On most monitors, the blood temperature curve is in the positive direction,
even though the blood is cooling. Following the simulated cardiac-output test, ECG
reverts to normal sinus rhythm at 80 BPM.
To simulate cardiac output, use the cardiac-output adapter box, which is supplied as part
of the cardiac-output option. (See the section in the “Setting Up for a Cardiac-Output
Test” section later in this chapter.)
Setting Up For a Cardiac-Output Test
Action
1. Configure the cardiac-output monitor to the settings listed in Table 2-28, which are
compatible with the MPS450 simulation:
Table 2-28. Cardiac-Output Monitor Settings
Variable Setting
CATHETER TYPE / SIZE: Baxter Edwards, 93a-131-7f
CALIBRATION COEFFICIENT: 0.542 for 0 °C injectate; 0.595 for 24 °C injectate
INJECTATE VOLUME: 10 cc
INJECTATE TEMPERATURE: 0 °C or 24 °C
2. Connect the cardiac-output adapter box to the CO/TEMP connector on the right-side
panel of the MPS450.
3. Connect the BT thermistor cable from the cardiac-output monitor to the smaller 4-pin
connector on the cardiac-output adapter box. This is the blood-temperaturesimulation line directly wired to the MPS450.
2-36
4. Connect the injectate-temperature cable from the cardiac-output monitor to the bigger
4-pin switchcraft connector on the cardiac-output adapter box. This line is wired to
the trimpot on the front panel of the CO adapter box, enabling the resistance to be set
correctly to either 0 °C or 24 °C, as displayed on the CO monitor.
5. With the MPS450 turned on, the blood-temperature indicator on the CO monitor
should read approximately 37 °C.
6. Turn the trimpot on the CO adapter box until the injectate-temperature (IT) sensor
Page 69

Cardiac Functions
Cardiac Output 2
reads “0” or “24” on the CO monitor. (To get a reading, the trimpot may have to be
turned all the way in one direction.)
Note
Fluke Biomedical supplies adapters to connect to some nonstandard
catheters. (Please consult the cable price list.) For manufacturers that are
not listed, a “pigtail” may be ordered and wired to cut-off catheters.
Simulating a Cardiac-Output Test
The MPS450 simulates two separate injectate temperatures (an iced solution of 0 °C /
32 °F or a room-temperature solution of 24 °C / 75.2 °F), each flowing at three different
rates (2.5, 5.0, or 10 liters per minute).
Action in the Menu-Control Mode
1. Press the top-menu key labeled CO to display the following LCD screen:
2. To set the injectate temperature to 0 °C or 24 °C, select INJ to toggle to the desired
setting.
3. To adjust the flow rate, select PREV or NEXT to scroll to the desired setting.
4. Select RUN. On the LCD screen, RUNNING flashes while the simulation is active.
To repeat a simulation, select RUN again.
5. To terminate a cardiac-output simulation, select END.
Alternatively, in the Numeric-Control Mode, press the number keys for a combined
temperature/flow setting listed in Table 2-29, and select RUN:
Table 2-29. Numeric Codes for Temperature/Flow Settings
Temperature/Flow Setting Numeric Code
CO OFF 090
CO 0 DEG 2.5 L/M 091
CO 0 DEG 5.0 L/M 092
CO 0 DEG 10.0 L/M 093
CO 24 DEG 2.5 L/M 094
gje038.eps
CO 24 DEG 5.0 L/M 095
CO 24 DEG 10.0 L/M 096
Injectate Failure and Left-To-Right Shunt
Injectate failure occurs, for example, when an injector fails to release an injectate in a
continuous manner, a situation caused most often by the human factor of hesitation.
A physiological condition called a left-to-right shunt occurs when the blood detours from
2-37
Page 70

MPS450
Operators Manual
Action in the Menu-Control Mode
the systemic (body) circulation to the pulmonary (lung-related) circulation. In other
words, the blood has been shunted from the left side of the heart to the right side, through
an abnormal aperture, such as a defect in the septum of the heart, or patient ductus
arteriosus (the persistence after birth of the open lumen between the aorta and the
pulmonary artery).
The MPS450 simulates both injectate-failure and left-to-right-shunt curves at either 0 °C
or 24 °C.
1. To simulate a cardiac-output test involving either a faulty injectate (as if the injectate
alternately stops and starts), or a left-to-right-shunt condition, press the top-menu key
labeled CO.
2. To set the injectate temperature to 0 °C or 24 °C, select INJ to toggle to the desired
setting.
3. Scroll to the FAULTY INJ screen, or to the L/R SHUNT screen.
4. Select RUN. On the LCD screen, RUNNING flashes while the simulation is active.
To repeat a simulation, select RUN again.
5. To terminate a cardiac-output simulation, select END.
Alternatively, in the Numeric-Control Mode, press the number keys for a combined
condition/temperature simulation listed in Table 2-30, and select RUN:
Table 2-30. Numeric Code for Condition/Temperature Setting
Condition/Temperature Setting Numeric Code
FAULTY INJ 0 DEG 097
FAULTY INJ 24 DEG 099
L TO R SHUNT 0 DEG 098
L TO R SHUNT 24 DEG 100
Simulating Output From a Calibrated Pulse Signal
The MPS450 sends a waveform to test the calibration of a cardiac-output monitor,
simulating an injectate temperature of either 0 °C or 24 °C and a step change of 1.5 °C
for 1 second.
Action in the Menu-Control Mode
1. Press the top-menu key labeled CO.
2. To set the injectate temperature to 0 °C or 24 °C, select INJ to toggle to the desired
setting.
3. Select PREV or NEXT to scroll to the CAL PULSE screen.
2-38
4. Select RUN. On the LCD screen, RUNNING flashes while the simulation is active.
To repeat the simulation, select RUN again.
5. To terminate the simulation, select END.
Alternatively, in the Numeric-Control Mode, press the number keys for a calibration
setting listed in Table 2-31, and select RUN:
Page 71

Cardiac Functions
Fetal / Maternal ECG (Option) 2
Table 2-31. Numeric Code for Calibration Setting
Calibration Setting Numeric Code
CAL PULSE 0 DEG 101
CAL PULSE 24 DEG 102
Fetal / Maternal ECG (Option)
The MPS450 simulates a combined fetal and maternal electrocardiogram (ECG)
occurring during labor, as well as a selection of pressure waveforms produced by uterine
contractions. The contraction period is adjustable and includes a manually generated
waveform.
The maternal ECG is always a normal sinus rhythm with a heart rate of 80 BPM; the fetal
heart rate is either fixed (to a selection from seven settings), or periodic, which is
interactive with uterine contractions. The simulated fetal heart rate represents a
measurement from a fetal scalp electrode, while the simulated maternal heart rate
represents a measurement from an electrode on the mother’s thigh.
The MPS450 simulates the fetal / maternal ECG on its regular ECG leads. The maternal
signal is a P-QRS-T wave fixed at 80 BPM, at half the selected ECG amplitude; the fetal
signal is a narrow R wave at full amplitude. Fetal and maternal signals are summed to
make a composite signal.
The simulated intrauterine-pressure (IUP) waveform represents a measurement taken by
an intra-amniotic catheter connected to a pressure transducer. The MPS450 simulates the
IUP on its BP4 blood-pressure channel, the same as if it were a blood-pressure
transducer, either at 5 or 40 μV/V/mmHg sensitivity (as has been set up for blood
pressure).
The MPS450 does not provide simulations for all types of fetal heart rate tracings and
contraction patterns. A few examples of simulation not provided are:
• Variable decelerations
• Sinusoidal pattern
• Reactive tracing
• Variations in FHR variability
• Tachysystole
Simulating a Fixed Fetal Heart Rate (Fhr)
The MPS450 simulates seven preconfigured settings (BPM) for a fetal heart rate that is
fixed: 60, 90, 120, 140, 150, 210, or 240.
Action in the Menu-Control Mode
1. Press the top-menu key labeled MORE to display the following LCD screen:
2. Select FETAL MATR to display the following LCD screen:
gje039.eps
2-39
Page 72

MPS450
Operators Manual
3. Select FHR repeatedly to scroll to a different fetal heart rate. The FHR setting
identified on the LCD screen is active when displayed and remains active until the
setting is changed. (Fixed settings do not affect IUP simulations, since they set their
own rates.)
Alternatively, in the Numeric-Control Mode, press the number keys for a fixed fetalheart-rate setting listed in Table 2-32, and select RUN:
Table 2-32. Numeric Codes for Heart-Rate Settings
FHR Setting Numeric Code
60 BPM 409
90 BPM 410
120 BPM 411
140 BPM 412
150 BPM 413
210 BPM 414
240 BPM 415
gje040.eps
2-40
Simulating a Periodic FHR With Intrauterine Pressure (IUP)
The MPS450 sends waveforms to simulate intrauterine pressure during a contraction of
the uterus in childbirth. The duration of each IUP wave is 90 seconds, generating a bellshaped pressure curve that rises from zero to 90 mmHg and returns back to zero. During
an IUP-wave simulation, the fetal heart rate (which always begins at 140 BPM) varies
with the blood pressure; the LCD screen displays both values as they change.
The IUP period is adjustable to four preconfigured settings, including a single contraction
that is triggered manually, as well as waveforms that automatically simulate a contraction
generated once every 2, 3, or 5 minutes.
The MPS450 simulates three types of preconfigured waveforms for a periodic FHR that
is interactive with uterine contractions: early deceleration; late deceleration; or
acceleration:
• With early deceleration, the fetal heart rate follows the intrauterine pressure
(no lag). FHR starts at 140 BPM, slows to 100 BPM at intrauterine-pressure
peak, and returns to 140 BPM as the IUP falls back to zero.
• With late deceleration, the change in fetal heart rate begins when IUP pressure
is at its peak and lags the change in intrauterine pressure by 45 seconds. FHR
starts at 140 BPM, slows to 100 BPM, and returns to 140 BPM.
• With acceleration, the change in fetal heart rate lags the change in intrauterine
pressure by 30 seconds. FHR starts at 140 BPM, increases to 175 BPM, and
returns 140 BPM.
Page 73

Cardiac Functions
Fetal / Maternal ECG (Option) 2
Action in the Menu-Control Mode
1. Press the top-menu key labeled MORE.
2. Select FETAL MATR.
3. Select PER to scroll to a different contraction-period setting.
4. Select IUP to scroll to the desired wave simulation: EARLY DEC (early
deceleration); LATE DEC (late deceleration); or ACC (acceleration).
5. Select RUN. On the LCD screen, RUNNING flashes while the simulation is active.
6. A manually generated IUP ends after one contraction. To repeat the simulation, select
RUN again.
7. Periodically generated IUPs repeat at the selected period. To terminate a periodic-
IUP simulation, select END.
Alternatively, in the Numeric-Control Mode, press the number keys for an IUP-wave
simulation using one of the codes in Table 2-33, and select RUN. (The selected IUP is
generated according to the specific period that was last selected, whether manual, or once
every 2, 3, or 5 minutes.)
Table 2-33. Numeric Codes for IUP Wave Settings
IUP Wave Setting Numeric Code
IUP OFF 400
IUP EDEC (early deceleration) 402
IUP LDEC (late deceleration) 403
IUP UACC (acceleration) 404
To select a contraction period in the Numeric-Control Mode, press the number keys for
one of the settings found in Table 2-34, and select RUN. (The selected period is applied
to a run of the specific IUP-wave simulation that was last selected, whether early
deceleration, late deceleration, or acceleration.)
Table 2-34. Numeric Codes for IUP Contraction Period Settings
IUP Contraction Period Setting Numeric Code
IUP MANUAL 405
IUP 2 MIN 406
IUP 3 MIN 407
IUP 5 MIN 408
2-41
Page 74

MPS450
Operators Manual
2-42
Page 75

Chapter 3
Other Functions
Title Page
Introduction.......................................................................................................... 3-3
Respiration ........................................................................................................... 3-3
Setting the Respiration Lead and Baseline ...................................................... 3-3
Adjusting the Respiration Rate........................................................................ 3-4
Adjusting the Respiration Amplitude (Impedance Variation)......................... 3-5
Simulating Apnea (Respiration Standstill)...................................................... 3-6
Temperature (Adjusting Body Temperature)....................................................... 3-6
3-1
Page 76

MPS450
Operators Manual
3-2
Page 77

Other Functions
Introduction 3
Introduction
The MPS450 also simulates to other bodily functions: Respiration and Temperature. This
chapter explains how to simulate these functions through the front-panel controls and
Numeric-Control mode.
Respiration
The MPS450 sets the respiration lead as either left arm or left leg. Respiration rate,
baseline (impedance, between two limb leads), and amplitude (impedance variation) are
adjustable to preconfigured settings. Values for respiration lead and baseline are storable.
The MPS450 also offers a selection of preconfigured apnea simulations.
Setting the Respiration Lead and Baseline
The MPS450 sends the respiration signal to the lead for either the left arm (LA, the
default) or left leg (LL). If the setting for left leg is stored, it becomes the new power-on
default.
For baseline impedance, the MPS450 simulates four preconfigured settings (ohms): 500;
1000 (the default); 1500; or 2000. Optionally, any of these settings can be stored to
become the new power-on default.
Action in the Menu-Control Mode
1. Press the top-menu key labeled SETUP to display the LCD screen:
2. Select RESP to scroll to the LCD screen RESPIRATION CONFIG. If the settings
for respiration lead and baseline impedance have not been changed, the screen
displays the default settings (LA and 1000 OHMS):
gje022.eps
gje023.eps
3. To change the respiration lead, select LEAD.
4. To adjust the respiration base, select BASE to scroll to the desired setting.
5. The values identified on the LCD screen are active when displayed and remain active
until the settings are changed. (Settings other than defaults do not persist beyond the
current session unless they have been stored specifically.)
6. To store the settings for respiration lead and baseline, select STORE. On the LCD
screen, Storing blinks for a moment to indicate the selected values are being saved.
3-3
Page 78

MPS450
Operators Manual
RESP LEAD LA 389
RESP LEAD LA STORED 390
RESP LEAD LL 391
RESP LEAD LL STORED 392
RESP BASE 500 OHM 180
Alternatively, in the Numeric-Control Mode, press the number keys for a respiration-lead
setting according to Table 3-1, and select RUN:
Table 3-1. Numeric Codes for Respiration-Lead Settings
Respiration-Lead Setting Numeric Code
For baseline impedance, press the number keys for a respiration-baseline setting
according to Table 3-2, and select RUN:
Table 3-2. Numeric Codes for Respiration-Baseline Settings
Respiration-Baseline Setting Numeric Code
RESP BASE 500 STRD 393
RESP BASE 1000 OHM 181
RESP BASE 1000 STRD 394
RESP BASE 1500 OHM 182
RESP BASE 1500 STRD 395
RESP BASE 2000 OHM 183
RESP BASE 2000 STRD 396
Adjusting the Respiration Rate
Respiration rate is measured by the number of times per minute the lungs inflate
(inspiration) and deflate (expiration), expressed as breaths-per-minute (BrPM). Pediatric
respiration rates are two or three times higher than adult rates. Newborn babies, for
example, breathe from forty to fifty times per minute, while adults typically breathe
approximately fifteen times per minute.
The MPS450 simulates nine preconfigured respiration rates (BrPM): 15, 20, 30, 40, 60,
80, 100, and 120, plus a respiration-off condition.
Action in the Menu-Control Mode
1. Press the top-menu key labeled RESP. If the respiration-rate setting has not been
changed, the screen displays the default setting (20 BRPM):
3-4
gje024.eps
Page 79

Other Functions
Respiration 3
2. To adjust the respiration rate, select DOWN or UP. The rate identified on the LCD
screen is active when displayed and remains active until the setting is changed.
Alternatively, in the Numeric-Control Mode, press the number keys for a respiration-rate
setting according to Table 3-3, and select RUN:
Table 3-3. Numeric Codes for Respiration-Rate Settings
Respiration-Rate Setting Numeric Code
0 BrPM 156
15 BrPM 157
20 BrPM 158
30 BrPM 159
40 BrPM 160
60 BrPM 161
80 BrPM 162
100 BrPM 163
120 BrPM 164
Adjusting the Respiration Amplitude (Impedance Variation)
The MPS450 offers four preconfigured settings (ohms) for respiration amplitude: 0.2,
0.5, 1.0, or 3.0.
Action in the Menu-Control Mode
1. Press the top-menu key labeled RESP. If the respiration-amplitude setting has not
been changed, the screen displays the default setting (1.0 OHMS).
2. To adjust the respiration amplitude, select AMPL repeatedly to scroll to the desired
setting. The amplitude identified on the LCD screen is active when displayed and
remains active until the setting is changed.
Alternatively, in the Numeric-Control Mode, press the number keys for a respirationamplitude setting according to Table 3-4, and select RUN:
Table 3-4. Numeric Codes for Respiration-Amplitude Settings
Respiration Amplitude Setting Numeric Code
0.2 ohms 195
0.5 ohms 196
1.0 ohms 197
3.0 ohms 198
3-5
Page 80

MPS450
Operators Manual
Simulating Apnea (Respiration Standstill)
Action in the Menu-Control Mode
Apnea is described as the cessation of breathing. In general there are three types of apnea:
central (often seen in infants, when there is no diaphragm movement and no air flow);
obstructive (where an object, such as food, is lodged in the trachea); and mixed (where
central apnea is followed immediately by obstructive apnea).
The MPS450 offers four apnea simulations that differ from each other only by simulation
length, not by waveform. These four simulations are available as pre-configured, onetime events (with apnea lasting for a duration of 12, 22, or 32 seconds), plus a continuous
user-controlled apnea.
1. Press the top-menu key labeled RESP. If the apnea on/off setting has not been
changed, the LCD screen indicates the default condition with apnea turned off (OFF
APNE).
2. Select APNE to display the LCD screen RESPIRATION APNEA.
3. If the apnea setting has not been changed, the LCD screen references the default
apnea simulation (12 SECONDS). To simulate a one-time event of 12-second apnea,
select RUN. On the LCD screen, ON flashes while the MPS450 counts down and
displays the seconds remaining in the simulation. To repeat the simulation, select
RUN again.
4. For a one-time event of 22-second or 32-second apnea, or for a continuous-apnea
simulation, select PREV or NEXT to scroll to the LCD screen displaying the desired
condition, and select RUN.
5. To terminate a running simulation of apnea at any time (including continuous apnea),
select END.
6. To return to the top menu RESPIRATION, press the ESC key.
Alternatively, in the Numeric-Control Mode, press the number keys for an apnea
condition according to Table 3-5, and select RUN:
Table 3-5. Numeric Codes for Apnea Simulation Settings
Apnea Simulation Setting Numeric Code
APNEA ON CONTINUOUS 150
APNEA OFF 151
APNEA 12 SECONDS 152
APNEA 22 SECONDS 153
APNEA 32 SECONDS 154
Temperature (Adjusting Body Temperature)
All temperatures output by the MPS450 are compatible with Yellow Springs, Inc. (YSI)
Series 400 and 700 probes. The type of probe simulated is based on the type of cable
connected to the MPS450 and/or the input used. (Cables for connection to the 400 or 700
are available directly from Fluke Biomedical.)
3-6
The MPS450 simulates four preconfigured body temperatures, which can be applied at
any time while operating the instrument.
The MPS450 simulates four preconfigured temperatures of the human body, accurate to
Page 81

Other Functions
Temperature (Adjusting Body Temperature) 3
within ±0.40 °C: freezing (0 °C / 32 °F); hypothermic (24 °C / 75.2 °F); normal (37 °C /
98.6 °F); or pyretic (40 °C / 104 °F).
Action in the Menu-Control Mode
1. Press the top-menu key labeled TEMP to display the following LCD screen:
2. To adjust the simulated temperature to the desired setting, select DOWN or UP.
3. The temperature setting identified on the LCD screen is active when displayed and
remains active until the setting is changed.
Alternatively, in the Numeric-Control Mode, press the number keys for a Celsiustemperature setting according to Table 3-6, and select RUN:
Table 3-6. Numeric Codes for Temperature-Celsius Settings
Temperature-Celsius Setting Numeric Code
0 DEG 189
24 DEG 190
37 DEG 191
40 DEG 192
gje037.eps
3-7
Page 82

MPS450
Operators Manual
3-8
Page 83

Chapter 4
Remote Operations
Title Page
Introduction.......................................................................................................... 4-3
Remote Connection.............................................................................................. 4-3
Entering Remote Commands ............................................................................... 4-3
Using Remote Entry to Operate In Numeric-Control Mode................................ 4-4
General Remote Commands ................................................................................ 4-4
Error Messages .................................................................................................... 4-4
Codes and Actions ............................................................................................... 4-4
ECG Functions ................................................................................................ 4-5
Normal-Sinus ECG ..................................................................................... 4-5
ECG Amplitude........................................................................................... 4-5
Adult / Pediatric .......................................................................................... 4-6
STE Elevation ............................................................................................. 4-6
ECG Artifact Stimulation............................................................................ 4-7
Pacemaker Waveform ................................................................................. 4-8
Pacemaker Amplitude ................................................................................. 4-8
Pacemaker Width ........................................................................................ 4-8
Arrhythmia Functions...................................................................................... 4-9
Supraventricular Arrhythmia ...................................................................... 4-9
Premature Arrhythmia................................................................................. 4-9
Ventricular Arrhythmia............................................................................... 4-10
Conduction Defect ...................................................................................... 4-10
ECG Testing .................................................................................................... 4-10
Performance Waves .................................................................................... 4-11
Performance Wave Amplitude.................................................................... 4-11
R-Wave Rate ............................................................................................... 4-12
R-Wave Width ............................................................................................ 4-12
R-Wave Amplitude ..................................................................................... 4-13
Respiration Functions...................................................................................... 4-14
Respiration Lead ......................................................................................... 4-14
Respiration Baseline (Impedance) .............................................................. 4-14
Respiration Rate .......................................................................................... 4-15
Respiration Amplitude ................................................................................ 4-15
Apnea Simulation........................................................................................ 4-16
Blood Pressure Functions ................................................................................ 4-16
Blood-Pressure Sensitivity .......................................................................... 4-16
Blood Pressure Zeroing............................................................................... 4-16
BP Channel 1: Static-Pressure Levels......................................................... 4-16
BP Channel 2: Static-Pressure Levels......................................................... 4-17
4-1
Page 84

MPS450
Operators Manual
BP Channel 3: Static-Pressure Levels......................................................... 4-17
BP Channel 4: Static-Pressure Levels......................................................... 4-18
BP Channel 1: Dynamic Waveforms .......................................................... 4-18
BP Channel 2: Dynamic Waveforms .......................................................... 4-18
BP Channel 3: Dynamic Waveforms .......................................................... 4-19
BP Channel 4: Dynamic Waveforms .......................................................... 4-20
BP Channel 1: Respiration Artifact............................................................. 4-20
BP Channel 2: Respiration Artifact............................................................. 4-21
BP Channel 3: Respiration Artifact............................................................. 4-21
BP Channel 4: Respiration Artifact............................................................. 4-21
Other Functions ............................................................................................... 4-21
Temperature ................................................................................................ 4-21
Cardiac-Output Wave / Injectate................................................................. 4-22
FHR Rate (Fixed)........................................................................................ 4-22
Intrauterine-Pressure (-) Wave .................................................................... 4-23
Intrauterine-Pressure (IUP) Period.............................................................. 4-23
View Angle ................................................................................................. 4-23
Beeper ......................................................................................................... 4-24
4-2
Page 85

Remote Operations
Introduction 4
Introduction
MPS450 features include a built-in RS-232 serial port running at 9600 baud—configured
so that it can be connected to a standard PC serial port with a straight-through cable—
that enables instrument control through remote commands. (See the “Entering Remote
Commands” section later in this chapter.)
Remote Connection
The serial-port connector is a 9-pin female D-SUB, configured as Data Communications
Equipment (DCE) and intended to connect straight through to Data Terminal Equipment
(DTE). Table 4-1 lists the pins of the remote connector and their signal name and
function:
Table 4-1. Remote Connector Signal Pin-Out
Pin Signal Name Direction DCE Function
1
2
3 TX Input Data transmitted by DTE (received by
4 (not used)
5 Ground Signal common
6 DSR Output Handshake line indicates MPS450/DCE ready,
7 RTS Input Handshake line from DTE says MPS450/DCE
8 CTS Output
9 (not used)
(not used)
RX Output Data received by DTE (transmitted by
MPS450/DCE)
MPS450/DCE)
always ON
can send data
Hand Handshake line tells DTE it is OK to send
data to MPS450/DCE
For serial communications to work properly, the RTS handshake line must be connected
and functioning. Normally, when connecting to a PC serial port, that requirement is met.
The PC serial port may need to be configured in order to turn on RTS/CTS handshaking.
Entering Remote Commands
In addition to using the MPS450 keypad (in either the menu-control or numeric-control
mode), the instrument can be controlled by sending remote commands to its serial port.
For example, the following remote-entry command sets blood-pressure sensitivity to
40 μV/V/mmHg:
BPSNS40
A complete list of the remote-entry commands, which set up MPS450 parameters and
return standard operational responses, is arranged by category is in the “Codes and
Actions” section later in this chapter.
The following guidelines apply to entering remote commands:
4-3
Page 86

MPS450
Operators Manual
Using Remote Entry to Operate In Numeric-Control Mode
• The MPS450 executes a command upon a carriage return and/or a line feed.
• Alphabetic characters in commands are case-insensitive.
• When entering commands, the BACKSPACE key operates normally (that is, deletes
the previously recorded character).
• When entering commands, the ESCAPE key discards the entire command.
• When a command is completed, a message is sent back (usually “OK”).
In addition to using remote commands to set up wave parameters, one specific remoteentry command can be used to operate the MPS450 in the numeric-control mode from a
peripheral device:
NUMENT=num (where num is a numeric-control code)
For example, entering the remote command
NUMENT=017 runs a simulation of atrial
tachycardia—just as if the MPS450 was being operated in the numeric-control mode, the
number keys 017 were pressed on the MPS450 keypad, and RUN was selected.
A list of numeric-control codes—cross-referenced both to actions and to remote-entry
commands—is available in the “Codes and Actions” section later in this chapter.
General Remote Commands
The general remote commands are listed in Table 4-2:
Table 4-2. General Remote Commands
Remote Command Action
IDENT Identifies the instrument. Returns “MPS450; version; options,” where
version is the version of the firmware program and options equal “C” for
Cardiac Output, and/or “F” for Fetal / Maternal.
VER Returns the firmware version.
NUMENT=num Executes a numerical entry function, where num equals the 3-digit number
to execute.
Error Messages
Invalid commands return error messages, including the following:
• “ERR=00, NO COMMANDS ALLOWED AT THIS TIME”
• “ERR=001, UNKNOWN COMMAND”
• “ERR=02, ILLEGAL COMMAND”
• “ERR=03, ILLEGAL PARAMETER”
• “ERR=04, DATA CORRUPTED”
• “ERR=05, UNKNOWN ERROR”
• “ERR=06, OPTION NOT INSTALLED”
• “ERR=20, INVALID NUMERIC ENTRY”
• “ERR=21, ILLEGAL SWAN-GANZ COMMAND”
4-4
Codes and Actions
This section lists the code numbers for controlling MPS450 actions, including both
numeric-mode and remote-control-entry codes. (See the Table of Contents for this
chapter to locate a specific action.)
Page 87

Remote Operations
Codes and Actions 4
The code numbers used in the numeric-control mode range from 000 to 420, with most of
the numbers from 0 through 247 matching the numbers used previously by the
Lionheart 3. Both active and inactive numeric-control codes are listed; when operating in
the numeric-control mode, selecting DOWN or UP on the LCD screen automatically
skips the inactive codes.
For more information about using the remote-control-entry codes (including how to use
one specific remote-control command to operate the MPS450 in the numeric-control
mode), see the “Remote Operations” section.
ECG Functions
The ECG functions category consist of Normal-Sinus ECG, ECG Amplitude,
Adult/Pediatric, STE Elevation, ECG Artifact simulation, Pacemaker Waveform,
Pacemaker Amplitude, and Pacemaker Width
Normal-Sinus ECG
Table 4-3 lists the numeric control codes for the normal-sinus ECG functions.
Table 4-3. Numeric Codes for Normal Sinus ECG Actions
Numeric
Control Code
165 Run normal sinus ECG at 30 BPM. NSR30
166 Run normal sinus ECG at 40 BPM. NSR40
250 Run normal sinus ECG at 45 BPM. NSR45
167 Run normal sinus ECG at 60 BPM. NSR60
168 Run normal sinus ECG at 80 BPM. NSR80
251 Run normal sinus ECG at 90 BPM. NSR90
169 Run normal sinus ECG at 100 BPM. NSR100
170 Run normal sinus ECG at 120 BPM. NSR120
171 Run normal sinus ECG at 140 BPM. NSR140
172 Run normal sinus ECG at 160 BPM. NSR160
173 Run normal sinus ECG at 180 BPM. NSR180
174 Run normal sinus ECG at 200 BPM. NSR200
175 Run normal sinus ECG at 220 BPM. NSR220
176 Run normal sinus ECG at 240 BPM. NSR240
177 Run normal sinus ECG at 260 BPM. NSR260
178 Run normal sinus ECG at 280 BPM. NSR280
179 Run normal sinus ECG at 300 BPM. NSR300
Action
Remote Control
Entry
ECG Amplitude
Table 4-4 lists the numeric control codes for the ECG amplitude functions.
Numeric
Control Code
252 Set ECG amplitude to 0.05 mV. NSA0.05
Table 4-4. Numeric Codes for ECG Amplitude Actions
Action
Remote Control
Entry
4-5
Page 88

MPS450
Operators Manual
Table 4-4. Numeric Codes for ECG Amplitude Actions (cont.)
Numeric
Control Code
253 Set ECG amplitude to 0.10 mV. NSA0.10
254 Set ECG amplitude to 0.15 mV. NSA0.15
255 Set ECG amplitude to 0.20 mV. NSA0.20
256 Set ECG amplitude to 0.25 mV. NSA0.25
257 Set ECG amplitude to 0.30 mV. NSA0.30
258 Set ECG amplitude to 0.35 mV. NSA0.35
259 Set ECG amplitude to 0.40 mV. NSA0.40
260 Set ECG amplitude to 0.45 mV. NSA0.45
261 Set ECG amplitude to 0.50 mV. NSA0.50
262 Set ECG amplitude to 1.00 mV. NSA1.00
263 Set ECG amplitude to 1.50 mV. NSA1.50
264 Set ECG amplitude to 2.00 mV. NSA2.00
265 Set ECG amplitude to 2.50 mV. NSA2.50
266 Set ECG amplitude to 3.00 mV. NSA3.00
Action
Remote Control
Entry
267 Set ECG amplitude to 3.50 mV. NSA3.50
268 Set ECG amplitude to 4.00 mV. NSA4.00
269 Set ECG amplitude to 4.50 mV. NSA4.50
270 Set ECG amplitude to 5.00 mV. NSA5.00
271 Set ECG amplitude to 5.50 mV. NSA5.50
Adult / Pediatric
Table 4-5 list the numeric control codes for the adult / pediatric functions.
Numeric
Control Code
010 Set patient type to Adult. ADULT
011 Set patient type to Pediatric. PEDS
STE Elevation
Table 4-6 lists the numeric control codes for the STE elevation functions.
Numeric
Control Code
Table 4-5. Numeric Codes for Adult / Pediatric Actions
Action
Table 4-6. Numeric Codes for STE Elevation Actions
Action
Remote Control
Entry
Remote Control
Entry
4-6
237 Set ST elevation to -0.8 mV. STD-0.8
Page 89

Remote Operations
Codes and Actions 4
Table 4-6. Numeric Codes for STE Elevation Action (cont.)
Numeric
Control Code
236 Set ST elevation to -0.7 mV. STD-0.7
235 Set ST elevation to -0.6 mV. STD-0.6
234 Set ST elevation to -0.5 mV. STD-0.5
233 Set ST elevation to -0.4 mV. STD-0.4
232 Set ST elevation to -0.3 mV. STD-0.3
231 Set ST elevation to -0.2 mV. STD-0.2
230 Set ST elevation to -0.1 mV. STD-0.1
221 Set ST elevation to -0.05 mV. STD-0.05
220 Set ST elevation to 0. STD0
219 Set ST elevation to +0.05 mV. STD+0.05
229 Set ST elevation to +0.1 mV. STD+0.1
228 Set ST elevation to +0.2 mV. STD+0.2
227 Set ST elevation to +0.3 mV. STD+0.3
226 Set ST elevation to +0.4 mV. STD+0.4
Action
Remote Control
Entry
225 Set ST elevation to +0.5 mV. STD+0.5
224 Set ST elevation to +0.6 mV. STD+0.6
223 Set ST elevation to +0.7 mV. STD+0.7
222 Set ST elevation to +0.8 mV. STD+0.8
ECG Artifact Stimulation
Table 4-7 lists the numeric control codes for the ECG artifact Stimulation functions.
Table 4-7. Numeric Codes for ECG Artifact Stimulation Actions
Numeric
Control Code
104 Set ECG artifact to off. EAOFF
105 Set ECG artifact to 50 Hz sine. EA50
106 Set ECG artifact to 60 Hz sine. EA60
107 Set ECG artifact to muscle. EAMSC
108 Set ECG artifact to wandering baseline. EAWNDR
109 Set ECG artifact to respiration. EARESP
Action
Remote Control
Entry
4-7
Page 90

MPS450
Operators Manual
Pacemaker Waveform
Table 4-8 lists the numeric control codes for the pacemaker waveform functions.
Table 4-8. Numeric Codes for Pacemaker Waveform Actions
Numeric
Control Code
383 Run atrial pacer wave. ATR
110 Run asynchronous pacer wave. ASN
111 Run demand frequent sinus pacer wave. DFS
112 Run demand occasional sinus pacer wave. DOS
113 Run AV sequential pacer wave. AVS
114 Run noncapture pacer wave. NCA
115 Run nonfunction pacer wave. NFU
Pacemaker Amplitude
Table 4-9 lists the numeric control codes for the pacemaker amplitude functions.
Table 4-9. Numeric Codes for Pacemaker Amplitude Actions
Numeric
Control Code
384 Set pacer amplitude to 1 mV. PA1
385 Set pacer amplitude to 2 mV. PA2
Action
Action
Remote Control
Entry
Remote Control
Entry
386 Set pacer amplitude to 5 mV. PA5
242, 387 Set pacer amplitude to 10 mV. PA10
Pacemaker Width
Table 4-10 lists the numeric control codes for the pacemaker width functions.
Numeric
Control Code
243 Set pacer width to 0.1 ms. PW0.1
244 Set pacer width to 0.5 ms. PW0.5
245 Set pacer width to 1.0 ms. PW1.0
246 Set pacer width to 1.5 ms. PW1.5
247 Set pacer width to 2.0 ms. PW2.0
Table 4-10. Numeric Codes for Pacemaker Width Actions
Action
Remote Control
Entry
4-8
Page 91

Remote Operations
Codes and Actions 4
Arrhythmia Functions
The Arrhythmia Functions category consists of Supraventricular Arrhythmia, Premature
Arrhythmia, Ventricular Arrhythmia, and Conduction Defect.
Supraventricular Arrhythmia
Table 4-11 lists the numeric control codes for the supraventricular arrhythmia functions.
Table 4-11. Numeric Codes for Supraventricular Arrhythmia Actions
Numeric
Control Code
012 Run atrial fibrillation, coarse. AF1
013 Run atrial fibrillation, fine. AF2
014 Run atrial flutter. AFL
015 Run sinus arrhythmia. SINA
016 Run missed beat. MB80
017 Run atrial tachycardia. ATC
382 Run paroxysmal atrial tachycardia. PAT
018 Run nodal rhythm. NOD
019 Run supraventricular tachycardia. SVT
Premature Arrhythmia
Table 4-12 lists the numeric control codes for the premature arrhythmia functions.
Table 4-12. Numeric Codes for Premature Arrhythmia Actions
Numeric
Control Code
Action
Action
Remote Control
Entry
Remote Control
Entry
035 Run premature atrial contraction. PAC
036 Run premature nodal contraction. PNC
037 Run premature vent contraction left (PVC1), standard. PVC1S
038 Run premature vent contraction left (PVC1), early. PVC1E
039 Run premature vent contraction left (PVC1), R on T. PVC1R
040 Run premature vent contraction right (PVC2), standard. PVC2S
041 Run premature vent contraction right (PVC2), early. PVC2E
042 Run premature vent contraction right (PVC2), R on T. PVC2R
043 Run multifocal PVCs. MF
4-9
Page 92

MPS450
Operators Manual
Ventricular Arrhythmia
Table 4-13 lists the numeric control codes for the ventricular arrhythmia functions.
Table 4-13. Numeric Codes for Ventricular Arrhythmia Actions
Numeric
Control Code
021 Run PVCs 6 per minute. PVC6
022 Run PVCs 12 per minute. PVC12
023 Run PVCs 24 per minute. PVC24
024 Run frequent multifocal PVCs. FMF
025 Run bigeminy. BIG
026 Run trigeminy. TRG
027 Run pair of PVCs. PAIR
028 Run 5 PVCs. RUN5
029 Run11 PVCs. RUN11
030 Run ventricular tachycardia. VTC
031 Run ventricular fibrillation, coarse. VFB1
032 Run ventricular fibrillation, fine. VFB2
033 Run asystole. ASY
Conduction Defect
Table 4-14 lists the numeric control codes for the conduction defect functions.
Action
Remote Control
Entry
4-10
Numeric
Control Code
046 Run first-degree block. 1DB
047 Run second-degree block. 2DB1
048 Run third-degree block. 3DB
049 Run right-bundle-branch block. RBB
050 Run left-bundle-branch block. LBB
ECG Testing
ECG Testing category consists of Performance Waves, Performance Wave Amplitude, RWave Rate, R-Wave Width, and R-Wave Amplitude.
Table 4-14. Numeric Codes for Conduction Defect Actions
Action
Remote Control
Entry
Page 93

Remote Operations
Codes and Actions 4
Performance Waves
Table 4-15 lists the numeric control codes for the performance waves functions.
Table 4-15. Numeric Codes for Performance Waves Actions
Numeric
Control Code
120 Run 2 Hz square performance wave. SQU2
121 Run .125 Hz square performance wave. SQU.125
Table 4-15. Numeric Codes for Performance Waves Actions (cont.)
Numeric
Control Code
122 Run 2 Hz triangle performance wave. TRI2
123 Run 2.5 Hz triangle performance wave. TRI2.5
124 Run 30 BPM pulse performance wave. PUL30
125 Run 60 BPM pulse performance wave. PUL60
207 Run 0.5 Hz sine performance wave. SIN0.5
208 Run 5 Hz sine performance wave. SIN5
209 Run 10 Hz sine performance wave. SIN10
210 Run 40 Hz sine performance wave. SIN40
211 Run 50 Hz sine performance wave. SIN50
Action
Action
Remote Control
Entry
Remote Control
Entry
212 Run 60 Hz sine performance wave. SIN60
213 Run 100 Hz sine performance wave. SIN100
Performance Wave Amplitude
Table 4-16 lists the numeric control codes for the performance wave amplitude functions.
Table 4-16. Numeric Codes for Performance Wave Amplitude Actions
Numeric
Control Code
272 Set performance amplitude to 0.05 mV. PFA0.05
273 Set performance amplitude to 0.10 mV. PFA0.10
274 Set performance amplitude to 0.15 mV. PFA0.15
275 Set performance amplitude to 0.20 mV. PFA0.20
276 Set performance amplitude to 0.25 mV. PFA0.25
277 Set performance amplitude to 0.30 mV. PFA0.30
278 Set performance amplitude to 0.35 mV. PFA0.35
279 Set performance amplitude to 0.40 mV. PFA0.40
280 Set performance amplitude to 0.45 mV. PFA0.45
Action
Remote Control
Entry
4-11
Page 94

MPS450
Operators Manual
Table 4-16. Numeric Codes for Performance Wave Amplitude Actions (cont.)
Numeric
Control Code
281 Set performance amplitude to 0.50 mV. PFA0.50
282 Set performance amplitude to 1.00 mV. PFA1.00
283 Set performance amplitude to 1.50 mV. PFA1.50
284 Set performance amplitude to 2.00 mV. PFA2.00
285 Set performance amplitude to 2.50 mV. PFA2.50
286 Set performance amplitude to 3.00 mV. PFA3.00
287 Set performance amplitude to 3.50 mV. PFA3.50
288 Set performance amplitude to 4.00 mV. PFA4.00
289 Set performance amplitude to 4.50 mV. PFA4.50
290 Set performance amplitude to 5.00 mV. PFA5.00
291 Set performance amplitude to 5.50 mV. PFA5.50
R-Wave Rate
Table 4-17 lists the numeric control codes for the R-wave rate functions.
Action
Table 4-17. Numeric Codes for R-Wave Rate Actions
Remote Control
Entry
Numeric
Control Code
312 Run R wave at 30 BPM. RWR30
313 Run R wave at 60 BPM. RWR60
314 Run R wave at 80 BPM. RWR80
315 Run R wave at 120 BPM. RWR120
316 Run R wave at 200 BPM. RWR200
317 Run R wave at 250 BPM. RWR250
R-Wave Width
Table 4-18 lists the numeric control codes for the R-wave width functions.
Numeric
Control Code
318 Set R-wave width to 8 ms. RWW8
319 Set R-wave width to 10 ms RWW10
320 Set R-wave width to 12 ms RWW12
Action
Table 4-18. Numeric Codes for R-Wave Width Actions
Action
Remote Control
Entry
Remote Control
Entry
4-12
321 Set R-wave width to 20 ms RWW20
322 Set R-wave width to 30 ms RWW30
Page 95

Remote Operations
Codes and Actions 4
Table 4-18. Numeric Codes for R-Wave Width Actions (cont.)
Numeric
Control Code
323 Set R-wave width to 40 ms RWW40
324 Set R-wave width to 50 ms RWW50
325 Set R-wave width to 60 ms RWW60
326 Set R-wave width to 70 ms RWW70
327 Set R-wave width to 80 ms RWW80
328 Set R-wave width to 90 ms RWW90
329 Set R-wave width to 100 ms RWW100
330 Set R-wave width to 110 ms RWW110
331 Set R-wave width to 120 ms RWW120
332 Set R-wave width to 130 ms. RWW130
333 Set R-wave width to 140 ms. RWW140
334 Set R-wave width to 150 ms. RWW150
335 Set R-wave width to 160 ms. RWW160
336 Set R-wave width to 170 ms. RWW170
Action
Remote Control
Entry
337 Set R-wave width to 180 ms. RWW180
338 Set R-wave width to 190 ms. RWW190
339 Set R wave width to 200 ms. RWW200
R-Wave Amplitude
Table 4-19 lists the numeric control codes for the R-wave amplitude functions.
Numeric
Control Code
292 Set R-wave amplitude to 0.05 mV. RWA0.05
293 Set R-wave amplitude to 0.15 mV. RWA0.10
294 Set R-wave amplitude to 0.15 mV. RWA0.15
295 Set R-wave amplitude to 0.05 mV. RWA0.20
296 Set R-wave amplitude to 0.25 mV. RWA0.25
297 Set R-wave amplitude to 0.05 mV. RWA0.30
298 Set R-wave amplitude to 0.35 mV. RWA0.35
299 Set R-wave amplitude to 0.05 mV. RWA0.40
Table 4-19. Numeric Codes for R-Wave Amplitude Actions
Action
Remote Control
Entry
300 Set R-wave amplitude to 0.45 mV. RWA0.45
301 Set R-wave amplitude to 0.05 mV. RWA0.50
4-13
Page 96

MPS450
Operators Manual
Table 4-19. Numeric Codes for R-Wave Amplitude Actions (cont.)
Numeric
Control Code
302 Set R-wave amplitude to 1.00 mV. RWA1.00
303 Set R-wave amplitude to 1.50 mV. RWA1.50
304 Set R-wave amplitude to 2 mV. RWA2.00
305 Set R-wave amplitude to 2.50 mV. RWA2.50
306 Set R-wave amplitude to 3.00 mV. RWA3.00
307 Set R-wave amplitude to 3.50 mV. RWA3.50
308 Set R-wave amplitude to 4.00 mV. RWA4.00
309 Set R-wave amplitude to 4.50 mV. RWA4.50
310 Set R-wave amplitude to 5.00 mV. RWA5.00
311 Set R-wave amplitude to 5.50 mV. RWA5.50
Respiration Functions
The Respiration Functions category consists of Respiration Lead, Respiration Baseline
(Impedance), Respiration Rate, Respiration Amplitude, and Apnea Simulation.
Respiration Lead
Table 4-20 lists the numeric control codes for the respiration lead functions.
Action
Remote Control
Entry
Table 4-20. Numeric Codes for Respiration Lead Actions
Numeric
Control Code
(N/A) Store the respiration lead. RLSTORE
389 Set respiration lead to LA. RLLA
391 Set respiration lead to LL. RLLL
390 Store LA respiration lead. (N/A)
392 Store LL respiration lead. (N/A)
Respiration Baseline (Impedance)
Table 4-21 lists the numeric control codes for the respiration baseline (impedance)
functions.
Table 4-21. Numeric Codes for Respiration Baseline (Impedance) Actions
Numeric
Control Code
180 Set respiration base to 500 ohms. RB500
181 Set respiration base to 1000 ohms. RB1000
Action
Action
Remote Control
Entry
Remote Control
Entry
4-14
182 Set respiration base to 1500 ohms. RB1500
183 Set respiration base to 2000 ohms. RB2000
Page 97

Remote Operations
Codes and Actions 4
Table 4-21. Numeric Codes for Respiration Baseline (Impedance) Actions (cont.)
Numeric
Control Code
393 Store respiration base 500 ohms. (N/A)
394 Store respiration base 1000 ohms. (N/A)
395 Store respiration base 1500 ohms. (N/A)
396 Store respiration base 2000 ohms. (N/A)
(N/A) Store the respiration base. RBSTORE
Respiration Rate
Table 4-22 lists the numeric control codes for the respiration rate functions.
Numeric
Control Code
156 Set respiration rate to 0 BrPM. RR0
157 Set respiration rate to 15 BrPM. RR15
158 Set respiration rate to 20 BrPM. RR20
159 Set respiration rate to 30 BrPM. RR30
Action
Table 4-22. Numeric Codes for Respiration Rate Actions
Action
Remote Control
Entry
Remote Control
Entry
160 Set respiration rate to 40 BrPM. RR40
161 Set respiration rate to 60 BrPM. RR60
162 Set respiration rate to 80 BrPM. RR80
163 Set respiration rate to 100 BrPM. RR100
164 Set respiration rate to 120 BrPM. RR120
Respiration Amplitude
Table 4-23 lists the numeric control codes for the respiration amplitude functions.
Table 4-23. Numeric Codes for Respiration Amplitude Actions
Numeric
Control Code
195 Set respiration amplitude to 0.2 ohms. RO0.2
196 Set respiration amplitude to 0.5 ohms. RO0.5
197 Set respiration amplitude to 1.0 ohms. RO1.0
198 Set respiration amplitude to 3.0 ohms. RO3.0
Action
Remote Control
Entry
4-15
Page 98

MPS450
Operators Manual
Apnea Simulation
Table 4-24 lists the numeric control codes for the apnea simulation functions.
Table 4-24. Numeric Codes for Apnea Simulation Actions
Numeric
Control Code
152 Start apnea for 12 seconds. A12
153 Start apnea for 22 seconds. A22
154 Start apnea for 32 seconds. A32
150 Turn on apnea continuously. AON
151 Turn off apnea. AOFF
Blood Pressure Functions
The Blood Pressure Functions consists of Blood-Pressure Sensitivity, Blood Pressure
Zeroing, BP Channel 1: Static-Pressure Levels, BP Channel 2: Static-Pressure Levels, BP
Channel 3: Static-Pressure Levels, BP Channel 4: Static-Pressure Levels, BP Channel 1:
Dynamic Waveforms, BP Channel 2: Dynamic Waveforms, BP Channel 3: Dynamic
Waveforms, BP Channel 4: Dynamic Waveforms, BP Channel 1: Respiration Artifact,
BP Channel 2: Respiration Artifact, BP Channel 3: Respiration Artifact, and BP
Channel 4: Respiration Artifact.
Blood-Pressure Sensitivity
Table 4-25 lists the numeric control codes for the blood-pressure sensitivity functions.
Table 4-25. Numeric Codes for Blood-Pressure Sensitivity Actions
Action
Remote Control
Entry
Numeric
Control Code
069 Set blood-pressure sensitivity to 5 μV/V/mmHg. BPSNS5
068 Set Set blood-pressure sensitivity to 40 μV/V/mmHg. BPSNS40
132 Store blood-pressure sensitivity at 5 μV/V/mmHg. (N/A)
133 Store blood-pressure sensitivity to 40 μV/V/mmHg. (N/A)
(N/A) Store the blood-pressure sensitivity BPSNSSTORE
Blood Pressure Zeroing
Table 4-26 lists the numeric control codes for the blood-pressure zeroing functions.
Table 4-26. Numeric Codes for Blood-Pressure Zeroing Actions
Numeric
Control Code
007 Zero all four blood pressure channels. ZALL
BP Channel 1: Static-Pressure Levels
Table 4-27 lists the numeric control codes for the BP channel 1: static-pressure levels
functions.
Action
Action
Remote Control
Entry
Remote Control
Entry
4-16
Page 99

Remote Operations
Codes and Actions 4
Table 4-27. Numeric Codes for BP Channel 1: Static-Pressure Levels Actions
Numeric
Control Code
342 Set BP1 to -10 mmHg static. P1S-10
343 Set BP1 to zero. P1S0
344 Set BP1 to 80 mmHg static. P1S80
345 Set BP1 to 160 mmHg static. P1S160
346 Set BP1 to 240 mmHg static. P1S240
347 Set BP1 to 320 mmHg static. P1S320
348 Set BP1 to 400 mmHg static. P1S400
BP Channel 2: Static-Pressure Levels
Table 4-28 lists the numeric control codes for the BP channel 2: static-pressure levels
functions.
Table 4-28. Numeric Codes for BP Channel 2: Static-Pressure Levels Actions
Numeric
Control Code
351 Set BP2 to -10 mmHg static. P2S-10
352 Set BP2 to zero. P2S0
Action
Action
Remote Control
Entry
Remote Control
Entry
353 Set BP2 to 50 mmHg static. P2S50
354 Set BP2 to 100 mmHg static. P2S100
355 Set BP2 to 150 mmHg static. P2S150
356 Set BP2 to 200 mmHg static. P2S200
357 Set BP2 to 240 mmHg static. P2S240
BP Channel 3: Static-Pressure Levels
Table 4-29 lists the numeric control codes for the BP channel 3: static-pressure levels
functions.
Table 4-29. Numeric Codes for BP Channel 3: Static-Pressure Levels Actions
Numeric
Control Code
360 Set BP3 to -5 mmHg static. P3S-5
361 Set BP3 to zero. P3S0
362 Set BP3 to 20 mmHg static. P3S20
363 Set BP3 to 40 mmHg static. P3S40
Action
Remote Control
Entry
4-17
Page 100

MPS450
Operators Manual
Table 4-29. Numeric Codes for BP Channel 3: Static-Pressure Levels Actions (cont.)
Numeric
Control Code
364 Set BP3 to 60 mmHg static. P3S60
365 Set BP3 to 80 mmHg static. P3S80
366 Set BP3 to 100 mmHg static. P3S100
BP Channel 4: Static-Pressure Levels
Table 4-30 lists the numeric control codes for the BP channel 4: static-pressure levels
functions.
Table 4-30. Numeric Codes for BP Channel 4: Static-Pressure Levels Actions
Numeric
Control Code
369 Set BP4 to -5 mmHg static. P4S-5
370 Set BP4 to zero. P4S0
371 Set BP4 to 20 mmHg static. P4S20
372 Set BP4 to 40 mmHg static. P4S40
373 Set BP4 to 60 mmHg static. P4S60
374 Set BP4 to 80 mmHg static. P4S80
Action
Action
Remote Control
Entry
Remote Control
Entry
375 Set BP4 to 100 mmHg static. P4S100
BP Channel 1: Dynamic Waveforms
Table 4-31 lists the numeric control codes for the BP channel 1: dynamic waveforms
functions.
Table 4-31. Numeric Codes for BP Channel 1: Dynamic Waveforms Actions
Numeric
Control Code
060 Run BP1 arterial dynamic wave 120/80. P1ART
061 Run BP1 radial art dynamic wave 120/80. P1RART
062 Run BP1 left vent dynamic wave 120/0. P1LV
063 Run BP1 right vent dynamic wave 25/0. P1RV
BP Channel 2: Dynamic Waveforms
Table 4-32 lists the numeric control codes for the BP channel 2: dynamic waveforms
functions.
Action
Remote Control
Entry
4-18
 Loading...