Page 1

2271A Industrial
Pressure Calibrator
The complete pneumatic
pressure calibrator that grows
along with your workload
for wide workload coverage
now and in the future
Technical Data
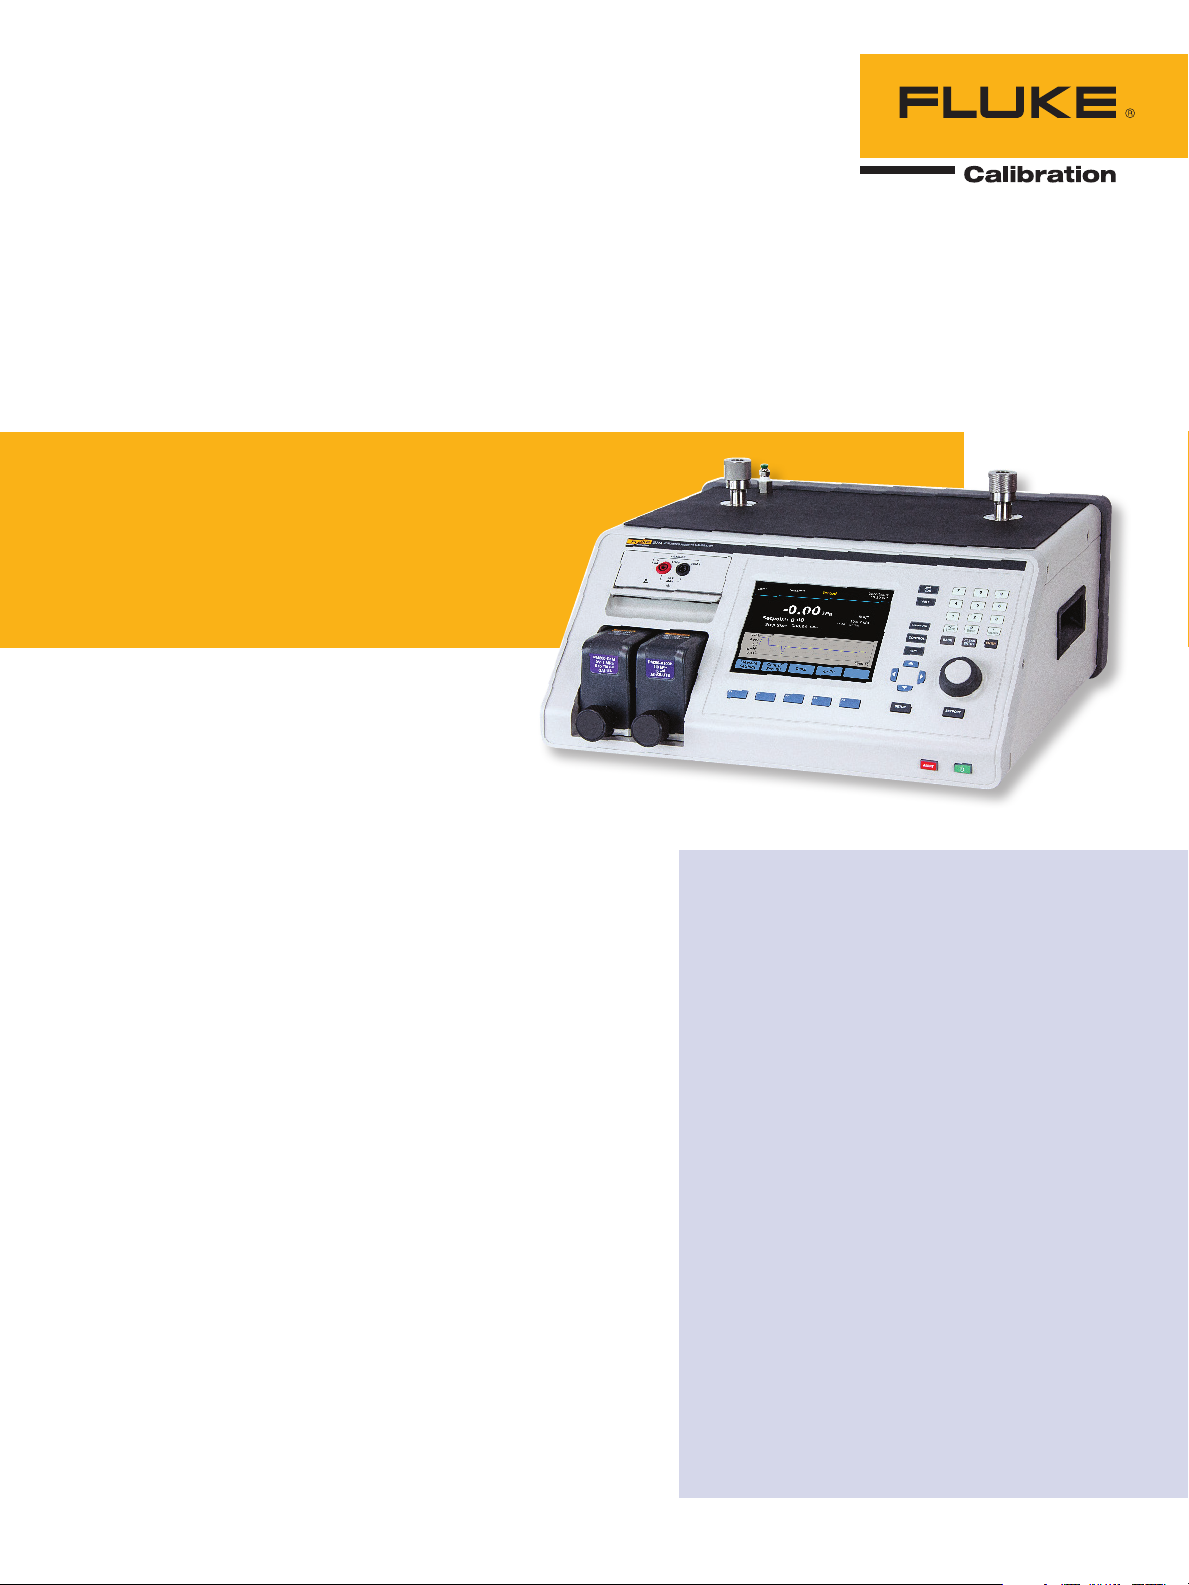
The Fluke Calibration 2271A
Industrial Pressure Calibrator
provides a complete, automated
solution for calibrating a wide
variety of pressure gauges and
sensors. Thanks to its modular
design, it can be configured to
meet different needs and budgets, and expanded to cover a
broad workload.
The 2271A is ideal for calibration laboratories starting out in
pressure calibration because it
offers wide pressure measurement capabilities in a single
instrument. Everything you
need for calibrating pressure is
included; just connect supply
pressure. And your investment
will stand the test of time:
as your workload grows and
changes, the 2271A can grow
and change too. Just add measurement modules.
The 2271A is also a great
fit for labs that currently calibrate pressure transmitters and
gauges and want to expand
their capabilities or make their
processes more efficient. This
instrument is easy to set up and
use, so you don’t have to reserve
it for your most experienced
technicians. And it can be fully
automated so it can help your lab
run more efficiently.
If you are concerned about
contamination from workload
coming in from the field, the
2271A is a good choice for you
as well. Its optional Contamination Prevention System (CPS)
provides an important safeguard
against that pervasive hazard.
A graphical user interface in
your choice of ten languages and
an intuitive menu structure, as
well as an intuitive hardware
design, make the 2271A remarkably easy to learn and to use.
2271A features at a glance
• Calibrate a wide range of gauges
and sensors with a single
instrument
• Wide measurement range
from -100 kPa to 20 MPa
(-15 psi to 3000 psi)
• Removable pressure measurement modules make it easy to
change or add measurement
ranges
• Integrated electrical measurement module provides a complete
solution for calibrating pressure
transmitters
• Built-in dual test ports enable
you to connect multiple devices
under test (DUTs)
• 0.02 % FS pressure measurement
uncertainty
• Localized graphical user interface in choice of ten languages
Page 2

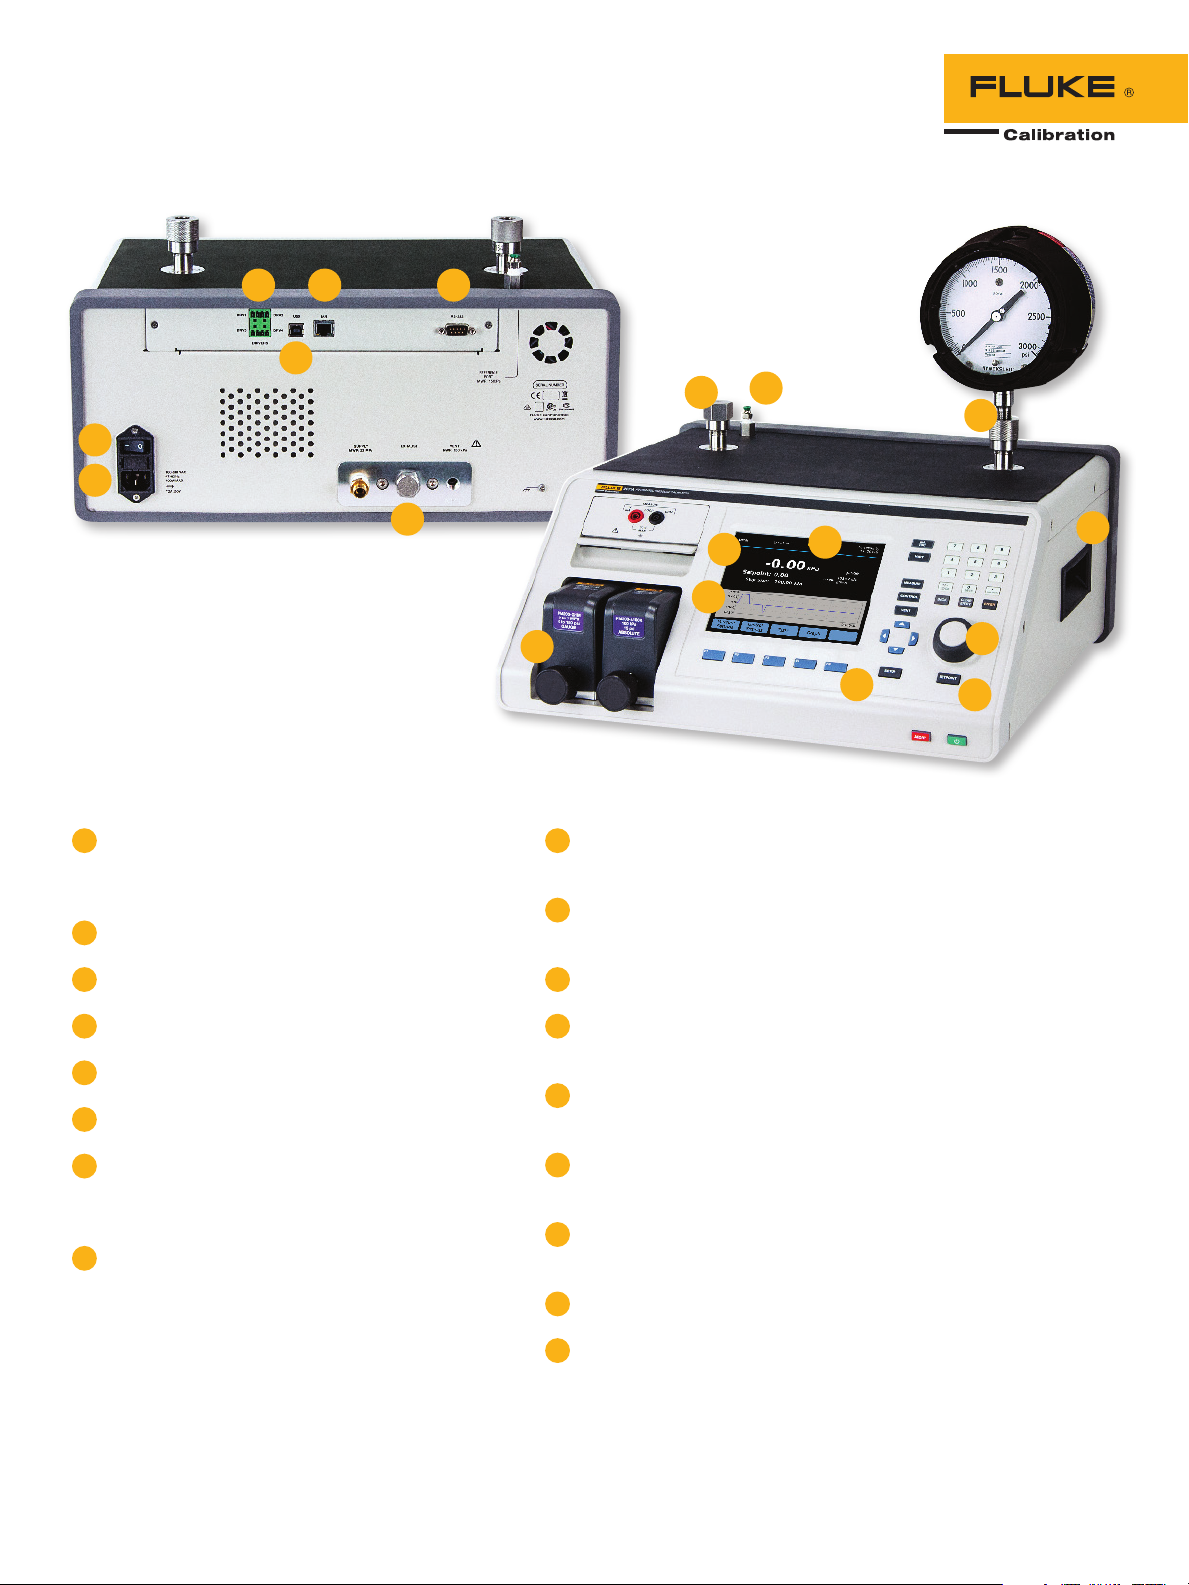
1
5
6
3 4
2
14
15
14
7
1
These external drivers are 24 V dc outputs that
operate accessories such as the Contamination
Prevention System
2
USB port
3
Ethernet connector
4
RS-232 connector
5
Master on/off switch
6
Line power fuse AC PWR INPUT Connector
8
10
13
9
The large main display enables you to easily
9
11
view and edit important information
10
Real time graph makes it easy to see pressure
stability or procedure status
11
Function softkeys
12
Push the Setpoint button to quickly enter a
pressure value to control
13
Pressure measurement modules snap in and
out easily
16
17
12
7
All of the pressure connections are made
on the rear panel through this replaceable
manifold
8
Graphical user interface in choice of ten
languages features an easy-to-read, intuitive
menu structure that lets you access any feature
within four button presses or less
2 Fluke Corporation 2271A Industrial Pressure Cali brator
14
Test ports provide easy, hand-tight
connection to devices under test
15 Reference port for applications that require an
atmospheric reference
16
Handle
17
Make minor adjustments to the pressure using
the jog wheel; ideal for calibration of analog
dial gauges
Page 3

Wide workload coverage
for the present and the
future
The 2271A features pressure ranges from -100 kPa to
20 MPa (-15 psi to 3000 psi),
which covers the requirements
of a wide range of gauges and
sensors. Thanks to its modular
design, the 2271A enables you
to install two modules with
different measurement ranges
within the same chassis. You can
purchase modules to match your
current workload now; later,
when your workload changes
and grows, you can easily add
ranges. This flexibility enables
you to maintain your investment
in the 2271A for years to come.
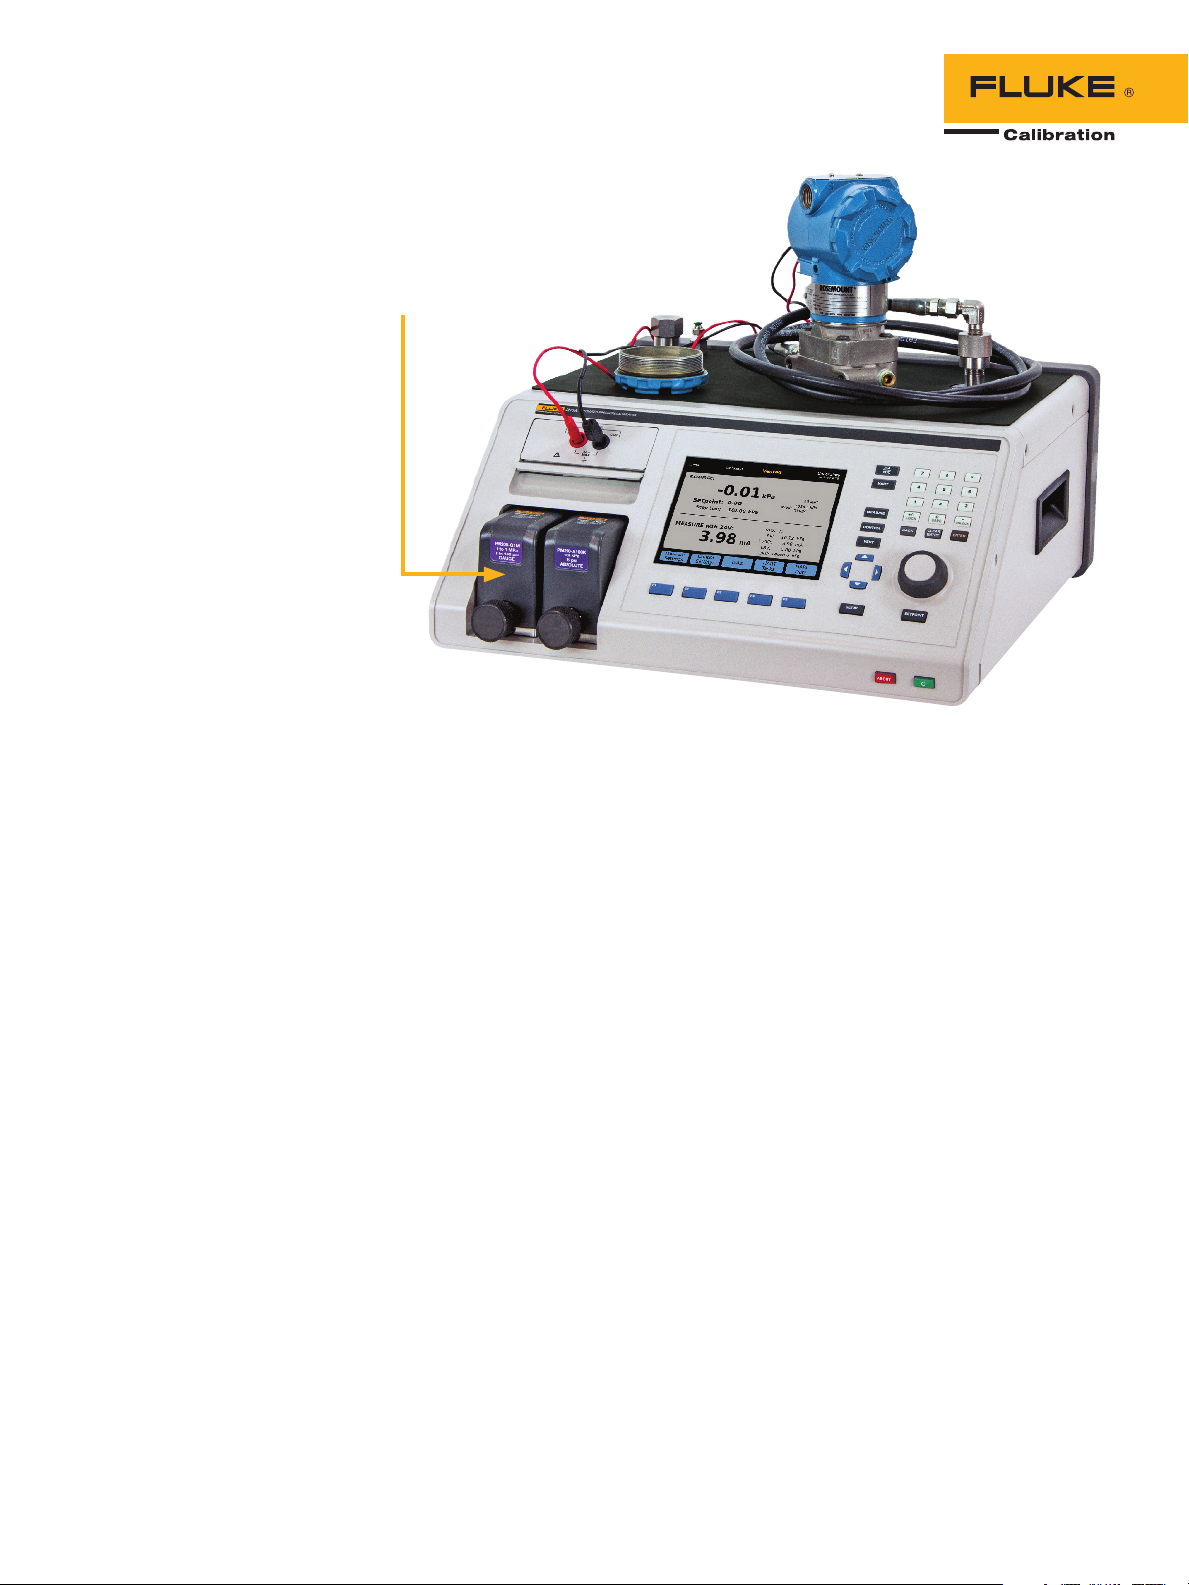
A built-in electrical measurement module (EMM) with HART
capabilities enables you to perform closed loop, fully automated
calibration on 4-20 mA devices
such as smart transmitters,
gauges and switches. Just set up
the 2271A and then walk away
to attend to other tasks.
The EMM supplies 24 V dc
loop power for measuring mA
and V dc. It has a built-in 250
Ohm resistor that can be toggled
on or off, eliminating the need
to have an external resistor to
enable HART communications.
The 2271A accuracy specifications are provided in full and
supported by a technical note
that details its measurement
uncertainty so you know exactly
what you are getting. This
technical note is available for
download on the flukecal.com
website. As with all Fluke
Calibration instruments, these
specifications are conservative,
complete and dependable.
Install up to two pressure
modules in the 2271A
chassis at one time.
Use the 2271A to perform closed loop, fully automated calibration on
4-20 mA devices like this transmitter.
Versatile pressure
measurement modules
The 2271A uses PM200 Pressure
Measurement Modules. These
modules use a highly characterized silicon pressure sensor to
provide an economical method
of making accurate pressure
measurements. The 0.02 % full
scale (FS) specification includes
the short-term performance of
the module (linearity, hysteresis
and repeatability) as well as
its long-term stability and the
uncertainty of the calibration
standard. Users can be confident in the PM200 measurement
performance.
Install up to two pressure
modules in the 2271A chassis
at one time, mixing and matching module ranges to get the
combination that best suits your
needs. There is no limit to the
number of modules that can be
used with the system, allowing
you to change pressure ranges
on the fly to meet your needs.
Modules snap in and out quickly
and easily through the front of
the 2271A; just slide each into
a specially-designed track and
tighten the knob until you hear
it click into place. The click
tells you the module is safely
in place; a special anti-torque
guard on the knob prevents
over-tightening so you never
have to wonder if you tightened
it too much or not enough.
Each module uses an
enhanced face-seal design that
has been leak tested to pressures three times higher than
the maximum working pressure.
You don’t have to worry about a
leak in the system affecting your
ability to measure and control
pressure.
3 Fluke Corporation 2271A Industrial Pressure Cali brator
Page 4

Dual test ports on top of the 2271A
let you easily mount two devices
under test.
Conveniently located
dual test ports and
reference port
Dual test ports on the top of
the 2271A let you easily mount
two devices under test (DUTs).
You can potentially double your
throughput without spending
time searching for fittings and
tees. The vertical test ports let
you easily connect analog dial
gauges without the need for
additional test stands or manifolds. Two test port types are
supported, the standard HC20
or the P3000 test port. Both
types of test ports enable you to
make hand tight connections to
traditional NPT, BSP, or metric
pressure fittings. The HC20 test
port includes easy grip features
and integral support for M20
connections, whereas the P3000
style test port provides backwards compatibility for users of
Fluke Calibration P3000 deadweight testers or P5500 pressure
comparators.
A reference port is also
located on top of the 2271A for
applications that require an
atmospheric reference.
Safety features protect
operators and instruments
Each measurement module, as
well as the main chassis, has
pressure relief valves to protect
the instrument and its operators
from accidental overpressure.
The 2271A has been designed
using Sound Engineering Practices (SEP). With the internal
relief valves, user-settable pressure limits, and emergency abort
button, safety is the highest
priority.
Preventing contamination
If your workload includes devices
that contain different substances
like water, oil and gas, you
could be at risk for contamination—something getting into your
system that isn’t supposed to be
there. Contamination can clog
a calibrator’s valves, wear out
its parts, and make it difficult to
maintain pressure. If the contamination gets into the sensor,
it can actually change the calibrator’s behavior and throw off
your readings. If contamination
is a concern to you, order the
optional Contamination Prevention System (CPS) to help keep
the calibrator’s valves clean and
free from debris.
The CPS provides an unprecedented level of protection by
maintaining uni-directional
flow away from the controller, a
gravity sump system, and a twostage filtering system.
The Contamination Prevention System helps keep the valves on the 2271A clean
and free from debris.
4 Fluke Calibration 2271A Industrial Pressure Calibrator
Page 5

Automation, support and
training
Automate with COMPASS®
software for improved consistency and throughput
Fluke Calibration COMPASS for
Pressure software is designed
specifically for pressure calibration. It enables you to automate
the 2271A and run complete
pressure calibration sequences
on single or multiple devices
under test. COMPASS software
removes the unknowns often
associated with getting automated systems online. The
2271A also features a full remote
interface that enables you to
use it with custom software or
other data acquisition equipment. Details about the interface
are provided in the 2271A User
Manual.
CarePlans help you manage
cost of ownership
Reduce downtime and control
your cost of ownership with a
CarePlan. Fluke Calibration offers
one-year, three-year and fiveyear Priority Gold CarePlans,
which feature an annual standard or accredited calibration
of your 6270A calibrator with
guaranteed six-day in-house
turnaround, plus free repairs
with guaranteed ten-day
in-house repair (includes calibration). One-year, three-year,
and five-year Silver CarePlans
are available for those customers
who only want extended warranty coverage.
Electrical Calibration Products
Instrument CarePlan
Electrical Calibration Products
Instrument CarePlan
Gold CarePlans Silver CarePlans
Annual calibration Extended warranty coverage
beyond original factory warranty
Free repairs with guaranteed
turnaround time
Pre-paid priority freight on return
of instrument
Free product updates Discounts on regular calibrations
Discounts on product upgrades
Discounts on training
A range of training options
gets you up and running
quickly
We sponsor pressure and flow
calibration courses in our Phoenix, Arizona facility in the United
States. We also host periodic
web seminars at no charge on a
wide variety of pressure calibration topics. If you need service
or maintenance training to help
you maintain your fleet of pressure controllers, we can help you
there, too.
We’re here to help
Fluke Calibration’s testing, repair
and calibration services are
dedicated to filling your needs
quickly and at a fair cost while
maintaining the unmatched level
of quality that is our trademark.
Our pressure calibration laboratories are accredited by the
American Association for Laboratory Accreditation (A2LA) for
conformance to ISO Guide 17025.
We maintain global calibration
and repair facilities to help you
keep your hardware in top working order.
Calibration included on repair
Free product updates performed at
time of repair
and out-of-plan service charges
We sponsor pressure and flow calibration courses in
our Phoenix, Arizona facility.
5 Fluke Calibration 2271A Industrial Pressure Calibrator
Page 6

Summary specifications
General specifications
Power requirements 0 V ac to 240 V ac, 47 Hz to 63 Hz
Fuse T2A 250 V ac
Max power consumption 100 W
Operating ambient temperature range 15 °C to 35 °C
Storage temperature -20 °C to 70 °C
Relative humidity Operating: <80 % to 30 °C, <70 % to 35 °C
Storage: <95 %, non-condensing. A power stabilization period of four days may be required
after extended storage at high temperature and humidity.
Vibration MIL-T-28800D CLASS 3
Altitude (Operation) <2000 m
Ingress protection IEC 60529: IP20
Safety IEC 61010-1, Installation Category II, Pollution degree 2
Warmup time 15 minutes typical
Weight (chassis only) 15 kg (33.06 lbs)
Dimensions Height: 2271A-NPT-HC20 305 mm (12 in)
Height: 2271A-BSP-HC20 305 mm (12 in)
Height: 2271A-NPT-P3K 237 mm (9.33 in)
Height: 2271A-BSP-P3K 237 mm (9.33 in)
Width: 442 mm (17.40 in)
Depth: 446 mm (17.55 in)
Control specifications
Control Precision (Dynamic Mode) PM200-BG2.5K 0.005% Range Span
All other ranges 0.001 % Range Span
Control turndown 10:1 ( T y pica l )
Low control point 1 kPa (0.15 psi) absolute
Control turndown is defined as the relationship between the provided supply pressure and the appropriate supply pressure for the range. For
example, a unit with a 7 MPa (1000 psi) and 700 kPa range (100 psi) with a supply pressure of 7.7 MPa (1100 psi) provides control precision
of 0.001 % range because 7 MPa is 10 times greater than 700 kPa. A system with ranges of 20 MPa (3000 psi) and 700 kPa (100 psi) with
supply pressure of 22 MPa (3300 psi) will have 0.001 % range control precision on the 20 MPa range but only 0.003 % control precision on
the 700 kPa range. Control precision of 0.001 % on the low range can be achieved by reducing the supply pressure.
Supply pressure requirements
Clean dry air or nitrogen (industrial grade, 99.5 %)
Maximum particulate contamination ≤ 1.25 micrometer (50 microinches)
Maximum moisture content -50 °C dew point
Maximum hydrocarbon content 30 ppm
Interface / communications
Primary remote interfaces Ethernet, RS-232, USB
Electrical Measurement Module (EMM)
Connection Standard 4 mm jack
Maximum 30 V dc w.r.t. chassis ground
Aux drivers 4 external solenoid drivers
24 V dc. 100 % duty cycle when turned, reducing to 40 % shortly after.
6 Fluke Calibration 2271A Industrial Pressure Calibrator
Page 7

Pressure measurement specifications
PM200 Modules
Model Range (SI units) Range (Imperial units) Measurement mode 1 year specification
PM200-BG2.5K -2.5 kPa to 2.5 kPa -10 inH₂0 to 10 inH₂0 gauge 0.20 %
PM200-BG35K -35 kPa to 35 kPa -5 psi to 5 psi gauge 0.05 %
PM200-BG40K -40 kPa to 40 kPa -6 psi to 6 psi gauge 0.05 %
PM200-BG60K -60 kPa to 60 kPa -9 psi to 9 psi gauge 0.05 %
PM200-A100K 2 kPa to 100 kPa 0.3 psi to 15 psi absolute 0.10 %
PM200-BG100K -100 kPa to 100 kPa -15 psi to 15 psi gauge 0.02 %
PM200-A200K 2 kPa to 200 kPa 0.3 psi to 30 psi absolute 0.10 %
PM200-BG200K -100 kPa to 200 kPa -15 psi to 30 psi gauge 0.02 %
PM200-BG250K -100 kPa to 250 kPa -15 psi to 36 psi gauge 0.02 %
PM200-G400K 0 kPa to 400 kPa 0 psi to 60 psi gauge 0.02 %
PM200-G700K 0 kPa to 700 kPa 0 psi to 100 psi gauge 0.02 %
PM200-G1M 0 MPa to 1 MPa 0 psi to 150 psi gauge 0.02 %
PM200-G1.4M 0 MPa to 1.4 MPa 0 psi to 200 psi gauge 0.02 %
PM200-G2M 0 MPa to 2 MPa 0 psi to 300 psi gauge 0.02 %
PM200-G2.5M 0 MPa to 2.5 MPa 0 psi to 360 psi gauge 0.02 %
PM200-G3.5M 0 MPa to 3.5 MPa 0 psi to 500 psi gauge 0.02 %
PM200-G4M 0 MPa to 4 MPa 0 psi to 580 psi gauge 0.02 %
PM200-G7M 0 MPa to 7 MPa 0 psi to 1000 psi gauge 0.02 %
PM200-G10M 0 MPa to 10 MPa 0 psi to 1500 psi gauge 0.02 %
PM200-G14M 0 MPa to 14 MPa 0 psi to 2000 psi gauge 0.02 %
PM200-G20M 0 MPa to 20 MPa 0 psi to 3000 psi gauge 0.02 %
(%FS)
Notes
• Gauge mode modules (PM200-GXXX or PM200-BGXXX) with ranges of 100 kPa (15 psi) or greater will support absolute mode measurement
when used with a Barometric Reference Module.
• For temperatures from 15 °C to 18 °C and 28 °C to 35 °C, add 0.003 % FS/°C.
• Uncertainty for gauge mode modules assumes routine zeroing. Uncertainty for absolute-mode modules includes 1-year zero stability.
This specification can be reduced to 0.05 % FS if the PM200 module is zeroed on a continuing basis to remove the 1-year zero stability
component.
• Instrumental measurement uncertainty for gauge mode modules used in absolute mode by addition of a barometric reference module is
calculated as the uncertainty of the gauge mode module plus the uncertainty of the Barometric Reference Module.
7 Fluke Calibration 2271A Industrial Pressure Calibrator
Page 8

Ordering information
Models Description
2271A-NPT-HC20 Industrial Pressure Calibrator Chassis,
NPT Manifold, HC20 Test Port Connections
2271A -NPT-P3K Industrial Pressure Calibrator Chassis,
NPT Manifold, P3000 Test Port Connections
2271A-BSP-HC20 Industrial Pressure Calibrator Chassis, BSP
Manifold, HC20 Test Port Connections
2271A-BSP-P3K Industrial Pressure Calibrator Chassis, BSP
Manifold, P3000 Test Port Connections
Pressure modules
Please refer to the summary specifications for details about the pressure
measurement modules.
Accessories
CASE-2271 Shipping Case, 2271A
CASE-PMM Shipping Case, 3 PMM Modules
PK-2271-NPT-HC20 Lines and Fittings Kit, 2271A-NPT-HC20
PK-2 271-NPT-P3K Lines and Fittings Kit, 2271A-NPT-P3K
PK-2271-BSP-HC20 Lines and Fittings Kit, 2271A-BSP-HC20
PK-2271-BSP-P3K Lines and Fittings Kit, 2271A-BSP-P3K
PMM-CAL-KIT-20M Pressure Module Calibration Kit, 20 MPa
(3000 psi)
VA-PPC/MPC-REF-110 Vacuum Pump Package, 110 V
VA-PPC/MPC-REF-220 Vacuum Pump Package, 220 V
The broadest range
of calibration solutions
Fluke Calibration provides the broadest range of calibrators and standards, software, service, support and
training in electrical, temperature, pressure, RF and
flow calibration.
Visit www.flukecal.com for more information about
Fluke Calibration products and services.
The Contamination Prevention System acts as a test stand
for connecting units under test, as well as for preventing
contamination from reaching the 2271A.
8 Fluke Corporation 2271A Industrial Pressure Cali brator
Fluke Calibration. Precision, performance, confidence.
Fluke Calibration
PO Box 9090,
Everett, WA 98206 U.S.A.
For more information call:
In the U.S.A. (877) 355-3225 or Fax (425) 446-5716
In Europe/M-East/Africa +31 (0) 40 2675 200 or Fax +31 (0) 40 2675 222
In Canada (800)-36-FLUKE or Fax (905) 890-6866
From other countries +1 (425) 446-6110 or Fax +1 (425) 446-5716
Web access: http://www.flukecal.com
©2016 Fluke Calibration. Specifications subject to change without notice.
Printed in U.S.A. 3/2016 6007367a-en
Modification of this document is not permitted without written permission
from Fluke Calibration.
Fluke Europe B.V.
PO Box 1186, 5602 BD
Eindhoven, The Netherlands
Web access: http://www.flukecal.eu
™
 Loading...