

Page 1

formerly
DPB24TLX
700+TVL TDN Bullet Camera
Instruction Manual
English Version 1.0
www.digimerge.com
www.flir.com/security
Copyright © 2013 Digimerge Technologies Inc., a FLIR Company
Page 2
Thank you for purchasing this product. FLIR/Digimerge is committed to providing
our customers with a high quality, reliable security solution.
This manual refers to the following models:
• DPB24TLX
For more information on this product and accessory products, please visit us at:
www.digimerge.com
CAUTION
RISK OF ELECTRIC SHOCK
DO NOT OPEN
CAUTION: TO REDUCE THE RISK OF ELECTRIC SHOCK DO NOT
REMOVE COVER. NO USER SERVICABLE PARTS INSIDE.
REFER SERVICING TO QUALIFIED SERVICE PERSONNEL.
The lightning flash with arrowhead symbol, within an
equilateral triangle, is intended to alert the user to the
presence of uninsulated "dangerous voltage" within the
product's enclosure that may be of sufficient magnitude to
constitute a risk of electric shock.
The exclamation point within an equilateral triangle is
intended to alert the user to the presence of important
operating and maintenance (servicing) instructions in the
literature accompanying the appliance.
WARNING: TO PREVENT FIRE OR SHOCK HAZARD, DO NOT
EXPOSE THIS UNIT TO RAIN OR MOISTURE.
CAUTION: TO PREVENT ELECTRIC SHOCK, MATCH WIDE BLADE
OF THE PLUG TO THE WIDE SLOT AND FULLY INSERT.
Page 3
Important Safeguards
In addition to the careful attention devoted to quality standards in the manufacturing process of
your video product, safety is a major factor in the design of every instrument. However, safety is
your responsibility too. This sheet lists important information that will help to assure your
enjoyment and proper use of the video product and accessory equipment. Please read them
carefully before operating and using your video product.
Installation
1. Read and Follow Instructions - All the safety and
operating instructions should be read before the
video product is operated. Follow all operating
instructions.
2. Retain Instructions - The safety and operating
instructions should be retained for future reference.
3. Heed Warnings - Comply with all warnings on the
video product and in the operating instructions.
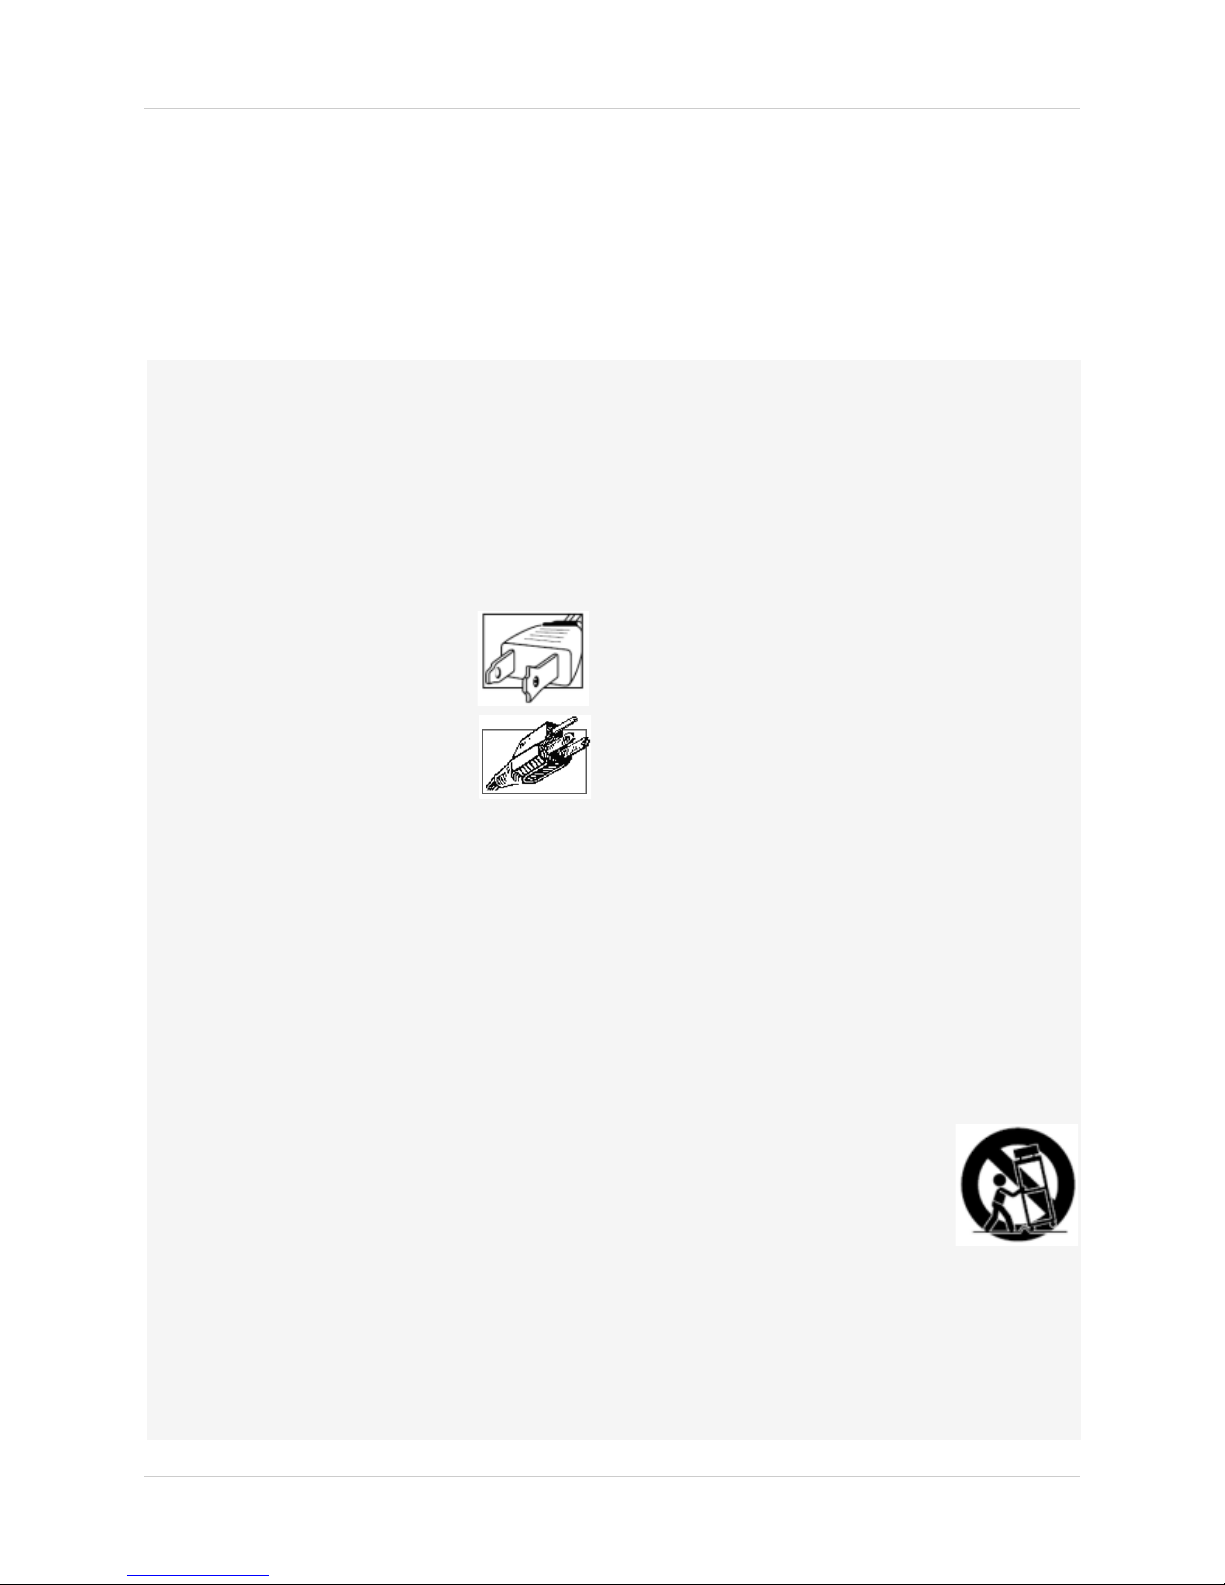
4. Polarization - Do not defeat the
safety purpose of the polarized or
grounding-type plug.
A polarized plug has two blades
with one wider than the other.
A grounding type plug has two
blades and a third grounding prong.
The wide blade or the third prong
are provided for your safety.
If the provided plug does not fit into your outlet,
consult an electrician for replacement of the
obsolete outlet.
5. Power Sources - This video product should be
operated only from the type of power source
indicated on the marking label. If you are not sure of
the type of power supply to your location, consult
your video dealer or local power company. For video
products intended to operate from battery power, or
other sources, refer to the operating instructions.
6. Overloading - Do not overload wall outlets of
extension cords as this can result in the risk of fire
or electric shock. Overloaded AC outlets, extension
cords, frayed power cords, damaged or cracked wire
insulation, and broken plugs are dangerous. They
may result in a shock or fire hazard. Periodically
examine the cord, and if its appearance indicates
damage or deteriorated insulation, have it replaced
by your service technician.
7. Power Cord Protection - Power supply cords should
be routed so that they are not likely to be walked on
or pinched by items placed upon or against them,
paying particular attention to cords at plugs,
convenience receptacles, and the point where they
exit from the video product.
8. Ventilation - Slots and openings in the case are
provided for ventilation to ensure reliable operation
of the video product and to protect it from
overheating. These openings must not be blocked or
covered. The openings should never be blocked by
placing the video equipment on a bed, sofa, rug, or
other similar surface. This video product should
never be placed near or over a radiator or heat
register. This video product should not be placed in a
built-in installation such as a bookcase or rack
unless proper ventilation is provided or the video
product manufacturer’s instructions have been
followed.
9. Attachments - Do not use attachments unless
recommended by the video product manufacturer as
they may cause a hazard.
10. Camera Extension Cables – Check the rating of
your extension cable(s) to verify compliance with
your local authority regulations prior to installation.
11. Water and Moisture - Do not use this video product
near water. For example, near a bath tub, wash
bowl, kitchen sink or laundry tub, in a wet
basement, near a swimming pool and the like.
Caution
operated equipment or accessories connected to
this unit should bear the UL listing mark of CSA
certification mark on the accessory itself and should
not be modified so as to defeat the safety features.
This will help avoid any potential hazard from
electrical shock or fire. If in doubt, contact qualified
service personnel.
12. Accessories - Do not place this
video equipment on an unstable
cart, stand, tripod, or table. The
video equipment may fall, causing
serious damage to the video
product. Use this video product
only with a cart, stand, tripod,
bracket, or table recommended by the
manufacturer or sold with the video product. Any
mounting of the product should follow the
manufacturer’s instructions and use a mounting
accessory recommended by the manufacturer.
: Maintain electrical safety. Powerline
i
Page 4

Service
13. Servicing - Do not attempt to service this video
equipment yourself as opening or removing covers
may expose you to dangerous voltage or other
hazards. Refer all servicing to qualified service
personnel.
14. Conditions Requiring Service - Unplug this video
product from the wall outlet and refer servicing to
qualified service personnel under the following
conditions:
• When the power supply cord or plug is damaged.
• If liquid has been spilled or objects have fallen into
the video product.
• If the video product has been exposed to rain or
water.
• If the video product does not operate normally by
following the operating instructions. Adjust only
those controls that are covered by the operating
instructions. Improper adjustment of other controls
may result in damage and will often require
extensive work by a qualified technician to restore
the video product to its normal operation.
• If the video product has been dropped or the cabinet
has been damaged.
• When the video product exhibits a distinct change
in performance. This indicates a need for service.
Use
19. Cleaning - Unplug the video product from the wall
outlet before cleaning. Do not use liquid cleaners or
aerosol cleaners. Use a damp cloth for cleaning.
20. Product and Cart Combination - Video and cart
combination should be moved with care. Quick
stops, excessive force, and uneven surfaces may
cause the video product and cart combination to
overturn.
21. Object and Liquid Entry - Never push objects of any
kind into this video product through openings as
they may touch dangerous voltage points or
“short-out” parts that could result in a fire or
electric shock. Never spill liquid of any kind on the
video product.
22. Lightning - For added protection for this video
product during a lightning storm, or when it is left
unattended and unused for long periods of time,
unplug it from the wall outlet and disconnect the
antenna or cable system. This will prevent damage
to the video product due to lightning and power line
surges.
15. Replacement Parts - When replacement parts are
required, have the service technician verify that the
replacements used have the same safety
characteristics as the original parts. Use of
replacements specified by the video product
manufacturer can prevent fire, electric shock or
other hazards.
16. Safety Check - Upon completion of any service or
repairs to this video product, ask the service
technician to perform safety checks recommended
by the manufacturer to determine that the video
product is in safe operating condition.
17. Wall or Ceiling Mounting - The cameras provided
should be mounted to a wall or ceiling only as
instructed in this guide, using the provided
mounting brackets.
18. Heat - The product should be situated away from
heat sources such as radiators, heat registers,
stoves, or other products (including amplifiers) that
produce heat.
General Precautions
ii
Page 5

General Precautions
FCC CLASS A NOTICE
NOTE
This equipment has been tested and found to comply with the limits for a Class A digital device
pursuant to Part 15 of the FCC Rules. These limits are designed to provide reasonable protection
against harmful interference when the equipment is operated in a commercial environment. This
equipment generates, uses, and can radiate radio frequency energy and, if not installed and used
in accordance with the manufacturer’s instruction manual, may cause harmful interference with
radio communications. Operation of this equipment in a residential area is likely to cause harmful
interference, in which case you will be required to correct the interference at your own expense.
www.digimerge.com
1. All warnings and instructions in this manual should be followed.
2. Remove the plug from the outlet before cleaning. Do not use liquid aer
water dampened cloth for cleaning.
3. Keep enough space around the unit for ventilation. Slots and openings in the storage cabinet
should not b
4. During lightning storms, or when the unit is not used for a long time, disconnect the power
y
suppl
e blocked.
, antenna, and cables to protect the unit from electrical surge.
osol detergents. Use a
This equipment has been certified and found to comply with the limits regulated by FCC, EMC, and
LVD. Therefore, it is designated to provide reasonable protection against interference and will not
cause interference with other appliance usage.
However, it is imperative that the user follows the guidelines in this
usage which may result in damage to the unit, electrical shock and fire hazard injury.
In order to improve the feature functions and quality of this product, the
to change without notice from time to time.
manual to avoid improper
specifications are subject
iii
Page 6

Features
• 1/3" Sony EX-View™ II 960H with Effio DSP/700+ TVL
• Next Generation Polaris Vision3 for Superior Low Light Viewing
• Smart-IR Night Vision (135ft/41m)
• 2.8-12mm Auto Iris D/N Long-Range Varifocal Lens
• True Day Night with ICR mechanism (TDN)
• IP66 Weatherproof
• Advanced 3D Digital Noise Reduction
• Advanced Shadow Reduction
• Vivid Color Reproduction
• ArcticPro technology for harsh climates (minimum operating
temperature –40°F / –40°C)
• Cable through bracket design
• Privacy Masking/Motion Detection
• 12V DC/24V AC Operation
• Service Monitor Output
iv
Page 7

TABLE OF CONTENTS
1. Getting Started . . . . . . . . . . . . . . . . . . . . . . . . . . . . . . . . . . . . . . . 1
2. Camera Installation . . . . . . . . . . . . . . . . . . . . . . . . . . . . . . . . . . . 2
3. Configuring OSD Menus . . . . . . . . . . . . . . . . . . . . . . . . . . . . . . . 5
3.1 Menu Tree Overview . . . . . . . . . . . . . . . . . . . . . . . . . . . . . . . . . . . .6
3.2 Default Menu Settings . . . . . . . . . . . . . . . . . . . . . . . . . . . . . . . . . .7
3.3 Exposure . . . . . . . . . . . . . . . . . . . . . . . . . . . . . . . . . . . . . . . . . . . . .9
3.3.1 Auto . . . . . . . . . . . . . . . . . . . . . . . . . . . . . . . . . . . . . . . . . . . . . . . . . . . . . . . . . . . . . . . . . . 9
3.3.2 Manual . . . . . . . . . . . . . . . . . . . . . . . . . . . . . . . . . . . . . . . . . . . . . . . . . . . . . . . . . . . . . . . 10
3.4 Pict Adjust . . . . . . . . . . . . . . . . . . . . . . . . . . . . . . . . . . . . . . . . . . .10
3.4.1 E-Zoom . . . . . . . . . . . . . . . . . . . . . . . . . . . . . . . . . . . . . . . . . . . . . . . . . . . . . . . . . . . . . . 11
3.5 White Bal . . . . . . . . . . . . . . . . . . . . . . . . . . . . . . . . . . . . . . . . . . . .12
3.5.1 ATW (Auto Trace White Balance) . . . . . . . . . . . . . . . . . . . . . . . . . . . . . . . . . . . . . . . . . 12
3.5.2 Push . . . . . . . . . . . . . . . . . . . . . . . . . . . . . . . . . . . . . . . . . . . . . . . . . . . . . . . . . . . . . . . . . 12
3.5.3 User1/2 . . . . . . . . . . . . . . . . . . . . . . . . . . . . . . . . . . . . . . . . . . . . . . . . . . . . . . . . . . . . . . 13
3.5.4 Anti-CR . . . . . . . . . . . . . . . . . . . . . . . . . . . . . . . . . . . . . . . . . . . . . . . . . . . . . . . . . . . . . . 13
3.5.5 Push Lock . . . . . . . . . . . . . . . . . . . . . . . . . . . . . . . . . . . . . . . . . . . . . . . . . . . . . . . . . . . . 13
3.6 WDR . . . . . . . . . . . . . . . . . . . . . . . . . . . . . . . . . . . . . . . . . . . . . . . .13
3.7 DNR . . . . . . . . . . . . . . . . . . . . . . . . . . . . . . . . . . . . . . . . . . . . . . . .14
3.8 Day/Night . . . . . . . . . . . . . . . . . . . . . . . . . . . . . . . . . . . . . . . . . . .15
3.8.1 Auto . . . . . . . . . . . . . . . . . . . . . . . . . . . . . . . . . . . . . . . . . . . . . . . . . . . . . . . . . . . . . . . . . 15
3.8.2 BW Setup . . . . . . . . . . . . . . . . . . . . . . . . . . . . . . . . . . . . . . . . . . . . . . . . . . . . . . . . . . . . . 16
3.9 Privacy . . . . . . . . . . . . . . . . . . . . . . . . . . . . . . . . . . . . . . . . . . . . . .17
3.10 Motion Detect . . . . . . . . . . . . . . . . . . . . . . . . . . . . . . . . . . . . . . .18
3.10.1 Monitor Area . . . . . . . . . . . . . . . . . . . . . . . . . . . . . . . . . . . . . . . . . . . . . . . . . . . . . . . . . 18
3.11 Others . . . . . . . . . . . . . . . . . . . . . . . . . . . . . . . . . . . . . . . . . . . . .19
3.11.1 Language . . . . . . . . . . . . . . . . . . . . . . . . . . . . . . . . . . . . . . . . . . . . . . . . . . . . . . . . . . . . 19
3.11.2 Lens . . . . . . . . . . . . . . . . . . . . . . . . . . . . . . . . . . . . . . . . . . . . . . . . . . . . . . . . . . . . . . . . 19
3.11.3 Sync . . . . . . . . . . . . . . . . . . . . . . . . . . . . . . . . . . . . . . . . . . . . . . . . . . . . . . . . . . . . . . . . 20
3.11.4 Cam Title . . . . . . . . . . . . . . . . . . . . . . . . . . . . . . . . . . . . . . . . . . . . . . . . . . . . . . . . . . . . 20
3.11.5 WPC (Advanced Function; Not for Normal Use) . . . . . . . . . . . . . . . . . . . . . . . . . . . . 21
3.11.6 Version . . . . . . . . . . . . . . . . . . . . . . . . . . . . . . . . . . . . . . . . . . . . . . . . . . . . . . . . . . . . . . 21
3.11.7 Camera Reset (Factory Default) . . . . . . . . . . . . . . . . . . . . . . . . . . . . . . . . . . . . . . . . . 22
3.12 Exit / Save All . . . . . . . . . . . . . . . . . . . . . . . . . . . . . . . . . . . . . . .22
4. Dimensions . . . . . . . . . . . . . . . . . . . . . . . . . . . . . . . . . . . . . . . . . 23
5. Technical Specifications . . . . . . . . . . . . . . . . . . . . . . . . . . . . . . 24
6. Troubleshooting. . . . . . . . . . . . . . . . . . . . . . . . . . . . . . . . . . . . . 25
v
Page 8

vi
Page 9

1. GETTING STARTED
Allen Key
BNC Test Cable
Mounting Screw Kit:
• 3x mounting screws
(PA4 30mm)
• 3x drywall anchors
Mounting
Template
The system comes with the
following components:
• 1 x Camera
• 1 x Mounting Screw Kit
• 1 x Allen Key
• 1 x BNC Test Cable
• 1 x Mounting Template
Getting Started
1
Page 10
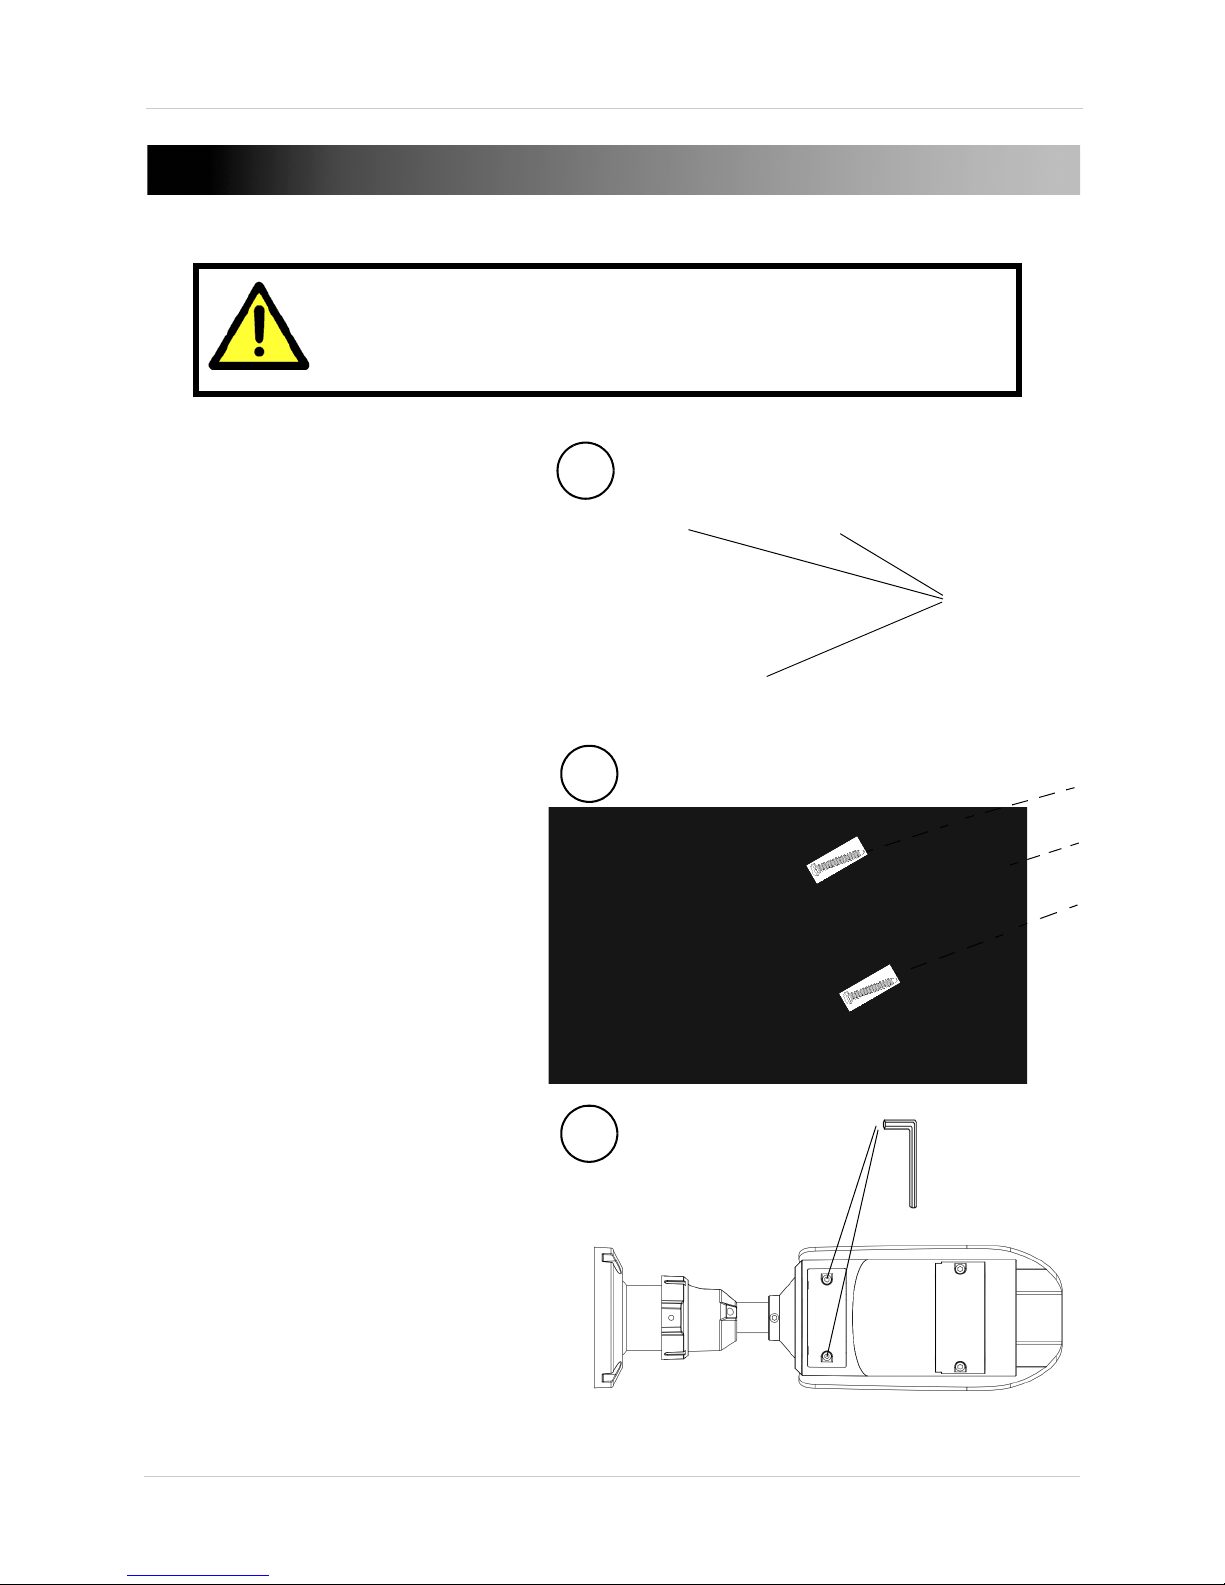
Camera Installation
1
Mounting
Points
2
3
Make sure to follow the correct polarity if connecting
the camera to DC power. Polarity is marked on the
power connector.
2. CAMERA INSTALLATION
1. Use the included mounting
template to mark mounting
points for the camera.
NOTE: If mounting the
c
mera on a wall, ensure
a
that the TOP label on the
template faces up.
2. Connect the connection
cables, and then mount the
camera to the surface using
the included screws (x3).
3. (Optional) To use a BNC test
cable or adjust the OSD
menu, open the service
compartment near the
camera base by loosening
the screws (x2) with the
included allen key.
2
Page 11

• A. Insert the included BNC
Stand screw
4
Adjustment ring
BNC Test Cable
3A
test cable into the video test
cable terminals and connect
to a test monitor to check the
camera viewing angle.
• B. For details on adjusting
the OSD menu, see “3.
Configuring OSD Menus” on
page 5.
4. To change the camera’s
viewing angle:
• Loosen the stand screw
using the included allen key.
Camera Installation
• Loosen the adjustment ring
by hand.
• Move the camera into the
desired position, then
tighten the stand screw and
adjustment ring.
3
Page 12

Camera Installation
Focus
5
Zoom
At the end of installation, ensure both service compartments
are firmly closed to ensure the weatherproof rating of the
camera.
5. To adjust the camera’s zoom
and focus:
• Open the service
compartment near the
camera lens by loosening
the screws (x2) with the
included allen key.
• Twist the zoom and focus
knobs counterclockwise to
unlock. Move the knobs left
or right to adjust the zoom
and focus.
• Tighten the knobs when
finished.
4
Page 13

Configuring OSD Menus
OSD Controls:
• Middle: Open Menu; enter
button
• Left/Right: Change
Settings; move cursor
• Up/Down: Move cursor
If a menu option contains ,
a submenu is available. Press
the middle button to access
sub-menus.
UP
LEFT
DOWN
RIGHT
IMPORTANT - When finished updating settings, highlight Save All and
press the middle button (Enter). If you do not select Save All, settings
changes will be lost when the camera reboots.
3. CONFIGURING OSD MENUS
Use the OSD controls, located inside the service compartment, to configure
the camera’s OSD menus. Press the middle button to open the OSD menu.
5
Page 14

Configuring OSD Menus
3.1 Menu Tree Overview
6
Page 15

Configuring OSD Menus
3.2 Default Menu Settings
Setting Default Value
EXPOSURE AUTO
EXPOSURE>AUTO>HIGH LUMINANCE>MODE AE+AUTO IRIS
EXPOSURE>AUTO>HIGH LUMINANCE>BRIGHTNESS 32
EXPOSURE>AUTO>LOW LUMINANCE>MODE AGC>DSS
EXPOSURE>AUTO>LOW LUMINANCE>AGC MAX 98
EXPOSURE>AUTO>LOW LUMINANCE>DSS MAX x4
PICT ADJUST>MIRROR OFF
PICT ADJUST>DIS OFF
PICT ADJUST>EZOOM>ZOOM 0
PICT ADJUST>EZOOM>PAN 512
PICT ADJUST>EZOOM>TILT 256
PICT ADJUST>LEVEL 32
PICT ADJUST>SHARPNESS 9
PICT ADJUST>HUE 50
PICT ADJUST>R-GAIN 177
PICT ADJUST>B-GAIN 177
PICT ADJUST>DEFOG OFF
WHITE BAL ATW
WHITE BAL>ATW>SPEED 2
WHITE BAL>ATW>DELAY CNT 2
WHITE BAL>ATW>ATW FRAME x4
WHITE BAL>ATW>ENVIRONMENT INDOOR
WDR>MODE OFF
WDR>LEVEL WDR>HLC OFF
WDR>CLIP LEVEL 0
WDR>SCALE 10
WDR>BLC OFF
DNR>DNR MODE 2D+3D
DNR>LEVEL MIDLOW
DAY/NIGHT EXT
7
Page 16

Configuring OSD Menus
DAY/NIGHT>AUTO>BURST OFF
DAY/NIGHT>AUTO>DELAY CNT 003
DAY/NIGHT>AUTO>DAY NIGHT 002
DAY/NIGHT>AUTO>NIGHT DAY 005
DAY/NIGHT>BW>SMART IR ON
DAY/NIGHT>BW>SMART IR>MODE AUTO
DAY/NIGHT>BW>SMART IR>LEVEL 005
PRIVACY>AREA SEL 1/15
PRIVACY>MODE OFF
PRIVACY>POSITION PRIVACY>COLOR PRIVACY>TRANSP PRIVACY>MOSAIC MOTION DET>MOTION DET ON
MOTION DET>DETECT SENSE 111
MOTION DET>BLOCK DISP OFF
MOTION DET>DETECT AREA EXIT:HOLD ENTER
MOTION DET>MONITOR AREA>AREA SEL 1/4
MOTION DET>MONITOR AREA>MODE OFF
MOTION DET>MONITOR AREA>TOP 0
MOTION DET>MONITOR AREA>BOTTOM 0
MOTION DET>MONITOR AREA>LEFT 0
MOTION DET>MONITOR AREA>RIGHT 0
OTHERS>LANGUAGE ENGLISH
OTHERS>LENS AUTO
OTHERS>LENS>AUTO>TYPE DC
OTHERS>LENS>AUTO>MODE AUTO
OTHERS>LENS>AUTO>SPEED 64
OTHERS>SYNC INT
OTHERS>CAM TITLE OFF
8
Page 17

3.3 Exposure
Select AUTO or MANUAL exposure.
3.3.1 Auto
Configuring OSD Menus
High Luminance
• Mode: Select AE+AUTO IRIS or ME+AUT
O IRIS.
• Brightness: Brightness level of operating mode set above. Default setting
is 32.
Low Luminance
• Mode: Se
lect AGC, DSS, AG
NOTE: Settings availabl
e only when AUTO is selected in OTHERS>LENS.
C>DSS, AGC>DSS>AGC, or OFF.
• AGC Max: Brightness level of operating mode as set above.
• DSS MAX: Maximum speed of Digital Slow Shutter feature (1X ~ 512X).
9
Page 18

Configuring OSD Menus
3.3.2 Manual
• Mode: Select the manual exposure mode: SHUT or DSS.
• Shut: When Mode is set to SHUT, select the shutter speed in x / second:
1/60, 1/100, 1/250, 1/500, 1/1000, 1/2000, 1/4000, 1/10000. Default
setting is 1/60.
When Mode is set to DSS, select the shutter speed: 2, 4, 8, 16, 32, 64, 128,
256. It is not recommended to set the DSS shutter speed higher than 32.
• AGC: Set a fixed gain value for the AGC in db: 6, 12, 18, 24, 30, 36, 42, 44.8.
3.4 Pict Adjust
Picture and display control settings.
• Mirror: Select V-FLIP to vertically flip the image, H-FLIP to horizontally
flip the image,
or OFF.
HV-FLIP to both horizontally and vertically flip the image,
• DIS: Select ON to enable Digital Image Stabilization or OFF.
• Level: Select screen brightness from 0~63.
10
Page 19

Configuring OSD Menus
• Sharpness: Select screen sharpness from 0~15.
• Hue: Adjust the hue value from 0~100.
• R-Gain: Adjust red gain from 0~255.
• B-Gain: Adjust blue gain from 0~255.
• Defog: Select HIGH, MID, or LOW to select the level for Defog function or
OFF to disable. The Defog function compensates for foggy conditions. It
allows the camera to measure each pixel for fog thickness and adjust
contrast to offer a uniform image.
3.4.1 E-Zoom
• Zoom: Adjust digital zoom level from 0~255.
• Pan: Pan camera image left and right.
• Tilt: Tilt camera image up and down.
NOTE: Zoom le
vel selected must be greater than 0 to enable digital Pan
and Tilt controls.
11
Page 20

Configuring OSD Menus
3.5 White Bal
Select one of the following White Balance modes: ATW, PUSH, USER1,
USER2, ANTI CR, or PUSH LOCK.
3.5.1 ATW (Auto Trace White Balance)
• Speed: Specifies the AE control for ATW between 0~255.
• Delay Cnt: Sets the delay time for ATW changes between 0~255.
• ATW Frame: Sets pull-in frame for magnification. Select x0.5, x1.0, x1.5,
or x2.0.
• Environment: Set the pull-in frame of ATW: INDOOR or OUTDOOR.
3.5.2 Push
Use white balance regardless of the subject conditions.
12
Page 21

Configuring OSD Menus
3.5.3 User1/2
User defined Blue and Red gain adjustment.
• B-Gain: Adjust Blue gain for white balance between 0~255.
• R-Gain: Adjust Red gain for white balance between 0~255.
3.5.4 Anti-CR
Activates color rolling suppression.
3.5.5 Push Lock
Press down on joystick to set current scene as the white balance level. Place
a 18% gray card in front of the lens and select PUSH LOCK for a natural white
level.
3.6 WDR
Configure Digital Wide Dynamic Range settings.
• Mode: Select D-WDR to enab
le Digital Wide Dynamic Range or OFF.
13
Page 22

Configuring OSD Menus
• Level: When Mode is set to D-WDR, select the Digital Wide Dynamic Range
level: LOW, MIDLOW, MID, MIDHIGH, or HIGH.
• HLC: Select ON to enable High Light Compensation, select OFF to disable,
or select AUTO for automatic selection.
• Clip Level: Select the clipping level between 0~255.
• Scale: Select the scale between 0~15.
• BLC: When Mode is set to OFF, select ON to enable Backlight
Compensation or OFF.
3.7 DNR
Configure Digital Noise Reduction settings. DNR function reduces the
background noise in a low luminance environment.
• DNR Mode: Select the filter mode for DNR: 2D+3D, 3D, 2D, or OFF.
• Level: Select the filter strength for DNR: OFF, LOW, MIDLOW, MID,
MIDHIGH, or HIGH.
14
Page 23

3.8 Day/Night
Day/Night mode can be set to the following options:
• COLOR: Color image.
Configuring OSD Menus
BW: Black and white image.
•
• EXT: CdS light sensor activates Day/Night operation.
• AUTO: Camera sensor selects Day/Night mode, based on lighting
conditions.
3.8.1 Auto
• Burst: Select ON to enable the burst signal when Night mode has been
identified or OFF.
• Delay Control: Select Day/Night delay time between 0~255.
15
Page 24

Configuring OSD Menus
• Day-Night: Select threshold for Night status from Day status between
0~255.
• Night-Day: Select threshold for Day status from Night status between
0~255.
3.8.2 BW Setup
Allows additional Smart IR settings to be enabled.
• Smart IR: Select ON to enable Smart IR; press the middle button to
configure Smart IR settings. Select OFF to disable Smart IR.
• Mode: Select AUTO or select CENTER and press the middle button to
define a rectangular area for Front Light Compensation by adjusting TOP,
BOTTOM, LEFT, and RIGHT.
• Level: Select the Level for Smart IR from 0~31.
• Gama Opt: Select ON to optimize Gamma settings or OFF.
16
Page 25

Configuring OSD Menus
3.9 Privacy
Configure up to 15 privacy areas that will not be displayed on the monitor.
• Ar
ea Sel: Select the area you would like to configure.
• Mode: Select ON to enable the selected privacy area or OFF. When a
privacy area is enabled, you may configure the settings below.
• Position: Press the middle button to configure the position of the selected
privacy area.
Press the directional buttons to move the corners (you can create any
4-sided shape). The selected side is highlighted by a small box. To select the
next c
orner, press the middle button. To return to privacy menu, press the
middle button repeatedly.
• Color: Choose the color for the selected privacy area: BLACK, RED,
GREEN, BLUE, YELLOW, CYAN, MAGENTA, or WHITE.
• Transp: Choose the transparency for the selected privacy area: 1.00, 0.75,
0.50, or 0.00.
• Mosaic: Select ON to enable Mosaic mode for the selected privacy area
or OFF. Mosaic is not available if the Transp setting is 1.00.
17
Page 26

Configuring OSD Menus
3.10 Motion Detect
Configure Motion Detection settings for the camera. The motion detection
areas of the screen are broken into 24 x 16 rectangular blocks. Use
MONITOR AREA to configure always-on motion alert areas on the screen.
TIP: Motion detection settings are usually set independently on the DVR,
which allows for more advanced customization options.
• Motion Det: Select ON to enable motion detection or OFF to disable.
• Detect Sense: Select the motion detection sensitivity level between 0~127.
• Bl
ock D
isp: Select ON to display blocks in areas where motion is detected
or OFF.
3.10.1 Monitor Area
Allows you to configure up to 4 motion detection areas. Areas will be
highlighted on the screen and flash when motion is detected within them.
When enabled, Monitor Area colors are: 1: Red. 2: Green. 3: Blue. 4: Yellow.
• Area Sel: Select the monitor area to adjust.
18
Page 27

Configuring OSD Menus
• Mode: Select ON to enable the selected monitor area or OFF.
• Top: Select the top position of the area.
• Bottom: Select the bottom position of the area.
• Left: Select the left position of the area.
• Right: Select the right position of the area.
3.11 Others
Miscellaneous camera functions.
3.11.1 Language
Select OSD language.
3.11.2 Lens
Select AUTO or MANUAL. If you select AUTO, press the middle button to
configure the following options:
NOTE: It is recommended to use the AUTO setting to ensure the best
possible performance.
19
Page 28

Configuring OSD Menus
• Mode: Select the iris control mode: AUTO, OPEN, or CLOSE.
• Speed: Select the iris convergence speed between 0~255.
3.11.3 Sync
Camera uses internal sync (INT) when camera is connected to DC power.
Line Lock (LL) is used when camera is connected to AC power.
If you notice color rolling when the camera is connected to AC power:
1. Select LL and pr
ess the middle button.
2. Select PHASE UP or
the phase.
3.11.4 Cam Title
PHASE DOWN and press the middle button to adjust
Select a camera title to be shown on the screen.
To create a camera title:
1. Under Cam Titl
e, sel
2. Press the up/down/left/right buttons to move around and press the
middl
e button to enter characters.
• Use the arrows to move the cursor.
• Use CLR to delete the currently selec
20
ect ON and press the middle button.
ted character.
Page 29

Configuring OSD Menus
• Use POS to change the title position.
3. When finished, select RETURN and press the middle button to save the
camera title.
3.11.5 WPC (Advanced Function; Not for Normal Use)
The WPC (White Pixel Compensation) features is used to correct the CCD if
dead pixels are visible.
To use White Pixel Compensation:
NOTE: F
c
an enter the camera sensor.
1. Select WPC and pr
or WPC to work, you must cover the lens completely so no light
ess the middle button.
2. Press the up, down, left, right, middle button to start the compensation
ocess.
pr
3. When prompted, press the middle button to exit.
3.11.6 Version
Select VERSION and press the middle button to view information regarding
the current camera software.
21
Page 30

Configuring OSD Menus
3.11.7 Camera Reset (Factory Default)
Select CAMERA RESET and press the middle button to reset the camera to
factory default settings.
3.12 Exit / Save All
• Exit: Select EXIT and press the middle button to exit the OSD menu. This
will keep any changes only until camera is powered off.
• Save All: Select SAVE ALL and press the middle button to save current
settings to camera. Settings are retained after the camera loses power.
22
Page 31

4. DIMENSIONS
Dimensions
23
Page 32

Technical Specifications
5. TECHNICAL SPECIFICATIONS
Description Specification
Power Source DC 12V / AC 24V +10%
Power Consumption 7.2W
Minimum Power Requirement 600mA
Image Sensor Sony EXview™ HAD II 960H
Total Pixels 976 (H) x 494 (V)
Scanning System 2:1 Interlace
Sync. System Internal
Resolution 700+ TVL
Minimum Illumination 0.01 Lux @ F1.2
0.00002 Lux with Slow Shutter (512x)
0.0 Lux with IR LED
Video Output BNC Connector
S/N Ratio More than 52db
Power Input 2-pin terminal block (detachable)
Video Output 1.0 Vp-p (75 ohm, composite)
Lens 2.8–12mm F1.4 Varifocal DC Auto Iris
Operating Humidity Within 85%RH
Operating Temperature –40~122°F / –40~50°C
IP Rating IP66
Weight 0.8kg/1.7lbs
Because our products are subject to continuous improvement, Digimerge
Technologies Inc, a FLIR Company, reserves the right to modify product
design and specifications without notice and without incurring any
obligation. E&O.E.
24
Page 33

Troubleshooting
6. TROUBLESHOOTING
Follow the steps below if you are experiencing trouble with your camera.
Contact Digimerge Technical Support if the issue persists.
Nothing appears on the screen:
• Check that the power cable is connected
correct.
• Check that you have properly connected VIDEO cable to the camera VIDEO
output jack and to the monitor/DVR.
The image on the screen is unclear:
• Is the lens stained with dirt? Clean the lens with a soft, clean cloth.
• Re-position the camera if necessary.
• Adjust the Zoom and Focus screws as needed.
The image on the screen is dark:
• If you have an intermediate device, set the impedance to 75Ω / Hi-z.
• Adjust the monitor contrast & brightness controls.
Image quality is poor:
• Return the camera OSD to factory default settings (Middle
button>OTHERS>CAMERA RESET).
properly and that the voltage is
• Verify that the camera is receiving sufficient power.
There is interference in the image.
• The camera or the cables may
as a generator. Re-position the camera if necessary.
be close to a source of high voltage, such
25
Page 34

Need Help?
Please make sure to visit our website www.digimerge.com
to receive product updates and information.
3 Easy Ways To Contact Us
Online:
Product support is available 24/7 including product
information, user manuals, quick start up guides and FAQ’s
at www.digimerge.com
By Email:
Technical support (for technical/installation issues)
tech@digimerge.com
By Phone:
North America: 1-866-816-5919
Technical support (for technical/installation issues)
Mon-Fri 8.00 am to 8.00pm EST
We welcome your feedback at
info@digimerge.com
For more information, visit
www.digimerge.com
20032013_R5
Page 35

Page 36

formerly
DPB24TLX
English Version 1.0
www.digimerge.com
www.flir.com/security
Copyright © 2013 Digimerge Technologies Inc., a FLIR Company
 Loading...